
Colin McCrate's Blog, page 25
October 7, 2014
2014: Year of the Tomato

It turned out 2014 was all about tomatoes! Tomatoes seem to be the crop that excites our clients and gardeners all around Seattle the most. While tomatoes are very easy to grow in many parts of the country, our summers tend to be relatively cool and short. While many Seattle transplants are used to eating fresh tomatoes off of the vine all summer long, it isn’t uncommon that we find ourselves harvesting tons of green tomatoes off dying vines at the end of September.
So it is with good reason that every year we head forth into the tomato growing season with a healthy amount of apprehension. We do our best to grow the healthiest, strongest transplants; baby them with regular applications of organic fertilizer, and plant tons of vines with the hopes of securing a healthy harvest due, if nothing else, to the sheer numbers of plants!
If there was ever a reason for us to be concerned about the success of our tomato plants this year, we quickly forgot about it as warm summer days started early and seemed to stretch on for an eternity. Many of our gardens still have healthy tomato plants producing large, ripe fruit today!
So if you find yourself with 10 giant tomato vines in your backyard, and are now knee-deep in ripe tomatoes, here are a few ideas for you:
Make soup:Simple idea, yes, but this soup stands alone. It’s delicious.
Easy Tomato Soup Two Ways


How to Plant Garlic
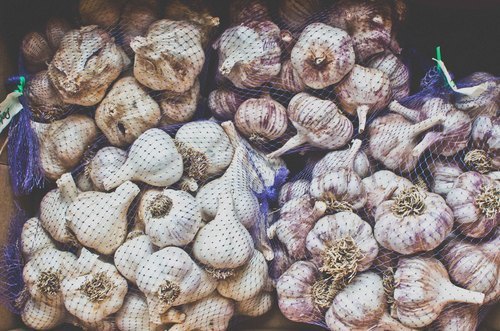
Garlic is a member of the Allium family, which also includes onions, scallions, shallots and leeks.
Garlic is a very long season crop. Garlic grows best when planted in the fall because it must “vernalize.” When a crop requires vernalization, it means that it will grow best after prolonged exposure to cold temperatures. In the case of garlic, vernalization initiates the bulbing of the head.
To Plant:Choose seed-stock. If you can’t find garlic seed in a local nursery or online, you can plant the organic garlic found in the produce section of your local grocery store. If buying seed from the grocery store, look for heads that are tight and have large, firm cloves.
Prepare soil: Loosen soil, check soil pH, mix in compost or balanced fertilizer,
Plant garlic 5-6 inches apart and 2-3 inches deep (pointy side up), depending on the size of the clove. The goal is to have the top of the clove covered under at least 1 inch of soil. If you are planting in a region where the ground freezes and thaws regularly, you may want to plant a little deeper to keep the cloves from being pushed out of the soil during the temperature changes.
Cloves should start to emerge in early spring!
Once cloves have emerged side dress with balanced granular fertilizer.


Hardneck vs. Softneck:
HARDNECK: Hardneck garlic has a stiff central stem with fewer, but larger cloves than softneck. It’s storage life is shorter than softneck so it is usually grown for specialty markets such as restaurants and farmers markets. Many people feel it has better flavor than softneck and is easier to peel. Hardneck garlic is the source of garlic “scapes”, the coveted edible flowering stalk the plant produces late in the spring.
SOFTNECK: Softneck garlic has a flexible central stem, and the bulbs tend to have many small cloves and thick wrappers skins. This type of garlic stores well, so it is most often the variety you would find at the grocery store.
Great garlic varieties to plant this fall:HARDNECK: Red Razan, Georgian Fire, and Chesnok Red
SOFTNECK: Polish White, French Pink
Where to buy garlic:September 9, 2014
Last Call For Planting
With the exception of garlic, September is the last month to plant annual edible crops In the Pacific Northwest. Plants need a minimum of 10 hours of daylight to grow and by the end of October the daylight hours have grown too short for crops to mature. October 31st may be just around the corner, but the good news is that even though growing season will eventually end, your harvests can continue well into the winter!
How to prepare your garden for a winter harvest:
1. Make room for fall crops by removing crops that are mature and will not hold up against a frost. It may still be a little early to pull out crops such as tomatoes and peppers, but potatoes and onions are often done producing by late summer and can be pulled to make room for fall crops. These crops also have a long storage life outside of the garden, often keeping for up to six months after they are harvested! For a quick guide to storing root crops, click here.
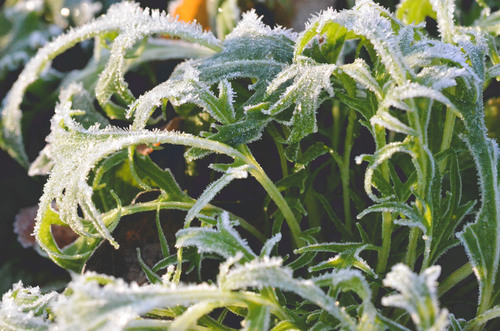
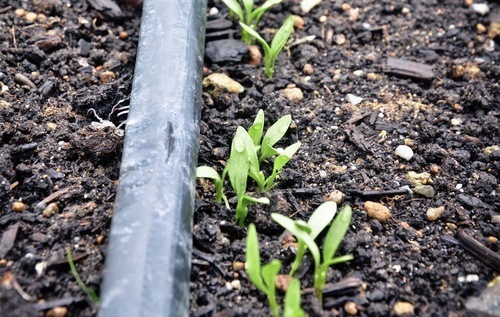
2. Plant one last round of short season, frost sensitive crops. There are more than 8 weeks between now and the last 10 hour day, and almost 10 weeks between now and the estimated first frost date so that leaves plenty of time to plant crops such as lettuce and radish. These crops will start to decompose in the garden after the first frost, so be sure you have also planted plenty of frost tolerant crops that will hold up in the cold weather.
Frost sensitive, short season crops that can be planted now are:
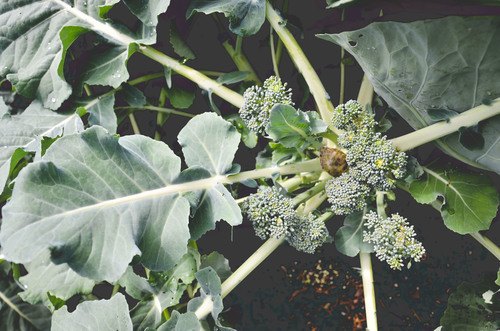
Bok choi (T)Head lettuce (T)Lettuce (D)Radish (D)4. Plant frost tolerant crops for a winter and early spring harvest. Frost tolerant crops are crops that will hold up against the cold weather. Though they don’t mind the cold, like other crops, these plants still need at least 10 hours of daylight to grow. A good goal is to plant your crops early enough so that they are at least 75% mature by the time the days become shorter than 10 hours, also know as the Persephone. If well established by the end of the growing season, these crops can not only provide a winter harvest but will likely start growing again early in the spring before the freshly planted spring crops have a chance to mature. For example, healthy, well-established fall broccoli will provide a harvest before the end of the growing season, but if left in the garden it may also sprout tons of new florets in the spring (see photo).
Frost tolerant crops that can be planted in late summer are:
Arugula (D)Broccoli* (T)Cabbage* (T)Cilantro (D)Kale* (T)Kohlrabi (T/D)Mustard greens* (D)Spinach* (T/D)Turnips (D)* best choices
(D) = Direct Seed
(T) = Transplant
Kohlrabi for Fall

Kohlrabi is an often-ignored crop in home vegetable gardens, and we think that’s a shame. It’s easy to grow and surprisingly tasty. The roots are high in vitamin C, and the leafy greens are a great source of vitamin A, folate, and calcium. It grows quickly and prefers cooler weather, making it a great crop for a fall garden.
Kohlrabi is very similar in growth habit to turnips and rutabagas, but it is grown for its swollen stem instead of its root structure. When mature, it appears as roundish bulbs sitting on the surface of the soil.
Harvest when bulbs are 2-3 inches in diameter. You can harvest up to ⅓ of the leaves off of each plant while the bulb is still growing.
Growing Kohlrabi: Plants should be spaced 4-6 inches apart, in rows 12 inches apart. If direct-seeded, the plants must be thinned to these specifications. Transplant or direct-seed into loosened, moist, fertilized soil. Plants need consistent water to grow, so if the fall rain has not come yet, water regularly after planting.
Kohlrabi greens can be used much like kale or collards. The smallest leaves are tender enough to put in salads or on sandwiches, but the larger, more mature leaves will be thick and tough without cooking.
Recommended variety: Kolibri
Add a little color to your fall garden with this vibrant purple variety. It matures from seed in 45 days, and if transplanted into the garden it can be ready to harvest in 30 days!
Thinking about planting kohlrabi, but don’t know how you would cook with it? Our friends at the kitchen have you covered!
July 15, 2014
Cilantro
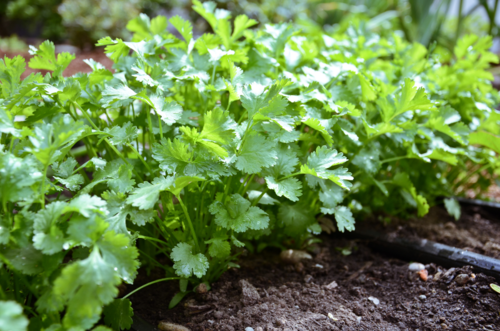
Cilantro ready to harvest
Cilantro, also known as coriander and Chinese parsley, is an herb that is commonly associate with Latin American and Asian cuisines, but can be found in traditional dishes from all around the world.
In our opinion, cilantro is the finest of herbs, but many people think it tastes like soap! The reasoning behind this is interesting, but too complicated to dive into in this post. To learn more, check out this New York Times article.
Cilantro is an annual vegetable that grows easily from seed during the late spring and summer months. Cilantro is prone to bolt, so for folks who eat a lot of cilantro, we suggest direct-seeding rows in your garden every other week. This should provide a steady supply of the most tender and flavorful leaves for the entire summer.
All parts of the plant are edible, but the fresh leaves and the dried seeds are the parts most traditionally used in cooking.
Plant now and it will be ready for your summer salsa, succession plant to have into the fall!
To plant: Direct seed into loosened and fertilized soil. Sow seeds into ½ deep furrow along irrigation lines at a rate of around 3 seeds/ inch. Cover seeds and water. Plant 1-2 row feet per planting.
Seed saving: Cilantro seed is very easy to save. After a few cuttings, your cilantro will start to bolt. Allow the plant to flower and eventually the flower heads will produce seeds. Wait until the majority of the plant and seed heads turns brown before cutting down the plant. Once plant has turned brown, cut off the seed heads (the part the was the flower) and hang them upside down in a brown paper bag. When the seeds are fully dried they will easily fall off the flower head. Place them in a glass jar or paper bag and store them in cool, dark, dry place until spring!
Cilantro seedlings
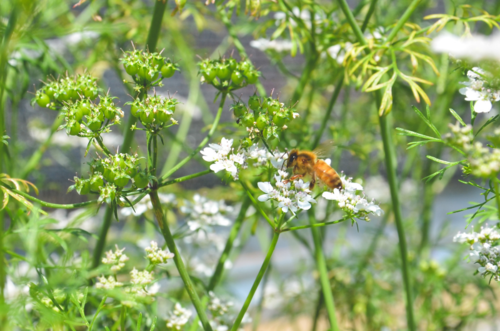
Flowering cilantro and immature seed heads.
June 5, 2014
Harvesting Garlic Scapes
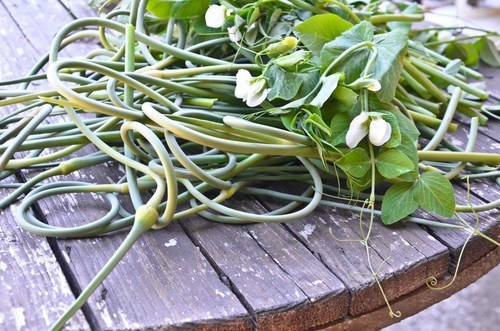
A garlic scape is the elongated, curly stem that emerges from the central stem of hardneck garlic plants in early summer. It’s actually the precursor of the garlic’s seed head or flower. The scapes are delicious, and removing them will ultimately result in a larger bulb of garlic. This is best done when the scape has about one full loop in it. If you wait too long, they will straighten out and become tough and stringy. Even if they straighten out, cut them off to encourage larger heads of garlic.
To harvest: In the early summer, once the scapes emerge and curl, break them off immediately at the top leaf of the plant.
Young, tender garlic scapes can be enjoyed raw or cooked. Their mild, bright garlic flavor makes them extremely versatile in the kitchen. They make a delicious addition to salads, can be sauteed and used in pasta dishes and are even great pickled! Our favorite way to enjoy garlic scapes is to blend them into a pesto.


May 12, 2014
Eggplant Growing Tips and Recommended Varieties
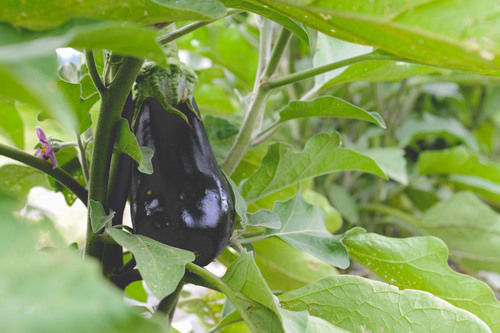
Eggplants, Solanum melongena, are beautiful, colorful, unique, and among the most fun crops to grow. Rich in fiber, potassium, and manganese, the eggplant is a nightshade and is related to tomato, potato, and pepper and is considered a native of India. Eggplants come in a variety of colors, including purple, white, pink, and green and can range from 12 in long to only 1 or 2 in.
The French word aubergine is used in many places outside the United States to refer to eggplant (and the dark purple color typically associated with it).
Like tomatoes and peppers, eggplants love hot weather. This can make them tough to grow in our mild, coastal climate, but we plant them anyways and usually have great results. If growing in cooler climates we suggest choosing the warmest, sunniest part of your garden-probably right by the tomatoes-for the best results.
Recommended varieties: There are many shapes and sizes of eggplants from all over the world.
Nadia or Rosa Bianca: These are European and American varieties that are the large purple or purple-white types often seen in grocery stores.
Ping Tung: This Asian type is long and slender with few seeds. These varieties tend to ripen earlier than other types so they are a good choice for cooler climates.
Tips for growing:
Fertilize before planting. Then again 3 and 6 weeks after transplanting. Use ¼ cup balanced fertilizer per plant.
If planted in a warm location, eggplant does not require a tremendous amount of cultural care, but check regularly for pest or disease problems. The fruit can become heavy, and the plants may require stalking.
Harvest eggplant as soon as they are the size you like. They can be harvested early when still small and, may have a softer texture at this stage. Harvesting often will encourage the plant to continue producing. Eggplant will continue to set flowers until the end of the season, but since summer will inevitably come to and end, flowers set in the fall will never have a chance to develop into fruit. Removing the flowers during the last few weeks of the summer will encourage the plant to put energy into the fruit that is already set. This will help the last fruit to size up fully before the cold weather hits.March 27, 2014
4 Steps to Growing Great Bulb Fennel
Annual fennel, Foeniculum vulgare, also know as “bulb” fennel, is a versatile vegetables that makes a great addition to soups, salads, pizza’s and has even been know to make an appearance in desserts (Fennel cupcakes)! It’s high in vitamin C, and is also a good source of calcium, fiber and potassium.
Annual fennel is a relatively fast growing vegetable. Closely related to the hardy perennial herb fennel, It is know to be a finicky plant due to it’s propensity to bolt before maturing into a nice sized bulb. To avoid bolting:
[image error]
Annual or "Bulb" Fennel

Perennial Fennel
In the Seattle-area, we can usually grow fennel all summer long, but for those growing in warmer climates plant it early to mid-spring for an early summer harvest. Fennel can be direct seeded or transplanted into the garden. To direct seed, sow plants ¼- ½” deep, and thin to 6-8” apart.
Harvest “bulbs” 3-4” diameter. The crunchy white “bulb” that you eat consists of the swollen stem bases of the leaves. Once harvested, cut off the stalks and store “bulbs” in a plastic bag in the refrigerator.
Perennial fennel is a beautiful, tall herb that will add a soft, feathery texture to your garden and attract beneficial insects. This type of fennel is a good source of seeds and fronds that are great for seasoning. Perennial fennel is very hardy. It's root spread aggressively and can fill your garden with unwanted volunteer plants. It is considered an invasive weed in some areas so plant with care!
We have found that perennial fennel doesn't grow well in containers, but do plant it someplace where it's spreading nature won't consume other plants or it's tall fronds won't shade them out!
March 5, 2014
Rhubarb
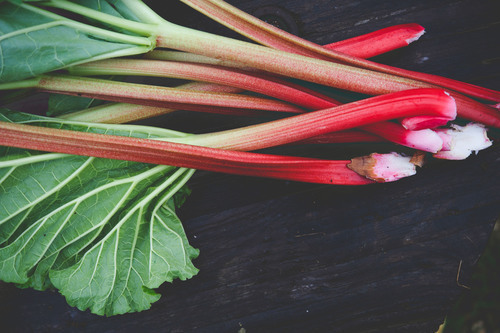
Horticulturally rhubarb ( Rheum rhabarbarum) is a vegetable, but it is often used more like a fruit. It has a relatively sour taste which makes it well suited to mix with honey or sweet fruits such as strawberries.
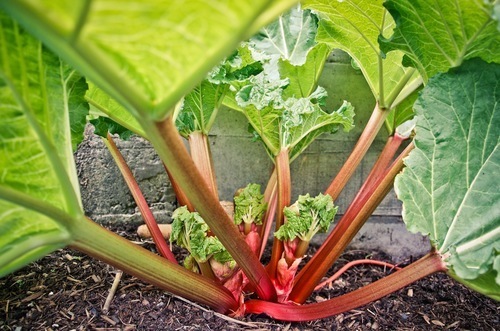
Rhubarb is a hardy perennial from Asia and has long been used as a food and medicine in Chinese cultures. It has large, almost jurassic-sized green leaves on bright red or green stalks. The large leaves create great visual structure in a landscape, but only the stalk are eaten, as the leaves contain high concentrations of oxalic acid, which is toxic to humans.
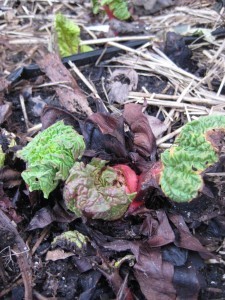
Rhubarb is one of the easiest plants to grow and varieties can be found that thrive in almost any climate. A friend of mine lives in Jackson, Wy where the typical growing season is around 120 days long, and even she has a 30 year old rhubarb plant in her yard which she affectionately calls “Old Monster.” Typically, after getting a rhubarb plant established, it requires almost no care at all moving forward (however, additional care will improve your harvest). Rhubarb is not an invasive plant, but it is hardy enough that it can take several attempts to remove it once it is established.
We suggest growing rhubarb from rhizomes, so if you want to add rhubarb to your garden we suggest buying a root cutting at your local nursery or finding a friend who has an established plant and digging up a chunk of the root. The benefit to purchasing a plant from a nursery is that you will be able to choose your variety, and there are many to choose from!
Once you have located your rhubarb rhizome, plant it with the crown up. Add one cup of balanced fertilizer when planting. Water the area until the soil is saturated. If you are planting more than one rhubarb rhizome, space plants 3-4 feet apart. Plant rhubarb anytime in the spring or fall!
Rhubarb is relatively tolerant of acidic soils, but thrives in slightly alkaline soils with the pH of 6.2-6.9. This is the same pH your annual vegetable should be so you can plant rhubarb on the edge of an annual bed. Rhubarb also appreciates fertilization. We have noticed that applying a balanced fertilizer in the spring and 2-3 inches of compost around your rhubarb each fall is sufficient.
Eventually your rhubarb plant will begin to spread out, as the rhizomes you planted begin to expand (this will take a few years). For many people, this is considered a good thing, because more rhubarb rhizomes means more rhubarb stalks! If the plant does end up growing larger than you want, simply dig around the base of the plant and chop back sections of the root mass. Just be sure to remove the dug up sections from your garden (give them to a friend!) so they don’t become new rhubarb plants!
Harvest rhubarb stalks when leaves start to fill out in the spring. To harvest, simply grab a stalk near the base and pull it from the plant. The stalk should come off easily. Remember to cut off the leaf! After several weeks of spring harvesting, the stems may lose much of their flavor and become less tender. This is a good time to stop harvesting for the season.


February 10, 2014
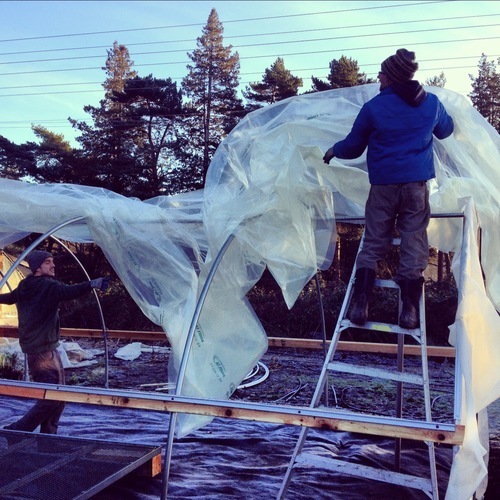
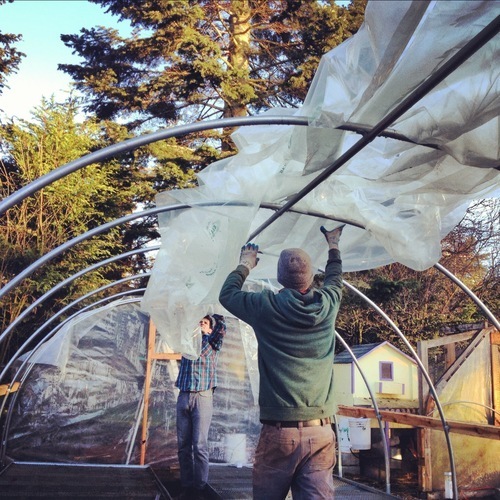
New Greenhouses
Did you know that we start 97% of our own annual vegetable transplants from seed? That ends up being around 40,000 transplants every year! We grow our own transplants, hand picking varieties that we have tested and know to grow well in the PNW, to ensure that our plants get off to a healthy start.
Some crops need to be ready to transplant out into gardens in March which means we have to start propagating them as early as January. Other plants, such as tomatoes and peppers, don't like to be transplanted outside until the temperature really warms up. Our summer season is so short that we have to start these heat-loving crops in the greenhouse two months before they are ready to go outside to ensure they have enough time to mature and produce harvests before the cold weather comes back around.
Because the extra warm and light in a greenhouse can give almost any crop a great head start, we start seeds indoors all spring long. Some crops, such as peas and lettuce will only spend a few weeks in the greenhouse before they will be ready to transplant outside, and these are the first crops to be planted outside in the gardens each spring.
To accommodate our growing need for transplants, we just built three new caterpillar tunnel greenhouses. Our Caterpillar tunnels — so named because of their segmented appearance — were constructed out of galvanized steel and covered with uv-resistant greenhouse plastic. These greenhouses, 36’ long, 30’ long, and 10’ long respectively, will house our annual vegetable transplants until they are established enough to take out into gardens.

If you are interested in starting your own transplants, see our blog post from last month: Seeding Transplants for Spring for tips and seeding dates!


