
Colin McCrate's Blog, page 24
February 10, 2015
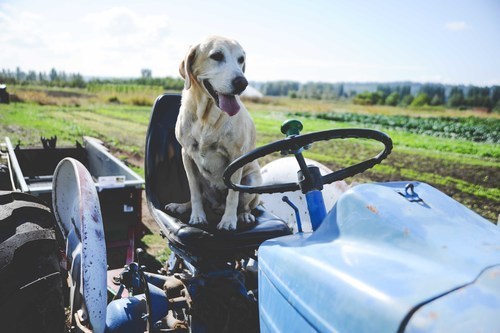
Favorite Tomato Varieties of 2014
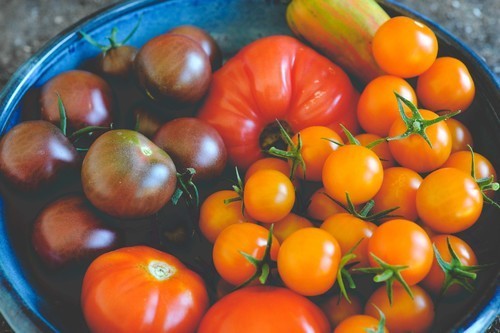
Clockwise from top: Green Zebra, Sungold, Stupice, Black Cherry, and Prudens Purple (center)
All photos by: Hilary Dahl
In some climates, tomatoes are endlessly bountiful. Here in the Pacific Northwest, where even in mid-summer temperatures remain moderate, tomatoes can be the most unpredictable and uncertain of crops. Professional growers in our area nearly always grow tomatoes under cover (meaning in a greenhouse or field tunnel), but this isn’t always a feasible option for the small-scale grower or home gardener. Regardless of your tomato management techniques, if you want a prolific and tasty harvest, it helps to start with the right varieties. Here is a short list of some of our favorite types, selected specifically to reflect the best varieties of 2014 (kind of like the Oscars for tomatoes):
Kellogg’s Breakfast: Big slicing tomatoes can be tough to grow in the Pacific Northwest, but last year these guys did great! They produced tons of vine-ripened fruit; the bright orange fruit are very large, sweet and juicy!Cherokee Purple: Another big slicer that’s worth taking a chance on. These are some of the most flavorful large tomatoes we have ever tried, and the slices have incredible color to boot! Check out this photo from 2014 to see how beautiful they are. Black Prince: We have been growing Black Prince for the past 5 seasons with consistent success. Because of their medium-small size, these dark purple heirloom slicing tomatoes are a reliable bet in the PNW even in mild summers. Black Cherry: Many varieties of dark colored cherry tomatoes are making a splash in the most recent seed catalogs. This type is delicious and prolific. Sungold: These have always been our favorite cherry tomato. Very prolific and delicious, because Sungolds don’t travel well, you won’t see them at grocery stores, but every home gardener and small farmer in the area should have these in their planting plan.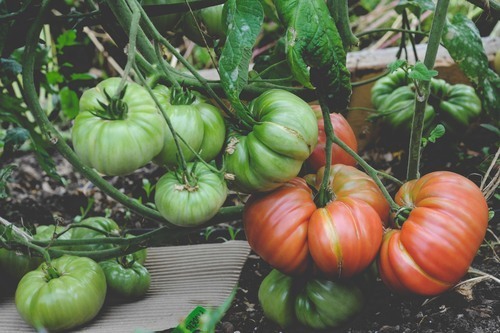
Cherokee Purple: cardboard protects the low-hanging fruit from the ground.
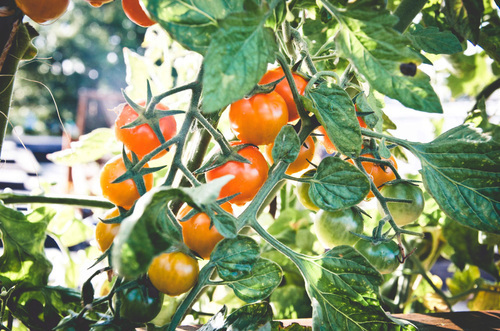
Sungold
Getting Started:
You can grow tomatoes from seed in your home nursery or purchase them from virtually any local nursery, garden center, hardware store or grocery store. If you grow your own, you have many more variety options and the added pleasure of tending the plants through the seedling stage. However, growing healthy and robust tomatoes from seed can be a relatively involved project. The seedlings require warm temperatures, frequent watering and great light conditions. If you don’t have the appropriate time/space to care for the plants through their relatively long grow-out phase (6-8 weeks indoors), consider purchasing them from a nursery right when you are ready to plant them outdoors.
Tomato Care:
While its not possible to cover the endless techniques and considerations for tomato production in a short blog, here are a few key concepts that will help you have the best tomato season yet (weather permitting):
Location: Select an especially sunny spot in the garden. Chances are that you will be growing indeterminate varieties (meaning they continue to grow all season and need a trellis), so take this into account when finding a good spot.
Fertilizer: Tomatoes are especially heavy feeders, so make sure to adequately prepare the soil with compost and organic fertilizers. We recommend adding a granular organic fertilizer at planting time, 3 weeks later and again 3 weeks after that.
Trellising: As mentioned above, most tomato varieties require trellising. Make sure to set up the trellis on planting day. Tomato plants are very fragile and attempting to add a trellis to a large, sprawling plant will be frustrating at best (and very damaging to the plant at worst).
Pruning: Tomatoes benefit from mid and late season pruning. There are many schools of thought on the best way to prune a tomato, but by removing excess leaves and stems, you can improve airflow, increase production and make harvesting easier.
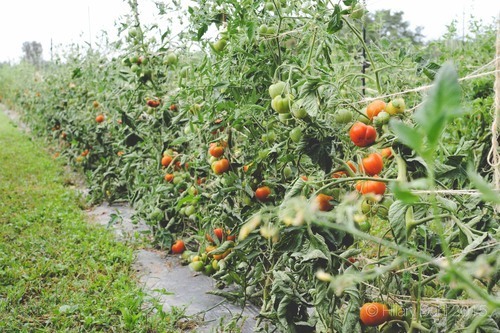
Tomatoes on a t-post and twine trellis
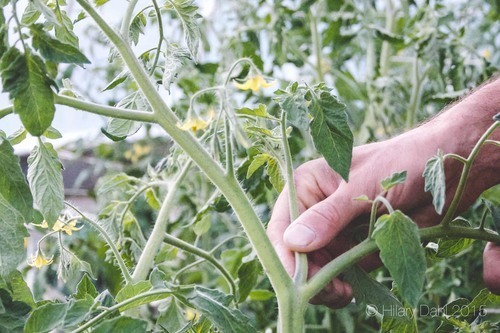
Pruning some of the 'crotch' pieces can help keep a tomato plant light and encourage fruiting.


February 6, 2015
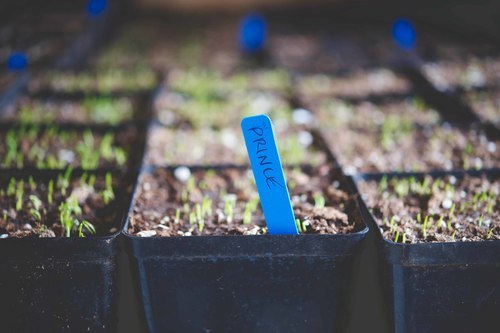
New Propagation Station
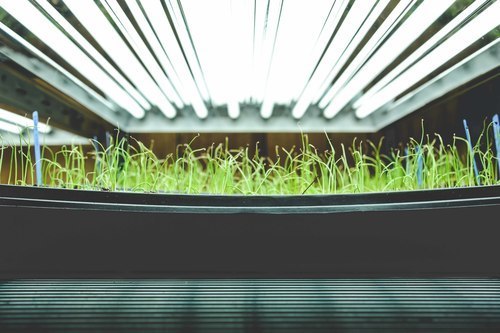
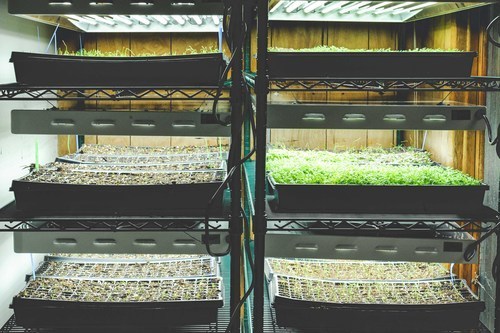
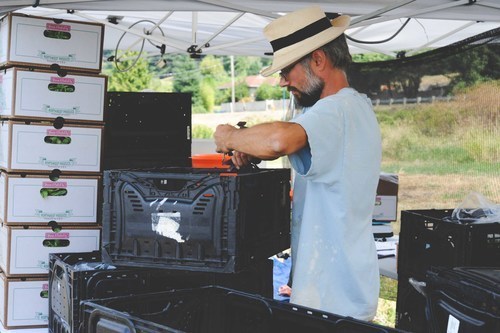
Propagation of spring transplants starts early in the year. As our garden maintenance program continues to grow, so does the volume of transplants we need to produce. We propagate 95% of our annual crop transplants each year, totaling well over 100,000 plants each year! The plants are sown in successions each week starting in January and continuing all the way until September. Most of these plants are transported to our urban farms while still very tiny, so the nursery space needed for each plant is small, but keeping 20,000-40,000 plants in the nursery at a time still takes up real estate!
This winter we invested a small part of our Barnraiser contributions towards a new, vertical indoor Propagation Station. We set up steel racks, each with 5 shelves and a full spectrum light on each shelf. This system allows us to fit 4x as many plants into our heated propagation space than previous years. After germination and a few days or weeks of early growth, the transplants are moved outside to our larger, unheated greenhouses to fill out until they are ready for outdoor planting. Keep an eye on our social media and blog sites for continued updates as to the crops we are sowing and their progress from the Propagation Station to the Greenhouses to a Garden near you!
December 16, 2014
A Sneak Peak Into the Mind of A SUFCo Farmer

Colin McCrate
Always wanted to ask your favorite farmer random questions?
Well Barnraiser did! They wanted to know more a little more about us so they caught up with a few of our famers and asked them the following questions! You'll laugh, you'll cry or at least you'll see that farming is never far from our minds!
First thing you thought of when you woke up yesterday?
Colin: Microgreens
Brad: Did I shut the main valve for the irrigation system off? (I still have recurring nightmares of a night I left it on too long and it exploded this past summer)
Skip: I hope I have a clean SUFCO shirt.
Weirdest thing that's ever happened on the farm?
Colin: The day GQ showed up to do a photo shoot
Ethan: I was weeding and when I looked up there was a coyote roughly fifteen yards away looking at me. A little unnerving but it seems harmless
Favorite farm related word?
Colin: Acre-Inch - A volume measurement typically associated with irrigation operations on cropland. An acre-inch is equivalent to 27,154 gallons. When an inch of water is applied to cropland via irrigation, each acre receives 27,154 gallons. (Alternatively, a measure of the volume of water applied to the soil/growing crop using irrigation - approximately equivalent to 27,154 gallons.)
Skip: Hapludalf- It is a soil taxonomical name and it is fun to say.
The best farming hack you've come up with?
Brad: I made a makeshift spoon from a carrot so I could eat my lunch.
Ethan: I built a foot pedal valve for our wash pack area so that we could control a spray arm with our foot and have both hands free while cleaning vegetables.
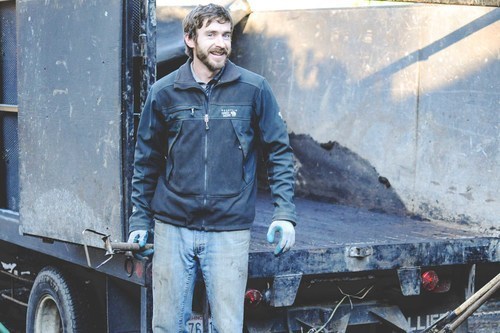
Brad Halm
If Mike from Dirty Jobs were to show up what would you have him do?
Colin: Brad's laundry
Guiltiest food pleasure?
Colin: macaroni and cheese with beets
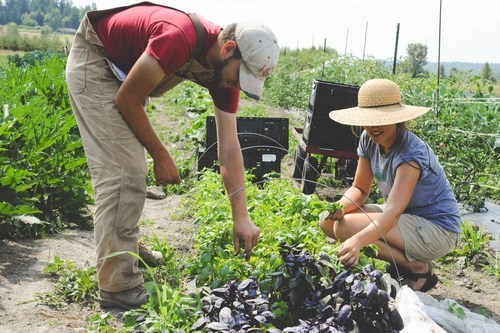
Skip: Bacon grease and brussel sprouts
Brad: French fries with sausage gravy.
If you didn't farm what would you do?
Colin: South Florida helicopter pilot
Brad: Live in a state of withdrawal because I wasn’t farming
Ethan: Work in soil remediation
Skip Mackintosh
What is the best thought about farming you've ever heard of?
Brad: Go with your love to the fields.
Lie down in the shade. Rest your head
in her lap. Swear allegiance
to what is nighest your thoughts.
from Manifesto: The Mad Farmer Liberation Front by Wendell Berry
If you could be any plant what would you be and why?
Skip: A leek. They make a good soup.
Brad: A strawberry plant: it has amazing fruit, and they’re so tough you can drive a tractor over the plant without fazing it.
Ethan: A bonsai tree because they are usually well taken care of and last longer than most plants
Favorite beverage to enjoy after a long day working?
Brad: Yuengling Lager- refreshing and still family owned!
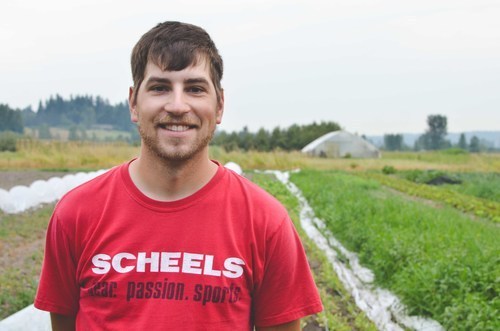
Ethan Bahe
December 11, 2014
Starting Onions + Leeks from Seed
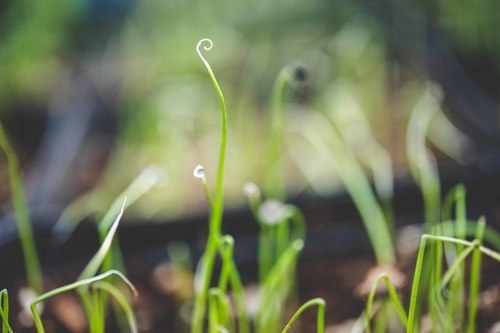
Onions and leeks are always the first transplants we seed each year at Seattle Urban Farm Co. (SUFCo). Bulbing onions and leeks have a long growing season, so getting them started early allows for them to grow to maturity in the optimal growing conditions of summer. They also cure better and store longer when harvested during dry weather conditions. Many people devote a large part of their gardens to alliums because they so store well and are very easy to use, so another advantage to a summer harvest is that it can also create room for fall crops!
Onions come in all shapes, sizes and colors. There are hundreds of different onion varieties, each suited for specific climates, day lengths and culinary uses. The main advantage to starting any crop from seed is that you have a much larger selection of varieties to choose from. Now, with that said, over the last few years nurseries around the Seattle area have really stepped up their organic vegetable transplant game, so if you finish this article and decide starting your own seeds just isn’t for you, you won’t totally be out of luck! You can just wait until later in the spring and go pick up a few pots of healthy, young transplants. If you live in an area where vegetable transplants are harder to come by or if you love starting seeds as much as we do, the following instructions are definitely for you!
What you’ll need:Germination soil mix (available at any nursery or garden center)Fine, granulated balanced organic fertilizer (1/8th cup per gallon of soil)Clean 4” plastic pots (you can wash and re-use the ones you bought your transplants in last year)SeedsWaterWarm spot by a windowHow to do it:Dampen the germination mix with water evenly throughout soil mixtureFill 4” pots about ¾ of the way with germination mixAdd 1 Tbs balanced fertilizer to each 4” pot, and mixDampen the soil mix and then gently tamp it down using the bottom of another 4” potSprinkle seeds on top of soil at a rate of about 5 seeds/inchCover the seeds with ⅛” of germination mix, then waterLabel varieties Place on a sunny window-sill or table and keep seeds moist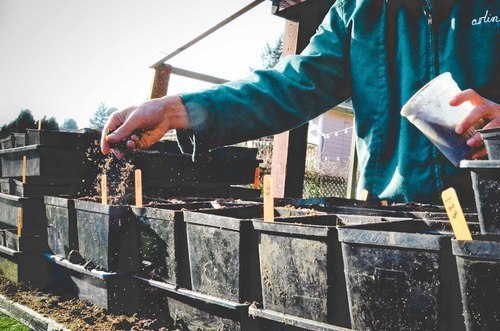
Seeds should germinate in 1-2 weeks.
Once seeds have reached about 2 inches in height, give them a little “hair cut” by trimming the tops about ½ inch down. This will actually encourage more growth and that growth will be more robust. While in their pots, you can trim the tops again every couple of weeks to keep encouraging the plants to put energy into the roots.

Transplant into your garden in mid-late April.
Want a little help getting your transplants started this season? As part of our Barnraiser campaign we will be offering a seed-starting workshop in late spring 2015. It will be little late to start onions at this workshop, but we can help you start scallions, leeks, broccoli, kale, lettuce, and more! For more details on the workshop, click here!
December 8, 2014
The Importance Of Appropriate Wash and Pack Infrastructure

The Importance Of Appropriate Wash and Pack Infrastructure
By Brad Halm
Small-scale organic produce farmers carry a lot of responsibility on their shoulders. We spend most of our time and energy just growing the food- analyzing the soil and amending it with minerals and organic compost, planting seeds, tending the greenhouse, setting out transplants, irrigating, weeding, scouting for pests...the tasks sometimes seem endless. But the job doesn’t end with harvesting- we need to make sure that the produce is washed and packed appropriately to ensure the highest food safety standards at met for the consumer.
Although food safety has not always been at the forefront of the news, recent outbreaks of foodborne have brought this subject into the spotlight in the past decade. Most outbreaks have been associated with large-scale industrial farming, but that’s not to say small-scale growers should turn a blind eye to the issue. It’s something we all must focus on, because bacterial contamination can occur no matter how organically or sustainably the crop was grown.
Many types of produce are eaten raw, and these are the most important crops to consider from a food safety standpoint. Take salad mix, for example. We know our customers will be feeding these greens to their friends and family, so we must do our best to make sure it is not only grown in an environmentally sound fashion, but is washed, stored, and transported in a way that minimizes the chance of bacterial contamination.
To do this, we need the right tools and infrastructure for the job. Our process starts with a rigorous hand washing schedule, sanitizable harvest bins and clean knives. Produce wagons and sacrificial “ground boxes” keep our clean harvest bins off the ground. Once the greens are harvested, they go through a 3-stage rinsing and sorting process that removes field dirt and damaged leaves. An organically approved sanitizer in the rinse water keeps any errant pathogens on the greens from spreading.
A dedicated, protected packing area keeps birds and other animals away from our infrastructure when it’s not in use, and keeps us dry and protected from the elements while we’re washing. When the greens are clean, they are immediately packed and loaded into our delivery truck. If we’re not delivering that same day, the produce goes into a walk-in cooler, where it’s stored at appropriate temperatures to maximize freshness and prevent pathogens from growing.
This sounds like a lot of extra work and expense, and it is. Responsible farmers have been pioneering sustainable farming practices for hundreds of years, and are now doing the same with on-farm food safety. But this does not exempt consumers from responsibility (I also eat lots of produce, so I’m happy to consider myself both a farmer and a consumer). There are food safety practices we can employ at home, like giving our produce a good rinse before we eat it, and washing our hands before we prepare food.
We can also choose to support farmers who grow food sustainably AND handle it safely. Don’t be afraid to pay a little extra to support your local farmer! We can also take responsibility as a society to support the growth and development of a healthy, financially viable farming economy. Beginning farmers have ever-increasing start up costs, yet have extremely limited access to capital. Investment is hard to come by because returns on most farming enterprises aren’t high enough to attract private investment, and is considered too “risky” to attract interest from banks.
So I’m talking to everyone out there who believes that sustainable farming is a vital part of our future: get out and help! Contribute to a crowd funding campaign, ask your local credit union to make some higher risk loans to farmers, and consider investing in a farm directly or through an organization like Slow Money. We farmers will thank you and I think you’ll thank yourself as move into the role of a responsible consumer.
Visit: https://www.barnraiser.us/projects/new-greenhouses-at-seattle-urban-farm-co to contribute to our Barnraiser campaign to build new greenhouses and wash and pack infrastructure at our Urban Fringe Farm.
null
December 2, 2014
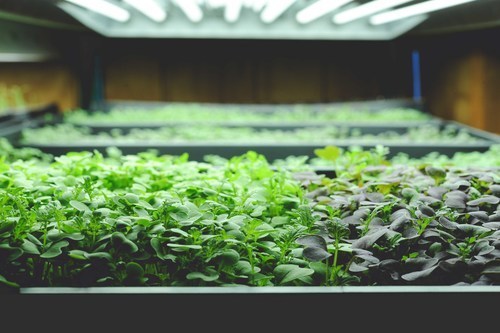
Grow Your Own Microgreens
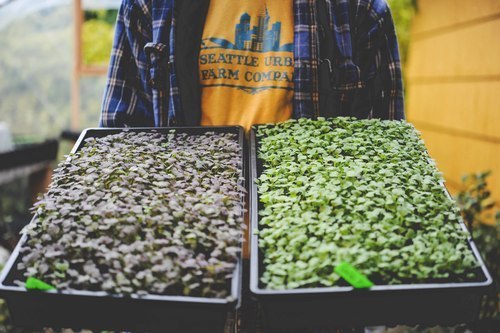
Microgreens
Growing microgreens is another great way to produce year-round food with a minimum of space and time. Microgreens are essentially just sprouts that are propagated in a nursery flat on a bit of soil and allowed to grow larger than traditional sprouts and put on tiny leaves (as the name suggests, microgreens are just very tiny salad greens). You can grow flats of arugula, mesclun mix, mustards, and just about any other crop with edible greens. Wheat grass is typically grown as a microgreen for making a healthful juice.
What You’ll Need
Flats. Microgreens can be grown in virtually any tray or shallow container, but we prefer to use standard nursery flats with small perforations or in the bottoms. These containers retain some water, which helps keep the soil moist; however, it’s important to avoid saturating and drowning the greens.
Soil mix. You can use potting soil, germination mix, or even straight garden soil as a medium for the greens. Plan to compost or dump the soil into the garden after use, as it will be full of miniature roots which will need time and space to decompose.
Light. Microgreens can be grown with natural light or under any grow light. Supplemental light helps the plants grow more quickly and evenly, but amazing microgreens can be grown on a windowsill.
How to Grow Microgreens
Fill your flat with 1-2” of potting soil. Gently tamp down soil so your surface is relatively flat.Sprinkle seeds over soil.
small seeds- 1-1.5 tsp / flatlarge seeds- 1-2 tbs / flat
Cover seeds with a dusting of peat or sifted potting soil. Carefully and evenly water the seeds using a gentle stream from a hose or watering can.Place the tray on a sunny, south-facing windowsill or under grow lights.
Keep soil moist
Seeds should germinate in 3-7 days and be ready to harvest between a week and 3 weeks, depending on the seed.
Harvest when greens have put on the first set of “true leaves” (see photo below)

Seeding

Covering

Ready to harvest
Crops for Microgreen Production
Many crops can be grown as microgreens, but some are better suited to growing this way than others are. For example, any brassica can be easily sprouted. However, broccoli and cauliflower seed are much more expensive and slower growing than mustard greens are, so it makes more sense to use mustard for microgreens.
Crops we suggest growing as micro-greens:
Arugula
Beets
Chard
Cilantro
Cress
Kale
Mustards
For more ideas or to find microgreens specific seeds mixes, visit Jonny's Select Seeds.
December 1, 2014
Why Contribute to the Seattle Urban Farm Co Barnraiser?
As you may have read in our previous post, we are launching a Barnraiser Campaign! Some folks are wondering why an established business is looking for crowfunding, so here's a little bit about our business and how we are growing:
The Seattle Urban Farm Company’s design/installation/maintenance branch has been operating for over 7 years! We are very proud to say it has been profitable and seen over 20% growth each year for the past 4 years!
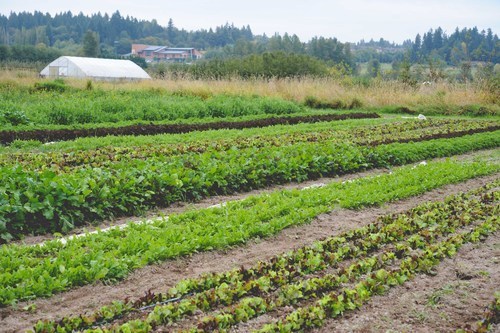
This past year we decided to expand our vision of urban agriculture to include a 4-acre production farm called Urban Fringe Farm located just 13 miles from downtown Seattle. This farm provides produce for four Seattle restaurants and one local organic dog-food company.
The Urban Fringe Farm has just completed its first season of operation. During this first season we hired 5 new employees and grew enough produce that the restaurants were even able to donate over 350lbs of produce to local food banks! Although it was a successful year, it is still in its startup phase, and has very significant infrastructure needs. Thus far, we’ve funded the start up costs for the Fringe Farm through profits from the design/installation/maintenance portion of the business.
For the Fringe Farm to be the best that it can be, we’re looking for additional funds to expand propagation and production greenhouse space and bring our wash and pack operation to the standards required by the soon to be enacted FSMA law (Food Safety Modernization Act). We believe that the Fringe Farm is an important and unique component to our mission to expand sustainable food production in urban areas, and has the potential to be a guiding business model for many small-scale produce farmers.
Click here for more information on our Barnraiser Project!
November 26, 2014
Help us grow! Join our Barnraiser campaign!

Today we are launching a crowdfunding campaign with Barnraiser and are asking you to join us in our efforts to increase food production within a 20-mile radius of downtown Seattle. We hope to construct new greenhouses and make other infrastructure improvements at our Seattle Headquarters and at our new 4-acre certified organic Urban-Fringe Farm in Woodinville, WA.
To get straight to the point, check out our campaign page here: OUR BARNRAISER CAMPAIGN
People from all walks of life are interested in connecting more closely with the food they eat. Urban food production provides an opportunity to increase awareness of environmental and social issues, to make city life more sustainable and to provide access to fresh, healthy food.
As interest in urban food production grows, we hope to continue creating new garden spaces and to improve our existing spaces. In order to accomplish these goals, we need larger and better infrastructure.
We need YOU to join us in this endeavor by helping us raise $30,000 to expand our farm infrastructure: creating new jobs, reaching more of our community, and growing more food!
Click here to support our project if you can, or spread the word to others: OUR BARNRAISER CAMPAIGN
Help us build new greenhouses and expand our infrastructure. Support us as we work toward creating more viable jobs for aspiring farmers and increasing opportunities for everyone to experience the wonders of food production!
Thank you so much for all your support. Our community is very important to us and it is so exciting to step back and see the network of sustainable food we are creating together.

November 4, 2014
Overwintering: Crops that can withstand the cold and how to help them thrive:
It’s officially dark at 5pm and it’s time to clean up your garden for winter. Fall cleanups typically involve: pulling out the last of the summer crops, testing the soil pH, adding compost or other soil amendments to protect the soil from winter rains, and planting garlic. In this post aren’t going to get into the details of winter garden prep, but we are going to discuss what crops can be left in the garden over-winter, for winter or early spring harvest.
Overwintering usually refers to the practice of leaving cold-hardy, healthy, established crops in the ground in the fall with the expectation that they will provide harvests through the dark and cold months of winter. During these coldest months of the year, crop selection is very limited and plant growth is much slower than during the principal part of the growing season. You won't be reaping huge harvests over the winter, but once the day length increases to 10 hours a day in the early spring, these plants will start to grow again, often providing an abundant spring harvest well before spring planted crops have even been put in the ground.
Overwintering crops in the garden can be both incredibly satisfying and challenging. The good news is that it is easy to choose which crops to overwinter and there is very little work to do besides harvesting, protecting plants from frost and watching out for pest damage. In fact, overwinter gardening typically involves only a few minutes of work per week, checking on your crops. The bad news is that, despite all of your best efforts, it is still possible to lose winter crops to the vagaries of weather and animal pests. Overwintering is far from a guarantee of bountiful harvests, but it is always worth the minimal investment of time and resources. There is nothing that bolsters your spirits on a cold, dark winter day like harvesting your own fresh salad or cooking greens, reminding you of the full, diverse harvests to come again in spring.
Lets consider the best overwinter crop choices for the Pacific Northwest climate:
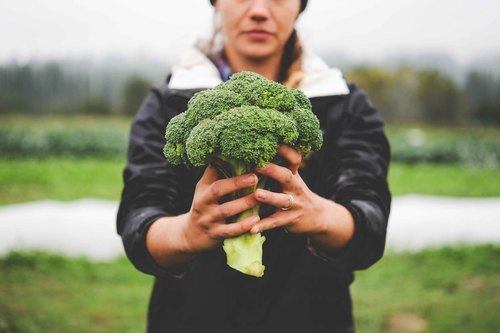
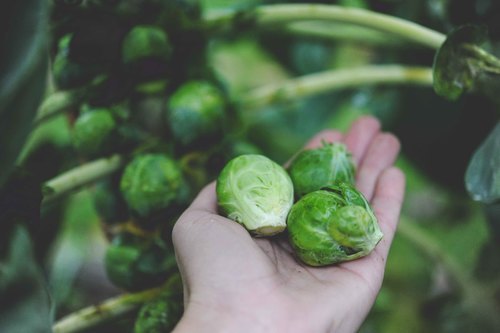
ArugulaBroccoliBrussels SproutsCabbageClaytonia (also called Miner’s lettuce)Fava BeansGarlicKaleLeeksLettuce (especially romaine types)Mustard GreensScallionsSpinachOf this group, the most cold-hardy and reliable are Cabbage, Fava Beans, Kale, Mustard Greens and Spinach. Every year we successfully overwinter these crops in our Seattle gardens, without any sort of protection. The other crops on this list are also great candidates for overwintering, but are often more likely to die in extreme weather conditions. Many of these slightly more sensitive crops benefit greatly from some sort of protection such as a cold-frame or floating row cover; or you can simply harvest them earlier in the winter during November and December before serious frosts have set in.
Keys to successful overwinter crop management:
Plant crops on time: depending on the crop, overwintered varieties should be planted between mid-summer and early fall. Now that it is November, if you’d still like to plant an overwinter crop this year, consider garlic. Garlic can be planted anytime this month and even later into the winter for next year’s summer crop.
Keep crops protected from cold: if possible, cover your crops with greenhouse plastic or floating row cover. Planting in a greenhouse or covering your garden beds with a cover will protect plants from extreme temperatures and drying winds. Certain crops such as broccoli, cabbage, claytonia, kale, and spinach can easily survive through the winter without any protection. Other crops like arugula, leeks and lettuce often die when unprotected during periods of extreme winter cold. A simple row cover can make all the difference between January harvests and mounds of black mush!
Watch for pest damage: winter is a very active time for slugs, wireworms and vermin. Keep an eye on crops for damage and harvest crops as necessary.
Overwintered kale putting on new leaves in late March.

Overwintered broccoli sending out florets in March.

Spinach blanketed in January snow.
Meet Our Friends: Green Juju Kitchen
We have partnered with our good friend Kelley to help her grow the freshest, local, organic ingredients for her new dog food supplement, Green Juju, at our Woodinville Farm site! Ever since Kelley’s dog, Bailey was diagnosed with cancer Kelley has been on a mission to treat her holistically rather than subject her to amputation, stressful recovery, prescription medications and more toxins. To fuel Bailey’s healing body, Kelley started giving her green juice and green vegetables mixed in with her new raw buffalo diet.
When Bailey was diagnosed with cancer, the oncologist said that if Kelley didn’t amputate her leg, she wouldn’t be able to walk within a month or two. One year since that date, her vet said her tumor is smaller and softer than it was when diagnosed. Kelley is sharing her experience and what she has learned on her blog and, offering her new product, Green Juju, at pet stores all around Seattle.
Green Juju is an excellent whole foods supplement made from fresh, local, organic produce that brings a powerhouse of nutrition to your pup’s diet. Green Juju is beneficial whether you feed your pup kibble, raw, a home cooked diet, or something in between.

For more of Kelley and Bailey’s story, or to learn more about Green Juju, visit: http://greenjuju.wordpress.com/


