
Colin McCrate's Blog, page 15
June 30, 2017
Encyclopedia Botanica Podcast, Episode 51: Brussels Sprouts

We’re recording this in late June, so in many climates it’s either too late to plant Brussels or it is getting down to the wire, as they’re a long season crop. Depending on the variety, they can take between 90-110 days to mature. We have had some requests for an episode on the topic from members of our Slack group and there are some Brussels growing cultural practices besides just how and when to plant, that are worth discussing this time of year.
HOW TO LISTEN:
Listen right now in your browser by clicking above. Subscribe in iTunes (or your favorite podcast player) to have our podcasts sent directly to your device.SHOW NOTES:In this episode, we discuss:
How Brussels sprouts grow and why they can be tricky to growTechniques to help improve the quality and quantity of your harvest


Important Take-aways:
Brussel sprouts are a cool season biennial.
Like winter squash, people associate Brussels with a fall harvest, but also like winter squash, they need to be planted early enough so they have enough time to mature.
Brussels is that they are very cold hardy, and many people say they actually taste better after they’ve been exposed to a frost.
Brussels are best transplanted. They should be spaced 18 inches apart. 1 plant will yield around 1-2 lbs of sprouts, so we suggest planting at least 4 plants.
Like all long season brassicas, Brussels are heavy feeders, so you should fertilize at planting time at then again 3 and 6 weeks after transplanting. In addition to that, they’ll benefit from a few feedings of kelp-based liquid fertilizer throughout the season.
Late in the summer, just as the sprouts are beginning to form in leaf axils, you’ll notice a small, cabbage-like head starting to form on the top of your plants. Cut this head off about 6-8 inches from the top of the plant. This helps redirect the plant's energy into the formation of the sprouts. The top head that was removed can be eaten! They’re delicious sautéed and roasted.
Brussels sprouts live in the garden for a long time, so the lower leaves on the plants will inevitably start to turn yellow and brown. This is totally normal. Remove these leaves to improve air circulation and help sunlight reach the sprouts on the stalk. The sprouts start to form from the bottom of the plant up, so they’re sort of forming in tandem with the leaves that are yellowing and will be removed. Eventually, you’ll end up with a stalk the resembles Beaker from The Muppets, with only a few leaves on the top of the plant and the rest of the stalk exposed to the late fall sun.
Brussels sprouts should be harvested when the sprouts feel tight and dense.


Like what you hear? Please share our podcast with a friend. Subscribe on iTunes or your favorite podcast player so you never miss a beat. And we'd really appreciate you showing us some love by leaving a rating and review on iTunes.
Have a topic you'd like see us dig in to? Leave us a note in the comment section below or #EBpodcast on Instagram and Twitter!
We need your support to keep make fresh, quality weekly content! Support us here:
Become an Encyclopedia Botanica Patreon


June 16, 2017
Encyclopedia Botanica Podcast, Episode 49: Blossom End Rot

Blossom end rot can be an incredibly frustrating challenge for any vegetable gardener. There is something particularly upsetting about watching a perfectly healthy-looking plant produce damaged and rotten fruits! Fortunately, blossom end rot can be avoided and, once in process can often be overcome.
HOW TO LISTEN: Listen right now in your browser by clicking above. Subscribe in iTunes (or your favorite podcast player) to have our podcasts sent directly to your device.SHOW NOTES:In this episode, we discuss:
What causes blossom end rotHow to spot blossom end rotHow to prevent and treat blossom end rotImportant Take-aways:
Blossom end rot can occur on a range of fruits, but is most commonly seen on tomatoes, peppers and eggplant.
Blossom end rot is the result of a lack of calcium in the fruit tissue. Calcium is vital for the development of strong cell wall in plants and is especially important to fruiting crops. This calcium deficiency can be caused by a lack of calcium in the soil or by the plant’s inability to effectively absorb calcium from the soil.
There are a few simple ways to prevent and/or reduce the impact of blossom end rot in the garden (most of these things you should be doing anyways!):
Soil pH: Check the pH of your soil. Proper pH range for most fruiting vegetables is between 6.3 and 6.9. Maintaining the proper pH will help crops absorb nutrients from the soil.
Consistent watering: Maintain even watering cycles through the season. Most often, blossom end rot is a result of water stress which disrupts the plant’s ability to draw calcium up from the soil. Keeping the soil adequately and consistently moist can eliminate this problem.
Bone Meal: If your garden is on a consistent watering schedule but your still having issues, you might want to add bone meal to your soil. Bone meal, known primarily for its supply of phosphorus, but also supplies calcium. Bone meal feeding supplements are a long-used tool to prevent blossom end rot in long-season fruiting crops.
Dolomitic lime: Dolomite lime supplies both magnesium and calcium to the soil (in addition to adjusting soil pH). If used in high doses or too frequently, it can lead to nutrient imbalances in the soil, but it can also be highly effective in supplying fruiting crops with adequate calcium to support healthy fruit production.
Like what you hear? Please share our podcast with a friend. Subscribe on iTunes or your favorite podcast player so you never miss a beat. And we'd really appreciate you showing us some love by leaving a rating and review on iTunes.
Have a topic you'd like see us dig in to? Leave us a note in the comment section below or #EBpodcast on Instagram and Twitter!
We need your support to keep make fresh, quality weekly content! Support us here:
Become an Encyclopedia Botanica Patreon
June 9, 2017
Encyclopedia Botanica Podcast, Episode 48: New Potatoes

New potatoes are potatoes that are harvested young, or before the potato plant dies back and the potatoes fully mature. They have a thin, tender skin, are generally sweeter than mature potatoes, and are particularly delicious when pulled fresh from the garden.
HOW TO LISTEN:Listen right now in your browser by clicking above.Subscribe in iTunes (or your favorite podcast player) to have our podcasts sent directly to your device.SHOW NOTES:In this episode, we discuss:
What new potatoes areHow and when to harvest new potatoesHow to store and use new potatoesImportant Take-aways:
If your potato plants have flowered, it is likely the new potatoes have formed! To harvest, gently dig around the base of your potato plant, being very careful not to disturb the plant, and pull out potatoes that are close to the surface. The plant will continue to photosynthesis, feeding the potatoes that are left in the ground as they continue to grow.
New potatoes don’t make a great storage crop because of their thin skins and high moisture levels.
We recommend you use new potatoes within a few days of harvesting, but they can be stored for a week or two in the refrigerator. If refrigerating new potatoes, keep them unwashed potatoes in a paper bag or loosely wrapped plastic. Washing the potatoes with water will shorten their storage life and should be done gently because their tenders skins will easily scrub off. If the potatoes you pull from your garden are really dirty, gently wipe the dirt off with a dry towel.
You don't need to peel new potatoes; just rinse to remove any dirt. Since new potatoes are relatively small, they’re often cooked whole or just cut in half. They’re great roasted, boiled or added to soups or lentils, but are often served with minimal preparation, as they flavor and texture of new potatoes holds up well on it’s own.
Like what you hear? Please share our podcast with a friend. Subscribe on iTunes or your favorite podcast player so you never miss a beat. And we'd really appreciate you showing us some love by leaving a rating and review on iTunes.
Have a topic you'd like see us dig in to? Leave us a note in the comment section below or #EBpodcast on Instagram and Twitter!
We need your support to keep make fresh, quality weekly content! Support us here:
Become an Encyclopedia Botanica Patreon
June 2, 2017
Encyclopedia Botanica Podcast, Episode 47: June Listener Q + A

It's time for another Q&A episode from our Slack group. This has been a super fun time of year in there because everyone is sharing pictures of their plantings and swapping lots of advice and questions and answers. This episode we’ll cover a wide range of topics from tomato pruning, to a refresher on how potatoes grow, to drip irrigation. Tune in because this one is packed with useful tips!
HOW TO LISTEN:
Listen right now in your browser by clicking above.Subscribe in iTunes (or your favorite podcast player) to have our podcasts sent directly to your device.SHOW NOTES:
In this episode, we discuss:A little bit about pruning tomatoes...more to come in another episode!Hilling potatoesDrip irrigation timingGrowing cauliflowerImported cabbage wormsImportant Take-aways:
Tomato pruning: This is one of the topics that there are many varying opinions on, but we tend to prune our plants down to 2-3 "leaders"- those are the main branches. These leaders come from those "crotch" pieces, so they're popping up all of the time. Once the plant is about 2 feet tall, choose 2-3 "leaders" that are about 1 foot from the ground. Eventually you'll remove all of the foliage between those leaders and the ground (so you just have a bare stem below your leaders). We'll get into more of this on the podcast, but at least you can start with this here!”
Potato hilling: Just for a refresher, potatoes are like their tomato cousins in that they have root hairs along the plant's main stem. In the case of a potato, those root hairs have the ability to make more potatoes. Because of this, people will mound soil up around a potato plants stem to increase their yield of tubers. So, why you wouldn't just bury the seed potato much deeper in the ground? Because the seed potato doesn't have an infinite store of energy and so the plant needs to photosynthesis in order to grow. Simply put, if you planted your seed potatoes 2 feet underground, the plant would most likely sprout, but it would probably run out of energy before the stem reached the surface of the soil and wouldn't have any energy to then go and form potatoes. So, back to hilling- Typically people will hill up their potatoes 2 times. Once when the plants are around 8-10 inches tall, and then again a few weeks later. The second hilling may only be a few inches of soil or some people use straw mulch.
Drip irrigation timing: Start slow with a set schedule, and then monitor the moisture level of your soil by digging down a few inches. You want the soil to be moist under the surface, but not so saturated that the surface of the soil never dries out.
Garden gnats: Fungal gnats, which breed at the surface of the soil, so in order to get rid of them, you’ll want to let the surface of the soil dry out and cultivate regularly. Watering more deeply and less frequently, and this should help! In general though, gnats are not usually going to disturb your plantings, but they are annoying company in the garden.
Cauliflower tips: First of all, cauliflower is a tough crop to grow! It loves to button-up (put on a super small head) and bolts really quickly. One tricky part of growing cauliflower and broccoli is knowing when to harvest it.
Imported cabbage worms: If you’re finding lots of holes in your brassica leaves, it’s likely that you have some sort of cabbage worm. If you notice the damage early enough and can spot the worms, picking them off of your plants is a very effective way to get rid of them. If the cabbage worm damage looks like it’s starting to effect the overall health of the plant, I'd pull those plants and put them directly into the compost or yard waste- or just get them out of the garden, rework the soil, and then replant in a new location! Keep a close eye on your next round of brassicas and search for cabbage worms at the first sign of damage!


Like what you hear? Please share our podcast with a friend. Subscribe on iTunes or your favorite podcast player so you never miss a beat. And we'd really appreciate you showing us some love by leaving a rating and review on iTunes.
Have a topic you'd like see us dig in to? Leave us a note in the comment section below or #EBpodcast on Instagram and Twitter!
We need your support to keep make fresh, quality weekly content! Support us here:
Become an Encyclopedia Botanica Patreon
May 26, 2017
Encyclopedia Botanica Podcast, Episode 46: Choosing the Right Beans For Your Garden
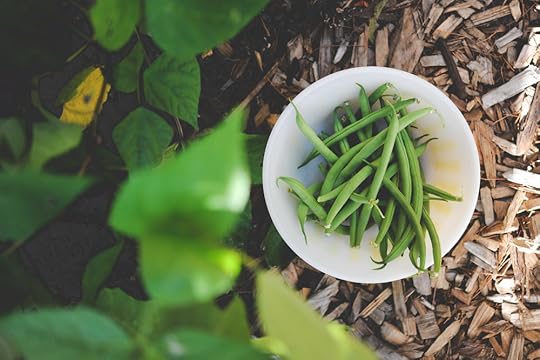
There are so many types and varieties of beans to choose from, that picking the right types to grow in your garden can be confusing. In this episode we discuss the 3 main culinary categories that beans are broken into, and how each of these types are grown in your garden. We compare growth habits, crop lifespans, and productivity differences between beans, including sharing some of our favorite varieties.
HOW TO LISTEN:Listen right now in your browser by clicking above.Subscribe in iTunes (or your favorite podcast player) to have our podcasts sent directly to your device.SHOW NOTES:In this episode, we discuss:
The three main types of beansThe growth habits and crop lifecycles of different beansThe productivity difference between dry beans and fresh beansVarieties we recommend


Important Take-aways:
Snap beans are the type of beans that you eat whole, so that means you eat the pod or shell and the seeds that it encases. Your standard “green beans” are all snap beans because you’re eating the pod along with the immature bean seeds.
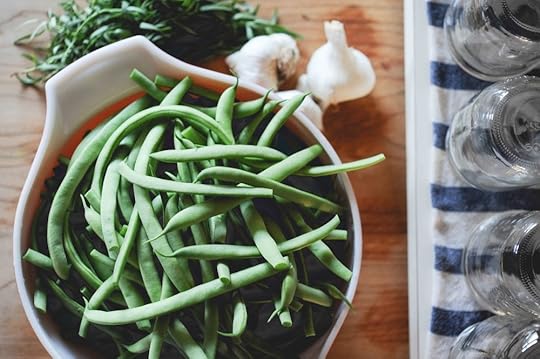
Fresh shell beans are dry bean varieties that are harvested when the pod is still green and the inner beans are very tender.
Dry beans are shelling beans that are harvested after they’re fully mature and the pods are withered and dry (they’re usually dried further for extended storage).
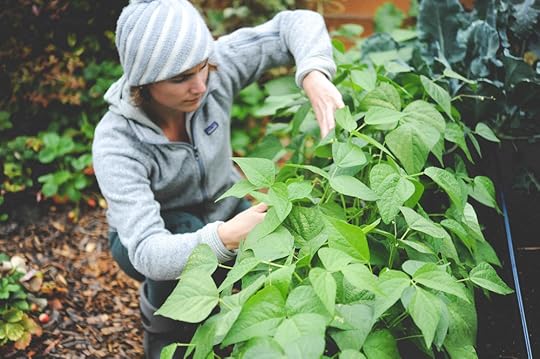
All beans have two different growth habits, pole and bush. Pole beans are usually grown vertically on a trellis, and bush beans are shorter and don’t need to be trellised. There are many types of bush and pole beans and in fact, some types and varieties come in both growth forms.
From a productivity standpoint, if you're a smaller space urban or suburban gardener, snap beans will produce more yield per square foot than shelling beans.
Favorite varieties:
Bush snap beans: Provider, Royal Burgundy, Indy Gold Wax Bean (Golden Wax is a non-patented alternative), Greencrop
Pole snap beans: Fortex
Shelling beans: Kenearly Yellow Eye, Cananolini, Cranberry, Drangon langrie (can also be eaten fresh)
Some of these varieties are carried by our friends at Seattle Seed Co. Remember to use the coupon code EBPODCAST for off of your order!
Like what you hear? Please share our podcast with a friend. Subscribe on iTunes or your favorite podcast player so you never miss a beat. And we'd really appreciate you showing us some love by leaving a rating and review on iTunes.
Have a topic you'd like see us dig in to? Leave us a note in the comment section below or #EBpodcast on Instagram and Twitter!
We need your support to keep make fresh, quality weekly content! Support us here:
Become and Encyclopedia Botanica Patreon
May 19, 2017
Encyclopedia Botanica Podcast, Episode 45: Cucumbers with Jeanne Nolan

We’re excited to have Jeanne Nolan on the podcast today to talk with us about growing cucumbers. Jeanne is based in Chicago and has been growing food organically for over twenty-five years. Among other garden-related achievements, she is the founder of The Organic Gardener - you can find them online to read much more about Jeanne's cool past, including living and working for 17 years on communal farms across the country, as well as lots of inspiring garden photos. Jeanne is also the author of the well-loved garden memoir From the Ground Up.
HOW TO LISTEN: Listen right now in your browser by clicking above. Subscribe in iTunes (or your favorite podcast player) to have our podcasts sent directly to your device.SHOW NOTES:In this episode, we discuss:
When and how to plant cucumbersTrellising techniquesSuccession planting cucumbersHarvesting cucumbersJeanne’s favorite cucumber varieties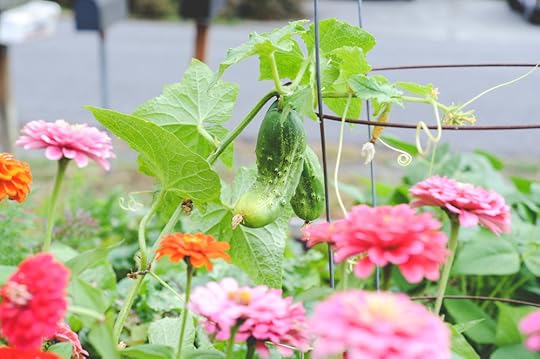


Important Take-aways:
Cucumber can be direct seeded or plant from transplants. If growing from a transplant, keep in mind that the roots do not like to be disturbed at all so it needs to be transplanted very gently.Cucumbers can be left to sprawl in the garden, but to keep things tidy, ease of harvesting, and space optimization, we recommend trellising them. If using a cage to trellis, plant 2-3 cucumbers per cage. Jeanne recommends using a Texas Tomato Cage, which folds away for easy storage!If you're having a hard time training the vines on your trellis, Jeanne recommends using plant velcro to help steer your vines in the right direction. Cucumbers can be succession planted for an extended harvest. If you do plan to succession plant your cucumbers, you’ll want to have designated areas for each of the plantings, as their timing will overlap in the garden.Harvest cucumbers when they are on the smaller side. Like most fruiting crops, harvesting often will extend your crops fruiting period.Powdery mildew is common on cucumbers. Organic anti-fungal sprays (like our Baking Soda Spray) will help keep powdery mildew at bay. Jeanne’s favorite cucumber varieties:"Excelsior" pickling cucumber "Diva" seedless cucumber from Johnny's Selected SeedsSuyo Long from Johnny's Selected Seeds"Marketmore 76" traditional cucumber from High Mowing Seeds (variety in header photo)"Salt & Pepper" white cucumber from Johnny's Selected SeedsFeatured Guest:
Jeanne Nolan
The Organic Gardener, Chicago, Illinois
Jeanne grew up in Winnetka, Illinois and left in 1987 to live on a communal farm for the next seventeen years of her life. Upon her 2004 return to Chicago, she planted a vegetable garden in her parents’ backyard. Its success reaffirmed her belief that she could make an impact in the world by helping people experience the benefits of growing their own food.
In 2005, Jeanne began working with Chicago’s Green City Market. On their behalf, she designed, installed, and today maintains The Edible Gardens, a 5,000 square-foot educational children’s garden at the Lincoln Park Zoo Farm-in-the-Zoo. That same year, Jeanne founded The Organic Gardener, the ultimate expression of her life experience, beliefs, and skills.
[image error] [image error]Jeanne regularly teaches about growing food on WTTW’s Chicago Tonight, and has been featured in Chicago Tribune, Food & Wine, Woman’s Day, and other national publications. In 2013, Random House published her book, From the Ground Up, called “one of the most intelligent, surprising, and impressive garden memoirs” by The New York Times. She lives with her husband, Verd, and two daughters on a little farm in Northbrook, Illinois.
Like what you hear? Please share our podcast with a friend. Subscribe on iTunes or your favorite podcast player so you never miss a beat. And we'd really appreciate you showing us some love by leaving a rating and review on iTunes.
Have a topic you'd like see us dig in to? Leave us a note in the comment section below or #EBpodcast on Instagram and Twitter!
We need your support to keep make fresh, quality weekly content! Support us here:
Become an Encyclopedia Botanica Patreon
May 12, 2017
Encyclopedia Botanica Podcast, Episode 44: May Listener Q+A

Spring has really kicked in across the country, and as a result, we're covering a lot of specific growing questions today. Stay tuned for more on slug control, a carrot seeding experiment, supplemental feeding, as well as lots of details around spring planting.
HOW TO LISTEN:Listen right now in your browser by clicking above.Subscribe in iTunes (or your favorite podcast player) to have our podcasts sent directly to your device.SHOW NOTES:In this episode, we discuss:
Slug controlCarrot seeding techniquesSupplemental feeding for BrassicasPotassium salt build-up in transplantsYellowing leaves on garlicBeet thinningImportant Take-aways:
Slug controlIron phosphate slug control products are safe for humans and pets- Sluggo is a great organic brand of iron phosphate and is what we use in our gardens!Even if you’re using iron phosphate, removing the slugs from your garden is very beneficial. You can easily round up a bunch of slugs by placing a few wooden boards on your garden pathways. When the sun comes up, slugs will retreat to these dark wet spots, so you can simply flip the board over and collect a bunch of slugs at once that would otherwise have dispersed widely around the garden.Diatomaceous Earth is an organic product that is made from the pulverized fossils of ancient organisms known as diatoms which also helps keeps slugs and other soft-bodied creatures out of your garden. Be sure to surround your plants with Diatomaceous Earth because it's effective as a physical barrier between your plants and pests. Supplemental feeding for BrassicasWith the exception of Brussels, if my brassicas are looking happy and healthy as they grow, I just stick with a kelp-based liquid fertilizer every other week after the initial dose of balanced granular fert + extra blood meal at planting time. If you didn't get a chance to add extra nitrogen at planting time, I'd side-dress your plants with some now, but then call it good.Yellowing leaves on garlicYellowing leaves on garlic is normal. It’s just a sign that the plant is starting to mature. Once ¾ of the plant has turned brown, it will be ready to harvest.Beet thinningWhen plants have 1-2 sets of true leaves, thin to 4” spacingEat your thinnings, they’re delicious!If you’re very careful beet thinnings can be transplanted back into your garden. If you're transplanting beet thinnings into another part of your garden, or using them to fill out places where seeds didn't germinate, just be sure to handle to plants really gently and get all of the root. Beets tend to germinate in clusters. If I'm going to transplant my beet thinnings, I would actually use a hand trowel to lift the soil under the plants and pull out the entire cluster (even the one you were planting to leave in that spot), and then gently separate the cluster of plants and replant at your desired spacing.If you’re growing in an area with a shorter season, you many actually want to grow beets as transplants and plant them in the ground when they're a few inches tall.
Like what you hear? Please share our podcast with a friend. Subscribe on iTunes or your favorite podcast player so you never miss a beat. And we'd really appreciate you showing us some love by leaving a rating and review on iTunes.
Have a topic you'd like see us dig in to? Leave us a note in the comment section below or #EBpodcast on Instagram and Twitter!
We need your support to keep make fresh, quality weekly content! Support us here:
Become an Encyclopedia Botanica Patron!
May 5, 2017
Encyclopedia Botanica Podcast, Episode 43: Succession Planting
Succession planting is the practice of planting small quantities of a crop on a regular basis so that they can be harvested at regular intervals throughout the growing season. This practice is key to maintaining a high-yield vegetable garden. I think among new gardeners there is a popular misconception that vegetable gardens are planted in the spring, and then that's it, just sit back and watch it grow! While there are certainly some crops that will only be planted once, early in the growing season, many crops can be planted throughout the season. In some cases, you'll have to plant certain crops multiple times throughout the season in order ensure a continued harvest.
HOW TO LISTEN:Listen right now in your browser by clicking above.Subscribe in iTunes (or your favorite podcast player) to have our podcasts sent directly to your device.SHOW NOTES:In this episode, we discuss:
Crop lifecyclesWhy succession plant short season cropsSuccession planting timing tipsCut and come again harvestingImportant Take-aways:
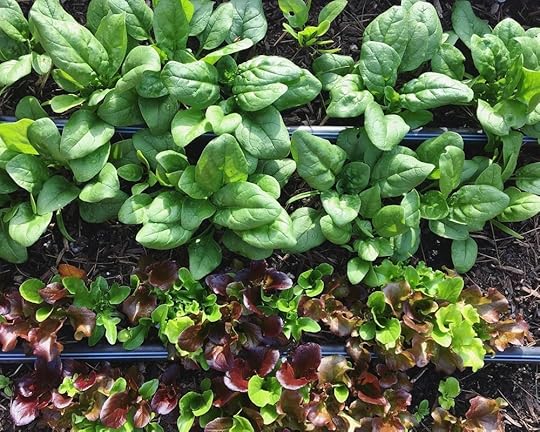
Short season crops usually take only a month or six weeks to reach maturity, so can be planted several times throughout the season. Examples of short season crops are:
ArugulaLettuceRadishSpinach(All annual vegetable crops profiled in our book, Food Grown Right, In Your Backyard, are categorized by crop lifespan and growth habit, so check it out if you’re curious about crops we haven’t listed here.)

Why succession plant?
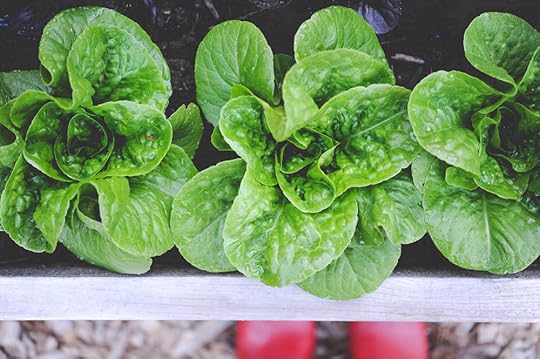
Short harvest window: Many short season crops are at their peak harvest stage for a very short period of time, after which they quickly lose their desirable flavor and texture. Short season crops are also prone to flowering quickly, especially in warmer weather conditions.Space out your harvest: Here's an example pulled from our book, High Yield Vegetable Gardening : 'Many new growers catch spring fever and plant a huge amount of salad greens early in the season, only to wonder what to do with 75 heads of lettuce come June. A better approach (assuming that you're growing lettuce only for your household use) would be to plant two heads of lettuce every week, starting as early as the weather allows and continuing until late in the season.'How: The general idea behind succession planting is that you plant small amounts of a crop on multiple occasions throughout the season. With short season crops, you usually want to plant small amounts of crops at regular intervals, for example once per week or once every two weeks.
If you are starting to experiment with succession plantings for the first time and it seems daunting to keep up with, consider trying out the system with one crop, something that you know you'll use a lot of and try putting the planting dates on whatever calendar you use to manage your other scheduling needs. For example, if you love cilantro and use it very regularly in cooking, you could plan to seed a single 2' long row of cilantro every two weeks. To keep on schedule, just put a reminder on your calendar for every other Monday and make sure to take a few minutes when the reminders come up to head out to the garden and sow a new row.
With many short season succession planted crops, you may also want to experiment with cut and come again harvesting. This technique can apply to direct seeded crops such as lettuce mix, arugula, mizuna, braising mix, cilantro and baby spinach. The concept is simple, when the crop is ready for harvest, cut it down and leave the roots in the garden. Within a week or two, the plants may sprout a new flush of leaves which you can then cut for a second harvest!

Like what you hear? Please share our podcast with a friend. Subscribe on iTunes or your favorite podcast player so you never miss a beat. And we'd really appreciate you showing us some love by leaving a rating and review on iTunes.
Have a topic you'd like see us dig in to? Leave us a note in the comment section below or #EBpodcast on Instagram and Twitter!
We need your support to keep make fresh, quality weekly content! Support us here:
Become an Encyclopedia Botanica Patron!
April 28, 2017
Encyclopedia Botanica Podcast, Episode 42: Growing Tomatoes

Tomatoes are probably the most popular garden vegetable, and for good reason; they're versatile, highly productive, and produce fruits that are far superior to any you can buy at the grocery store.
HOW TO LISTEN:
Listen right now in your browser by clicking above.Subscribe in iTunes (or your favorite podcast player) to have our podcasts sent directly to your device.SHOW NOTES:In this episode, we discuss:
How to choose the best tomato for your space and needsTomato planting tipsSome of our favorite tomato varieties


Important Take-aways:
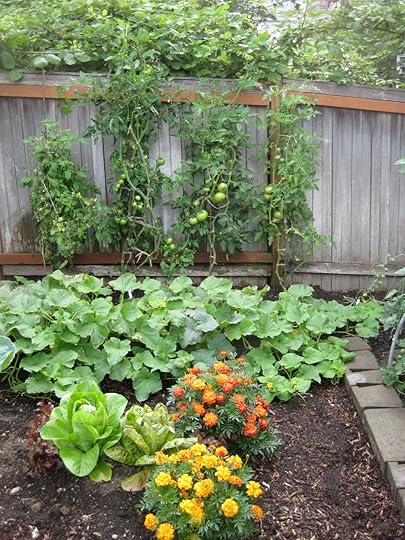
There are two main types of tomato plants you can grow. Determinate and indeterminate:Determinate tomatoes grow to a certain height, then flower and set fruit. Traditionally, many determinate types were Roma and plum varieties, but now you can find tomato plants that will produce fruit in all shapes, sizes and colors that have been bred to be determinate. Determinate types are great for growing in containers and small spaces.Indeterminate tomatoes, which will continue to grow larger and larger throughout the season and continue to set fruit for as long as they can before a frost sets in.Choosing the best types of tomatoes for you and your garden can feel overwhelming. I'm going to go over some of the main categories of tomatoes to help you begin to narrow down your choices:Cherry and Grape varieties are the small, very sweet tomatoes that are usually eaten whole.Plum and Roma are medium sized fruit that are usually an oblong shape and are used for sauces and canning because of their low-moisture content, meaty texture, and low seed count.Slicing and Beefsteak are the large, juicy tomatoes used for slicing on sandwiches, caprese salad, etc.When planting tomatoes, it's crucial to start with large, healthy transplants. By large, I mean 6-8 inches tall. If you're growing in a cooler region, planting out transplant that are even larger than that can be helpful.Tomato plants should be spaced at least 18 inches apart.To plant tomatoes:Pull off the lowest side branches and the bottom set of leaves on your plants (these are usually small little leaves that are coming straight off the central stem).Dig a hole deep enough for your plant to be buried up to the next lowest set of leaves. Mix in ¼ cup of balanced fertilizer and a little extra blood meal if the leaves on your plants are yellowing at all.Place your plant in the hole, burying the bottom of the central stem. Tomatoes set new roots straight off of their stem so planting them nice and deep will give them the opportunity to develop a large root structure, which will help the plant absorb water and nutrients.Tomato yield is variable but you'll likely harvest 3-10 lbs per plant.In many regions it's good to be aware of the fact that tomatoes are a long season crop. They'll be in the garden for about 6 months, but will probably only produce fruit for 3 of those months, and in some years maybe only 2. This means that you may get a really big flush of fruit at some point late in the season. This sounds like heaven, but we've found that many of our clients can get overwhelmed with the amount of fruit that is coming off of their plants late in the summer. Just be aware of this and have a plan.
Like what you hear? Please share our podcast with a friend. Subscribe on iTunes or your favorite podcast player so you never miss a beat. And we'd really appreciate you showing us some love by leaving a rating and review on iTunes.
Have a topic you'd like see us dig in to? Leave us a note in the comment section below or #EBpodcast on Instagram and Twitter!
We need your support to keep make fresh, quality weekly content! Support us here:
Become an Encyclopedia Botanica Patron!Encyclopedia Botanica Podcast, Episode 43: Growing Tomatoes
Tomatoes are probably the most popular garden vegetable, and for good reason; they're versatile, highly productive, and produce fruits that are far superior to any you can buy at the grocery store.
HOW TO LISTEN:
Listen right now in your browser by clicking above.Subscribe in iTunes (or your favorite podcast player) to have our podcasts sent directly to your device.SHOW NOTES:In this episode, we discuss:
How to choose the best tomato for your space and needsTomato planting tipsSome of our favorite tomato varietiesImportant Take-aways:
There are two main types of tomato plants you can grow. Determinate and indeterminate:Determinate tomatoes grow to a certain height, then flower and set fruit. Traditionally, many determinate types were Roma and plum varieties, but now you can find tomato plants that will produce fruit in all shapes, sizes and colors that have been bred to be determinate. Determinate types are great for growing in containers and small spaces.Indeterminate tomatoes, which will continue to grow larger and larger throughout the season and continue to set fruit for as long as they can before a frost sets in.Choosing the best types of tomatoes for you and your garden can feel overwhelming. I'm going to go over some of the main categories of tomatoes to help you begin to narrow down your choices:Cherry and Grape varieties are the small, very sweet tomatoes that are usually eaten whole.Plum and Roma are medium sized fruit that are usually an oblong shape and are used for sauces and canning because of their low-moisture content, meaty texture, and low seed count.Slicing and Beefsteak are the large, juicy tomatoes used for slicing on sandwiches, caprese salad, etc.When planting tomatoes, it's crucial to start with large, healthy transplants. By large, I mean 6-8 inches tall. If you're growing in a cooler region, planting out transplant that are even larger than that can be helpful.Tomato plants should be spaced at least 18 inches apart.To plant tomatoes:Pull off the lowest side branches and the bottom set of leaves on your plants (these are usually small little leaves that are coming straight off the central stem).Dig a hole deep enough for your plant to be buried up to the next lowest set of leaves. Mix in ¼ cup of balanced fertilizer and a little extra blood meal if the leaves on your plants are yellowing at all.Place your plant in the hole, burying the bottom of the central stem. Tomatoes set new roots straight off of their stem so planting them nice and deep will give them the opportunity to develop a large root structure, which will help the plant absorb water and nutrients.Tomato yield is variable but you'll likely harvest 3-10 lbs per plant.In many regions it's good to be aware of the fact that tomatoes are a long season crop. They'll be in the garden for about 6 months, but will probably only produce fruit for 3 of those months, and in some years maybe only 2. This means that you may get a really big flush of fruit at some point late in the season. This sounds like heaven, but we've found that many of our clients can get overwhelmed with the amount of fruit that is coming off of their plants late in the summer. Just be aware of this and have a plan.Like what you hear? Please share our podcast with a friend. Subscribe on iTunes or your favorite podcast player so you never miss a beat. And we'd really appreciate you showing us some love by leaving a rating and review on iTunes.
Have a topic you'd like see us dig in to? Leave us a note in the comment section below or #EBpodcast on Instagram and Twitter!
We need your support to keep make fresh, quality weekly content! Support us here:
Become an Encyclopedia Botanica Patron!

