
Marisa McClellan's Blog, page 43
May 1, 2017
Giveaway: Jar Storage from JarBOX

When you start doing a lot of canning, one of the biggest challenges becomes how to store both your processed jars and the empties waiting for your next project. I’ve spent a goodly amount of time over the years, pondering how to best shoehorn my canning habit into the storage space available in my 1,000 square foot apartment.

I keep jars under my couch, deep in my coat closet, and under my bed (and, if we’re being entirely honest, there is also currently a tower of boxes in the corner of my bedroom. Needs must). One tool that I use to help keep these storage spots useable and organized are the trays made by JarBOX. These clear, plastic boxes come sized for both pints and quarts and are a genius solution for stashing jars safely and securely.
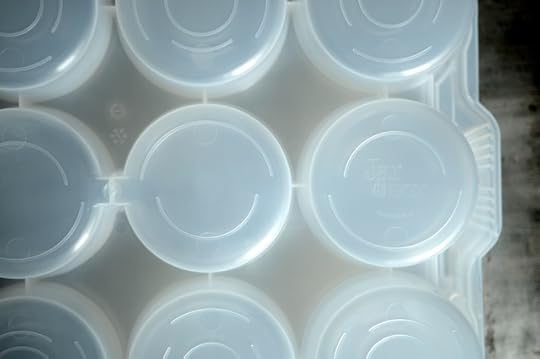
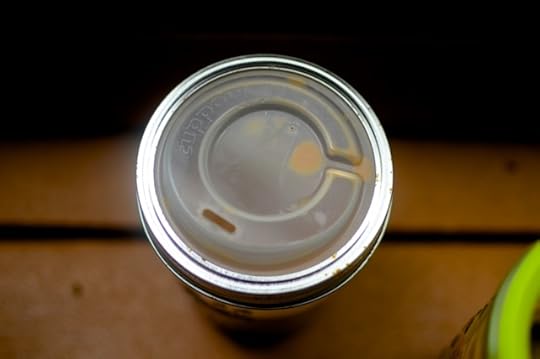
They’re designed to work in pairs, so that you can lock your jars into individual pods. Then, those locked trays can be stacked and locked together, to create a tower of jars that behaves as a single unit, further reducing the chance of breakage. I call on a pair of JarBOX trays any time I need to transport sealed jars to family gatherings and food swaps, because I know they’ll get my jars to their destination intact.
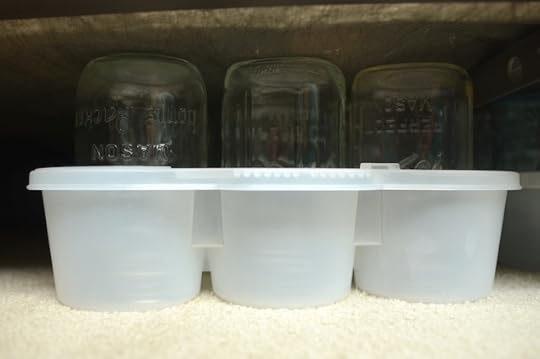
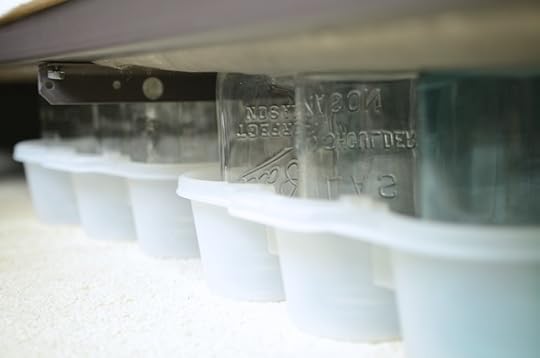
I use a goodly number of my JarBOX sets to store the empties I keep under our bed. I arrange them upside down (to keep the worst of the dust out) and then slide the trays in and out as canning season ramps up. It’s a far better solution than fragile cardboard boxes I’d used previously.
This month, the good folks from JarBOX are sponsoring weekly giveaways on a series of blogs. I’m kicking things off by giving away two sets of JarBOX trays (a pint and a quart). What’s more, everyone who enters the individual giveaways will also be entered to win a Grand Prize of four more JarBOX sets. To keep up to date with all the JarBOX giveaways, make sure to follow them on Facebook!
We’re going old school for this giveaway. Here’s how to enter.
Leave a comment on this post and tell me how you’d use a set of JarBOX trays.
Comments will close at 12 noon on Sunday, May 7, 2017. A winner will be chosen at random and will be posted to the blog later that day.
Giveaway open to United States only (so sorry!). Void where prohibited.
One comment per person, please. Entries must be left via the comment form on the blog at the bottom of this post.
Disclosure: JarBOX sent me a pair of JarBOX trays for photography and review purposes. They’re also provided a second set for the giveaway. No additional compensation was provided. All opinions expressed here are entirely my own.
Related Posts:
Giveaway: The JarBOX (sponsored by Fillmore Container)
Giveaway: Cuppow & BNTO Jar Adapters
Giveaway: Pint & Half Jars from Fillmore Container


May Sponsors: Cuppow, Fillmore Container, EcoJarz, MightyNest, Mason Jar Lifestyle, and Mrs. Wages
Happy May, friends and readers! It’s the start of the month and so is time to thank the businesses that help make this site possible. Please do show them your appreciation for their support with your time and attention! And if your company, shop, or family business is interested reaching the food-loving and engaged Food in Jars audience, you can find more details here. Leave a comment on this post or drop me a note to learn more!
In the top spot are our friends at Cuppow. They are the creators of the original mason jar travel mug topper and the BNTO, a small plastic cup that transforms a canning jar into a snack or lunch box. Parents and kids love their EIO set, with its grippy silicone sleeve and a lid that makes for easy sipping.
Lancaster, PA-based and family-owned Fillmore Container are next! They sell all manner of canning jars, lids, and other preservation gear. As always, their blog is an amazing resource for all things jar-related. I’m teaching a Low Temperature Pasteurization class in their space this summer. Hold your spot today!
Our friends over at EcoJarz on board again this month. They make an array of products designed to fit on top of mason jars, including cheese graters, coffee brewers, and stainless steel storage lids. Make sure to follow them on social, because they host a weekly EcoJarz Fan Pic of the Week giveaway!
Mason Jar Lifestyle is a one-stop shopping site for all the jar lovers out there. They sell all manner of mason jar accessories and adaptors. If you’re in the market for lids, straws, sprouting lids, and cozies to transform your mason jars into travel mugs, make sure to check them out!
MightyNest is an amazing resource for non-toxic, natural, and organic products for homes and families. I’m a big fan of the MightyFix, their monthly product subscription program. Right now, you can get a year’s subscription to the MightyFix for just $99 (it regularly costs $10 a month, so that’s a great deal).
Our friends at Mrs. Wages are on the roster again this month. They make pectin, vinegar, and more canning mixes than I can count. Their website is an incredible preserving resource and I can’t say enough good things about their salsa mix. If you need a little help getting your produce into jars, remember to seek out their products!
Related Posts:
Check the recipe index for more tasty preserves!
April 29, 2017
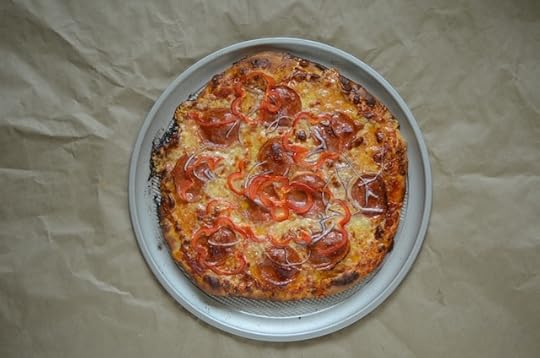
Speedy Pizza Dough + OXO Pizza Tools
I believe that the process of learning a new kitchen skill is much like learning a new dialect of a language you already speak. In the beginning, you feel awkward and mistake-prone. However, over time you begin to find markers in the landscape and soon enough, your brain builds the pathways necessary for increasing mastery. Eventually, you find that the new knowledge informs your previous understanding and brings greater depth to that which you thought you’d already known intimately.
This is why, despite having at last seven pizza joints within a three block radius of my apartment, I make my own pizza. Because it informs my baking and cooking, deepens my grasp of caramelization, and tastes mighty good, to boot. (I learned a great deal about making pizza from this free Craftsy class taught by baking great Peter Reinhart. If you have the time, I highly recommend it.)
Over the years, I’ve tried a number of different pizza dough recipes. When I have an active sourdough starter and I plan ahead, there’s nothing more delicious than a naturally leaven crust. Other times, I’ll use a recipe with very little yeast and do a long, slow rise.
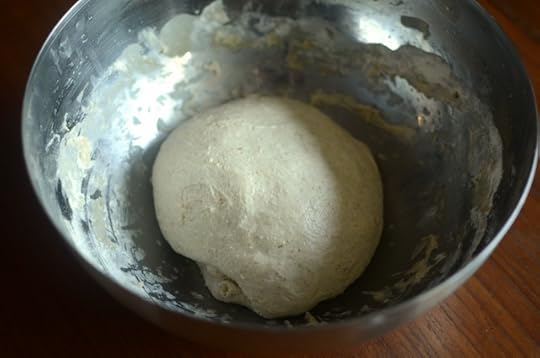
However, most often, I have neither a sourdough starter at the perfect stage of readiness or the time for an overnight rise. When that happens, I use this recipe. It has a generous amount of instant yeast and gets mixed by hand, for a fast rise and a minimum of fuss.
Now, if you have the time, you can let this dough do a second rise, which increases its tangy flavor and makes it even more delicious. But that’s entirely optional. Once the dough is ready, you divide into two portions and then work them flat. For most of my pizza making life, I stretched my dough out on a sheet of parchment paper, topped it and then carefully transferred it to a hot baking steel.

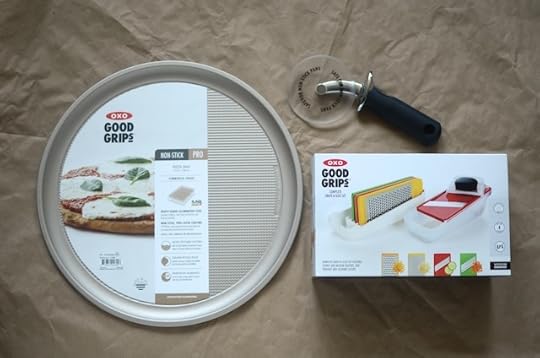
However, recently the folks at OXO sent me some of their pizza tools to try and I’ve fallen hard for their non-stick pizza pan. Instead of using and trashing a sheet of parchment for every pie (and sometimes setting it to smolder in my very hot oven), I work the dough out into a round on the pan (the trick is to work the dough with damp hands and then let it rest for a minute or two. If you keep working it without a rest, it bounces back into a ball), top it, and bake all on the pan.
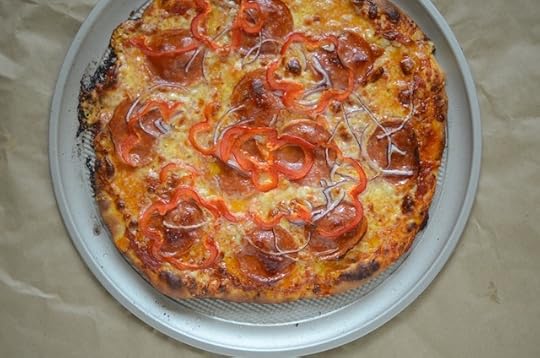
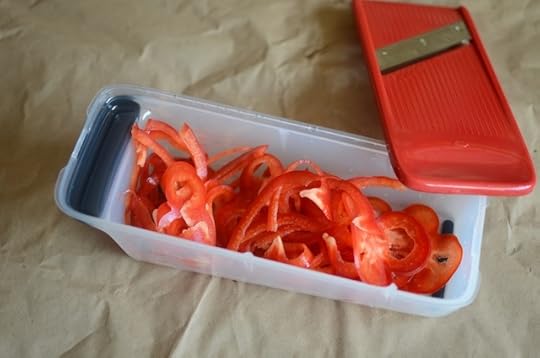
When it comes to topping my pizzas, I go simple. A jar of homemade sauce (my favorite small batch recipe is in Preserving by the Pint), a combination of grated mozzarella and cheddar, and some slivered onion and pepper (I’m loving the OXO Grate & Slice Set they sent for this prep). If we have it, Scott likes pepperoni, but it rarely feels necessary to me.
Baked at 475F on a pre-heated baking steel (I love this thing! I’ve owned and cracked several ceramic pizza stones over the years, but the steel is indestructible), the finished pizza is ready after 10 minutes or so (if you’re using a non-stick pan like I am these days, make sure to check out OXO’s non-stick safe pizza wheel).
PrintSpeedy Pizza Dough
Ingredients
1 1/2 cups hot water (approximately 180°F)1 tablespoons olive oil, plus more to oil the bowl
2 teaspoons honey
2 1/2 cups/300 grams all purpose flour
1 1/2 cups/180 grams whole wheat flour
1 tablespoon instant yeast
1 tablespoon fine grain sea salt
Instructions
In a heatproof measuring cup, combine the water, 1 tablespoon olive oil, and honey. Stir to combine.Measure out the flours, yeast and salt in a large bowl and whisk to combine. Add the water and work with your hands just until the dough comes together into a ball. Drizzle a bit of olive oil over the dough and smooth over top.
Cover the bowl with a piece of plastic wrap or a damp kitchen towel and set in a warm, draft-free spot for an hour.
Once dough has doubled in size, divide into two equal-sized pieces. When you're ready to make pizza, preheat your oven to 475 degrees F (or really, as hot as it will got). Put one of the dough balls on a pizza pan.
Using damp hands, work the dough out into a flat round (the secret is to stretch it a little and then let it rest for a couple minutes. Eventually, it will relax and stay put).
Top and bake for 8-12 minutes per pie.
3.1http://foodinjars.com/2017/04/speedy-pizza-dough-oxo-pizza-tools/
Related Posts:
Sponsored Post: Perfect Pizza at Home with Craftsy
Dark Days: Local Bits, Pieces and Pizza
April 27, 2017
How to Make Homemade Grassfed Ghee
Regular Food in Jars contributor Alex Jones checks in today to show us all how to make gorgeous, homemade grassfed ghee. Looking at these pictures, I can almost smell the nuttiness of the melting butter! -Marisa

During my years as a local foods buyer for the CSA at Greensgrow Farm and Fair Food Farmstand here in Philly, I brought home my share of produce that was still delicious but no longer sellable. Those leftover, cosmetically damaged, or too ripe to sell fruits and vegetables kept my fridge full. My proximity to occasional stashes of “seconds” even spurred me to learn how to preserve those goodies for later use.
I’m no longer bringing home flats of half-moldy strawberries to pick over or sacks of so-ripe-they-burst figs on a regular basis. But my work with local farms and food makers still yields the occasional bounty of perishable product that can be turned into something delicious and shelf-stable.
The most recent foodstuff in need of a little TLC came from my friend Stefanie, cheesemaker and owner of Valley Milkhouse and one of the two area cheesemakers (along with Sue Miller of Birchrun Hills Farm) with whom I run the CSA-style cheese subscription Collective Creamery.
I’dd gone up to Stef’s farmhouse in the Oley Valley, about 90 minutes northwest of Philly, for an evening meeting and spent the following day helping out in the cheese room. When I was ready to head back to the city, she sent me on my way with a very special treat: a half-full five-gallon bucket of cultured butter that was a little past its prime — but the only ingredient I’d need to make a big batch of homemade grassfed ghee.
I spent the next few days working my way through that butter, which had simply sat around in the cooler too long and developed some off-flavors, and ended up with several quarts of grassfed, organic and biodynamic ghee. (Stef sources cream for Valley Milkhouse’s butter exclusively from Seven Stars Farm, makers of heavenly cream and yogurt whose products are unparalleled.)

Since then, I’ve been getting to know and love this cooking fat. It adds amazing flavor to seared mushrooms and fresh veggies, and it’s my new high-heat go-to when I’m cooking up pastured steaks or chops from my Primal Supply Meats Butcher’s Club package. In addition to its purported health benefits, it’s simply delicious, whether you’re spreading it on a slice of sourdough toast or searing off dinner.
When sourcing butter for making ghee, look for the best quality you can find — ideally from 100 percent grassfed cows, made by a local farmer or artisan who could use your support, and unsalted. (Valley Milkhouse’s butter is lightly salted, so my batches weren’t technically traditional, but much of the salt is extracted with the milk solids as you remove them during the cooking process, so the final product I made doesn’t taste salty.)

Where I live, cultured butter from Valley Milkhouse or sweet cream butter from Oasis at Bird-in-Hand cooperative in Lancaster County are great grassfed options, as is Trickling Springs butter made in south central Pennsylvania. Brands like Kerrygold or Organic Valley’s Pasture Butter are good choices if a local source can’t be found where you are.
To make homemade grassfed ghee, simply heat your butter over low heat and bring it to a gentle simmer. You’ll want to keep an eye on the pot, but you can pretty much set it and forget it, checking occasionally to skim foam from the surface and make sure the heat isn’t too high or too low.

As you simmer the ghee, milk solids will sink to the bottom and slowly brown. How brown you let them get is a matter of preference, but getting the milk solids to caramelize is part of what separates ghee from clarified butter. You’ll know this process has started when your kitchen is filled with a buttery, nutty aroma.

Foam will rise to the surface of the ghee as the moisture is cooked out. You can carefully skim this off with a spoon. If you are using unsalted butter, you can toss these milk solids with cooked grains or vegetables to add a rich browned butter flavor (if you use salted butter, the milk solids may be too salty for this purpose and should be composted).
Keep simmering until you see that the milk solids at the bottom of the pot have browned when you spoon back the foam on the surface. The eight-ounce tub of cultured butter in the photo became deep golden ghee with well-browned solids on a very low simmer in about 90 minutes, but the time will vary depending on your stove and the type and quantity of butter you’re using.

Once the solids have browned to your liking, remove the pot from the heat and skim all of the foam from the surface. Strain the mixture through a very fine mesh strainer or a few layers of cheesecloth. Don’t forget to squeeze the cheesecloth to get that last little bit of golden ghee out of there.

Decant your ghee into a clean, dry jar; once it cools completely, it will solidify and turn an opaque bright, buttery yellow. If you’re doing a larger batch, I suggest filling a few cute jars like Weck tulips or decos or Ball Elite half-pints for gift giving. Ghee is the new jam!

Once you try making your own ghee, there’s a good chance you’ll be hooked on the rich flavor, myriad uses, and exceptional qualities that it brings to your recipes.
Have you had a chance to taste homemade ghee? Have you tried your hand at making homemade grassfed ghee before? How do you like to use it? Share with us in the comments!
PrintGrassfed Ghee
Ingredients
8 ounces grassfed butter, unsaltedInstructions
Place butter in a small saucepan over low heat. Melt the butter and bring it to a gentle simmer.Simmer the melted butter until it smells fragrant and nutty. Milk solids will sink to the bottom of the pot and foam will begin to form on the surface. Do not stir.
Once the butter smells nutty and rich, check beneath the foam layer to see if milk solids have browned (this may take as long as 90 minutes). Browning is a matter of preference; you can stop the process when the milk solids are just golden brown or leave the pot on the heat until they turn darker.
When the milk solids have browned to your liking, remove the pot from the heat and skim off all of the foam on the surface of the ghee.
Strain ghee through a few layers of cheesecloth set in a fine mesh strainer into a clean, dry jar. Cover and store at room temperature for up to three months or in the refrigerator for up to a year.3.1http://foodinjars.com/2017/04/homemade-grassfed-ghee/
Related Posts:
Transforming Homemade Creme Fraiche Into Cultured Butter
Mastery Challenge: Quick Pickled Mushrooms
Pantry Management: Get Yours in Shape for the Upcoming Season
April 26, 2017
Quick Pickled Balsamic Strawberries
Today’s guest post comes to us from Erin Urquhart, blogger at Putting Up With Erin. She’s stopped by to share her recipe for Quick Pickled Balsamic Strawberries. Welcome to Food in Jars, Erin!
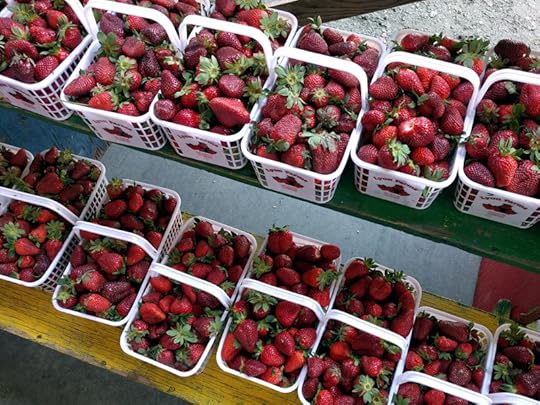
Strawberries are like gold at my farmers market. I’ve been known to spend as much as twenty minutes in line, waiting to get my hands on some locally-grown strawberries (and I have my suspicions that many of you have done the same).
Like locally grown heirloom tomatoes, strawberries are at their peak for a limited amount of time. It takes time and dedication to wait out the other shoppers in order to get the best pick, particularly if you want to have enough to can. I like to put up at least a dozen jars of various strawberry preserves and pickles to get me through the year. They take time and energy, but they’re always worth it.

In years past I’ve played with canned strawberries, pickled green strawberries, strawberry jam , and strawberry whole grain mustard. With only a week left to get my quick-pickled entry in for the Mastery Challenge, I decided to spice it up a bit and try quick pickled balsamic strawberries.
What I love the most about quick-fridge pickling is that it affords you a bit more adventure in your recipes due to modern refrigeration. Even better, because these berries never take a trip through a boiling water bath canner, they hold their texture and shape nicely.
A familiar combination for strawberry jam, the acid in the balsamic vinegar is a perfect compliment to the sweet berries. There’s no need to buy an uber fancy balsamic vinegar for this recipe. Get something that you’d buy for making quick vinaigrettes.
I used a $7 commercially produced organic balsamic vinegar that I picked up from the local food co-op. And because I wanted the pickles to have even more flavor and interest, I decided to get funky by substituting soy sauce for salt, and adding fresh thyme leaves and whole mustard seed to the mix.
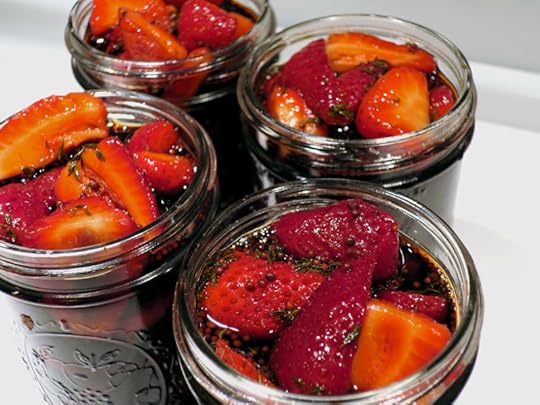
The result: a sweet and tangy pickled strawberry backed by the depth of the balsamic vinegar. Enjoy this balsamic strawberry pickle as a mid-day snack with ricotta cheese, cracked black pepper, and some citrus zest, OR simply add a spoonful of pickles to a light field greens salad.
PrintQuick Balsamic Pickled Strawberries
Yield: makes 4 pints
Ingredients
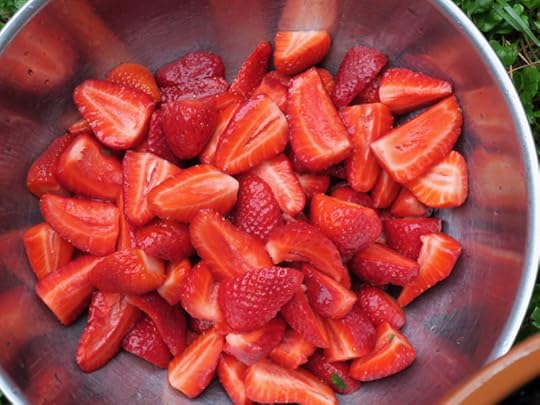
2 1/2 pounds strawberries (washed, stemmed, and cut in quarters)2 cups white sugar
2 Tbsp fresh thyme
1 Tbsp mustard seed
1 Tbsp soy sauce
2 cups balsamic vinegar
2 cups water
Instructions
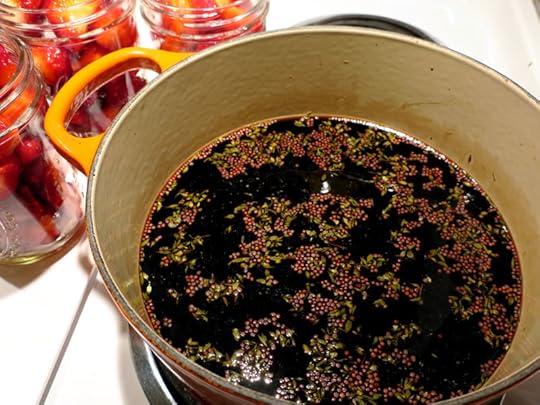
In a medium-sized, non-ionized pot combine balsamic vinegar, water, sugar, soy sauce, thyme, and mustard seeds.Cook on low-medium heat until sugar is completely dissolved. Remove from heat and allow to cool to room temperature (to avoid mushy strawberries).
Divide prepared strawberries between jars. Cover strawberries with vinegar brine (plus thyme and mustard seeds).
Wipe rims and apply lids. Place in refrigerator for at least 12 hours before consuming.3.1http://foodinjars.com/2017/04/quick-pickled-balsamic-strawberries/
Related Posts:
Mango Habañero Mint Shrub
Submit your April Mastery Challenge Projects!
Mastery Challenge: Quick Pickled Mushrooms
April 25, 2017
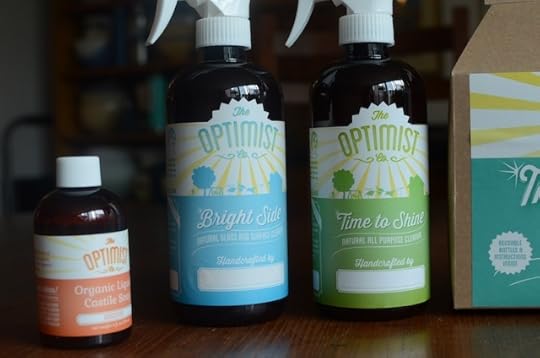
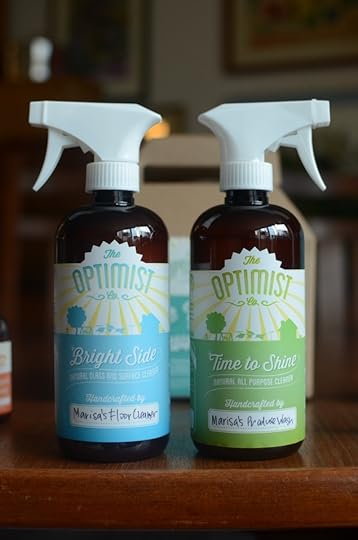
Giveaway: “Make Your Own” Cleaning Kits from The Optimist Co.
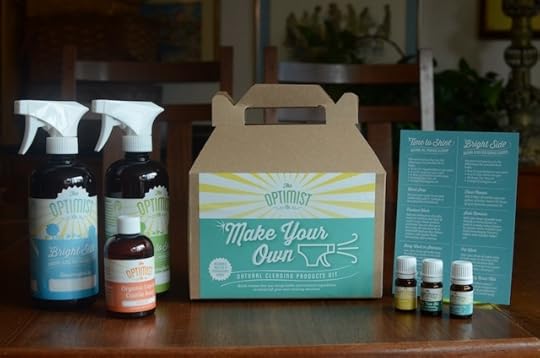
Homemade cleaning products, compiled in my kitchen using the kit from The Optimist Co. have been in regular use in my kitchen for nearly two years now. They are effective and, thanks to the clear instructions on the bottles, incredibly easy to make. Plus, I love the fact that instead of carting home new spray bottles from Target or CVS, I’m reusing the ones I’ve already got.
Recently, The Optimist Co. founder Devin Donaldson (who started the company after conventional cleaning products left her with a nasty asthma attack) got in touch and asked if I might like to try a second kit. At first, I was confused because I’ve been entirely pleased with the first kit and the two products they make.
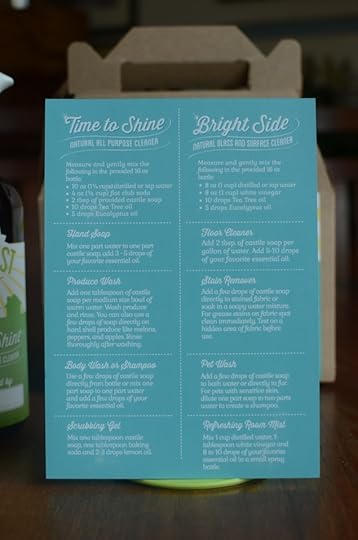
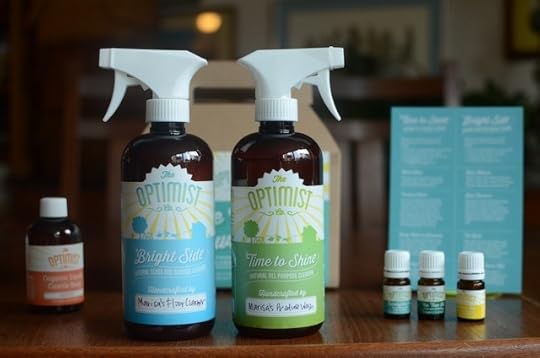
But Devin reminded me that it’s possible to do more than just make Time to Shine and Bright Side with the goodies in the box. And so I started thinking about other cleaning products that might be useful in the kitchen.
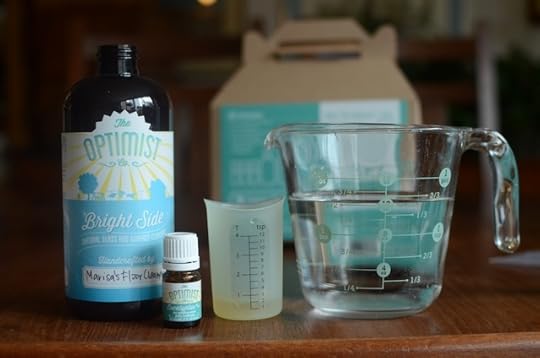
The first thing that popped to mind was a bottle of pre-made produce rinse. With farmers market and CSA season rapidly approaching, I know that very soon I will have a lot of pretty dirty produce on my hands. Instead of regularly filling the sink with a little white vinegar and water, having something that I can spritz over lettuces, zucchini, and strawberries sounds pretty darned appealing.
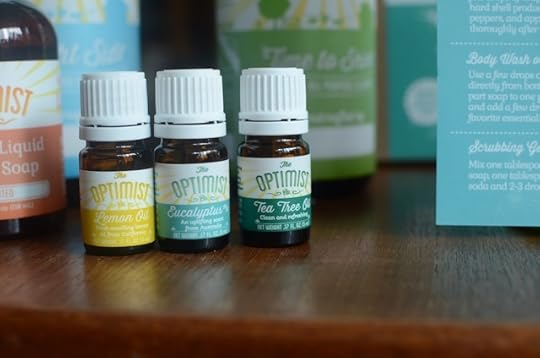
For this one, I used 12 ounces of water, three tablespoons of white vinegar and ten drops of the lemon essential oil from the kit (for both the sunny scent and the extra boost of antiseptic that it provides). A quick shake before using and my produce has never been cleaner.
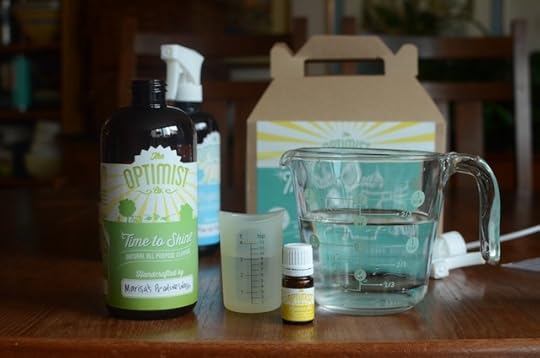
The second thing that occurred to me was something that would help out with cleaning the kitchen floor. As many of you know, my kitchen is pretty tiny. Because there’s so little floor real estate, I rarely pull out a mop to get the job done (to be honest, I don’t think I even have a mop anymore). Instead, I do a lot of after-dinner spot cleaning (supplemented by the occasional, all-out, hands and knees scrub with a sponge and bucket of soapy water).
For that cleaner, I used 14 ounces of water, 2 teaspoons of castile soap, and 7 drops of the eucalyptus essential oil. It’s powerful enough to help cut through splatters of cooking grease, but not so soapy that I have to follow up with several rounds of rinsing. And I love the earthiness of the eucalyptus (we had eucalyptus trees in our back yard when I was very young and as a result, their scent forever feels comforting and home-like to me).
In order to encourage the Food in Jars community to think DIY and explore what The Optimist Co. kit can do in your homes, Devin is offering up three of her Make Your Own Cleaning Products Kit for this week’s giveaway. Please use the widget below to enter!
Related Posts:
Giveaway: The Optimist Make Your Own Cleaning Products Kit
The Optimist Cleaning Kit Winners
Giveaway: The Optimist Cleaning Kit
April 24, 2017
Upcoming Classes & Events: April, May, and June 2017
We are hurtling towards the true start of the canning season (at least up here in the mid-Atlantic region. I know lots of you down south have been canning for months) and so my teaching season is starting up as well. I’m not teaching nearly as much as I have in past years, so if you want to take a class with me, make sure to mark your calendars and sign up! As always, my full calendar can be found here.
Saturday, April 29 (Morris Arboretum, Chestnut Hill)
(THERE ARE JUST THREE SPOTS LEFT IN THIS CLASS) In this two-hour, hands-on workshop at the Morris Arboretum, you’ll learn the basics of pickling. I’ll walk you through the steps of pickling carrots in a vinegar brine and fermenting cucumbers in a salt water brine. Marisa will also show you how to safely preserve the vinegar pickles using the boiling water bath method. All students will go home with the recipes and canning details, as well as a jar of carrot pickles made in class that day. $40/45. Register here.
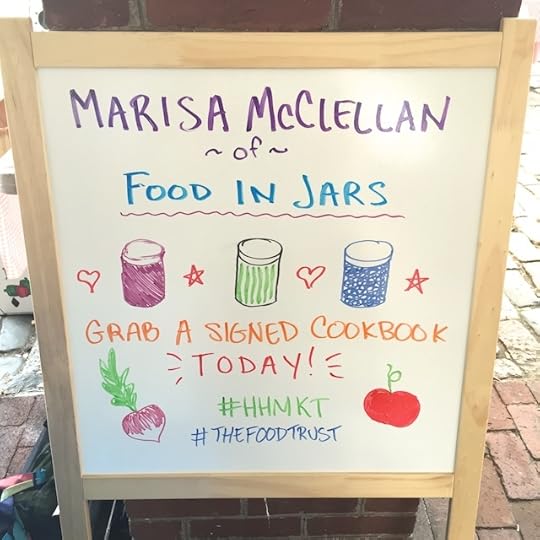
Sunday, May 7 (Headhouse Square, Philadelphia)
This is the final opening day for the Headhouse Square Farmers Market (they’ll now be doing year round!). I’ll be there from 10 am to 2 pm, along with fellow local authors Tenaya Darlington and Amanda Feifer, selling and signing books. If you don’t yet have a copy of Naturally Sweet Food in Jars, come and pick one up.
Monday, May 8 (Culinary Literacy Center, Free Library of Philadelphia)
Co-taught with Joy Manning, this Improvisational Grain Bowl class will teach you how to turn the contents of your CSA box, farmers market haul, or Instacart order into hearty and wholesome grain bowls. This class will focus on essential techniques, including different ways to cook grains, using the blender to make quick sauces, and how to combine flavors and textures for a satisfying spring meal. 6-8 pm. $15. Register here.
Thursday, May 11 (Haddon Township, NJ)
I’ll be at the Haddon Township branch of the Camden County Library system for a free jam making demo. I’ll show you how to make a batch Strawberry Vanilla Jam, sweetened with honey and set with Pomona’s Pectin. Bring your questions! 6:30-8 pm. Free.
Sunday, June 11 (Hillsdale, NY)
I’m teaching not one, but two classes at the Hillsdale General Store Home Chef. This is going to be a fun and satisfying day of canning. If you can swing it, I highly encourage the canning curious to join me for both classes.
11 am to 1:30 pm – An introductory canning class! We’ll make strawberry preserves and strawberry chutney and will dig into the details of boiling water bath canning. $55. Register here.
2:30-4:30 pm – Pressure canning! Join me for an in-depth pressure canning workshop. We’ll make onion jam with rosemary and balsamic vinegar and will safely can it in a pressure canner. $75. Register here.
Saturday, June 17 (Philadelphia)
In this hands on pickling workshop at Greensgrow in Kensington, we’ll make both shelf stable and fermented pickles. You’ll go home with a useful handout and the two jars of pickles you made in class. 12-2 pm. $35. Details and registration info here.
Tuesday, June 20 (Culinary Literacy Center, Free Library of Philadelphia)
Co-taught with Joy Manning, this Improvisational Salad class will teach you how to turn the bounty of your CSA box, farmers market haul, or Instacart order into delicious satisfying entree salads. This class will focus on essential techniques, including whipping up a quick homemade dressing and how to combine flavors and textures for the perfect summer meal. 6-8 pm. $15. Register here.
Related Posts:
Upcoming Events: Fante’s! Terrain! Morris Arboretum!
Upcoming California Events: Pacific Grove! Healdsburg! San Francisco! Oakland!
Upcoming Events: Fayetteville, Atlanta, and Nashville!
April 23, 2017
Links: Pickled Strawberries, Green Onion Kimchi, and Winners
This week has been a bit of a mess in my world. Just when I got myself clear of a 48 hour stomach bug, I managed to slide an inch-long splinter into the ball of my left foot, necessitating a trip to urgent care. I managed a pot of soup and some simply homemade pizza, but otherwise we’ve been surviving on scrambled eggs, bagged salad, and take-out. May this week be a little easier. Now links!
Plum strawberry jam
Grilled cheese with pickled strawberries
Green onion kimchi
Pickled deviled eggs
Easy green curry paste
Peanut butter and jelly muffins
Oatmeal bread
On preserving spring produce
Red onion galette
Skillet oatmeal
Big batch cocktails in giant mason jars
And don’t miss the summer schedule from Preserving Now
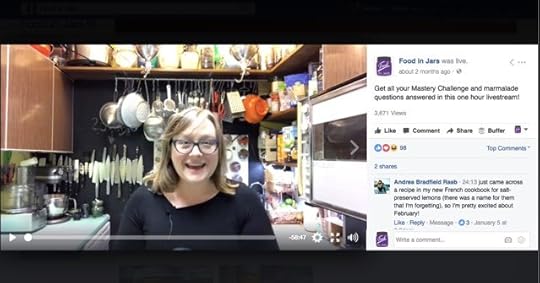
This Monday night (April 24, 2017), I’m going to do a Facebook Live broadcast on the topic of quick pickling. Join me at 9 pm eastern time and bring all your quick pickle questions!
Finally, our five winners in last week’s Cuppow giveaway. Thanks to everyone who entered!
a Rafflecopter giveaway
Related Posts:
Links: Jam Bars, Kinda Bars, and Winners
Links: Ramps, Water-saving Canning, and Winners
Links: Rose Petal Preserves, Garlic Scape Vinegar, and Winners
Links:
This week has been a bit of a mess in my world. Just when I got myself clear of a 48 hour stomach bug, I managed to slide an inch-long splinter into the ball of my left foot, necessitating a trip to urgent care. I managed a pot of soup and some simply homemade pizza, but otherwise we’ve been surviving on scrambled eggs, bagged salad, and take-out. May this week be a little easier. Now links!
Plum strawberry jam
Grilled cheese with pickled strawberries
Green onion kimchi
Pickled deviled eggs
Easy green curry paste
Peanut butter and jelly muffins
Oatmeal bread
On preserving spring produce
Red onion galette
Skillet oatmeal
Big batch cocktails in giant mason jars
And don’t miss the summer schedule from Preserving Now
This Monday night (April 24, 2017), I’m going to do a Facebook Live broadcast on the topic of quick pickling. Join me at 9 pm eastern time and bring all your quick pickle questions!
Finally, our five winners in last week’s Cuppow giveaway. Thanks to everyone who entered!
a Rafflecopter giveaway
Related Posts:
Links: Jam Bars, Kinda Bars, and Winners
Links: Ramps, Water-saving Canning, and Winners
Links: Rose Petal Preserves, Garlic Scape Vinegar, and Winners
April 19, 2017
Cookbooks: The Quick Pickle Cookbook
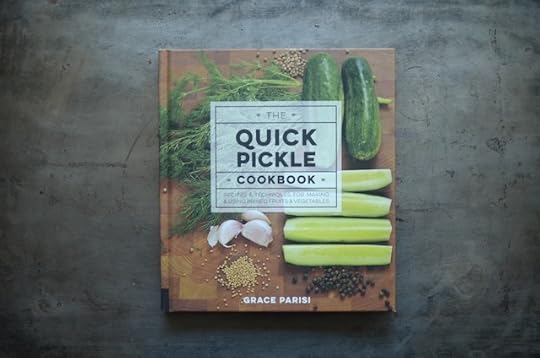
A couple weeks ago, I wrote a blog post rounding up some useful cookbooks to help inspire us all during this month of quick pickles. In my research for that post, I came across a new-to-me book on the topic called The Quick Pickle Cookbook.
Written by Food & Wine alum Grace Parisi, this slim volume came out last fall and is a delightful addition to my personal pickle resource library. I think many of you will feel similarly.
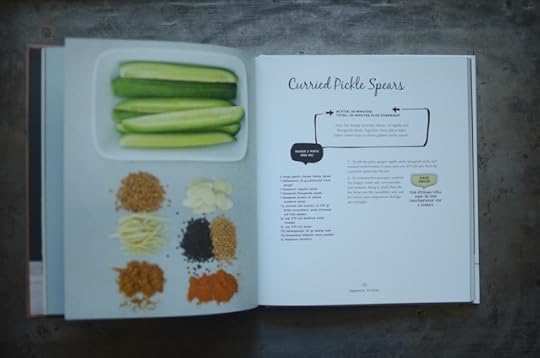
The book is divided into two sections, with vegetable pickles coming first and fruit pickles coming second. Scattered amidst the pickle recipes are dishes designed to help you put your pickles (and their leftover brine) to work.
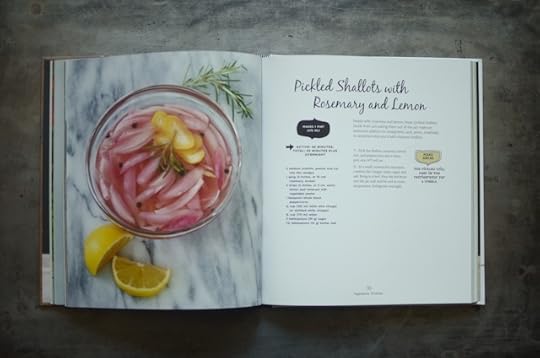
Some of the recipes I’ve marked to try include the Smoky Okra Pickles (page 47), the Pickled Pepper Romesco (page 85), the Bourbon-Pickled Blackberries (page 97), and the Lime-Chile Pickled Pineapple (page 135).
If you’ve really enjoyed this month’s quick pickle challenge, consider adding this one to your library for future idea fodder!
Related Posts:
Submit your April Mastery Challenge Projects!
Quick Pickled Radishes for the Mastery Challenge
Quick Pickle Cookbook Recommendations


