
Marisa McClellan's Blog, page 41
June 3, 2017
June Sponsors: Cuppow, Fillmore Container, EcoJarz, Mason Jar Lifestyle, CanningCrafts, and Mrs. Wages
Happy June, friends and readers! It’s the start of the month and so is time to thank the businesses that help make this site possible. Please do show them your appreciation for their support with your time and attention! And if your company, shop, or family business is interested reaching the food-loving and engaged Food in Jars audience, you can find more details here. Leave a comment on this post or drop me a note to learn more!
In the top spot are our friends at Cuppow. They are the creators of the original mason jar travel mug topper and the BNTO, a small plastic cup that transforms a canning jar into a snack or lunch box. I love pairing their straw-ready drink lid with a 24 ounce mason jar for the perfect summer iced coffee vessel.
Lancaster, PA-based and family-owned Fillmore Container are next! They sell all manner of canning jars, lids, and other preservation gear. As always, their blog is an amazing resource for all things jar-related. Sign up for the salsa class I’m teaching in their space on August 19!
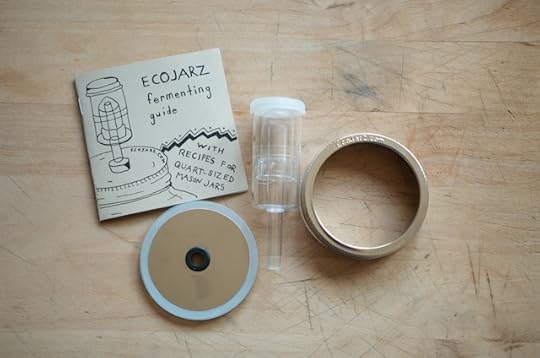
Our friends over at EcoJarz on board again this month. They make an array of products designed to fit on top of mason jars, including cheese graters, coffee brewers, and stainless steel storage lids. Make sure to follow them on social, because they host a weekly EcoJarz Fan Pic of the Week giveaway!
Mason Jar Lifestyle is a one-stop shopping site for all the jar lovers out there. They sell all manner of mason jar accessories and adaptors. If you’re in the market for lids, straws, sprouting lids, and cozies to transform your mason jars into travel mugs, make sure to check them out!
Back after a few months away is CanningCrafts. Shop owner Alison sells an array of ready made and custom mason jar labels for all your various preserves, syrups, and backyard honey. I particularly love her line of labels encouraging people to return the jar! When next you need labels for a special project, check out CanningCrafts.
Our friends at Mrs. Wages are on the roster again this month. They make pectin, vinegar, and more canning mixes than I can count. Their website is an incredible preserving resource and I can’t say enough good things about their salsa mix. If you need a little help getting your produce into jars, remember to seek out their products!
Related Posts:
June Sponsors: Cuppow, EcoJarz, Fillmore Container, Mrs. Wages, Mason Jar Lifestyle
March Sponsors: Cuppow, Fillmore Container, EcoJarz, MightyNest, Mason Jar Lifestyle, and CanningCrafts
December Sponsors: Cuppow, Fillmore Container, EcoJarz, iLids, MightyNest, Mrs. Wages, Hobby Hill Farm, & Mason Jar Lifestyle


June 2, 2017
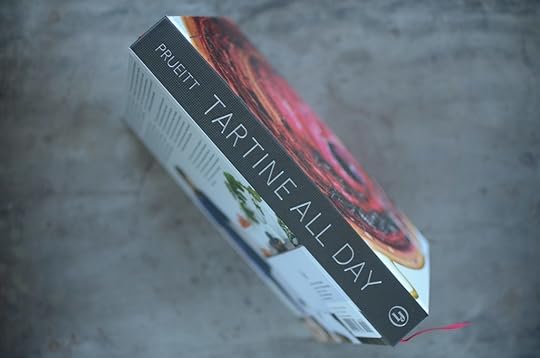
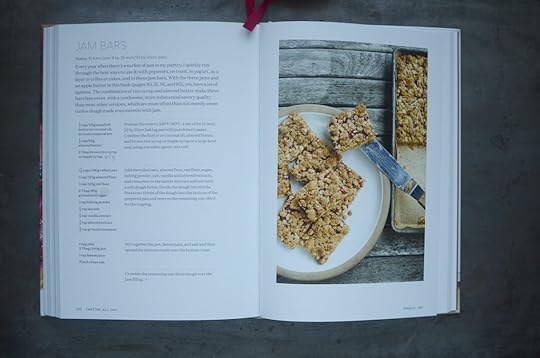
Tartine All Day Jam Bars

From the very first moment I picked up Tartine All Day, I liked it a whole lot. My initial flip was at my local cookbook shop and after just a moment or two with the book, I raised my head and said to the owner, Jill, “I want to make everything in this book.” Were I an emoji, I would have been the one with hearts for eyes.
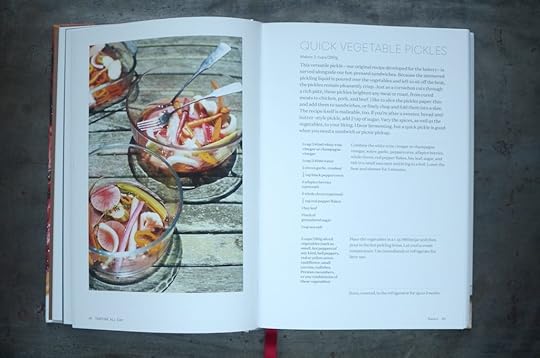
The thing that speaks to me so much in this book is that it is offers both easy, everyday things you can make with the things already in your fridge, along with the fun project cooking you might trot out on a unscheduled Sunday. Plus, there are a handful of approachable recipes for jams and pickles. Author Elisabeth Prueitt seems to really understand how many of us cook.
For those of you who pay attention to the world of cookbooks (or live in the San Francisco Bay Area), you will have heard of Tartine. It’s a cafe-turned-brand that has spawned multiple books, locations, and much frenzy among the food-loving set. However, unlike previous volumes, this book isn’t about recreating restaurant food. It’s about the cooking we do at home.
Because I knew that this was a book I wanted to write about, I reached out to the PR folks handling its publicity. They sent me a review copy and gave me permission to share a recipe from the book. I made a few suggestions and together we settled on the Jam Bars. Because a another method for using up jam is always (ALWAYS!) welcome.

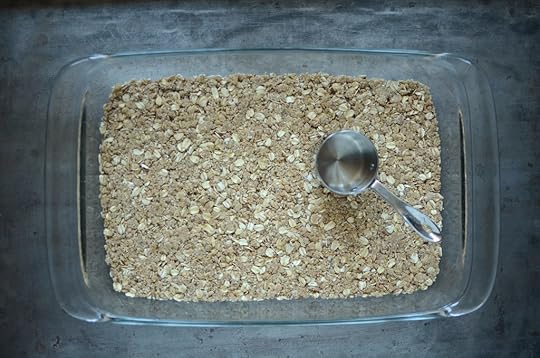
This recipe functions in the same way most other jam bars do. You make a simple, crumbly dough, press about two-thirds into the bottom of the pan, spread it generously with jam and then scatter the remaining bits on top.
However, the beauty of this particular jam bar is in the details. Elisabeth offers gram measurements along with the cups, so you can plunk your bowl down on a scale and heap in your ingredients without dirtying lots of measuring cups. The dough is built in a single bowl. And she uses a combination of vanilla and almond extracts to flavor the base, which is somehow so much more delicious than a jam bar with just vanilla.
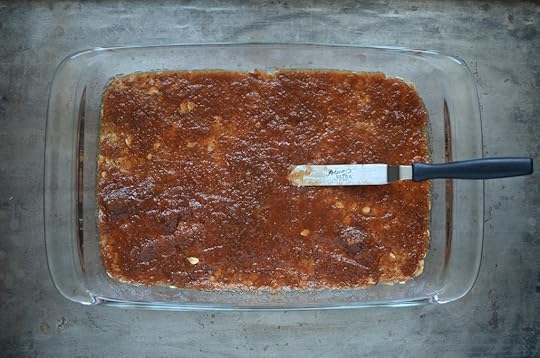
Another clever element is that she has you mix up the jam with some lemon juice and salt. This helps temper the sweetness of the finished cookie, and also helped thin out the jar of slightly overset jam I used nicely.
I’ll confess that I didn’t follow the directions perfectly. I used cashew butter rather than almond, because I have a jar I’ve been endeavoring to use up. And I somehow I managed to top the jam with an even layer of cookie dough, rather than scattering it prettily (it was just before dinner and I was hungry). But even with that small substitution and smaller error, they are still quite delicious (they’ll be going with me to a picnic tomorrow, so that I don’t end up eating them all).
If you feel moved to make a batch of Jam Bars from Tartine All Day, the recipe is below.
PrintTartine All Day Jam Bars
Yield: Makes 12 bars (one 9 by 13-inch/23 by 33cm pan)
Ingredients
1/2 cup/110g unsalted butter or coconut oil, at room temperature1/3 cup/85g almond butter
2 Tbsp brown rice syrup or maple syrup
1 1/2 cups/150g rolled oats
1 cup/120g almond flour
1 cup/120g oat flour (grind rolled oats in your blender or food processor)
6 Tbsp/90g granulated sugar
1 tsp baking powder
1/2 tsp sea salt
1/2 tsp vanilla extract
1/2 tsp almond extract
1/2 tsp ground cinnamon
1 cup plus 2 Tbsp/340g jam
1 tsp lemon juice
Pinch of sea salt
Instructions
Preheat the oven to 350°F/180°C.Line a 9 by 13-inch/23 by 33cm baking pan with parchment paper.
Combine the butter or coconut oil, almond butter, and brown rice syrup or maple syrup in a large bowl and, using a wooden spoon, mix well.
Add the rolled oats, almond flour, oat flour, sugar, baking powder, salt, vanilla and almond extracts, and cinnamon to the butter mixture and stir until a soft dough forms. Divide the dough into thirds. Press two-thirds of the dough into the bottom of the prepared pan and reserve the remaining one-third for the topping.
Stir together the jam, lemon juice, and salt and then spread the mixture evenly over the bottom crust.
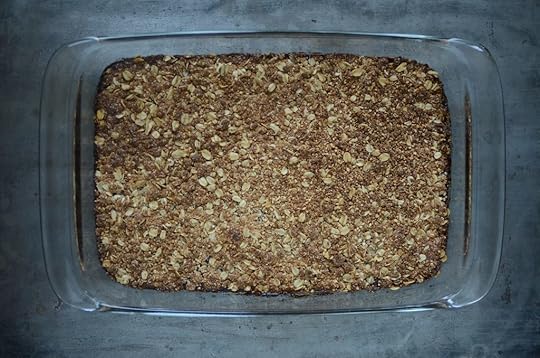
Crumble the remaining one-third dough over the jam filling.
Bake the jam bars until golden brown around the edges, about 35 minutes. Let the pastry cool completely in the pan on a wire rack before cutting into bars.
The jam bars will keep, well wrapped, at room temperature for up to 4 days.
Notes
Every year when there’s a surfeit of jam in my pantry, I quickly run through the best ways to use it: with popovers, on toast, in yogurt, as a layer in trifles or cakes, and in these jam bars. With the three jams and an apple butter in this book, you have a lot of options. The combination of rice syrup and almond butter make these bars less sweet, with a toothsome, more substantial savory quality than most other versions, which are more often than not merely sweet cookie dough made even sweeter with jam.
“Reprinted with permission from Tartine All Day: Modern Recipes for the Home Cook by Elisabeth Prueitt, copyright © 2017. Published by Lorena Jones Books/Ten Speed Press, an imprint of Penguin Random House LLC.”
Photography credit: Paige Green © 2017
Related Posts:
All-Clad d5 Stainless-Steel All-In-One Pan + Apple Butter Barbecue Sauce
All-Clad NS1 Nonstick Induction Stock Pot + Roasted Tomato and Basil Soup
Applesauce Loaf
May 31, 2017
How to Make Elderflower Cordial
Regular Food in Jars contributor Alex Jones has stopped by (on her birthday! Happy day, Alex!) to show us how to make elderflower cordial with fresh, foraged elderflower blossoms. Read on to see how easy it is to make your own batch! – Marisa

As an apartment-dweller who loves plants, I’m lucky to live in a neighborhood rich in community garden spaces. I can count a dozen community gardens less than a mile from my home in West Philly; I currently tend plots in three of them.
The garden I’ve been with the longest is one of the oldest in the neighborhood, built on the site of a demolished apartment building down the block from where I live. It’s been around for a few decades, and the common spaces have been planted with perennial fruit trees and shrubs that have had lots of time to establish.
While the peaches, plums, and figs never seem to ripen, our sour cherry tree, gooseberry bush, and kiwi berry vines are prolific. We also boast a specimen of one of the most exciting (to me) perennial fruits: An elderberry bush.
While elderberries contain powerful medicine, the birds end up getting most of the berries just before they ripen in our garden. So rather than competing with them for a pint of berries that will make just a half-cup of elderberry syrup, I focus on the elderflowers, which typically bloom in mid-May, and make a batch of elderflower cordial.

If you’ve ever tasted a cocktail made with St. Germain liqueur, you know the sweet, floral aroma of elderflower. While the flavor in most preparations is mild, it goes beautifully with citrus, and a sweet-tart cordial is my favorite way to preserve this ephemeral, spring-into-summer crop.
Unfortunately, due to the extreme perishability of these flowers — which must be used within a few hours of harvest before they begin to brown and lose their aroma — it’s next to impossible to purchase them at a grocer or farmer’s market.

For this reason, I recommend planting your own (or a few, which will help them grow more vigorously) if possible. You can also look for buds or flowers in early May near streams, river beds, ponds, or lakes that get good sun and are far from roads, highways, and other sources of potential contamination.
If you’re foraging for elderflowers, I recommend learning how to identify the plant properly from an expert; you want black or European elderberries, Sambucus nigra, not these potentially deadly lookalikes. You may also want to ask around in your neighborhood to see if anyone has an elderberry plant growing in their yard from which you can harvest in exchange for some finished elderflower cordial.

It’s best to harvest elderflowers in the late morning, after morning dew has evaporated but before they’ve lost their aroma in the heat of the day. Bring a large paper bag and scissors, and snip flower heads with open blooms into the bag (this will help to catch the aromatic pollen). It’s ok if there are a few unopened buds on the heads. Avoid harvesting too much from any one plant.
Next, trim your blooms. The stems and leaves of elderberry bushes contain toxic compounds, so some recipes recommend trimming off the blooms with as little of the green stem as possible. However, others I’ve read that hark back to traditional British recipes for elderflower cordial recommend placing whole flower heads, including stems, in the cordial mixture to steep. For this reason, I try my best to trim off the blooms with as little stem as possible, but I don’t stress too much about it.

Once you’re procured and trimmed your elderflowers, this cordial is incredibly simple to make. Combine the flowers with the zest and juice of a lemon, a little citric acid to preserve, and simple syrup. Cover and let sit at room temperature for three days. Strain the mixture through cheesecloth, then bottle and enjoy. Store unused elderflower cordial in the refrigerator.
The finished product is bright and lemony with a floral, perfumed quality from the elderflowers. My favorite way to use it is in a cocktail with gin, seltzer, a dash of bitters, and a lemon wedge on a warm spring day, ideally with the season’s first strawberries or a springtime cheese board. Simply leave out the gin and bitters for an equally delicious, alcohol-free drink.

Do you have access to elderflower where you live? If so, what have you made with it? If you don’t, I hope I’ve inspired you to plant this wonderful perennial in your yard. Share with us in the comments!
PrintHow to Make Elderflower Cordial
Ingredients
2 cups water2 cups sugar
1 lemon, juiced and zested
1/2 teaspoon citric acid (available online or from many South Asian grocers)
12-15 large elderflower heads
Instructions
Harvest the elderflower heads, ideally in late morning. Look for those with mostly if not all open buds; skip any with browning blooms. Snip the heads directly into a clean paper bag. Get them home and process as soon as possible or within a few hours to avoid losing the aroma.Using scissors, trim the elderflowers from the heads, removing as much green stem as possible from the blossoms. Place the flowers into a medium glass bowl. Discard stems.
In a small saucepan, combine water and sugar. Bring to a boil and stir so that all sugar is dissolved. Allow to cool to room temperature.
While the simple syrup is cooling, scrub, dry, and zest the lemon, then add the zest to the bowl with the flowers. Juice the lemon and add to the flower mixture, then add the citric acid.
Once the syrup has cooled, pour it over the flower mixture and give it a gentle stir.
Cover the bowl tightly with a dish towel so that no insects, debris, or other contaminants can get into it. Let steep at room temperature for three days.
By the third day, the elderflowers will have begun to brown and the aroma should be powerful. Place cheesecloth into a fine mesh strainer and position the strainer over a medium bowl. Pour the elderflower mixture through the strainer, taking care to squeeze out every last bit of cordial from the cheesecloth.
Bottle and enjoy. Refrigerate unused cordial for up to a month.3.1http://foodinjars.com/2017/05/elderflower-cordial-recipe/
Related Posts:
Mastery Challenge: Rhubarb Pickles
How to Make Homemade Grassfed Ghee
Pantry Management: Get Yours in Shape for the Upcoming Season
May 25, 2017
Beeswax Food Wraps from Kentucky Home
This post is sponsored by Kentucky Home (makers of those nifty MasonToGo lids!). To learn more about their new beeswax food wraps, read on!
I started using beeswax food wraps four or five years ago in an attempt to give up my plastic wrap and plastic baggie habit. I was already solidly on the reusable container and jar bandwagon, but hadn’t quite figured out to store food that functioned best when wrapped or swaddled.
When I discovered the beeswax food wraps, I thought my food storage prayers were answered. And while I’ve happily used them from various brands and makers for years, I’ve always struggled a bit with their cost (they can be pricy, particularly if you’re paying for shipping!). That has led to me running a funny mental calculation whenever I’m putting away leftovers or packing food for the road.
I find myself questioning whether the item is worthy of one of my beeswax food wraps. If the item fails to pass muster, I find myself rooting around in the cabinet under the sink for a plastic produce bag to reuse or I pull down the roll of plastic wrap that I’ve been nursing for half a decade. However, thanks to the folks over at Kentucky Home, my beeswax food wrap equation has changed.
Earlier this week, they started selling beeswax food wraps in bundles affordable enough to allow me to simply use them without feeling like I should be saving them for good. Best of all, they’re made right there in Leitchfield, Kentucky by retired farmer Mr. Dale.
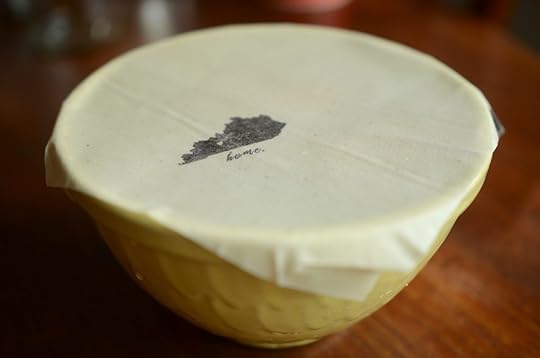
So, now that I’m no longer encumbered by worries over cost, how am I using beeswax food wraps? To cover bowls and dishes. While I have plenty of food storage containers with lids, sometimes I just want to throw the leftover grain salad into the fridge in the bowl in which it was made. You just form the wrap around the bowl and then press your hands into it for a moment to soft the wax enough to hold its shape (if you suffer from perpetually cold hands like I do, run them under warm water for a moment to help make the wax behave).
I also now feel free to use them to cover dishes bound for potlucks and other gatherings. While each time I hope that I’ll go home with the wrap I brought, if it does wind up in the trash at the end of the night, I don’t feel the same compulsion to dig for it.
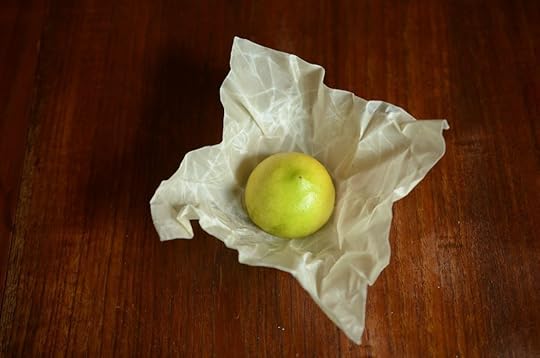
They’re also great to cover cut pieces of fruits and vegetables. Lemon halves, partially eaten avocados, and half-used cucumbers have never looked better or stored more sustainably. If you’re working with a new beeswax food wrap, give it a good crinkling to help work the wax into the fabric and make the surface a little tackier. Then, to keep these bundled bits of produce neatly sealed, give the ends a firm twist and they’ll stay in place for days.

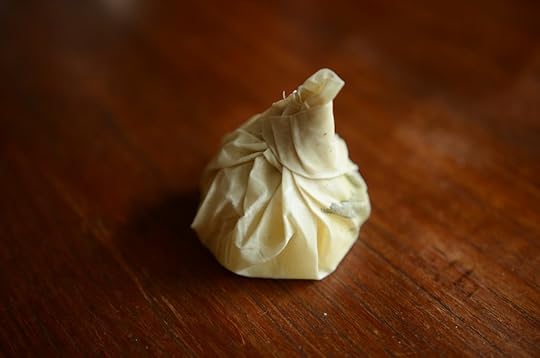
Another way that I like to use beeswax food wraps in to cover sandwiches and snacks that I’m packing for later. One of my errand running tricks is to go first thing in the morning so that the day doesn’t get away from me. When I tackle my to-do list like that, I like to pack a little peanut butter and jam sandwich to bring with me, rather than spend time eating breakfast at home (I’ll also bring a reusable coffee mug so that I can treat myself to a fancy cup without incurring the guilt of a disposable).
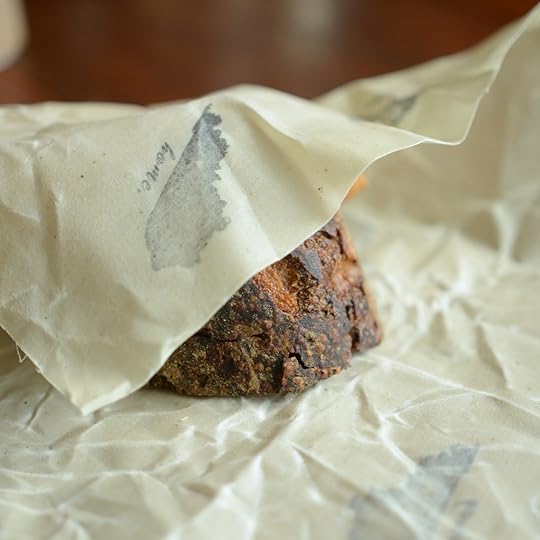
Another thing that beeswax food wraps do well is swaddle bread. Whenever I’m deep in a home baking phase, I find myself with needing something to keep my loaves from getting stale. I find that these wraps do a lovely job of keeping a homemade loaf of sourdough fresh for the time it takes us to eat our way through it.
Cleaning the wraps is also a breeze. Just use a little gentle soap and lukewarm water (no super hot water or you’ll start to melt away the wax). Oh, and keep them away from things like raw meat and poultry. When the wraps finally wear out (which they do after about a year of heavy use), they can be composted.
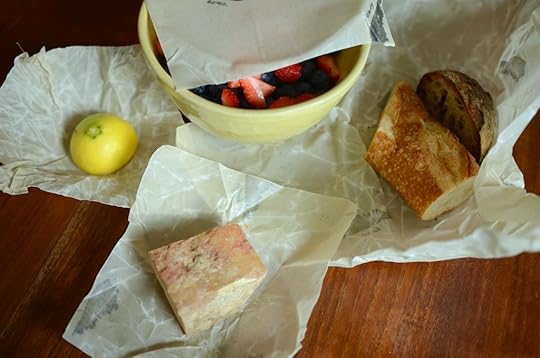
You can buy these affordable beeswax food wraps from Kentucky Home in two different configurations. A 12 pack of 7″ x 7″ wraps (perfect for wrapping up bits of cheese, half sandwiches, and halves of lemons, limes, avocados, apples and more) is just $19.97.
For those of you who want more options in the sizes of your beeswax food wraps, the 7 piece variety pack is your best bet. It comes with one 29″ x 29″ wrap, two 15″ x 15″ wraps, and four 7″ x 7″ wraps.
If you try them, make sure to check back in and share the creative ways you’re using them in your home!
Related Posts:
A Late Winter Cooking Reset with Blue Apron
Glass Spray Bottle with Soap Flakes from the MightyFix by MightyNest
Mason to Go Launching on Kickstarter Tomorrow!
May 24, 2017
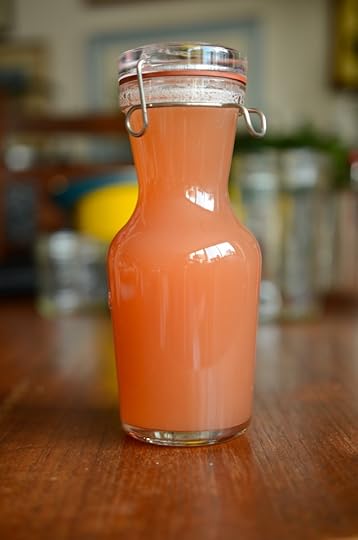
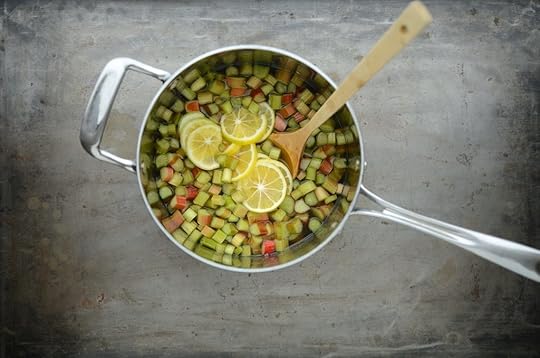
Honey Sweetened Rhubarb Meyer Lemon Cordial
Celebrating the arrival of summer this holiday weekend? Toast the season with a glass of bubbly water or a fancy grown-up cocktail sweetened with this Honey Sweetened Rhubarb Meyer Lemon Cordial.
One of the constants of my culinary calendar is rhubarb syrup. I make a batch or two every spring when those rosy stalks show up at my local farmers market. Some years, I make a basic version with nothing more than rhubarb, sugar, and water. Other times, I’ve spiked my batches with ginger, rosemary, vanilla, or parsley.
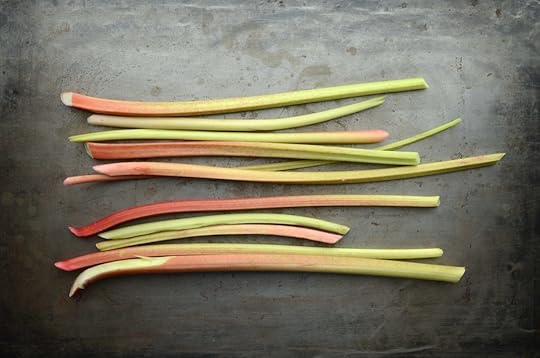
This year’s version (which I’m officially calling Honey Sweetened Rhubarb Meyer Lemon Cordial) is made from diced rhubarb, honey, and thinly sliced rounds of Meyer lemon (regular lemon would also work).
(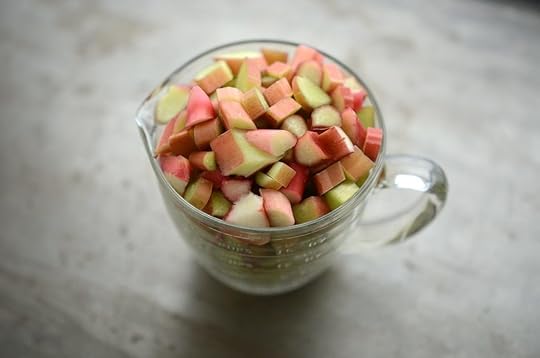
One of the things I love about making rhubarb syrup is that it barely feels like work. It takes no time to chop the rhubarb, slice the lemon, and measure out the water and honey. As long as you remember to reduce the heat to medium-low after it comes to a simmer, you hardly even need to stir it.
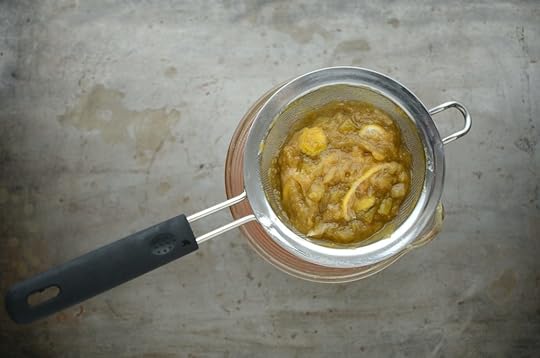
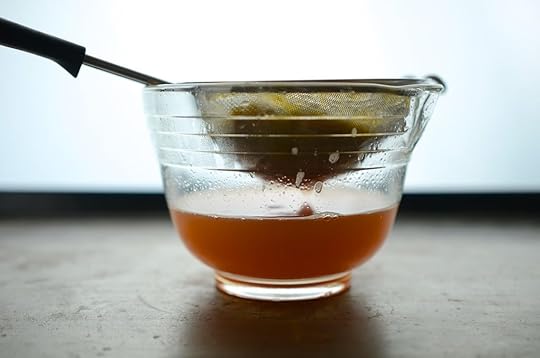
After about 20 minutes on the stove, I turn off the heat and let it cool just long enough that there’s no chance that I’ll burn myself as I pour it through a strainer. In the past, I’ve used cheesecloth for an extra-smooth syrup, but these days I cannot be bothered with the mess that it causes. In this case, fully embrace the path of imperfection.
Once the syrup is fully strained, it goes into a bottle and into the fridge. Rhubarb is acidic enough that one could can the finished product, but I find that I prefer to make this in small enough batches to be used up within a few weeks. I add it to sparkling water, drizzle it over bowls of fruit salad, and combine it with white wine vinegar and olive oil for a quick salad dressing.
How are you preserving and transforming rhubarb these days?
Related Posts:
Rhubarb Syrup Recipe
Mastery Challenge: Rhubarb Pickles
Honey Sweetened Gingery Peach Butter
Summer Class Spotlight – HGS Home Chef

I’ve taken a slightly different approach to my teaching schedule this summer than I have in past years. Instead of saying yes to everything and hustling to fill every moment of the canning season, my strategy is to teach fewer workshops in the hopes that I won’t feel entirely broken by the time the weather turns chilly.
So instead of having long lists of events appear here on the blog each week, I’m going to shine a spotlight on individual classes. First up is a pair of workshops at Hillsdale General Store Home Chef that I’m teaching on Sunday, June 11. This lovely cooking school is located on the main street of Hillsdale, NY, across the street from the General Store location. They carry cookware, cutlery, homewares, cookbooks, and offer a robust schedule of cooking classes.
I taught a single class at HGS Home Chef last summer and was delighted by the community that they attract. This year, I’m teaching two classes. From 11 am to 1:30 pm, I’m teaching a water bath-focused class in which we’ll make traditional strawberry preserves and sweet and savory strawberry chutney.
Then, from 2:30-4:30 pm, I’m teaching a pressure canning workshop. I’ll demonstrate how to make a tasty onion and rosemary jam as well as how to safely preserve it (and other low acid foods) in a pressure canner.
Participants will leave these classes with knowledge, useful handouts, and sample jars of the preserves made in the workshops (I’ve also heard rumors about peanut butter and jam sandwiches). For those of you within spitting distance of Hillsdale, I’d love to have you join me!
Hillsdale General Store Home Chef
2635 Route 23
Hillsdale NY 12529
Related Posts:
Upcoming Events: May Classes, Demos and More!
Classes at The Pantry at Delancey in Seattle and an Event at the Book Larder
Sour Cherry Winner, Classes + More
May 23, 2017
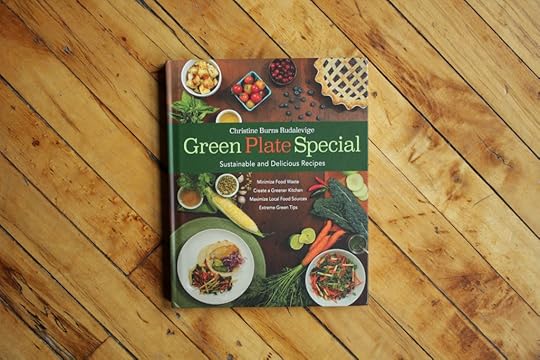
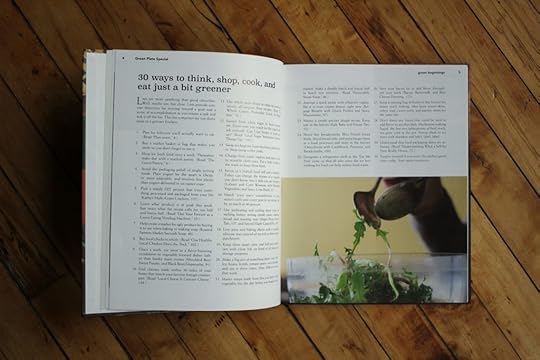
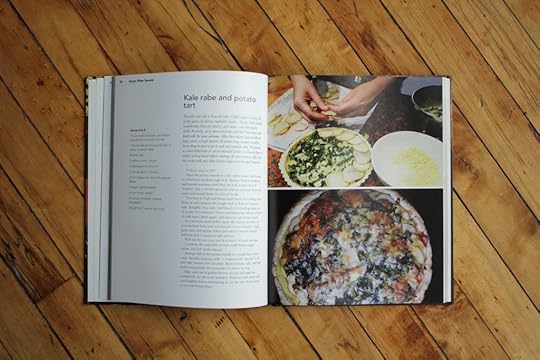
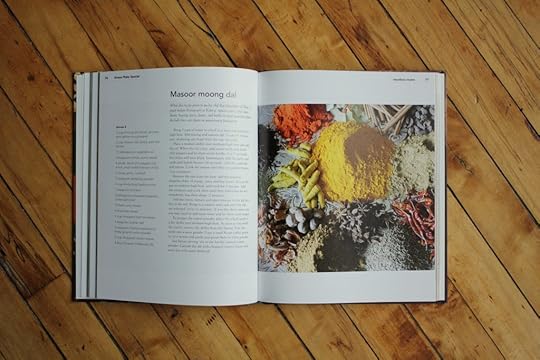
Cookbooks: Green Plate Special by Christine Burns Rudalevige
The first time I met Christine Burns Rudalevige was at a potluck held in honor of the release of the New York Times Cookbook. Christine had driven in from Carlisle, PA to join the party and fit right into our crew of giddy, early career food writers, all bursting with excitement over the fact that we were there to meet Amanda Hesser.
Since then, Christine has moved from Pennsylvania to Maine. Thanks to the wonders of social media, we’ve stayed in touch and I’ve followed her progress as she began writing a weekly column on sustainable home cooking. More recently, she published her very first cookbook, which is what I’m here to share with you today.

Called Green Plate Special, this lovely book is built on the foundation of Christine’s columns and is dedicated to helping all of us making our home cooking and eating just a little bit greener. Instead of my regular tour through a cookbook, I’ve got a short Q&A with Christine to share with you all.
FIJ: Could you tell us a little about Green Plate Special?
CBR: The book, a spinoff of the weekly column I’ve been writing for three years in the Portland Press Herald/Maine Sunday Telegram’s Source, a section dedicated to living and eating sustainably, helps home cooks navigate the mountains of information available regarding eating sustainably in the modern age and then apply that information in a practical way in their own kitchens.
Many people want to eat in a way that ensures there will be good, healthy food for future generations, but have limited time, money and energy to put toward that goal. My book breaks down dozens of sustainable tenets regarding sourcing, cooking and not wasting food, explains them in a down-to-earth fashion, and demonstrates each point with a great recipe.
FIJ: What does sustainability mean to you?
CBR: It means shopping, cooking and eating in such a way that I am not harming the environment or taking more than my fair share of natural resources. And, the critical point of my book, taking on these measures as habit at a rate you can sustain over time. You don’t have to be homesteading to be part of the sustainable food movement.
FIJ: How did your time living in Europe impact your food philosophy?
CBR: When we lived in England, where the price of food is almost twice as much as it is here in the United States, I really honed my skills for not wasting a morsel of food while still making interesting meals.
When we spent a semester in France, where meat products are most often pasture-raised and the prices reflect a fair price for the farmer, I found myself “right-sizing” my omnivore family’s meat portions to reflect both the higher price and the stronger flavor. There, we learned we needed less meat to be satisfied if it was sustainably raised.

FIJ: I first met you when you were living in Pennsylvania. Did your family’s move to Maine change how you cooked at all?
CBR: Living in Central Pennsylvania was a just a fully on feast because the vegetable and fruit farmers kept me in gorgeous produce year-round. In Maine, we’ve got a shorter growing season, and to my dismay, very few stone fruit trees. But our state’s 400-miles of coastline give us access to fantastic seafood.
It’s been a learning curve to understand which fishes make the greenest dishes, but I’ve had a delicious time working that all out. People know Maine for lobsters, but there are certainly a whole lot more fish in the swimming in the sea at sustainable levels.
It’s important to know that if the seafood in the fishmonger’s case in Maine or in Pennsylvania was caught in American waters, it was done so within the confines of very strict fishery management plans. Eaters should buy more seafood and feel good eating it because they are supporting the rock star fishermen who are reeling it in according to the rules.

FIJ: What’s one easy change that people can make to help them make their culinary lives a bit more sustainable?
CBR: Be flexible. If you’ve gone to the farmer’s market looking for spinach, but the farmer only has chard left, understand that it’s a great substitute, one that supports your farmer. Don’t go to the fish market fixed on buying cod, but keep an open mind, knowing that any white flaky fish will work just fine. And if you have a hectic day that ends with a meal less green than you’d like, forgive yourself and try again tomorrow.
Related Posts:
Giveaway: Will It Skillet by Daniel Shumski
Cookbooks: The Quick Pickle Cookbook
Cookbooks: Perfect for Pesach
Submit your May Mastery Challenge Projects!
We’re well past the midway point of May, which means it’s time to get serious about completing this month’s cold pack preservation challenge! If you’ve already finished up your project for this month’s Mastery Challenge, please use the form below to record your information and be counted in the final tally. If the embedded form isn’t working for you, click here.
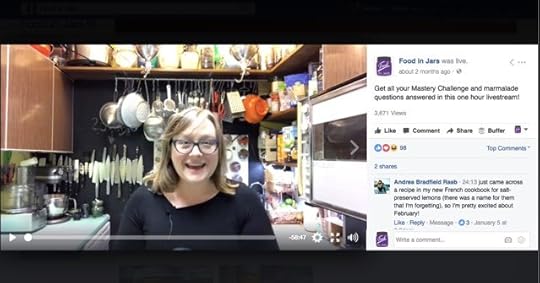
If you’ve not yet tackled the cold pack skill, consider whipping up a batch of spicy pickled green beans, pickled rhubarb, or some pickled okra. If you need to see the skill exercised in person, head over to Facebook and watch my recent livestream on the topic (toward the end, you’ll even see how I keep my cool when a jar breaks in the canner).
To be counted in the final tally, please submit your projects no later than Monday, May 29 (Memorial Day).
Oh, and if you do post to social media, make sure to use the #fijchallenge tag to help spread the word of our preserving activities!
Loading…
Related Posts:
Spicy Pickled Green Beans
Mastery Challenge: Rhubarb Pickles
Submit your April Mastery Challenge Projects!
May 22, 2017
Small Batch Pickled Okra Recipe
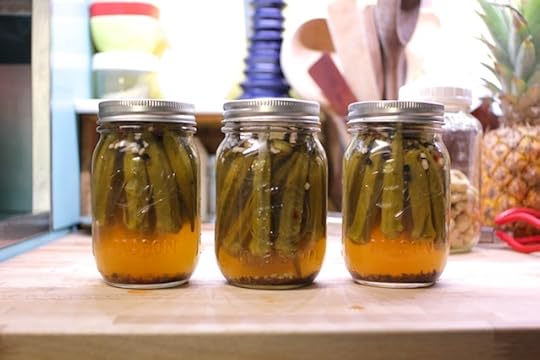
Earlier tonight, I did a live pickle making demonstration over on the Food in Jars Facebook page (you can watch it any time you want right here). In it, I made a small batch of one of my favorite pickles – pickled okra.
Now, before you wrinkle your nose and announce that you don’t like okra, know that pickling it reduces its slime factor quite radically. I find that people who normally dislike okra find much to appreciate about the pickled version. Even my mother, who is disinterested in okra on a good day, can really dig into a jar of the pickled version. I highly recommend that you try it.
PrintPickled Okra
Yield: makes 4 pints
Ingredients
2 1/2 pounds small okra pods (use those that are between 3-4 inches in length)2 cups apple cider vinegar
2 cups water
2 tablespoons pickling salt
8 cloves garlic or 2 teaspoons dried minced garlic
2 teaspoons dill seed
2 teaspoons black peppercorns
2 teaspoons mustard seeds
1 teaspoon red chili flakes
Instructions
Prepare a boiling water bath canner and 4 pint jars.Wash the okra pods and trim away the stem ends.
Combine vinegar, water, and salt in a medium saucepan and bring to a boil.
Divide the garlic cloves, dill seed, red chili flake, mustard seeds, and peppercorns evenly between the four jars.
Pack the okra into the jars over the spices, arranging them so that the bottom layer has the tips up and the top layer is tips down.
Pour the boiling brine over the okra, leaving approximately 1/4 inch headspace.
Gently tap the jars on the counter to loosen any trapped air bubbles. For stubborn air pockets, use a chopstick to wiggle them free.
Wipe rims, apply lids and rings, and process in a boiling water bath canner for 10 minutes.
When the time is up, remove the jars and set them on a folded kitchen towel to cool. When the jars have cooled enough that you can comfortably handle them, check the seals.
Sealed jars can be stored at room temperature for up to a year. Any unsealed jars should be refrigerated and used promptly.3.1http://foodinjars.com/2017/05/small-batch-pickled-okra-recipe/
Related Posts:
Pickles and Potlucks
Note to Self – Remember the Okra
May 21, 2017
Facebook Livestream Summer Schedule
For that few months, I’ve done a series of Facebook Live broadcasts in something of a haphazard fashion. I’ve been promising that I would get more organized with these and release a schedule. And look! Here it is. I’ll be doing livestreaming demonstrations and question & answer sessions on the following days from 9-10 pm eastern time on the Food in Jars Facebook page.
The bulk of these dates are Monday nights (any later in the week, and 9 pm seems impossibly late). If you can’t watch live, you can always tune in after the fact and watch the saved broadcast. And if you’ve got a burning question that you want me to answer but can’t join in live, just shoot me an email and I’ll make sure to get to it.
Finally, you may notice that the first of these scheduled live broadcasts is tomorrow night. I’ll be making cold packed pickled okra and answering questions. Join in then!
May 22
June 4
June 18
July 3
July 17
August 7
August 21
September 5 (note that this is a Tuesday rather than a Monday)
September 18
Related Posts:
Facebook Live Shrub Demo This Thursday
Links: Pickled Strawberries, Green Onion Kimchi, and Winners
How to Make Tart Red Cherry Jelly


