
Nancy Zieman's Blog, page 133
January 15, 2015
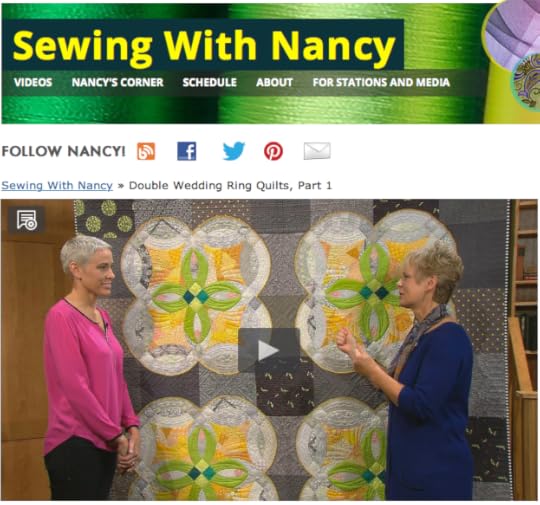
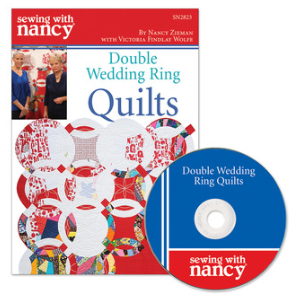
Double Wedding Ring Quilts by Victoria Findlay Wolfe
You might think of the Double Wedding Ring quilt pattern with the signature interlocking rings as a very traditional quilt design. Get ready to change your perspective! Victoria Findlay Wolfe, an improvisational quilter, is my most recent Sewing With Nancy guest who shares her modern, reinvented Double Wedding Ring designs.
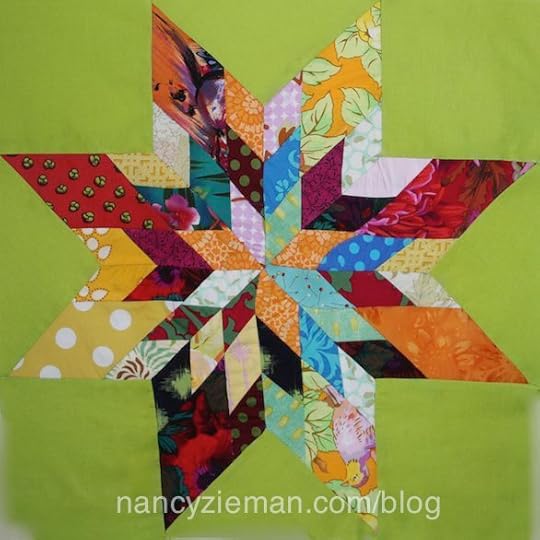
Made Fabric
One of Victoria’s signature design elements included in her quilts is made fabric. Somewhere in her Double Wedding Ring quilts you’ll find randomly pieced fabrics that are cut into quilt shapes. Watch Victoria and me demonstrate this improvisational technique online.
Double Wedding Ring Quilts, is this week’s Sewing With Nancy streaming video feature, watch online with my guest, Victoria Findlay Wolfe.
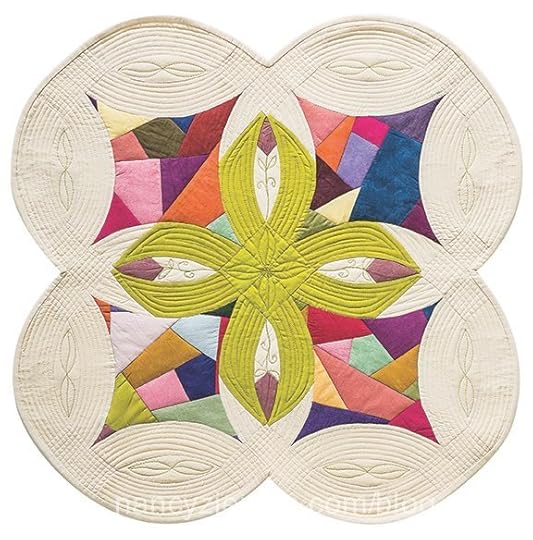
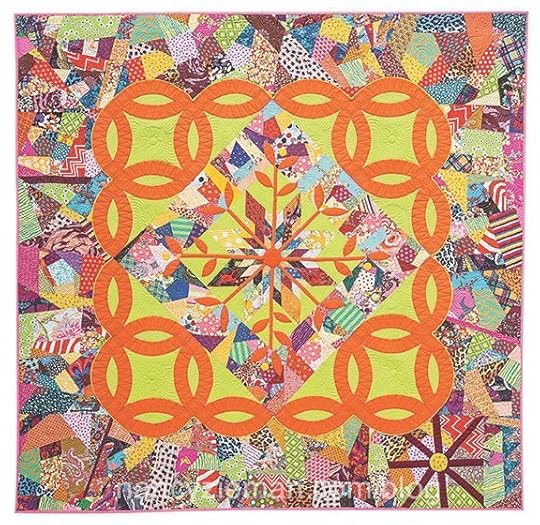
Iris by Night
Victoria’s quilt, Iris by Night, features made fabric in the concave squares. The quilt is a tribute to Victoria’s grandparents, Leo and Elda whose garden bloomed with yellow irises each spring. Memories and photos of that flower garden served as the inspiration and color palette for this charming quilt.
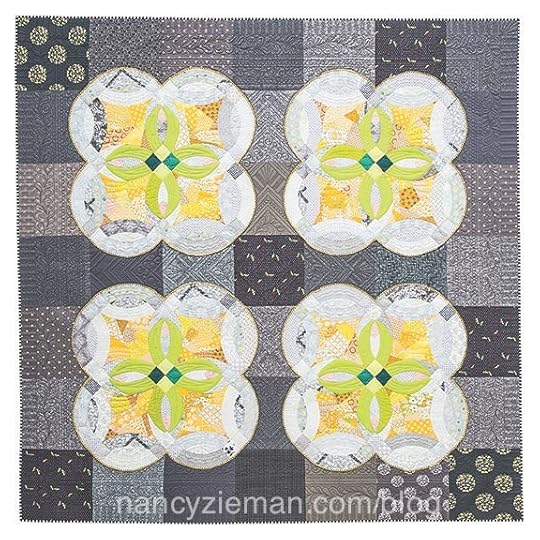
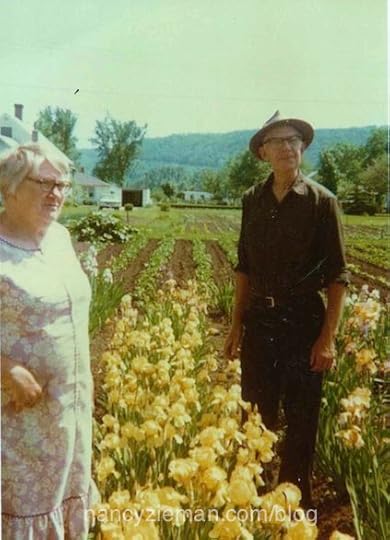
Photo courtesy of Victoria Findlay Wolfe
A Summer’s Day
Did you ever piece a quilt top that wasn’t perfect and then store it away in a closet? That’s what happened with the first version of Victoria’s quilt, A Summer’s Day. There’s no hint of a Double Wedding Ring quilt, just yet!
Later, she was inspired to cut it up, add to it, and give it new life. When you watch online, you’ll see how she turned a mistake into a thing of beauty!
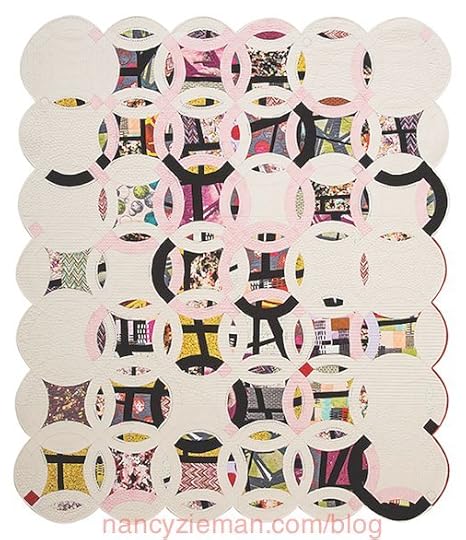
Double-Edge Love
Risk taking is great for your creativity! That’s what Victoria’s quilt Double-Edge Love is all about. She took the risk of cutting apart an already pieced quilt top that wasn’t going anywhere. What visually appeared were some sections that reminded her of her roots in the farmland of Minnesota and the other parts resemble streets of New York City—now her home. Here’s a quilt that visually connects Victoria’s past with her present.
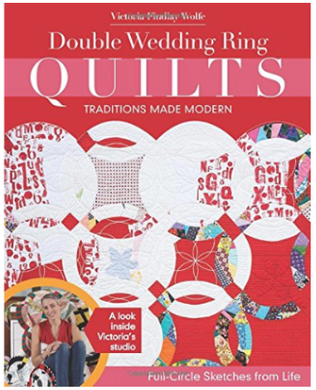
Victoria’s Book is Visually Inspiring
If you need a boost of quilting adrenaline, a walk through Double Wedding Ring Quilts will provide the remedy. With full-size patterns for 10 quilts, the book will teach you the Double Wedding Ring basics plus Victoria’s unique fabric slashing and made fabric methods to create with personality.
Watch Double Wedding Ring Quilts online
To watch on your iPad, iPod Touch, or iPhone, download the app.

Post a comment for a chance to win a DVD copy of Double Wedding Ring Quilts. The random winner will be announced in my blog on January 29.

The random winner of Eileen Roche’s book, Today’s Crazy Quilting with Your Embroidery Machine, is Linda Pawlak. She said, I am unable to embroider by hand due to a health condition. So, crazy quilting was pretty much out of the picture for me. This technique will finally allow me to try my “hand” at crazy quilting and its beautiful embellishments! Thank you!
Bye for now,

Content in this feed is © copyright 2015 by Nancy Zieman and may not be republished without written permission. You’re welcome to forward the email to a friend or colleague but it’s not okay to add the RSS feed automatically as content on a blog or other website.


January 13, 2015
Sew a Quick Hostess Tote
Here’s a quick and easy gift inspired by one of the projects featured in my book, Nancy’s 30 Favorite Gifts to Sew. Plus, I’ve added a Blog Exclusive Tip in this posting.
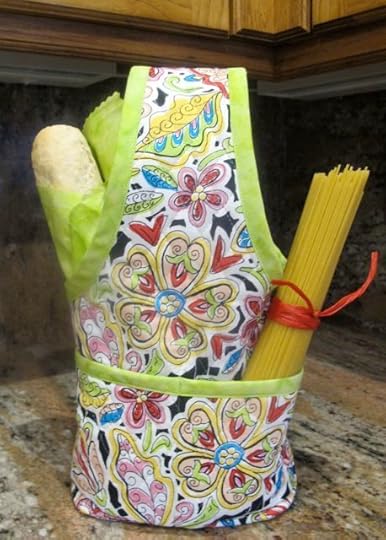
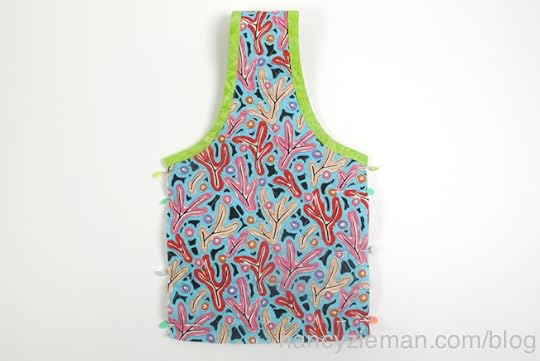
The original wine tote in the book uses two coordinating cotton fabrics. My new version shown above, uses double-faced quilted fabric and bias trim. Follow my tips below for sewing this really fast hostess tote with prequilted fabric.
Supplies:
Nancy’s 30 Favorite Gifts to Sew book
1/3 yd. double-faced quilted fabric
2″ wide bias strips of cotton quilting fabric to make 60″ bias binding strips
Clover’s 1″ Bias Tape Maker
Sewing Tutorial:
Follow the Wine Tote instructions in Nancy’s 30 Favorite Gifts to Sew book to create the tote pattern.

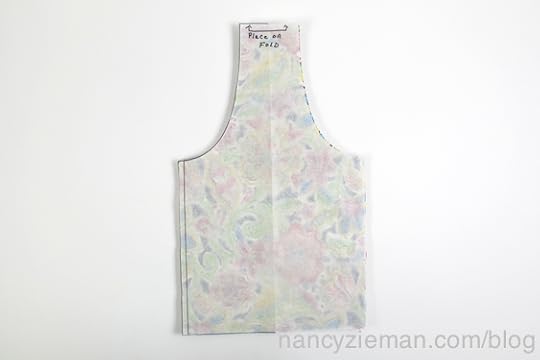
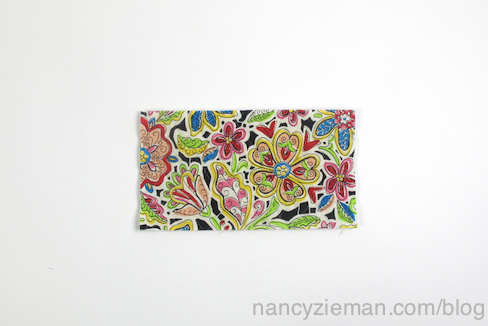
Lay the pattern on the fabric—place top handle on fold. Cut one pattern on the fold.
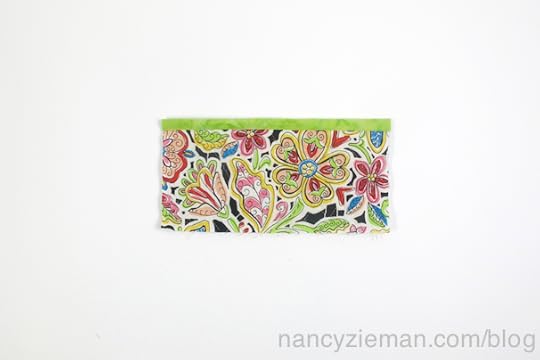
Blog Exclusive: Cut one 5″ x 10″ front pocket.
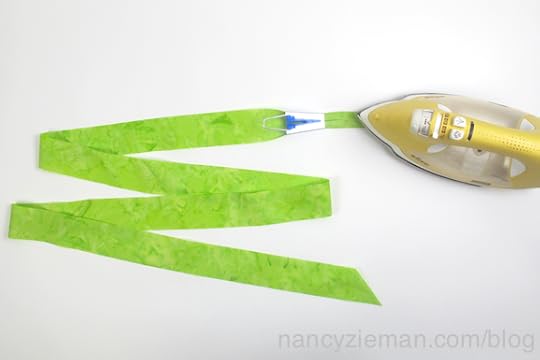
Blog Exclusive: Feed 2″ wide bias strips through Clover’s 1″ Bias Tape Maker to make 60″ coordinating bias tape.
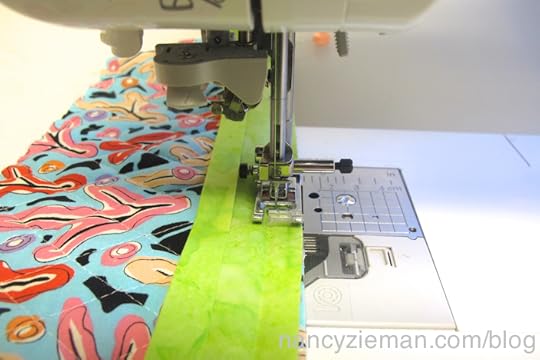
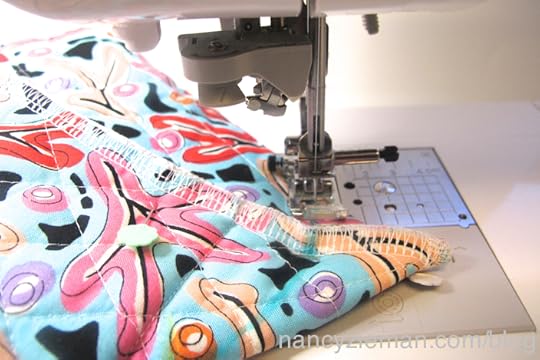
Meet right side of bias tape to pocket wrong side. Stitch edge of bias tape to pocket top edge using 1/4″ seam.
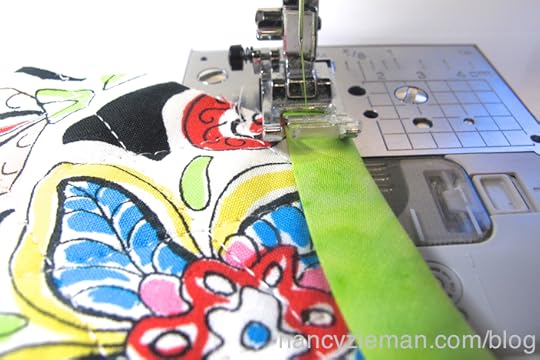
Fold bias tape to front and topstitch to pocket top near edge of bias.
At lower pocket edge, press under 1/4″ towards back.
Pin pocket to tote front 2-3/4″ from lower edge. Topstitch pocket to tote at sides and across lower pocket.
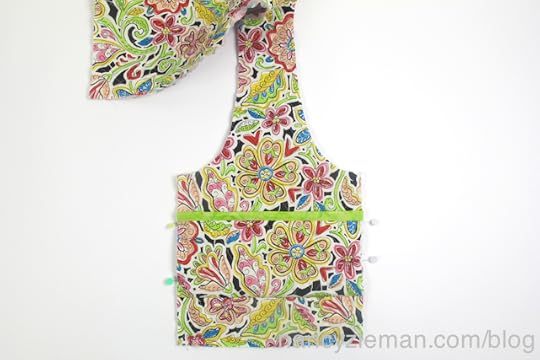
Create two pockets by topstitching down center front pocket.
Stitch bias tape to curved handle edges using bias techniques above.
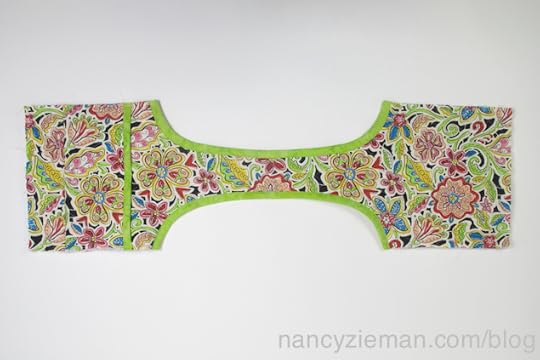
Fold tote right sides together and serge or zigzag sides and lower edge.
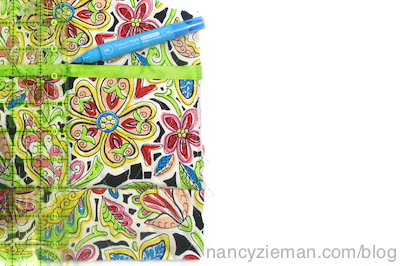
At each corner, fold tote so side seam stacks on top of lower edge seam, forming a triangle. Place a mark 1-1/4″ from edge.
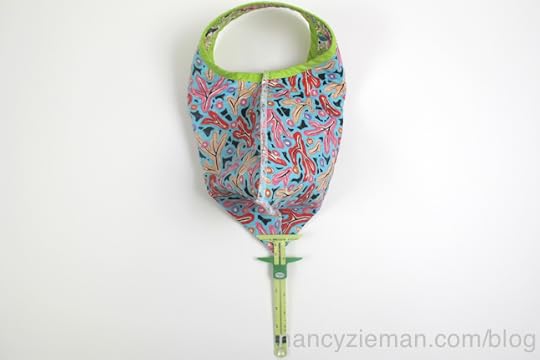
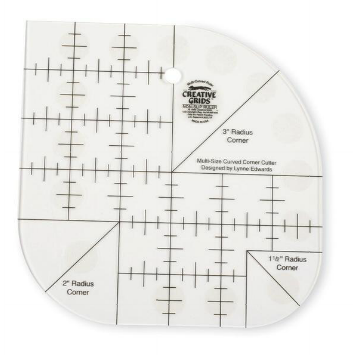
For an added detail, use a Curved Corner Ruler to draw in a slight curve.
Stitch along the curve. Repeat on opposite corner. Trim excess fabric and serge or zigzag.
Combine an hour of sewing time with a few simple supplies. The result: An attractive hostess tote. Fill with your favorite recipe, ingredients, and kitchen gadgets. Or add a favorite bottle of wine, bread, and cheese. Voila! You have an ideal festive gift.

30 Gift Ideas in One Book!
If you like the quick gift I’ve shown you in this blog, there are 29 more options just waiting for you to stitch in Nancy’s 30 Favorite Gifts to Sew book.

Bye for now,
Content in this feed is © copyright 2015 by Nancy Zieman and may not be republished without written permission. You’re welcome to forward the email to a friend or colleague but it’s not okay to add the RSS feed automatically as content on a blog or other website.
January 10, 2015
A Handy Sewing Notion with 5 Uses in 1 Compact Tool

I was recently asked if the 5-in-1 Sliding Gauge could really live up to its name, providing help with five sewing and quilting tasks. My response was, I certainly hope so! That question prompted me to go to my sewing studio and check out the little tool that I use every time that I sew or quilt. Here are my findings on how I use the gauge.
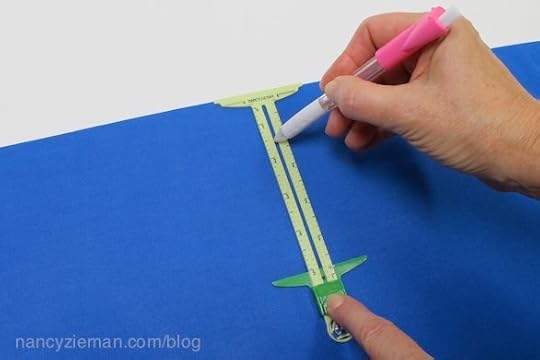
Close-up look at the design
It’s a six-inch ruler, marked in 1/8″ increments (Left side of ruler begins at 1″ and ends at 6″ inches. Right side of ruler is reversed, beginning at 6″ and ending at 1″).
The cursor slides and then locks into position with a push of a button. The top of the cursor shows the selected measurement.
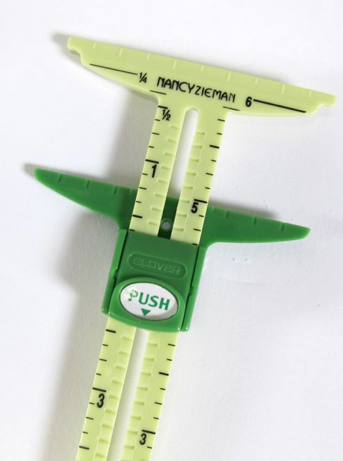
The top of the gauge and cursor has 1/4″ markings.
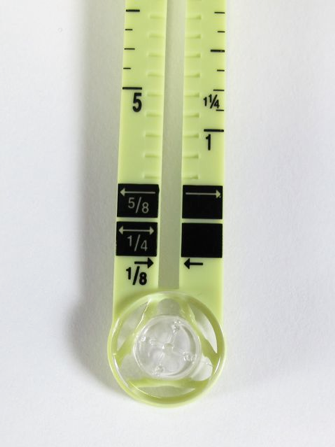
The width of the ruler is 5/8″.
Each side of the ruler is 1/4″.
The open space in the center is 1/8″.
Finally, the end of the gauge features a compass pivot point—that’s a very unique feature. Details to come later!
Here are my five favorite uses for the 5-in-1 Sliding Gauge
1. Space and Mark Buttonholes:
Slide the cursor and set it to the measurement the distance between buttonholes.
Align the edge of the ruler to the center marking.
Position the top edge of the gauge to the placement at the of top the buttonhole.
Trace the top edge of the gauge the length of your buttonholes. Next, trace the top edge of the cursor.
Slide the gauge down. Align the top of gauge to the second buttonhole marking. Again, trace. Repeat the process until all buttonholes are marked.
 2. Measure Seam Allowances:
Use the width of the ruler to mark and check garment seams. It’s 5/8″ wide, how convenient!
Or, use the ruler to achieve a truly accurate 1/4″ seam when changing the needle position.
 3. Hem Gauge:
Slide the cursor and set it to your pattern’s hem width measurement. Remember the gauge locks in place!
Fold up the hem and press or pin.

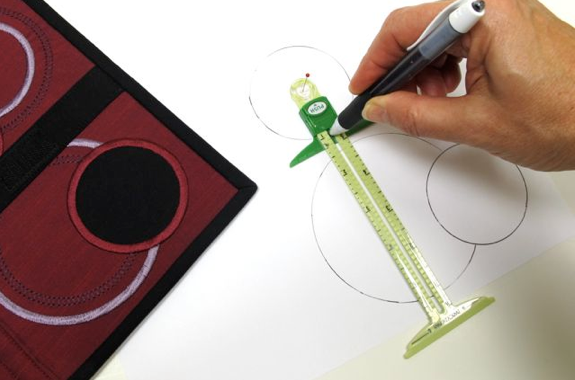
4. Circle Compass:
With the push of a button, slide the cursor to desired marking equaling the circle radius, or half your circle size.
Hold the compass pivot with a pin or stiletto/awl.
Insert the point of a marking tool into the cursor opening, and draw circles and arches.
Mark directly onto fabric, template material, or freezer paper.
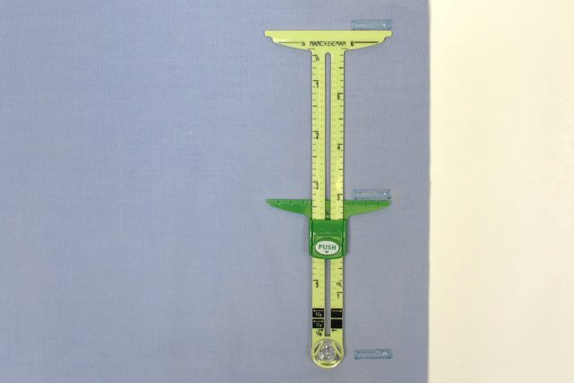
5. T-Gauge:
When you need to measure both length and width at the same time, use the T-Gauge feature.
The top edge of the gauge measures 2-1/2″—the numbered hash marks along the top edge making it a convenient marking tool.
Mark and measure both length and width at the same time.
Ta da!
For a chance to win a 5-in-1 Sliding Gauge let me know what sewing notion is on your wish list. Leave a comment below. A special thank you to Clover Needlecraft for providing the giveaway notion.
Bye for now,

Content in this feed is © copyright 2015 by Nancy Zieman and may not be republished without written permission. You’re welcome to forward the email to a friend or colleague but it’s not okay to add the RSS feed automatically as content on a blog or other website.
January 8, 2015
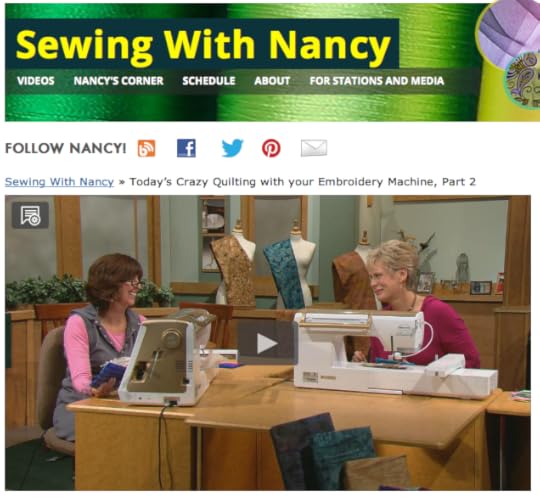
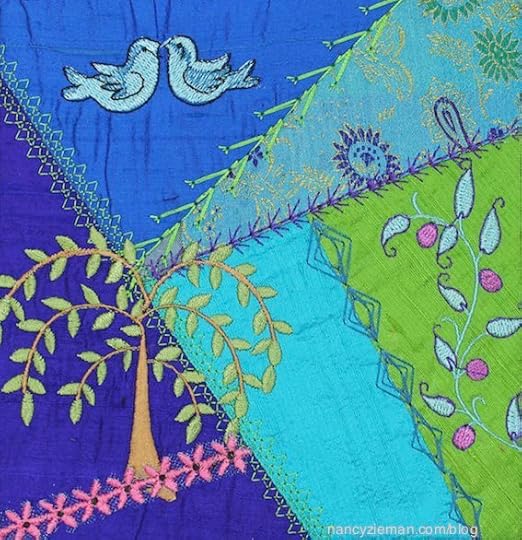
In-The-Hoop Crazy Quilting Projects
If you’re a quilter and would like to try embroidery or an embroiderer and would like to try quilting, here’s the perfect solution—crazy quilting. This Victorian-era needle art can be mastered by using an embroidery machine.
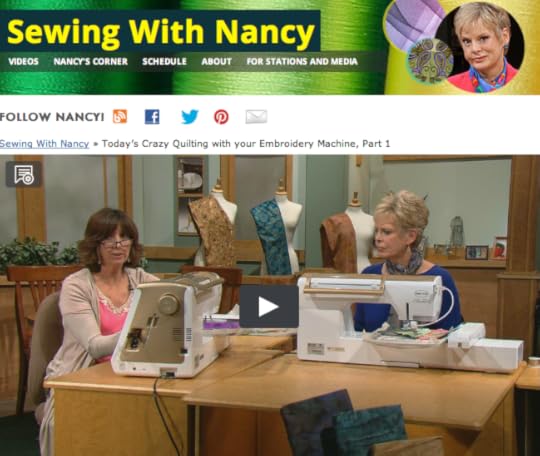
Today’s Crazy Quilting with your Embroidery Machine, is this week’s Sewing With Nancy streaming video feature, watch the second episode online with my guest, Eileen Roche.
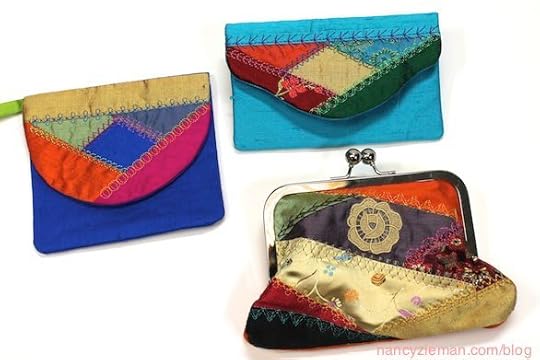
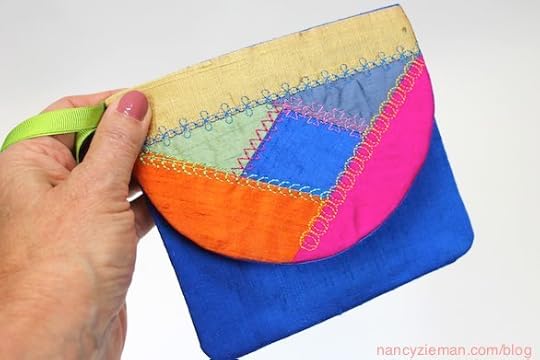
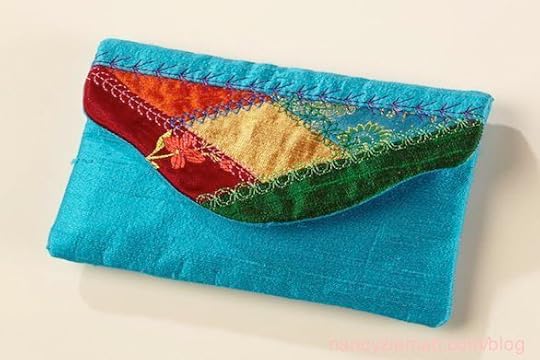
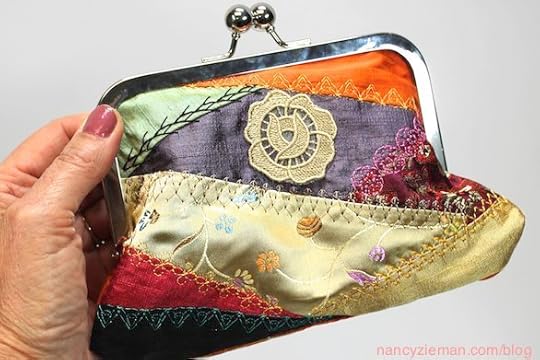
Wristlet, Eye Glass Case, Evening Bag—all are In-the-Hoop Projects
With crazy quilting, a small accent makes a statement. The three featured projects were all pieced, elegantly embroidered, and even assembled in the embroidery hoop. It’s a magical process!
Watch Sewing With Nancy online
If you missed the first episode of Today’s Crazy Quilting with Your Embroidery Machine, you can watch it on your computer. To watch on your iPad, iPod Touch, or iPhone, download the app.
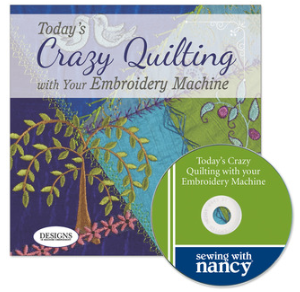
Today’s Crazy Quilting with Your Embroidery Machine , it’s a book with a CD
You too can duplicate your great-grandmother’s crazy quilting designs the easy way with Eileen’s book Today’s Crazy Quilting with Your Embroidery Machine. The 80-page book includes a multiformat CD that features 23 embroidery designs: three different block designs, 12 accent designs, and eight designs to complete three in-the-hoop projects.
Would you like a chance to win a copy of Eileen’s book, Today’s Crazy Quilting with Your Embroidery Machine? Let us know what you like most about this updated technique.
Bye for now,
Content in this feed is © copyright 2014 by Nancy Zieman and may not be republished without written permission. You’re welcome to forward the email to a friend or colleague but it’s not okay to add the RSS feed automatically as content on a blog or other website.
January 6, 2015
The Easiest Way to Use Your Embroidery Machine
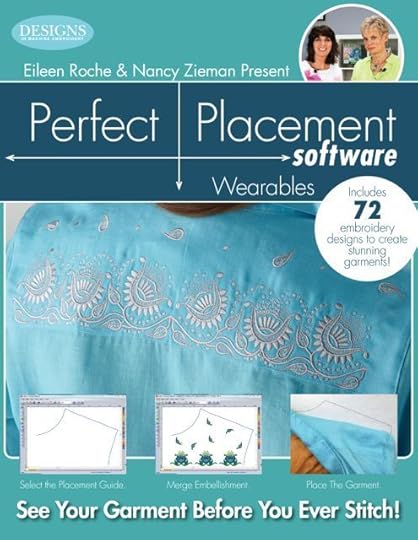
Embroidering is quite easy, it’s positioning the designs that can be tricky! If you own a computerized embroidery machine, you know exactly what I mean. My solution is to use Perfect Placement Software.
The Perfect Placement Software includes placement outlines (they’re embroideries, just not the pretty kind) for collars, cuffs, yokes, necklines, hemlines . . . all wearables. Plus there are 70 embroideries of the pretty nature.
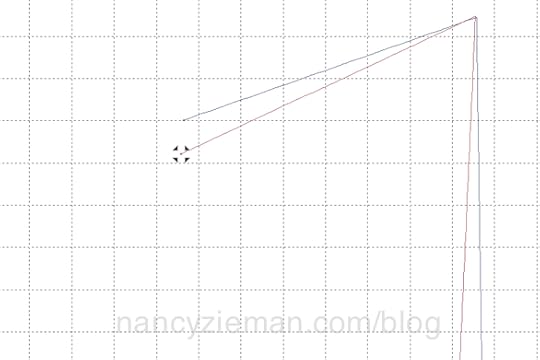
First step, choose a perfect placement outline
The first embroidery that I selected from the collection was one of the collar outlines. The terrific part of the placement embroideries is that any colored line can be selected and moved. Let’s say your collar is slightly wider than the outline, just click on the icon at the end of the red line and move it! Bingo.
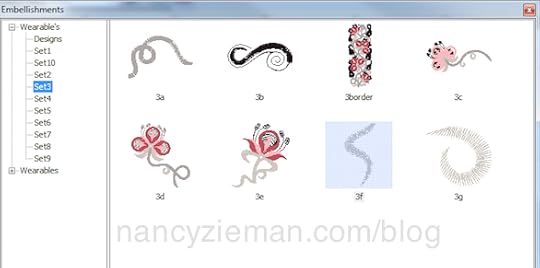
Next, place the pretty embroideries
Using embroidery from your collection, or the embroideries included in the software, select a design. (I know the design labeled 3f is highlighted, but actually I placed design 3e first! Oops!)
Move the design around within the outlines until you like what you see.
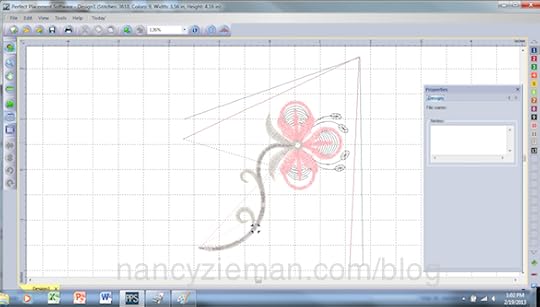
Add the Sprinkle Design
Sprinkles are what I call the small, companion designs within each collection. From the screen shot of designs, I chose embroideries numbered 3f and 3g and “sprinkled” them around the larger motif.

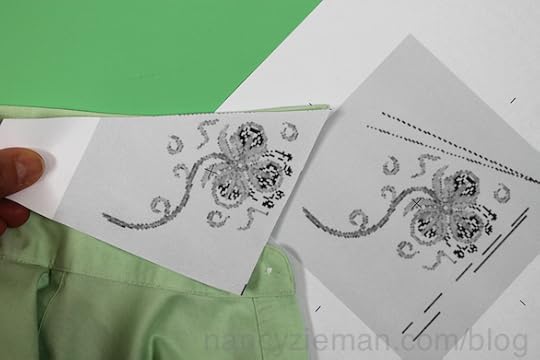
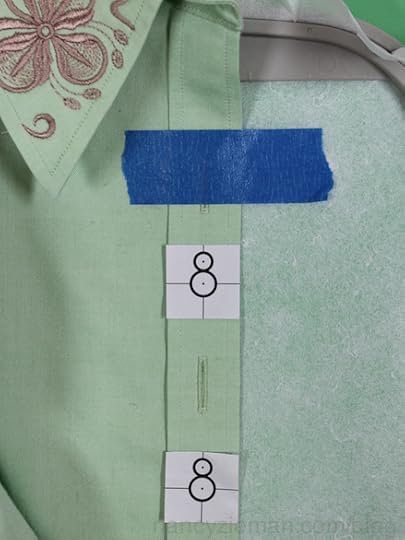
Print out a template and check the placement on the shirt
The photo shows two templates: one cut out and the other whole. Placing the template on the collar tells me I’ll have a perfectly placed embroidery. If the shape wasn’t right, I could easily go back to my computer and tweak the size and shape of the placement outlines.
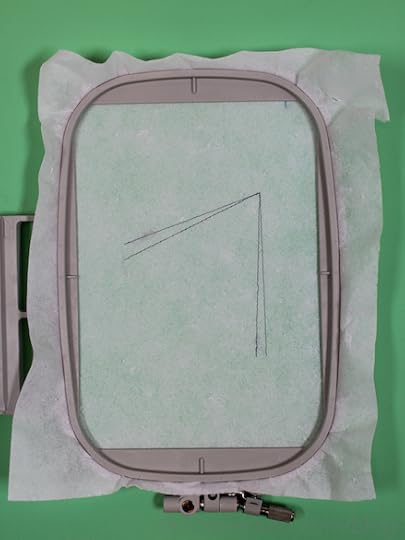
Stitch the first embroidery
Hoop a stabilizer of your choice. I chose a tear-away mesh stabilizer .
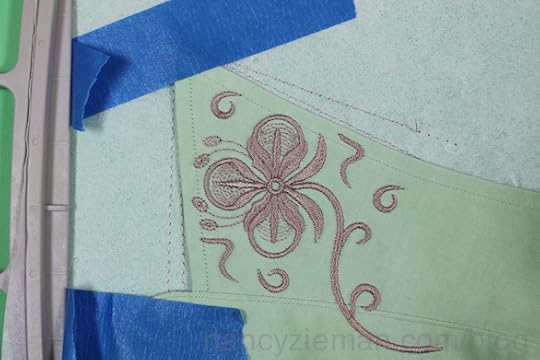
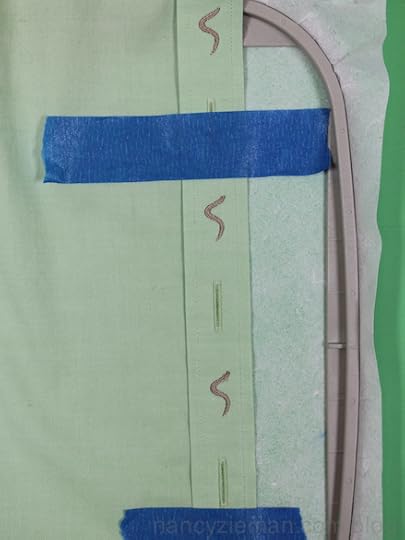
Stitch out the first embroidery—the placement outlines.
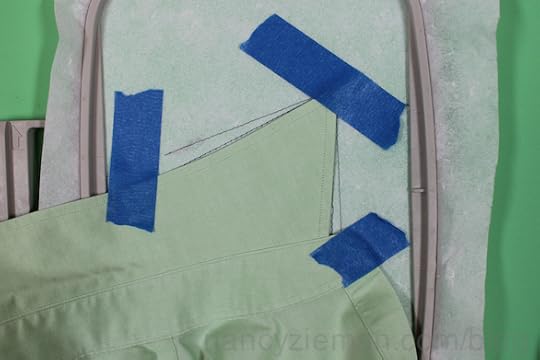
Place the collar along the outlines
Painter’s tape is one of my favorite embroidery helpers. It’s sticky enough to hold the collar in place, but doesn’t leave a residue.
Stitch the pretty embroideries
It’s fun to watch what appeared on the computer screen come to life on the fabric.
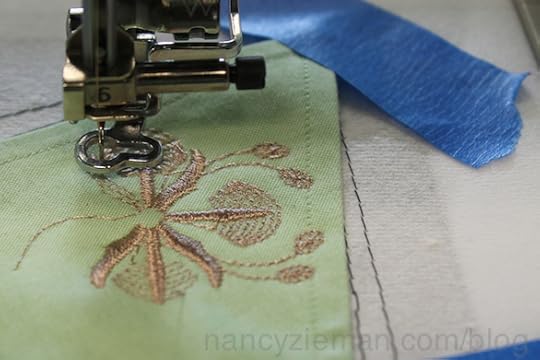
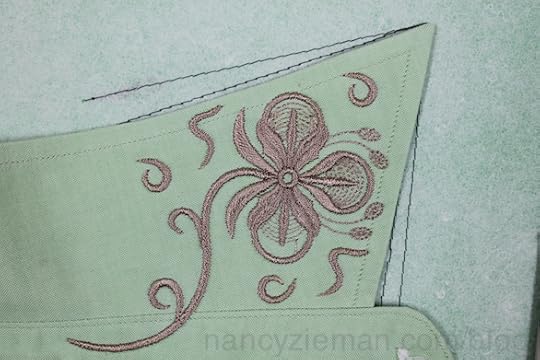
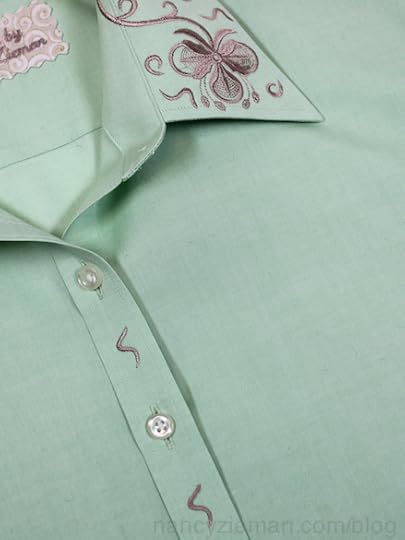
Rotate the image and stitch the other side of the collar.
Add more sprinkles!
I decided to use one of the sprinkle designs between each of the top three buttons to carry out the embroidery theme. On my machine, a Baby Lock Ellisimo Gold, I used the positioning stickers that came with the machine.
The built-in camera detects the placement sticker.
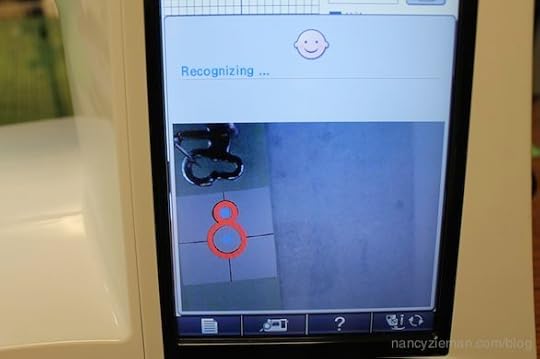
Then, it zeroed in on the placement.
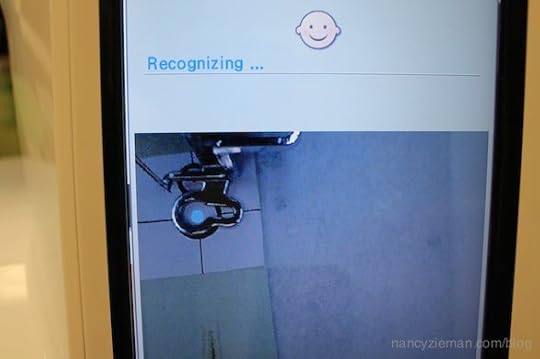
After removing the sticker, I just hit the “go” button to sew. It was truly easy to add these smallest of embellishments.
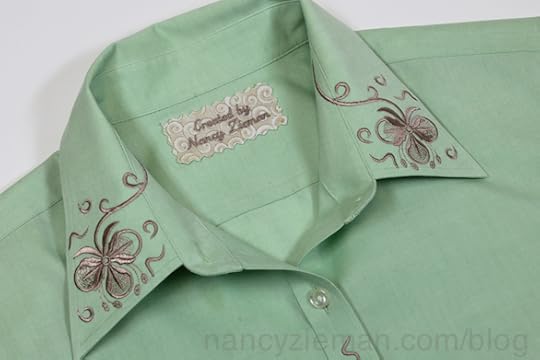
Since this blouse will be used as a sample for my seminars, I thought a label was in order.
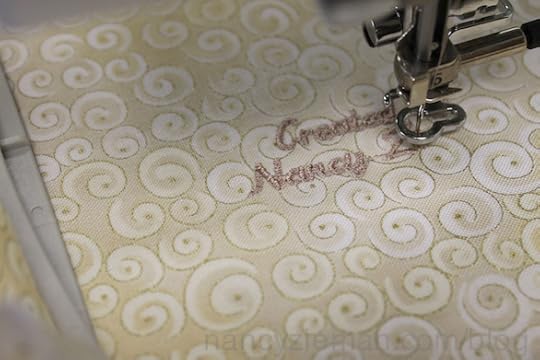
Ta da!
Previously, I posted a blog detailing how to embroider the neckline of a cardigan with the Perfect Placement Software. You might like to check it out.
Bye for now,
Content in this feed is © copyright 2015 by Nancy Zieman and may not be republished without written permission. You’re welcome to forward the email to a friend or colleague but it’s not okay to add the RSS feed automatically as content on a blog or other website.
January 3, 2015
Today’s Crazy Quilting with your Embroidery Machine
If you have scraps of fabric, thread, and an embroidery machine, you can immediately become a crazy-quilting expert. Wondering how? All the patches, stitches, and elegant embroidery are programmed into the design. The process is extremely gratifying!

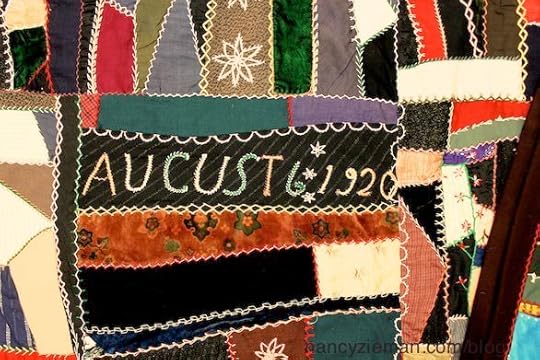
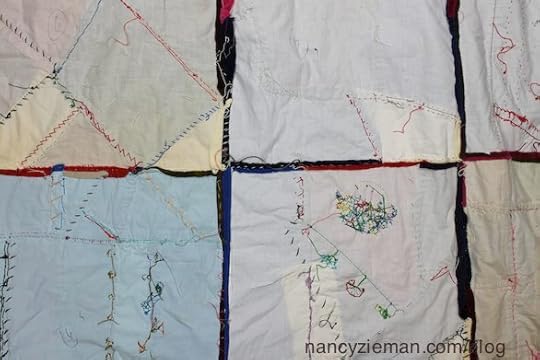
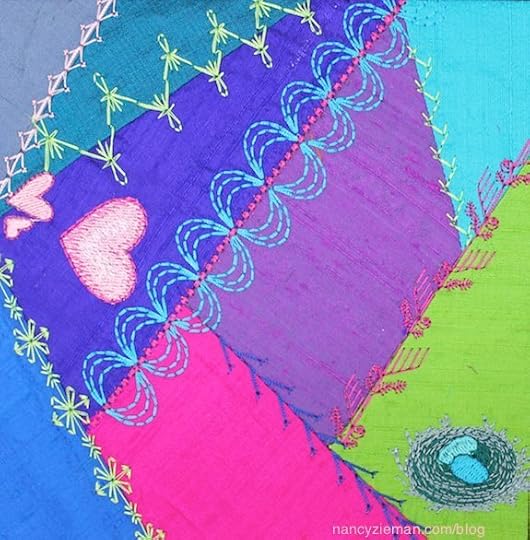
First a brief history lesson: Crazy quilting became popular in the late 1800s. Small, random patches of fabric were hand-stitched together and then embellished with elaborate embroidery. My great-grandmother Alice Lea Larson hand-stitched this quilt. The fabrics are leftover silks, wools, cottons, and anything that could have been salvaged from worn-out clothing and her fabric stash.

The quilt, without a backing, was given to me several years ago by Alice’s daughter. Before finishing the quilt, I took a photo of the backing fabric—old tablecloths cut into squares. Waste not, want not.
Fast-forward to today. Crazy quilting can be totally created using an embroidery machine. Eileen Roche, embroidery specialist and editor of Designs in Machine Embroidery, has mastered the technique using 21st century technology and is my guest on the 2-part Sewing With Nancy series, Today’s Crazy Quilting with Your Embroidery Machine. Watch online or on PBS.
Preview of Crazy Quilting with Your Embroidery Machine
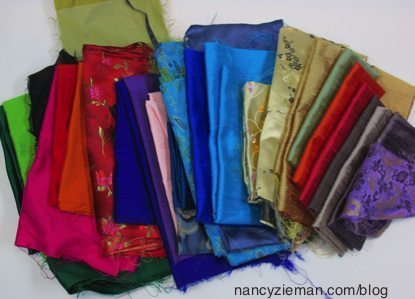
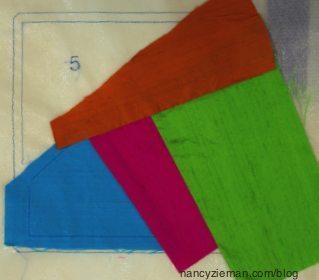
First select fabric; either silks or cottons are best. Solid colors showcase the decorative embroidery. Eileen and I chose silk fabrics for our projects.
Then, check out the embroidery designs as found in the book/CD combo, Today’s Crazy Quilting with Your Embroidery Machine . There are numbers that are only stitched on the stabilizer to provide the sewing sequence, straight stitching lines to stitch down the fabrics, and then the embroidery stitches.
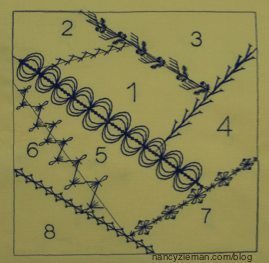
Hoop a tear-away stabilizer and stitch the initial thread color of the embroidery, only on the stabilizer—the outline of the block and the numbers.
Roughly cut out fabric pieces and position right sides to the stabilizer. The machine will stitch the pieces in place. How easy is that!
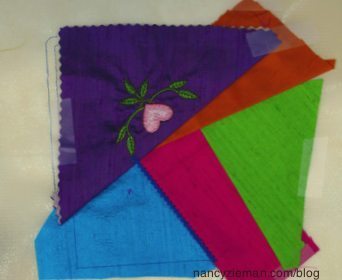
Before adding the next fabric piece, flip to the right side.
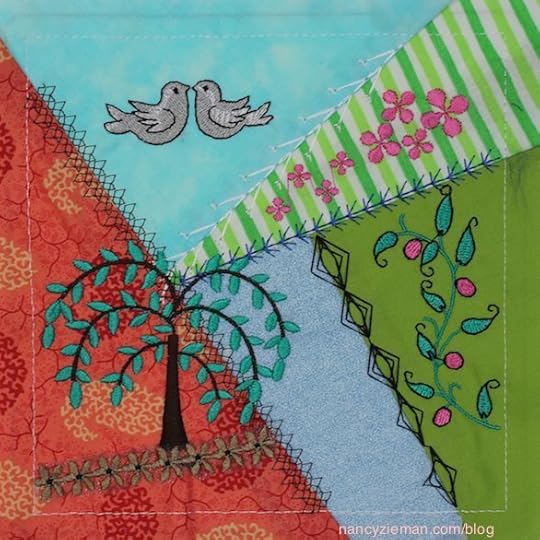
Stitch the decorate embroideries, which have characteristic Victorian styling.
Learn how to personalize the crazy-quilting blocks, adding dates or initials.
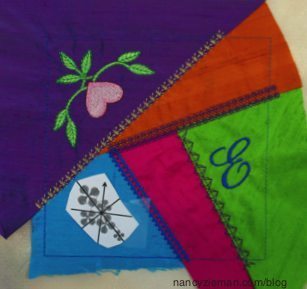
Unhoop the fabric, cut along the final stitching lines, and the blocks are ready to add to a project.
Select cotton fabrics as another option for crazy-quilting.
Today’s Crazy Quilting with Your Embroidery Machine , it’s a book with a CD
You too can duplicate your great-grandmother’s crazy quilting designs the easy way with Eileen’s book Today’s Crazy Quilting with Your Embroidery Machine. The 80-page book includes a multiformat CD that features 23 embroidery designs: three different block designs, 12 accent designs, and eight designs to complete three in-the-hoop projects.
Would you like a chance to win a copy of Eileen’s book, Today’s Crazy Quilting with Your Embroidery Machine? Let us know what you like most about this updated technique.
Last Week’s Giveaway Winner
The random winner of Molly Hanson’s book, Free Motion Quilting For Beginners is Norma Weeks. She said: I’m working on making consistent loops but my real goal is to learn how to make beautiful feathers. This style of quilting really appeals to me.

Watch Sewing With Nancy online.
There are four seasons of programs to watch online, or on your iPad, iPod Touch, or iPhone. Have you downloaded the app?
Bye for now,
Content in this feed is © copyright 2014 by Nancy Zieman and may not be republished without written permission. You’re welcome to forward the email to a friend or colleague but it’s not okay to add the RSS feed automatically as content on a blog or other website.
December 30, 2014
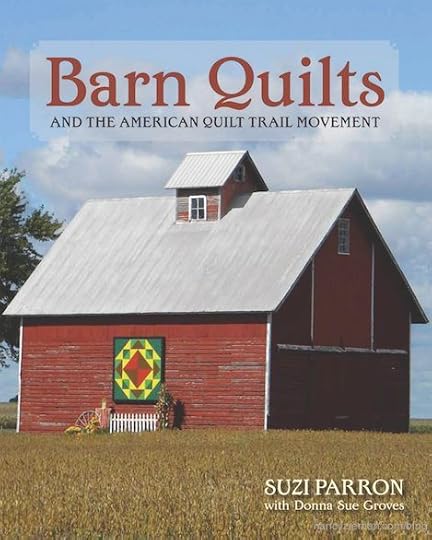
Barn Quilts: Blazing a Trail of Artistry, History, and Community
Barn quilts are a growing phenomenon in the United States and Canada, forming trails of roadside art—and scores of heartwarming stories—all across North America.
Author Suzi Parron explains that a barn quilt is “a replica of a quilt block painted on plywood, usually eight-by-eight feet, and hung on a building for a passerby to see. Most of them are mounted on barns, so they are called barn quilts.” Each block is chosen for a reason specific to the creator/creators. They stand as an impressive way to tell stories that pull entire communities together.

An Italian Tile barn quilt located in Green County, Wisconsin. Owner Yvonne Devoe designed it to energize her when she gets up at 3:45 every morning to work on her dairy farm.
The “official” tradition of barn quilts is a short one, starting with Donna Sue Grove’s Ohio Star tribute to her mother in 2001. This initial block quickly expanded into creating an entire trail of barn quilts, which would help to bring attention to local artists. This new goal was supported by many others: “everyone thinks of agriculture and the men hard at work; we wanted to recognize the women’s role and remind folks that we have always produced art as well” said Belinda Holland, a Kentucky resident with her own barn quilt proudly on display.
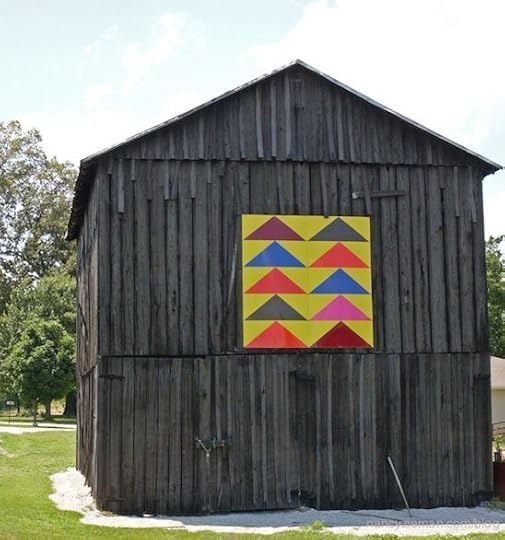
Belinda Holland's barn features a Flying Geese quilt pattern.
On a beautiful October day in 2001, the quilt trail dream came true and the very first barn quilt, Donna Sue’s vibrant Ohio Star block, was unveiled in Manchester, Ohio. Nichola Moretti, a member of the Ohio Bicentennial Commission, described it as follows: “I remember people lining up for pictures like enthusiastic kids lining up for school photos. It spoke to us. Standing on that mountaintop with all of those people—there was not a dry eye. I knew I was looking at a legacy.”
Nichola wasn’t wrong. Today, over 7,000 barn quilts trail across 48 states and into Canada. Farmers, woodworkers, homemakers, artists, and masses of volunteers have gathered rain or shine, paintbrushes and nails in hand, to commemorate the treasured stories and beloved members of their community.
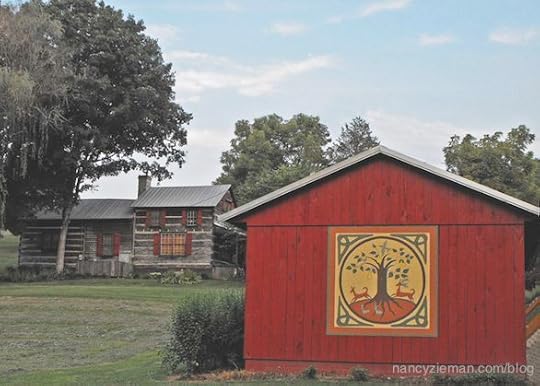
This barn quilt was copied from an eighteenth-century Williamsburg sampler made by an 11-year-old girl. The log cabin home pictured behind was built in the 1780s, and acts as a perfect backdrop for the historic design.
For road travelers, the barn quilts bring a welcomed touch of artistry to the landscape. They give the eye a break from the scrolling fields, dotted forests, and bounding hills that go whizzing by. But that’s not all.
Suzi Parron, author of the fascinating memoir Barn Quilts, best describes the appeal of these artworks in her book: “standing alone in a strange place, four hundred miles from home, I felt that I belonged and was welcomed… It was as if I had family scattered throughout the countryside, waiting for me to come by.”
See the first barn quilt ever made, and read more captivating stories in Suzi’s book, available now at Nancy’s Notions.
Thanks for the guest blog, Roxanne.
I recently interviewed Suzi Parron on Sewing With Nancy. Learn more by watching the interview.

Bye for now,
Content in this feed is © copyright 2014 by Nancy Zieman and may not be republished without written permission. You’re welcome to forward the email to a friend or colleague but it’s not okay to add the RSS feed automatically as content on a blog or other website.
December 27, 2014
Can’t Fail Free-Motion Quilting Techniques

One of my favorite phrases is, If you think you can’t you’re probably right! Did you ever have that thought when it came to free-motion quilting? Luckily my Sewing With Nancy guest, Molly Hanson, took the can-do attitude and taught herself artistic stitching. Now, you can watch her can-do free-motion quilting techniques online and view the specific techniques in her book.
Molly’s goal in teaching free-motion quilting is to inspire creativity. The best news is that creativity isn’t difficult! To prove it, we’ll start with Paisley free-motion quilting techniques.

Paisley
The wide-to-narrow paisley design is often paired with geometric quilt patterns. It’s a free-motion design perfect for beginner stitchers.
Note from Nancy— I’ve tried free-motion quilting in the past and was never able to master paisley. After following Molly’s directions, I had success after the first try. Really!

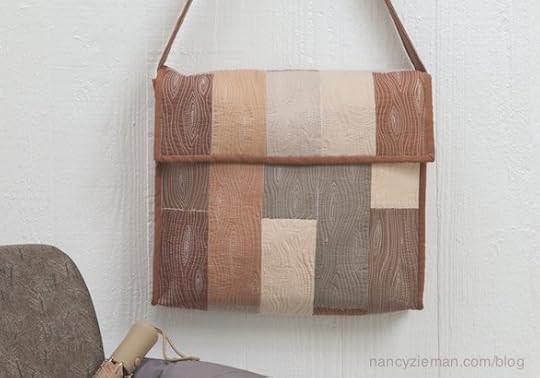
Woodgrain
Quilting nature-based designs seems to bring a sense of calm. Woodgrain is a design that relies on imperfection for its beauty. This is not a design to stress out about or fuss over. Small wiggles and bumps give it character, and variance in width of the grain adds to the beauty.
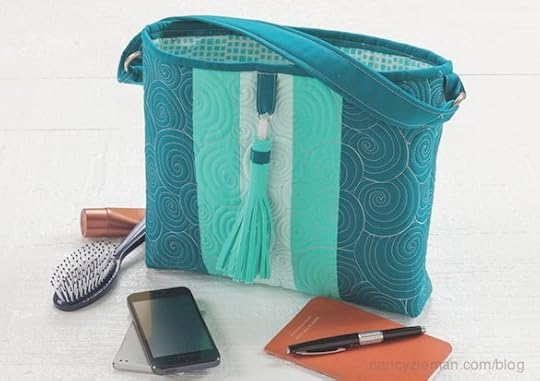
Swirls
Swirls work well almost anywhere. You’ll learn how to manipulate the shape by creating a half or even a quarter swirl, or stitch around one swirl to create more layers to fill a space. This design teams well with many other free-motion styles.
Print Tracking
Our last free-motion quilting technique of this series is Print Tracking. Just like it sounds, you choose a printed fabric and track or stitch along the design. This outline stitching allows you to make the fabric design really stand out, while giving you the opportunity to quilt all sorts of new shapes you might not otherwise try.
Watch both the first and second episodes of Free-Motion Quilting For Beginners online.
This week, the second episode of Free-Motion Quilting For Beginners is our featured video. Also watch the first episode online.
There are four seasons of programs to watch online, or on your iPad, iPod Touch, or iPhone. Have you downloaded the app?
You’ll really enjoy Molly’s Book!
In Free-Motion Quilting for Beginners learn how to:
Set up your machine for free-motion quilting, no technique is left out.
Begin by learning how to quilt your name, because soon you’ll be signing unique works of art.
Master all the fundamentals of free-motion quilting by working on manageable fat-quarter-sized fabric pieces.
Confidently stitch 10 different quilting designs, including stippling variations, pebbles, square meander, swirls, and woodgrain.
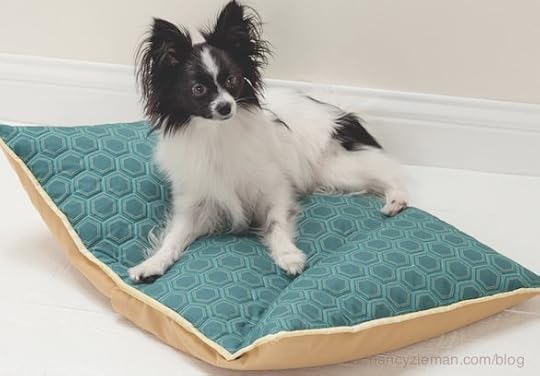
Take your skill to new heights as you quilt 15 practical projects to enhance your daily life, such as a tabletop organizer, table runner, tote bag, weekender bag, and laptop sleeve.

For a chance to win a copy of Free-Motion Quilting for Beginners, let us know which free-motion style is your favorite. A random winner will be announced on January 1.
Bye for now,
Content in this feed is © copyright 2014 by Nancy Zieman and may not be republished without written permission. You’re welcome to forward the email to a friend or colleague but it’s not okay to add the RSS feed automatically as content on a blog or other website.
December 23, 2014
Sew A Towel Wrap from a Bath Towel
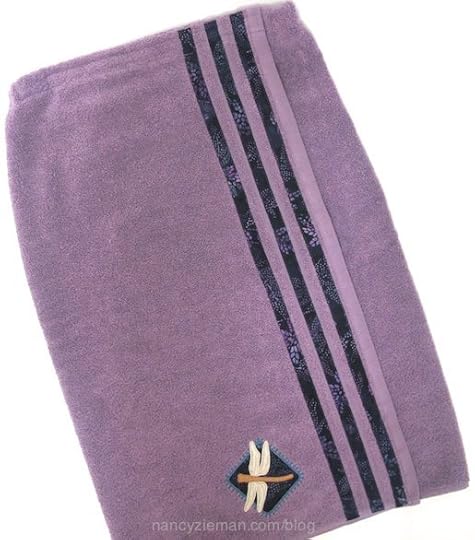
I decided it was time to sew something for me—a towel wrap. Three to four times a week I swim at the YMCA before heading to my office. The towels that I take to the Y are less than stellar looking. It will be great to have a new towel wrap to start off the new year!
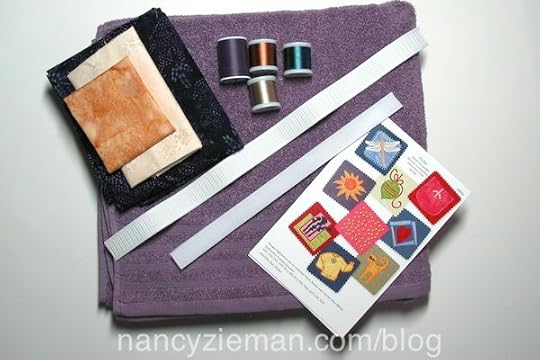
Gather supplies!
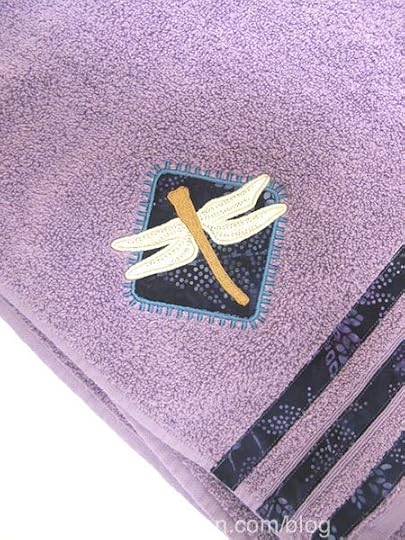
In addition to the bath-sized towel, you’ll need 18″ of 3/4″ wide elastic, and 12″ of Hook & Loop Tape, I chose an embroidery design from the Appliqués for Sweatshirts Embroidery Designs and fabric for the appliqué. Appliqués are ideal to add to terry cloth since the fabric rests on top of the nap, not embedded in the nap! Or, you could leave your towel wrap unembellished.
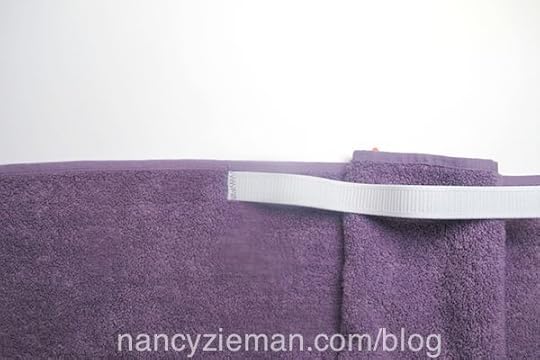
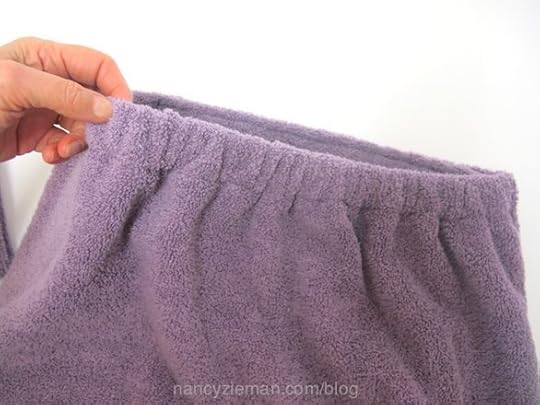
Give shaping to the towel
Divide the lengthwise edge of the towel into quarters; mark with pins.
Pin the elastic to the wrong side of the towel, meeting the ends of the 18″ of elastic to the first and third quarter marks. Position the elastic 1/4″ from the upper edge of the towel .
Zigzag the elastic end to the towel.
Turn under 1-1/4″ along the upper edge, encasing the elastic. Pin.
Attach a zipper foot and stitch close to, but not through, the elastic.
Note: This is a simple process. If you’d like to read more detailed instructions along with illustrations, check out the instructions in the book, Nancy’s 30 Favorite Gifts to Sew.
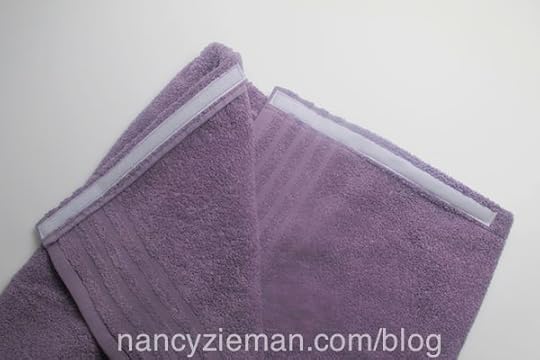
Attach the hook and loop tape or Velcro.
Position and stitch the soft side of the tape on the inside edge of the right front, starting at the corner.
Position and stitch the hook side on the outside edge of the left front.
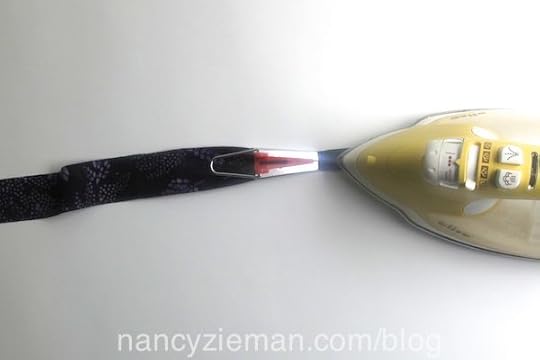
Now, personalize your towel wrap
Make fabric trim. Cut 1-1/2″ crosswise strips of fabric and insert through a 3/4″ bias tape maker. Press. Instant trim!
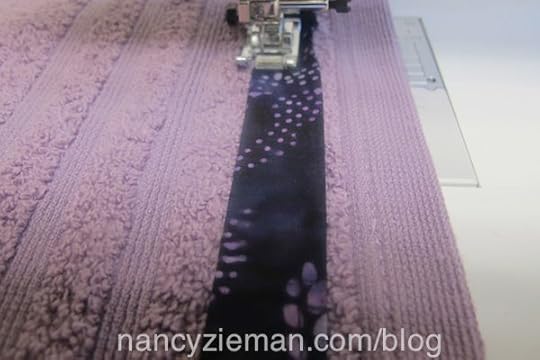
Topstitch the trim along the sides of the towel. Since my towel had grooves along each side, I covered the non-terry cloth sections with trim.
Stitch the appliqué
I hooped a tear-away stabilizer , black in color. Then pressed a square of a fusible stabilizer to the wrong side of the towel in the area where the towel will be embroidered.
Then, with a touch of adhesive spray , the towel is applied to the hooped stabilizer.
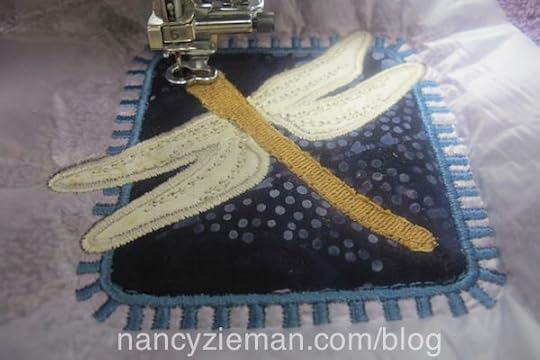
The first stitching of the embroidery is a tack-down of the embroidery’s background fabric. After stitching, trim.
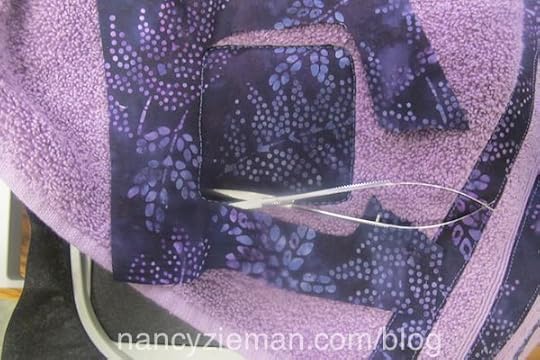
Before stitching the decorative stitch, add a layer or two of a wash-away stabilizer . The stabilizer gives the embroidery a base, preventing the stitches from embedding in the nap of the fabric.
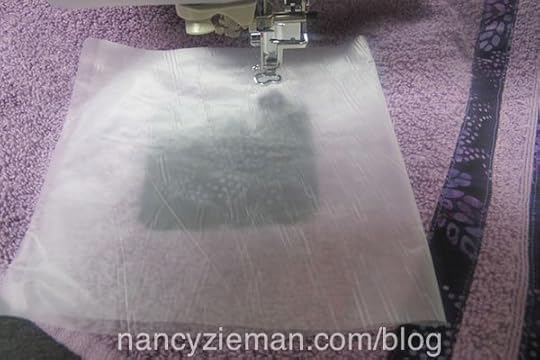
Before adding the next appliqué fabric, tear away the excess stabilizer.
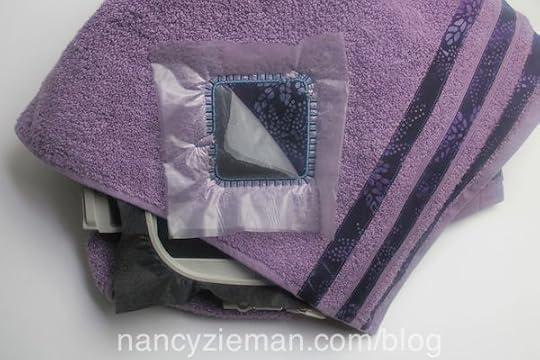
The next section to be embroidered is the body of the dragonfly. A piece of cream-colored fabric is placed over the embroidery field, the machine stitches an outline, and the excess fabric is trimmed away. Now it’s time for the decorative stitches to be sewn to cover the edges. (I’m not showing every embroidery step, I think you get the idea.)
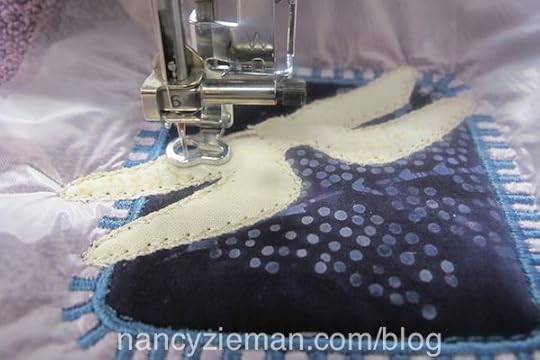
The fabric for the body of the dragonfly is positioned, stitched, trimmed, and stitched again.
After the embroidery is complete, tear away the top stabilizer, spritz away any of remnants of the wash-away stabilizer, and remove the towel from the hoop.
Ta da! What an attractive design!
29 More Projects to Sew!
For more project ideas, check out Nancy’s 30 Favorite Gifts to Sew.
Watch Sewing With Nancy Online
If you’d like to rewatch an episode of Sewing With Nancy or watch any of the last two years of programs (52 shows in all), head over to www.nancyzieman.com and click on Videos. Then find your favorite topic under Select a Category and click Apply.
Or, watch on your iPad, iPod Touch, or iPhone. Have you downloaded the app?

Bye for now,
Content in this feed is © copyright 2014 by Nancy Zieman and may not be republished without written permission. You’re welcome to forward the email to a friend or colleague but it’s not okay to add the RSS feed automatically as content on a blog or other website.
December 20, 2014
Sew a Kids’ Owl or Bear Towel Wrap

Get ready for some cuteness! (I could be prejudice since Luella and Avery are my precious granddaughters.) Plan to sew towel wraps for the special children in your life.
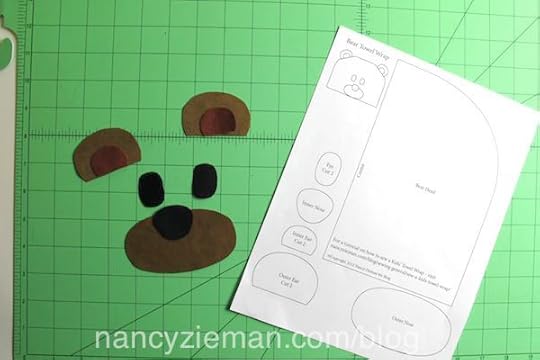
We have a special gift for you today. It’s a free project sheet of sewing appliqués—the Owl and Teddy Bear faces—to stitch on the Towel Wraps that Luella and Avery are wearing. To receive the free project sheet, sign up for my email subscription. If you’re already receiving my email subscription in your inbox, email info@ziemanproductions.com with “Free Project Sheet—Owl and Teddy Bear faces” in the subject line.
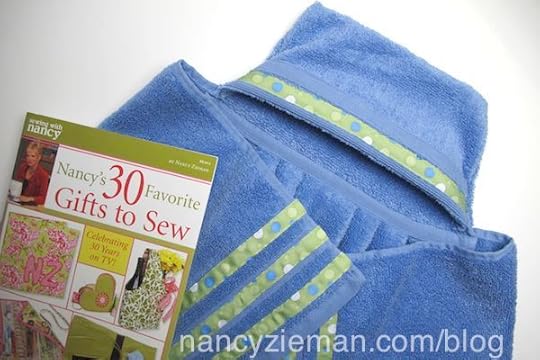
Towel wraps are a guaranteed hit for bath or swimming time. The basic towel wrap is really fast to make; it’s one of the featured projects in my book, Nancy’s 30 Favorite Gifts To Sew, a book that the Sewing With Nancy team and I put together in celebration of Sewing With Nancy’s 30th anniversary. In today’s blog, you’ll receive Blog Exclusive Tips on learning how to personalize the wrap.
Supplies:
Bath Towel
Washcloth
Sensuede Pack
Madeira Monofilament Thread
Nancy’s 30 Favorite Gifts To Sew
Glue Stick (Paper glue stick)
Grosgrain Ribbon (optional)
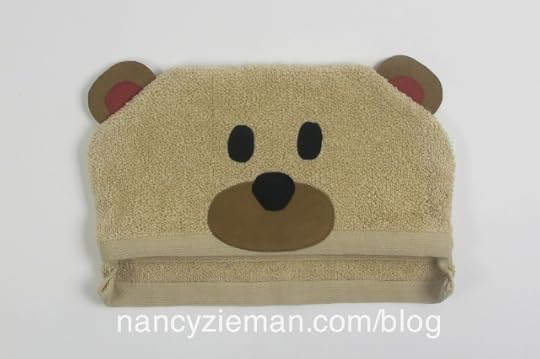
Sewing steps for the Teddy Bear Towel Wrap:
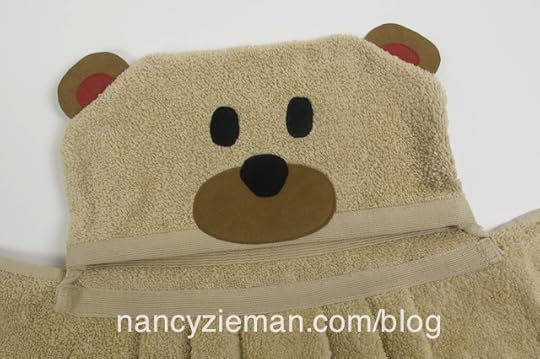
Cut out the face appliqué shapes and trace on the back of the Sensuede fabric or other nonraveling sueded fabric such as Ultrasuede scraps. Cut out the shapes.
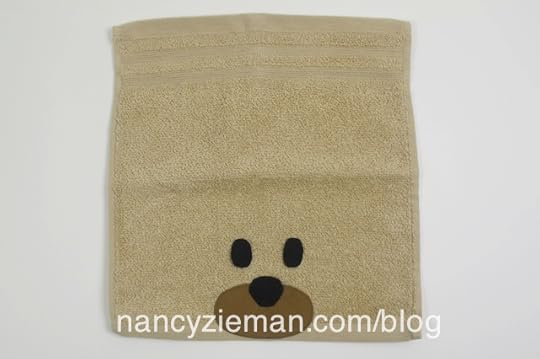
Position the eyes, muzzle, and nose on the washcloth as pictured. Pin or “pin” by applying office glue stick on the wrong side of the fabric.
Straight stitch around the appliqués, using monofilament thread in the needle. Shorten the stitch length to easily sew around the curved shapes.
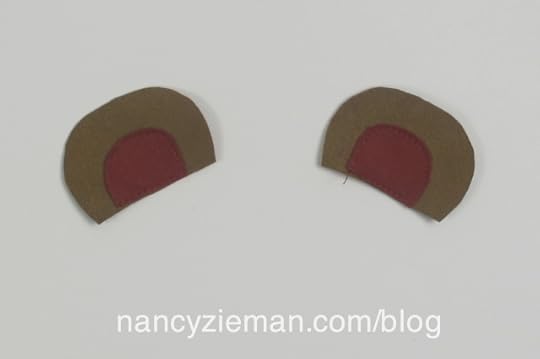
Stack the ear pieces. “Pin” with a glue stick. Straight stitch along the edge of the inner ear.
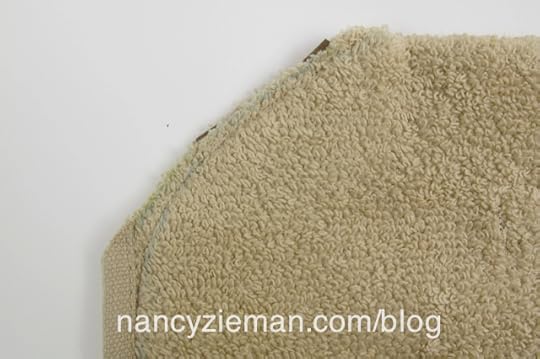
Cut out the shape of the Teddy Bear Head. Fold the washcloth, right sides together, with one edge 1-1/2″ longer than the other; pin. Trace the head shape on each edge of the washcloth.
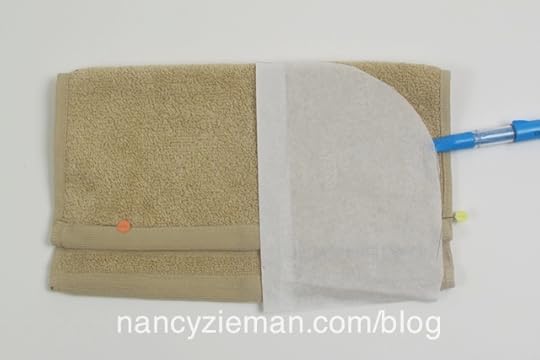
Cut the washcloth along the marked line. Insert the ears, right side up, between the layers, matching all the cut edges. (The photo features the ears extended, we exaggerated this step in order for you to see where the ears should be placed.)

Stitch the sides with a 1/4″ seam. Zigzag or serge to finish the edges.
Turn the hood right side out.
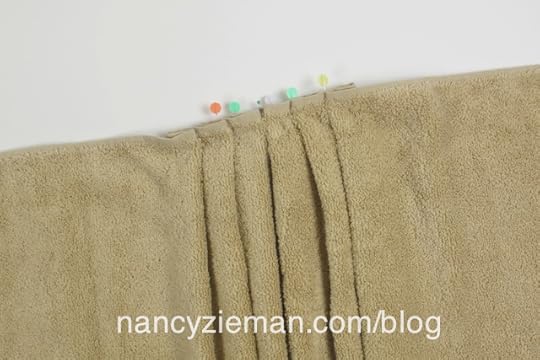
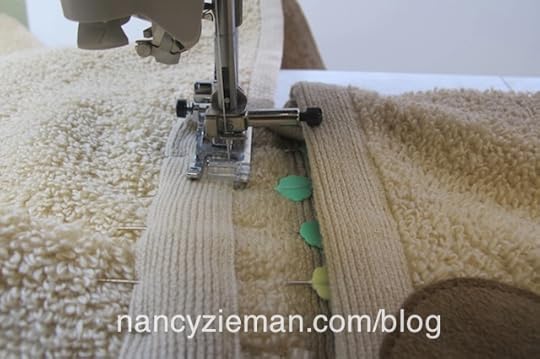
Find the center of one long edge on the bath towel. Create three 1″ tucks on each side of the center; pin. Stitch tucks 1/4″ from towel edge.
Overlap the hood onto the bath towel, matching center points.
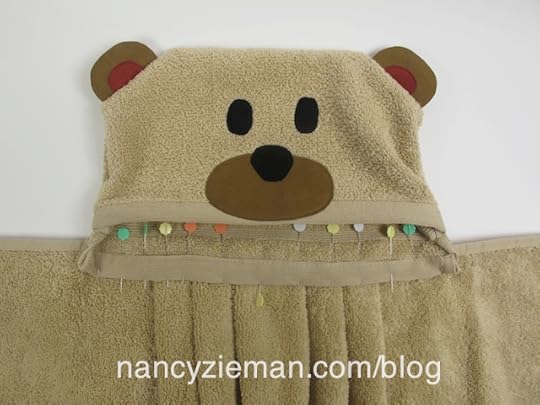
Stitch along the lower edge of the washcloth, and along the edge of the towel.
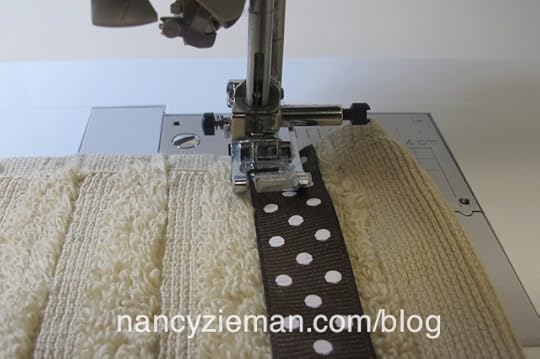
If you’d like, stitch grosgrain ribbon trim along the edges of the bath towel.
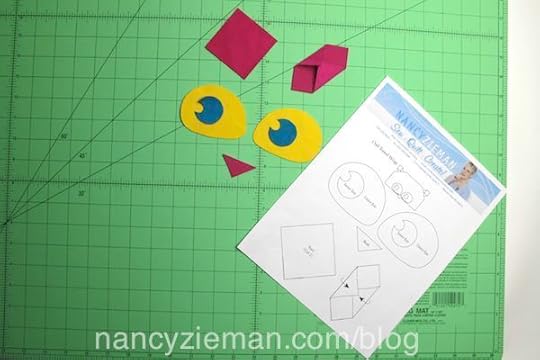
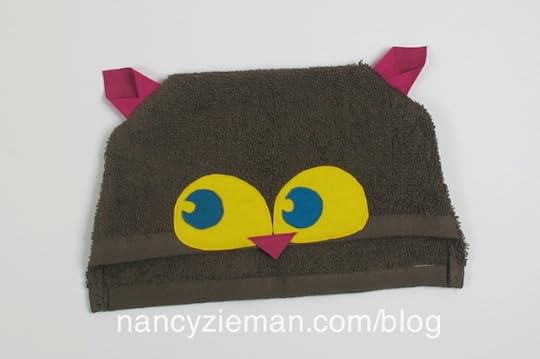
Owl Towel Wrap
There’s just a few tweaks to the instructions to create the Owl Towel Wrap.
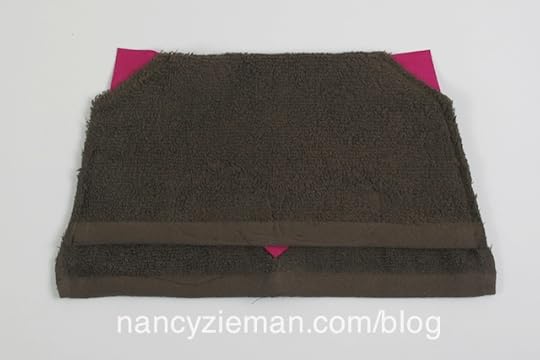
Trace, cut, and stitch the appliqués to the washcloth. Reference the instructions for the Teddy Bear (above) for stitching tips.
Fold the washcloth right sides together with one edge 1-1/2″ longer than the other; pin. As the basic instructions in Nancy’s 30 Favorite Gifts To Sew book state, measure in 1″ from each side along the upper fold, trace from the lower edge to the 1″ mark creating an angled stitching line.
Then, mark an angle across the top corners, about 1-1/2″ wide.

Cut the washcloth along the marked edges.
Fold the ears (square shapes) as illustrated above and on the free project sheet.
At top corners, insert the ears between the layers of the hood.
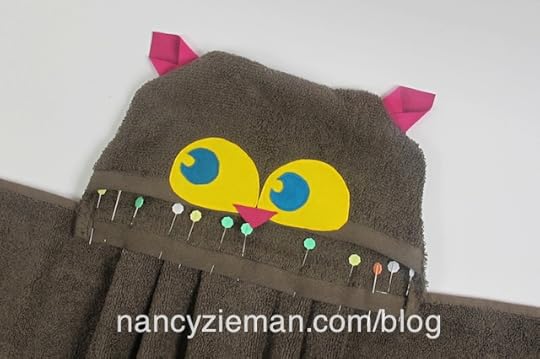
Stitch the sides with 1/4″ seam allowances.
Trim all the excess extensions of the ears. Zigzag or serge to finish the edges.
Turn right side out.
Pin and stitch the hood to the bath towel, following the steps listed above.
There are 29 other great gift-giving ideas in Nancy’s 30 Favorite Gifts To Sew . Order one for more gift sewing ideas.

To receive the free project sheet of appliqués—to stitch the Owl and Teddy Bear faces—sign up for my email subscription . If you already receive my weekly emails in your inbox, email info@ziemanproductions.com with “Free Project Sheet—Owl and Teddy Bear faces” in the subject line.
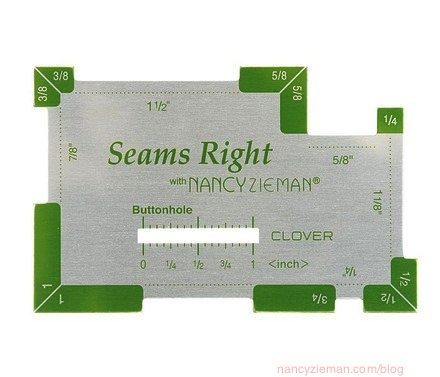
Thank you for all your comments from my blog titled Seams Right—One of the Handiest Sewing Notions .
The random winner of the Seams Right gauge is Pat Stoughton. She said, I would use mine not only for larger projects but I also sew doll clothes. For these hems, 1/4 inch is standard and if you don’t keep the seams perfect, nothing matches. I get tired of my cardboard cutting guide!
Bye for now,
Content in this feed is © copyright 2014 by Nancy Zieman and may not be republished without written permission. You’re welcome to forward the email to a friend or colleague but it’s not okay to add the RSS feed automatically as content on a blog or other website.
Nancy Zieman's Blog

- Nancy Zieman's profile
- 21 followers

