
A Handy Sewing Notion with 5 Uses in 1 Compact Tool
I was recently asked if the 5-in-1 Sliding Gauge could really live up to its name, providing help with five sewing and quilting tasks. My response was, I certainly hope so! That question prompted me to go to my sewing studio and check out the little tool that I use every time that I sew or quilt. Here are my findings on how I use the gauge.
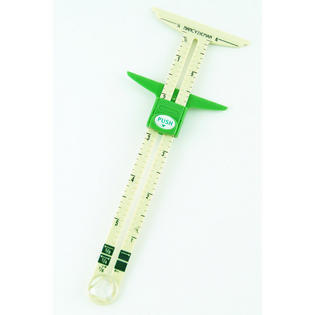
Close-up look at the design
It’s a six-inch ruler, marked in 1/8″ increments (Left side of ruler begins at 1″ and ends at 6″ inches. Right side of ruler is reversed, beginning at 6″ and ending at 1″).
The cursor slides and then locks into position with a push of a button. The top of the cursor shows the selected measurement.
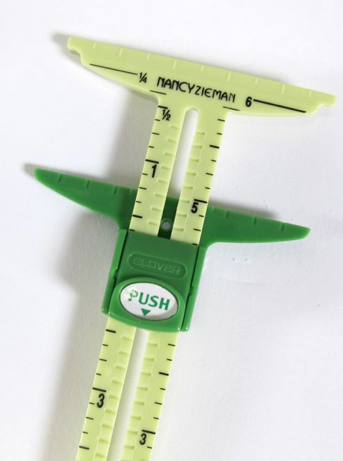
The top of the gauge and cursor has 1/4″ markings.
The width of the ruler is 5/8″.
Each side of the ruler is 1/4″.
The open space in the center is 1/8″.
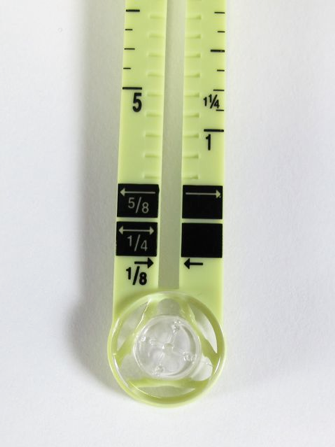
Finally, the end of the gauge features a compass pivot point—that’s a very unique feature. Details to come later!
Here are my five favorite uses for the 5-in-1 Sliding Gauge
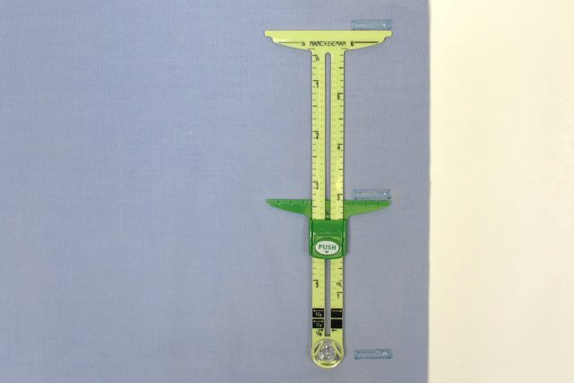
1. Space and Mark Buttonholes:
Slide the cursor and set it to the measurement the distance between buttonholes.
Align the edge of the ruler to the center marking.
Position the top edge of the gauge to the placement at the of top the buttonhole.
Trace the top edge of the gauge the length of your buttonholes. Next, trace the top edge of the cursor.
Slide the gauge down. Align the top of gauge to the second buttonhole marking. Again, trace. Repeat the process until all buttonholes are marked.
 2. Measure Seam Allowances:
Use the width of the ruler to mark and check garment seams. It’s 5/8″ wide, how convenient!
Or, use the ruler to achieve a truly accurate 1/4″ seam when changing the needle position.
 3. Hem Gauge:
Slide the cursor and set it to your pattern’s hem width measurement. Remember the gauge locks in place!
Fold up the hem and press or pin.

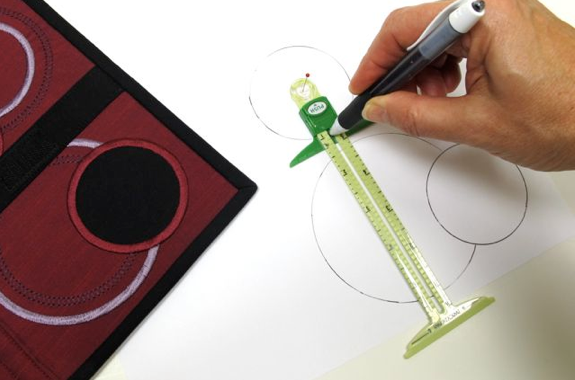
4. Circle Compass:
With the push of a button, slide the cursor to desired marking equaling the circle radius, or half your circle size.
Hold the compass pivot with a pin or stiletto/awl.
Insert the point of a marking tool into the cursor opening, and draw circles and arches.
Mark directly onto fabric, template material, or freezer paper.
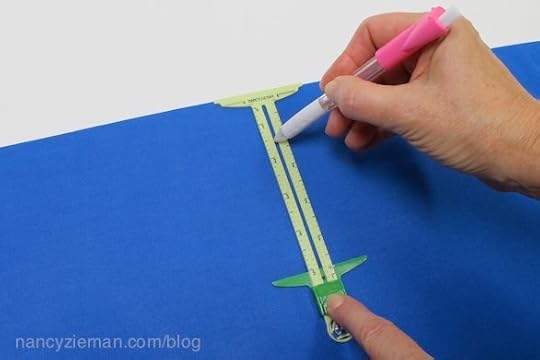
5. T-Gauge:
When you need to measure both length and width at the same time, use the T-Gauge feature.
The top edge of the gauge measures 2-1/2″—the numbered hash marks along the top edge making it a convenient marking tool.
Mark and measure both length and width at the same time.
Ta da!

For a chance to win a 5-in-1 Sliding Gauge let me know what sewing notion is on your wish list. Leave a comment below. A special thank you to Clover Needlecraft for providing the giveaway notion.
Bye for now,

Content in this feed is © copyright 2015 by Nancy Zieman and may not be republished without written permission. You’re welcome to forward the email to a friend or colleague but it’s not okay to add the RSS feed automatically as content on a blog or other website.


Nancy Zieman's Blog

- Nancy Zieman's profile
- 21 followers

