
Nancy Zieman's Blog, page 130
March 26, 2015
Sew Amazing Scarves Easily
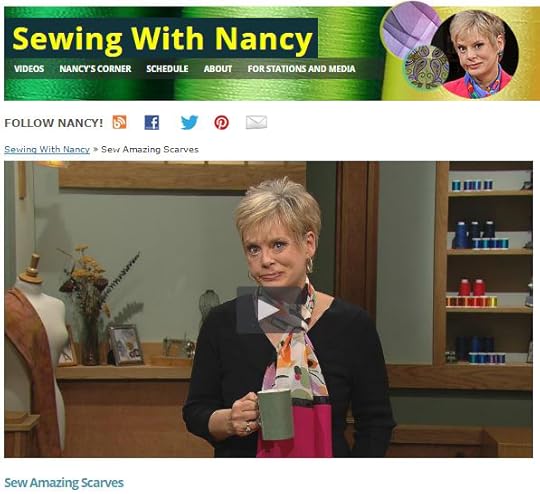
Welcome to the third installment of Sew Amazing Scarves. See the fun, easy-to-sew scarves here, and watch the third program in the three-part series of Sewing With Nancy. The complete series features a mix of scarf styles with something to fit everyone’s design taste.
As in the past two weeks, vote for your favorite style. A random winner will receive a copy of the book, Sew Amazing Scarves, which includes a total 20 scarf projects.
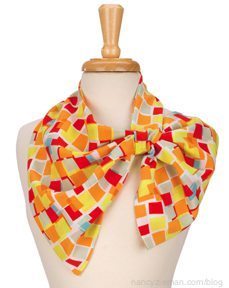
Loop & Tuck Scarf
Let’s start with the Loop & Tuck Scarf. However you choose to loop and/or tuck, the fabric stays put! The secret ingredient is the way the pattern is designed; there’s no slipping or sliding of the fabric.
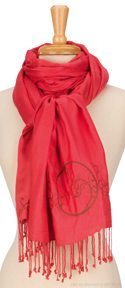
Shirred Scarves
Start with a large purchased scarf, like a Pashmina scarf, and add texture with elastic thread. I’ll provide the sewing know-how; you decide the stitching and shirring accents. You’ll soon see that creativity is only moments away when using elastic thread in the bobbin. By the way, this technique is easier than you might think!
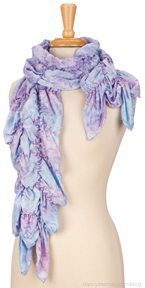
Shirred Crossroads Scarf
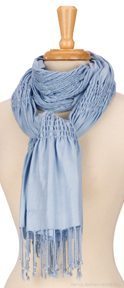
Faux Shirred Scarf
Embroidered Elegance
Add your own signature to a scarf, with embroidery. With a delicate design and a few stitching tips, give your scarf a touch of elegance.
Fringed Folly
Two fabric tubes make this offset scarf design—it’s called Fringed Folly. The fringed ends, offset design, and playful buttons give this scarf unique style.
Date Night Scarf
A couple years ago, I had the opportunity to travel to Japan on business. Shopping in the Ginza district, I was drawn to a lovely scarf. When I saw the $400 price tag, I knew a comparable design could be made for a song. I call it the Date Night Scarf.
Watch Sewing With Nancy Online!
You can watch online, or on your iPad, iPod Touch, or iPhone. Download the app?


What’s your favorite scarf so far? Vote and you could be the random winner of the book, Sew Amazing Scarves. Twenty scarves are included in the book, plus patterns for the designs. This is the last week to vote for your favorite scarf. The winner will be announced April 2.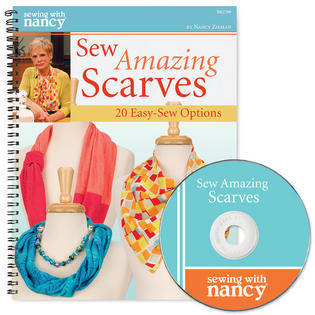
Bye for now,

Content in this feed is © copyright 2015 by Nancy Zieman and may not be republished without written permission. You’re welcome to forward the email to a friend or colleague but it’s not okay to add the RSS feed automatically as content on a blog or other website.


March 24, 2015
Viewers’ Dresden Quilt Showcase
Sewing With Nancy viewers and blog readers have been busy at work with the Trace ‘n Create Quilt Templates—Dresden Collection. The Dresden quilt block is so diverse; the combinations seem almost endless. From traditional and historic to contemporary and modern, it is always exciting to see what you, my followers, create!
Without further ado—Viewers’ Dresden Showcase:
Sew Grand Dresden Quilts Inspiration
The first project submitted is from a long arm quilter in Sweden, Diane Ahnstedt. She made the quilt as featured in the Sew Grand Dresden Quilt book, choosing her own color palette. I truly admire Diane’s long-arm quilting skills!
I bought the Sew Grand Dresden Quilt template last summer and quilted this after taking classes last fall. Thanks Nancy, you are inspiring! TV SHOW and BOOK.” ~Diane Ahnstedt


. . . . . . . . . . . .
Dresden Melody Inspiration
Here’s another project from Diane Ahnstedt. She used the project/pattern sheet, Dresden Melody, to create a dynamic table runner. The multi-size Dresdens twist and turn through the project to add movement to this contemporary block design.
I made up another Dresden for the local store with their fabric. I’ve always loved Dresden quilting. I made this table runner! ~Diane Ahnstedt

. . . . . . . . . . . .
Modern Quilt Guild Challenge
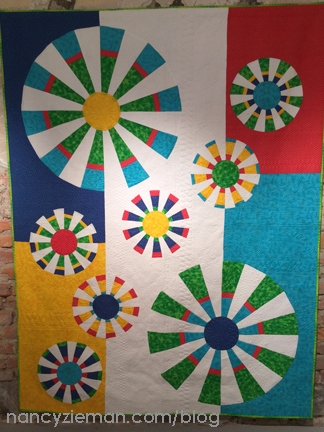
The Dresden block is generally regarded as a traditional quilt block; however, see what our next viewer created. Diane Heimel worked with the Trace ‘n Create Quilt Templates—Dresden Collection and multi-size Dresdens to create a challenge quilt for her Modern Quilt Guild (MQG). The bold colors on a black background highlight the Dresden petals; great composition.
“The Dresden plate quilt was a challenge in my Modern Quilt Guild. I had to take a traditional block and make it modern. I enjoy the shows; keep them coming.” ~Diane Heimel

. . . . . . . . . . . .
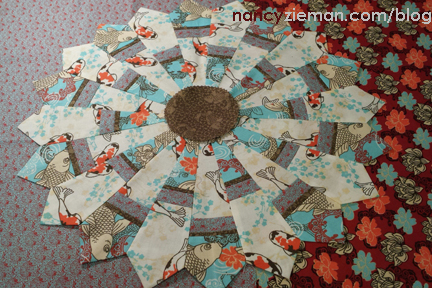
Fabric Play
This mother-daughter team worked up a couple Dresden blocks featuring a variety of fabrics. Calicos, eyelets, and solids really show how the block can move from traditional to contemporary just in smart fabric choices.
“My daughter and I are both enjoying the many combinations of Dresden Flowers.
Thank you for your simple but rich tutorials that you share with us.” ~Darinka & Irena


. . . . . . . . . . . .
Block of the Month Inspiration
The 2015 Adventure Quilt Block of the Month #1 inspired several of our blog readers to create a scrappy Dresden or Dresden Fan block.
January Block of the Month ~Suey Thomas
January Block of the Month ~Joan Zamojcin

. . . . . . . . . . . .
Traditional Dresden Fan Quilt
Royal purple Dresden Fans~Pam Margolis

For more Dresden quilt block resources and ideas, see these popular episodes, products, and blog posts:
Sewing With Nancy—Sew Grand Dresden Quilts
Sew Grand Dresden Quilts Book and DVD by Nancy Zieman
Clover’s Trace ‘n Create Quilt Template—Dresden Collection
Dresden Melody Table Runner Project Sheet
Topsy Turvy Table Runner Project Sheet
2015 Adventure Quilt—Block of the Month #1 Dresden Fan
What are you making? Send your project photos to info@ziemanproductions.com to be considered for a future Viewers’ Showcase.

The random winner of a Cute for Kids Embroidery Collection, from a previous blog, is Judy G. She said, The Cute for Kids Embroidery Collection is adorable. I would put them on burp cloths, diaper covers, bottle covers, and even on a quilted diaper bag for a coordinating baby shower gift.
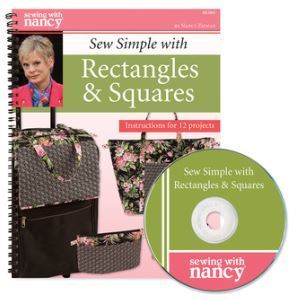
From my blog titled Absolute Easiest Way to Use Printable Patterns, the random winner of a copy of Sew Simple with Rectangles & Squares is Linda M. She said, The majority of my patterns are traditional. I will have to try the pdf versions sometime.

To be considered for a future Viewers’ Showcase, send your project photos to info@ziemanproductions.com.
Bye for now,
Nancy Zieman—author, pattern designer, businesswoman, producer, and national sewing authority—is the host of the popular show Sewing With Nancy ®, which appears exclusively on public television stations across the United States and Canada. Follow Nancy’s blog at NancyZieman.com/blog and sign up to receive Nancy’s E-News for the latest news in Sewing, Quilting, Creating, and Block of the Month updates.
Content in this feed is © copyright 2015 by Nancy Zieman and may not be republished without written permission. You’re welcome to forward the email to a friend or colleague but it’s not okay to add the RSS feed automatically as content on a blog or other website.
March 21, 2015
2015 Adventure Quilt – Block of the Month #3
March is National Quilting Month; let’s celebrate with the third of twelve in the Block of the Month pattern series. Once complete, the blocks will comprise what I’m calling, The 2015 Adventure Quilt. Join us on our journey as we stitch our way through many quilting fabrics and scraps using assorted techniques. I’ve compiled a collection of blocks that look great as a sampler, which features one stitched block for each month, or as a single block in a quilt design.
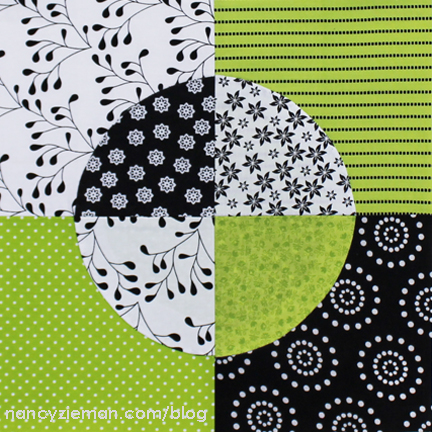
Our third Block of the Month pattern is the Scrappy Quarter Circle Block. Quarter-circle blocks are generally pieced together using two shapes with opposing seams. Talk about difficult! My quarter-circle block is made as an appliqué. Quilting with curves couldn’t be easier!
Last month, the Cornered Hearts block was made with one of the Trace ‘n Create Quilt Templates—Carefree Curves templates. This month, use another template from the same set, selecting the 1/4-Circle and Circle Template.
Remember, this quilt will be a scrap adventure for you and me. Total yardage for the entire quilt is not provided; rather we will be working in a color palette of scraps (or Fat Quarters).
If you’d like this block pattern as a downloadable PDF, please click the “Print Post as PDF” button at the lower right of this post.
Notions, Fabrics, and Supplies:
Assorted fabric scraps or fat quarters
Trace ‘n Create Quilt Templates—Carefree Curves Collection
SofShape Fusible Interfacing
45 mm Pinking Rotary Cutter Blade by Clover
Fine Tip Water-Soluble Marking Pen
Optional: Clover’s Point 2 Point Turner
Getting Started:
Throughout this adventure, I am working in a scrappy palette of three colors. Any three colors should work. I’ll be working with black, white, and a green/chartreuse color collection. As I rummaged through my quilting fabric scraps, I found that I had the most of these colors on hand.
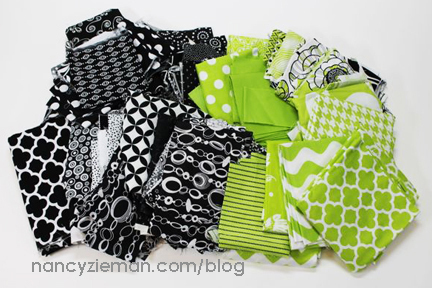
Keep in mind that you may need to add interchangeable pieces as the months progress. I found out that as I made this third Block of the Month quilt block some of my go-to fabrics were now gone. A small allover black print was the first fabric that needed to be replaced, and then I purchased a small green polka dot print. As this quilt adventure progresses, you too may need to buy additional fabrics. How’s that for an excuse to buy fabric?
Scrappy Quarter Circle Block
The block this month measures 12-1/2″ x 12-1/2″, and it measures 12″x 12″ once it is stitched into a final project. A 1/4″ seam allowance is included.
Cutting Directions:
Select eight fabrics from the scrap fabric grouping. Choose light, medium, and dark fabrics.
Cut four 6-1/2″ background squares for each block.

Cut four 4-1/2″ additional squares from both cotton and fusible interfacing, such as Sofshape , for each quarter-circle appliqué.
Stack the 4-1/2″ squares of fabric and interfacing, right side of fabric to the smooth (non-fusible) side of the interfacing.

Place the circle template over the square set, align the corners, and trace the 1/4-Circle for 6″ Finished Block arch size.

Set the machine at a shorter stitch length, 2.0 mm. Stitch along each curve.

Trim away the excess fabric from the outer curve using a pinking blade.

Trim the excess interfacing from the interior of the quarter-circle, leaving approximately 1″ of interfacing.

Turn the interfacing to the wrong side. Glide a point of the turning tool along the stitching line to smooth the curve.

Press the interfacing to the wrong side of the quarter-circle.

Position the quarter-circle on a background quarter.

Stitch along the curve with a straight stitch. Also stitch the sides of the quarter-circle to the background square.

Note from Nancy: I don’t trim the excess from behind the appliqué. The extra layer of fabric has never caused a bulk issue in my quilt projects.
Arrange four quarter-circle sections in a pleasing arrangement.


Align the top two and lower sections, right sides together. Stitch with a ¼″ seam allowance.

Press the seam open.
Note from Nancy: There are two options when pressing seams: Press the seams open or press both seams to one side. Due to the number of layers of fabric, I prefer to press the seams open for this scrappy block.


Join the block halves, right sides together, matching the center seam. Stitch with a 1/4″ seam allowance.

Press the seam allowance open.


Share your 2015 Adventure Quilt Blocks Socially
If you have a blog site, website, or online social sewing group, feel free to grab the code and share this button.

If you are on social sites like Instagram, Twitter, Flickr, or Facebook, let all your friends know you are working on The 2015 Adventure Quilt Blocks by tagging your post with the hashtag: #NZBoM.
The hashtag is a searchable “word” associated with an event or activity, which when searched on popular social websites, like Instagram, Twitter, Flickr, and Facebook shows every single post using that hashtag. Even if you don’t personally know that stitcher, you’ll see her/his progress and a photo. Hashtags are a fun way to network and connect with people who share similar interests.
What would a quilt look like?
As part of this Block of the Month series, included are ideas of what a quilt might look like if you made it with only this month’s block. Some of the concepts have sashing and others do not. These quilts are a good way to brainstorm what this block looks like repeated.
This quilt features scrappy blocks, set in sashing and traditional cornerstones. This quilt also uses a double border.

The following quilt uses the quarter-circle block but has a planned, rather than a scrappy fabric arrangement.

Changing up the “What would a quilt look like” feature, I decided to include a bed runner. Bed runners lay at the foot of the mattress, warming your feet and giving a bit of accent color to the room. Mixing up the fabric placement creates these large black focus squares. This would measure 24″ x 72″.

Watch more on Trace ‘n Create Quilt Templates—Carefree Curves Collection on Sewing With Nancy part two of Carefree Curves.

To watch Sewing With Nancy on your iPad, iPod Touch, or iPhone, download the app.
In the 2015 Adventure Quilt Block of the Month series, we’ll be making twelve fun blocks from five different templates/tools: Carefree Curves Template, Dresden Template, Grandmother’s One Patch Template, Lone Star Template, and the No-Hassle Triangles Gauge.
See the 2015 Adventure Quilt Blocks HERE.
Watch for the next block to arrive on the third Saturday of each month!
Bye for now,
Content in this feed is © copyright 2015 by Nancy Zieman and may not be republished without written permission. You’re welcome to forward the email to a friend or colleague but it’s not okay to add the RSS feed automatically as content on a blog or other website.
Nancy Zieman—author, pattern designer, businesswoman, producer, and national sewing authority—is the host of the popular show Sewing With Nancy®, which appears exclusively on public television stations across the United States and Canada. Follow Nancy’s blog at NancyZieman.com/blog and sign up to receive Nancy’s E-News for the latest news in sewing, quilting, and creating.
March 19, 2015
Sew MORE Amazing Scarves
Sometimes sewing inspiration strikes but you feel like you don’t have enough time set aside. Well, if you are motivated to stitch, make a quick scarf. This week, part two of Sew Amazing Scarves is the featured online, streaming video, where you’ll learn how to create six scarf options.
Listed below are the scarf designs. Vote for your favorite and you could be the random winner of the book Sew Amazing Scarves, featuring 20 scarf techniques in all! Details are listed at the end of this blog.
Knot Your Average Scarf
Knot Your Average Scarf is the first scarf option you’ll see demonstrated online. Use either knit or woven fabric; the scarf has a definite focal point. You’ll learn how to knot, and then sew!
20-Minute Scarf
Ever think you could complete a sewing project in a less than a half hour? It’s true! The 20-Minute Scarf takes about 10 minutes to cut and another 10 minutes to sew or serge. With only four seams, the 20-Minute Scarf just may become your go-to gift to serge or sew!
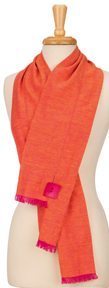
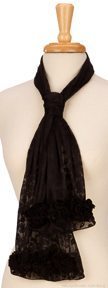
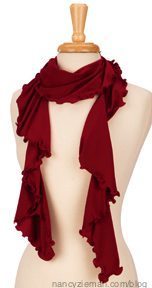
S-Curve Scarf
Different fabrics, different looks—that statement couldn’t be more obvious when looking at these two scarf options. Even though the same pattern was used, the edge finish plus the fabric choice changed this scarf from elegant to casual. It’s called an S-Curve Scarf. Two donut shapes are the pattern pieces. Wonder how it’s made? I think you’ll be surprised!
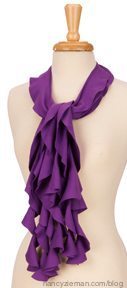
Lettuce-Edge S-Curve Scarf
Flirty Scarf
This scarf started out as six circles. With a little creative cutting, each circle turns into a flounce. It’s practically a no-sew technique, since non-raveling interlock knit is the fabric of choice.
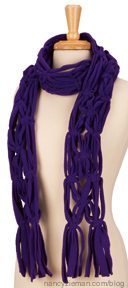
All Knotted Up Scarf
For scarves with plenty of dimension and texture, turn knit fabric into yarn-type strips and tie knots! From fleece to slinky knit, use 1/2 yard of fabric or less to fashion your version of the All Knotted Up Scarf.
Watch Sewing With Nancy online !
You can watch Sewing With Nancy on your iPad, iPod Touch, or iPhone. Download the app.
Vote for your favorite scarf!
What’s your favorite scarf from this episode? Vote this week and next week too, and you could be the random winner of the book, Sew Amazing Scarves. Twenty scarves are included in the book, plus patterns for the designs that are not rectangles. A winner will be announced April 2.
Bye for now,
Content in this feed is © copyright 2015 by Nancy Zieman and may not be republished without written permission. You’re welcome to forward the email to a friend or colleague but it’s not okay to add the RSS feed automatically as content on a blog or other website.
March 17, 2015
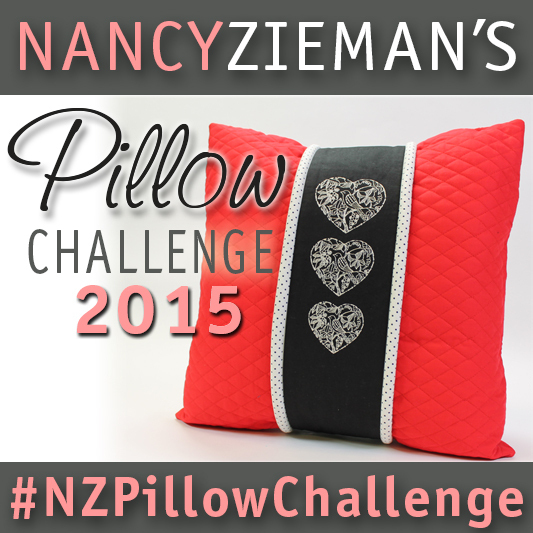
Nancy Zieman Pillow Challenge Winners
Thank you to all who participated in this year’s first annual Pillow Sewing Challenge. I am happy so many of you decided to enter the challenge. Each participant was asked to sew and submit up to four pillow projects. The challenge includes over 220 entries and over 8,300 votes were cast.
Be on the lookout for another exciting sewing challenge later this spring.
Today we announce the five prize winners who were selected based on YOUR votes. Congratulations are in order for these top five pillow creators who gained the most votes through our week-long online voting:

You will be contacted with prize details, via email, by one of my team members.
First Place Winner: Bloomin’ Beauty

A Bundle of Products from Pellon, $115 value!

Second Place Winner: Butterfly

Madeira Aerofil 18 count thread pack, $60 value from
Madeira. Plus, a Pellon Pillow Insert! 
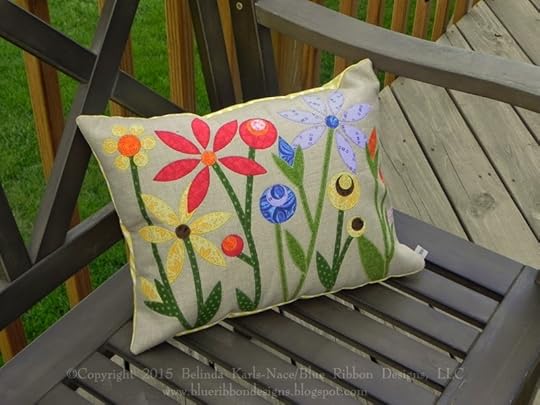
Third Place Winner: Garden Girl

The Absolute Easiest Way to Sew book & DVD from Nancy’s Notions, value of $34.98. Plus, a Pellon Pillow Insert!
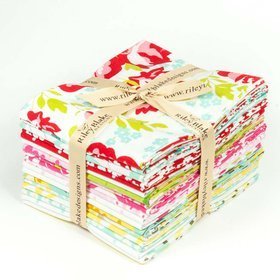
Fourth Place Winner: Charming Petals
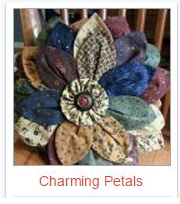
Fabric Bundle from Riley Blake Designs, $25 value. Plus, a Pellon Pillow Insert!
Fifth Place Winner: Color Connections

Hobo Tote Template from Clover, $19.95 value. Plus, a Pellon Pillow Insert!
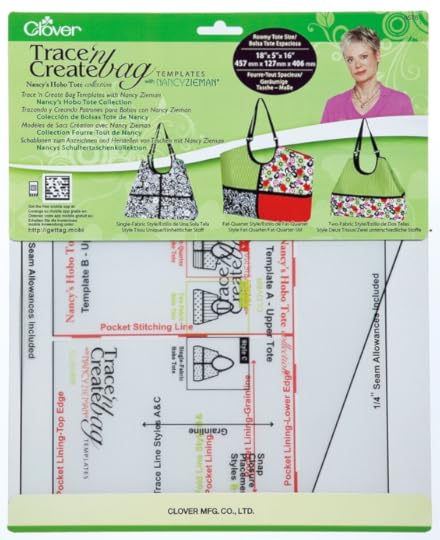
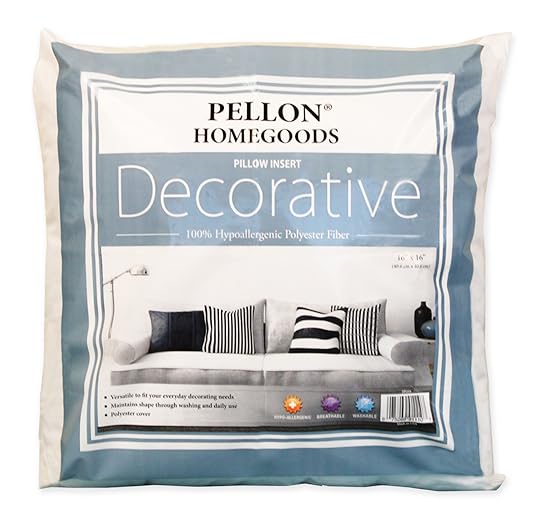
Each Pillow Sewing Challenge prize winner (above) will receive a Pellon® HomeGoods Decorative Pillow Insert, 16″ x 16″. Value $10.99
Thank you to our sponsors!


Bye for now,
Nancy Zieman—author, pattern designer, businesswoman, producer, and national sewing authority—is the host of the popular show Sewing With Nancy®, which appears exclusively on public television stations across the United States and Canada. Follow Nancy’s blog at NancyZieman.com/blog and sign up to receive Nancy’s E-News for the latest news in sewing, quilting, and creating.
Content in this feed is © copyright 2015 by Nancy Zieman and may not be republished without written permission. You’re welcome to forward the email to a friend or colleague but it’s not okay to add the RSS feed automatically as content on a blog or other website.
March 14, 2015
Absolute Easiest Way to Use Printable Patterns

In my sewing career, sewing patterns have evolved. Initially, there was a printed sewing pattern for each size. Convenient, but not economically savvy in today’s economy.

Now patterns sizes are nested with multiple sizes printed on a tissue or paper pattern. Or, we can print patterns on demand, having almost instant access to online sewing patterns.

How to Download Sewing Patterns
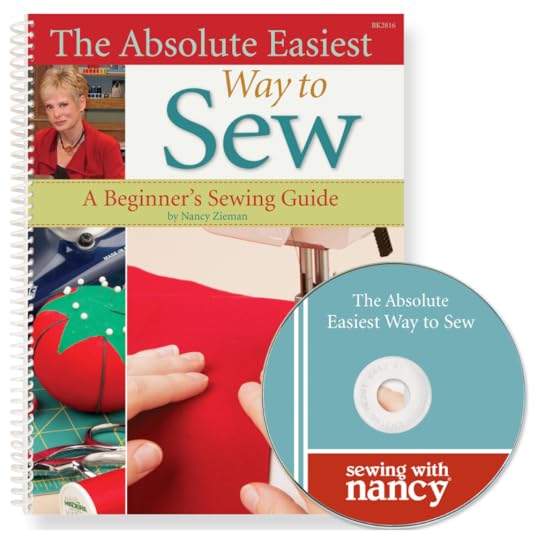
In my book, The Absolute Easiest Way to Sew, I detail how to download sewing patterns. Here are the basic instructions.
Digital, downloadable, printable or PDF (hereafter referred to as PDF) patterns allow for almost instant delivery of patterns to your computer. After purchasing a PDF pattern from a website, you will receive an email from the pattern company with login information, and then you’ll be able to print the pages of the pattern. Some assembly is required to tape or tile the pages together.
Benefits of PDF Patterns:
PDF patterns are generally less expensive than printed versions.
The patterns can be purchased at your convenience.
PDF patterns can be reprinted. Some patterns are downloaded to your computer and stored in a folder for later use. Other pattern services don’t allow downloads, but rather the service stores your purchase on their site. (Check reprinting guidelines before making the purchase.)
Disadvantages of PDF Patterns:
Some patterns require upwards of 60 sheets of paper.
Patterns must be assembled or tiled together.
After purchasing a PDF pattern, you’ll receive a link to use in order to proceed to the actual pattern. There are generally a couple extra steps when using a PDF pattern.
Printing PDF Patterns
There are two ways PDF patterns are offered:
Downloadable file to computer: Open the PDF file using a free PDF reader such as Adobe Reader or Google PDF. Create a folder on your computer for this pattern file.
Digital file on pattern service website: The pattern service stores the PDF file and you will be asked to download the service’s PDF reader. The instructions are generally user-friendly.
Print pattern pages by selecting “Actual Scale” or “Full-Scale” or “100%” as the printer scaling option.
Select the paper size. The file that contains the pattern is tiled, which provides for the pattern pieces to be printed to scale on standard paper sizes. Standard paper sizes are: letter (8-1/2″ x 11″), ledger (11″ x 17″), legal (8-1/2″ x 14″), A3 and A4. A3 and A4 are international standard paper sizes.

Print the first page. Look for the text square on the first page and measure with the ruler. If the square matches the described size, print the remaining pages. If not, check printer settings, make any changes, and print another test page. The test square must measure as required or the pattern will be a different size than promised.

Tiling Pattern Pages
Acquaint yourself with the printed sheets. Each pattern company/service has a specific unique way to tile or connect the sheets. In general, every printed sheet has (1) frames, (2) hash marks, and (3) a row/column reference.

Trim along two connecting frames of each sheet allowing for easy overlapping of pages. For example, Trim off all right and lower frames. Use paper scissors or consider investing in a paper trimmer (generally less than $25) for speed and accuracy.

Lay out the sheets in order. First connect the columns, overlapping lower frame to the top frame; tape. After all columns are created, tape the columns, overlapping and matching the frames at the tape.

PDF Instructions
PDF or downloadable construction instructions are part of the digital pattern purchase. Reduce paper waste by saving the file to your computer or mobile device and then reading the construction instructions electronically.
*PDF pattern featured in the examples Copyright © Butterick Pattern Company, #5273
Watch Sewing With Nancy online.
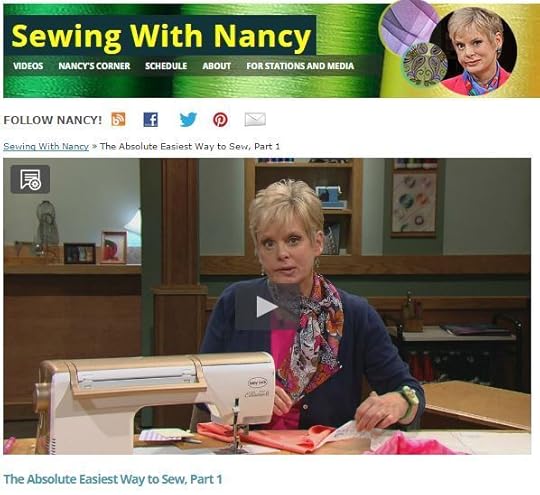
For additional sewing insights and my favorite sewing techniques, check out my 3-part Sewing With Nancy online TV series, The Absolute Easiest Way to Sew.

For a chance to win a copy of The Absolute Easiest Ways to Sew, leave a comment answering the question: Is your pattern inventory more traditional paper patterns or more digital patterns?
A random winner will be announced on March 21.
Bye for now,
Content in this feed is © copyright 2015 by Nancy Zieman and may not be republished without written permission. You’re welcome to forward the email to a friend or colleague but it’s not okay to add the RSS feed automatically as content on a blog or other website.
March 12, 2015
Sew Amazing Scarves
Create a fashionable scarf in under an hour? You may think I’m kidding, but with Sew Amazing Scarves, a yard of fun fabric, and a sewing machine or serger you will be able to do just that. The scarf sewing is absolutely easy and you’ll make a splash with this versatile accessory.
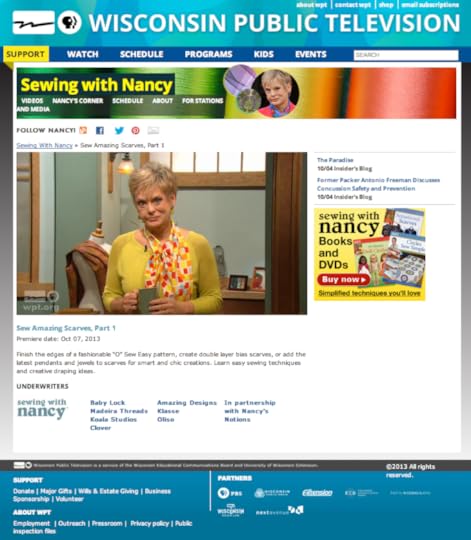
Sew Amazing Scarves, three-part Sewing With Nancy series, is this week’s online Sewing With Nancy feature. Watch online, on PBS, or DVD.
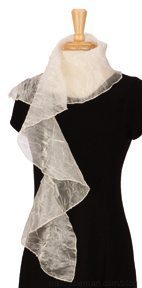
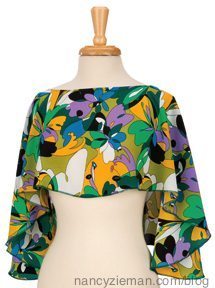
“O” Sew Easy Scarf
The first scarf idea you’ll see is the “O” Sew Easy Scarf. Made with a single layer of lightweight fabric, a simple “O” shape is cut out, and then the edges are serged. The scarf can be simply worn like a pullover or transformed with some creative draping ideas. (The pattern for this scarf or wrap is included in the book.) Consider making this scarf from a wool fabric for fall.
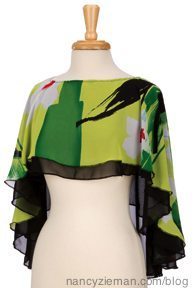
Double Layer “O” Sew Easy Scarf
If the single layer “O” Sew Easy Scarf is appealing to you, consider this option of making it a double layer. Using a short top layer and longer bottom layer, the look is ideal for evening with only a minimum of time invested. This is an ideal serger project.
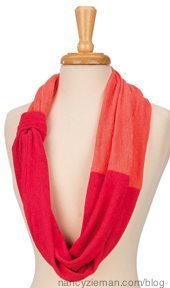
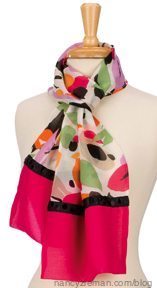
Convertible-Ride Scarf
If I owned a convertible, I’d choose a hot pink number, buy a big floppy hat and wear this scarf cavalierly around my neck! Since a new car isn’t in my future, I’ll wear this scarf while driving my minivan. If you’re in need of a mental get-away, this easy-to-sew scarf has daydreaming possibilities. Choose two coordinating fabrics and a ribbon accent. That’s it!
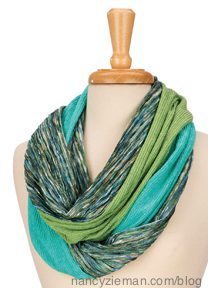
Double De-Lite Scarf
Select two compatible fabrics, cut bias strips, finish the edges, and after stacking and sewing the layers together, you’ll find that you’ve created a flowing, graceful neck wrap. I call it the Double De-Lite Scarf; it’s a delightful process to create and a stunning way to frame your face.
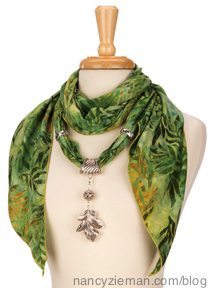
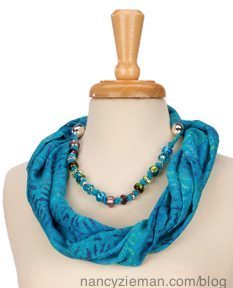
Pendant Scarf
During the show, I demonstrate how to cut and sew a bias scarf. Use that knowledge to make another scarf, this time choosing a medium weight fabric, such as rayon batik. Slip on scarf accents and almost instantly you’ll have a pendant scarf.
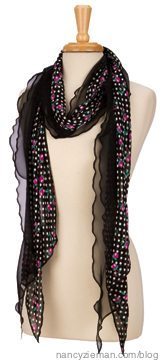
Be-Jeweled Scarf
I’m not a jewelry maker, but a few bangles purchased from the beads section of a craft store along with fabric make a 2-in-1 scarf idea. Simple sewing, hand and machine, plus a simple technique of knotting the fabric, will transform an ordinary scarf to a be-jeweled neck wrap.
Watch Sewing With Nancy online!
You can watch Sewing With Nancy on your iPad, iPod Touch, or iPhone. Download the app.
What’s your favorite scarf so far? Vote and you could be the random winner of the book, Sew Amazing Scarves. Twenty scarves are included in the book, plus patterns for the designs that are not rectangles. You can vote the following two weeks—more scarves will be featured! Winner will be announced April 2.
Thanks for reading my blog titled Sew a Versatile Hobo Tote. I appreciate all your comments sharing your favorite tote options. The random winner of a Trace ‘n Create Template–Hobo Tote Collection is Judy D. She said: Option 5 with the scarf. I love it!!!
Bye for now,
Content in this feed is © copyright 2015 by Nancy Zieman and may not be republished without written permission. You’re welcome to forward the email to a friend or colleague but it’s not okay to add the RSS feed automatically as content on a blog or other website.
March 10, 2015
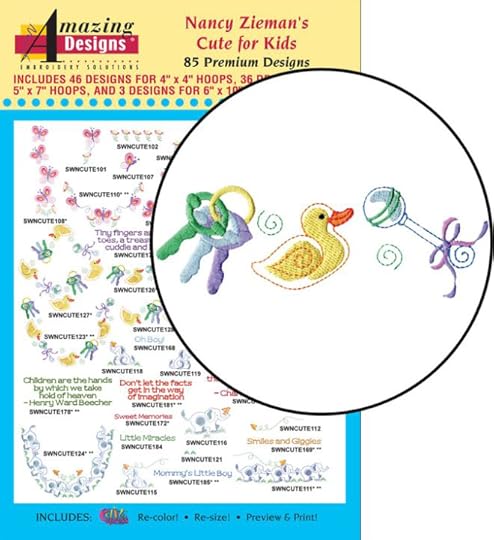
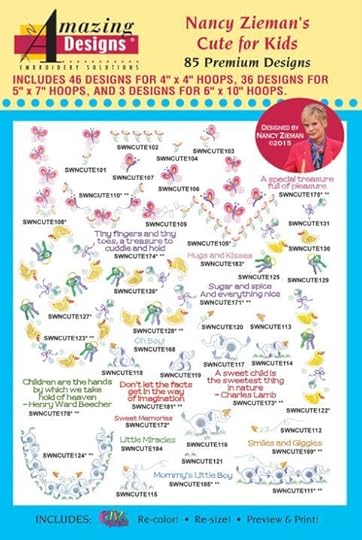
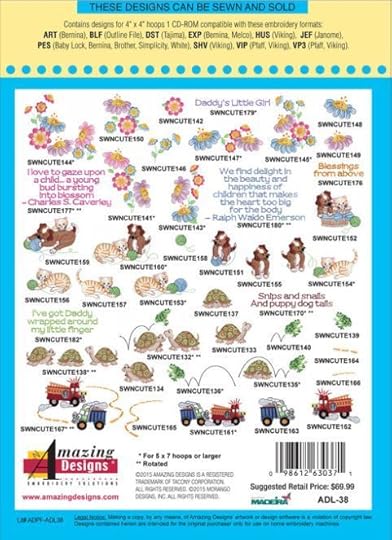
Embroidering for Kids Just Got Easier!

When I design embroidery collections, I always think in terms of coordinates. Fabric coordinates make it easy to design and sew a quilt with a variety of print sizes and color combos in one collection. The same principle applies to embroidery designs—a single motif, a grouping of that same motif—large and small, or an embroidery ideal for a border. Yes, coordinates make it easy to embroider!
Seven Cute for Kids Embroidery Coordinates
I started by sketching what I thought would be classic designs for newborns to toddlers: mid-century modern baby toys; playful elephants; fluttering butterflies; smiling flowers; curious puppies and kitties; turtles & leaping frogs; and animated trucks. Then, talented Sewing With Nancy artist, Laure Noe, took my rough designs and made my visions come to life.
Embroidery Coordinates
I rarely just stitch one embroidery design on a project. Rather, I like two or three of the same motif on the design. For example, the fluttering butterflies motif has ten coordinates. If you look at the product cover above, you can see the individual designs. Here the options are grouped together so that you can see the versatility of the embroidery coordinates.

I’m in the process of embroidering a baby layette. The playful elephants embroideries will someday make a great baby shower gift of a top, pants, and bib!

Bonus Bib Pattern
Three motifs are included within the Cute for Kids Embroidery Collection that are designed to fit a curved bib. Download the free bib pattern, cut two layers of fabric, fuse interfacing to the back of the fabric if needed, embroider one of the three curved embroidery designs, stitch right sides together using 1/4″ seam allowances, and add a snap or Velcro closure.

Note from Nancy: I used a No-show Fusible Mesh stabilizer in the hoop and a Wash-Away topping stabilizer.
Embroideries are Great for Quilts

The Cute for Kids Embroidery Collection CD purchase includes a FREE Baby/Lap Quilt Showcase Pattern.
Alternate embroidered blocks with Log Cabin blocks. The 36″ square quilt is an ideal palette for showcasing embroidery.

Position the single embroidery motif in the center of the Log Cabin quilt block—it’s a perfect fit!

Use the linear design as embellishment for the quilt border.

Say it with Needle and Thread!
Cute little sayings, especially those relating to babies and toddlers, can’t help but bring a smile. There are eight timeless phrases that complete this embroidery collection. Hmm, just think of where you can say a word or two.


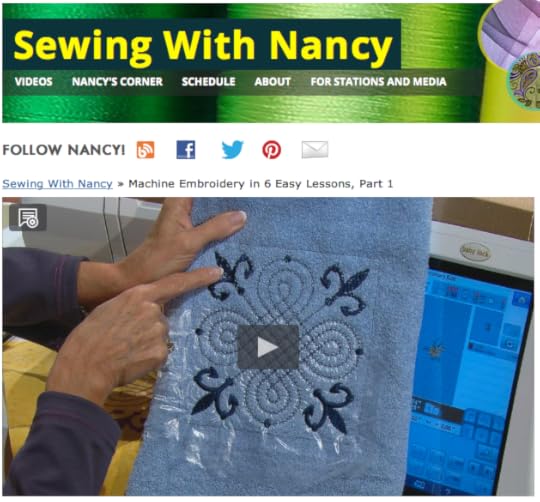
Embroidery Lessons on Sewing With Nancy
Polish your embroidery skills by watching Machine Embroidery in Six Easy Lessons Part One and Machine Embroidery in Six Easy Lessons Part Two with guest Eileen Roche.
For a chance to win a Cute for Kids Embroidery Collection, please leave a comment sharing where you’d add these adorable embroideries.
The random winner of Sew Simple with Rectangles & Squares is Precilla Palmer. She said, The smallest scrap I keep is 1″; you never know when you might need it for an appliqué!
Bye for now,
Content in this feed is © copyright 2015 by Nancy Zieman and may not be republished without written permission. You’re welcome to forward the email to a friend or colleague but it’s not okay to add the RSS feed automatically as content on a blog or other website.
March 7, 2015
Nancy Zieman 2015 Pillow Challenge Voting Begins
On my February 3 blog posting, I kicked off the first annual Pillow Sewing Challenge. I am thrilled so many of you decided to step up to the challenge. Each participant was asked to sew and submit up to four pillow projects. Five prize winners will be selected based on YOUR votes and you can vote up to five times.
Can you ask friends to vote? Certainly! Share this blog post? Please. Each person will be able to cast up to five unique votes.
Good luck! The voting will close on March 14, 2015. We’ll announce the winners, at my blog, on March 17, 2015.
Tech Tip from Nancy: If the images are small on your computer screen, use Ctrl + to increase the images on the screen. Use Ctrl – to reduce the size when finished.

—————————-
An InLinkz Link-up
—————————-
Here’s a listing of the prizes that will be awarded to the top five vote winners:
First Place: A Bundle of Products from Pellon, $115 value!
Second Place: Madeira Aerofil 18 count thread pack, $60 value from
Madeira. Plus a Pellon Pillow Insert!
Third Place: The Absolute Easiest Way to Sew Book & DVD from Nancy’s Notions, value of $34.98. Plus a Pellon Pillow Insert!
Fourth Place: Fabric Bundle from Riley Blake Designs, $25 Value. Plus a Pellon Pillow Insert!
Fifth Place: Hobo Tote Template from Clover, $19.95 value. Plus a Pellon Pillow Insert!
Each Pillow Sewing Challenge prize winner (above) will receive a Pellon® HomeGoods Decorative Pillow Insert, 16″ x 16″. Value $10.99Thank you to our sponsors!
2015 Pillow Sewing Challenge Schedule
March 7: Voting Opens
March 14: Voting Closes
March 17: Winners Announced
————-
Bye for now,
Nancy Zieman—author, pattern designer, businesswoman, producer, and national sewing authority—is the host of the popular show Sewing With Nancy®, which appears exclusively on public television stations across the United States and Canada. Follow Nancy’s blog at NancyZieman.com/blog and sign up to receive Nancy’s E-News for the latest news in sewing, quilting, and creating.
Content in this feed is © copyright 2015 by Nancy Zieman and may not be republished without written permission. You’re welcome to forward the email to a friend or colleague but it’s not okay to add the RSS feed automatically as content on a blog or other website.
March 5, 2015
Sew a Versatile Hobo Tote
I like to create bags and totes, just like you. The roomy Hobo Tote style is my go-to bag pattern of late. This tote is a versatile pattern and is an ideal palette to showcase a casual, coordinated fabric collection. Give the tote a classic look by adding tailored touches and using a sophisticated color combo.
My Sewing With Nancy program, Hobo Totes—Casual to Classic, is the online video feature this week. I began with the Trace ‘n Create Template—Hobo Tote Collection. It’s a template set with just two pieces, but what great options those two templates give you! You’ll see eight options shown in the blog. Vote for your favorite; see details below.

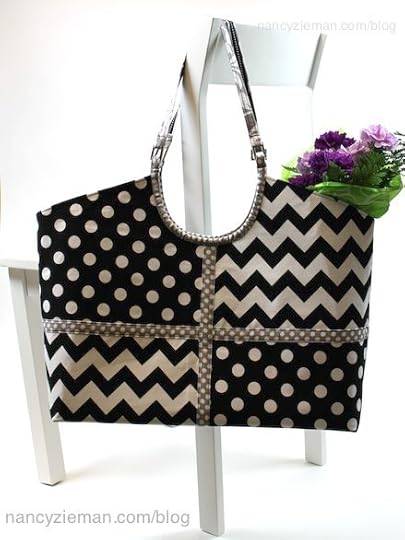
When I originally designed the Hobo Tote, I simply used the template as is. A few other options include using the four sections of the template (great for fat quarters), two-fabrics, or one feature fabric to change up the look.
Four-Section Design—Option #1
Two-Fabric Design—Option #2
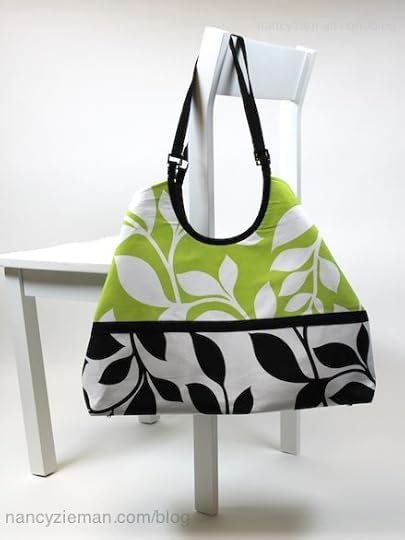
One-Fabric Design—Option #3
A pattern with so many variables!
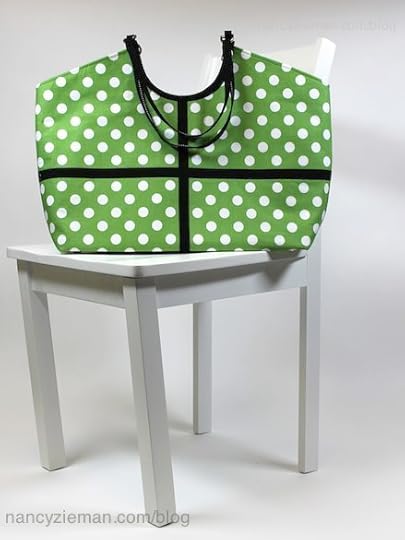
First, the Quick-Change Hobo Tote—Option #4
Now, learn how to accessorize this template or your favorite tote or bag pattern. Classic colors and the addition of belt loops make this version of the Hobo Tote very adaptable. A modified belt takes center stage in this version.
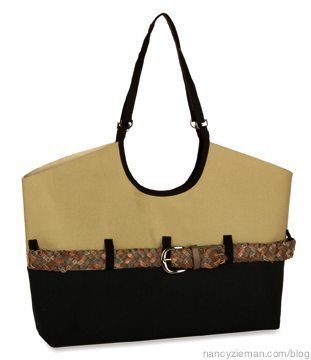
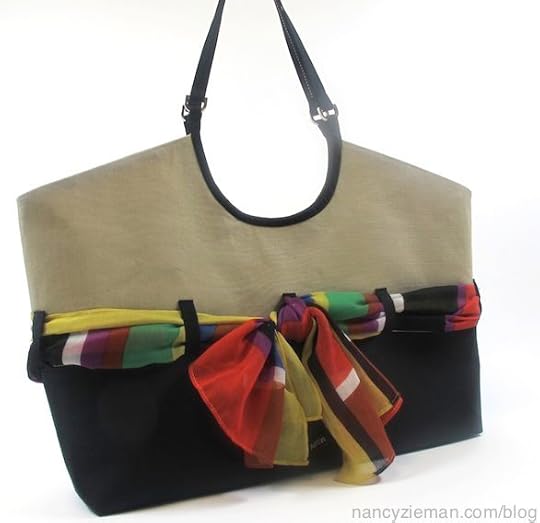
Scarves Are Not Only for Necklines—Option #5
The look can easily change in seconds by replacing the belt with a scarf. In the video or in the book you’ll learn this quick-change idea. With this neutral classic-toned bag, a scarf for every season and mood will add to its fashion range.
Next, Stitch a Quilted Cotton Hobo Tote—Option #6
This tote is equally laid back and casual. Using a reversible, quilted cotton fabric, create a tote that is on trend with the popular ready-made brands. Using reversible fabric, the lining of your tote is omitted, making this a speedy tote to stitch. The inside details are fun to create. I’ll show you how online or read about it, too!

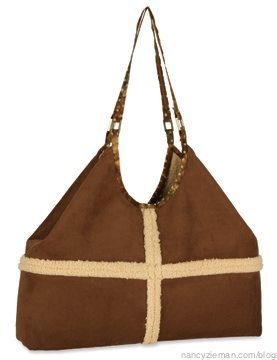
HUGG Tote—Option #7
If you’re sporting a pair of the ever so popular sheepskin boots, complete the look with a HUGG Tote! The fabric looks like sheepskin, but it’s faux sheepskin and soft like a hug. Hence the name HUGG Tote. Using many of the same sewing techniques from the Cotton Quilted Hobo Tote, make your own faux sheepskin tote, in two evenings of time.
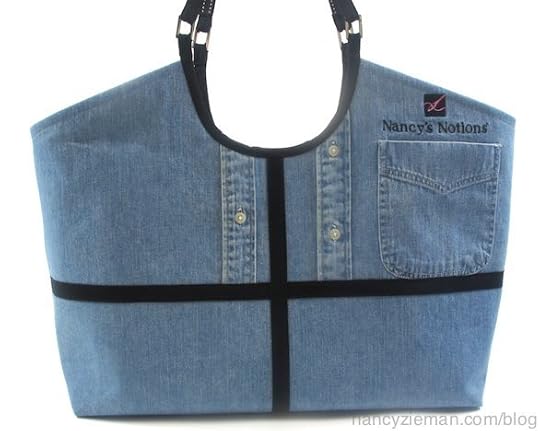
Shirt Off My Back Tote—Option #8
When you get tired of wearing a shirt, carry it instead—Hobo Tote style. Since most Hobo patterns make large totes, a size medium or larger shirt is the perfect up-cycled fabric choice. Incorporate shirt details in the tote for the look of a well-seasoned drifter.
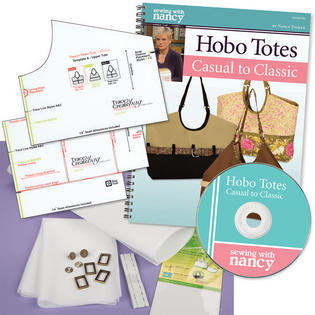
Book and Template Combo
If you’d like to receive all the instructions and the template, Nancy’s Notions has paired them together. Or, you can buy a starter pack, or just the book! There are lots of choices.
Watch Sewing With Nancy online.

To watch Sewing With Nancy on your iPad, iPod Touch, or iPhone, download the app.
Which is your favorite Hobo Toto option? Leave a comment below. A random winner will receive a Trace ‘n Create Template–Hobo Tote Collection and will be announced next week Thursday.
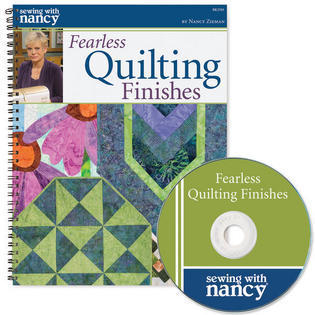
The random winner of Fearless Quilting Finishes is Kathy who said, I love a double border. I have seen Prairie Points on a border and would like to try this sometime.
Bye for now,
Nancy Zieman—author, pattern designer, businesswoman, producer, and national sewing authority—is the host of the popular show Sewing With Nancy®, which appears exclusively on public television stations across the United States and Canada. Follow Nancy’s blog at NancyZieman.com/blog and sign up to receive Nancy’s E-News for the latest news in sewing, quilting, and creating.
Content in this feed is © copyright 2015 by Nancy Zieman and may not be republished without written permission. You’re welcome to forward the email to a friend or colleague but it’s not okay to add the RSS feed automatically as content on a blog or other website.
Nancy Zieman's Blog

- Nancy Zieman's profile
- 21 followers

