
Nancy Zieman's Blog, page 128
May 9, 2015
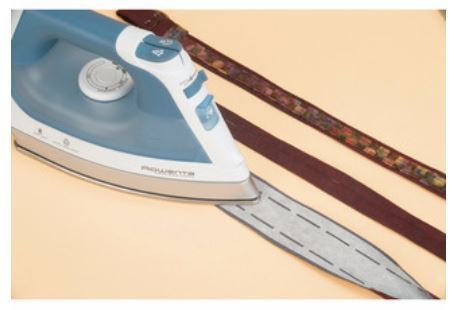
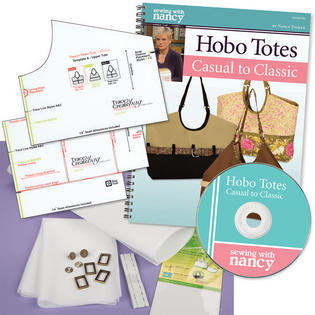
Hobo Tote Skinny Handle Upgrade

Enjoy the style of narrow straps with the benefit of being durable. The bag is created with the Trace ‘n Create Hobo Tote Template with an upgrade of double handles. Here are the simple steps to create this go-to handbag.
Extra Supplies:
Two packages of 1″ Create-a-Strap instead of one package of 5/8″ Create-a-Strap.
Double Handle Instructions:
Follow the instructions within the packaging of the Trace ‘n Create Hobo Tote Template, including these modifications for the handles.
Cut two, 2″ x 40″ crosswise strips of fabric for the handles.
Fuse the Create-a-Strap to the wrong side.
Fold and press along the lengthwise perforations.
Press a second time, meeting wrong sides and folded edges. The 1″ strap will now be 1/2″ in width.
Pin or clip the folded edges.


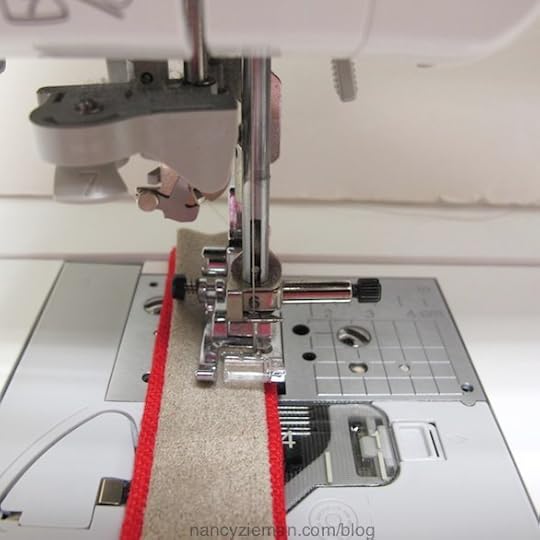
Edgestitch the folded edges, starting 3” from the beginning and leaving 3” at the end.


Insert the straps through the D-rings. Do not twist the straps.

Unfold the short ends, align right sides, and stitch short ends of each strap with a 1/4″ seam, making a continuous loop. Press the seam open.

In the unsewn area, refold along the perforations, fold a second time, and edgestitch the folded edges.

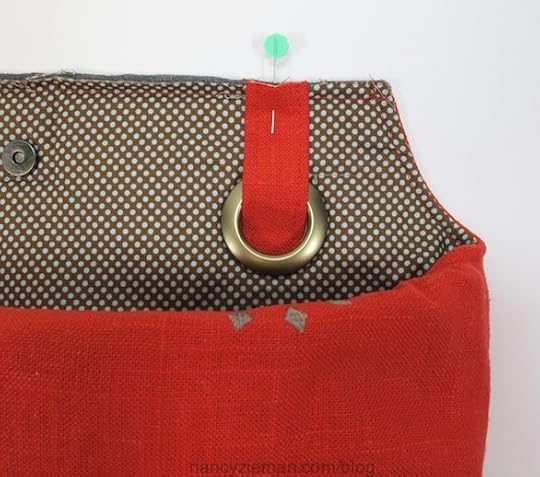
Insert the D-rings through the strap connectors, which are sewn to the bag.
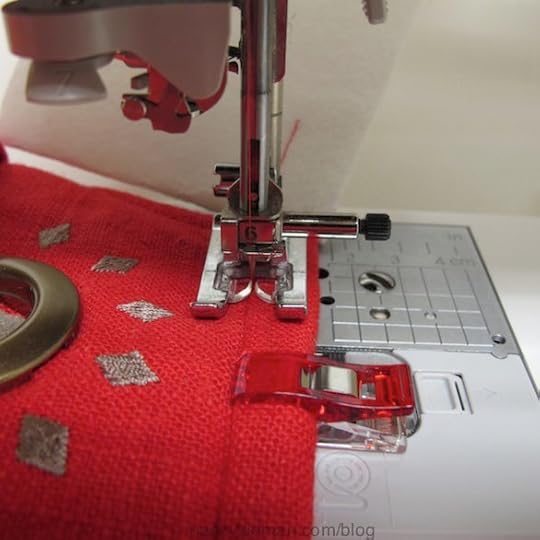
Align the double layers of each handle. Pin or clip above the D-Ring.

Move the needle position to the left.
Stitch through both layers above the D-Ring.

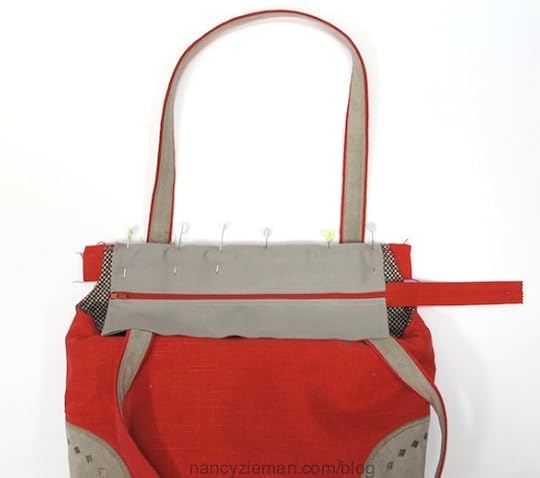
Mark the center of each double strap.
Place double straps on the end of an ironing board. Pin layers together 1-1/2″ on each side of the center mark.
Stitch double straps together in this 3″ area to keep the handles from separating.


Watch Hobo Totes—Casual to Classic on Sewing With Nancy online.
To watch Sewing With Nancy on your iPad, iPod Touch, or iPhone, download the app.
Bye for now,

Content in this feed is © copyright 2015 by Nancy Zieman and may not be republished without written permission. You’re welcome to forward the email to a friend or colleague but it’s not okay to add the RSS feed automatically as content on a blog or other website.


May 7, 2015
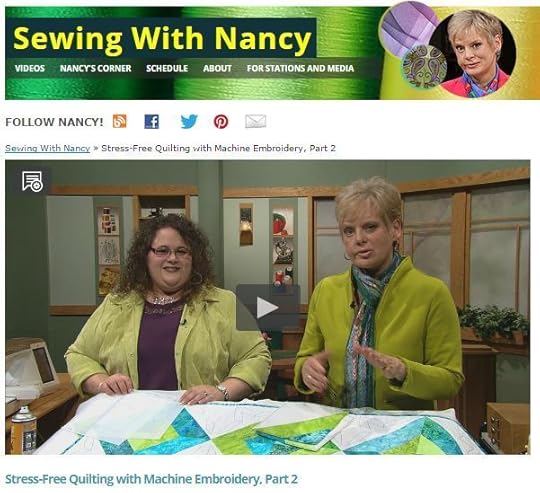
Stress-Free Machine Quilting with Embroidery Designs
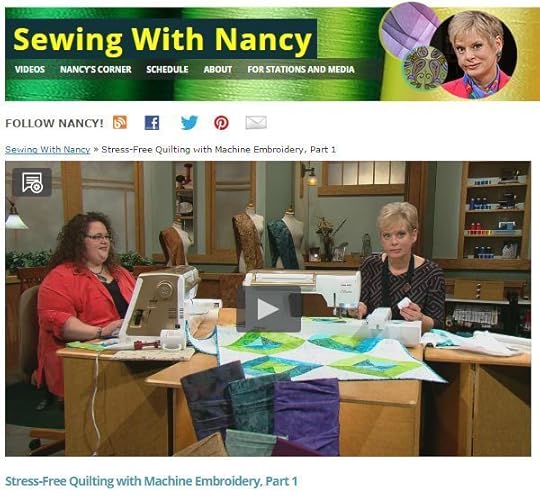
Sometimes the quilting step is the most perplexing and stressful. Your goal is for a stress-free process, but where to begin? Denise Abel, my guest on Sewing With Nancy, has a solution—use an embroidery machine and turn it into a quilting machine. Denise joins me for the second part of this series, Stress-Free Quilting with Machine Embroidery, which is this week’s online video feature. Watch the second part on Sewing With Nancy, online.
First Episode Highlights
During the first program of this series, Denise and I showcased piecing simple blocks using an embroidery machine. If you missed that episode, click here to watch! Programming the design into the embroidery machine yields precisely stitched blocks with unbelievable accuracy.
Highlights from the Second Episode
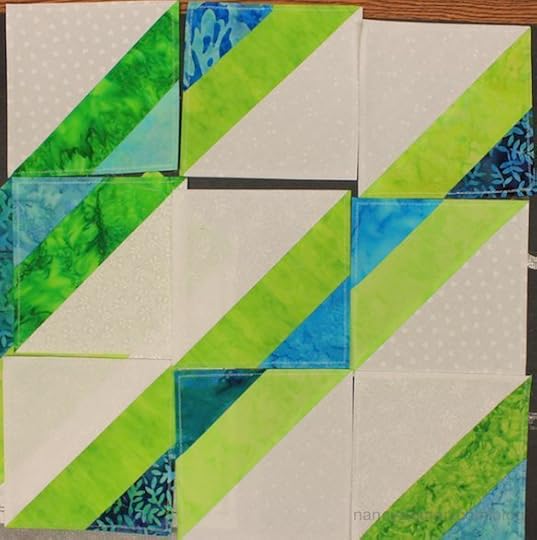
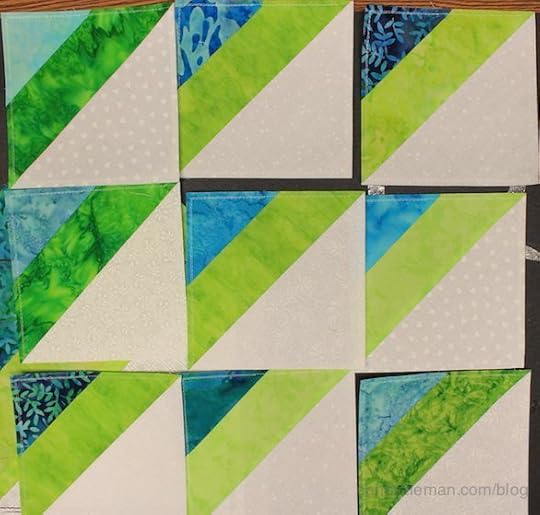
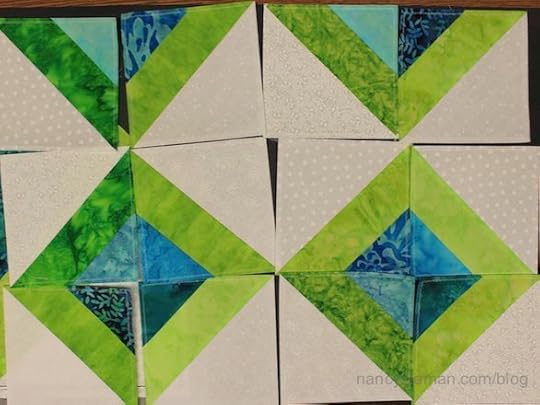
Determine the layout of the blocks. For the Simple Shadow blocks, there are a few design options.
Stress-Free Hooping
Positioning the three layers of a quilting sandwich—backing, batting, and pieced top—evenly into a hoop might seem tricky at first glance! Not so, with these techniques.
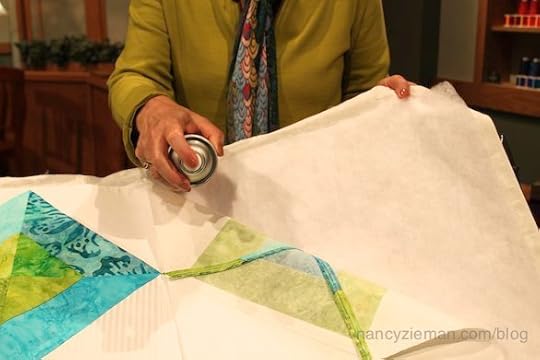
First option: Spray baste the layers together
Tape backing to tabletop, wrong side up.
Lightly spray baste the backing fabric with KK2000 .
Position batting.
Lightly spray baste the batting.
Position pieced top; right side up.
The quilt sandwich is ready to hoop.
Second option: Fuse-tack the layers together.
Cut 1/2″ wide strips of Wonder-Under
Press 1/2″ wide strips of Wonder-Under to the wrong side of backing and quilt top.
Press 1/2″ squares in place, a fist width apart.
Remove paper backing.
Press layers together.
The quilt sandwich is ready to hoop.

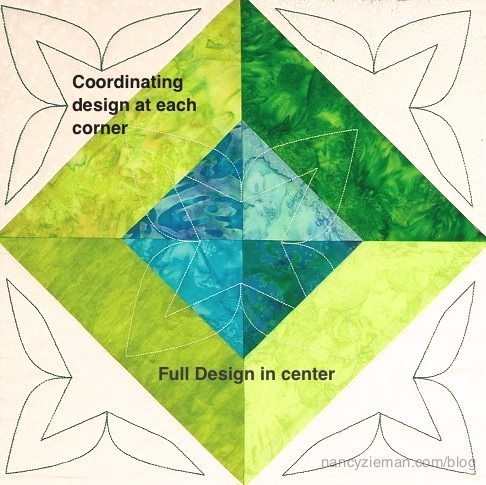
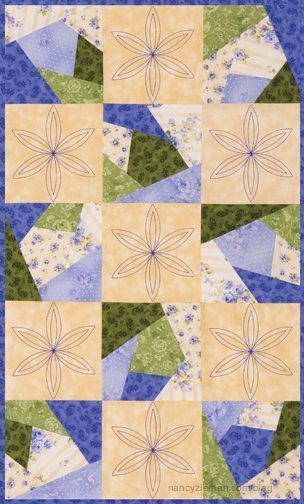
Choose a quilting embroidery design
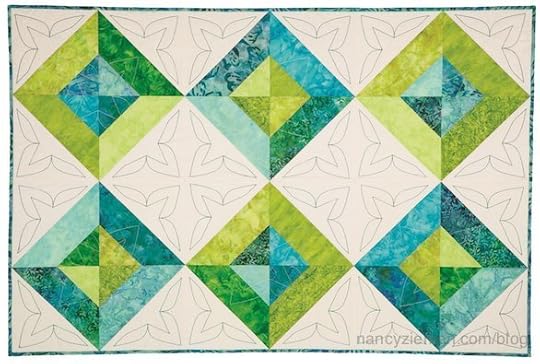
There are 24 quilting designs available with the book purchase. The two designs that were used to quilt the layers of this lap quilt are featured below.
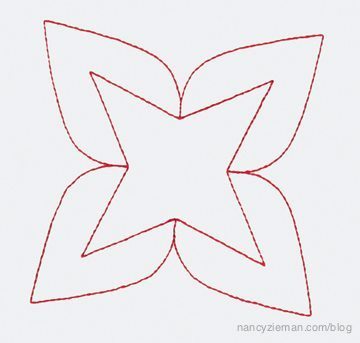
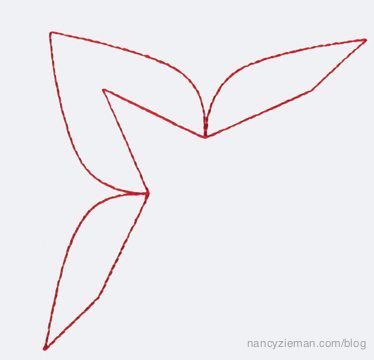
There are other embroidery designs that are digitized for machine quilting. Look for designs that have compatible components such as a square, a 1/2-square triangle, or borders.
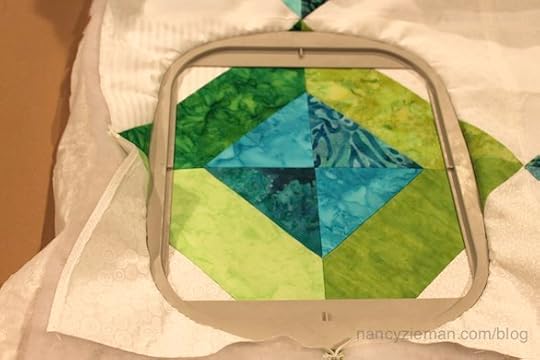
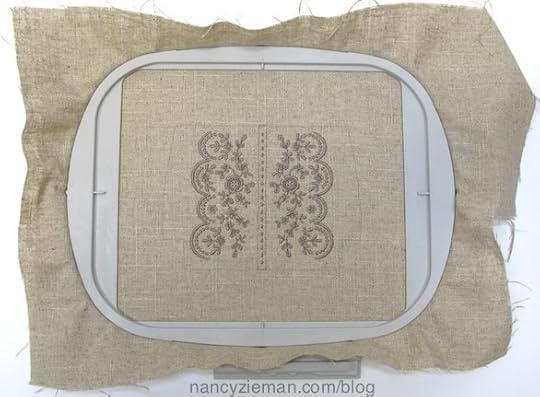
Attach embroidery hoop
Mark center of each block with a wash-away marking pen . This block has a seam at the center, which eliminates this step.
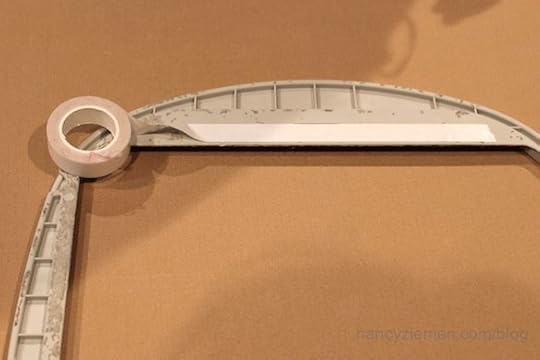
Add double-sided basting tape to the underneath side of the inner hoop. (Can you see the shadow of my hoop earring in this shot? The photo was hurriedly taken at the studio during a recording day!)
Position hoop on fabric, aligning crossmarks of hoop with wash-away marks on fabric or crossmarks on template.
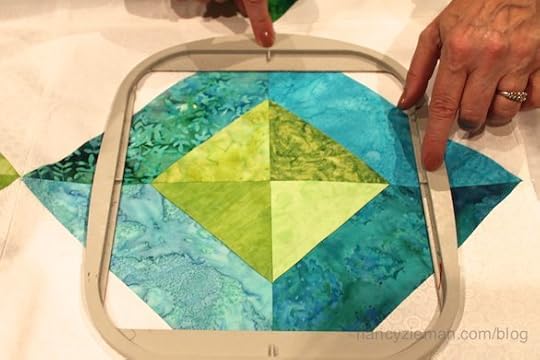
Place outer hoop underneath the quilt sandwich; loosen the screw. Insert inner hoop into the fabric. Tighten screws.
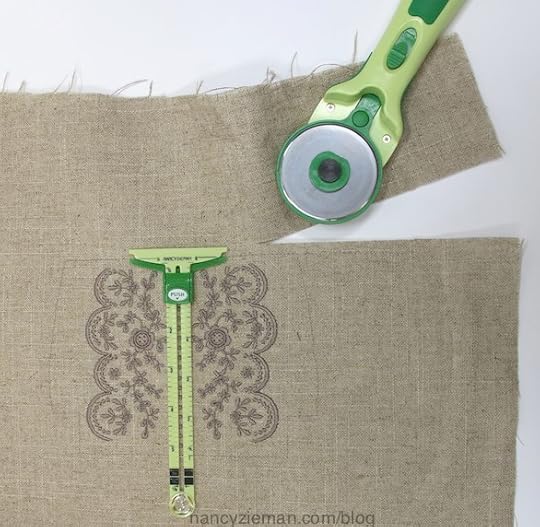
Remove template if a template was used.
Close-up of the quilting stitches
Denise used white thread to stitch the full embroidery design in the center of the pieced blocks and the design that fills a 1/2-square block in the corner of each white triangle.
Watch Stress Free Quilting with Machine Embroidery Part Two on Sewing With Nancy online.
To watch Sewing With Nancy on your iPad, iPod Touch, or iPhone, download the app.

Leave us a comment sharing the most stressful step in the quilting process to be entered to win a copy of Stress-Free Quilting with Machine Embroidery. A winner will be chosen randomly and announced on May 14.
Bye for now,
Content in this feed is © copyright 2015 by Nancy Zieman and may not be republished without written permission. You’re welcome to forward the email to a friend or colleague but it’s not okay to add the RSS feed automatically as content on a blog or other website.
May 6, 2015
Personal Note from Nancy Zieman

Dear Sewing and Quilting Friends,
Thank you for following my blogs and for watching Sewing With Nancy.
Some of you, who have read Seams Unlikely, already know that my life has been filled with detours due to medical issues.
Recently my life has taken another detour. I’ll explain in the video.
http://www.youtube.com/watch?v=7kkTp8vdj_0
Please know that I am rendered cancer free at this time. I’m feeling remarkably well and have been showered with love and friendship. The purpose of this video is not to alarm you, only to explain why you might see changes in the upcoming Sewing With Nancy season and my travel schedule. Most of all, it is meant to reassure you, that I’m doing well and being very well cared for.
Bye for now,
Nancy Zieman—author, pattern designer, businesswoman, producer, and national sewing authority—is the host of the popular show Sewing With Nancy, which appears exclusively on public television stations across the United States and Canada. Follow Nancy’s blog at NancyZieman.com/blog and sign up to receive Nancy’s E-News for the latest news in sewing, quilting, & creating.
Content in this feed is © copyright 2015 by Nancy Zieman and may not be republished without written permission. You’re welcome to forward the email to a friend or colleague but it’s not okay to add the RSS feed automatically as content on a blog or other website.
May 5, 2015
Nancy Zieman Knit Dress Sew Along, Part One
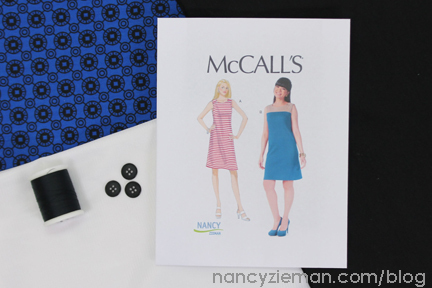
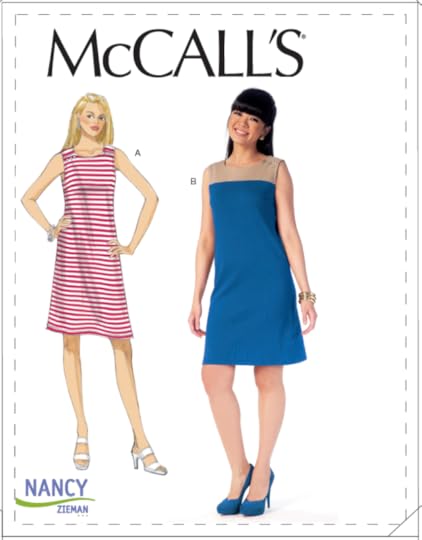
Welcome to the first day of the Nancy Zieman Knit Dress Sew Along! I’m glad you are joining me to sew McCall’s M7152. The dress is a great addition to any spring wardrobe. Today’s focus is on fabric and interfacing choices, yardage, and pattern cutting directions.

Gather the supplies listed on the back of the McCall’s pattern envelope. For the sew along, I am creating the dress with a contrasting yoke.
Ponte Knit —dress body
Ponte Knit —dress yoke
Knit Interfacing
Pattern M7152
Klasse Ball Point Needle, Size 80/12 .
Buttons
All-purpose polyester thread
Non-Permanent Marking Pen
Determine Your Yardage
Use the back of the pattern envelope to determine your required yardage. As you may know, the size listed for sewing patterns is different than the size worn in “off-the-rack” clothing. Sewing pattern sizes are based entirely on your body measurements.
Grab a tape measure and jot down your Bust, Waist, Hip, and Back-Neck length before purchasing fabric. For best results, work with a sewing buddy.

Fabric and Interfacing Choices
Working with knits shouldn’t be daunting or intimidating. First, let’s talk about the recommended fabric for the knit dress: Ponte Knit.
Ponte knits are double knits; in simple terms, double the weight of a T-shirt or single-knit jersey.
The fiber content of the Ponte knit that I chose is rayon, polyester, and spandex. The weight of this fabric enhances most body shapes, travels without ironing, is colorfast, and is easy to launder.
The fabric you choose might include wool or cotton. The key element is to choose a fabric with a minimum of 3%–5% spandex, which gives the fabric shape and retention.

Your final fabric consideration must be the stretch. Test the crosswise grain of the fabric by positioning 4″ of fabric along the top back envelope. Stretch the knit to the second position on the guide. The fabric must stretch to the second position on the guide to be suitable to use with this pattern.

Note from Nancy: Knits need to be pretreated just as woven fabrics do. Excess finishes need to be removed, and shrinkage needs to be controlled before cutting out the fabric. Prewash your knit fabric using a mild soap or baby shampoo to keep colors bright.
Choose an interfacing. For best results, use a fusible knit interfacing, such as Pellon Fusible Easy Knit Interfacing . Since the fabric and interfacing are the same type, they will behave in the same manner when worn and washed.

Needles
Stretch needles and ballpoint needles are designed with a medium ballpoint tip that prevents snags on knits fabrics. The ballpoint needle works well on sweater-type knits. The eye and scarf of the stretch needle are specially designed to prevent skipped stitches on highly elastic knits such as spandex. For this Ponte knit dress, I’ll be using a Klasse Ball Point Needle, size 80/12.

Begin with the Tissue Patterns
Open the pattern to find the guidesheet page and look for the section that details the pattern pieces needed for the dress view that you’re planning to sew.
Find the numbered pieces in the tissue and roughly cut out.
Place Pattern Tracing Paper over the multi-sized pattern; trace your size. Then, cut along the traced line with a paper scissors.
Note from Nancy
Before laying out your pattern, determine the pattern size and make any adjustments. Though I’m not covering fitting tips during this sew along, reference my , and/or watch my Fit With Confidence Techniques on YouTube.
Layout and Cut Out the Pattern Pieces
Open the main dress fabric.
Fold each selvage edge towards the middle.
Place each piece according to the layout illustration found on the guidesheet.
Use pattern weights or pins to hold the pattern tissue in place.
If using a printed knit fabric, pay careful attention to the direction of the print. Pin the patterns to the fabric using the “with nap” layout, positioning the tops of each piece facing the same direction. (You’ll find the layout on the guidesheet.)

If working on a large cutting mat surface, use a rotary cutter to carefully cut along your marked size line. Or, cut out the pattern pieces, using your favorite fabric shears.

“Nip” a 1/4″ clip into the seam allowance at each notched mark.

Mark the darts by placing a pin at the apex point of the dart, through both layers of fabric. Nip into the seam allowance at each end of the dart legs.

Fold the tissue and one layer of fabric to reveal the fabric “wrong side” and the pin.

Mark the pin points with a non-permanent marker .

Cut Out the Yoke
Open the yoke fabric completely.
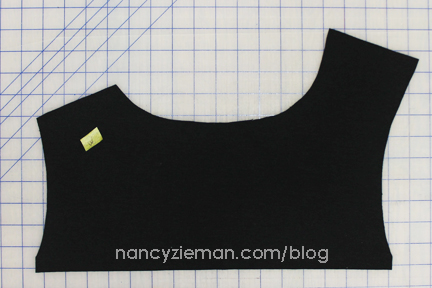
Arrange the pattern pieces as described in the guidesheet layout diagram. Keep in mind that the yoke is asymmetrical. It is critical to place the pattern tissue print-side-up on the fabric.

Lay out the yoke facing pattern pieces on the interfacing pieces. Make sure the pattern is print side up and the interfacing is adhesive side down.
Cut.

Mark the right side of the asymmetrical yoke with a sticker.
Note from Nancy: When working with knit fabrics, it is helpful to mark the right side of the fabric with a small piece of tape. Knit solids can often be difficult to discern right and wrong fabric sides.
With all the pieces cut out, you and I will be ready for Part Two of the Nancy Zieman Knit Dress Sew Along, next week.
Use the link tool below to share your progress. Click the “add link” button (below) to enter your work directly to the gallery. If you aren’t able to upload; simply email the photo to info@ziemanproductions.com.
————————————-
An InLinkz Link-up
————————————-
Share your Nancy Zieman Knit Dress Sew Along
If you have a blog site, website, or online social sewing group, feel free to grab the code and share this button.

If you are on social sites like Instagram, Twitter, Flickr, or Facebook, let all your friends know you are working on the Knit Dress Sew Along by tagging your post with the hashtag: #NZKnitDressSAL
The hashtag is a searchable “word” associated with an event or activity, which, when searched on popular social websites, like Instagram, Twitter, Flickr, and Facebook, will show every single post using that hashtag. Even if you don’t personally know that seamstress, you’ll see her/his progress and a photo. Hashtags are a fun way to network and connect with people who share similar interests.
Don’t forget to pin a picture from this blog post and tell all your sewing friends.
The more people who sew along with this project, the more fun it will be. I look forward to sewing along with you!
For additional tips on sewing knits, watch Sew Knits with Confidence on Sewing With Nancy online.
To watch Sewing With Nancy on your iPad, iPod Touch, or iPhone, download the app.
See the entire Nancy Zieman Knit Dress Sew Along schedule online here.
Bye for now,
Content in this feed is © copyright 2015 by Nancy Zieman and may not be republished without written permission. You’re welcome to forward the email to a friend or colleague but it’s not okay to add the RSS feed automatically as content on a blog or other website.
Nancy Zieman—author, pattern designer, businesswoman, producer, and national sewing authority—is the host of the popular show Sewing With Nancy®, which appears exclusively on public television stations across the United States and Canada. Follow Nancy’s blog at NancyZieman.com/blog and sign up to receive Nancy’s E-News for the latest news in sewing, quilting, and creating.
May 1, 2015
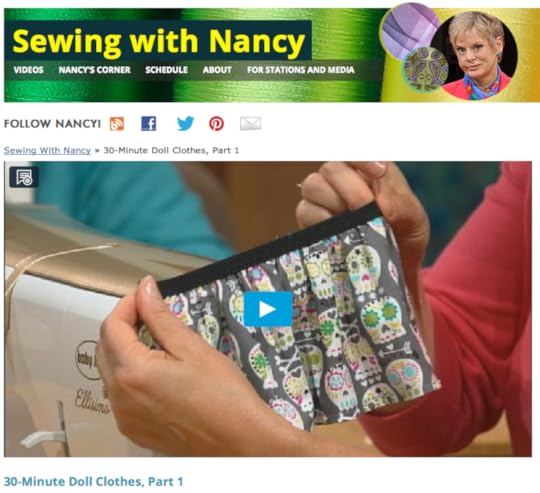
Easy 30-Minute Doll Clothes

Sewing doll clothes in 30 minutes sounds too good to be true, but when Joan Hinds proposed the idea of 30-Minute Doll Clothes for a Sewing With Nancy program, my interest piqued. I asked if the pieces could truly be made in just 30-minutes instead of several sewing sessions. Her answer—absolutely!
 I gave Joan the go-ahead to submit ideas centering on sewing for the popular 18″ dolls. She sent me sketches and photos. The difficult part was to narrow down the selections for a two-part TV series! Watch the 30-Minute Doll Clothes video.
Birthday Party Trio
The Birthday Party Trio is a double skirt, camisole, and leggings combo. It’s a mix and match ensemble that is a breeze to create. In the 30-Minute Doll Clothes DVD and book and on the TV show you’ll see how flat-construction tips streamline the process.
 Pretty and Perky Combo
Dig through your fabric scrap box and search for a pretty little print. With just a few straight seams and 30 minutes of time, you’ll be able to create a skirt. Spend another half-hour of time and stitch a top. The result is a pretty and perky combo.
 Speedy Sundress
Your favorite little girl can have an extensive doll wardrobe using Joan’s simple patterns and speedy sewing tips. This sundress, the Speedy Sundress to be exact, is so quick to sew that you could create two dresses in just about the same time as sewing one of them. Simplified techniques make it possible.
 Bonus Project
Joan stitched an updated version of her sundress since recording the TV show. Here are her hints:
Simply cut 2″ off the bottom edge of the original pattern. A band of two fabrics gives the dress more interest, while keeping the stitching time within 30 minutes.
Cut the top band 1-1/4″ wide and fold it in half lengthwise.
Place it over the bottom band, which is 2-1/2″ wide. Match the raw edges.
Then, stitch the double band to the lower edge of the dress.

Tea Time
This doll is set to attend an afternoon tea party. Bolero jacket and dress—a perfect combo—like tea and cookies, will delight any little girl.
 Meet Me at the Mall
Our next doll is ready to go shopping. The knit shirt, top, and skirt ensemble is the perfect outfit for a doll to wear during an imaginative Meet Me at the Mall outing.
 Popular Book with Patterns!
You’ll find all the instructions and patterns for these clothes and more in the book, 30-Minute Doll Clothes.

Watch 30-Minute Doll Clothes on Sewing With Nancy online.
To watch Sewing With Nancy on your iPad, iPod Touch, or iPhone, download the app.
Where Are They Now?
If you’re a long-time Sewing With Nancy viewer, you may remember my earlier doll clothes program, Girls ‘n Dolls, circa 2002.

The cute little girls featured on the cover of the book are now lovely young women. Instead of playing dolls, Morgan (left) and Caitlyn (right) are playing cards and talking about their future/current college days. Morgan is wearing the knit skirt from my Monterey Knit Collection Pattern and Caitlyn is wearing the knit top from the same pattern. Thank you Morgan and Caitlyn!


The random winner of a M7152 Knit Dress Pattern from The McCall Pattern Company is Becky M. Be sure to join the Sew Along.
Bye for now,
Content in this feed is © copyright 2015 by Nancy Zieman and may not be republished without written permission. You’re welcome to forward the email to a friend or colleague but it’s not okay to add the RSS feed automatically as content on a blog or other website.
April 30, 2015
Stress-Free Quilt Piecing with Machine Embroidery

Do you love quilting and not love quilting at the same time? Quilting for non-quilters, that’s what this Sewing With Nancy program is all about. Let my guest Denise Abel and I show you how to turn your computerized embroidery machine into a quilting machine. Denise is the embroidery and quilting expert on the Sewing With Nancy team.
Here’s a preview of what you’ll learn on TV!
The piecing of the Simple Shadow Block was stitched on a stabilizer, assuring precise piecing without precise cutting of strips. You can piece a quilt without being a quilter! Denise and I developed a book with 30 embroideries, some of the embroideries are for piecing, the others for quilting! The embroideries are found on the companion CD that is included with the Stress-Free Quilting with Machine Embroidery book. Here are the specifics—it’s quite a deal!
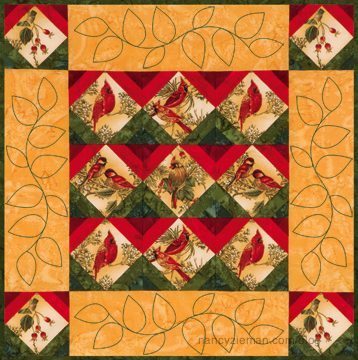
Four piecing quilt block designs: Simple Shadow blocks, Quilt Charm blocks, Fancy Squares blocks, and Crazy Quilting blocks.
Six quilting designs: Leaves block, Leaves border, Flower block, Flower half, Modern Star block, and Modern Star half.
Includes 10 designs in three sizes each for a total of 30 designs:
30 designs: 10 (5″ x 7″), 10 (6″ x 10″), 10 (8″ x 8″).
Includes:
Thread color sequence charts for each design.
10 embroidery formats: ART, BLF, DST, EXP, HUS, JEF, PES, SHV, VIP, VP3
Amazing Designs Edit Xpress software to re-size, re-color, preview and print Amazing Designs collections.

How to piece a quilt block in an embroidery hoop
Listed below is an overview of the technique. There’s more detail shown on the TV show and in the book. Each quilt block design is available in three sizes. Obviously, the larger the block, the larger the embroidery hoop size is needed:
8″ block requires an 8″ x 8″ or larger hoop
6″ block requires a 6″ x 10″ or larger hoop
5″ block requires a 5″ x 7″ hoop or larger
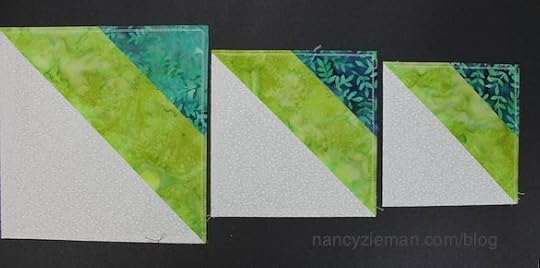
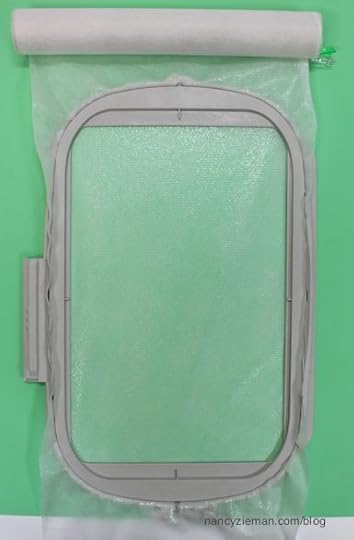
Hoop a Fusible Mesh Cut-Away Stabilizer , fusible side up. (The photos feature a 5″ block.)
Select three fabrics: a light, medium, and dark. Cut 6-1/2″ squares of the light (white) color; then cut them in half, point to point, to create 1/2-square triangles.
Set up the sewing machine with the embroidery unit and appropriate foot.
Import and select the embroidery design for the Simple Shadow Blocks. (There are four other blocks to choose from!)
Select all-purpose poly or poly/cotton thread; wind the bobbin with the same thread as used in the needle. A slightly contrasting color works best. (Now this is different! Rayon thread is usually used for embroidery but we’re piecing quilt blocks!)
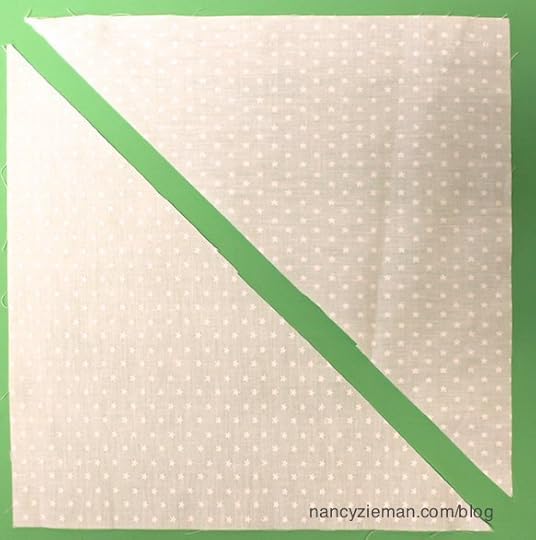
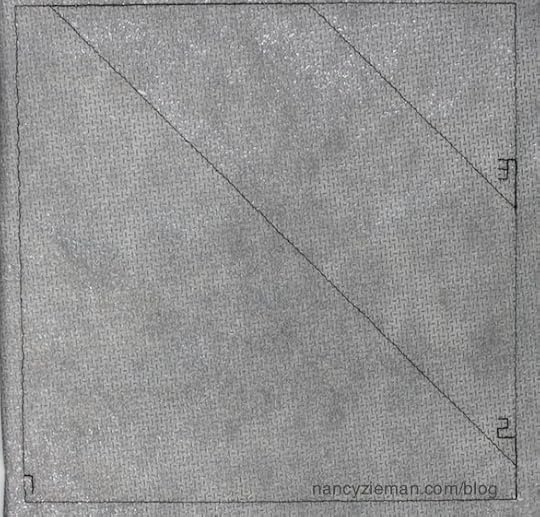
Stitch the first thread color directly on the stabilizer, the outline of the quilt block plus the numbers 1–3.
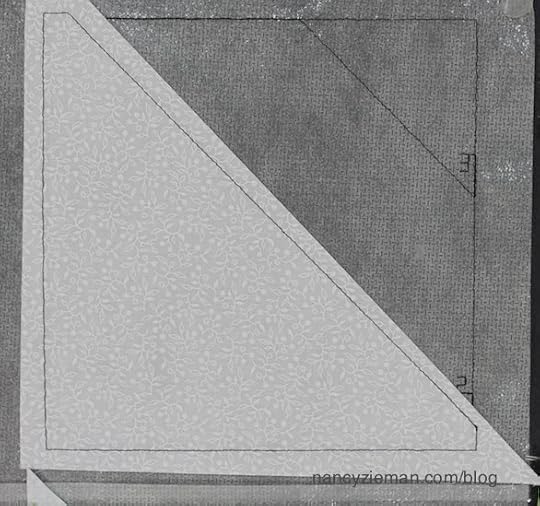
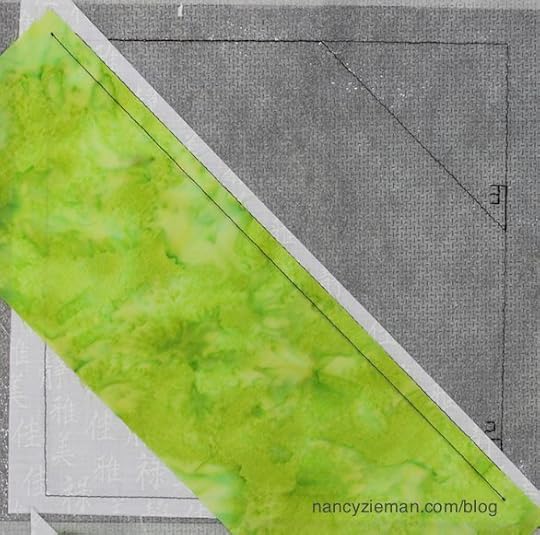
Place the ½-square triangle of color #1 over the section marked #1—right side up. The fabric must extend beyond the stitching lines.
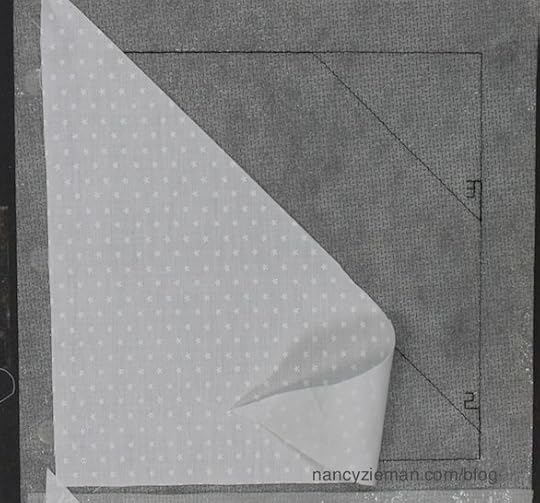
Stitch the second thread color, which bastes down fabric #1.
Align fabric strip #2 along the diagonally stitched line, right sides together. Make certain that the fabric is extending ½″ beyond the outline on the stabilizer at the upper left corner.
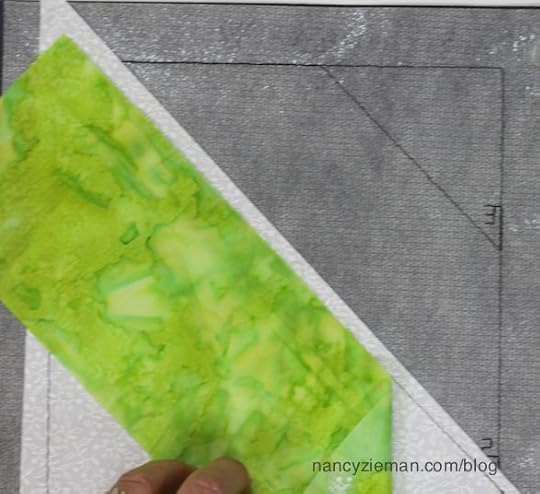
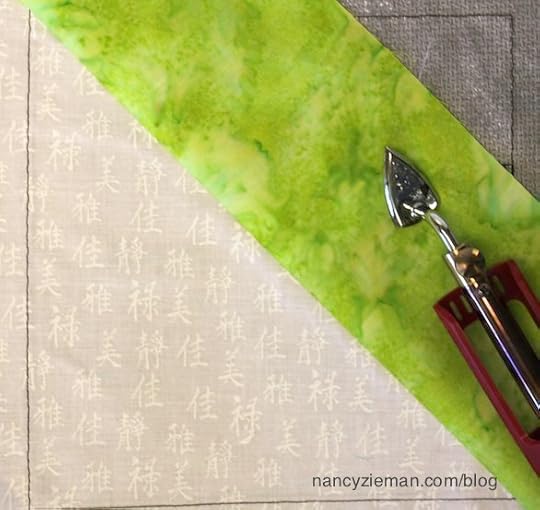
Stitch the third thread color.
Trim away the excess fabric along the previously stitched line.
Fold up Color #2.
Press from the folded edge and work to the opposite corner so there are no wrinkles. (Watch how we press while the hoop is still attached to the machine. Learn how to make a portable pressing surface. ( Click here to view .)
Align fabric strip #3 along the previously stitched diagonal line, right sides together. Make certain that the fabric is extending ½″ beyond the outline on the stabilizer at the upper left corner.
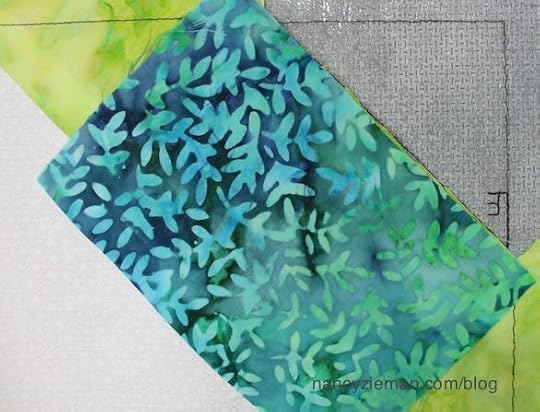
Stitch the next thread color, which attaches the fabric to the stabilizer
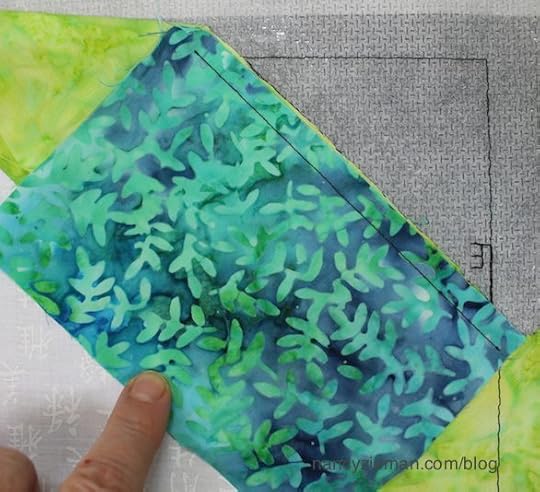
Trim away the excess fabric along the previously stitched line.
Fold up fabric #3. Press from the folded edge, and work to the opposite corner.
Then stitch the next thread color, which attaches the fabric to the stabilizer along the outer edges.
Stitch the final thread color. This stitching gives a cutting guideline.
Trim the block. It’s the perfect size!
There are more design options to piece with your embroidery unit. The best part is that each block is perfect in size!
Watch Stress Free Quilting with Machine Embroidery Part One on Sewing With Nancy online.
To watch Sewing With Nancy on your iPad, iPod Touch, or iPhone, download the app.
Leave us a comment sharing the most stressful step in the quilting process to be entered to win a copy of Stress-Free Quilting with Machine Embroidery. A winner will be chosen randomly and announced on May 14.

The random winner of Handbags 2—Designer Knockoffs is Bonnie. She said: I love them all, but my favorite is the red bag. Thanks for sharing your wonderful designer tips for sewing the bags.

Bye for now,
Content in this feed is © copyright 2015 by Nancy Zieman and may not be republished without written permission. You’re welcome to forward the email to a friend or colleague but it’s not okay to add the RSS feed automatically as content on a blog or other website.
April 28, 2015
Join Nancy Zieman’s Knit Dress Sew Along

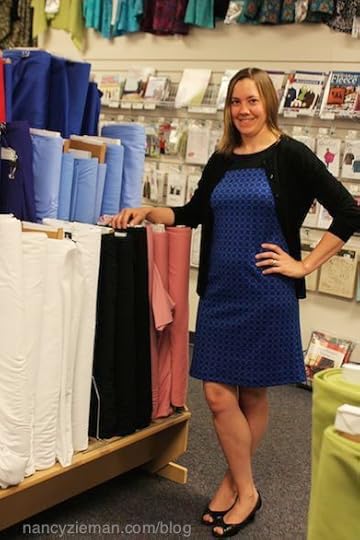
Meet M7152, my latest knit dress design with The McCall Pattern Company. Stacey, Nancy’s Notions Digital Assets Manager, took a break from her daily Photoshop and graphics work to model my latest dress pattern.
A few notes about the dress: The dress pattern features two different style variations, with a yoke and without. The fabric recommended for the dress is a ponte knit. The A-Line fit is flattering on many figure types and the hem is modest. Though the spring dress is sleeveless, it pairs nicely with a cardigan or light jacket as pictured above.
You can pick up the pattern at Nancy’s Notions, The McCall Pattern Company, or wherever you shop for McCall’s Patterns.

Knit Dress Sew Along
To kick off the M7152 Knit Dress pattern launch, I thought it would be fun to host a sew along. If you’ve never participated in an online sew along before, you are in for a treat. Think of this as a sewing guild or group, where we all are working on the same project, sharing our ideas, pictures and input as we go. I’ll lead the sew along with step-by-step instructions and images. There will be time to work on each step of the project. The sew along will be spread out over May, and include a photo round-up day in June. Mark your calendars:
Knit Dress Sew Along Schedule
May 5 – Kick Off: Pattern overview, fabric considerations, yardage, and cutting directions
May 12 – Dress construction tips and steps
May 19 – Finishing techniques and dress reveal
June 2 – Photo gallery showcase of all your progress and finished dresses

As you sew along, snap photos of your progress for the June photo round-up. We will be sharing photos, using an easy-to-use link-up tool. Throughout the sew along, post questions or comments below.
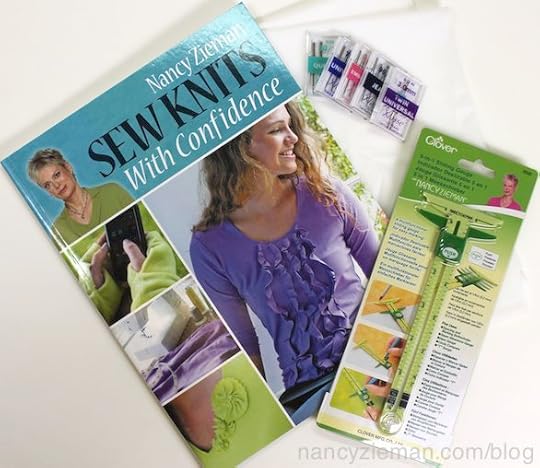
Sew for the Chance to Win!
When the sew along is complete and photos are uploaded to the link tool, one winner will be randomly chosen to receive a copy of my book, Sew Knits with Confidence, Klasse Needles Variety Pack, Clover 5-in-1 Sliding Gauge, plus one yard Pellon Easy Knit Interfacing. At the end of the sew along, a random winner will be announced in June.
Share your Nancy Zieman Knit Dress Sew Along
If you have a blog site, website, or online social sewing group, feel free to grab the code and share this button.
If you are on social sites like Instagram, Twitter, Flickr or Facebook, let all your friends know you are working on the Knit Dress Sew Along by tagging your post with the hashtag: #NZKnitDressSAL
The hashtag is a searchable “word” associated with an event or activity, which, when searched on popular social websites, like Instagram, Twitter, Flickr and Facebook, will show every single post using that hashtag. Even if you don’t personally know that seamstress, you’ll see her/his progress and a photo. Hashtags are a fun way to network and connect with people who share similar interests.


The McCall Pattern Company is giving away one M7152 Knit Dress Pattern to one lucky winner from this blog post. If you’d like to win McCall’s M7152 Knit Dress Pattern and join the sew along, please leave a comment below. The random winner will be announced on Facebook on Friday and repeated in Saturday’s blog post.
Don’t forget to pin a picture from this blog post and tell all your sewing friends. The more people who sew along with this project, the more fun it will be. I look forward to sewing with you!
Watch Sew Knits with Confidence on Sewing With Nancy online.
To watch Sewing With Nancy on your iPad, iPod Touch, or iPhone, download the app .
The random winner of Quick Column Quilts from last weeks blog is Kay Bennett. She shared the colors she’d use to make a Heartbeat Table Runner. She said: First I want to make one in red, white and blue to celebrate this great place we call home!
Bye for now,
Content in this feed is © copyright 2015 by Nancy Zieman and may not be republished without written permission. You’re welcome to forward the email to a friend or colleague but it’s not okay to add the RSS feed automatically as content on a blog or other website.
Nancy Zieman—author, pattern designer, businesswoman, producer, and national sewing authority—is the host of the popular show Sewing With Nancy®, which appears exclusively on public television stations across the United States and Canada. Follow Nancy’s blog at NancyZieman.com/blog and sign up to receive Nancy’s E-News for the latest news in sewing, quilting, and creating.
April 25, 2015
How To A Sew Scrappy Quilt Binding

Are you notorious for saving fabric scaps? Use those scraps to make variegated bias tape, trim, or binding by choosing three or more compatible coordinating fabrics. Sewing the strips together in a staggered or offset fashion creates a Barber Pole binding effect. This technique transforms even small fabric pieces into eye-catching finishes.
Cutting Guidelines
Select a group of fabrics that coordinate in color and fiber content.
Cut fabric strips 1″–4″ wide and at least 18″ long.
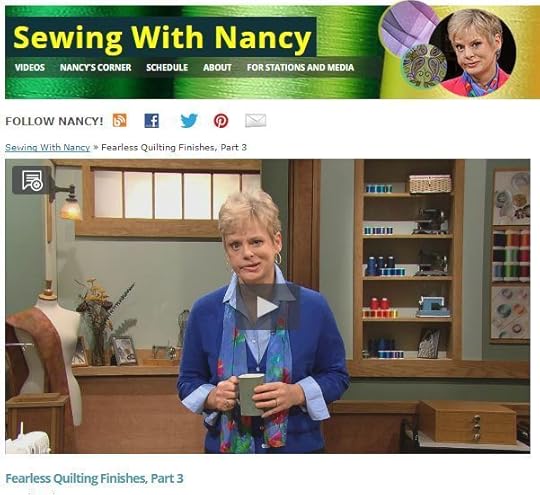
More details on binding application can be found in Fearless Quilting Finishes and in the Fearless Quilting Finishes three-part series on Sewing With Nancy ( Part One , Part Two , Part Three ).
Stagger the Strips
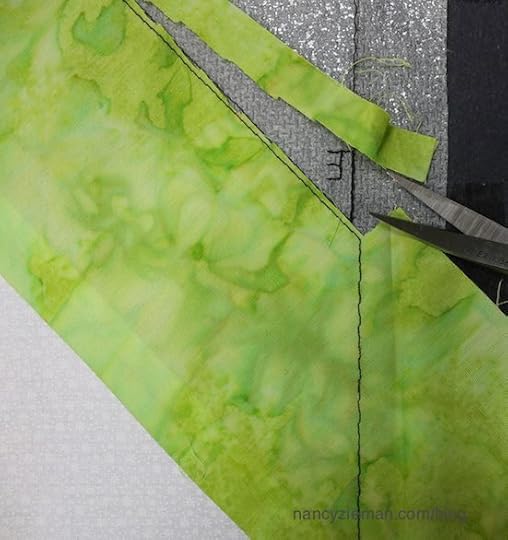
To get the maximum use from the fabric, offset ends of each strip to an approximate 45° angle when joining. I’ll show you how.
Fold the short end of the first strip down to meet the lengthwise side. Finger press the fold, creating a perfect right triangle.

Position the second strip even with the first strip’s triangle point.
Use a 1/4″ seam allowance to join strips.

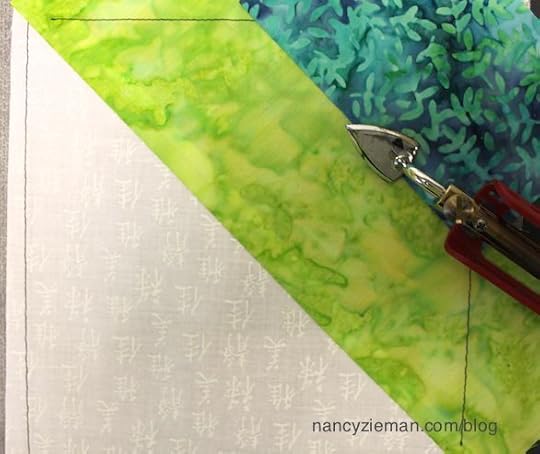
Fold the short end of the second strip up to meet the seamline. Finger press the fold, creating a perfect right triangle.

Add the third strip at the edge of the folded second-strip triangle.
Repeat these steps to join and stagger all fabric scrap strips.

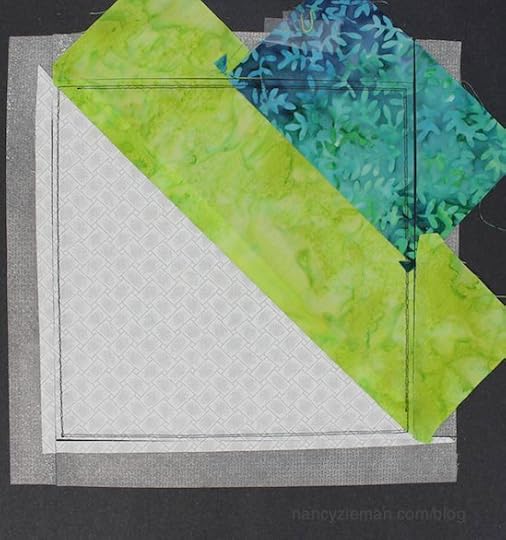
Press seam allowances toward the offset strip.
Cut Binding Strips
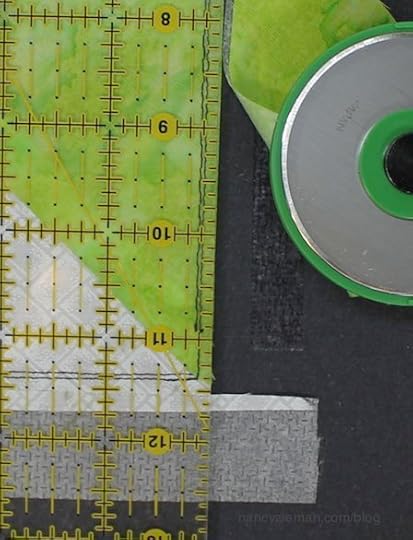
Align the strip set along a horizontal line on the cutting mat. Place a long, rotary cutting ruler at a 45-degree angle on the strip set, positioning the ruler to trim off only the staggered ends of the strip sets.
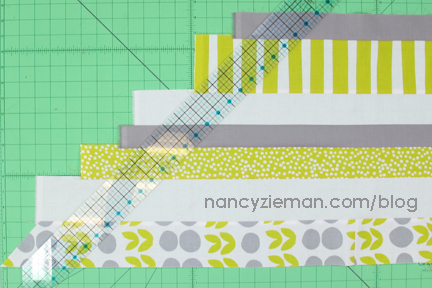
Trim off the staggered ends, even with the long rotary cutting ruler.

Align the ruler along the cut edge of the fabric. Make all subsequent cuts 2-1/2″ wide.

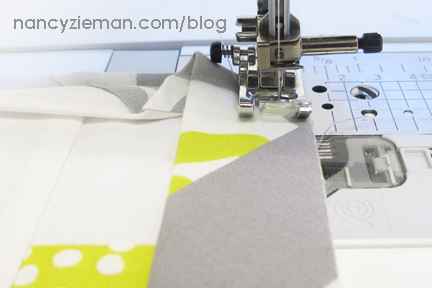
Join the Binding
Join the cut strips at the short ends.

Align strips right sides together, offsetting the seam edges by 1/4″.

Join using a 1/4″ seam allowance.

Prepare and Apply the Binding
Press the long scrappy binding in half, meeting lengthwise edges and matching wrong sides.

Align the two cut edges of the binding with the quilt edges. Use a 1/4″ seam allowance to stitch the binding to the quilt back.
Fold and sew the binding at each corner to create a miter. Join the cut ends of the binding. More can be found on these techniques in Fearless Quilting Finishes .
Working from the quilt back, press the binding away from the quilt.
Fold the binding to the quilt front. Pin or hold binding with Wonder Clips .

Stitch the binding from the quilt front to finish.

Did You Miss the Heartbeat Table Runner Blog Posting?
The instructions for the featured quilt pattern,
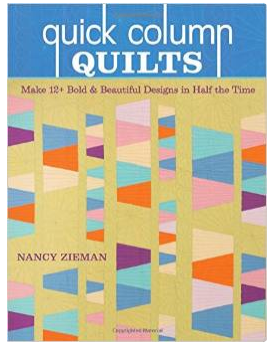
Heartbeat Table Runner, are available on another of my blog posts. It’s a variation of a quilt pattern from my book , Quick Column Quilts.

Watch Fearless Quilting Finishes on Sewing With Nancy online.
To watch Sewing With Nancy on your iPad, iPod Touch, or iPhone, download the app.
Bye for now,
Content in this feed is © copyright 2015 by Nancy Zieman and may not be republished without written permission. You’re welcome to forward the email to a friend or colleague but it’s not okay to add the RSS feed automatically as content on a blog or other website.
April 23, 2015
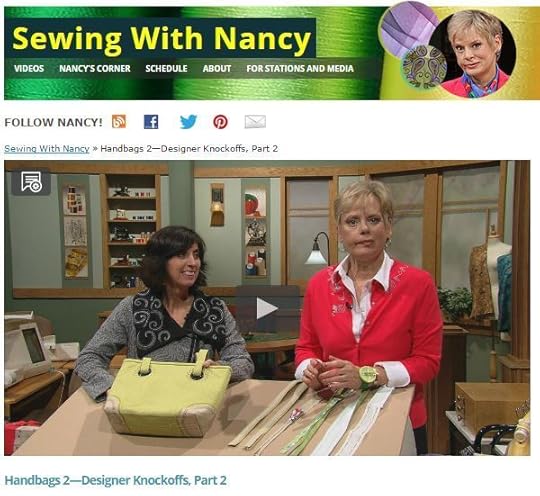
Learn Designer Tips for Sewing Handbags
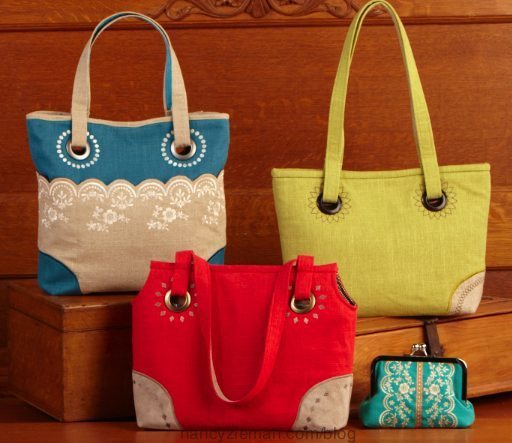
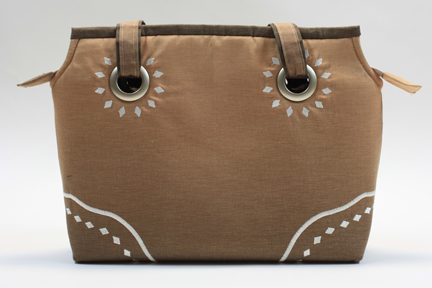
Last week, I showcased a few bags from Handbags 2—Designer Knockoffs. This two-part series with embroidery expert Eileen Roche features our unique approach to creating fashionable handbags. As you might guess, this week’s Sewing With Nancy online video is the second episode. You can watch it online at nancyzieman.com. Here’s a preview of what you’ll see:
First Episode Review
Earlier, in the first of the two-part series, we focused on how to embroider accents and placements for grommets, and how to easily embellish corners of the bags with the help of machine embroidery.
Why not watch the first episode by clicking here or read the blog, which details the first show, by clicking here. Knowing what’s in the first show is important before taking the next step.
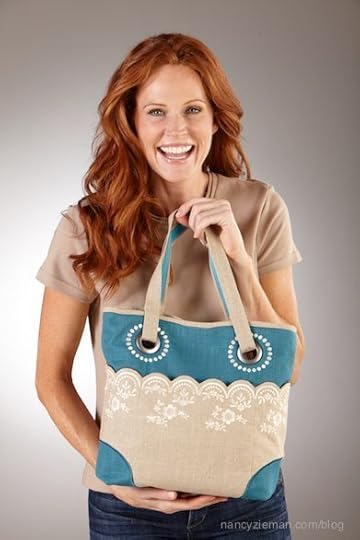
Designer Bag Finishing Features
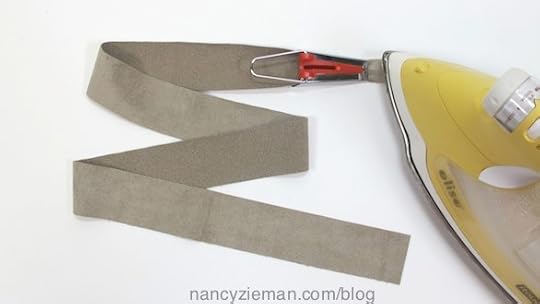
Make handbag straps with the use of 1″ Create-A-Strap . Press it to the wrong side of the fabric. Then, fold along the perforations.
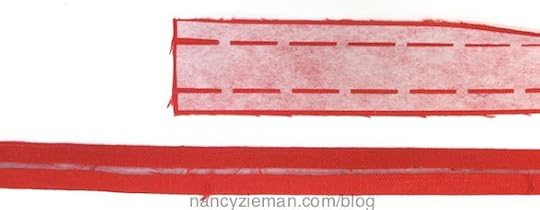
Cut 1-1/2″ wide crosswise strips of an accent fabric. Insert fabric strip through the wide end of a 3/4″ bias tape maker; press.
Center the folded strip over the cut edges of the strap; stitch.
Insert the straps through the grommets and align the short ends with the edges of the fabric.

Baste the edges together.
Add the zipper unit. We give specific details on how to create the zipper unit in the book, Handbags 2—Designer Knockoffs .
Finish the top edges with your favorite binding technique. I like to use Fuse ‘n Bind . PS: Wonder Clips are a great pin substitute.
Isn’t this a great looking handbag!

Thank You!
Thank you, Eileen, for sharing even more bags with us.


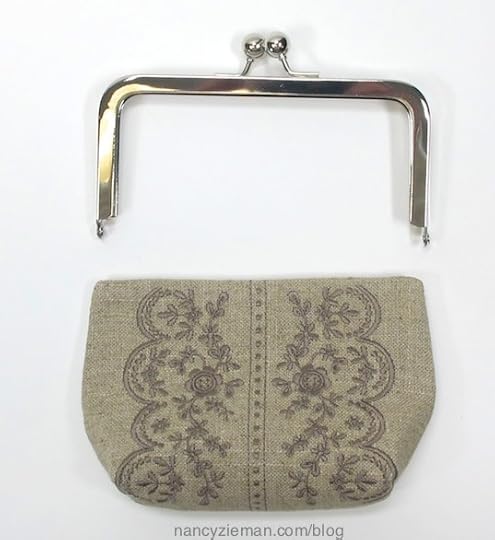
Personalized Clutch
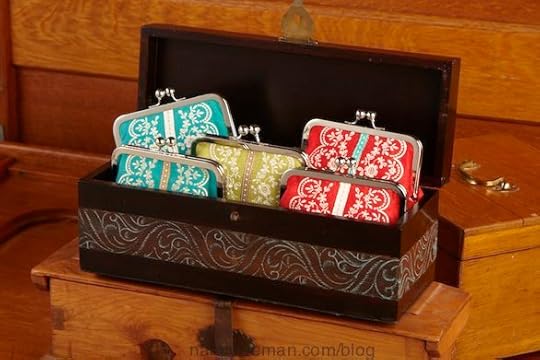
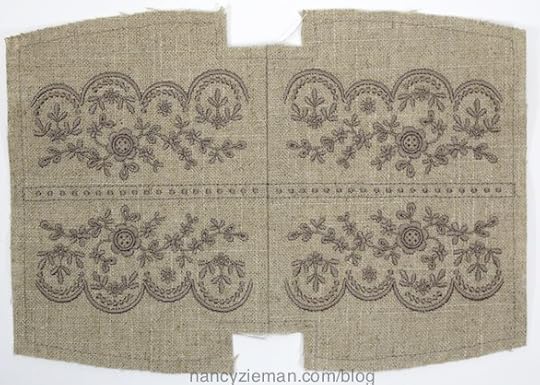
Who wouldn’t love to carry one of these feminine clutches? It’s big enough to fit a cell phone, small wallet, and tissues. If you have a large embroidery hoop, let the machine do all the pattern making for you. If not, you can easily stitch the design and then use a template to create the bag shape. What a great idea for a bride, bridesmaids, or formal event!
A little disclaimer: I took photos while making a prototype of the clutch, but didn’t take any photos after the embroidery design was fine-tuned. What was I thinking? (Rhetorical question, I know.) Regardless, during the frenzy of testing the clutch embroidery design, I didn’t place the ribbon on the design . . . I skipped that step. Oh well, you can see how to create one of these clutches while watching the online video or reading the book.
Embroider two designs: one for the front and the other for the back of the clutch.
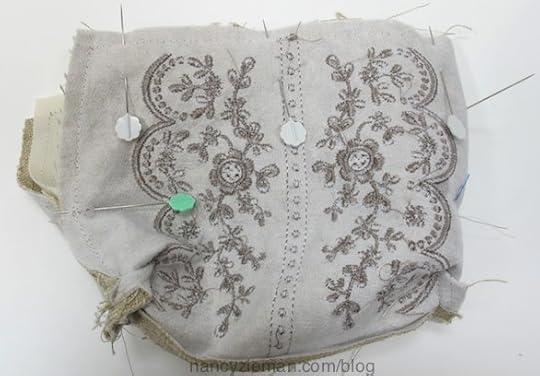
Trim 1/4″ from the outer line.
Stitch the lower seam.
Next, the side seam is sewn to the notch marking and then the corner is stitched. The lining is also sewn, and the lining and outer clutch are met, right sides together.
The top and side seams are sewn. Then, the clutch is turned right side out.
Hint: An opening is left in the lower seam of the lining in order to turn the fabric right side out.
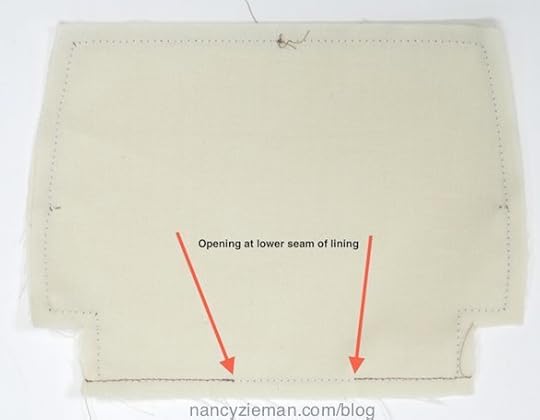
Press the edges and then get ready to attach the hardware.
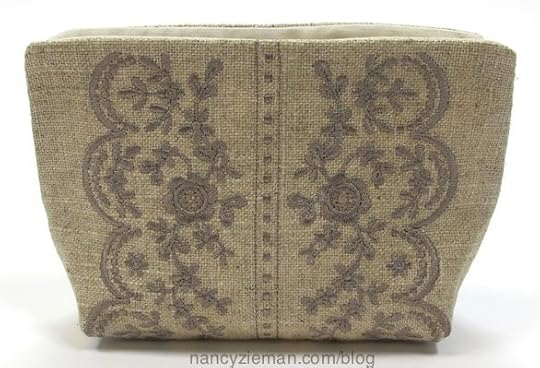
Apply a line of glue in the purse frame ; then slip the fabric into the correct position. Hint: Before applying the glue, take a test run inserting the fabric into the hardware.

Watch Designer Handbags 2, Part Two on Sewing With Nancy online.
To watch Sewing With Nancy on your iPad, iPod Touch, or iPhone, download the app.

Included with this 80-page book is a CD of all of the embroidered designs you’ll need to complete three bags and a clutch—a total of 28 designs. Eileen and I would like to give away a copy. Simply leave a comment telling us your favorite of the four bags pictured below. A random winner will be announced April 30.

Check out details on the teal/cream scalloped bag on Eileen’s Blog! Click here to read the details.
Content in this feed is © copyright 2015 by Nancy Zieman and may not be republished without written permission. You’re welcome to forward the email to a friend or colleague but it’s not okay to add the RSS feed automatically as content on a blog or other website.
April 21, 2015
Quick Column Quilts Heartbeat Table Runner
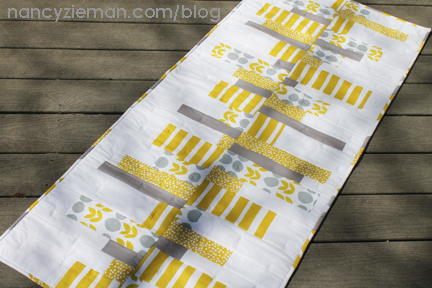
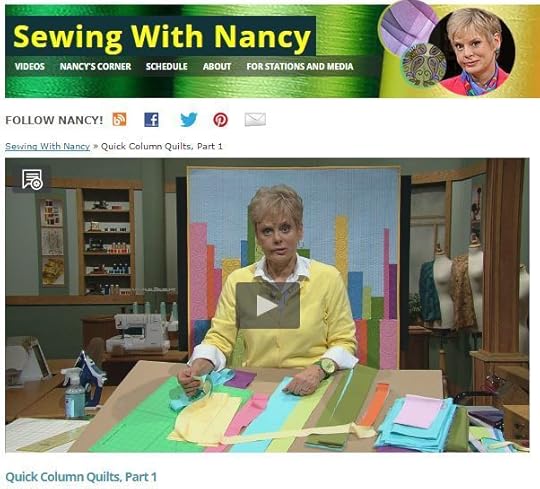
No matter the size—table runner to king—you can sew a quick column quilt in a heartbeat! Colorful accent strips in a variety of widths make up the heartbeat pattern, while the subdued one-color strips add a perfect background for the design. In my book Quick Column Quilts you’ll find this design sewn in various sizes including a baby and queen-sized quilt. In this post, I’ve scaled down the design to a table runner size, 24″ x 57″. See all the different ways to adapt this method in my book or watch Quick Column Quilts Part One on Sewing With Nancy.
Create Strip Sets
Prepare assorted scrap fabrics (or fat quarters) and white yardage, by stabilizing all fabrics with spray starch, then cut:
Cut twenty-four to twenty-eight crosswise strips 2″–4″ wide x 12-1/2″ long.
Cut the same number and same widths of background strips. (We chose white.)

Pair printed fabrics with background fabrics.

Use 1/4″ seam allowances to join the short ends, right sides together.

Stitch 1/4″ seams at each end of the strip set to create a tube.

Stitch strips continuously to save time.

Clip the thread between each strip set.

Press all seam allowances flat to set the stitches. Then, press seams open.

Determine Heartbeat Layout
Fold each tube in half, varying the amount of printed fabric that is visible.
Cut the folds of each tube.

Sort the cut tubes, leaving the top strip for the top of the heartbeat and the bottom strip for the bottom.

Complete the Table Runner
Stagger the strips for the top and bottom, separately, in an interesting arrangement.

Use a 1/4″ seam to stitch pairs of strips for the top half of the heartbeat. Press seams open. Stitch all pairs to create the top.
Use 1/4″ seams to stitch the pairs of strips for the bottom half of the heartbeat. Press seams open. Stitch all pairs to create the bottom.

Use a 1/4″ seam allowance to join the heartbeat top and bottom halves, right sides together.
Note from Nancy: When pinning the top and bottom halves, keep in mind that the strip sets will not match up and you will not need to concern yourself with matching intersections. This is a very forgiving pattern.

Use a stiletto to help guide the seam allowances under the presser foot.

Press the seam open.
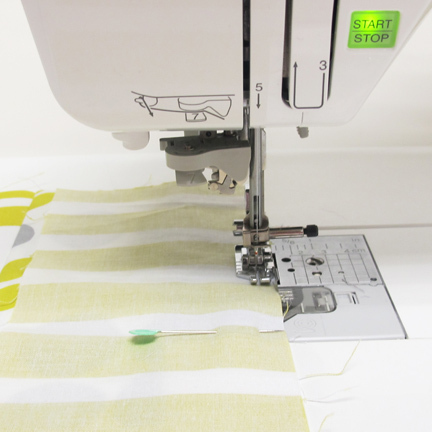
Quilting with Decorative Stitches
Prepare the quilt for traditional machine quilting. Create a quilt sandwich, layering the quilt top, batting, and backing. Hand baste or pin baste the layers together.
Use color-coordinating thread in the needle and bobbin.
Choose a decorative machine stitch. I chose 7-049, a stacked circle design, on my Baby Lock.

Note from Nancy: Use the recommended presser foot for the chosen decorative stitch. Although you are quilting with your sewing machine, you do not need a Walking Foot or a special free-motion quilting presser foot for this technique.

Begin in the middle of the table runner and work outward. Stitch a single repeat of the decorative motif.

Add decorative stitches at the recommended intervals listed on the batting packaging.
Note from Nancy: I generally add a decorative stitch every 3″–4″ in random intervals.
In my blog posing this Saturday, April 25, I’ll detail the easy steps of sewing a scrappy binding for your table runner.
Watch Quick Column Quilts on Sewing With Nancy online.
To watch Sewing With Nancy on your iPad, iPod Touch, or iPhone, download the app.

Simply leave a comment telling us your favorite colors to use in quilts, to be entered to win a copy of Quick Column Quilts by Nancy Zieman. A random winner will be announced April 28.
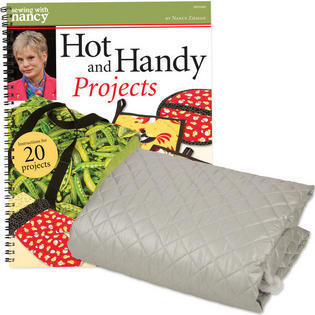
The random winner of the Hot and Handy Projects book from last week’s blog is Kathy in MN who said: As a Packer fan in Minnesota—definitely out of Green Bay Packer material. There would be no question that it was mine!
Bye for now,
Content in this feed is © copyright 2015 by Nancy Zieman and may not be republished without written permission. You’re welcome to forward the email to a friend or colleague but it’s not okay to add the RSS feed automatically as content on a blog or other website.
Nancy Zieman's Blog

- Nancy Zieman's profile
- 21 followers

