
Nancy Zieman's Blog, page 132
February 7, 2015
A Clever Storage Solution for Sewing Bobbins
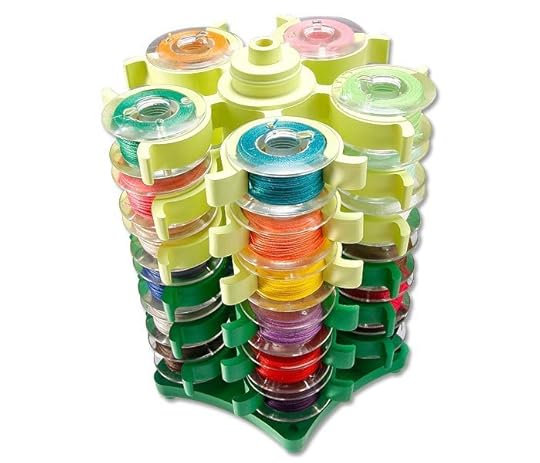
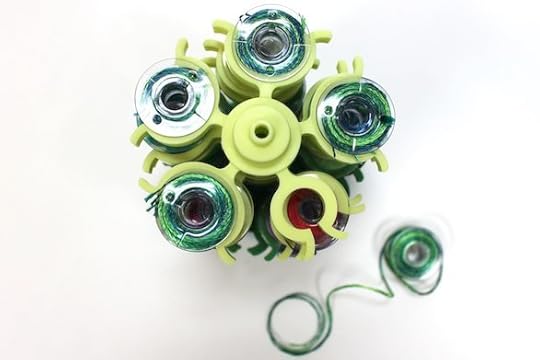
The Stack ‘n Store Bobbin Tower has six bobbin wheels on a stand. You can see thread colors at a glance.
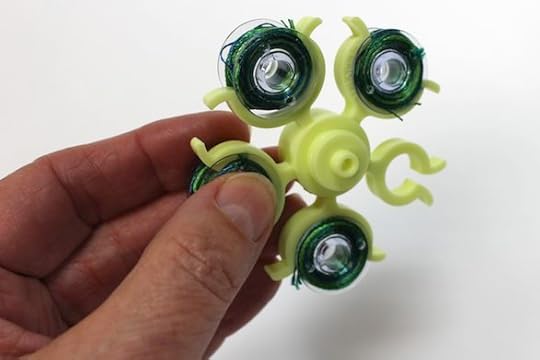
Each wheel holds five bobbins. The Stack ‘n Store Bobbin Tower organizes up to 30 bobbins.
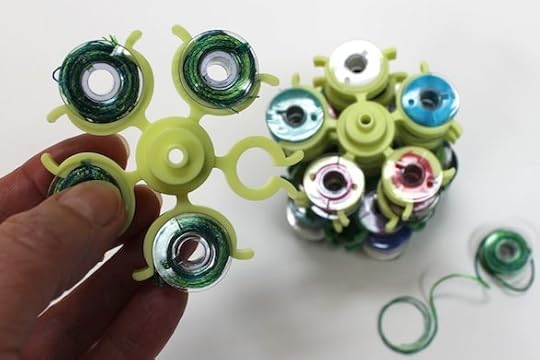
Wrap loose thread ends around bobbin. Slide bobbin into wheel section. Stack wheels on bobbin tower stand.
Bobbin Thread Showcase
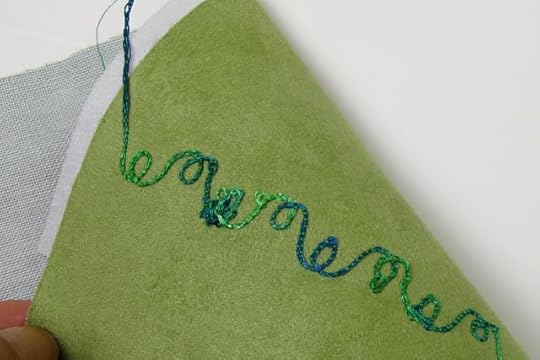
Bobbin thread generally takes a back stage role. Since this blog features bobbin thread, I’d like to show you how to bring the bobbin thread to the forefront. I call the technique Undercover Stitching!
Undercover Stitching
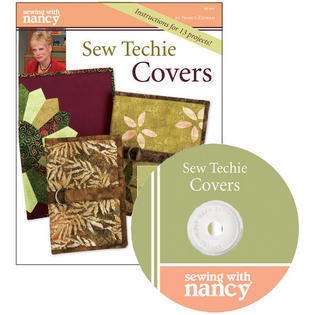
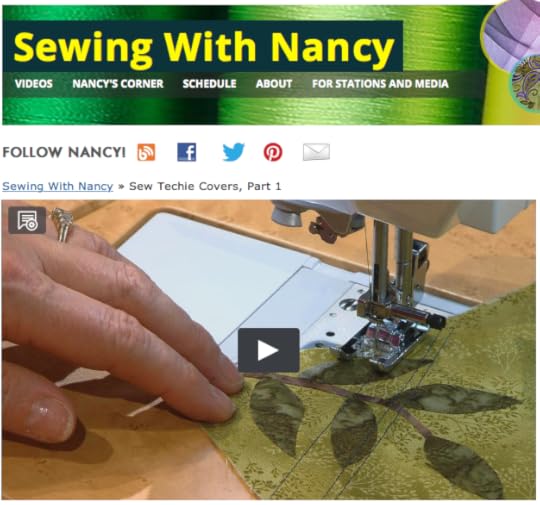
During the first program of the 2-part Sewing With Nancy series, Sew Techie Covers, I detail the undercover stitching technique. You can watch this program episode online! There are two other featured techniques: E-appliqué tips and How to Stitch Techie Circles.
Supplies:
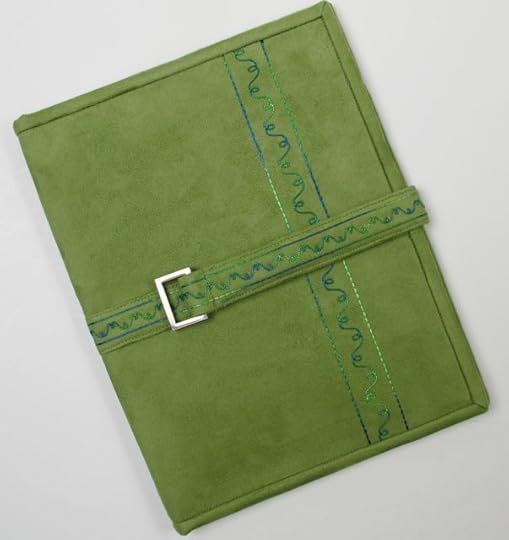
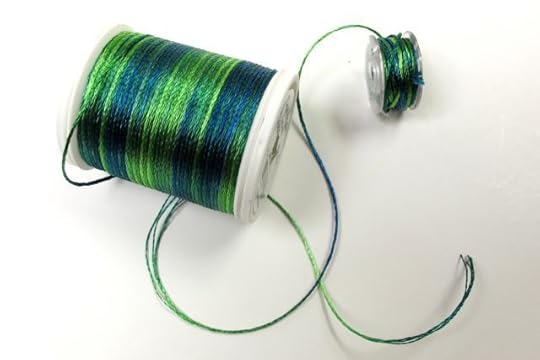
I wound a few bobbins with 12 wt. decorative thread and stored the extra ones in my Stack ‘n Store Bobbin Tower. Then, added undercover decorative stitching to the fabric of my Tablet Keeper, a cover for my iPad.
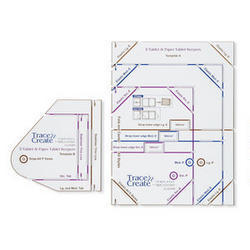
To create these unique e-tablet covers, use Clover’s E-Tablet & Paper Tablet Keeper Templates and Tablet Keeper 2.0. The original Tablet Keeper has sizes to fit the iPad Mini, original Kindle, plus others. The Tablet Keeper 2.0 is designed to fit the Nook, Kindle Fire, and many more tablets.
 Undercover Stitching Showcase
I know that not all of you clicked to watch the video, sigh… To give you a little idea of what you may be missing, here are the highlights of Undercover Stitching (otherwise known as bobbin work).
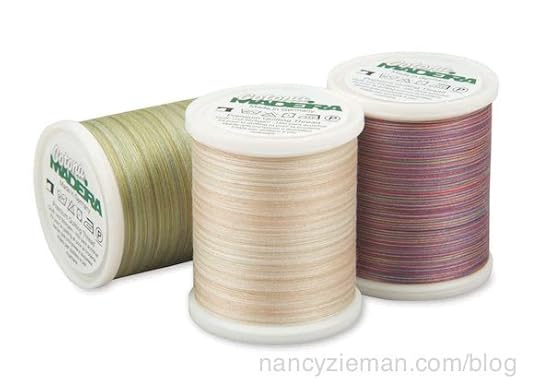
Wind 6- or 12-weight thread in the bobbin, using conventional bobbin winding techniques. I selected Madeira’s Decora 6 wt. thread . Note: If your machine has difficulties winding heavier thread, wind the thread by hand. Thread the needle with all-purpose thread.
Insert the bobbin into the bobbin case.
Back the fabric with interfacing, and add a second stabilizer and length of interfacing in the stitching area. Then, mark the stitching line on the wrong side of the fabric.
Choose a nonsatin, decorative stitch. An outline or open stitch is best suited for bobbin work. Lengthen the stitch for best results. Test the stitch on a sample fabric.
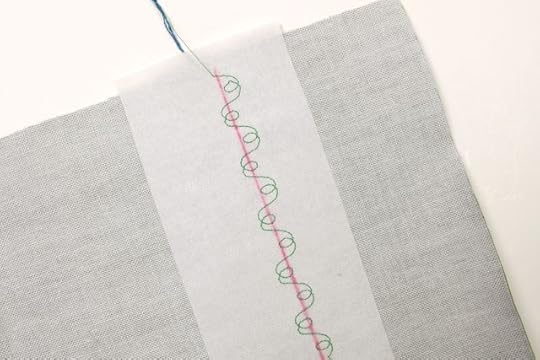
Check the look of the stitch on the right side. My test stitch had a few hiccups! So, I adjusted the settings, lengthening the stitch. It doesn’t always go perfectly for me either!
Helpful Hint! Some machines handle heavier thread in the bobbin if you bypass the bobbin case tension. In short, don’t pass the thread through the bobbin case tension guide.
Also, test a variety of stitch settings, lengthening/shortening or narrowing/widening the stitch length and/or width. A straight stitch is also ideal! A narrower stitch width setting was used for the strap.
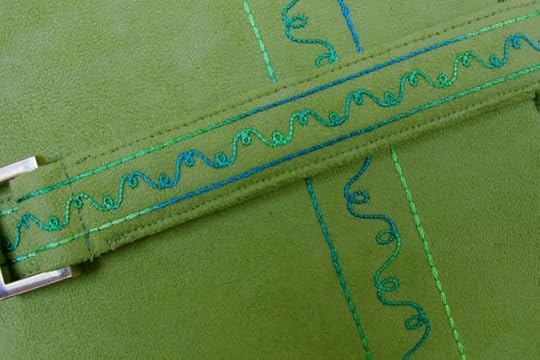
The Undercover Stitching idea is just one of 12 techniques found in Sew Techie Covers! Check out all the options!
Watch Sew Techie Covers Online.
To watch Sewing With Nancy on your iPad, iPod Touch, or iPhone, download the app.
We’re giving away a Bobbin Tower! For a chance to win, share a comment about your favorite sewing room organization tool.
Bye for now,

Content in this feed is © copyright 2015 by Nancy Zieman and may not be republished without written permission. You’re welcome to forward the email to a friend or colleague but it’s not okay to add the RSS feed automatically as content on a blog or other website.


February 5, 2015
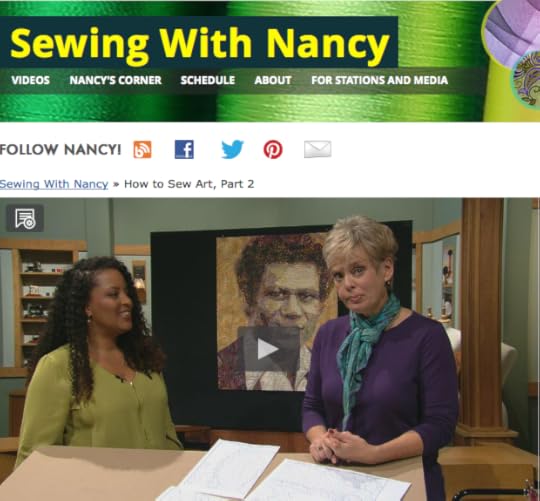
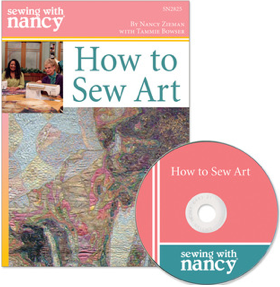
How to Sew Art Part Two
Today we continue with part two of the Sewing With Nancy mini series, How to Sew Art. Starting with a photo, choosing fabrics, and then following steps to turn a common digital image into spectacular wall art. Tammie Bowser, a quilt innovator, will show us how to transform ordinary fabric into fine art.
In my January 29 blog post, I shared an overview of How to Sew Art part one, including choosing a photo, downloading the software, printing the pattern, creating a fusible web sandwich, and selecting fabrics.


In How to Sew Art part two, the magic happens!
Learn techniques for cutting the pattern pieces.
See how to cut and add the fabric pieces.

Watch Tammie demonstrate the stitching/quilting process.

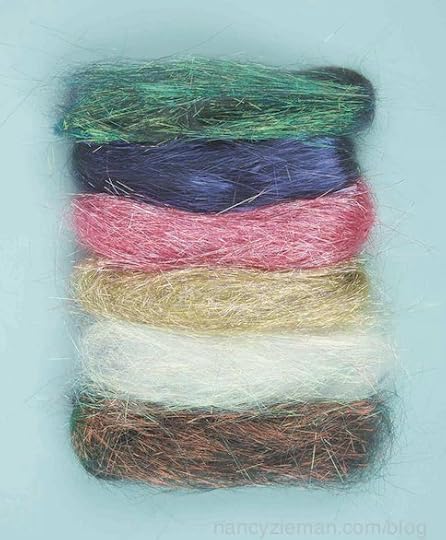
See how to add texture with Cotona thread and Angelina fibers .
In How to Sew Art part two, you’ll also see an inspirational gallery of Tammie’s quilts!


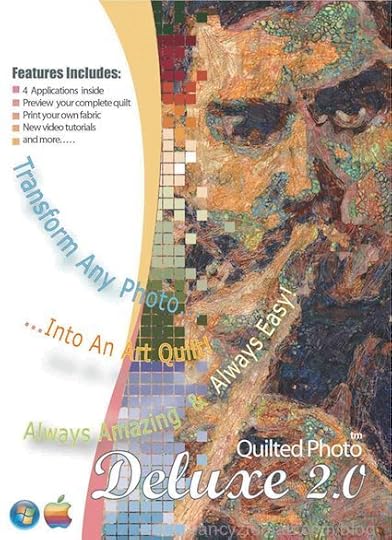
At Tammie’s website, howtosewart.com. you’ll find details on downloading a free software trial. The software turns an image into an art quilt pattern and includes the Gerber Daisy image below!

Nancy’s Notions has assembled a How to Sew Art Starter Set that includes the book, DVD, Color Value Isolation Tool, 505 Spray and Fix Adhesive, and Wonder-Web Fusible.

Watch How to Sew Art part one and part two online.
To watch on your iPad, iPod Touch, or iPhone, download the app.
 For a chance to win a DVD of How to Sew Art, please let me know what subject you’d choose for your first art quilt. The random winner will be announced on February 12.
 Thank you to my guest Tammie Bowser for sharing How to Sew Art on Sewing With Nancy.
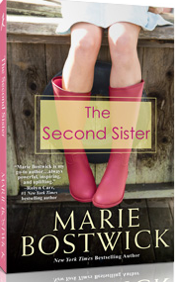
At the end of last week’s program, my Nancy’s Corner guest Marie Bostwick generously offered a copy of her book as a giveaway. The random winner of The Second Sister book is Mary who said, I have read all of Marie’s books and the Jennifer Chiaverini Quilting novels. I can’t wait to read Marie’s new one…
Bye for now,
Content in this feed is © copyright 2015 by Nancy Zieman and may not be republished without written permission. You’re welcome to forward the email to a friend or colleague but it’s not okay to add the RSS feed automatically as content on a blog or other website.
February 3, 2015
Nancy Zieman’s 2015 Pillow Sewing Challenge
You are invited to participate in my 2015 Pillow Sewing Challenge. Brainstorm, browse, design, plan, and stitch your favorite pillow. Enter my Pillow Sewing Challenge by adding a photo in the link listed below. It’s easy!
This is a small project designed for you to showcase your sewing talents. Entries may be for any occasion, any color or any size (that fits on a sofa or comparable household furniture). The guidelines are wide open for you to create. Sew a pillow using as much imagination as you like. You may enter up to four different pillows. Pillows must be completed within the last year.
For this challenge, use a link tool. Click the “add link” button (below) to enter your pillows directly to the gallery. (Once button is clicked–it may appear as a workable link). If you aren’t able to upload, no problem; simply email a photo of your completed project to info@ziemanproductions.com. Deadline for photo entries is March 3, 2015.
Pillow Sewing Challenge Guidelines
Select or create your design.
All sewing, quilting, serging, machine embroidery, and embellishment techniques are eligible!
Grab our Pillow Sewing Challenge blog badge to let your friends know about this fun Pillow Sewing Challenge.
Remember to share your progress and projects on your social media sites using the hashtag: #NZPillowChallenge
Upload or email your photo(s) by March 3, 2015, to info@ziemanproductions.com .
Online voting begins March 7, 2015.
Voting closes on March 14, 2015.
Winners will be announced March 17, 2015.
An InLinkz Link-up
Go Social with Your Pillow Sewing Challenge

If you have a website, copy the code above and paste it into your website editor to have the Pillow Sewing Challenge badge on your site.
If you are on social sites like Instagram, Twitter, Flickr, or Facebook, let all your friends know you are working on the Pillow Sewing challenge by tagging your post with the hashtag: #NZPillowChallenge.
The hashtag is a searchable “word” associated with an event or activity, which, when searched on popular social websites, like Instagram, Twitter, Flickr, and Facebook, shows every single post using that hashtag. Even if you don’t personally know that stitcher, you’ll see her/his progress and a photo. Hashtags are a fun way to network and connect with people who share similar interests.
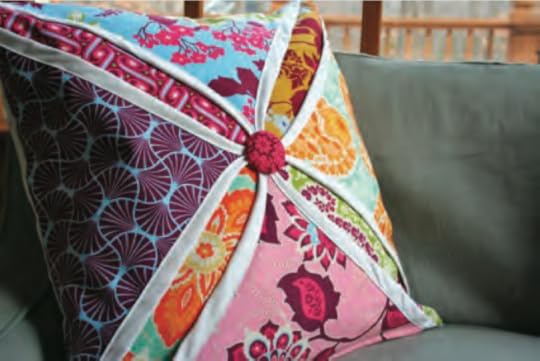
Inspiration: Traditional Cathedral Window Block
A traditional Cathedral Window Quilt block is the source for our first inspiration pillow. Follow along on the Pellon Projects site as Kim Niedzwiecki enlarges the traditional block and makes the design bold with bright, fresh colors.
Cathedral Window Pillow by Kim Niedzwiecki for Pellon
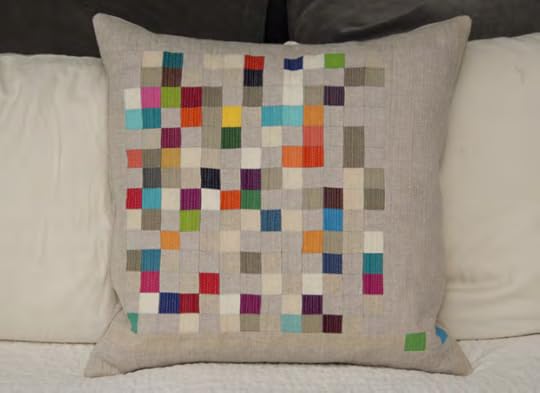
Inspiration: Computer Pixels
Look no further than your computer for the next pillow inspiration; Kati Spencer shares her Pixel Pillow on the Pellon Projects site. She uses bold graphic squares, which are reminiscent of the dotted-look that images have online.
Pixel Pillow by Kati Spencer for Pellon
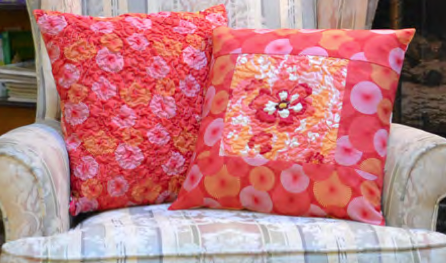
Inspiration: Fabric Magic
On occasion it isn’t only seeing something that triggers inspiration, but rather trying something new. In this case I’m referring to the Fabric Magic product by Pellon. This unique sew-in interfacing gives amazing texture to fabric as it permanently shrinks up to 30%. Alexandra Henry uses the Fabric Magic in two ways to create these featured pillows. Read more at the Pellon Projects site.
Seeing Double Fabric Magic Pocket Pillows by Alexandra Henry for Pellon
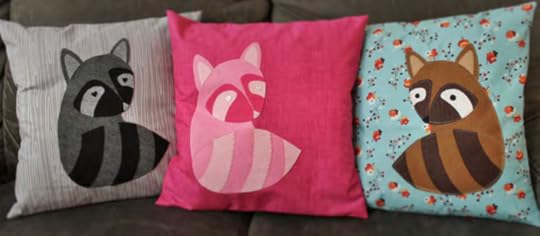
Inspiration: Wildlife and Nature
Nature is often a source of inspiration in any form of artwork; sewing is no exception. Rachael Gander showcases raccoons in her pillow set, the appliqué shapes are reversed to create the illusion that the raccoons are sitting in different directions. Read more about this design on the Pellon Projects site.
Raccoons in Love Throw Pillows by Rachael Gander for Pellon
Here’s a listing of the prizes that will be awarded to the top five vote contenders:
First Place: A Bundle of Products from Pellon, $115 value!

Second Place: Madeira Aerofil 18 count thread pack, $60 value from
Madeira. Plus a Pellon Pillow Insert!

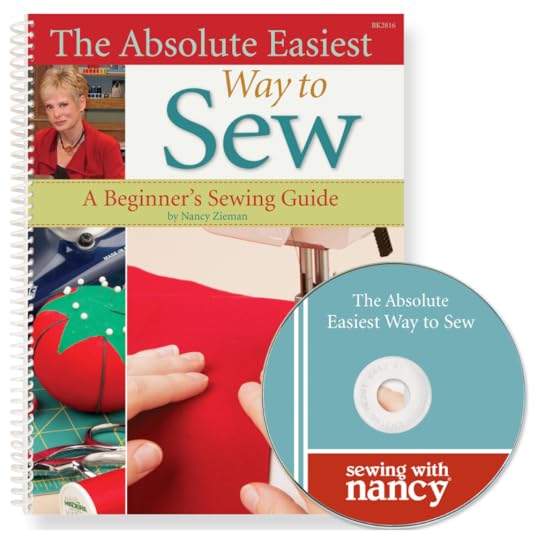
Third Place: The Absolute Easiest Way to Sew Book & DVD from Nancy’s Notions, value of $34.98. Plus a Pellon Pillow Insert!
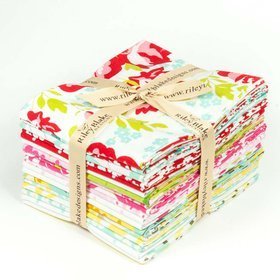
Fourth Place: Fabric Bundle from Riley Blake Designs, $25 Value. Plus a Pellon Pillow Insert!
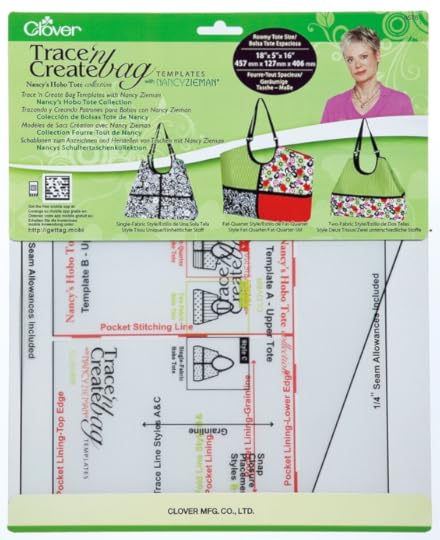
Fifth Place: Hobo Tote Template from Clover, $19.95 value. Plus a Pellon Pillow Insert!
 Each Pillow Sewing Challenge prize winner (above) will receive a Pellon® HomeGoods Decorative Pillow Insert, 16″ x 16″. Value $10.99
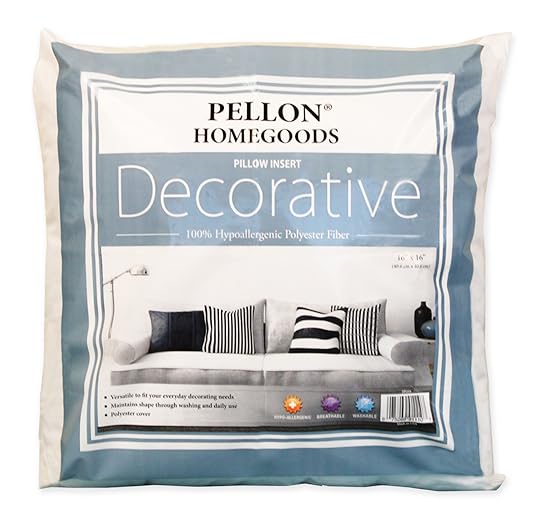
Thank you to our sponsors!


2015 Pillow Sewing Challenge Schedule
February 3: Pillow Sewing Challenge kick off TODAY!
March 3: Entry Deadline
March 7: Voting Opens
March 14: Voting Closes
March 17: Winners Announced
Share your comments below about the Pillow Sewing Challenge and let us know if you plan to join!
Get Stitching!
Email challenge questions to info@ziemanproductions.com. Challenge not open to sponsors, employees, and immediate family members. Photos and techniques may be featured in future promotions, blog posts, videos, and/or TV shows.
Nancy Zieman—author, pattern designer, businesswoman, producer, and national sewing authority—is the host of the popular show Sewing With Nancy®, which appears exclusively on public television stations across the United States and Canada. Follow Nancy’s blog at NancyZieman.com/blog and sign up to receive Nancy’s E-News for the latest news in Sewing, Quilting, Creating, and Block of the Month updates.
Content in this feed is © copyright 2015 by Nancy Zieman and may not be republished without written permission. You’re welcome to forward the email to a friend or colleague but it’s not okay to add the RSS feed automatically as content on a blog or other website.
January 31, 2015
Sewing With Nancy Viewers’ Quilt Showcase

Welcome to the Sewing With Nancy Viewers’ Quilt Showcase. I am excited to feature quilt projects that were inspired and created after watching my TV show or reading my blog. I hope you’ll be motivated to sew and quilt, then share photos of your projects with me in the future.
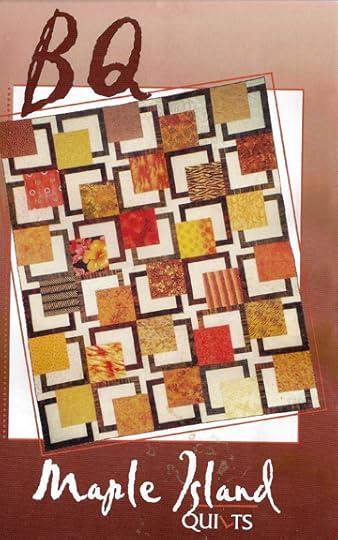
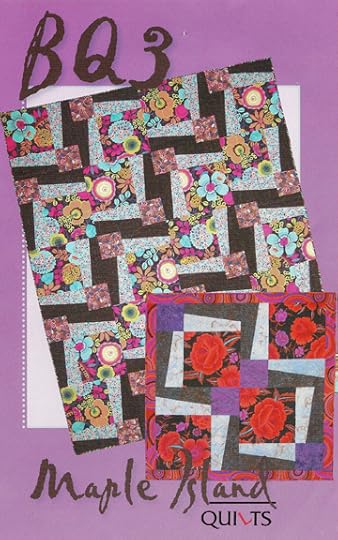
Inspired by: Sew Big Quilt Blocks
Sew Big Quilt Blocks seems to have struck a common, creative chord with viewers! Debbie Bowles was my guest on the 2-part Sewing With Nancy series. Watch Part 1 and Part 2 online. Debbie’s patterns BQ and BQ3 were used as the inspiration in several viewers’ quilts.
A Study in Black, White, and Gray
Here’s a photo of a quilt I recently finished after watching the show—the recipient loved it. Keep the TV shows coming! ~Diane Heimel

90th Birthday Quilt
My sister and I created this quilt for our Dad’s 90th birthday. We each made 14 blocks, then sent them to our Dad to open—one each day during the month of February. Later, we put them into the BQ pattern. It made a wonderful quilt! ~Ruth Fidino

Black and White with Flowers All Over
I am making this big-block quilt for a friend. She picked out black and white prints, plus floral prints. I love how it’s turning out. ~ Karen Tipton
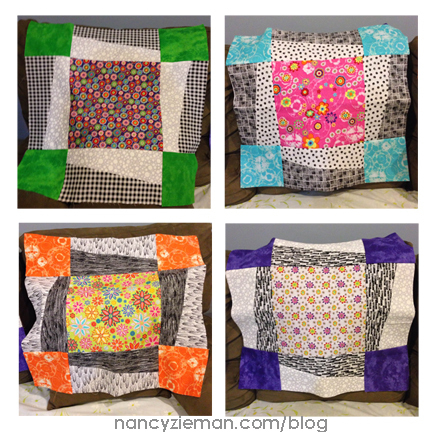
Karen also sent us a photo of a big block made into a receiving blanket with flannel on the back. Clever!

Inspired by: Circles Sew Simple
Circles are trending and viewers have taken notice. This design element can be a bit tricky to perfect. The pattern book and sewing tool, Circles Sew Simple, takes the challenge out of sewing the circle and creates a very smooth shape every time. My viewers really enjoyed the Circles Sew Simple episode of Sewing With Nancy, too.
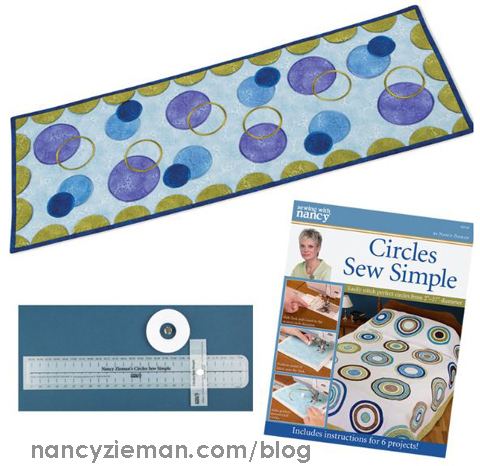
Classic Orange Peel Quilt Design
I made this quilt after being inspired by the Orange Peel quilt in Circles Sew Simple. I donated it to a charity group. ~Jean Inda

Inspired by: Grandmother’s One-Patch Quilts
My next viewer/reader Pamelyn Baim was one of the blog contest winners from this blog post, which showcases the Trace ‘n Create Grandmother’s One-Patch Quilt Templates. See the various different quilt looks you can achieve with the templates used on Sewing With Nancy. Pamelyn used the tumbler template to create this tote.

Show-and-Tell Tote
I was playing around with the Grandmother’s One-Patch Quilt Templates I won. I had a panel of four rows long, which looked good. Here’s a little tote that I made from that panel. The tulips are free-motion quilted for more texture. It’s perfect for bringing show-and-tell projects to my quilting club meetings! ~ Pamelyn Baim

Inspired by: Quick Column Quilts
Quick Column Quilts is an innovative quilt pattern book, which focuses on constructing quilts in columns, rather than in blocks. Sewing With Nancy showcased the book in a three-part series. Sue was inspired by episodes where we demonstrated the Floating Square pattern and the Hit and Miss Table Runner.

The Floating Squares Quilt
When I received my Quick Column Quilts book, I used fabric I had on hand to test my skill with columns. I had a “low volume” quilt on my to do list, and wanted to try some embroidery. As a result, this quilt was created. I love piecing in columns and will make others from the book. ~ Sue Fitzpatrick

Sue also created and sent us a picture of her Hit and Miss Table Runner.

Inspired by: Quilts from the House of Tula Pink
I watched the episode with guest Tula Pink and decided I might be able to make this pattern. I recently retired from work and wanted to learn to quilt. You were my inspiration to get started on a project! I went to mom’s fabric stash and made this quilt for my nephew based on your show with Tula Pink, Quilts from the House of Tula Pink. The quilt is named “Gone Fishing,” the tans represent a dirt road, the greens a river bank, and the blue for the water. ~Cindy Pilkington

Inspired by: The Farmer’s Wife Sample Quilt Book
Quilt samplers often show us variety and visual interest, which influence our future quilting projects. This is definitely true with The Farmer’s Wife series. Nancy’s Corner has interviewed and featured the books from Laurie Arron Hird several times. Laurie’s titles include the The Farmer’s Wife Sampler Quilt Book and The Farmer’s Wife Pony Club Sampler Quilt Book.

The Farmer’s Wife Sampler Quilt
I am working on an amazing quilt with 110 blocks. Sashing is the next step. ~Penny Havens Street

Inspired by: Honor Quilt made from Military Uniforms
Last June and July, taking care of a friend of mine in Wisconsin, we saw a guest you had on the show, Nancy’s Corner guest, Major Cathy Ott, who had made a quilt from military uniforms. My uniforms were still in storage, only because I could not throw them away. A spark had been ignited in my mind after seeing that quilt. Here’s a picture of my first quilt! Jan H.

Thank you!
Thanks to those of you who sent in your photos and notes.
Requesting Dresden Project Photos by Feb. 28th
If you have photos of a project you’ve made from the show, please send them to info@ziemanproductions.com. My next viewers’ showcase will feature your work from Sewing With Nancy’s episodes, blog posts and Sew Grand Dresden Quilts template, including your version of the 2015 Adventure Quilt Block of the Month—January: Scrappy Dresden Fan.
January 2015 – Block of the Month
Bye for now,
Content in this feed is © copyright 2015 by Nancy Zieman and may not be republished without written permission. You’re welcome to forward the email to a friend or colleague but it’s not okay to add the RSS feed automatically as content on a blog or other website.
January 29, 2015
How to Sew Art

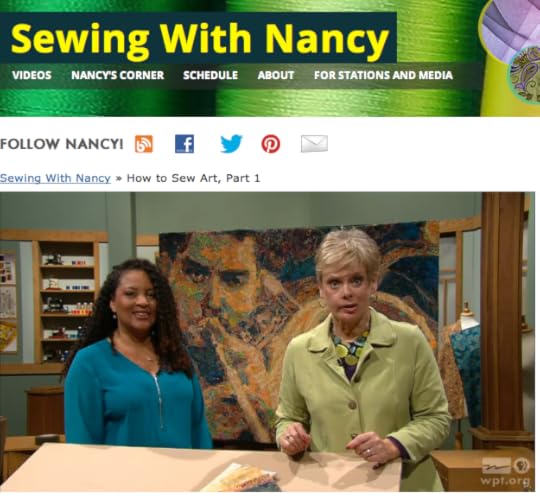
Did you ever think of yourself as an artist? Believe it or not, all of us can be textile artists—one step at a time—with Tammie Bowser’s stitched art techniques. Tammie is an award-winning, international quilter, and my recent guest on Sewing With Nancy–How to Sew Art part one.

Often the first reaction to Tammie’s stitched art is, “That looks too difficult to make—I could never do that!” In the How to Sew Art TV show, book, and DVD, Tammie shares how starting with a great photo, choosing 9–12 fabrics, and then following her steps, you too can make fabric art projects that you’ll be proud to show.
In Sewing With Nancy – How to Sew Art part one, you’ll learn:
Tips for choosing a great photo.
How to make a pattern from the Stitch A Sketch Art Quilt Software or Quilted Photo Deluxe 2.0 Art Quilt Software , and how to download a free trial at Tammie’s web site, howtosewart.com .

Print and tile the pattern pieces.
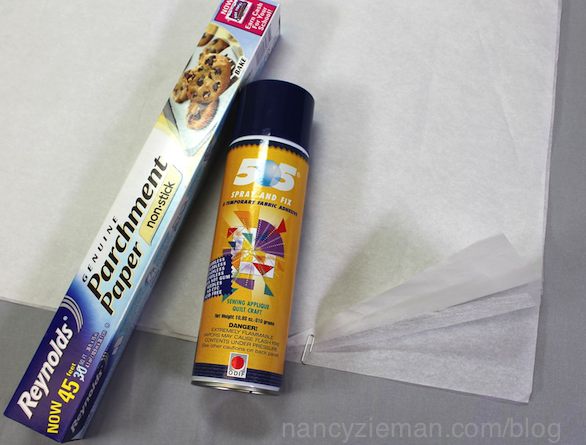
Create a fusible foundation for an art quilt with parchment paper, Pellon Wonder-Web Fusible and 505 Spray and Fix Adhesive .
How to choose 9–12 batik fabrics .

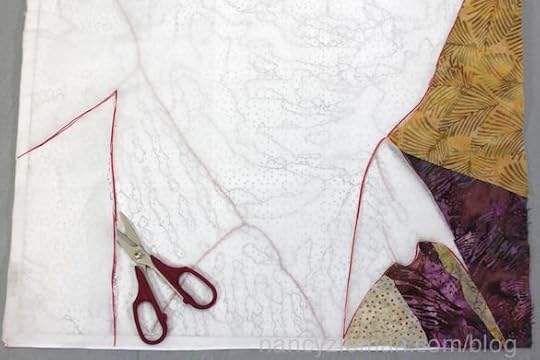
In How to Sew Art Part One, Tammie also shares her techniques for preparing the pattern for cutting fabrics.
Thank you to my guest Tammie Bowser for sharing How to Sew Art with fabric and photos. Tune in next week for part two—when fabrics are cut, positioned, and quilted into art.
Nancy’s Notions has assembled a How to Sew Art Starter Set that includes the book, DVD, Color Value Isolation Tool, 505 Spray and Fix Adhesive, and Wonder-Web Fusible.
Watch How to Sew Art online.
To watch on your iPad, iPod Touch, or iPhone, download the app.
At the end of this week’s program, my Nancy’s Corner guest Marie Bostwick generously offered a copy of her book as a giveaway. For a chance to win The Second Sister book, share other sewing or quilting related novels you’ve enjoyed. The random winner will be announced on February 5.
For a chance to win a DVD of How to Sew Art Quilts, please let me know what subject you’d choose for your first art quilt. The random winner will be announced on February 12.

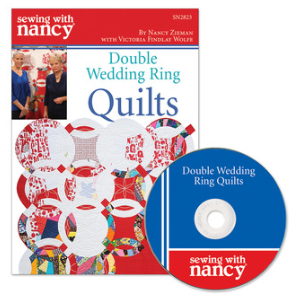
The random winner of a DVD copy of Double Wedding Ring Quilts is Jennifer Fried. Her comment was: Dear Nancy and Victoria, How adventuresome, really bold moves. I also was inspired by the crazy quilts. I have some that I grew up with from my Great Aunt Evy, made from cotton, and an old one, made from velvets, satins and such, which I bought at an auction when I was in high school. ( So many years ago. ) I am fond of the Christmas past quilt. I love these shows and blogs that you have Nancy. Thanks for sharing. Jennifer Fried
 Bye for now,
Content in this feed is © copyright 2015 by Nancy Zieman and may not be republished without written permission. You’re welcome to forward the email to a friend or colleague but it’s not okay to add the RSS feed automatically as content on a blog or other website.
January 27, 2015
A Small Sewing Tool with a Big Story
By Roxanne Nickolie: Nancy’s Notions guest blogger
Anyone who’s tried to replace presser feet or clean under their throat plate knows how difficult it can be to reach those pesky screws. Screw B Do is a miniature screwdriver with a strong magnetic tip that’s safe for computerized machines. Being super compact makes it perfect for the tight spaces and all the tiny screws littered across your machine. Although it’s a fantastic product, the story of how it came to be is far more spectacular.
The story starts with Barbara McCraw, an internationally acclaimed art quilter. Just like every other quilter, Barbara was fed up with struggling to reach the screws around her machine. That’s when her son Joseph stepped in. A former marine, Joe put his engineering skills to work to hand-make a solution. At lectures, classes, and among friends, Screw B Do quickly caught on. What started as a sweet gesture from son to mother, is now a wildly popular product in demand by sewers across the nation.
We at Nancy’s Notions are proud to carry Screw B Do, and happy to share Joe’s story. Watch the video to hear his first-hand account, and be sure to take a peek at the product online.
http://www.youtube.com/watch?v=9gj56lAn5H4
Bye for now,
Content in this feed is © copyright 2015 by Nancy Zieman and may not be republished without written permission. You’re welcome to forward the email to a friend or colleague but it’s not okay to add the RSS feed automatically as content on a blog or other website.
January 24, 2015
No-Hassle Triangles Table Runner

Last summer my staff and I designed an easy-to-sew table runner, featuring a handful of half- and quarter-square triangles. Somehow, we missed featuring it in our blog until now. The featured photo was taken in the backyard of Birch Haven Retreat, a sewing and quilting getaway. Compared to the gray, snowy skies outside my window, this scene makes me lonesome for summer!
Many of you commented on the ease of creating triangles with the No-Hassle Triangles Gauge and wanted additional projects. I’m confident you’ll add the No-Hassle Triangles Table Runner to your to-do list. Made in the same style as the projects featured in Quick Column Quilts, triangle blocks plus column strips make for fast, easy, and no-hassle assembly of this 22″ x 58″ table topper.
Notions, Fabrics, and Supplies:
Two yards green fabric (background & backing)
2/3 yard blue fabric (triangles & binding)
Pellon Fusible Fleece Batting piece measuring 22″ x 58″
No-Hassle Triangles Gauge
Bordeaux Embroidery Scissors
Mechanical pencil or other fine-point marking pen
Fearless Quilting Finishes book
Cutting Directions:
Green Fabric:
Cut one 21″ crosswise strip (backing).
Cut one 10″ crosswise strip (backing).
Cut one 5-1/4″ crosswise strip (triangles).
Cut one 4-7/8″ crosswise strip (triangles).
Cut six 4-1/2″ crosswise strips (background).
Subcut the following from the six green 4-1/2″ background strips:
Subcut four 4-1/2″ x 4-1/2″ squares.
Subcut ten 4-1/2″ x 8-1/2″ rectangles.
Subcut two 4-1/2″ x 10-1/2″ rectangles.
Subcut four 4-1/2″ x 18-1/2″ rectangles.
Subcut one 4-1/2″ x 20-1/2″ rectangles.
See Cutting Diagram Below:

Blue Fabric:
Cut one 4-7/8″ crosswise strip (triangles)
Cut one 5-1/4″ crosswise strip (triangles)
Cut four 2-1/2″ crosswise strips (binding)
First Step, Building the Half-Square Triangle Units
Create 12 Half-Square Triangle Units using the No-Hassle Triangles Gauge .

Set the No-Hassle Triangles Gauge to 4-1/2″ block size on the left side of the gauge. The left side notes Half-Square Triangle sizes. The gauge tells you what size blocks to cut, 4-7/8″.

Cut 4-7/8″ crosswise strips of green and blue. Layer a 4-7/8″ green strip on a 4-7/8″ blue strip and cut six square pairs, measuring 4-7/8″ x 4-7/8″.

Position the No-Hassle Triangles Gauge on a pair of squares.
Use the fine point marking tool to draw a diagonal line.

Use a 1/4″ presser foot as a guide to stitch 1/4″ from the right and the left sides of the marked line.

Chain piece these half-square triangle shapes. Stitch one set of squares right after another. After creating a long “chain,” simply clip the threads, using the Bordeaux Embroidery Scissors to separate the units.

Take the stitched units to the rotary cutting mat and cut the two halves apart along the marked line.

Open and press the seam allowances to the darker, blue side.

Second, Create the Quarter-Square Triangle Units

Set the No-Hassle Triangles Gauge to 4-1/2″ block size on the right side of the gauge. The right side notes Quarter-Square Triangle sizes. The gauge tells you what size blocks to cut, 5-1/4″.
Cut 5-1/4″ crosswise strips of green and blue. Layer a 5-1/4″ green strip on a 5-1/4″ blue strip and cut square pairs, measuring 5-1/4″ x 5-1/4″.
Place a blue and green square under the gauge and mark the diagonal line.
Stitch 1/4″ from the marked line, following the guidelines for the Half-Square Triangle Units, in the first step, above. Cut the units apart and press. These blocks should measure 4-7/8″ x 4-7/8″.
Lay one Half-Square Triangle block on another, matching right sides. It is important that the diagonal lines lock. You’ll feel this “lock” as the seams meet.


Set the No-Hassle Triangles Gauge to 4-1/2″ on the left side of the gauge.
Mark a diagonal line, perpendicular to the seamline.

Use a 1/4″ presser foot as a guide to stitch 1/4″ from the right and left sides of the marked line.

Chain piece the three units, stitching one right after another.

Use rotary cutting tools to cut the units apart.

Press the Quarter-Square Triangle Units.

Third, Arrange the Table Runner Columns
Arrange the table runner into columns as detailed below.
Stitch the pieces using 1/4″ seam allowances.

Assemble the runner by joining the columns to each other, using 1/4″ seam allowances.

Press the column seam allowances in one direction.

After all five columns are stitched, the No-Hassle Triangles Table Runner top is complete.
Create the Backing
Cut the backing piece measuring 10″ x 42″ into two pieces measuring 10″ x 21″ each. Use those two pieces and the larger piece, 21″ x 42″ to assemble the table runner back as described below, using 1/4″ seam allowances.

Quilt and Finish the No-Hassle Triangles Table Runner

Layer the quilt backing, seam-side-up, the Pellon Fusible Fleece Batting, and the table runner quilt top to create a quilt sandwich.
Fuse the layers per the package directions to prepare for quilting.
Using tips and techniques featured in Fearless Quilting Finishes , quilt the table runner by stitching through all three layers.

Trim away excess batting and backing fabric.
Join the 2-1/2″ crosswise strips of blue binding fabric, end-to-end, using 1/4″ seam allowances.
Press the binding strip in half, lengthwise.
Bind the table runner, using your favorite technique. Click here for binding instructions.
Read and Watch More
Please see these blog posts for more detailed instructions on the Half-Square Triangle and Quarter-Square Triangle units. And, watch the online video instructions: Sewing With Nancy Half-Square Triangles and Sewing With Nancy Quarter-Square Triangles.
Bye for now,
Nancy Zieman—author, pattern designer, businesswoman, producer, and national sewing authority—is the host of the popular show Sewing With Nancy®, which appears exclusively on public television stations across the United States and Canada. Follow Nancy’s blog at NancyZieman.com/blog and sign up to receive Nancy’s E-News for the latest news in Sewing, Quilting, Creating, and Block of the Month updates.
Content in this feed is © copyright 2015 by Nancy Zieman and may not be republished without written permission. You’re welcome to forward the email to a friend or colleague but it’s not okay to add the RSS feed automatically as content on a blog or other website.
January 22, 2015
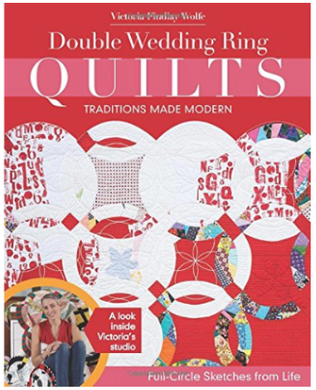
Quilt Traditions Made Modern with Victoria Findlay Wolfe

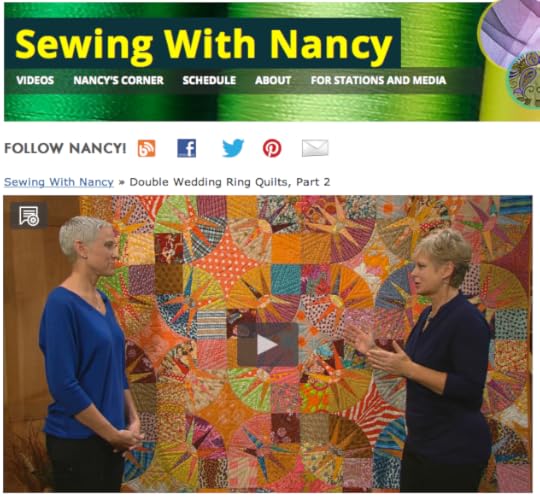
Sewing With Nancy guest Victoria Findlay Wolfe has one foot in Minnesota and the other in New York City. She ties her two lives together through her amazing quilts. The second episode of Double Wedding Ring Quilts is this week’s Sewing With Nancy online video feature. Watch the 30-minute TV show online.
Victoria Findlay Wolfe uses the Double Wedding Ring quilt pattern as a palette to tell her life stories. During this episode, watch and learn how to assemble all the pieces of a Double Wedding Ring design.
Victoria’s Quilt Showcase
Greatest Possible Trust
The featured photo is of Victoria’s quilt, Greatest Possible Trust. If my grandmother and I were able to make a quilt together, this quilt—Greatest Possible Trust—is what it might look like, explains Victoria. The design, a contemporary Double Wedding Ring, combines modern and traditional quilting and brings two worlds together. The quilt is also on the cover of her newest book, Double Wedding Ring Quilts.
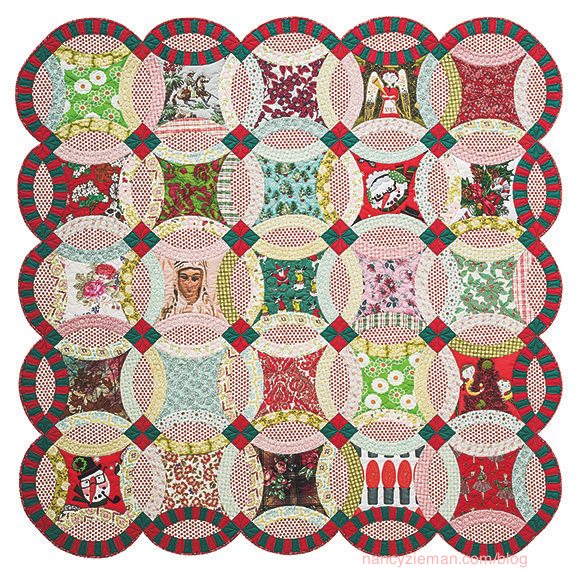
Remembering Christmas Past
Remembering Christmas Past is filled with images from Victoria’s childhood. The concave square of the Double Wedding Ring design is the perfect palette to showcase memories using fabric. With this quilt as the backdrop, learn her secret to piecing this traditional design.
Retro Poly Mod
If you asked most quilters, “What’s your go-to quilting fabric?” My guess is that polyester double knit will NOT be the response. Yet, polyester knit is what Victoria chose for this quilt! The look is modern; the stretch in the fabric makes piecing curves a breeze, and the durability is second to none.

The inspiration for the above quilt, was a design created by Victoria’s grandmother, Elda, again using polyester double knits.

Bright Lights Big City
One hundred and fifty fabrics make this scrappy quilt extremely lively. The Bright Lights Big City quilt vicariously tells the story of Victoria’s move to New York City and the life she built there. It also is a study in pushing a design, combining the New York Beauty quilt element with a Double Wedding Ring design. This quilt defines the term Improvisational Quilt!

Watch Double Wedding Ring Quilts online.
To watch on your iPad, iPod Touch, or iPhone, download the app.
Victoria’s Book is Visually Inspiring
If you need a boost of quilting adrenaline, a walk through Double Wedding Ring Quilts will provide the remedy. With full-size patterns for 10 quilts, the book will teach you the Double Wedding Ring basics plus Victoria’s unique fabric slashing and made fabric methods to create with personality.
Post a comment for a chance to win a DVD copy of Double Wedding Ring Quilts. The random winner will be announced in my blog on January 29.
Bye for now,
Content in this feed is © copyright 2015 by Nancy Zieman and may not be republished without written permission. You’re welcome to forward the email to a friend or colleague but it’s not okay to add the RSS feed automatically as content on a blog or other website.
January 20, 2015
To Appliqué with Love
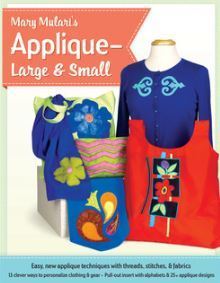
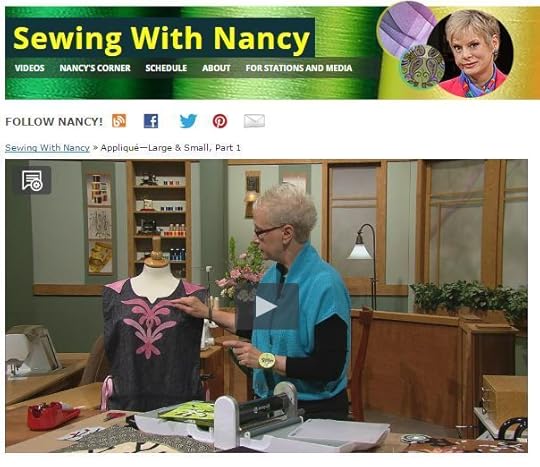
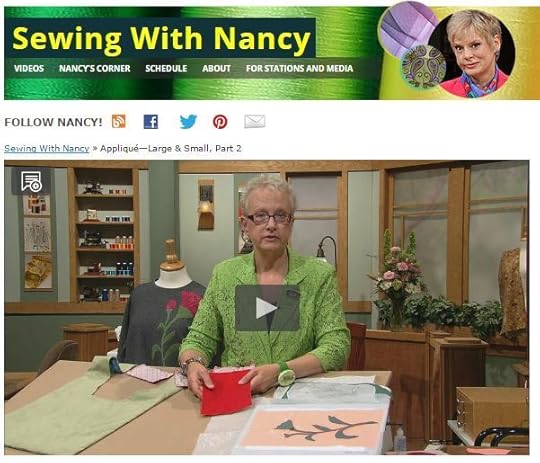
I’m excited that Mary Mulari, Sewing With Nancy’s most frequent guest, is sharing more ideas from her popular appliqué book, Applique Large & Small. She has projects featuring patterns and techniques, just in time for Valentine’s Day. Join us as Mary Mulari guest blogs today. And, watch her on Sewing With Nancy online, in her two part series, (Part 1 and Part 2).

By Mary Mulari, Guest Blogger
It’s not too late to plan and stitch some great Valentine’s Day mementos. With a copy of my book Applique—Large & Small and the appliqué designs included, you can create distinctive cards, gift bags, and gifts. Start now and you’ll have time to ship your creations to friends and family. You’ll see how to form heart shapes from swirls and how to use intriguing techniques to build appliqué designs. You have permission to enlarge and reduce the sizes of the 25+ appliqué designs and two alphabets from the pattern sheet in the book. Join me in inventing classy but easy projects perfect for my favorite February holiday.
Applique- Large & Small
Turn a plain tee into a perfect garment to wear to a Valentine’s Day party. The design is built from two fabric cutouts of one swirl appliqué shape. To make the heart more interesting, I chose a square of lace fabric to be placed off center and beneath the appliqué. The perfect tiny silver button adds additional dimension to the appliqué.

Appliqué Aprons
Aprons are terrific candidates for heart appliqués. Here’s the Blue Ribbon Apron from my pattern Newfangled Reversible Aprons. I chose the red rick rack trim, so a matching red heart was just right. To make the heart shape, I chose two different size paisley shapes from the pattern sheet. You can see how they fit together to form a heart. The heart fabric has wrinkles, which gives it lots of texture. The cotton fabric was sewn to specialty fabric (Fabric Magic™ or Texture Magic ™), which shrinks with a steam iron.

What are Appliqué Chips?
Start with scraps too small to save; they’re what I call appliqué chips.
Arrange the chips on a base fabric and sew everything together with clear monofilament thread. You’ll find the instructions and recommended materials in the book so you can build chips creations of your own. On this table runner, a flower cut from a chips base is terrific trim for a Valentine’s Day dinner table. Lines of stem stitching extend from the heart shaped pearl button in the center. Lana wool thread (stitched with a topstitch needle) creates the prominent heavy stitching.
The flower on the table runner is one of the three-layered flowers shown on a notebook cover—a pretty and practical Valentine’s Day gift for someone special.

Let’s Get Personal with Appliqué
Monograms are popular accents and embellishments. Choose one or more letters from the alphabets and reduce or enlarge the size as needed.
One large initial makes a bold and colorful trim on a small pillow. Use the traditional red and pink tones of Valentine’s Day, or select colors to match a girlfriend’s bedroom.
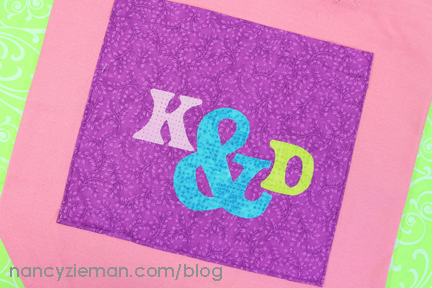
Monograms are also great tote bag decorations. To celebrate the holiday of Cupid and love, this tote features an added front pocket with appliquéd first initials of a special couple. Consider this idea also for a wedding shower or tote bag gifts for wedding party attendants.

Lots of Love Enclosed
With these cute and clever gift bags, it’s the thought that counts. A boating enthusiast will love the anchor-stitched design (Use the anchor appliqué shape and stitch around it by hand or on the Baby Lock Sashiko machine). The wool-felted bag trimmed with a woolen heart cut from an orange and white blanket holds an electronic tablet or a warm pair of socks. The bottle carrier can hold a Valentine’s Day “peace offering” of wine or flavored vinegar.

Last Minute, Fast No-Sew Heart Appliqués
With colorful fabrics, paper-backed fusible web, such as Wonder-Under, and an iron, you have the materials to turn plain paper bags into Valentine’s Day holiday décor. For a coordinated gift, match the appliqué fabrics to the colors of the gift inside the bag.

Beautify an everyday towel with a swirl appliqué shape paired to form a heart. When adding cotton fabric appliqués to a heavily textured waffle-weave towel, first apply lightweight fusible interfacing, such as Sof Shape Interfacing by Pellon, to the wrong side of the appliqué fabric. This helps maintain a flat appliqué surface.

Turn samples of heart appliqué designs into greeting card trim. The oval opening on the card frames the stitched heart shape.

I hope you’ll enjoy the creation of Valentine’s Day appliqué gifts and decorations along with giving and receiving gifts for this holiday of love, gratitude, and friendship.
~Mary
Do You Have a Copy of Mary’s Book?
Learn 14 easy-to-sew, up-to-date appliqué techniques—you get more than 3 dozen ideas on how to use these techniques on projects.
Make quick and easy, yet inventive appliqué projects both big and small—the 14 techniques can be used to create large and small applique designs depending on your project, requiring minimal fabric and time
25+ full-size appliqué designs, plus full upper and lower case alphabet included on a pullout pattern to make tracing simple and easy
Techniques include:
Using basic appliqué steps and tips for professional looking appliqués
Utilizing common machine stitches that often never get touched to simplify the appliqué process, while adding an artistic touch
Creating leaf and flower appliqués without fussy cutting a single leaf or petal shape
Watch Applique—Large & Small
Watch Mary on Sewing With Nancy in this two part series. Part One:
Watch Mary on Sewing With Nancy in this two part series. Part Two:
Where’s Nancy?
If you watched the show online and didn’t find me, Nancy, at the helm of Sewing With Nancy, you might wonder what happened! No, I’m not trying to compete with Waldo, rather I was recovering from a rather serious illness and needed time to rest. What better person to fill the job than my most frequent Sewing With Nancy guest and dear friend Mary Mulari. Not to worry, I’m back to my old self and once again I’ve returned to my favorite classroom, the Sewing With Nancy studio.
For a chance to win a copy of Mary Mulari’s book, please leave us a comment telling us your favorite appliqué method.
The random winner of a 5-in-1 Sliding Gauge from Clover Needlecraft is Patti K. Her comment was: This 5-in-1 tool is definitely going on my wish list! It would solve so many situations I deal with daily. Thanks for sharing the information on it. I hadn’t ever really looked at it before. Thanks.
And thank you Mary! What great ideas.
Bye for now,
Content in this feed is © copyright 2015 by Nancy Zieman and may not be republished without written permission. You’re welcome to forward the email to a friend or colleague but it’s not okay to add the RSS feed automatically as content on a blog or other website.
January 17, 2015
2015 Adventure Quilt—Block of the Month #1

Welcome to the first of twelve Block of the Month patterns. The series of blocks will go together in, what I’m calling, The 2015 Adventure Quilt. Join us on our journey as we stitch our way through many quilting fabrics and scraps using many different techniques. I’ve compiled a collection of blocks that will look great as a sampler, which features one stitched block for each month, or as a single block in a quilt design.
Notions, Fabrics and Supplies:
Clover’s Trace ‘n Create Quilt Template—Dresden Collection
Clover’s Pen-Style Chaco Liner and/or Trace ‘n Mark Pen marking tools
Clover’s Rotary Cutter and mat
Fabric Scraps or fat quarter collection
Pellon Sof Shape Fusible Interfacing
Optional: Clover’s Point 2 Point Turner
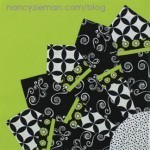
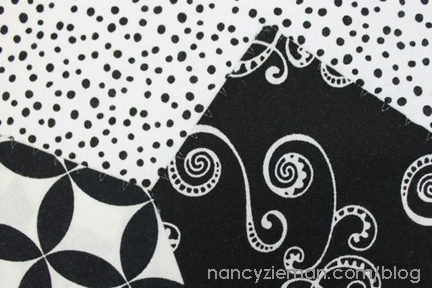
Let’s get started on the quilt adventure by choosing fabrics. I recommend choosing three colors. Any three colors should work. I’ll be working with black, white, and a green/chartreuse color collection. As I rummaged through my quilting fabric scraps, I found that I had the most of these colors on hand.
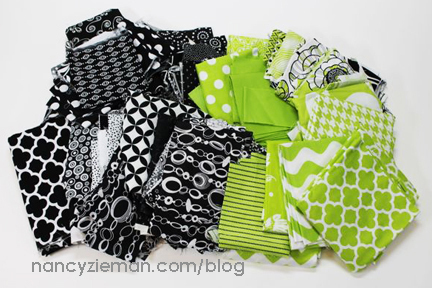
One thing I was thinking as I pulled my fabrics is that I may need to have interchangeable pieces as the months progress. By that I mean, a collection of black-based fabrics, a collection of mostly-white and an assortment of greens. As we add more blocks, I want to ensure easy addition of fabrics if my scrap bin gets low.
January: Scrappy Dresden Fan
The block this month measures 12-1/2″ x 12-1/2″, and it measures 12″x 12″ once it is stitched into a final project. A 1/4″ seam allowance is included.
Cutting Directions:
For the scrappy strips:
Cut a 5-1/4″ x 17″ strip black fabric.
Cut a 3/4″ x 17″ strip green fabric.
Cut a 1-1/4″ x 17″ strip black/green/white print fabric.
Cut a 3-1/2″ x 17″ strip white fabric.
For the background:
Cut a 12-1/2″ x 12-1/2″ square white fabric.
Cut a 6″ x 6″ square green fabric.
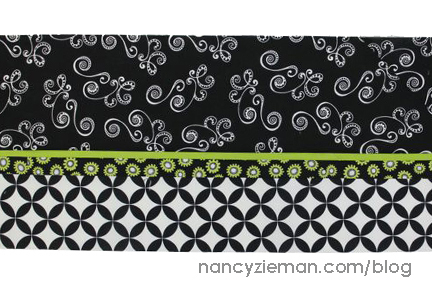
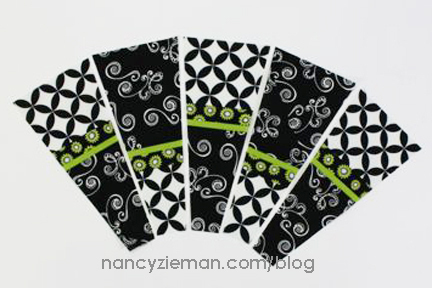
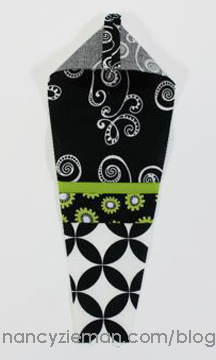
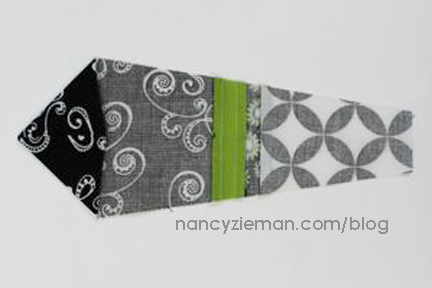
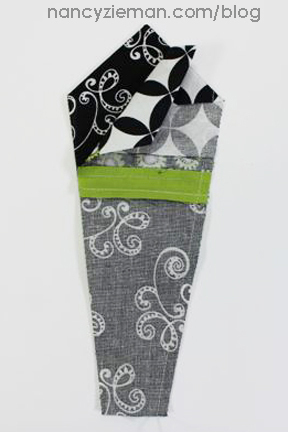
First Step, Stitch the Strip
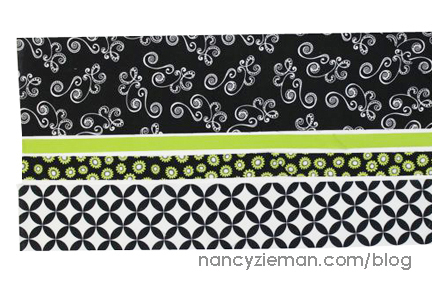
Arrange the strips as shown above. Keep the narrowest strips in the center.
Match right sides and use a 1/4″ seam allowance to join the strips. Press.
Once the strip set is stitched, it should measure 9-1/4″ x 17″.
Create the Dresden Plate
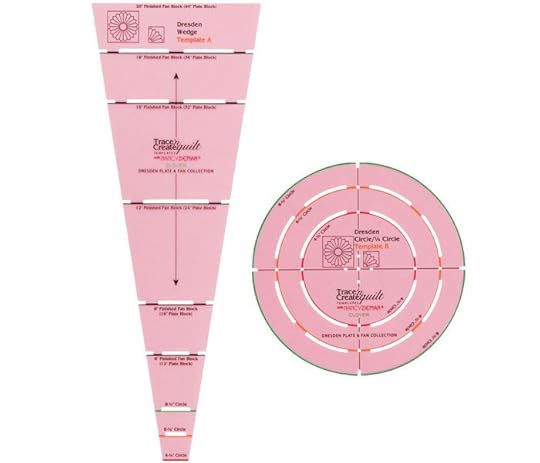
If you’ve never created a Dresden Plate appliqué, you’ll need a template to create the wedges.
The traditional Dresden wedge is 4″ to 8″ in length. I designed a template that creates traditional to super-sized Dresden blocks, the Trace ‘n Create Quilt Template—Dresden Plate Collection .
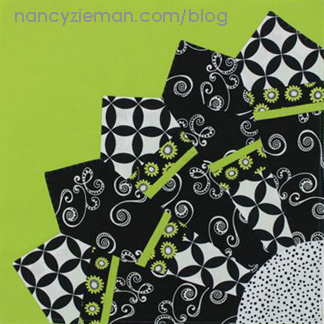
Follow the directions included with the Trace ‘n Create Dresden Template, select the wedge size desired, and trace five wedges per block.
For each quilt block, trace five wedges on the top layer, following the instructions in the package.
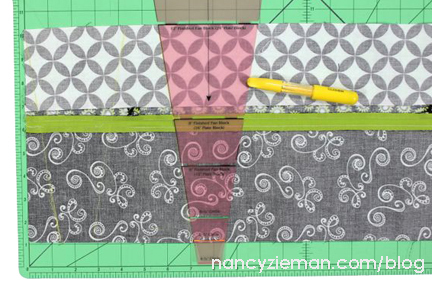
Use a rotary cutter , mat, and ruler to cut wedges along traced lines.
Alternate cutting directions with the ruler. This will make efficient use of your fabric and yield a scrappy design by rotating the cut wedges.
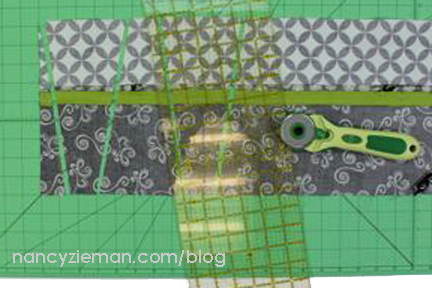
Place wedges right sides together and stitch using a scant 1/4″ seam allowance.
Use the chain stitching method to stitch all five wedges.
Cut threads between wedges and finger-press seams open.
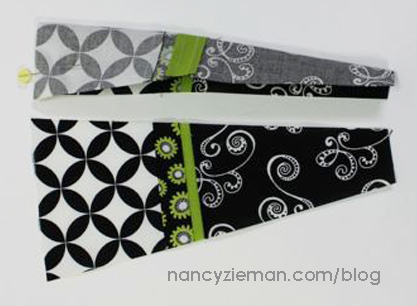
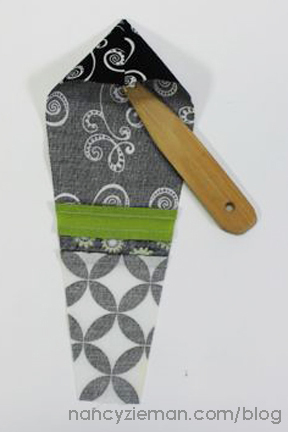
Turn wedges right side out.
Create a crisp point using a bamboo pointer or Clover’s Point 2 Point Turner .
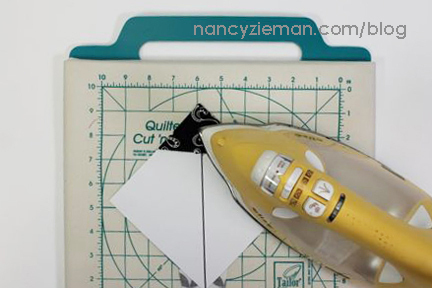
Make a pressing template from a 4″ square of tagboard. In the center of the pressing template, draw a straight line from corner to corner.
Insert pressing template between fabric layers, aligning seam with straight line.
Press. Use the pressing template to assure that all twenty wedges will align in the next step.
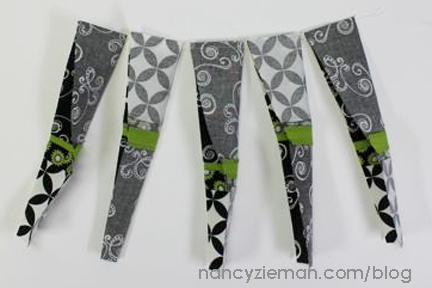
Place two wedges right sides together. Stitch with scant 1/4″ seam. Press seam open.
Stitch five wedges together.
Press the seam allowances open.
Pin the Dresden petals to the background, aligning the bottom and right sides of the petals to the background.
Machine stitch around the points of the Dresden petals using a blanket stitch and monofilament thread .
Use a straight-stitch along the bottom and right sides to secure the edges.
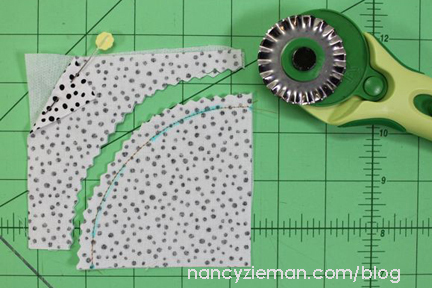
Determine the size of the circle diameter used in the lower corner of the quilt block.
Follow the directions on the Trace ‘n Create Quilt Template—Dresden Plate Collection to determine the finished diameter.
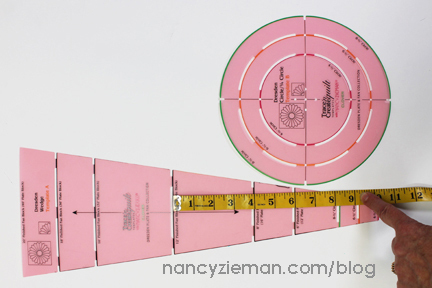
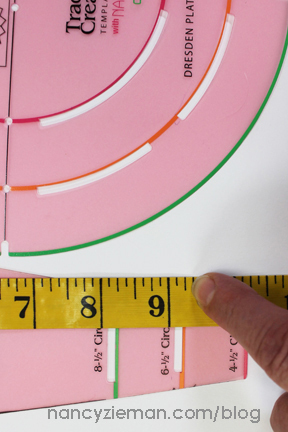
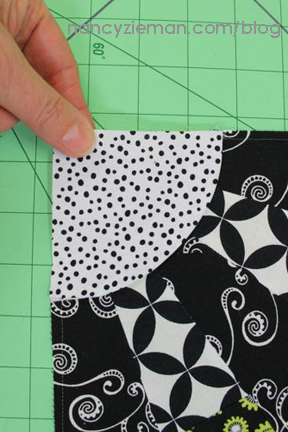
Layer the circle fabric and interfacing, nonfusible side to right side of fabric. Trace desired circle size onto interfacing.
For this block, the diameter is traced at the 6-1/2″ diameter mark on the circle template.
Mark the stitching line.
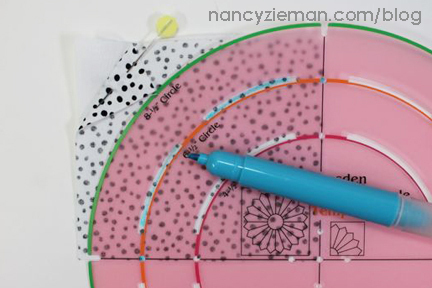
Stitch directly along the line.
Remove the excess fabric, 1/4″ past the stitching line, using the Pinking Rotary Cutter .
Trim away the interior of the interfacing with a scissors, leaving about 1″.
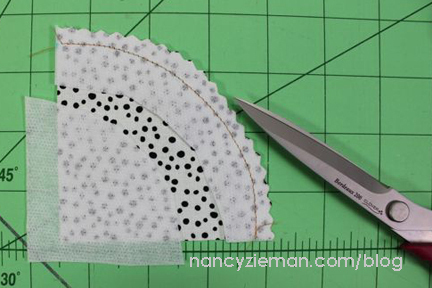
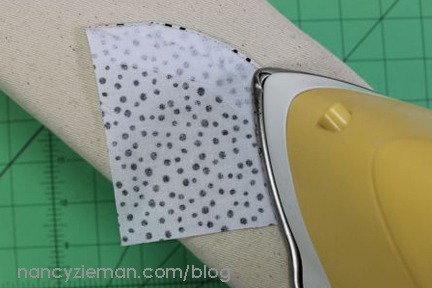
Turn and fuse interfacing to the wrong side of the fabric.
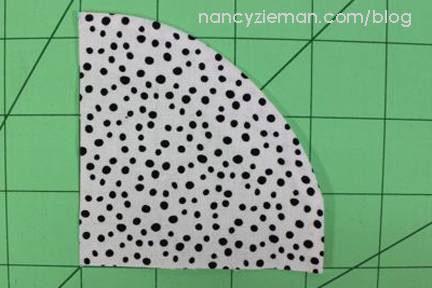
Place finished quarter circle on the lower corner of the Scrappy Dresden block.
Cover the edges of the Dresden center by at least 1/4″.
The quarter circle should line up with the background square.
Stitch circle to Dresden Plate with a straight stitch, blind hem stitch, or decorative stitch.
Straight stitch the corner edges to secure them.
.
Share your 2015 Adventure Quilt Blocks Socially
If you have a blog site, website, or online social sewing group, feel free to grab the code and share this button.

If you are on social sites like Instagram, Twitter, Flickr or Facebook, let all your friends know you are working on The 2015 Adventure Quilt Blocks by tagging your post with the hashtag: #NZBoM.
The hashtag is a searchable “word” associated with an event or activity, which, when searched on popular social websites, like Instagram, Twitter, Flickr and Facebook, will show every single post using that hashtag. Even if you don’t personally know that stitcher, you’ll see her/his progress and a photo. Hashtags are a fun way to network and connect with people who share similar interests.
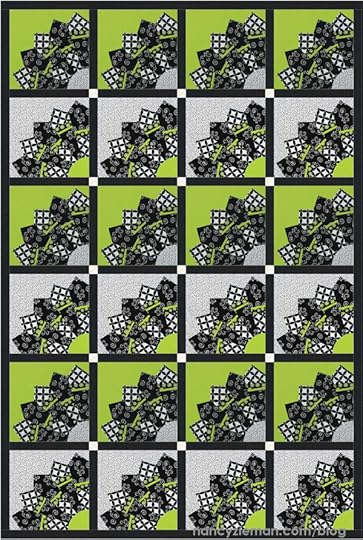
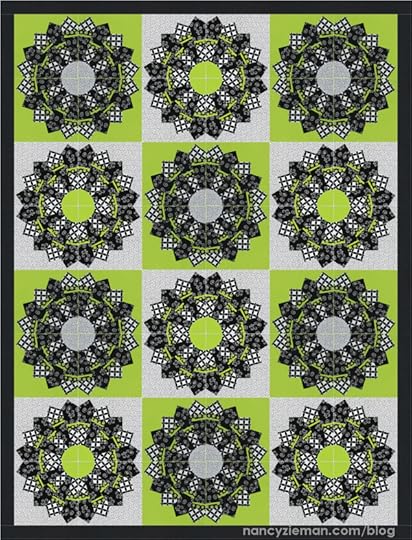
What would a Quilt Look Like?
As part of this Block of the Month series, included are ideas of what a quilt might look like if you made it with only this month’s block. Some of the concepts have sashing and others do not. These quilts are a good way to brainstorm what this block looks like repeated.
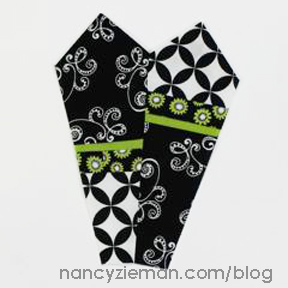
This quilt features blocks made with different backgrounds, sashings, cornerstones, and borders. The Dresden petals all point in one direction.
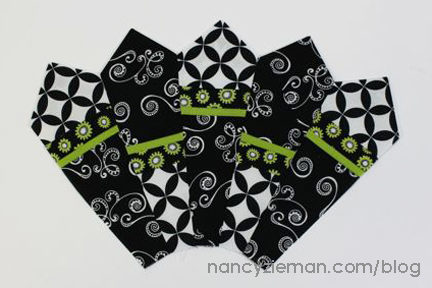
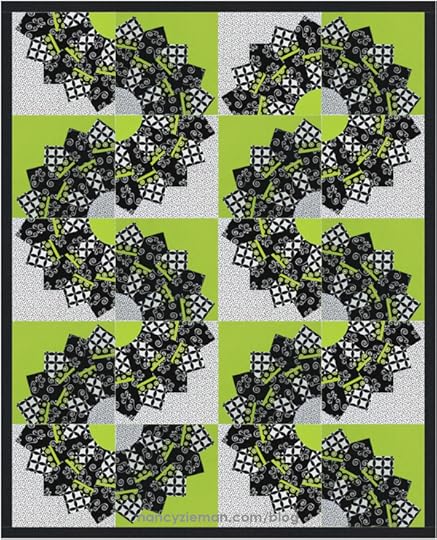
The following quilt features four blocks grouped together to make a circle or flower shape. No sashing is included, but a border has been added.
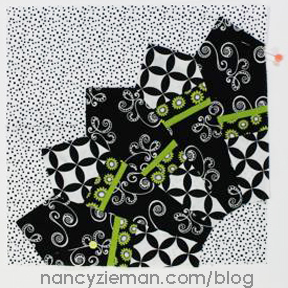
Lastly, a Dresden block quilt for your wild side. This concept has Dresdens pointing in all directions to make a sort of “snake” through the quilt top. No sashings were used, but a border has been added.
Bye for now,
Content in this feed is © copyright 2015 by Nancy Zieman and may not be republished without written permission. You’re welcome to forward the email to a friend or colleague but it’s not okay to add the RSS feed automatically as content on a blog or other website.
Nancy Zieman's Blog

- Nancy Zieman's profile
- 21 followers

