
Nancy Zieman's Blog, page 131
March 3, 2015
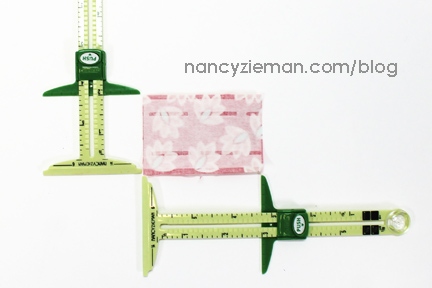
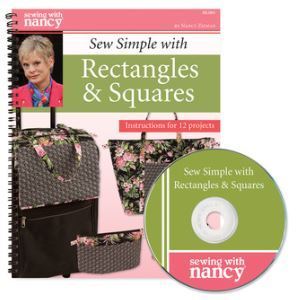
Sew Pattern Weights from Fabric Scraps

From the book Sew Simple with Rectangles & Squares, see this useful project that will have you searching the sewing room for fabric scraps. Toss them in a game or use them to hold down pattern pieces, these Mini Fabric Sacks can be both fun and functional. Use only a small amount of fabric and finish the project in under an hour.
Fabric, Supplies, and Notions
1/8 yard laminated cotton fabric
1/8 yard coordinating cotton fabric
1/8 yard 1″ wide Create a Strap
Sew Simple with Rectangles & Squares book
5-in-1 Gauge
Approximately two cups of bean bag pellets

Construction Steps
Cut the fabric
Laminated cotton fabric: Cut a 4″ x 6″ rectangle for each sack.
Coordinating cotton fabric: Cut a 2″ x 3″ rectangle for each handle.
Create-a-Strap : Cut a 3″ length for each handle.
Create the handles
Fuse a 3″ strip of Create-a-Strap to the wrong side of each 2″ x 3″ handle rectangle.
Fold each 3″ side along the perforations.
Press.


Edgestitch along the folds.

Fold in half, meeting short ends and wrong sides.
Create the sack base
Fold the 4″ x 6″ rectangles in half, meeting the 4″ sides (short edges), right sides together.

Center and insert the tab in the top seam, with the raw edges even.

Use a 1/4″ seam allowance to stitch the top seam.

Fold the seam down along the seamline.
Use a Wonder Clip to hold the top seam in one direction.
Stitch the side seam, sewing over the folded seam allowance.

Fold a 1/2″ hem along the open edge, using the 5-in-1 Gauge for accuracy.

Turn the fabric sack right side out.

Fill the sack with bean bag pellets.
Use a machine straight stitch to close the sack.
Note From Nancy: Attach a zipper foot for this last step to easily stitch close to the stuffed area of the fabric sack.
Watch Sew Simple with Rectangles & Squares on Sewing With Nancy
To watch Sewing With Nancy on your iPad, iPod Touch, or iPhone, download the app.

For a chance to win a copy of Sew Simple with Rectangles & Squares, leave a comment telling me: What is the smallest size fabric scrap you will keep?
A random winner will be announced on March 10.

Have you entered your pillow in my 2015 Pillow Challenge ? Entry deadline is next Tuesday, March 3, 2015. Join the fun and learn the details at my February 3 Blog Posting .
Bye for now,

Content in this feed is © copyright 2015 by Nancy Zieman and may not be republished without written permission. You’re welcome to forward the email to a friend or colleague but it’s not okay to add the RSS feed automatically as content on a blog or other website.


February 28, 2015
Circle Appliques That Make “Wow” Quilts

Circle accents are everywhere—quilts, pillows, table runners, or handbags. Make a statement by sewing circles, spots, or dots with my no-stress appliqué technique. The sewing secret is to use fusible interfacing.
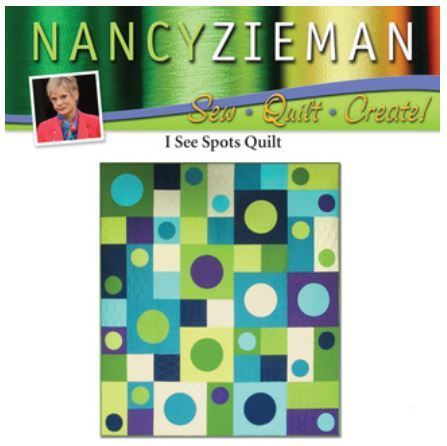
The featured quilt, I See Spots, recently hung on display at the Modern Quilt Guild’s QuiltCon conference in Austin. The bold colors, large blocks (18″ squares), and rectangle shapes (9″ x 18″) give the quilt a modern feel. But don’t think you need to make a quilt! Just one 18″ block would make an ideal pillow.

I See Spots
Create circles or spots without ever cutting a circle! How? Fusible interfacing is the key. Learn how to create this bed-sized quilt with the streamlined process of stitching circles instead of cutting them.
I See Spots is a bed-sized quilt with 18″ blocks, 9″ blocks, and 9″ x 18″ rectangles. The focal points are the circles or spots! Cast aside traditional appliqué techniques and learn the speedy way of creating and appliquéing circles. Want a smaller project? Scale down the quilt to a lap size or simply make a pillow.
Tools
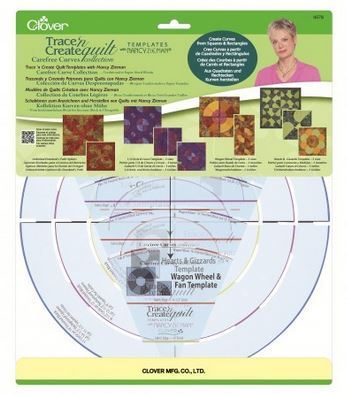
Trace ‘n Create Quilt Template—Carefree Curves Collection
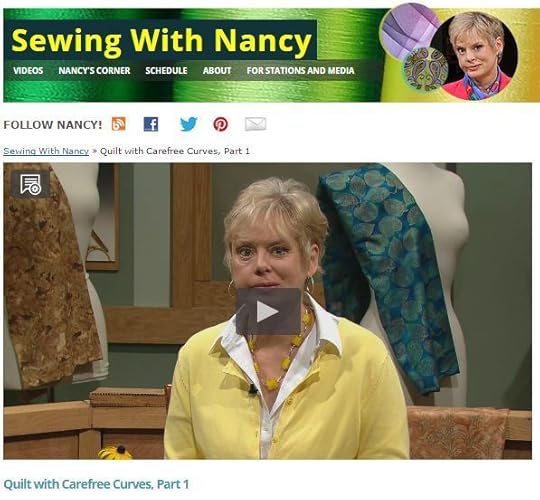
Note from Nancy: There are three templates in this collection, the 1/4-Circle & Circle Template will be used for this project. For other quilt design ideas, check out the book and Sewing With Nancy TV show, Quilt with Carefree Curves.
Point 2 Point Turner
Pellon SofShape Interfacing
Monofilament Thread
I See Spots Project Sheet
Fabrics Select eight fabrics in various shades of light, medium, and dark. If you’d like to personalize or change the color scheme, make certain to follow the standard rule of thumb for quilting and choose light, medium, and dark shades.
Note from Nancy: The fusible interfacing is the key to the construction of this design. Don’t choose a heavy fusible interfacing, light is best! This quilt was made using Pellon’s Sof-Shape.
Technique Instructions
The complete instructions to make the circles or spots are available in the I See Spots Project Sheet.
Create the Circles or Spots
Details on the strip size relative to the circle size and strip widths are marked on the template.
Layer same-sized interfacing and fabric blocks, right sides together.
Placing smooth side of interfacing to right side of fabric. Pin.

Place circle template on each block set.
Trace the circle.
Use a fine-point fabric-marking pen .


Set machine for a straight stitch, 2.0 stitch length.
Stitch directly on the traced line.
Note from Nancy: When stitching curves, I like to use a shorter stitch length, which provides a smoother finished curve.

Trim away excess fabric. For best results, use a pinking rotary cutter blade.

Trim away excess interfacing from interior, leaving 1″ of interfacing.
 Note from Nancy: Save the trimmed interior section of the interfacing to use when creating smaller circles.
Turn interfacing to wrong side.
Press curved edge, making certain seam is along the edge.

Fold background blocks and circles into fourths. Lightly press folds.

Unfold fabrics.
Center the small circles onto larger blocks, matching creases; pin.
Pair the circles to blocks as per the illustrated color guide I See Spots Project Sheet .

Fold each rectangle in half, meeting long edges. Lightly press the fold. Unfold the fabric.
Measure down 1-3/4″ from one end of each rectangle.

Align creases of circles with vertical creases on rectangle. Pin.
Pair the circles to rectangles as per the illustrated color guide.
Stitch Circles to Background Blocks and Rectangles
Thread needle with monofilament thread such as Madeira’s Monofilament thread .
Use all-purpose thread in the bobbin.
Set machine for either a straight stitch, narrow zigzag stitch, or blanket stitch.
Stitch circles to fabric.

Follow illustrated color guide to assemble and stitch blocks and squares.
Stitch blocks and squares using 1/4″ seam allowances.
Layer quilt top, batting, and backing.
Quilt using your favorite quilting techniques.

.

Finish quilt with binding.
Get the complete I See Spots Project Sheet at Nancy’s Notions.
Watch Carefree Curves Techniques Online
I demonstrate how to make circle appliqués during this Sewing With Nancy episode. Enjoy!
A big thank you to those of you who attended my two lectures: Seams Unlikely and Crafting a Sewing Business: One Stitch at a Time, checked in on my QuiltCon guest book, and entered to win a Carefree Curves template from Clover. The random giveaway winner is Judy Tucker! Congratulations, Judy!
——————
Have you entered your pillow into my 2015 Pillow Challenge? Entry deadline is next Tuesday, March 3, 2015. Join the fun and learn the details at my February 3 Blog Posting.
Bye for now,
Content in this feed is © copyright 2015 by Nancy Zieman and may not be republished without written permission. You’re welcome to forward the email to a friend or colleague but it’s not okay to add the RSS feed automatically as content on a blog or other website.
February 26, 2015
Quilt Binding in Six Easy Steps
A narrow strip of fusible interfacing is the secret to fearlessly binding the edges of a quilt in six easy steps. In the past, it was a trick for me to join the beginning and ending of the quilt binding. Not any more! I hope that you will enjoy this sewing tutorial on quilt binding.
I can’t take credit for this technique, fellow Sewing With Nancy team member; Donna Fenske came up with this idea. Her innovative process is one of the techniques in this week’s Sewing With Nancy featured online video. It’s the last of the three-part series, Fearless Quilting Finishes. During this 30-minute show you’ll learn assorted quilt binding finishes. Watch the process online for all the details.
Here’s how sew a quilt binding
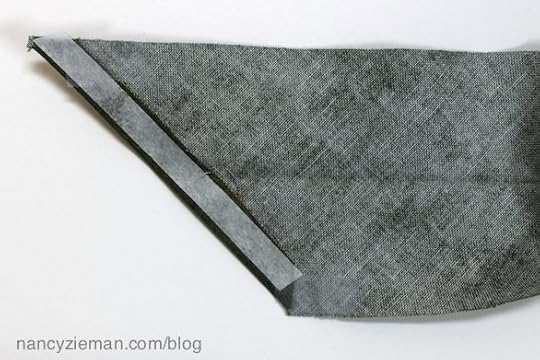
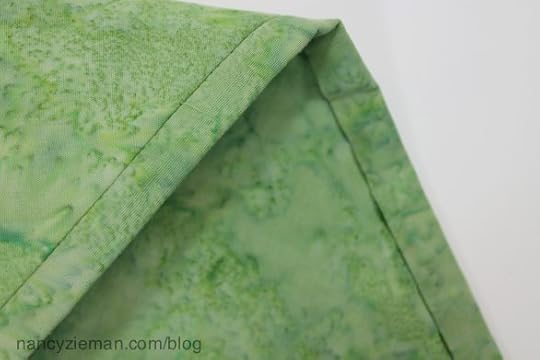
Step One: Prepare the binding strips
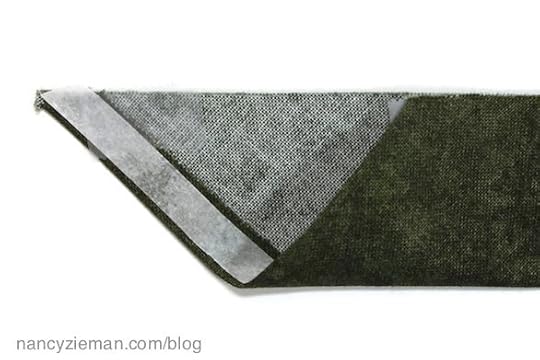
Cut one end of the binding with a 45-degree angle. Press in 1/4″ at the beginning angled edge.
Press a 1/4″ strip of fusible tape on top of the folded inner edge.
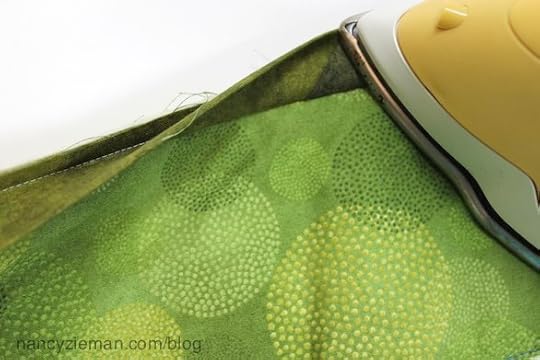
Step Two: Press the binding
Fold and press the binding in half, wrong sides together, meeting lengthwise edges.
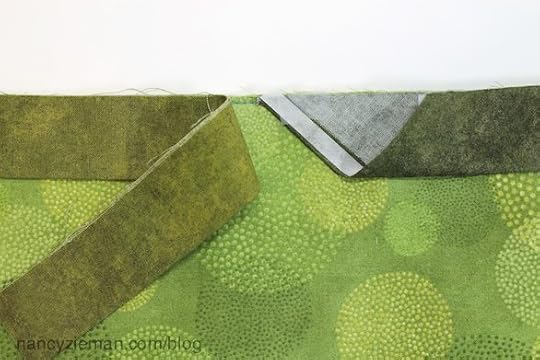
Step Three: Stitch the binding to the quilt
Stitch the binding to the quilt with a 1/4″ seam, starting about 4″ from the end of the binding. (See the white thread at the far right of the photo!)

I detail how to fold and stitch the binding at the corners. Remember, you can watch online , view the DVD , or of course, watch on Public TV!
Step four: Fuse the quilt binding ends together
Remove the paper backing from the fusible web.

When the binding reaches the starting point, tuck the end of the binding into the beginning.
Trim off the excess binding, if there is any.
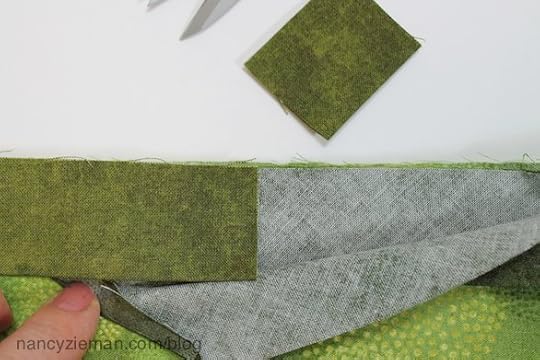
With the binding end sandwiched between the starting point, press. The bias seam is secured without stitching.
Next, continue to stitch the remaining 1/4″ seam.

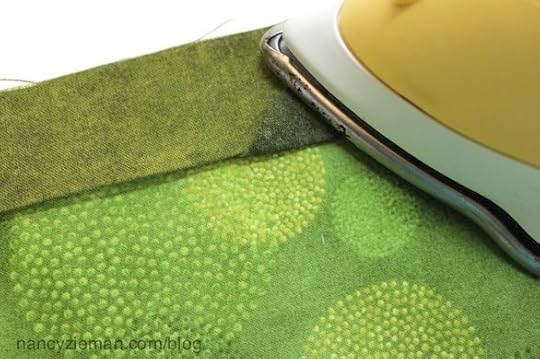
Step five: Turn the binding to the wrong side
Press the binding up.
Wrap and pin the binding to the wrong side, covering the stitching line.

Step six: Stitch the final time
Stitch in the ditch, sewing in the well of the seam.

Or, hand stitch the folded edges, stitching on the wrong side of the fabric. (I’ve obviously used another sample.)
There’s more to learn online or read in the Fearless Quilting Finishes book!
If the corners of your quilting project are hexagon or octagon shaped, learn the tips on how to add binding to easily finish those edges. Also learn how to add binding to curves.

Did you catch the first two episodes of Fearless Quilting Finishes?
Watch episode one and episode two online. Or, check out my blog post on borders and the blog post on stippling!
Here’s a reference to have close at hand.
All the information shown in the three-part series is written and illustrated in my book, Fearless Quilting Finishes. Plus, the DVD features all three parts of the series. The Sewing With Nancy staff makes certain that all the steps are carefully written and illustrated. Presenting sewing and quilting techniques is a team effort!
For a chance to win a copy of Fearless Quilting Finishes, please let me know your favorite quilt border technique. The random winner will be announced on March 5.
Watch Sewing With Nancy online.
To watch Sewing With Nancy on your iPad, iPod Touch, or iPhone, download the app.

Have you entered your pillow into my 2015 Pillow Challenge ? Entry deadline is next Tuesday, March 3, 2015. Join the fun and learn the details at my February 3 Blog Posting .
Bye for now,
Nancy Zieman—author, pattern designer, businesswoman, producer, and national sewing authority—is the host of the popular show Sewing With Nancy®, which appears exclusively on public television stations across the United States and Canada. Follow Nancy’s blog at NancyZieman.com/blog and sign up to receive Nancy’s E-News for the latest news in sewing, quilting, and creating.
Content in this feed is © copyright 2015 by Nancy Zieman and may not be republished without written permission. You’re welcome to forward the email to a friend or colleague but it’s not okay to add the RSS feed automatically as content on a blog or other website.
February 24, 2015
Top 5 Favorite Sewing Scrap Busters
With all the sewing that goes on inside the walls of Nancy’s Notions, we get more than our share of fabric scraps. In fact, our sewing room has boxes and boxes of them building up beneath tables and along walls. Every seamstress knows it would be a cardinal sin to throw a single scrap away. So how do you use them up? Here are 5 ideas for useful and beautiful projects to get your creativity going.
Idea #1: Fabric Twine
This was the video that got us thinking about scraps in the first place. This tutorial will show you how to make twine that’s functional and 100% fabulous. This beautiful multicolored cord would be fantastic as a gift-wrapping element, a textural accent on a quilt, braided into headbands, belts, purse handles, and anything else you can think of!
If you don’t have long strips of scraps at home, precut fabric strips would make an excellent alternative.
http://www.youtube.com/watch?v=-XfpFhnh8xg
Video courtesy of mypoppet.com.au
Idea #2: Rag Rugs
Rag Rug patterns are some of the most popular items sold at Nancy’s Notions. The reason they’re in such high demand is because they don’t require any special skills or equipment. Anybody can make a rag rug. Plus, the look of a rag rug is classically cozy. But of course, the very best thing about rag rugs—they take a ginormous bite out of your scrap stash.

Small projects are scraps’ best friend, and pincushions are the ultimate small project to make. You can sew dozens of them and feel good about giving them away; they’re a practical gift, and with tons of different designs to choose from, you can never go wrong handing them off to friends and family for birthdays, holidays, or just to show a little love.

Find instructions for this pincushion in the Pincushion Appeal Book at nancysnotions.com
Idea #4: Pet beds
Who knew a fluffy bed for your furry friend was only a pillowcase away? Fill a pillowcase with shredded scraps, sew the end shut, and voila! You have a pet bed perfect for your own home use, or as a fantastic donation to an animal shelter.
Want to make it even scrappier? Sew the pillowcase yourself from old yardage! Nancy’s Notions has a free pattern for an easy pillowcase here.

Idea #5: Crazy Quilting
Of course we have to mention the fairy godmother of all scrap projects: crazy quilting. Crazy quilting has been around for centuries. The technique involves impromptu patchwork using small scraps—making it a resourceful, yet beautiful way to prevent fabric waste. Often embellished with a variety of stitches, the end result has lots of color, texture, and of course—meaning—infused within the project. Modern variations include using embroidery, coordinating colors for a more cohesive look, and mixing crazy quilting with more structured quilting to get a nice contrast. Small projects like decorative pillows, mug rugs, and pot holders are simple ways to try out crazy quilting.

This pillow sham was created using Eileen Roche’s Today’s Crazy Quilting With Your Embroidery Machine Set.
This is really only the tip of the iceberg—there are hundreds of ways people use up their scraps. For even more ideas, visit nancysnotions.com/scraphappy or connect with Nancy’s Notions on Pinterest to get those creative wheels turning.
Thanks for the blog Roxanne!
The random winner of Quick Column Quilts is Joyce W. She shared, I was watching your Quick Column Quilts program on our local PBS station on Saturday and the phone rang. My 86 year old mother called to ask if I was watching the program. We both found it very interesting and hope to try your techniques. Thank you for continuing to present such great programing and the tutorials on your blog.
 Bye for now,
Content in this feed is © copyright 2015 by Nancy Zieman and may not be republished without written permission. You’re welcome to forward the email to a friend or colleague but it’s not okay to add the RSS feed automatically as content on a blog or other website.
February 21, 2015
2015 Adventure Quilt – Block of the Month #2

Welcome to the second of twelve Block of the Month patterns. The series of blocks goes together in what I’m calling The 2015 Adventure Quilt. Join us on our journey as we stitch our way through many quilting fabrics and scraps using many different techniques. I’ve compiled a collection of blocks that look great as a sampler, which features one stitched block for each month, or as a single block in a quilt design.
Remember, this quilt will be a scrap adventure for you and me. Total yardage for the entire quilt is not provided, rather we will be working in a color palette of scraps (or Fat Quarters).
Notions, Fabrics, and Supplies:
Assorted fabric scraps or fat quarters
Trace ‘n Create Quilt Templates—Carefree Curves Collection
SofShape Fusible Interfacing
Optional: Clover’s Point 2 Point Turner
Getting Started
In January, I decided my block of the month adventure would be made in green, black, and white fabric scraps.
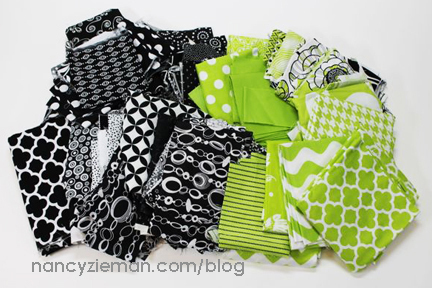
As I pulled my fabrics, I was thinking that I may need to have interchangeable pieces as the months progress. By that I mean, a collection of black-based fabrics, a collection of mostly white, and an assortment of greens. As we add more blocks, I want to ensure easy addition of fabrics if my scrap bin gets low.
February: Cornered Hearts
The block this month measures 12-1/2″ x 12-1/2″, and measures 12″x 12″ once it is stitched into a final project. A 1/4″ seam allowance is included.
Note from Nancy: I made two “Cornered Hearts blocks” for my adventure quilt. A complete crosswise strip isn’t needed to make just two blocks—fabric scraps are all you need.
Cutting Directions:
Cut one 12-1/2″ background square for each block.
Select two coordinating fabrics for each heart shape.
Cut 6″ and 8-3/4″ crosswise strips, as indicated on the Carefree Curves Template.

Cut crosswise strips of SofShape Fusible Interfacing
Cut 2-1/2″ crosswise strips for the smaller size.
Cut 3″ crosswise strips for the larger size.
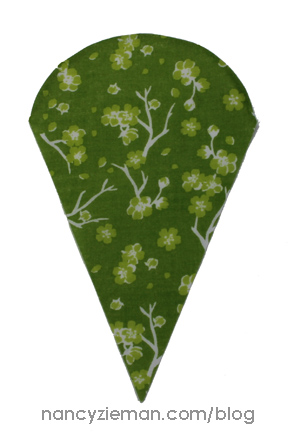
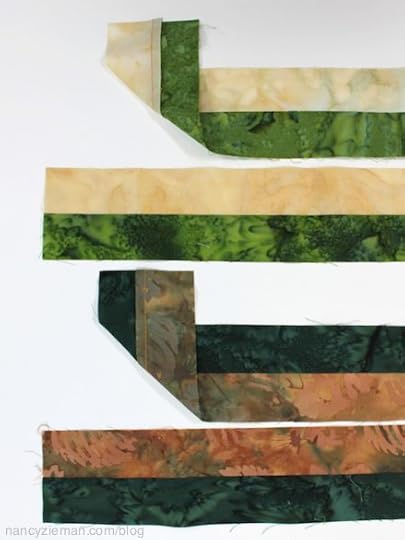
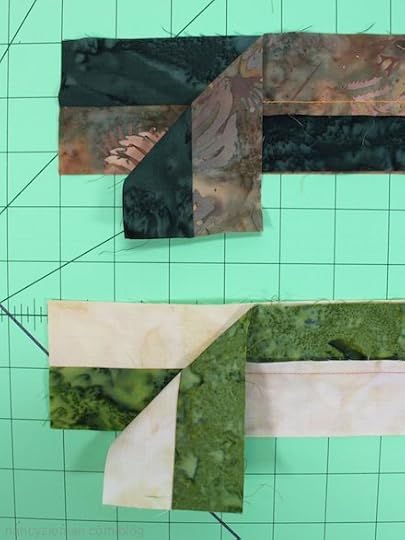
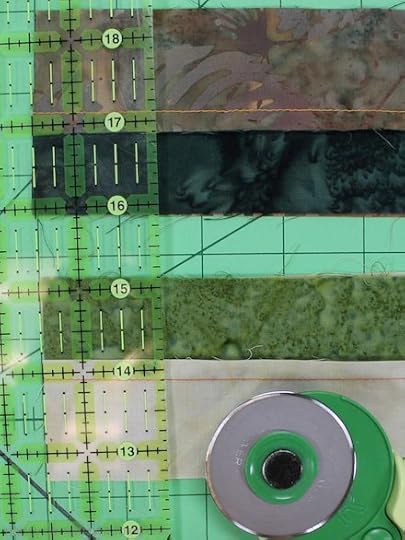
Trace and Stitch
Align template on crosswise strip, placing template “fabric edge marking” along top edge of fabric.
Starting at one edge, trace both sides of template with fabric marking pen/pencil.
Trace curve within die-cut areas of template.
Rotate template 180-degrees; align template “fabric edge” with fabric lower edge and side of template with previously traced straight line.
Mark the untraced side of template and mark curve within die-cut areas.

Repeat the tracing and rotating process until desired quantity is achieved. Each block requires two wedges cut from the 6″ strip and two cut from the 8-3/4″ strip.
Cut along straight traced lines, using a rotary cutter, ruler, and mat.

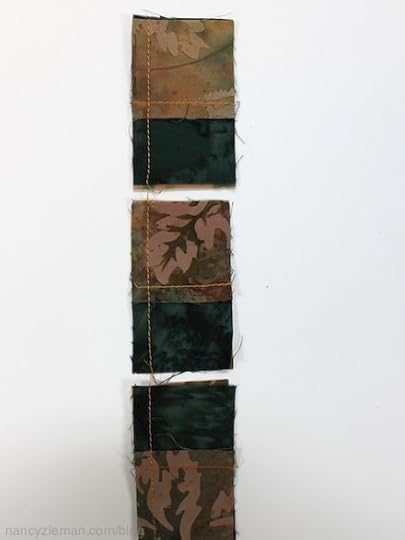
Align top edges of fabric and interfacing, right side of fabric to fusible side of interfacing; pin. Position top of next wedge along the lower edge of the interfacing and pin.

Stitch directly on curved traced lines.

Cut apart.
Trim away excess fabric. For best results, use a pinking shears or pinking rotary cutter blade.

Trim away excess interior interfacing with a scissors, leaving about 1″ of interfacing.

Turn interfacing to wrong side using Clover’s Point 2 Point Turner.

Press curved edge.

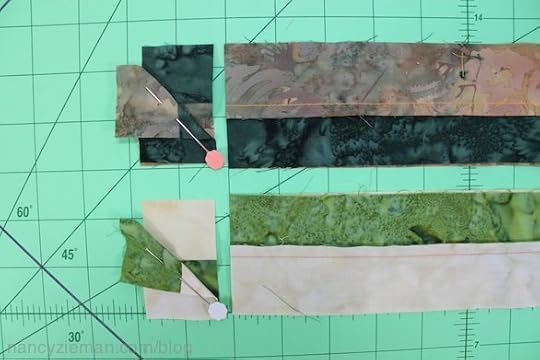
Align the same sized heart-shapes, right sides together and pin.
Stitch along one edge with a 1/4″ seam allowance.

Press the seam open.

Pin the heart shapes at opposite corners of the background fabric, aligning the corner edges.

Thread machine with monofilament or clear thread such as Madeira’s Monofilament thread .
Select a bobbin thread that matches the background fabric.
Machine stitch shapes to background, using a straight stitch, zigzag, or blind hemstitch.

Baste the heart straight edges to the background fabric along outer edges.
.

Share your 2015 Adventure Quilt Blocks Socially
If you have a blog site, website, or online social sewing group, feel free to grab the code and share this button.

If you are on social sites like Instagram, Twitter, Flickr, or Facebook, let all your friends know you are working on The 2015 Adventure Quilt Blocks by tagging your post with the hashtag: #NZBoM.
The hashtag is a searchable “word” associated with an event or activity, which when searched on popular social websites, like Instagram, Twitter, Flickr, and Facebook, will show every single post using that hashtag. Even if you don’t personally know that stitcher, you’ll see her/his progress and a photo. Hashtags are a fun way to network and connect with people who share similar interests.
What would a Quilt Look Like?
As part of this Block of the Month series, included are ideas of what a quilt might look like if you made it with only this month’s block. These quilts are a good way to brainstorm what this single block looks like repeated.
This quilt features 35 of February’s Cornered Hearts in alternating colors. Blocks are rotated to create focus flowers in two sizes.

16 blocks in alternating colors and set in sashing create this unique lap or baby-sized quilt, which draws your eye to the center.

With a modern twist, the 10 traditional Cornered Hearts quilt blocks come to life floating in white space. An additional five, 6-1/2″ blocks are created with smaller hearts appliquéd. The blocks are set with 6-1/2″ and 12-1/2″ White Tone on Tone fabric squares to create this quilt.

Watch more on Trace ‘n Create Quilt Templates—Carefree Curves Collection on Sewing With Nancy part two of Carefree Curves.

To watch Sewing With Nancy on your iPad, iPod Touch, or iPhone, download the app.
Bye for now,
Content in this feed is © copyright 2015 by Nancy Zieman and may not be republished without written permission. You’re welcome to forward the email to a friend or colleague but it’s not okay to add the RSS feed automatically as content on a blog or other website.
February 19, 2015
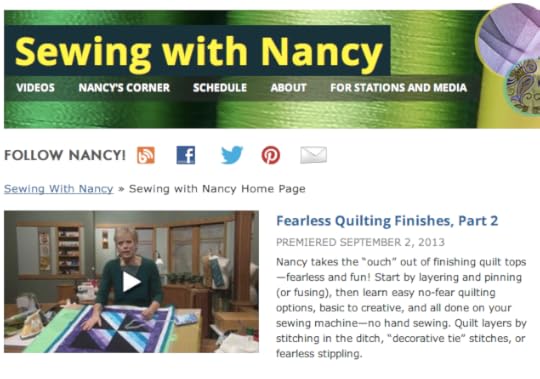
Stippling: Machine Quilting Basics
The creative process of quilting is quite rewarding, but how should you finish your work? On Sewing With Nancy the online video features part two of Fearless Quilting Finishes, and I’ll show you three different ways to tackle the quilting steps: stitching in the ditch, decorative “tie” stitching, and stippling.
The stippling-style quilting I’ll show you is easy to photograph, but it is much more effective if you watch the quilting process in motion. What better way to illustrate the technique than to have you click here and watch online. You can find all the details written in the book that accompanies the three-part series, Fearless Quilting Finishes.
Stippling Review
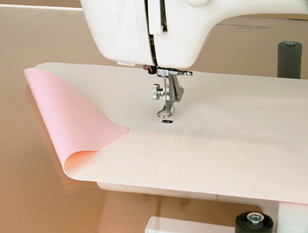
Setting up your sewing machine is the first step in learning how to stipple.
Lower the feed dogs.
Attach a quilting foot.
Set the machine for a straight stitch.
Choose a thread that matches the background, or use a variegated thread as featured in the quilted project.
Use a needle compatible with the thread. With the thicker variegated thread , I suggest a topstitching needle —the large eye accommodates the thread.
Helpful notions
With the feed dogs lowered, you’ll be guiding and moving the quilt layers underneath the needle area. This is the motion or process that makes many people leery! Consider using a Supreme Slider on the bed of the machine. I use it since it helps the fabric move effortlessly under the needle. The Supreme Slider has a Teflon top, and it has a tacky underside that sticks to the machine.
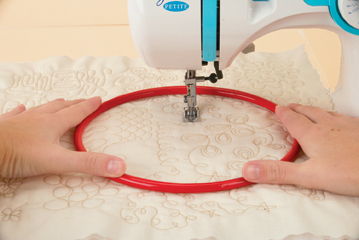
Use a Quilt Halo to help control the fabric—it’s comparable to the steering wheel on a car. Position the halo on top of the basted quilt and slide it under the foot of the machine. Then, hold the sides of the notion using gentle pressure. The tacky underside of the Quilt Halo grips the fabric while giving you a sense of control.
Begin by stippling a small project
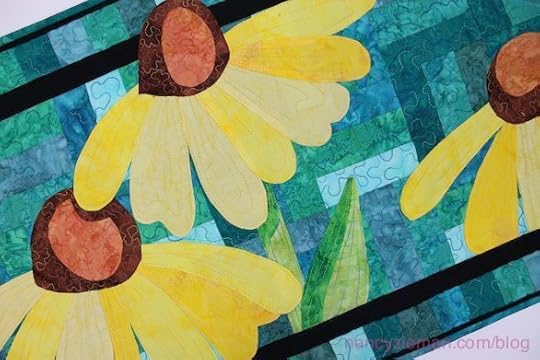
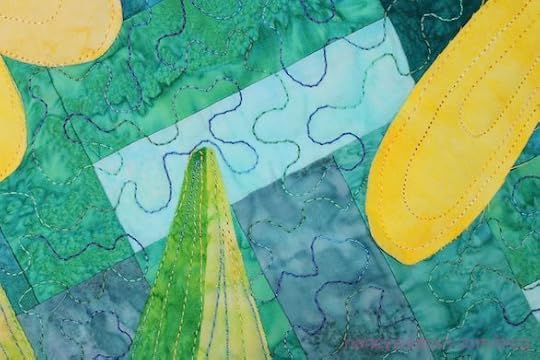
Choose a small quilting project for your first stippling adventure, such as a placemat or small wall hanging. Then, move the fabric under the needle to create medium to large “puzzle-end” shapes. Big shapes are okay, in fact that’s the best way to learn. Just be consistent in size.
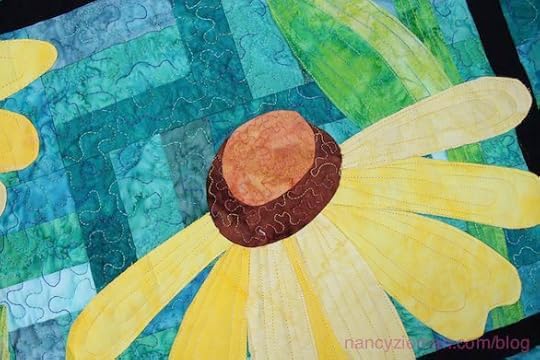
Or, stipple following the shape of the design as featured in the petals and leaves of the coneflower. It’s best to watch the process online!
Here’s a reference to have close at hand
All the information shown in the 3-part series is written and illustrated in my book, Fearless Quilting Finishes. Plus, the DVD features all three parts of the series. The Sewing With Nancy staff makes certain that all of the steps are carefully written and illustrated. Presenting sewing and quilting techniques is a team effort!
For a chance to win a copy of Fearless Quilting Finishes , please let me know your favorite quilt border technique. The random winner will be announced on March 5.

From Mary Mulari’s guest blog, the random winner of her book, Applique—Large & Small, is Ilana. She said, I love fusible applique. The pattern sheet in Mary’s book includes 25+ appliqué designs and two alphabets.
Watch Sewing With Nancy online.
To watch Sewing With Nancy on your iPad, iPod Touch, or iPhone, download the app.
Bye for now,
Nancy Zieman—author, pattern designer, businesswoman, producer, and national sewing authority—is the host of the popular show Sewing With Nancy®, which appears exclusively on public television stations across the United States and Canada. Follow Nancy’s blog at NancyZieman.com/blog and sign up to receive Nancy’s E-News for the latest news in sewing, quilting, and creating.
Content in this feed is © copyright 2015 by Nancy Zieman and may not be republished without written permission. You’re welcome to forward the email to a friend or colleague but it’s not okay to add the RSS feed automatically as content on a blog or other website.
February 17, 2015
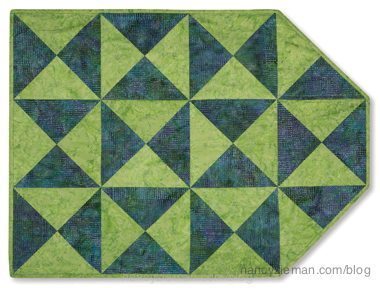
Quilting Simplified—Folded Flying Geese

Half-square triangles and bias edges are not needed to make the Flying Geese quilt pattern. Use folded triangles or Prairie Points to create this traditional design. Using squares, folds, clever pressing, and columns, quilting couldn’t be simpler.
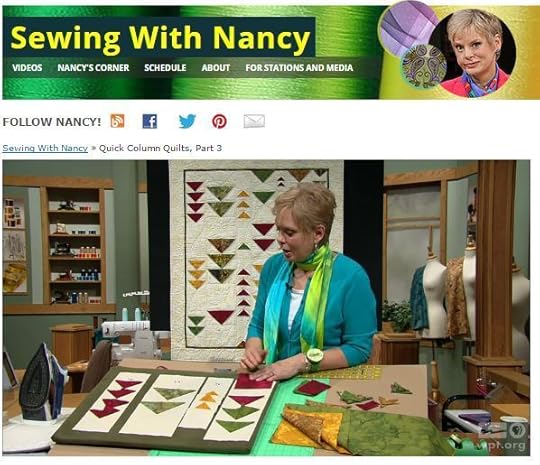
In this blog post, I’ll show you the basic technique for assembly so that you may incorporate this easy Flying Geese design in your quilts. For directions to create the quilt pictured above, see Folded Flying Geese in my book, Quick Column Quilts.
For a streaming video demonstration on how to create the Flying Geese design with three easy folds, watch Sewing With Nancy Quick Column Quilts (Part Three).
Cutting Directions:
Background or columns: Cut 2-1/2″ wide to 6-1/2″ strips from beige background fabric
Flying Geese: Cut 2″ to 6″ squares from five to six different colors of fabric.
Fold and Stitch Techniques
Press all cut squares in half matching wrong sides.
Meet the folded corners to the cut edge at the center. Press.

Stitch Flying Geese to Columns
Use a Folded Flying Geese unit that is 1/2″ narrower than the corresponding column width.
Mark the placement on the column.
Align the cut edge of the Folded Flying Geese unit to the placement mark.

Fold the column strip, right sides together, at each marked placement line. The Folded Flying Geese unit is sandwiched between the fabrics.
Press.

Stitch 1/4″ from the fold.

Open and press.

Repeat these steps to add many Flying Geese to a single column.

Arrange and Stitch the Columns
Measure and trim each column to a uniform length.
Join the columns together using 1/4″ seam allowances.
Stitch down the center of the Flying Geese units with monofilament thread to secure them to the column.

Note from Nancy: When quilting this Folded Flying Geese project, make certain to choose a quilting design that will maintain the integrity of the dimensional fold.

Watch Folded Flying Geese online.
To watch on your iPad, iPod Touch, or iPhone, download the app.

I’m giving away a copy of Quick Column Quilts! Post a comment telling me if you’ve ever used any or wanted to try dimensional quilting techniques. A random winner will be drawn on February 24, 2015.
Bye for now,
Nancy Zieman—author, pattern designer, businesswoman, producer, and national sewing authority—is the host of the popular show Sewing With Nancy®, which appears exclusively on public television stations across the United States and Canada. Follow Nancy’s blog at NancyZieman.com/blog and sign up to receive Nancy’s E-News for the latest news in sewing, quilting, & creating.
Content in this feed is © copyright 2015 by Nancy Zieman and may not be republished without written permission. You’re welcome to forward the email to a friend or colleague but it’s not okay to add the RSS feed automatically as content on a blog or other website.
February 14, 2015
Boxed-Corner Buttoned Pillow Tutorial

Give your living space a breath of fresh air by sewing new pillows. These box-cornered pillows are almost effortless to make. I’m sharing this pillow-sewing tutorial in hopes you’ll be inspired to participate in our pillow challenge. Click on the badge directly below and learn how you can participate in this great sewing project.

Fabric, Notions, and Supplies:
Home Décor Fabric
Matching Thread
Three Buttons
SofShape Interfacing
5-in-1 Sliding Gauge
Fabric dimensions for 14″, 16″, 18″, and 20″ pillow forms are listed blow:
14″ pillow form: 15″ X 38″ (1/2 yard)
16″ pillow form: 17″ x 42″ (1/2 yard)
18″ pillow form: 19″ x 46″ (5/8 yard)
20″ pillow form: 21″ x 50″ (5/8 yard)
If using a pillow form that is smaller or larger than the sizes listed, cut a fabric rectangle as follows: 1″ wider than the pillow form (width) x double the pillow size plus 10″ (length). If using a 12″ pillow form, cut a 13″ x 34″ rectangle of fabric.
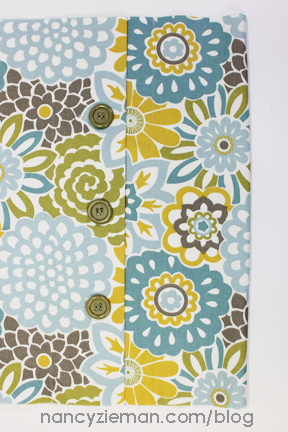
Note from Nancy: The ivory and yellow print is directional. Normally, 5/8 yard would be the amount to purchase for 20″ pillow forms. To keep the print of the fabric in the correct orientation, I purchased 1-1/4 yards (54″). The benefit is I now can have two matching pillows.
Construction:
Cut two 4″ wide strips of fusible interfacing, such as SofShape Interfacing
Fuse the interfacing to the wrong side of each narrow end of the pillow fabric.

Attach the interfacing and finish the fabric edge with a serger or zigzag stitch.
Consider using a wide zigzag stitch to finish the edge, if a serger isn’t available.

.

Using the 5-in-1 Sliding Gauge , turn under 4″ on each narrow edge; pin.

Hem the narrow edges using a straight stitch.

Mark 1/2″ from the cut edge with a pin, which denotes the seam allowance.

Marking Buttonhole Placement:
Three buttons and buttonholes are centered along the narrow ends.
Fold the narrow end in half.
Fold a second time, meeting the center fold to the ½” pin markings. Place pins at each fold.
Unfold the fabric.

Measure 1″ from the fold. Place a mark for the starting point for the buttonhole.

Buttonholes:
Note from Nancy: Do not let buttonholes intimidate you or keep you from this design element. See The Absolute Easiest Way to apply buttonholes on this previous blog post: How to Sew Buttonholes.
Make a test buttonhole on a scrap of fabric. Determine the appropriate length of the buttonhole based on button size.
Measure and mark the ending point of the buttonhole, based on the test size.
Stitch three buttonholes; cut open.

Buttons:
Measure 1-1/4″ from the fold at each of the three pin markings on the opposite end of the pillow fabric.
Hand or machine stitch buttons at each of the three markings.
Add a thread shank to each button, allowing space between the fabric and the back of the button.

Note from Nancy: With this technique, the buttons are sewn to the fabric while the fabric is still lying flat, making it easier to sew!
Button the pillow. The closure is centered in the featured pillows; however, another option is to offset the button/buttonhole accents.
With the pillow buttoned, cut a small nip at each corner.
Turn the pillow wrong side out, aligning the nips in the corners.

Stitch the side seams with a ½” seam allowance.

Make the Boxed Corners
Insert the pillow form.
Determine how deep to sew the box-corner treatment.
Fold the fabric at one corner with the seam down the center.
Place a pin or mark at the point in the fabric where the pillow form ends.
Measure from the tip of the corner to the marking. Record that measurement.

Remove the pillow form.
Mark the stitching line at all four corners.
Stitch along the marking.
Do not trim off the excess fabric.

.

Turn the pillow cover right-side out.
Push the boxed corners out gently with a Bamboo Pointer Creaser
Insert the pillow form and button the opening.

Need a Refresher Course in Sewing Buttonholes?
If you need an introduction or refresher course on how to sew buttonholes or other sewing or quilting techniques, check out Nancy Zieman’s The Absolute Easiest Way to Sew. You’ll find updated basics in this compilation of my favorite tried-and-true sewing and quilting tips and techniques.

Bye for now,
Nancy Zieman—author, pattern designer, businesswoman, producer, and national sewing authority—is the host of the popular show Sewing With Nancy®, which appears exclusively on public television stations across the United States and Canada. Follow Nancy’s blog at NancyZieman.com/blog and sign up to receive Nancy’s E-News for the latest news in sewing, quilting, & creating.
Content in this feed is © copyright 2015 by Nancy Zieman and may not be republished without written permission. You’re welcome to forward the email to a friend or colleague but it’s not okay to add the RSS feed automatically as content on a blog or other website.
February 12, 2015
Sew Easy Checkerboard Quilt Borders

I often create classes and content for Sewing With Nancy with the beginners in mind. Whether you are new to sewing, quilting, and embroidery or simply want to brush up on core skills, I hope to create projects that inspire.
Learning the basics is what spurred my 3-part series, Fearless Quilting Finishes, which teaches the fundamentals of quilting borders, quilting, and binding.
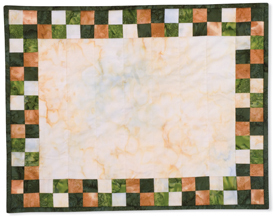
For the first program in this 3-part series, I was able to fit in eight quilt piecing techniques! You may watch all eight techniques online plus see the step-by-step, strip-pieced checkerboard border here:
Checkerboard Border Preview
Note from Nancy: I used 1-1/2″ strips for this small wall quilt or table topper.
Cut crosswise strips of light and dark fabrics to use in the main quilt design.
Stitch a light and a dark strip, right sides together. Press seam toward the dark fabric. Cut strips in half.
Stack two of the half-strips, right sides together, positioning the light coloration of one strip over the dark section of the second strip.
Subcut strips into sections the same width as the strip.
Join subcut pairs, right sides together, to form the 4-patch.
Chain stitch pairs, one after the other.
Cut apart.
Press the seams open and lay out the 4-patch blocks to create a checkerboard border.
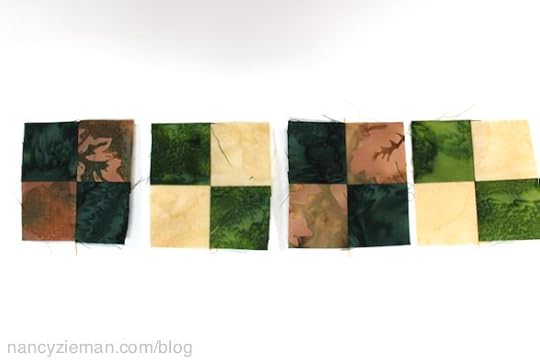
Simple, but creative, don’t you think? This border shines by itself!
Watch seven more quilt piecing ideas online in Fearless Quilting Finishes !
To watch Sewing With Nancy on your iPad, iPod Touch, or iPhone, download the app.
All the details are in one place!
For a chance to win a copy of Fearless Quilting Finishes, please let me know your favorite quilt border technique. The random winner will be announced on March 5.
The random winner of a DVD of How to Sew Art Quilts is Carol M. She said, What a beautiful art piece. I’m thinking I could actually do it!
Bye for now,
Content in this feed is © copyright 2015 by Nancy Zieman and may not be republished without written permission. You’re welcome to forward the email to a friend or colleague but it’s not okay to add the RSS feed automatically as content on a blog or other website.
February 10, 2015
A Quick Sewing Project—Texting Gloves

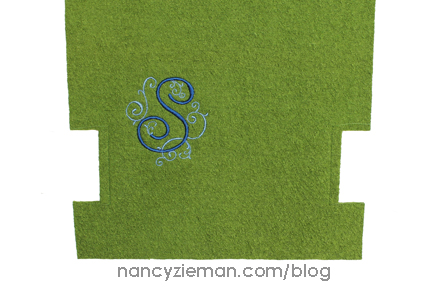
Here’s a quick sewing project—texting gloves. Use fleece scraps to create a comfy pair in an evening of sewing. Or, spend a little more time to embellish the gloves with a monogram for an added personal touch.
Notions, Fabrics, and Supplies
1/2 yard high-loft fleece
Matching all-purpose thread
Pattern Tracing Paper
Non-Permanent Marking Pen or Tailor’s Chalk
1/2″ wide Fusible Web
Embroidery Supplies (Optional)
Sticky-Back Tear-Away Stabilizer
Wash Away Avalon Film Stabilizer
Madeira Embroidery Thread
Cutting Directions
Prepare the Pattern
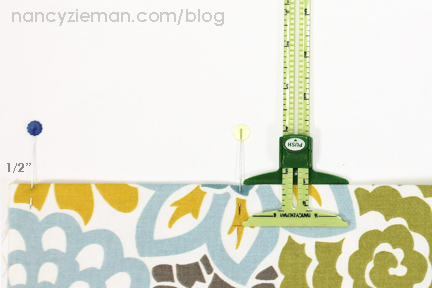
Using Pattern Tracing Paper , trace a 12″ x 14″ rectangle with the grain running the 14″ length.
Measure in 1″ from each edge along one 12″ side.
Draw a line from the point to the other 12″ side, tapering the pattern.
Mark a 1″ seam allowance along the 14″ edges.
Mark a thumb opening 2″ and 4-1/2″ from the narrower end of the glove.

Pin pattern to high-loft fleece and cut two.

Transfer seamline and thumb opening marks with non-permanent Marking Pen or Tailor’s Chalk.

Texting Gloves Embroidery (optional)
There are two schools of thought on monogramming gloves or in this case, texting gloves: The monogram can either face outward or inward. I chose the outward option.
How to Monogram on Fleece
Attach embroidery unit.
Determine the embroidery design and transfer the design to your sewing machine.
Note from Nancy
I used a font found in Personalize ‘N Stitch 2:0 and scrolls from the Delightful Daisies Collection.
Place a marking or embroidery-positioning sticker 4-5/8” from the top and 3-1/2” from the right side. On the opposite glove, use the same measurements, marking from the left side.

Position a Sticky-Back Tear-Away Stabilizer in the hoop.

Perforate the stabilizer inside the hoop with a tip of a pin. Tear away the paper covering.

Place fabric on the stabilizer, centering the marking or placing the stickered area in the middle of the hoop.

Move the needle to begin stitching over the mark or sticker. Remove the sticker.
Place a Wash Away Avalon Film Stabilizer over the fabric.

Embroider the design.
Tear away the excess wash-away stabilizer and gently tear the fabric away from the sticky-back stabilizer. If any residue of the wash-away stabilizer remains, spritz the fabric with water and the stabilizer will vanish.
Construct the Gloves
This series of steps features photography for the left-hand glove.
Clip to seam allowance at marked thumb openings.
Fuse a 2-1/2″ strip of Fusible Web at the ends of the clips as pictured.

Remove the paper covering from the strip. Turn under the seam allowances and press.

Stitch the seam allowances in place.

Press a 5/8″ hem at the top and bottom edge of the glove.

Meet the long edges, right sides together.

Stitch 1″ seam with a basting stitch, using caution to not stitch the thumb area.
Try on the gloves and adjust the seam width, if necessary, to fit your hand/wrist.

Restitch the long seam, reinforcing the thumb area before and after the opening.

Fold the 5/8″ hem along the marked crease, topstitch.
Turn gloves right side out.

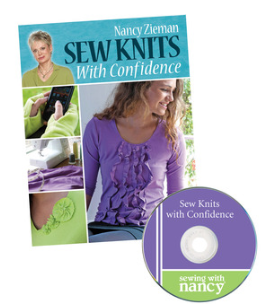
More Knit Project Ideas
For more information on the Texting Gloves pattern and other knit sewing project ideas, check out my book, Sew Knits with Confidence.
Watch Sewing With Nancy online
Enjoy watching my two-part series, Sew Knits with Confidence, featuring basic to creative knit sewing techniques. Click to watch Part One and Part Two.
Bye for now,
Nancy Zieman—author, pattern designer, businesswoman, producer, and national sewing authority—is the host of the popular show Sewing With Nancy®, which appears exclusively on public television stations across the United States and Canada. Follow Nancy’s blog at NancyZieman.com/blog and sign up to receive Nancy’s E-News for the latest news in Sewing, Quilting, Creating, and Block of the Month updates.
Content in this feed is © copyright 2015 by Nancy Zieman and may not be republished without written permission. You’re welcome to forward the email to a friend or colleague but it’s not okay to add the RSS feed automatically as content on a blog or other website.
Nancy Zieman's Blog

- Nancy Zieman's profile
- 21 followers

