
Nancy Zieman's Blog, page 124
August 11, 2015
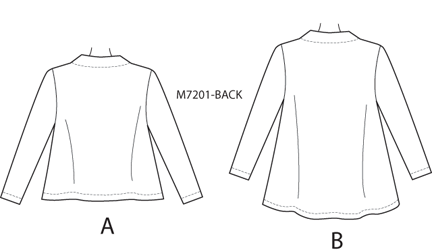
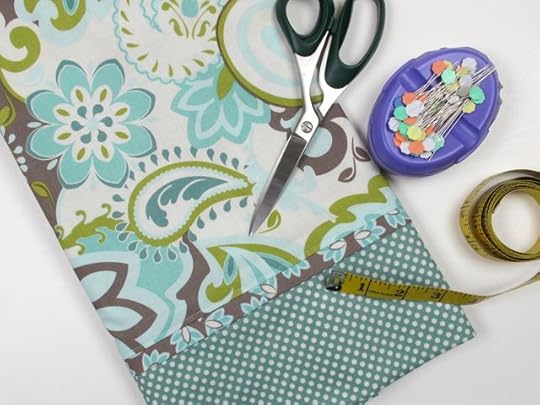
Make an Easy-to-Sew Swing Jacket

Effortless. That’s the word that best describes my new sewing pattern from The McCall Pattern Company. There are just a few main pattern pieces to this jacket—front, back, sleeves, plus facings— yet the style flows with ease.

There are two views, a shorter cropped version and an asymmetrical style. In this tutorial, we’ll feature the uneven hemline version as shown above. The fabric is linen—a perfect choice for this casual jacket. You’ll find that the sewing is streamlined, perfect for sewing newbies and welcomed by seasoned seamstresses.

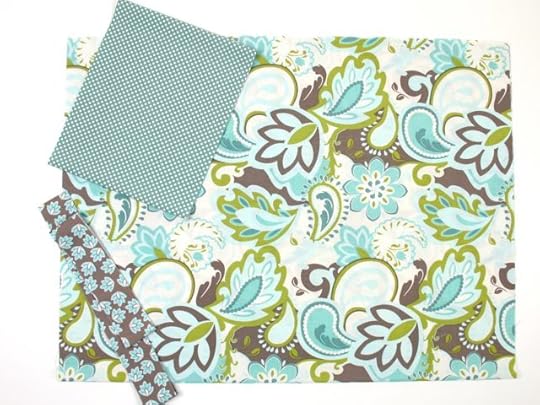
I’ve decided to share the sewing highlights in two blog postings—the follow-up posting will be next week, August 18. Enjoy the process; then wear the jacket with confidence. Underlining Tip The linen I chose was too lightweight. Here’s a simple solution—underline the fabric. This step is optional if you are using a heavier fabric, want a sheer jacket, or prefer the drape of a lighter weight fabric.
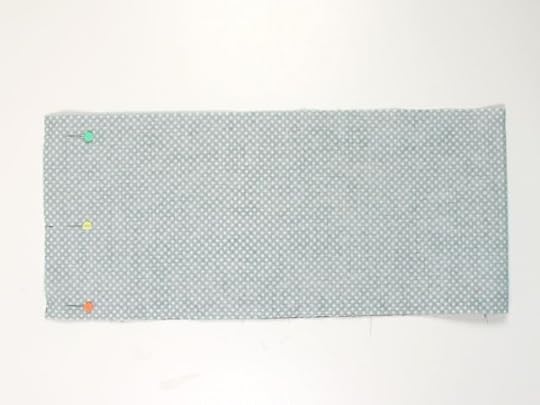
Cut a second layer for the front, back, and sleeves from a lining fabric. The outer fabric and lining are treated as one.
Pin the two layers, wrong sides together.


Serge or zigzag the edges to prevent unnecessary raveling during the sewing process and to keep your project neat!


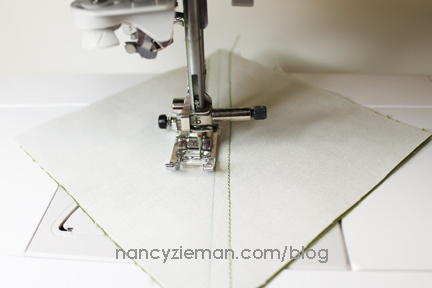
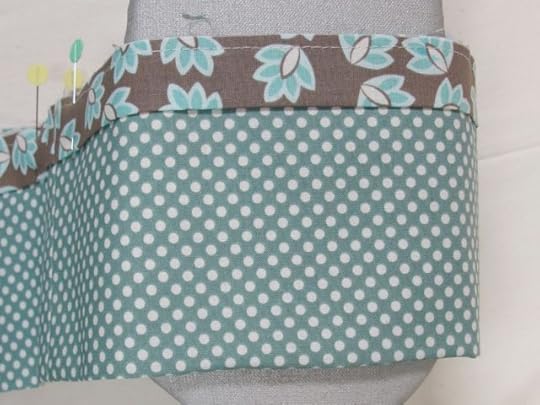
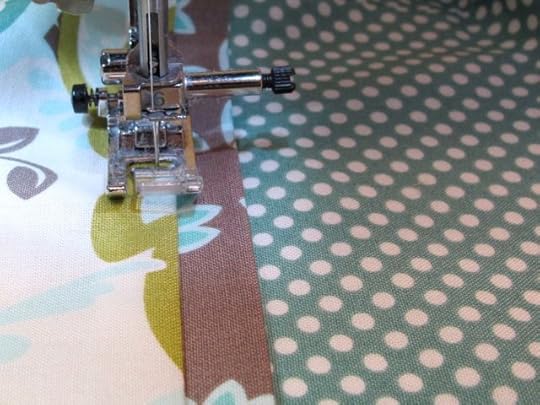
Align and pin right sides and notches of the Jacket Front and Jacket Back at the shoulder seams.

Stitch the shoulder seams using the recommended seam allowance.

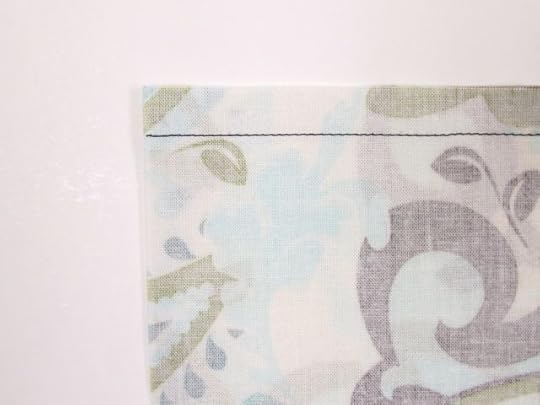
Press seams flat; then press seams open.

 Note from Nancy: To prevent the edges of the seams from making an imprint on the right side, press the seams over a sleeve roll. If you don’t have a sleeve roll, tightly roll and tape several magazines or catalogs. Cover with a wool fabric or wool felt and hand stitch. The fabric will absorb the moisture of the iron.
Set-in Sleeves—Both Views
Mark the center of the sleeve cap with a pin or non-permanent fabric marker.
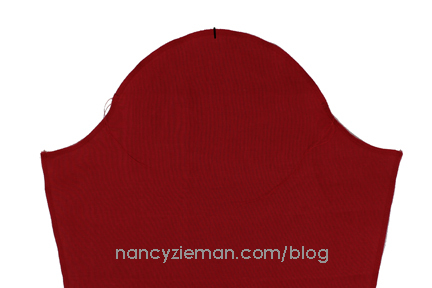
Place a pin at each notch along the cap.

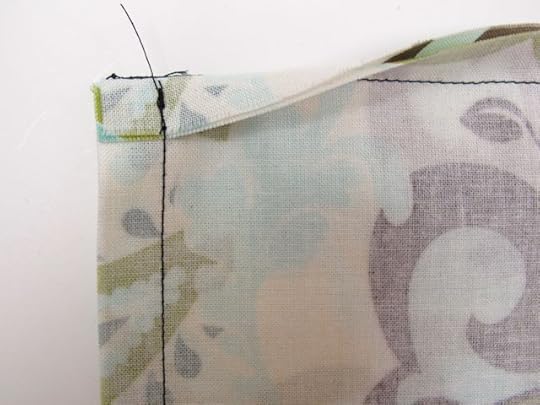
Change the stitch length to a basting stitch, 6–8 stitches per inch.
From the right side of the fabric, stitch one basting row from notch to notch, along the seamline, 5/8” from the cut edge. Leave 2″–3” thread tails at the beginning and end of the stitching.
Stitch a second basting row from notch to notch, approximately ¼” from the cut edge of the sleeve cap.
Fasten the threads at one end of the stitch by wrapping them around a pin in a figure eight.
Pull the bobbin threads at the opposite end of the stitching until the size of the sleeve matches that of the armhole.
Note from Nancy: I recommend sewing the basting stitches from the right side so that the bobbin threads are on the wrong side. For some magical reason, it is easier to ease the fabric by pulling the bobbin threads than pulling the top threads!
Pin the sleeve into the armhole, right sides together, matching underarm seam and the circle at the cap with the shoulder seam.

Stitch the sleeve in place. Press the seam flat, then toward the sleeve. Repeat for the other sleeve.

Stitch Underarm Seams—Both Views
Align and pin the side seams and the sleeve underarm seams; stitch.

Press the seams flat; then press open.

Let’s stop here for today. The jacket is about half-way finished. You are welcome to sew ahead, or wait for the next installment of this how-to tutorial next week. Sign up for my enews mailing list so you won’t miss it! Click here to join the mailing list.
For more information on the absolute easiest way to gather a sleeve cap, ease an armhole, or press seams:
The Absolute Easiest Way to Sew Book
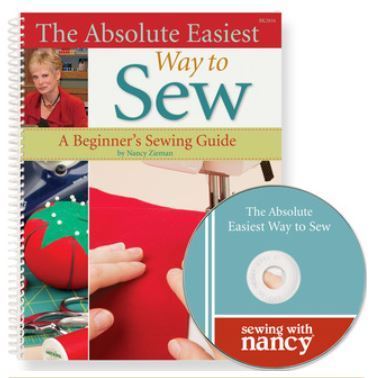
This book is a lifetime compilation of techniques that make sewing fun and easy for all skill levels. You’ll learn about sewing tools, easy sewing techniques, how to use a sewing machine and serger, how to select and use fabrics and patterns, and how easy it is to sew simple projects.
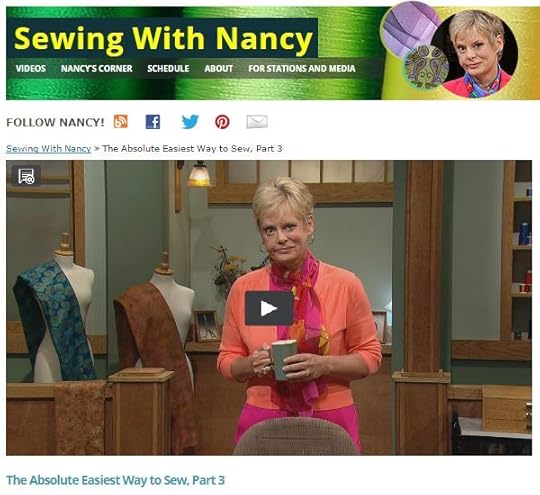
Watch The Absolute Easiest Way to Sew (Part One, Part Two, and Part Three) on Sewing With Nancy online.
To watch Sewing With Nancy on your iPad, iPod Touch, or iPhone, download the app .
 For a chance to win a copy of my new Swing Jacket Pattern, simply leave me a comment sharing what fabric type you’ll be using in your jacket project. A winner will be randomly selected on Aug. 25.
Don’t forget to enter my Fall Table Runner Challenge—$1000 in prizes!
Click here to see how to enter. Make sure you are subscribed to my enews mailing list so you won’t miss a thing. Sign up here.
Bye for now,

Content in this feed is © copyright 2015 by Nancy Zieman and may not be republished without written permission. You’re welcome to forward the email to a friend or colleague but it’s not okay to add the RSS feed automatically as content on a blog or other website.


August 8, 2015
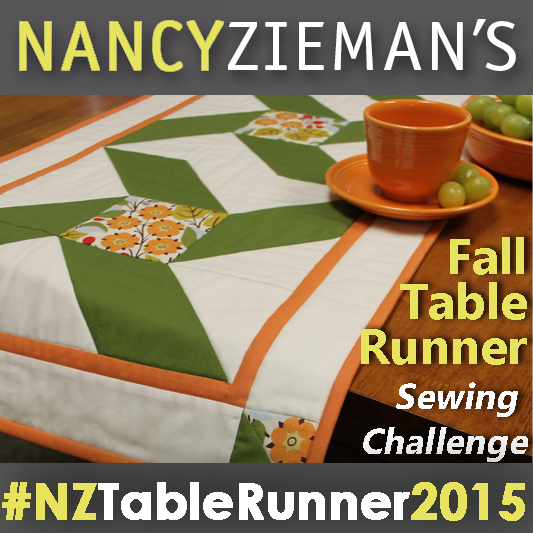
Nancy Zieman’s Fall Table Runner Sewing Challenge 2015

You are invited to participate in my 2015 Fall Table Runner Sewing Challenge. Sew a fall table runner to showcase your sewing and quilting talents and post an entry below. Table runner entries may feature any fall occasion, color palette, or size that fits on a kitchen or dining room table—use your imagination! Enter up to four different table runners that have been sewn within the last year. You could be a prize winner!
Nancy Zieman’s Fall Table Runner Sewing Challenge Guidelines
Select or create your design. All sewing, quilting, serging, machine embroidery, and embellishment techniques are eligible.
Grab our Fall Table Runner Sewing Challenge blog badge to let your friends know about this exciting sewing challenge.
Share your progress and projects on your social media sites using the hashtag: #NZTableRunner2015
Upload your photo(s) by September 14, 2015.
How to Enter
Enter the Fall Table Runner Sewing Challenge by adding a photo or photos in the link listed below. It’s easy! Use the below link tool and click the “add link” button. Your entry will appear directly in the gallery. (Once button is clicked—it may appear as a workable link).
An InLinkz Link-up
Go Social with Your Fall Table Runner Sewing Challenge

If you have a website, copy the code above and paste it into your website editor to have the Fall Table Runner Sewing Challenge badge on your site. Or, add the link to your social sites such as Instagram, Twitter, Flickr, or Facebook, let all your friends know you are working on the Fall Table Runner Sewing Challenge by tagging your post with the hashtag: #NZTableRunner2015
Inspiration: Box Quilt Block Table Runner
I’d like to share a quilt block pattern that’s ideal for a table runner. Featured is the Box Quilt Block, which dates back to 1898, each 12-1/2″ block is made with eight half-square triangles and a center square. This pattern is included in the No-Hassle Triangles Quilt Blocks, a quilt block sampler pattern book. Streamline the piecing process by using the No-Hassle Triangle tool.

Supplies, Notions, Fabric
No-Hassle Triangle Tool
Quilting thread
Assorted fabrics/fat quarters
Batting to measure 4″ larger than the finished runner, in length and width
Backing fabric to measure 4″ larger than the finished runner, in length and width
Binding fabric

Construction
Each block will require:
One square 4-1/2″ x 4-1/2″ (center)
Four squares 4-7/8″ x 4-7/8″ (background)
Four squares 4-7/8″ x 4-7/8″ (solid)
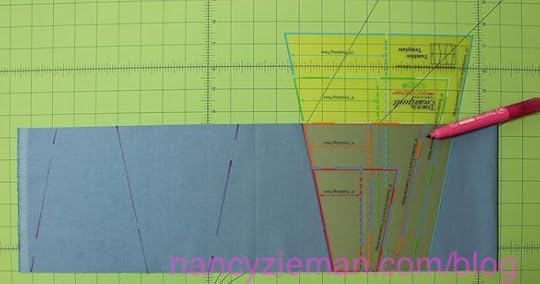
Press the fabric. Use June Tailor’s Quilter’s Starch to stabilize the fabrics.
Note from Nancy: In our sewing studio before cutting quilting strips or shapes, we always spray the fabric with Quilter’s Starch and then press. This simple step gives the fabric crispness that translates into more accurate cutting results.

Use a cardboard template measuring 4-1/2″ x 4-1/2″ to fussy cut a design from the print to showcase a particular motif in the focus fabric.


Cut the solid and background fabrics into strips, 4-7/8″ wide. Each block will require four solid squares and four background squares.
Layer the solid and background strips to rotary cut 4-7/8″ squares.

Set the No-Hassle Triangle Tool to 4-7/8″ on the left-hand side of the tool.

Lay the tool on the cut square sets, marking the center line with a non-permanent marking pen.

Stitch 1/4″ on each side of the marked center line.
Chain piece shapes, sewing all the right sides, then left sides.

Cut apart.

Use a rotary cutter and ruler to cut along the marked line.

Press seam allowance towards the darker fabric.

Create eight pairs.

Lay out Box Quilt block following the layout.

Join squares to form block, using a 1/4″ seam allowance. Placing squares from first column onto second column, right sides together; stitch.

Place squares from column three onto stitched sections and join with a 1/4″ seam allowance.

Press seams open.

Join rows.

Create and join three or more blocks to create the table runner.

Add an inner border—cut fabric strips 1″ wide—and an outer border—cut fabric strips 2-1/2″ wide.
Create and add 2-1/2″ half-square triangles at all four corners.

Use the stitch in the ditch quilting technique demonstrated in the Fearless Quilting Finishes episode of Sewing With Nancy , or find that technique in my book, Fearless Quilting Finishes .
Bind with coordinating fabric.

An InLinkz Link-up
A Total of $1000 in Prizes for the top vote contenders:
Top Ten Winners: F+W Media will provide a copy of 50 Fat Quarter Makes, a $250 value.

First Place: A Bundle of Nancy Zieman Products and Notions from Clover, a $200 value.

Second Place: Create With Nancy Five Book Collection, Value $177.94

Third Place: Quilter’s Package from June Tailor, a $107 value.

Fourth Place: Pellon Bundle Package, a $105 value.

Fifth Place: Autumn Array Cotona Thread Pack from Maderia, a $76 value.

Sixth Place: Nancy’s Notions Tool and Notion Bundle, a $63 value.

Seventh Place: Klasse Needle Pack from Klasse Needles, a $32 value.

Enter the Fall Table Runner Sewing Challenge by adding a photo or photos in the link listed above. It’s easy! Use the above link tool and click the “add link” button. Your entry will appear directly in the gallery. (Once button is clicked—it may appear as a workable link).
Plus share your comments below about the Fall Table Runner Sewing Challenge and let us know if you plan to join!
Get Stitching!
Email challenge questions to info@ziemanproductions.com. Challenge not open to sponsors, employees, and immediate family members. Photos and techniques may be featured in future promotions, blog posts, videos, and/or TV shows.
Nancy Zieman—author, pattern designer, businesswoman, producer, and national sewing authority—is the host of the popular show Sewing With Nancy®, which appears exclusively on public television stations across the United States and Canada. Follow Nancy’s blog at NancyZieman.com/blog and sign up to receive Nancy’s E-News for the latest news in Sewing, Quilting, Creating, and Block of the Month updates.
Content in this feed is © copyright 2015 by Nancy Zieman and may not be republished without written permission. You’re welcome to forward the email to a friend or colleague but it’s not okay to add the RSS feed automatically as content on a blog or other website.
August 6, 2015
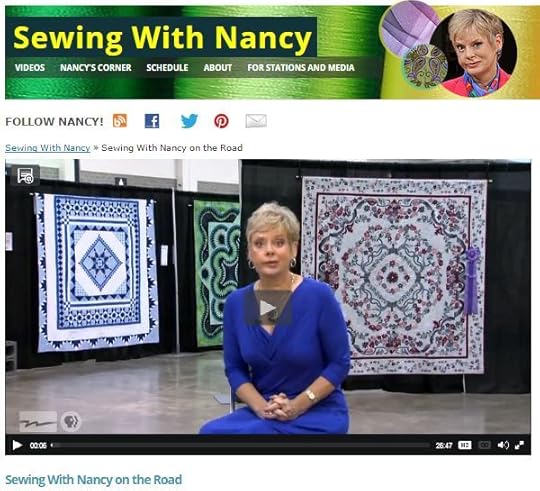
Sewing With Nancy on the Road
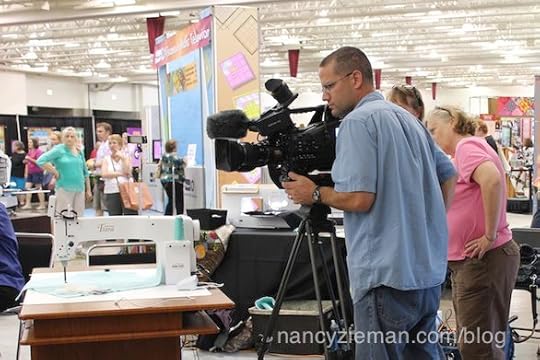
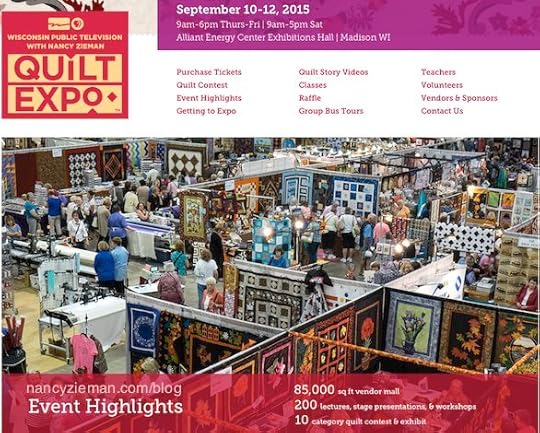
Have you ever wondered where I get my own sewing inspiration? I often find it out on the road at quilt shows and speaking engagements. This week’s Sewing With Nancy takes you on the road to the Wisconsin Quilt Expo. Join me as we see vendors, sewing machines, fabrics, and exquisite quilts. Watch the episode online.
Plan to attend this year’s Quilt Expo, September 10–12 in Madison, WI.
Here’s a preview of the TV show!
New machines and products
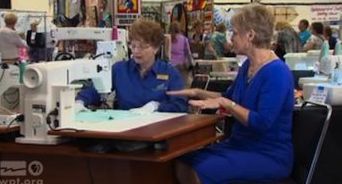
We head to the Baby Lock booth for a visit with Educator Cathy Brown. Cathy demonstrates a longarm sewing machine with a Stitch Regulator that communicates with the machine. So whether you move the quilt sandwich slow or fast, the machine makes consistent stitches.
New Fabrics
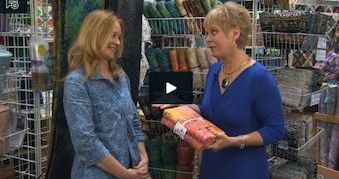
Diane Magidson of Sew Batik tells us about hand dyed batik fabrics. She explains the importance of thread count for quilt backings. I didn’t know thread count was important for the back of quilts, did you?
Prize Winning Quilts
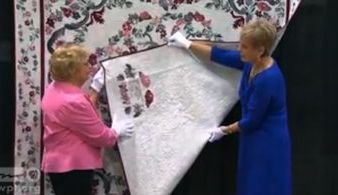
NQA Certified Judge Klaudeen Hansen details what makes a prize-winning quilt while showing a quilt made by Betty Ekern Suiter. Betty’s quilt was the Best of Show. Amazing!
Special Quilt Exhibits
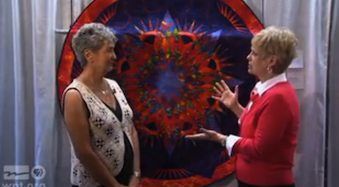
Native American Quilter Viola Colombe shares techniques featured in her quilts as they hang in one of the Special Exhibits at Quilt Expo. See more of Viola’s quilts in my previous blog posting, Stunning Lone Star Quilts—Learn From a Master.
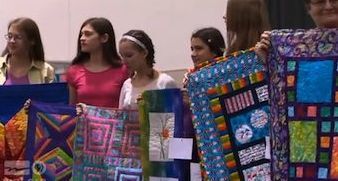
Kids’ Quilt Contest
The annual Kids’ Quilt Contest is open to all girls and boys ages 15 and under. The creativity of these young participants is amazing! Watch interviews with a few of the talented kids as they talk about the process of making their quilt.
Community Service Project, Quilt to Give
Next, watch my interview with Sharon Raimondo—a repeat volunteer at Quilt to Give—Quilt Expo’s Community Service Project. During the three-day event, 13 quilts were stitched and completed by attendees. Plus, 16 additional bed-size quilts were generously donated to the Quilt to Give Project.
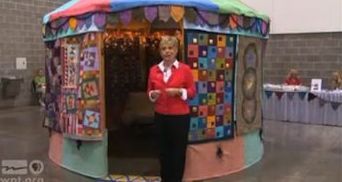
WMQFA Yurt
The most unique exhibit at the expo this year was the quilted yurt! See a glimpse into the Wisconsin Museum of Quilts and Fiber Arts Quilted Yurt—a portable, circular dwelling on a collapsible framework, traditionally used by nomads in Central Asia.
Watch Sewing With Nancy on the Road on Sewing With Nancy online.
To watch Sewing With Nancy on your iPad, iPod Touch, or iPhone, download the app.
Here’s where you can register for this year’s Quilt Expo.


The random winner of Circles Sew Simple is Elaine Wong. She said: That looks like so much fun! I would love to win and start making circles on my sewing table.
The three random winners of two Quilt Expo tickets go to:
Sherril Harris who said: I have been attending Quilt Expo every year for the past 5 years. I usually have a lecture to attend right away in the morning. The lectures are so informative and always give me new ideas. Then it’s off to the show. I start at one end of the showroom floor and I don’t go home until I’ve seen it all. This is really one of the best quilt shows around! I wouldn’t miss it!
Marsha Nater who said: I’ve never been to a quilt show before, so I know I will be overwhelmed by the artistry and the new ideas that I will see. I will probably check out the vendors first and then check out the quilt displays.
Vicky Gjerde who said: The first thing I love to do is grab my honey (hubby) who always attends with me, and look to get my picture taken with Nancy and chat with her. I admire her and the wonderful show she sponsors, the Quilt Expo. You are the best Nancy!!! Thanks for everything. P.S. Of course I love the quilts and the vendors!!!! Well worth the 5-hour drive.
Bye for now,
Content in this feed is © copyright 2015 by Nancy Zieman and may not be republished without written permission. You’re welcome to forward the email to a friend or colleague but it’s not okay to add the RSS feed automatically as content on a blog or other website.
August 4, 2015
Tumbling Tumblers Quilt

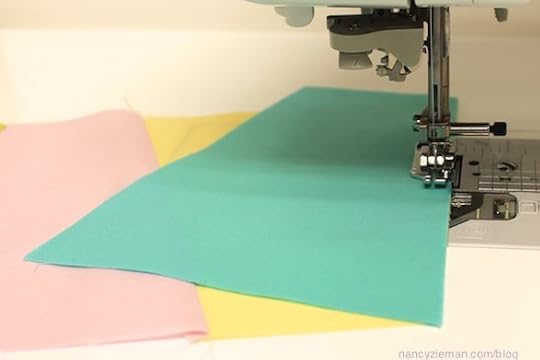
Let me introduce you to a contemporary, yet easy way to make a quilt. Tumbling Tumblers is made using the multi-sized tumbler template. The design is achieved by stitching the tumbler shapes in columns with several groupings of same-colored tumbler shapes in sequence to create the all-important negative space seen in modern quilts.
Tumbling Tumblers Quilt
Generally, tumbler shapes are sewn in rows. Not this time! Rotate the shapes 90 degrees to create columns, not rows. Turn what was a traditional quilt pattern into a modern design.
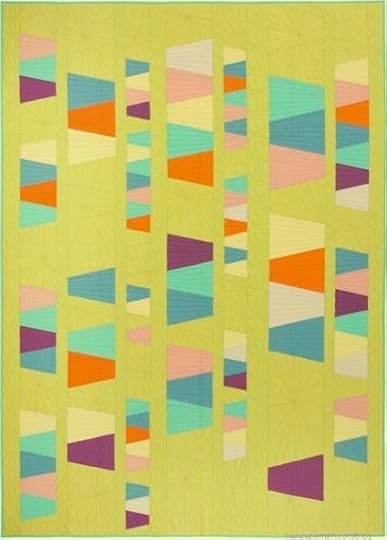
Use the Trace ‘n Create Grandmother’s One Patch Template to create this quilt design. There are four sizes of tumbler shapes—4″, 6″, 8″, and 10″ in one template. All four sizes are traced on the fabric and then cut, using a ruler, rotary cutter, and mat.
Stitch the tumbler shapes using traditional quilting techniques.
Stitch multiple background colored tumbler shapes to create negative space in the design. Negative space is the new buzz word in quilting, and it references the space around the quilt design, not the design itself, which forms an interesting or artistic look.
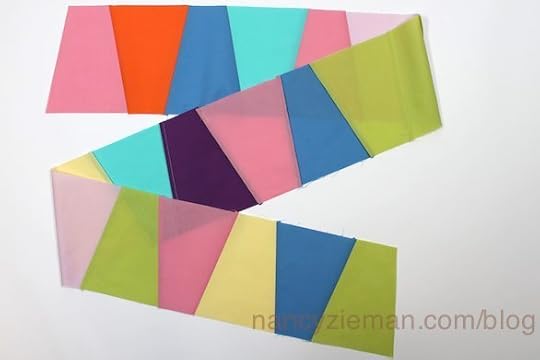
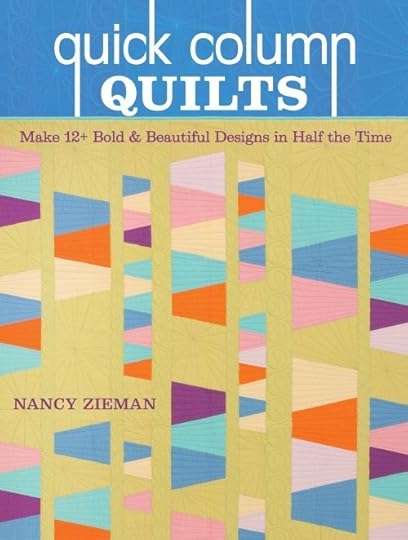
See how the rest of the quilt is created while watching the Sewing With Nancy TV show or find all the instructions detailed in the book, Quick Column Quilts .
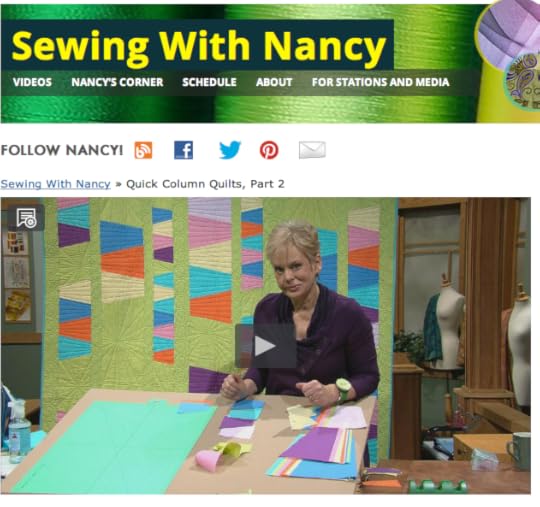
Watch Quick Column Quilts on Sewing With Nancy online.
To watch Sewing With Nancy on your iPad, iPod Touch, or iPhone, download the app.
Bye for now,
Content in this feed is © copyright 2015 by Nancy Zieman and may not be republished without written permission. You’re welcome to forward the email to a friend or colleague but it’s not okay to add the RSS feed automatically as content on a blog or other website.
August 1, 2015
You’re Invited to Quilt Expo in Madison WI

Really "Wild" Flowers! by Sharon L. Schlozhauer, Monument, CO
September 10–12, thousands of quilting enthusiasts will gather in Madison, WI to find inspiration, share new techniques, stock up on supplies and celebrate the joy of quilting. Now in its eleventh year, Quilt Expo continues to be the Midwest’s premier quilting destination. I invite you to join me at this year’s event!
It’s a Big Deal!
Here’s a sampling of the highlights of this year’s event. With over 200 educational lectures, sit & sew workshops, and hands-on workshops, there’s something for everyone. Plus you’ll find hundreds of quilts on display.
View the juried and judged quilt contest—over 300 amazing quilts


Vote for your choice of Best of Show
2014 Quilt Expo Best of Show—Once Upon a Time by Mary S. Buvia, Greenwood IN

Shop in the 85,000-square-foot vendor mall

Take a class from a nationally known celebrity presenter—here’s a small sampling:
In Weeks Ringles’ class Details Matter , you’ll learn how quilting details can transform or ruin a quilt.

Wendy Bulter Berns will teach a class, Capering with Creativity and Our Quilts , perfect for those of us who like to collect fabric.

Laura Murray will take us on a journey to create the appearance of a complicated piecework quilt without sewing in her class, On the Edge of Thread.

Attend a stage presentations
The stage presentations are included with your admission ticket.

Our Kids’ Quilt Challenge, which is held on the stage, is a Saturday morning favorite.

Learn the fine-art of hand quilting
Sign-up for hands-on workshops .

Choose from over 100 educational lectures

Dedicate time to attend a sit & sew workshop
You’ll find a variety of offerings when you go to the Quilt Expo website . Sign up soon as these workshops quickly fill.

Sign-up for an evening event
Thursday night, September 10, join Dr. Clarice Coswell as she presents, Pre-Civil War Quilts: Their Hidden Codes to the Freedom of Slaves Through The Underground Railroad.

Friday night, watch a lighthearted presentation given by Dalen and Mitzie Keys, Quilting and Kids’ Books and the Magic of Story.

Participate in the Quilt to Give community service project
Our goal is to make or collect 20 twin-sized quilts. Enchanted Makeovers and DAIS (Domestic Abuse Intervention Services) will be the recipients of the quilts.
Click here to download instructions to sew an easy quilt. Consider making a quilt in advance and then donating it at Quilt Expo.


Get in Step!
Just like quilting, becoming heart healthy comes together one piece at a time. Join UW Health/ Go Red for Women and pick up a free pedometer to keep track of your steps while promoting healthy living.

These Quilt Expo Attendees walked 10,000 steps a day. (Yes, that's "Flat Nancy!)
Register Online
Three random winners will receive a pair of Quilt Expo Tickets. To be eligible, answer this question: What’s the first thing you’d do at Quilt Expo? (Getting a cup of coffee doesn’t count!) Winners will be announced on August 8.

Bye for now,
Content in this feed is © copyright 2015 by Nancy Zieman and may not be republished without written permission. You’re welcome to forward the email to a friend or colleague but it’s not okay to add the RSS feed automatically as content on a blog or other website.
July 30, 2015
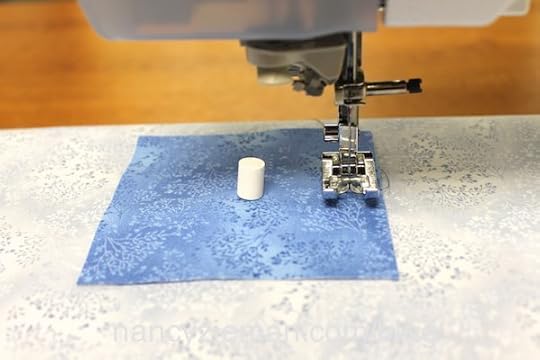
How to Easily Sew Perfect Circles
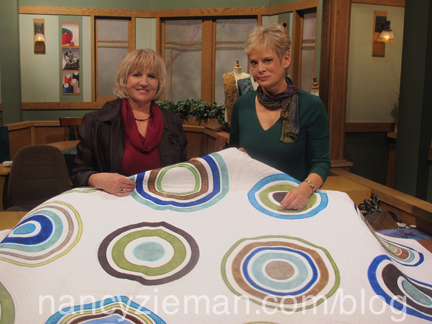
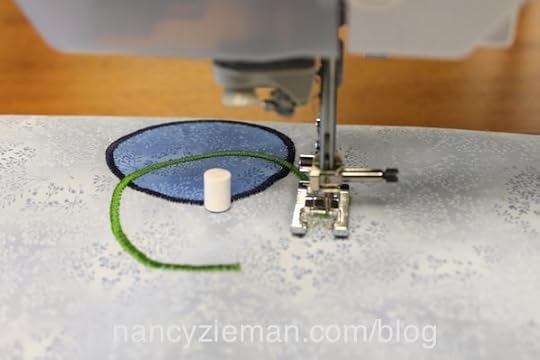
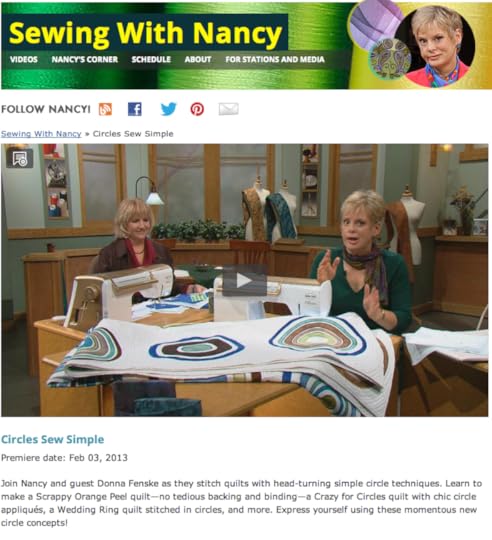
Circles are an incredibly popular stitching motif. Chances are you have traced a plate or glass to create a circle stitching line on one of your projects. I have a better way to sew perfect circles, each time! Create appliqué shapes or open circle designs easily with Circles Sew Simple and watch the demonstration on Sewing With Nancy.
Donna Fenske, Sewing With Nancy designer joins me on TV, for the Circles Sew Simple episode.
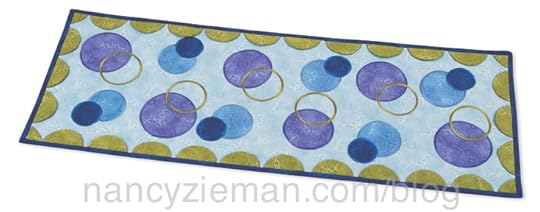
Appliquéd Circles
This 13″ x 35″ table runner features the basics of circle stitching. Satin stitched and appliquéd circle accents are the ideal point to begin. What a great project to practice and perfect your perfect circles. All the instructions and the tool are included in the Circles Sew Simple book and tool set.
Supplies List
1/2 yd. light blue cotton quilting background fabric
1/4 yd. purple cotton quilting fabric for large circles
1/8 yd. medium-blue cotton quilting fabric for medium circles
1/8 yd. dark-blue cotton quilting fabric for small circles
3/4 yd. green cotton quilting fabric for half-circles border
1/2 yd. flannel backing
3/8 yd. Fusible Easy Knit Interfacing
Prep the fabrics as detailed in the Circles Sew Simple book. The book’s included with the tool!
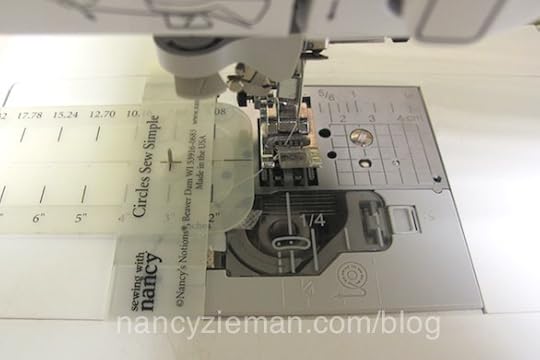
Here’s the Circles Sew Simple Tool:
The Circles Sew Simple Tool easily attaches to your machine with double-sided tape—included with the tool!
Stitch perfectly symmetrical circles with this unique tool.
Create straight stitched, satin stitched, or appliquéd circles in 26 sizes: circles range in diameter from 2″–27″.
The tool includes the Circle Gauge Base, Cross Bar Attachment, Tack and Guard in two sizes, double-sided tape, and Circles Sew Simple book with step-by-step instructions for attaching and using the tool, plus 6 projects.
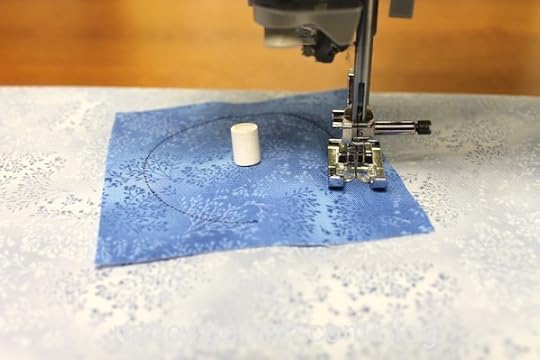
Back fabrics with interfacing and mark center circle placement on the wrong side of the fabric.
Position table runner background fabric over Tack point at center circle marking.
Position appliqué fabric over Tack point. Cover Tack with Guard.
Thread machine with rayon thread and set machine for a straight stitch; stitch circle.
Trim close to stitching line.
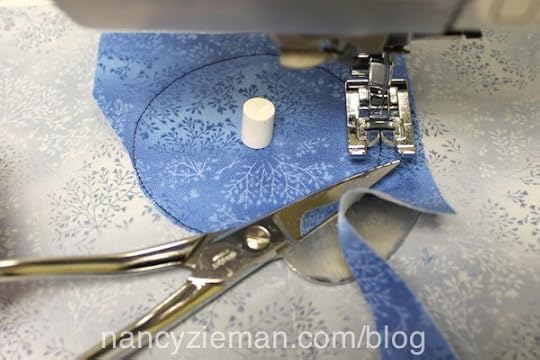
Change machine settings for a satin stitch. Stitch with the satin stitch to cover the straight stitching.
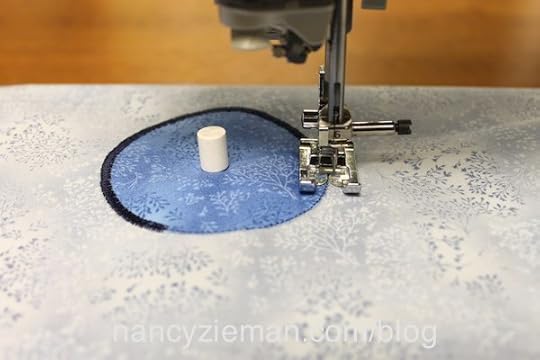
Stitch open circles using the same method—just leave out the appliqué fabric.
Repeat the process until you’ve created all the circles you desire.
Learn how to create the half-circles for the border and finish the table runner following the instructions included in the Circles Sew Simple book.
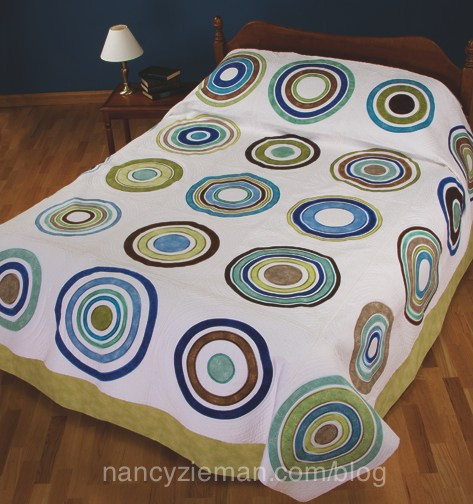
Also in the online video feature, Circles Sew Simple, you’ll learn how to make the Crazy for Circles Quilt. Incorporate appliquéd circles and a quilt-as-you-go technique to make super-sized blocks for a bed quilt. Designed by Donna, this queen-sized quilt features 13 fabric coordinates and gives you permission to go crazy for circles!
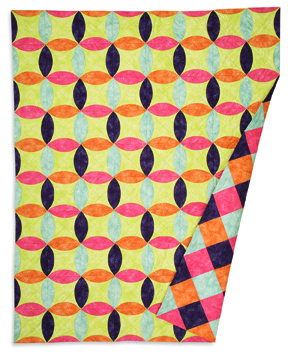
Quilt a Scrappy Orange Peel vintage-inspired pattern with an updated twist. What’s different? Circles are stitched to perfection with the Circles Sew Simple Tool. We’ll show you how to create a circle envelope that uniquely transforms into a reversible quilt.
Watch Circles Sew Simple on Sewing With Nancy online.
To watch Sewing With Nancy on your iPad, iPod Touch, or iPhone, download the app.

For a chance to win a Circles Sew Simple book and tool set, leave a comment below about your next circle project. A winner will be randomly selected and announced on Aug 6.
The random winner of a Sew Knits with Confidence book is Mary Wippold. She said: Like someone else here, I also have a hard time finding knits in prints suitable for an adult. There are lots of cute kids knits prints but not so many for adults.
Bye for now,
Content in this feed is © copyright 2015 by Nancy Zieman and may not be republished without written permission. You’re welcome to forward the email to a friend or colleague but it’s not okay to add the RSS feed automatically as content on a blog or other website.
July 28, 2015
Teach Kids to Sew Pillowcases
If you’ve been thinking about teaching one of your favorite kids to sew, this pillowcase sewing project is truly for beginners—ideal for a summer sewing project. Working in tandem, it’s a project that can be finished in an afternoon or evening.
Fabric—make it fun!
Novelty fabric prints are ideal for pillowcases. Have your young sewing buddy choose his or her fabric.
Buy and cut the fabric:
Listed below are the three fabric pieces and sizes you’ll need to make one pillowcase. This cutting step is the big person’s job!
3/4 yd. main fabric—Cut main fabric into a 27″ x 41″ rectangle.
1/4 yd. cuff fabric—Cut the cuff fabric into a 9″ x 41″ rectangle.
2″ x 41″ crosswise strip of trim fabric
Kid Friendly Sewing Instructions:
Fold the 2″ strip of trim fabric in half, wrong sides together, aligning lengthwise edges; press. Again, you might consider prepressing the strip. Little fingers and big irons don’t always mesh!
Pin trim to right side of cuff fabric rectangle, aligning raw edges with one long edge. Machine baste in place. Kids like to pin; they can begin the sewing process with this step.
Fold the cuff in half, meeting short edges and right sides. Stitch a 1/2″ seam.
Note from Nancy: I suggest using a 1/2″ seam allowance. But, it really doesn’t matter as long as you’re consistent and use the same seam allowances throughout the project. For a first sewing project, use the edge of the presser foot as a guide or consider adding a seam guide to your machine.
Turn the cuff right side out; press the seam.

Align the long edges of the cuff, wrongs sides together. Baste the edges.
Fold main fabric rectangle in half, right sides together, aligning the 27″ edges. Stitch or serge across the 20-1/2″ end, using a 1/2″ seam.
Wrap the corner by folding the seam toward the pillowcase along the stitching line and stitch or serge the side seam.
Note from Nancy: You’ll have perfect corners when following my three-step corner process:
Stitch along the horizontal seam.
Fold along the seamline.
Stitch the vertical seam.
Turn the main portion of the pillowcase right side out; press.
Pin cuff fabric over the main pillowcase, meeting cut edges and right sides. Stitch or serge layers together. Zigzag or serge the edges. Turn the pillowcase right side out.

Topstitch trim to the main pillowcase if desired. (That might be a big person’s job!)
Ta-dah!
For more sewing basics, look for my book, The Absolute Easiest Way to Sew.
Watch the 3-part series of The Absolute Easiest Way to Sew on Sewing With Nancy online.
To watch Sewing With Nancy on your iPad, iPod Touch, or iPhone, download the app.
What are your favorite projects to sew with kids?
Jot a note below and share with other readers!
Bye for now,
Content in this feed is © copyright 2015 by Nancy Zieman and may not be republished without written permission. You’re welcome to forward the email to a friend or colleague but it’s not okay to add the RSS feed automatically as content on a blog or other website.
July 25, 2015
How to Sew a Scrap-Buster Mug Rug

Here’s an ideal summer sewing project—colorful mug rugs! Create the reversible coaster from your fabric stash; then sit down to enjoy a cup of tea or coffee with a friend.
Supplies, Notions, and Fabric:
Point 2 Point Turner
Pellon’s Shirtailor Interfacing
Fusible Fleece
Trace’n Create Carefree Curves Template Set
5-in-1 Sliding Gauge
6-in-1 Stick ‘n Stitch Guide
Assorted Fabric Scraps

Requirements:
Each single mug rug requires:
- Four fabric squares cut 4″ x 4″
- Two interfacing squares cut 7-1/2″ x 7-1/2″
- One fleece square cut 7-1/2″ x 7-1/2″
Cutting:
Cut four squares each measuring 4″ x 4″ from four fabric scraps.

Cut one square of fabric 7-1/2″ x 7-1/2″ for the back.
Cut one square 7-1/2″ x 7-1/2″ from the fleece and two same-sized squares from the interfacing.

Construction:
Use the 6-in-1 Stick ‘n Stitch Guide on the sewing machine plate to mark perfect 1/4″ seam allowances.
Join pairs of squares, right sides together, using a 1/4″ marked seam allowance,.

Press seam allowances open.

Align the center seamline, right sides together, and pin the two pair together.
Join fabrics using the 1/4″ marked seam allowance.
Press seam allowances open.

Use the Carefree Curves template to trace a circle onto the stacked fabrics.

To create the top of the mug rug, layer pieces in this order:
Fleece, adhesive side down
Sewn Four-Patch, right side up
Interfacing, adhesive side up

For the mug rug back, layer pieces in this order:
7-1/2″ fabric square, right side up
Interfacing square, adhesive side up

Stitch directly on the marked lines of both the top and bottom sets.

Trim excess fabric 1/8″ past the stitching line using a pinking rotary cutting blade , on both top and bottom pieces.

Use scissors to trim away excess interfacing, leaving 1″ of interfacing.

Turn the interfacing to the wrong side.

Carefully, smooth the circle edges with the turner.

Note from Nancy: Notice that the adhesive side of the fusible fleece is facing you as you smooth the interfacing. We’ll use this adhesive to fuse the top and bottom circle shapes together in the center of our final mug rug. Be mindful of the adhesive during the next pressing step.
Press the curved edge along the interfacing only, of both the top and bottom sections.


Layer the two circles, wrong sides together.

Press.

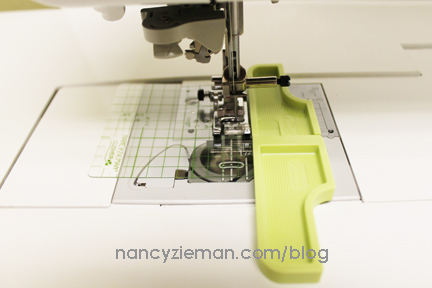
Position and set the seam guide to allow you to stitch a consistent edgestitch around the circle.

Stitch in the ditch, sewing along the seams. If needed, use a fabric scrap to start the stitching onto the mug rug. Cut away extra fabric when stitching is complete.


Watch Sewing With Nancy online
For additional fun sewing projects, pick up my book Sew Simple with Rectangles & Squares.

Or watch Sew Simple with Rectangles & Squares online at nancyzieman.com.
Watch Sewing With Nancy on your iPad, iPod Touch, or iPhone; download the app .

Bye for now,
Content in this feed is © copyright 2015 by Nancy Zieman and may not be republished without written permission. You’re welcome to forward the email to a friend or colleague but it’s not okay to add the RSS feed automatically as content on a blog or other website.
July 23, 2015
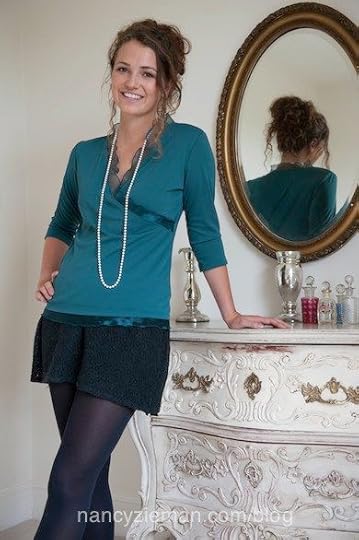
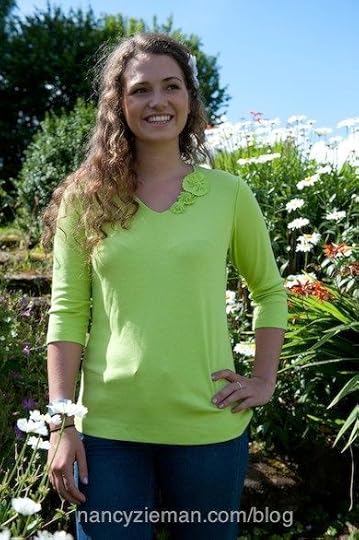
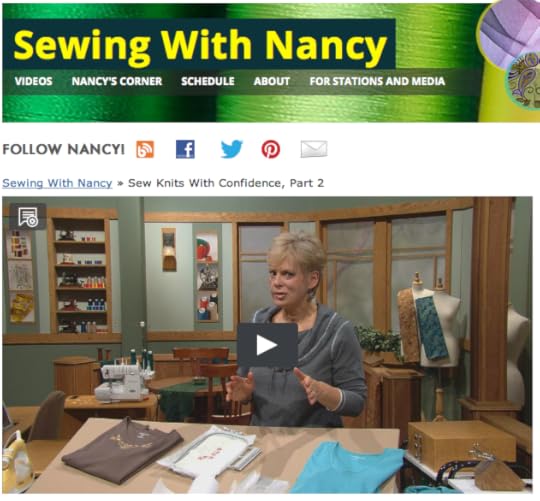
Enjoy Working with Knit Fabrics
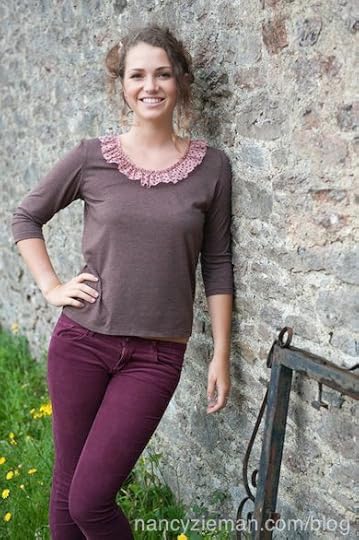
In this week’s second episode of Sew Knits With Confidence on Sewing With Nancy, we’ll look at ways to really take knits to the next level. We’ve covered the basics in episode one, and now we’ll add easy touches to really personalize your knit sewing.
Extra Touches
Combine knits and lightweight woven fabric such as organza around the neck and hemline for a trendy finish. The sewing is streamlined with the help of paper-backed fusible web. Press, fuse, stitch—it’s a three-step process!
Ruffles

Another creative option is to add ruffles. This time the organza edges are not finished, giving a shabby chic appearance. Bias strips with a minimum of gathering add this easy extra touch to your favorite knit top.
Pleated Posies
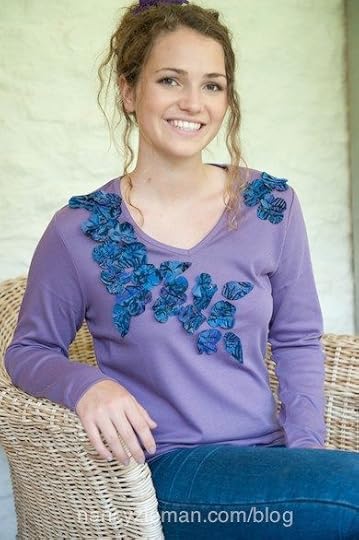
Cotton batik or lightweight knit creates these tumbling petals. A stiletto or even a seam ripper will serve as a valuable tool as you add texture.
T-shirt Makeover
Could it be that the fabric for your next creation is hanging in your closet? An over-sized tee-shirt can easily be transformed into a more attractive knit top. Sometimes you can use the existing neckline and only modify the body shape. Other times you can turn a billboard tee-shirt into a knit top with an attractive silhouette. Knowing how to sew gives you the tools to be creative!
Embroidery on Knits
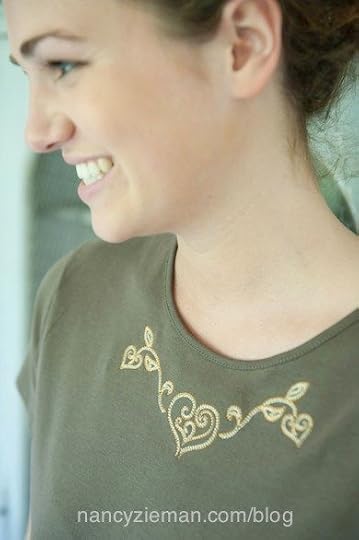
In this second episode, I show you how to gain confidence when sewing and embroidering on knits. Make it easy on yourself and don’t over plan or over stitch. The streamlined steps are made possible by selecting knit-friendly stabilizers.
Flouncy Tee

The cascading flounces created for this tee are raw-edge and easy to achieve. Use your favorite knit top pattern and make a few modifications to create a top with charming details.
All the techniques featured on TV, plus many more, are in my book, Sew Knits with Confidence.
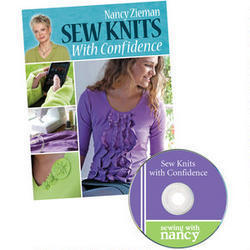
For a chance to win a copy of Sew Knits with Confidence, let me know your most challenging part of sewing with knits. A random winner will be announced on July 30.
Watch Sew Knits with Confidence on Sewing With Nancy online.
To watch Sewing With Nancy on your iPad, iPod Touch, or iPhone, download the app.
Bye for now,
Content in this feed is © copyright 2015 by Nancy Zieman and may not be republished without written permission. You’re welcome to forward the email to a friend or colleague but it’s not okay to add the RSS feed automatically as content on a blog or other website.
July 21, 2015
How to Sew Bean Bags for the Popular Backyard Game

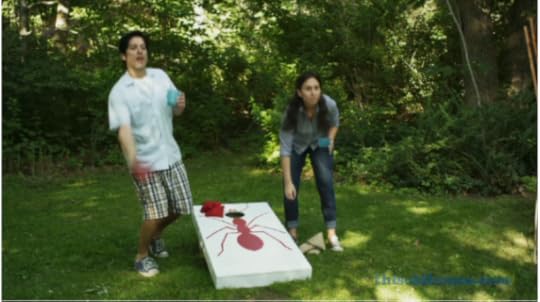
Sewing and lawn games—I don’t think I’ve put those two thoughts in the same sentence before! Today, learn how to sew your own bean bags or corn bags, then play cornhole, tailgate, bean bag toss, doghouse, Baggo, or, whew, just plain bags. This is a perfect afternoon sewing project to create with kids. Then, go have some backyard fun.
How to Sew Bean Bags for Cornhole or Bean Bag Toss
Using the following instructions, you’ll be able to create regulation-size bags as set by the American Cornhole Organization. If you’re going to play the game, you better be official!
Supplies, Notions and Fabric
12 oz duck canvas, 1/4 yard each of two colors
Quality feed corn, 15 oz. for each corn bag (or use 15 oz. dried beans)
Zipper foot
Optional: 5-in-1 Sliding Gauge
Optional: Clover Point 2 Point Turner
Optional: Wonder Clips
Note from Nancy: If you opt to use novelty print cotton fabrics for your bean bags, perhaps to align with your favorite sports teams, you’ll want to underline the cotton squares with duck canvas for durability.

Create
For each bag, rotary cut two squares 7″ x 7″.

Use the 5-in-1 Sliding Gauge to measure a 1/2″ hem on one side of each square.
Press. Fold open prior to stitching.

Match right sides and use a 1/2″ seam allowance to stitch one side of the square.
Stitch seams twice, or choose a double-stitch decorative stitch for durability. (I used Baby Lock 1-05.)


“Wrap” the corners: Fold the fabric along the stitch line at the bottom corner; pin.
Stitch the bottom seam starting at the fold. Use a 1/2″ seam allowance.
Fold the bottom seam along the stitch line and sew the remaining side. Use a 1/2″ seam allowance.

Note from Nancy: In the following pressing steps, it will help to press the bean bag envelope around a free-arm sleeve board or tailor’s pressing seam roll.
Press seam allowances open at the top edge.
Remove a small rectangle within the seam allowance to reduce bulk.

Refold the 1/2″ pressed seam allowance.
Press again.

Turn the bag right side out.
Use the turning tool to push out the corners.

Fill with 15 oz. of corn.

Pin the pressed folded edges together, placing pins parallel to the fold.
Optional: Using a hand sewing needle, sew a long basting stitch along the top edge to hold the corn in place when you move to the sewing machine.

Attach the zipper foot to your sewing machine.
Carefully sew the opening closed; removing pins as you stitch.

Optional: Use Wonder Clips at this step for ease of pinning.

Use an anchor cloth (starter piece of fabric) to stitch the final seam. Reverse stitch on the fabric to secure the seam. Then, clip away the anchor cloth.

What a great project combining sewing and backyard fun!

Learn How to Build Your Own Corntoss Board
Check out this blog and video on how to make the corntoss board, compliments of This Old House.
To learn more about the game, visit the American Cornhole Organization website.
Wrapped Corner Tips
The wrapped corner technique detailed above is also featured in my book, The Absolute Easiest Way to Sew or watch the demonstration online on Sewing With Nancy.
To watch Sewing With Nancy on your iPad, iPod Touch, or iPhone, download the app.
The random winner of a package of Fuse ‘n Gather from Clover is LuLu. She said: I have always used the 2 rows of regular stitching—pulling the threads to make my gathers look good! I would like to try Fuse ‘n Gather!
The random winner of The Absolute Easiest Way to Sew book is Kimberly Hubbard. She said: I am a nurse, and these mitered patch pockets will go perfect on my scrub tops!
Bye for now,
Content in this feed is © copyright 2015 by Nancy Zieman and may not be republished without written permission. You’re welcome to forward the email to a friend or colleague but it’s not okay to add the RSS feed automatically as content on a blog or other website.
Nancy Zieman's Blog

- Nancy Zieman's profile
- 21 followers

