
Nancy Zieman's Blog, page 121
October 15, 2015
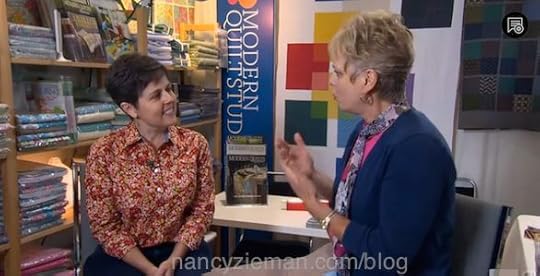
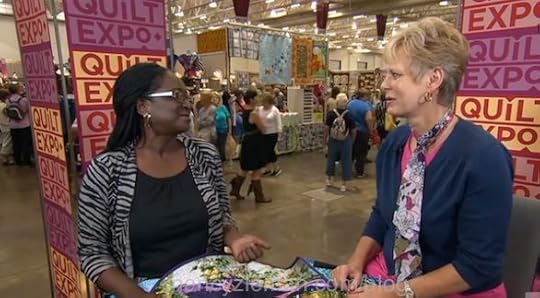
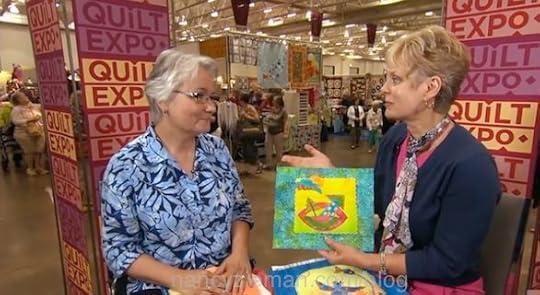
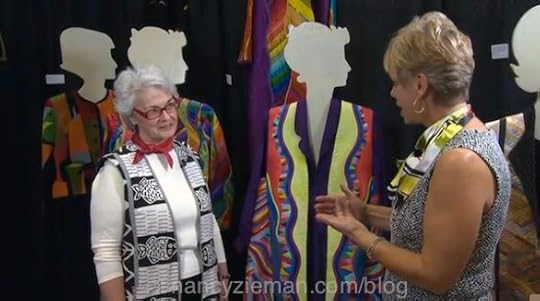
A Modern Quilting Bee
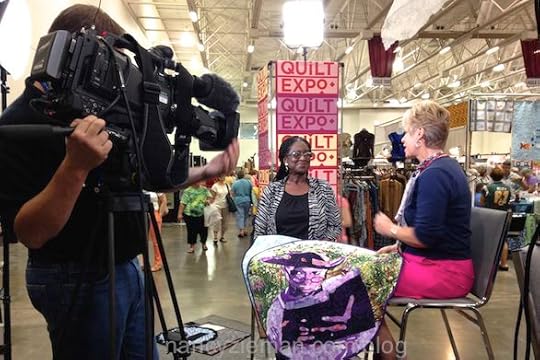
Often you hear the phrase, “Quilting Bee”. I’m sure your mind pictures images of old: Friends, family, fabric, and fun. The Modern Quilting Bee has all those elements plus more. Join me as we journey outside the Sewing With Nancy studio to celebrate the art of quilting at the Quilt Expo in Madison, Wisconsin, and watch A Modern Quilting Bee on Sewing With Nancy online.
Modern quilting is a buzz word in the quilting community. Weeks Ringle, author, publisher, designer, teacher, lecturer, and fabric designer joins me for a chat on modern quilting—quilting as a reflection of today.
One of my favorite fabrics to work with when Landscape Quilting is hand-dyed fabric. Wendy Richardson is a master at dying fabric. Wendy joins me and shares some of the processes she uses when hand-dying fabrics.

I’ve often said that I have the best job in the world, because I get to interview and learn from leaders and innovators in the sewing and quilting world. Lola Jenkins, quilter and lecturer, joins me to share her quilting journey inspired by her life and heritage.
My next guest and friend, Laura Wasilowski, shares her art quilting methods for combining slow-quilting and quick-quilting.
When most of us think of quilts, we generally think of bed quilts or wall quilts. In addition to two-dimensional, quilting is also three-dimensional. Lorraine Torrence, author, designer, and educator, joins me to share her legacy exhibit of quilted garments.
Watch A Modern Quilting Bee on Sewing With Nancy online.
To watch Sewing With Nancy on your iPad, iPod Touch, or iPhone, download the app .

For a chance to win a
Quilt Expo Tote Bag from Wisconsin Public Television, please leave a comment below sharing your favorite part of a sewing or quilting event. ![]()

The random winner of a copy of Beginning Landscape Quilting book is Martha Drabiski. She said: I love the outdoors & would love to create a scene using your method.

Bye for now,

Content in this feed is © copyright 2015 by Nancy Zieman and may not be republished without written permission. You’re welcome to forward the email to a friend or colleague but it’s not okay to add the RSS feed automatically as content on a blog or other website.
Make sure you are subscribed to my enews mailing list so you won’t miss a thing. Sign up here . Join us on Facebook , plus a host of other social media channels. Connect With Nancy today!


October 13, 2015
Serge a Warm Pullover Top

I truly love to sew; yet my schedule—like yours—doesn’t always allow time for this pleasure. When designing and making this trio of knit tops, I was pleasantly surprised that I was able to cut out the pattern and sew the top during an afternoon. Follow these streamline steps included in the pattern and you, too, will have time to enjoy your sewing passion with a comfy, trendy knit top.
Last week, I shared my new sewing pattern from The McCall Pattern Company in this blog post. The first top (the diagonal stripe top) is created using a lightweight knit fabric, a sewing machine and a wobble stitch. This week, we’ll use the same four easy pattern pieces to create a warm fleece pullover with a serger technique.

Review: In options A and B, styles feature differing hem lengths, which make this top excellent to wear with tights, jeans or skirts. The styles are also drafted for sewing machine stitching or serger construction. Shown in style C, the top has an asymmetrical wrap across the body. The pullover is a truly versatile piece.
The pullover top may be sewn on a serger or a sewing machine set to a wobble stitch. And the best part: The pattern only has four pieces!


Construction Details
Center Front and Center Back Exposed Serged Seams
Choose thread that coordinates or matches the fabric. Set serger for 4-thread overlock stitch with the width setting at “M” or a 1/4″ stitch width.
Test the serger settings and thread color choices on a scrap of fabric before serging the actual fabric pieces. Adjust the stitch length to achieve the desired appearance.

Serge outer edges of Center Front and Center Back seams.

Note from Nancy: When serging fleece or other thick knit fabrics, beginning serging on an “anchor cloth,” an extra piece of fabric. Align the project fabric next to this starter fabric and proceed to serge the edge or seam. Later, clip off the anchor cloth and save it for the next seam. This little tip assures that the beginning of the seam or edges have perfectly even stitches.

Seal thread ends at hemline with a seam sealant .
Stack Front pieces—right sides up—with a 1/2″ overlap, aligning the outer or left-needle thread stitching lines of both pieces.


Straight stitch, or wobble stitch, sewing along the right-needle thread.

Repeat steps on the Center Back seam.
Serge along the hemline of Front and Back pieces.

Note from Nancy: With exposed serged edges, it is difficult to have an even stopping and starting point when serging in the round along hemlines and outer edges of the collar and cuffs. For this reason, I serge the outer edges before sewing the side seams. I hope you’ll like that approach, too!
Collar and Neckline
The following photos feature the black and white knit fabric, but the construction for the red fleece pullover follows the same steps.
Align edges and pin Center Back seam of Collar, right sides together, matching notches.
Stitch or serge seam.
Press seam flat; then press open. Press serged seam to one side.
Serge along the hemline.

Press under 1/4″ and topstitch.

Attach Collar to Neckline
Quarter-mark the neckline of the collar and neckline of the top. To quarter-mark, fold the opening in half and in half again, placing a pin at each of the four folds.

Align edges and pin the WRONG side of the collar to the RIGHT side of the neckline at each quarter mark.
Stitch or serge with 1/4″ seam allowances.

Press seam flat; then press toward the top.
Topstitch seam to top.
Fold top of collar toward the neckline.
Underarm Seam and Hem
Align edges and pin Front to Back along underarm seams, right sides together, matching notches.
Stitch or serge with a 1/4″ seam allowance.
Press seam flat; then press open. Press serged seam to one side.

Cuff with Exposed Edges—View B
Align edges and pin one side seam of cuff, right sides together.
Stitch or serge one side seam. Press seam flat; then press to one side. Serge outer edge of cuff.


Seal thread ends with a seam sealant.
Align and pin remaining side seam, right sides together, matching notches.
Stitch or serge with a 1/4″ seam allowance.
Press seam flat; press serged seam to one side.
Attach Cuff to Sleeve
Align and pin WRONG side of cuff to the RIGHT side of the sleeve, matching edges and matching notches.

Stitch or serge with 1/4″ seam allowances.

Turn top right side out. Fold up cuff hem and align with the cuff seam. Hand stitch top cuff to sleeve at each side seam.

The new pullover is finished and ready to wear!
Demystify the fear about working with knit fabrics. You can sew them easily and with confidence with tips and techniques in my book: Sew Knits with Confidence. Sewing With Nancy also has a two-part series featuring knits. Watch Part One and Part Two online.
This book is a lifetime compilation of techniques that make sewing fun and easy for all skill levels. You’ll learn about sewing tools, easy sewing techniques, how to use a sewing machine and serger, how to select and use fabrics and patterns, and how easy it is to sew simple projects.
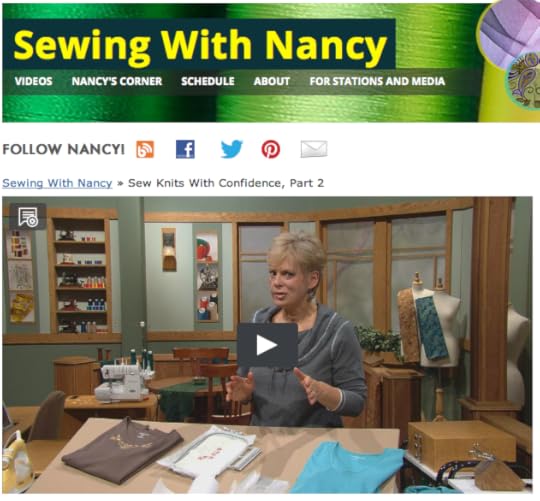
Watch Sew Knits with Confidence (Part One and Part Two)on Sewing With Nancy online.
To watch Sewing With Nancy on your iPad, iPod Touch, or iPhone, download the app.
For a chance to win a copy of pattern M7252, from The McCall Pattern Company, please leave a comment below sharing what knit fabric you’d choose to make this new fall fashion top. Two patterns will be randomly given away—must be US residents.
Bye for now,
Content in this feed is © copyright 2015 by Nancy Zieman and may not be republished without written permission. You’re welcome to forward the email to a friend or colleague but it’s not okay to add the RSS feed automatically as content on a blog or other website.
Make sure you are subscribed to my enews mailing list so you won’t miss a thing. Sign up here . Join us on Facebook , plus a host of other social media channels. Connect With Nancy today!
October 10, 2015
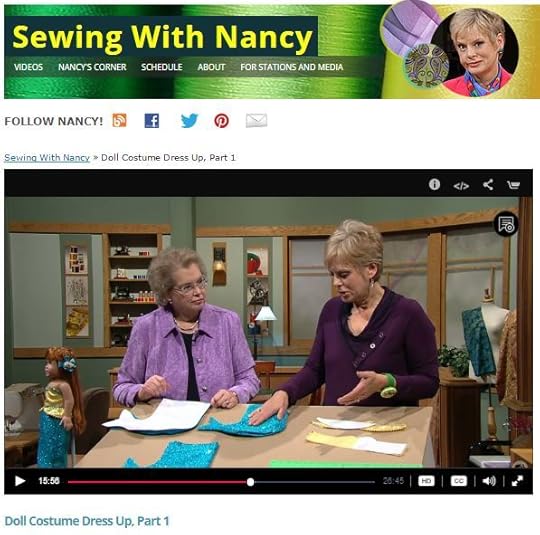
Sew a Mermaid Costume for Girls and 18″ Dolls

Here’s a sewing tutorial on how to create a mermaid tail in time for Halloween or for dress-up all-year long. The idea came from my granddaughers. After watching Doll Costume Dress Up on Sewing With Nancy, my oldest granddaughter Avery promptly asked, “Gramma, for my birthday could you make a mermaid costume for my doll and one for me too? Now, don’t make an opening for my feet, I can swim like a mermaid with a tail!” Then I asked her sister, Luella what she would like for her birthday. Answer: “Same as Avery!” So, two mermaid sets–big and small–were the task. (Much to Avery’s dismay, I made the big-girl fish tails with openings for feet!)

My Sewing With Nancy guest and friend, Joan Hinds developed the pattern for an 18″ doll dress-up mermaid costume. You can see how we created it in sequin fabric on the Doll Costume Dress Up episode online, and you’ll find the patterns in the book. The pattern can be scaled (pun intended) to fit child sizes, giving you matching dress-up clothes for your favorite little ones. Here’s how I scaled the design and created a mermaid tail for my granddaughters, ages six and four.

Supplies, Fabric, and Notions
For both doll and child sizes:
Pattern Tracing Paper
Point Turner
Clip and Glide Bodkin Set
Fiberfill
For 18″ doll size:
Tail-
1/3 yd. sequin knit fabric
1/3 yd. lining fabric
11″ elastic, 1/4″ wide
Create the Girls’ Mermaid Tail Pattern
Draw a 13″ x 20″ rectangle on Pattern Tracing Paper .

At lower right edge, draw a curve using the 5-in-1 Sliding Gauge .

Place a dot at the top of the curve, 1/4″ in from edge.
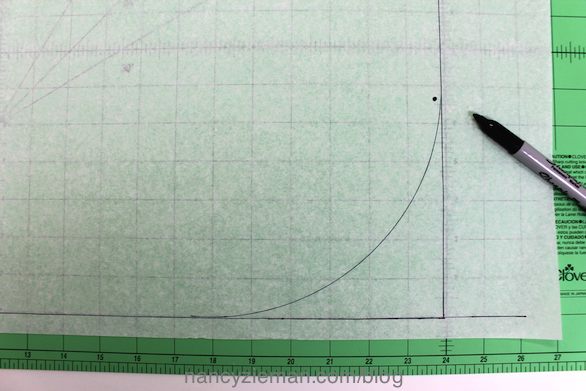
Note from Nancy: To alter the pattern, Lengthen at top edge, and widen at left edge.
Print the tail pattern and tape at lower left edge.

Cut out the paper pattern.

Construct the Tail
Place fabric wrong sides together, and cut two tails from both the sequin fabric and the lining fabric.

Sew side seams and bottom edge of the tail, right sides together, leaving opening between dots as marked on the pattern piece.

Turn to the right side and press.
Note from Nancy: Use Point Turner to turn tail points.


Repeat steps above for lining, but don’t turn sewn lining to right side.

With wrong sides together, insert the lining inside the tail. Zigzag or serge the top edges together.

Fold 1/2″ of the waist fabric/lining toward the wrong side and stitch, leaving a 1″ opening for an elastic casing.

Thread the elastic through the casing, using a Clip and Glide Bodkin. Secure the edges of the elastic. Optional: Sew opening closed.


Turn up a 1/4″ hem to the wrong side, folding the lower edges of the sequin and lining fabric together; topstitch.


Using a Point Turner, “stuff” tail and topstitch to hold stuffing in place.


Create the 18″ Doll Top
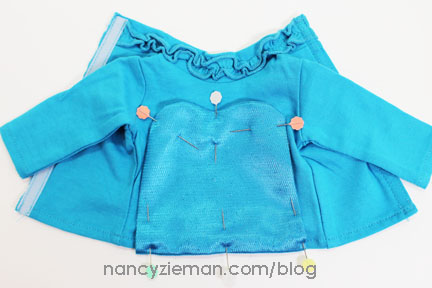
Note from Nancy: In the Doll Costume Dress Up book, a pattern is provided for the 18″ doll mermaid top. For another option, I decided to do a quick makeover on a ready-made 18″ doll T-shirt.
Create a front bodice panel and topstitch to an existing T-shirt. The shirt pictured below is for an 18″ doll.
Cut a bodice shape from Pattern Tracing Paper. Cut one bodice panel from the shimmer overlay and two panels from the lining.

Sandwich the shimmer fabric between the two lining pieces. Pin.

Sew using a 1/4″ seam allowance; leaving the lower edge unstitched.
Notch seam allowance at curves. Remember to clip to, but not through, the stitching line.

Turn the bodice shape right side out.
Smooth the curves with a point turner tool .
Fold the lower edge towards the bodice panel lining, and press up a 1/4″ hem.

Position the panel on the center-front of the shirt.
Topstitch the folded hem at the lower edge.

Edgestitch the bodice panel to the shirt.

Apply as much trim as you like to finish off the mermaid costume top.

Ta-Dah! Time for a make-believe swim!

Watch Doll Costume Dress Up on Sewing With Nancy online.
To watch Sewing With Nancy on your iPad, iPod Touch, or iPhone, download the app.
In last week’s blog , I asked what type of stitched item you are most likely to add embroidery to. The random winner of Creative Quilt Outlines…Pumpkins with Style is Marvel Donovan. She said, I am very new to machine embroidery but so far I am thrilled with the results. I love the fall designs, especially the use of tablecloths and napkins. I have an idea for a basket and bag using the embroidery designs to make them extra special and fun for the holidays.
Bye for now,
Content in this feed is © copyright 2015 by Nancy Zieman and may not be republished without written permission. You’re welcome to forward the email to a friend or colleague but it’s not okay to add the RSS feed automatically as content on a blog or other website.
Make sure you are subscribed to my enews mailing list so you won’t miss a thing. Sign up here . Join us on Facebook , plus a host of other social media channels. Connect With Nancy today!
October 9, 2015
Sew Adorkable Blog Tour

Welcome to the Nancy Zieman Blog stop on the Sew Adorkable Blog Tour. The author, Samarra Khaja , online and very active in social media ( Facebook , Twitter , Tumblr & Instagram ). You may already be following her and enjoying her sewing and illustration works. I recently had the opportunity to interview the author, Samarra Khaja about her upcoming release with C&T Publishing/Stash Books.
Meet Samarra:

How long have you been sewing/quilting?
It was the late 70s and there was a big DIY home sewing/garment-making wave going on. My mom made amazing reversible tennis skirts for herself and patchwork dresses with gathered puffy sleeves for me that I proudly wore to school. It was during that time that she taught me how to sew and I made my first quilt (reversible!) at age 10 on the Singer Stylist that she still has today. In fact, part of my 8-Bit Birds quilt was assembled on that very machine when we were on summer vacation and I was getting all my book projects done. It’s not easy to have sewing pit-stops on a family road trip, but mom’s machine — just like mom herself — is always reliable!
When did you first start brainstorming this creative book collection?
Some of the projects, like the Teacher Tool Belt and Toothy the Tooth Fairy have existed in some form for a few years now, but the bulk of the book started bubbling to the front of my mind about two years ago.

Your illustrations in the book are outstanding, was integrating illustrations into the project artwork part of the original concept?
Thank you! Yes, the illustrations and the final look and feel of the entire book was a solid concept from the get-go. C&T/Stash Books was downright awesome in believing in my vision and helping see it through. I wanted to present a complete world of creativity to makers, so along with having unique statement-making projects mixed with my unabashed goofball humor, I also wanted to frame everything together in a world of fantastical and imaginative possibility to inspire readers to have fun and enjoy crafting.
What is your favorite project in the book? Ok, you can pick the top two.
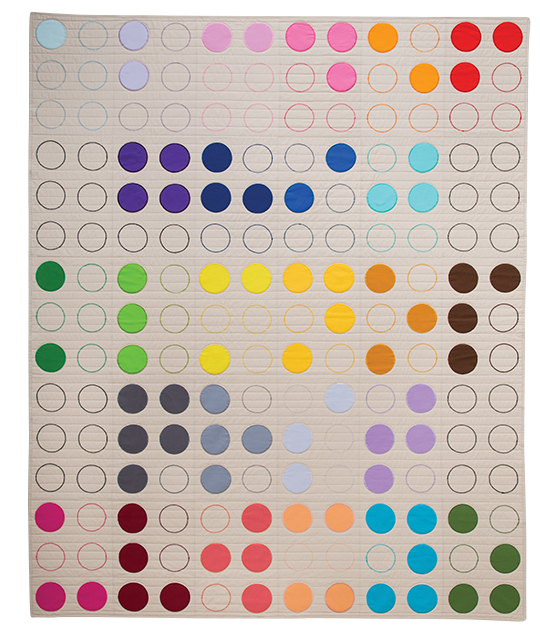
As you might guess, depending on the day, I have a different answer. At this moment, I’m particularly fond of my Candy Dot quilt and my Prehistoric Portrait Painting, because they’re both comically over the top, fun and are good reminders to not take everything so seriously.

My staff and I are particularly fond of the graphic impact in your Braille Quilt. Can you tell us a bit more about it?
It all started when I was in elementary school and ordered “Louis Braille” from my Scholastics book flyer. That book, which I still have to this day, had raised braille dots embossed into the back cover and I’d spend a great deal of time running my fingers across the letters and thinking about what Louis’ life might have been like. Having a brother with disabilities has always made me very sensitive to the challenges people can face. Aside from being enraptured with the brilliance of Braille’s alphabet system, I was also amazed at its graphic perfection being logical, functional, universal, yet simple all at the same time.
What is next from Samarra in the world of sewing, quilting and design?
I’m excited to say that I also have a coloring book for adults coming out this fall. It’s called “Off the Bookshelf” and for people who know my fabric designs, you’ll see at least a couple of familiar characters and scenes in the book! I’m crazy excited about it and can’t wait to get my paws on my own copy!
Any other info you’d like to share with quilters & seamstresses of all skill levels?
Let preconceived ideas of perfection and standards and what’s “correct” and what’s “wrong” fall away from your process and just focus on making. We wind up inhibiting ourselves preemptively with ideas that we don’t have the ‘best sewing machine/tools/etc’ or the ‘right technique’ or are somehow ‘no good enough’ at whatever it may be. It doesn’t matter what brand your sewing machine is; does it get the job done? Then use it! It doesn’t matter how someone else made something; can you get to the same end point yourself in your own way? Then do it! Life is too short to restrict yourself with invisible and subjective ideas of good/bad. Down with comparing! Up with making!
If you weren’t writing sewing books and working in the illustration and textiles industry, what would be your dream job?
Saving and helping animals in one way or another; I wanted to be a veterinarian as a kid and that passion and love for animals has never gone away.
What is your greatest sewing challenge?
Trying not to rush projects. Sometimes I’m so clear on what a finished piece looks like in my head and so excited to get to that endpoint, that I speed my way to get there. Let’s just say I’ve been known to drive my sewing machine like I’m trying to outrun the fuzz on the Autobahn. Slow and steady would probably shave less years off my life and save more time in the long run, but this just might be part of my messy method, so really, who am I kidding.

Leave a comment telling us which project you are most looking forward to in Samarra’s new book? Open internationally, however if winner lives outside of the US, they will receive a promo code to purchase the ebook version free of charge. US winner will receive a hard copy. The random winner will be selected October 26.
Tour Schedule:
09/14/15: C&T/Stash Books
09/16/15: Generation Q Magazine
09/18/15: Sew Timeless
09/21/15: The Fire Science Blog
09/23/15: Art School DropOut
09/25/15: Craft Buds
09/28/15: Pellon
09/30/15: Crafty Planner
10/02/15: Modern Handcraft
10/05/15: Imagine Gnats
10/07/15: May Chappell
10/09/15: Nancy Zieman
10/12/15: Dritz
10/14/15: Spoonflower
10/16/15: Sew Sweetness
10/19/15: Aurifil
10/21/15: Accuquilt
10/23/15: Schmancy Toys
10/26/15: Samarra Khaja
Bye for now,
Nancy Zieman—author, pattern designer, businesswoman, producer, and national sewing authority—is the host of the popular show Sewing With Nancy®, which appears exclusively on public television stations across the United States and Canada. Follow Nancy’s Blog at NancyZieman.com/Blog and sign up to receive Nancy’s E-News for the latest news in Sewing, Quilting, & Creating.
Content in this feed is © copyright 2015 by Nancy Zieman and may not be republished without written permission. You’re welcome to forward the email to a friend or colleague but it’s not okay to add the RSS feed automatically as content on a blog or other website.
Make sure you are subscribed to my enews mailing list so you won’t miss a thing. Sign up here . Join us on Facebook , plus a host of other social media channels. Connect With Nancy today!
October 8, 2015
Elements of Landscape Quilting
[image error]
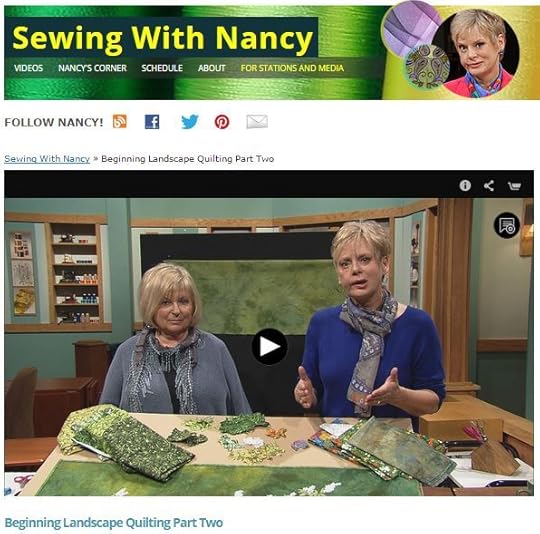
Landscape quilting breaks many quilting rules. It’s okay to cut inaccurately, in fact, it’s often recommended. Glue sticks are used instead of pins, and the pattern is not a pattern at all, just a photo! Natalie Sewell taught me her spontaneous technique many years ago, and I haven’t stopped quilting since. She’s back to give simple techniques on Beginning Landscape Quilting Part 3 on Sewing With Nancy.
After making hundreds of landscape quilts, Natalie has learned to fine-tune the process. In this series we’re focusing on specific elements within scenes. In the quilt, Prairie, you’ll see distant and close-up coneflowers. Designing a scene such as this might seem daunting, yet you’ll soon learn how you too can become a landscape quilter.
In Beginning Landscape Quilting Part 3, we share how to create the flowers in this prairie scene.

You’ll see how Natalie and I select fabrics, creatively cut blooms, and accent flowers with fabric markers.


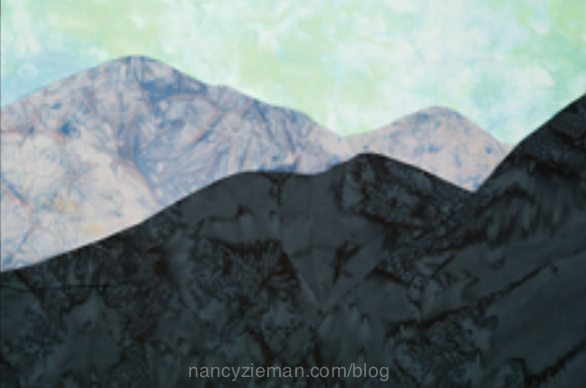
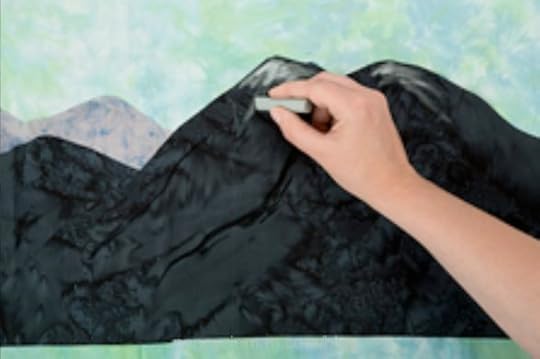
In Beginning Landscape Quilting Part 3, we also share how to create mountains. I used two inspirational photos to create my quilt titled Rocky Mountain Summer.


Hand dyed fabrics, permanent fabric markers, and oil pastels are the needed elements to create the majestic mountain in fabric. See how we select fabrics, cut mountain shapes, and shade with permanent markers/oil pastels.

In the Beginning Landscape Quilting book, we share quilting and finishing tips for machine basting, layering, stippling, binding, and more.

Watch Beginning Landscape Quilting, Part 1, Part 2, and Part 3 on Sewing With Nancy online.
To watch Sewing With Nancy on your iPad, iPod Touch, or iPhone, download the app.


Now that you’ve seen how easy it is to dive into landscape quilting, which season would you most like to capture in landscape quilt imagery? Leave your answer in the comment section below for a chance to win a copy of Beginning Landscape Quilting. One winner will be randomly selected.

Bye for now,
Content in this feed is © copyright 2015 by Nancy Zieman and may not be republished without written permission. You’re welcome to forward the email to a friend or colleague but it’s not okay to add the RSS feed automatically as content on a blog or other website.
Make sure you are subscribed to my enews mailing list so you won’t miss a thing. Sign up here . Join us on Facebook , plus a host of other social media channels. Connect With Nancy today!
October 6, 2015
Sew a Versatile Fall Pullover

Contemporary, seasonal, and absolutely easy-to-sew are some of the favorite elements about my new sewing pattern from The McCall Pattern Company. M7252 can be made in three styles; all featuring a sophisticated cowl neckline. Using the softest knit fabrics, this comfortable top will be a complementary addition to your wardrobe.

In options A and B, styles feature different hem lengths, which make this top excellent to wear with leggings, jeans, or skirts. The styles are also drafted for sewing machine stitching or serger construction. Shown in style C, the top has an asymmetrical wrap across the body. The pullover is a truly versatile piece.
The pullover top may be sewn on a serger or a sewing machine set to a wobble stitch. And the best part: The pattern only has four pieces!
View A
This design features a shorter hem length in a cozy shirt-style pullover. We stitched View A using a bold stripe to accent the shape and ease of the garment.

View B
View B is created with serger seams exposed. The pullover featured below is created using fleece and a special technique, which we’ll see next week, for showcasing a serged seam.

View C
The third style has an across-the-body wrap design element making the pullover feel more like outerwear. This look is perfect for layers and is every bit as easy to sew as Views A and B.

Construction Details
Fold the fabric, right sides together, as shown in the cutting layouts for your size and fabric width.
Roughly position all patterns on the fabric.
Note From Nancy: You’ll notice I have traced the pattern pieces onto paper to use multiple times and to allow me to reuse my pattern for multiple sizes. As I traced my pattern, I used a quilter’s ruler with a 45° line to pencil in a bias grainline 45° from the marked grainline on the pattern. By doing this, I’m able to align my pattern pieces to create an exact diagonal stripe on my pullover. **Remember, when tilting the pattern pieces, you may need to purchase more fabric than originally required.

Pin pattern pieces in place or use pattern weights.
Markings
Mark Notches: Cut a short “nip” in the edge of the fabric at each notch or circle marking, about 1/8″ in length. Clip two nips at a double notch.
Construction
Match right sides together and match the diagonal stripes along the center fronts and center backs.
Serge the seams or stitch with a wobble stitch, .5 width x 2.5 length on your sewing machine.

Align and pin Front and Back pieces along shoulder seams, right sides together, matching notches. Stitch.

Press seam flat; then press open. Press a serged seam to one side.
Collar and Neckline
Align edges and pin Center Back seam of Collar, right sides together, matching notches.
Stitch or serge seam.
Press seam flat; then press open. Press a serged seam to one side.
Optional: Serge along the hemline.
Press under 1/4″ and topstitch.
Attach Collar to Neckline
Quarter-mark the neckline of the collar and neckline of the top. To quarter-mark, fold the opening in half and in half again, placing a pin at each of the four folds.
Align edges and pin the WRONG side of the collar to the RIGHT side of the neckline at each quarter mark.
Stitch with a 1/4″ seam allowance.
Press seam flat; then press toward the top and topstitch.
Fold top of collar toward the neckline.
Underarm Seams and Hem
Align edges and pin Front to Back along underarm seams, right sides together, matching notches.
Stitch with 1/4″ seam allowances.
Press seams flat; then press open. Press serged seams to one side.
Optional: Serge along the hemline.
Press under 1/4″ and topstitch.
 .
.

Cuff
Align edges and pin side seams of cuff right sides together.
Stitch seam.

Press seams flat; then press open. Press serged seams to one side.
Optional: Serge along the hemline.

Press under 1/4″ and topstitch.
Attach Cuffs to Sleeves
Align and pin WRONG side of cuffs to the RIGHT side of sleeves, matching edges and notches.
Stitch with 1/4″ seam allowances.
Turn top right side out. Fold up cuff hems and align with the cuff seams. Hand stitch top cuff to sleeve at each side seam.
The new pullover is finished and ready to wear!
Join me next week as we take a closer look at the construction of View B, a style serged in fleece knit. I will be detailing the simplicity of working with fleece and share a tip for decorative topstitching. If you don’t already subscribe to my enewsletter, sign up here, so you won’t miss a thing!
Demystify the fear of working with knit fabrics. You can sew easily and with confidence using tips and techniques in my book: Sew Knits with Confidence. Sewing With Nancy also has a two-part series featuring knits. Watch Part One and Part Two online.
This book is a lifetime compilation of techniques that make sewing fun and easy for all skill levels. You’ll learn about sewing tools, easy sewing techniques, how to use a sewing machine and serger, how to select and use fabrics and patterns, and how easy it is to sew simple projects.
Watch Sew Knits with Confidence (Part One and Part Two)on Sewing With Nancy online.
To watch Sewing With Nancy on your iPad, iPod Touch, or iPhone, download the app.

For a chance to win a copy of M7252, from The McCall Pattern Company, please leave a comment below sharing what knit fabric you’d choose to make this new fall fashion top. Two patterns will be randomly given away—must be US residents.
Bye for now,
Content in this feed is © copyright 2015 by Nancy Zieman and may not be republished without written permission. You’re welcome to forward the email to a friend or colleague but it’s not okay to add the RSS feed automatically as content on a blog or other website.
Make sure you are subscribed to my enews mailing list so you won’t miss a thing. Sign up here . Join us on Facebook , plus a host of other social media channels. Connect With Nancy today!
October 3, 2015
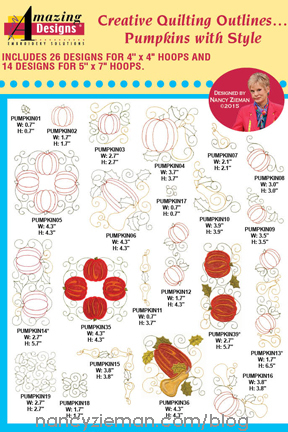
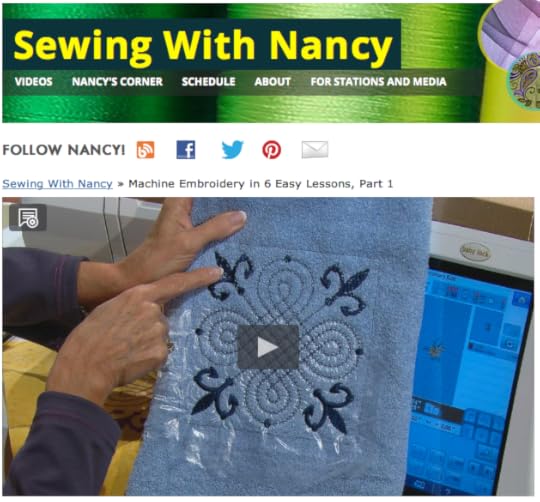
In-The-Hoop Quilting Outlines. . . Pumpkins With Style

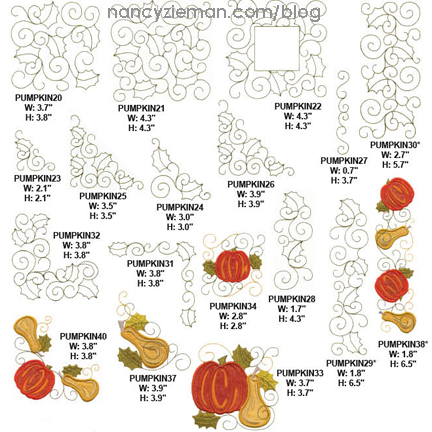
Combine in-the-hoop machine quilting with coordinating embroidery designs to your next fall-themed quilting project. I’m happy to introduce this exciting fall-themed embroidery pack by Amazing Designs. The embroidery bundle includes 26 designs for 4″ x 4″ hoops and 14 designs for 5″ x 7″ hoops. The possibilities for Creative Quilting Outlines…Pumpkins with Style are endless.
Join me to see how easy it is to use your embroidery machine for in-the-hoop quilting designs with these favorite fall projects.
Appliqué Accents
Adding color to your embroidery design couldn’t be easier with the five appliqué options in this design bundle.
Align the fabric and selected design in the hoop.
Back fabric with your favorite stabilizer.
Stitch the outline shape.
Trim away any excess fabric beyond the stitching line.
Finish the edges with the beautifully digitized embroidery stitches.

Perfect Machine Quilting In-The-Hoop
Get the look of a complex accurate quilting design using the computer guide feature of your embroidery machine. That’s right; you can quilt your next project in-the-hoop.
Layer the quilt: backing, batting, and quilt top.
Use spray adhesive to secure the layers.
Align the area to be quilted in the hoop, matching horizontal and vertical register marks.
Select the outline, or should I say quilt design, and stitch.

I rarely just stitch one embroidery design on a project. Rather, I like two or three of the same motif for the design. This set allows me to mix and match many autumn motifs to create an interesting finished design.

Potpourri of Fall Projects
With designs for different sized hoops, we have options as to how big or small we’d like to stitch. The hoop will give you control over the larger sized projects, making quilts quite easily.

You can mix embroidery designs flawlessly with the quilting motif, as the two are designed to complement each other.

Consider repeating one single design on a mantle scarf.

Three similar fall wall hangings make quite a statement with colorful detailing in each embroidered and quilted stitch.
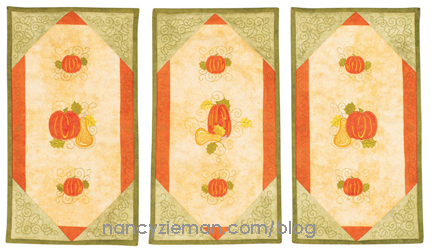
You can even dress up the entire table this holiday season with a table runner and placemats.

This table runner features the embroidery designs on a 6-1/2″ center or focus block, which then gets a border (3-1/2″ on each side) and is set on point. The blocks are not complicated and you’ll be able to create them in any size.

The coordinating placemats are equally easy to create by simply adding the fall embroidery designs to 6-1/2″ blocks, which will be sewn into a basic 9-patch quilt block and also set on point.

If you are new to machine embroidery, you may want to watch Sewing With Nancy for more machine embroidery tips and ideas.
Embroidery Lessons on Sewing With Nancy
Polish your embroidery skills by watching Machine Embroidery in Six Easy Lessons Part One and Machine Embroidery in Six Easy Lessons Part Two with guest Eileen Roche.
On what type of stitched item are you most likely to add embroidery? Leave your answers in the comments section to be entered to win Creative Quilt Outlines…Pumpkins with Style. A winner will be randomly selected.
The random winner of the CD Stress-Free Machine Embroidery: Diamond Spectrum Quilt is Shirley Clark. She said: Quilting would have to be the most stressful. I don’t have a machine that uses a stitch regulator and hand stippling is really hard, so using the embroidery machine is my best option. Thanks for the tutorial!
Bye for now,
Content in this feed is © copyright 2015 by Nancy Zieman and may not be republished without written permission. You’re welcome to forward the email to a friend or colleague but it’s not okay to add the RSS feed automatically as content on a blog or other website.
Make sure you are subscribed to my enews mailing list so you won’t miss a thing. Sign up here . Join us on Facebook , plus a host of other social media channels. Connect With Nancy today!
October 1, 2015
Create a Garden Scene with Fabric

Two of my favorite hobbies are sewing and gardening. Almost 20 years ago, I was introduced to a quilting technique by Natalie Sewell, nationally known landscape quilt artist. Natalie and I became fast friends and schedule two–three quilting dates each year. During this three-part series, our goal is to simplify the process so that everyone interested can enjoy the pleasure of creating outdoor scenes in fabric.

How to Create a Garden Scene with Fabric
A great beginner’s project is to create a close-up garden scene. Natalie’s design, Summer Flowers, is what we used during the TV program as an example for choosing fabric, messy and fussy cutting, as well as designing with raw-edge appliqué.
Our book, Beginning Landscape Quilting, is a step-by-step guide for designing simple scenes. We’re confident that you’ll have great success.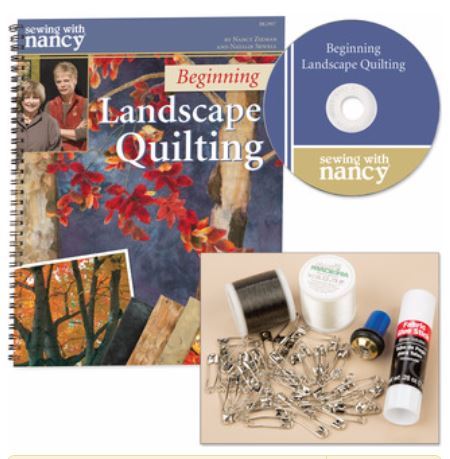
First we start with an inspirational photo. We’ll teach you how to study the photo, which will help in the fabric selection process.

Watch online and follow along in the book as we show you exactly how to create a garden scene. Below are the pages from Beginning Landscape Quilting featuring the steps to create a Garden Scene. It is a direct step-by-step guide, leaving no question as to what to do.


We can’t help, but share a few of our scenes. Irises in my Garden is one of my early landscape quilts—I still enjoy looking at it!

How to Create Ground Cover
The next landscape quilting topic focuses on ground cover. I’m certain your eye focuses on the Dancing Maple in Natalie’s quilt by the same name. The lively and spirited tree is the star of the design. Yet, without the interesting ground cover, the depth and dimension in the quilt would not be as impactful. If your inspiration photo features ground cover, we’d like to share with you the tricks of choosing fabric and designing that all-important landscape quilt element.

You’ll learn that the inspirational photo is a starting point. Our quilts rarely, if ever, look like the inspiration. That’s not the point!

Dogwood by Natalie is another showcase quilt. I almost feel as if I could walk right into the woods!

My design, If Trees Were Teal, is more impressionist than realistic.

How to Create Background Tree Foliage
I am certain by now you realize you’re learning to use fabric as paint and scissors as your paintbrush to capture nature in a wall hanging. Natalie’s Autumn Birches design combines many techniques we’ve already explained, with the exception of background tree foliage. Next learn the importance of the scale of fabric prints and the importance of really bad messy cutting to give the impression of distant trees. (Learn how to do really bad messy cutting when watching online ).

The inspirational photo gave Natalie an idea of what fabric to choose.

Here’s another showcase, September by Natalie. Okay, we like to share our work!

Watch Beginning Landscape Quilting (Part One and Part Two) on Sewing With Nancy online.
To watch Sewing With Nancy on your iPad, iPod Touch, or iPhone, download the app.
Now that you’ve seen how easy it is to dive into landscape quilting, which season would you most like to capture in landscape quilt imagery? Leave your answer in the comment section below to be considered for a copy of Beginning Landscape Quilting. One winner will be randomly selected.
Bye for now,
Content in this feed is © copyright 2015 by Nancy Zieman and may not be republished without written permission. You’re welcome to forward the email to a friend or colleague but it’s not okay to add the RSS feed automatically as content on a blog or other website.
Make sure you are subscribed to my enews mailing list so you won’t miss a thing. Sign up here. Join us on Facebook, plus a host of other social media channels. Connect With Nancy today!
September 29, 2015
Stitch a New Look for a Tired Lampshade
By Emily Jansson, Nancy’s Notions guest blogger
Is your décor in need of refreshment? Why not jazz it up with a new embroidered lampshade? You don’t even have to purchase a new shade—let me show you how to cover one you already own.
This great piece can be made in an afternoon, and looks like it’s from a fancy boutique. Start with a luscious piece of Essex Linen or textured cotton Osnaburg, and add crewelwork embroidery from the Artful Autumn Crewel Collection.
Crewelwork is traditionally a décor-centric type of embroidery. It reached its heyday in the 1600s, when British women typically hand-embroidered with wool threads on linen to create items for the home. Other uses included decoration on clothing items—waistcoats of silk, stockings, and dressing gowns done up in all manner of fashionable beasts and foliage.
American colonists continued the trend, and some of the most recognizable samplings known today are from the good old USA.
I chose to recolor the designs to suit my living room—with grayish-blue tones and pops of yellow and wisteria. You may recolor to suit your own tastes, or use the existing autumnal hues for a more traditional look.
Supplies:
Lamp shade (I found one at Goodwill for $3.)
Essex Linen or cotton Osnaburg , approximately 1-1/2 yds (more or less may be needed depending on the size of your lamp shade)
Artful Autumn Crewel Embroidery Designs (or choose your own embroidery designs to suit your décor)
Lana Embroidery Thread (in your chosen colors)
Cotona Embroidery Thread (in your chosen colors)
Roll of brown kraft paper
Tape measure
Jumbo Wonder Clips (or binder clips)
Pencil for tracing pattern
Quilter’s Ruler
Fabric Marking Pen
Point Turner/Seam Creaser
Permanent Spray Adhesive (Use Scotch’s Super 77 or Krylon’s All-Purpose Adhesive Spray.)
Fabri-Tac Permanent Adhesive
Craft (popsicle) stick

Getting Your Shade Ready
Peel off any “binding” from the top and bottom of your shade. Not all lampshades have this binding. Discard.

Make a Pattern for Your Lamp Shade
Measure around the largest circumference of your shade (this is usually the bottom edge of your shade).
Cut a length of kraft paper that’s about 5″ longer than that measurement.
Spread your length of kraft paper out on a large, flat surface. You may wish to weigh the corners down with weights so that it remains flat.
Center your lampshade over the kraft paper with the seam down—you’ll want the seam to be going as perpendicular to the top and bottom of the kraft paper as possible.
Use a pencil to mark across the kraft paper at the top and bottom of the shade, and add crossmarks at the seam along the top and bottom.

Now slowly rock the shade to the right, marking the bottom edge of your shade as you roll it. Be careful to keep checking that your crossmarks stay registered with the shade’s seam. Rock the shade 2″ to the right, mark the edge of the shade. Go 2″ more, repeat. Do this until you go right off the edge of the paper.

Roll the shade back to the middle (make sure your crossmarks still match your seam), repeat with the top edge.

Now use your quilter’s ruler to add a 1/2″ seam allowance at the top and bottom lines of the pattern. These will be your fold-over edges.

Set the lampshade aside. Now you’re going to fold the kraft paper in half, using your seam marks as pinch points. Pinch at each end of the seamline marks, and fold so that it’s one continuous foldline. The kraft paper should now be folded in half, with the seamline you originally marked as the middle.


Cut along the outer seam allowance lines (top and bottom), all the way to the ends. The ends of your pattern will be uneven—don’t worry.

Open your pattern up and center the foldline over the seamline of the shade. Clip at seamline, top and bottom Note: I folded over the extra 1/2″ allowance.
Clip your pattern to the shade from the seamline in both directions. At some point, the edges of your pattern will start to overlap each other. Clip at the top and bottom of the pattern so that it stays snug.

Undo all of the other binder clips that are holding the pattern to the shade, but keep the edges of the pattern clipped to each other. Lift the pattern from the shade. Rotate it so that the overlapped edges are now centered over the shade seamline.

Use a pin to pierce through both layers of pattern paper at the top seamline. Mark with crossmarks. Repeat for the bottom seamline.


Remove the clips, lay the pattern flat and connect your crossmarks to each other from top to bottom. Do this on both left and right sides of the shade pattern.
Lay your quilter’s ruler 7/8″ to the outside of the right side’s edge, and draw a parallel line. This line becomes the folded, finished edge that will cover the left side’s raw edge.

Cut out along the new lines—now you’ve got your custom pattern!
Embroidering Your Fabric
Lay your pattern over your fabric, aligning the grain of the fabric to the middle of your pattern.

Trace your pattern onto fabric with a fabric marking pen , but do not cut the fabric.
Embroider your designs where you’d like them. Note: I concentrated mine at the front of the shade, which falls in the middle of your pattern.

Note: The pattern is marked but not cut just in case the embroidery shrinks your fabric ever so slightly.
Covering the Lamp Shade
Be sure to lay the pattern back over your embroidered fabric to check for any distortion—re-mark if the lines have to be modified.
Cut the fabric along your final markings.
Flip the cut piece over and use your quilter’s ruler to mark a scant 1/2″ from one short edge.
Fold this 1/2″ flap over toward the inside and press it crisp and straight.
Secure flap down with a thin layer of Fabri-Tac Permanent Adhesive. Note: You don’t want it to seep through to the right side of the fabric, so make sure to apply sparingly. Use the point turner/seam creaser for a crisp edge.
Now comes the fun part: adhering the fabric to your shade. The embroidered fabric should be lying face down on your table, flat.
Spray your shade with spray adhesive in a well-ventilated area. Make sure it’s contained in a box or something similar so that you don’t get the adhesive anywhere it shouldn’t be. You may wish to tape off the top opening so that you don’t get any adhesive inside the shade as you spray.
Orient your shade so that the existing seam is facing up toward you. This will be the back of the lamp shade. To adhere the fabric to the front of your shade, simply center the shade over your fabric, and press it down.

Gently roll the shade toward the side of your fabric with the raw-edged end, smoothing as you go to avoid wrinkles and slippage of the fabric. Try and keep 1/2″ of fabric over the top and bottom of the shade.

Once you’ve adhered the raw-edged side, roll the shade in the other direction, toward the folded edge, smoothing to avoid wrinkles and slippage as you go. When you get to the very edge, the fold should overlap your raw edge by about 1/4″.
Spread a thin layer of fabric glue with the craft stick along the folded edge, and secure to the overlap.
Use the point turner/seam creaser to smooth out any bubbles or wrinkles between the fabric and the shade.

You can use the point to carefully press in the finer details so that everything lies nice and flat.

Now it’s time to secure the top and bottom raw edges. Starting with the top edge, spread a thin layer of fabric glue along the inside edge of the fabric with the craft stick. Fold over the top edge, securing around the wire frame. Use the point turner/seam creaser to ease the raw edge into the crevice under the wire for a neat finish.


Repeat with the bottom edge. Note: If the wrapped edge looks uneven, you can always glue a strip of hem tape, ribbon, or binding over the edge for a clean and polished look.
Et voila! Now it’s time to invite all your friends over for tea to admire your amazing handiwork. Get ready for the requests to start rolling in.

If you’d rather play around with some mini versions of this project, check out the Adhesive Lampshade and Nightlight Set or Fusible Wine Shade Panels at NancysNotions.com.
Just imagine all the possibilities with embroidery, appliqué, and other surface techniques!
Thanks to Emily Jansson and the Nancy’s Notions Team for this DIY lampshape makeover project!
Bye for now,
Content in this feed is © copyright 2015 by Nancy Zieman and may not be republished without written permission. You’re welcome to forward the email to a friend or colleague but it’s not okay to add the RSS feed automatically as content on a blog or other website.
September 26, 2015
Beginning Landscape Quilting—All About Trees

Learn to Create Dark-Shaded Trees
During the three-part series, we take a simplified approach to landscape quilting. It’s all about trees—dark-shaded trees, light-colored tress, snow-accented trees! You’ll learn to messy-cut, glue, shade, and finally stitch a tree—ta-dah, you’re a landscape quilter.

First we’ll show you how to create a simple fall scene. Natalie’s quilt, October Evening, features dramatic trees and simple foliage. Instead of showing you how to make this specific design, we’ll detail how to easily create trees with my raw-edge appliqué technique.
 You’ll learn that your quilting “pattern” is no more, no less than an inspirational photo. You’re not going to create a wall quilt that looks just like the photo, only use the photo as a guideline. Watch online as we give fabric guidelines and create this scene. Find more information on the techniques in the book Beginning Landscape Quilting.

Natalie and I enjoy sharing our landscape quilts. Windy by Natalie Sewell 19″ x 22″ shows how simple, yet effective a design can be.

Create Light-Colored Trees—Birch or Aspen
When you’d like to create a landscape featuring birch or aspen trees like Natalie’s design, Old Friends, some of the same designing principles apply, along with a few new tricks. In this design we’ll detail how to create depth and shape, and also how to improvise when you can’t find the exact leaf fabric.

This inspirational photo guided Natalie on what fabrics to choose.

I took some leeway with my quilt, Blue Birches, casting a blue hue to the birch trees.

Create a Winter Landscape
Winter landscape scenes pose new design opportunities. River Birch Trees in Snow by Natalie, showcases the stark contrast between the snow and trees. We think you’ll be slightly surprised to learn all the fabric options when your inspiration comes from snow-covered ground.

This photo “tells” you that very few fabrics are needed.

Thank you for joining us today for the first episode of Beginning Landscape Quilting . If you’d like to rewatch this program or any recent episode, go to nancyzieman.com to watch online.
Watch Beginning Landscape Quilting on Sewing With Nancy online.
To watch Sewing With Nancy on your iPad, iPod Touch, or iPhone, download the app.

Now that you’ve seen how easy it is to dive into landscape quilting, which season would you most like to capture in landscape quilt imagery? Leave your answer in the comment section below to be considered for a copy of Beginning Landscape Quilting. One winner will be randomly selected.
Bye for now,
Content in this feed is © copyright 2015 by Nancy Zieman and may not be republished without written permission. You’re welcome to forward the email to a friend or colleague but it’s not okay to add the RSS feed automatically as content on a blog or other website.
Make sure you are subscribed to my enews mailing list so you won’t miss a thing. Sign up here. Join us on Facebook, plus a host of other social media channels. Connect With Nancy today!
Nancy Zieman's Blog

- Nancy Zieman's profile
- 21 followers


![[image error]](http://www.nancyzieman.com/blog/wp-content/uploads/2015/10/Screenshot-2015-10-06-13.24.03.png)