
Nancy Zieman's Blog, page 119
November 28, 2015
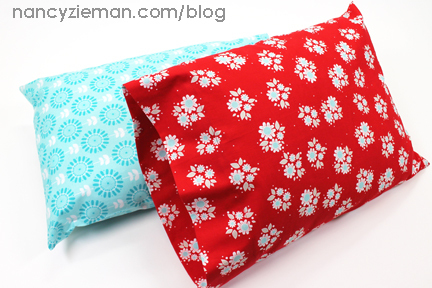
Sew and Donate a Travel Pillowcase
When my team recently approached our local cancer treatment center to inquire about their sewn item needs, the response was immediate: “Super-soft travel pillows with washable pillowcases”. We were happy to oblige. I encourage you to reach out to your local hospitals and treatment centers to ask if they may have similar needs. Here’s a free tutorial on sewing travel pillowcases.
Sewing Tutorial
Here’s a quick sewing tutorial for a super-easy travel-sized pillowcase, which is designed to fit over smaller pillow forms (14″ x 20″); available at most big box retailers. Or, you can sew your own 14″ x 20″ pillow forms (below).
Supplies
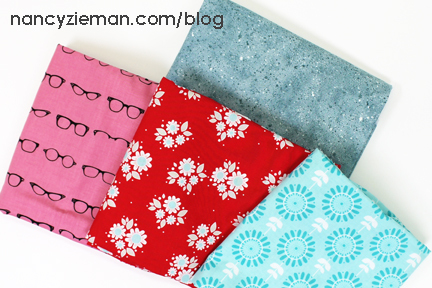
2/3 yard washable cotton fabric
Cutting
Cut a fabric rectangle 24″ x 30″.

Create the Travel Pillowcase
Along one 30″ edge, press under 1/4″ towards the fabric’s wrong side.

Along the same edge, press under 3″ hem.

Edgestitch.

Fold the fabric in half, matching right sides and matching the 24″ cut edges. Pin.

Serge the seam.
Note from Nancy: A straight stitch with a 1/4″ seam allowance and zigzag stitch to secure the seam can be used in place of the serger.
Fold or “wrap” the seam allowance forward and serge the remaining seam at the end of the pillowcase.

Use a hand embroidery needle to secure the serger thread ends into the stitched seam.

Press the pillowcase flat.

Turn right side out and insert travel pillow.

How to sew a travel pillow insert:
Cut a fabric rectangle 20-1/4″ x 28-1/2.
Fold the fabric in half, matching right sides and matching the 20-1/4″ cut edges. Pin.

Serge one short edge.

Fold or “wrap” the seam allowance forward and serge the long edge of the pillow.

Stuff the pillow with super-soft fiber fill and serge the opening closed.

Ta-da! These are so fun, fast and easy to make! Plus these pillows are such a comfort to those undergoing medical treatments.
Don’t forget to submit your holiday stocking in my Stocking Challenge! The deadline to enter is MONDAY, December 7, 2015. Click here to see how to enter. Make sure you are subscribed to my enews mailing list so you won’t miss a thing. Sign up here.
Bye for now,

Content in this feed is © copyright 2015 by Nancy Zieman and may not be republished without written permission. You’re welcome to forward the email to a friend or colleague but it’s not okay to add the RSS feed automatically as content on a blog or other website.
Make sure you are subscribed to my enews mailing list so you won’t miss a thing. Sign up here . Join us on Facebook , plus a host of other social media channels. Connect With Nancy today!


November 25, 2015
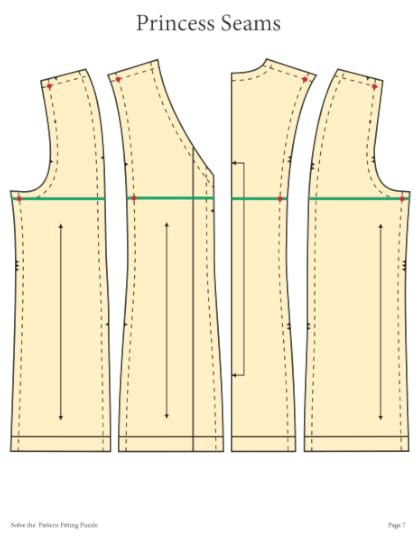
Solving the Pattern Fitting Puzzle, Part Two

Learning to fit sewing patterns is definitely a sewing necessity. If clothing you’ve made or purchased doesn’t fit, you’re not going to wear it. Well, we can’t have that happen! So, in this new Sewing With Nancy episode, Solving the Pattern Fitting Puzzle Part Two , you’ll learn that fitting patterns doesn’t need to be puzzling.

The common sense approach that I prefer takes the mystery out of the pattern-fitting puzzle. In Solving the Pattern Fitting Puzzle Part Two, I’ll continue where we left off after part one, and show you additional fitting tips. By the end of this program, you’ll have the confidence you need to fit and then sew patterns with ease.
I’ll share my Sleeve Fitting Changes, including measuring and altering sleeve width and length.


Then, I’ll cover Shoulder Fitting Changes, including narrow shoulders, sloping shoulders, and square shoulders.


Next I’ll move on to Back Fitting Changes—including swayback and rounded back.


I’ll finish up Solving the Pattern Fitting Puzzle Part Two with Skirt Fitting Changes including waistline and hipline.

Check out last week’s post on Solving the Pattern Fitting Puzzle Part One, where I cover the pattern fitting basics; bust, waist, and hip adjustments, along with my Right Size Measurement Fitting Chart (below).


Bonus: You can practice these skills using my mini-pattern pieces, which you can download for free.
Watch Solving the Pattern Fitting Puzzle Part One and Part Two on Sewing With Nancy online.
To watch Sewing With Nancy on your iPad, iPod Touch, or iPhone, download the app.


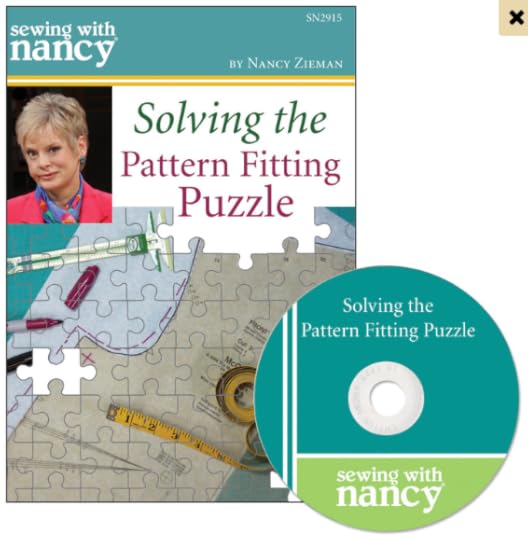
For a chance to win a Solving the Pattern Fitting Puzzle DVD from Nancy’s Notions, please leave a comment below sharing your pattern fitting puzzler.
Don’t forget to submit your Christmas Stocking in my Stocking Challenge! The deadline to enter is MONDAY, December 7, 2015. Click here to see how to enter. Make sure you are subscribed to my enews mailing list so you won’t miss a thing. Sign up here.
Bye for now,
Content in this feed is © copyright 2015 by Nancy Zieman and may not be republished without written permission. You’re welcome to forward the email to a friend or colleague but it’s not okay to add the RSS feed automatically as content on a blog or other website.
Make sure you are subscribed to my enews mailing list so you won’t miss a thing. Sign up here . Join us on Facebook , plus a host of other social media channels. Connect With Nancy today!
November 24, 2015
Foundation-Piece a Festive Reindeer Block

This fun paper-piecing project is much simpler than it looks! Sew a 16″ x 16″ (finished) block to turn into a holiday pillow cover or wall hanging. You may even choose to omit the patchwork border to create a pot holder, or make a few blocks to incorporate into a quilt.
Supplies:
Blue Moon Batik 2-1/2″ Fabric Strips
Fat quarter of white tone-on-tone snowflake fabric
Translucent foundation paper
Rotary Cutter
Cutting Mat
Madeira 50-wt Cotona Quilting Thread (I prefer Dove Gray)
Tailor’s Clapper
Best Press
Iron
Tweezers
There are three “secrets” that are truly the trifecta of paper-piecing:
Before you begin, preshrink all fabric with your iron, and saturate the fabric with steam. Pretreat all fabric with Best Press . This prevents distortion of such small pieces: you’ll thank me later.
Use 50-wt. thread ; when you have multiple layers of seam allowances on top of each other, you want everything to stay as low-profile as possible.
Use a Tailor’s Clapper —it makes all the difference.
Remember these steps if you don’t want your pieced block to feel like a cracker when you’re finished. Okay, now for the fun part—let’s get to it!
Begin by choosing eight strips of fabric : four in medium tones, and four in dark tones. Stack them and cut to 16″ long.
Set your stitch length to a short stitch—around 1.5 or so. Alternate your fabrics in medium and dark tones, and sew into two sets of four stacked strips. Use 1/4″ seam allowances.

Press your seams and rotary cut six strips from each of your two stacks (a total of 12 strips).

Stitch one of each stack to the other (for a checkerboard effect). You will have six rectangles. Take care to sew up each pair in the same configuration.

Now stitch up two pair of these along the short sides (as shown). Set aside.

Paper Piecing the Reindeer:
Choose one or more strips to use for the reindeer silhouette. If you use multiple fabrics, you can alternate them as you sew for a random, organic look.
I’ve chosen to demo this technique with the “K” section of this project, as it has several layers radiating out from the center, and therefore lends a nice example.
Download the pattern here . Then, print out the PDF pattern onto Translucent Foundation Paper and cut the pattern sections near the outer seam allowance lines.
Trim a rectangle of blue fabric that clears the first “K1″ space with at least 1/4″ around all sides. Be sure to give yourself extra to make sure it will have an adequate seam allowance.
Working from the back of the translucent paper , place your first piece of fabric, right side up, into the K1 spot. Glue the wrong side of the fabric to the back/unprinted side of the foundation paper. There should be at least 1/4″ of fabric seam allowance extending over the marks where the seamlines will be for piece #K1.

Cut a piece of white fabric larger than the K2 spot, and lay it on the K1 piece, right sides together. Make sure that once it is stitched and pressed back on itself, it will cover the K2 spot and extend over with extra seam allowance.

Holding the fabric and paper in place (or pin, if you choose), flip over so the translucent paper is printed-side-up, and stitch on the seamline, adding two-three stitches at the beginning and the end of the seam to secure (I don’t backstitch, as that adds more bulk).

Fold back the paper on the seamline and use your ruler and rotary cutter to trim a neat 1/4″ seam allowance. Don’t worry about the other edges of the second piece yet—they will be trimmed as each seam is sewn.

Unfold the paper and press the fabric open and into place.

Now lay your white fabric onto the piece you just pressed open, right sides together, making sure that it will cover the K3 piece once it’s sewn and pressed open.

Flip over so that paper is facing printed-side-up, holding everything in place, and stitch (don’t forget to add 2–3 extra stitches at the beginning and end for added security). Fold the paper back, trim your seam to 1/4″ and press open.
Repeat these steps for each section:
Fold paper back.

Trim fabric.

Press open.

Once each section is pieced and pressed, you’ll want to trim the fabric to the edges of the seam allowance and set aside.
Easy-peasy, right? Press everything.
Assembling the Block:
Okay, you’ve stitched up all of your pieced papers: now it’s time to assemble.
Divide your sections into groups:
Group A, B, C, D
Group E, F, G
Group H, I
Group J, K

Remove the translucent foundation paper from each grouping as you sew (this prevents confusion). I use a pair of tweezers to really get in there and grab from the corners.

Once the paper is removed from each group (remember, do each group one at a time!), stitch the sections together in the following order, pressing each seam as you go:
1. A to B = AB
AB to C = ABC
ABC to D = ABCD

2. F to G = FG
FG to E = EFG

3. H to I = HI

4. J to K = JK

Now sew your groups in this order, pressing each seam as you go (see diagram):
1. ABCD to HI = ABCDHI
2. ABCDHI to EFG = ABCDHIEFG
3. ABCDHIEFG to JK = Done!

That’s it!
Time to add the borders:
Grab the patchwork pieces you stitched earlier, and align the 8-square rectangles along the top and bottom of your paper-pieced block. Stitch and press.

Now align the long patchwork rectangles to each side, being careful to match up the seams nicely. Stitch and press.

Finish into a pretty wall hanging, or turn into a pillow cover. Don’t you feel accomplished?
Thank you, Emily, for being our guest blogger and for sharing this festive paper-pieceing project.
Don’t forget to submit your holiday stocking in my Stocking Challenge! The deadline to enter is MONDAY, December 7, 2015. Click here to see how to enter. Make sure you are subscribed to my enews mailing list so you won’t miss a thing. Sign up here.
Bye for now,
Content in this feed is © copyright 2015 by Nancy Zieman and may not be republished without written permission. You’re welcome to forward the email to a friend or colleague but it’s not okay to add the RSS feed automatically as content on a blog or other website.
November 21, 2015
2015 Adventure Quilt Block of the Month #11

November’s Block of the Month in The 2015 Adventure Quilt is the Tumbler Block. To create the 12″ finished Tumbler Block, I used the Tumbler Template from Clover’s Trace N Create Grandmother’s One Patch Template Collection. This template also includes the half-tumbler shape to finish the ends of each row.
Block #11: Tumbler
All blocks in The 2015 Adventure Quilt measure 12-1/2″ x 12-1/2″, creating a 12″x 12″ finished block. 1/4″ seam allowances are included.
Notions, Fabrics, and Supplies:
Get started by choosing fabrics. Any three color combinations will work. I had a surplus of black, white, and chartreuse green in my quilting fabric scraps. If you’ve been following along, you know that this Block of the Month series is a scrap fabric adventure.
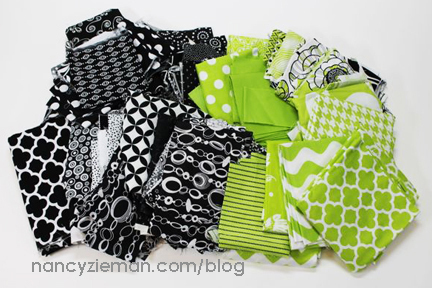
Assorted Fabric Scraps
Grandmother’s One Patch Template
Fine Tip Non-Permanent Marking Pen

Cut Fabrics
Cut at total of 12 tumbler patches.
Cut a total of six half-tumbler row end patches.
Cut rows 4-1/2″ wide x width of fabric. By using the width of fabric, we’ll create enough tumblers for two blocks.
Align the template close to the cut end to trace a half-tumbler first.
Trace along the straight and diagonal edges.
 .
.

Flip the template , align the traced edge with the template side, and trace the other side of the Tumbler shape. Repeat the process until the entire fabric strip has been marked.


Use a rotary cutter and ruler to cut on each marked line.

Repeat marking and cutting steps for each color.
Create the Patchwork
Arrange the 12 tumblers into three rows.

Note from Nancy: Notice the ends are staggered. We’ll be cutting our stocking shape from this modified tumbler block; having squared ends isn’t necessary.
Pin tumbler pairs together.
Offset the end ¼″—the seam allowance width. Stitch.

Join the block pairs with 1/4″ seam allowances.
Press seam allowances open.
Join pairs to form rows.

Join rows using 1/4″ seam allowances.
Press seam allowances open.

The block is complete!
With each block of the month, I have created two blocks. Let me share with you my second block in the coordinating fabrics. It is stitched the same way as the first.
Arrange tumblers.

Match right sides; offset 1/4″; join with a 1/4″ seam allowance.

Press seam allowances open.

Join pairs to form rows.

Join rows using 1/4″ seam allowances.
Press seam allowances open.

The second block is complete!

Share your 2015 Adventure Quilt Blocks Socially
If you have a blog site, website, or online social sewing group, feel free to grab the code and share this button.

<img src="http://www.nancyzieman.com/blog/wp-content/uploads/2015/01/Nancy_Zieman_Block_of_the_Month.jpeg" alt="Nancy Zieman Block of the Month" style="border:none;" />
————–
If you are on social sites, let all your friends know you are working on The 2015 Adventure Quilt Blocks by tagging your post with the hashtag: #NZBoM.
The hashtag is a searchable “word” associated with an event or activity, which when searched on popular social websites, like Instagram, Twitter, Flickr, and Facebook, will show every single post using that hashtag. Hashtags are a fun way to network and connect with people who share similar interests.
What would a Quilt Look Like?
As part of this Block of the Month series, included are ideas of what a quilt might look like if you made it with only this month’s block. The tumbler block by itself was tricky to work into a single-block-quilt design.
You caught me. This is a one-patch quilt using the tumbler patch, but not exactly using the Tumbler Block (above). I wanted to show an updated, contemporary version of a traditional Tumbler Quilt design.

This quilt features the Tumbler Block arranged in a 5 x 7 grid. You’ll notice the row’s end pieces join together to create a new shape when the blocks meet.

The following quilt uses bold black sashing to frame each Tumbler Block in its own space. The quilt is also arranged on a 5″ x 7″ grid.

Here’s another use for the tumbler template: Create a
Christmas Stocking and join my 2015 Christmas Stocking Sewing Challenge. 
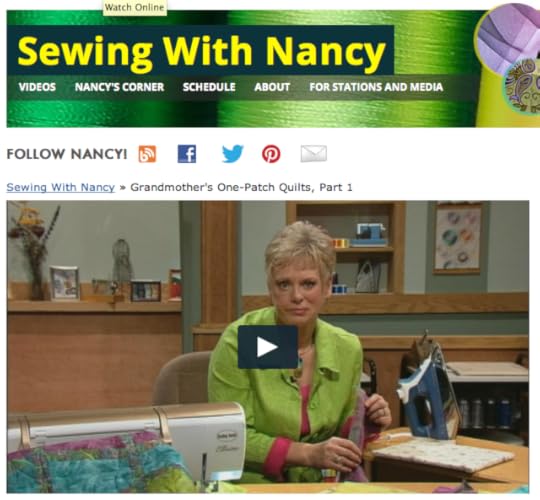
Watch Grandmother’s One Patch (Part One and Part Two) on Sewing With Nancy online.
To watch Sewing With Nancy on your iPad, iPod Touch, or iPhone, download the app.
Don’t Miss the Other 2015 Adventure Quilt Block of the Month Features
In the 2015 Adventure Quilt Block of the Month series, we’ll be making twelve fun blocks from five different templates/tools: Carefree Curves Template , Dresden Template , Grandmother’s One Patch Template , Lone Star Template , and the No-Hassle Triangles Gauge .
See all the 2015 Adventure Quilt Blocks HERE.
An InLinkz Link-up
Bye for now,
Content in this feed is © copyright 2015 by Nancy Zieman and may not be republished without written permission. You’re welcome to forward the email to a friend or colleague but it’s not okay to add the RSS feed automatically as content on a blog or other website.
Make sure you are subscribed to my enews mailing list so you won’t miss a thing. Sign up here . Join us on Facebook , plus a host of other social media channels. Connect With Nancy today!
November 19, 2015
Solving the Pattern Fitting Puzzle, Part One
Do you ever shy away from sewing fashions, since getting the right fit may seem daunting? Don’t worry—you’re not alone. During the next two Sewing With Nancy episodes featuring the new show, Solving the Pattern Fitting Puzzle, I’d like to share with you my favorite pattern fitting techniques that are easily mastered without cutting the original pattern pieces apart!

Fitting sewing patterns can be approached as if you’re putting together a puzzle. In Solving the Pattern Fitting Puzzle, Part One, I’ll cover the fitting basics; bust, waist, and hip adjustments.

Learn a new approach to choosing the right pattern size with my Right Size Measurement Fitting Chart.
See how to easily measure and choose a basic pattern size.

Then learn how to change the pattern with simplified pivot and slide techniques.
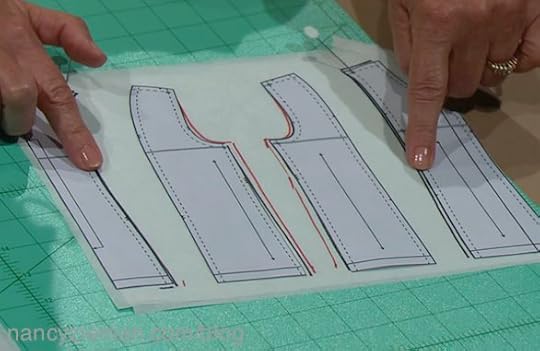
You can also practice these skills using mini-pattern pieces that you can download for free.
Watch Solving the Pattern Fitting Puzzle on Sewing With Nancy online. Then, tune in next week for Solving the Pattern Fitting Puzzle, Part Two.
To watch Sewing With Nancy on your iPad, iPod Touch, or iPhone, download the app.

For a chance to win a Solving the Pattern Fitting Puzzle DVD, from Nancy’s Notions, please leave a comment below sharing your pattern fitting puzzler.
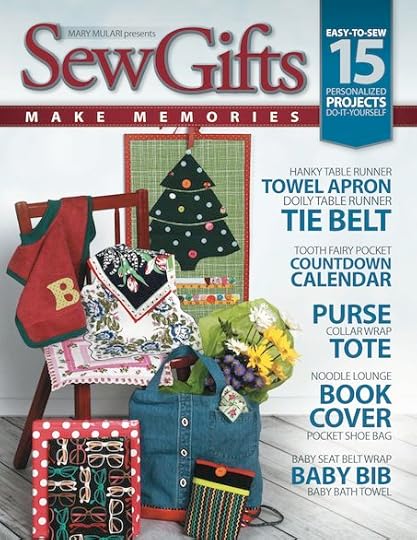
 The random winner of a copy of the book, Sew Gifts—Make Memories by Mary Mulari, is Nadine Nakano, who shared, “I have a huge box of old jeans that I want to upcycle so I’ll use a lot of it for the holidays as gifts”.
Don’t forget to submit your holiday stocking in my Stocking Challenge! The deadline to enter is MONDAY, December 7, 2015. Click here to see how to enter. Make sure you are subscribed to my enews mailing list so you won’t miss a thing. Sign up here.
Bye for now,
Content in this feed is © copyright 2015 by Nancy Zieman and may not be republished without written permission. You’re welcome to forward the email to a friend or colleague but it’s not okay to add the RSS feed automatically as content on a blog or other website.
Make sure you are subscribed to my enews mailing list so you won’t miss a thing. Sign up here . Join us on Facebook , plus a host of other social media channels. Connect With Nancy today!
November 18, 2015
National Tie One On Day is Nov. 25

Give from the heart on Wednesday November 25—then give thanks on Thursday. This Thanksgiving Eve, Tie One On (an apron of course!) and bring joy to the life of someone in need.

Participation is easy and uplifting. Simply wrap a loaf of bread or baked goods in an apron and tuck an encouraging note or prayer into the pocket; then present your offering to a neighbor, friend, or person in your community who could benefit from your gesture of kindness. Tie One On—and put the “give” back into Thanksgiving. There’s also a Tie One On Day card that you can print from the website and include with your gift.
EllynAnne Geisel is the founder of Tie One On Day and has this to say about this unique approach to Thanksgiving. “Women clad in aprons have traditionally prepared the Thanksgiving meal, and it is within our historical linkage to share our bounty.”

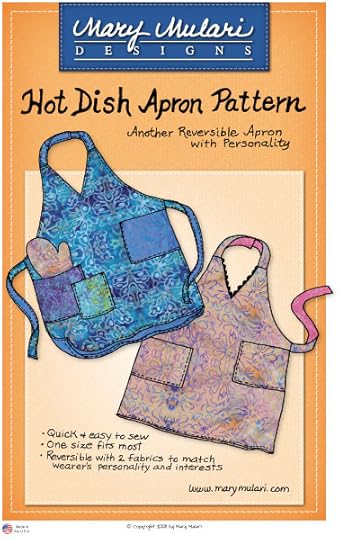
Sew
You may have an apron to give away or might think of sewing a brand new version. Mary Mulari’s Hot Dish Apron Pattern is a versatile “One Size Fits Most” size.
Bake
Nancy Zieman’s A–Z Quick Bread Recipe
Blend together
3 eggs
1 cup canola oil
1 cup sugar
1 tsp. vanilla
Add
1 tsp. baking powder
1 tsp. baking soda
2 tsp. cinnamon
2 cups all-purpose flour
1 cup whole wheat flour (or 3 cups all-purpose flour)
Add 2 cups of “A–Z”
Such as:
2 cups unsweetened applesauce
2 cups bananas, mashed
2 cups carrots, shredded
2 cups zucchini, shredded
“N” for nuts is optional
Note: For moist bread, use 1 cup of applesauce and 1 cup of another fruit or veggie.
Pour into two loaf pans and bake at 350 degrees for 50–55 minutes.
Give
Wrap a loaf of bread in an apron and tuck in an encouraging note; then present your offering to someone in your community who could benefit from your gesture of kindness. Tie One On—and put the “give” back into Thanksgiving.
Enter Giveaways at the Tie One On Day website
Encourage involvement and spread the word about Tie One On Day. Please leave a comment over at the Tie One On Day website to be included in the giveaways.
Don’t forget to submit your holiday stocking in my Stocking Challenge! The deadline to enter is MONDAY, December 7, 2015. Click here to see how to enter. Make sure you are subscribed to my enews mailing list so you won’t miss a thing. Sign up here.
Bye for now,
Content in this feed is © copyright 2015 by Nancy Zieman and may not be republished without written permission. You’re welcome to forward the email to a friend or colleague but it’s not okay to add the RSS feed automatically as content on a blog or other website.
Make sure you are subscribed to my enews mailing list so you won’t miss a thing. Sign up here . Join us on Facebook , plus a host of other social media channels. Connect With Nancy today!
November 17, 2015
Sew An Ideal Three-Season Knit Jacket

My newest pattern from The McCall Pattern Company, M7290, is an ideal three-season jacket to keep you cozy and warm, while being stylish. Choose a medium-weight knit to wear over straight-legged pants. For extra snuggling, select a cozy fleece knit and toss over jeans. It will be your go-to jacket from fall to spring.
Choose from Three Styles
View A showcases the cozy design as an accent vest. This view is also constructed with exposed serged seams. You may choose to add the exposed seam details to any of the styles. Easy-to-follow instructions for achieving this look are included in the pattern.

View B is made in one single fabric option. All styles include deep side pockets.

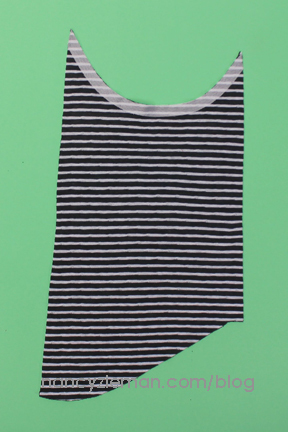
View C features a long jacket in knit fabric with a contrasting collar. The collar is easily achieved by revealing the other side of the knit fabric.

Let’s walk through the easy construction of View C with this step-by-step tutorial. In the photos, you’ll notice I’ve selected a reversible knit fabric.
Pockets
Cut 1/2″ wide bias strips of lightweight fusible knit interfacing such as Pellon’s Easy-Knit Interfacing. Knit stay tape may also be used.
Note from Nancy: I often cut six to eight bias strips of fusible interfacing and store what I don’t use in a plastic bag. Later in this project, you’ll fuse more strips to stabilize the shoulder seams. Save the remaining strips for your next project!
Fuse interfacing strips or stay tape to the wrong side of each outer pocket along the top edge.

Pin pocket lining to outer pocket, aligning notches and right sides. Stitch seam.


Carefully, trim the edges of the seam allowance with a pinking shears or rotary cutter with pinking blade .

Note from Nancy: It’s often recommended to clip the seam allowances of curved seams. I prefer to notch out fabric with a pinking blade or pinking shears. The seam allowance is trimmed and notched without clipping too close to the seam.
Turn pocket right side out; press. Topstitch.
Align pocket lining to side front, right sides together, matching notches. Pin the pocket lining to the side front.
Stitch the sides and lower edge of the pocket, starting and ending at the notches.

Fold down the lower pocket. Pin and machine baste all the layers together along the side seams.

Front Seams and Center Back Seams
Align and pin Jacket Front to Jacket Side Front and Jacket Backs, right sides together, matching notches. Stitch or serge seams.

Press the seams flat; then open. Or if the seam is serged, press the seam allowances to one side.
Stay Stitch/Clip the Neckline
Staystitch, stitching along seamline on both sides of the neckline corner between “dot” markings.

Clip to but not beyond the stitching at each corner.
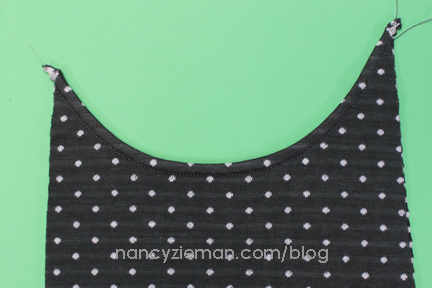
Shoulder and Cowl Collar Seams
To stabilize the shoulder, fuse 1/2″ wide fusible interfacing strips, or knit stay tape, to the wrong side of the jacket back shoulder, aligning cut edges.

Pin; then stitch cowl collar center back seam, right sides together, matching notches. Stitch or serge seams.


Lightly trim seam edges with rotary pinking blade or pinking shears.

Press seam flat; then open. Topstitch edges to collar. If the seam was serged, press to one side and edgestitch to collar.
Pin cowl collar to neckline, right sides together, matching notches. Stitch seam, carefully following along the initial staystitching line, especially at the “clipped” corners.

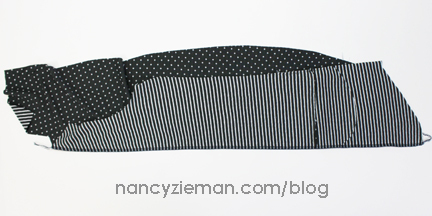
Set in Sleeves
Pin sleeve to armhole, matching right sides and notches. Pin from the jacket side. Stitch or serge seam, placing sleeve next to the feed dogs of the sewing machine or serger. Repeat for second sleeve.

Trim excess seam allowance.

Note From Nancy: The sleeve is slightly larger than the armhole of the jacket. Stitch with the longer layer of fabric next to the feed dogs, which has “teeth.” The feed dogs will gently ease the longer layer of fabric to perfectly fit the armhole
Stitch Underarm Seams
Match garment right sides. Pin underarm, sleeve, and side seam.

Stitch or serge seam.

Finish the Outer Edges
Apply interfacing strips or knit stay tape to the wrong side of the garment edge.

Note from Nancy: If the knit fabric is lightweight, try this tip. Press
Pellon Lite EZ-Steam II—a 1/4″ wide paper-backed fusible web—along the wrong side of the outer edges. Remove the paper backing; then press 1/4“ to the wrong side. The fusible webbing provides extra stability and shaping.
Lightly trim seam edges with rotary cutter pinking blade or pinking shears.

Press under 1/4″ to the wrong side along outer edges.


Topstitch.
Finish the Sleeve Hems
Lightly trim seam edges with rotary cutter pinking blade or pinking shears.
Press under 1/4″ to the wrong side along outer edges.
Topstitch.

Optional: Handstitch the seam allowance to the jacket along the hem and the sleeve edge.

The newest addition to your wardrobe is complete!

Demystify the fear of working with knit fabrics. You can sew easily and with confidence using tips and techniques in my book: Sew Knits with Confidence. Sewing With Nancy also has a two-part series featuring knits. Watch Part One and Part Two online.
This book is a lifetime compilation of techniques that make sewing fun and easy for all skill levels. You’ll learn about sewing tools, easy sewing techniques, how to use a sewing machine and serger, how to select and use fabrics and patterns, and how easy it is to sew simple projects.
Watch Sew Knits with Confidence (Part One and Part Two)on Sewing With Nancy online.
To watch Sewing With Nancy on your iPad, iPod Touch, or iPhone, download the app.

For a chance to win a copy of my new McCalls M7290 Jacket Pattern, please leave a comment below and let us know what view you’d like to make. The McCall Pattern Company will give away one pattern to one US resident in the 48 contiguous states.

Don’t forget to submit your holiday stocking in my Stocking Challenge! The deadline to enter is MONDAY, December 7, 2015. Click here to see how to enter. Make sure you are subscribed to my enews mailing list so you won’t miss a thing. Sign up here.
Bye for now,
Content in this feed is © copyright 2015 by Nancy Zieman and may not be republished without written permission. You’re welcome to forward the email to a friend or colleague but it’s not okay to add the RSS feed automatically as content on a blog or other website.
Make sure you are subscribed to my enews mailing list so you won’t miss a thing. Sign up here . Join us on Facebook , plus a host of other social media channels. Connect With Nancy today!
November 14, 2015
Sew a New Christmas Tree Skirt
With a small investment of time, you can create a Christmas Tree Skirt that will showcase the center of your holiday decorations. Choose fat quarter cuts or use fabric from your stash to create the wedge shapes. The sewing is streamlined; the end result a boutique-style decoration. Enjoy!

Note from Nancy: One super-sized Dresden appliqué is the basis for this tree skirt. It takes about as much time to create this large Dresden shape (40 “ ) as a traditional quilt block (12 “ ). Soon you’ll realize that there is still time to create this tree skirt before the holidays.
Fabric/Supplies:
Six coordinating fat quarter cuts of fabrics (18″ x 22″)
2-1/2 yd. of 42″ wide cotton fabric for the tree-skirt background fabric

1-1/4 yd. of batting or Pellon Fleece
1/3 yd. of fabric for piping
1 pkg. 3/16″ Wrap ‘n Fuse Piping (6 yd. pkg.)
Madeira’s Monofilament Thread
One-inch 3/4″ wide Velcro Sew On Tape
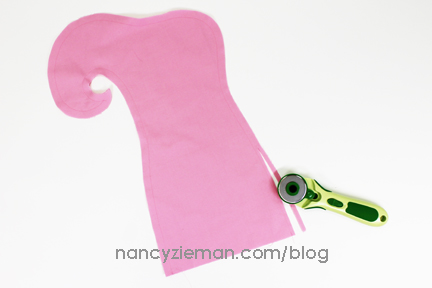
Trace ‘n Create Quilt Template—Dresden Collection
Cut 19 Dresden Wedges
Note from Nancy: Detailed instructions are found in the Trace ‘n Create Quilt Templates—Dresden Collection package. These instructions are modified to create this tree skirt. Consider reading the instructions found in the packaging prior to creating your tree skirt.

Press each fat quarter section.
Use the Trace ‘n Create Quilt Templates—Wedge Shape (Template A) .
Align the 6-1/2″ edge of the wedge template along the long edge of the fabric. Trace along the sides of the entire length of the template.
Rotate, align the template along the first marking, and trace the opposite side of the template. Rotate and trace again.
Trace three wedge shapes.

Stack and align three fat quarter layers. Place a rotary ruler along the markings, cut.

Repeat, tracing and cutting three wedges from the remaining three fat quarter fabrics.
Cut one additional wedge shape from the left over fabric, cutting a total of 19 wedges.
Stitch the Wedges to Form a Dresden Shape
Note: All seam allowances are 1/4”.
Lay out the wedges in a pleasing arrangement. Make note of the arrangement.


Fold each wedge in half, right sides together, aligning the top edge.
Stitch with a 1/4″ seam along the top edge of each wedge. Chain stitch the wedges together.
Clip the threads between the wedges.

Finger press the seam open.

Turn the wedges right sides out.
Mark a 45-degree line at the corner of an index card. Insert the card in the wedge shape and align the seam with the marking on the card. Or use Clover’s Hot Hemmer . Press.

Referencing the color sequence determined earlier, align and pin two wedges right sides together. Stitch with a 1/4″ seam.


Sew the wedges, following the color sequence until all 19 wedges have been sewn together. Press the seams open.

Note from Nancy: Twenty wedges create a full Dresden Plate. The tree skirt is made with 19 wedges, which allows for an opening, making it easy to wrap the skirt around the base of the tree.
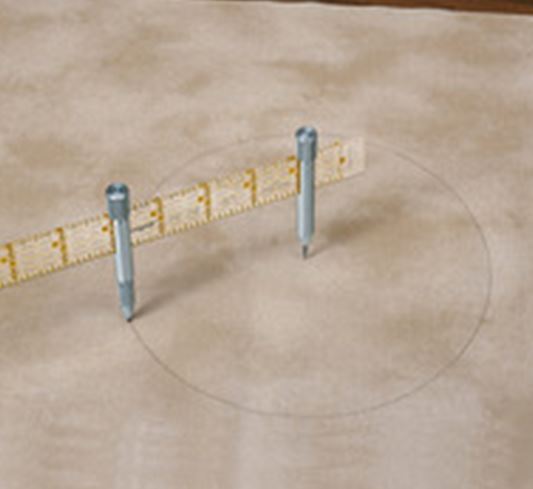
Create a 41″ Circle
Trace a 41″ circle on paper.
Note from Nancy: We used a Yardstick Compass tool to create the 41 ″ circle. The photo depicts a much smaller circle, but you get the idea!
Fold the background fabric in half, meeting cut edges. The folded fabric will be square-shaped.
Place the fabric on top of a single layer of the batting.
Pin the circle pattern to the fabric/batting; cut out the pattern, yielding two fabric circles and one batting circle.


Stack one fabric circle and the batting circle, wrong side of fabric to batting.
Center and pin the Dresden shape to the circles. There will be a space where typically the 20th wedge would have been.

Position and pin the ends of the wedges approximately 1″ from the cut edge of the fabric.

Securely pin the Dresden shape to the circle.
Sewing Machine Set-Up
Thread the needle with Madeira’s Monofilament Thread .
Use all-purpose thread that matches the background fabric in the bobbin.
Set the machine for a medium-width zigzag stitch or a blanket stitch.
Stitch the Dresden Shape to the Background Fabric
Stitch with the zigzag or blanket stitch along the outer edges of the Dresden shape.

Quilt the layers by using a straight stitch, stitching in the ditch, along the wedge seamlines.
Note from Nancy: If you have a clear foot, use it at this time, since it’s easier to see the “ditch” of the seam.

Cut out the extra background/batting fabric at the center of the tree skirt and along the edges of the wedges.


Cut 1-1/4″ bias strips of fabric. Piece strips together until strips measure 160″.
Insert Wrap ‘n Fuse between the wrong sides of the fabric; press.

Align the edges of the piping to the tree skirt, applying the piping to the long edges and around the outer perimeter.
Attach a Zipper Foot or the Pearls ‘n Piping Foot . Stitch the piping to the right side of the tree skirt.

At each lower corner, slightly round the piping around the corner.
Create the Velcro Tab
Cut a 2-1/4″ x 4″ rectangle of fabric.


Fold the fabric in half, meeting short ends. Stitch along the sides.

Turn right side out; stitch one side of the Velcro to the tab.

Finish the Tree Shirt
Pin and stitch the Velcro tab along the top edge of one side of the tree skirt as pictured.

Pin the remaining fabric circle to the tree shirt unit, right sides together.
Pin along the straight edges, outer perimeter, and along the top edges.

Using the Zipper Foot or Pearls ‘n Piping Foot , stitch the backing fabric to the tree skirt.

Leave a 4–5″ opening along one straight edge, which will be used to turn the tree skirt right side out.

Along the upper edges and lower edges, wrap and fold the seam allowances toward the tree skirt. The stitching line should be along the fold.
Restitch the corners, sewing the wrapped seam allowances to the tree skirt.
Note from Nancy:
This wrapping technique will make it easier to achieve sharp corners when the tree skirt is turned right side out.


Turn the tree skirt right side out.

Press the tree skirt.
Hand stitch the opening closed.
Stitch the remaining section of Velcro to the opposite side of the tree skirt, making certain that the Velcro pieces will align.


Watch Sew Grand Dresden Quilts on Sewing With Nancy online.
To watch Sewing With Nancy on your iPad, iPod Touch, or iPhone, download the app.
For a chance to win a Trace ‘n Create Dresden Quilt Template from Clover, please share your comment below and let us know what you’d make with the Trace ‘n Create Dresden Quilt Template.
The random winner from last week’s pillow wrap tutorial is Lillian K. She said, The tips in your tutorial are great. I AM ACTUALLY teaching my granddaughter to make pillows for gifts this year. This is very helpful. Lillian won a package of 3/8″ Wrap ‘n Fuse (Jumbo) Piping from Clover.
Don’t forget to submit your holiday stocking in my Stocking Challenge! The deadline to enter is MONDAY, December 7, 2015. Click here to see how to enter. Make sure you are subscribed to my enews mailing list so you won’t miss a thing. Sign up here.
Bye for now,
Content in this feed is © copyright 2015 by Nancy Zieman and may not be republished without written permission. You’re welcome to forward the email to a friend or colleague but it’s not okay to add the RSS feed automatically as content on a blog or other website.
Make sure you are subscribed to my enews mailing list so you won’t miss a thing. Sign up here . Join us on Facebook , plus a host of other social media channels. Connect With Nancy today!
November 12, 2015
Sew Gifts—Just in Time for the Holidays

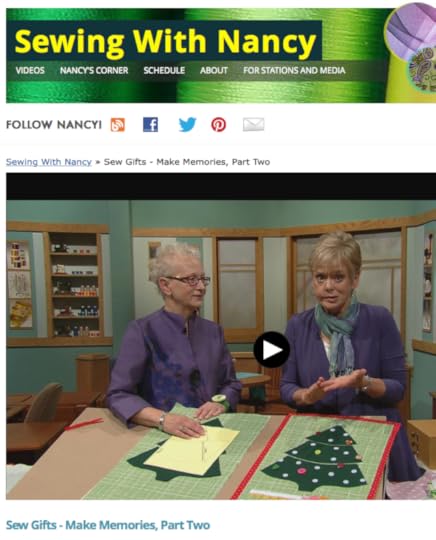
During this brand-new Sewing With Nancy series, Sew Gifts–Make Memories , we’ll be featuring gifts to sew that don’t always start with fabric yardage. Sewing gifts ranks as the number one reason why most of us sew. When my guest Mary Mulari proposed the idea of sewing gift-giving solutions, I knew it was the perfect TV topic. Mary’s projects are clever, useful, and enjoyable to create.

Our first gift project, in Sew Gifts–Make Memories Part Two, is a Hanky and Doily Table Runner made from items that might be tucked away in a drawer. A collection of vintage handkerchiefs are usually stored away and seldom seen. Choose several handkerchiefs and with just a few sewing steps, you’ll have a table runner that’s an attractive conversation piece.

Next we’ll show how to sew a Two-Tie Belt. Is there a bag full of men’s neckties in one of your closets, waiting for an inspirational project? Here’s one way to use two at a time and wear the results. The obi-style belt features a hidden pocket to store a credit card, money or other treasures. If the ties formerly belonged to a family member, your new belt has additional memories attached.

Our third gift project, in Sew Gifts–Make Memories Part Two, is a Speedy Towel Apron. This unisex style apron is a speedy gift project sewn from ready-made towels. All you need are two canvas-weight or vintage towels, grosgrain ribbon and a little sewing savvy and you’ll be able to stitch up a welcomed gift.

Tune in and watch Sew Gifts–Make Memories Part Two to learn how to make Mary’s Upcycled Notebook Wraps. Make a classy new cover for a notebook, recipe book, journal, or photo album. These notebook covers started out as laminated shopping bags. Adjustable, upcycled book wraps are the perfect way to preserve the good memories stored inside.

Mary and I wrap up this new series with Everyone’s Favorite Baby Bib. You’ll soon learn that guest and hand towels are easy choices for durable baby bibs. Mom, dad, grandmother, and caregiver will all appreciate having bibs on hand; so make several.

Thanks, Mary, for sharing your gift sewing ideas on Sewing With Nancy! Tune in to see more of Mary’s gift ideas in Sew Gifts–Make Memories Part One.
Watch Sew Gifts–Make Memories Part One and Part Two on Sewing With Nancy online.
To watch Sewing With Nancy on your iPad, iPod Touch, or iPhone, download the app.
For a chance to win a copy of the book,
Sew Gifts–Make Memories by Mary Mulari, please leave a comment below and let us know what gifts you’re sewing this holiday season.
Don’t forget to submit your holiday stocking in my Stocking Challenge! The deadline to enter is MONDAY, December 7, 2015. Click here to see how to enter. Make sure you are subscribed to my enews mailing list so you won’t miss a thing. Sign up here.
Bye for now,
Content in this feed is © copyright 2015 by Nancy Zieman and may not be republished without written permission. You’re welcome to forward the email to a friend or colleague but it’s not okay to add the RSS feed automatically as content on a blog or other website.
Make sure you are subscribed to my enews mailing list so you won’t miss a thing. Sign up here . Join us on Facebook , plus a host of other social media channels. Connect With Nancy today!
November 10, 2015
Creative Christmas Stocking Sewing Ideas

As you may know, last week we kicked off the Second Annual Nancy Zieman Christmas Stocking Sewing Challenge and you’re invited to participate. Use one of the free sewing patterns below, or any stocking pattern, and sew a Christmas stocking for yourself, a family member, or as a gift. Then, enter our Christmas Stocking Sewing Challenge. It’s easy!
Here’s a listing of free stocking patterns:
Novelty Christmas Stocking from Nancy’s Notions
I {Heart} Pellon Stocking from Pellon Projects
Christmas Stocking Tutorial from Amy’s Creative Side
Fancy Fleece Stockings from June Tailor
Christmas Stocking Projects from Baby Lock, enter keyword “stocking”
Christmas Stocking Sewing Challenge Guidelines
Select or create your design. All sewing, quilting, serging, machine embroidery, and embellishment techniques are eligible. Stocking must be made within the last year and may not have been entered into the 2014 NZ Stocking Challenge.
Grab our Stocking Sewing Challenge blog badge to let your friends know about this exciting sewing challenge.
Share your progress and projects on your social media sites using the hashtag: #NZStocking
Upload your photo(s) by December 7, 2015.
An InLinkz Link-up

Get inspired to join the 2015 Stocking Sewing Challenge with this free pattern from Baby Lock Sewing Machines (enter keywords “elf stocking”). The original design is by Patty Young. Today we’re going to change it up and feature my Lime and Teal Ribbons from Renaissance Ribbons. I’ve chosen Amy Barickman’s Crossroads Denim fabric to complete the look.
Supplies Fabrics and Notions
1/2 yard turquoise fabric (outer stocking)
1/4 yard pink cotton quilting fabric (lining fabric)
1/3 yard Pellon fusible fleece
Renaissance Ribbon Bundle
Non-permanent marking pen
Chaco Liner Pen—yellow
Point 2 Point Turner
Elf Stocking Pattern by Patty Young for Baby Lock
Prep: Download and Cutting
Download and print the elf stocking template pattern from Baby Lock and Patty Young .
Cut out the four pattern pieces.
Match quadrants and tape in place.
Cut out the paper pattern.

Cut out two of each: stocking fabric, lining fabric, and fusible fleece.
 .
.

Cut four rectangles measuring 6-1/4″ x 9″ from the stocking fabric.

Cut one rectangle measuring 1-1/2″ x 8″ for the hanging loop.

Create Stocking & Lining
Press the fusible fleece to wrong side of outer stocking fabrics. Follow the manufacturer’s directions for application and iron settings.

Note from Nancy: If you choose to add quilting to the body of the stocking, complete that step now.
Match right sides of stocking front and back. Pin.

Stitch using a 1/2″ seam allowance.

Trim the seam allowance to 1/4″.

Clip/notch the curves and remove any excess seam allowance from the toe area. Press seams open.

Turn the stocking right side out using the Point 2 Point Turning tool to create a crisp toe. Press.

Match the right sides of the stocking lining. Pin.

Stitch using a 1/2″ seam allowance.
Trim seam allowance to 1/4″.
Place the lining into the stocking, matching wrong sides.

Pin the stockings together at top edge.

Baste stocking together, at top edge, with a 1/4″ seam allowance.

Prepare Cuff
Print and cut out the cuff pattern piece. Cut directly on the marked tracing lines at the lower edge.
Place pattern on cuff rectangle and trace along lower edge with chaco pen —trace a second cuff rectangle on the wrong side of the fabric.


Using one of the marked rectangles, create the ribbon cuff.
Audition ribbons and arrange ribbons on right side of fabric rectangle.

Topstitch ribbons to right side of cuff fabric.

Continue to add ribbons to the right and left, edgestitching at both sides of each ribbon.

Place cuff front and back right sides together and pin. Stitch side seams with a 1/4″ seam allowance.
 .
.

Repeat to join the cuff lining.
Press all seam allowances open.

Trim cuff lining seam allowance to 1/8″.
Place the cuff lining into the ribbon cuff, matching right sides and side seams.

Pin along the traced edge, through the tracing lines.

Machine baste layers together just passed the traced lines.
 .
.

Use a 2.5 mm straight stitch to sew directly on the traced lines.

Cut away the triangles leaving a 1/8″ seam allowance.
Clip into each top peak as close as you can without snipping through the stitching line.

Turn the cuff right side out.
Use the Point 2 Point Turner to push each triangle to a crisp point.

Press.
Pin cut edges of the ribbon cuff and lining, wrong sides together.

Using a 1/4″ seam, baste cuff layers together at top edge.

Create Hanging Loop
Fold the 1-1/4″ x 8″ piece of fabric in half lengthwise.
Finger press this fold.
Open the fabric and meet each long side to the foldline.
Press.

Fold in half again, lengthwise. Press.

Edgestitch.

Fold the fabric to form a loop.
Stitch ends together.

Finish Stocking
Baste the hanging loop inside the stocking along the back. Note that the loop is pointing down, opposite of how it will be used.

Place the cuff into the stocking matching the ribbon side to stocking lining.

Pin layers at the top edge.

Using 1/2″ seam allowance, sew around top edge.

Trim seam allowance to 1/4″.
Use a zigzag stitch or serger to finish the seam edge.
 .
.

Press seam allowance down, towards stocking.

Flip cuff right side out.
Press seam one last time.

Ta-dah! The Ribbon Embellished Elf Stocking is complete and ready for the Stocking Sewing Challenge !

How to Enter
Enter the Stocking Sewing Challenge by adding a photo or photos in the link listed below. It’s easy! Use the link tool below and click the “add link” button. Your entry will appear directly in the gallery. (Once button is clicked—it may appear as a workable link). Schedule:
November 3—Stocking Challenge Launches
December 7—Deadline to Enter Using InLinkz Tool
December 8—Voting Opens
December 13—Voting Closes
December 15—Winner Announced
Over $1000 in prize packages from our generous sponsors:
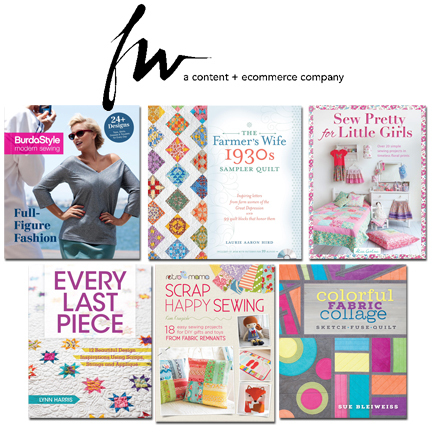
First Place: F+W Media Sewing and Quilting Book Bundle, a $159 value
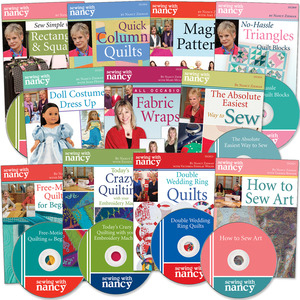
Second Place: Nancy’s Notions DVD Bundle, a $149 value
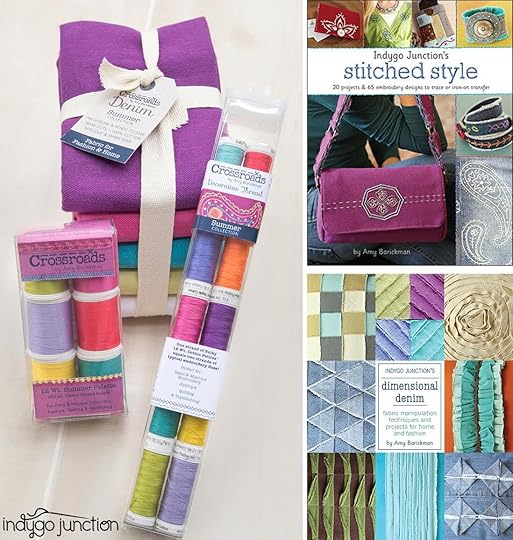
Third Place: Indygo Junction product bundle, a $120 value
Fourth Place: Riley Blake Church Ladies Apron Fabric, a $110 value

Fifth Place: Pellon Bundle Package, a $110 value

Sixth Place: Bundle of Nancy Zieman Products and Notions from Clover, a $102 value

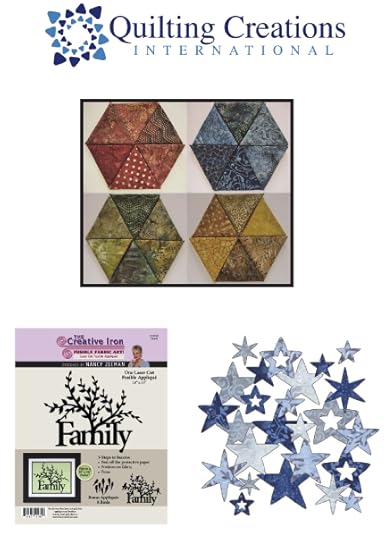
Seventh Place: Quilting Creations International Pattern Bundle, a $94 value
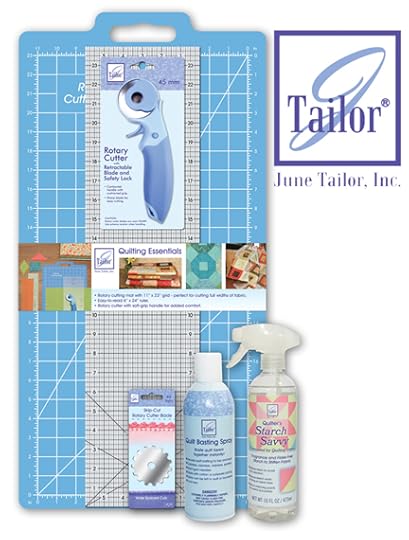
Eighth Place: Quilter’s Package from June Tailor, a $90 value
Ninth Place: Book and Fabric Bundle from Amy’s Creative Side, a $71 value

Don’t forget to submit your holiday stocking in my Stocking Challenge! The deadline to enter is MONDAY, December 7, 2015. Click here to see how to enter. Make sure you are subscribed to my enews mailing list so you won’t miss a thing. Sign up here.
Get Stitching!
Email challenge questions to info@ziemanproductions.com. Challenge not open to sponsors, employees, and immediate family members. Photos and techniques may be featured in future promotions, blog posts, videos, and/or TV shows.
Nancy Zieman—author, pattern designer, businesswoman, producer, and national sewing authority—is the host of the popular show Sewing With Nancy®, which appears exclusively on public television stations across the United States and Canada. Follow Nancy’s blog at NancyZieman.com/blog and sign up to receive Nancy’s E-News for the latest news in Sewing, Quilting, Creating, and Block of the Month updates.
Content in this feed is © copyright 2015 by Nancy Zieman and may not be republished without written permission. You’re welcome to forward the email to a friend or colleague but it’s not okay to add the RSS feed automatically as content on a blog or other website.
Nancy Zieman's Blog

- Nancy Zieman's profile
- 21 followers

