
Nancy Zieman's Blog, page 120
November 7, 2015
Update Home Decor with a Pillow Wrap

You can easily change your home décor with a little fabric and a great embroidery design with this pillow wrap project. Embroider a seasonal motif on fabric or choose an elegant fabric design to complement your décor. Then, follow these simple directions to create a pillow wrap, or two! We’ve made this pillow wrap two-sided, which will save time, fabric, and add a splash to the family room all year ’round.
Here’s what you’ll need:
5/8 yd. Quilted Fabric
20″ Pillow Form
7 inches of 3/4″ Sew-in Hook and Loop Tape
1-1/8 yd. Pellon ShirTailor Interfacing
3/8″ Wrap ‘n Fuse (Jumbo) Piping from Clover
5-in-1 Sliding Gauge
Non-Permanent Marking Pen
Optional, Maderia Rayon Embroidery Thread
Optional, Tear-Away Stabilizer
Optional, Iron Safe-Iron Plate
Create the Pillow:
Use the quilted fabric hook and loop tape to create the pillow cover.

Cut quilted fabric to the following sizes: Pillow Front: Cut one 21″ square. Pillow Back: Cut two 13″ x 21″ rectangles.
Serge or zigzag along one long edge of each pillow back rectangle.

Center the hook side of hook and loop tape, 1-1/2″ from one back finished edge and pin. Center the loop side of hook and loop tape, 1-1/2″ from one back finished edge and pin.

Fold finished edges 3″ toward the wrong side. Pin.
Use a 2″ seam allowance to hem.

Overlap the pillow back pieces, aligning the hook and loop tape.
Baste the pillow back at each side.

Note From Nancy: I like to eliminate wimpy pillow corners by removing excess fabric at each corner.
Measure in 1/2″ at each corner, front and back. Mark with a pen.
 .
.

Measure in 4″ from each edge and place a mark with a pen .


Connect marks to make a small triangle wedge.
Remove excess fabric by cutting along marked line.

Match right sides of pillow front and pillow back. Pin.

Use a 1/2″ seam allowance to sew completely around the pillow.
Note from Nancy: Remove excess batting from the corner areas.

Turn the pillow right side out.
Insert pillow form.
Create the Two-Sided Decorative Pillow Wrap/Band
Cut two 5-1/2″x 39-1/4″ rectangles from each black fabric and Pellon ShirTailor fusible interfacing.
Follow the manufacturer’s directions to fuse the ShirTailor to the wrong side of the decorative fabric bands.

Optional: If you’d like to add embroidery to your pillow wrap, follow these steps:
Hoop Tear-Away Stabilizer .
Use painter’s tape to center the decorative band in the embroidery hoop.

Stitch your embroidery design to the center of the fabric band. I chose to embroider the word, “Joy”—in a script included with my Baby Lock Ellisimo Gold 2 .

Remove the tape and fabric band from the hoop.

To make a reversible pillow wrap, use painter’s tape to center the second fabric band in the embroidery hoop.
Select a second embroidery design to apply to the reverse fabric band. I chose Valentine hearts in three sizes—a design included with my Baby Lock Ellisimo Gold 2 .

.

Remove tape and fabric from hoop.
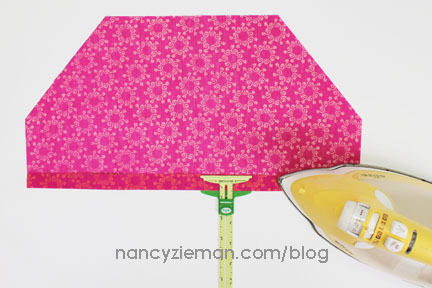
Easily Create and Apply Piping Trim
For this step, cut two 2-3/4″ x 20″ crosswise fabric strips, and two 18-1/2″ piping lengths. To create piping, follow the instructions included with the Wrap ‘n Fuse Piping.

Simply center the piping in the fabric strip and wrap fabric around the piping. Press.
Stop pressing 4″ from each piping end.

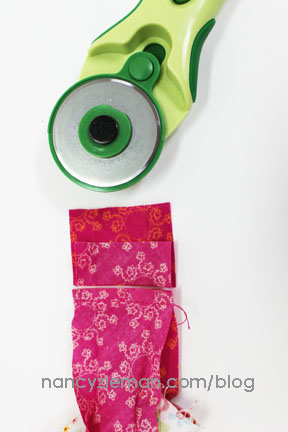
At each end, cut fabric 1″ longer than piping.

Fold each fabric end in half.
Fold a 45° angle, meeting the cut end with the edges.

Press.

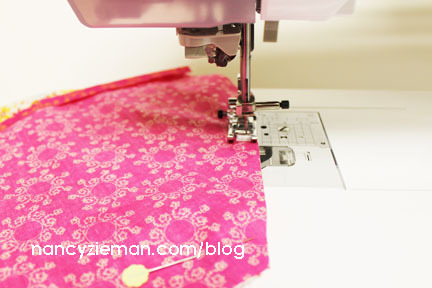
Center and pin piping along the long edges of decorative bands.

Use a zipper foot to baste the piping to the band.

Matching right sides, join the decorative fabric bands along the top and bottom lengths. Stitch using a 1/2″ seam allowance.
Leave a 4″ opening along one long edge.

At opening, press seam allowances open.

Pull one short end into the decorative band, matching seams and right sides together. Pin.
Keep the opening on the outside as you work.

Use a 1/2″ seam allowance to completely sew around the short end.

Turn the decorative band right side out through the opening.

Press using the Iron Safe shield on your iron—to prevent shine from ironing.

Slip the band over the pillow. Voila!
Sew a Pillow Wrap for any holiday or occasion!

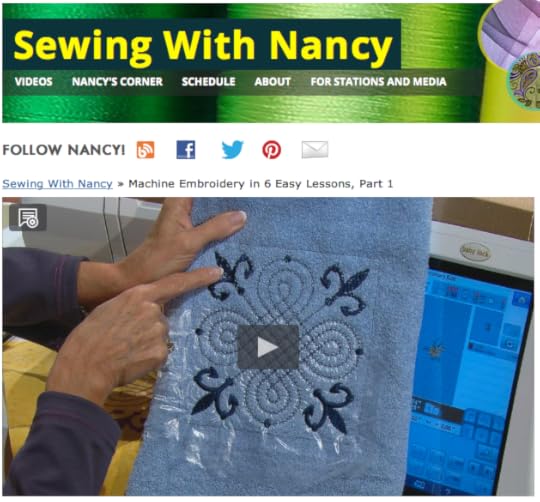
If you are new to machine embroidery, you may want to watch Sewing With Nancy for more machine embroidery tips and ideas.
Embroidery Lessons on Sewing With Nancy
Polish your embroidery skills by watching Machine Embroidery in Six Easy Lessons Part One and Machine Embroidery in Six Easy Lessons Part Two, with guest Eileen Roche.

For a chance to win a package of 3/8″ Wrap ‘n Fuse (Jumbo) Piping from Clover, please leave a comment below and let us know what you’d like to showcase on your pillow wrap.

The random winner of a Creative Quilting Outlines…Charming Poinsettias CD is Janet Weirauch. She said: This year I want to make Christmas stockings and basket liners. This collection would be perfect!
Don’t forget to submit your holiday stocking in my Stocking Challenge! The deadline to enter is MONDAY, December 7, 2015. Click here to see how to enter. Make sure you are subscribed to my enews mailing list so you won’t miss a thing. Sign up here.
Bye for now,

Content in this feed is © copyright 2015 by Nancy Zieman and may not be republished without written permission. You’re welcome to forward the email to a friend or colleague but it’s not okay to add the RSS feed automatically as content on a blog or other website.
Make sure you are subscribed to my enews mailing list so you won’t miss a thing. Sign up here . Join us on Facebook , plus a host of other social media channels. Connect With Nancy today!


November 5, 2015
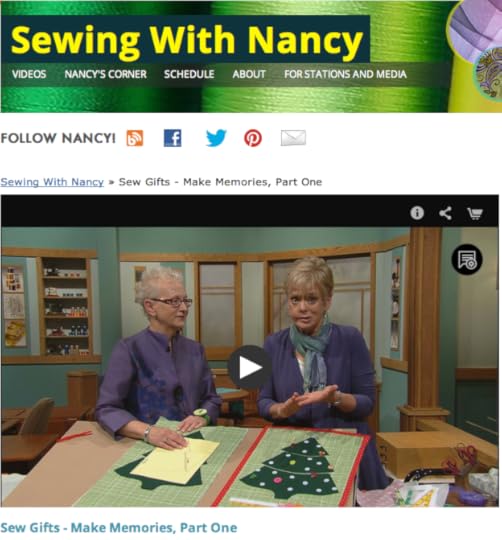
Sew Gifts-Make Memories Part One

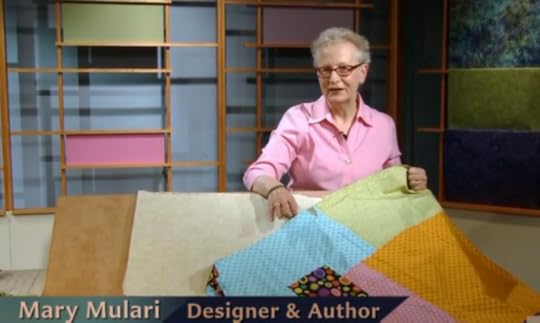
Shop outside the big box stores and make your own gifts from new or upcycled fabrics. In this new Sewing With Nancy series, Sew Gifts–Make Memories, we sew gifts for kids and adults that will be appreciated, and enjoyable to make. Mary Mulari is my guest for this series—she always amazes me with her clever approach to sewing.

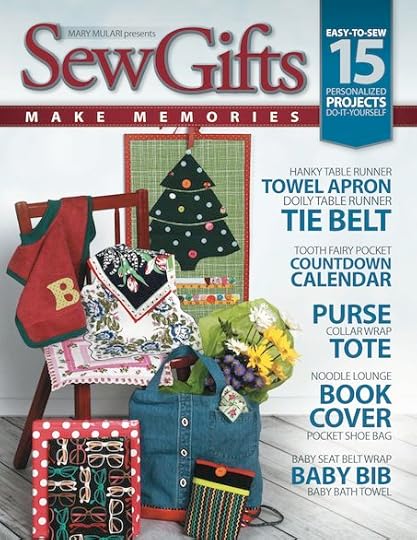
In Sew Gifts–Make Memories Part One, we start with Mary’s December Countdown Calendar. Mark the days of December by moving vintage or contemporary buttons from the strip to a dot on the tree. The pockets at the bottom of the calendar can be used for letters to Santa or for small notes promoting acts of kindness for others. Nancy’s Notions has put together a project pack that includes all the fabrics and supplies to make Mary’s December Countdown Calendar.

Next in Sew Gifts–Make Memories Part One , we show how to sew a Two-Pocket Shoe Bag. Carrying shoes to the gym, school, travel, and work is an everyday event. Why not make these clever bags just for that purpose? Choose new fabric, or recycle a shirt and tie. Either way, this is a useful gift to make and offers many opportunities for personalization.

Our third gift idea is a Noodle Lounger! Using mesh fabric and grosgrain ribbon, create a lounge-style seat that fits over a swimming noodle. Make one for yourself and another for a friend, and then share lazy summer afternoons seated and relaxed in the water—making more memories. Tune in to Sew Gifts–Make Memories, and learn Mary’s convenient way to fold and store your lounger.

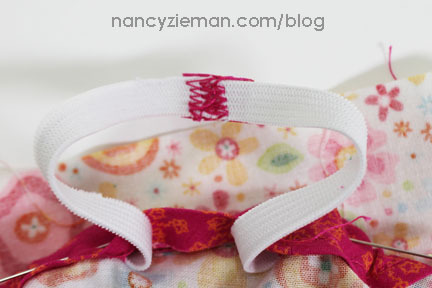
Next up in Sew Gifts–Make Memories Part One , Mary shows how to make Seat Belt Wrappers. Add comfort to children’s car seats with plush wraps that pad the straps near the neck. A little bit of stitching, small strips of hook and loop tape, a touch of ribbon and lightweight quilt batting are all you’ll need.

Then, watch as we turn one beach towel into two hooded bath towels for babies or toddlers. This practical, quick-to-sew gift easily wraps around little ones with ease—it’s sure to be a welcomed gift and a wonderful surprise.

Our sixth gift idea is a Girlfriend’s Shopping Purse. Celebrate your friendship by making a purse for your girlfriend or sister. These bags are perfectly sized for a day of shopping, lunch, and travel. All the essentials—phone, keys, credit cards, cash, and tissues—fit in this compact and lightweight bag.

Thanks, Mary, for sharing your gift sewing ideas on Sewing With Nancy! Tune in next week to see more of Mary’s gift ideas in Sew Gifts–Make Memories Part Two.
Watch Sew Gifts–Make Memories on Sewing With Nancy online.
To watch Sewing With Nancy on your iPad, iPod Touch, or iPhone, download the app.
For a chance to win a copy of the book, Sew Gifts–Make Memories by Mary Mulari, please leave a comment below and let us know what gifts you’re sewing this holiday season.
Thanks for sharing your favorite sewing or quilting tips at the end of October 22 and October 29 blogs. The random winner of a copy of the book, 50 Tried and True Sewing & Quilting Tips is Maretta Walker. She said: When I need to press pieces that have an iron-on fusible attached, I use a sheet or two of paper towels. They will keep you from burning your fabric and can be reused or tossed. It keeps any of the fusible from getting on the iron. Also, you can dampen the paper towel instead of using your steam iron for small projects.
The winner of the Sew Adorkable book from the author, Samarra Khaja, is Cheryl Cole who’s comment was: I really like the braille quilt and the prehistoric painting. I’ve been wanting to try a portrait like that.
Don’t forget to submit your holiday stocking in my Stocking Challenge! The deadline to enter is MONDAY, December 7. Click here to see how to enter. Make sure you are subscribed to my enews mailing list so you won’t miss a thing. Sign up here.
Bye for now,
Content in this feed is © copyright 2015 by Nancy Zieman and may not be republished without written permission. You’re welcome to forward the email to a friend or colleague but it’s not okay to add the RSS feed automatically as content on a blog or other website.
Make sure you are subscribed to my enews mailing list so you won’t miss a thing. Sign up here . Join us on Facebook , plus a host of other social media channels. Connect With Nancy today!
November 3, 2015
Nancy Zieman’s Annual Stocking Sewing Challenge

You’re invited to participate in our Christmas Stocking Sewing Challenge. Use one of the free sewing patterns below, or any stocking pattern, and sew a Christmas stocking for yourself, a family member, or as a gift. Then, enter our Christmas Stocking Sewing Challenge. It’s easy!
From elegant to whimsical, Christmas stockings are a great way to add a pop of holiday cheer to any room. Plus, they can readily be sewn in a few hours of enjoyable sewing time.
Here’s a listing of free stocking patterns:
Novelty Christmas Stocking from Nancy’s Notions
I {Heart} Pellon Stocking from Pellon Projects
Christmas Stocking Tutorial from Amy’s Creative Side
Fancy Fleece Stockings from June Tailor
Christmas Stocking Projects from Baby Lock, enter keyword “stocking”
Christmas Stocking Sewing Challenge Guidelines
Select or create your design. All sewing, quilting, serging, machine embroidery, and embellishment techniques are eligible. Stocking must be made within the last year and may not have been entered into the 2014 NZ Stocking Challenge.
Grab our Stocking Sewing Challenge blog badge to let your friends know about this exciting sewing challenge.
Share your progress and projects on your social media sites using the hashtag: #NZStockingChallenge
Upload your photo(s) by December 7, 2015.
An InLinkz Link-up

Jump into the Stocking Sewing Challenge with this free pattern from Pellon Projects. The original design is by Rachel Gander. Today we’re going to change it up to feature a traditional Tumbler pattern as the front of the stocking. I’ve chosen rich, gorgeous silks to complete the look.

Supplies, Fabrics, and Notions:
Assorted brown, red, and green silk dupioni , poly dupioni , or fabrics from your stash.
505 Spray and Fix Adhesive
Pellon Shirtailor Interfacing
Stocking Pattern
Chaco Liner Yellow Pen
Grandmother’s One Patch Template: Tumbler Block

Cutting Tumblers:
Cut a total of 30 tumbler patches.
For each solid fabric tumbler, the cutting directions are the same.
Cut 4-1/2″ wide crosswise fabric strips.

Align the template as close to the cut end as possible.
Trace along each edge.

Flip the template , align the traced edge with the template side, and trace the other side of the Tumbler shape. Repeat the process until the entire fabric strip has been marked.

Use a rotary cutter and ruler to cut on each marked line.


Repeat marking and cutting steps for each color.
Create the Patchwork
Arrange the six tumblers into five rows.

Note from Nancy: Notice the ends are staggered. We’ll be cutting our stocking shape from this modified tumbler block; having squared ends isn’t necessary.
Pin tumbler pairs together.
Offset the end ¼″—the seam allowance width. Stitch.
Join the block pairs with a 1/4″ seam allowance.
Press seam allowances open.

Join pairs to form rows.

Join rows using a 1/4″ seam allowance.
Press seam allowances open.

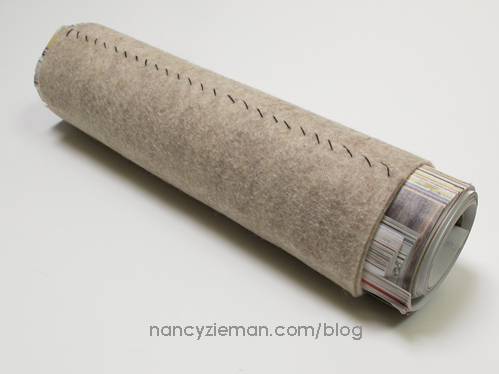
Note from Nancy: To prevent the edges of the seams from making an imprint on the right side, press the seams over a sleeve roll. If you don’t have a sleeve roll, tightly roll and tape several magazines or catalogs. Cover with a wool fabric or wool felt and hand stitch. The fabric will absorb the moisture of the iron.

Use temporary adhesive basting spray to attach the patchwork tumbler to the interfacing.

Use a machine straight stitch to stitch in-the-ditch though the patchwork and the interfacing.

Stocking Construction
Download and print the stocking pattern from Pellon Projects .
Align the stocking right and left sides. Join with clear tape.
Note from Nancy: For our stocking, we are using the stocking shape provided and we’re skipping the stitched design.

Align the top and bottom halves. Join with clear tape.

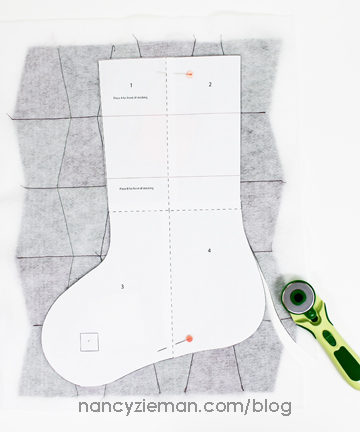
Cut out the paper stocking pattern.
Position the paper pattern on the interfacing side of the patchwork tumbler.
Pin. Use a rotary cutter to cut around the paper pattern.
Lay the paper pattern on another piece of interfacing. We’ll use this for the back of the stocking.
Rotary cut the second piece of interfacing.

Cut one stocking from the green silk stocking back fabric and two stockings from the green lining.

Spray baste the interfacing to the stocking back fabric.

Create the Hanging Loop
Cut a fabric rectangle measuring 2-1/2″ x 6-1/2″

Fold the rectangle in half lengthwise. Finger press the folded edge.
Open the rectangle. Meet long edges at the fold.

Fold in both top and bottom edges. Press.

Fold in half lengthwise again. Press.

Edgestitch along each side.

Fold the loop in half and pin the cut edges to the top of the stocking lining.

Baste.

Create the Stocking
Layer the lining onto the stocking fabrics, for both back and front pieces.
Pin along the top edge.

Use a 1/4″ seam allowance to stitch along the top edge of each the back and front fabrics.
 .
.

Once sewn and opened, the pieces should look like this:

With both stocking back and front open and flat, match right sides and pin.

Note from Nancy: When joining the stocking, we need to leave an unstitched opening along the lining straight edge. To remind myself to stop stitching at this area, I place a pin parallel to the cut edge, rather than perpendicular.

Stitch around the stocking using a 1/4″ seam allowance.
Backstitch at the start and finish, leaving 4″ unsewn along the lining’s straight edge.

Press the seam allowance at the opening.

Use a rotary cutting pinking blade to trim excess fabric from the seam allowance at the curved edges.

Turn the stocking right side out through the opening.

Hand stitch the opening closed.

Tuck the lining into the stocking fabric.

Press the top edge.

Our stocking is complete! I look forward to seeing your stockings in the Stocking Sewing Challenge!
Go Social with Your Stocking Sewing Challenge

If you have a website, copy the code above and paste it into your website editor to have the Stocking Sewing Challenge badge on your site. Or, add the link to your social sites such as Instagram, Twitter, Flickr, or Facebook. Let all your friends know you are working on the Stocking Sewing Challenge by tagging your post with the hashtag: #NZStockingChallenge
How to Enter
Enter the Stocking Sewing Challenge by adding a photo or photos in the link listed below. It’s easy! Use the link tool below and click the “add link” button. Your entry will appear directly in the gallery. (Once button is clicked—it may appear as a workable link).
Schedule:
November 3- Stocking Challenge Launches
December 7- Deadline to enter using inlinkz tool
December 8- Voting Opens
December 13- Voting Closes
December 15- Winner Announced
Prize packages from our generous sponsors:
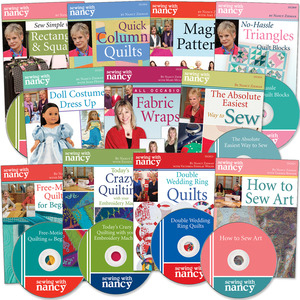
First Place: Nancy’s Notions DVD Bundle, a $149 value
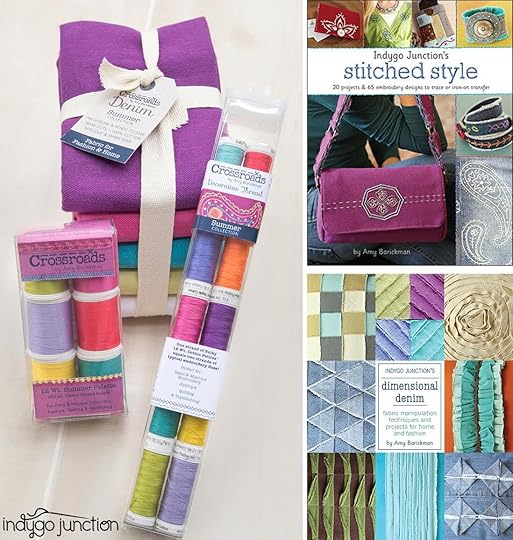
Second Place: Indygo Junction product bundle, a $120 value
Third Place: Pellon Bundle Package, a $110 value

Fourth Place: Bundle of Nancy Zieman Products and Notions from Clover, a $102 value

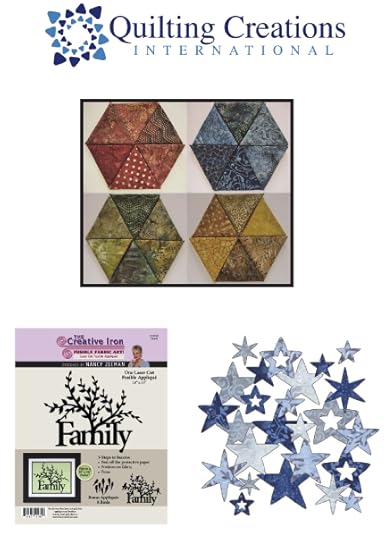
Fifth Place: Quilting Creations International Pattern Bundle, a $94 value
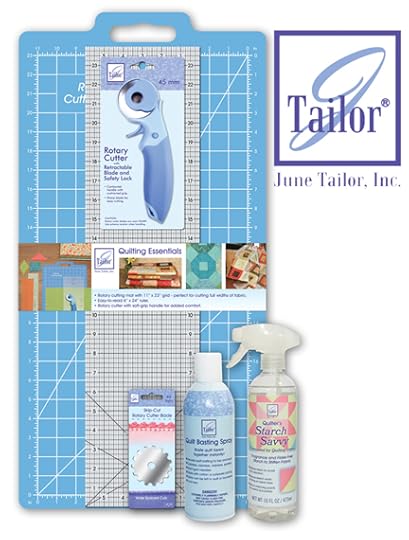
Sixth Place: Quilter’s Package from June Tailor, a $90 value
Look for more exciting prize packages to be added on my November 10 blog post!
Enter the Stocking Sewing Challenge by adding a photo or photos in the link listed above. It’s easy! Use the above link tool and click the “add link” button. Your entry will appear directly in the gallery. (Once button is clicked—it may appear as a workable link). Plus share your comments below about the Stocking Sewing Challenge and let us know if you plan to join!
Get Stitching!
Email challenge questions to info@ziemanproductions.com. Challenge not open to sponsors, employees, and immediate family members. Photos and techniques may be featured in future promotions, blog posts, videos, and/or TV shows.
Nancy Zieman—author, pattern designer, businesswoman, producer, and national sewing authority—is the host of the popular show Sewing With Nancy®, which appears exclusively on public television stations across the United States and Canada. Follow Nancy’s blog at NancyZieman.com/blog and sign up to receive Nancy’s E-News for the latest news in Sewing, Quilting, Creating, and Block of the Month updates.
Content in this feed is © copyright 2015 by Nancy Zieman and may not be republished without written permission. You’re welcome to forward the email to a friend or colleague but it’s not okay to add the RSS feed automatically as content on a blog or other website.
October 31, 2015
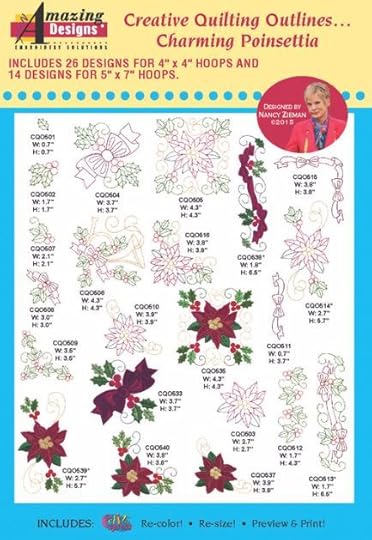
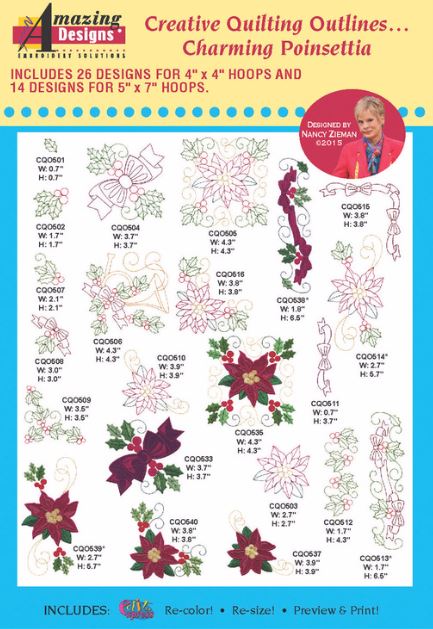
Creative Quilting Outlines…Charming Poinsettias

For sewing enthusiasts, fall is so much more than a lovely season with great weather and gorgeous foliage. Fall is the start of the holiday-gift-sewing-season! It is never to early to dive into the Christmas gifts and décor projects. Jump start your holiday sewing with this exciting poinsettia embroidery pack by Amazing Designs. The embroidery bundle includes 26 designs for 4″ x 4″ hoops and 14 designs for 5″ x 7″ hoops. Making festive holiday décor and gifts is easy with Creative Quilting Outlines…Charming Poinsettias.
Appliqué Accents
Adding color to your embroidery design couldn’t be easier with the appliqué options in this design bundle.
Align the fabric and selected design in the hoop.
Back fabric with your favorite stabilizer.
Stitch the outline shape.
Trim away any excess fabric beyond the stitching line.
Finish the edges with the beautifully digitized embroidery stitches.

The detail and depth achieved by layering fabric, thread, and embroidery outlines makes these appliqué accents shine.


Perfect Machine Quilting In-The-Hoop
Get the look of a complex accurate quilting design using the computer guide feature of your embroidery machine. That’s right; you can quilt your next project in-the-hoop.
Layer the quilt: backing, batting, and quilt top.
Use spray adhesive to secure the layers.
Align the area to be quilted in the hoop, matching horizontal and vertical register marks.
Select the outline, or should I say quilt design, and stitch.

I enjoy mixing and matching embroidery motifs to create more interest within the project. This pack has plenty to choose from and allows me the freedom to select whatever I like, knowing it will already coordinate with the many other designs.

Potpourri of Holiday Projects
With designs for different sized hoops, we have options as to how big or small we’d like to stitch. The hoop will give you control over the larger sized projects, making quilts quite easily.

You can mix embroidery designs flawlessly with the quilting motif, as the two are designed to complement each other.

Consider repeating one single design on a mantle scarf.

Three similar holiday wall hangings make quite a statement with colorful detailing in each embroidered and quilted stitch.

You can even dress up the entire table this holiday season with a table runner and placemats.

This table runner features the embroidery designs on a 6-1/2″ center or focus block, which then gets a border (3-1/2″ on each side) and is set on point. The blocks are not complicated and you’ll be able to create them in any size.

The coordinating placemats are equally easy to create by simply adding the holiday embroidery designs to 6-1/2″ blocks, which will be sewn into a basic 9-patch quilt block and also set on point.

If you are new to machine embroidery, you may want to watch Sewing With Nancy for more machine embroidery tips and ideas.
Embroidery Lessons on Sewing With Nancy
Polish your embroidery skills by watching Machine Embroidery in Six Easy Lessons Part One and Machine Embroidery in Six Easy Lessons Part Two, with guest Eileen Roche.
On what type of holiday gift item are you most likely to add embroidery? Leave your answers in the comments section to be entered to win Creative Quilting Outlines…Charming Poinsettias. A winner will be randomly selected.
Bye for now,
Content in this feed is © copyright 2015 by Nancy Zieman and may not be republished without written permission. You’re welcome to forward the email to a friend or colleague but it’s not okay to add the RSS feed automatically as content on a blog or other website.
Make sure you are subscribed to my enews mailing list so you won’t miss a thing. Sign up here . Join us on Facebook , plus a host of other social media channels. Connect With Nancy today!
October 29, 2015
50 Tried and True Sewing & Quilting Tips Part Two
Welcome to the second episode of the new two-part Sewing With Nancy mini-series, Tried and True Sewing & Quilting Tips. Sewing and Quilting specialists took time out from their busy schedule, while teaching at Nancy’s Notions Sewing Weekend event in Beaver Dam, WI, to record some of their favorite sewing and quilting tips. I hope you enjoy the variety of personalities and their tips!
Pam Mahshie, Baby Lock Sewing Machine National Education Ambassador, shares her tips for successful hooping for machine embroidery.

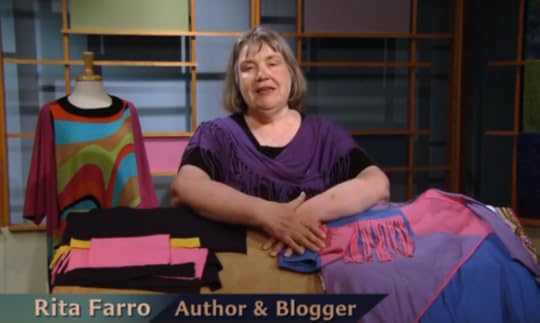
Rita Farro, Author and Blogger, shares her T-shirt fringe techniques.
Wendy Butler Berns, fiber artist, teacher, and lecturer, shares her tips for stabilizing art quilts with Pellon Décor-Bond.

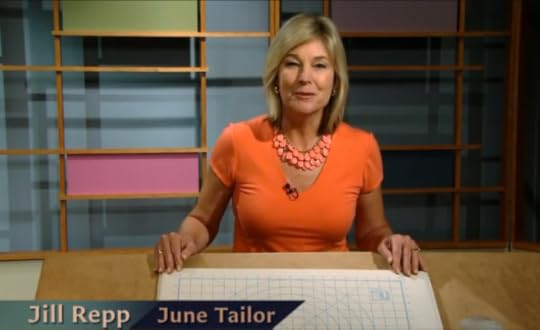
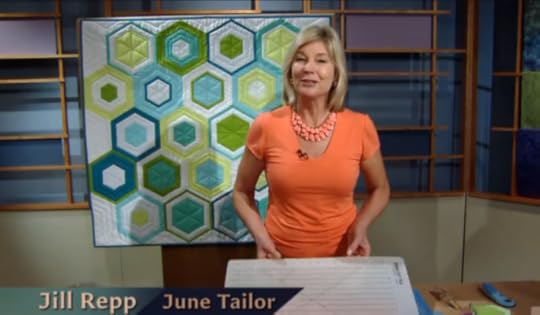
Jill Repp, from June Tailor, shares tips for using spray starch in sewing and quilting.
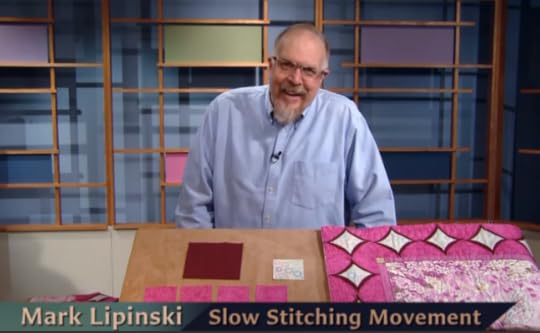
Mark Lipinski, of the Slow Stitching Movement, shares his 3-D faux cathedral window block technique.
I know that you’ve learned numerous sewing and quilting tips during this 2-part series. My gratitude goes out to all my friends who made this program possible. In case you missed it, last week my guest tipsters shared six additional great tips in the first episode of Tried and True Sewing & Quilting Tips. Remember you can watch this episode and many other Sewing With Nancy shows online at nancyzieman.com. Plus, in the book that accompanies the show, 50 Tried and True Sewing & Quilting Tips, I’ve included 39 of my favorite sewing and quilting tips!
Watch Tried and True Sewing & Quilting Tips on Sewing With Nancy online.
To watch Sewing With Nancy on your iPad, iPod Touch, or iPhone, download the app.
For a chance to win a copy of the book, 50 Tried and True Sewing & Quilting Tips, please share your favorite sewing or quilting tip below in the comments. A random winner will be announced on November 5.
Bye for now,
Content in this feed is © copyright 2015 by Nancy Zieman and may not be republished without written permission. You’re welcome to forward the email to a friend or colleague but it’s not okay to add the RSS feed automatically as content on a blog or other website.
Make sure you are subscribed to my enews mailing list so you won’t miss a thing. Sign up here . Join us on Facebook , plus a host of other social media channels. Connect With Nancy today!
October 27, 2015
Four Myths Regarding Iron Water
This year, I demonstrated irons at Quilt Expo 2015, and I realized just how much conflicting information there is surrounding iron maintenance. I wanted to clear up a few things on the subject—for the sake of irons everywhere, and their owners’ peace of mind.
A few things to be aware of:

Myth #1: “Fill your iron with regular tap water.”
This is false. Most high-quality iron manufacturers state that you can use regular tap water in your iron. However, most iron manufacturers have never lived in the Midwestern United States. They cannot possibly fathom the levels of limescale and sediment in our water. Don’t do it.
If you don’t believe me, read your iron manuals—you’ll notice some fine print that says extra-hard water will need to be diluted. Just go the safe route and refrain from tap water entirely—especially if you live in the Midwest or have well water.

Myth #2: “Distilled water is the best water for your iron.”
False… and true. Okay, okay—this is a tough one to explain. Truly distilled water is a perfectly lovely thing to put in your iron’s reservoir—in theory. However, it’s really not a good idea for most irons. Here’s why:
Distilled water has no solid minerals in it. It’s been super-heated and turned into steam and then collected (rather like what a dehumidifier does in your house). Distilled water is pure water. Unfortunately, pure water molecules are hungry to get their atomic hands on carbon dioxide from their environment, making the water mildly acidic and prone to corroding metals. Irons are made of metal. Savvy?
The true part comes in for some irons that specifically state in the manual that you CAN use distilled water. These irons contain innards that are made of specific anti-corrosive materials.
If you don’t have a manual that says you can use distilled water, I’d suggest you stay away. It’s best to stay on the safe side.

Myth #3: Deionized water is the best water for your iron.”
False. Deionized water is cheaper than distilled, and is defined as water that has had ions removed. Therefore, it is desperate for positively-charged ions. Putting water that’s starved for ions in anything electronic is a bad idea.
You’ve got alternating current flowing through your iron, and a bunch of working metal parts. Add deionized water to that, and you’ll have a temperamental beast in no time.

Myth #4: “Spring water is best.”
Nope. Often, spring waters are full of minerals, which are great for your health, but not so much for your iron. Minerals are solids that can gunk up your reservoir and steam vents.
“So what kind of water am I supposed to use?”
Easy. Use filtered tap water. Water that’s been filtered through something like a Brita has most of the solid particles filtered out of it. If you have a refrigerator with an icemaker and water dispenser, this is even better, as most refrigerator filters will even filter out the sodium that’s present from water softeners.

Spitting, leaking from the soleplate:
When someone tells me their iron spits or dribbles from the soleplate, the first thing I ask them is whether they’re filling it with tap water (the answer to this question is very often, “yes.”).
What’s probably happening here: sediments and limescale are accumulating on the gaskets controlling your steam vents, preventing a proper seal—and causing leakage.
The fix? You can improve the situation by filling the reservoir with clean, filtered water, turning the iron onto high, and pumping the manual steam button.
As you do this, use your other hand to move the steam control lever back and forth from no-steam to full-steam, and back again. This raises and lowers the steam gaskets, and will hopefully dislodge some of the sediment on the gaskets as they rise and sink in the steam vents.
The final word…
Please don’t use vinegar in your iron unless the manual specifically says you can. Vinegar can react with some rubbers and plastics (like gaskets and the reservoir itself), wreaking havoc on your iron’s innards. I learned this the hard way on my steamer.
Try and be diligent with emptying your iron of water when you’re finished. Empty the reservoir while the iron is still hot, and leave the lid open to help any stray droplets evaporate.
Proper iron maintenance can really improve the life expectancy of a unit. Sometimes irons simply conk out on us. Things happen. Make sure the iron has a good warrantee. Better yet, purchase from Nancy’s Notions. Nancy’s promise, made more than 30 years ago, still stands today—at Nancy’s Notions, your 100% satisfaction is guaranteed. If for any reason, any product does not meet your expectations, simply return it for an exchange, refund, or credit of the purchase price.

Thanks to Emily Jansson and the Nancy’s Notions Team for debunking these myths!
Bye for now,
Content in this feed is © copyright 2015 by Nancy Zieman and may not be republished without written permission. You’re welcome to forward the email to a friend or colleague but it’s not okay to add the RSS feed automatically as content on a blog or other website.
October 24, 2015
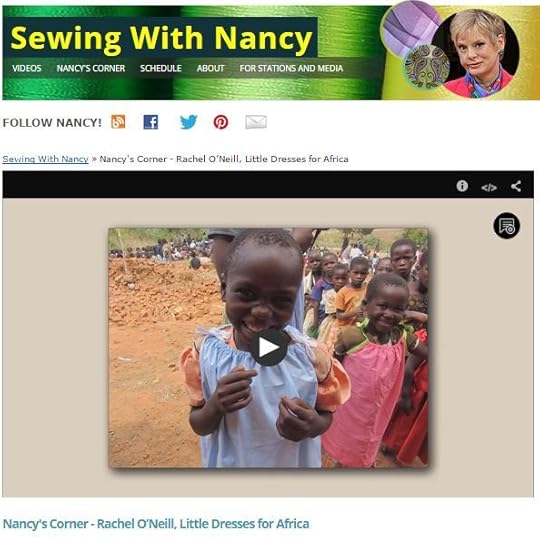
Lillian’s Dress, a New Style for Little Dresses for Africa
Many of us have a couple pieces of “extra fabric,” and would be interested in knowing more about charitable initiatives. In 2008 Little Dresses for Africa was formed by Rachel O’Neill. Her non-profit organization offers dresses and britches to children at orphanages, schools, and churches. Donors from around the world send stitched items, monetary donations, or travel to Africa.
I invited Rachel O’Neill to do another Nancy’s Corner segment with an update on Little Dresses for Africa. Since her first interview in 2011, Nancy’s Notions has shipped your generous donations totaling 132,949 dresses and 5,449 britches to Little Dresses for Africa.

Each year, Rachel leads a team to deliver the dresses.

A New Little Dresses for Africa Pattern
Ms. Lillian makes raglan sleeve dresses using a pattern given to her by Geraldine Lowery. We have adapted those directions and included them in a FREE pattern project sheet. You can download the pdf file HERE.

These dresses are fast and easy to make. Lets walk through the simple dress construction together:

Draft the Pattern Pieces
Dress Body:
Tape two pieces of paper together along the 8-1/2″ edges.
Draft a rectangle measuring 10″ x 19″.
Along the top edge, measure 5-1/4″ from the left edge; make a mark.
Along the right hand edge, measure up 14″; make a mark.
Connect the two marks to create a diagonal line.
Cut away the corner.
Make note of the foldline along the remaining 19″ edge.

Sleeves:
On one sheet of paper, draft a rectangle measuring 8-1/4″ x 9″.
Along the top edge, measure 4-1/4″ from the right edge; make a mark.
Along the right hand edge, measure down 4-1/4″; make a mark.
Connect the two marks to create a diagonal line.
Cut away the corner.
Make note of the foldline along the remaining 9″ edge.

Supplies
1 yard 45″ wide fabric OR
-at least 20″ for dress body
-at least 22″ for sleeves, ruffle, and bias tape
17″ of 3/8″ wide elastic
Bias Tape Maker
5-in-1 Sliding Gauge
Flex ‘n Glide Bodkin and Elastic Lock Set
Fuse ‘n Gather Tape
Cut Out Dress
45″ fabric folded twice
Fold selvages of fabric to the center of the fabric on each side.
Fold the fabric in half lengthwise meeting folded edges.
Place pattern pieces on the fold.

Note from Nancy: The illustration above will create a dress in one single fabric. Consider cutting two dresses at a time, of coordinating fabrics, to mix and match sleeve and ruffle pattern pieces with their coordinating dress body pattern pieces.

Cut two dress body pieces.
Cut one sleeve on the double folded edge to create two sleeves.
Cut two ruffles on the double folded edge.
Cut a bias fabric strip 1-7/8″ x 40″ for bias tape.
Press all fabric pieces.

Construction
Press a 3/4″ hem in each sleeve.
Use the 5-in-1 Sliding Gauge for accuracy.
Open hem and press edge to the hemline, about 3/8″.

Match right sides together, pin the sleeves to the dress body front and back.

Stitch the sleeves to the dress body using a 1/4″ seam allowance.
Stop sewing 1/4″ from the armhole edges. Leave this unstitched.

Press seam allowance open.

Create Bias Tape
Use the 1-7/8″ x 40″ bias cut strip of fabric and Clover Bias Tape Maker to create custom tape.
Following the directions on the bias tape maker , feed the bias cut strip into the tape maker.
Press the strip as it comes out the narrow end; edges folded toward the center.

Finish the Neckline and Sleeves
Unfold one edge of the bias tape.
Pin the unfolded edge along the dress neckline starting at center back.

Carefully pin around the curved edges.

Use the fold as a guide; stitch the bias tape to the neckline with a 1/4″ seam allowance. Leave the first and last 2″ unstitched.

Fold the unstitched portions of tape onto themselves, making their folds meet. Press.

Open the unstitched tape, match right sides and pin.

Join the tape ends by stitching directly on the pressed mark.

Use a rotary cutter to remove the excess seam allowance; 1/4″ past the stitching line.
Press the new seam allowance open.
Join the unstitched portion of tape to the dress body.

Press seam allowances towards tape, pressing tape up.

Press the bias tape to the wrong side of the neckline.
Note from Nancy: Notice, on the left-hand side of the bias tape (pictured below), you can see a small amount of the dress body fabric. This is called favoring the seam and creates a more professional finish to the neckline edge. The bias tape will be completely concealed.

Unfold the bias tape edge.
Clip into the seam allowances at the curves to allow the tape to lay flat once finished.

Working from the wrong side, edgestitch the bias tape.
Leave a 2″ opening at the center back edge.

Unfold the pressed sleeve hem.
Matching right sides together, stitch the seam using a 1/4″ seam allowance.
Press seam allowance open.

Refold and topstitch the sleeve hems.

Using the bodkin elastic tool , glide the 1/4″ elastic through the bias tape casing at the center back opening.

Use a piece of scrap fabric to join the elastic cut ends. This reduces bulk.
Zigzag stitch over each elastic cut end, where they meet.

Trim excess fabric.

Gently stretch the neckline to ease the narrow elastic into the opening.
Evenly space the neckline gathers; edgestitch the opening closed.

Ruffled Edge
Sew ruffle ends together to create a circle.
Press seam allowances open.

Hem the lower edge by turning up a double-folded 1/4″ hem; press.

Edgestitch, working from the wrong side.
 .
.

Use an iron to apply the Fuse ‘n Gather Tape to the wrong side of the unhemmed edge.
Note from Nancy: I like to use Fuse ‘n Gather Tape for gathering. The results are fast and easy to accomplish. Press Fuse ‘n Gather, with blue threads facing up, to the top edge on the wrong side of the ruffle fabric. Pull blue threads to gather.

Use a pin to easily pull the blue prestitched gathering stitches.

Adjust and pull the gathers to evenly distribute them around the dress lower edge.
Pin ruffle to the dress body lower edge matching right sides.

Working with the ruffle-side-up, stitch ruffle to the dress using a 1/4″ seam allowance.

Press the seam allowances toward the dress body.

You can read more about sending your donation on the Little Dresses for Africa website. FREE pattern project sheet. Nancy’s Notions has also assembled a dress kit for the pillowcase style dress and can receive your dresses at the following address:
Little Dresses for Africa
c/o Nancy’s Notions
333 Beichl Ave
Beaver Dam WI 53916-0683
Watch the Little Dresses for Africa interview on Sewing With Nancy online.
To watch Sewing With Nancy on your iPad, iPod Touch, or iPhone, download the app.
Bye for now,
Content in this feed is © copyright 2015 by Nancy Zieman and may not be republished without written permission. You’re welcome to forward the email to a friend or colleague but it’s not okay to add the RSS feed automatically as content on a blog or other website.
Make sure you are subscribed to my enews mailing list so you won’t miss a thing. Sign up here . Join us on Facebook , plus a host of other social media channels. Connect With Nancy today!
October 22, 2015
50 Tried and True Sewing & Quilting Tips Part One
The recording of the new two-part Sewing With Nancy mini-series, Tried and True Sewing & Quilting Tips, took place during Nancy’s Notions annual Sewing Weekend event in Beaver Dam WI. This yearly event takes place in May. Over 3,000 people flock to our small community for the 3-day sewing extravaganza. My guess is that during this weekend there are more sewists and quilters per capita than any other place in the country! During this exciting weekend, I invited my friends and associates to share one or two of their favorite tried and true sewing & quilting tips. I know you’ll enjoy learning tips from these specialists, as you watch the show.
Jill Repp, from June Tailor, shares her Quick Block Cutting Tricks:
Eileen Roche, from Designs in Machine Embroidery, shares her Reversible Piecing Hints:

Jenny Doan , from Missouri Star Quilting Co., shares her tips for making ½-square triangles:

Pam Damour, Interior Designer, shares here Painless/Pinless Zipper Techniques:

Mary Mulari, Designer, Author, shares her tips for Quick Aprons with Fat Quarters:
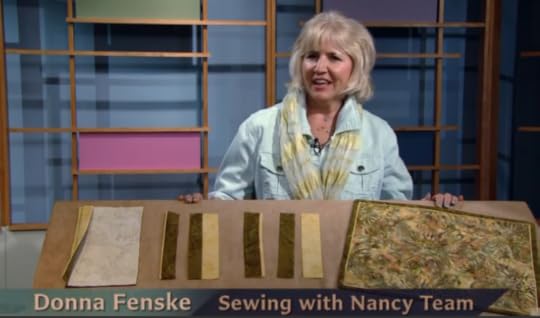
Donna Fenske, Sewing With Nancy Team, shares her techniques for adding a Fabulous Flange Binding:
Well, how about that—six tried and true tips from such knowledgeable people! Next week my guest tipsters will be back with five more great tips in the second episode of Tried and True Sewing & Quilting Tips. Remember you can watch this episode and many other Sewing With Nancy shows online at nancyzieman.com. Plus in the book that accompanies the show, 50 Tried and True Sewing & Quilting Tips, I’ve included 39 of my favorite sewing and quilting tips!
Watch Tried and True Sewing & Quilting Tips on Sewing With Nancy online.
To watch Sewing With Nancy on your iPad, iPod Touch, or iPhone, download the app.
For a chance to win a copy of the book, 50 Tried and True Sewing & Quilting Tips, please share your favorite sewing or quilting tip below in the comments. A random winner will be announced on November 5.
The random winner, from last week’s blog is Jodi Bowlden. She won a Quilt Expo Tote Bag from Wisconsin Public Television. Jodi said: My favorite time was when I purchased my long arm at the show! SEW FUN!!
Bye for now,
Content in this feed is © copyright 2015 by Nancy Zieman and may not be republished without written permission. You’re welcome to forward the email to a friend or colleague but it’s not okay to add the RSS feed automatically as content on a blog or other website.
Make sure you are subscribed to my enews mailing list so you won’t miss a thing. Sign up here . Join us on Facebook , plus a host of other social media channels. Connect With Nancy today!
October 20, 2015
No Quilting Experience Needed! Here’s the Easy Solution

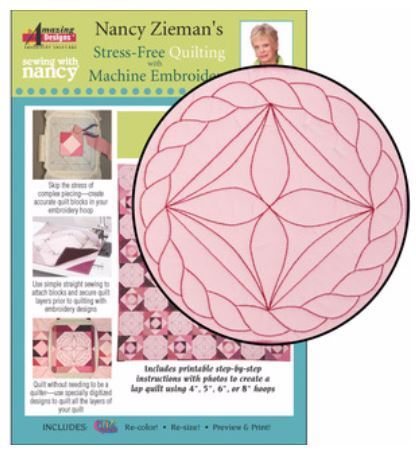
If you love the look of perfectly pieced blocks and precision machine quilting, put your embroidery machine to work for both tasks! We call it Stress-Free Quilting .
No quilting experience required! First, create accurate and consistent quilt blocks with the piecing-in-the-hoop technique. Usually we think of embroideries as decorative designs, but with Stress-Free Quilting , the embroidery designs stitch out precision seams for piecing, all in the hoop. Then learn how to layer your quilting project and add quilting designs that look like free-motion designs. Both piecing and free-motion quilt designs in several sizes are included in the new embroidery package, Stress-Free Quilting and Machine Embroidery, the Lover’s Knot Collection.
Collection includes five designs in four sizes each:
20 designs: 5 (4″ x 4″), 5 (5″x 5″), 5 (6″ x 6″), 5 (8″ x 8″)


Supplies
Stress-Free Machine Embroidery: Love Knot Quilt
Love Knot Quilt kit (includes embroidery designs and quilt fabric)
Fusible Mesh Cut-Away Stabilizer
Coordinating all-purpose thread, such as Madeira Aerofil
50 Weight Quilting Thread
Make Blocks
Alternating the Snowball Block and the Square-in-a-Square block creates this Love Knot Quilt. Let’s make the blocks one style at a time.
Gather the required fabrics as listed in the Love Knot Quilt instructions.
Sort the 5″ charm pack and the 2-1/2″ pre-cut strips into light, medium, and dark values.
 .
.

Cut each darker value 5″ charm square in half diagonally.

Choose four assorted triangles per block.

Layer four medium value squares.
Cut the medium value 5″ charms diagonally, twice.

.

Square-in-a-Square Block:
Gather the required fabrics for one block:
- One light charm square
- Four assorted medium value quarter triangles
- Four assorted light value 2-1/2″ precut strips
- Four assorted dark value 2-1/2″ precut strips

Hoop a Fusible Mesh Cut-Away Stabilizer , fusible side up.
Set up the sewing machine with the embroidery unit and appropriate foot.
Import and select the embroidery design for the block.
Select all-purpose poly or poly/cotton thread; wind the bobbin with the same thread as used in the needle. A slightly contrasting color works best. (Now this is different! Rayon thread is usually used for embroidery but we’re piecing quilt blocks!)
Stitch the first thread color directly on the stabilizer.

Start with the center square, section one. Place the 5″ charm over that section making sure the fabric covers the stitching lines.
Fuse the fabric strip to the stabilizer with a mini iron .

Stitch the thread Color 2, which bastes down fabric #1.

Using a sharp scissors, trim excess fabric; 1/8″–1/4″ past the stitched line.

Working with section two and matching right sides, lay one end of a 2-1/2″ strip on top of the center square. Fabric should extend beyond the square, slightly.

Embroider thread Color 3 to stitch the section to the block.

Fold the second fabric strip over the stabilizer.
Start pressing from the folded edge, working to the opposite corner to eliminate wrinkles. “Prepressing” with your fingertips is ideal—you can feel any wrinkles.
Press and fuse the fabric strip to the stabilizer.

Embroider thread Color 4 to baste the pressed section to stabilizer.

Trim away excess fabric along the previously stitched basting line.

Repeat these steps to complete the remaining sections.

Before stitching the last thread color, tape the seam edges with Sewer’s Fix-It Tape . This prevents the embroidery foot from catching on the fabric folds as you embroider the outer block perimeter.
Place the tape 1/8″–1/4″ away from the stitched basting lines.

Stitch the final thread color.

Trim block approximately 1/4″ outside stitching lines.

Create 28 of the Square-in-a-Square blocks.
Snowball Block:
Gather the required fabrics as listed in the Love Knot Quilt instructions.
Choose four assorted triangles per block.
Gather the required fabrics for one block:
- One light charm square
- Four assorted medium or dark value quarter triangles
Hoop a Fusible Mesh Cut-Away Stabilizer , fusible side up.
Set up the sewing machine with the embroidery unit and appropriate foot.
Import and select the embroidery design for the block.
Select all-purpose poly or poly/cotton thread; wind the bobbin with the same thread as used in the needle. A slightly contrasting color works best. (Now this is different! Rayon thread is usually used for embroidery but we’re piecing quilt blocks!)
Stitch the first thread color directly on the stabilizer.

Start with the center square, section one. Place the light fabric over that section making sure the fabric covers the stitching lines.
Fuse the fabric strip to the stabilizer with a mini iron .

Stitch the thread Color 2, which bastes down fabric #1.

Using a sharp scissors, trim excess fabric; 1/8″–1/4″ past the stitched line.

Working with section two and matching right sides, lay one end of a 2-1/2″ strip on top of the center square. Fabric should extend beyond the square, slightly.

Embroider thread Color 3 to stitch the section to the block.

Fold the second fabric strip over the stabilizer.
Start pressing from the folded edge, working to the opposite corner to eliminate wrinkles. “Prepressing” with your fingertips is ideal—you can feel any wrinkles.
Press and fuse the fabric strip to the stabilizer.

Embroider thread Color 4 to baste the pressed section to stabilizer.

Trim away excess fabric along the previously stitched basting line.

Repeat these steps to complete the remaining sections.
Before stitching the last thread color, tape the seam edges with Sewer’s Fix-It Tape . This prevents the embroidery foot from catching on the fabric folds as your embroider the outer block perimeter.
Place the tape 1/8″–1/4″ away from the stitched basting lines.

Stitch the final thread color.
Trim the fabric ends approximately 1/4″ from the perimeter stitching lines.

Create 28 of the Snowball blocks.
Arrange the Quilt Top
If necessary, trim all blocks to uniform size.
 .
.

The quilt uses 56 total blocks; a 7″ x 8″ grid.
Join pairs of blocks—one of each, using a 1/4″ seam allowance. Press.
Join eight blocks to create a column. Make seven columns. Press.
Join columns, making sure the blocks alternate when joined. Press.
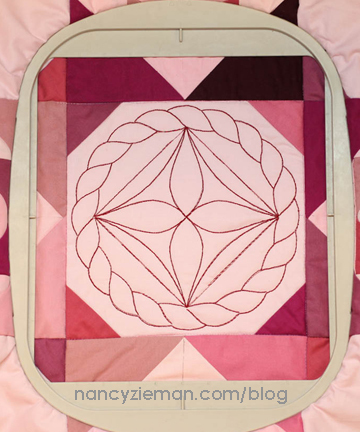
Machine Embroider to Quilt
Choose a quilting embroidery design. The Love Knot Quilt Collection includes the three different designs to mix and match with this quilt. Each design is specially sized for each size block.
Print a template using an embroidery software program such as Amazing Designs® Edit Express™ (included on the CD Love Knot Quilt Collection).
Note from Nancy: Print embroidery templates on Translucent Foundation Paper for better visibility and alignment of the designs on your quilt.
Trim excess paper.
Position the template over the quilt and tape in the desired location.

Align the quilting embroidery design, hoop quilt, and quilt. Details covering hooping options and specific steps can be found in the complete directions.
Position a placement sticker to center the design.

Remove the paper template after the hoop and quilt are aligned.
Change thread and bobbin to 50 weight machine quilting thread, if desired.
Embroider.
Repeat these steps for each desired embroidered quilting motif.
Add embroidered quilting to all desired areas of the quilt repeating the previous steps.
Finish the Quilt
Cut remaining 2-1/2″ strip ends at a 45° angle.
Join strips end-to-end with a 1/4″ seam allowance.
Press seam allowances open.

Fold the long strip in half lengthwise to prepare the quilt binding.
Finish the quilt with your favorite binding method. You can find my absolute easiest binding tutorial here.

Ta-Dah—Computer-guided accuracy with this in-the-hoop quilting project.

Watch Stress Free Quilting with Machine Embroidery Part Two on Sewing With Nancy online.
To watch Sewing With Nancy on your iPad, iPod Touch, or iPhone, download the app.
There are two random winners of a copy of M7252, from The McCall Pattern Company.

The winner from the blog on October 6 is Karen Payton. She said: I noticed a lot of knit fabric at my local fabric store and wondered what I could make. This would be perfect. Looks so quick and easy.
The winner from the blog on October 13 is Melanie. She said: I have a lovely Autumn “brown” knit piece and a “marine” blue fleece…decisions, decisions, which one should I create first?!!!
Bye for now,
Content in this feed is © copyright 2015 by Nancy Zieman and may not be republished without written permission. You’re welcome to forward the email to a friend or colleague but it’s not okay to add the RSS feed automatically as content on a blog or other website.
Make sure you are subscribed to my enews mailing list so you won’t miss a thing. Sign up here . Join us on Facebook , plus a host of other social media channels. Connect With Nancy today!
October 17, 2015
2015 Adventure Quilt Block of the Month #10

Half-square triangles are a go-to traditional quilt block element. They are so easy to make, I had to include them in the 2015 Adventure Quilt. Once you see how fast these are to stitch, you may find that this month’s block of the month will turn into blocks of the month with many layout options. October’s Block of the Month in The 2015 Adventure Quilt is the Triangle Medley. To create the block, use the 5-in-1 Sliding Gauge. Here’s how:
Block #10: Triangle Medley
All blocks in The 2015 Adventure Quilt measure 12-1/2″ x 12-1/2″, creating a 12″x 12″ finished block. 1/4″ seam allowances are included.
Notions, Fabrics, and Supplies:
Get started by choosing fabrics. Any three color combinations will work. I had a surplus of black, white, and chartreuse green in my quilting fabric scraps. If you’ve been following along, you know that this Block of the Month series is a scrap fabric adventure.
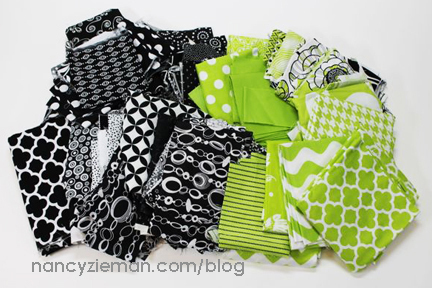
Assorted Fabric Scraps
5-in-1 Sliding Gauge
No-Hassle Triangle Tool
Non-permanent marking pen
Create Half-Square Triangles
We are creating 16 half-square triangle blocks. This means, we’ll need eight total pairs of squares.
-Four pair will be cut from white fabric with black fabric.
-Four pair will be cut from white fabric with green fabric.
Layer two strips, 3-7/8″ x 16″, matching right sides.

Rotary cut the two layers to 3-7/8″ x 3-7/8″ squares.
Cut four pair from this strip.
Layer white and black fabrics to cut four additional pairs of squares. (not pictured)
Use the 5-in-1 Sliding Gauge to check for accuracy.

Working with a single pair of squares, move the No-Hassle Triangle Tool to 3-7/8″ on the left side.

Position the triangle tool over the squares to mark the center diagonal line with a non-permanent marking pen.


Sew 1/4″ from each side of the marked diagonal line.

Chain stitch.
Cut the stitching apart.

Note from Nancy: Red stitching lines have been added digitally. When stitching, use coordinating threads.
Use rotary cutting tools to cut the half-square triangle blocks along the marked line.
 .
.

Press the seam allowance towards the darker fabric.

Decide on a Block Arrangement
As with many four by four grid blocks, the arrangements can vary quite a bit. I’ll be the first to tell you there is no wrong or right way to arrange your 16 half-square triangles. The October block will have many possibilities. I have narrowed my triangle arrangement down to two choices. But, you’ll find twelve additional block ideas in my No Hassle Triangles Book.

Decide on a layout with triangles pointing in the direction most pleasing to you.
Use a 1/4″ seam allowance to sew pairs together to form rows.
Note from Nancy: The most important thing to remember when creating the block is to press the seam allowances in one direction, alternating by row, as shown below. This will guarantee the seams will lock with each other to create more accurate triangles.

Use a 1/4″ seam allowance to join the rows.

See more half-square triangle block arrangements and how to create them on this blog post .
 Share your 2015 Adventure Quilt Blocks Socially
If you have a blog site, website, or online social sewing group, feel free to grab the code and share this button.

<img src="http://www.nancyzieman.com/blog/wp-content/uploads/2015/01/Nancy_Zieman_Block_of_the_Month.jpeg" alt="Nancy Zieman Block of the Month" style="border:none;" />
————–
If you are on social sites, let all your friends know you are working on The 2015 Adventure Quilt Blocks by tagging your post with the hashtag: #NZBoM.
The hashtag is a searchable “word” associated with an event or activity, which when searched on popular social websites, like Instagram, Twitter, Flickr, and Facebook, will show every single post using that hashtag. Hashtags are a fun way to network and connect with people who share similar interests.
What would a Quilt Look Like?
As part of this Block of the Month series, we have included ideas of what a quilt might look like if you made it with only this month’s block.
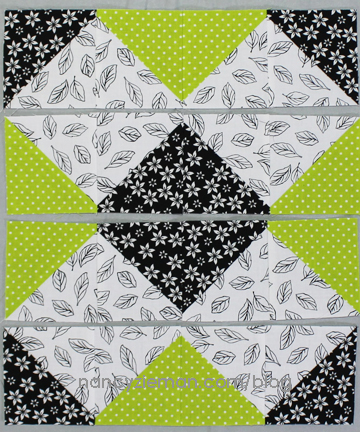
The Great X quilt is a Triangle Medley block arranged in a traditional grid with no sashing strips. 48 blocks are featured.

This next design is based on a single block. The block is directional and, as we all have done, one set of blocks is made in the opposite direction. I’ll show you the planned block and the new block side by side. The accident worked out well to create a quilt design that appears to make a spinning star design when the blocks are alternated. Without sashing, this quilt features 35 blocks.


Using the blocks as planned, directional and all pointing the same direction, I created the quilt below by adding sashing to 35 quilt blocks.

Watch No-Hassle Triangle Blocks on Sewing With Nancy online.
To watch Sewing With Nancy on your iPad, iPod Touch, or iPhone, download the app .

Don’t Miss the Other 2015 Adventure Quilt Block of the Month Features
In the 2015 Adventure Quilt Block of the Month series, we’ll be making twelve fun blocks from five different templates/tools: Carefree Curves Template , Dresden Template , Grandmother’s One Patch Template , Lone Star Template , and the No-Hassle Triangles Gauge .
See all the 2015 Adventure Quilt Blocks HERE.
An InLinkz Link-up
Bye for now,
Content in this feed is © copyright 2015 by Nancy Zieman and may not be republished without written permission. You’re welcome to forward the email to a friend or colleague but it’s not okay to add the RSS feed automatically as content on a blog or other website.
Make sure you are subscribed to my enews mailing list so you won’t miss a thing. Sign up here . Join us on Facebook , plus a host of other social media channels. Connect With Nancy today!
Nancy Zieman's Blog

- Nancy Zieman's profile
- 21 followers

