
Nancy Zieman's Blog, page 123
September 1, 2015
The Absolute Easiest Way to Sew Binding
Occasionally you find a new tool or notion that changes your life. The day I started at my first sample room job, I was introduced to the Binder Foot… and my life has never been the same.
For years I used double fold binding, and stitched it up the old-fashioned way—not the easy way like Nancy shows us. Well, the humble Binder Foot is even better. It just about takes all the work out of stitching binding!
If you’re a crafty quilter, you know how often binding is used in all kinds of projects, from bags and wallets, to larger items like home décor and quilts.
If you’re an apparel sewer like me, you may decide that this is a fantastic way to finish seams in your unlined clothing. The Hong Kong finish is smart-looking, and one more opportunity for creative self-expression—just use a contrasting print that complements your garment for a little surprise on the inside.
Supplies and Notions:
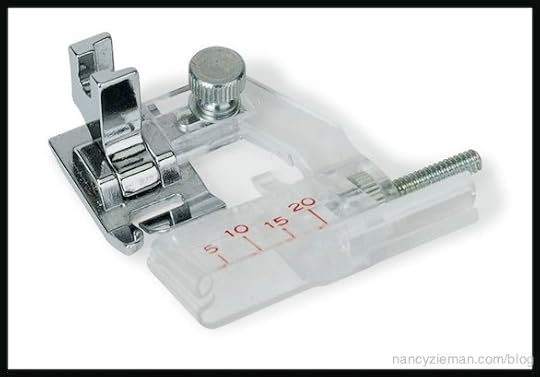
Binder Foot
Bias Tape Maker
Optional: Sixth Finger Stiletto
Optional: Spray starch (I prefer Best Press )
Optional: Fancy Footworks 2 Workbook

Some will say the Binder Foot is finicky. Although this can be true, I’ve found that all you need are a little patience and preparation. Use the following steps for great results:
Start by preparing your bias tape. I prefer to cut my own from fabric that coordinates with my project.
Cut the strips slightly wider, because bias stretches (and consequently gets thinner). If the directions ask that the cut piece be 1-1/2″ wide, add an extra 1/16″ to that measurement, and cut at 1-9/16″ wide.
THE GOLDEN BINDING RULE: The final width of your binding as you feed it through the foot will make or break your sewing.
Starch fabric before cutting if you’re using slippery or loosely woven fabrics, like satin or polyester crepe, etc.
Use a Bias Tape Maker.
Press your binding slowly and carefully, stretching the fabric as little as possible. Starch again as you press the double folds in your strip—you’ll be grateful for the added stability later.

Wind the binding up slowly once it’s all pressed. You will be tempted to pull and wind it tight to make a neat little roll, but this is detrimental to your binding width, as it will stretch. Try to roll it up more like a lasso, without any tension. It takes some finesse, but it will make all the difference.

Start the binding through the machine before you feed your fabric through—just to make sure you’ve got everything lined up, and that it’s feeding through properly. You can always trim the excess when you’re finished.

Suspend the binding gently in your right hand as you feed the binding through the foot, and ultimately through your machine. This does two things: one, it helps you control how the bias is being fed into the foot, and two, it helps you keep control of the binding tension (too much tension=stretching and misery).
Notice below how I’m helping hold the bias around the fabric? This makes it easier, too.

Use a stiletto to help keep your fabric fed through the foot and in its place between your binding.
Check out Fancy Footworks 2 , by Nancy Zieman, for a fully illustrated, step-by-step process for using this handy little foot. Nancy explains how to adjust your Binder Foot and use a Bias Tape Maker, plus in-depth how-tos are included for 11 other specialty feet. Keep this workbook close to your machine for easy reference.
Thanks to Emily Jansson.
—The Nancy’s Notions Team
Go slowly. Be patient. Always cut extra bias strips. Good things come with practice. You’ll be a binding ace in no time!
Bye for now,

Content in this feed is © copyright 2015 by Nancy Zieman and may not be republished without written permission. You’re welcome to forward the email to a friend or colleague but it’s not okay to add the RSS feed automatically as content on a blog or other website.


August 29, 2015
Introducing the 6-in-1 Stick’n Stitch Seam Guide

In this age of multi-tasking, your seam guide of choice should be able to do more than provide a single seam allowance. I’d like to introduce you to Clover’s newest go-to seam guide for perfect stitching. This guide offers six different uses in its innovative design. From garment sewing to perfect quilt seams, the 6-in-1 Stick’n Stitch is the tool for the job.
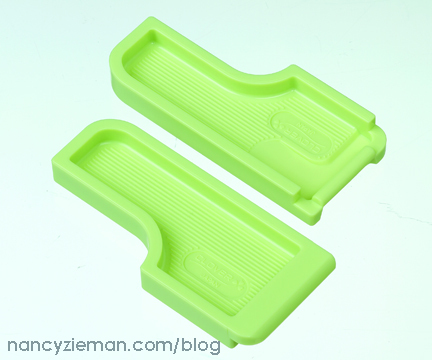
These two-piece interlocking guides are ideal shapes with edges created for perfect stitching. The tool is reusable and repositionable with an adhesive on the underside of the guide to work smoothly on any machine. Let me show you the versatility:
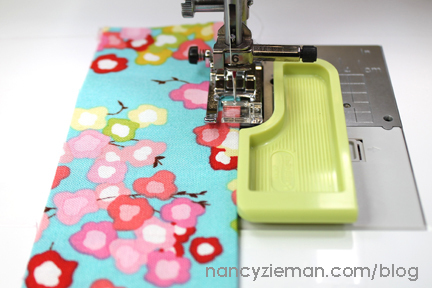
1. Straight Stitching
Using the grid provided in the packaging, align needle at desired gridline.
Insert needle into opening at lower edge.
Attach guide along template edge.
This will set your guide up to the exact seam allowance for the project at hand. Narrow seam allowances to wide rod pockets will be easily stitched with the guide in place.
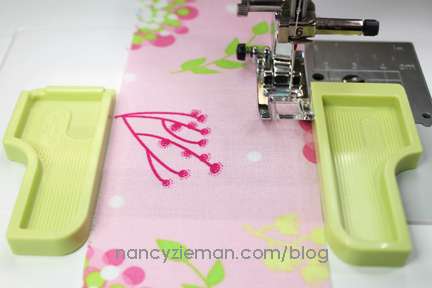
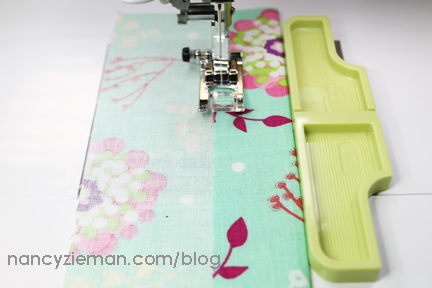
2. Stitching quilting strips
Keep quilting strips straight and perfectly aligned with a 1/4″ seam allowance by positioning guides on both sides of the fabric. The fabric will feed into the machine without ever wobbling.
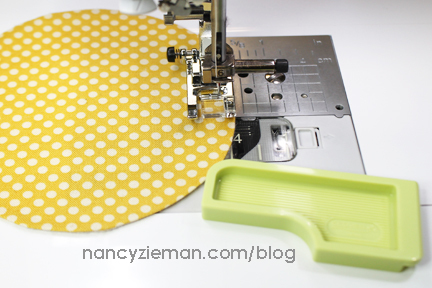
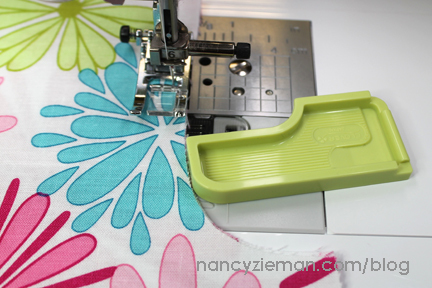
3. Stitching outer curves
Position a curved shape under the presser foot.
With the fabric in place, set the guide to a position in front of the foot, touching the curved fabric edge.
Stitch a perfect circle, using the guide.
4. Stitching inner curves
The unique shape of the 6-in-1 Stick’n Stitch lends itself to also make a great guide for inner curves, such as pant seams.
5. Topstitching along right side
Lock the guides together to create a long guide for topstitching. This is a good tip for machine hemmed garment edges and other topstitched finishing applications.
6. Topstitching along left side
Working from the other side of a project? No problem—simply set the guide on the left side of the machine to create a straight topstitched line.


For a chance to win a 6-in-1 Stick’n Stitch from Clover, please leave a comment below and share how you would use this versatile new seam guide.
Don’t forget to submit your table runner in my Fall Table Runner Challenge! Click here to see how to enter. Make sure you are subscribed to my enews mailing list so you won’t miss a thing. Sign up here.
Bye for now,
Content in this feed is © copyright 2015 by Nancy Zieman and may not be republished without written permission. You’re welcome to forward the email to a friend or colleague but it’s not okay to add the RSS feed automatically as content on a blog or other website.
August 27, 2015
Mending—A Cheaters Way to Sewing Repairs
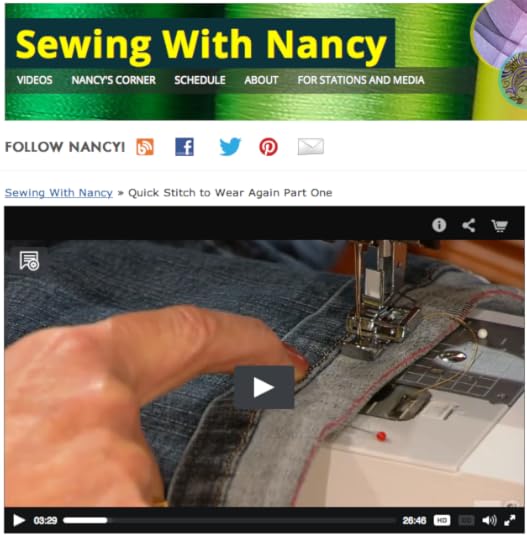
Then one day, I decided that mending doesn’t need to be a trial. You can cheat! No demerits, rather legitimate— although unconventional—sewing repairs with minimal effort. You’ll find four common mending repairs in the first episode of Quick Stitch to Wear Again, a new Sewing With Nancy video. Watch online, on Public TV, or on DVD. Or, follow all the details in the book. Here’s what you’ll learn!
Fool’em Jeans Hem
Here’s the first cheater’s way to mend, the Fool’em Jeans Hem! I’ll show you how to shorten a pair of jeans, yet keep the original hemline stitching—you might be surprised at the solution. Click to watch online.

No-Bump Jeans Hem
When tapered or flared jeans must be shortened, another fix-it approach is needed. Usually, it’s tricky to sew over the thick seams. Not so with the No-Bumps Jeans Hem approach. No steamroller needed, just a quick-stitch tip!

Snug-up the Waist Fix
When pants or jeans fit around your hips, but gape at the waist, you can “Snug-up the Waist” without a second thought. Grab a seam ripper and some elastic and I’ll show you how to create a snug fit in mere minutes.

Cover-Up Zipper Fix
Sew True! You’ll never see zippers the same way! The Cover-Up is Exposed. Okay, we’re having fun with a topic that can be dry. The Cover-Up Zipper technique, replacing zippers in jeans and pants, is truly sensational. Don’t look for the latest edition of Sew True at the grocery checkout—just watch online!
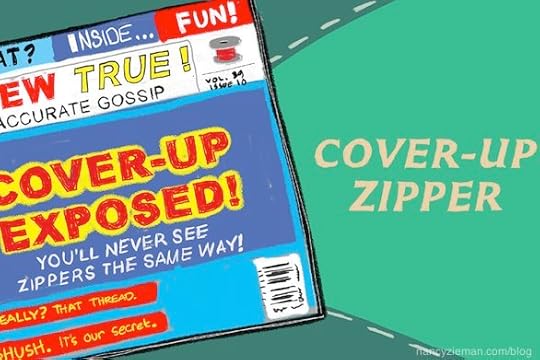
Special thanks to Philip Ashby, graphic artist at Wisconsin Public TV for the clever illustrations.
Watch Quick Stitch to Wear Again on Sewing With Nancy online.
To watch Sewing With Nancy on your iPad, iPod Touch, or iPhone, download the app.
19 Cheater’s Sewing Repairs in My New Book!
There wasn’t time to demonstrate all the mending tips and tricks on TV—you know, only a half-hour show–so my staff and I gathered additional easy ideas to add to the tips shown on TV. All 19 tips with illustrations are in the full-color book, Quick Stitch to Wear Again.
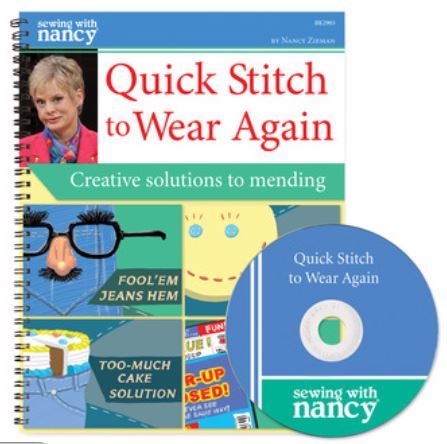
For a chance to win a copy of Quick Stitch to Wear Again, simply leave me a comment sharing which of these mending tips you need the most. A winner will be randomly selected and announced on September 10.
Don’t forget to submit your table runner in my Fall Table Runner Challenge! Click here to see how to enter. Make sure you are subscribed to my enews mailing list so you won’t miss a thing. Sign up here.
Bye for now,
Content in this feed is © copyright 2015 by Nancy Zieman and may not be republished without written permission. You’re welcome to forward the email to a friend or colleague but it’s not okay to add the RSS feed automatically as content on a blog or other website.
August 25, 2015
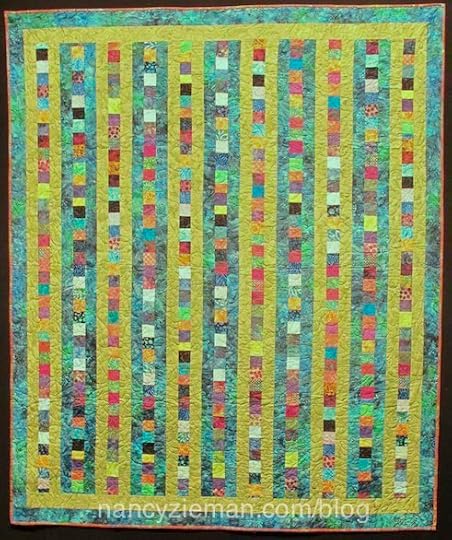
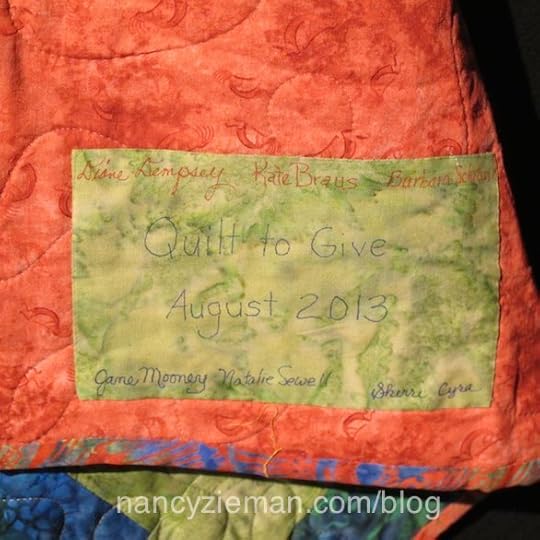
Quilt to Give—Free Quilt Instructions

Sewing a quilt and giving it as a gift is gratifying. Sewing a quilt for someone in need or who is going through tough times shows compassion. Most importantly, the recipient feels loved. Win. Win!
This will be the forth year that the Quilt to Give quilt pattern will be sewn and quilted during the annual Quilt Expo in Madison, WI, September 10–12. If you aren’t able to be at the event, you, too, can make a twin-sized quilt, then donate it to a local shelter or charity.
I made the first Quilt to Give design in 10-days, sewing a little each day. I chronicled the 10-day journey with full instructions on how to make the quilt on my blog. My hope is that sometime in the near future, you or your quilting group will consider making this easy quilt design made with columns instead of blocks and then give it away. Hence the name Quilt to Give.
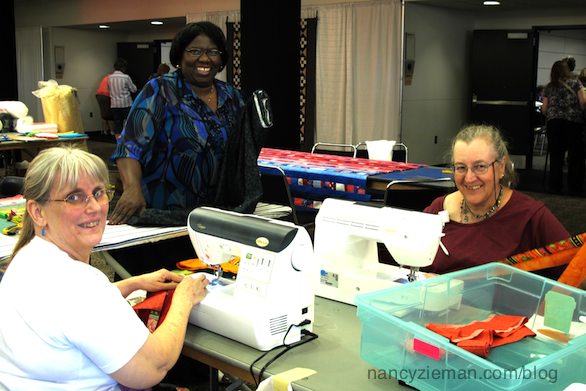
Quilt to Give community service project
The project will again be the community service project at our annual Quilt Expo, Last year over 25 twin to queen-sized quilts were made and/or donated by participants.
Several kind souls presented us with completely finished quilts
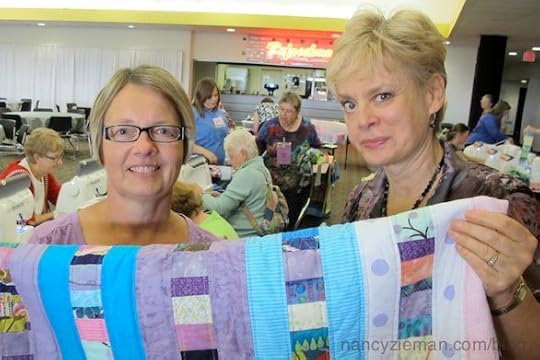
Quilting groups also took on the challenge
Others donate time during the Quilt Expo event
Twin-sized quilts are in demand
I know that I’ll see some of my blog readers at the Quilt Expo in Madison, WI, September 10–12, 2015. For most of you, the logistics of attending aren’t in the cards. Yet, I encourage you to make one of these easy Quilt to Give projects with the intent of giving it away!
This year we’re asking for twin-sized quilt donations—that is the size we’ll be sewing during the event, too. Why? The two organizations that will be receiving the finished quilts, Enchanted Makeovers and Domestic Abuse Intervention Services (DAIS) both requested this particular size. Enchanted Makeovers services women’s shelters and Domestic Abuse Intervention Services (DAIS) is a woman’s shelter with twin-sized beds in each room.
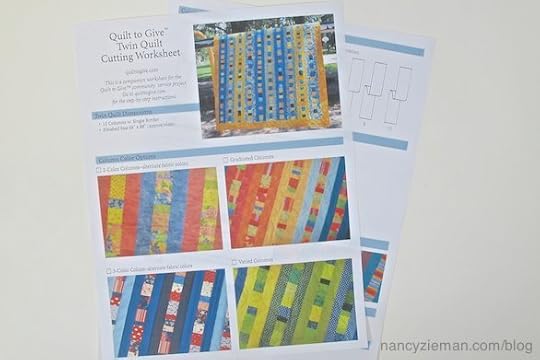
Make a quilting plan
Download the twin-sized quilt worksheet. Click here to download the twin-sized quilt worksheet . It will assist you in sorting and cutting fabrics.
Sort fabrics from your stash. Begin by selecting a print or prints that will be used as the inspirational fabrics. Then choose other fabrics that coordinate with the inspirational fabric.
Gather solid-color fabrics that coordinate or match with the inspirational fabrics. Choose many solids or mottled fabrics (subtle prints that appear as solid colors from a distance) as possible for this project. Click here to read the full lesson on sorting fabrics.
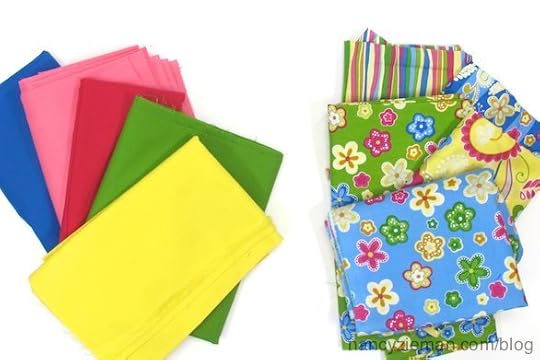
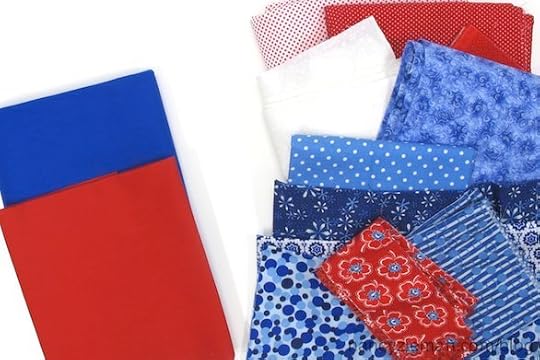
Determine which fabrics will be the outside columns (the more solid the better) and which will be used for the scrappy center columns. Fill out the worksheet to denote which fabric colors will go where.

Free online instructions
For links to all 10 Quilt to Give lessons, click here or visit QuiltToGive.com.
The Easiest Ever Quilt to Give Design
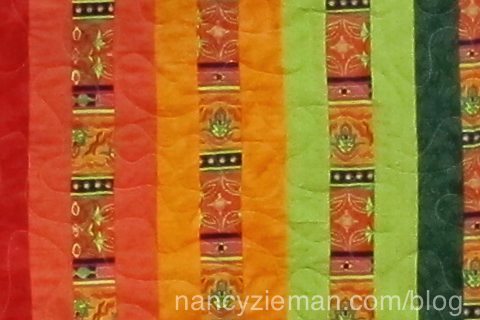
During our first community quilting project, a donation of four yards of striped fabric with a salsa flavor was given. Great donation, but it just didn’t seem to fit with any other fabrics.

Then it dawned on me to use the striped fabric as the center section of each column—no piecing needed for the center columns! You’ll find optional fabric cutting instructions when using a stripped fabric when you download the twin-sized quilt worksheet
The gift is in the giving!

I enjoyed reading all your comments regarding my new Swing Jacket pattern from my blogs on August 11 and August 18 .
The winner of McCall’s pattern M7201 is Diana G. She said: Oh so many fabrics one could make this out of… but I think velvet would be the preference for me. Thank you for the chance to win!

Bye for now,
Nancy Zieman—author, pattern designer, businesswoman, producer, and national sewing authority—is the host of the popular show Sewing With Nancy, which appears exclusively on public television stations across the United States and Canada. Follow Nancy’s blog at NancyZieman.com/blog and sign up to receive Nancy’s E-News for the latest news in sewing, quilting, & creating.
Content in this feed is © copyright 2015 by Nancy Zieman and may not be republished without written permission. You’re welcome to forward the email to a friend or colleague but it’s not okay to add the RSS feed automatically as content on a blog or other website.
August 22, 2015
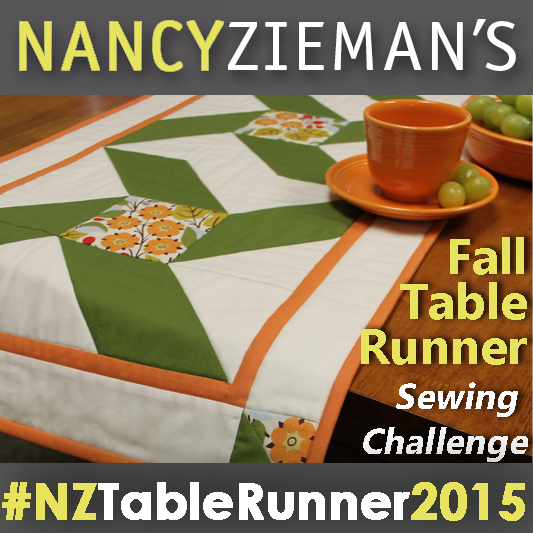
2-Hour Table Runner Sewing Project

Are you already planning to enter the Fall Table Runner Challenge? Showcase your favorite quilting, sewing, embellishing, or embroidery techniques. The guidelines are listed below.
Today I’m sharing a table runner that you can easily create in 2-hours—my kind of home décor project! Renaissance Ribbons, Silk Dupioni, and a little thread are all you’ll need. The ribbon is the unifying element in this design.
Fabric and Ribbon Supplies:
1/2 yard of two coordinating colors of Silk Dupioni
1 yard each of three ribbons
Monofilament thread
Note from Nancy: I selected the ribbons first, fabric second. This collection of Renaissance Ribbons has five options, well, really seven. The narrow ribbons are reversible!

Cut and Stitch the Table Runner
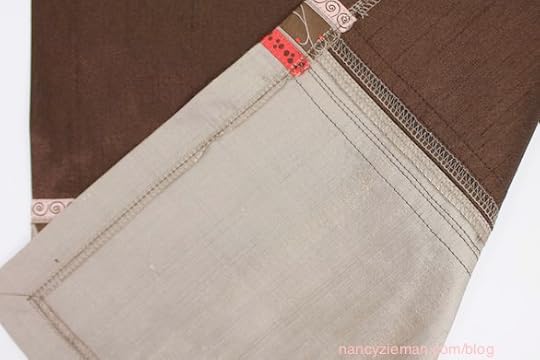
Cut one 18″ x 48″ section for the center of the table runner (dark brown)
Cut two 18″ x 10″ sections from the lighter fabric (beige)
Serge or zigzag the edges.
Pin the lighter fabrics to each end of the darker center fabric, matching the 18″ cut edges.
Stitch a 1/4″ seam; press.
Cut the ribbons in half, creating 18″ lengths.
Position and topstitch the ribbons over the seam. Use monofilament thread in the needle.
Note from Nancy: Oops, we forgot to take a photo of the table runner before turning and stitching the hem. Please visualize the table runner as a flat piece of fabric!
Miter the Corners of the Table Runner
The instructions will result in a 1″ hem.
Measure and mark 2″ from each side of all corners on the wrong side of the fabric.

Place a strip of tape, such as Sewer’s Fix-It Tape , on the wrong side of the fabric between the two marks, extending the tape at each end.

Fold the corner to a point, right sides together, aligning the marks and the tape.
Stitch from mark to mark, following the tape.

Trim the seam to 1/4″; remove the tape.

Turn mitered corners right side out. Fold up and press the remaining 1″ hem edges of the table runner. Topstitch 3/4″ from the folded edges.
Your table runner is complete. Find more time-saving sewing tips like this one in The Absolute Easiest Way to Sew , a beginner’s sewing guide that includes my tried and true sewing tips.
The size will be approximately 18″ x 48″.

Create this pattern or any table runner to enter into the challenge. You may enter up to four different table runners. Table Runners must be completed within the last year.
For this challenge, use a link tool. Click the “add link” button (below) to enter your projects directly to the gallery. (Once button is clicked–it may appear as a workable link). Deadline for photo entries is September 14, 2015.
Fall Table Runner Sewing Challenge Guidelines
Select or create your design.
All sewing, quilting, serging, machine embroidery, and embellishment techniques are eligible!
Grab our Fall Table Runner Sewing Challenge blog badge to let your friends know about this fun Fall Table Runner Sewing Challenge.
Remember to share your progress and projects on your social media sites using the hashtag: #NZTableRunner2015
Upload your photo(s) by September 14, 2015.
Online voting begins September 15, 2015.
Voting closes on September 19, 2015.
Winners will be announced September 22, 2015.
An InLinkz Link-up
Go Social with Your Fall Table Runner Sewing Challenge

[image error]
If you have a website, copy the code above and paste it into your website editor to have the Fall Table Runner Sewing Challenge badge on your site. If you are on social sites like Instagram, Twitter, Flickr, or Facebook, let all your friends know you are working on the Fall Table Runner Sewing Challenge by tagging your post with the hashtag: #NZTableRunner2015
————————
A Total of $1000 in Prizes for the top vote contenders:
Top Ten Winners: F+W Media will provide a copy of 50 Fat Quarter Makes, a $250 value

First Place: Bundle of Nancy Zieman Products and Notions from Clover, a $200 value

Second Place: Create With Nancy Five Book Collection, valued at $177.94

Third Place: Quilter’s Package from June Tailor, a $107 value

Fourth Place: Pellon Bundle Package, a $105 value

Fifth Place: Autumn Array Cotona Thread Pack from Maderia, a $76 value

Sixth Place: Nancy’s Notions Tool and Notion Bundle, a $63 value

Seventh Place: A pattern collection from Quilting Creations International, a $60 value

Seventh Place: Klasse Needle Pack from Klasse Needles, a $32 value

Enter the Fall Table Runner Sewing Challenge by adding a photo or photos in the link listed above. It’s easy! Use the above link tool and click the “add link” button. Your entry will appear directly in the gallery. (Once button is clicked—it may appear as a workable link). Plus share your comments below about the Fall Table Runner Sewing Challenge and let us know if you plan to join!
Get Stitching!
Email challenge questions to info@ziemanproductions.com. Challenge not open to sponsors, employees, and immediate family members. Photos and techniques may be featured in future promotions, blog posts, videos, and/or TV shows.
Nancy Zieman—author, pattern designer, businesswoman, producer, and national sewing authority—is the host of the popular show Sewing With Nancy®, which appears exclusively on public television stations across the United States and Canada. Follow Nancy’s blog at NancyZieman.com/blog and sign up to receive Nancy’s E-News for the latest news in Sewing, Quilting, Creating, and Block of the Month updates.
Content in this feed is © copyright 2015 by Nancy Zieman and may not be republished without written permission. You’re welcome to forward the email to a friend or colleague but it’s not okay to add the RSS feed automatically as content on a blog or other website.
August 20, 2015
1 Handbag Sewing Pattern—5 Different Options!

Handbags—many of us are obsessed with them. We have bags for travel, totes for shopping, and handbags for special occasions. It’s no wonder that I’m asked sewing questions each week on how to create bags. To share innovative tips and handbag sewing upgrades, I’ve devoted a two-part Sewing With Nancy series that you can watch online.
Handbag #1: Cinched Tote
Kicking off this second episode is the cinched tote. Made with double-quilted fabric, a continuous or infinity strap weaves in and out of the grommets providing flexibility and expandability at the same time. It’s easy to make and enjoyable to carry.
Did you know that you can create piping with the serger? You’ll learn that sewing tidbit when you watch the show or follow along in the book.

When you unleash the cinch, you’ll find loads of room. I’ll show you how to modify your handbag pattern or template to add grommets and make infinity straps, using Create-A-Strap. It’s rather magical!

Handbag #2: Yoga Tote
With a few modifications, turn your handbag into a handy Yoga Tote with adjustable infinity straps. Not into Yoga? Use it for a picnic tote with convenient storage for a blanket. Or, make another option for going to the beach and easily store lofty towels. Regardless, it’s a handy carryall with many possibilities.

Learn how to add tabs made with Fuse ‘n Bind to the tote or bag to make it a carryall for mats, blankets, and towels.

Handbag #3: Monogrammed Faux-Leather Bag
Simple details—that’s what I like in handbags. Adding a monogram provides an elegant statement without adding clutter. Stitch the embroidered accent on faux leather, faux ostrich fabric to be exact, and master two new sewing skills while creating one trendy handbag.

Embroidery tips on vinyl include:
Using a 75 Universal needle
Backing fabric with lightweight fusible interfacing
Hooping the stabilizer, not the fabric

Handbag #4: Ribbon-Accent Bag
If you watched the first episode of this series, you already saw this handbag. With this design I detailed how to add the inside support and construction of a handbag from the bottom up! (You have to tune in to see the details!)

Handbag #5: Market Tote
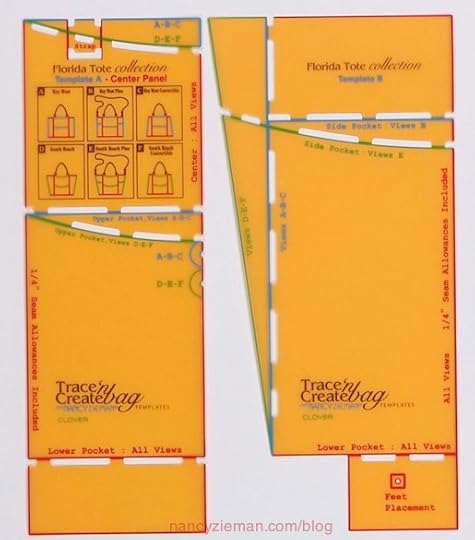
This handbag or tote incorporates the most requested upgrade—a customized recessed zipper. (I know you can’t see it from this angle, remember the closure is recessed!) Regardless of your pattern, I’ll show you how to make one. If you’re using the Trace ‘n Create Bag Florida Tote Template, you’ll find the patterns printed in the book.
The sewing features of this bag are also shown in the first Sewing With Nancy episode. Click on the blue link to watch online.

Watch Nancy’s Favorite Handbag Sewing Techniques online.
To watch Sewing With Nancy on your iPad, iPod Touch, or iPhone, download the app.

New Book and DVD

Handy Florida Tote Template Set !
This is the pattern that I used to create all five bags. I prefer templates as the shape and size never changes.

Don’t forget to enter my Fall Table Runner Challenge—$1000 in total prizes!
Click here to see how to enter. Make sure you are subscribed to my enews mailing list so you won’t miss a thing. Sign up here.
Bye for now,
Content in this feed is © copyright 2015 by Nancy Zieman and may not be republished without written permission. You’re welcome to forward the email to a friend or colleague but it’s not okay to add the RSS feed automatically as content on a blog or other website.
August 18, 2015
Finish an Easy-to-Sew Swing Jacket

Sewing a jacket may sound overwhelming, but not so when you use my new pattern, from The McCall Pattern Company. The swing style with asymmetrical or cropped styling is flattering to wear and best of all, streamlined to sew.

In last week’s blog you learned how to construct the basic jacket—shoulders, sleeves, and side seams. Today, you’ll see how a continuous facing finishes the back neck, front, and hemline edges—neat—clean—nice!
Facings
Press fusible interfacing to wrong side of the Back Neck and Front Facing pieces, following manufacturer’s instructions.
Serge or zigzag outer edges of Back Neck Facing, Front Facing, Front Hemline Facing, and Back Hemline Facing.
Stitch Facings
Align and pin right sides and match notches of Front Facing and Back Neck Fabric at shoulder seams; stitch seams.

Press seams flat; then open.
Align and pin right sides of Front Hem Facings to Back Hem facing at side seams; stitch seams.
Serge or zigzag outer edges of Back Neck Facing, Front Facing, Front Hemline Facing, and Back Hemline Facing.
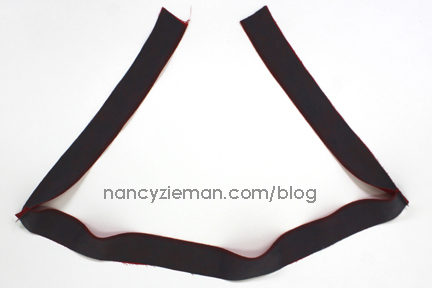
Attach the hem facing unit to the back neck and front facing unit. The facings are all sewn together, creating a facing unit. This unit will finish all the outer edges, including the hemline.

Note from Nancy: The facing unit will be stitched to the jacket, section by section, not in one continuous seam as you might expect. Follow along—the jacket corners will be effortless to sew and turn out perfectly!
Align and pin right sides and notches of facing unit to jacket along the neckline.
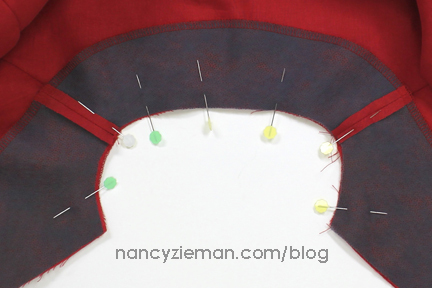
Stitch the neckline seam.
Grade the seam allowance, trimming the facing seam the narrowest width.
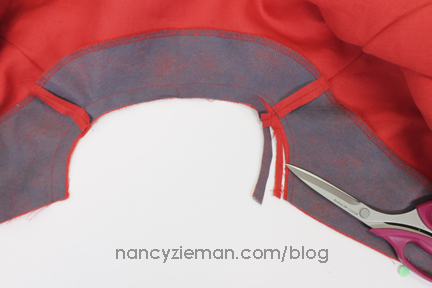
Press the seam allowance toward the facing.
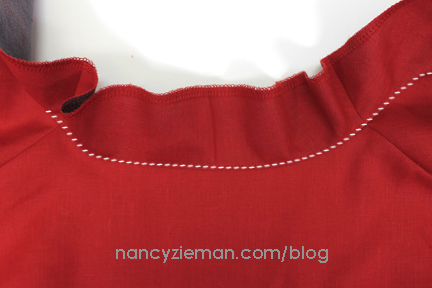
Understitch, stitching the seam allowance to the facing.
Note from Nancy: The white thread has been added digitally, making it easier to see. In real life, I used coordinating thread.
Align and pin right sides and notches of front facing to jacket front.
Note from Nancy: Notice the seam allowances at the neckline corner are already graded and understitched. This sewing process will give you perfect corners! And, as before, the white stitching has been added only to illustrate the stitch. Coordinating thread should be used.

Stitch the jacket front seam.
Grade the seam allowances, trimming the facing seam the narrowest width.

Understitch the seam allowances to the facing, stitching from the hemline to the neckline. Stitch as far to the corner as possible.
Align and pin right sides and notches of jacket hem facing to jacket. Stitch the jacket hem seam.
Grade the seam allowances, trimming the facing seam the narrowest width.
Turn jacket right side out, aligning the seam along the jacket edges; press.
Pin facing to the jacket.

Topstitch Facing to Jacket—Both Views
Set machine for a straight stitch.
Topstitch from the facing side, sewing along the serged or zigzag edge.
Note from Nancy: Generally I would recommend stitching from the right side. In this case, the facing provides a perfect sewing guide, eliminating the need to measure the stitching distance from the outer edges.

Fold up the hem allowance at the sleeve; pin. Topstitch the hem in place.
Stitch a buttonhole on the jacket right front. Cut the opening.
Hand stitch the button to the left side of the jacket front.
For more information on applying facings, creating buttonholes, and grading seam allowances, see my book, The Absolute Easiest Way to Sew.
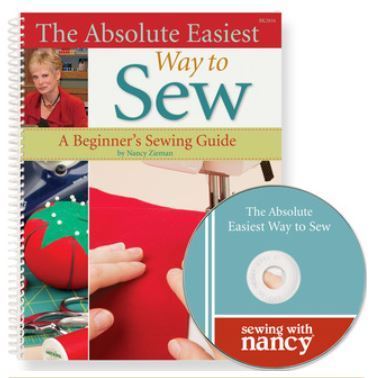
This book is a lifetime compilation of techniques that make sewing fun and easy for all skill levels. You’ll learn about sewing tools, easy sewing techniques, how to use a sewing machine and serger, how to select and use fabrics and patterns, and how easy it is to sew simple projects.
Watch The Absolute Easiest Way to Sew (Part One, Part Two, and Part Three) on Sewing With Nancy online.
To watch Sewing With Nancy on your iPad, iPod Touch, or iPhone, download the app.

For a chance to win a copy of my new Swing Jacket Pattern, simply leave me a comment sharing what fabric type you’ll be using in your jacket project. A winner will be randomly selected on Aug. 25.
Don’t forget to enter my Fall Table Runner Challenge—$1000 in prizes!
Don’t forget to submit your table runner in my Fall Table Runner Challenge! Click here to see how to enter. Make sure you are subscribed to my enews mailing list so you won’t miss a thing. Sign up here.
Bye for now,
Content in this feed is © copyright 2015 by Nancy Zieman and may not be republished without written permission. You’re welcome to forward the email to a friend or colleague but it’s not okay to add the RSS feed automatically as content on a blog or other website.
August 15, 2015
2015 Adventure Quilt Block of the Month #8

The eighth Block of the Month in The 2015 Adventure Quilt is the Quarter Lone Star. Using the Trace ‘n Create Quilt Templates— Lone Star Quilts Collection, create a simplified version of a quilting classic using fabric scraps from your quilting collection. Stitch the Lone Star block without any dreaded Y-seams.
Notions, Fabrics, and Supplies:
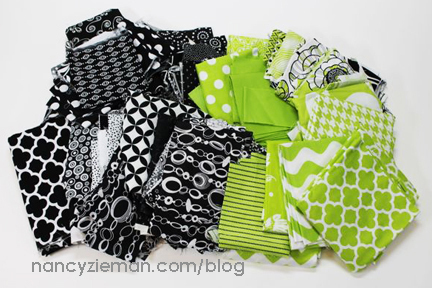
Get started by choosing fabrics. Any three-color combinations will work. I had a surplus of black, white, and chartreuse green in my quilting fabric scraps. If you’ve been following along, you know that this Block of the Month series is a scrap fabric adventure.
Month: Quarter Lone Star
All blocks in The 2015 Adventure Quilt measure 12-1/2″ x 12-1/2″, creating a 12″x 12″ finished block. 1/4″ seam allowances are included.
Supplies:
Assorted Fabric Scraps
Trace ‘n Create Quilt Templates— Lone Star Quilts Collection
Fine Tip Non-Permanent Marking Pen
Glow Line Tape (optional)
Build a Strip Set
Gather 7–9 fabrics to arrange and audition for the strip set.
Fabrics should be at least 14″ long.

Note from Nancy: Use small widths of the darkest fabric for the greatest impact.
For my block, I cut seven fabrics in the following strip widths:
2-1/2″ x 14″
4″ x 14″
2-1/4″ x 14″
3-1/2″ x 14″
1-1/4″ x 14″
2-1/2″ x 14″
1-1/2″ x 14″

Stitch strips together using a 1/4″ seam allowance.
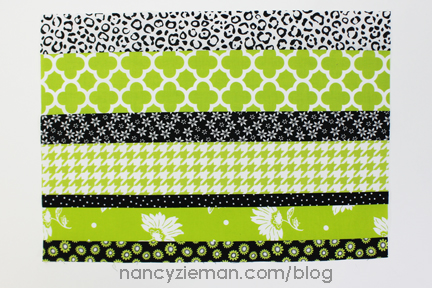
Press seam allowances towards the darker fabrics.

The finished strip set measures approximately 15-1/2″ x 14″.
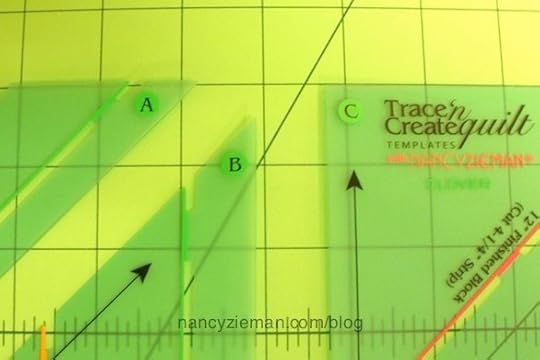
Trace Shapes
Use templates labeled as “24-inch” Finished Block
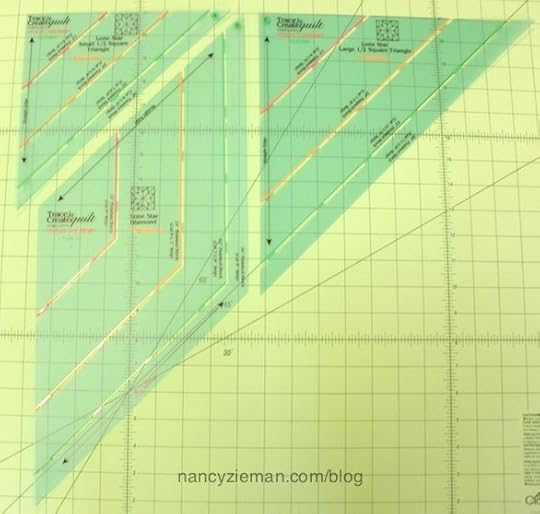
The templates are marked in the upper corners with either A, B, or C. You’ll find that helpful when assembling the blocks.
Spritz the strip set with your favorite spray starch alternative. Then, press to add extra crispness.
Position Template B (diamond shape) onto the wrong-side of the strip set.
Trace with a non-permanent marking pen .

Allow a 1″ space between the diamond shapes, and trace a second diamond.
[image error]
August 13, 2015
Nancy’s Favorite Handbag Sewing Techniques

Weekly, one of the top searched topics on my blog site is how to sew handbags. Even though I’ve presented numerous Sewing With Nancy programs on the topic, I am glad that you want more bag sewing tips. Why? I too enjoy creating handbags and totes.
Welcome to a new season of Sewing With Nancy to my first of two episodes, Nancy’s Favorite Handbag Sewing Techniques, which you can watch online.
What You’ll Learn in this Episode of Sewing With Nancy
Start with a Favorite Bag or Tote Pattern, or Templates
During this two-part series, you’ll see five different handbag options all made using the Trace ‘n Create Bag Florida Tote Template.
It’s What’s Inside that Counts
The foundation for all bags and totes is what’s inside. Here’s how I give shape and support when sewing bags and totes.
Fuse interfacing to the back of the bag pieces. I like to use ShirTailor .
Cut another layer of interfacing, Peltex, and machine baste along the edges.
Finally add a layer of Create ‘n Shape , a bag and tote plastic stabilizer, to the base of the bag/tote. It stitches like a hot knife to butter, but must be held in place prior to sewing with double-sided basting tape .

Use Ribbons for Classic Accents
A collection of Renaissance Ribbons that I designed inspired the first bag idea. The ribbons make a statement as pocket accents and are also used to accent the designer handles.
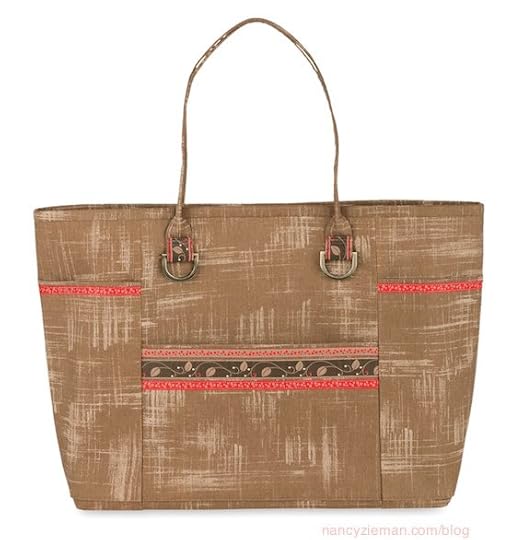
I like to make visual decisions visually, a quote I’ll always remember from Sewing With Nancy guest, Lorraine Torrence. Some of the ribbons are reversible. Auditioning them on the fabric made the decision easy.


Apply Designer Straps
Checking out ready-made bags, I found straps that were 1″ wide at the base and sewn in the handle area. Nice! Learn how to use Create-a-Strap, D-Rings, and ribbon to copy brand-name designs.

Create a Market Tote
I mentioned earlier that sewing handbags is a frequently requested topic, specifically how to add a zipper to a pattern that doesn’t include one. The Market Tote addresses that need. It’s big, roomy, and most importantly, a secure bag with a recessed zipper closure.

You’ll learn how to custom-sew a recessed zipper to fit any tote or handbag.


Then, learn how to modify handles, making them arched!

Watch this New Episode of Sewing With Nancy online.
To watch Sewing With Nancy on your iPad, iPod Touch, or iPhone, download the app .
Don’t forget to enter my Fall Table Runner Challenge—$1000 in prizes!
Click here to see how to enter. Make sure you are subscribed to my enews mailing list so you won’t miss a thing. Sign up here.
Bye for now,
Content in this feed is © copyright 2015 by Nancy Zieman and may not be republished without written permission. You’re welcome to forward the email to a friend or colleague but it’s not okay to add the RSS feed automatically as content on a blog or other website.
August 12, 2015
Nancy Zieman’s Facebook Page Hacked!

Monday, the Nancy Zieman Facebook paged was hacked/stolen. It was totally my fault. This is what happened.
I received a message from Facebook along with their logo, stating that my account would be suspended because I violated their policy and that I needed to verify my account or they would temporarily shut it down. I filled out the form with my login information. Stupid—I know better than that.
That night I could no longer access my administrator account. When I went to my Facebook page I found posts for all sorts of unrelated products. My password was changed and I could not delete the posts.
We are currently working on gaining back control of my Facebook page. But it is not happening very quickly. Thanks to many of you who reported the hack and to those of you who are working to help my team regain control of the site.
Lessons to learn from my big mistake:
Do NOT click or share any of the non-sewing or quilting posts. Likely, the purpose of the perpetrator is to achieve financial gain from clicks and/or sales.
Never give out your password. (I know this and you know this – but did I follow my own advice? No.)
Have a different password for each internet/social media account.
Have patience. We hope to gain back control in the near future.
Egg on my face and feeling mighty stupid,

Nancy Zieman's Blog

- Nancy Zieman's profile
- 21 followers


![[image error]](http://www.nancyzieman.com/blog/wp-content/uploads/2015/08/Nancy-Zieman-Block-of-The-Month-7-f.jpg)