
Nancy Zieman's Blog, page 126
June 25, 2015
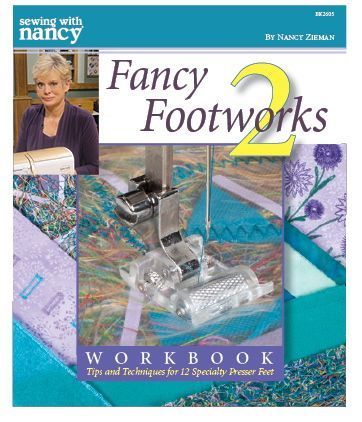
How to Use Sewing Machine Presser Feet
Do you ever wonder how to use specialty sewing machine presser feet? You’re not alone! Many of us rarely change presser feet and subsequently never reap the creative benefits of sewing.
The goal of my three-part Sewing With Nancy, Fancy Footworks 2, series is to put your mind at ease and show you exactly how and when to use theses sometimes unique-looking feet. In the first episode, get the inside scoop on an Invisible Zipper Foot, a Walking Foot, a Roller Foot, a Satinedge Foot, and a Teflon Foot .
For the next three weeks, the episodes from this three-part series will be the featured Sewing With Nancy online videos. Click here to watch the first, second, and third episodes, plus you can reference the printed information in the book, Fancy Footsworks 2.
First, the Invisible Zipper Foot
It was designed to do one thing and do that process well, namely to use when inserting an invisible zipper. In this TV show, I break down the process in a few simple steps.

The Roller Foot
For smooth sailing over varied thicknesses of fabric, stitching napped fabrics, and sewing on tacky surfaces, use the Roller Foot. See it in action gliding over fabric, alleviating the “pushing” on the underside of the foot as the feed dogs “bite” the fabric. The Roller Foot also works great when making Thread & Trim Pizza. Tune in to learn the recipe.


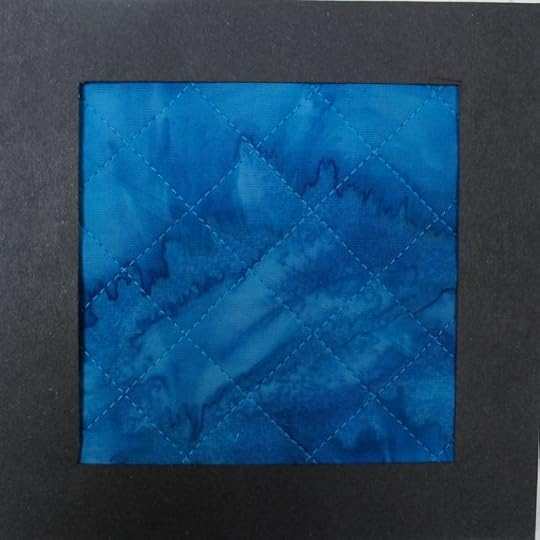
The Walking Foot
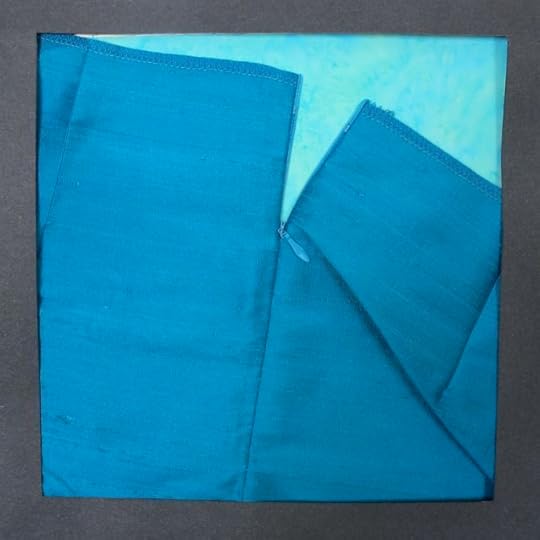
My third featured foot makes the edges of a seam meet perfectly. Or, quilt multiple layers of fabric without shifting when using a Walking Foot. It’s a hard-working presser foot that most sewing and quilting enthusiasts shouldn’t be without.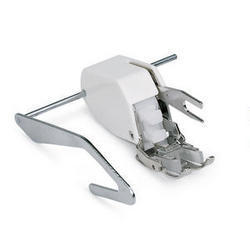
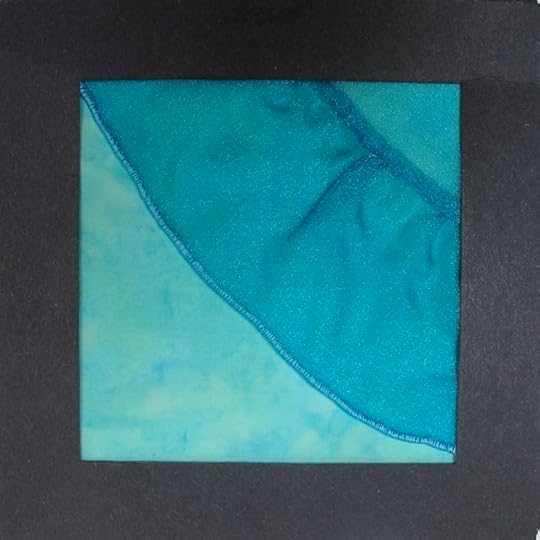
The Satinedge Foot
When a satin edge or appliquéd edge is next on your sewing agenda, use the Satinedge Foot. Designed with an even zigzag stitch in mind, this specialty foot provides a uniform stitch, ideal for finishing edges.

Watch F ancy Footworks 2 ( Part One , Part Two, and Part Three) on Sewing With Nancy online.
To watch Sewing With Nancy on your iPad, iPod Touch, or iPhone, download the app.

 Now that you are acquainted with these assorted presser feet, which one will you try first? Let us know in the comments for a chance to win Fancy Footworks 2 Workbook. A randomly selected winner will be announced on July 16.
 Congratulations. The random winner of the Sew Techie Covers book is Nancy Lewis who said: Oh my. My Christmas list just got a big boost. Everyone that has an iPad or Kindle will be getting a new cover!! Thanks for the great giveaway!!
 Bye for now,

Content in this feed is © copyright 2015 by Nancy Zieman and may not be republished without written permission. You’re welcome to forward the email to a friend or colleague but it’s not okay to add the RSS feed automatically as content on a blog or other website.


June 23, 2015
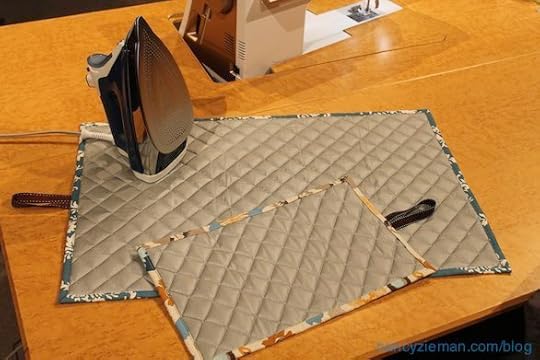
Make a Notions or Jewelry Caddy—A Sew Simple Project
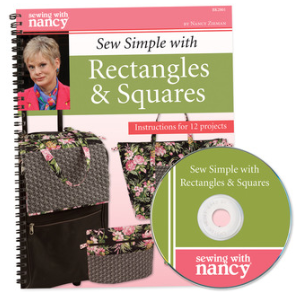
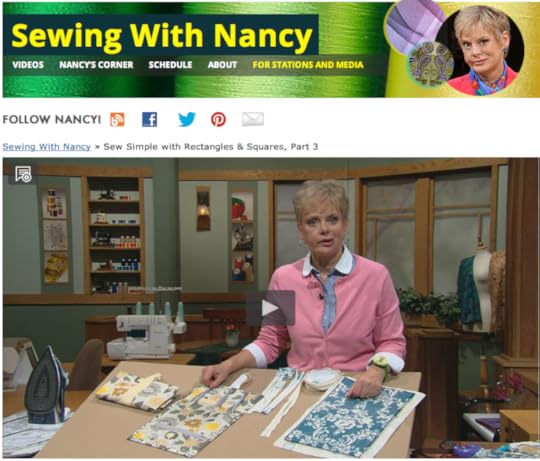
Incorporating specialty fabrics, such as clear vinyl, can add functionality when sewing gifts and projects. This unique and widely available fabric is the star of the Sewing With Nancy program, Sew Simple with Rectangles & Squares—the third episode. Watch online by clicking here.
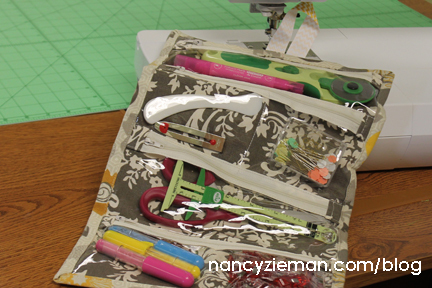
If you are planning to attend sewing retreats, sew-ins or simply heading out on a family vacation, create a Jewelry Caddy, which nicely doubles as a Notions Caddy and is featured in a Sewing With Nancy online tutorial.
Here’s a preview of the project that you’ll see demonstrated during the show. Exact measurements and detailed instructions can be found in Sew Simple With Rectangles & Squares.
 Supplies, Fabric, and Notions:
One 12″ x 18″ outer fabric rectangle
One 10″ x 16″ inner fabric rectangle
One 10″ x 16″ piece of clear vinyl fabric
One 10″ x 16″ piece of polyester fleece batting
Make-A-Zipper or four 9″ zippers
One yard 5/8″ wide ribbon
5-in-1 Sliding Gauge
Double-sided basting tape
Permanent Marker
Teflon Presser Foot
Clover’s Wonder Clips
Construction:
Note From Nancy: In some photos the clear vinyl is laid on top of the fabric so you can more easily see it. I hope this doesn’t confuse you as we construct the Notions Caddy. For more clarity, watch the video demonstration online.
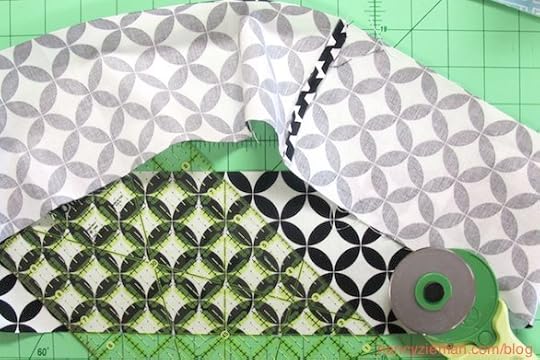
Use the 5-in-1 Sliding Gauge to measure 1″ from the clear vinyl fabric rectangle’s short edge to determine the first zipper placement.
Mark a line parallel to the short edge with a permanent marker.
Use a measured or folded method to divide the vinyl equally into four pocket sections.

If you are using Make-A-Zipper , measure the 9″ zipper length, making sure that you have a zipper tape on each section. Bartack on each end of the zipper before cutting them apart.
Wrap a 2-1/2″ square of inner fabric around each zipper end, staring at the underside of the zipper and meeting right sides together.
Stitch 1/4″ from ends through fabric and zippers.
Turn fabric right side out over ends of four zippers.
Optional: Place d ouble-sided basting tape
on the wrong side of the zippers along both tape edges.

Layer inner fabrics on a flat surface in this order:
-Polyester fleece batting
-Inner fabric
-Clear vinyl fabric

Remove paper baking from double-sided basting tape.
Position the zippers over the marked lines.
Baste layers using Wonder Clips instead of pins.

Topstitch the zippers to the clear vinyl fabric layer.
Note from Nancy: Use a Teflon Presser Foot to stitch on vinyl. The smooth foot will glide over the unique fabric and allow for easier stitching. If you do not have a Teflon Foot, see the tip for sewing with vinyl in the video.
Trim away vinyl from the underside of the zipper between the stitching lines.
Trim excess zipper length flush with the vinyl edges.

Lay the vinyl onto the inner fabric/fleece stack.
Stitch pockets though all inner layers, along the top edge of each zipper tape.

Optional: Decide which pockets you would like to subdivide. Stitch vertical lines through the center of the vinyl, starting at the lower edge of the zipper tape and ending at the upper edge. Do not sew through the zipper teeth.

Add the wide ribbon closure to outer fabric by folding the fabric in half lengthwise to determine the center. Press.
Fold outer fabric in half again meeting short edges to determine center. Press.
Place a pin 4″ from the lower edge of the outer fabric rectangle, along the center press mark.
Place cut edge of ribbon at center point and inner edge along vertical fold. Pin.
Align the ribbon so it ends at the 4″ pin mark. Loop the ribbon back along the opposite side of the press mark, allowing the loop to extend 3″ past the cut fabric edge.
Fold under 1/2″ of ribbon end and overlap at the starting point.
Use the measurements provided in the Sew Simple with Rectangles & Squares book to secure the ribbon closure to the outer fabric.

Bind the edges by centering the rectangles stacked in the following order:
-Outer fabric, wrong side up
-Polyester fleece batting
-Inner fabric, right side up
Fold long cut edges of outer fabric to meet the cut edge of the inner fabric. Press.
Fold long edges a second time to cover the cut edges.
Edgestitch along inner folded edges.
Miter the corners by folding the short end corners at a 45° to meet the cut inner fabric edge.

Fold the short edge to meet the inner fabric cut edge.

Fold a second time to cover the cut edges.
Edgestitch along inner folded edges.
Fold and pin the ribbon handle out of the way while you sew.

All that is left for this project is to fill each pocket with your favorite sewing notions or jewelry!

Also in Sew Simple with Rectangles & Squares:
Portable Ironing Blanket
Make a portable mini-ironing blanket, and use it next to your sewing machine for quick presses. Or, create a larger ironing blanket, any size of your choice, with the same portability. It could easily be used as an ironing board substitute or for travel. Either way, you can custom-make these projects easily with my sew simple techniques.
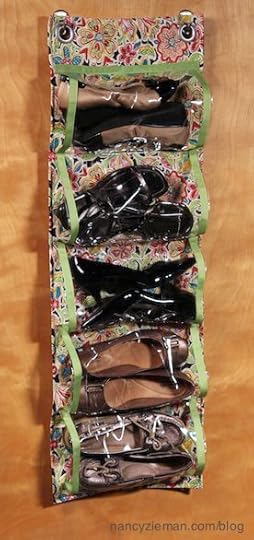
Closet Organizer
How about adding extra storage to your home without assembling knock-down furniture or remodeling a closet? Create portable, compact closet organizers with double-sided quilted fabric, clear vinyl, and ribbon trim. It’s another straight-stitched project that can hang in full sight or hidden behind a closet door.
Watch Sew Simple With Rectangles & Squares (Part One, Part Two, and Part Three) o n Sewing With Nancy online.
To watch Sewing With Nancy on your iPad, iPod Touch, or iPhone, download the app.
What’s your favorite project from this series? A random winner will receive a copy of Sew Simple with Rectangles & Squares book. Look for the announcement on June 30.
12 Complete Projects are featured in Sew Simple with Rectangles & Squares
Bye for now,
Content in this feed is © copyright 2015 by Nancy Zieman and may not be republished without written permission. You’re welcome to forward the email to a friend or colleague but it’s not okay to add the RSS feed automatically as content on a blog or other website.
June 20, 2015
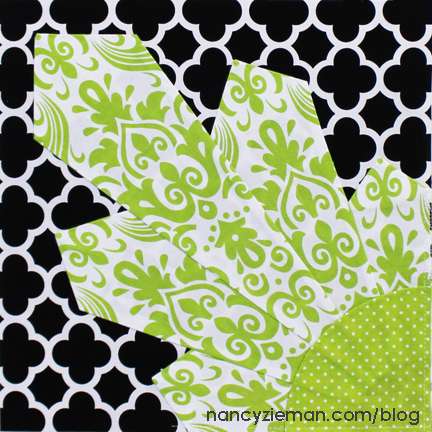
2015 Adventure Quilt: Block of the Month #6

Can you believe we are half way through our block of the month adventure? This sixth Block of the Month is the Art Deco Dresden. The modifications to a traditional Dresden block give a striking new look to an old favorite. Using the Sew Grand Dresden Templates, the Dresden sections are pieced and easily machine appliquéd. You may recall that we also used this template set in January’s Block #1 and April’s Block #4. As a bonus, this block has two appliqué size variations; make one or both.
The series of blocks will go together in The 2015 Adventure Quilt. Join us on our journey as we stitch our way through many quilting fabrics and scraps using lots of different techniques.
This quilt will be a scrap adventure. Total yardage for the entire quilt is not provided. Rather, we will be working in a color palette of scraps (or Fat Quarters).
If you’d like this block pattern as a downloadable PDF, please click the “Print Post as PDF” button at the lower right of this post.
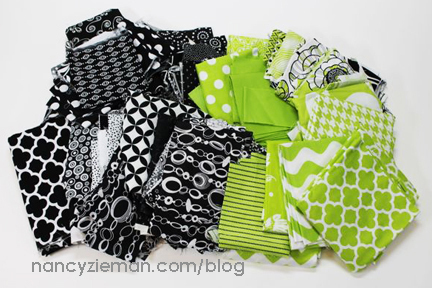
Notions, Fabrics, and Supplies:
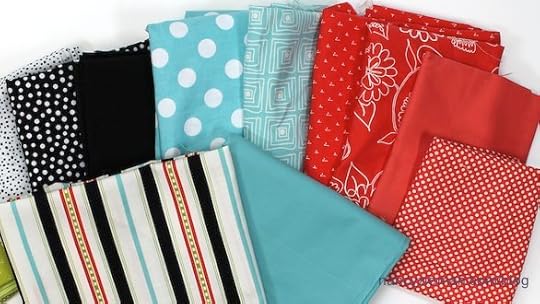
Get started by choosing fabrics. Any three-color combinations will work. I had a surplus of black, white, and chartreuse green in my quilting fabric scraps.
Month: Art Deco Dresden
All blocks in The 2015 Adventure Quilt measure 12-1/2″ x 12-1/2″, creating a 12″x 12″ finished block. 1/4″ seam allowances are included.
Supplies:
Assorted Fabric Scraps
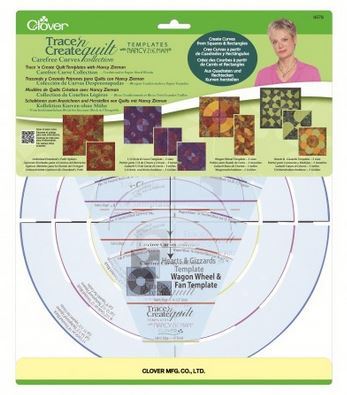
Trace ‘n Create Dresden Templates
Sof Shape Interfacing
Fine Tip Non-Permanent Marking Pen
Trace and Cut
For the smaller appliquéd design (green background with a black and white appliqué):
Cut a 10-1/4″ crosswise strip. Then trace one 12″ Dresden wedge (center), aligning the template on the fabric between the 12″ Dresden Wedge marking and the lower edge, which is the same as the 4-1/2″ circle marking.
Cut a 6-1/4″ and a 4-1/4″ crosswise strip. Then trace two 8″ and 6″ wedges. Again, align the template between either the 8″ or 6″ Dresden Wedge markings and the lower edge.
Note from Nancy: If you are only making one block, cut a partial crosswise strip or use scraps of fabric. You’ll only need a small amount of fabric for each wedge.

Rotary cut along the marked lines.


For the larger appliquéd block (black background with a green and white appliqué):
Cut a 13-1/4″ crosswise strip. Then trace one 16″ Dresden Wedge (center), aligning the template on the fabric between the 16″ wedge marking and the lower 6-1/2″ circle marking.
Cut a 9-1/4″ and a 5-1/4″ crosswise strips. Then trace two 12″ and 8″ wedges. Again, align the template along the 12″ or 8″ Dresden Wedge marking and the 6-1/2″ circle line.

Note From Nancy: The wedges in this block were fussy-cut to create a secondary design. The translucent templates make it easy to center the template over a specific portion of the fabric design.

Both the larger and smaller appliqué shapes will be constructed in the same manner.
Fold each wedge in half lengthwise.

Use a 1/4″ seam allowance to chain stitch the short ends of all Dresden wedge shapes.

Clip chain stitching threads.

Finger press the seams open. Turn each wedge right-side out.
Make a pressing template from a 4″ square of tag board. Draw a straight line from corner to corner.
Insert pressing template between fabric layers, aligning seam with a straight line. Press.

Stagger the five wedges.
Matching right sides together, align the smaller pair of wedges.
Use a 1/4″ seam allowance to stitch along the shortest wedge.

Press the seam allowance AND the unstitched edge of the larger wedge towards the wrong side of the larger wedge. In some cases, the “press towards the darker fabric” will not apply. It is ok.

Repeat these steps to add the remaining three wedges.
Create the Quarter Circle
A 4-1/2″ quarter circle was used for the smaller appliquéd block and a 6-1/2″ quarter circle was used for the larger appliquéd block.
Cut one fabric and one interfacing square to create a 4-1/2″ or 6-1/2″ quarter circle, 2-1/2″ and 3-1/2″ squares respectively. Directions are given in the packaging for the Trace’n Create Dresden Template.
Lay the smooth side of the interfacing on the right side of the fabric.
Using a fine tip marking pen to trace the quarter circle onto the interfacing.

Pin the two layers together, matching right sides.

Straight stitch directly on the marked curve.

Use a rotary pinking blade to remove excess fabric.

Remove the excess interfacing from within the circle, leaving approximately 1″ of interfacing.

Turn the interfacing to the wrong side with a turning tool .

Press.


Appliqué and Finish
Position the stitched wedge shape in one corner of the block, matching the cut edges of the block with the cut edges of the wedge.
Pin in place.

Use monofilament thread to edgestitch around the points.
Baste along the cut edges within the 1/4″ seam allowance.


Position the quarter circle over the wedges aligning the cut edges of the corner.
Pin and edge stitch with monofilament thread .

Ta Dah! The June block is complete. Six down, six to go!
Share your 2015 Adventure Quilt Blocks Socially
If you have a blog site, website, or online social sewing group, feel free to grab the code and share this button.

If you are on social sites like Instagram, Twitter, Flickr, or Facebook, let all your friends know you are working on The 2015 Adventure Quilt Blocks by tagging your post with the hashtag: #NZBoM.
The hashtag is a searchable “word” associated with an event or activity, which, when searched on popular social websites, like Instagram, Twitter, Flickr, and Facebook, will show every single post using that hashtag. Even if you don’t personally know that stitcher, you’ll see her/his progress and a photo. Hashtags are a fun way to network and connect with people who share similar interests.
What would a Quilt Look Like?
As part of this Block of the Month series, included are ideas of what a quilt might look like if you made it with only this month’s block. Some of the concepts have sashing and others do not. These quilts are a good way to brainstorm what this block looks like repeated.
Arranging the directional Art Deco block around a center point creates this medallion style quilt.

This quilt creates the illusion of floral clusters by grouping four blocks together and meeting the center quarter-circles.

With traditional quilt sashings, this quilt features the strong diagonal line created in each block, to create a crisscross directional effect over the entire quilt design.

Watch Sew Grand Dresden Quilts on Sewing With Nancy online.
To watch Sewing With Nancy on your iPad, iPod Touch, or iPhone, download the app.
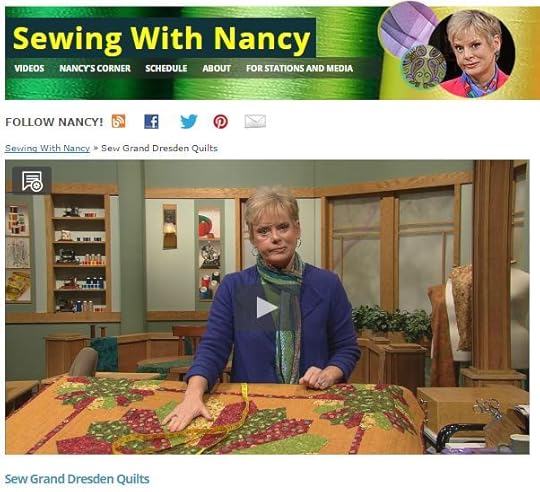
Read and watch more about all the different quilt designs you can create with the Sew Grand Dresden Templates.

In the 2015 Adventure Quilt Block of the Month series, we’ll be making twelve fun blocks from five different templates/tools: Carefree Curves Template , Dresden Template , Grandmother’s One Patch Template , Lone Star Template , and the No-Hassle Triangles Gauge .
See all the 2015 Adventure Quilt Blocks HERE.
An InLinkz Link-up
Watch for the next block to arrive on the third Saturday of each month!

The random winner of a Trace ‘n Create Carefree Curves Template set from Clover is Betty. She said: I started sewing when I was very young and thought I knew everything about sewing until I started watching your TV shows. I’ve got many of your books and have learned many, many things. Love it and I am going to make the little boat quilt. I have four little great grandchildren that would love them. Thank you Nancy for getting me back to sewing.
Bye for now,
Content in this feed is © copyright 2015 by Nancy Zieman and may not be republished without written permission. You’re welcome to forward the email to a friend or colleague but it’s not okay to add the RSS feed automatically as content on a blog or other website.
Nancy Zieman—author, pattern designer, businesswoman, producer, and national sewing authority—is the host of the popular show Sewing With Nancy®, which appears exclusively on public television stations across the United States and Canada. Follow Nancy’s blog at NancyZieman.com/blog and sign up to receive Nancy’s E-News for the latest news in sewing, quilting, and creating.
June 18, 2015
Here’s a Project for a Leftover Quilt Block

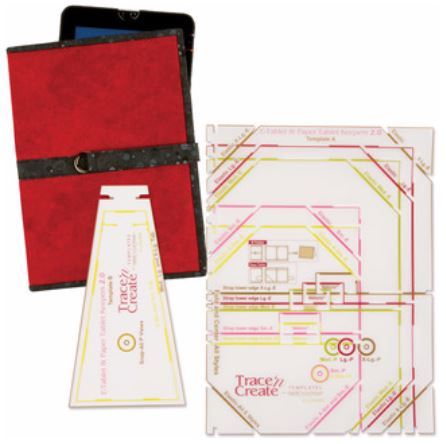
Do you have any leftover quilt blocks floating around your sewing area? Use one of those orphan blocks as part of a cover for an e-tablet or paper-tablet cover. You’ll make a statement and give that quilt block a good home!
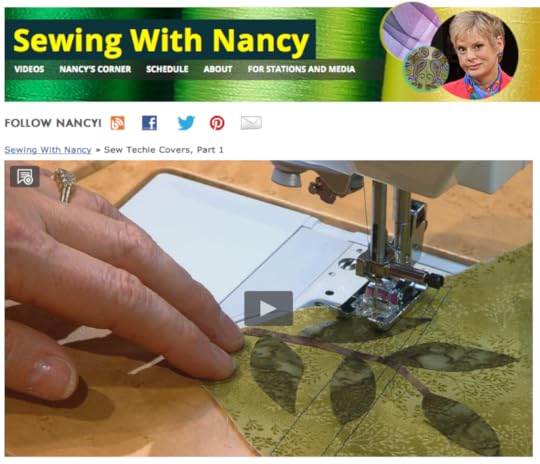
During the Sewing With Nancy two-part TV series of Sew Techie Covers, I featured 12 different creative ways to sew covers for your electronic or paper tablets. Click here to watch the second episode of Sew Techie Covers. You can also watch the first episode by clicking here.
Preview of Two of the Projects You’ll See on Sewing With Nancy
Showcase a Leftover Quilt Block to Make a Paper-Tablet Cover
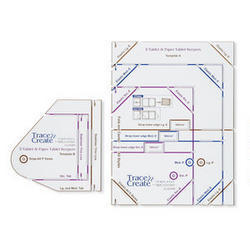
Use the largest size of the Trace ‘n Create Template–E-Tablet & Paper Tablet Keeper. Trace and cut out the background fabric.
Then, use a leftover block such as a 12″ Dresden appliqué. My staff and I created the appliqué using the Trace ‘n Create Quilt Template—Dresden Collection and topstitched the design in the center of the rectangle.
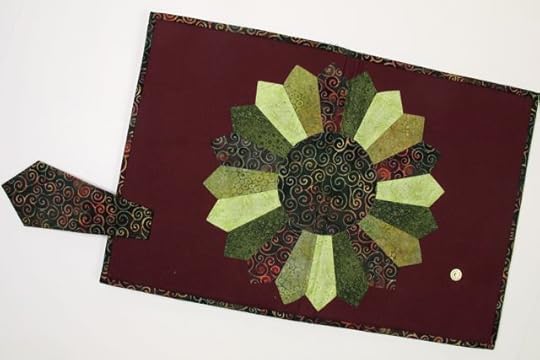
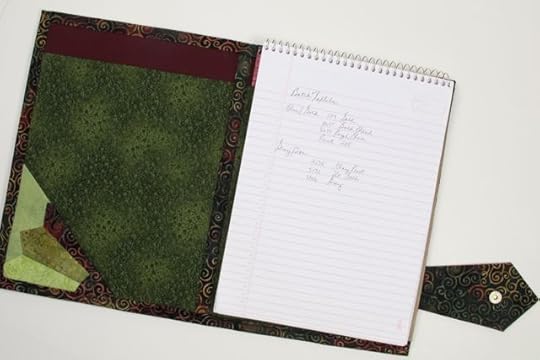
A partial Dresden Fan block was ideal for the inside pocket of my Paper Tablet Keeper.
Watch the Sew Techie Covers episode to see exactly how to create the Dresden appliqué and then, apply it to the tablet keeper. The details are also in the companion book.
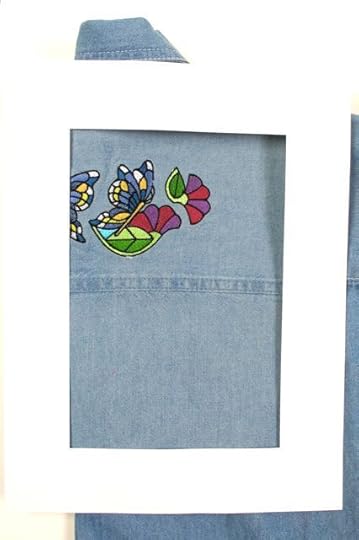
E-Cycled Cover for your iPad, Kindle Fire, Nook . . .
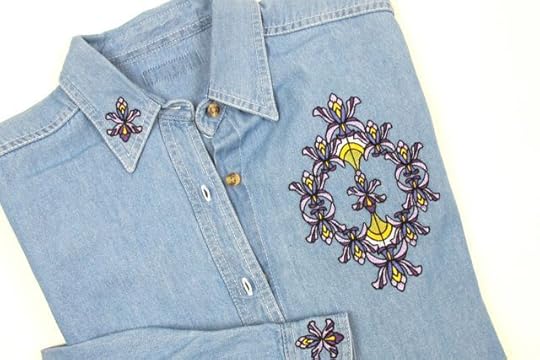
Do you have an embroidered shirt that’s just hanging in the back of your closet? Give it a new life as a tablet keeper cover. I called this Sew Techie technique an E-Cycled Cover—embroidery that’s recycled!
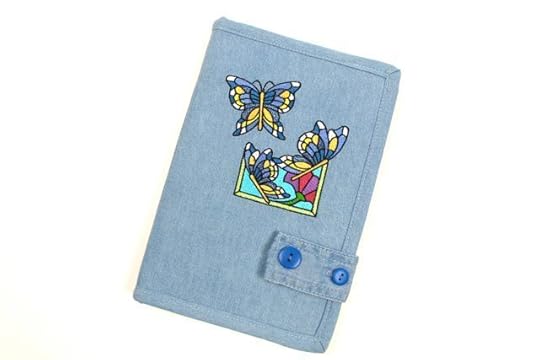
Select an embroidered shirt (or other embroidered project) that’s been hiding in the back of your closet.
Select the original Clover’s Trace ‘n Create Tablet Keeper Template for an iPad, iPad Mini, or the original Kindle. (There are more tablets that fit the original Tablet Keeper.) Click here to view the original Tablet Keeper Template device listing .

Select the newer Tablet Keeper, Trace ‘n Create Tablet Keeper Template 2.0 , for the Kindle Fire, Nook, and many more. Click here to view the Tablet Keeper 2.0 device listing . If you don’t see your tablet listed, email us at info@ziemanproductions.com and we’ll add your electronic device to the listings.
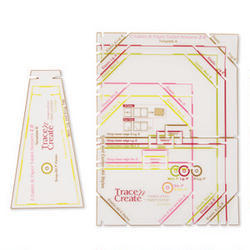
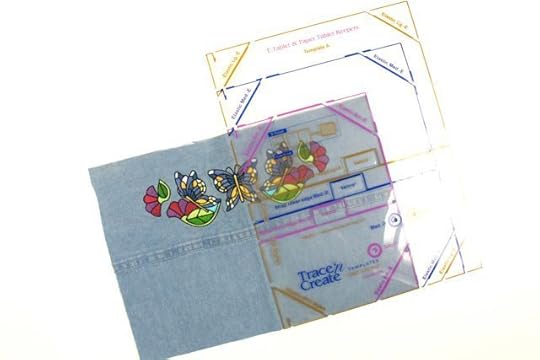
Trace tablet keeper size on paper and cut out a “window.”

Audition the placement. In this example, the embroidery is across the center back. In the above photo, there would not be enough embroidery for the front and back, necessitating a seam at the spine.
Trace the template size on the shirt and then cut it out. Follow the instructions for stitching the pieces together.
There’s more on TV and in the book!
This is just a sneak preview of some of the Sew Techie Covers you can create. All the specifics can be found in the Sewing With Nancy companion book.
Watch Sew Techie Covers (Part One and Part Two) on Sewing With Nancy online.
To watch Sewing With Nancy on your iPad, iPod Touch, or iPhone, download the app.


Make and embellish a tablet cover of your own, or give one as gift. Here is your chance to win this Clover’s E-Tablet & Paper Tablet Keeper Template set by leaving a comment telling us how many covers you think you’ll make. One winner will be selected randomly and announced on June 25.

Bye for now,
Content in this feed is © copyright 2015 by Nancy Zieman and may not be republished without written permission. You’re welcome to forward the email to a friend or colleague but it’s not okay to add the RSS feed automatically as content on a blog or other website.
June 16, 2015
Our Family’s Barn Quilt

Just as fabric quilts have their own history, so do barn quilts. Before paint was readily affordable, some creative farmers decorated their building with leftover paint depicting different types of folk art, often including quilt block designs. In early 2000, the barn quilt trend was reinvented, now the movement is growing exponentially.
For Christmas, I received a gift certificate from my mom for a barn quilt to hang on our forth-generation family farm. Mom got the idea after reading that Menasha, WI High School drawing and paining students under the direction of Erin Culligan planned to design and make 20 wooden barn quilts as part of their semester assignment. She immediately signed up!
Nancy’s Spool
I drew out a design—obvious, why I chose a spool—and emailed it to the art teacher. The High School class began painting in January.

The two sections of the 8′ x 8′ barn quilt were delivered this spring.

Several weeks ago, relatives who own the right equipment, were given the task to assemble their first quilt. Lucky for them, this quilt is made of wood. No 1/4″ seam allowances necessary!


The final touch, my mom’s idea, was to add above the window the year the homestead was settled—1883. My great-grandparents Theodore and Alice Larson were the first settlers; followed by my grandparents Loyall and Georgina Larson; my parents Ralph and Barbara Luedtke; and now my husband and I are pleased to keep this homestead in the family. It is filled with history and wonderful memories.

Many thanks to my mom, Barbara, and my step-father, Warren, for the terrific gift!

Photos courtesy of Wendy Brockman.
Learn More About Barn Quilts
Last year I interviewed Suzi Parron, author of “Barn Quilts and the American Quilt Trail Movement.” Watch the Sewing With Nancy interview online.
Post a photo of your favorite barn quilt on my Facebook page!
Bye for now,
Content in this feed is © copyright 2015 by Nancy Zieman and may not be republished without written permission. You’re welcome to forward the email to a friend or colleague but it’s not okay to add the RSS feed automatically as content on a blog or other website.
June 13, 2015
Carefree Curves Sailing Quilt

Here’s an easy quilting tutorial that details how to sew a nautical-style quilt project in just a few hours. Designed by my friend Carol Porter, Education Director for Clover Needlecraft, Inc. The quilt is called Carefree Curves Sailing Quilt—the design makes me smile!
The quilting project finishes at 24″ x 32″, a great wall hanging size. With the Carefree Curves Template set and No-Hassle Triangles Gauge, the construction method can easily be adapted to any size. Take a look at how the quilt was created, making two different sections: machine pieced sailboats and machine appliquéd rings.
Supplies, Notions, and Fabric
Trace ‘n Create Carefree Curves Template Set
No-Hassle Triangles Gauge
Fine tip non-permanent marking pen
Lightweight fusible interfacing
Point 2 Point Turner
Background Fabric
Assorted coordinating fabric scraps OR a Fat Quarter bundle
Create the Sailboats
For each of the three boats, cut the following pieces:
Cut two 2-7/8″ squares: one blue water background and one foreground (for smaller half-square triangles used on the boat).
Cut two 4-7/8″ squares: one white background and one foreground (for larger half-square triangles used as the boat’s sail).
Cut two 2-1/2″ x 4-1/2″ background rectangles.
Cut one 2-1/2″ x 4-1/2″ foreground rectangle (used on the boat).
Layer one background fabric onto one foreground fabric square, matching right sides.
Using the No-Hassle Triangle Gauge , carefully mark a diagonal line on each pair of squares.


Straight stitch a scant 1/4″ from each marked line.

Cut along the center marked line.
Open each set of half-square triangles.
Press seam allowances in one direction, towards the darker fabric.
Note from Nancy: A leftover larger half-square triangle will be created for each boat color-way. Save this extra piece to incorporate into the quilt back or into a future scrap quilt project.

Arrange the boat block by adding in the remaining cut rectangles.

Use 1/4″ seam allowances to join the pieces and create the sailboat.
Repeat for the remaining two boats.

Join the three boat blocks to form the lower row of the quilt.
Create the Rings
Cut eight 2-1/4″ x 11″ strips from the remaining fabric scraps or fat quarters.
Use the Carefree Curves Template Wagon Wheel to trace wedge shapes and curves with a non-permanent pen onto the wrong side of the fabric strips.
Use eight wedges per ring. This quilt requires a total of 32 wedges.


Cut the wedges using a rotary cutter, mat, and ruler.

Arrange the fabric wedges into a circle.

Join the wedges using 1/4″ seam allowances, along the diagonal edges.

Press seam allowances open.

Pin the ring to lightweight fusible interfacing, right sides together.
Use a straight stitch to sew 1/4″ from the outer edge, curving stitching gently at each seam.

Use a rotary cutter with a pinking blade to remove the excess fabric, as shown.

Carefully remove the interfacing from the center, leaving roughly 1″.

Turn the ring right side out using a turning tool.

Press.

A 7″ circle is needed to create the inner ring. Cut four 8″ squares of background fabric and four 8″ squares of
lightweight fusible interfacing.

Lay the background fabric onto fusible interfacing, right sides together. Trace a 7″ plate on the wrong side of the background fabric. Or use the
Yardstick Compass and set the distance between the points at 3-1/2″ (half of 7″).

Sew along the marked line and use a rotary cutter with a pinking blade to remove the excess fabric.

Trim the interfacing from the center, leaving roughly 1″.
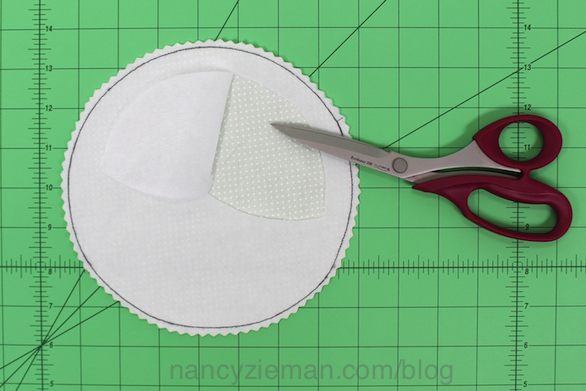
Turn the background circle right side out using a turning tool, such as the
Point 2 Point Turner.

Press.

Use a straight stitch to machine appliqué the background circle over the ring center, concealing the cut edges.

Each ring will finish at 11″ in diameter.
Create the Quilt
Note from Nancy: With the size of this small wall hanging, you have several options for the background fabric. Choose to simply cut a square 24-1/2″ x 24-1/2″ and evenly distribute the ring shapes for machine appliqué. Or, you can do as we did. Cut four squares each measuring 12-1/2″ x 12-1/2″. Using the individual blocks allows you to accurately center each ring.
Cut background fabric.
Arrange the rings.
Edgestitch around each shape. Press.
Join the row of sailboats to the lower edge.
Create Any Size Quilt
Using the Carefree Curves Templates and the easy-to-follow techniques, you can create this quilt in a variety of designs. The key to remember is: Two ring blocks fit above three sailboat blocks. In this digital sample below, I’ve simply eliminated a row of rings and added horizontal borders. The possibilities are endless.

Thank you to Carol for this lovely Carefree Curves Sailing quilt. Carol’s quilting talents are impressive!
Watch Carefree Curves (Part One and Part Two) on Sewing With Nancy online.
To watch Sewing With Nancy on your iPad, iPod Touch, or iPhone, download the app.

For an opportunity to have a Trace ‘n Create Carefree Curves Template set from Clover, simply leave a comment telling us: What is your favorite size quilt to make. A winner will be randomly selected and announced on June 20.
The random winner of a Trace ‘n Create Hobo Tote Bag Template from Clover Needlecraft is Michele Kolodij. Her comment regarding using a border print for a bag or tote was, What a great idea for a unique bag. I’m planning to make a kimono jacket with border print fabric. How wonderful to make a matching bag. I hope I win so that I can make this idea a reality. Thank you for all the great ideas and inspiration you provide!
In my blog titled, Sew with Ribbons—Renaissance Ribbon Bags. I was thrilled to tell you about my new line of Renaissance Ribbons. They are so elegant!
The random winner of the Teal and Lime Ribbon Pack is Paulette Bergman. She said, Ooooh! The Teal and Lime are lovely. What fun! I would love to win these new ribbons. Thank you for the opportunity!

Bye for now,
Content in this feed is © copyright 2015 by Nancy Zieman and may not be republished without written permission. You’re welcome to forward the email to a friend or colleague but it’s not okay to add the RSS feed automatically as content on a blog or other website.
June 11, 2015
Easily Embellish Techie Device Cases
When developing the Sewing With Nancy series on how to create covers for electronic tablets or low-tech paper tablets, it was exciting to see how a small amount of stitching or a creative use of fabric could create a stylish cover. The first of the two-part series, Sew Techie Covers, demonstrates how simple embellishments can transform the practical device covers. Watch the episode online.
In this first episode you’ll learn these three easy stitching techniques:
E-appliqué tips
How to Stitch Techie Circles
Undercover Stitching accents
Choose a Tablet Keeper Template
To create these functional, yet fashionable tablet covers, use Clover’s E-Tablet & Paper Tablet Keeper Templates. There are two template offerings. Why you may ask? Good question: After designing and bringing the first template to market, more electronic tablets with different sizes were introduced. So, a second tablet keeper was needed.
Select the original Clover’s Trace ‘n Create Tablet Keeper Template for an iPad, iPad Mini, or the original Kindle. (There are more tablets that fit the original Tablet Keeper.) Click here to view the original Tablet Keeper Template device listing.

Select the newer Tablet Keeper, Trace ‘n Create Tablet Keeper Template 2.0, for the Kindle Fire, Nook, and many more. Click here to view the Tablet Keeper 2.0 device listing. If you don’t see your tablet listed, email us at info@ziemanproductions.com and we’ll add your electronic device to the listings.
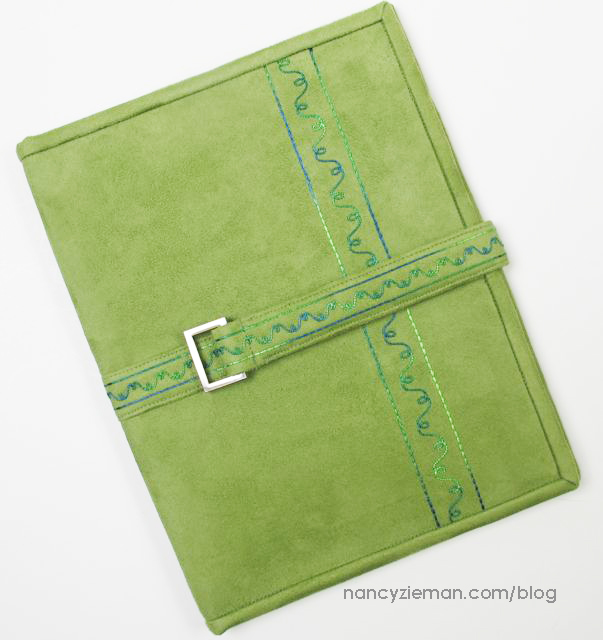
I know that not all of you clicked to watch the video . . . sigh. To give you an idea of what you may be missing, here are the highlights of one of the three easy stitching techniques, Undercover Stitching (otherwise known as bobbin work).
Wind 6- or 12-weight thread in a bobbin, using conventional bobbin winding techniques. I selected Madeira’s Decora 6 wt. thread . Note: If your machine has difficulty winding heavier thread, wind the thread by hand. Thread the needle with all-purpose thread.

Insert the bobbin into the bobbin case.
Back the fabric with interfacing, and add a second stabilizer and length of interfacing in the stitching area. Then, mark the stitching line on the wrong side of the fabric.
Choose a non-satin, decorative stitch. An outline or open stitch is best suited for bobbin work. Lengthen the stitch for best results. Test the stitch on sample fabric.

Check the look of the stitch on the right side. My test stitch had a few hiccups! So, I adjusted the settings, lengthening the stitch. It doesn’t always go perfectly for me either!

Helpful Hint! Some machines handle heavier thread in the bobbin if you bypass the bobbin case tension. In short, don’t pass the thread through the bobbin case tension guide.
Also, test a variety of stitch settings, lengthening/shortening or narrowing/widening the stitch length and/or width. A straight stitch is also ideal! A narrower stitch width setting was used for the strap.

Watch Sew Techie Covers (Part One) on Sewing With Nancy online.
To watch Sewing With Nancy on your iPad, iPod Touch, or iPhone, download the app.
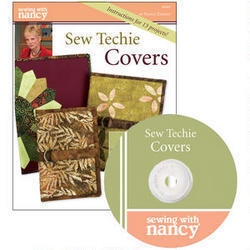
A book with 12 Sew Techie Cover Ideas
The Undercover Stitching idea is just one of 12 techniques found in Sew Techie Covers! Check out all the options!
For a chance to win a copy of Sew Techie Covers leave a comment sharing your ideas for embellishing your tablet keeper. A randomly selected winner will be announced on June 25.
The random winner of the Ultimate Serger Technique Workbook is Barb Steinmetz. Her comment was: I just bought the Evolution at Sewing Weekend and want to learn how to work with decorative threads and the wave stitch.
Bye for now,
Content in this feed is © copyright 2015 by Nancy Zieman and may not be republished without written permission. You’re welcome to forward the email to a friend or colleague but it’s not okay to add the RSS feed automatically as content on a blog or other website.
June 9, 2015
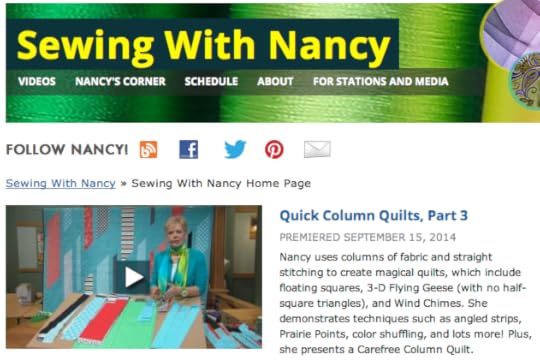
Wind Chime Column Quilt

I am not patient enough to spend months on a large sewing project, despite my love for sewing. One day, I started to brainstorm — how about a quilt with columns instead of blocks! “Column-based quilts” was an idea that grabbed hold of me and more quilt designs flowed. Come with me as I show you the Wind Chime Quilt from my book, Quick Column Quilts.
Today’s quilt is featured in part-three of Quick Column Quilts on Sewing With Nancy. Watch it online. Listed below is the basic technique for creating the Wind Chime Quilt. By the way, all of the instructions for the quilts are found in the book, Quick Column Quilts.
Watch part-one of Quick Column Quilts on Sewing With Nancy online.
Watch part-two of Quick Column Quilts on Sewing With Nancy online.
Wind Chime Column Quilt

The wind chimes hanging from our deck served as the inspiration for this Wind Chime Column Quilt. Just like real wind chimes, the angled accent pieces, seem to move as if gently nudged by the wind. Here’s a little preview of how I designed and made this column quilt:
Auditioning fabrics
You’ll learn how to use a print fabric to audition other fabrics to see if they’re compatible. The striped fabric served as the color inspiration for this quilt. All of the “wind chime fabrics” came from my stash. Once the main print fabric was selected it was easy to find coordinates; making this a great stash buster quilt. Simply add the background yardage to tie the color story together.
Strips
Use the pattern in Quick Column Quilts to create this quilt approximately 80″ x 88″ by cutting assorted background and foreground strips at varied widths.
Diagonal Cuts
Waste not want not: Since some of the fabrics were short on yardage, I designed a way to use almost every inch of a strip.
Match the short ends of each strip.
Use a 1/4″ seam allowance to chain piece each strip, forming a tube.

Clip apart chained pieces.
Press the seam allowance open.

Cut each tube into angled pieces by aligning the fabric along a vertical marking on the cutting mat.
Use the 45° angle on the ruler to make cuts at approximately 1/2, 1/3 or 1/4-length intervals.
Note from Nancy: It might be wise to roughly determine the lengths of the columns and leave spaces for the background fabric. Then, cut the lengths of background fabric to achieve the required column lengths.

Making Columns
Lay out the columns on a large work surface to arrange the design.
Join background and foreground strips using a 1/4″ seam allowance.
Note from Nancy: Off-set the cut edges by 1/4″ to compensate for the 45° angle.

Square the top end of each column, aligning the ruler at a 90° angle and trimming away the excess fabric.

Add a solid background column to the right-hand edges of each pieced column.

Press seam allowances towards the solid background column.

Stitch a solid background column to the left-hand side of the far left pieced column.


Working from left to right, join the column sets.
The Wind Chimes Quilt top is finished. All that is left now is to create your quilt sandwich and apply your favorite quilt designs.
Watch Quick Column Quilts (Part Three) on Sewing With Nancy online.
To watch Sewing With Nancy on your iPad, iPod Touch, or iPhone, download the app.
The random winner from my blog titled Summer Napkins: Sew-Easy Mitered Corners is Connie Douty. She won a Sew Simple with Rectangles & Squares book. Connie said, Thank you for a wonderful idea for hostess gifts to make and take. My mind is whirling with ideas to use: tea light linen, monogrammed for a new bride and groom; bandana prints for Texas barbecues; a colorful gingham check for wedding showers; fun prints for a girl’s birthday party; horses, dinosaurs, planes, and things for a boy’s birthday party; and just on and on using the wonderful colorful theme prints.
Bye for now,
Content in this feed is © copyright 2015 by Nancy Zieman and may not be republished without written permission. You’re welcome to forward the email to a friend or colleague but it’s not okay to add the RSS feed automatically as content on a blog or other website.
June 6, 2015
Border Prints—Perfect for Sewing Bags

Fussy cutting fabric isn’t just for quilting! After finding inspiration from a designer handbag, I knew a border print would present a great alternative to a plain bag.
Border print fabrics are readily available and easy to fussy-cut. If you aren’t familiar with the term, fussy-cut, it means to feature a certain portion of the textile print in your sewing design. In this bag design, we feature the border. Using the Trace ‘n Create Hobo Tote Template collection, the designer upgrade is quite simple.
Supplies, fabric, and notions:
Fusible Pellon Peltex Interfacing
Fine-tip non-permanent marking pen
Border Print Fabric : Note from Nancy: Use the fabric requirements listed on the Hobo Tote pattern. Keep in mind you may need extra yardage to center the design. The fabric from Lecien is, unfortunately, no longer available. Shop at your local fabric retailer for the newest in border prints.
Trace ‘n Create Hobo Tote Bag Template
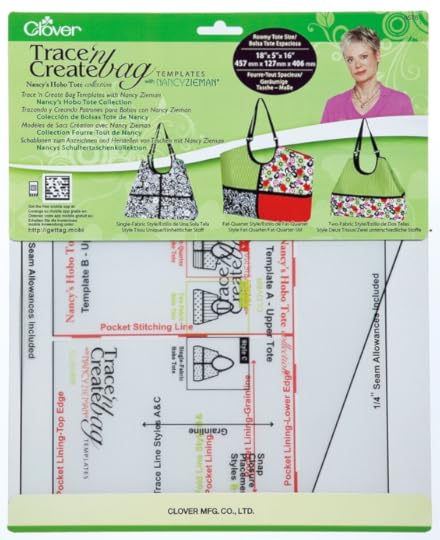
Modify the Template
To easily fussy-cut the border print, we’ll create a full front/full back template from the provided pattern as described in the Hobo Tote: Style B.

Lay the bag template on the interfacing.
Use a non-permanent marking pen to trace around the template marking center front/back. Notice the center is not the edge of the template, but rather the marked seam allowance line shown in yellow.

Flip the template to the left-hand side.
Align the center front markings and trace the left side of the bag.
Make two interfacing templates: one front and one back.

Cut out the interfacing templates.

Position each interfacing shape over the border print.

Note from Nancy: I decided to only showcase the floral portion of the fabric design. Notice that the Peltex is positioned with the bag base plus the 1/4″ seam allowance on the green section.

Cut the shape.
Fuse the interfacing to the wrong side of the fabric, following the manufacturer’s directions.

Repeat these steps to create a bag front and bag back.

Join the bag front and back by stitching the bottom seam.

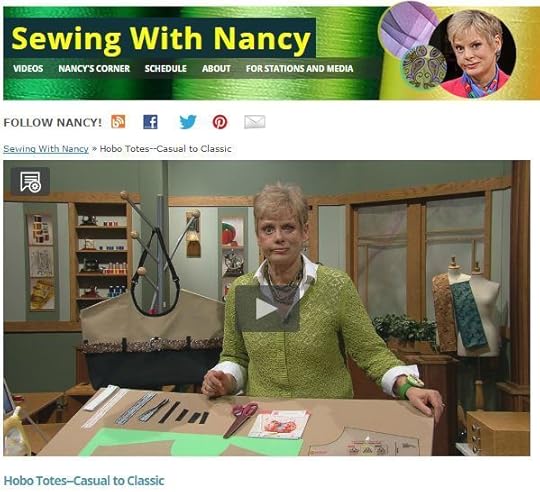
From this point, the border print designer tote can be stitched following the directions for the Hobo Tote: Style B. Read more about the Hobo Tote construction on this blog post.

Watch Hobo Totes—Casual to Classic on Sewing With Nancy online.
To watch Sewing With Nancy on your iPad, iPod Touch, or iPhone, download the app.
For a chance to win a Trace ‘n Create Hobo Tote Bag Template from Clover Needlecraft, Inc., please leave a comment below sharing your plans to make a border print Hobo Tote Bag.
We have three random winners from last week’s blog that showcased my three new bodkin tools. Each winner receives one of the bodkin tools courtesy of Clover Needlecraft, Inc. The winner of the:
Flex ‘n Glide Bodkin is Maryellen who said: This is so exciting! I’ve been sewing forever and usually dread threading elastic through a casing. The safety-pin method rarely works without a tweak or two and makes the job more time-consuming than it needs to be. I guess that can be in the past tense now with these new tools! Great ideas, Nancy!
Clip ‘n Glide Bodkin is Katie who said: These tools seem like they would cut my time and frustration in half! I probably spend as much time threading the elastic as I do sewing the casing. I hope to be able to make it a 10–15 minute sewing task!
Elastic Lock Set is Kathy Smigen who said: These tools would be so useful sewing 18″ doll clothes. I end up having the end of my elastic slip back into the waistband! So frustrating! I also have a long skirt that the 2″ elastic turned over on itself in the waistband. I’m going to have to open the seam allowance and adjust the elastic and the elastic lock would be so helpful when doing this to keep the rest of the elastic in the right orientation. Thank you for your great products, sewing tips, and directions.
Reread last week’s blog to learn more about these new bodkin tools.
Bye for now,
Content in this feed is © copyright 2015 by Nancy Zieman and may not be republished without written permission. You’re welcome to forward the email to a friend or colleague but it’s not okay to add the RSS feed automatically as content on a blog or other website.
June 4, 2015
Take a Serger Technique Workshop at Home
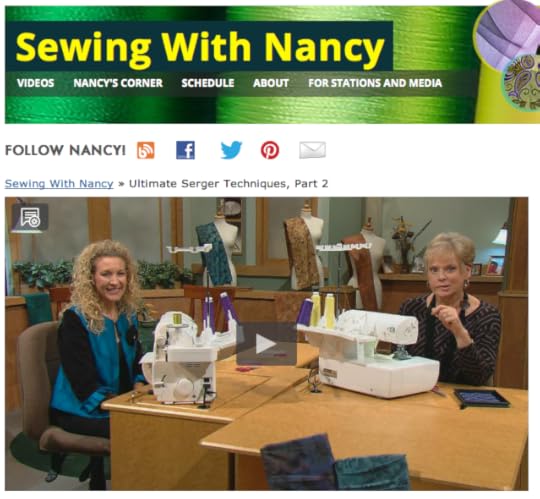
Do you find yourself wishing you had time to take a serger sewing class, yet never finding the time? Solution: take a serger technique workshop at home. Watch Sewing With Nancy online! It’s a 3-part workshop with my guest, Pam Mahshie, Baby Lock’s National Sewing Ambassador.
Here’s a preview of the second episode.
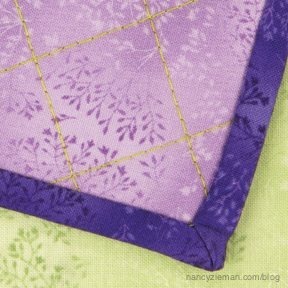
Quilt Binding using a 4-thread overlock stitch
With just a few changes, the basic overlock stitch can be modified to stitch binding on a quilted project. Learn how fusible thread streamlines the sewing process, producing professional results.
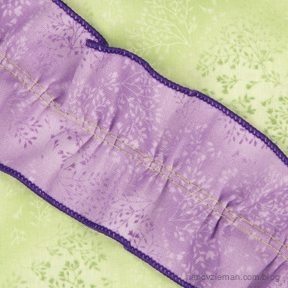
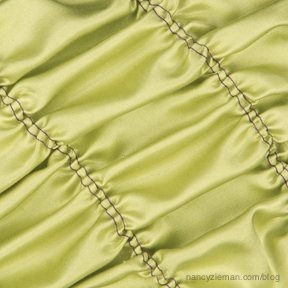
Gathering with a Cover Stitch
If you’ve gathered fabric before, you’ve probably stitched a row or two of basting stitches and then pulled the threads to gather the fabric. Gathering on a serger with a cover stitch can be automatic—stitch and gather at the same time. Curious? Learn now by watching online!
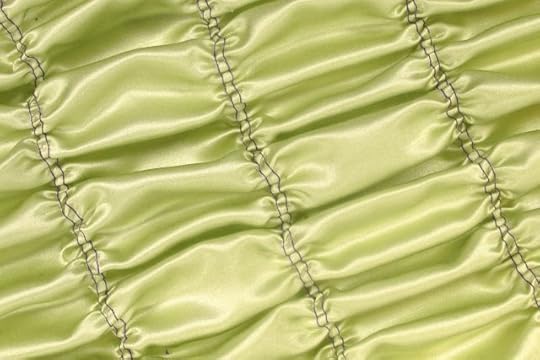
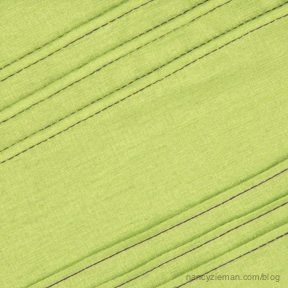
Creating Pintucks
Create texture with pintucks, again using the cover stitch setting. Light to medium weight fabric can easily take on dimension once you know how to set up your serger.
Embellishing with Decorative Threads
Decorative threads and your serger are a prime choice for embellishing. The amazing part of this technique is that the stitching is done from the wrong side of the fabric—the pretty part only shows once the stitching is complete.
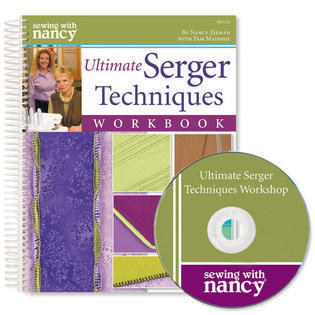
A Serger Workbook with 33 Serger Techniques!
Several seasons ago, Pam and I presented a three-part Sewing With Nancy series simply called the Serger Workshop. The Ultimate Serger Techniques Workshop spiral bound book combines the information from this series. Learn 33 techniques using 10 different serger stitches! Now is your chance to win this workbook by leaving a comment telling us a serger technique you’d like to try. One winner will be selected randomly and announced on June 11.
Watch Ultimate Serger Techniques on Sewing With Nancy online.
To watch Sewing With Nancy on your iPad, iPod Touch, or iPhone, download the app.
Bye for now,
Content in this feed is © copyright 2015 by Nancy Zieman and may not be republished without written permission. You’re welcome to forward the email to a friend or colleague but it’s not okay to add the RSS feed automatically as content on a blog or other website.
Nancy Zieman's Blog

- Nancy Zieman's profile
- 21 followers

