
Bakerella's Blog, page 28
July 8, 2013
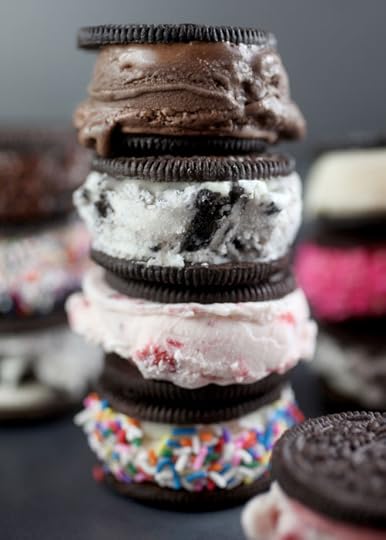
Easy Oreo Ice Cream Sandwiches

Okay, I almost feel silly posting this. It’s sooo so easy, but it makes me way happy when I bite into one that I can’t resist.
It’s the simple things sometimes you know.
I was at Bruster’s the other day getting some ice cream and this poster was staring me back in the face.

Umm duh!! Why have I never ever done this before? And why am I not at the grocery store buying a bunch of Oreos right now.
Side note – Is it bad when the teenager at Bruster’s knows my order when I walk up and he finishes my sentence before I do? What about when the new guy that I’ve never met before knows my order. Is that bad? I’m thinking so. That or either I’m helping inspire great customer service.
Either way, I’m way too excited for this easy ice cream treat. I didn’t try any of them at Bruster’s (I stuck to my regular order of course) so I don’t know if theirs are special larger size Oreos made just for them or if they just use the regular cookies.
But I vote regular cookies. Small and cute ice cream cookie sandwiches. Yes, please.
Okay, this is hard. Please pay close attention.
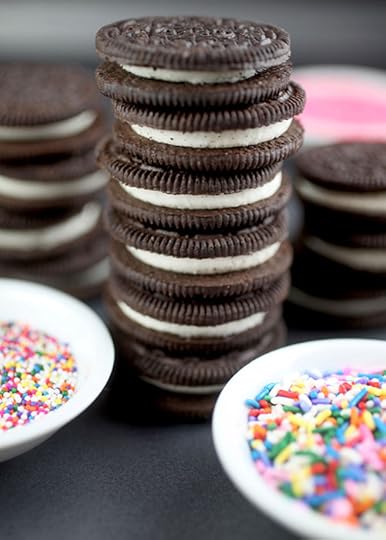
Oreos.
Ice cream.

Sprinkles.

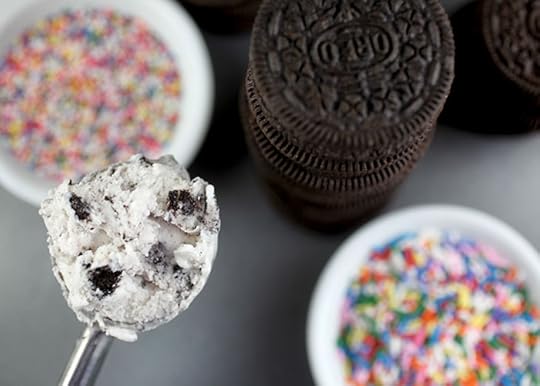
Yum! … and done.
Just use a 1.5-inch scoop to place ice cream in between the separated cookies and press.
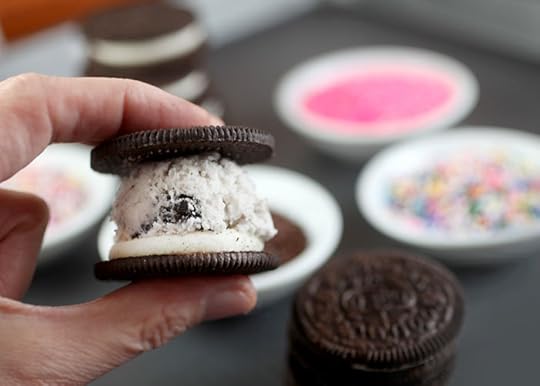
Life. Changed.

Rock and roll them in some sprinkles. Pretty and sweet.
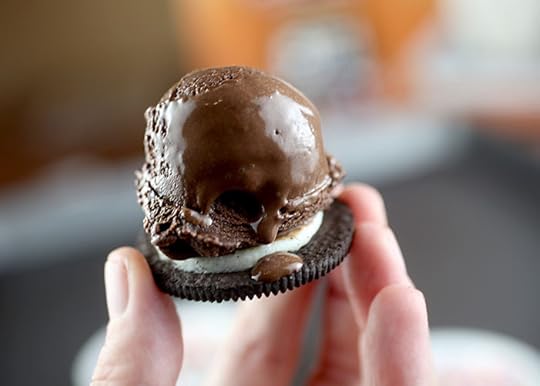
The fun part is having a few flavors to play with. Chocolate is mandatory for me.
And these are totally fun for kiddos, too. Perfect portion-size treats.
You can make a bunch in advance and wrap them in wax paper so you can grab one from the freezer and go when the mood strikes.
Triple chocolate treats. I like.
Now take a load off, smile and go make yourself something sweet and easy!


June 30, 2013
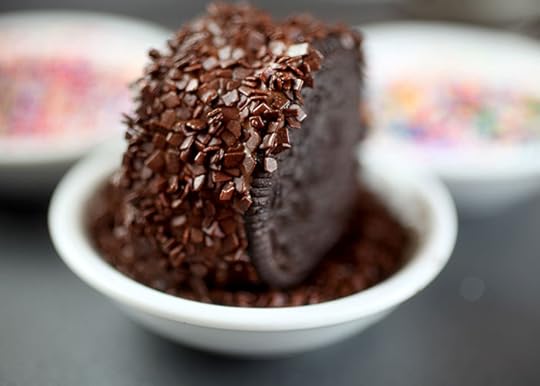
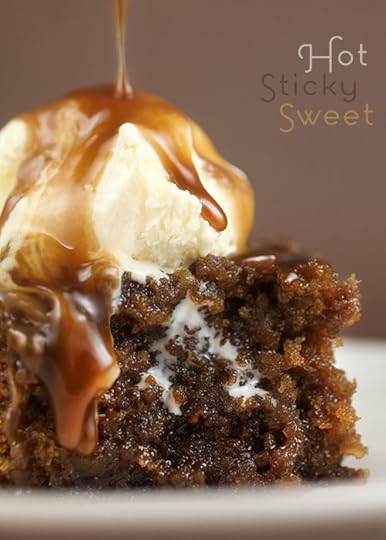
Hot. Sticky. Sweet.
It’s July and it feels like 100 degrees outside so naturally I made something light and refreshing to cope with the heat.
Sticky Toffee Pudding.
Okay, not so much a summertime treat. But hey, I did add ice cream. I should get points for that.
I’ve been wanting to make this for the past several months after I saw the recipe in Martha Stewart Living. I ripped the recipe out to save and this picture has basically been begging me to make it every since.
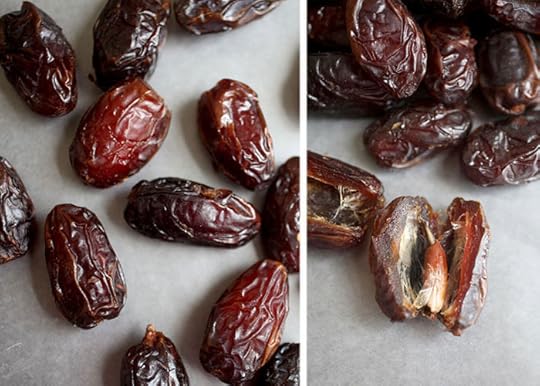
So Sunday was the day. Mainly because I finally came across the Medjool Dates at the Fresh Market that are recommended in the recipe.
Whoppers! Just slice them open, remove the pits and coarsely chop them up for the batter.
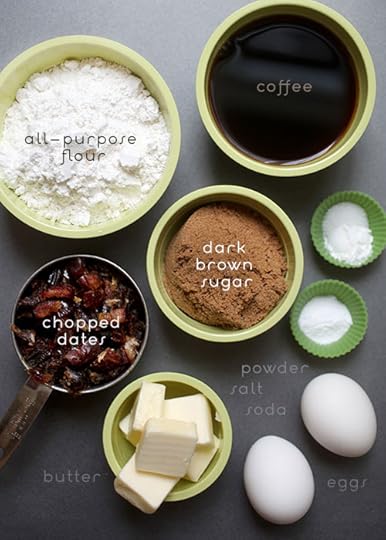
I love that this dessert just calls for a few ingredients.
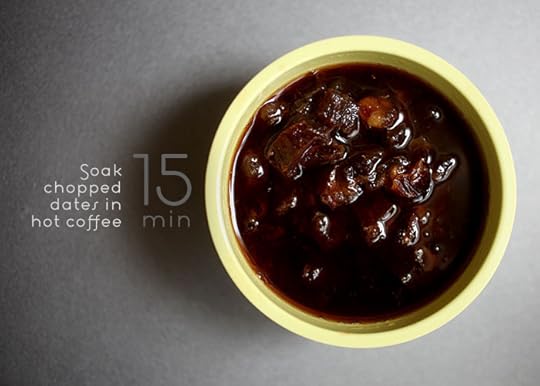
And that the dates get soaked in steaming hot coffee. Again… so summery.
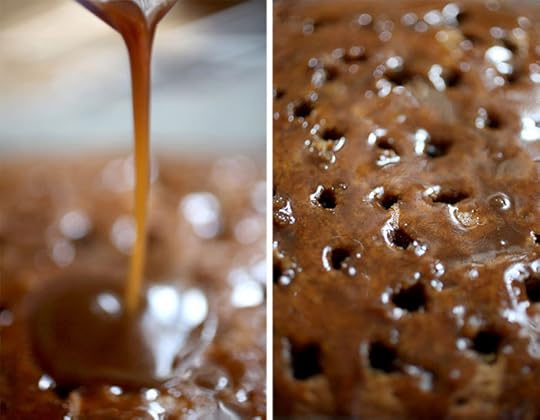
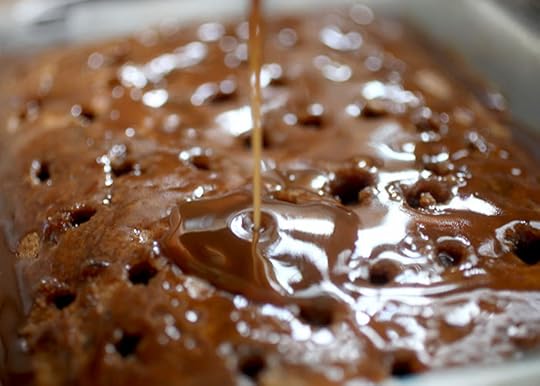
And then after the cake comes out of the oven, you pour warm, cozy toffee sauce all over the top.
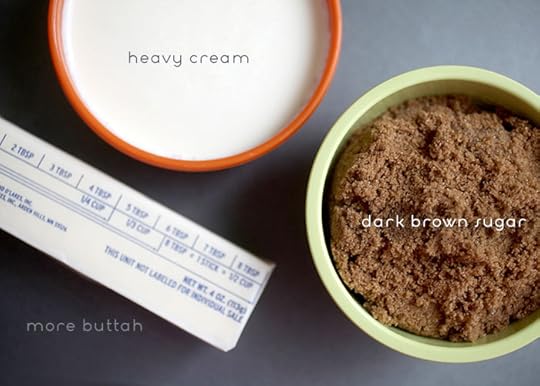
The sauce is super easy, too. Three ingredients easy.

Simmer down now.
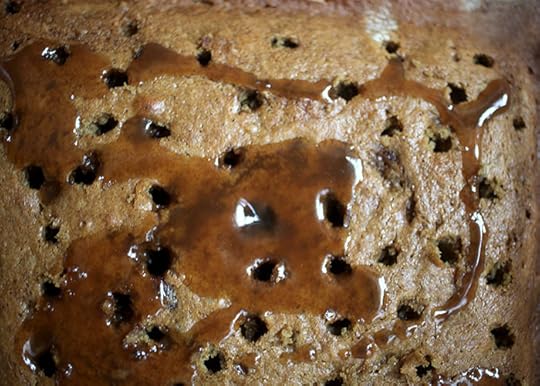
Poke the cake with a toothpick or skewer and pour the sauce all over.
I went all lollipop stick on mine for greater saturation.
Help.
Let’s look at that again.
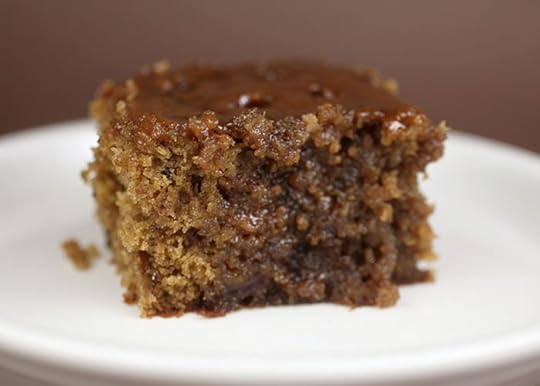
The cake is gloriously drenched and just delicious all by itself.
But it looks kind of lonely, don’t you think?
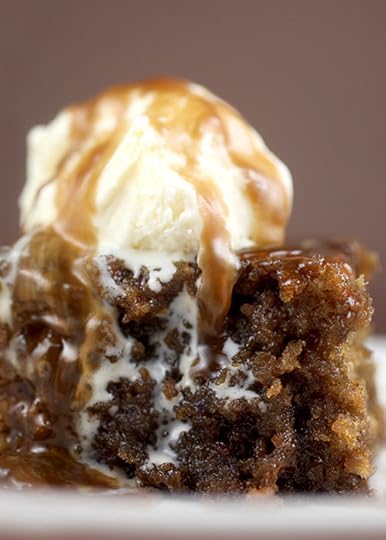
There. That’s better.
Sticky Toffee Pudding Topped with Toffee Sauce -
Here’s the recipe from Martha if you want to make it too. I mean if you want something hot to cool you off.

June 23, 2013
A LoveLee Giveaway
How does a whole bunch of yumminess sound?
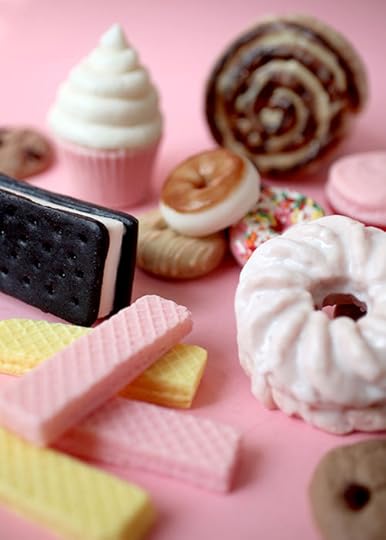
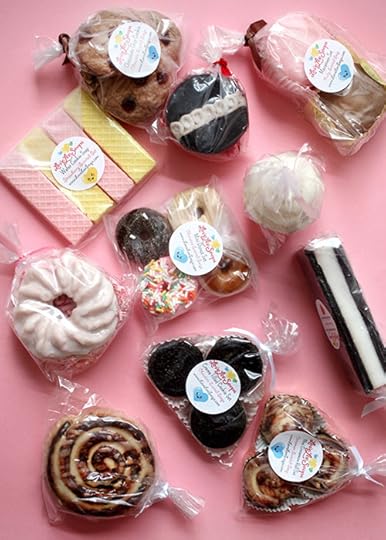
I’m talking cinnamon rolls, doughnuts, cupcakes, ice cream sandwiches, cookies, crullers and much more.
Sounds pretty sweet to me… only you can’t eat these little treats. No sirree.
You can shower, splash and scrub-a-dub-dub with them though.
That’s right. They’re not sugar, they’re soap. But, they’re still totally sweet. Like literally.
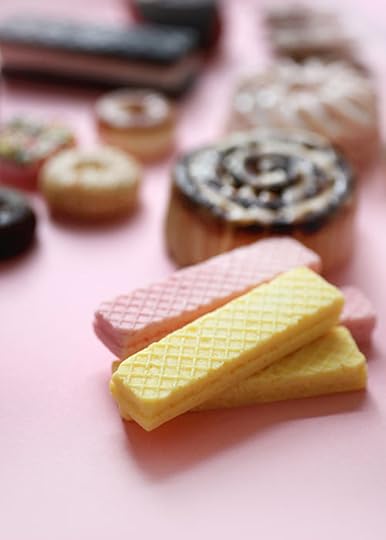
These wafer cookies? Yep. Soap.
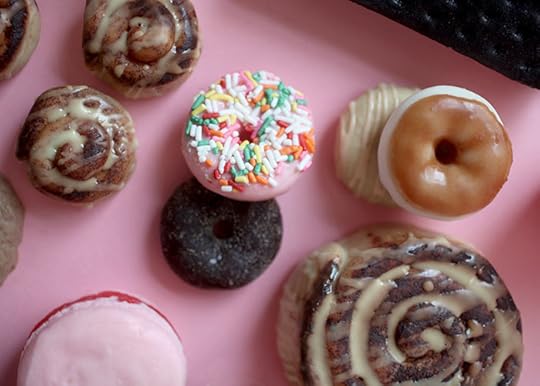
Doughnuts. All soap.
And the crullers. Well, they’re just cruel. I mean they’re soap, too. But they taunt me because they look too real … I just want to wash my mouth out with them.
But seriously, these soaps are super fun. And I can’t help but smile when I look at them. They’d make great gifts or party favors and they’ll certainly sweeten up your soap dish.
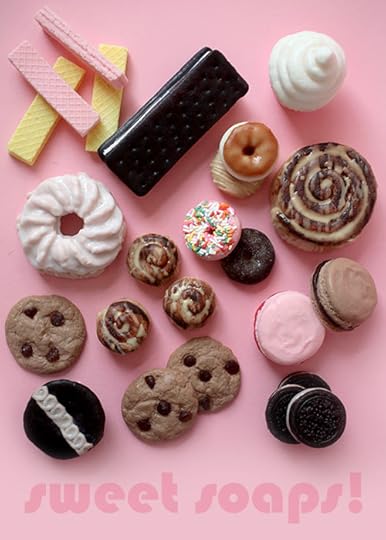
They’re all from Leeana of Lovelee Soaps. A while back Leeana surprised me with some adorable cupcake pop soaps and now I’m happy to be giving away gift certificates to three lucky winners to choose their own clean, sweet, fun.
Here’s some more samples of her work.
(P.S.… she has some savory soaps too if you’re into that sort of thing.)

Enter for a chance to win one of three $75 gift certificates to
LoveLee Soaps and choose your own treats.
To enter, just leave a comment on this post and let me know which sweet soap you’d pick first.
Deadline to enter is Wednesday, June 26th at 7:00 pm ET.
Three winners will be chosen at random and announced sometime Wednesday evening on this post.
Good Luck!
Soaps for photos provided by LoveLee Soaps. Giveaway sponsored by me.

June 17, 2013
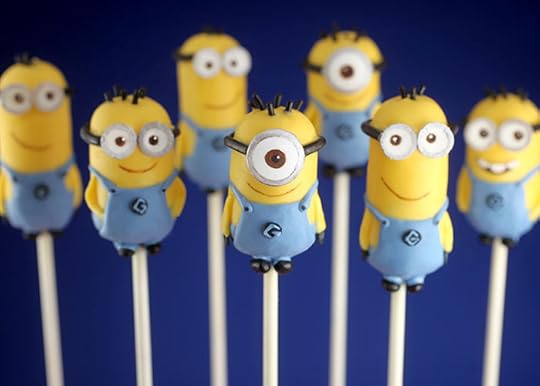
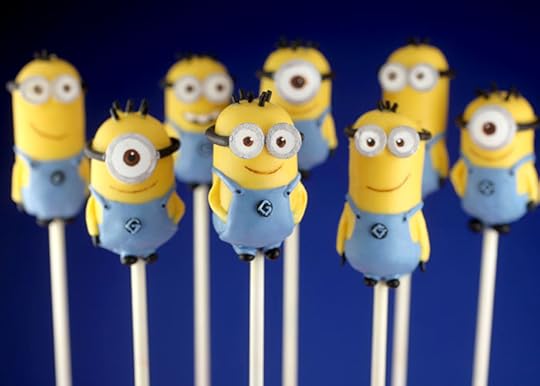
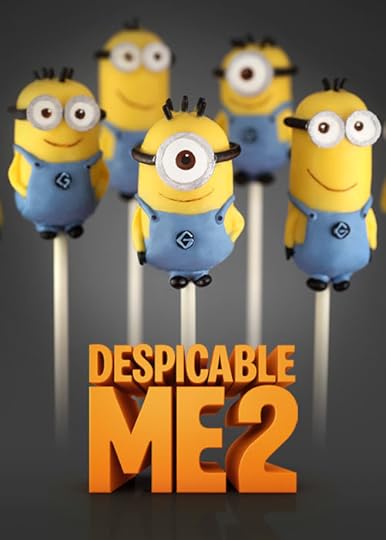
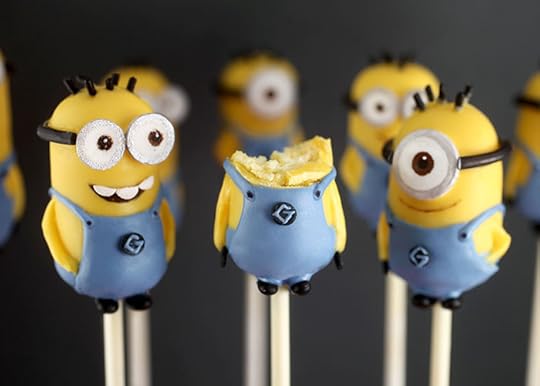
Mini Minions

Despicable Me 2 is coming out soon (July 3, that is) and I made these mini Minions for the movie release. I was super excited to be asked to make them because I know a bunch of you have wanted decorating ideas on these in the past.
So here goes. I hope you like them.
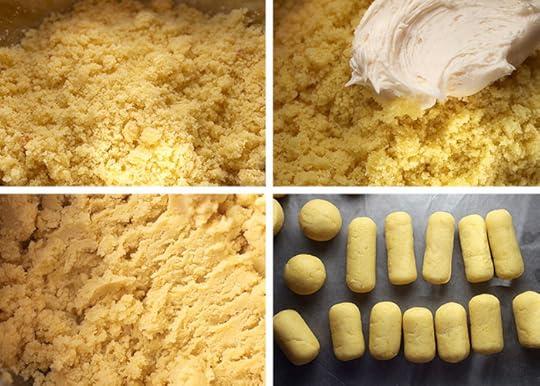
Crumbled cake. Frosting. Mixing. And shaping. You guys know the drill.
But if you don’t, I have a link at the bottom of the post for the full instructions on how to make them.
But pictures are way better, right.
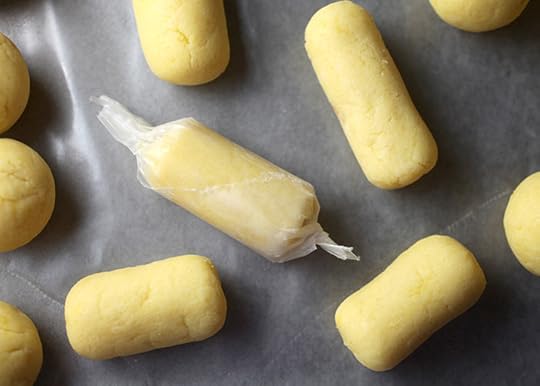
Okay, here’s a little tip I want to share on shaping. I think it really helps to get smoother edges. After you roll your mixture into evenly sized cake balls, you can use wax paper to help shape. I do this all the time for shapes that need sharper edges like boxes and such. You can simply slide the shape along a wax-paper covered surface and rotate.
And in the case of cylinders like these, start the shape of your cake ball cylinders by hand and then roll them up in a strip of wax paper. Twist the ends and then squeeze together while rolling on a flat surface to get smooth sides. It really works great.
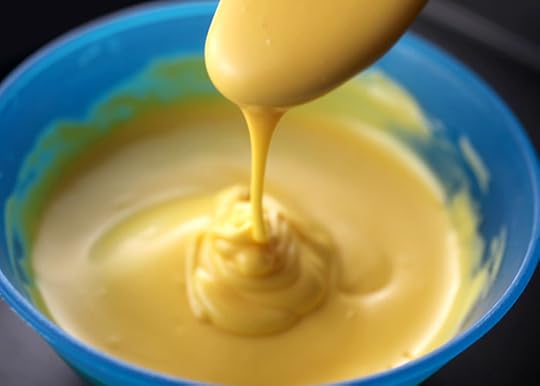
After your cake balls are shaped and chilled until firm, it’s time to dip……
And decorate! The fun part.
Hi Carl, Tom and Tim!
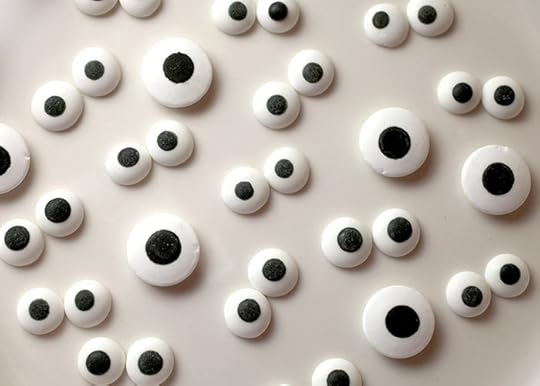
I found these candy eyes in two sizes and they made making the minions a blast. I found them at Hobby Lobby if you have one in your area, but you can also use white M&M’s, candy necklace pieces or even piped white coating for a similar look.
My first plan was to use the eyes like you see them, but I ended up turning them over instead. For two reasons… one, the Minions’ eyes are brown with black pupils so I could use the solid white side to draw on them. And two, if you turn the smaller eyes over, the backs are flat instead of curved and it looked more like their goggles were really raised off of their faces that way.
I know. Overkill and you can totally use the black sides and they will still look cute. But I wanted to try and make them look as close to the original as I could. Because I’m crazy.

To decorate…
Dip in yellow coating and before the coating dries, attach a candy eye on front and insert some black or chocolate jimmies on the top for hair.
For the goggles, you can use licorice strings to make the bands. Just cut to the length you need and attach to the pop with candy coating and let dry. Or pipe bands with black tinted candy coating.
When dry, you can paint the rims on the goggles using silver luster dust and a small brush.
For the overalls, gently twist the Minions off the stick so you can take them for another little dip. Submerge the bottom fourth of the minion body into blue candy coating and let dry.
To finish the overalls, pipe the bibs on front using a toothpick or squeeze bottle and more blue candy coating. Use a toothpick to quickly smooth the surface before it dries. Then pipe the straps starting at the top of the overall bib.
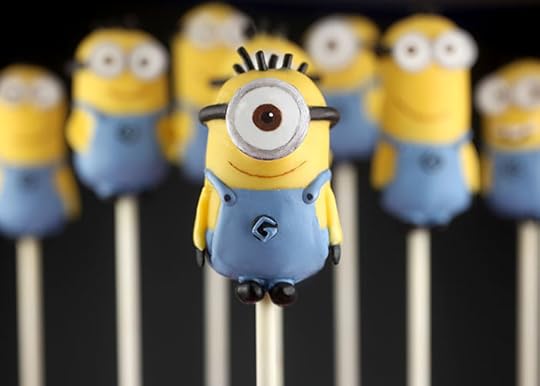
Super cute.
To finish decorating, draw eyes and a mouth with a brown edible ink pen. Then, complete the eyes with a black pen and dot the pupils with white candy coating. (Here’s another tip when it comes to drawing on candy coating with an edible ink pen. You can use a toothpick to gently scrape it off the surface of the pop. Doing so can help you create straighter lines if you mess up while drawing. You can also use a toothpick to shave away candy coating and make smoother edges or straighter lines. Just don’t press too hard.)
You can totally stop there and they will be awesome, but if you are compulsive and crazy like me, you can add more detail to your Minions.
Use a toothpick to apply yellow coating in a line on the side of each pop for arms and add a black confetti sprinkle attached at the end for gloves.
Apply two dots of blue coating on the bottom of each minion body and attach two coated black sunflower seeds for shoes.
Draw on two black dots for overall buttons with your edible ink pen and attach a black confetti sprinkle on the overall fronts. Use a toothpick dipped lightly in blue coating and draw a G on each confetti sprinkle for their patch. Again. They’ll be just as sweet arm and legless and you won’t be hairless by the time you finish. : )
Minions! Yay!
But I also made something more from the movie.
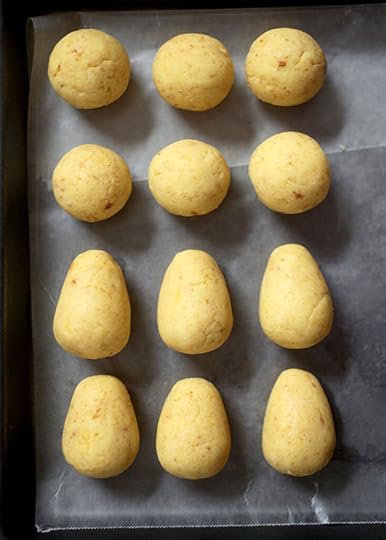
I started with these shapes.
Circles. Easy enough.
And really rounded cones. You can use the wax paper trick for those.

The balls became little Agnes.
So adorable. And these are neat because I only used one candy to decorate. The rest was all melted candy coating. So you can do a lot with a little.
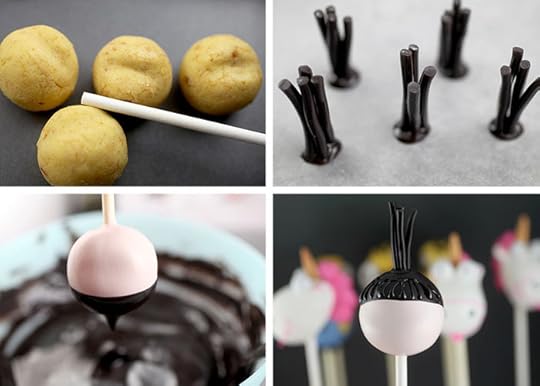
To create Agnes, make a small indention in the front of each ball. It’s all about details. The impression will help them look more like faces instead of round balls. Dip them in candy coating tinted using white and pink or peach to create a flesh color.
For her ponytail, I used licorice strings again, cut into short pieces. To make it easier to attach, I made the ponytails first by dotting some black candy coating on wax paper and attaching the licorice. This made the ponytail one unit and it was much easier than trying to attach the pieces on the top of the rounded pop.
When the ponytails are ready, dip the top of each Agnes’ head in black candy coating and attach her ponytail right on top before the coating dries.
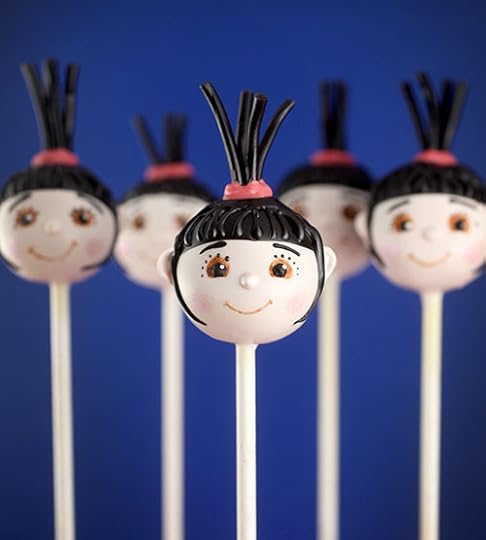
For her sweet little face, draw eyes and mouth with a brown edible ink pen. Draw on eyebrows and dot on eyes and eyelashes with black candy coating and a toothpick.
Add bangs using a toothpick dipped in black candy coating to draw on hair. This will tie in the look to the licorice pieces, too.
Then dot on noses and ears with more flesh tinted candy coating and make her hair band by drawing on red candy coating.
Give her sweet little cheeks by brushing on dry pink luster dust.
Now Agnes wouldn’t be complete without her favorite stuffed animal.
Want to see?
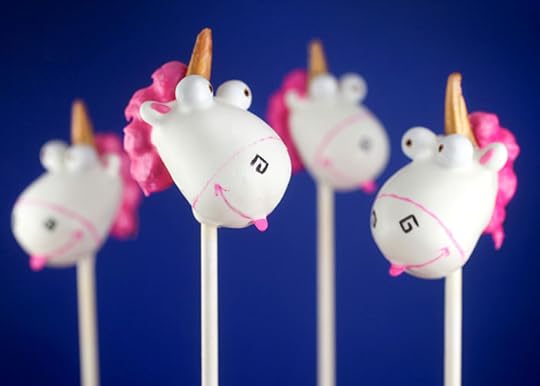
It’s so fluffy!!!!! Or yummy in this case.

For the unicorn, I used candy corn… sixlets for eyes and hair, sunflower seeds for ears and confetti sprinkles for tongues.
Let me show you.

For the unicorn horn, I had some pastel colored candy corn and cut them in half. Then I painted the bottoms with gold luster dust. Painting the bottoms first is helpful so you don’t get luster dust on the head if you paint them after they are dipped. And you can use other candy corn colors, too since you are painting over them.
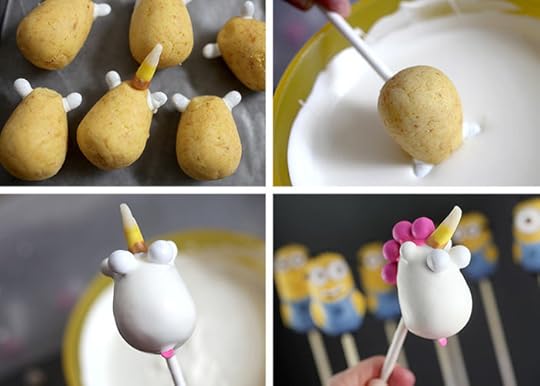
The ears were sunflower seeds attached to the cake ball shape, so when they were dipped it created one overall shape.
After dipping, immediately attach the horn, eyes and insert the tongue.
When dry, attach sixlets to the back for hair using melted dark pink candy coating. The sixlets work great and give the hair substance.
Then you can finish painting the horns with luster dust.

To make them look more like a main, use the pink candy coating (Merckens brand) and draw on the surface of the candies. Drag the toothpick through to simulate hair.

Voila. Unicorns with big voluminous manes.
Want to see one more.
Did you know there are new minions in this movie. Evil ones. Eeek.
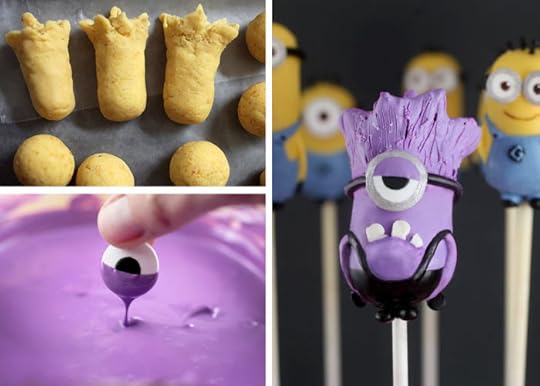
I only made one of these but, it’s basically the same idea as the yellow minions, but with different colors, gnarly teeth and crazy hair.
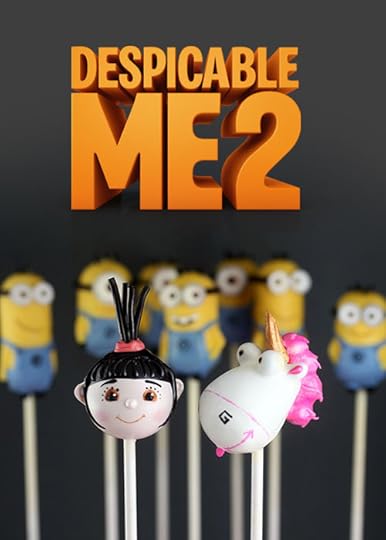
Despicable Me 2 Cake Pop Instructions
Enjoy! And I can’t wait to see these guys on the big screen.
Hey, who did that?!?
Disclosure: I was compensated to make Despicable Me Cake Pops for the upcoming movie release. I love these little guys though and I only make things on the site that I think you’ll enjoy, too. I hope they make you smile.

June 10, 2013
Single Chicks
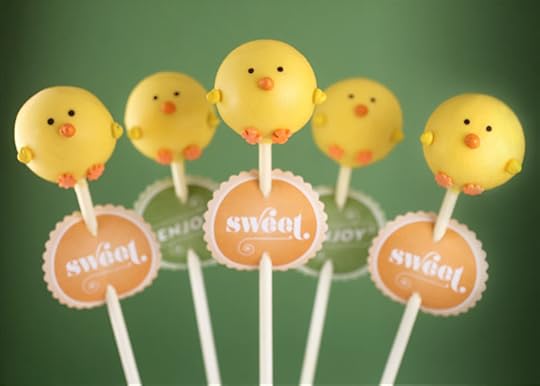
I have some new Cake Pops Singles Kits to share with you guys. And there’s a nice big prize-pack giveaway from my publisher, too.

My publisher is Chronicle Books and they do a fantastic job of producing and designing pretty, yummy, crafty, funny and even grumpy books. And they are known for creating some of the cutest gift items, too.
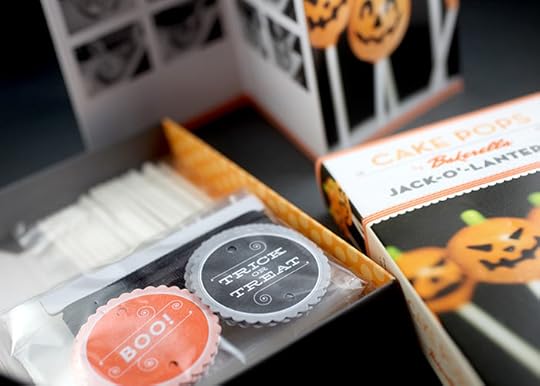
These mini kits are single projects of some favorite cake pops from my books. They come with instructions for making them… plus gift tags, cake pop sticks, ribbon, and treat bags for presenting each individual project. Unfortunately, they don’t include sprinkles since Chronicle specializes in paper goods, but they are still super cute.
Chronicle has done my books, the original Cake Pops Kit, notecards and now these Single Kits. I guess there’s a little something for anyone’s interest level in pops. I see these as a really sweet gift for someone new to cake pops. A fun introduction. They’d be a sweet gift for someone that’s a pro at making them, too. A helpful way to make your cake pop presentations even more adorable.
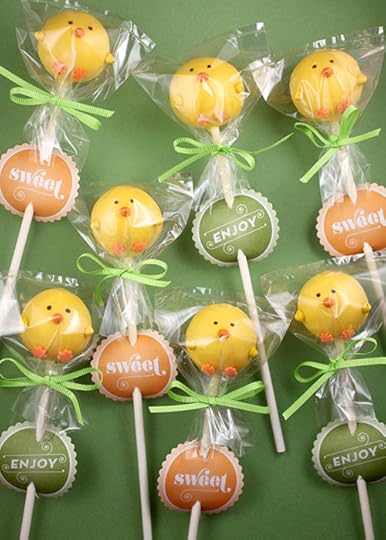
Too cute!
Love the little scalloped tags. The ink and ribbon colors coordinate with each project.
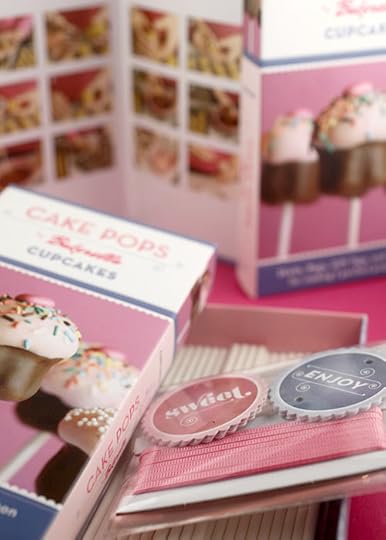
Pink for the the cupcake pops of course. And blue ones, too.
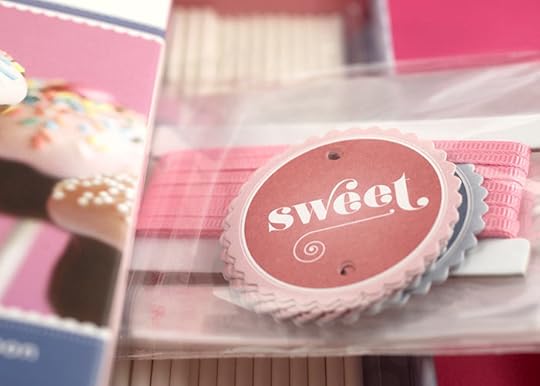
So sweet!
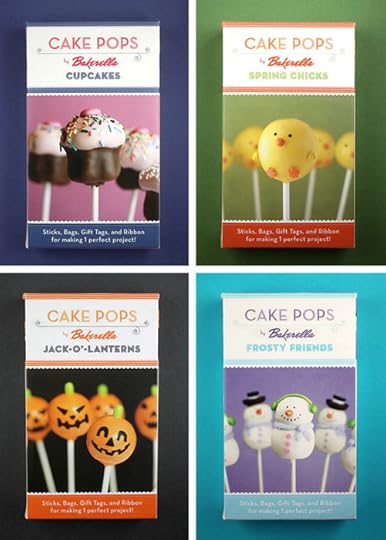
And this fall, they there will be two more Single Kits released. Jack O’ Lanterns and Frosty Friends.
With coordinating colors, of course.
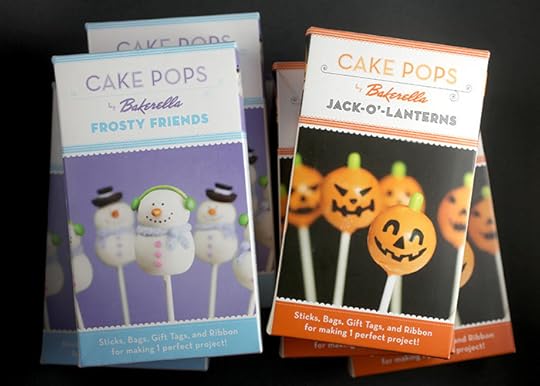
Be on the lookout for these two later this year.
>>>>>>>>>>>>>>>>>>>>>>>>>>>>>>>>>>>>>
Now for a nice big Cake Pops giveaway.
Hop on over to Chronicle’s Blog before June 12.
They are giving away the following to five (5) lucky winners:
1. Cake Pops: Spring Chicks (Singles Mini Kit)
2. Cake Pops: Cupcakes (Singles Mini Kit)
Plus:
3. Cake Pops by Bakerella
4. Cake Pops Holidays
5. Cake Pops Kit
Equals: Awesome!!!
>>>>>>>>>>>>>>>>>>>>>>>>>>>>>>>>>>>>>

June 2, 2013
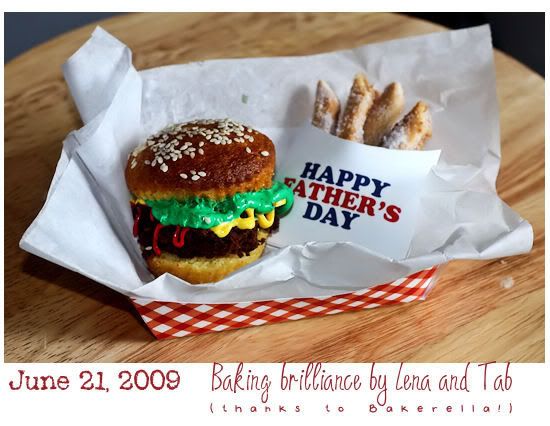
Happy Meals… Cupcake Replay
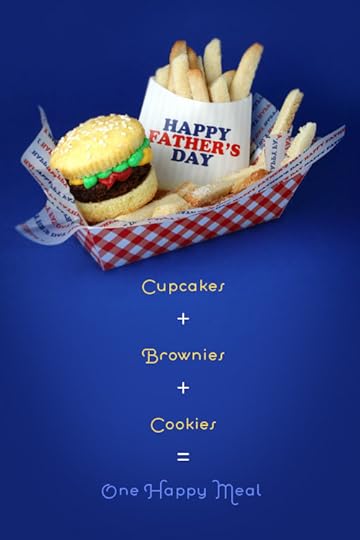
Father’s Day isn’t too far away and I wanted to do a little replay of a fun project from almost four years ago. Yikes, that’s weird to say. Or type. Sometimes I can’t believe how long I’ve been baking and posting treats here. And that I still love every minute of it. This project goes so far back on the site, I thought it would be fun to share again for new readers because it’s one of my favorites. And it’s one I remember being so giddy over as it all came together in my kitchen.

I think it was the french fry cookies that sent me over the top. I love how they turned out.
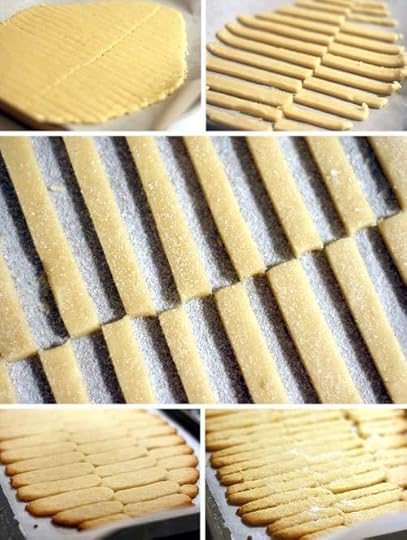
Sugar cookies for fries and sugar for salt. So sweet!

But the other part I love about this project is the presentation. I made templates for the paper tray, printed tissue and french fry containers… all for Father’s Day. It totally pulls the whole look together. And I promise you’ll fool people at first glance.
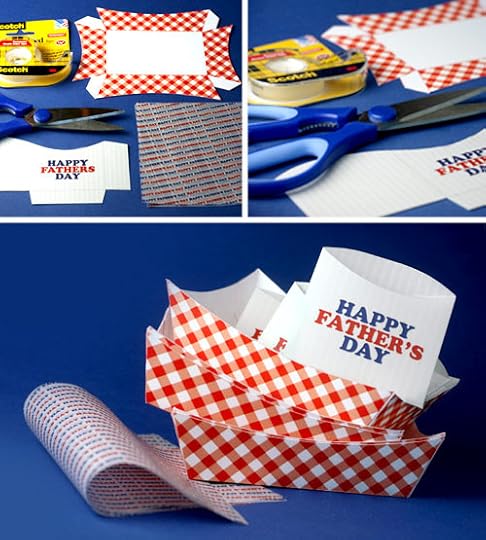
Here is the original Father’s Day Fast Food Fun post with instructions. Make ‘em and make dad happy!
And because so many of you loved these the first time around and wanted to make them for the Fourth of July, here are some new templates for the most requested events. Hope they come in handy! And there’s a blank french fry template if you want to fill in with your own phrase.
Happy Memorial Day Template … for next year!
And just for fun… a glimpse at some of the Happy Meal photos you guys emailed me after making them.
I’m lovin’ it.
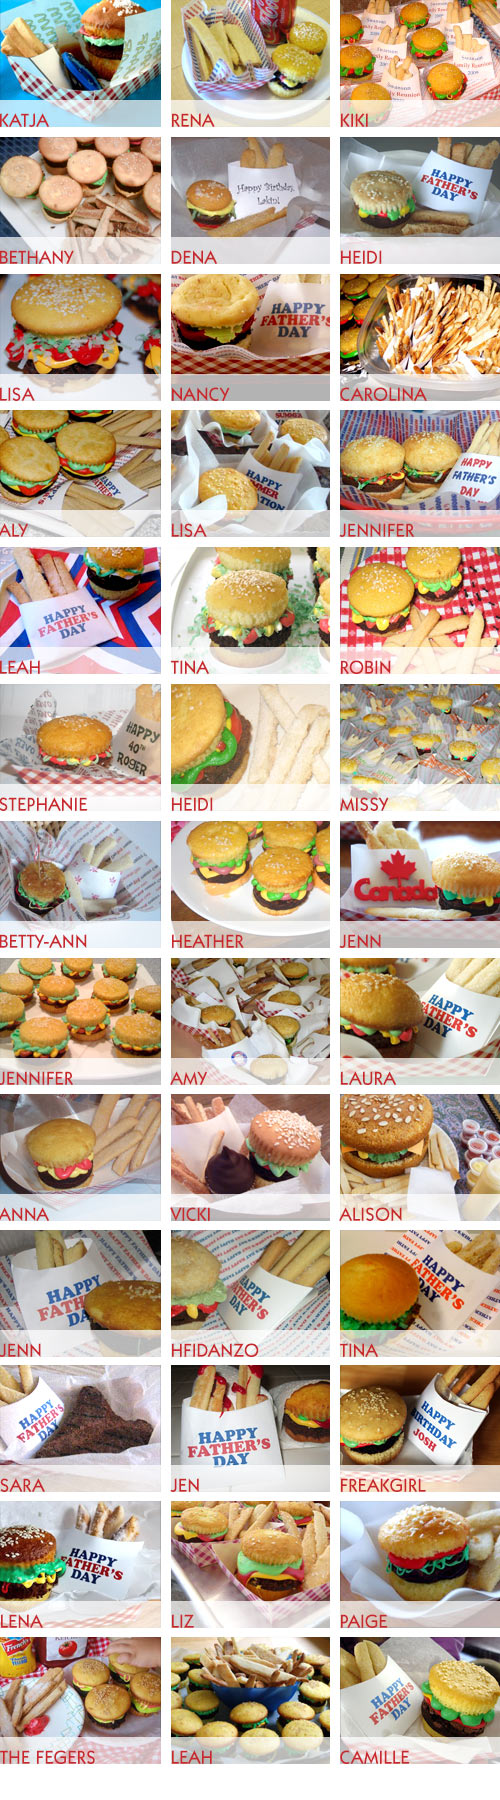
Thanks for emailing your pics Katja, Rena, Kiki, Bethany, Dena, Heidi, Lisa, Nancy, Carolina, Aly, Lisa, Jennifer, Leah, Tina, Robin, Stephanie, Heidi, Missy, Betty-Ann, Heather, Jenn, Jennifer, Amy, Laura, Anna, Vicki, Alison, Jenn, Hfidanzo, Tina, Sara, Jen, Freakgirl, Lena, Liz, Paige, The Fegers, Leah, Camille.
Your meals made me happy!
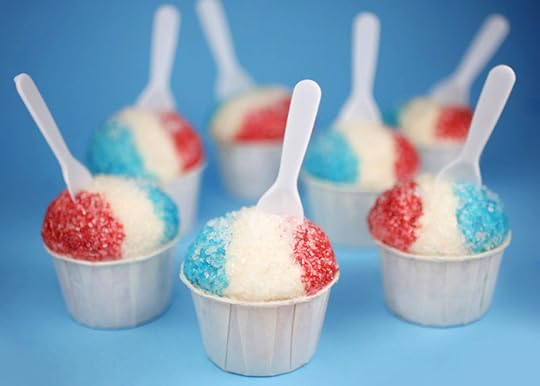
Oh and if you decide to make these for the Fourth, you could go for the “full meal deal” … cupcakes disguised as snow cones would so be an over-the-top way to cap off your cookout.
HAVE FUN!

May 19, 2013
Chip Chip Hooray!
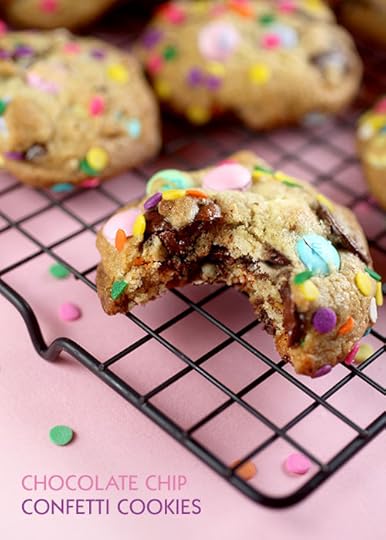
Chocolate Chip Confetti Cookies!
Get in my mouth. Right now. It’s cookie time!
Okay, anytime is cookie time in my book. How about you?
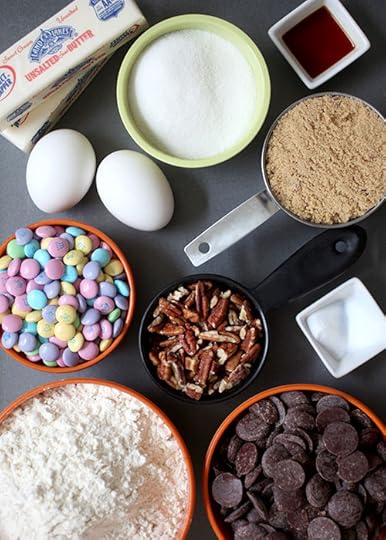
I made these chocolate chip cookies using a few extras that I had on my counter.
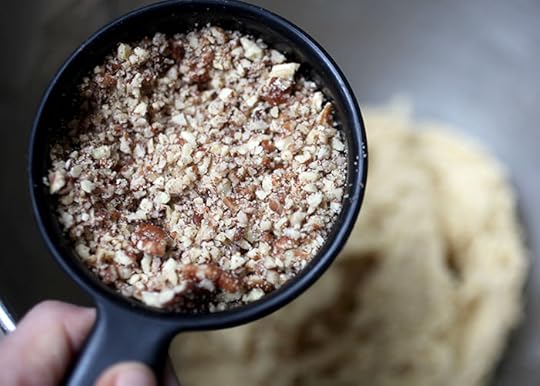
Leftover pecans from last weekend’s Hummingbird Cake that I chopped up.

Pastel M&M’s leftover from Easter. These were hiding under a pile of different color candy melts I had on the counter or else they would have already been gone by now.
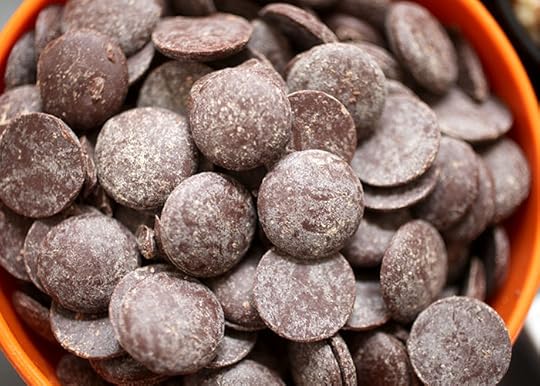
E. Guittard semi-sweet chocolate wafers. I still had a box from the last time I made Jacques Torres’ Chocolate Chip Cookies. And now I don’t think I can make chocolate chip cookies with little baby morsels ever again. Okay, that’s not true. But seriously, try making chocolate chip cookies with these chocolate baking discs sometime. Holy yum. I picked mine up at Williams-Sonoma.
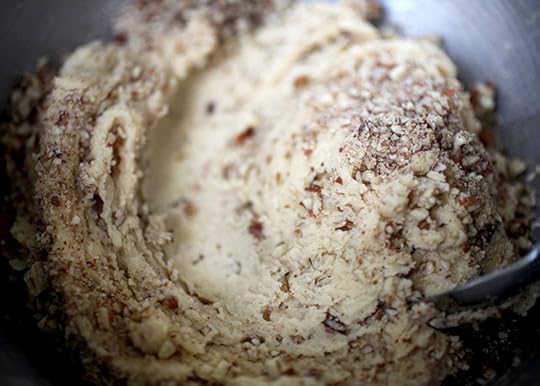
Mix up the dough and add in the pecans. That is if you want. You can also leave them out.
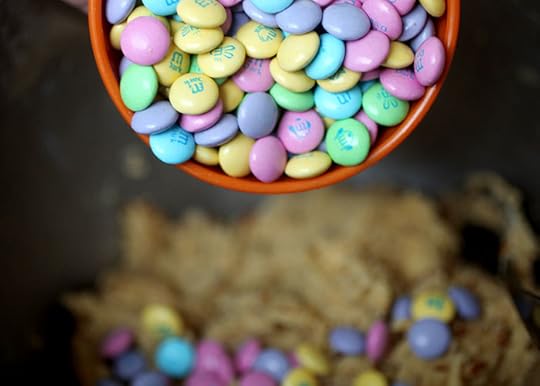
Add in some M&M’s. Any color combo you like.
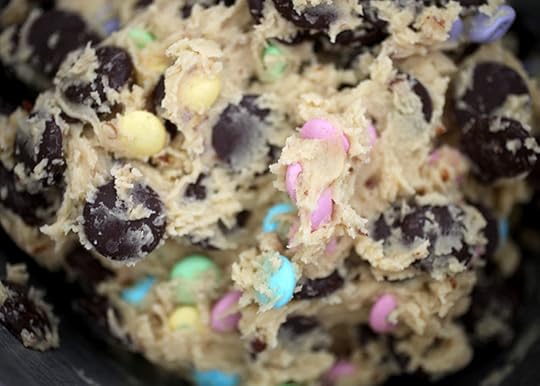
And stir in the chocolate.
Dough it!
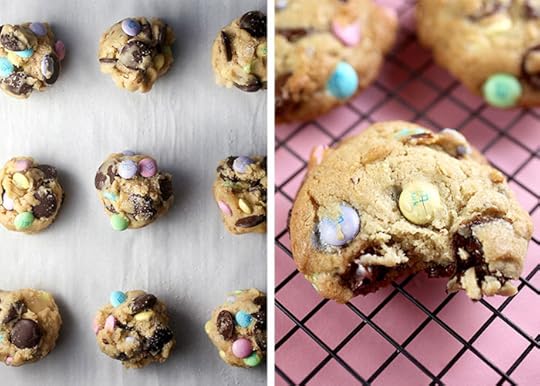
Scoop them and bake them right up.
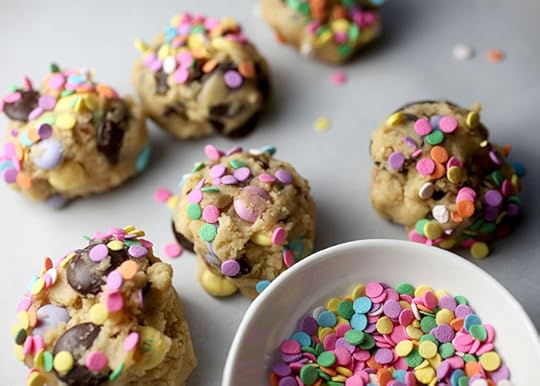
Or coat the tops in confetti sprinkles for a little more fun.
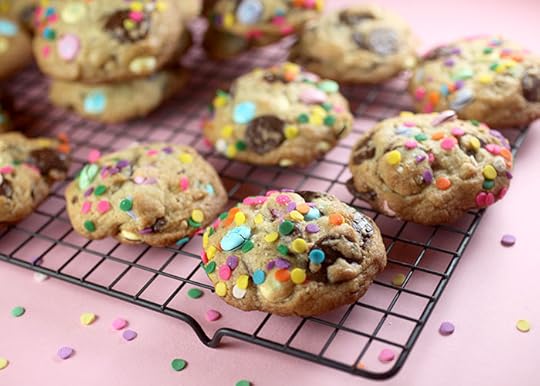
Chocolate Chip Confetti Cookies.
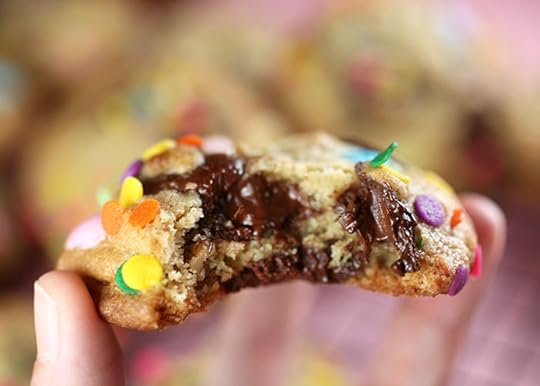
It’s like a party in every bite.
Chocolate Chip Confetti Cookies
May 12, 2013
Hummingbird Cake
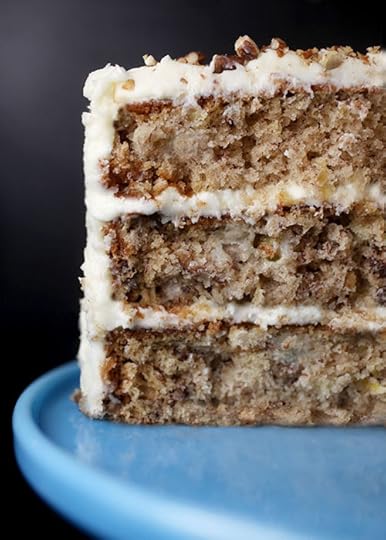
I made my mom this cake Sunday afternoon. A Hummingbird Cake and it was so good.
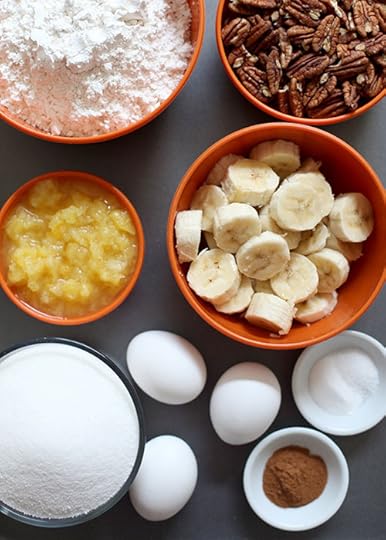
This cake is basically healthy. At least in my mind it is.
I mean bananas, pineapple and nuts.
It’s like dieting.
Okay, maybe not so much. Especially with the generous amount of cream cheese frosting I slathered all over it.
When I was a kid I would have skipped cake like this rather than putting something non-chocolate in my mouth.
Yeah, would not have touched it. Or I would have picked out all the nuts. Pecans and pineapple were not on the list of approved foods.
But my mom loves them. So I thought this would be a great cake to make for her.
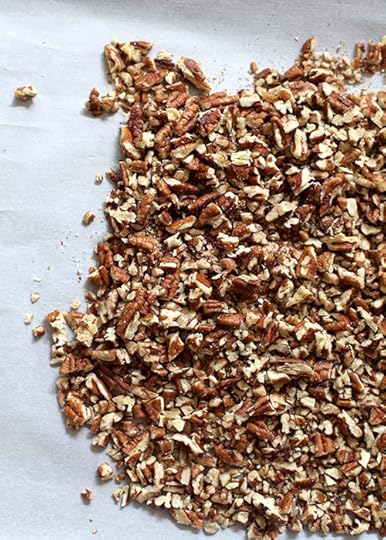
Chopped and toasted pecans. Yum. I’m glad I can say that now.
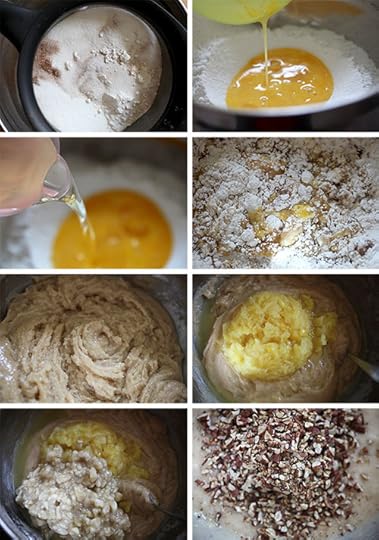
The cake is super easy to throw together, too. You don’t even need to break out your mixer for the batter. A spoon will do the trick.
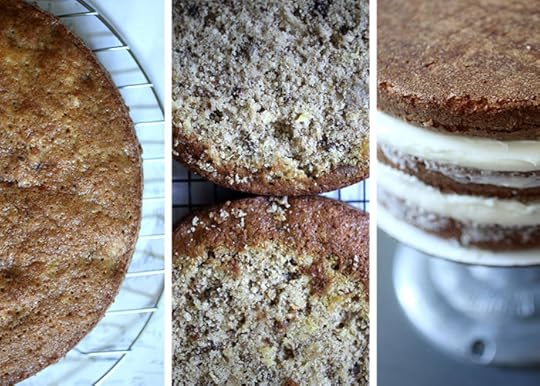
The recipe makes a giant cake. Three 9-inch layers.
Level the cakes with a serrated knife to remove the mounded tops and make for a more even cake and easier to frost.

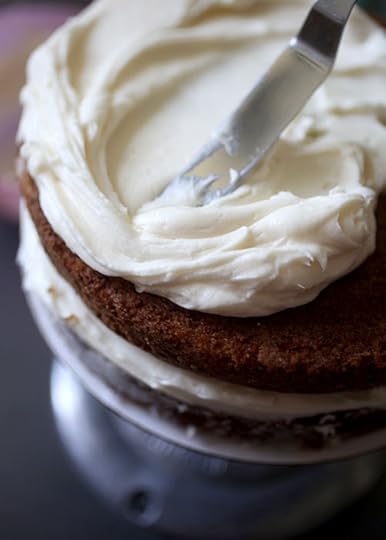
Here’s something else I use that makes frosting cakes a bit easier for me.
I bought this pottery wheel thing to place my cakes on. It’s awesome. And heavy and spins fast and smooth.

And the nice part is you can easily lift the plate right off the base.
Amaco No. 5 Pottery Decorating Wheel The metal isn’t polished, so some areas could have a sharp or rough spot.
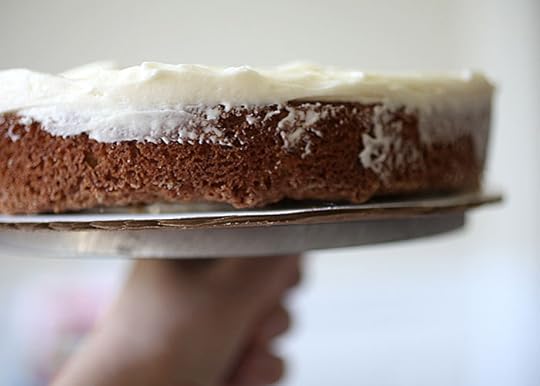
The removable base makes it easy to hold up in the air and see things at eye level.
I had a plastic turntable meant for cake decorating, but I didn’t like that one so much. This one just feels better in my hands. But that’s probably because it’s on the smaller side. The plate is just 7 inches in diameter, but still worked out perfectly for this 9-inch cake.
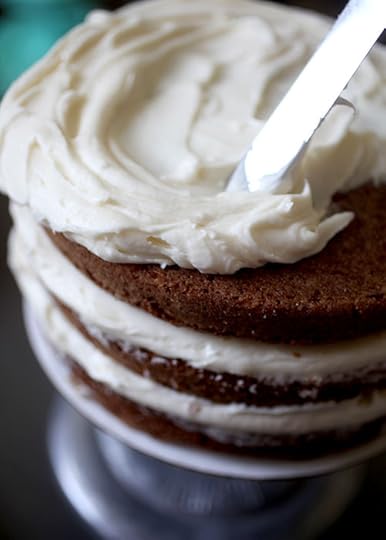
Spin and spread.

I tried to go for that whole my cake is so messy that it’s beautiful look.
I think I need to practice more.
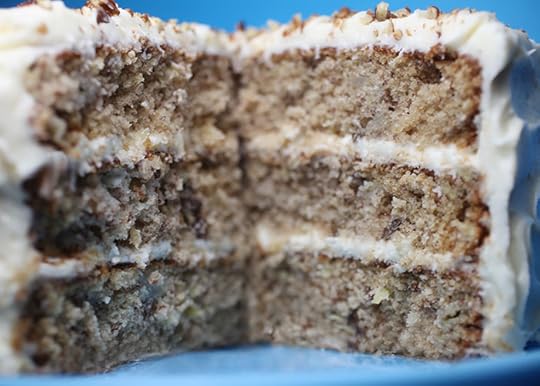
But that’s okay. It’s what’s on the inside that counts… And my mom loved it.
Hope you do too.
Hummingbird Cake
May 5, 2013
So Cal So Sweet

…… and Saucy.
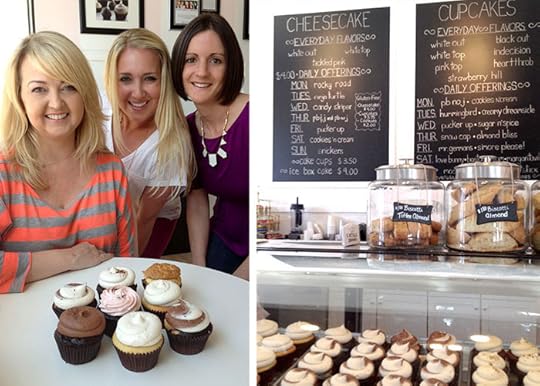
I was in Southern California a week ago and finally got to visit Melody of My Sweet and Saucy. Well, that was her blog name back before she became a superstar cake decorating, bakery owning machine. Now she has two Sweet and Saucy Shops and she’s in the construction stage of a third.
Hi Melody. You are a doll.
I first “met” Melody when she would leave sweet comments here on the blog way back in the beginning and it’s been a blast watching all of her success.
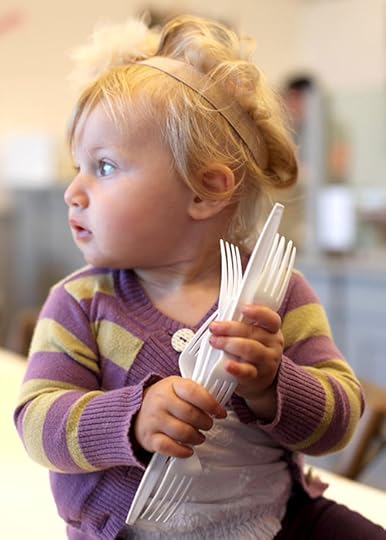
She’s super-talented and so is her staff… including her sweet little helper Blake.
And their wedding cake designs are just gorgeous, modern and sing Melody.
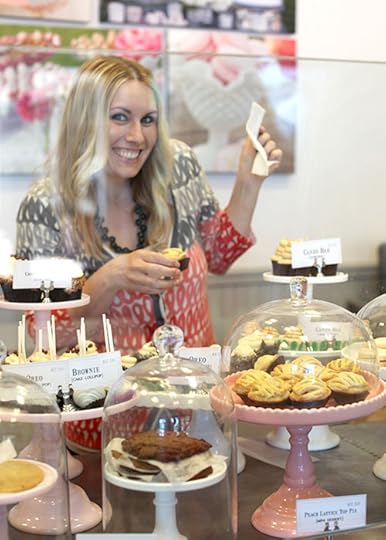
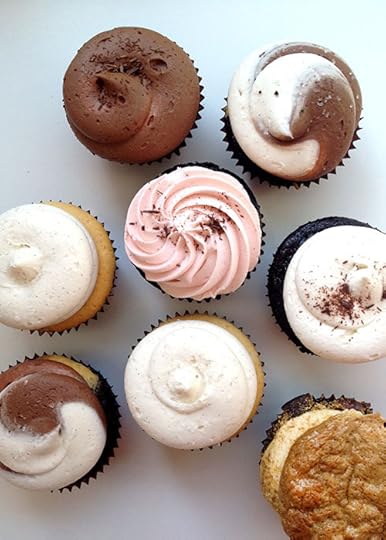
But what I love most is her love for mini desserts. Little pies and mini tarts, macarons, cupcakes and cake pops, too.
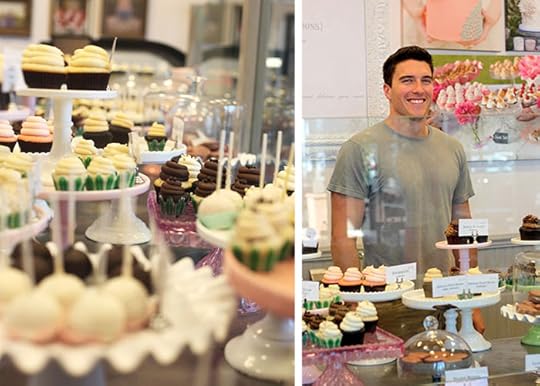
The desserts are all displayed on beautiful cake stands like these. So cute. And so are the cupcakes. ; )
If you stop by, make sure you get a mini pie… Oh my. Get any flavor and have them warm it up for you. You won’t regret it.
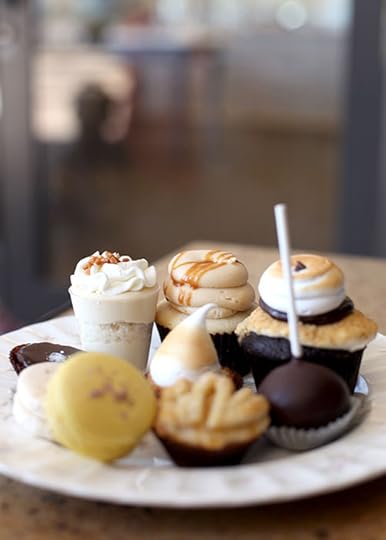
The S’mores cupcake shouldn’t be missed either. Heck, just get a whole plate of petite treats.
We did. Thank you Melody.

Yeah, I didn’t eat this all myself. I had help. Jenny of Picky Palate, Amanda of Kevin and Amanda and I went on a quick sweets tour to a few places in Jenny’s neck of the woods before we headed out to a food blogging conference. Prep work.
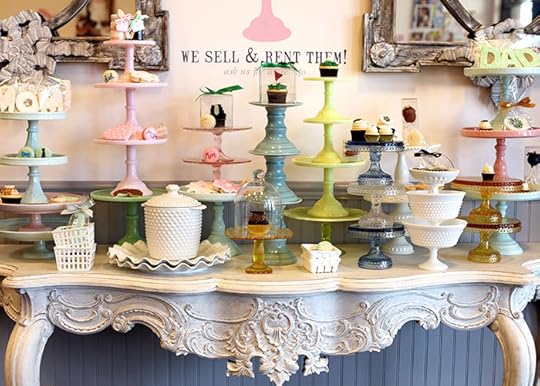
Oh yeah, you can also rent or buy these beautiful cake stands from Melody’s shop. I wanted the whole table.
Okay, the whole bakery.
Newport Beach, CA
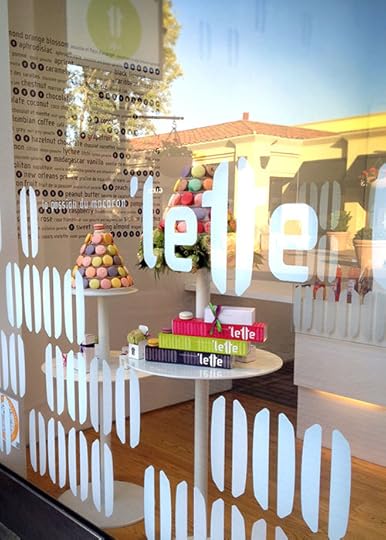
Not far from Melody is ‘lette.
Macarons. Macarons. Macarons.
Okay. Will do.
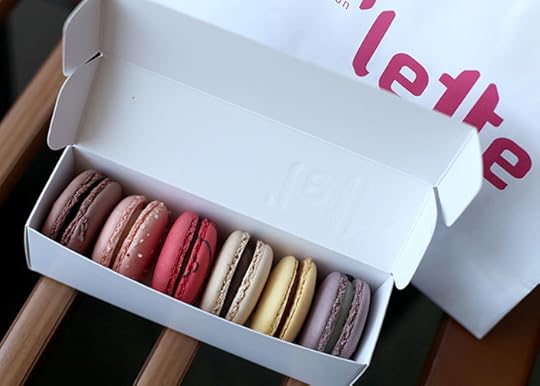
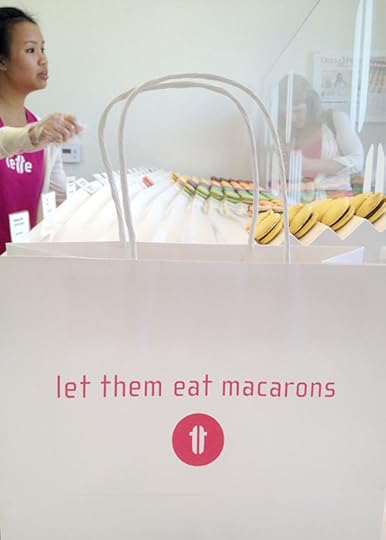
Here’s the sampler pack I picked up for a next day treat. I say sampler pack because it sounds less like I’m eating so many.
They didn’t make it that long though before I had to dive in.

I’m always drawn to these little bites of perfection and their beautiful colors, but I haven’t found a flavor that beats out chocolate for me. Always my favorite.
Fashion Island, Newport Beach

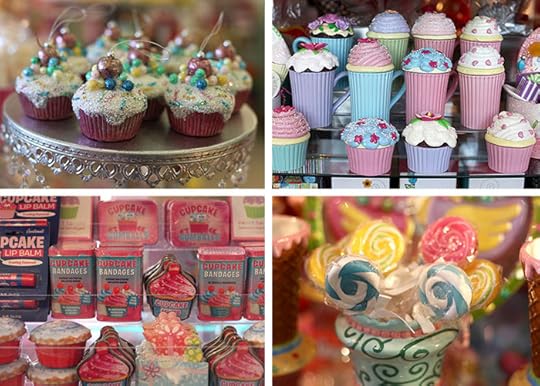
Jenny also took us to a little place called Wonderland. Such a perfect name for this sweet shop. So much eye candy.
 \
\
And tons of cupcake gifts. Ornaments, mugs, and yes bandaids.
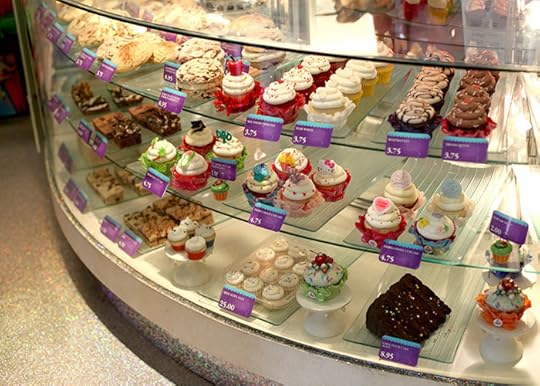
And what a cute curved cupcake case set atop a sparkling glittery floor. Magical.
We didn’t pick up any cupcakes here though. Instead we had a couple of cookies.
Just two. Sandwiched between a tiny bit of buttercream… Ummm… that they will warm up for you!
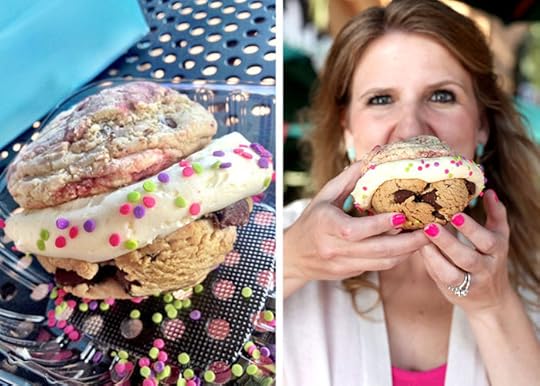
And just for reference, I asked Amanda to hold it up for you.
See … tiny. Like Big Mac tiny. Help.
P.S. You can mix and match the cookies. We had Peanut Butter Chunk and Raspberry Dream. Yum!
Newport Beach, CA
Truly Madly Sweetly. We stumbled on this cupcake shop by accident when we arrived for the conference.
It was at a mall that we were “accidentally” shopping at with Maria of Two Peas and Their Pod ; ) and it was a sweet surprise.
Great cupcakes. Great frosting. We decided the chocolate cupcakes were our faves. Go figure.
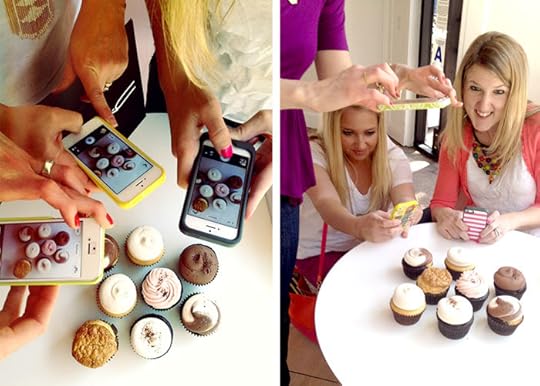
That’s once we finally finished photographing them. And when I finished photographing them photographing them. We have a problem. A big sweet problem.
Temecula, CA
::::::::::::::::::::::::::::::::::
Oh and next time I’m in Jenny’s area I want to try Sprinkles Ice Cream in Newport Beach or even the one in Beverly Hills. They have red velvet waffle cones. Oh yes they do! The Newport Beach location just opened, but the line was Ridiculous!!! Even for me. I’m also told I need to check out B. Candy and Confexion Cupcakes. Any other recommendations?

April 21, 2013
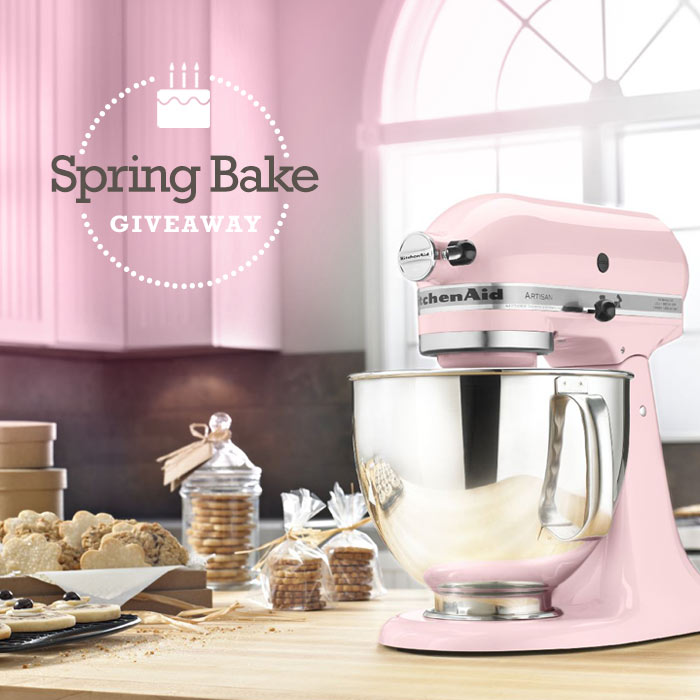
Spring Bake
I’ve been in spring break mode lately. You might have noticed since I didn’t bake last weekend. I think it’s because I recently went on a vacation which I haven’t done in a couple of years and it felt awesome to just relax and do nothing. And now being back home I can’t stop enjoying the warmth that’s finally taking over. Spring is probably my favorite time of the year. Unfortunately, in the south, you only have about seven minutes to enjoy the season before the hot and humid heat of summer takes over. Okay, okay – I’m exaggerating a little. It probably lasts eleven minutes. ; ) So you’ve got to enjoy all of them while they last. And I’m trying.
Got Spring Fever, too? Take a break with me and enter this sweet Spring Bake Giveaway for a chance to win a KitchenAid Stand Mixer… in one of the following pastel colors. Plus a white and silver choice in case springy isn’t your speed. Me? I have the pink one, but man, that aqua sky is calling my name. And the ice and crystal blue. too. I’m glad I don’t have to choose.
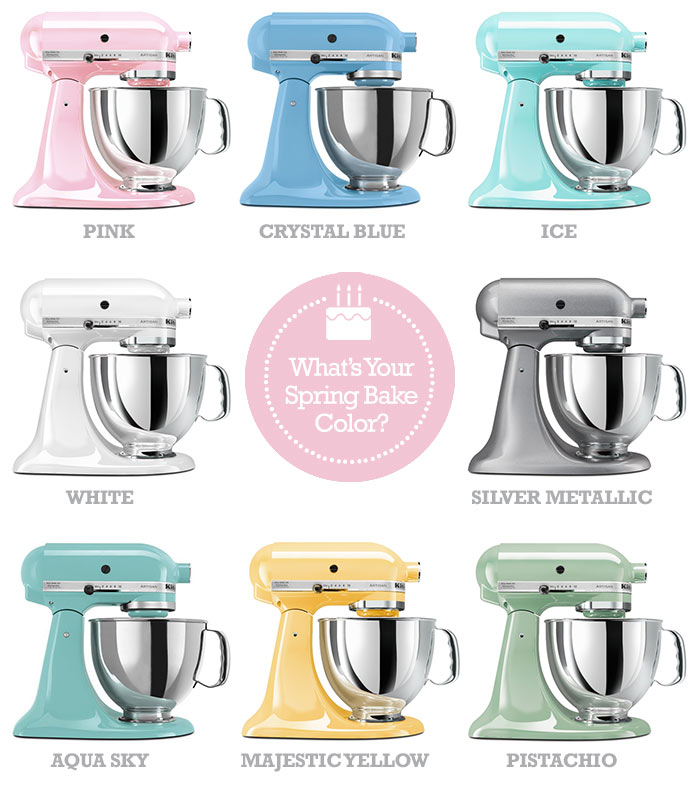
Enter the Spring Bake Giveaway for a chance to win a KitchenAid 5-quart Artisan Series Stand Mixer
To enter, just leave a comment on this post answering the following question.
What’s your favorite thing to do or place to go on vacation? Oh and pick your pastel, too.
Deadline to enter is Wednesday, April 24th, at 7:00 pm ET.
One winner will be chosen at random and announced sometime Wednesday evening on this post.
Good luck!
Giveaway sponsored by me.

Bakerella's Blog

- Bakerella's profile
- 9 followers

