
Bakerella's Blog, page 31
December 9, 2012
Cake Pops Holidays Ornaments and a Giveaway
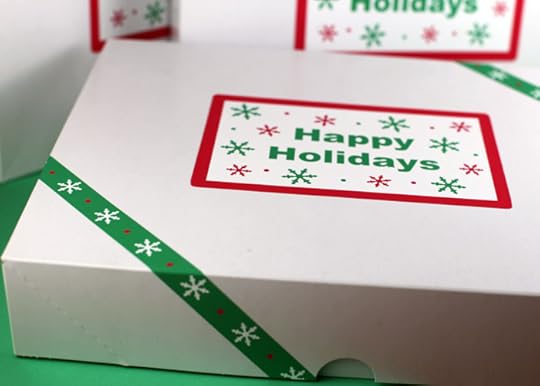
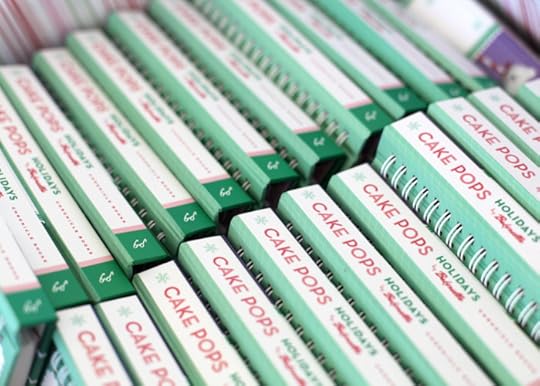
There’s something adorable in these boxes.
Something happy for the holidays.
and beary cute.
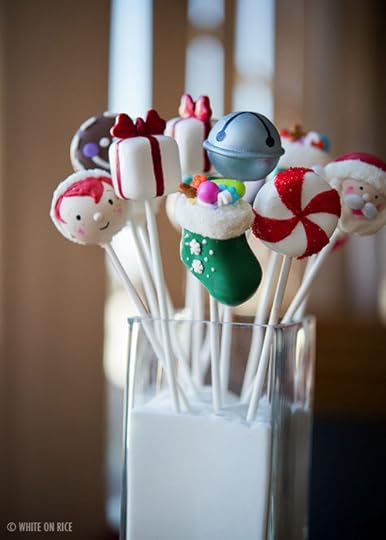
They are handmade custom cake pop ornaments that Amy Miller Designs created for me.
And there are five of them. So fun and festive!
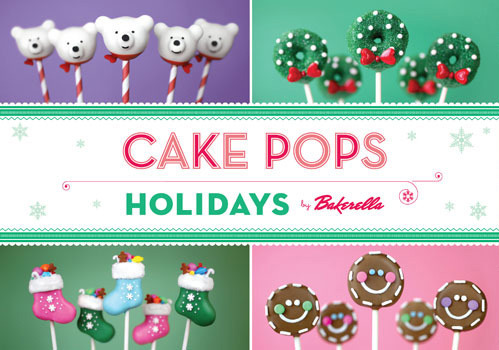
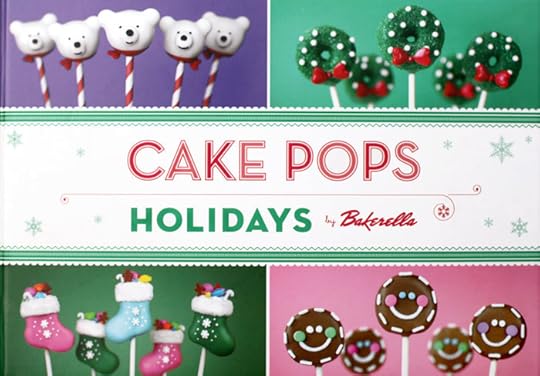
They are all based on the cake pop designs from the Holidays book.
And I hope they make you smile!
And yay, you can totally hang these cuties on your tree.
But the best part is they’ll stay sweet. No spoiling.
When Amy first surprised me with some cupcake pop ornaments, I liked them so much I ordered a bunch without the hanger so I could keep them on display all year long. Then last year I met Amy at my Phoenix Book signing and she surprised me yet again with these Muppet Cake Pops to match the real ones I made. I was blown away. So, I thought it would be fun to see what she could do with some designs from the book. Amy came up with these cute cake pop ornaments and I’m completely in love. So I bought a few extra sets to share with you guys. Amy is awesome. When she shipped them to me, my mouth dropped when I saw how she packaged them. Completely unexpected but I love the little snowy scene and the box makes a great way to store them and keep them safe when they’re not on display. Perfect for gifting. I can hardly part with them they are so cute. But I will for you guys.
Want to win some and make decorating a little sweeter?
Three winners will win a 5-piece cake pops ornaments set PLUS a signed copy of Cake Pops Holidays!
To enter just leave a comment at the bottom of this blog post below and tell me what the last present was that you bought or made for someone else. Easy.
Deadline to enter is Thursday, December 13th, 2012 at 7:00 PM ET.
The winners will be chosen at random and announced sometime Friday on this post. I’ll ship them out quick so you can hopefully have them for the holidays.
Good luck guys!

Now here’s just a few more Holidays book related stuff I wanted to share with you before the holidays end. Kind of a cake pops recap in one big post.
First up – I have another fun giveaway to tell you about. It’s pretty awesome! Chronicle Books is hosting a holiday cake pops photo contest from their facebook page. If you are in the US and you’ve made or are planning to make cake pops for the holidays, you could win a KitchenAid mixer and the complete Cake Pops set. (Cake Pops, Cake Pops Holidays, Cake Pops Kit, and Cake Pops Notecards).
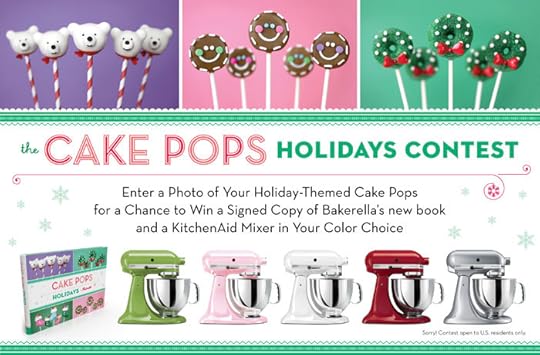
To enter just upload a photo of some of your holiday cake pops here.
The winner will be chosen at random. Deadline to enter is December 17. Happy Cake Popping. I’m excited to see what you all create.
Here’s something I want to share with some of my international friends before the holidays end. There are actually four versions of the book. I don’t think I have mentioned that on the blog before.
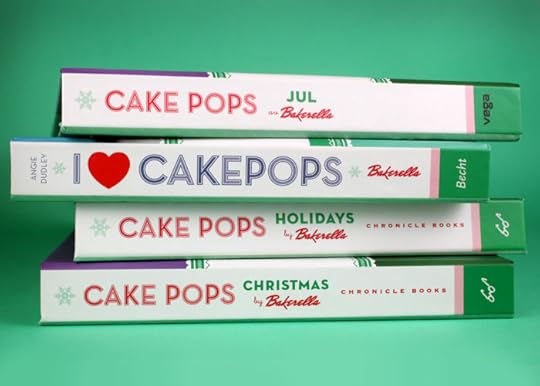
Cake Pops Holidays in the US and Canada. Cake Pops Christmas in the UK. Cake Pops Jul in Norway and I heart Cake Pops in The Netherlands. They are all the same content just different covers and translated in Norwegian and Dutch.
I totally heart that “I heart cakepops” cover by the way.
Here are some links if you’d like to get your hands on a copy or need a sweet last minute stocking stuffer for the baker/cute lover/decorator in your life.
In the U.S.
Amazon
Barnes and Noble
Chronicle Books
Target
Also available here:
Canada: Amazon.ca
Netherlands: Bol.com (fyi-the cover image is incorrect on this link)
Norway: Norli.no
UK: Amazon.co.uk
Final Book Signings
Just a reminder – The NEW YORK book signing that was cancelled in November in Garden City due to Sandy is rescheduled for this Thursday at 12:00 pm at the Williams-Sonoma in Huntington Station.
And on Friday – BOSTON will be the very last book signing stop before this year. I’ll be at the Burlington Barnes & Noble at 7 pm. I’ve never been to Boston and can’t wait.
Here are the details for the last two signings. Hope you can make it.
New York & Boston Book Signings
Unfortunately, the Paramus, NJ signing at Chef Central that was cancelled due to Superstorm Sandy wasn’t able to be rescheduled before the holidays. I’m so sorry for those of you who had wanted to attend.
And lastly…
finally if you’ve even read this far, here are some photos from the first events. I’m still working on uploading Houston and Dallas.
Feel free to grab a photo from the flickr links if you attended one of the signings. Thank you so much for coming out. I have loved meeting you all and cherish seeing your smiling faces. Yay for cake pops.
Houston (coming soon)
Dallas (coming soon)
That’s it. I know it was long, but I thought it would be better to do one wrap up instead of a bunch of little posts.
Don’t forget to enter below for a chance to win a set of cute cake pops ornaments and a copy of Cake Pops Holidays.


December 3, 2012
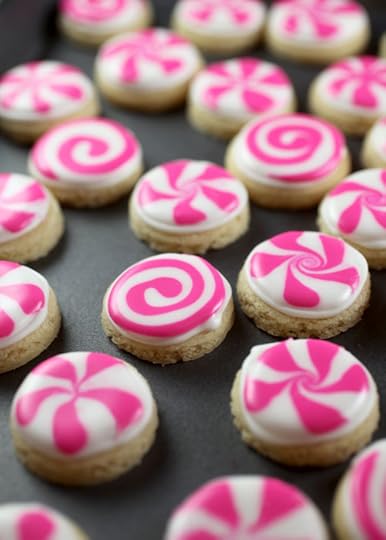
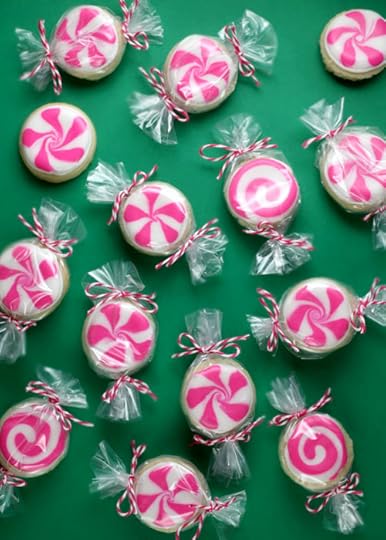
Peppermint Candy Sugar Cookies
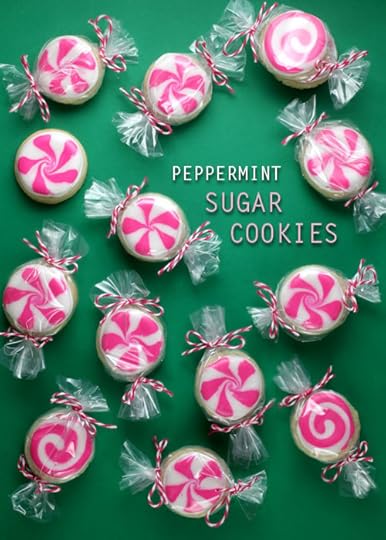
Happy National Cookie Day! I thought I’d remind just you in case you needed an excuse to enjoy a cookie today.
These bite-size sugar cookies are super fun and pretty easy to make and decorate. But I think the best part about them is how they are packaged to look like peppermint candy.
I have so many small treat bags on hand for wrapping cake pops and I was looking at them the other day and thought to myself that they could make cute little wrappers for some peppermint candy decorated cookies.
They had to be small cookies though… to fit in the bags after being baked and decorated. But small is good. Bite-size is even better. Cuter. More fun! So off I went to make some cookies … so I could turn around and make them look like candy.
Totally makes sense.
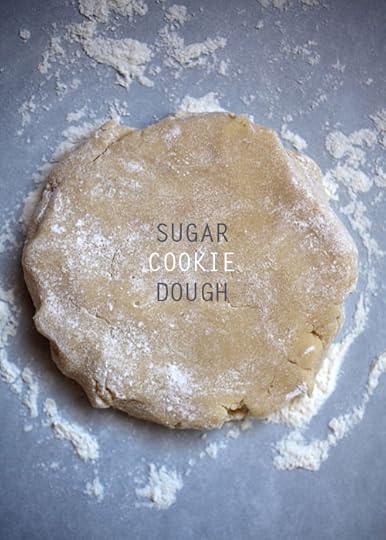
I love this sugar cookie dough. It is so easy to work with. The basic recipe I worked from is by my friend Bridget at Bake at 350.
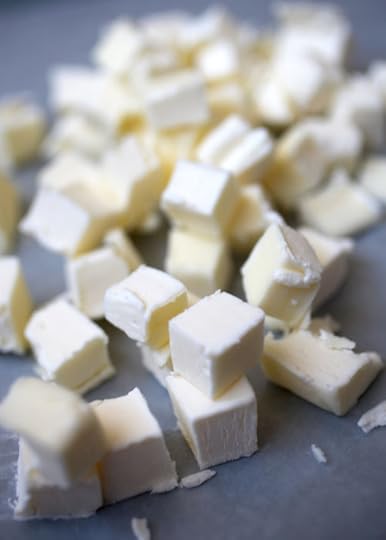
I especially love it because it uses cold butter. No waiting for it to get to room temperature. I am terrible about remembering to set out my butter ahead of time anyway. Plus there’s no waiting for the dough to chill before you roll. Just mix and go.
I like that. A lot.
Just get to mixing and you’ll be ready in no time to start cutting out cookie shapes. The fun part.

Just look at that dough. So smooth and thick. Dough like this makes me giddy inside.

I used a 1.5 inch round cutter for my circles. It needs to be small so when the cookies bake, they are still small enough to fit inside the treat bag with enough room to tie off the ends.
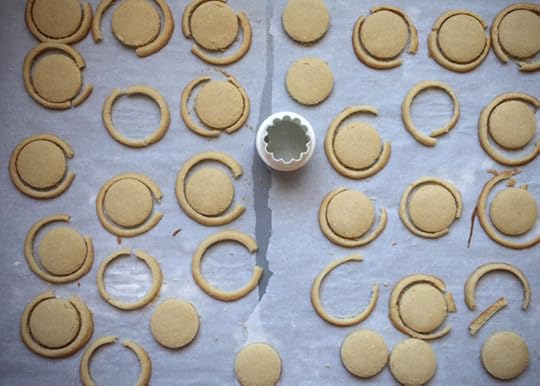
If you bake right away, the dough will probably spread some, but that’s perfectly okay. While the cookies are still warm, just use the same cutter to recut your shapes and trim off the excess so they stay the size you need them.
If you freeze the sugar cookie shapes for a few minutes, they won’t spread as much during baking. Just place the cutter on top and compare… if they look a lot larger than the cutter, then trim them down. If they are just a little larger than the cutter, you can leave them with their nice and pretty edges.
When cool, whip up some royal icing and start piping.
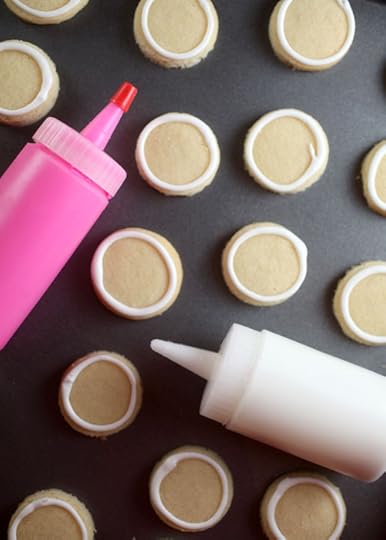
I used white for the base and pink for the swirls, but you can also do green and red to make even more festive peppermints.
First pipe the border of all the cookies in white royal icing for the outline.
I also tinted my white icing with white gel color to make them brighter and more opaque.
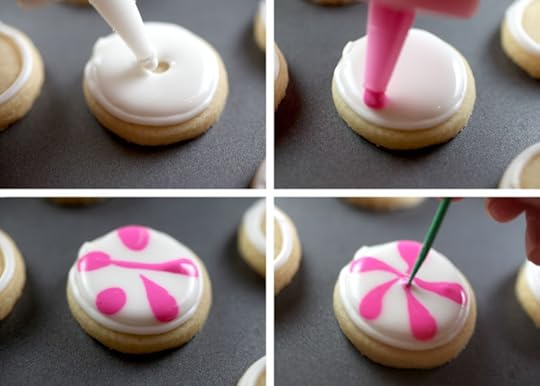
Then add a tiny bit of water to the icing to make a flood icing for the centers. Fill the center of a cookie with the white icing and while the icing is wet, add five drops of pink royal icing with the same flood consistency as the white to the perimeter of the cookies, pulling in towards the center slightly. Then just use a toothpick to gently guide the pink icing toward the center while also creating curving shapes. Nice clean edges, too.
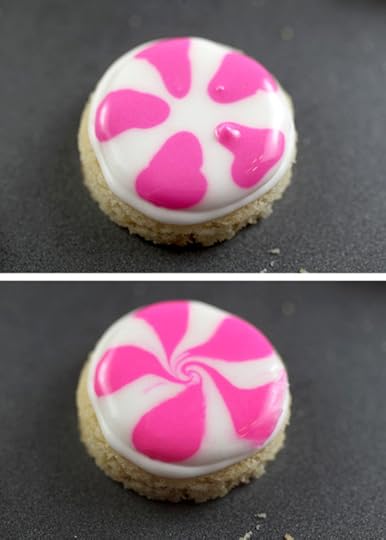
But I also trimmed down quite a few. Still cute. For thicker swirls, pipe more of a triangular shape with the pink icing stopping short of the center. Use the toothpick to smooth and curve the pink icing in the same curving direction for each triangle shape, directing it towards the center. When you get close to the center, gently make a tiny swirl in the middle while touching the five points of the pink icing.
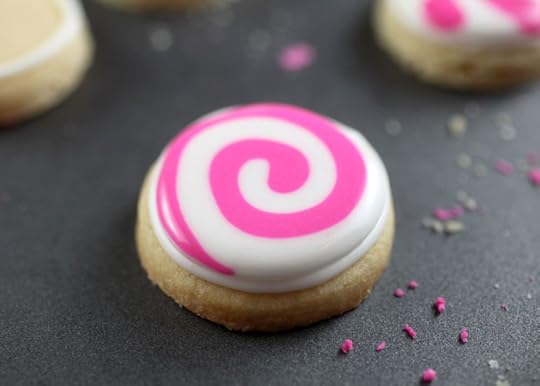
Or just pipe pretty swirls. Much quicker, and just as cute.
Maybe even cuter.
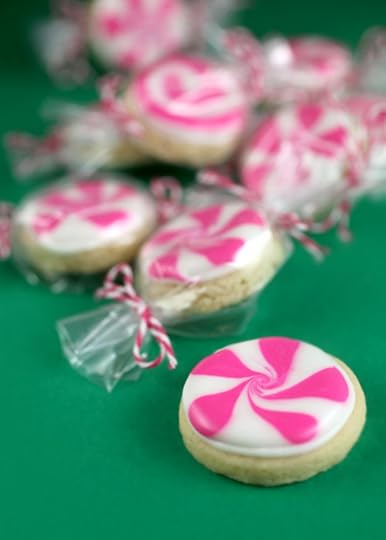
When they are completely dry (wait 24 hours to make sure), then it’s time to wrap them up.
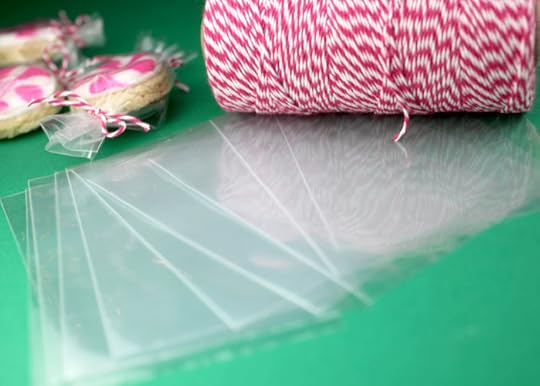
You’ll need some treat bags and twine. I used these 3X4 treat bags to go with the 1.5 inch cutter I used.
But you can certainly use bigger bags and a larger cutter. Just make sure whatever round cutter you use that it will give you enough room to tie the ends of the treat bags around your cookies. To test beforehand, cut out a piece of cardboard or something thick to the size of your cutter and place inside the bag to see if you have enough room to tie each end.
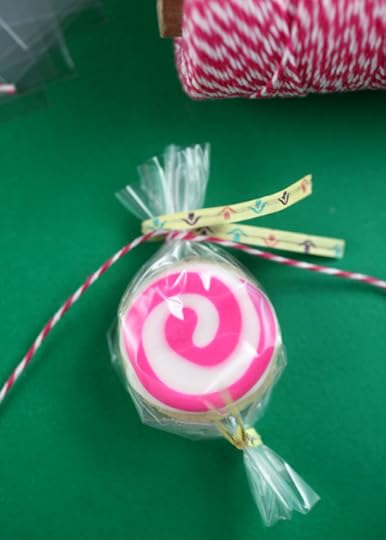
The little bags can be slippery, so I used a twist tie to clamp the bag together so I could easily tie the string. A big help.
And of course if you have enough twist ties, you could just use those by themselves. Try cutting them in half or thirds so you can get more out and so you won’t have long ends sticking out around your cookies.
When both ends are secure, then snip off the bottom of the bag if you like so you can open it and fan it out like the other side.
And that’s all there is to it for these sweet little peppermint candy cookies.
Perfect for giving out during the holidays. Individually or by the handful. : )
Peppermint Sugar Cookies
November 22, 2012
Sponsor test post

November 20, 2012
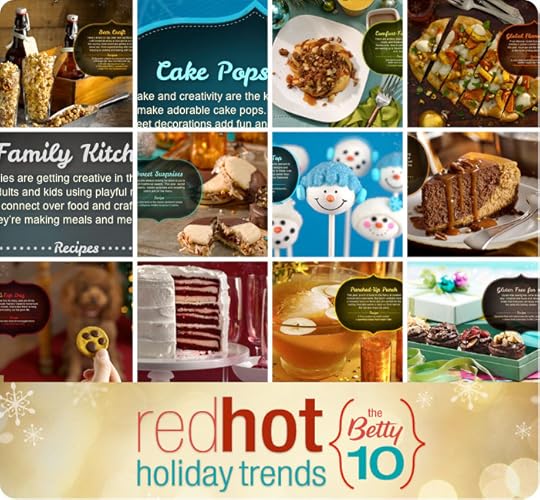
Red Hot Holidays
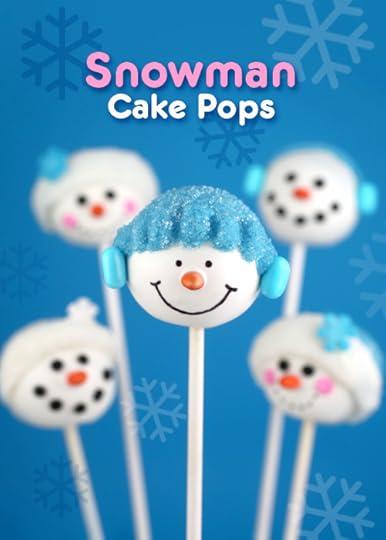
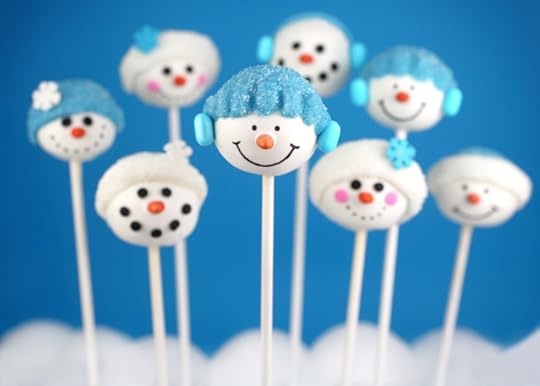
I’m excited to share some cute new snowman cake pops with you guys today. I made them for my friend Betty. As in Crocker. As in cra-zee!
I was asked to create a holiday-inspired cake pop project to be included in this year’s, The Betty 10: Red Hot Holiday Trends where Betty Crocker features ideas and recipes to inspire your holiday festivities. Hey, that rhymed. They were just announced earlier this week and the trends look fantastic.
Anyway… Eeeek! Of course I said yes. And I hope my Granny is smiling right now. She would be so proud to see me hanging out with Betty and probably pretty surprised that I bake … (And eat pecans, too).
You may recognize these little snowman heads. They were inspired by these snowmen gingerbread head cookies I made last year. I love ‘em and kinda wish I had made them earlier … like in time to include in the holiday book I have out now. That’s ok, there’s another cute snowman in there. Snowmen are fun because you can really change up their look so many ways with hats, scarves, bodies, heads, earmuffs, color and candy. Frosty, too!
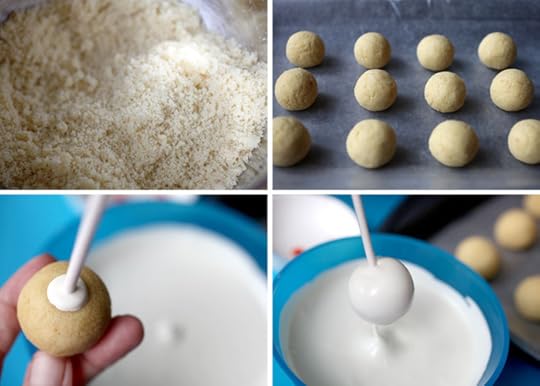
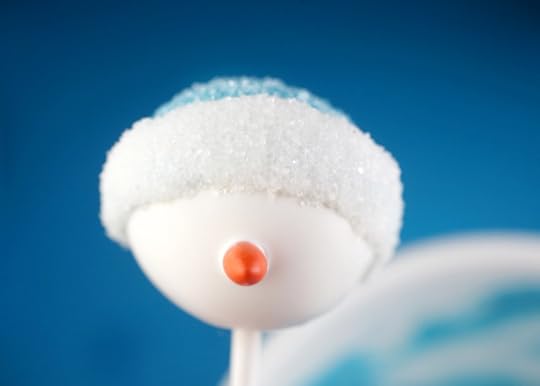
To get started I used crumbled white cake. The finer the crumbs the smoother the cake ball base you will have when you dip. Also, using light color cakes with white candy coating will make it less likely that the cake color will show through the candy.
The coating in this picture is Mercken’s Super White. Super fluid by the way.
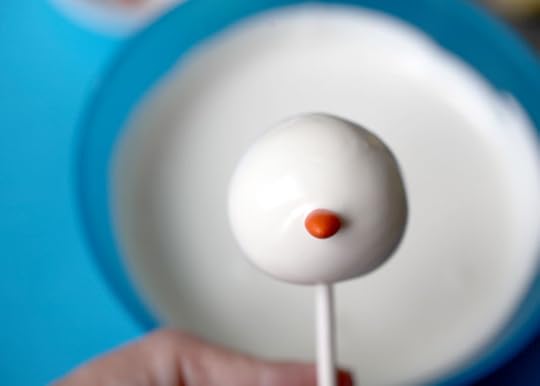
Right after you dip, insert an orange coated sunflower seed for a carrot nose and let dry.

Then dip the top in a second color and before it dries, sprinkle with white sanding sugar.
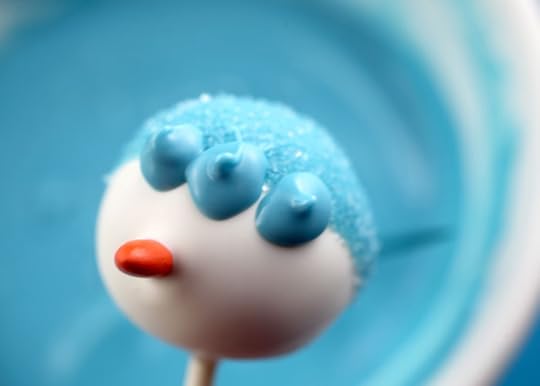
When that dries, dot on more coating around the perimeter of the hat color with a toothpick and sprinkle again with sanding sugar.
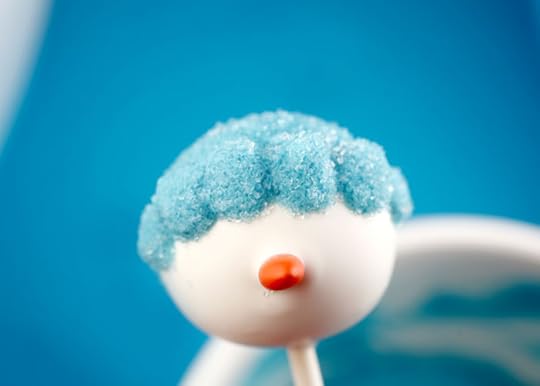
Before it all dries, use the toothpick to help define indentions for a sweet little cap.
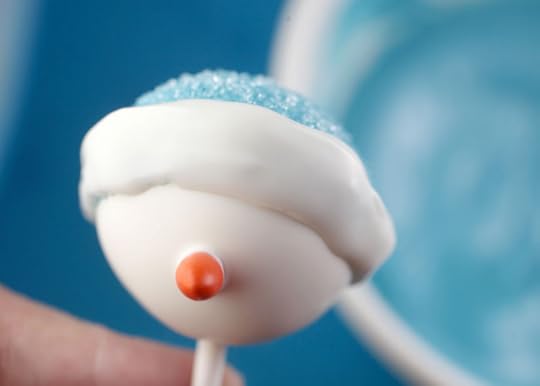
Or you can use a toothpick to apply a big band of white coating.
And sprinkle with white sanding sugar for a two-tone cap.

When the pops dry, use more sprinkles or candy to decorate using candy coating as glue.
Black confetti sprinkles make great eyes made out of coal.
Pastel pink confetti sprinkles make sweet cheeks.
Jumbo snowflakes to top off the caps.
And I hear Tic Tacs make great ear muffs. I used these for the color but you can easily swap it out for M&M’s or another similar candy.
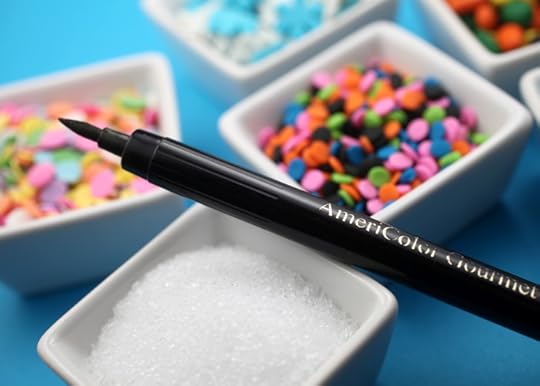
Dot or draw on sweet smiles with a black edible ink pen like Americolor.
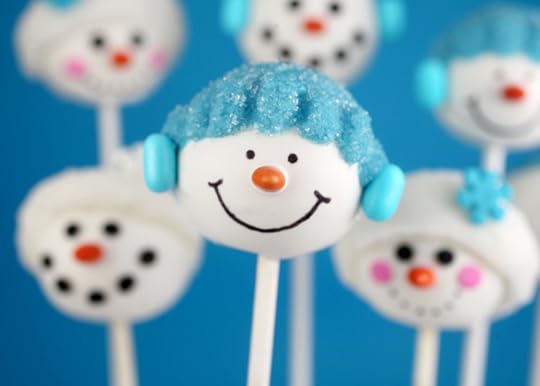
Big smile! Say freeze.
Thanks for including me Betty!
Here’s the complete list of The Betty 10: Red Hot Holiday Trends
And here’s the Snowman Cake Pops Recipe.
Enjoy and hope your holidays are red hot.
Have you made holiday cake pops? Plan to make them?
Share what you’re up to. I’d love to see all the sweetness.

November 18, 2012
My Kind of Stuffing
I feel like I should be baking Thanksgivingy, cinnamony, pumpkiny treats right now. But today just called for some serious chocolate chip cookies. And these were the perfect feel good Sunday sweet. They would have made an even better Friday treat though. Then I could have eaten them over the whole weekend instead of wanting to eat them all in one day. I try to start the week off sweet free you know. Try being the key word.
I don’t know why it’s taken me so long to make these. I know you’ve probably seen them all over the interwebs.
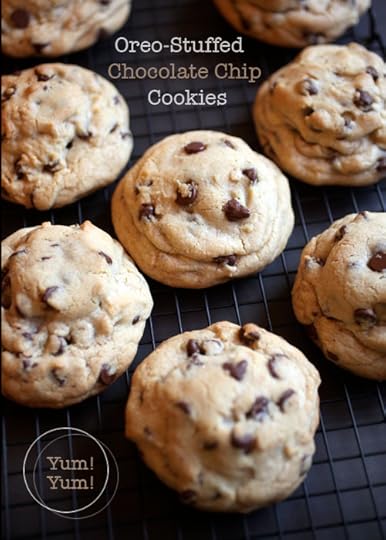
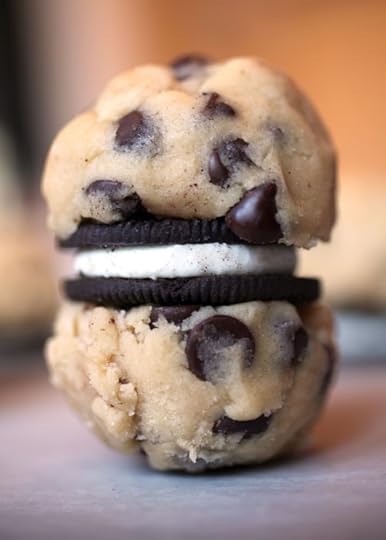
I mean jumbo chocolate chip cookies…
…stuffed with Double Stuf Oreo cookies.
Hello…
Heaven.
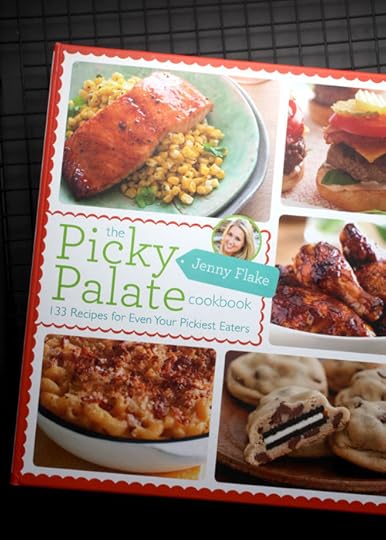
My friend Jenny of PickyPalate.com started making these cookies a while ago and I can’t believe I have not baked any before today. But now that I have her new cookbook (filled with plenty of sweets by the way) in my kitchen, I guess baking her cookies is the next best thing to baking up cookies with her sweet, smiling face.
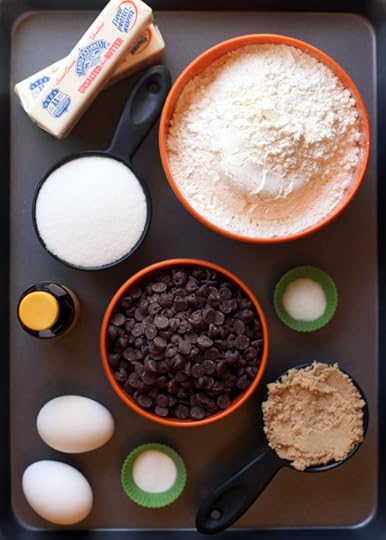
Your basic chocolate chip cookie ingredients all ready to go.
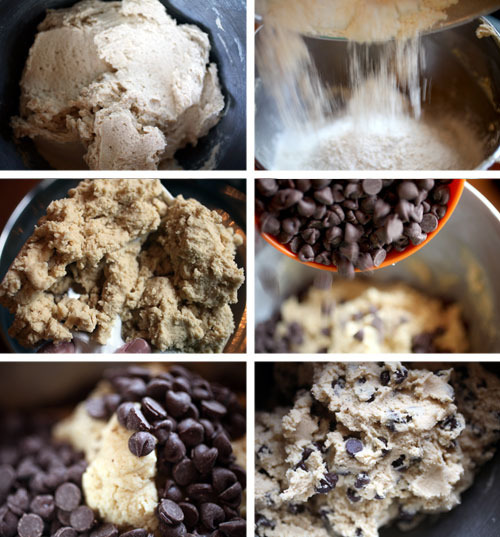
Ready to become cookie dough.
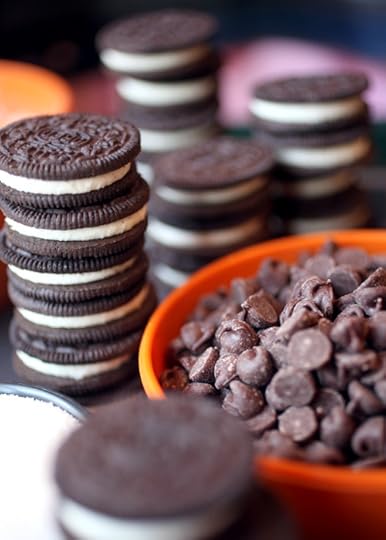
And now for the star. The surprise inside.
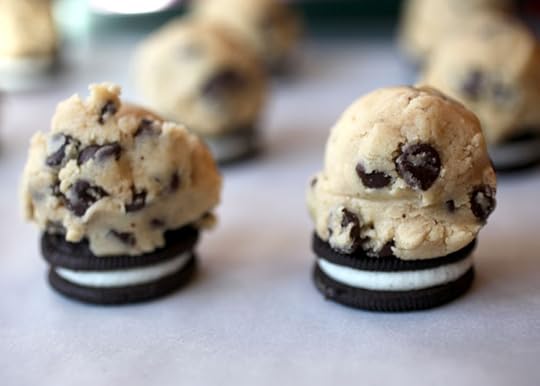
Just scoop cookie dough and place on top of an Oreo cookie.
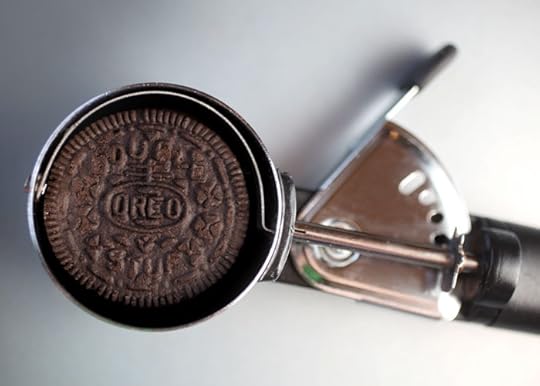
I used a regular size ice cream scoop.
Sandwich the cookie sandwich with another scoop on the bottom.
That’s some kind of awesome.
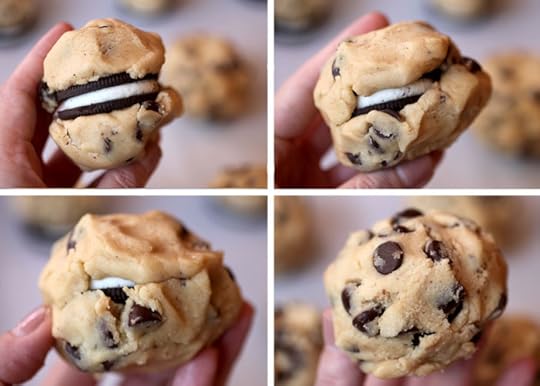
Now, gently seal the dough and tuck the cookie safely inside.
These make huge cookies by the way.
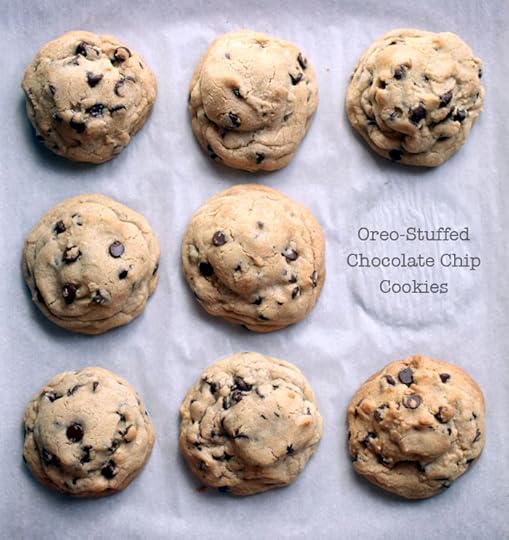
Giant Oreo-Stuffed Chocolate Chip Cookies.
Drastically delicious and easy, too.
I’ve made some brownie stuffed pillow cookies before, but these save you the extra step of baking the inside sweet. Love it.
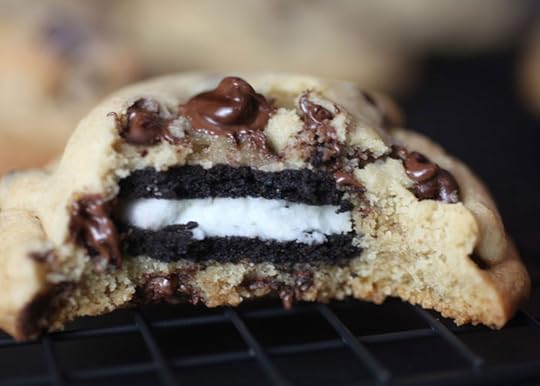
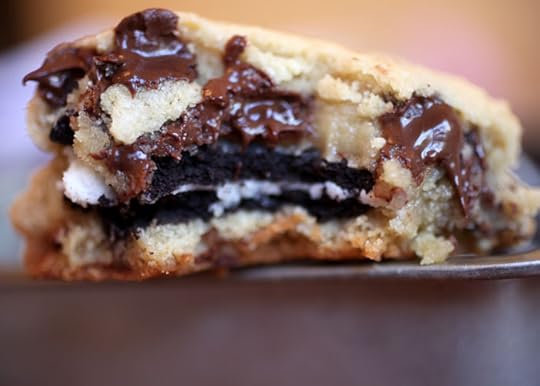
Here’s my attempt at gently biting away the cookie so you can see the pretty Oreo layers inside.
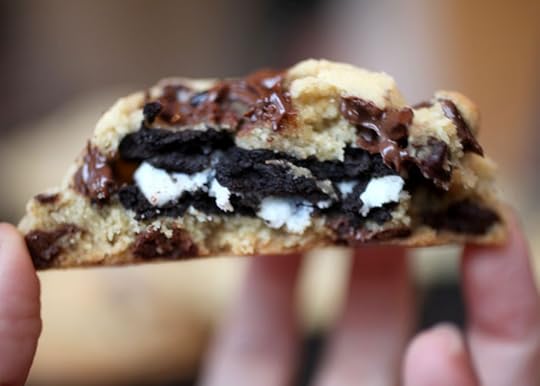
And this is what I would call a face plant.
Enjoy!
P.S. I finally added a printable recipe function.
I feel like a grown up food blogger now.
Picky Palate's Oreo-Stuffed Chocolate Chip Cookies
November 12, 2012
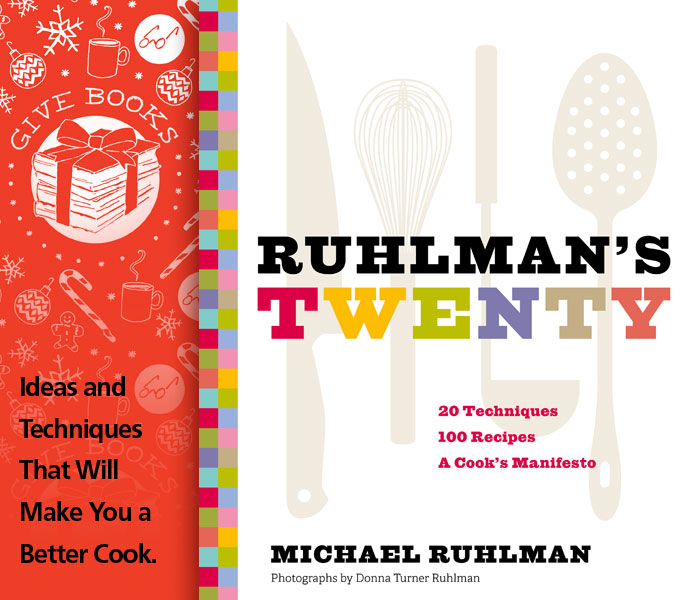
Give Books
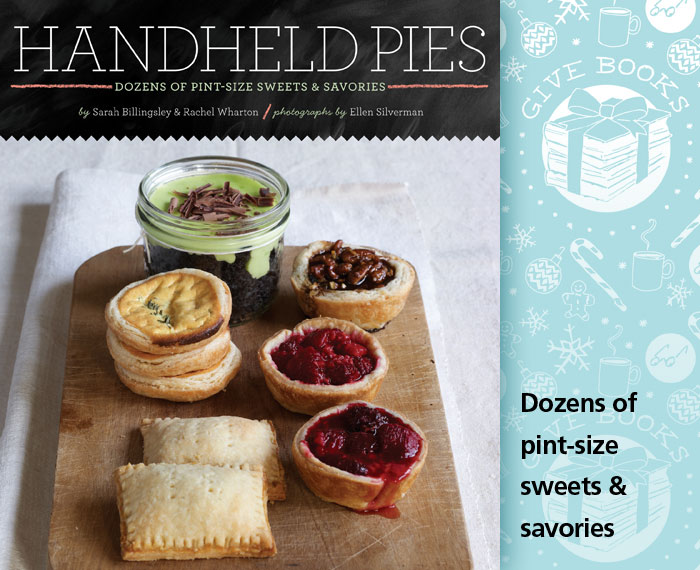
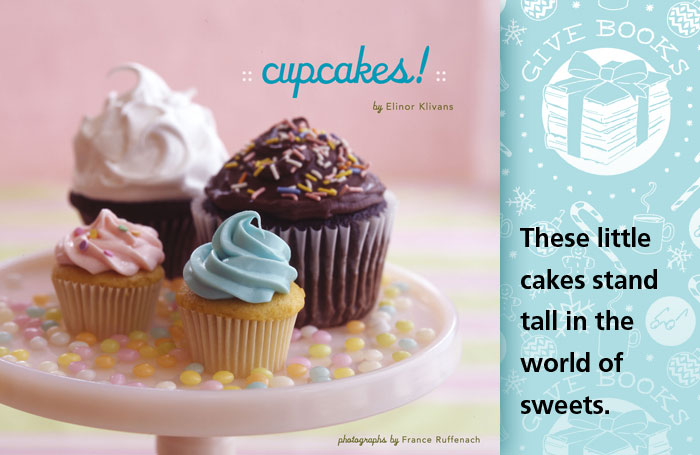
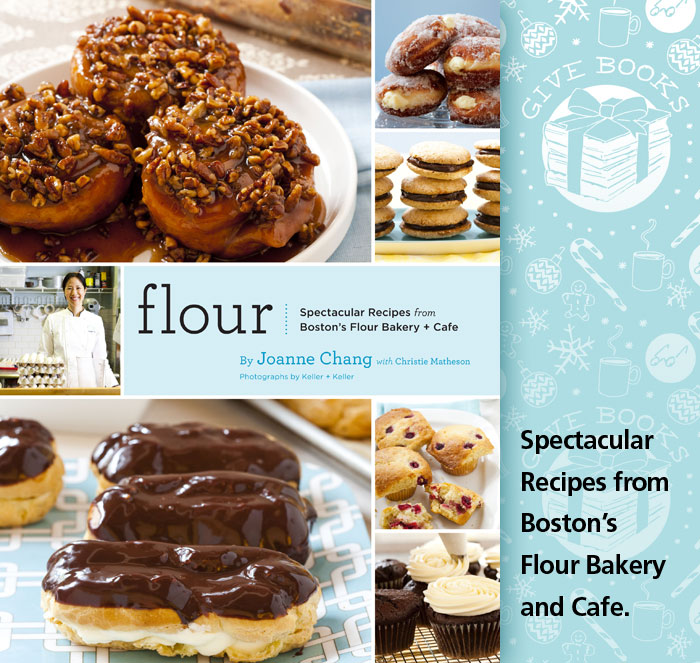
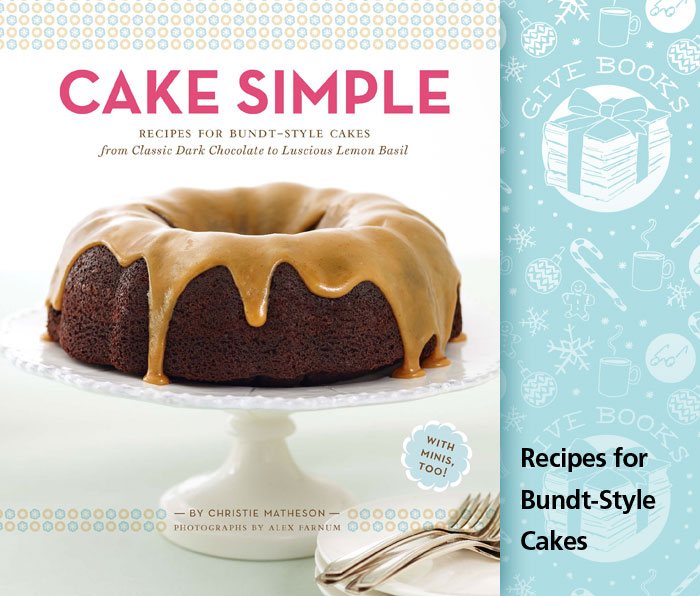
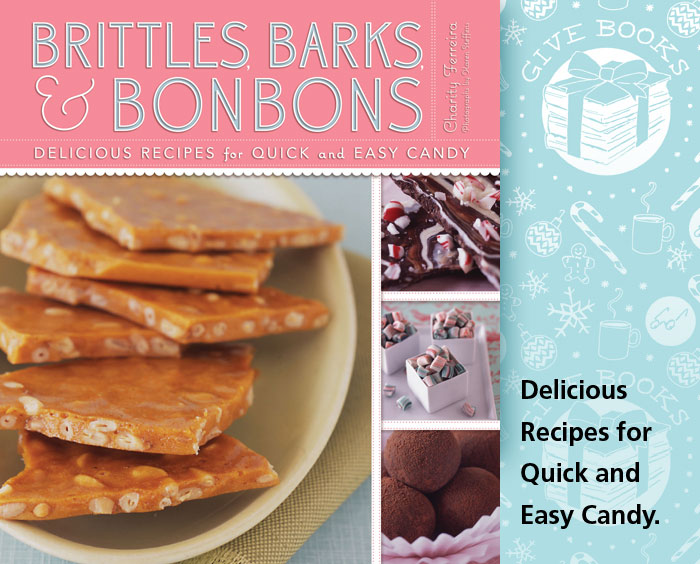
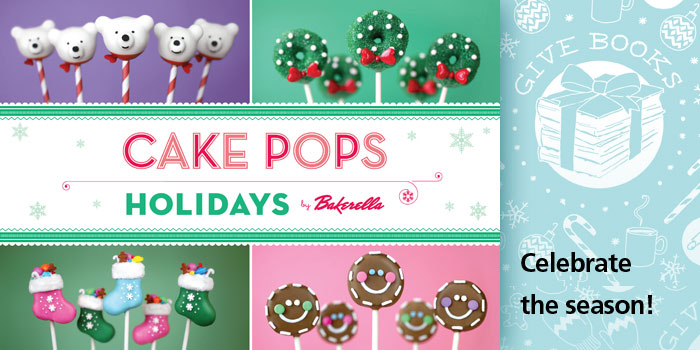
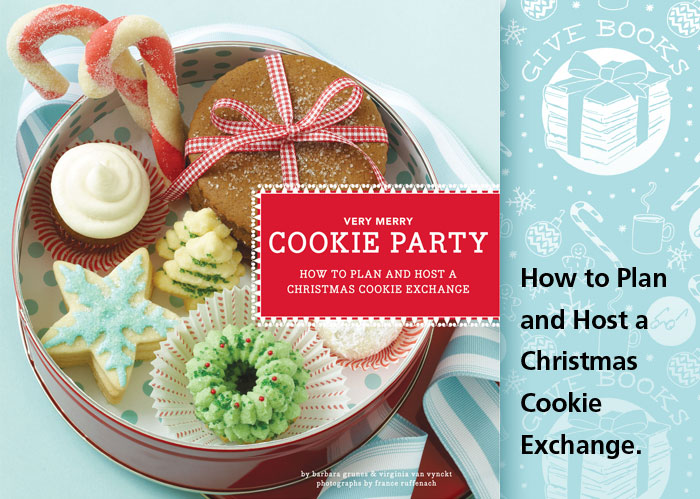
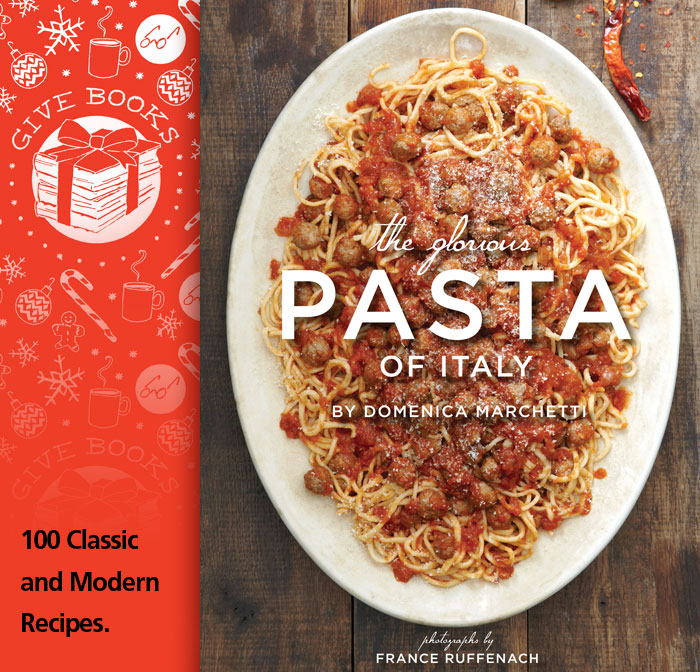
My publisher, Chronicle Books launched a fun Give Books campaign yesterday. They are partnering with authors, artists and blogs to encourage people to give books for the holidays and I’m helping them spread the word. Books are a perfect gift don’t you think. There’s one for everyone. For every age, for every interest. They are personal and the right one can really show the recipient how much you care. They feel good to hold and they make you feel good to give.
I know because I’m giving away 10 books courtesy of Chronicle Books.
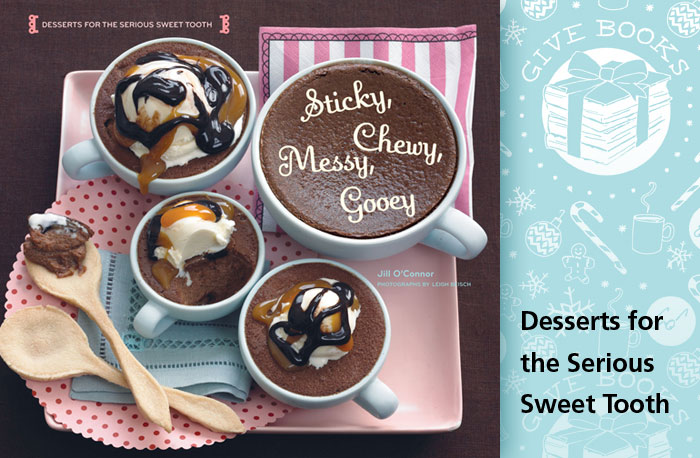
I stuck with all cookbooks and I tried to find a good mix for keeping or gift giving. It’s up to you.
Want to see which ones I picked from their website?
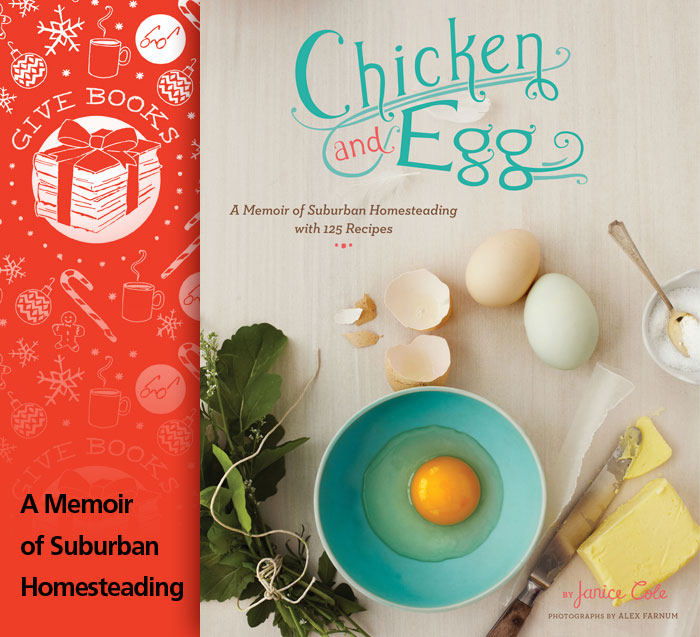
Good… let’s check out some sweet reads! I think these would all come in pretty handy for holiday baking.

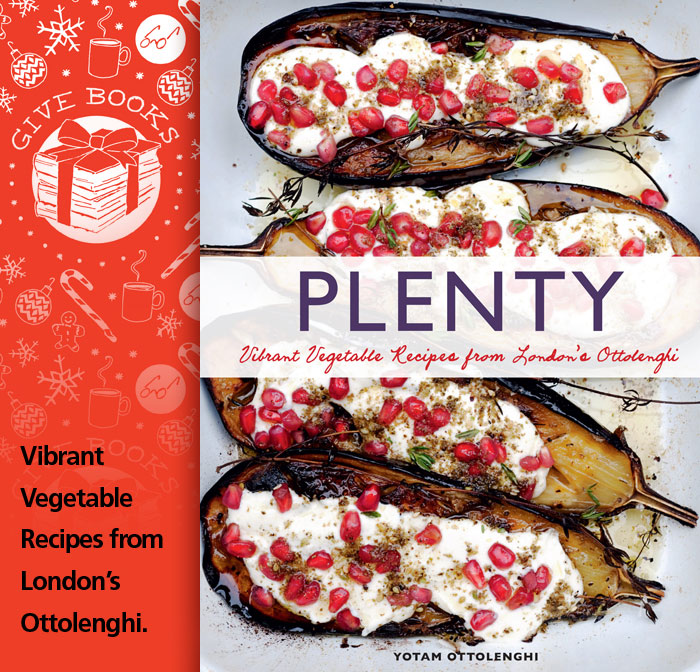
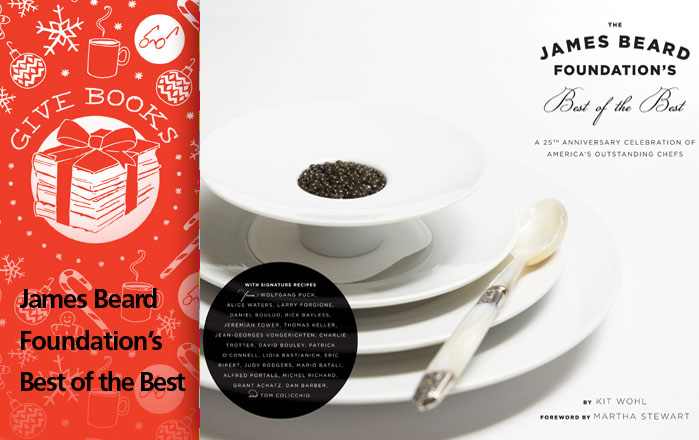
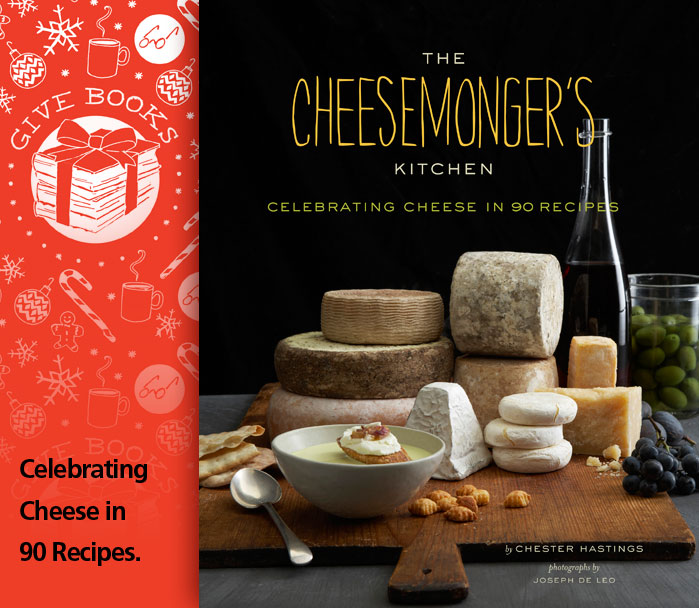
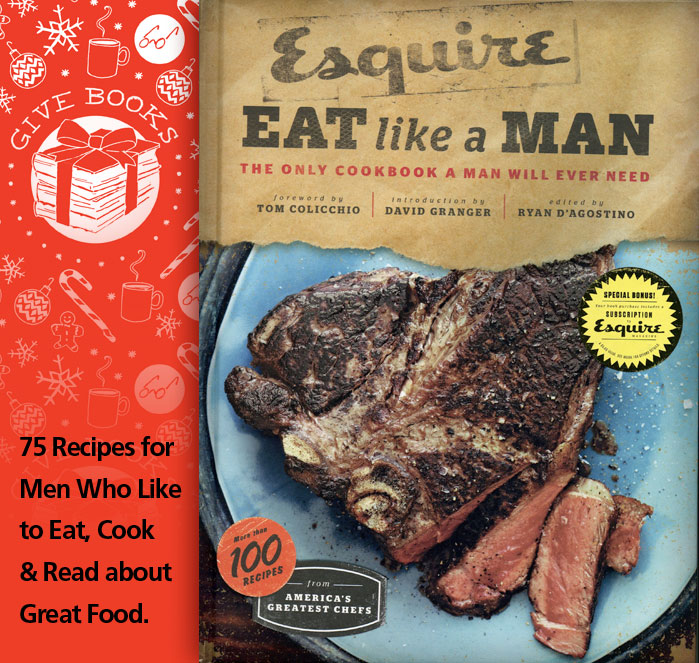
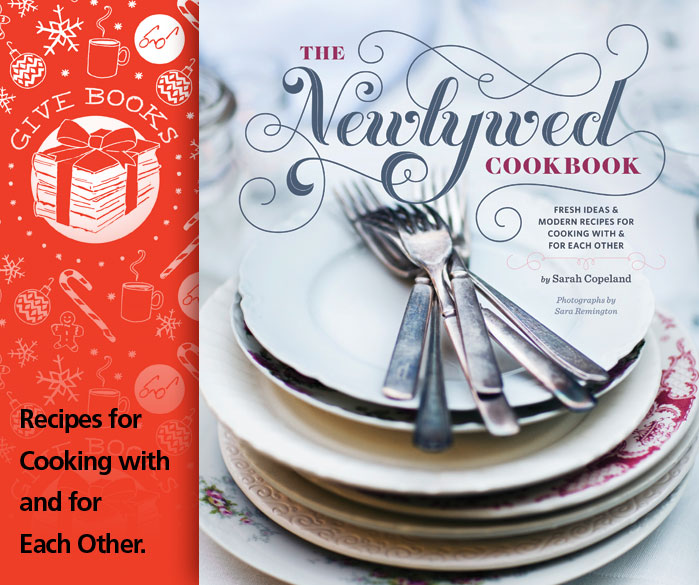
Now since I’m an equal opportunity eater,
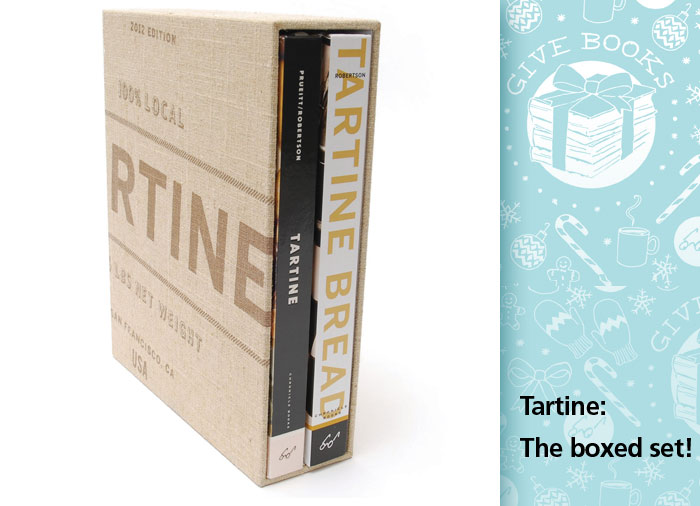
here’s another set of 10 books you might want more.
These are less sweet and much more savory.


Want a chance to win one of these groups of ten?
You choose which one.

Just leave a comment on the blog and let me know which group of ten you’d like to win. Sweet or savory?
The deadline to enter is 6:00 pm ET on Thursday, November 15, 2012
One winner will be chosen at random and announced sometime Thursday evening on this post.
Good luck guys!
P.S. Here’s a post on Chronicle’s blog if you’d like to try and win one of the other sets of ten books chosen by others.
And now through December 31, enjoy 30% off + free ground shipping on all holiday orders at ChronicleBooks.com! Just enter discount code GIVEBOOKS at checkout.
Give Books artwork created by the amazing Julia Rothman!

November 4, 2012
Jingle Bell, Jingle Bell …
Jingle bell, jingle bell, jingle bell POP!
It’s the right time to dip the night away don’t you think.
It’s here! It’s here! And I’m super excited Cake Pops Holidays is available online and in stores and even at scholastic book fairs, too I hear.… just in time for some fun holiday cake popping!
And I know you guys are gonna bring some serious cuteness this Christmas. I’m constantly blown away by the cake pops you all share on the Bakerella Facebook page. I mean super, super, super stuff. I often find my jaw dropping.
I hope the book continues to inspire you to make lots of people happy this holiday season. Lots of sweet smiles.
The book is full of cute winter holiday cake pop projects just like these.
Elves, Santas, stockings, presents … and gingerbread houses, Christmas lights, dreidels, wreaths and more.
It has a wiro-binding like the first book.
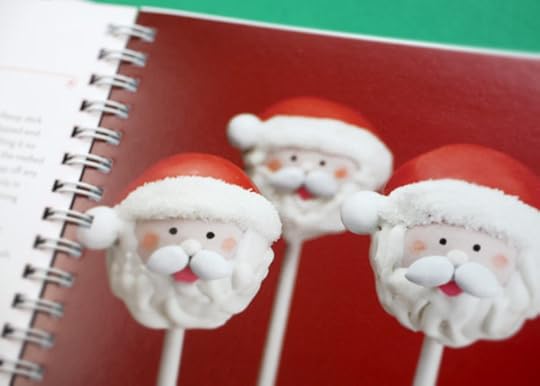
So you can lay it flat while you dip.
And to celebrate I’m giving away five (5) copies of the book.… Signed if you’d like.
(The book is available on Amazon, at Barnes & Noble, and Target, too.)
But that’s not all.
Each of the five winners will also be getting something else.
Something fun!
And something to have fun with!
The Cake Pops Toy that’s available at Toys R US…

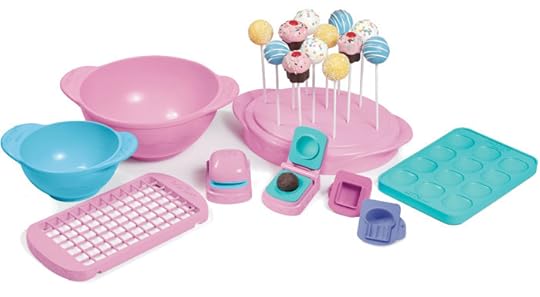
It comes with all this cute stuff to play with. And help little ones make real cake pops with.
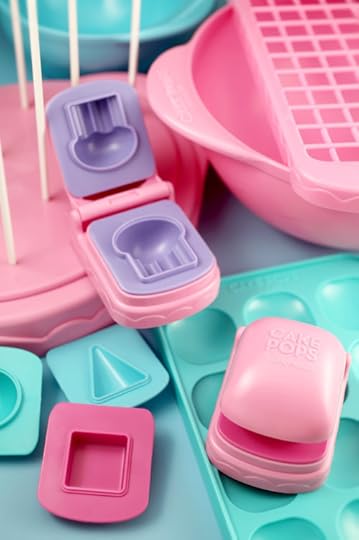
A toy for tiny treats.
:::::::::::::::::::::::::::::::::::::::::::::::::::::::::::::::::::::::::::::::::::::::::::::::::::::::::::::
Enter for a chance to win Cake Pops Holidays and the Cake Pops Toy
To enter the giveaway, just answer one of the following questions.
How do you usually spend Christmas Eve? Or What’s your favorite part of the holiday season?
The deadline to enter is Tuesday, November 6, 2012 at 7:00 p.m. ET.
Five (5) winners will be picked at random and announced sometime Wednesday evening.
Please note: The toy manufacturer is currently only shipping to the US and Canada. If a winner is chosen outside those countries, the winner will receive two signed Cake Pops Holidays books instead.
Good Luck!
P.S. I had my first book signing earlier today in King of Prussia and I want to thank all of you that came out to say hi. It was so much fun and I hope you enjoy your books. The first two signings were supposed to be in New York and New Jersey, but with the devastation from Sandy, we are going to try and reschedule. I hope all of you in those areas affected are safe.
Here’s the remaining Cake Pops Holidays Book Signing Dates. I’d love to see you.
P.P.S. I know there’s been a lot of cake pops on the site lately, but I’ll be back to regular baking too soon. I need a brownie or a cookie or 12.

October 28, 2012
Happy Halloweenie!
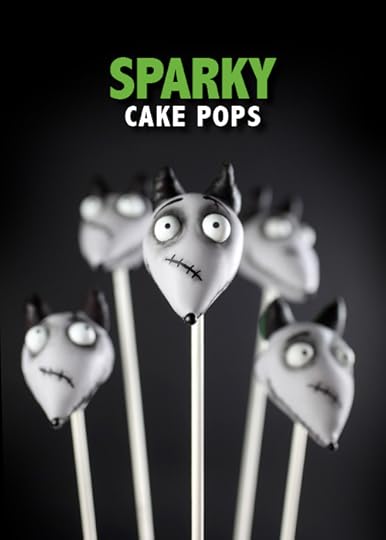
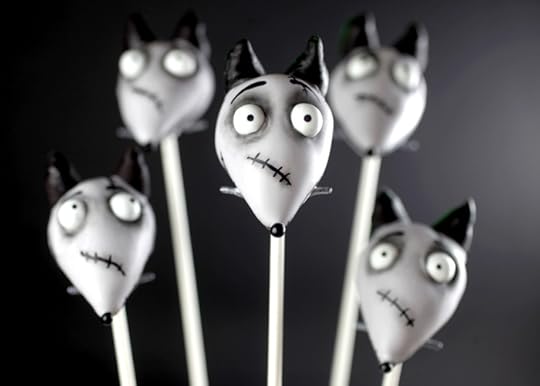
Halloween is just a few days away, but I want to share one more cake pop creation with you guys. I made these Sparky pops for Disney’s new website Spoonful. They’re inspired by Disney’s stop-motion 3D animated film, Frankenweenie from Tim Burton that opened earlier this month. If you haven’t seen the movie, Sparky is brought back to life by his young owner Victor after a car accident resulting in monstrous consequences.
I loved the idea of making these cake pops in shades of gray since the movie was filmed in black and white. And I’m so happy with how they came out. It’s neat how these are all full color photos, but you can’t really tell since the candy coating is gray and the candies are black and white, too.
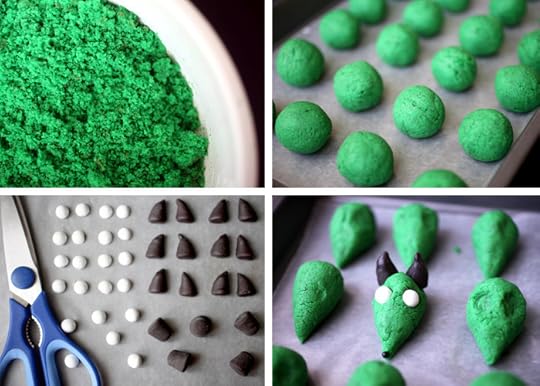
A lot of times I’ll take on a character, but I don’t really know what it will end up looking like until I find the right candies to make the features. You can always use fondant to make features if you want, but using candies to help create the characters is more fun and challenging to me. It really is amazing all the creative possibilities a candy or sprinkle has.
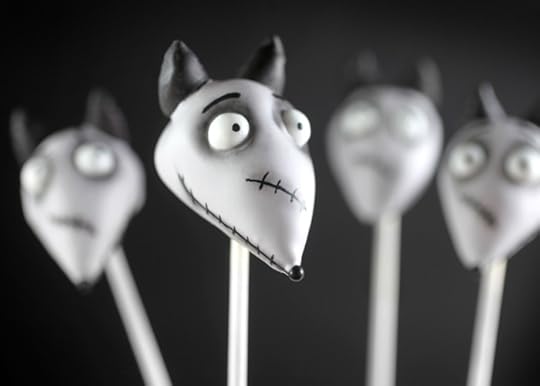
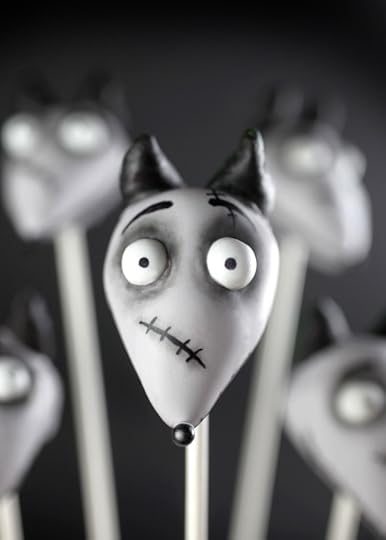
And of course, edible ink pens come in handy too. Especially for dotting eyes and drawing all of Sparky’s stitches.
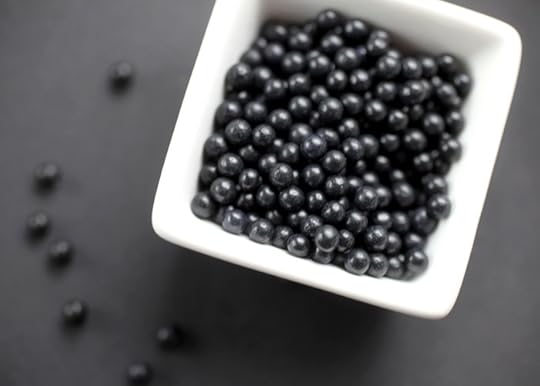
Proportion is key to recreating a character in cake pops. And something as simple as a black sugar pearl may be all you need for just the right touch.
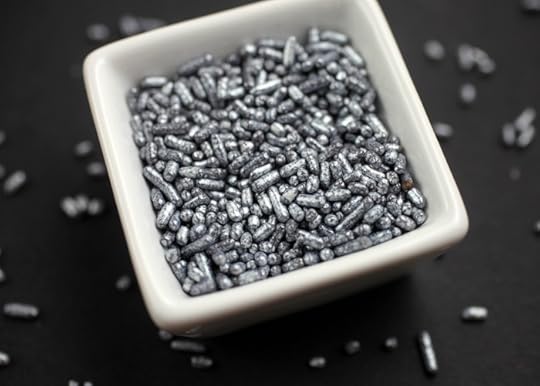
And silver jimmies… ?
How about bolts – they go great with the black and white theme, too.
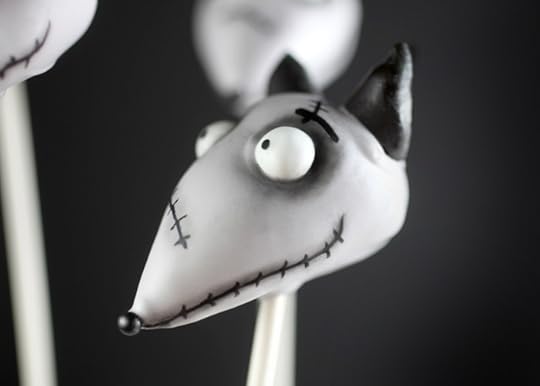
Sparky’s stare even looks kinda spooky.
Sparky! You are too cute… and it’s too bad I’m going to eat you.
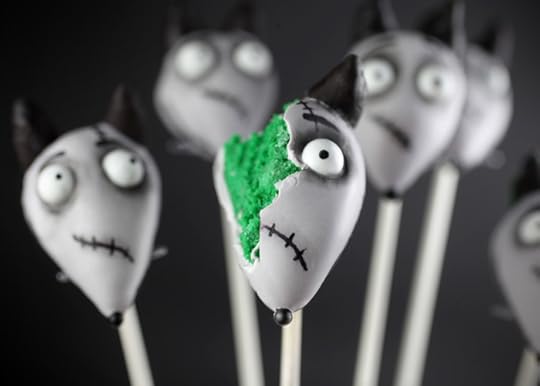
Awe, poor Sparky. Can’t catch a break. But he sure is tasty.
Here are the full instructions on Disney’s website Spoonful so you can make your own.
Have a Happy Halloweenie!
And here are more Disney Projects I’ve worked on for their website.

October 21, 2012
Candy Corn and Spider Web Cake Pops
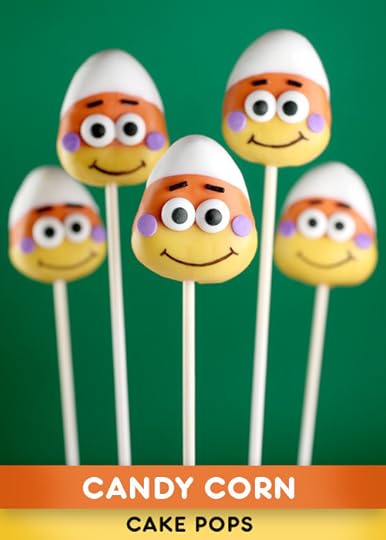
Can I interest you in some candy corn? These aren’t my favorite candy to eat, but for Halloween there’s nothing more iconic. So I thought it was about time I turned them into cake pops.
Cute cake pops that will make them the most popular treat for Halloween.
By the way… caramel candy corn… It rocks. Try it.
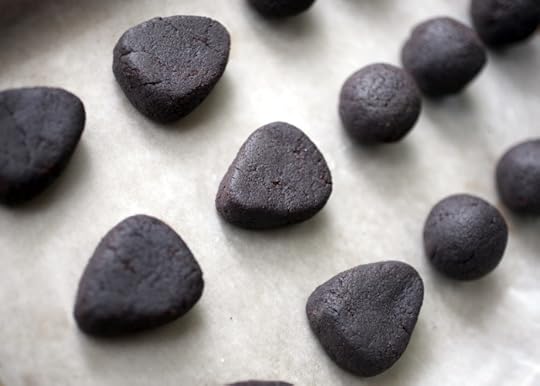
Make your cake balls following the basic instructions here and then hand shape them into candy corn shapes. Use a piece of wax paper to slide the edges across for smoother more defined edges.
These are really pretty easy to decorate since all the decorative add ons get added after the cake pops are dipped.
It’s a little less work than when the add ons need to be attached while the coating is still wet. These, for instance, you could dip one day and then decorate another.
You can dip these a couple of ways to get a tri-color effect.
You can dip in one color, let dry, then the next and let dry and then the last. But when you do it this way, the pop gets three layers of coating on the last color by the time you’re done. It can get a little thick and can also distort the design some.
So… I did these with a little more effort.
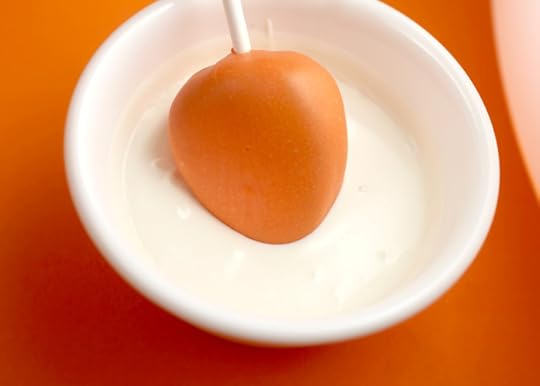
First I start with orange… the color I want for the middle. And I dip the entire shaped cake ball into the orange coating and let dry. Then, I dip the top in white coating. Insert at an angle to get the coating to curve around the edges. Or insert straight if you want your sections straight.
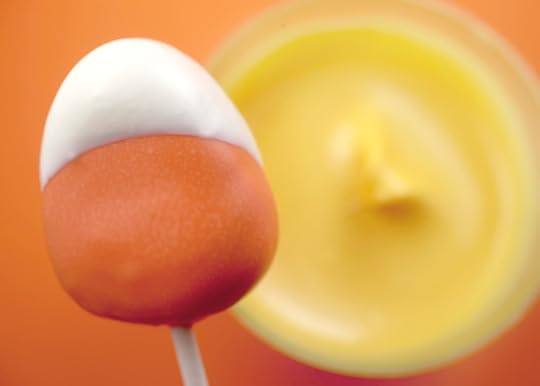
Now how to get them yellow since they are on sticks?
Very easy and I do this often depending on the design.
Gently twist the stick out of the pop. Then dip the bottom in the yellow coating. Dip the tip of your stick in coating and insert the stick right back into the cake pop and let dry.
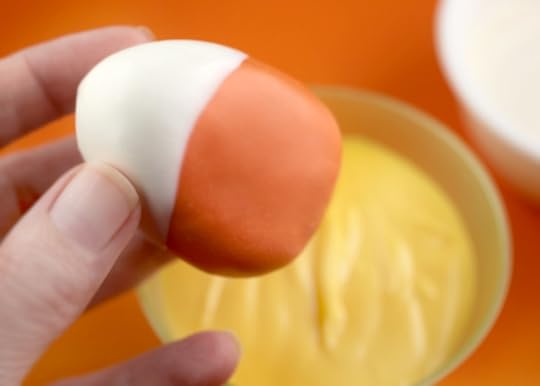
This way the coating is only two layers thick in places. Much better for recipients I think.
And now they are ready to decorate.
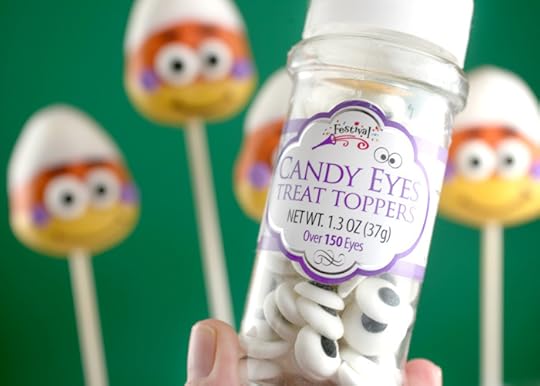
Candy eyes! These little guys have big faces and can pull off big eyes. (found at Hobby Lobby)

See. So cute with big happy expressions.
Just attach the eyes with a dot of melted candy coating. Then do the same with black jimmies for eyebrows and purple confetti sprinkles for cheeks.
Then draw a big sweet smile with a black edible ink pen (I use Americolor pens) or pipe on with melted candy coating.
And there you have it. Candy corn cake pops.
But that’s not all. Let’s use the eyes again. On some spiders this time.
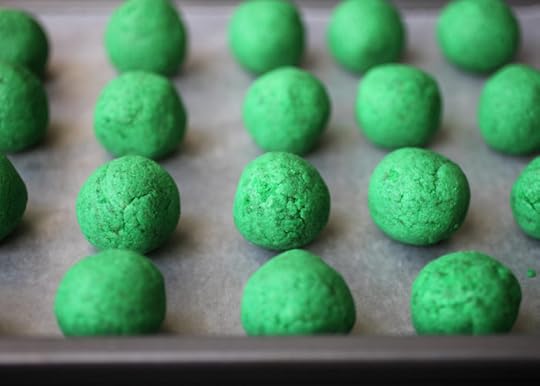
OOooOh. And let’s tint the cake batter green just for fun.
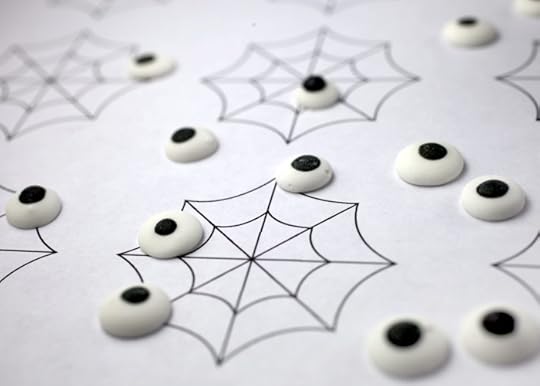
Spider webs are the stars of this cake pop design.
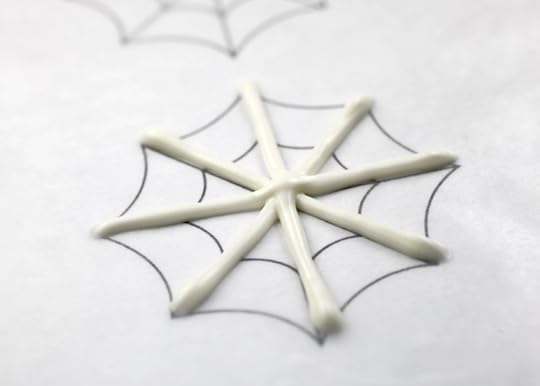
Pipe some candy coating on wax paper.
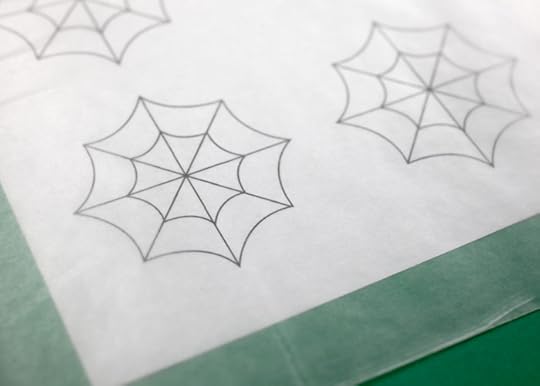
Here’s a web template you can place underneath to help you draw them.
Then press your lollipop stick on the coating while it’s still wet.
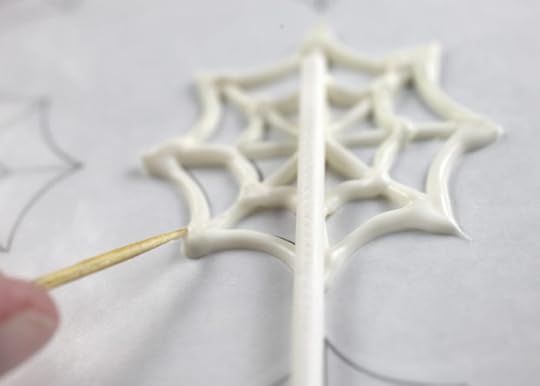
You can use a toothpick to pull through the coating for more pointed ends.
And when the webs are dry, you can also use it to help shape any wonky edges. Gently rub the side of the toothpick against any bumps in the coating to help smooth it out. And you can also use the tips of your fingers.
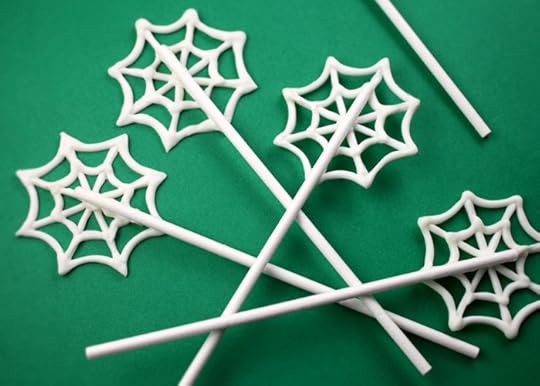
Now use them to dip your cake pops.
… Or what I would recommend to be safer, is dip and decorate your cake pops first and then gently twist the sticks out and use those to place on the piped spider webs.
When dry, simply dip the ends in a little leftover coating and insert back into the cake pops.
If you do, you’ll have the cute little crawlers staring at you.
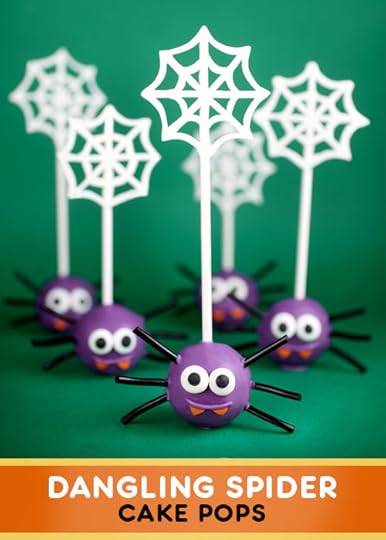
To decorate the spiders, dip in the candy coating color of your choice and while the coating is still wet gently insert cut licorice pieces for legs. Let dry and you can attach the candy eyes with melted coating. The fangs are just miniature confetti hearts. After they are attached, you can pipe on a smile to cover up the top part of the hearts.
Darling dangling spiders.
::::::::::::::::::::::::::::::::::::::::::::::::::::::::::::::::::::::::::::::::::::::::::::::::::::::::::::::::::::
Need More Halloween Cake Pop Ideas?
Here are some to get your creative juices going … starting with more spiders. Yuck and yummy at the same time.
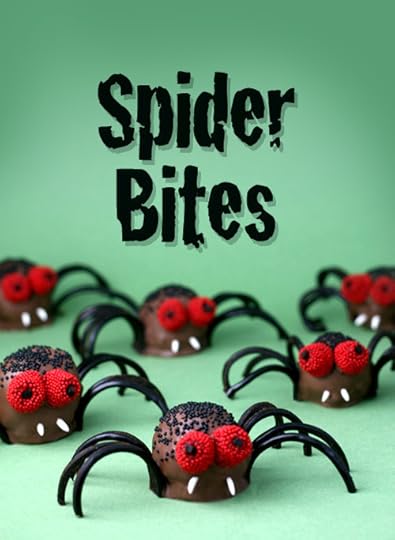
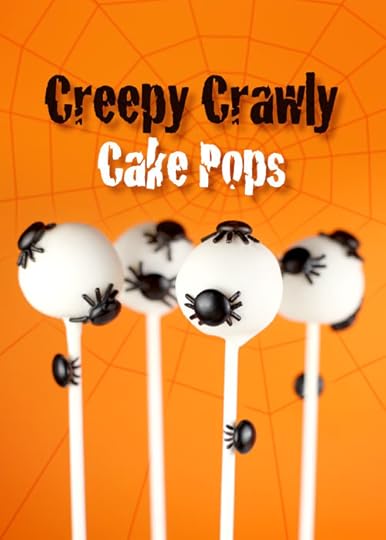
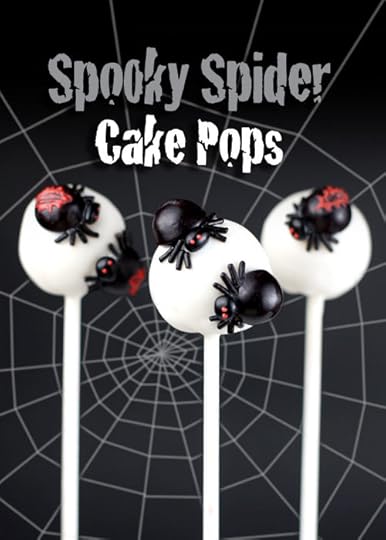
Creepy Crawly and Spooky Spider Cake Pops
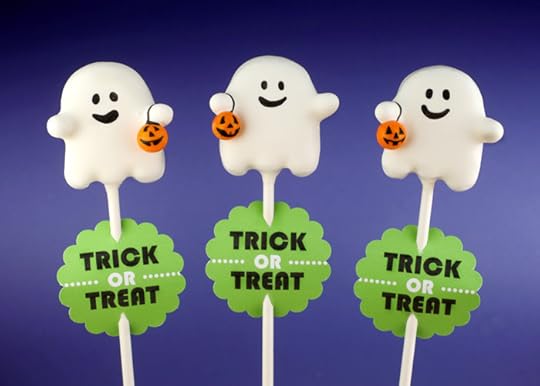
Sweet Ghosts from a couple of weeks ago.
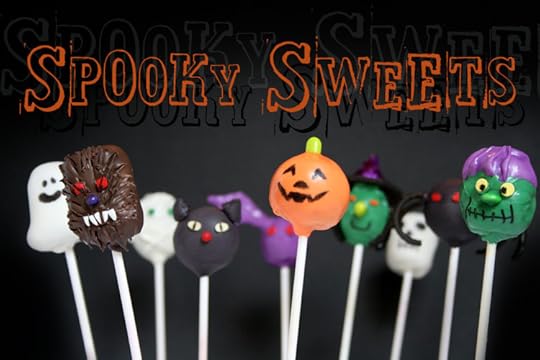
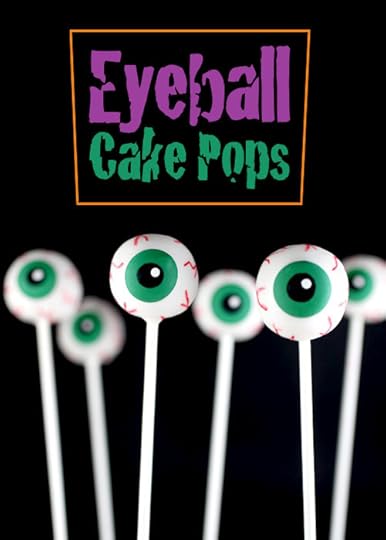
And then there’s all these little Spooky Sweets I made a few years ago.
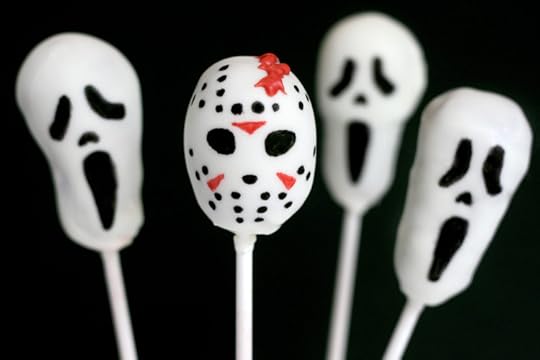
And these too. Yikes!
What should I make next for Halloween?
What treats are you guys making? Spill all the spooky sweets.

October 15, 2012
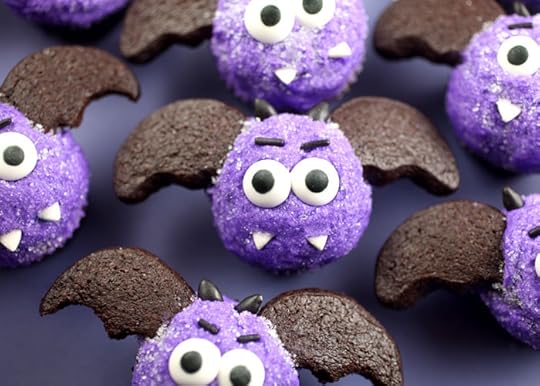
Itty-Bitty Bat Cupcakes
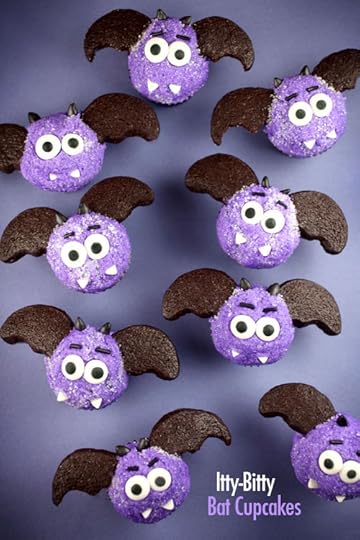
These are cute little guys. Bite-size!
When I made homemade kitty cat oreos the other day, I thought the set of cutters I used might come in handy again.
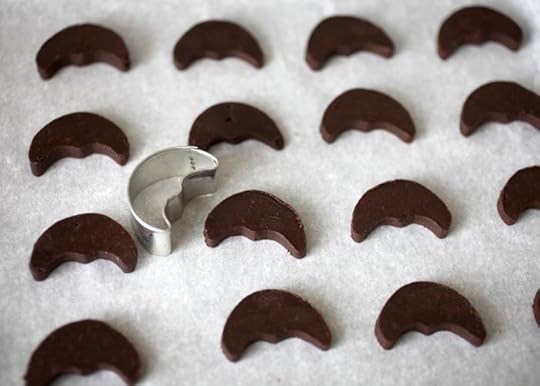
And they did. This moon shape mini cutter doubled perfectly as a bat wing.
And just the right size for mini cupcakes. So I made another batch of those chocolate cookies this weekend to use as decoration.
It’s ok if you don’t have a mini moon cutter. You can just wing it.
Try using a small round cutter and then another smaller round cutter of some kind to remove semi-circles from the wing.
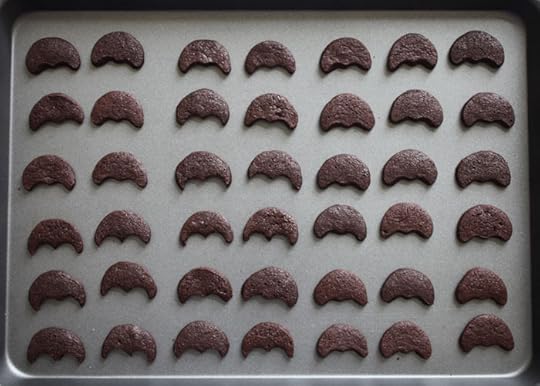
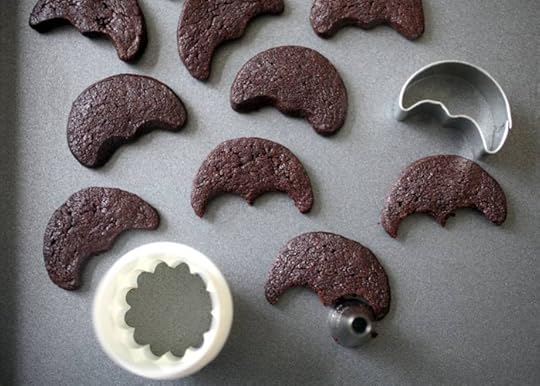
I used the moon cutter for most of them and on some of them, I used a decorating tip to cut away curved shapes right when the cookies came out of the oven. I thought the cookies had spread a little too much and thought I’d like sharper, more defined wings. But I didn’t. In the end, I liked the rounded ones best. Makes them cuter I think.
Now if you don’t have any cutters like that, you can also, take some packaged Oreos and use a serrated knife to gently saw and cut them in half. They’ll be half circles, but will definitely work in a pinch.
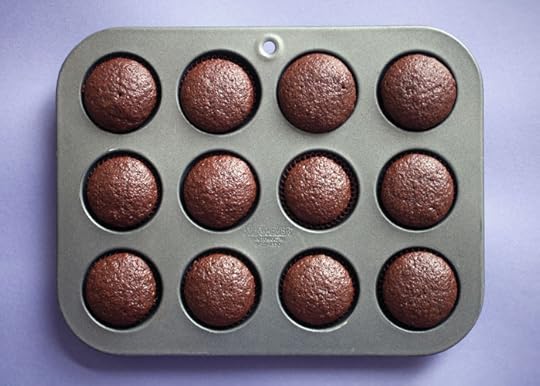
Once you have your wings made, bake some miniature cupcakes.
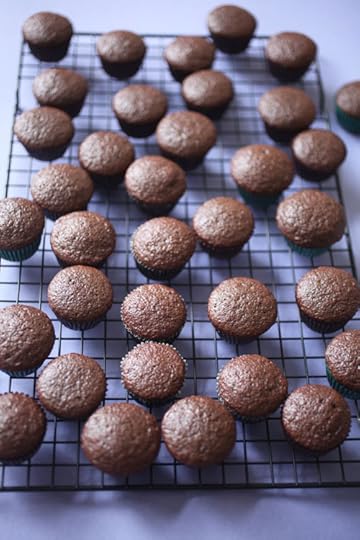
The more the merrier.
Now it’s time to decorate.
Whip up some buttercream frosting tinted purple or black if you like and start attaching the wings.
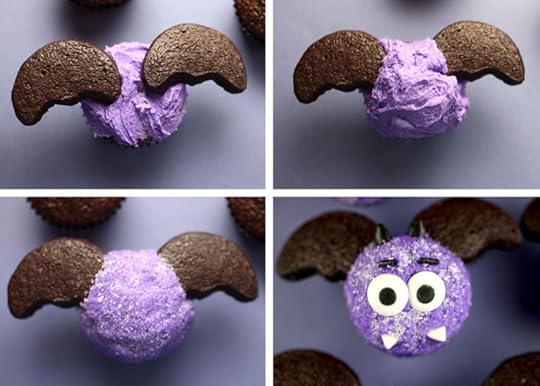
Spread a flat layer of frosting on top of the cupcake. (Note: cupcakes that aren’t mounded much will work better and help the wings to lay flat.)
With the wings in place, spread a little more frosting on top to cover up the ends of each wing in the middle. This will help secure them. It’s okay if the frosting doesn’t look so pretty.
Next, sprinkle some sanding sugar right on top and the gently shape the surface if necessary to make it nice and round. The sugar crystals will act as a barrier so you don’t get frosting on your fingers. Sprinkle over a large bowl so you can save and reuse the extra.
A toothpick will help you shape the frosting where the wings are inserted and will also aid in gently scraping off any excess sugar crystals.
Now, use a few fun candies to finish the faces.
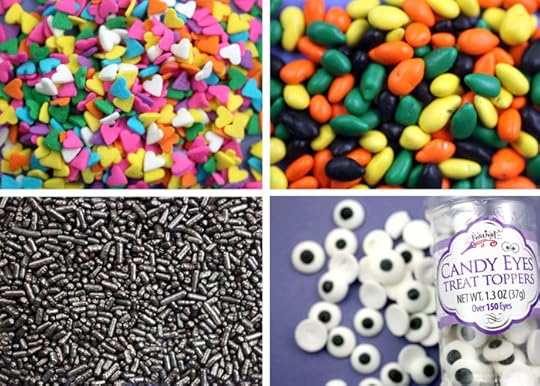
Miniature white heart sprinkles inserted for fangs
Black candy coated sunflower seeds for ears.
Black jimmies for eyebrows
And candy eyes for eyes : ) Apply a thin layer of frosting to help the eyes attach to the sugar coated cupcake tops. You could also use white M&M’s or even pipe on white frosting. Oh and I’m pretty sure I found this jar of candy eyes at Hobby Lobby if you’re looking.
P.S. – Reminder – now is a great time stock up on unique black sprinkles. They might just come in handy sometime during the year.
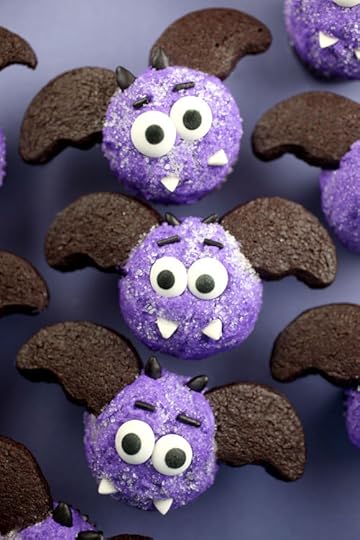
And that’s it for these adorable itty-bitty bats.
You can use this recipe for the mini cupcakes and frosting and this one for the cookie wings.
Enjoy each and every bite!

Bakerella's Blog

- Bakerella's profile
- 9 followers


![[image error]](http://www.bakerella.com/wp-content/uploads/2012/11/jinglebell.jpg)