
Ree Drummond's Blog, page 52
September 10, 2012
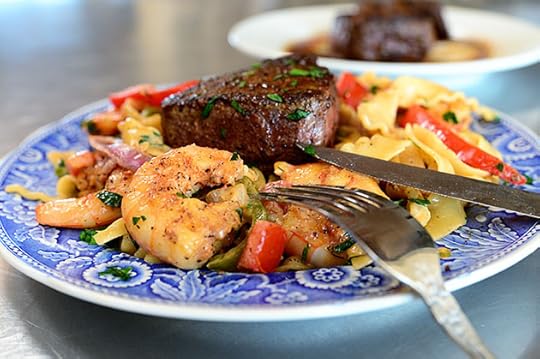
Surf & Turf Cajun Pasta
 *SPOILER ALERT*
Are you ready?
Here goes.
Marlboro Man loved this dish.
And I realize this information likely doesn’t mean much to you. But in the life of me, it was a nice little triumph.
This is a variation of my Cajun Chicken Pasta, one of the most man-friendly pastas (and gal-friendly, too!) pastas on my website. I had the idea to make a surf-and-turf version when my beloved and I were watching TV a few nights ago and he saw a commercial for a restaurant chain that featured a pasta with steak and shrimp.
“That looks good,” he said.
I hadn’t really been paying attention to the commercials. I think I was texting my sister something extremely non-cerebral, something along the lines of “Your mom.” But when Marlboro Man said that, my ears perked up. I made him rewind the DVR so I could see what he thought looked good. And now, days later, I can’t even remember what restaurant chain it was. Something along the lines of ApplebeesChilisTGIFridays. All I knew is, my husband had seen a food he liked. And I knew I had to make it happen.
 The Cast of Characters! Lots of stuff, but it’s all pretty simple…and—speaking of stocking up—almost all of it was stuff I had on hand. If you keep shrimp in your freezer and can pick up a couple of steaks at the store, you have it made!
 I love this Cajun seasoning.
It’s very Cajun seasony.
 I used these beautiful beef filets, but any small, roundish steak will do.
 Sprinkle the Cajun seasoning on both sides of the steaks.
 Rub it in, then set them aside for a bit.
 Sprinkle the shree-yump with the spice, too.
Or, if you want to call it shu-ree-yump, that would be okay. But just this once.
 Next, get the veggies ready! Lop off the top and bottom of the green bell pepper and violently rip out the seeds.
 Cut it in half, and cut the halves into strips.
 Do the same with the red bell pepper and shove them over next to the green bell pepper. Think of Christmas. Realize it’s too early to think about Christmas. Remind yourself you’re not that organized. Proceed with the next step.
 Slice a red onion in half and peel it. Wonder why they call them red onions when they’re so clearly purple. Get mad. Proceed with the next step.
 Admire your scrap pile. Imagine Renoir using it as a model for a still life. Wonder if he liked bell peppers. Proceed with the next step.
 Whack three garlic cloves with the knife.
By the way, this is how I shot this photo: I whacked the garlic clove. Then I placed my fist on the knife, securing the garlic clove below it. Then, with my right hand, I snapped a photo. It would have been impossible for me to actually take a photo of the real-time whack.
I just like to provide you with these behind-the-scenes tidbits. But only the second Monday in September.
 This is my bracelet. St. Francis helps me cook.
He loved anything with Cajun spice.
 Onto the garlic. Mince it up really finely.
 Next, slice a couple of tomatoes in half…
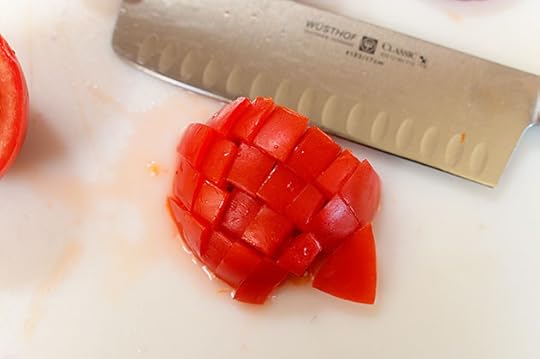 Then dice ‘em up.
 Oh! And throw in some pasta. I used this fun, frilly stuff but you can use linguine, fettuccine, or…well, any ol’ noodles you want.
 *Said in Arnold Schwarteznegger-esque voice: I’ll be back.
 Now we’re ready to do this thing! First, preheat the oven to 425 degrees. Then melt some butter and olive oil in a large (because we’re going to mix up the whole pasta dish in here eventually) skillet over medium-high heat.
 When the butter is melted and the oil/butter mixture is hot (and, as you can see, starting to turn color)…
(Turn color? Is that a grammatically legitimate phrase? I know not what I say.)
 Throw on the steaks, pressing them into the pan.
 Then just sear them on both sides, probably about a good minute per side.
 When they’re nice and dark on both sides, remove them to an oven-proof plate or dish and put them in the oven to finish cooking. If you’re starting with thinner steaks, you probably won’t need to put ‘em in the oven. Just cook them till medium rare in the skillet, then remove them to a plate and keep them warm.
 After the steaks are out, add a little more butter and olive oil to the skillet…
 And thu-row in the shu-ree-yump!
 Cook them around until they get nice and golden brown in color…
 Then throw ‘em on a plate and set them aside.
 Finally, add a little splash of olive oil. Oh, and if your skillet is really messy like this…well, rejoice. Rejoice, for that is where worlds of flavor reside.
Grammar lesson: Worlds reside. That’s why the sentence above is correct. Some would have said “worlds of flavor resides” because “flavor” is right next to “reside.”
Actually, you know what? Don’t listen to me. I don’t know anything. Okay, thanks.
 Instead of listening to me, throw the veggies into the pan.
 Stir them around and cook them just for a minute or so.
 Then throw in the garlic…
 And cook the veggies around for another minute or so.
 Remove the veggies and set ‘em aside.
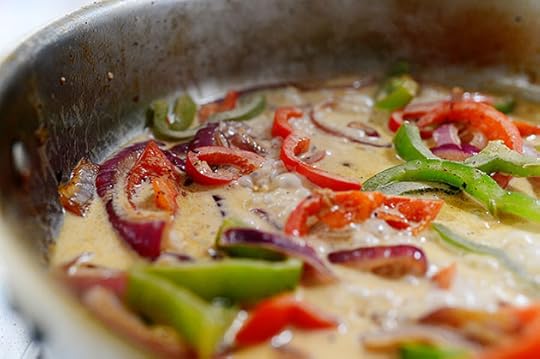
 And now it’s time to party! Woo-HOOOOOOOOO!
I’m monumentally sorry for that outburst. What I meant was, pour in about a half a cup of white wine. More if you’re a party animal. Less if your husband doesn’t like wine in his food. Please feel very sorry for me.
You can also only use broth if you don’t want to use wine at all, but make sure it’s low-sodium! You don’t want the salt to get out of control.
 Use a whisk to scrape the bottom of the pan…
 Then pour in some low-sodium chicken broth.
 Let this bubble up and cook over medium-high heat for several, several, several, several minutes.
Otherwise known as four minutes.
 When it’s nice and reduced and dark and flavorful…
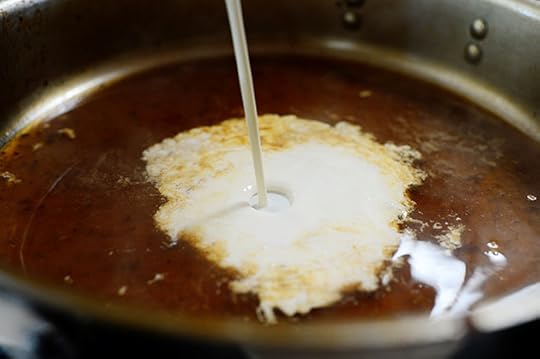 Pour in some heavy cream.
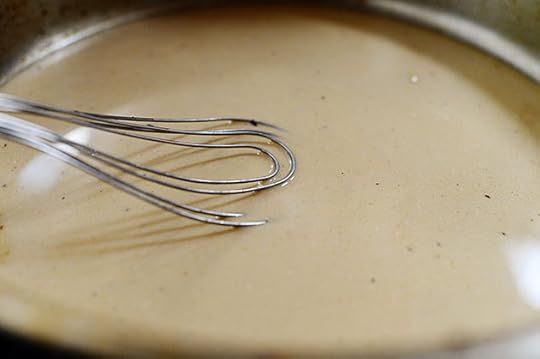 Whisk it all together…
 Then let it bubble up and thicken for at least a couple of minutes.
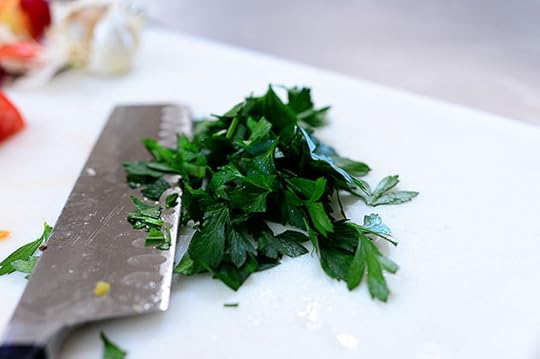 Mince up some parsley. Amen.
 Then throw the veggies into the pasta.
 Let it bubble up…
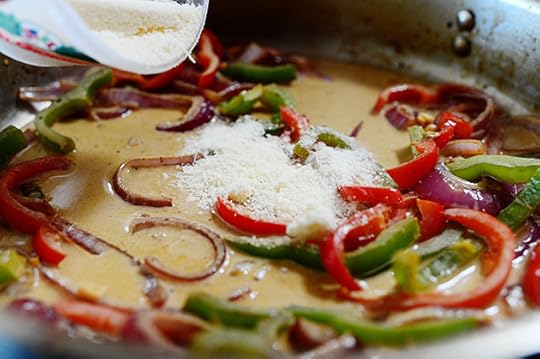 Then throw in the parmesan…
 The pasta…
 And the diced tomatoes. They aren’t cooked, but they’ll heat up when you toss ‘em in and they’ll stay together and keep their wits about them.
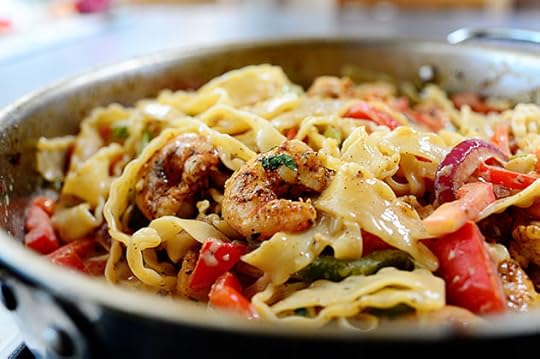
 Toss it all together…
 Then throw in the she-ree-yump-uh (I added another syllable)…
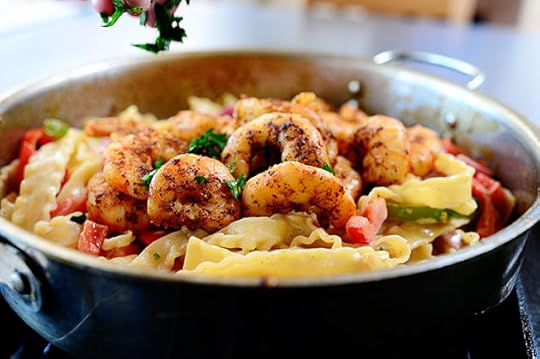 Sprinkle in some parsley…
 And toss it in, my love.
Sorry I called you my love. I’m always doin’ that.
 Meanwhile, the steaks are out of the oven! And they look good enough to scarf down.
 To serve it all up, heap a bunch of pasta on a plate…
 Then nestle a steak right in the middle.
 See that red/pink middle? That’s good stuff right there.
 This is one yummy plate of goodness. You know what I would have done differently, though? I would not have tossed the shrimp in with the pasta and sauce. I would have just placed them on top along with the steak. That way, they would have kept their Cajun spice coating and the nice color.
Live and learn. And eat as you live and learn.
 Oh, and one other thing.
 Marlboro Man inhaled this.
Enjoy, guys!
Here’s the handy dandy printable:
Recipe: Surf & Turf Cajun Pasta
Prep Time: 20 Minutes
|
Cook Time: 25 Minutes
|
Difficulty: Easy
|
Servings: 4

Print Recipe
3"x5" Cards
4"x6" Cards
Full Page
Ingredients
4 whole 6-ounce Beef Filet Steaks 1 1/2 Inches Thick (or Any Small/petite Steak) Cajun Seasoning2 Tablespoons Butter3 Tablespoons Olive Oil1 pound Jumbo Shrimp, Deveined & Shells Removed1 whole Small Red Onion, Halved And Sliced1 whole Green Bell Pepper, Seeded, Halved, And Sliced1 whole Red Bell Pepper, Seeded, Halved, And Sliced3 cloves Garlic, Minced1/2 cup White Wine1-1/2 cup Low-sodium Chicken Broth (more To Taste)3/4 cups Heavy Cream1/2 cup Parmesan Cheese, Grated2 whole Tomatoes, Diced Minced Parsley, To Taste1 pound Fettuccine, Rigatoni, Or Other Noodle Preparation Instructions
Cook pasta according to package directions. Drain when pasta is still al dente; do not overcook!
Preheat oven to 425 degrees.
Season steaks generously with Cajun spice. Melt 1 tablespoon butter and 2 tablespoons olive oil in a large skillet over medium-high heat. Sear the steaks until dark golden brown on both sides. Remove to an oven-safe plate or dish. Place in the oven and continue cooking until medium rare, about 12 minutes.
Add additional 1 tablespoon butter and another tablespoon olive oil to the skillet and allow to melt/get hot. Season shrimp liberally with Cajun spice and throw into the skillet. Cook until opaque and deep golden brown. Remove to a plate and set aside.
Throw in onion and bell pepper, then cook for a couple of minutes until golden brown and color but still somewhat crisp. Add garlic and cook around for 30-45 seconds. Remove veggies to a plate and set aside.
With the pan over high heat, pour in the wine and chicken broth. Cook on high for 3 to 5 minutes, scraping the bottom of the pan to deglaze. Reduce heat to medium-low and pour in cream, stirring/whisking constantly. Cook sauce over medium-low heat for a few minutes, until cream starts to thicken the mixture. Add Parmesan and stir to melt. Taste and adjust seasonings as needed.
Finally, add vegetables to the sauce, making sure to include all the juices that have drained onto the plate. Stir and cook for 1 to 2 minutes, until mixture is bubbly and hot. Add drained fettuccine, minced parsley, and toss to combine. Splash in more chicken broth if it needs more liquid.
Mound pasta on plates and nest a warm steak in the middle. Arrange shrimp around the edge of the plate. Sprinkle with a little more minced parsley and serve!
Posted by Ree on September 9 2012


September 4, 2012
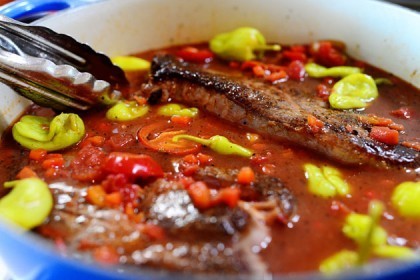
Hot & Spicy Italian Drip Beef
 This is a yummy play on the old drip beef recipe my friend Hy shared with me years ago, and I made it last week as I was using up some pantry items as part of my pantry purging process.
I spy an alliteration.
Anyway, just a few things to note:
* You can easily halve this recipe. I was making a bunch so I could freeze some for later.
* You can change up the peppers however you like. I just used what I had in my pantry.
* You can use different roasts to your heart’s content.
* You can serve this meat on sandwiches or with noodles or mashed potatoes.
* You can also serve it on tacos, nachos, and tostadas.
* This was very, very yummy.
* I love bullet points.
(I’m still working on my fridge, freezer, and pantry. What an odyssey it’s been. I want my mommy.)
 The Cast of Characters: Chuck roast, crushed tomatoes, beef stock, pepperoncinis, hot cherry peppers (sold in the pickle aisle!), and pimentos.
 I didn’t use the tomato paste, because it’s a woman’s prerogative not to use tomato paste if she changes her mind.
 Start by salting and peppering the chuck roasts…
 Then brown both of them in olive oil in a heavy dutch oven over high heat.
 Brown them on both sides…
 And remove them to a plate.
 Reduce the heat to medium, then pour in the beef stock. Whisk it around and loosen up all the little bits of flavor in the bottom of the pot.
 Crack open a beer. That had nothing to do with this recipe. What I meant to say is crack open a big can of crushed tomatoes…
 And pour it into the pot.
 Stir it around to combine…
 Then pour in the jar of cherry peppers. I drained them to get rid of the really hot liquid, and if you’re sensitive to spice you can add half the jar. Or you can use a jar of more mild peppers.
 Next, pour in the pepperoncinis, juice and all!
 The liquid in this jar is more mild, and it adds a nice tang to the meat.
 Next up, crack open a couple of jars of pimentos and pour them in too!
 Stir around the liquid, then put the meat back into the pot.
 Submerge the meat, then put the lid on the pot and put the pot in the oven for about four hours or so. The meat should be fork-tender and falling apart. If it’s not, just stick it back in the oven for 30 to 45 more minutes.
Remember: If a chuck roast is tough it hasn’t cooked long enough. A tough roast often tricks people into thinking they’ve overcooked it, but actually the opposite is true.
 This is optional, but if you have the time (which I did) you can put the pot in the fridge overnight and allow the fat to harden on top of the pot.
If you don’t have the time, just use a ladle to carefully skim the fat off the top after the meat has cooked.
 Then you can easily scoop it away in big chunks.
And yes, you could remove the meat and peppers before refrigerating, and refrigerate them separately, which would allow the fat removal to be more seamless. But I didn’t want to work that hard.
 Yum yum! Fat!
 Leaving a little fat is fine. Then just return the cold pot to the stove…
 And heat it up until everything’s nice and hot.
 Remove the roasts from the pot. This one pretty much fell apart, which is a very, very, very, very, very good thing.
 This one stayed together, but it wanted to fall apart more than anything.
It told me.
 Next, just use two forks to shred the meat into chunks. I like to keep it in chunks rather than shred it to smithereens, as I like the texture a little better. But shred to your heart’s content.
 Mmmmm. Meat. Me like meat.
 When it’s all shredded up, use a big spoon or spatula…
 To return the meat to the juice.
 Then just keep it warm and serve it up!
 You can use a slotted spoon or tongs…
 To heap the meat and peppers on a toasted deli roll. Mmmm. Yum!
 Oh, and in order to be truly happy in life, you’ll want to lay on a slice of mozzarella or provolone cheese…
 And melt it under the broiler.
But only if you want to be truly happy, of course.
 If you’re like me and can’t get enough peppers in your life, throw a few extras on top of the cheese.
 Delicious! You’ll love this, guys.
Here’s the handy dandy printable.
Recipe: Hot & Spicy Italian Drip Beef
Prep Time: 5 Minutes
|
Cook Time: 4 Hours
|
Difficulty: Easy
|
Servings: 16
Print Recipe
3"x5" Cards
4"x6" Cards
Full Page
Ingredients
2 Tablespoons Olive Oil2 whole Chuck Roasts (2 1/2 To 3 Pounds Each) Salt And Pepper32 ounces, fluid Beef Stock1 can 28 Ounce Crushed Tomatoes1 jar (16 Ounce) Pepperoncinis, With Juice1 jar (16 Ounce) Hot Cherry Peppers, Drained2 jars (4 Ounces Each) Pimentos1 Buttered, Toasted Rolls (optional)1 Provolone OR Mozzarella Cheese Preparation Instructions
***NOTE: This recipe can easily be halved!
Preheat oven to 300 degrees.
Heat the olive oil in a heavy, large dutch oven over high heat. Salt and pepper the chuck roast on both sides, then sear each roast until deep golden brown on both sides, about 1 1/2 minutes per side. Remove roasts from pot and set aside on a plate.
Reduce heat to medium. Pour in beef stock, whisking to scrape the bottom of the pan. Pour in crushed tomatoes, pepperoncinis (with the juice), and the drained hot cherry peppers. (NOTE: You can use whatever jarred peppers you like!) Stir to combine, then add the roasts back to the pot.
Place the lid on the pot and place the pot in the oven. Cook for 4 hours, or until meat is fork tender. If it's not, return the pot to the oven for another 30 to 45 minutes, or until it's falling apart. If you have time, allow the pot to cool slightly, then place it in the fridge for several hours to allow fat to harden at the surface. Use a spoon to scoop out the hardened fat (some fat is okay!) then heat it up again on the stovetop.
When the meat is heated again, remove the roasts to a cutting board. Use two forks to shred it into big chunks, then return the meat to the cooking liquid. Serve on toasted deli rolls with cheese melted on top (with extra peppers over the cheese!) You can also serve it with mashed potatoes or noodles.
***The liquid is quite spicy, but if you use a slotted spoon it will keep it pretty mild.
Posted by Ree on September 3 2012

August 31, 2012
Mango Margaritas!
 I’ve got Mango Margaritas on the brain for three very important reasons:
1. It’s one of my favorite recipes in my new cookbook. I mean my second cookbook. It came out in March. Newer cookbook. I’m glad we had this talk.
2. I served to ten guests I had over for dinner last night. I went ahead and served one to myself, too. I didn’t want to be rude to the hostess.
 3. On tomorrow’s new episode of my Food Network show, I serve them when we have our good friends over for Mexican food. The kids got a non-alcoholic version and everyone was happy!
I absolutely love this cocktail. It’s very, very flavorful and very, very, very, very, very, very easy to whip up. And it’s extra delicious because instead of putting salt on the rim (which I do not like; call me margarita flawed) I do a nice, unapologetically thick rim of lime-spiked sugar.
A fun little benefit is watching your guests attempt to lick their glasses in a semi-dignified way, which I’ve learned firsthand is really difficult to do.)
 Begin by zesting a couple of limes and laying the zest on a plate. If you have ten to twenty minutes, let the zest sit for ten minutes or so to let it dry out.
 Pour some coarse sugar over the zest, then use your fingers to mix it all together. Lime sugar!
(I used coarse sanding sugar used to decorate cookies in the photo above, but last night I used an even coarser sanding sugar. It was very crunchy and fun.)
 The basis for the margaritas are jarred mango chunks. You can get ‘em almost anywhere (the same can not be said for fresh mangoes) and the texture is nice and ripe and consistent.
I usually keep a few jars in the back of the fridge at the Lodge so I always have a quick drink to whip up when my Orkin man or other guests drop by.
(FYI, this not a paid advertisement for that there brand up there. Over and out.)
 Drain the mangoes and throw them into the blender. (Note that the photos here show half the quantity shown in the printable recipe below.)
 Throw in a bunch of ice…
 Some tequila…
 And some triple sec…
(Note: For the non-alcoholic version, add about a cup or so of Sprite or 7-Up! Just be careful not to fill the blender too full or the carbonation will make everything go crazy.)
 Then squeeze in the juice of the limes…
 Add in a little bit of sugar…
 Then throw on the lid and blend it up! Last night I made the full amount and it almost blew the lid off the blender, it was so full.
 To serve the margaritas, cut a small wedge from one of the juiced limes and rub it around the rim of the glasses.
And yes, I am aware this is a martini glass. But I have to be me.
 Dip the rim of the glass into the lime sugar and move it around…
 Until the glass has a nice, sparkly, lime-sugary rim. Pretty!
And yum.
 Pour the margarita into the glass until it reaches the level of the sugar…
And serve ‘em up!
A warning: These are over-the-top flavorful and really trick you into thinking they’re harmless slushies. Sip slowly and be careful going back for seconds!
Don’t ask me how I know this.
Enjoy these, guys. Perfect for Labor Day weekend.
(In other news, I’m still plowing throw my pantry/freezer/fridge stocking up project, and will post updates and recipes next week.)
Lots of love,
P-Dub
Recipe: Mango Margaritas
Prep Time: 10 Minutes
|
Cook Time:
|
Difficulty: Easy
|
Servings: 8

Print Recipe
3"x5" Cards
4"x6" Cards
Full Page
Ingredients
2 whole Limes2 Tablespoons Coarse Sugar (decorator's Sugar)2 jars (20 Ounce) Mango Chunks, Drained1-1/2 cup Tequila1-1/2 cup Triple Sec1/4 cup Sugar Preparation Instructions
Zest the limes and lay the zest on a plate. If you have the time, let the zest dry out for ten minutes or so. Pour the coarse sugar over the zest and toss it around with your fingers to combine. Lime sugar! Yum.
Throw the mango chunks into a blender. Pour in the tequila, triple sec, and sugar. Squeeze in the juice of the limes, then top off the whole thing with ice. Blend it until it's totally smooth. Give it a taste, then add more of what you think it needs (alcohol, sugar, lime, etc.)
To serve, cut a small wedge in one of the juiced limes and rub the lime all over the rim of the glass to moisten. Dip the rim of the glasses in the lime sugar to give it a pretty, crystally rim.
Pour in the margaritas and serve immediately!
Posted by Ree on August 31 2012

August 29, 2012
Chocolate Covered S’mores
 When we went to Vail, Colorado to ski last spring, a few things happened:
1. I had the best time of my life.
2. I didn’t want to leave. And I didn’t. I’m still there.
3. Just kidding.
4. I pulled something in my groin (pronounced “grow-in”) while skiing.
5. I ate a chocolate covered S’more from a little store in Vail Village.
I’ve been wanting to make the easy treats at home ever since, but only got around to it today, when, in the midst of cleaning out/organizing my pantry, I came across all the ingredients necessary to make the things:
Graham crackers.
Marshmallow creme.
Almond bark.
I love simple things.
I had bunch of spaghetti sauce simmering on the stove (recipe will be posted soon) and a bunch of chuck roast simmering in the oven (recipe will be posted soon, but ouch—it’s spicy), so I decided to procrastinate the rest of my pantry project and whip up some of the sweet little numbers. They’re really easy to make, really cute, really gooey, and they’ll make a mess of your fingers.
A sign of a great dessert, I say!
 The graham crackers I had were the stackable ones that already come in squares like this. But I’d prefer to use regular graham crackers and break them myself. Makes me feel more useful.
 I used a kitchen scoop, which probably translates to a heaping tablespoon…
 To scoop the marshmallow creme onto eight crackers.
 Then I pressed a second cracker onto the top of each one…
 And immediately stuck the pan into the freezer in order to set the creme and stop the oozing process.
 This one looked good! Just the right amount of non-ooze.
That made no grammatical or logical sense.
 While the sandwiches were setting/getting cold, I melted a package of chocolate almond bark, which isn’t really chocolate at all, I think, but I don’t mind.
You can certainly use as high a quality chocolate here as your heart desires, or you could go halvsies and spike the almond bark with some good quality stuff.
By the way, I do not own a double boiler. I use glass bowls over simmering saucepans of water.
 Melt the chocolate, then remove the bowl to let it cool to room temperature. While it’s cooling, chop up some almonds if you like ‘em…(had a bunch in the pantry.)
 And some pecans.
 Then grab some sprinkles. I have these chocolate ones.
 I thought these would be cute, too.
 Upon further reflection, I should have had an assembly line with my girls and had them put each sandwich in the freezer the second I built it. The marshmallow creme begins to ooze so quickly, and the sooner you get them in the freezer to set, the better.
 Now, making sure the chocolate is no warmer than room temperature (it shouldn’t feel warm at all) throw each sandwich into the chocolate…
 Quickly flip it over to the other side…
 And throw it on the tray (a baking mat or parchment paper is a good idea!)
 Keep going until they’re all covered…
 Then quickly sprinkle on the goodies…


 Until they’re all decorated and darling.
Then immediately pop ‘em back into the freezer! Sorry for driving you crazy with the freezer. But the marshmallow creme does want to start oozing out whatever breach it can find in the chocolate…and the freezer will help mitigate that.
Huh huh. I said mitigate.
 Serve ‘em straight out of the freezer, or you can move them to the fridge (or to room temperature) after the chocolate’s all set.
Chow down whenever you need a chocolate/marshmallow/graham cracker fix! Half was plenty for me. At least for that five minute period.
A note: Next time I make these, I’m going to spread a very thin layer of marshmallow creme on the bottom cracker, then cover the surface with miniature marshmallows. Then I’ll spread another very thin layer of creme on the top cracker and put it face down on top. The marshmallow creme will secure the mini marshmallows in place, and I think the marshmallows will hold together and not ooze as much when dipped in the chocolate. I’ll put a note here when I try that method! Along those lines, you could use a kitchen torch to toast the top of the marshmallows before adding the top cracker to give the treats a real s’mores taste.
Another note: I didn’t try a salted version, but because the marshmallow and almond bark are so sweet, I think a sprinkling of salt—or crushed salted pretzels—would be delicious.
Enjoy!
Recipe: Chocolate Covered S'mores
Prep Time: 20 Minutes
|
Cook Time: 10 Minutes
|
Difficulty: Easy
|
Servings: 8

Print Recipe
3"x5" Cards
4"x6" Cards
Full Page
Ingredients
16 whole Graham Cracker Squares (two Single Rectangular Pieces Still Stuck Together)1 container (7 Ounce) Marshmallow Creme1 whole Package Chocolate Almond Barn Or Other Melting Chocolate Chopped Nuts, Sprinkles, Etc. Preparation Instructions
Scoop a heaping tablespoon of marshmallow cream onto 8 crackers. Top with the other 8 crackers, pressing gently. Immediately put the sandwiches in the freezer---within a minute of putting the second cracker on top. Freeze for a minimum of 30 minutes to set the marshmallow creme as much as possible.
Meanwhile, melt the chocolate in a glass bowl, then set aside to cool, stirring occasionally to keep the chocolate melted. When the chocolate is room temperature, remove the sandwiches from the freezer. One by one, dip the sandwiches in chocolate, allowing excess to drip off. Work quickly, then add on whatever sprinkles you'd like to use. Immediately put the sandwiches back into the freezer to set the chocolate and keep the marshmallow from rebelling and oozing out.
Freeze for at least 30 minutes, then you can store the s'mores at room temperature or in the fridge until you're ready to serve!
Posted by Ree on August 29 2012

August 27, 2012
Stocking Up, Part One
 Yesterday, when we got home from the Range Roundup, our fridge looked like this. A few eggs, a few apples, a couple of pears, some cheese, a bunch of lemons, and some red cabbage. Makes you feel all warm inside, doesn’t it?
Welcome to my home. Can I interest you in a sliced apple?
 This was the door. Mayonnaise, mustard, that demonic substance Marlboro Man likes to spread on his sandwiches, cream cheese, sour cream, jelly, syrup, storebought salsa, and only enough butter to get me through the next five minutes.
I’d purposely let things dwindle in my kitchen in preparation for this week, when I’m going to be stocking up my pantry, freezer and fridge for the next…well, period of time, whatever that turns out to be. I’ll also be cooking a lot of meals both to freeze and keep in the fridge since, between school, soccer practice for the girls and football practice for the boys (which Marlboro Man coaches), we’ve been getting home between 8:00 and 9:00 every night.
 So yesterday, after we all got home from the Range Roundup, my older daughter and I took off for the first of our supermarket trips. This one was just about getting some basics.
The next trip will be about produce, both fresh and frozen, and some more perishables like yogurt, cheese, etc.
The one after that will be about non-perishables. My pantry is an abomination. I’ll take before and after pics there.
Please hold us in your heart this week.
 Here are the bags after I unpacked them. Thank goodness Bravo was playing several Real Housewives episodes in a row. They propelled me forward.
Here are just a few things I picked up.
(Update: I definitely do not shop like this every week. What I’m doing this week—not just with this grocery trip but the other ones I’ll do this week, as well as the cooking/freezing/prepping I’ll be doing—is something I do two or three times a year. Big cleanout/stockup session at first, then I just fill in the missing pieces on a weekly basis.)
 I love these rainbow peppercorns, and I’ve been out for awhile. They’re pretty. I’ll crush them and rub them on beef, I’ll grind them into salad dressing, I’ll add them whole to my turkey brine recipe, and I’ll tie them in cheesecloth when I make Italian Meatball Soup.
 I still have a few cartons of chicken and beef broth in my pantry, but I like this stock, too. It’s très yum.
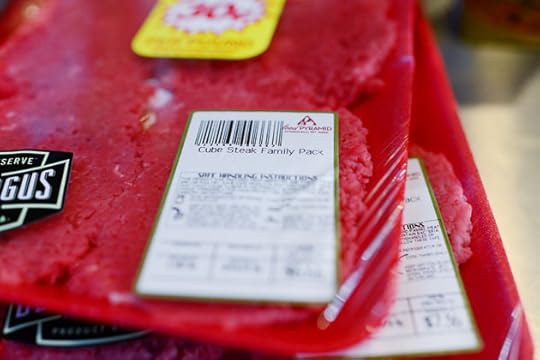 I got a whole bunch of cube steak (we don’t have much beef in our freezer right now) to make the meat mixture for Marlboro Man Sandwiches, which falls under the category of meals I can make ahead of time and keep in the fridge, then when Marlboro Man and the boys get home from football before the girls and I are home from soccer, they can heat up the meat mixture themselves and make their own sandwiches. I’m also going to lightly bread some of it and fry it up, because fried cube steak sandwiches are the best things ever. Here are the recipes:
The Marlboro Man Sandwich (Forgive the vintage photographs.)
Fried Round Steak (The best thing ever.)
 Gasp! 666! I’ll never be able to serve this to my family.
 I got these whole wheat deli rolls for the sandwiches, because by golly if I’m going to cook three pounds of meat in fifteen pounds of butter, I’m going to put it on a whole grain deli roll.
It’s all about healthy choices.
Ha.
 Jumbo shells. I’ll use them to make these cheesy, meaty stuffed shells, which are very easy for wayward stragglers (read: family members) to individually scoop out and microwave when they get home from various practices.
 I found these great tortillas for wraps, quesadillas, soft tacos, and rollups. These are multrigrain…
 These are blue corn and flaxseed. Yum!
 Whole wheat saltines. A healthy alternative.
 The same can not be said for these. But Marlboro Man loves them.
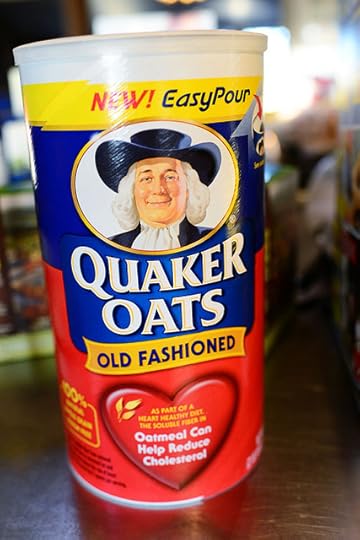 Oats. A healthy alternative.
 The same can not be said for these. But Charlie loves them.
Just kidding. I think.
 I’m out of strawberry jam we canned last fall, and the girls and I will make some later this week after I get a bunch of strawberries. But I always pick up this brand of blueberry preserves because I absolutely love the stuff. It’s beautiful on toast, and it’s really good in sauces for pork and chicken. Divine.
 I did buy a few strawberries to tide us over till the big produce trip, because my baby eats them like candy. I also bought some demonic bananas, but only because I’ve heard they’re healthy.
 Lots of green leaf lettuce for sandwiches, for tortilla rollups, shredded up for tacos, and for low-carb burgers for me since I’m stepping away from the bread these days.
I’m really cranky about it, too.
 Tons of Cilantro! Because everything in my garden is long gone, compliments of July 2012. I need pico de gallo. Badly.
And I’m getting ready to make a ton of this salsa. Maybe two tons.
It’s that good.
 Boneless, skinless chicken thighs. I love them very passionately. I’ll use them in most situations that would call for boneless, skinless chicken breasts and I’ll do so unapologetically, because I am a dark meat girl.
 Lots and lots and lots of dried pastas of many different shapes and sizes.
 Lots of jars of good marinara sauce. For pasta. For chicken dishes. For dipping sauces for Calzone and Fried Mozzarella. When I have a row of marinara sauce in the pantry, I feel I can do anything.
 Boursin. Stir into pasta sauses. Stir into scrambled eggs. Spread on tortillas before you add the other ingredients.
Eat it with a spoon.
Just kidding. I think.
 Stir into risotto.
Surely that wouldn’t be very fattening.
Does risotto have carbs in it?
 These! I love them with pear slices.
Power of suggestion: I just got up and ate a pear after writing that last sentence.
 Cukes! For sandwiches, salads, or just sliced, lightly salted, heavily peppered, and mixed with a little greek yogurt.
Trust me.
 Brown paper lunch sacks. For soccer practice snacks. For football snacks. For coop day.
For me to breathe into.
 I’d say this is about a third of the way done. Much better than yesterday, but there’s still a ways to go. I’m going to cook off a lot of the meat, but I’m also going to individually vaccuum seal some of it for use later.
 And I need a bunch more veggies: spinach, bell peppers, kale, broccoli, and sweet potatoes.
 My door’s looking a little better, but I need to stock up on some greek yogurt, both plain and vanilla.
I’ll keep you posted as the stocking up continues, and I’ll show you the things I cook along the way.
Here’s the printable “Stocking Up” list I posted early this year. Before I shop, I usually check my supplies of these items:
Stocking Up – The Printable List

August 24, 2012
Weekend Mixer Giveaway (Winners Announced!)
Here are the winners of the weekend mixer giveaway!
#4498 Alicia S. “We will be going out to dinner with friends tonight. Tomorrow I am shopping and catching up with my mama.”
#11231 Frances G “Clean, shop, cook, pay bills, be with my family and catch up on my paperwork for my business.”
#23156 JudithNYC “My plans this weekend: nothing, and that’s the way I like it. Worked all my life to reach this goal.”
Congratulations, winners! Contact prizes@thepioneerwoman.com to claim your mixer. Hope you enjoy it!
 Starting today…
Because there’s a chance of rain this weekend…
Because we’re competing in the ranch rodeo…
Because Charlie is snoring on the couch…
And because I love ya, I’m giving away three KitchenAid Artisan Stand Mixers…the color of each winners’ choice! I happen to love the beautiful “Aqua Sky” color above, but if you’re one of the winners, you can choose any color on this page:
KitchenAid Artisan Stand Mixers
To enter this giveaway, just answer the following question in the Comments section of this post:
What are your plans this weekend?
Whether you’re fly fishing in northern Canada or staying home and cleaning out a closet, just shout out your weekend plans and you’re automatically entered to win!
THE RULES
One entry per person, please.
Enter anytime through the weekend.
Winners will be randomly selected and announced Sunday night!
Have a great weekend, everyone.
Love,
P-Dub
Giveaway sponsored by Pioneer Woman.

Weekend Mixer Giveaway
Starting today…
Because there’s a chance of rain this weekend…
Because we’re competing in the ranch rodeo…
Because Charlie is snoring on the couch…
And because I love ya, I’m giving away three KitchenAid Artisan Stand Mixers…the color of each winners’ choice! I happen to love the beautiful “Aqua Sky” color above, but if you’re one of the winners, you can choose any color on this page:
KitchenAid Artisan Stand Mixers
To enter this giveaway, just answer the following question in the Comments section of this post:
What are your plans this weekend?
Whether you’re fly fishing in northern Canada or staying home and cleaning out a closet, just shout out your weekend plans and you’re automatically entered to win!
THE RULES
One entry per person, please.
Enter anytime through the weekend.
Winners will be randomly selected and announced Sunday night!
Have a great weekend, everyone.
Love,
P-Dub
Giveaway sponsored by Pioneer Woman.
August 22, 2012
T-Bone Steaks with Hotel Butter
 I love compound butter. I made some with berries last summer and slapped it on French toast. Lifechanging.
But that’s another story for a non-savory time.
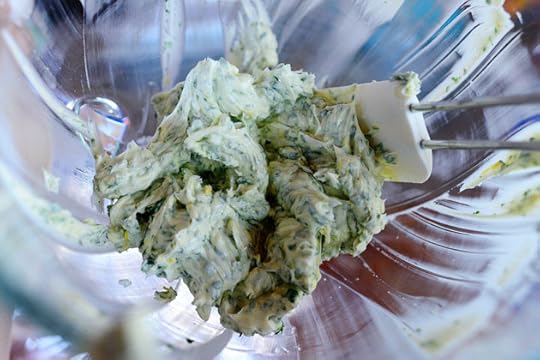
Compound butter, hotel butter, butter mixed with a buncha delicious ingredients, butter with a twist. It’s all basically the same thing, and it’s all delicious. This particular compound butter, called “Hotel Butter”, has a lemony parsley flavor and is divine on steak. But it’s also beautiful on fish, fabulous on chicken, perfect stirred into hot, cooked pasta, and irresistible spread on hot, crusty bread.
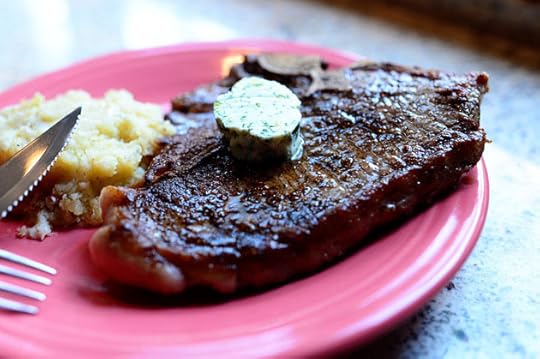
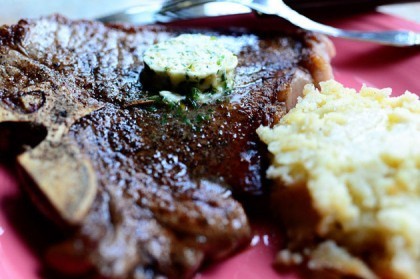
I made this roll of hotel butter some time ago and it kept (tightly wrapped in plastic wrap and foil) in the freezer, then in the fridge. And it was lovely as ever! I served a big ol’ pat of it on a big t-bone steak last night and…well, the heavens opened up.
On a beef note: I’m usually a ribeye or filet girl…but that t-bone steak was an experience. Utterly delicious. I’ll have to give t-bones a little more attention.
 To make the butter, mince up some parsley really finely. You can also use basil, sage, rosemary…any herb that makes your skirt fly up.
 Now, zest up a lemon.
 Throw some softened butter into the bowl of an electric mixer (I used four sticks because I needed to make a lot, but the recipe below just calls for 2 sticks. You could even go one further and do one stick. You could even go one step further and do half a stick. You could even go one step further and use 2 tablespoons. You could …)
(Okay, I’ll stop now. I just like to provide you lots of options.)
 Throw in a whole lotta the minced parsley, along with the lemon zest. It will look like a lot, but you want the butter to be really speckled and flavorful.
 Whip it together until it’s nice a mixed…
 Then squeeze in the juice of half the lemon, give or take.
Try not to be too impressed with my amazing manicure.
Not.
 Whip it all together again, scraping the sides once or twice to make sure everything’s evenly mixed.
 Then scrape it all together.
 Now, to make the roll, set a long piece of plastic wrap on top of a long piece of foil. Scoop out the butter into a line…
 Then bring one side up and over the top of the roll…
 Pressing gently with your hands to form a cylinder.
 Keep rolling it up, then twist the ends like a piece of candy—make it pretty taught so that the butter will be forced into a nice, cohesive tube shape. Then just pop the roll into the fridge (if you won’t need it for a little while) or the freezer (if you’re in a hurry for it to set/harden.)
Note: If you need a little more direction on rolling it up, check out my French toast recipe for more detailed instructions about rolling up the butter. I didn’t take enough photos this time.
Berry Butter – rolling instructions
 Hello, beautiful lover. I’ve missed you!
 And…aaah. Look at how lovely that is. Perfectly speckled. Lovely little yellow flecks of zest.
I am now officially hungry.
 To grill the steak, melt a tablespoon (give or take) of butter in a heavy skillet over medium-low heat. If you have vent on your stove, turn it on!
 Generously salt and pepper both sides of the steak…
 Then throw it into the skillet…
 And cook it on both sides until it’s nice and deep golden brown and perfectly medium rare. Should take 1 1/2 to 2 minutes per side, depending on how thick the steak is.
 Now, when the steak had about 30 seconds left, I sliced off a nice pat of the butter…
 And set it right on top of the steak. Since it was really cold and solid, I wanted to give the butter time to start melting.
 Oh my goodness.
Oh, and sorry about the lighting. I was chasing daylight.
 Oh my soul. You see that? As the butter melts, the parsley and lemon start to ooze down the surface of the steak and…oh, dear lawsie mercy. This gets me really excited.
 It is at this time I will elect not to confess that I took a little bit of the butter and slapped it on my mashed potatoes. Nobody saw me do it. Nobody can prove a thing.
This is yummy, guys! If you try compound butter, you’ll start to love having it in your fridge. Anytime you have grilled chicken, grilled fish, steaks, pastas, or veggies, you can just slice off a little pat and throw it on top. And the flavor possibilities for compound butter? Endless. Add ground peppercorns, garlic, different herbs, crushed red pepper, jalapenos, even minced chipotle pepper.
Enjoy, my friends!
Recipe: T-Bone Steaks with Hotel Butter
Prep Time: 20 Minutes
|
Cook Time: 5 Minutes
|
Difficulty: Easy
|
Servings: 4
Print Recipe
3"x5" Cards
4"x6" Cards
Full Page
Ingredients
HOTEL BUTTER2 sticks Salted Butter, Softened1/3 cup Finely Minced Parsley1 whole Lemon, Zested And Halved OPTIONAL: Finely Minced Garlic, Salt, Pepper, Any Mix Of Herbs, Crushed Red Pepper, Paprika...anything You Can Come Up With! Steaks4 whole Steaks (ribeye, T-bone, Filet) Salt And Pepper, to taste Butter, For Frying Preparation Instructions
Well in advance, make the hotel/compound butter: Place the softened butter in the bowl of a mixer fitted with a paddle attachment. Whip the butter until it's fluffy. Add parsley, the lemon zest, and the juice of half the lemon. Mix it until it's totally combined, scraping the sides as needed. Add more parsley, more lemon juice, or salt and pepper if you'd like.
Lay a long piece of plastic wrap on top of a long piece of aluminum foil. Scoop the butter mixture in a long strip down the middle of the plastic wrap. Carefully pull one side of the aluminum foil/plastic wrap over the butter, squeezing the foil gently to form it into a long. Continue to roll the log of butter into a roll. When it's all rolled up, twist the ends (like a piece of candy) until they become very taught (this means the butter is pressing together inside the plastic to form a cohesive roll.
Place the roll of butter into the fridge so it will harden, or into the freezer if you need to speed along the process.
To cook the steaks, salt and pepper both sides of the steak. Melt 2 tablespoons of butter in a heavy skillet over medium-high heat. When it's melted and golden brown, fry the steaks until medium rare, about 2 minutes per side (or more or less, depending on thickness.)
Remove the steaks from the skillet and lay a thick slice of hotel butter on top of each steak so it will begin to melt. Serve within five minutes with mashed potatoes!
Other uses for hotel butter:
Stir into cooked pasta
Lay a pat on grilled chicken or fish
Stir into rice
Spread on crusty French bread
Add to a baked potato
Posted by Ree on August 21 2012

August 20, 2012
Yummy Grilled Zucchini
 I love grilled vegetables more than anything on earth. Well, except my children. And my husband. And chocolate whipped cream coffee ice cream snickers cheesecake nutella loaf.
But other than that, I love grilled vegetables more than anything on earth!
And this grilled zucchini will rock your ever-loving world.
My goodness.
Serve it with fish! Chicken! Pasta!
Serve it with a glass of wine!
Ice water works well, too.
 Lop off the tops and bottoms of the zucchini, then cut them into quarters lengthwise.
 In other words, cut ‘em into spears.
 Throw the zucchini into one of those enormous ziploc bags, or two regular-sized ziploc bags.
 Pour in some olive oil…
 Then zest a lemon.
 Throw the lemon zest into the bag…
 Then squeeze in the juice of the lemon.
 Sprinkle in some salt and pepper.
 Then seal the bag and smush the zucchini around a bit to get it all coated.
 Yummy! Now, you can let this sit around for 20 minutes or so, or you can just keep on going.
I’m gonna keep on going.
I’m hungry.
 Grill the suckers over nice, mild heat.
 I like grilling wedges like this, as you can easily grill each of the three sides and they look really purty when they’re all grilled up.
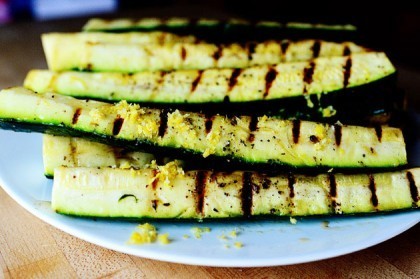
 Take the zucchini off the grill as they get done and pile them up on a plate.
 Now, zest a couple more lemons and pile the lemon zest on a cutting board.
 Sprinkle some kosher salt on top of the zest…
 And chop the zest and salt together a little bit until they become one.
 Lemon salt! It’s a little like lime salt for margaritas…or lime sugar for margaritas…depending on your poison.
Note: This won’t keep very long before the salt starts to dissolve and disappear into the zest, so don’t mix it together until just before you need it.
Or, if you have time, spread out the zest and let it dry out a bit before you sprinkle on the salt.
 Then just sprinkle the lemon salt generously over the zucchini!
 This is absolutely beautiful, guys. The lemon zest really tones down the saltiness so the whole thing is really fresh and lovely. And you can use the lemon salt to sprinkle on so many things: roasted chicken legs, corn on the cob, grilled fish, steamed veggies…even popcorn. Why not?
 Enjoy this, guys. Perfect late summer side dish!
Here’s the handy dandy printable:
Recipe: Grilled Zucchini with Yummy Lemon Salt
Prep Time: 30 Minutes
|
Cook Time: 20 Minutes
|
Difficulty: Easy
|
Servings: 8
Print Recipe
3"x5" Cards
4"x6" Cards
Full Page
Ingredients
6 whole Zucchini (medium Sized)1/4 cup Olive Oil1 teaspoon Kosher Salt1 teaspoon Black Pepper3 whole Lemons, Zested1 teaspoon Kosher Salt (additional) Extra Olive Oil If Needed For Brushing Preparation Instructions
Lop off the tops and bottoms of the zucchini and slice them into quarters, lengthwise. Place them all in a very large (or two regular sized) plastic zipper bag. Drizzle in olive oil, 1 teaspoon salt, pepper, 1 tablespoon lemon zest and the juice of two lemons. Seal the bag(s) and smush them around a bit so that the zucchini is coated. Set aside for 15 to 20 minutes to marinate.
Prepare the indoor or outdoor grill to medium to medium-low heat. Grill the zucchini on all three sides until nice and tender, being careful not to burn them. Remove the zucchini to a plate as it gets done.
Pile up the rest of the lemon zest and sprinkle 1 tablespoon kosher salt on top. Use a knife to chop the salt and zest together until it becomes...well, lemon salt! Add more salt if it needs it. Sprinkle the lemon salt over the plate of grilled zucchini and serve.
Posted by Ree on August 18 2012

August 18, 2012
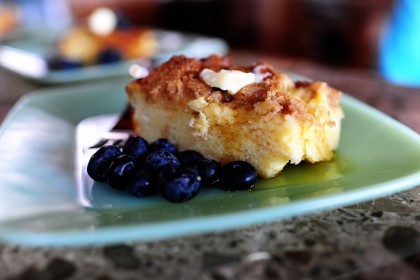
Baked French Toast
 On this morning’s Food Network episode, I make (among other things) this beautiful, simple, glorious, easy, delectable, scrumptious, heavenly baked French toast, which I served with syrup and blueberries to my daughter and her four friends. The girls absolutely loved it—between the six of us, we nearly polished off the whole pan—and it’s always one of my favorite things to make for breakfast, particularly when I have visitors. (I think I’ve made it for four or five groups that have come to stay at the Lodge this summer.) The great thing about baked French toast is that you can make it on the spot and bake it right away…OR assemble it the night before and let it sit and get even more luscious in the fridge overnight. You can leave it plain like this, or you can mix blueberries or other fruit in with all the bread.
It’s fabulosity in a baking dish. So simple, so wonderful.
Have I used enough adjectives today?
 I originally posted the step-by-step recipe here back in 2010, and the printable below has just a couple of tiny, inconsequential changes. If you’d like to see the four thousand step-by-step photos of the recipe, here ’tis!
Cinnamon Baked French Toast – Yum!
Here’s the handy dandy printable. Enjoy, guys!
Recipe: Baked French Toast
Prep Time: 15 Minutes
|
Cook Time: 1 Hour
|
Difficulty: Easy
|
Servings: 8
Print Recipe
3"x5" Cards
4"x6" Cards
Full Page
Ingredients
FRENCH TOAST Butter, For Greasing1 loaf Crusty Sourdough Or French Bread8 whole Eggs2 cups Whole Milk1/2 cup Heavy Cream1/2 cup Sugar1/2 cup Brown Sugar2 Tablespoons Vanilla Extract Topping1/2 cup Firmly Packed Brown Sugar1 teaspoon Cinnamon1/4 teaspoon Salt Freshly Grated Nutmeg, Optional1 stick Cold Butter, Cut Into Pieces Warm Syrup, For Serving Butter, For Serving1 cup Fresh Blueberries, For Serving Preparation Instructions
For the French toast: Grease the baking pan with butter. Tear the bread into chunks, or cut into cubes, and evenly distribute in the pan. Crack the eggs in a big bowl. Whisk together the eggs, milk, cream, granulated sugar, brown sugar and vanilla. Pour evenly over the bread. Cover the pan tightly and store in the fridge until needed (overnight preferably). Or you can make it and bake it right away---delicious no matter what!
For the topping: Mix the flour, brown sugar, cinnamon, salt and some nutmeg in a separate bowl. Stir together using a fork. Add the butter and with a pastry cutter, and mix it all together until the mixture resembles fine pebbles. Store in a plastic bag in the fridge.
When you're ready to bake the casserole, preheat the oven to 350 degrees F. Remove the casserole from the fridge and sprinkle the topping over the top. Bake for 45 minutes for a softer, more bread pudding texture or for 1 hour-plus or more for a firmer, crisper texture.
Scoop out individual portions. Top with butter and drizzle with warm pancake syrup and sprinkle with blueberries.
Posted by Ree on August 18 2012

Ree Drummond's Blog

- Ree Drummond's profile
- 2032 followers

