
Ree Drummond's Blog, page 48
November 30, 2012
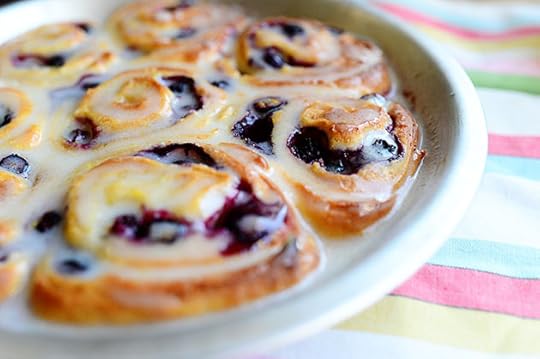
Blueberry Lemon Sweet Rolls
 First of all, I need to state for the record that I’m on a sweet roll jag. I made these over the weekend. I made an orange marmalade version yesterday. And of course, every Christmas, I make approximately forty million batches of cinnamon rolls and deliver them to friends. (Give or take 39,999,960.)
I love sweet rolls.
I think about sweet rolls.
I try to find any excuse to make sweet rolls.
I try to find different combinations of sweet rolls to make.
Second of all: Guess what? Huge news! Enormous news! Alert the media! I have just created a Sweet Roll category on The Pioneer Woman Cooks.
Sweet Rolls! on The Pioneer Woman Cooks
All the recipes are zero-calorie and fat-free. In my dreams.
I make these Lemon Blueberry Pancakes for my kids, and they love them. I suspected they’d love these, too. And guess what? I was right!
I suspect you’ll love them, too.
 First we’ll make the dough! I include these dough photos in pretty much all my sweet roll recipes, but I don’t want you to have to click over to another post to see them. So forgive the sweet roll dough redundancy if you’ve already seen this process.
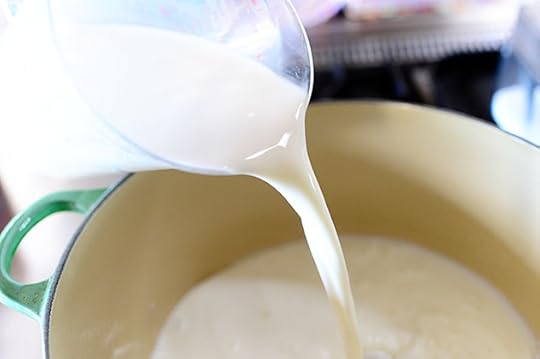
Into a pot, pour four cups of whole milk…
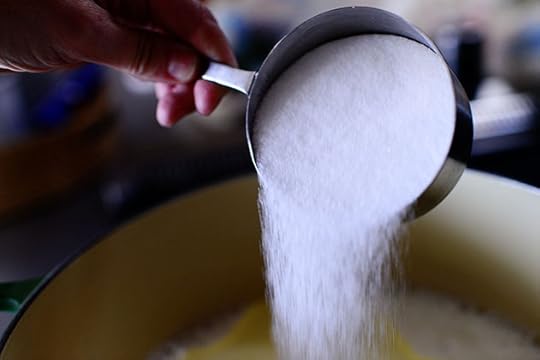
 A cuppa of sugar…
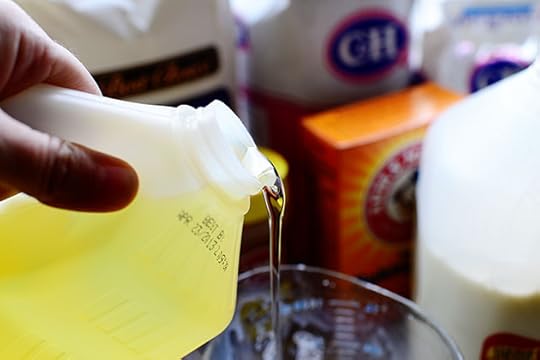
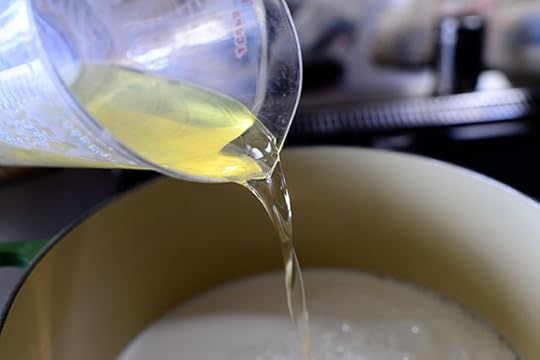
 And a cuppa canola or vegetable oil.
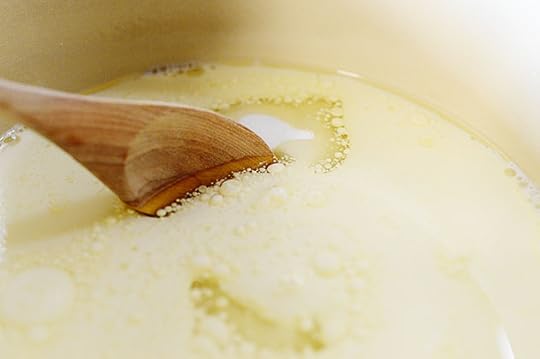 Stir it around and let it heat up over medium heat until it’s “scalded,” which my mother always told me means “hot but not boiling.”
So just before it starts to boil, turn off the heat.
I can’t tell you how many times I have walked away from the milk mixture only to come back to find it bubbling violently and tragically over the sides of the pan.
But it’s only made me a stronger person.
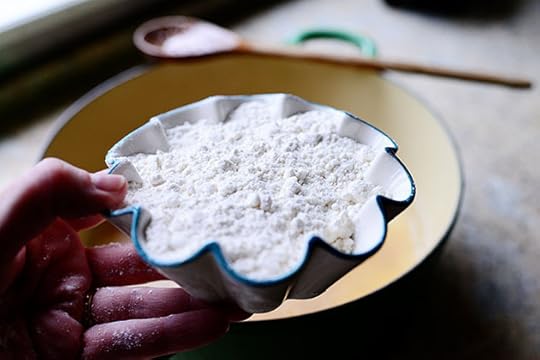
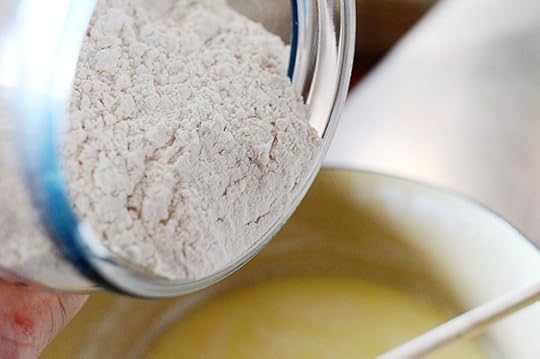 After you scald the mixture, you’ve got to let it cool to just warmer than lukewarm but not hot. Specific enough? Ha. After it’s to that temperature, add 8 cups of flour.
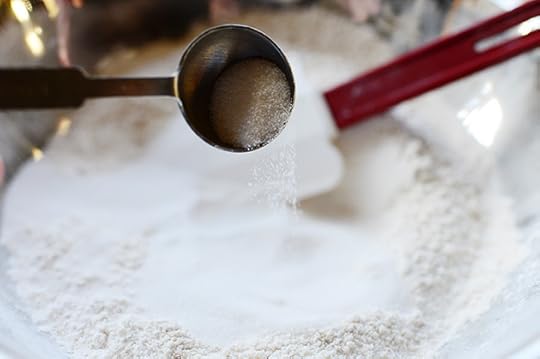
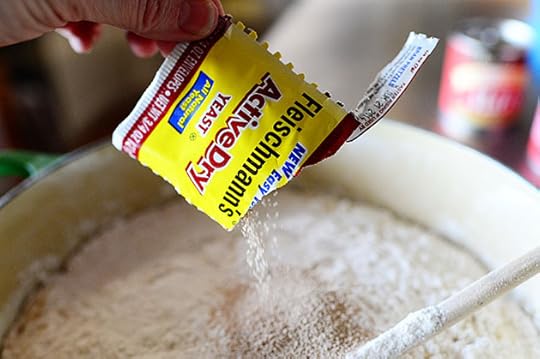 Sprinkle two packages of active dry yeast right over the flour, and I’d like to invite you to observe the strange phenomenon that is going on with my thumb in this photo. What in the name of all that is holy?
If I promise that my thumb looks nothing like that in real life, will you tell me that youthinks that I protesteth too much?
Okay, fine. Let’s just move on. But let the record reflect that I’m traumatized by this photo.
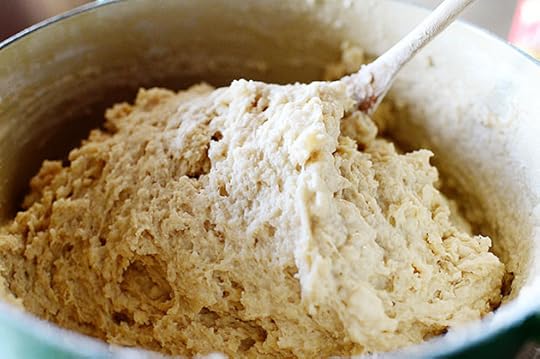 Stir the mixture around until it’s all combined. It’ll be tremendously sticky!
After you stir it, you need to cover the pot and leave it for an hour. Go live your life!
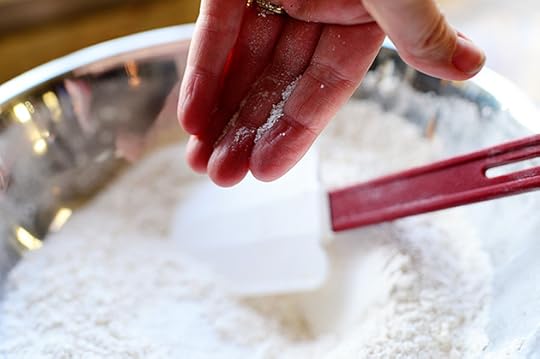
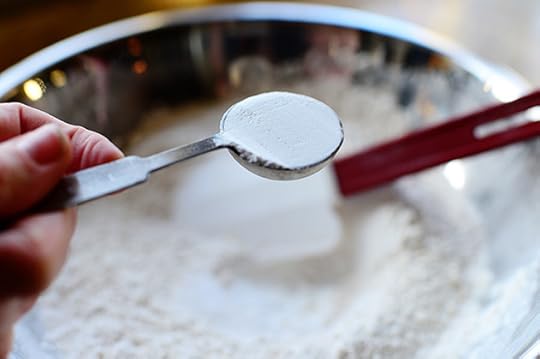
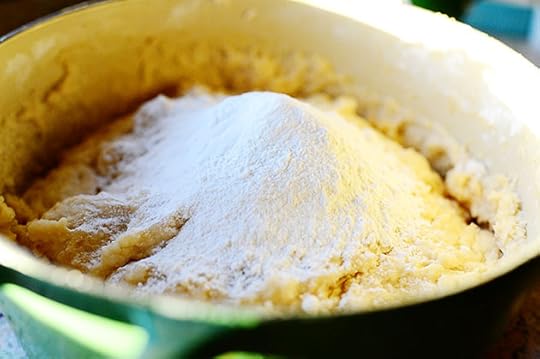 After an hour, take off the lid (obviously, Ree!) and add an additional cup of flour, a tablespoon of salt, a heaping teaspoon of baking powder, and a scant teaspoon of baking soda.
 Stir it around (it’ll be a little more difficult than the last stir, but surge on) until it’s combined…then you can use it right away or do what I did and stuck it in the fridge overnight! That’s one of my favorite sweet roll maneuvers: make the dough the night before.
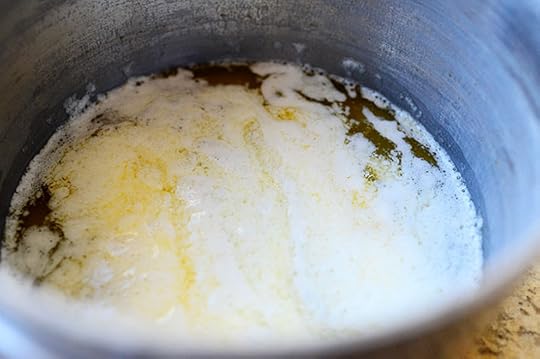
 When you’re ready to make the rolls, melt some butter (you just need a stick, but I did extra for another piece of mischief I was getting into.)
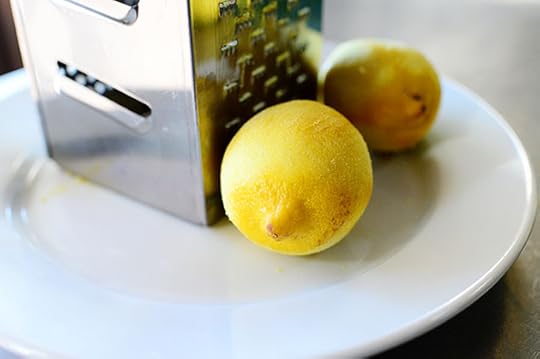 And zest two lemons.
 To use in the filling, I decided to make a lemon sugar along the lines of the stuff in Flo Braker’s famous Pull-Apart Coffee Cake, which I think was the genesis of the whole pull-apart bread craze. Put the lemon zest on a plate…
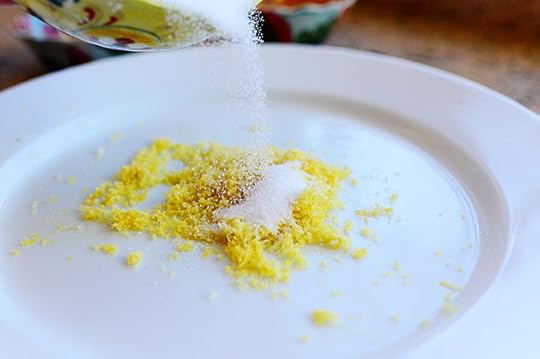 And sprinkle on some sugar.
 Use your fingers to work it together, adding more sugar or lemon zest as needed.
 The mixture should be pretty, sparkly, pale yellow, and slightly (ever-so-slightly) tacky.
Lemon sugar. Yum!
 As always, this dough recipe makes two batches of rolls, so reach into the pot and grab half the dough…
 Plop it onto a floured surface…
 And press it into a rough rectangle shape.
 From there, roll the rectangle nice and thin, much more wide than deep. I usually shoot for about 30 inches by 10 inches.
 The point is to get it really, really thin.
 Grab the melted butter…
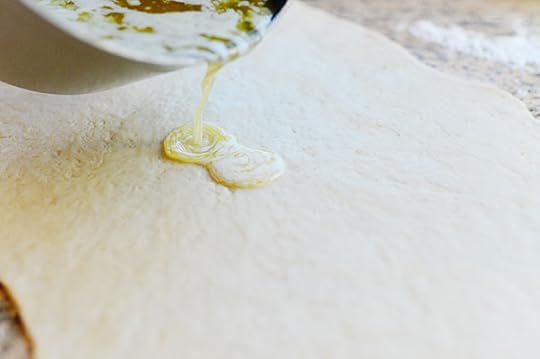 Drizzle it all over the top…
 And smear it with your fingers so that it totally covers the surface. Leave no inch of dough uncovered or the entire batch will be RUINED! Just RUINED!
Don’t pay any attention to me.
No, really. It’s best.
 After the dough’s all buttered, grab the lemon sugar…
 And sprinkle it all over the surface.
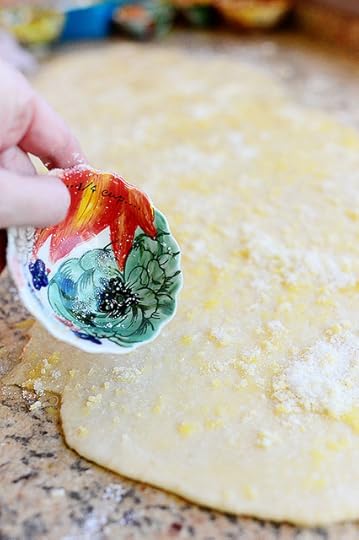 Shake shake shake…
 Now, I just guesstimated on the amounts here; in hindsight, I should have mixed up more lemon sugar so that there was a nice, semi-thick layer of the stuff. You should definitely see sugar all over the place.
 Next, because I was afraid the rolls would be too, too, too, too sweet, I very lightly sprinkled a little kosher salt over everything. Just a little bit.
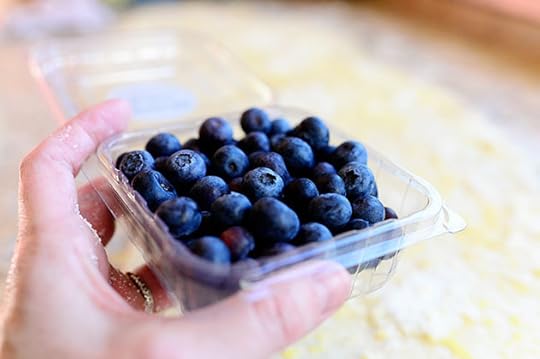 And finally: Blueberries!
 I sprinkled them all over the top.
Now, again: I was just guesstimating. I didn’t want to overdo it on the blueberries because I was afraid they’d bleed and freak out all over everything. But (warning: spoiler alert) actually, when I ate the finished rolls, I wanted more blueberry. More tartness. So next time, I’ll add more!
 Roll the dough toward you, making sure to keep it nice and tight as you roll it.
 When you’re finished rolling it up, pull up the seam and pinch it to seal.
 Then turn the roll seam-side down to keep it all together!
 Bush some pans with melted butter…
 Slice rolls with a sharp knife…and don’t worry when you slice right through the blueberries! You’ll never know it later.
 Place them in the pans, then set them aside for 20 minutes so they’ll rise a bit while you preheat the oven.
 Sometimes if I want to hasten this along (which I almost always do, because I want sweet rolls now, not later) I turn on the heat under an iron skillet or two, let them heat up just a tiny bit, then turn off the heat. Then I place the pans inside the skillets…
 And cover them with tea towels.
 When they’ve puffed up a bit, throw ‘em into a 375 degree oven for about 15 minutes or so, until they’re nice and golden brown. Make sure they’re definitely golden brown on top, as that will ensure that the rolls are done underneath (some of the blueberry juice will collect at the bottom, so they need a little extra baking.
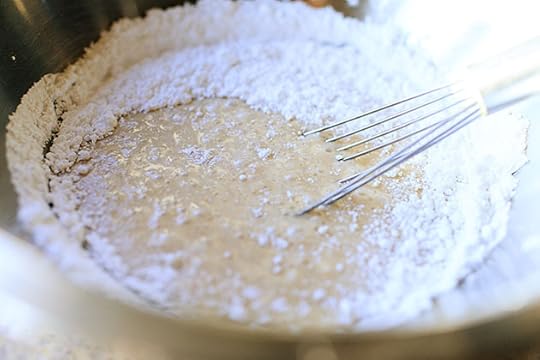
 While the rolls are baking, you want to make the icing so that it’s ready to pour right when the rolls come out of the oven. Throw some powdered sugar and some more lemon zest into a bowl…
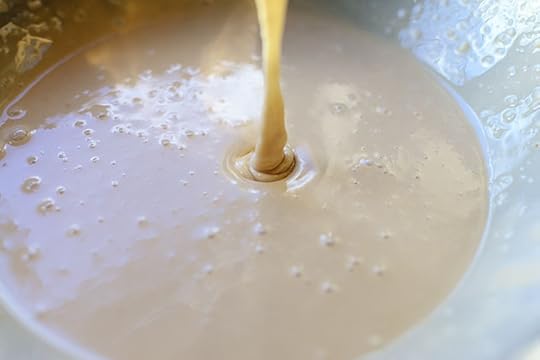
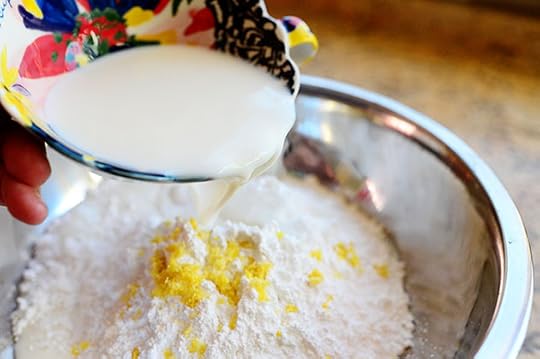 Then pour in some whole milk.
 Whisk it all around until it’s really smooth, then squeeze in some of the lemon juice.
 Add more lemon zest if you think it needs a little…
 And pour in a little melted butter just to give it a nice consistency.
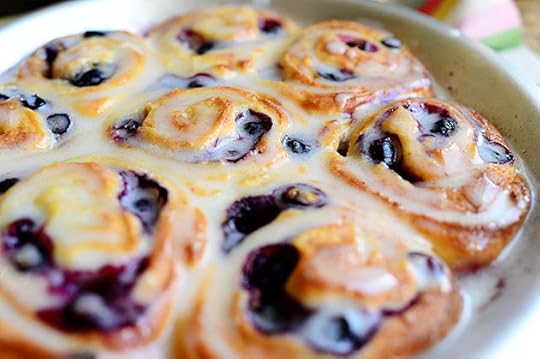
 The rolls are done! Hallelujah.
 And they look and smell just divine.
 So right after you pull them out, drizzle on the icing.
 Mmmm, baby.
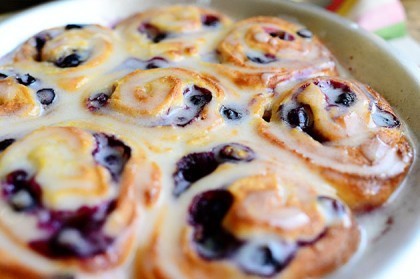
 You want to drizzle on the icing while the rolls are warm, because then it oozes down into the cracks and crevices and the whole thing becomes miraculous and…well, miraculous.
 Ta-da!
Enjoy these, my friends! They’re so, so dreamy and a nice twist on regular cinnamon rolls.
Recipe: Blueberry Lemon Sweet Rolls
Prep Time: 1 Hour30 Minutes
|
Cook Time: 20 Minutes
|
Difficulty: Easy
|
Servings: 24
Print Recipe
3"x5" Cards
4"x6" Cards
Full Page
Ingredients
FOR THE DOUGH:4 cups Whole Milk1 cup Sugar1 cup Canola Oil2 packages Active Dry Yeast, 0.25 Ounce Packets8 cups All-purpose Flour1 cup (additional) All-purpose Four1 Tablespoon (heaping) Salt1 teaspoon (scant) Baking Soda1 teaspoon (heaping) Baking Powder FOR THE FILLING:1 stick Butter3/4 cups Sugar2 whole Lemons, Zested2 cups (Heaping) Fresh Blueberries FOR THE GLAZE:1 whole Lemon, Juiced2 whole Lemons, Zested3 cups Powdered Sugar2 cups Whole Milk, Or As Needed1 dash Salt3 Tablespoons Melted Butter Preparation Instructions
Makes 24 rolls.
For the dough:
Mix milk, 1 cup sugar, and canola oil in a large pot or Dutch oven. Heat over medium heat until very warm but not boiling. Remove from heat and allow to cool until warmer than lukewarm but not hot.
Sprinkle yeast over the surface of the liquid, then add in 8 cups flour. Stir gently until totally combined. Mixture will be very wet and sticky. Cover with a tea towel, keep in a draft-free place, and allow to sit for 1 hour.
After 1 hour, add in an additional cup of flour, as well as the salt, baking soda and baking powder. Mix until combined. Refrigerate dough, covered, until you need it. (Refrigerating the dough helps make it easier to handle.)
Preheat oven to 375 F. Butter a large baking dish (or a couple of smaller dishes) generously. you could use a 9x13 or two 9-inch pie pans which is what I did.
Melt 1 stick of butter in a small saucepan over medium heat. Once melted remove from heat.
Divide dough in half. Store one half in the fridge for another use (another batch of these, a batch of cinnamon rolls, a batch of dinner rolls). Turn the other half of the dough onto a floured surface. Roll into a large rectangle, about 30 inches wide by 10 inches deep. Roll as thin as possible! Drizzle melted butter over the dough, using your fingers to spread evenly.
Using your fingers, mix sugar and lemon zest so that it's a nice, light yellow sugar. Sprinkle it all over the butter. Sprinkle the blueberries evenly over the surface.
Beginning at the side furthest from you, roll dough toward you until it’s in the shape of a tight log. Tuck as you go so the roll stays tight. Pinch the edges to seal the seam shut. With a sharp knife, slice into 1/2 thick hick rolls and lay the slices, cut side down, into the buttered baking dishes. Allow to rise for 20 minutes, then place in oven and bake for 15 to 20 minutes, or until deep golden brown on top.
To make the glaze: Add lemon juice, lemon zest, powdered sugar, milk, and dash of salt in a bowl. Add melted butter and whisk together until smooth. Taste it and add more of whatever it needs.
Remove rolls from oven and drizzle the glaze all over the rolls. Be sure to get it all around the edges and covering the surface so they’ll be nice and moist!
Serve warm or at room temperature.
(Adapted from my mom's cinnamon rolls recipe. Lemon sugar filling adapted from Flo Baker's pull-apart bread recipe.)
Posted by Ree on November 29 2012


November 28, 2012
The Best Skillet Ever (Winners Announced)
UPDATE: The winners of the Le Creuset skillets are:
#2298 Tara H: “I’m about halfway done but nothing is wrapped yet.”
#15654 Cindy W: “About 3% done, yikes!”
#20169 Sheri O: “For the first time ever, I have not even started. Usually I’m at least half way done by now….ugh.”
#29468 Elle: “None! I am such a procrastinator!”
#45107 John: “90% finished.”
Congratulations, winners! Contact prizes@thepioneerwoman.com to claim your prize!
Today, because it’s almost December…
Because there’s still lots of holiday cooking to do…
Because Charlie is currently snoring so loud, it sounds like a Harley…
And because I love ya…
 I’m giving away five (5) of these fabulous Le Creuset iron skillets, in the color of the winner’s choice!
I have one of these skillets, and I absolutely love it. Now, the title of this post—Best Skillet Ever—is a little deceiving, because everyone knows that regular, seasoned iron skillets are the best skillets ever. But this baby runs a close second. It’s heavy, solid, sturdy…and the cooking surface is impenetrable black enamel, which is sort of a built-in seasoning in terms of its durability.
I’m not just saying it because the colors are pretty: I love this thing. I’ve already gotten my mom and mother-in-law one for Christmas (mom got turquoise; mother-in-law got orange; I hope they’re not reading this) and I know they’re going to fall in love.
Here are just a handful of the colors!
 Green. Yum.
 Orange. Swoon.
 Blue. Dreamy.
 Yellow. I just fainted. How awesome is this?
TO ENTER
To enter the giveaway, just answer the following question in the Comments section of this post:
“How much Christmas shopping have you gotten done?”
Are you completely finished, with every single present wrapped and under the tree? Or have you not even started yet? Or have you bought one gift so far? Or are you almost finished? Just shout out where you are in your Christmas shopping progress and you’re entered to win one of the five skillets!
(If you don’t celebrate Christmas or would rather not say, just say something along the lines of Howdy and you’re entered!)
THE RULES
One entry per person, please.
Winners will be announced Thursday and skillets will be shipped out immediately!
Good luck!
Sponsored by Pioneer Woman.
NOTE: Contest has ended and comments are closed.

The Best Skillet Ever
Today, because it’s almost December…
Because there’s still lots of holiday cooking to do…
Because Charlie is currently snoring so loud, it sounds like a Harley…
And because I love ya…
I’m giving away five (5) of these fabulous Le Creuset iron skillets, in the color of the winner’s choice!
I have one of these skillets, and I absolutely love it. Now, the title of this post—Best Skillet Ever—is a little deceiving, because everyone knows that regular, seasoned iron skillets are the best skillets ever. But this baby runs a close second. It’s heavy, solid, sturdy…and the cooking surface is impenetrable black enamel, which is sort of a built-in seasoning in terms of its durability.
I’m not just saying it because the colors are pretty: I love this thing. I’ve already gotten my mom and mother-in-law one for Christmas (mom got turquoise; mother-in-law got orange; I hope they’re not reading this) and I know they’re going to fall in love.
Here are just a handful of the colors!
Green. Yum.
Orange. Swoon.
Blue. Dreamy.
Yellow. I just fainted. How awesome is this?
TO ENTER
To enter the giveaway, just answer the following question in the Comments section of this post:
“How much Christmas shopping have you gotten done?”
Are you completely finished, with every single present wrapped and under the tree? Or have you not even started yet? Or have you bought one gift so far? Or are you almost finished? Just shout out where you are in your Christmas shopping progress and you’re entered to win one of the five skillets!
(If you don’t celebrate Christmas or would rather not say, just say something along the lines of Howdy and you’re entered!)
THE RULES
One entry per person, please.
Winners will be announced Thursday and skillets will be shipped out immediately!
Good luck!
Sponsored by Pioneer Woman.
November 26, 2012
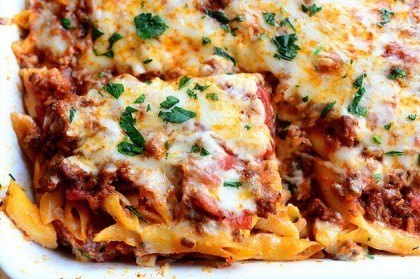
Baked Ziti
 Before I begin with this recipe tutorial, I must make an important disclosure:
I did not use ziti to make this Baked Ziti.
 I used Mostaciolli.
I’m truly sorry for this transgression. It’s just that Mostaciolli is all I had, and I did not want to call this dish “Baked Mostaciolli.” Just doesn’t have the same ring to it.
The next thing I need to say is this:
Oh my ever-loving goodness, is this good.
Baked Ziti is a classic baked pasta dish. It’s basically some kind of tomato or meat sauce baked in a dish with some kind of cheese and, of course, ziti noodles—unless you’re me, then you use mostaciolli noodles. Some people just use tomato/marinara sauce. That, of course, would never fly in this house. There must be meat. Meat there must be. As for the cheese, some people use only mozzarella, while others prefer use a gooey cheese mixture stirred throughout.
I’m in the latter camp. I like baked ziti to be almost like lasagna that forgot to use lasagna noodles. Messy. Gooey. Decadent.
Ridiculous. In every good sense of the word.
 Start by mincing up some garlic.
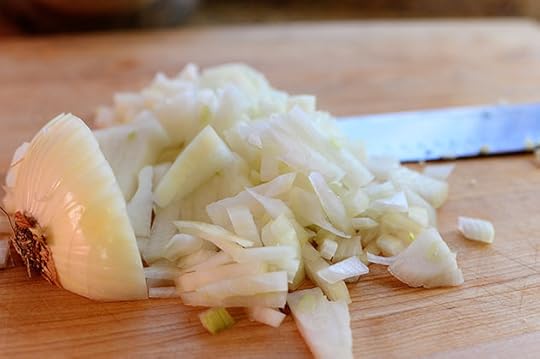 And dice some onion.
 Then throw the onion and garlic in a pot with some olive oil over medium heat. Stir them around and cook them for a few minutes, just long enough for the house to smell so good that everyone runs into the kitchen, embraces you, and says “What’s for dinner, darling mother and wife? We’re ready to eat.”
And then you yell “Psyche!” and then you cackle in a very evil manner.
 Grab some of that there Italian sausage. (Pronounced “Eye-talian”)…
 And mash it in the pot with the onions and garlic.
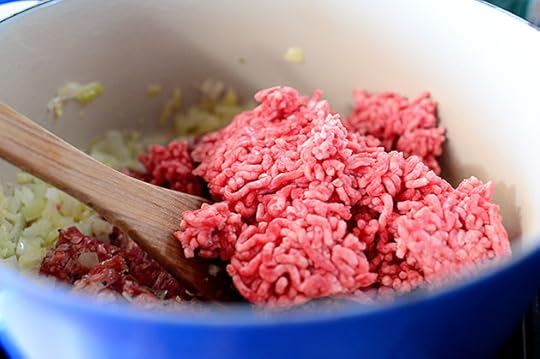 Throw in some hamburger, too.
Or just use sausage!
Or just use hamburger!
It’s a free country, Maynard!
Sorry I called you Maynard.
I’m also monumentally sorry about all the exclamation points.
 Stir it around until the meat’s all brown.
 Drain off the fat (but please leave a little bit to make sure the whole baked dish is nice and moist and oh-so-decadent) and pour in a big ol’ can of whole tomatoes…
 And a regular ol’ can or two of tomato sauce.
You could also just throw in a couple of jars of prepared marinara sauce. But I love the chunks of ‘maters.
 Stir it around and add some salt and pepper.
 Throw in some Italian seasoning…or whatever mix of things like parsley, basil, oregano, etc., that you want.
 And for a little spice…red pepper flakes!
Then just let the sauce simmer on low.
While the sauce is simmering, bawl up some mostaciolli.
 Drain it just before it reaches the al dente stage. It’s going to bake in the oven later, so you want it to have a fighting chance to have some bite when it’s done.
 The sauce looks good!
 So spoon a good three or four cups of the sauce into a separate bowl to cool off a bit.
You’ll see why in approximately 1.0293874 minutes.
 Meantime, make the cheese mixture. Use your very scary hand that resembles a naked chicken to grab a tub of ricotta.
 Plop it into a bowl, then laugh when it plops into the bowl in one piece.
Hahahahahahaha!
Hahaha!
Haha.
Ha.
I fell better now.
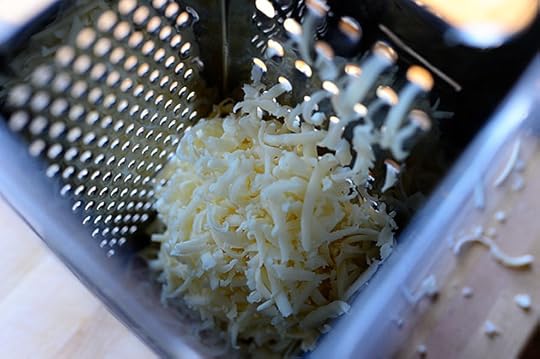 Grate a bunch of mozzarella…
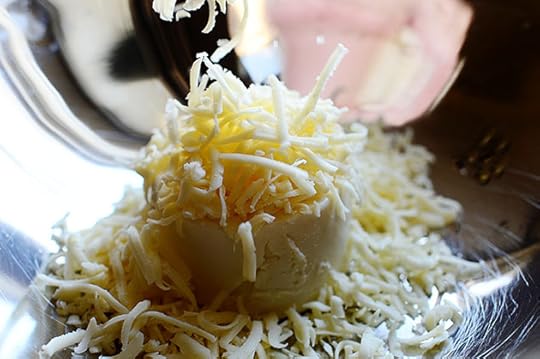 And throw it into the bowl.
 Next, add a bunch of Parmesan/Romano/Asiago…anything in that family, or a combination of the three.
 Crack in an egg and add some salt and pepper.
 Then give it a few stirs. Not enough to totally mix it together—you want big clumps of ricotta still intact.
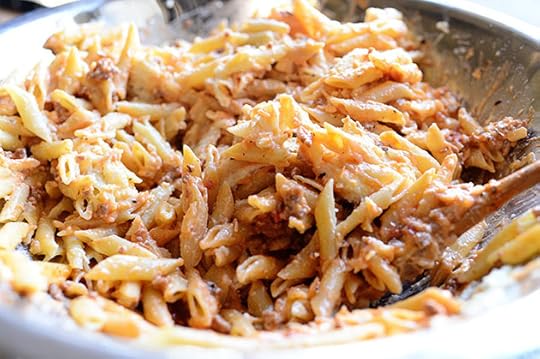
 Throw in the (cooled, rinsed) pasta…
 And toss it in the cheese mixture—again, don’t mix the heck out of it. Just toss. Toss peacefully.
 Now just pour on the sauce that’s been cooling.
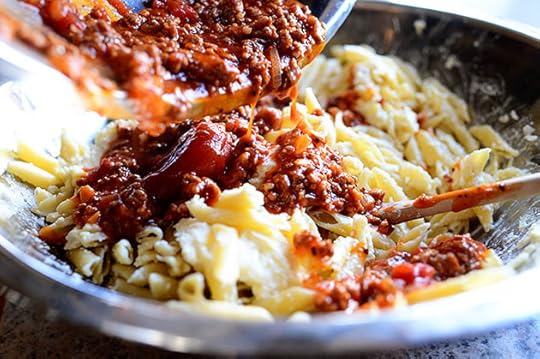 I love life.
 Toss it as you go…
 And add some more if you think it needs it. You want it to be really creamy, but really saucy too.
Not to be picky or anything!
Ha.
 Now, pour half the coated pasta into a very big, very honkin’ casserole dish.
 Spoon some extra sauce over the top…
 Then grate some more mozzarella and sprinkle it over the sauce.
 Add the rest of the pasta, packing it down a bit after you add it.
 Then spoon on the rest of the sauce…
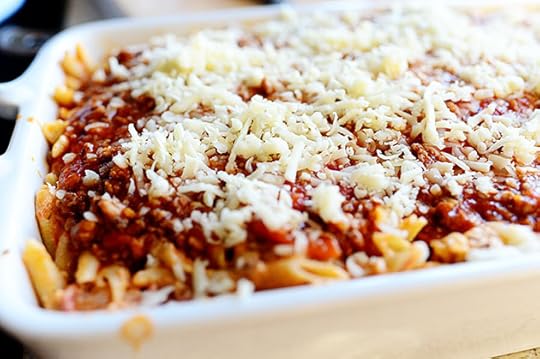 And add more mozzarella.
Actually, have your daughter add more mozzarella.
 Then check her fingernails and say, “Ew! Grody, man.”
Then listen to her retort, “I learned it from you, mom.”
Then cry and imagine a different way of life. One that involves lovely fingernails and pantyhose.
Then put all of those thoughts out of your mind. It’s best not to go there.
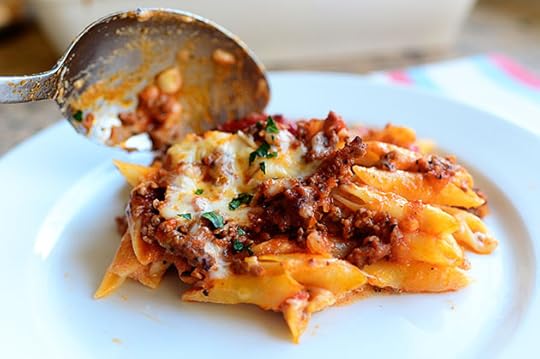
 Bake it in the oven until it’s nice and bubbly and awesome!
 Then sprinkle on some chopped fresh parsley if you have it.
Or don’t, if you don’t have it. I’m easy.
Come and get it!
 Yum.
Yum.
 You can also try slicing it into squares…but it needs to sit and set a bit first.
 Have I mentioned this is delicious?
You’ll like it.
You’ll love it!
You’ll devour it.
Here’s the recipe:
Recipe: Baked Ziti
Prep Time: 15 Minutes
|
Cook Time: 45 Minutes
|
Difficulty: Easy
|
Servings: 12
Print Recipe
3"x5" Cards
4"x6" Cards
Full Page
Ingredients
2 Tablespoons Olive Oil3 cloves Garlic, Minced1 whole Large Onion, Diced1 pound Italian Sausage1 pound Ground Beef1 can (28 Ounce Can) Whole Tomatoes, With Juice2 cans (14.5 Ounce) Tomato Sauce Or Marinara Sauce2 teaspoons Italian Seasoning1/2 teaspoon Red Pepper Flakes Salt And Pepper, to taste16 ounces, weight Ziti Or Mostaciolli, Cooked Until Not Quite Al Dente1 tub (15 Ounce) Whole Milk Ricotta Cheese1-1/2 pound Mozzarella Cheese, Grated1/2 cup Grated Parmesan Cheese1 whole Egg Fresh Minced Parsley Preparation Instructions
Heat olive oil in a pot over medium heat. Add onions and garlic and saute for several minutes, or until starting to soften. Add Italian sausage and ground beef and cook until browned. Drain off fat, leaving a bit behind for flavor and moisture.
Add tomatoes, tomato juice, salt, pepper, Italian seasoning, and red pepper flakes. Stir and simmer for 25 to 30 minutes. After that time, remove 3 to 4 cups of the sauce to a different bowl to cool down.
Preheat oven to 375 degrees.
In a separate bowl, mix together the ricotta cheese, 2 cups of the grated mozzarella, Parmesan, egg, and salt and pepper. Stir together just a couple of times (do not mix completely).
Drain the pasta and rinse under cool water to stop the cooking and cool it down. Pour it into the bowl with the cheese mixture and toss to slightly combine (there should still be large lumps.) Add the cooled meat sauce and toss to combine.
Add half the coated pasta to a large casserole dish or lasagna dish. Spoon half of the remaining sauce over the top, then top with half the remaining mozzarella cheese. Repeat with another layer of the coated pasta, the sauce, and the mozzarella.
Bake for 20 minutes, or until bubbling. Remove from oven and let stand 5 minutes before serving.
(Sprinkle chopped parsley over the pasta before serving!)
Posted by Ree on November 25 2012

November 23, 2012
Thanksgiving Leftovers!
Oh my. Are you as full as I am?
Did you go back for pie like I did late last night after swearing off food forever?
Okay, good. I feel better.
One of the very best things about Thanksgiving is the day after Thanksgiving, and I’m not talking about shopping Black Friday deals. I’m talking about Thanksgiving leftovers! Hopefully your fridges are bulging with extra turkey, cranberry sauce, and other yummy sides. And if so, here are a few of my favorite ways to use them.
 Leftover Turkey Spring Rolls. I absolutely, positively love these things.
 All you do is make up a yummy mixture of shredded turkey, carrots, and other stuff…
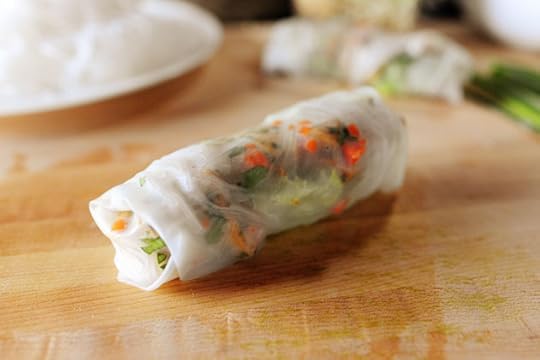 Then roll it up in a rice paper wrapper! I made a yummy dipping sauce with leftover cranberry sauce. I inhaled these, and they were a nice, crunchy change from all the heavy Thanksgiving food.
Here’s the step-by-step: Leftover Turkey Spring Rolls
 Leftover Turkey and Swiss Panini. My goodness. Yum. Double yum. Something about the turkey and the cranberry sauce and the melted, gooey Swiss.
I want one for breakfast.
Here’s the step-by-step, and you can just use a skillet to make the panini if you don’t have a panini maker. Just set a second (heavy) skillet on top as it grills!
Leftover Turkey and Swiss Panini
 Turkey Tetrazzini. Oh, my goodness. Use leftover turkey to make a scrumptious comfort-food casserole with peas, bacon, olive, cheese.
Your soul will sing.
Here’s the step-by-step: Turkey Tetrazzini
 Leftover Turkey Pot Pie. One of my favorite things to whip up in the day or two after Christmas is pot pie, because I almost always have a leftover pie crust I didn’t use…not to mention the leftover turkey.
I haven’t done pot pie in step-by-step form on my website (why I haven’t, I have no idea) but it’s in my first cookbook. Here’s the recipe!
Have a wonderful Friday, everyone!
Love,
P-Widdy-Dub-Diddy
P.S. Burp. ‘Scuse me.

November 19, 2012
Wild Rice Pancakes
 Before I begin explaining this luscious deliciousness, I need to state for the record that I love Minnesota. I’ve now visited Minneapolis three times and I want to marry it for the following reasons:
1. I don’t sweat there. The climate is right up my alley.
2. The people. What’s in the water up there? Everyone is seriously lovely and so kind.
Another reason I love Minnesota is that wild rice is everywhere. And when I was there earlier this month, I ordered wild rice pancakes from the room service menu because I’m, like, all about eating dishes that are true to the area I’m visiting.
And because I just wanted pancakes.
So here was my experience: I got the pancakes. I ate the pancakes. And I absolutely, positively loved the pancakes. Truly one of the best pancake experiences I’ve ever had, and believe you me, I’ve had a lot of pancake experiences. The texture…the very slight nutty flavor. I laughed, I cried, it moved me, Bob.
So before I left for New York last week (I’m posting photos in a bit!) I whipped up a batch just for kicks. I loved them every bit as much as I did in Minnesota, and even better, all four of my kids inhaled them, which I didn’t necessarily expect.
I just love it when unexpected inhalation occurs!
 Wild rice! This was a gift. (Thank you!)
 Wild rice! This was a gift, too. I was so excited to get these, because I’m making a Thanksgiving side dish with wild rice and I was plum out in my pantry.
I love it when unexpected wild rice pantry insertions occur!
 First, measure some wild rice and cook it according to package directions. Unless the package directions suggest that you cook it in chicken broth. If the package directions suggest that you cook the rice in chicken broth, do not cook the wild rice according to package directions.
Just cook it in water, okay?
Oh! And here’s something you need to know: It takes forever to cook wild rice. Like 45 to 55 minutes or something. So pull out every ounce of pancake patience you have. You’re gonna need it.
 For the pancakes, measure some flour into a big ol’ bowl. If you have cake flour, use it…but I just went for the all-purpose stuff.
 Then add some salt…
 Baking powder…
 And sugar.
 And then! This is totally optional, but I happened to have some in my pantry and I wanted to give the pancakes a little bit of a flavor edge. Ground flaxseed!
 I measured about four tablespoons or so…
 Then threw it on top of the flour mixture.
You can get the flaxseed meal at lots of supermarkets now, and you can throw it into basically any baked good: muffins, coffee cakes, cookies. It’s yummy, Maynard.
Sorry I called you Maynard. I just love the stuff.
 Stir the mixture around, then set it aside for a second or ninety.
 Measure some whole milk and crack in two eggs…
 Then add some vanilla and stir it all around to mix it up.
 Next up, slowly drizzle the wet ingredients…
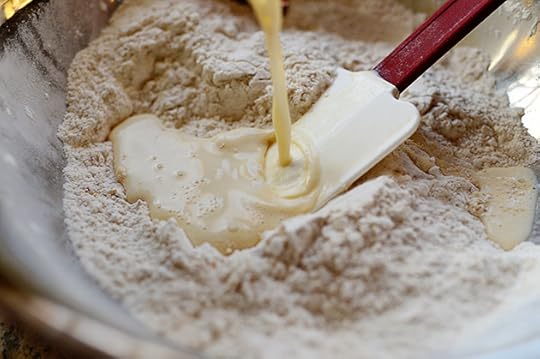 …Into the dry ingredients…
 Stirring gently as you go.
 The consistency should be nice and pancake-batter thick, but definitely still pourable. So splash in as much extra milk as you need in order to get it to the right consistency.
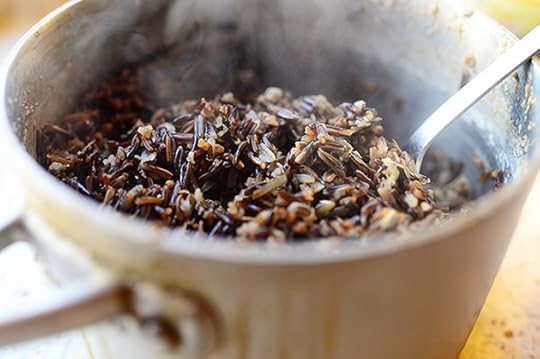 By now the wild rice is done.
Sheesh! That took forever.
 So by the spoonful, add it to the batter (mine was still pretty warm; it’s best to let the rice cool quite a bit.)
 And fold it in until it’s all mixed together. Now, how much cooked rice you add to the pancake batter is pretty personal, so I’d suggest you start by adding half…then work your way up from there. If you decide not to use all the rice and have some leftover, stir it into your Thanksgiving stuffing!
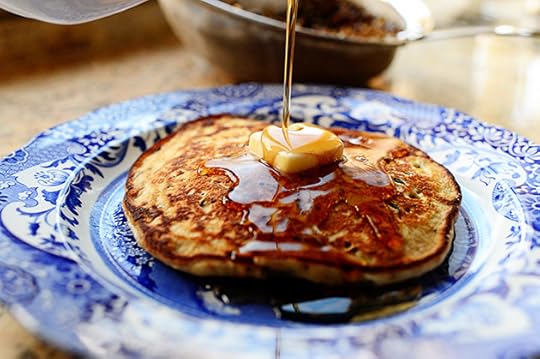
 The pancakes I had at the hotel were big monster, motherin’, mongo pancakes…so that’s exactly what I made.
First, I buttered the skillet really well.
Medium heat.
Slightly sizzly.
Amen.
 Flipped it when it was golden brown on the first side.
 And then it was time to get serious.
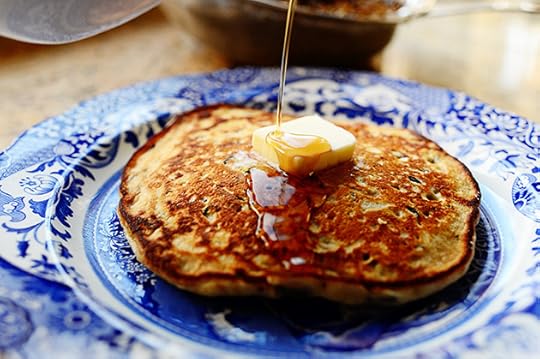 Butter and syrup.
 Hooray!
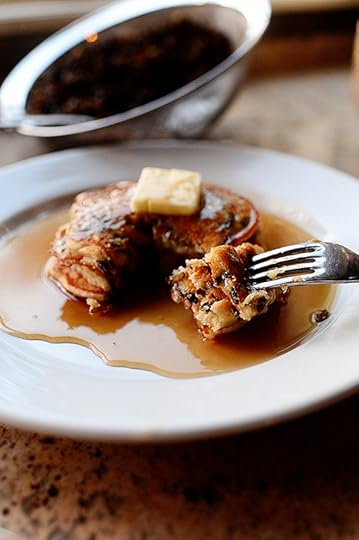
 You seriously won’t believe how good these are.
Texture galore.
Texture out the door.
Texture out the wazoo.
I could have stopped before that last one. Sorry.
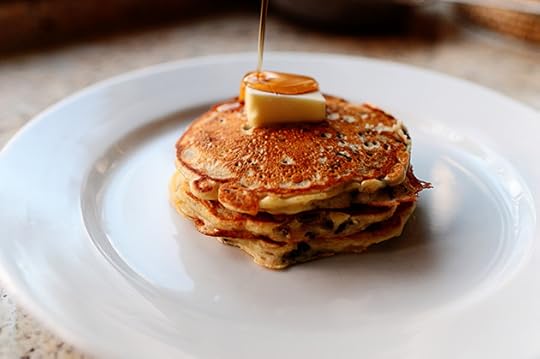
 You can also be a normal person and make normal-sized pancakes. I won’t tell anyone.
 I love life.
 For life…
 Includes these pancakes.
 Try them. Trust me. You’ll be so glad you did. They’re everything that’s good about pancakes, but with a delicious bonus.
Thank you, Minnesota!
Give your climate a kiss for me.
Here’s the handy dandy randy (wait…huh?) printable!
Recipe: Wild Rice Pancakes
Prep Time: 15 Minutes
|
Cook Time: 1 Hour
|
Difficulty: Easy
|
Servings: 6

Print Recipe
3"x5" Cards
4"x6" Cards
Full Page
Ingredients
1 cup Wild Rice3 cups All-purpose OR (if You Have It) Cake Flour1/2 teaspoon Salt2 Tablespoons Baking Powder4 Tablespoons Sugar3-1/2 cups Whole Milk2 whole Eggs1 Tablespoon Vanilla2 Tablespoons Butter, Melted Butter, For Serving Maple Or Pancake Syrup Preparation Instructions
Cook wild rice according to package instructions (do not add salt or cook in broth. Just cook in plain water.) Set aside.
Mix together dry ingredients in large bowl.
Mix together milk, eggs, and vanilla in a separate bowl.
Add wet ingredients to dry ingredients, stirring very gently until just combined. Add more milk if batter seems too thick. It should definitely be thick but easily pourable.
Add melted butter to the batter, stirring gently to combine.
Gently stir in cooked wild rice. (Add half at first and see how you like the looks of the batter. Then slowly add in as much as you want.)
Cook on a buttered skillet over medium-low heat until golden brown. Serve with an obscene amount of butter and warm syrup.
Posted by Ree on November 18 2012

November 16, 2012
My Favorite Thanksgiving Side Dishes
Note: My new Thanksgiving episode airs on Food Network this Saturday morning at 10:30 Eastern/9:30 Central. Hope you love it. I tried to cram as much food into the show as I possible could.
Slightly More Terrifying Note: I’m appearing on Thanksgiving LIVE on Food Network this Sunday from 12:00 to 2:00 Eastern (11:00 to 1:00 Central) and I think you’ll love the show…but not because I’m on it! Giada De Laurentiis, Rachael Ray, Alton Brown, Aaron Sanchez, Sunny Anderson, and Alex Guarnaschelli will be on the show too, so you won’t even know I’m there! We’re all going to be cooking, answering general Thanksgiving questions…and, I sincerely hope, eating. Hope you can watch. I’ll wave to you!
Okay, now onto my Thanksgiving post.
There’s the turkey. Yada yada yada.
But then there are the sides.
Here are some quick links to my very favorite Thanksgiving sides!
Raise your hand if you like the sides better than the actual bird!
Sometimes I even forget to put the turkey on my plate.
True story.
Click on the photos OR links below to be taken to the step-by-steps. Printables are at the end of each individual recipe (I didn’t think it would work to have a long line of printables here.)
Thanksgiving sides for president!
 The most delicious Mashed Potatoes in the world. And the best thing in the world is, you can make ‘em the day before, keep ‘em in a fridge, and bake ‘em the next day.
A Thanksgiving day without having to peel potatoes is a blessed Thanksgiving day indeed.
 It looks like baby food, but it tastes like Heaven. This Butternut Squash Puree will make you moan and groan.
Please trust me on this.
 Basic Thanksgiving Stuffing. It’s good. It’s really, really good.
Have I mentioned it’s really good?
 This Cornbread Dressing with Sausage and Apples is a variation of the basic one above, and is the same dressing I make on Saturday’s Thanksgiving episode on Food Network!
It’s dreamy.
 If you’re an Oyster Dressing fan, here’s a good, basic version.
I like it in small doses.
It’s a little salty. And fishy.
Of course, that’s sort of the point of oyster dressing.
 Okay. If you’ve never listened to anything I’ve ever said before—and I’d hardly blame you if that’s the case—you must make this Turnip Gratin.
Looks like potatoes…but so delightfully different.
 Sweet-Roasted Acorn Squash Wedges. I could eat these morning, noon, and night.
I love them.
 Put away the cream of mushroom soup, everyone! Not that there’s anything wrong with cream of mushroom soup. But for this Green Bean Casserole, you won’t need it!
I love this stuff.
It’s from scratch, man.
 If you haven’t tried these Whiskey Glazed Carrots…oh, boy. Change that next week! They’re divine.
As in, you’ll never not make them again.
 I made them for Christmas last year, but these delightfully deliciously divine Brussels Sprouts with Balsamic and Cranberries. You won’t be able to stop eating them. Addictive!
 And these Sweet Potatoes. My gracious.
(Translation: Oh, yum.)
 And finally, No-Knead Dinner Rolls. So good. So easy. So…full of wonderful carbs!
Yummy sides all around. I’m getting excited for the big meal!
Of course, I’m excited about every meal. But you probably already knew that.
Have a great weekend, everyone!
Love,
P-Dub

November 14, 2012
Buffalo Chicken Salad
 The idea for this salad came to me…on an airplane.
Last week I went on a small tour for my new children’s book. For the first time ever, I scheduled six straight days of signings, which meant I flew to a new city every day. In previous book trips, I’ve paced myself a little more, usually allowing a day between trips and signings to allow my old, decrepit, crippled, weary body to recover before going on the next leg. But this time, because we have a lot of school, sports, and stuff going on at home, I decided to compress the tour into a shorter amount of time. It wound up being a really fun adventure, I met some wonderfully incredible people, and as long as I didn’t sit still I held up really well!
But if I ever did sit still…well, it was all over for me. I’d zonk out and wake up four years later. Case in point: my flight from somewhere to somewhere. I can’t even remember where. All I remember is hearing, as I rested my head back against the seat just after takeoff, that the lunch choice for that flight would be Fish Tacos or Buffalo Chicken Salad. And that was the last thing I remember. I fell dead asleep and as I dreamed during that long high altitude-induced slumber, I could hear the voice of a flight attendant saying over and over “Buffalo Chicken Salad…Buffalo Chicken Salad…Buffalo Chicken Salad…” In my dream, I thought about what a great idea that was, to turn something so beloved as Buffalo chicken wings into crispy, crunchy salad form. In my dream, I could nearly taste the sauce-soaked chicken and the cool crisp greens, which I imagined would have some sort of a blue cheese dressing approach given the usual presentation of regular wings. And in my dream, when the flight attendant finally arrived at my row and presented me with the choice, I would say unequivocally and without reservation, “I will have the Buffalo Chicken Salad, ma’am! And thank you!”
And then I woke up. I opened my eyes, closed my mouth, wiped the drool from my chin, and saw, to my horror, my neighbor’s lunch tray—and the remnants of what appeared to have been a Buffalo Chicken Salad (I knew, because he’d missed a blue cheese crumble)—being whisked away. Lunch was over. I’d missed the whole thing entirely. And, groggy and confused, I didn’t have the presence of mind to raise my hand, stand up for my rights, and say, “I was told there’d be Buffalo Chicken Salad?”
So I didn’t speak up. And I never got to eat it.
A couple of evenings ago, after having been home for a few days, after ruminating and stewing and cogitating, I made my own. It wasn’t even about wanting the Buffalo Chicken Salad anymore. It was way beyond that at this point. It was about righting the wrong that had been done to me.
It was about vengeance, was what it was.
Come along with me on my journey.
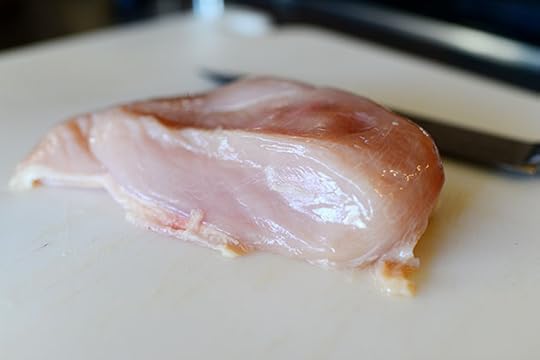 Grab a chicken breast…
 And cut it in half this way, so that there’s a top and a bottom piece.
Did that make any sense? I sure hope so.
 Heat some olive oil in a small-ish skillet…
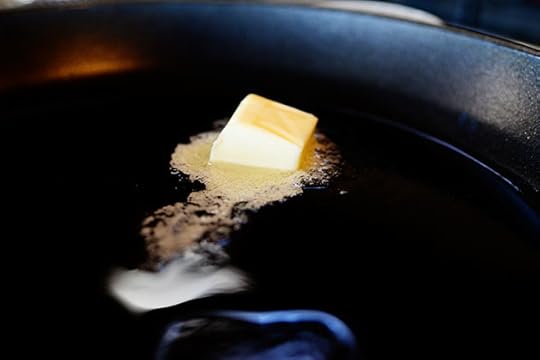 Along with some butter…
 And cook the chicken over medium-high heat until it’s totally golden brown on both sides. I wanted to get a little bit of a “fried” feel to the chicken even though it obviously wouldn’t have the crispy fried skin that regular wings have.
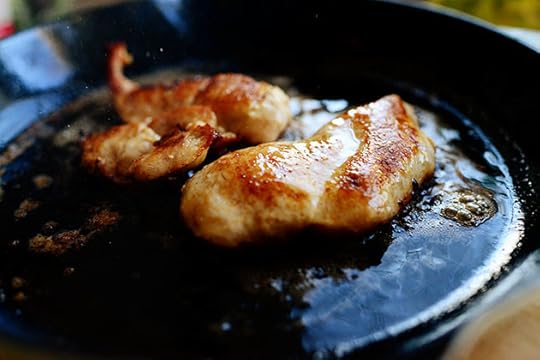 When the chicken’s done…
 Pour off the excess grease and turn off the heat.
 Then grab this stuff, which I used to know as Durkee’s Red Hot but that became Frank’s somewhere along the way.
 Pour some right over the top of both chicken pieces.
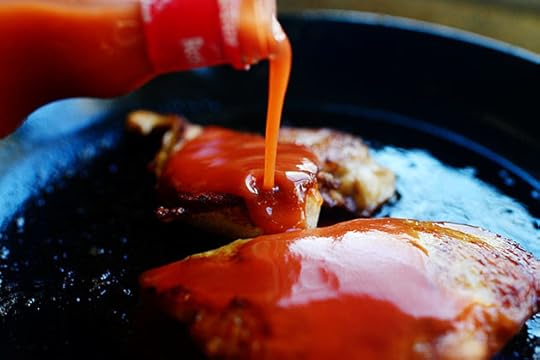 Glug, glug, glug…
 Turn over the chicken to totally coat it, then just set the chicken aside while you get everything else ready.
 Did you know you can make blue cheese dressing by grabbing some ranch dressing right from your fridge…
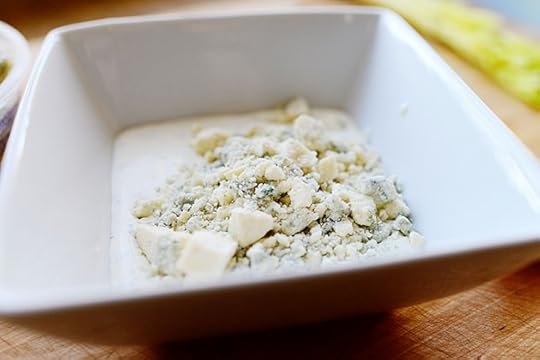 Adding blue cheese crumbles…
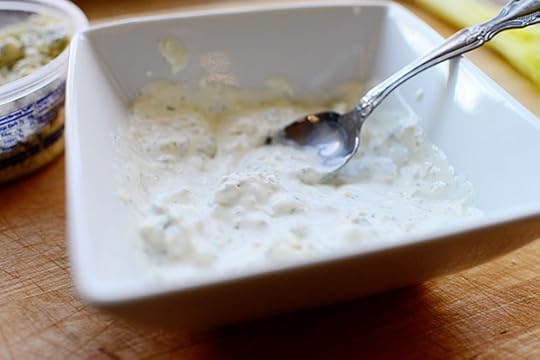 And stirring it to combine?
Well, you can. It’s true. It’s one of those things they never tell you.
 Iceberg and Romaine mix. From a bag.
 Lettuce mix. From a different bag.
My daughter loves salad from a bag. She hoards it. She sneaks it into my shopping cart and hides it in the fridge so no one else will eat it.
That’s normal, right?
Use whatever lettuce combo you have on hand, is what I’m saying.. I think it’s best to stick with iceberg/Romaine blends rather than spring greens. You want that cold, crunchy texture.
 Dribble some dressing over the lettuce…
 Not too much! Just enough to lightly coat the lettuce. Thin it with a little milk if it’s too gloopy.
 Then use tongs or your (very clean) hands to toss it. See? Not too heavy at all. Just a light coating with blue cheese crumbles throughout.
 Now throw the chicken breast pieces on a board…
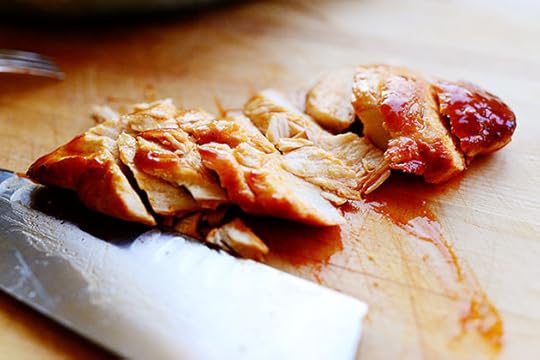 And slice ‘em up.
 To serve it up, mound the tossed salad in a bowl…
 Add some more blue cheese crumbles…
 And arrange the chicken slices all over the top.
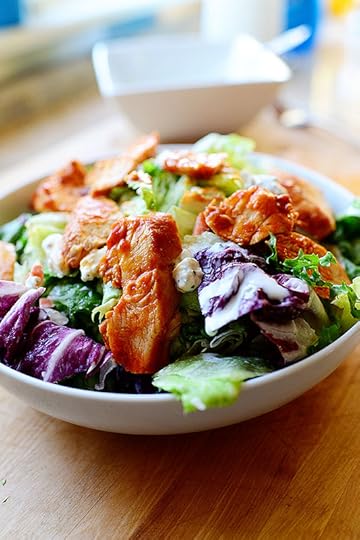 I’m happy now.
 Actually, I”m not. The chicken isn’t messy/sauce enough.
 So I dipped the slices back into the sauce.
And they were perfect.
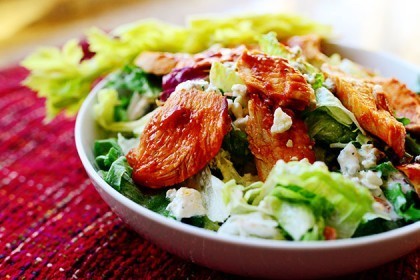
 Leesten. And heer me. This was so, so, so, so good. Everything I dreamed it would be while I was zonked out and drooling on the plane…and more.
 As I ate the salad, the sauce from the chicken slowly worked its way into the dressing on the salad, and hoooo, boy. It was a flavor explosion. I absolutely loved it.
(Celery hearts on the side. Leaves intact. next time I’ll probably chop the leaves and throw them over the top of the salad.)
Enjoy this, guys. Super scrumptious and really fun.
Recipe: Buffalo Chicken Salad
Prep Time: 10 Minutes
|
Cook Time: 10 Minutes
|
Difficulty: Easy
|
Servings: 2
Print Recipe
3"x5" Cards
4"x6" Cards
Full Page
Ingredients
1 whole Boneless Skinless Chicken Breast Salt And Pepper, to taste2 Tablespoons Olive Oil2 Tablespoons Butter1/2 cup Louisiana Hot Sauce (Frank's, Etc.) Salad Greens: Iceberg, Romaine, Mixed Greens1/2 cup Blue Cheese Dressing Extra Blue Cheese Crumbles Celery Hearts, Leaves Intact Preparation Instructions
With a sharp knife, carefully slice the chicken breast in half from top to bottom---meaning you'll have two similarly-sized chicken breasts that are much thinner. Heat olive oil and butter in a small skillet over medium-high heat. Salt and pepper both sides of the chicken breast pieces and pan fry them on both sides until they're done. Get as much golden brown color on the chicken as you can. When it's done, remove the chicken from the skillet and pour off any excess fat/oil (but don't clean the pan.)
Return the chicken to the skillet and pour over the hot sauce. Turn the chicken to coat it on both sides and let it sit in the sauce while you prepare the other ingredients. (Heat should not be on under the skillet.)
Toss the lettuce in a large bowl with just enough salad dressing to lightly coat it (thin the dressing with a little milk if it's too gloopy.) Heap tossed salad into two individual bowls. Sprinkle blue cheese crumbles over the top. Slice the chicken into thin slices (on the bias) and arrange them over the top of each salad. (Dip the slices back into the sauce if necessary to really coat them.)
Top the whole thing with more blue cheese crumbles and serve with celery hearts.
Posted by Ree on November 14 2012

November 12, 2012
Pull-Apart Bread
 I’ve made no bones about the fact that I’ve been bitten by the Pinterest bug, and by “bug” I mean a gigantic brain-sucking arachnid like the ones in Starship Troopers.
Not really. What I mean is, I love Pinterest. It took me a long, long time to figure out what the big deal is. But now, I totally get it. I cherish my boards. I’m picky about my pins. I’m Pinterested, man.
The funny thing about Pinterest, though, is that there are these…trends. For instance, you basically can’t spend any time on Pinterest before you want to coat every surface of your house with chalkboard paint. You also can’t spend any time on Pinterest without convincing yourself that you can make your own chandelier out of mason jars and barbed wire. You also can’t spend any time on Pinterest without eventually believing that brightly colored spray paint is the answer to all of life’s dilemmas.
And you definitely can’t spend any time on Pinterest without wanting to make pull-apart bread. It’s everywhere. Absolutely everywhere. So after weeks of seeing picture after picture of the stuff, I decided to make some yesterday. I used my go-to cinnamon roll dough recipe, which actually is the answer to all of life’s dilemmas. So it worked out perfectly!
Actually, it didn’t work out perfectly. But it worked out fine. I learned a few hard lessons along the way, and I’ll fill you in as I go along.
 Here’s what you need for the dough! Plus yeast, which I forgot to stick in the photo.
Don’t be like me.
 I made a double batch of dough, so just cut everything I do in half. Measure some milk and pour it into a large saucepan or pot.
 Then measure some canola oil…
 And pour it in…
 Along with some sugar.
 Stir it to combine, then heat it until it’s very hot but not boiling.
 Remove it from the heat and let it cool until it’s no longer hot. Needs to be warm—much warmer than lukewarm—but definitely not in the “hot” stage.
Is that weirdly specific enough for you?
 Grab your totally impractical—but cute, so you don’t care—ceramic measuring spoons…
 And measure 2 1/4 teaspoons of yeast…
 Then sprinkle it over the warm milk mixture.
 Now, grab your very impractical—but frilly, so you don’t care—measuring cup…
 And measure 4 cups of flour…
 And throw them over the yeast.
 Stir it around (it’ll be really, really sticky), put the lid on the pot, and set it aside to rise for an hour.
 This is what it’ll look like! Actually, it’ll look like half of this. Unless you want to double it, too, in which case it will look just like this!
 Throw another half a cup of flour, some baking powder, baking soda, and salt on top of the dough…
 And stir it around until it’s all combined.
*Now, I didn’t do this but I think the dough will be much easier to work with if you stick it in the fridge for an hour.
 Throw the dough onto a floured surface…
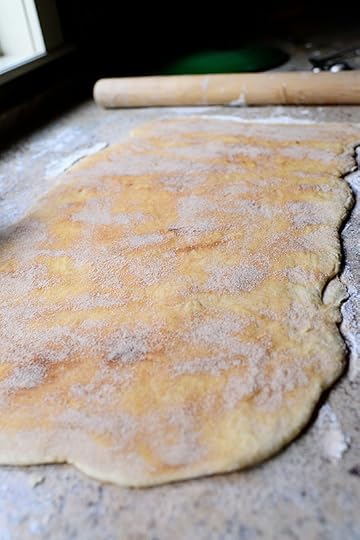
 And roll it into a semi-rectangle shape.
 Smear softened butter all over the surface, not missing a spot!
 Mix some sugar with some cinnamon…
 And stir it around to combine.
 Sprinkle it all over the surface of the dough…
 Until it’s totally coated.
But here’s something I learned! I didn’t sprinkle on enough cinnamon sugar. I was taking the same approach I take with my cinnamon rolls, but it turned out that for the pull-apart bread, there needed to be more of a coating between the layers.
And speaking of layers…here’s what you do next.
 Slice the rectangle into six to eight strips of equal width.
 And carefully stack them on top of one another. Use a spatula if the dough seems a little soft.
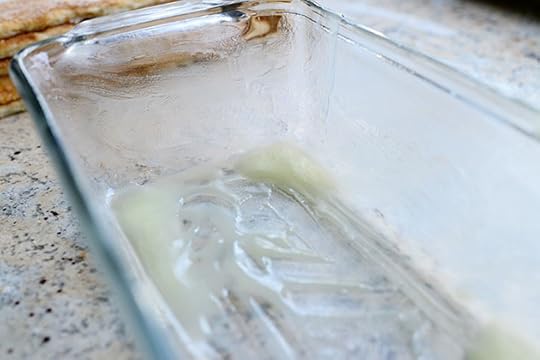 Butter a loaf pan…
 Then cut the stack into six pieces.
 Now you have several little stacks of dough squares!
 Then lay the stacks into the loaf pan sideways.
One thing I learned, though: Don’t cram the pan too tight! The slices needs just a tiny bit of room to breathe.
(You’ll have some squares leftover.)
 Now cover the pan with a dish towel and set it aside for 30 minutes or so.
 Then, once it’s risen, pop it into a 350 degree oven for 30 minutes!
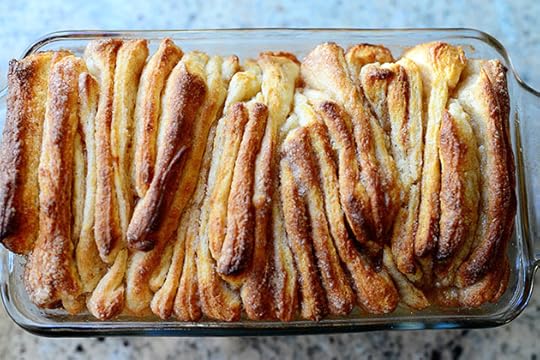 Tada! Cute, isn’t it?
 But I learned something else. I didn’t bake this long enough. This was after about 15 minutes, and while it looked perfect on top, the inside—I would learned later—was still just a little too soft to easily pull apart. Hence my suggested 30 minute baking time.
However: You’ll want to watch the top of the bread. Halfway through, if it looks like it’s starting to get too brown, cover it loosely with aluminum foil for the rest of the baking time.
 I decided to pour on the same icing I use for my cinnamon rolls, which is powdered sugar, melted butter…
 Maple extract…(a little coffee if you have some brewed)…
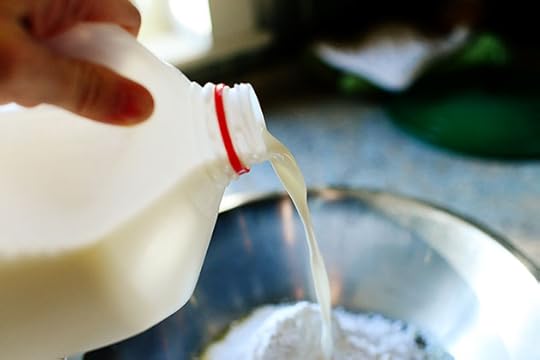 Some milk and a dash of salt.
 Whisk it around…
 Until it’s really smooth.
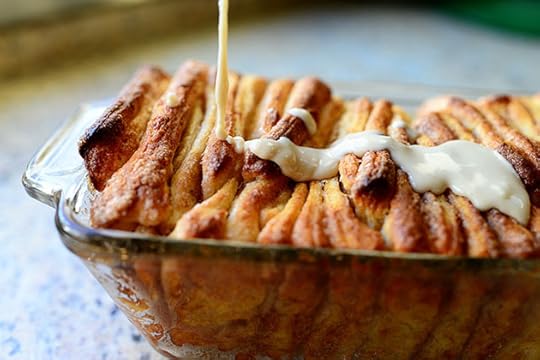 Then drizzle it on.
 Drizzle it slowly so that it seeps into the cracks!
Yes. Yes, yes, yes.
 If a little is good…a lot is better!
This was so very good.
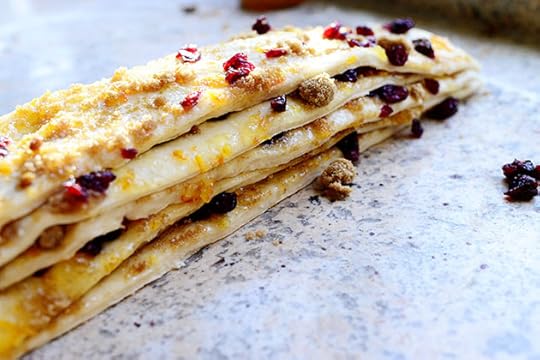
 So guess what? I made another batch. Only this time, I grabbed some sweet orange marmalade…
 And spread it on the dough with butter and brown sugar…and a good sprinkling of salt to cut all the sticky sweetness!
 Then I sprinkled on some dried cranberries…
 And went about the process of slicing…
 Stacking…
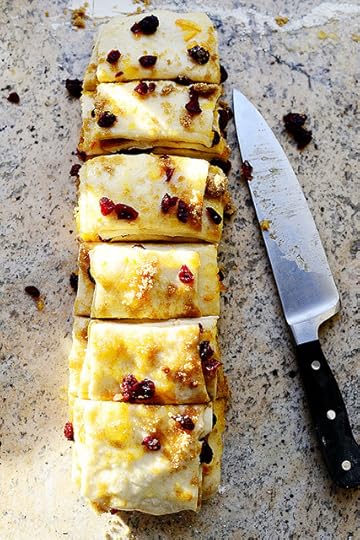 And slicing again.
 Then I stacked ‘em in another bread pan…
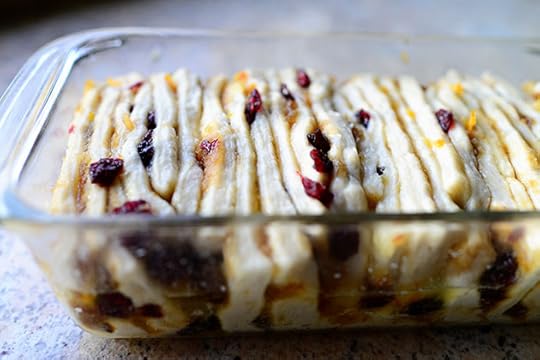 Let them rise…
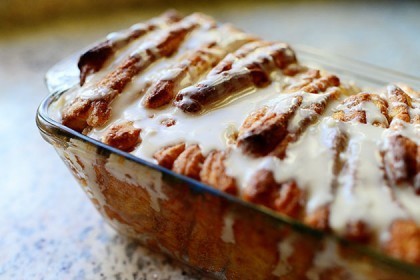
 And baked away!
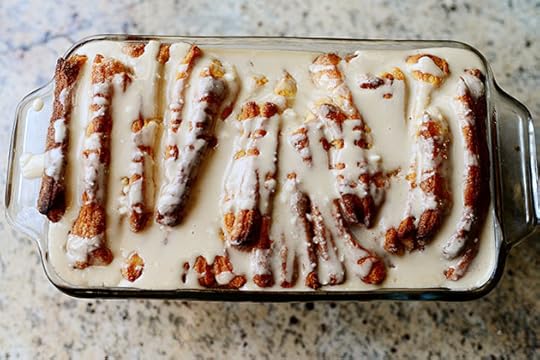
 I did a cream cheese icing with cream cheese, powdered sugar, orange juice, and a dash of salt. It was a little thick, but it eventually seeped down into the cracks.
One thought: The sticky marmalade really made the layers…sticky. Baking the bread longer did help a lot, but with stickiness between the layers, it’s a lot harder for the layers to separate.
Anyway, fifteen thousand lessons later…and the pull-apart bread wound up being really yummy! And I’ll be better equipped to make it perfect next time.
Here’s the recipe I used. Good luck!
I realize “good luck” isn’t typically the way I end recipe posts. But it made me laugh to write it just now.
Recipe: Pull-Apart Bread
Prep Time: 1 Hour30 Minutes
|
Cook Time: 30 Minutes
|
Difficulty: Easy
|
Servings: 12
Print Recipe
3"x5" Cards
4"x6" Cards
Full Page
Ingredients
Dough2 cups Whole Milk1/2 cup Canaola Oil1/2 cup Sugar2-1/4 teaspoons Active Dry Yeast4 cups All-purpose Flour1/2 cup (additional) All-purpose Flour1/2 teaspoon Baking Powder1/2 teaspoon Baking Soda2 teaspoons Salt1 stick Butter, Melted1-1/2 cup Sugar3 Tablespoons Ground Cinnamon Icing3 cups Powdered Sugar2 Tablespoons Butter, Melted1 Tablespoon Maple Extract1/3 cup Whole Milk Dash Of Salt Preparation Instructions
DOUGH
To make the dough, combine milk, canola oil, and 1/2 cup sugar in a large saucepan. Heat it until very hot but not boiling. Turn off heat and allow to cool to warm (not at all hot.)
Sprinkle in the yeast and add 4 cups of flour. Stir to combine, then put lid on the pot and allow to rise for 1 hour. After 1 hour, stir in additional 1/2 cup flour, along with the baking powder, baking soda, and salt. If dough is overly sticky, stir in another 1/2 cup flour.
Place dough in the fridge for at least 1 hour to make it easier to work with.
Roll out dough onto a floured surface. Drizzle on melted butter and smear so that it covers all the dough. Mix together the sugar with the cinnamon and sprinkle it all over the surface of the dough. (Dough should look very covered.)
Cut the dough into 6 to 8 strips, then stack all the strips into one stack. Cut the stack of strips into 6 slices. Place the stacks sideways into a buttered bread pan. Do not cram the slices into the pan. (You may have a few leftover.)
Cover with a dish towel and allow to rise for 20 minutes. Preheat oven to 350 degrees. Place the pan in the oven and bake for 30 minutes, checking at 20 minutes to make sure it's not getting too brown on top. It's important to bake the bread long enough to ensure that the middle won't be too doughy, because if it is it won't pull apart easily. If the top looks like it's getting too brown, cover it lightly with aluminum foil for the rest of the baking time. REPEAT: IT'S IMPORTANT TO BAKE THE BREAD LONG ENOUGH FOR THE CENTER TO NO LONGER BE DOUGHY.
Remove the pan from the oven when it's done. Run a knife along the edges and take the bread out of the pan. Mix together the icing ingredients and drizzle over the top, allowing it to sink into the crevices. Serve warm or room temperature!
(Note: You can also do a cranberry-orange version with orange marmalade, brown sugar, and dried cranberries!)
Posted by Ree on November 11 2012

November 9, 2012
Turkey Essentials! (Winners Announced)
The winners of the Turkey Essentials loot are:
#848 Dawn: “This year we are hosting a “Turkey Bowl” football game for our friends, family and neighbors. My husband and three boys love to kick off Thanksgiving Day by tossing the around the ole’ pigskin, so we figured the more the merrier! After the game we will have our whole family over for the traditional feast complete with lots and lots of wine- because it IS Thanksgiving, and we will have BOTH sets of parents in the house!”
#12812 Tina: “Celebrating with my best friend Caroline & her family at the farm where her mama grew up. Lots of hugs for old friends, marathon cooking / eating, four-wheeling, snuggling around the fire pit, hunting for the boys & many glasses of spiked apple cider.”
#14591 Tracylee: “Hosting this year! Can’t wait for all the family to come eat. Good times to be had.”
Congratulations to the winners! Contact prizes@thepioneerwoman.com to claim your turkey stuff. We’ll have it all to you before the big day!
Thanksgiving will be here before you know it! As such, I’m giving away three (3) packages of what I consider to be turkey essentials. If you’re planning on making the bird this year…you’ll be all set!
Here’s what’s in each prize package:
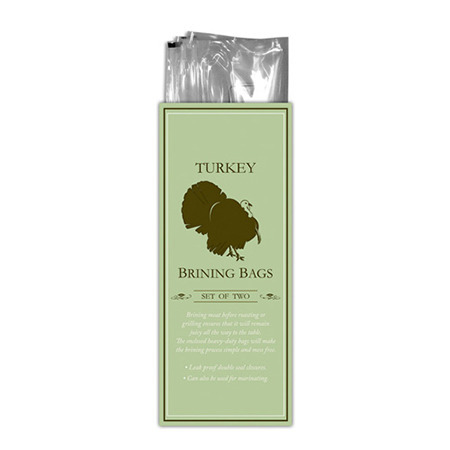 A package of heavy duty Brining Bags.
(Pssst. Here’s my favorite Brine Recipe. It’s delish, man.)
 An All-Clad Stainless Steel Roaster Set. You can’t hurt these things. You’ll still be roasting your turkey in this sucker in the year 2097.
Comes with a rack and two turkey lifters.
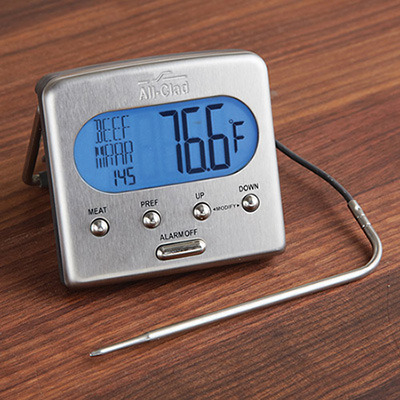 An awesome digital meat thermometer! I actually use the old fashioned kind, but I have used these digital ones and think they’re really nifty.
You’ve gotta have a good thermometer when you roast turkey. It’s, like, required.
 A good ol’ stainless steel baster. My favorite kind.
 A handy fat separator for gravy, baby.
 A flat whisk! I couldn’t make turkey gravy without it.
Well, I could, I suppose. With a normal, boring whisk.
But it wouldn’t be any fun.
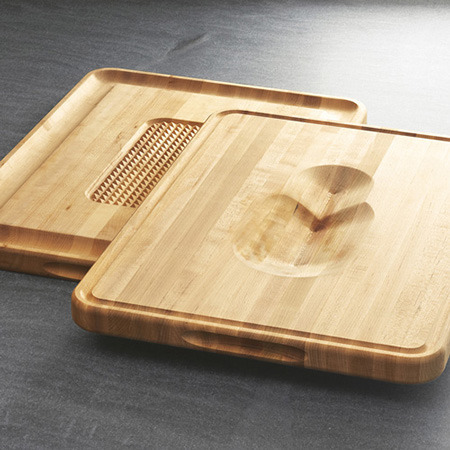 This cool reversible cutting board. I don’t have one of these. But I think it would be helpful! Securely holds the bird and catches the drippings at the same time.
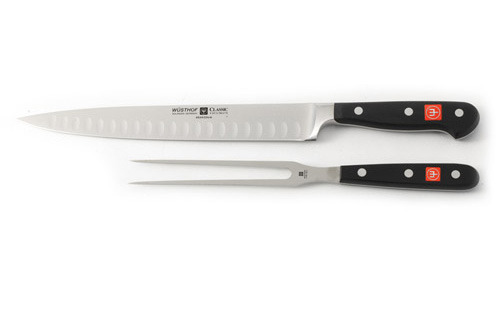 A Wusthof carving set. Have it. Use it. Love it.
I think that’s about all you need to make the best turkey in the world!
Oh. Except the turkey. But I’ll let you take care of that one.
TO ENTER
To enter the turkey essentials giveaway, just answer the following question in the Comments section of this post:
“What are your Thanksgiving plans this year?”
Are you hosting the whole shebang at your house? Are you going over the river and through the woods to grandmother’s house? Are you making frozen pizza and watching football? Or are you going down the street to your Uncle Peter’s house? Just shout out your Thanksgiving plans and you’re automatically entered to win this big, bad turkey package! (If you’re not cooking this year, save it for next year! You’ll be glad you have all this loot.)
THE RULES
One entry per person, pretty please.
Winners will be announced Sunday!
New yummy recipes all next week.
Good luck!
Giveaway sponsored by Pioneer Woman. Also known as Ree.
IMPORTANT NOTE: Winners will be announced on this post Sunday evening.
UPDATE: Winners have been announced and comments are closed.

Ree Drummond's Blog

- Ree Drummond's profile
- 2032 followers

