
Ree Drummond's Blog, page 34
January 16, 2014
Pot! (Winners!)
The winners of the beautiful yellow pot are…
#204 Jen: “We had leftover BBQ beef so we made nachos!”
#19847 Theresa K: “Went out with a friend, had cheesy penne with cauliflower, shepherds pie and pecan pie.”
#46324 Deb: “Grilled sausage.”
Congratulations, winners! Contact prizes@thepioneerwoman.com to claim your pot!
Today, because it’s Thursday, because I love ya, and because this pot makes cooking lots of fun…
 I’m giving away three (3) of these 7 1/4 quart Le Creuset French Ovens in this gorgeous “Soleil” color!
This pot will take you far in life.
(Or at least in your kitchen!)
To enter the giveaway, just shout out what you had for dinner last night in the Comments section of this post. Whether it was Steak Wellington or a Twinkie, just list what you had for dinner last night and you’re automatically entered to win the Le Creuset pot.
One entry per person, please.
Winners will be announced Friday!
Good luck.
Note: Winners have been announced and comments are closed.


Pot!
Today, because it’s Thursday, because I love ya, and because this pot makes cooking lots of fun…
I’m giving away three (3) of these 7 1/4 quart Le Creuset French Ovens in this gorgeous “Soleil” color!
This pot will take you far in life.
(Or at least in your kitchen!)
To enter the giveaway, just shout out what you had for dinner last night in the Comments section of this post. Whether it was Steak Wellington or a Twinkie, just list what you had for dinner last night and you’re automatically entered to win the Le Creuset pot.
One entry per person, please.
Winners will be announced Friday!
Good luck.
January 13, 2014
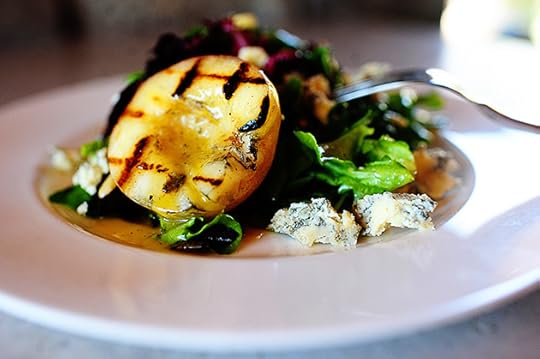
Grilled Nectarine Salad
 Just a couple of fun facts about this salad I’m posting today:
1. I made it back in 2011!
2. Nectarines are not even close to being in season right now!
But other than those two things, this post is absolutely timely and seasonal. Remember, you can always depend on The Pioneer Woman Cooks to bring you recipes that are up-to-date and appropriate to the time of year we’re in.
On Opposite Day.
Okay. Back-in-2011 and not-even-close-to-being-in-season aside, I really, really, really love this salad! I actually included the recipe in the electronic version of my second cookbook, which came out in 2012, but never got around to sharing it with you here on this here crazy ol’ website until now. And heck, it doesn’t really even matter that stone fruits aren’t even remotely in season. Every fruit is available 365 days a year nowadays, for the love of Pete, and you should be able to get your hands on a nectarine or peach iffin’ ya wanna.
And what’s up with that, anyway? Is nothing sacred anymore? Are we humans so demanding and impatient that we can’t wait to eat certain fruits and vegetables in their proper season? Have we stooped so low that redheaded foodbloggers in Oklahoma will actually post a recipe for a grilled nectarine salad in the month of January?
Well, yes. It appears so.
(But I repeat: It’s ding dang delicious.)
And here’s another fun fact: Did you know peaches and nectarines are the same species? It’s true. The only difference is that nectarines don’t have fuzz. Remember, you can always depend on The Pioneer Woman Cooks to bring you random, useless trivia about stone fruit.
Also, did you know there are as many stars in the sky as there are grains of sand in all the beaches of the world?
I’ll stop now.
Here’s how to make the salad!
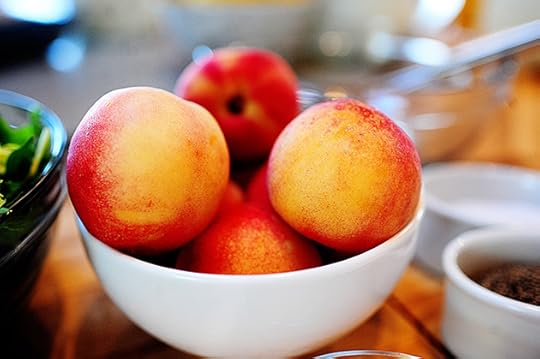 Grab some nectarines or peaches, which are definitely not in season right now. I might have mentioned that before.
 Set it on the counter…
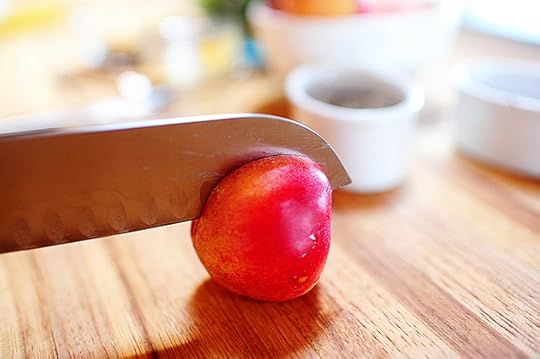 Then cut through the fruit until the knife hits the pit, then gently roll it forward /backward until it’s sliced evenly down the middle.
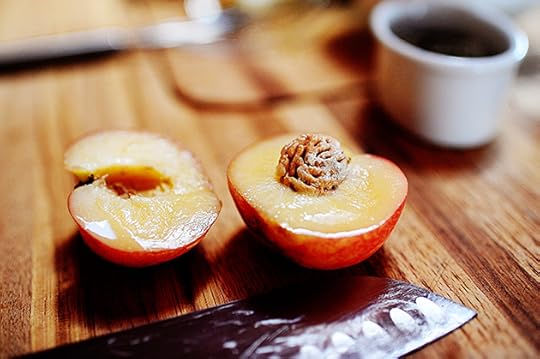 Gently twist it to separate it in two, then use a spoon to scoop out the other pits.
If only stone fruit didn’t have stones!
Sometimes those are stubborn little suckers.
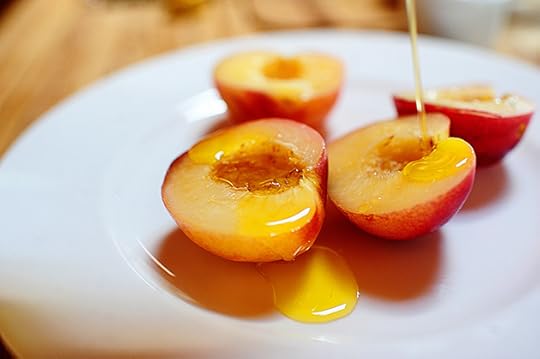 To grill the fruit, just drizzle the cut side with olive oil…
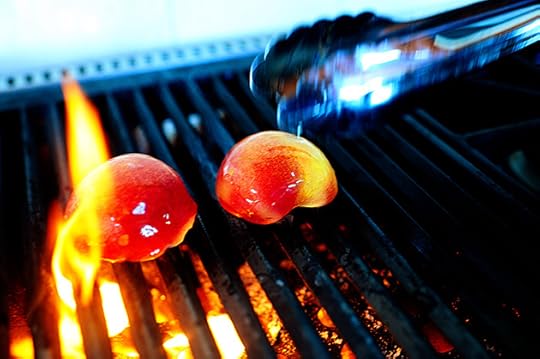 Then put it on the grill. Now, more often than not, I wind up using my cast iron grill pan instead of a real fire…and it works just great.
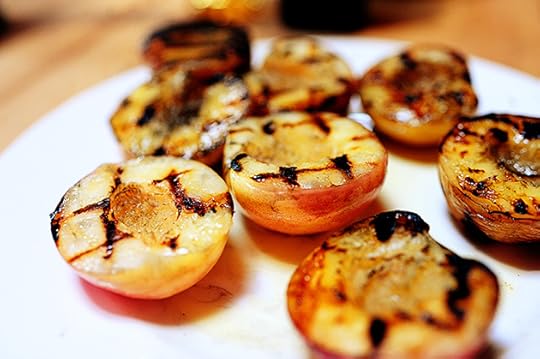
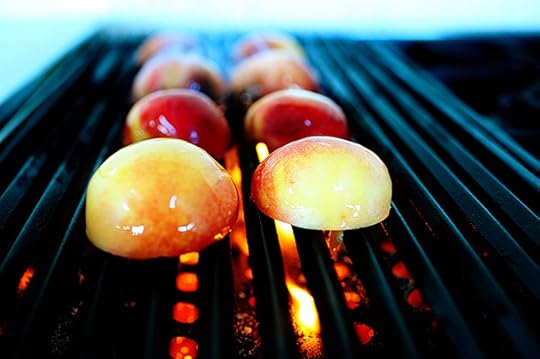 Let them grill on the first side for 2 to 3 minutes, rotating it halfway through to create purty grill marks…
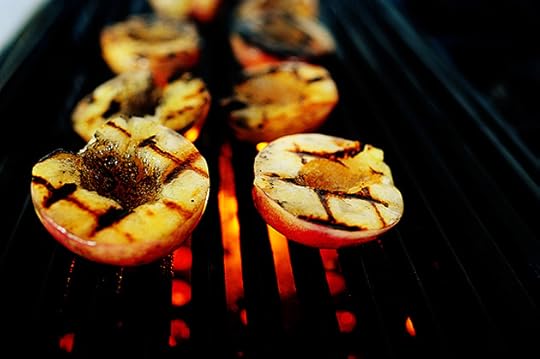 Then turn them over and let them go a minute or two on the other side. Here, you can see that I was (and, let’s face it, am) an airhead and got distracted and let the nectarines get a leeeeeetle dark.
I can’t be trusted around open flame.
And it doesn’t matter. They were good anyway.
 Set the peaches aside, then make the rest of the salad!
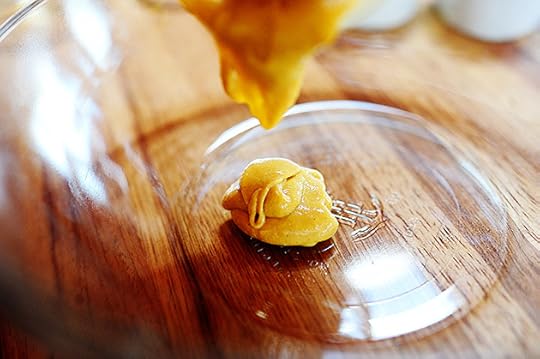 Start with the luscious dressing: Add a couple of teaspoons of Dijon into a bowl…
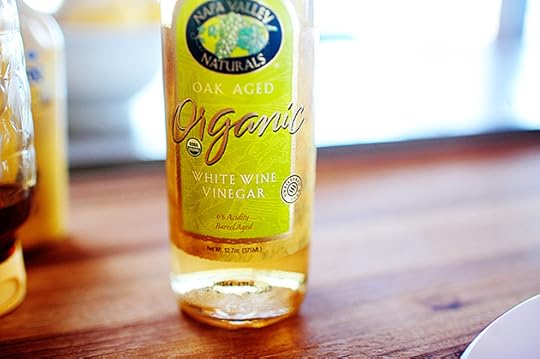 Then grab a bottle of white wine vinegar. And it is absolutely crucial that it be organic white wine vinegar. If it is not organic white wine vinegar, the salad will explode.
Needless to say, I’m totally kidding about the salad exploding.
Use whatever dang vinegar you want.
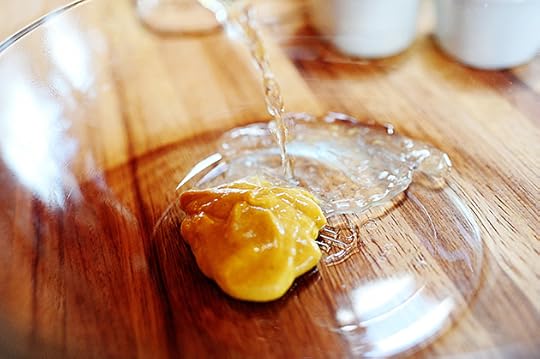 Add a couple of teaspoons of vinegar to the bowl…
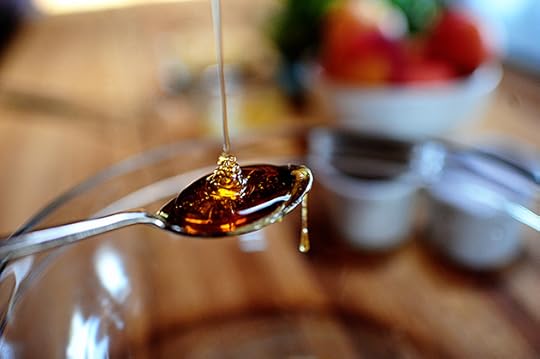 And a couple of teaspoons of honey.
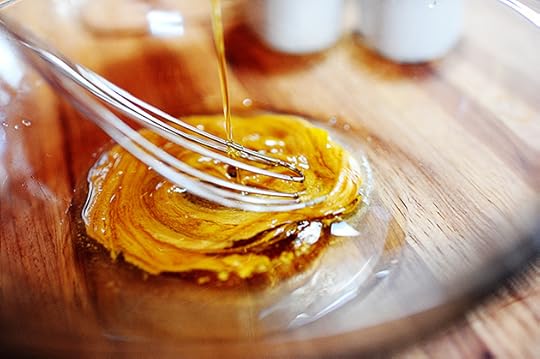 Whisk it together, then keep whisking as you drizzle in about half a cup of olive oil.
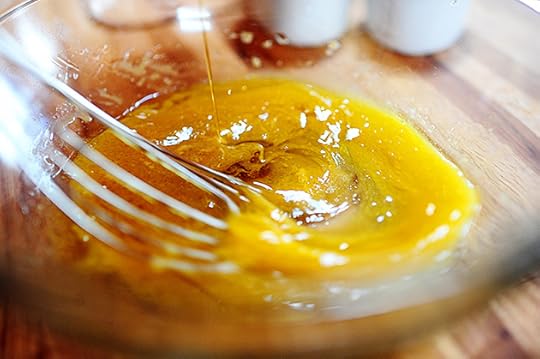 Keep on going…
 And keep on going…
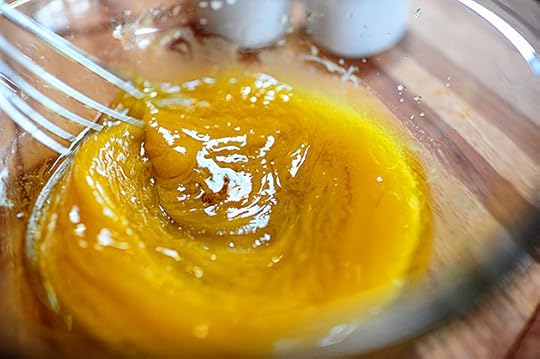
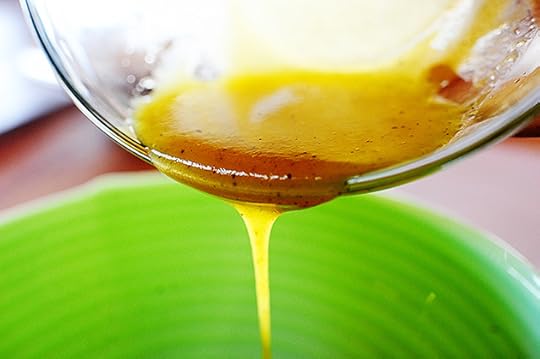
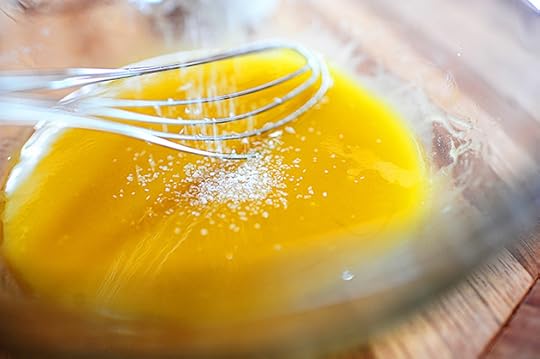 Until the dressing is smooth and beautiful. Then add a little bit of salt…
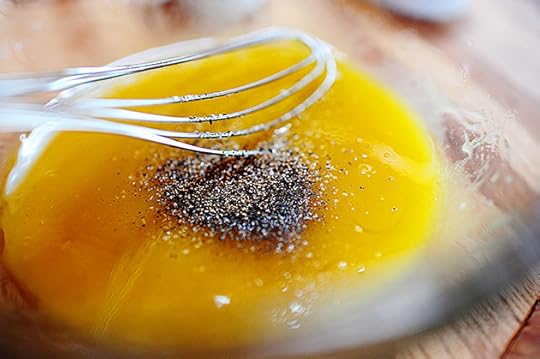 And pepper. Gorgeous!
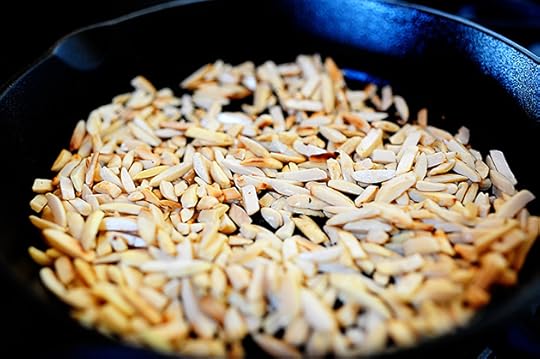 Next up, toast some slivered almonds in a skillet (I toasted way more than I needed for the salad because I love to snack on them): Just throw them into a skillet over medium heat and toss them around for a few minutes until they’re golden. Keep your eye on them to make sure they don’t burn!
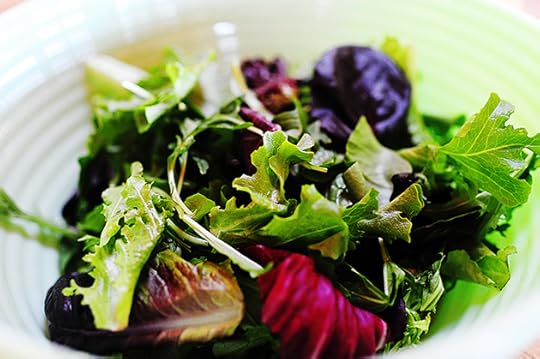 Fill a big salad bowl with mixed greens…
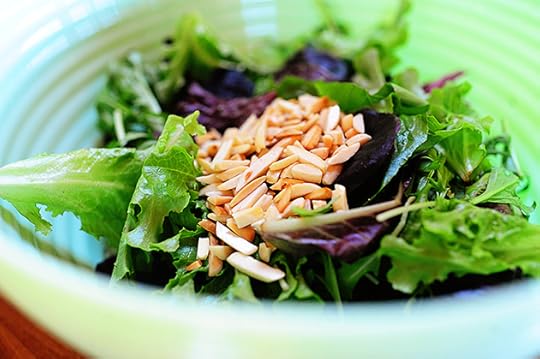 Throw on some of the toasted almonds…
 Then drizzle in some of the dressing (you won’t need all of it!) and toss it around with tongs.
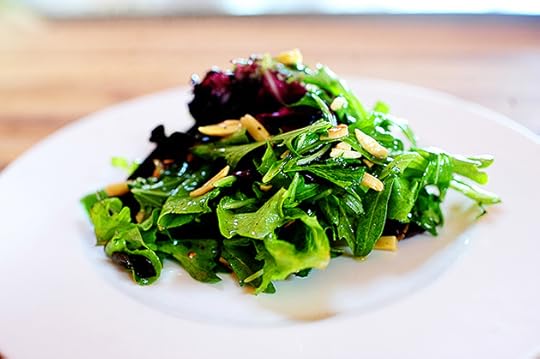 To serve it, mound a bunch of salad on a plate…
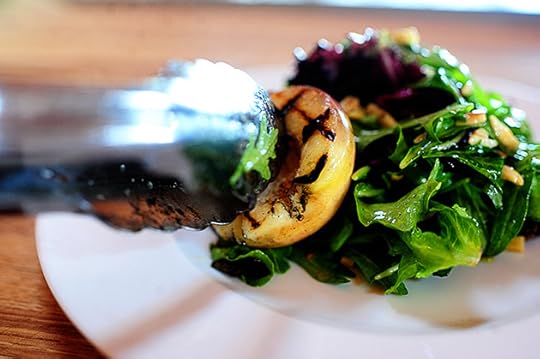 Then put one or two grilled nectarine halves on the side…
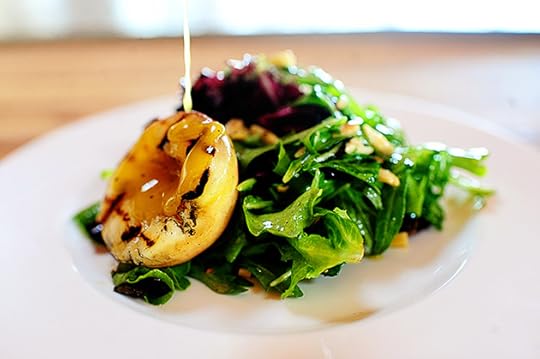 And drizzle a little more dressing on the fruit.
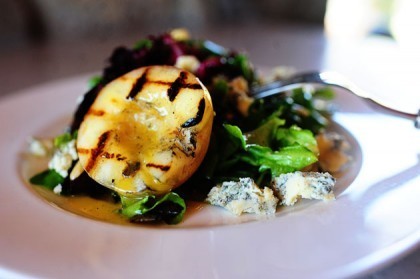
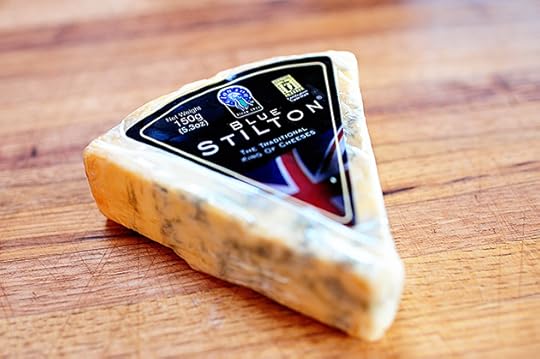 For a final touch of beauty and richness, grab a wedge of blue cheese (any kind is fine!) and use a fork to crumble it into chunks.
Then throw some of the crumbles right on the plate. Absolutely delicious and divine. (Psst. Goat cheese is wonderful, too!)
You’ll love this salad my friends. The dressing is lovely and is perfect for many different things, and the grilled fruit is an unexpected treat. And a bonus: It’s stunning! Perfect for lunch guests or a baby/wedding shower.
Here’s the handy dandy printable.
Recipe
Grilled Nectarine Salad
Prep Time: 10 Minutes
Cook Time: 10 Minutes
Difficulty: Easy
Servings: 4
Print Recipe
Ingredients
2 whole Nectarines, Halved And Pitted Olive Oil, For Drizzling2 teaspoons Dijon Mustard2 teaspoons White Wine Vinegar2 teaspoons Honey1/2 cup Olive Oil Salt And Black Pepper To Taste6 ounces, weight (1 Bag Or Box) Salad Greens (good Spring Mix) Or Arugula2 ounces, weight Stilton, Gorgonzola, Or Other Blue Cheese, Chunked1/2 cup Slivered Almonds Preparation Instructions
Drizzle nectarine halves with a little olive oil. Grill cut side down for 2-3, turning midway to achieve lovely grill marks. Set aside.
In a bowl, whisk together Dijon, vinegar, honey, and sugar. Whisk in 1/2 olive oil to emulsify. Add salt and pepper and mix.
Toast slivered almonds in a small skillet over medium-low heat until just turning golden brown.
In a large bowl, toss lettuce with enough of the dressing to lightly coat (you won't use all of the dressing; save to have another salad tomorrow!) Toss in warm toasted almonds.
Divide lettuce among four plates. Place a nectarine half on each serving. Drizzle nectarine with a little more dressing. With a fork, cut blue cheese into chunks and distribute among the four plates.
* Grill more fruit if you'd like each plate to have two halves instead.
Posted by Ree on January 13 2014

January 8, 2014
Ultimate Grilled Cheese Sandwich
 This was one of those it-snowed-last-night-and-I-didn’t-get-to-make-my-weekly-trip-to-the-grocery-store-after-church-because-church-was-canceled-so-what-can-I-make-with-what’s-already-in-my-fridge-and-pantry type of sandwiches. And why is it that those recipes always turn out to be the best ones? Go figure!
It’s like that little brown beaded necklace I found in the clearance bowl at Banana Republic in 1993. It was marked down to $1.75 and I wore that sucker for the better part of the nineties. To this day it’s one of my favorite pieces of jewelry I’ve ever worn.
The world is such a mysterious place.
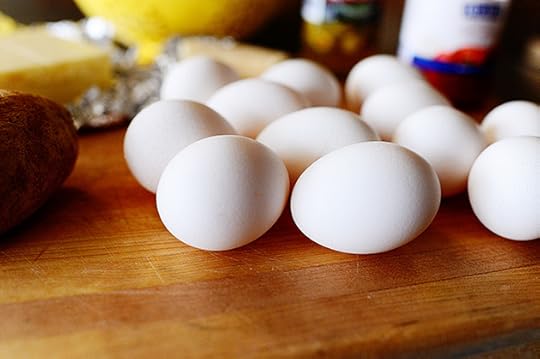
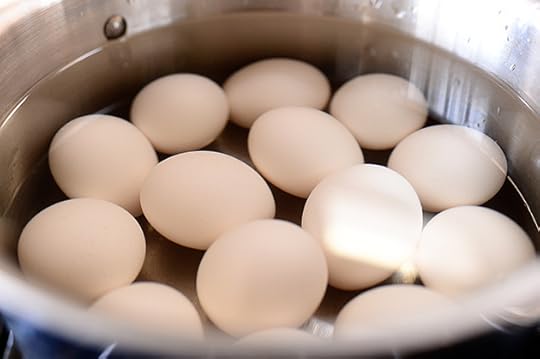 First, I hard boiled some eggs—not just for this sandwich but to put in a bowl in the fridge for my husband and boys, who eat hard-boiled eggs like candy. I put eggs in a saucepan of water…
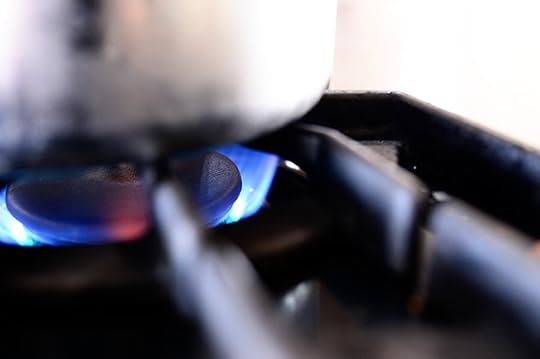 Then turned on the heat…
 And brought them to a boil.
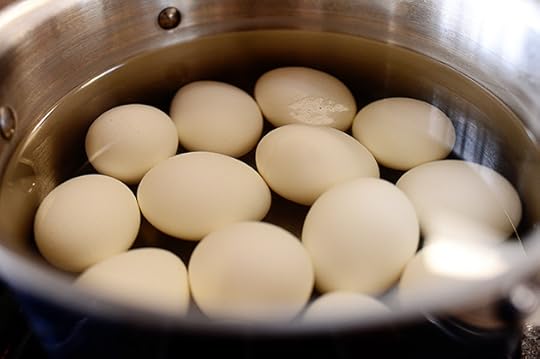 Then I turned off the heat and let them sit for 10 to 15 minutes—I’m not sure which, as I was folding laundry while watching The Real Housewives of Atlanta, which causes me to lose track of all time and space.
I have issues, is what I’m saying.
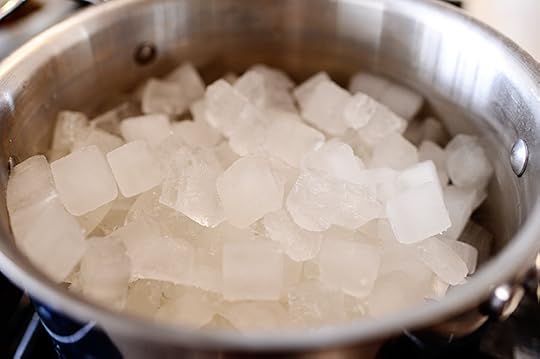 After that, I drained off the water and covered the eggs with ice to cool them down…then I got the other ingredients ready!
 I sliced up an onion. It just seemed like the right thing to do.
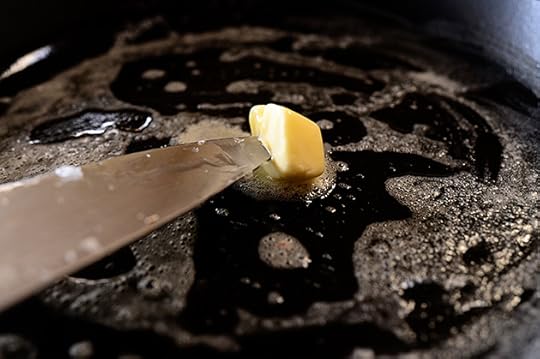 Then I melted a little butter in a skillet over medium-high heat…
 And threw in the onions.
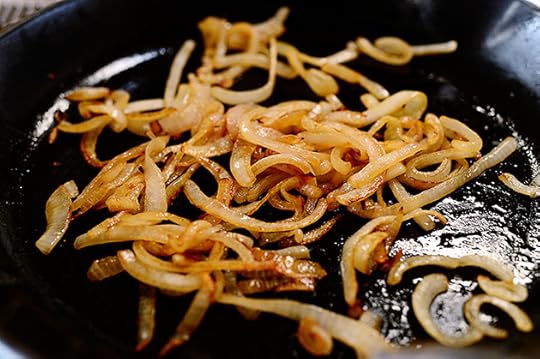 I cooked them over medium-low heat for probably 15-20 minutes, stirring them frequently, until they turned a beautiful dark golden brown color. You can speed this along by turning the heat up, of course, but I was afraid if I did that, I’d get distracted by the Atlanta housewives and wind up burning them.
I have to consider these things, you know.
 I removed the onions to a plate…
 Then used the same skillet to fry up some bacon! Now, in many recipes that call for both bacon and onions, I will cook the bacon first, then cook the onions in the bacon grease. This is a very naughty way to behave and results in much deliciousness. However, in this case, I was afraid cooking the onions after bacon would cause the onions to be way too “bacony” and overpower the other ingredients in the sandwich. So I took the road less traveled and cooked the onions first.
Thank you for taking 17 seconds out of your life to read that explanation.
 When the bacon was done, I drained it on paper towels.
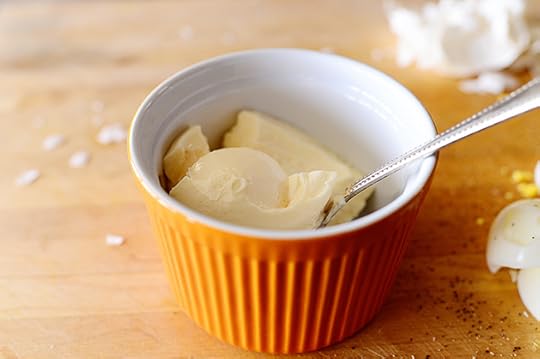 Then I whipped up a really simple sauce: Mayonnaise…
 And a good amount of Louisiana hot sauce. Any hot sauce will do here—or you could use adobo sauce from a can of chipotle peppers—but I thought the sandwich could use the tang of the Louisiana stuff.
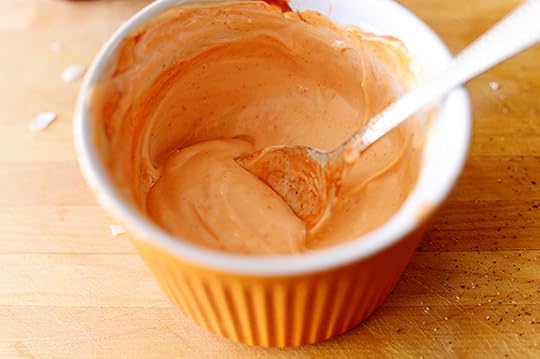 Stir it around, then taste it and make sure it’s nice and spicy and, again, tangy.
And instead of mayonnaise, you could use plain Greek yogurt if you’re all about making healthy choices.
But if that were the case, you probably wouldn’t be eating a grilled cheese sandwich with eggs and bacon on it.
So never mind.
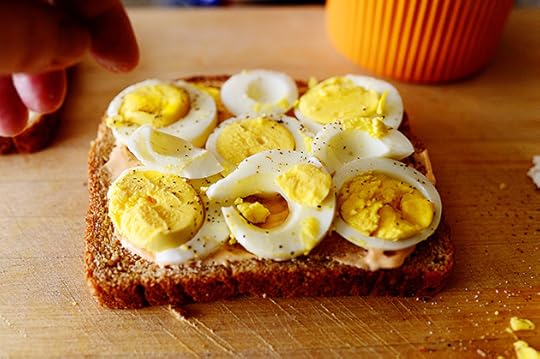
 Finally, I peeled and sliced up some eggs…
 And sprinkled them with salt and pepper. If I hadn’t been continuing on to make a sandwich, I would have sprinkled them with hot sauce and inhaled them right there.
Eggs and hot sauce = One of the best food combinations known to man.
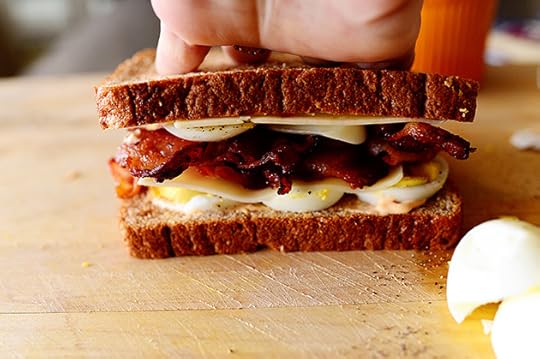
 To build the big, beautiful sandwich, spoon some of the sauce on a slice of bread…
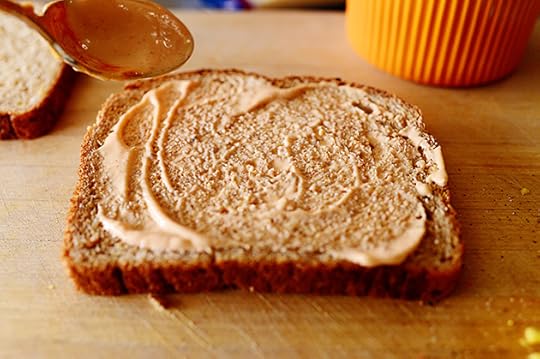 And spread it so that it completely covers the bread in a thin layer.
 Then you can build the sandwich in whatever order you wish: I did eggs…
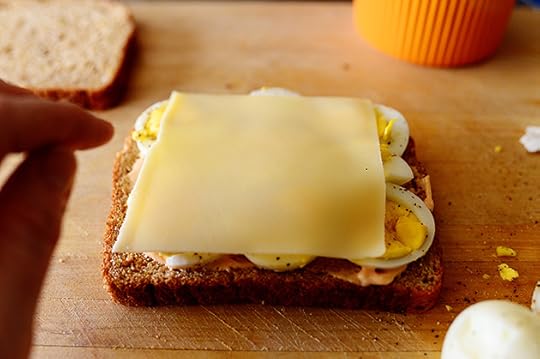 A slice of Swiss cheese (but you can use any cheese!)…
 A nice layer of bacon…
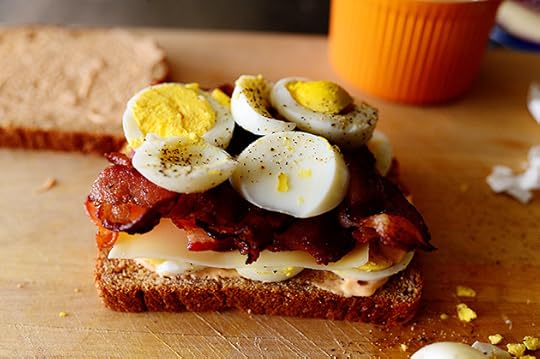 Another layer of eggs…
 Another slice of cheese. I used Pepper Jack, but again, you can choose whatever cheese path you want in life.
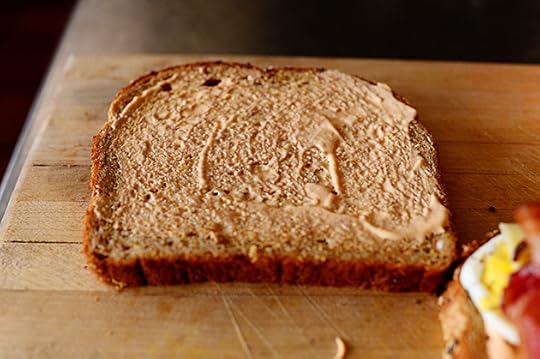 Next, spread the sauce on the second slice of bread…
 And put it on top of the pile!
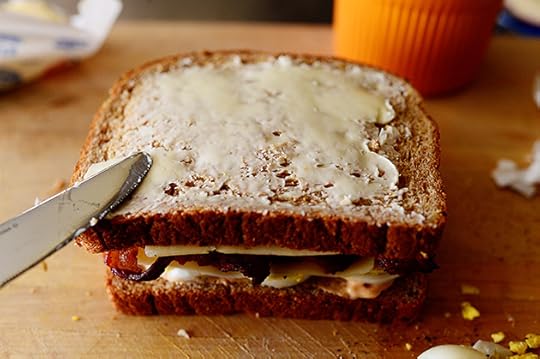 Spread the top of the sandwich with softened butter…
 Put it on the griddle, butter side down…
 And then—this is very, very important—suddenly remember that you completely forgot about the sauteed onions because that’s just how you roll.
Or maybe that’s just how I roll.
 There we go. Much better!
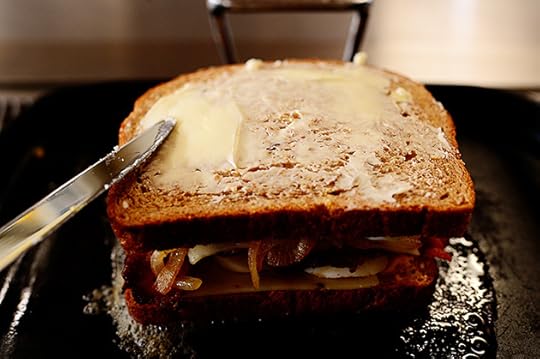 Once the sandwich is on the griddle, you can spread the softened butter on the other side.
 Then just grill that baby over medium-low to low heat. You want the insides to have a chance to warm up and the cheese to have a chance to melt without the bread getting too dark on the outside.
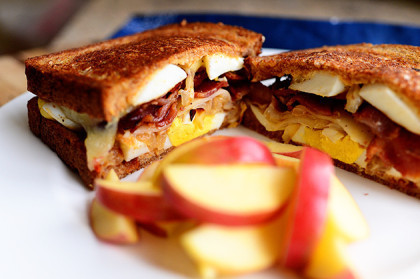
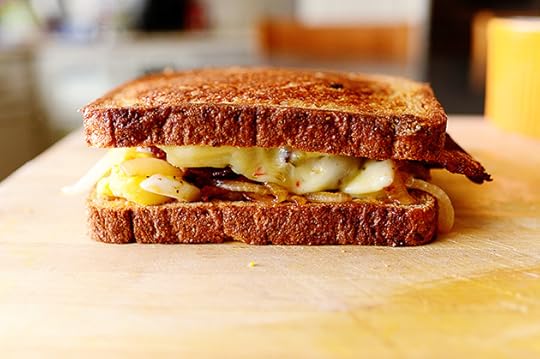 And…here it is!
 You’ll need a sharp serrated knife to slice it in half…
 And you’ll need to split this with someone you love, because half of this sandwich is more than enough!
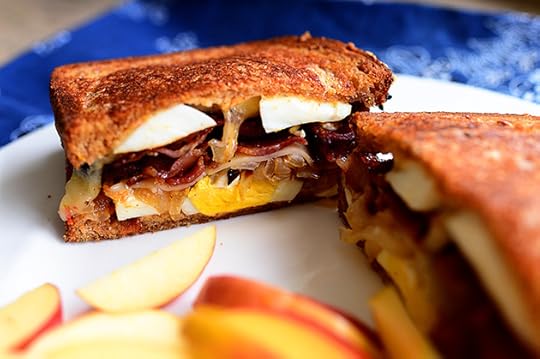 I served it with a side of sliced Honeycrisp apples because that’s really all it needed.
Enjoy this sandwich, my friends! I absolutely loved it.
Here’s the handy dandy printable!
Recipe
Ultimate Grilled Cheese Sandwich
Prep Time: 5 Minutes
Cook Time: 30 Minutes
Difficulty: Easy
Servings: 2
Print Recipe
Ingredients
1 Tablespoon Butter1 whole Medium Onion, Halved And Sliced4 slices Bacon, Cut In Half2 Tablespoons Mayonnaise Several Dashes Hot Sauce (I Used Louisiana)2 slices Sandwich Bread3 whole Hard Boiled Eggs, Peeled And Sliced Salt And Pepper, to taste2 slices Cheese, Any Variety (I Used Swiss And Monterey Jack) More Butter, For Grilling Preparation Instructions
Melt the butter in a skillet over medium-low heat and cook the onions low and slow for about 20 minutes, stirring frequently. Remove them to a place when they're deep golden brown and soft.
Fry the bacon in the same skillet until slightly crisp. Remove to a paper towel to drain.
Combine the mayonnaise and the hot sauce and stir. Taste and add more hot sauce if needed.
Sprinkle the sliced eggs generously with salt and pepper.
To assemble, spread one side of each piece of bread with the spicy mayo. Build the sandwich however you wish: eggs, bacon, cheese, onions, more eggs, more cheese. Spread one side of the assembled sandwich with softened butter and put it butter-side down on a griddle or skillet over medium-low heat. Spread the top side with butter, then continue grilling the sandwich until the bread is golden and slightly crisp and the filling is warm/cheese is melted.
Cut in half with a sharp serrated knife and share with a loved one!
Posted by Ree on January 8 2014

January 6, 2014
Hamburger Soup
 I made this glorious hamburger soup yesterday for three very important reasons: One, it was so ding dang cold outside, all I could think about was soup. Two, church was canceled (church? canceled? I don’t understand!) and I didn’t have anything else to do. Three, I was hungry, man.
I love hamburger soup so much, because you can add whatever veggies you want: zucchini, green beans, corn, even mushrooms. It’s meaty and hearty and flavorful and satisfying. Mmmmmm! It just feels good to eat it.
My kids loved every single bite of this.
(And so did their mom, by the way.)
 Here’s what you need, other than the seasonings, which I left out of this photo because I’m an airhead.
But you’re probably used to that.
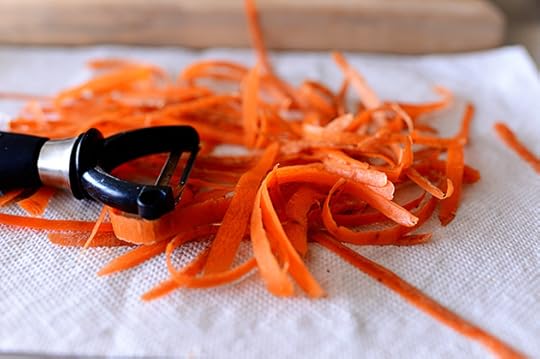 Peel the carrots.
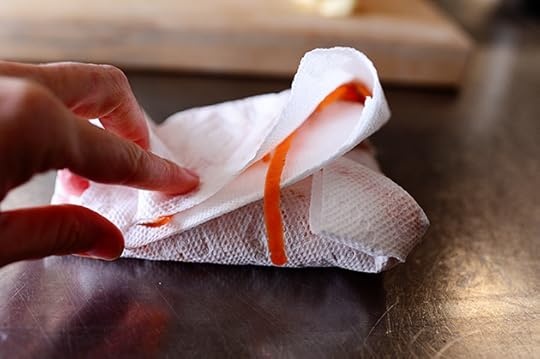 (I like to do it on a paper towel so I can just fold it up and toss it!)
 Now, dice up an onion. I keep the dice pretty small, so the soup won’t have big chunks.
 Then dice up a couple of stalks of celery to about the same size…
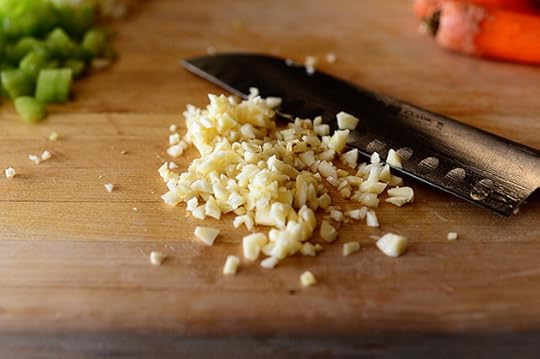 And mince up 3 cloves of garlic.
 I decided to use three colors of bell peppers, because my grocery store does this neat thing where they package up all three colors of bell pepper together, and I can’t resist them because they look so pretty together.
I’m very visually driven. I’m not sure if I’ve ever conveyed this to you before, what with my four thousand photos per recipe post and everything.
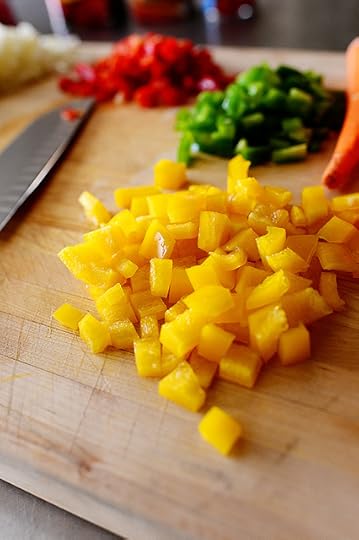 Seed the peppers, then dice them up.
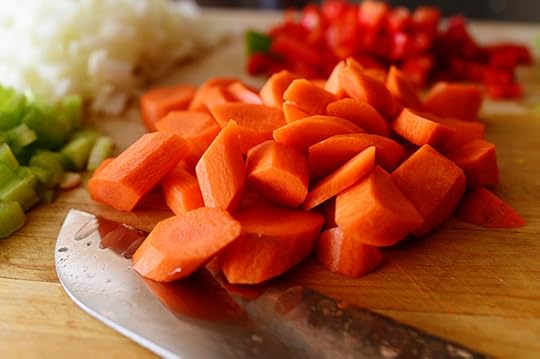 Slice the carrots on a diagonal…
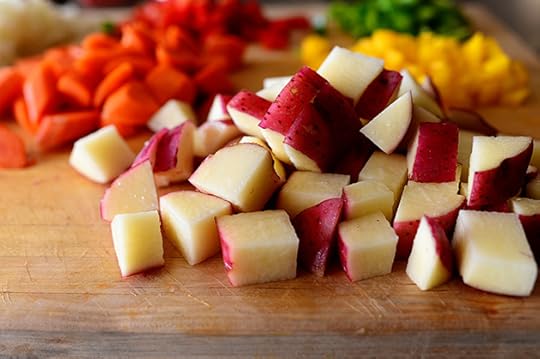 Then cut the red potatoes into large chunks.
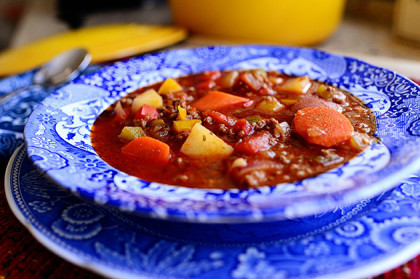
 And now it’s time to make the soup! Throw the hamburger, onion, celery, and garlic in a large pot….
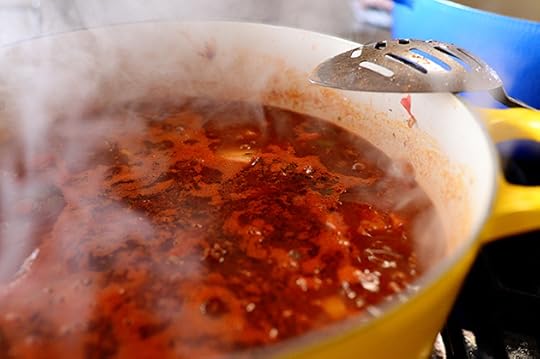
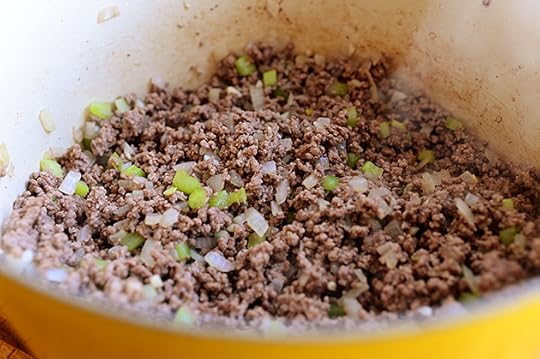 Then brown it over medium-high heat until the meat is totally cooked!
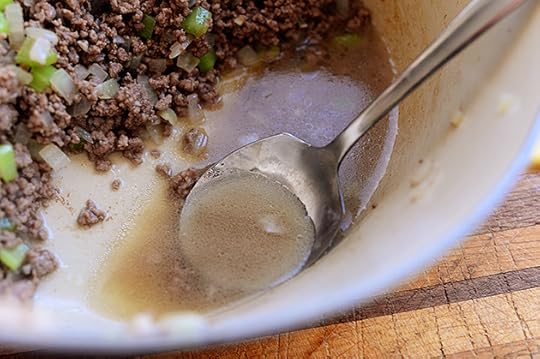 Now, this step is important: Remove the pot from the heat and drain off as much fat as humanly possible. The more fat you drain off, the less fat you’ll see later on the surface of the soup, the more palatable the soup will be, and the more your cardiologist will thank me.
So everyone wins!
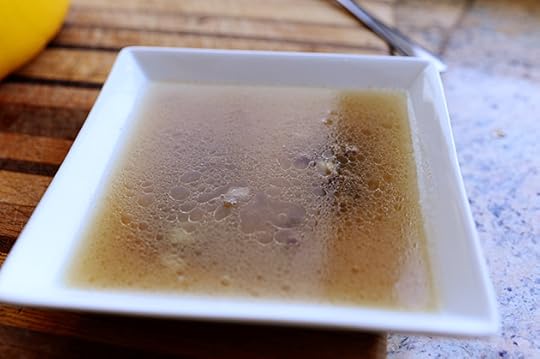 Yuck! Let it cool, then toss it.
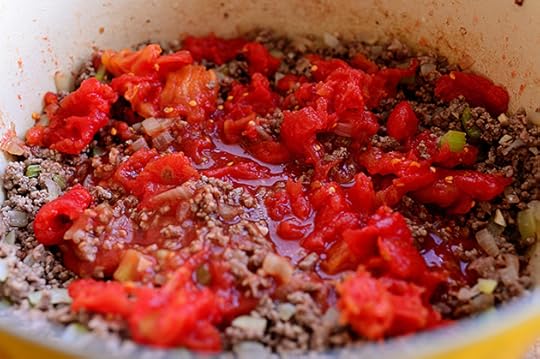
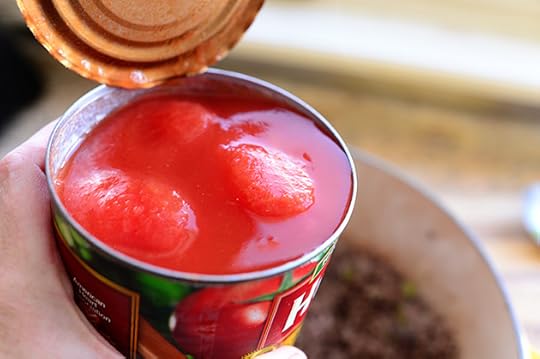 Crack open a can of whole tomatoes. (This is a large can, but I only used half of it.)
 Pour in the tomatoes along with the juice…
 Then reach in, grab the tomatoes one by one, and squish them with your hands.
 I like to do this rather than use canned diced tomatoes, because you’ll have more randomly shaped tomatoes in the soup rather than uniform dices.
And I’d rather be random than dicey.
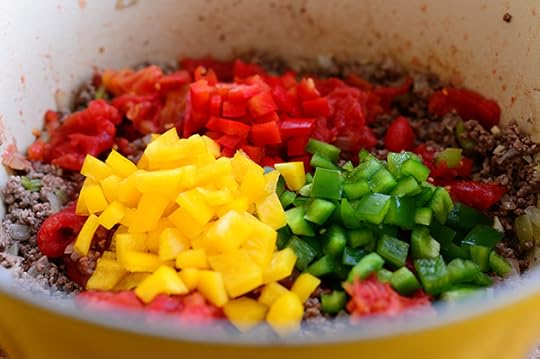 Throw in the bell peppers…
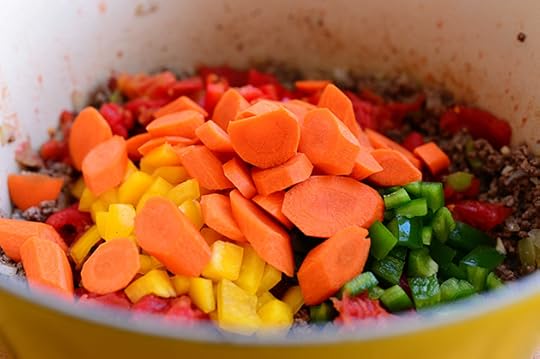 The carrots…
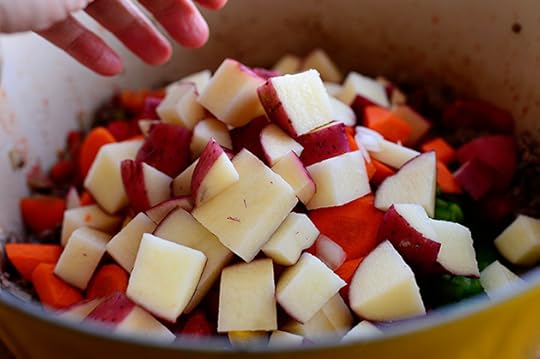 And the potatoes!
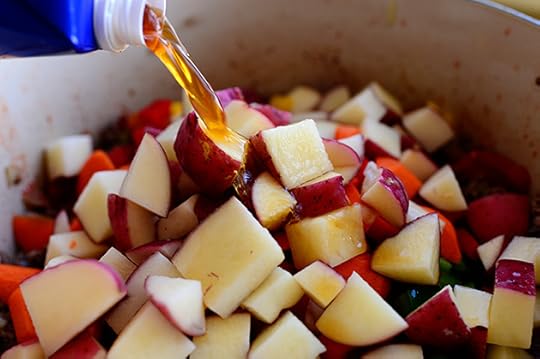 Next, for the liquid, add 4 cups of beef stock or beef broth. You can also add a cup or two of water if you want your soup to be more soupy (and less stewy), or you can add it toward the end of the cooking time once you assess the consistency.
Assessing Consistency…One Hamburger Soup at a Time.
I think that should be my new tagline. Has a nice ring to it.
 And now, I’m going to reveal something about myself that you might not know. I don’t share this with many people, but I feel we have developed a certain level of trust through the years. Here goes: I like to stir tomato paste into anything I cook that has a beef broth base. So brisket…pot roast…stew…you name it. A little dab of tomato paste will catapult it into the heavens.
I feel better having shared this with you. I feel lighter.
Figuratively speaking, of course.
 Now it’s time to season it up! Add some kosher salt—I start with just half a teaspoon at first. I can always add more later!
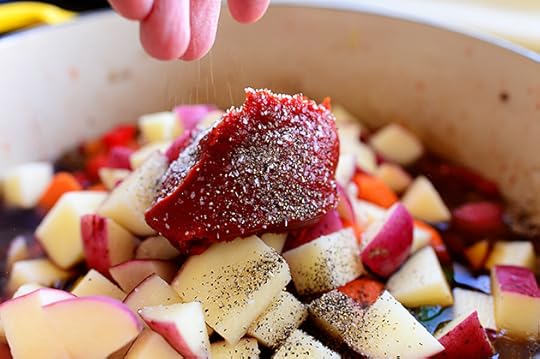 Next comes black pepper…
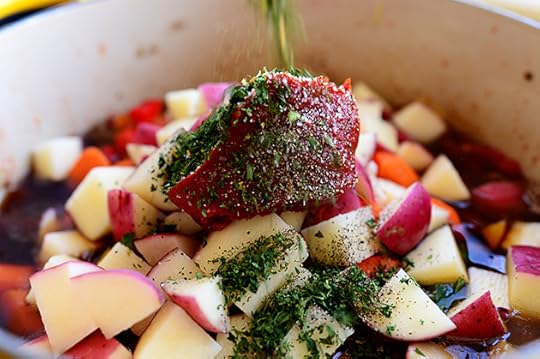 Dried parsley flakes (and I definitely could/would have used fresh if I’d had any)…
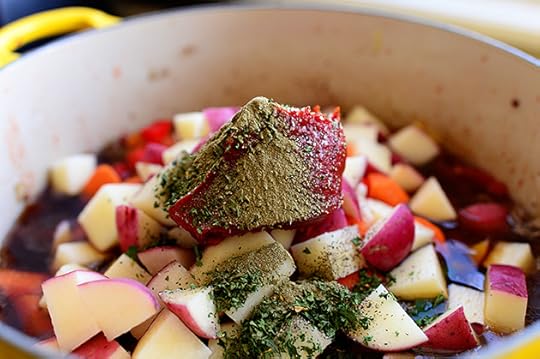 Ground oregano (you can also use ground thyme)…
 And, to make sure the soup eaters are awake, a little bit of cayenne pepper.
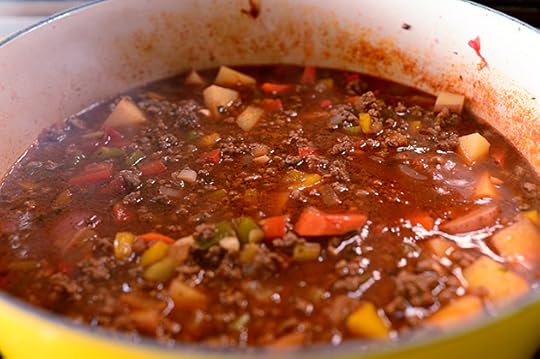
 Now just stir it all together, return it to the stovetop…
 And bring it to a boil!
 Then reduce the heat to low, cover the pot, and let it simmer for 20 minutes or so, until the potatoes are firm but tender enough to eat.
 Yum! Smells so, so good.
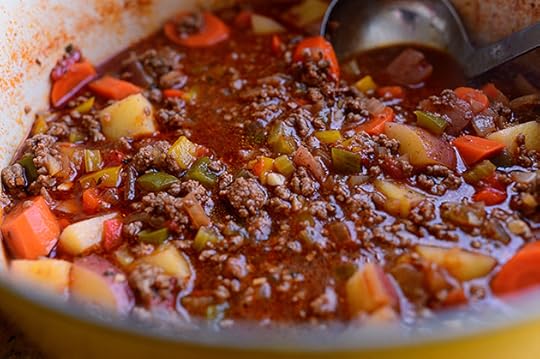 Now it’s time to taste the soup and make any adjustments it needs: Add more salt if you wanna, a little more cayenne if it needs a little heat, a little more tomato paste if it needs more tang.
 Then serve it up in all its chunky, flavorful glory!
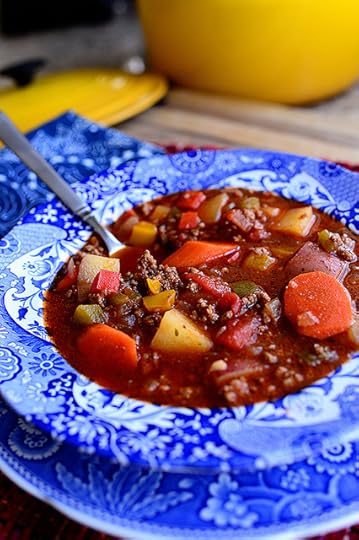 My kids positively inhaled this. It was perfect for a perfectly frigid day.
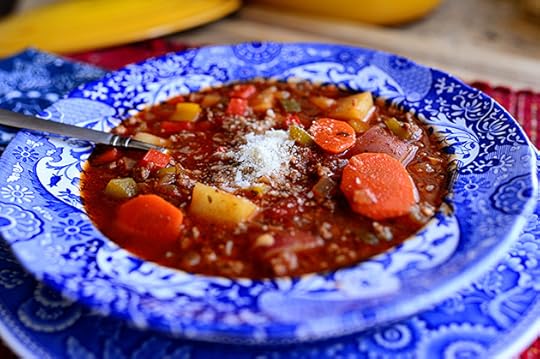 And psssst: A little spoonful of Parmesan never hurt anyone. Yum!
Enjoy this, guys. Here’s the handy dandy printable.
Recipe
Hamburger Soup
Prep Time: 15 Minutes
Cook Time: 30 Minutes
Difficulty: Easy
Servings: 12
Print Recipe
Ingredients
2-1/2 pounds Ground Chuck1 whole Large Onion, Diced2 stalks Celery, Diced3 cloves Garlic, Minced1 can (14.5 Ounce) Can Whole Tomatoes3 cups Beef Stock Or Beef Broth, Plus More As Needed1 whole Yellow Bell Pepper, Seeded And Diced1 whole Red Bell Pepper, Seeded And Diced1 whole Green Bell Pepper, Seeded And Diced4 whole Carrots, Peeled And Sliced On The Diagonal5 whole Red Potatoes, Cut Into Chunks3 Tablespoons Tomato Paste1/2 teaspoon Kosher Salt (more To Taste)1/2 teaspoon Black Pepper, More To Taste2 teaspoons Dried Parsley Flakes1/2 teaspoon Ground Oregano1/4 teaspoon Cayenne Pepper (more To Taste) Preparation Instructions
In a large pot over medium-high heat, brown the meat with the onion, celery, and garlic. Remove the pot from the heat and drain off as much fat as you can. (Discard the fat once it cools.)
Return the pot to the heat and add the rest of the ingredients. Stir to combine, then bring to a boil. Reduce the heat, then cover the pot and simmer the soup for 15-20 more minutes, until potatoes are tender but not overly mushy.
Soup should be somewhat thick, but if you'd like it to be more "soupy," add 1 to 2 cups more broth OR hot water and heat through. Taste and adjust seasonings, adding more salt if needed.
Serve with crusty bread!
Posted by Ree on January 6 2014

January 2, 2014
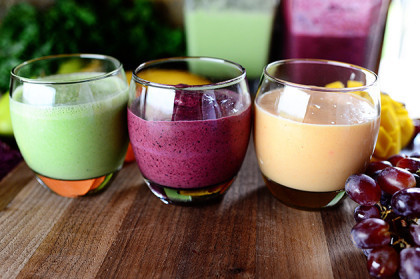
Purple Resolution Smoothie
 I have a variety of smoothie recipes in my holiday cookbook, and I wanted to share the purple variety with you today because it’s scrumptious, beautifully vivid, and the perfect way to kick off the new year!
And it’s purple, man.
Enjoy this!
(And Happy New Year, friends!)
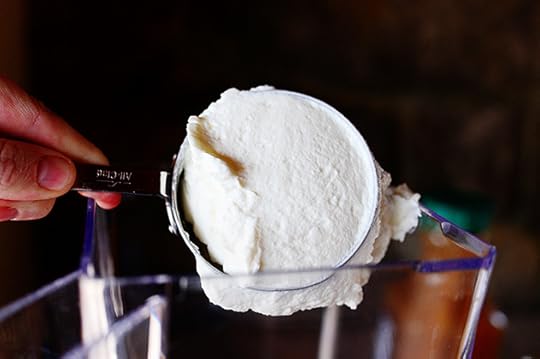 Add plain (or vanilla!) Greek yogurt to a blender…
And while you’re doing that, please excuse my thumbnail, which does not have polish despite the fact that my other fingernails do.
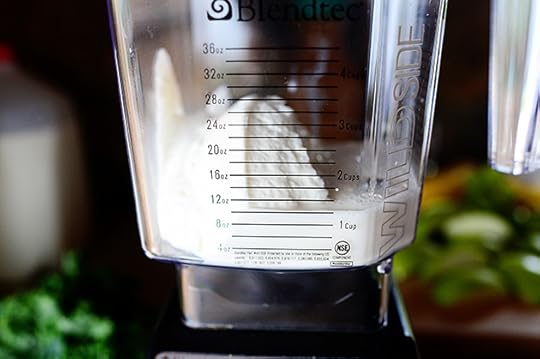 Add a little milk—whatever kind you like: Whole, 2%, 1%, skim, almond, soy…or ice cream. It’s up to you!
It’s one of the beautiful things about smoothies: Customize it according to your preferences.
And I was totally just kidding up there with the ice cream part.
At least I think I was kidding.
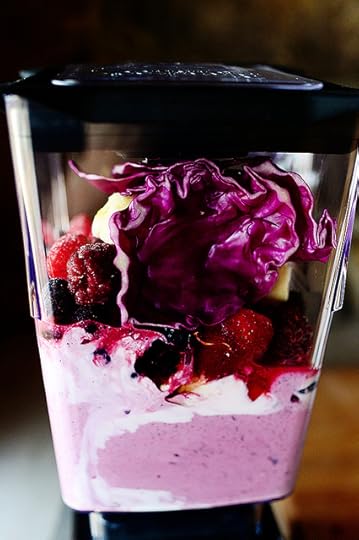
 Then, just load it up with whatever purple/red ingredients you can get your mitts on! I used blueberries, strawberries, raspberries, blackberries…and purple cabbage!
And on the berries: Use fresh, use frozen…either one works! If you use fresh, just be prepared to throw a little ice in the blender to give it more of a frozen/cold consistency.
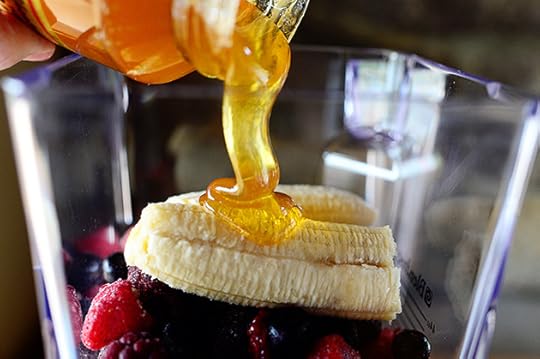 Oh, and I forgot: before I added the cabbage on top, I threw in a banana (against my better judgment) and drizzled in a little honey for sweetness.
I’ve had a revelation: Bananas in smoothies are a requirement. And I can’t believe I’m saying that, because bananas are demonic and wrong. But I’ve found you add plenty of other ingredients (especially strong-tasting ingredients) you won’t taste the evil, Satanic, awful bananas and will just be left with the thickness/smoothness they add.
So if you’re a lifelong banana hater like yours truly, just trust that if I lived through it…you can live through it, too! There is hope.
 Then splash in a little purple juice of some kind: Grape juice or any reddish-purplish cranberry blend. r
 Then just pop on the lid and give it a whirl!
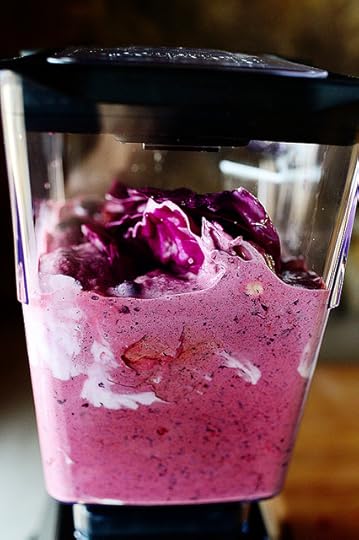 Ahh…glorious!
 Now, when it’s all smooth, give it a little taste and add a little more honey if it needs sweetness, or a little bit of milk if it needs creaminess, or a little bit of juice if it needs…well, juiciness.
And here’s a fun trick: Throw in a handful of granola and blend it in! Adds nuttiness and texture. Yum!
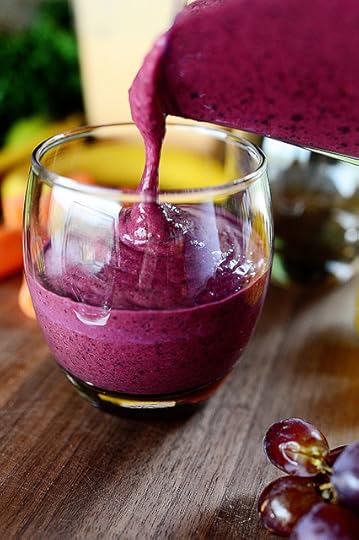 Once it’s perfect, pour it into a pretty glass and enjoy every single sip.
 Your body will definitely thank you.
Recipe
Purple Resolution Smoothie
Prep Time: 10 Minutes
Cook Time:
Difficulty: Easy
Servings: 8
Print Recipe
Ingredients
2 cups Plain Or Vanilla Greek Yogurt2 cups Fresh Or Frozen Blueberries2 cups Fresh Or Frozen Mixed Berries (blackberries, Strawberries, Raspberries, Etc.)1/4 head Red Cabbage1 whole Banana, Peeled1/4 cup Honey1 cup Cranberry Or Grape Juice (or Any Purple Blend!) Preparation Instructions
Throw all the ingredients in a blender and mix until smooth. Taste and adjust sweetness, creaminess...whatever it needs! Add ice if it needs to be more "frozen."
Posted by Ree on January 2 2014

December 30, 2013
Sunday Frittata
 I done came home from church yesterday and done made myself a dang frittata! Marlboro Man had taken the girls to the big city to a soccer game, and since the boys had had a big breakfast, they weren’t in the mood for lunch.
I, however, was most certainly in the mood for lunch. Because…when am I ever not in the mood for lunch? And so, after spotting a few half-empty and leftover ingredients in my fridge, I knew I had no choice but to whip up a frittata.
A frittata, my friends, is basically a crustless quiche, and one of the glorious things about is is that you cook the filling ingredients and bake the frittata in the same skillet. Super simple, super easy.
Another huge advantage to frittatas is that you can use up a whole bunch of random leftover ingredients that might be languishing in your fridge. You’ll see what I used here in a sec, but there’s no limit to what you can throw in. So use this recipe only as a general guide. Change up the cheeses, veggies, add meats…have some fun!
Oh! And speaking of the skillet: While you could fight with a regular skillet and try to get the frittata not to stick, having a good, ovenproof nonstick skillet really is essential with it comes to making a frittata. Being able to slide it right out of the pan and slice it up while it’s still warm is the way to go!
Here’s how I made mine.
 For a frittata, you need eggs.
Aren’t you glad you have me here to explain these things to you?
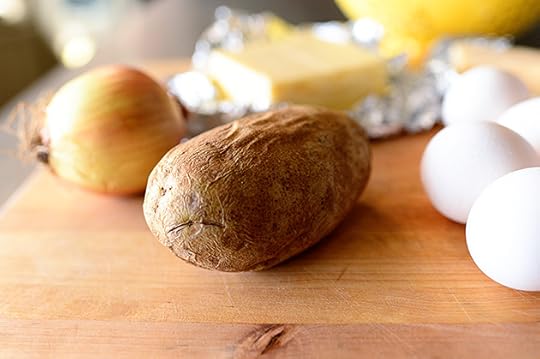 Then you need some fillings! I baked a bunch of potatoes last night for a baked potato bar and had a few leftover…but all I needed was one.
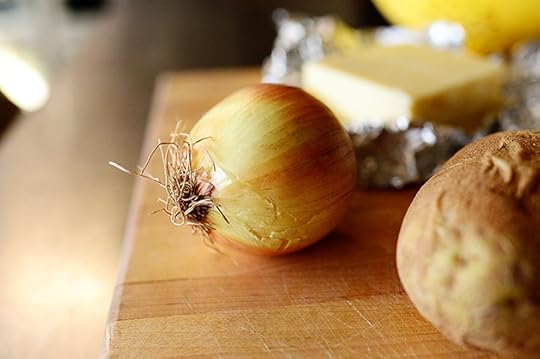 I always have onions on hand…
 And I always have cheese. I mean…this is me you’re talking to here. This is a partially used block of Romano, but Parmesan would do just fine.
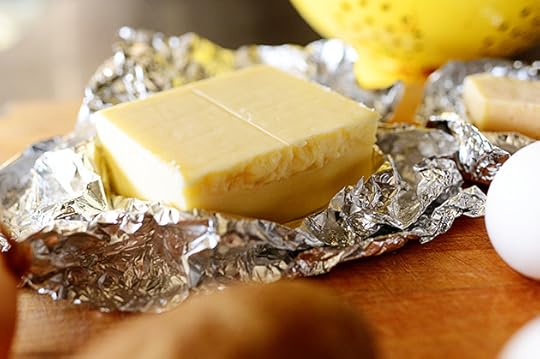 I also grabbed some Monterey Jack, because it’s one of my favorite cheeses to use with eggs.
It’s one of my favorite cheeses anyway.
And by the way: who’s Jack?
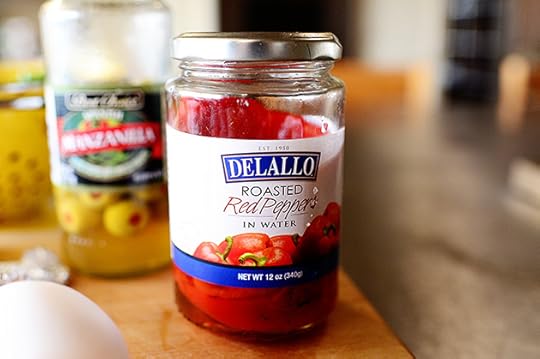 I also had a half-used jar of roasted red peppers in the fridge…
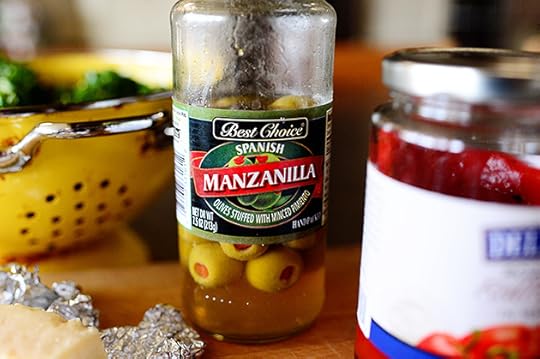 And a very sad jar of olives.
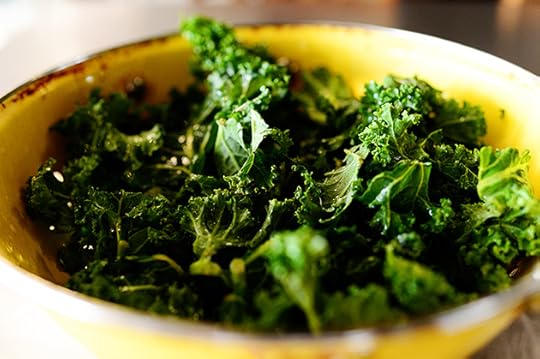 And I had a bag of kale that looked (and smelled) like it was about to check out…so I put some in my trusty rusty (literally) colander and gave it a good rinse. It’ll be perfect for this!
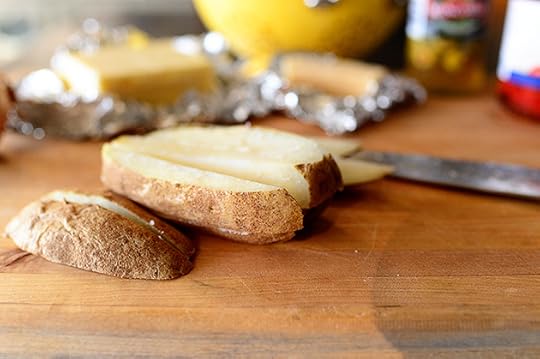 Now it’s time to prep the ingredients: Slice the potato into slabs, then slice the slabs into sticks…
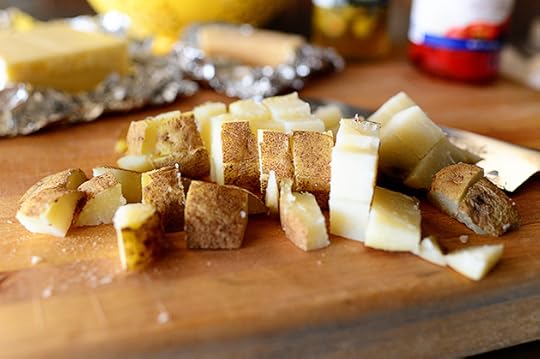 Then cut the strips into a dice. Done!
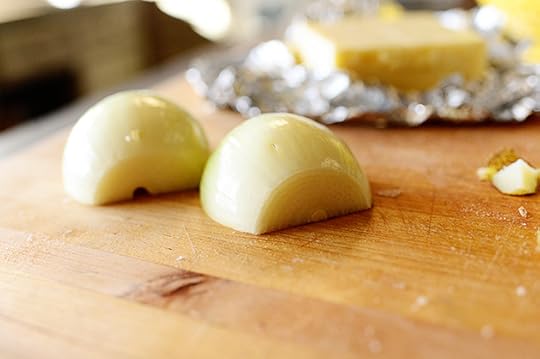 Cut the onion in half …
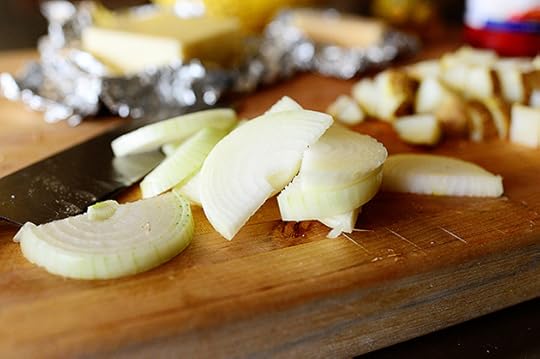 Then slice it up.
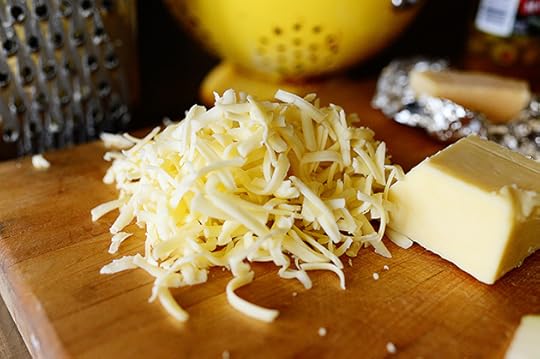 Then grate up the Monterey Jack…
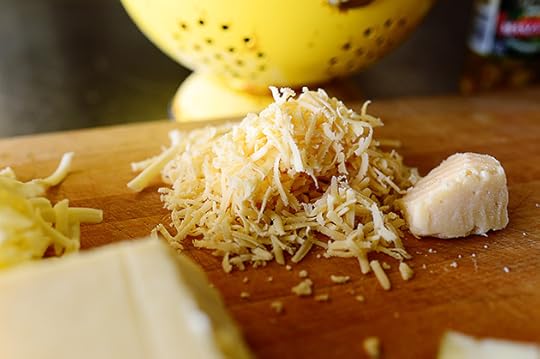 And the Romano.
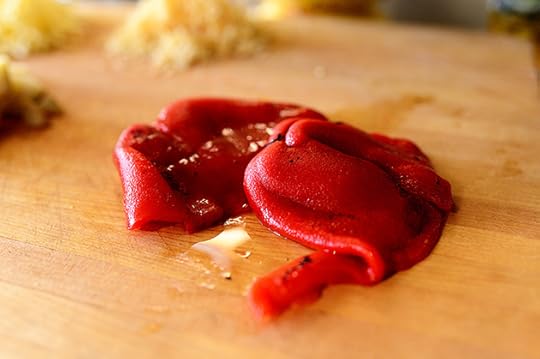 Next, grab a couple of glorious roasted red peppers, also known as one of the best pantry ingredients known to man…
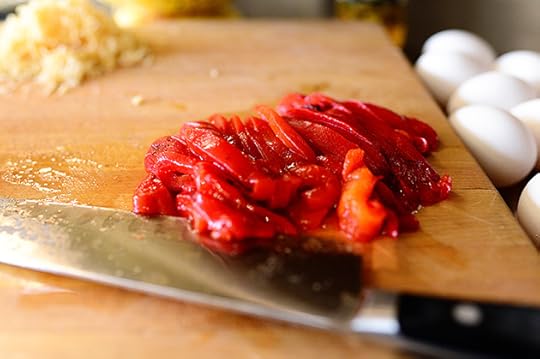 And slice them into strips.
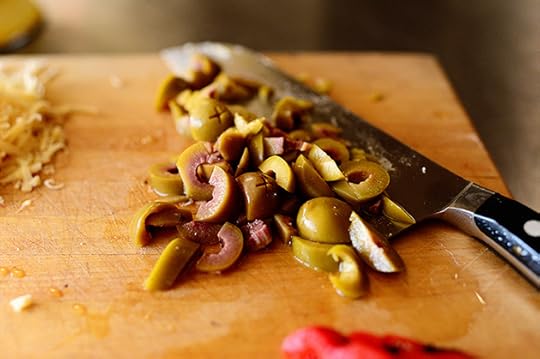 Finally, chop up a good handful of olives.
I love olives. I love them so much, in fact, I once ordered a dirty martini with extra olives and asked them to hold the dirty martini.
The server just…kind of…looked at me.
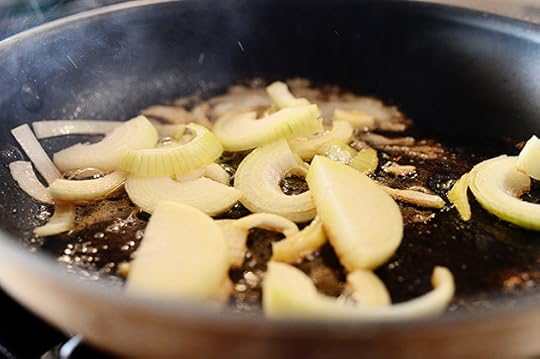 Now it’s time to get cookin’! Melt a couple of tablespoons of butter in a nonstick skillet over medium-high heat, then throw in the onions.
 Toss/stir them around and cook them for about 3 minutes, or until the onions are golden and starting to soften. (Turn down the heat if the butter gets too brown during this process.)
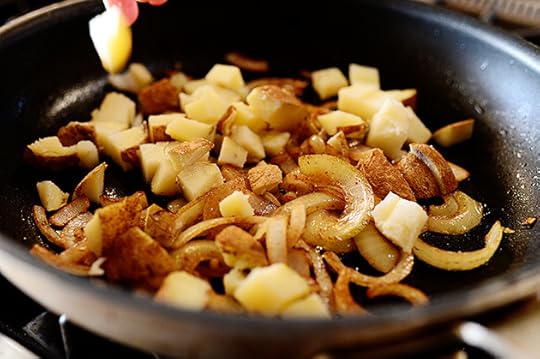 Sprinkle in the diced potatoes…
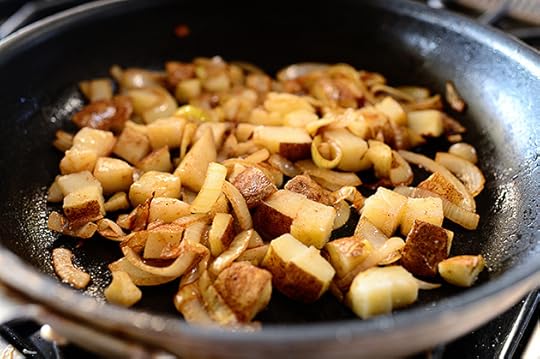 And stir/cook them with the onions for a couple of minutes.
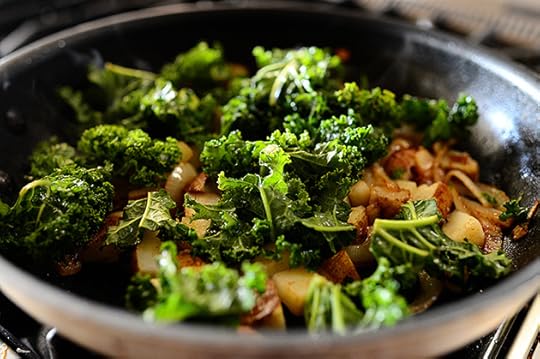 Next, add the kale and cook it with the onions and potatoes for a minute or two. It will wilt slightly, but will still keep its shape. (Unlike spinach which wilts almost immediately.)
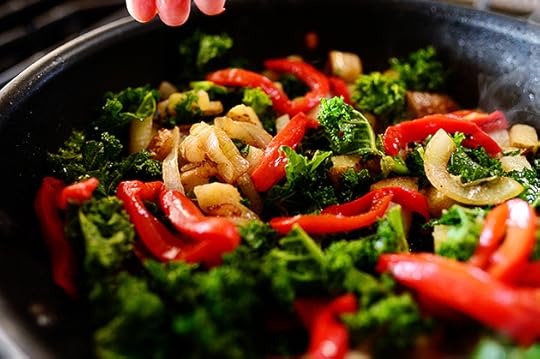 At the end, add the roasted red pepper strips…
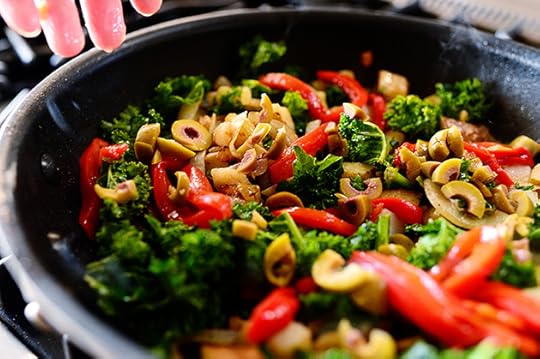 And the olives. Stir everything around and give it a chance to heat up…
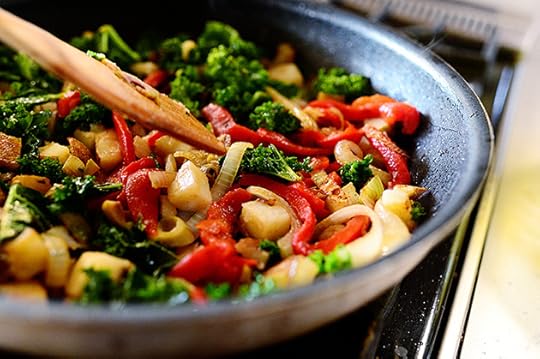 Then use a spatula to make sure all the ingredients are evenly distributed in the skillet.
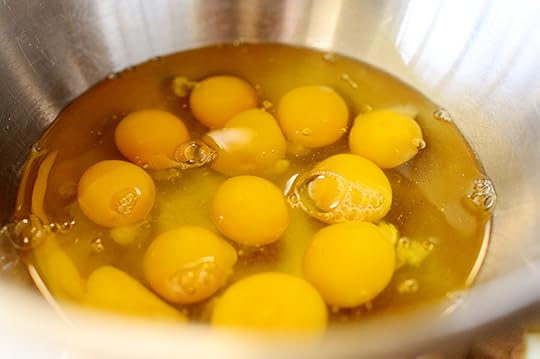 Time for the egg mixture now: Crack 12 big ol’ eggs into a bowl…
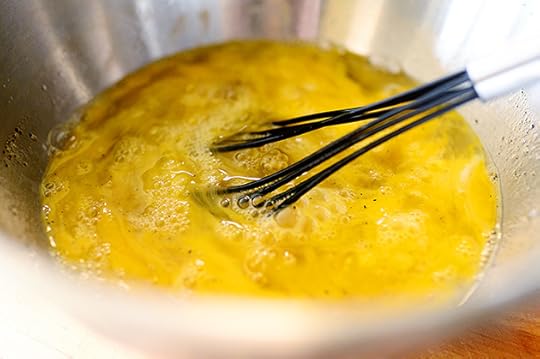 Add some salt and pepper and whisk it together until the eggs are about halfway combined.
Oh, and about the salt: Always consider the fillings you’ll be using in the frittata before salting the eggs. If you’re going to be adding salty ham, bacon, sausage, prosciutto, or anything overly salty, hold back a bit on the salt. If most of the ingredients aren’t inherently salty, be sure to add enough salt. Eggs need it!
 Finally, add in the cheese, mix it together…
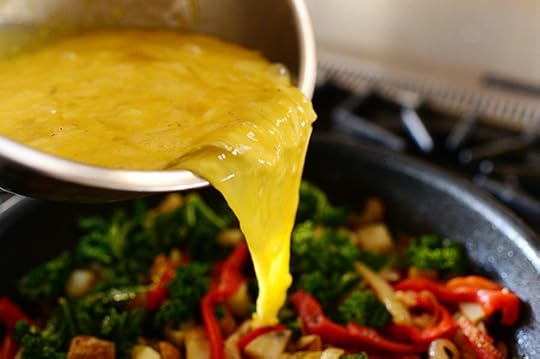 And pour it into the skillet…
 Making sure it gets evenly poured over all the ingredients.
 Beautiful!
 Now, let this sit on the stove over medium-high heat for about a minute or so. This will allow the edges to set up before it goes in the oven.
 Now just pop it right into a 375 degree oven! I settled on this temperature because it’s hot enough to help the frittata puff up a bit, but not so hot that the eggs will get brown on top.
Which brings me to my next globally important declaration: I can’t stand overly browned eggs! I must have had a negative childhood experience involving overly browned eggs and a monster or something, because I have a very visceral, angry, sometimes violent reaction to them. I like frittatas that are just barely browned on top, and the only way you can control this is to make sure the temperature of the oven isn’t too hot, and to watch the frittata like a hawk as it’s baking.
 Which is exactly what I did.
 Tada!
Tada!
 To serve it up, wait a minute or two before sliding the frittata onto a cutting board.
Nonstick skillets are beautiful things at times like this.
 Use a long, serrated knife to slice it down the middle…
 Then again in the other direction…
 Then cut each quarter in half to create nice, neat wedges.
 Or you can keep on going to make thin, grab-and-go wedges!
 Look how lovely!
 And the perfect ratio of egg to filling. Just the right amount of everything.
 I always want fruit with my frittata.
A fruit and a frittata.
A fruit a frittata.
Afruita frittata.
Hakuna frittata.
HAKUNA MATATA. Sing it with me, everyone!
This is how my mind works.
 Oh, and I want to show you the frittata’s underbelly real quick. See how lightly golden brown it is? Just a nice, light non-crust crust. That’s what that minute on the stovetop did.
And this brown doesn’t bother me, for some reason. I’m consistent like that!
 Enjoy, my friends! This would make a super delicious, super easy New Year’s Day brunch dish.
In other news, I can’t believe it’s almost 2014. It seems like only yesterday I was 15 and had a poster of Billy Idol on the ceiling of my bedroom.
But that’s another story for another time.
Here’s the handy dandy printable!
Recipe
Frittata
Prep Time: 10 Minutes
Cook Time: 20 Minutes
Difficulty: Easy
Servings: 8

Print Recipe
Ingredients
12 whole Large Eggs Salt And Black Pepper1/4 cup Grated Parmesan Or Romano Cheese1/2 cup Grated Cheddar Or Monterey Jack Cheese (more To Taste)2 dashes Hot Sauce, Optional2 Tablespoons Butter1 whole Medium Onion, Halved And Sliced Thin1 whole Baked Potato, Cooled And Diced2 cups Torn Kale Leaves Or Whole Spinach Leaves2 whole Jarred Roasted Red Peppers, Sliced Thin1/4 cup Chopped Green Or Black Olives Preparation Instructions
Preheat the oven to 375 F.
Beat together the eggs with the salt and pepper (do not over-beat; just mix until the eggs mostly come together.) Stir in the grated cheeses and set aside. (Stir in hot sauce if using.)
In a large oven-proof non-stick skillet, melt butter over medium-high heat. Add the onions and cook for several minutes, stirring frequently, until the onions are soft and golden brown. Add diced potato, sprinkle with salt and pepper, and stir to cook with the onion for a couple of minutes. Add the kale and stir to cook about 1 minute. Finally, add the roasted red peppers and olives and stir until everything is hot.
Make sure all the ingredients are evenly distributed across the bottom of the skillet, then pour in the egg mixture so that it evenly coats everything. Let it sit on the burner for 30-45 seconds to set the edges, then put the skillet in the oven.
Watch the frittata as it cooks. Let it cook in the oven for 10-12 minutes until the eggs are set but remove it before the eggs brown very much on top.
Slide the frittata out of the skillet and onto a cutting board. With a long serrated knife, slice it into wedges and serve warm with fresh fruit.
NOTE: Use any ingredients you want! Mushrooms, leeks, different cheeses, tomatoes, zucchini, squash, bell peppers. Have fun!
Posted by Ree on December 30 2013

December 27, 2013
Salted Pita Wedges
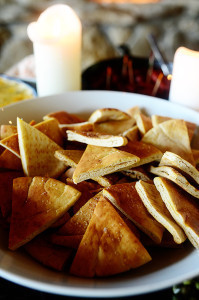
 As you start thinking about New Year’s Eve and all the luscious dips you might prepare for that huge, raucous party you’re going to throw, make plans to include a batch of these super easy, super flavorful pita wedges to go with them! I love these beautiful babies, because they’re a little more special than the typical storebought cracker, you can make them well ahead of time, and they’re nice and sturdy.
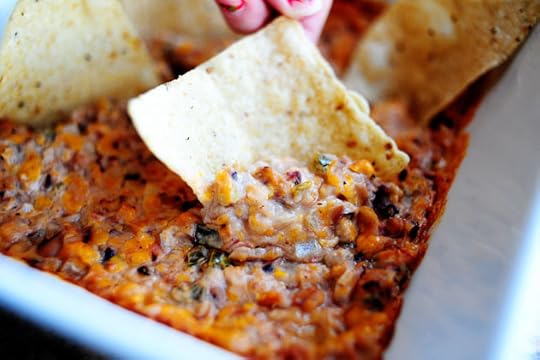
 Which means they can hold beautifully large mounds of everything from cold roasted corn dip…
 To hot, drippy spinach artichoke dip…
 To classic hummus…
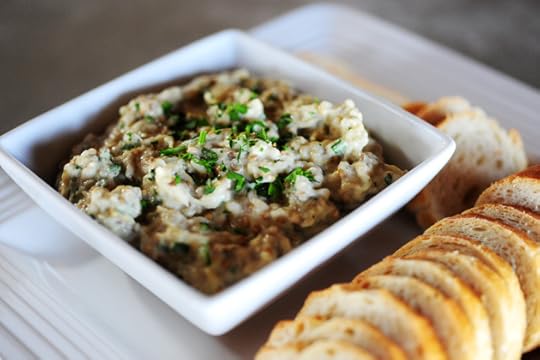 To Baba Ghanoush (oh, yum)…
 To creamy, herby salmon dip…
 To goat cheese coated in herbs and spices…
To every salsa, relish, and dip in between!
Here’s how to make ‘em!
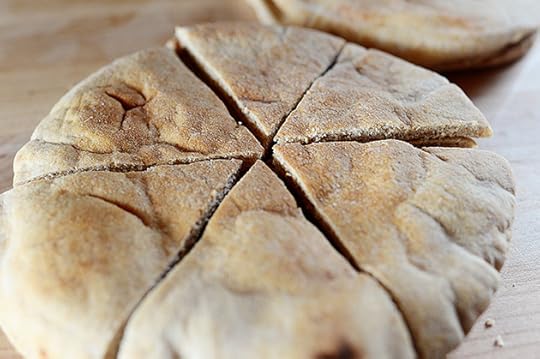 Cut pita bread into six wedges.
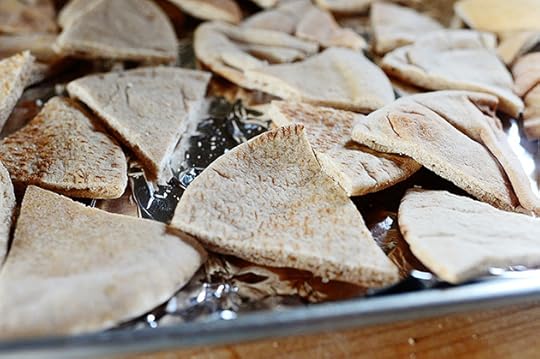 Spread them out in a single layer on a baking sheet. I lined mine with foil to make cleanup easy, but you don’t have to!
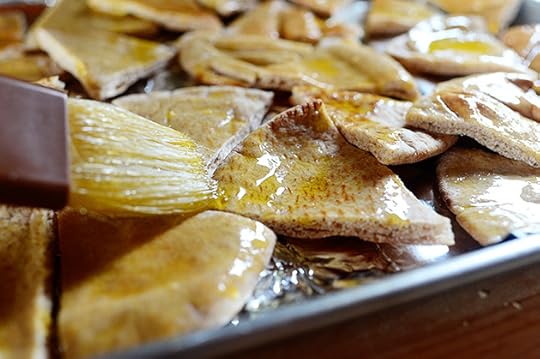 Now, here’s the kicker: You need to generously—and I mean generously—brush both sides of the wedges generously with a generous amount of olive oil. There shall be no light brushing here! You really want to be—yes, I’m going to say it again—generous with the olive oil because magic will happen in the oven and after the wedges are all crisped up, they’ll have a lovely olive oil flavor to them.
So be generous…okay?
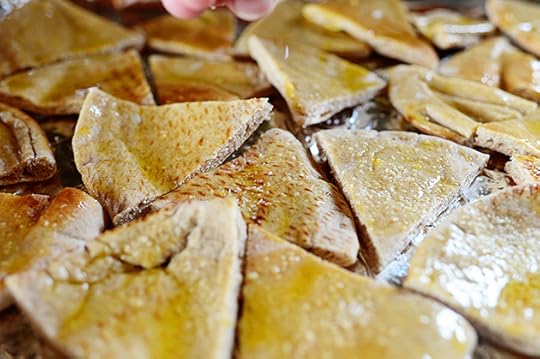 After you brush them with olive oil, sprinkle kosher salt on both sides of the wedges, then pop the pan in the oven for 15 to 18 minutes, or until the wedges are golden brown and crisp. You can decide how long to let them go—a little less time, and there’ll still be a little softness left; a little more, and they’ll be ultra crispy. The world is your oyster!
And that is it! Couldn’t be easier, and they look gorgeous next to any dip (or dips!) you decide to make.
Here’s the handy dandy printable!
Recipe
Salted Pita Wedges
Prep Time: 3 Minutes
Cook Time: 15 Minutes
Difficulty: Easy
Servings: 12
Print Recipe
Ingredients
6 pieces Pita Bread1/2 cup Olive Oil3 Tablespoons Kosher Salt Preparation Instructions
Preheat the oven to 375 F.
Cut the pita pieces into six wedges each. Lay the wedges on a foil-lined baking sheet and brush both sides generously with olive oil. Sprinkle both sides with salt, then bake them for 15 to 18 minutes until they're golden brown and crisp.
Serve warm or at room temperature with whatever dip you want!
Posted by Ree on December 27 2013

December 19, 2013
Chocolate Cupcakes with Peppermint Frosting
 I made these cupcakes the other evening, then waited to frost them until yesterday. And as I was making frosting and slapping it on the cupcakes, I watched Working Girl, one of my favorite movies in the world, while also busting Nutcracker moves and applauding myself since no one else was home to applaud me.
And I’m absolutely positive they would have applauded me.
That’s normal Christmas behavior, right?
Oh, good. I thought so!
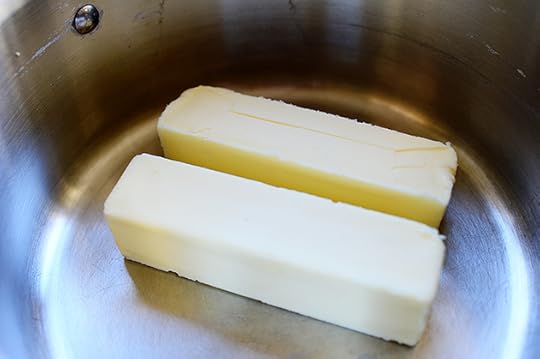 First make the cupcakes, which are made with the same chocolate batter I’ve made ever since my husband and I were married: Melt two sticks of butter in a large saucepan. Meanwhile, boil some water either in the microwave or in a tea kettle.
 Then measure 4 heaping (like, totally heaping) tablespoons of cocoa…
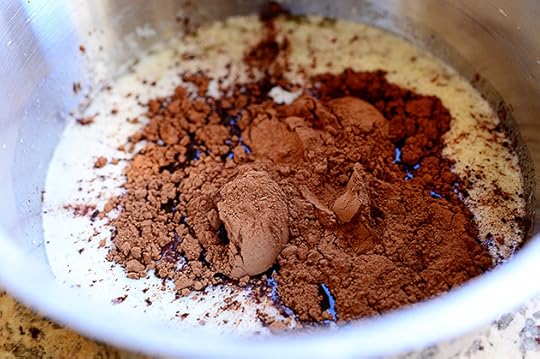 And throw that in with the butter.
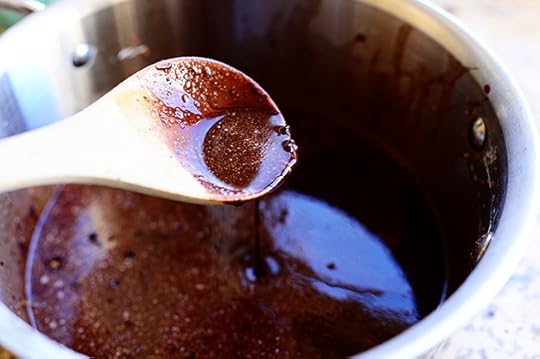 Stir it until it’s a nice, smooth chocolately mess…
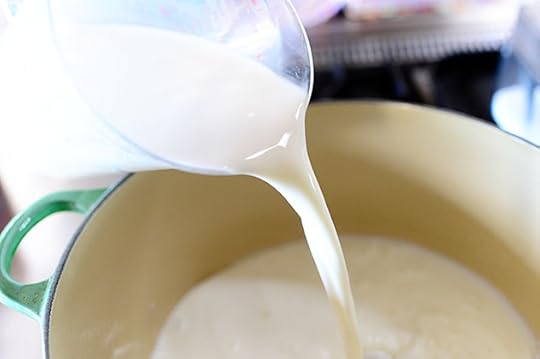
 Then pour in a cup of boiling water…
 Stir it around, and let it bubble up for about 15 seconds or so. Then turn it off and set the mixture aside.
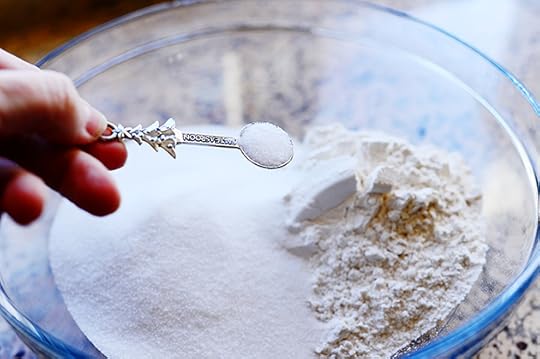 Measure 2 cups of flour and 2 cups of sugar in a mixing bowl…
 Then stir it together and set it aside.
 Then, in a separate bowl, mix together 2 eggs with 1/2 cup buttermilk (I did whole milk and 2 tablespoons of vinegar)…
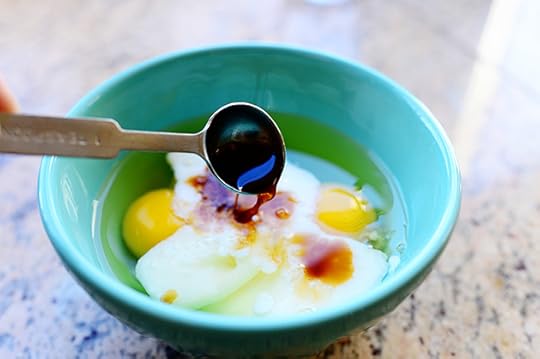 Add a teaspoon of vanilla…
 A teaspoon of baking soda…
 And whisk it together with a fork.
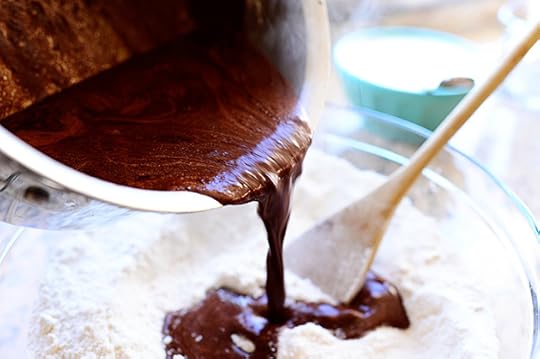 Pour the chocolate mixture over the flour mixture.
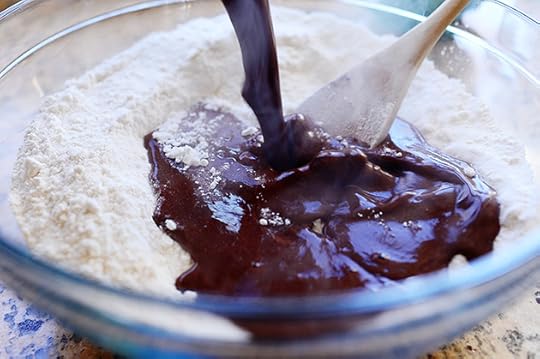 It’s still pretty hot at this point.
 Then give it just a few stirs until it’s halfway mixed together. You just want to give the chocolate mixture a chance to cool…
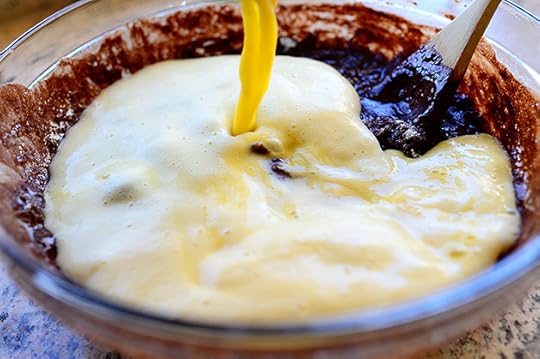 Before you pour in the egg mixture!
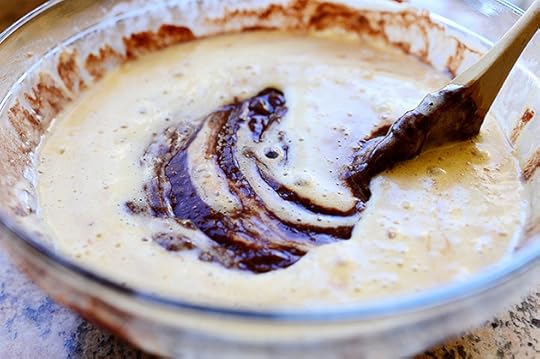 Stir the batter until it’s all combined!
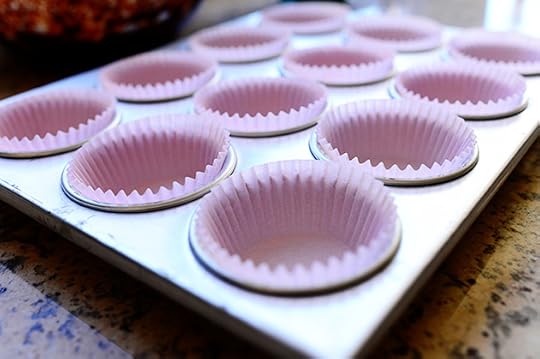 Line 2 muffin pans with liners…
 Then fill the liners with batter! I like to keep the cupcakes kind of manageable, so I fill them about 2/3 full. You can go higher if you want the cupcakes to have more of a dome that comes over the tops of the papers.
 Then just bake ‘em about 18 minutes or so.
Poifect!
 To make the frosting, grab a bunch of peppermints.
 Unwrap them…
 Then put ‘em in a plastic bag. Now, normal people will use a zipper storage bag of some sort. But people like me will have to resort to using a bag that is used with a vacuum sealer because they are all out of zipper storage bags.
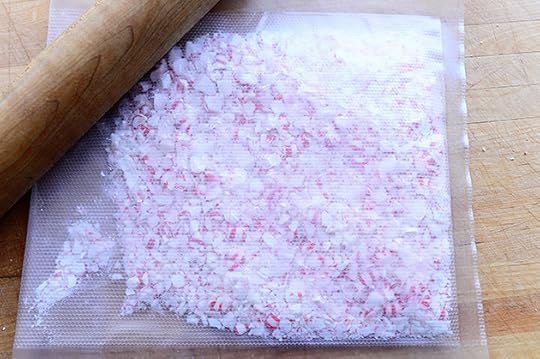 Use a rolling pin to crush the heck out of the peppermints.
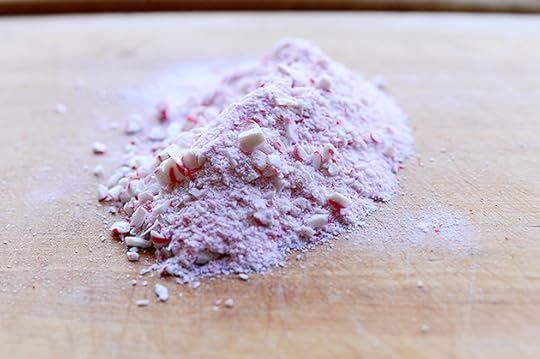 You want most of it to be nice and powdery, with a few crunchy little pieces. I’ll take out those large chunks, though, lest I cause anyone to break a tooth.
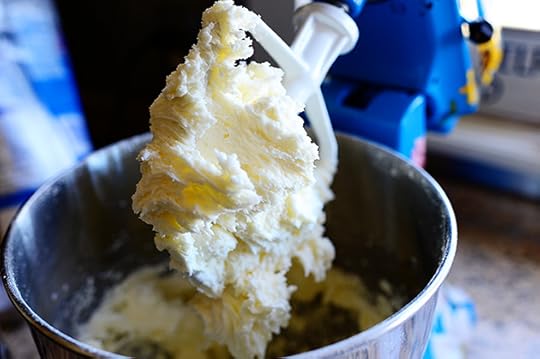
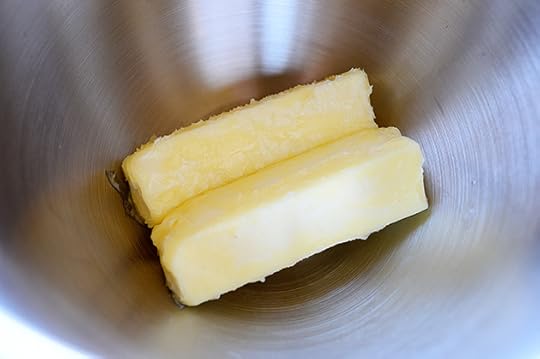 Start with 2 sticks of very soft butter. I used unsalted because my cinnamon roll and cookie baking had wiped out my salted butter supply…but I would definitely recommend using salted butter! The frosting is way too sweet if you don’t.
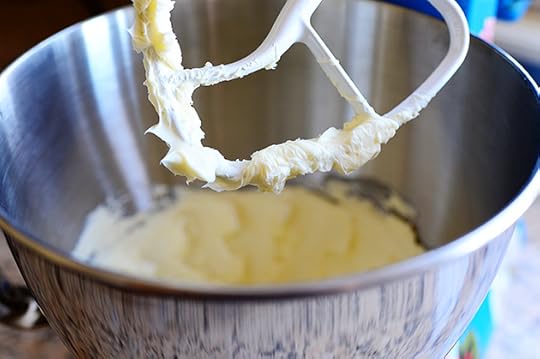 Beat the butter a bit to get it started…
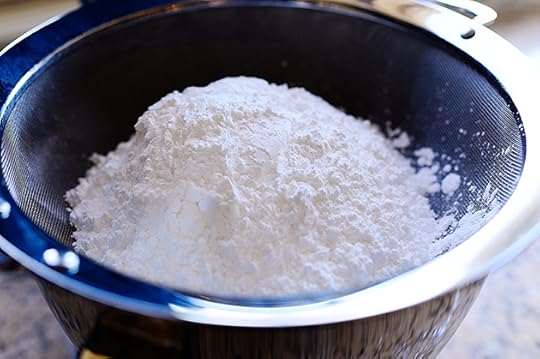 Then add 5 cups of powdered sugar to a sifter…
 And sift it right in.
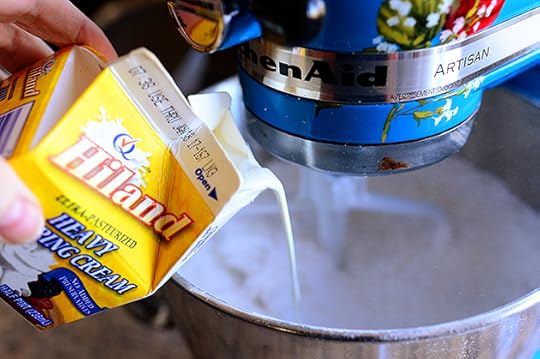 Let the mixture start to mix on the lowest speed, and add in about 3-5 tablespoons of heavy cream. Add it gradually; you want to add enough to make the frosting soft and spreadable, but not so much that it will be too “loose.”
 Mix it until it all comes together…
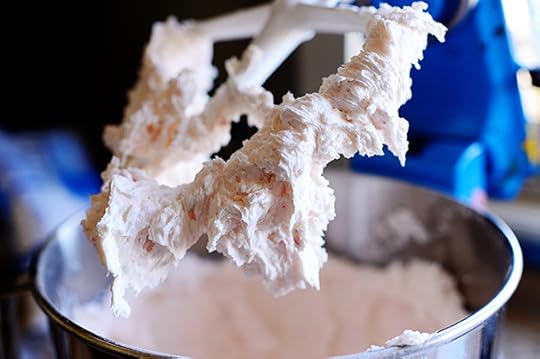
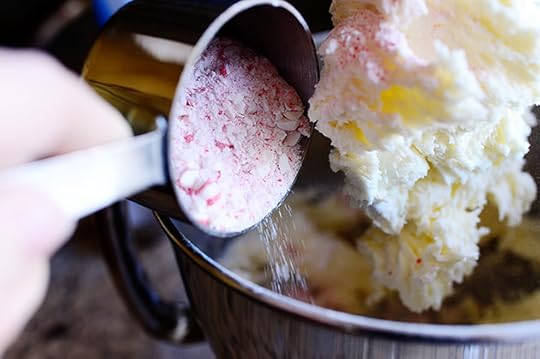 Then add in the crushed peppermints, reserving a little for garnish.
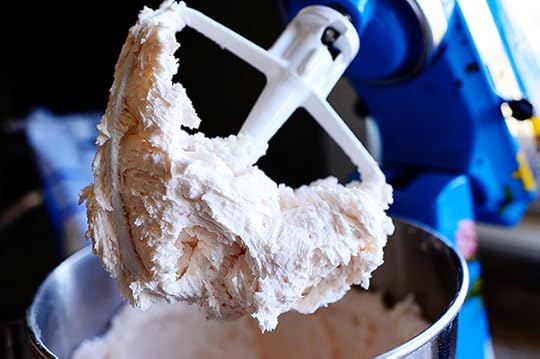 Scrape the bowl with a rubber spatula, then mix it on high for about 20-30 seconds, until it’s very light and fluffy.
 Gorgeous!
 Schmear the frosting on the cupcakes as thick or as thin as you want it, then sprinkle some more crushed peppermints on top.
 As you can see, I’m from the 1970′s school of cupcake decorating: Bake cupcakes. Let them cool. Slap some frosting on them. Sprinkle them with something. Done.
 They’re just going to be eaten, anyway.
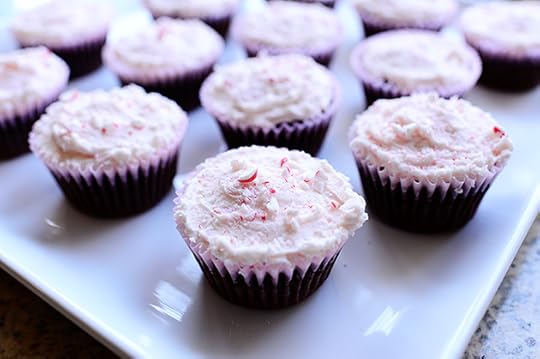 These are fun for Christmas!
 Even cuter with extra peppermints scattered all over the platter.
 A couple of things about the buttercream frosting: It will “crust” or harden on the outside (the inside will still be creamy) the longer it sits out. You can lessen this effect by storing them in covered containers, but I actually like the crust because it makes the cupcakes easier to transport. Up to you!
Enjoy these! And you can do a mix of red and green peppermints to make them extra festive.
Here’s the handy dandy printable!
Recipe
Chocolate Cupcakes with Peppermint Frosting
Prep Time: 30 Minutes
Cook Time: 18 Minutes
Difficulty: Easy
Servings: 36

Print Recipe
Ingredients
Cake2 sticks (1 Cup) Salted Butter, Softened4 Tablespoons (heaping) Cocoa Powder1 cup Boiling Water2 cups All-purpose Flour2 cups Sugar1/4 teaspoon Salt1/2 cup Buttermilk (or Whole Milk Mixed With 2 Tablespoons White Vinegar)2 whole Eggs1 teaspoon Vanilla1 teaspoon Baking Soda FROSTING2 sticks (1 Cup) Salted Butter, Softened5 cups Powdered Sugar, Sifted40 whole Peppermint Candies, Crushed Very Fine3 Tablespoons Heavy Cream, More If Needed (use 3-5) Preparation Instructions
Preheat oven to 350 degrees. Line 36 muffin tins with paper liners.
To make the cake, melt 2 sticks butter and stir in cocoa. Pour in boiling water, stir to combine, allow to boil for 15 seconds, then remove from heat and set aside.
In a separate bowl, stir together flour, sugar, and salt. Set aside.
In a separate small bowl, mix together buttermilk, eggs, vanilla, and baking soda.
Pour the chocolate mixture over the flour mixture and stir until halfway combined. Pour in the egg mixture and stir until the batter comes together.
Fill muffin cups 2/3 full and bake for 18 minutes, or until set. Remove from the oven and allow to cool completely.
To make the frosting, beat the butter to get it started, then add in the powdered sugar. Beat on low while adding the cream. When it comes together, add the crushed peppermints, reserving some for garnish. Beat the frosting for a good 30 seconds on high until it's light and fluffy, longer if needed.
Frost the cupcakes however you want, then sprinkle on more crushed peppermints.
Note that the frosting will develop a light "crust" on the outside if left out.
Posted by Ree on December 19 2013

December 16, 2013
Caramel Apple Sweet Rolls
 This just in: Sweet rolls are taking over the universe.
At least that’s the conclusion one might draw if they read my site regularly and see the constant stream of variations on my original Cinnamon Roll recipe. On this website, I have approximately six thousand variations of sweet rolls—everything from Blueberry Lemon Sweet Rolls (above) to Pumpkin Cinnamon Rolls, and everything in between. I have yet to try Potato Chip Sweet Rolls or Fried Chicken Sweet Rolls…but just give me time.
Not really.
I think.
Anyway, I’ve got another one for you.
 I made them for my holiday cookbook.
 Here’s what the spread looks like in the book! (Click on it to see the larger version.)
I like photos. Have I mentioned that before?
Anyway, after I shot the recipe and recorded all my relevant recipe notes…I took a big bite.
And oh…boy. My life was changed forever.
 They’re Caramel Apple Sweet Rolls, and aside from the original cinnamon rolls, which can never, ever be topped, I really do think this one’s my favorite variation.
It’s absolutely ridiculous.
In a super-delicious way.
 First, you need half of a batch of the regular cinnamon roll dough. If you’ve never made it before, take heart: This is the easiest yeast dough you’ll ever encounter in your life. You mix the ingredients and let the dough rise right in the pot, and you can use it right away or refrigerate it until you need it!
 While the quantities for the dough I’m about to give you are right, these photos are actually for a full batch of dough (the dough photos are from a different variation of rolls). So just don’t get confused when you make the dough and the volume is half this amount! (Are you confused yet?) Into a pot, pour 2 cups of whole milk…
 1/2 cup of sugar…
 1/2 cup of vegetable oil.
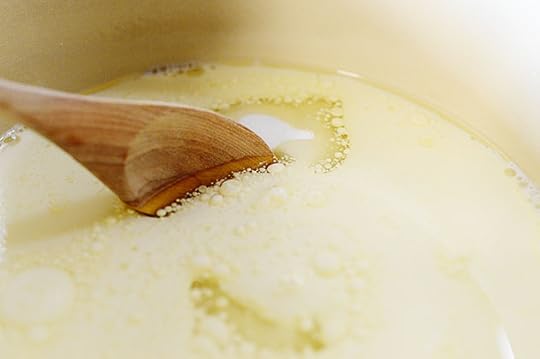 Then stir it around and let it heat up over medium heat until it’s “scalded,” which my mother always told me means “hot but not boiling.”
So just before it starts to boil, turn off the heat.
I can’t tell you how many times I have walked away from the milk mixture only to come back to find it bubbling violently and tragically over the sides of the pan.
But it’s only made me a stronger person.
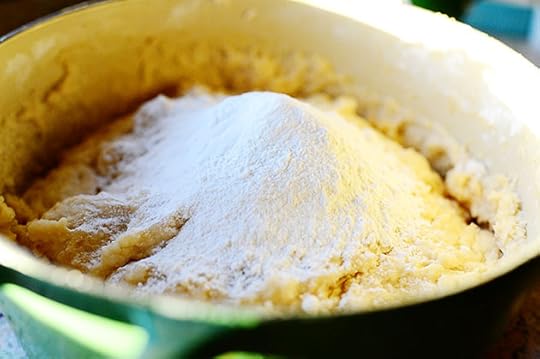
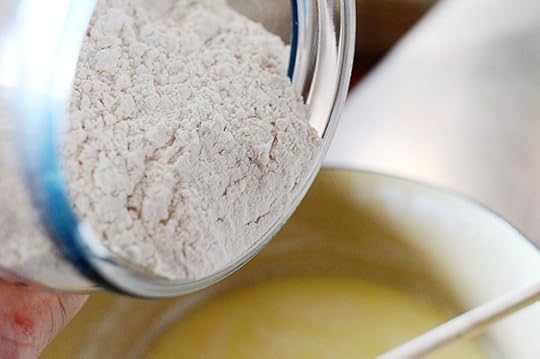 After you scald the mixture, you’ve got to let it cool to just warmer than lukewarm but not hot. Specific enough? Ha. After it’s to that temperature, add 4 cups of flour.
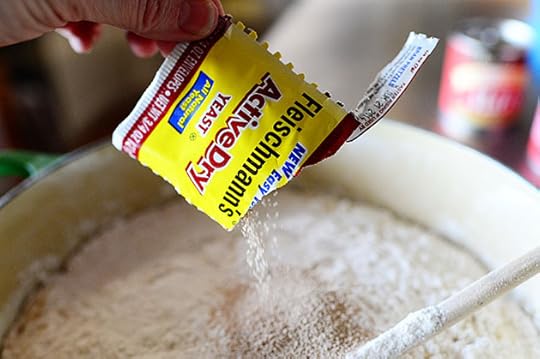 Sprinkle one package of active dry yeast right over the flour.
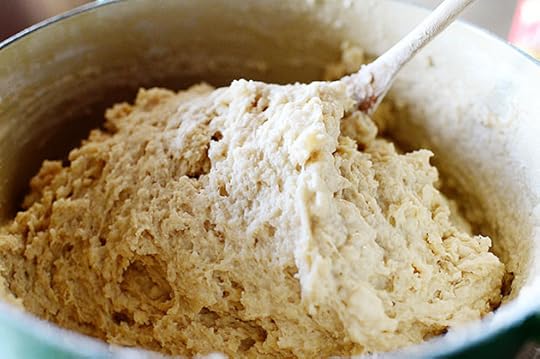 Stir the mixture around until it’s all combined. It’ll be sticky!
After you stir it, you need to cover the pot and leave it for an hour. Go live your life!
 After an hour, take off the lid and add an additional 1/2 cup of flour, 1 1/2 teaspoons of salt, 1/2 teaspoon of baking powder, and 1/2 teaspoon of baking soda.
 Stir it around (it’ll be a little more difficult than the last stir, but surge on) until it’s combined…then you can use it right away or do what I did and stick it in the fridge overnight! That’s one of my favorite sweet roll maneuvers: make the dough the night before.
THE FILLING
 The apple filling is one of the things that makes this version so remarkably luscious.
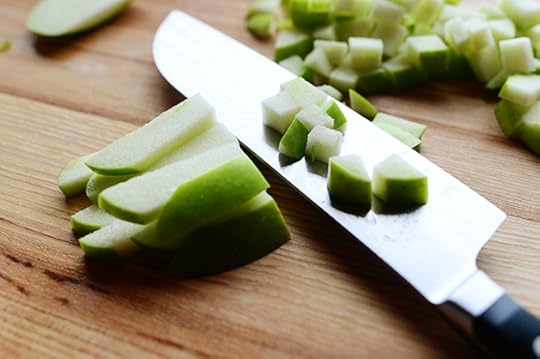 First, dice up a bunch of apples into a pretty small dice. These are Granny Smiths, which I reach for most of the time whenever I want to cook or bake something, but if you have another apple variety you like, knock yourself out!
“Knock yourself out” is the strangest saying.
Where does it come from? What does it mean?
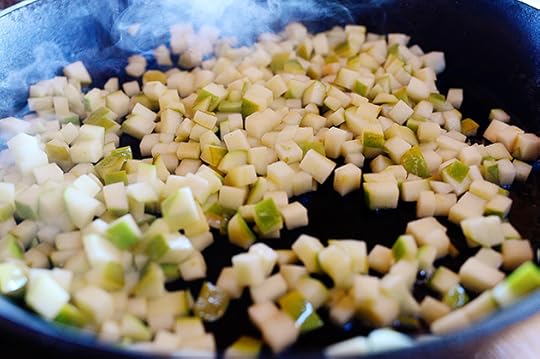 Throw the apples into a large skillet over medium-high heat and stir them around and let them cook…
 Until they start to turn golden brown in color.
 Then remove them to a plate so they won’t get too mushy, and set them aside for a bit.
 In the same skillet, add some more butter along with brown sugar. (Don’t worry; this makes approximately four million rolls!)
 Stir it around and let the butter melt and the sugar dissolve, all the time swimming around in all that apple flavor you left in the skillet.
Heaven!
 Next, because we live in a free society, add some heavy cream.
 Then stir the mixture around and let it cook for a couple of minutes or so, occasionally taking a deep breath and finding it hard to believe how delicious it smells.
 While it’s bubbling away, add the apples back in. Turn the heat to low.
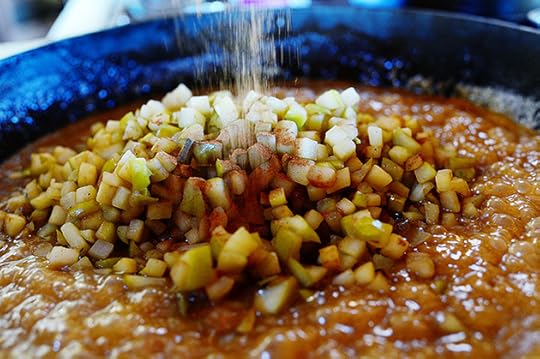 Then add a little cinnamon…
 And stir it to coat the apples in that glorious caramely goodness. Let it cook and thicken for another minute or two…
 Then transfer all the contents of the skillet to a bowl and let it cool on the counter a bit. I put it in the fridge to chill it before continuing with the rolls, but you don’t have to. Room temp would be fine.
THE ROLLS
 When you’re ready to make the rolls, roll out the dough onto a floured surface so that it’s about 10 inches by 30 inches. Basically, a long dang rectangle.
 Spoon little piles of apples all over the surface…
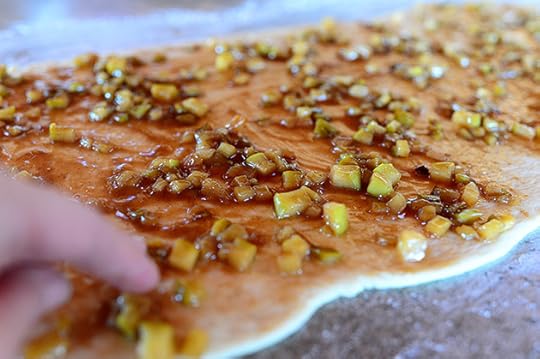 Then spread it all into an even layer.
Holy moly. This is going to be good.
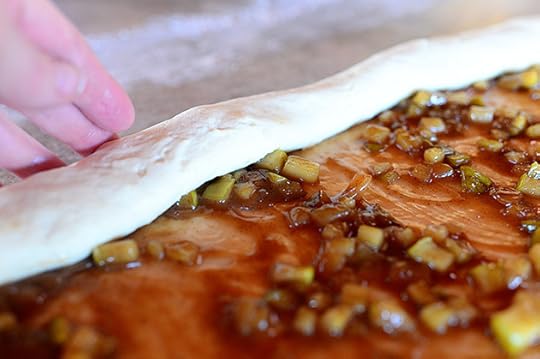 Then it’s time to roll it all up! Starting on the long end farthest from you, go back and forth down the line, using your fingers to roll the dough toward you, keeping it as tight as you can.
 When you get to the end, bring up the end and pinch the dough to seal it. Then turn the roll over so the seam is face down. this’ll make it easier to slice!
 Use a sharp knife to slice into individual rolls a little less than an inch thick…
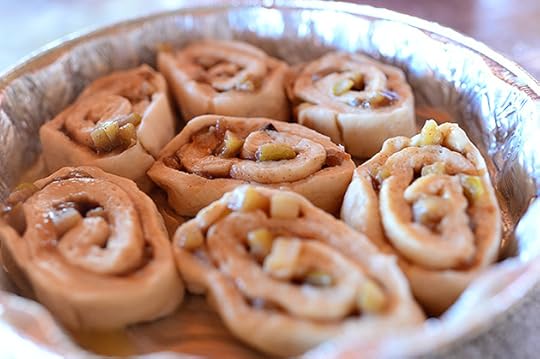 And place the rolls into round foil pans (which make them easy to deliver!). Or, if you’re just making them for your household, you can use regular baking pans of any size!
 When the rolls are all sliced up and in the pans, set them in a draft-free place and let them rise for about 20-25 minutes, then throw ‘em in the oven to bake!
THE CARAMEL ICING
 I make the caramel icing while the rolls are rising: Melt more butter (yes) with more brown sugar (yes) in a medium saucepan.
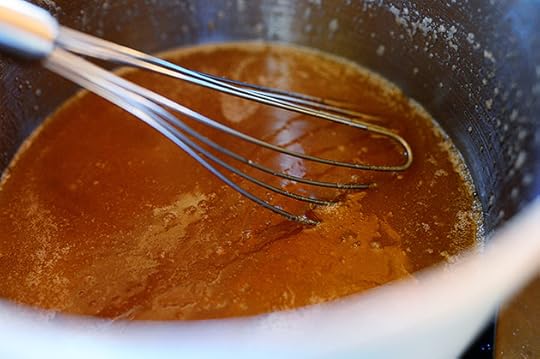 Stir it around and cook it until it’s all melted and dissolved…
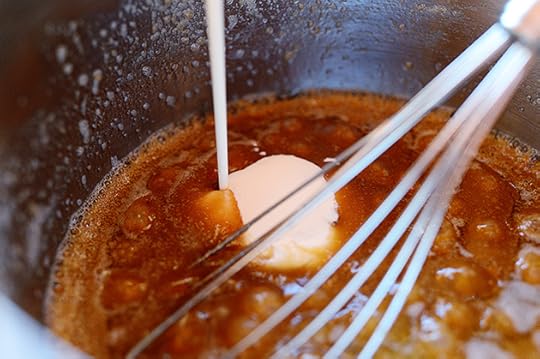 Then, once it starts to bubble, pour in the cream. As you’ve probably noticed, the caramel icing starts exactly the same way as the caramel sauce for the apples!
But we’re about to head in a different direction.
 Add some sifted powdered sugar!
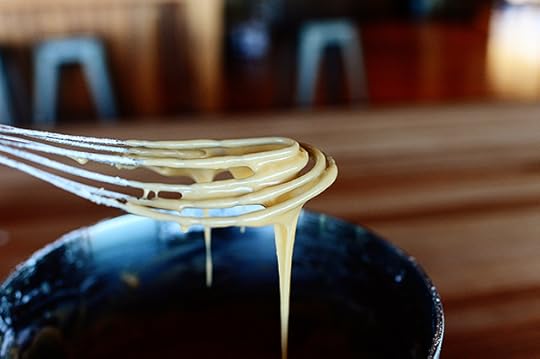 And here’s the thing: You can add enough for it to be a little on the thin/runny side (which I love, because the icing seeps in between the cracks and crevices, as is the case with my original cinnamon roll icing)…
 Or you can add more powdered sugar to make it a really thick frosting.
There’s no wrong way to do it!
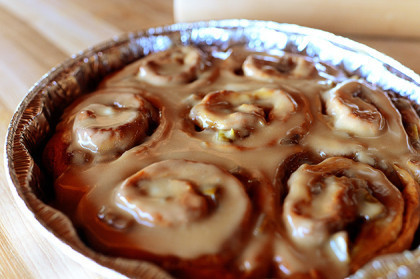
 By now the rolls are done. Just perfect!
 And the essential thing is to get the icing on the rolls the second they come out of the oven. That way, you can spread it out and the rolls will just suck that glorious stuff up.
Wow. Wow, wow, wow. These are absolutely decadent. The first bite will send you into a tizzy of bliss. The second bite will send you into a fit of ecstasy.
The third bite…well, by then the roll is gone.
And that’s how good they are.
Here’s the handy dandy printable! Enjoy the heck out of these, my friends.
Recipe
Caramel Apple Sweet Rolls
Prep Time: 1 Hour30 Minutes
Cook Time: 30 Minutes
Difficulty: Easy
Servings: 30
Print Recipe
Ingredients
Dough2 cups Whole Milk1/2 cup Vegetable Oil1/2 cup Sugar4-1/2 cups All-purpose Flour1 package Active Dry Yeast (about 2 1/4 Teaspoons)3/4 teaspoons Baking Powder1/2 teaspoon Baking Soda1-1/2 teaspoon Salt Filling4 whole Granny Smith Apples, Finely Diced1 stick Butter (1/2 Cup)1 cup Lightly Packed Brown Sugar1/2 cup Heavy Cream1 teaspoon Ground Cinnamon CARAMEL ICING1 stick Butter (1/2 Cup)1 cup Packed Brown Sugar1/2 cup Heavy Cream2 cups Powdered Sugar (up To 4 Cups Depending On Consistency You Want.)1/4 teaspoon Salt Preparation Instructions
DOUGH
To make the dough, combine the milk, vegetable oil, and sugar in a large saucepan or small pot. Heat it until just about to boil, but don't allow it to boil. Turn off the heat and let it cool until warm...but not too warm!
Add 4 cups of the flour and the yeast, and stir to combine. The dough will be very sticky at this point. Cover the pot and let it rise for an hour.
Add the remaining flour, the baking soda, the baking powder, and the salt. Stir to combine. Then you can proceed with the rolls OR refrigerate the dough, covered, until you need it.
FILLING
To make the filling, saute the apples in a large skillet over medium-high heat for 3 to 4 minutes. Remove them to a plate and set aside.
In the same skillet over medium heat, add a stick of butter and a cup of brown sugar. Stir it around until the butter melts and the sugar dissolves, then pour in the cream. Stir it around and let it bubble up and thicken for about a minute. Turn the heat to low and add the apples back to the skillet. Sprinkle in the cinnamon, stir the mixture, and let it thicken for another 1 to 2 minutes. Spoon it into a bowl to cool.
ROLLS
When you're ready to make the rolls, preheat the oven to 375 degrees and roll out the dough on a floured surface to a rectangle about 10 x 30 inches. Spoon the caramel apples all over the dough and spread it out evenly. Roll the dough toward you into a long, tight roll. Pinch the seam when you get to the end, then turn the roll over so that it's seam side down.
Slice the dough into rolls 1/2 inch to 3/4 inch thick and place them into disposable roil cake pans with a little melted butter spread into the bottom of each pan (the rolls will fill about 3 to 4 pans.) Set the rolls aside and let them rise for 20 to 25 minutes, then bake them for 15 to 18 minutes, or until they're nice and golden.
ICING
While the rolls are rising or baking, make the icing: Melt the butter and brown sugar in a saucepan over medium heat. Add the brown sugar and let it dissolve and start to bubble. Add the cream, then cook for 2 minutes, whisking constantly. Turn off the heat and add the powdered sugar and whisk together. Add up to 2 more cups of powdered sugar to get to the consistency you want.
The second the rolls come out of the oven top with the icing and spread to coat all the rolls generously!
Serve warm.
(One roll is more than enough for one person! These are super rich.)
Posted by Ree on December 16 2013

Ree Drummond's Blog

- Ree Drummond's profile
- 2036 followers

