
Ree Drummond's Blog, page 33
February 18, 2014
Spicy Dr Pepper Ribs
 I don’t make ribs very often, because when I eat ribs I feel like a cavewoman.
And you know what? I love eating ribs for that very reason. Sometimes it’s just fun to cut loose, lean over your plate, and dive in with both hands, unconcerned about how unfeminine—and covered in sauce—you look.
These little beauties are delicious. I made them before we left on our ski trip and they were so tender and yummy, I thought about them every day on the slopes as I was having a blast not falling. They’re a play on my Spicy Dr Pepper Pulled Pork, which you must try if you haven’t yet. Spicy, sweet, flavorful, and wonderful, and these ribs are no different. Serve ‘em with mashed potatoes, potato salad, or smashed potatoes. Or corn or cole slaw or macaroni and cheese!
You’ll love ‘em. Perfect for a regular ol’ weeknight meal or for a fun, messy meal with friends.
 First, make the marinade/sauce! Add a cup of brown sugar to a medium saucepan…
 Then pour in a can of the hard stuff.
 What a pretty sight!
Unless you hate Dr Pepper.
And/or brown sugar.
And/or saucepans.
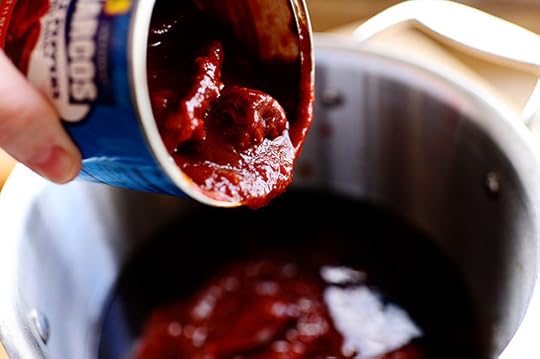 Next, for both flavor and spice, pour in a small can of chipotle peppers in adobo sauce. (Note: This is a large can, and I used half of it.)
 And add some minced garlic.
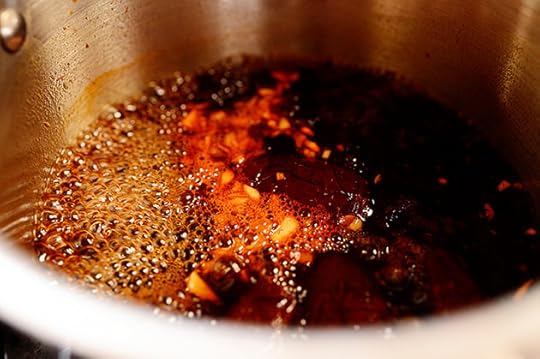 Bring it to a boil…
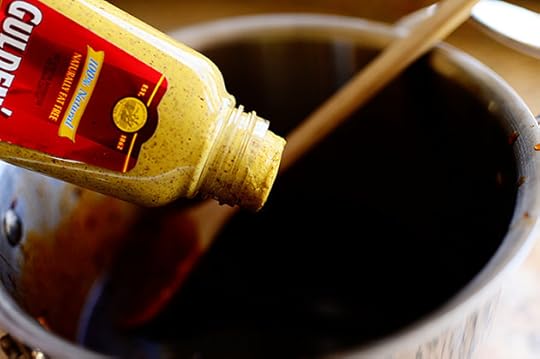 And oops! I forgot. Add some brown mustard (or any mustard!) along with a little vinegar.
 Keep cooking it until it’s thick and reduced by half, then divide the sauce into two containers and refrigerate until cold.
 Remove two packages of baby back ribs from the wrapping…
 Then set them on a foil-lined baking sheet and pat them dry.
Note: If you prefer, remove the silvery membrane on the bottom side of the ribs—similar to the silvery layer I remove from beef tenderloin when I make it. I don’t always remove this from baby back ribs, so if you’re lazy like me, don’t worry too much about it. If you want to remove it, just use a sharp small knife and slice/pull the silvery membrane until it’s mostly off.
 Using one of the containers of cooled sauce, generously brush it all over the surface of the ribs on both sides.
 Cover the whole thing with foil, then immediately put the pan into the fridge and let the ribs marinate for 8 to 12 hours—you can do this first thing in the morning then make them for dinner! Just be sure to let the marinade cool completely before you brush it on the ribs to marinate.
(Cooking Post Confession: I did not marinate these ribs, as I needed to get them in the oven and didn’t have time. They were still delicious, but would have been even more so if I’d marinated them.)
When you’re ready to cook the ribs, just preheat the oven to 275 and stick the whole pan right in, still covered in foil.
 Let the ribs cook at 275 for 2 hours, then take off the foil and increase the heat to 300.
 Take the second half of the marinade out of the fridge and brush/spoon it all over the ribs (I didn’t show this because I’m an airhead), then stick it back in the oven, uncovered, for another 15-20 minutes.
 Pull then out of the oven again and brush/spoon some more on…
 Then put them back in the oven for another 15-20 minutes or so.
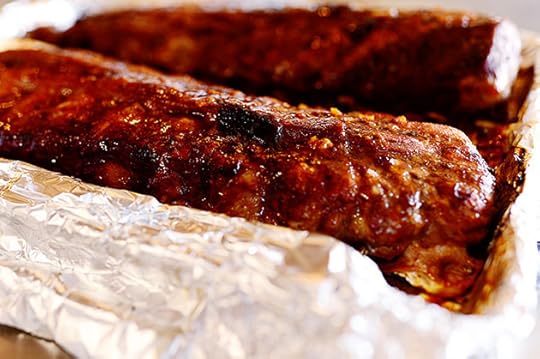 Basically, what we’re doing is finishing them off for the last 30-40 minutes of cooking at a slightly higher heat, uncovered, so the coating is dark and rich and thick.
And yum.
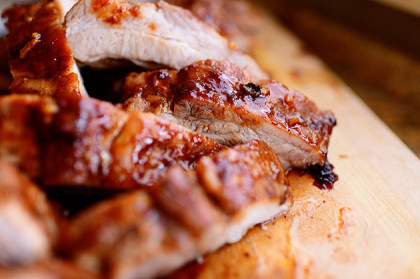
 The reeyubs (say it out loud; it’s fun!) should be tender and almost falling apart.
 Using a sharp knife, slice ‘em up. The knife should go through ‘em like buttah.
 Keep going until you have a big pile of ribs.
The flavor! The tenderness! The juiciness!
 Enjoy these, guys.
Here’s the handy dandy printable!
Recipe
Spicy Dr Pepper Ribs
Prep Time: 8 Hours
Cook Time: 3 Hours
Difficulty: Easy
Servings: 12
Print Recipe
Ingredients
1 cup Brown Sugar1 can Dr. Pepper1 can (5 Ounces) Chipotle Peppers Packed In Adobo1/3 cup Brown Mustard1 Tablespoon White Vinegar3 cloves Garlic, Minced2 packages Pork Baby Back Ribs Preparation Instructions
Prepare the marinade by gently boiling the first 6 ingredients in a medium saucepan until reduced and thick, about 20 minutes. Allow to cool completely. Divide into two containers and refrigerate one container for later.
Place ribs on a large baking sheet lined with heavy foil. Brush half the marinade all over the ribs on both sides. Cover with foil and refrigerate for 8 hours to marinate.
When you're ready to cook the ribs, preheat the oven to 275 degrees. Place the pan, still covered in foil, into the oven for 2 hours. Remove the foil and increase the temperature to 300. Using the other half of the sauce, brush another generous layer all over the ribs. Return the pan to the oven and continue cooking for another 30 to 40 minutes, brushing on another layer of sauce as it cooks.
Remove the ribs when they're fork tender (keep cooking until they are). Slice and serve!
Posted by Ree on February 18 2014


February 13, 2014
Valentine Treats!
 First things first! I would be remiss if I didn’t tell you how very excited I am about Tasty Kitchen‘s new design, which we just launched this week! For those of you who aren’t familiar with Tasty Kitchen, it’s a recipe community I started back in 2009 when I wanted to provide a place for readers of my website to share their favorite recipes. It has grown and flourished since then, and is an absolute treasure trove of amazing recipes contributed by its very talented members. There are also lots of foodbloggers on Tasty Kitchen, with links to their own sites so you can find new food blogs to follow!
I love Tasty Kitchen, and my sister Betsy, my friend Erika, and I worked hard on the new design so it would be easy to find scrumptious recipes whenever you need them. We hope you love the new, improved look and feel.
Check out Tasty Kitchen’s “Chocolate” search: Chocolate Recipes on Tasty Kitchen.
And, to narrow it down even more, here’s the Valentine’s Day category: Valentine’s Day recipes on Tasty Kitchen. Lovely!
I invite you to browse around Tasty Kitchen (or “TK” as we affectionately call it) the next time you’re looking for something new to cook or bake. I promise you’ll be inspired.
VALENTINE’S DAY RECIPES
Today, because Valentine’s Day is tomorrow, I wanted to share some of my favorite Valentine’s Day recipes here on PW Cooks. Whether it’s for your love of your life or just some buddies at work, here are some treats for you to consider. (Click on the links or photos below to see the step-by-step recipes.)
 Delicious and easy Homemade Chocolate Truffles. I sprinkled these with sea salt, but you can use red/pink sprinkles, you can coat them with red or pink melting candies…and pretty much have your way with them. Always a hit!
 Pretty Little Brownie Bites. These are absolutely lovely little pop-in-your-mouth treats, and just like the truffles, you can decorate them however you choose! I’m making these for Marlboro Man on Saturday when we get home from Colorado. He loves ‘em.
 Knock You Naked Brownies. The name says it all. I love these things more than most things in life! Just four of these in a little gift box are perfect for your sweetie. He/she will shower you with kisses!
 Chocolate Covered S’mores. Oh, these are so much fun. You can use marshmallow creme as I did on this post, or you can toast marshmallows and use them instead. Either way, these are absolutely delicious and you can have lots of fun decorating them.
 If you’re making a romantic Valentine’s dinner for your sweetie and need something super fast and easy for dessert, these Itty Bitty Nutella Cakes are totally charming. You won’t believe how simple! Sprinkle the tops with pink and red and you’re set.
 Or, for something a little more involved, whip up this Chocolate Strawberry Nutella Cake. Just trust me on this one! It is to die for. (Just don’t assemble it until an hour before you eat. See post for the reason why. Ha!)
 Chocolate Chocolate White Chocolate Chip Cookies. The name is a mouthful…but the cookies are a cinch to make, and oh so good. A lovely V-Day treat!
 Marshmallow Pops! This photo is from the day I made the pops on my Food Network show; on the linked post above, I made them for Christmas. But Marshmallow Pops are perfect for Valentine’s Day! Just use red, pink, and white melting candies (you can find them at craft stores) and a great variety of sprinkles. It’s best if no two are alike! This is a great treat for kiddos to help with.
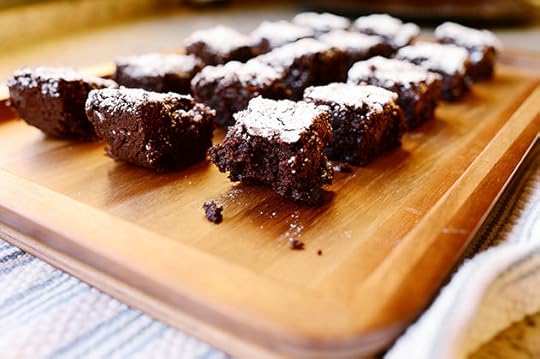
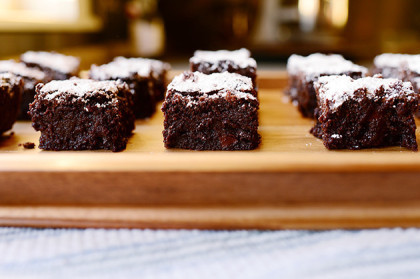
 In case you missed them here a couple of weeks ago, these Dark Chocolate Brownies are a chocoholic’s dream. Absolutely decadent!
 For another quick-and-easy idea with the kids, these Nutella Krispie Treats are perfect. Give ‘em a Valentine’s Day spin with red and pink sprinkles and melts. Super fun, super good.
 And finally, if you have a little more time on your hands, these Chocolate Valentine Hearts are just perfect. I’ve made them for decades (literally!) and they never, ever get old.
Happy Valentine’s Day, friends!

February 10, 2014
Bruschetta with Leeks, Goat Cheese, and Bacon
 I made this unimaginably delightful appetizer last week because I had leeks, bacon, and goat cheese in my fridge and I decided they were, like, totally made for each other. It’s nothing a cowboy would touch with a ten foot pole, generally speaking, but I didn’t let that thwart me.
Make this for your friend or neighbor or mother-in-law or cousin or anyone who drops by your house in need of a quick, delicious munchie and and a glass of cold white wine.
Super easy and incredibly tasty!
 First, chop up some thin bacon into small pieces…
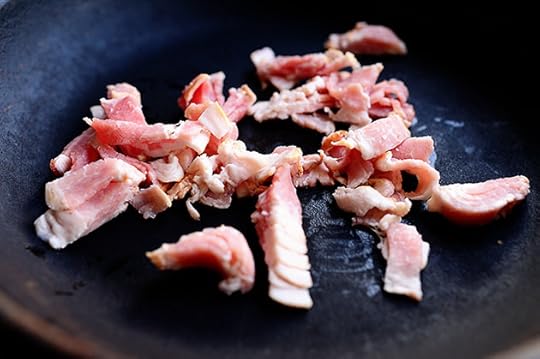 Then throw ‘em in a skillet…
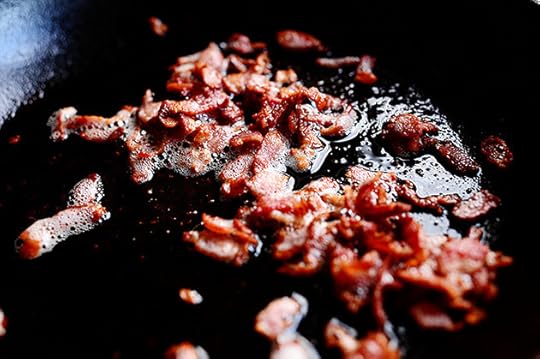 And fry ‘em until they’re nice and crisp.
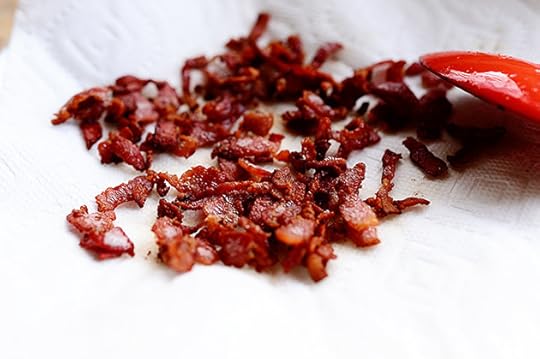 Remove the bacon to a paper towel lined plate and set it aside.
Important Note: Do not eat all the bacon. If you eat all the bacon, you will not have any for your bruschetta. This has been a public service announcement.
 Next, lop the tops off the leeks…
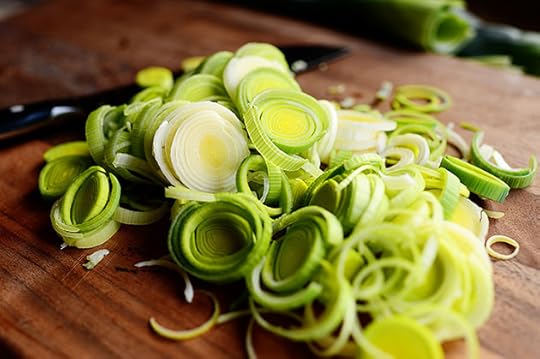 And slice them thinly until you get an inch or two into the darker green area.
*Note: At this stage, if the leeks look sandy/dirty, you can soak the slices in a bowl of cold water for a few minutes, then drain them. I didn’t do this, because they didn’t look very sandy at all, and besides that, a little sand never hurt anyone.
In other words, don’t be like me.
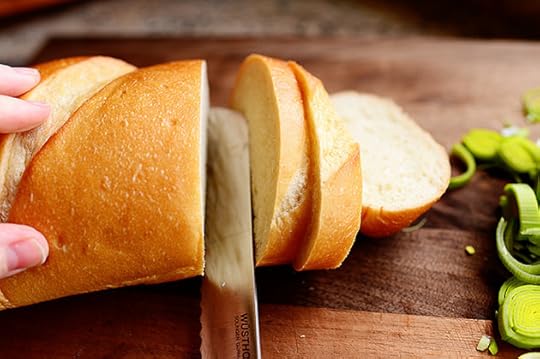 Next, slice up a loaf of good French bread.
 Then melt butter in a large skillet over medium to medium-low heat (depending on how hot your burner gets)…
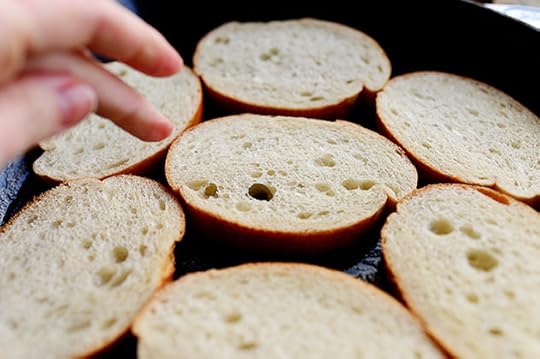 And toast the bread on both sides…
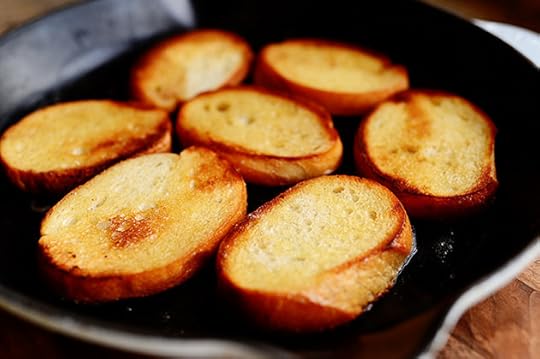 Until it’s nice and buttery and golden and crisp.
Note: Traditional bruschetta involves grilling the slices of bread, then rubbing a clove of garlic all over the surface. But I love the toasted-in-a-buttery-skillet method myself. Either way is delicious!
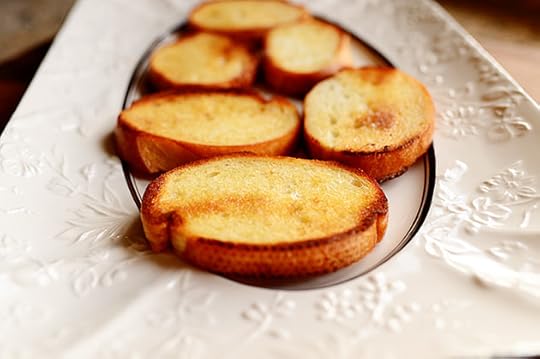 Remove them to a platter and set them aside to cool slightly.
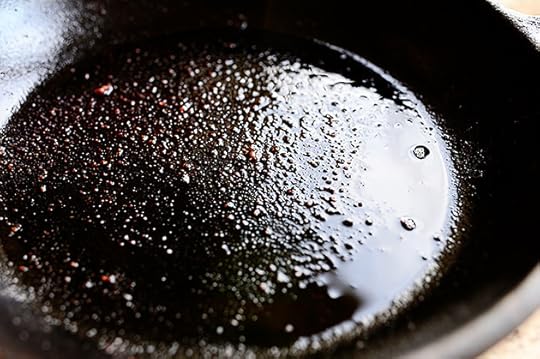 Now, grab the same skillet you used to fry the bacon.
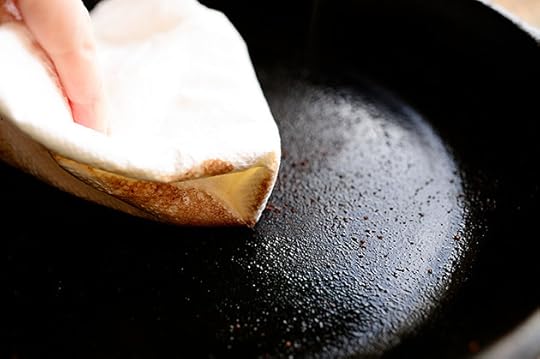 Drain off the fat, then use a paper towel to blot out the excess. You want the skillet still to have some bacon flavor and small bits, but not any of the grease.
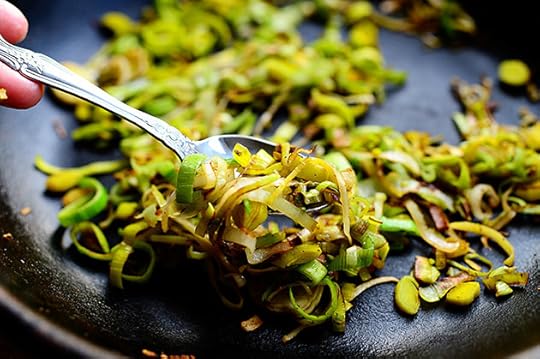
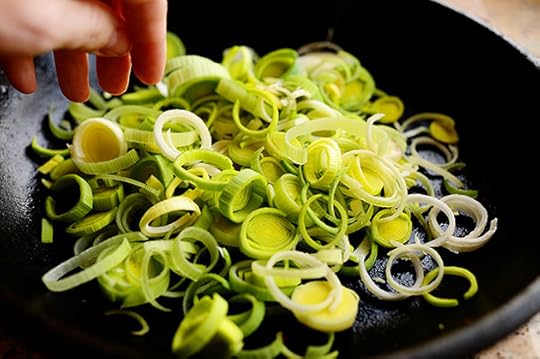 Turn the burner on medium-high heat, then throw in the sliced leeks!
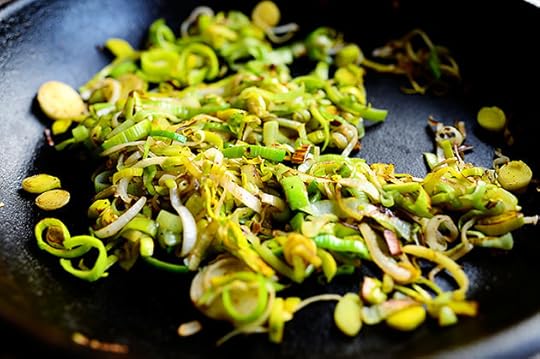 Saute them for a few minutes, stirring here and there, until they’re nice and golden. Yum!
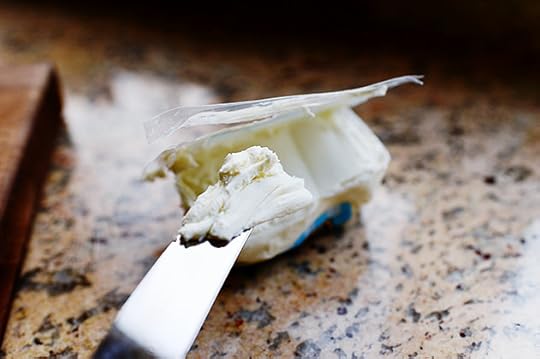 Finally, grab some goat cheese/chevre…
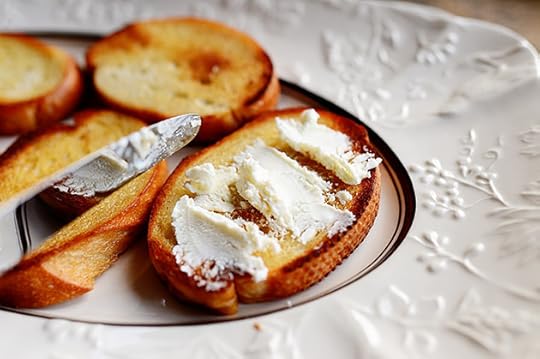 And spread a good amount on a slice of toasted bread.
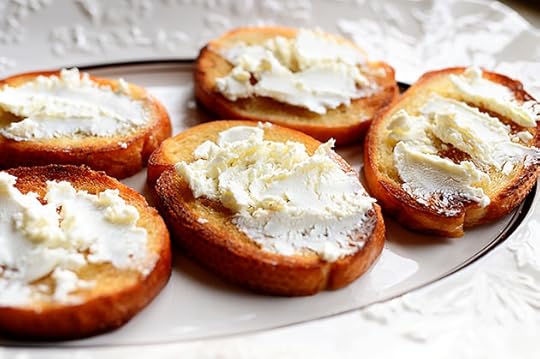 Repeat with the rest of the bread, and try with all your might not to eat one of these right now.
Goat cheese.
Sigh. I love it so.
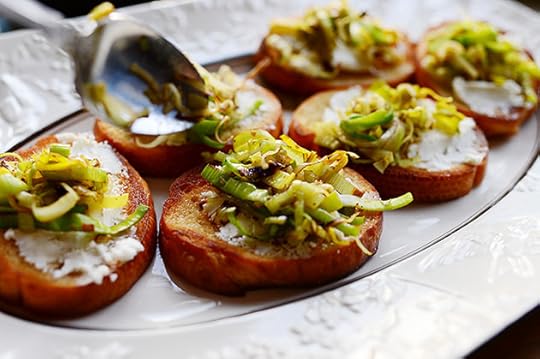
 Now just grab a spoonful of the leeks…
 And add it to the top of one of the pieces of heavenly goat cheese-smeared bread.
 Repeat with the rest of the pieces…
 Then sprinkle each one with a few bits of bacon.
 Done!
Done!
 Oh, wow. How scrumptious do these look?
 And they were every bit as good as I imagined.
You’ll love these! They’re perfect with cold white wine, and make a great little appetizer before dinner. You could use smaller crostini and make a whole bunch of them for a cocktail party, or heck…you could even stir the goat cheese, leeks, and bacon together and make a dip.
Enjoy!
Here’s the handy dandy printable.
Recipe
Bruschetta with Leeks, Goat Cheese, and Bacon
Prep Time: 5 Minutes
Cook Time: 15 Minutes
Difficulty: Easy
Servings: 8

Print Recipe
Ingredients
8 slices Good French Bread Butter, For Toasting Bread6 slices Thin Bacon, Cut Into Bits2 whole Leeks, Sliced Thin And Washed If Needed4 ounces, weight Goat Cheese/chevre, Softened Preparation Instructions
In a skillet, melt butter and toast the bread slices on both sides until golden and slightly crisp. Remove from the skillet and set aside to cool slightly.
Fry the bacon bits until crisp, then remove to a paper towel-lined plate. Pour off the excess grease, then blot the skillet clean. Add the leeks to the skillet and cook over medium-high heat for several minutes, until golden.
Smear each piece of bread with goat cheese, then top with leeks and bacon and serve!
Posted by Ree on February 10 2014

February 3, 2014
Croissant French Toast
 Yesterday before church, because I knew I would be spending all that afternoon frying chicken wings, I wanted to make something lovely for breakfast.
 I had a package of croissants in my fridge—I’d picked them up at Le Walmarte, otherwise known as The Wal Marts, also known as Walmart the other day—and had originally planned to use them to make breakfast sandwiches with eggs, shaved ham, and cheese. But since I was in the mood for something a little sweet before I headed to church, I decided to make French toast instead.
I’ll just launch into the recipe now and spare you all the adjectives describing how positively sublime this French toast was…but just trust me on this: you’ll want to make it this week.
I absolutely, positively loved it.
 Crack 5 eggs into a bowl. (I have a cold spot in my fridge that has been slightly freezing things; hence the appearance of these whites. I first learned about this cold spot in my fridge when I went to grab the package of blessed basil I’d found in the big city after not having had any for what seemed like many years and I found it had all turned black. I’m still crying.)
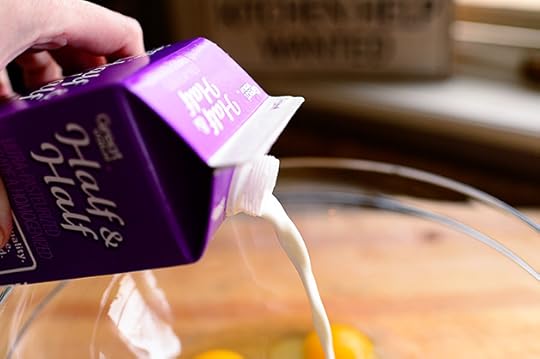 Splash in some half-and-half…
 And some vanilla.
 Then add a li’l sugar, Sugar…
Can I call you Sugar?
Thanks!
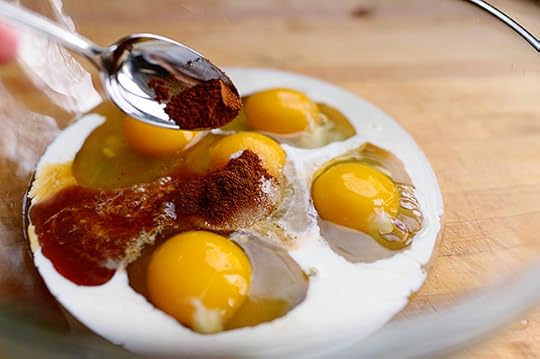 And a li’l cinnamon, Sugar.
Not cinnamon sugar.
Cinnamon, Sugar.
Oh, never mind!
 Whisk this together until it’s all combined, then set it aside for a bit.
 Split the croissants in half across the middle…
 Then, one by one, dunk them on one side…
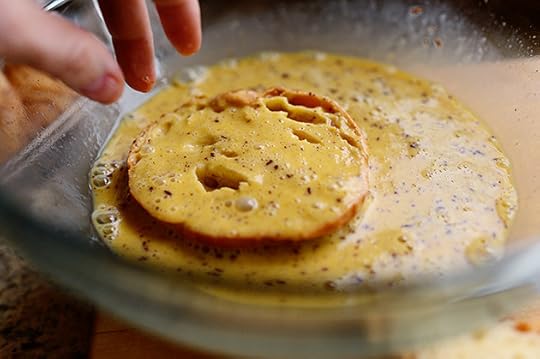 Then the other side…
 Then set them on a plate while you get the pan ready.
 I’d been heating a nonstick skillet over low heat the whole time I was getting the croissants ready, so by the time I added a little butter, it was nice and warm.
 Put as many pieces as will fit in the pan, cut side down. Then increase the heat to medium-low.
Note: You really want to control the heat as you’re making the French toast! Hover between low and medium-low, depending on how hot your stove gets, and move the toast around the pan a little as it cooks to keep it from getting overly brown. Basically, you want the heat low enough that it will warm the croissants through without getting the surface of the toast too dark!
So babysit. Just babysit.
(And a nonstick skillet really works best; if you don’t have one, that’s fine, just take extra care if you use a regular skillet.)
 After 3 to 4 minutes, turn the croissants over and let them cook on the other side for another 2 minutes or so. Remove them from the pan, add more butter to the pan, then continue cooking the rest of the croissants.
 To serve it up, arrange a top and bottom piece on a plate…
 With a leeeeetle butter…
 And, of course, warm syrup.
 Mmmmmm. Looks so good! Gorgeous texture, beautiful color. Like, inviting to the max!
 I sliced up a couple of strawberries and sprinkled them on, because then that turns this French toast into a fruit serving.
This is how my sick mind works.
 I’ll show you another way my sick mind works.
 A little squirt of whipped cream?
Oh, why not.
I’m not going to use a bunch of adjectives…I’m not going to use a bunch of adjectives…I’m not going to use a bunch of adjectives…
Just promise me you’ll try this soon! Its exquisite, drippy, delectable deliciousness will render you speechless. And rapturous. And euphoric.
(Okay, so I used an adjective or two. Or six. But after you try one bite, you’ll see what I mean.)
Here’s the handy dandy printable!
Recipe
Croissant French Toast
Prep Time: 5 Minutes
Cook Time: 15 Minutes
Difficulty: Easy
Servings: 8

Print Recipe
Ingredients
8 whole Croissants (a Rounder Shape Is Best)5 whole Eggs1/4 cup Half-and-half2 Tablespoons Sugar1 teaspoon Ground Cinnamon2 teaspoons Vanilla Extract Butter, For Frying And Serving Warm Syrup, For Serving Strawberries, For Serving (optional) Whipped Cream, For Serving (optional) Preparation Instructions
Split the croissants in half through the middle.
In a bowl, whisk together eggs, half-and-half, sugar, cinnamon, and vanilla. Dunk each croissant half into the mixture so that it's fully coated. Set pieces aside on a plate.
Heat a large nonstick skillet over low heat, then melt a small amount of butter. Add as many pieces as will fit, cut side down, then increase the heat very slightly (don't go above medium-low).
Allow the toast to cook on the first side for 3 to 4 minutes. Move it around in the skillet a bit to make sure it doesn't burn. When it's deep golden brown on the surface, flip it to the other side and let it cook for another 2 minutes or so.
Remove from the pan and cook the rest of the croissant halves.
Serve a top and bottom piece together with butter, warm syrup, strawberries, and whipped cream. Absolute heaven!
Posted by Ree on February 3 2014

January 31, 2014
Super Bowl Recipes!
I can’t believe that after Sunday night, football is going to be over. Over! The world is going to be a very dark, unkind place. What will become of us as a species? How will we spend our time? What is going to be left to live for?
I’m scared, my friends.
The good thing is, even though our lives as we know them are about to come to a crashing halt, we can at least go out in style by enjoying some delicious food during the big game.
For my entire archive of Super Bowl-friendly foods, click here: Super Bowl Recipes on The Pioneer Woman Cooks.
To make it easy, though, I’m listing some of my very favorites here. I’m actually still trying to decide my menu…but some of this list will definitely make an appearance!
 Queso Fundido! I just posted it the other day, but in case you missed it, here is the recipe. It is absolutely to die for, and such a pretty presentation.
 Dark Chocolate Brownies. Again, I just posted these this week…but they are a great, rich, chocoholic-pleasing brownie that football fanatics will love.
 And speaking of brownies…holy moly. These Knock You Naked Brownies are all that. If you ain’t tried them…you ain’t lived.
 If you’re needing to feed a crowd, this Spicy Dr Pepper Pulled Pork is ridiculously perfect. By far one of the most well-loved recipes on this site, this stuff is spicy, savory, sweet, and addictive.
 If you make the shredded pork, you can also whip up an easy cilantro slaw and make these luscious sandwiches. Just lay out the pork, the slaw, and buns and let everyone serve themselves!
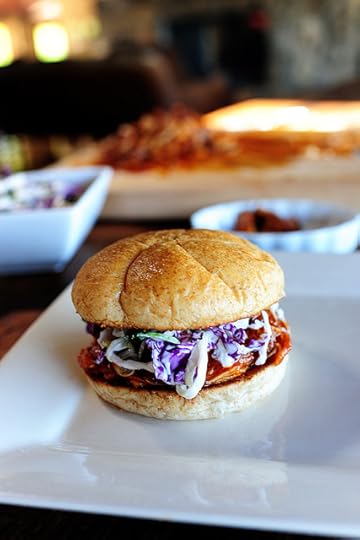 You could also make the cilantro slaw, but go the Barbecue Chicken Sandwich route instead. These are absolutely delicious!
 If you’re looking for a throwback to the early eighties, this Mexican Layer Dip is always a classic. This one’s from my website years ago, but my new holiday cookbook has an eight-layer version with grilled corn. Yum.
 If you’re needing good ol’ chips and salsa, look no further than this Restaurant Style Salsa recipe, which is possibly the most addictive recipe on my website, and I say that after years of emails and comments from folks who make this stuff by the gallon. It is salsa perfection.
 Sloppy Joes are also a good choice for serving a crowd. Make up a big pot, throw some buns in a basket, and tell your football guests to knock themselves out.
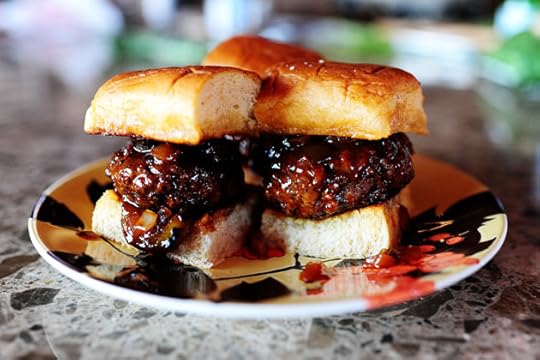 I have several slider recipes on my site, but these Spicy Whiskey BBQ Sliders are probably my faves. You can double it and have a big skilletful of simmering patties, then just serve them on split dinner rolls when everyone’s ready to eat.
 I’ll end with this luscious Grilled Corn Guacamole, which is really speaking to my soul for some reason.
Again, here’s the full Super Bowl archive if you want to browse: Super Bowl Recipes.
Hope you have a happy Super Bowl Sunday, everyone!

January 29, 2014
Dark Chocolate Brownies
 Are you a dark chocolate person or a milk chocolate person?
I have to say, I’m more in the light/milk chocolate camp myself. Always have been. Oh, I love a rich, dark chocolate bite or two…but I have to immediately wash it down with milk. Whole milk, preferably, that has been chilled to precisely 33.9 degrees. But that’s another story for another time.
My dad, on the other hand, has always been a dark chocolate addict. When I was growing up and my mom would buy those little bags of miniature Hershey’s candy bars, he’d go straight for the Special Dark chocolate bars no one else wanted. And I, of course, would scarf down the Krackels. Followed by the regular Hershey Bars. Followed by the Mr. Goodbars. Then I’d go watch Gilligan’s island and pull all the heads off my little sister’s Barbie dolls.
Over time, I’ve found that there’s no gift—for Christmas or birthday—that my dad has responded to more passionately than a box of good dark chocolates. So when I fiddled with these dark chocolate brownies this week, I knew I’d found the treat I’ll make him the next time he’s here. And he’s definitely getting a box of these on Valentine’s Day!
For these ultra-rich, ultra-decadent brownies, I basically adapted the regular brownie recipe that I’ve used for years. I made it in the saucepan rather than the mixer, and I added cocoa powder on top of the baking chocolate. Then, just before putting the batter into the pan, I stirred in chocolate chips. Whew! Chocolate, chocolate everywhere. There was no escape from it! And the results were delicious…though I have to admit to needing a swig of milk between each bite. Tiny squares of these brownies are more than enough, and if the idea that a little dark chocolate every day wards off depression…these babies could be downright medicinal.
Here’s how I made them!
 In a medium saucepan, add some butter and unsweetened chocolate. You can use the basic grocery store brand or the nice, nice, gourmet brand (if you can find it). Any unsweetened chocolate will do as long as it’s 5 ounces!
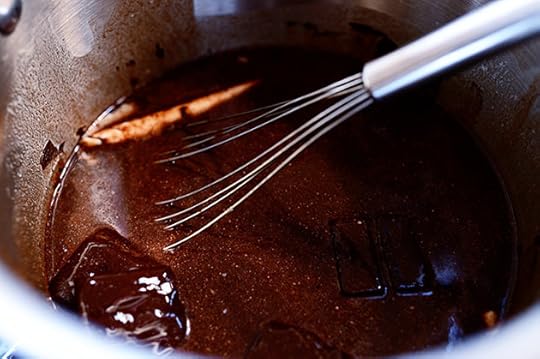 Heat them over low heat, whisking every 29.7 seconds, until it’s all smooth and melted and perfect.
 When it’s all melted, sprinkle in some cocoa powder.
Yummy!
 Stir the mixture until smooth, then remove it from the heat and let it cool off the stove for about 5 minutes or so.
 Next, to cut all this crazy, insane chocolate richness, pour in 2 cups of sugar…
 And stir it until it’s just barely incorporated.
 Add a tablespoon of vanilla, because vanilla makes everything a little more heavenly.
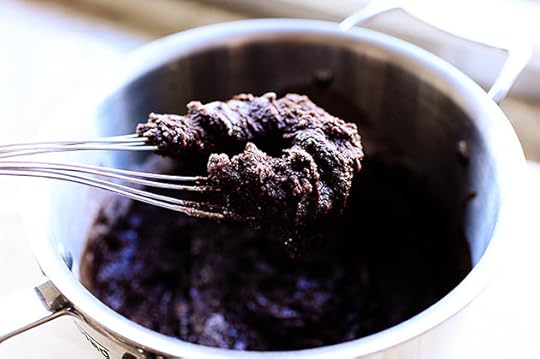
 After the sugar and vanilla, the mixture should be somewhat cooler now. So add three eggs, one at a time, stirring gently after each addition.
 Then sprinkle in flour…
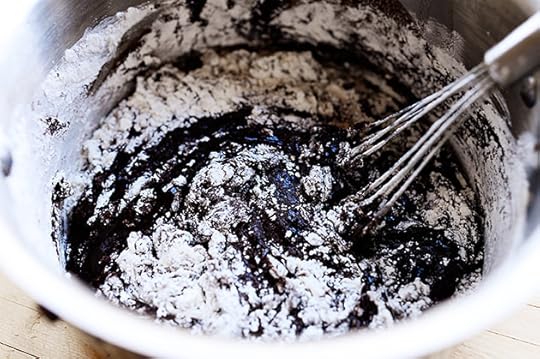 And stir it until it’s halfway combined.
 Then, to put the nail in the coffin of the chocolatey nature of these brownies, add some SEMI-SWEET chocolate chips. These are “dark chocolate” chips, which I thought would perfectly bring out the chocolate flavor of the brownies. But in hindsight, I think I should have added semi-sweet. The dark chocolate was a little out of control!
But don’t listen to me. I like Krackel bars.
UPDATE: I whipped up another batch of these this morning as I was making breakfast burritos for the cowboys. They are EVEN BETTER with semi-sweet chocolate chips. That’s definitely the way to go! The chocolate flavor is more well-rounded. Amen!
 Stir the mixture all together until it’s just barely combined…
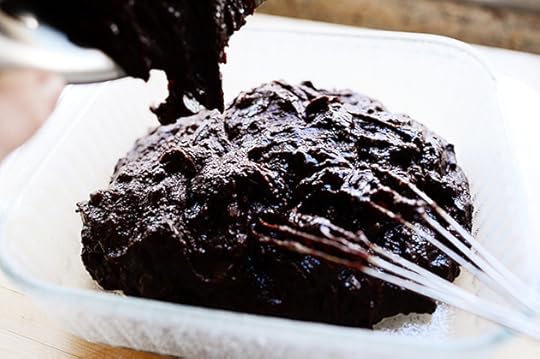 Then pour it into a very well greased and floured (or sprayed with baking spray) 8 x 8 OR 9 x 13 inch cooking pan.
About the pan size: A square pan will result in thicker brownies. These look great, but sometimes (depending on ovens, kind of pan, and astrological sign) it can be a challenge for the center to fully bake before the edges start to brown.
A 9 x 13 inch pan will result in a thinner brownie, but the baking can be a little more even.
Either one is fine—just keep an eye on it while it’s baking!
 Smooth out the top…
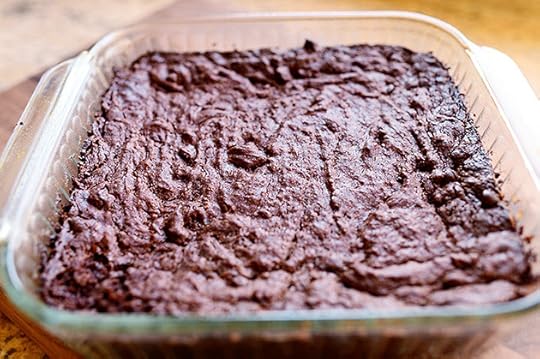 Then bake it at 350 degrees for 40 to 45 minutes if using a square pan, a little less if using a rectangular pan.
 Now, the hardest part is letting them cool. Ironically, even though brownies are notoriously delicious warm, I’ve found that they really turn out better when you allow them to cool completely and “settle down” before eating them. You can always nuke them later if you want to do an ice cream sundae or something. (Oh, that sounds awfully good right now.)
They should come right out of the pan (you might need to run a knife along the edges)…
 Then you can sprinkle away with powdered sugar!
 A little goes a long, long way so I decided to cut them into small-ish squares.
 Even these might be a little too big for how rich the suckers are!
 Ahhhh. A glorious sight!
 Ahhhh. A glorious bite!
 If you love chocolate, and I mean rich, rich, rich dark chocolate, you will love these!
 (Pssst. How delicious would they be with coffee ice cream? Wow!)
Here’s the handy dandy printable.
Recipe
Dark Chocolate Brownies
Prep Time: 15 Minutes
Cook Time: 45 Minutes
Difficulty: Easy
Servings: 16
Print Recipe
Ingredients
1 cup Butter5 ounces, weight Unsweetened Chocolate1/4 cup Unsweetened Cocoa Powder2 cups Sugar1 Tablespoon Vanilla3 whole Large Eggs1-1/4 cup Flour3/4 cups Semi-Sweet Chocolate Chips Powdered Sugar, For Sifting Preparation Instructions
Preheat oven to 350 degrees.
In a medium-large saucepan, melt the butter with the unsweetened chocolate over low heat, whisking occasionally until smooth and melted. Sprinkle in cocoa powder and whisk to combine. Remove the pan from heat and allow to cool for about 5 minutes.
Stir in sugar and vanilla until just combined.
One at a time, stir in the eggs.
Gently stir in the flour until halfway incorporated. Add the chocolate chips and stir just until combined.
Pour batter (it will be very thick!) into a greased 8 x 8 or 9 x 13 baking pan. (Square pan will result in thicker brownies.) Spread to even out the top and place in the oven.
Bake for 40 minutes, then check the brownies with a toothpick. If it is overly gooey/messy, return to the oven for 5 to 10 more minutes. (Just be careful not to burn the edges.)
Allow to cool completely (important!), then sprinkle with powdered sugar and cut into small squares. The brownies are very rich!
*Note: When warm the brownies will seem overly gooey/soft. As they cool, they will firm up. (Brownies are best several hours after baking, or even the next day!)
Posted by Ree on January 29 2014

January 27, 2014
Queso Fundido
 Queso Fundido is everywhere. It’s taking over the world. It’s sweeping the nation! My friend Gaby made it a couple of days ago, my friend Adrianna made it last year, and everyone has their own little spin on the luscious Mexican munchie. The common denominator, of course, is queso, otherwise known as cheese, otherwise known as the thing that makes me want to get out of bed in the morning, and as long as you melt a bunch of cheese with another ingredient or two and serve it with tortillas or chips (or both!) you’re on the right track.
When I first learned about Queso Fundido, I realized I’d been unknowingly making it all my life. When I was growing up, I’d sometimes put a little (okay, a big honking) slice of cheese on a plate and microwave it until it was gooey. And then I’d just stand there and eat it. With a fork. Completely devoid of shame or regret. And even though I was missing the meat component of Queso Fundido, I certainly had the cheese part down pat.
“Queso Fundido” translates to “molten cheese” (or “melted cheese”) and this skillet of wonderfulness definitely has plenty to spare! This is a classic Mexican appetizer (actually, the original Mexican version is flambéed…using booze!) that you can customize however your heart desires. And it’s absolutely perfect for the Super Bowl! Keep it pared down, with only cheese and sausage…or dress it up a little bit as I do in this post.
This is absolutely, positively a cheese lover’s paradise.
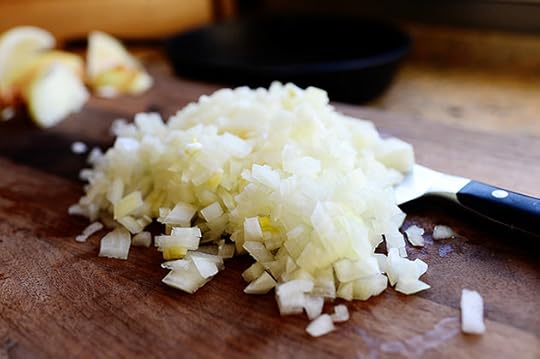 Chop up an onion…
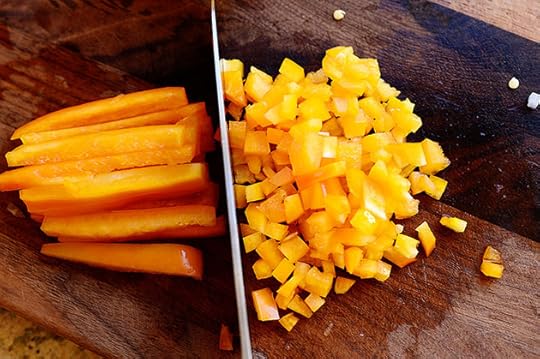 Then dice up a yellow bell pepper…
 And a green bell pepper.
And actually, you can use any color of bell pepper you want: red, yellow, orange, green. Just let your conscience be your guide.
But here was my thinking: I’m putting diced tomato on the whole delicious mess when it’s done. So that’ll take care of the red!
I spend entirely too much time thinking about color.
 Next, cook some sausage! I used good ol’ breakfast sausage (otherwise known as the J.C. Potter stuff) but you can use chorizo if you really want to go nuts. (Chorizo is nice and spicy!)
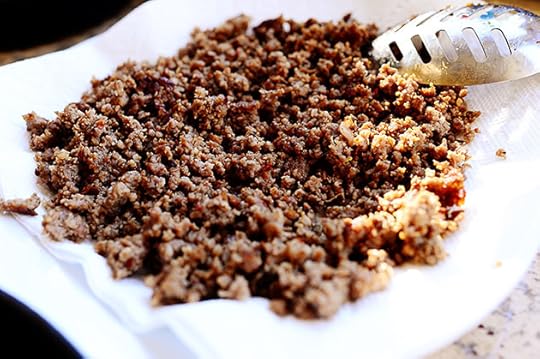 When the sausage is totally cooked, remove it to a paper towel to drain. Because it will be in with all the melting cheese later, you want to remove as much of the grease as possible.
 If there’s any excess grease in the skillet, pour it out and blot it with paper towels, if necessary. Then add the onions and peppers to the skillet and cook them over medium-high heat.
 You’ll want to cook them for a good 5 minutes or so, until they’ve softened up a bit and turned golden brown in color! Then just remove the skillet from the heat and set it aside.
(Note: I won’t use all of these veggies since I’m using a smaller skillet.)
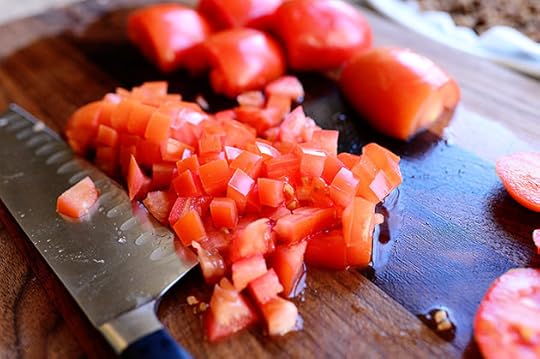 Dice up some tomatoes. You’ll need them later!
 Next: The Cheese. This is obviously a hugely important component to Queso Fundido. You can really use any cheese you want, but you want it to be the kind of cheese that becomes “stringy” when it melts. So Monterey Jack or mozzarella are perfect!
 Grate up a whole bunch of it seeing that it’s, well, the most important part of the whole dish.
 I also grate up some Mexican “Queso Quesadilla” cheese, which I discovered is pretty much the same as Monterey Jack!
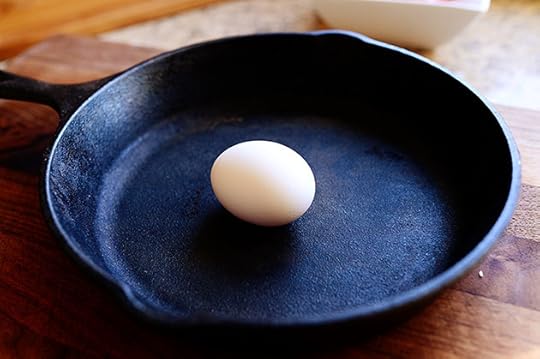 Now, the skillet size is another variable. I like to use smaller skillets for Queso Fundido—this is about 6-7 inches, I think—because the queso disappears faster…which you want, because otherwise, in a big skillet, it might not get eaten fast enough and the cheese might start to firm up, which is always a tragedy of epic proportions.
You can also use a regular glass or ceramic baking dish—it doesn’t have to be a skillet!
You can also split it all up among a few smaller vessels.
Or, of course, you can do it in a big ol’ skillet. Just make sure you have plenty of guests to gobble it up!
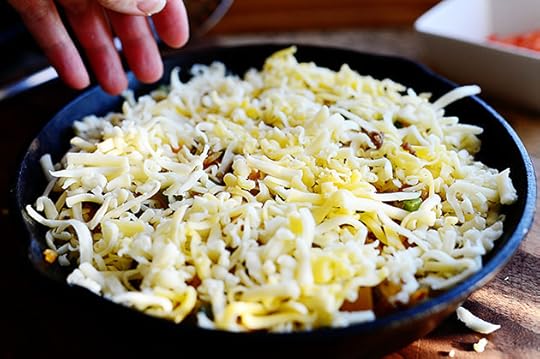
 Start with a layer of cheese, please.
 Then add a layer of sausage, por favor.
 Then another layer of cheese…
 And a layer of the veggies.
Note: If you have veggies left over, just save them in the fridge and make an omelet!
Another note: You can just use 1 onion and 1 bell pepper if you don’t care about representing all the colors of the rainbow. This recipe is very flexible.
 End with a layer of cheese…
 A little more sausage…
 And a little more cheese, just so the sausage is covered.
 Finally, to give it all a nice kick, give it a light sprinkling of chili powder! You can also do a really light sprinkling of cumin if you’d like. A little extra flavor never hurt anyone.
 Pop it in a 400 degree oven, and start watching it after about 4 to 5 minutes. You want to make sure the cheese is really hot and bubbly but not so much so that the cheese starts to harden. So just start peeking about 4 minutes in…but truth be told, it’ll probably need to be in there for a good 8 minutes or so. Possibly more, depending on how big or small your vessel is.
 Now, this is perfectly delicious as it is and you could go ahead and serve it now.
But it’s not nearly colorful enough for me.
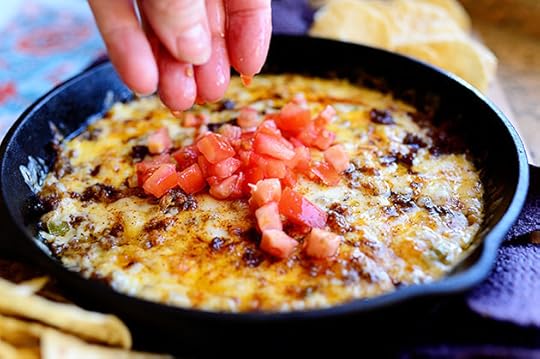 Top the whole thing with the diced tomato the second it comes out of the oven!
 Oh, dear.
But there’s still one more thing I need to do.
 Chopped cilantro!
 Just what it needed.
 Before I dive into the center of this and totally embarrass myself…let’s just take a final moment to look at this skillet full of perfection. I mean…melted cheese. Sausage. Peppers. Onions. Cool, fresh tomatoes. Fresh, flavorful cilantro.
The world is a beautiful place.
And have I mentioned I love cheese? I’m not sure if I’ve made that clear in the 8 years I’ve been blogging.
 Oh, and remember that thing I mentioned a few seconds ago about diving in? Well…that’s exactly what I did.
 Have a fork nearby. If it’s hard to dig the chips in without them breaking, the fork can help wrangle the cheese a bit!
 If you need something fabulous to serve your Super Bowl guests…
 If the wings and brownies and chili and sliders just aren’t enough…
 This is definitely the perfect solution!
Real quick, just a couple of tips/reminders:
* The skillet will be very hot, so be sure to wrap the handle in a cloth and tell your guests that it’s a hottie.
* Be sure to watch it in the oven to make sure the cheese doesn’t “overcook.”
* I can’t emphasize enough the importance of serving this piping hot right out of the oven! It changes pretty quickly as it starts to cool, and you want to experience maximum meltiness.
You’ll love this, guys!
Here’s the handy dandy printable.
Recipe
Queso Fundido
Prep Time: 10 Minutes
Cook Time: 20 Minutes
Difficulty: Easy
Servings: 12

Print Recipe
Ingredients
1/2 pound Hot Breakfast Sausage (such As Jimmy Dean Or J.C. Potter) Or Chorizo1 whole Medium Onion, Finely Diced2 whole SMALL Bell Peppers (any Color Combination), Seeded And Finely Diced1 pound Monterey Jack, Grated (OR Mozzarella, Or Other Stringy Melting Cheese), Grated Sprinkle Of Chili Powder3 whole Roma Tomatoes, Diced1/4 cup Cilantro, Chopped Tortilla Chips For Serving Preparation Instructions
Preheat oven to 400 degrees.
In a large skillet, cook and crumble the sausage until brown. Remove from skillet and drain on a paper towel. Pour off any excess fat. Add onions and bell peppers to the skillet and cook over medium-high heat until the veggies are soft and golden brown, about 7-8 minutes. Remove from heat and set aside.
To build the skillet, place 1/3 of the cheese in a medium-sized ovenproof skillet. Add half the sausage. Add another third of the cheese, then as much of the veggie mixture as you'd like (you may have a little left over.) Add almost all of the remaining cheese, the rest of the sausage, then whatever cheese you have left. Sprinkle the top very lightly with chili powder.
NOTE: Depending on the size of your skillet or baking dish, you may have some ingredients left over. Just build so that the ingredients roughly reach the top of the skillet; they'll shrink quite a bit once the cheese melts!
Place into the oven and start watching it about 4 to 5 minutes in. You want to bake it until the cheese is totally melted, hot, and slightly bubbling...but before the cheese starts to firm up/harden. (In other words, you still want the cheese to be extra gooey.)
Remove from the oven, top with the diced tomatoes, sprinkle on the tomatoes, and serve immediately with tortilla chips!
NOTE: Be sure to have everything ready so you can serve the queso fundido pretty much right out of the oven. It's best when piping hot!
IMPORTANT: Wrap a cloth around the skillet handle so guests won't burn themselves.
Posted by Ree on January 27 2014

January 24, 2014
Encore! (Winner Announced!)
The winner of the beautiful blue mixer and cookbook is…
#9333 Chris K: “When the kids were little, it was Easter. Loved the egg coloring and the egg hunt after. Now it’s Mother’s Day!”
Congratulations, Chris! Contact prizes@thepioneerwoman.com to claim your prize!
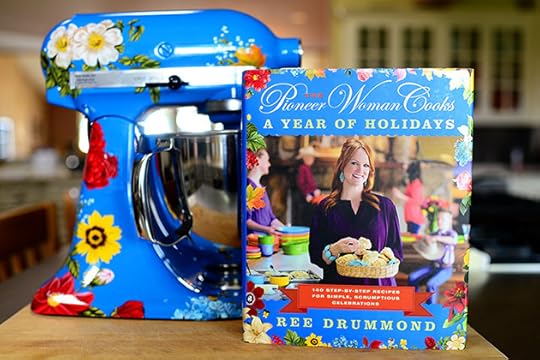 Today, because the Super Bowl, Valentine’s Day, Easter, Mother’s Day, Father’s Day, Fourth of July, and a bunch of other fabulous food-centric occasions and holidays are still upon us—and because I’ve gotten lots of requests for another one of these giveaways—I’m giving away one of these fabulous Pioneer Woman Holiday Edition Mixers along with a signed copy of my holiday cookbook!
(Pssst: There’s a whole Big Game/Super Bowl section in the book. I love that kind of food, man!)
 Here’s another peek in case you missed the mixer the last few times.
 It’s got pretty flowers here…
 And there…
 And, because it’s a holiday mixer, a poinsetta here…
 and an Easter lily there.
TO ENTER
 To enter the giveaway, just answer the following question in the Comments section of this post:
“Besides Thanksgiving and Christmas, what is your favorite holiday of the year?”
Are you a hopeless Valentine’s Day romantic?
A sucker for Easter?
A patriotic fan of Fourth of July?
Just shout out one of your favorite holidays throughout the year and you’re entered to win the holiday mixer!
THE RULES
One entry per person, please.
I’ll announce the winner Sunday!
(Note: If you get an error message, nine times out of ten, your entry has gone through. For a small amount of people, an error message is generated even though the entry was received.)
Lots of Love,
P-Dub
Custom KitchenAid mixer created by the amazing Nicole at Un Amore!
Note: Winner has been announced and comments are now closed.

Encore!
Today, because the Super Bowl, Valentine’s Day, Easter, Mother’s Day, Father’s Day, Fourth of July, and a bunch of other fabulous food-centric occasions and holidays are still upon us—and because I’ve gotten lots of request for another one of these giveaways—I’m giving away one of these fabulous Pioneer Woman Holiday Edition Mixers along with a signed copy of my holiday cookbook!
(Pssst: There’s a whole Big Game/Super Bowl section in the book. I love that kind of food, man!)
Here’s another peek in case you missed the mixer the last few times.
It’s got pretty flowers here…
And there…
And, because it’s a holiday mixer, a poinsetta here…
and an Easter lily there.
TO ENTER
To enter the giveaway, just answer the following question in the Comments section of this post:
“Besides Thanksgiving and Christmas, what is your favorite holiday of the year?”
Are you a hopeless Valentine’s Day romantic?
A sucker for Easter?
A patriotic fan of Fourth of July?
Just shout out one of your favorite holidays throughout the year and you’re entered to win the holiday mixer!
THE RULES
One entry per person, please.
I’ll announce the winner Sunday!
(Note: If you get an error message, nine times out of ten, your entry has gone through. For a small amount of people, an error message is generated even though the entry was received.)
Lots of Love,
P-Dub
Custom KitchenAid mixer created by the amazing Nicole at Un Amore!
January 20, 2014
Easy Caramel Sauce
 I made this easy caramel sauce (emphasis on unbelievably luscious) yesterday for the thousandth hundredth millionth time, and while it appears on this website as part of this Ice Cream Pie recipe (which, incidentally, was posted almost exactly four years ago, which was approximately four years after I started blogging, which means I’ve almost been doing this website blogging internet web crazy thing for 8 years, which means my jeans don’t fit), I realized that I’ve never posted the recipe for the sauce by itself. And it’s just so wonderful, so incredibly delicious, so easy…I wanted to right that wrong immediately so that it could be easily available for whatever desserts you need it for.
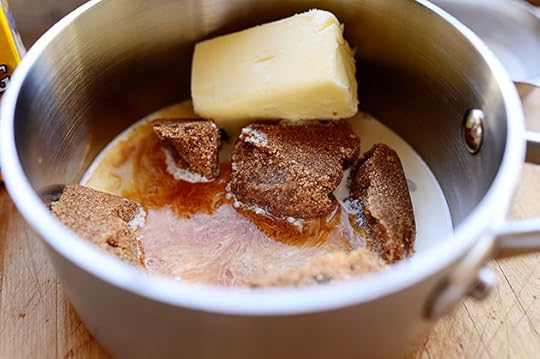 The sauce is ridiculously easy: Just combine brown sugar, butter, half-and-half OR heavy cream, vanilla, and salt in a small saucepan.
(I used heavy cream in this recipe because I was out of half-and-half. Cream makes the sauce thicker, but either one is fine.)
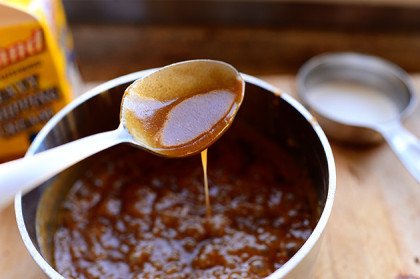
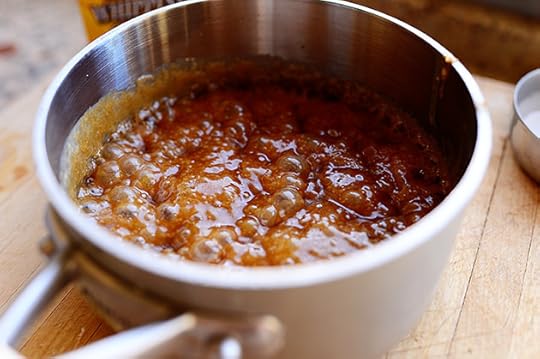 Bring it to a boil over medium-low to medium heat, and continue letting it bubble gently for several minutes, or until slightly thickened.
(*Note: I’m not using some magical cutting board here; I quickly brought my saucepan over to the cutting board by the window so I could show it in the best light. It’s a foodblogging thing.)
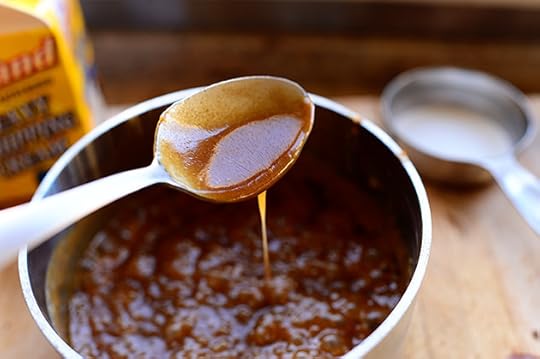 It takes almost no time at all for it to be perfect! It really should be called “Brown Sugar Sauce” because you’re not actually going through the whole process of caramelizing…but for all intents and purposes…it’s caramel!
Do you say care-uh-mell?
Or do you say car-muhl?
Or do you say car-uh-muhl?
(I say the second one.)
(I’m weird like that.)
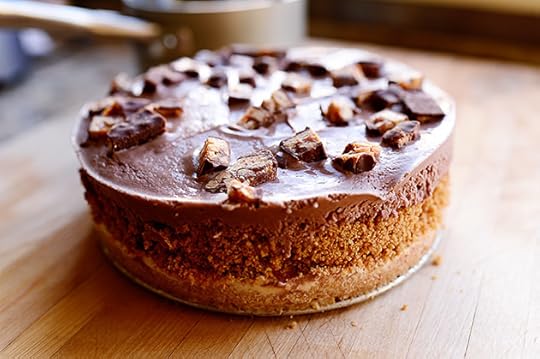 Next, just grab the dessert that was supposed to be freezing/setting in the freezer, even though it’s still got 3 hours left before you’re supposed to slice into it, because you are a foodblogger and it’s almost 5:00 p.m. and if you don’t get this shot now, it isn’t going to happen.
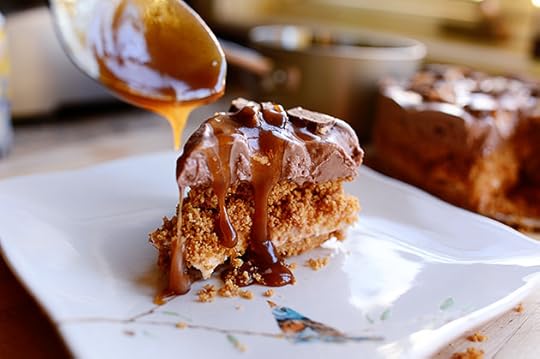 Don’t stress out if you slice into said dessert and it crumbles a bit. The caramel sauce is going to make it all better, and in seconds you just won’t care.
It’s delicious! Make it anytime you need a little caramel sauce in your life and you don’t want to slave over a hot stove for very long. And you can serve it hot, warm, or cold…it’s great no matter what.
Here’s the handy dandy printable!
Recipe
Easy Caramel Sauce
Prep Time: 2 Minutes
Cook Time: 8 Minutes
Difficulty: Easy
Servings: 8
Print Recipe
Ingredients
1 cup Brown Sugar1/2 stick Butter (4 Tablespoons)1/2 cup Half-and-half Or Cream (cream Will Make It Thicker)1 Tablespoon Vanilla Pinch Of Salt Preparation Instructions
Mix all ingredients in a medium saucepan over medium-low to medium heat. Cook while whisking gently for 5 to 7 minutes, until thicker. Turn off heat. Serve warm or refrigerate until cold.
If sauce is thin, just continue cooking for a few more minutes.
Posted by Ree on January 20 2014

Ree Drummond's Blog

- Ree Drummond's profile
- 2036 followers

