
Ree Drummond's Blog, page 37
October 14, 2013
Haunted House Cookies
 My new holiday cookbook comes out in…well, almost two weeks.
I’m excited!
And since it’s getting close to Halloween, I wanted to just share a fun idea for a Halloween treat. It sort of kind of indirectly appears in the book.
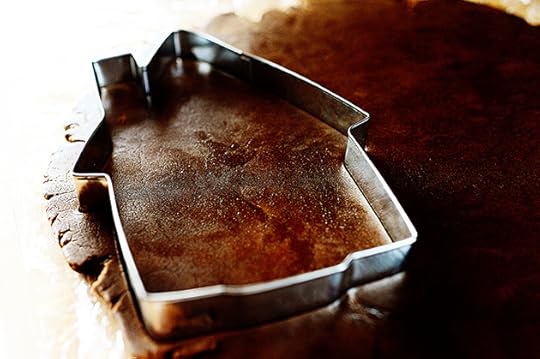 In my holiday cookbook, rather than construct a big, intimidating, daunting, bricks-and-mortar gingerbread house, which probably would have fallen over before I’d had a chance to photograph it since structural soundness has never really been my strong suit, I decided to do much more—well, doable—gingerbread house cookies instead. I used this huge (as in, 8-inch high) house-shaped cookie cutter, which was made expressly for the purpose of making gingerbread house cookies, but you could easily just use a dinner knife to carefully cut a rough house shape like this one. Or you can make a stencil so each cookie is exactly the same. Whatever your heart tells you to do!
(I got my cookie cutter here: Giant Cookie Cutter.)
And you can use any ol’ gingerbread dough like the one in these photos or just a good chocolate cookie dough like this one here: Chocolate Cookies with Toppings. Or, heck, just use a sugar cookie dough. Anything you can roll out, cut, and bake will do just fine.
 Anyway, you roll out the dough, cut the house shapes, then transfer the huge houses to baking sheets. These were so big, I could only fit two on a half-sheet pan. But you could make smaller ones for sure!
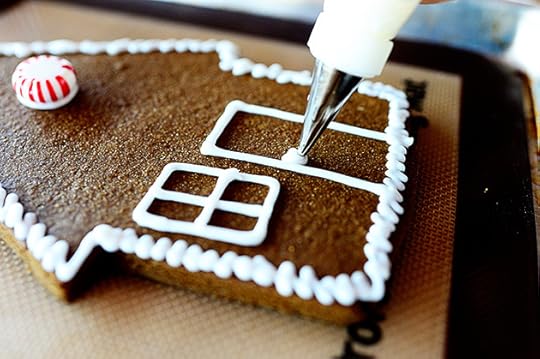 Then you just make a batch of Royal Icing, put it in a piping bag with a small tip, and go to town!
Here’s the simple Royal Icing recipe:
ROYAL ICING
2 pounds powdered sugar, sifted
1⁄3 cup whole milk
2 egg whites
Beat all ingredients with a mixer until thick and glossy. Add more powdered sugar if it seems too thin (size of eggs can affect consistency.) Just play with it until it’s right. The icing should be stiff enough to “stand still” when piped and not run.
 My cookbook shows lots of different ways to decorate the cookies to look like gingerbread houses.
 The possibilities are endless, and you never have to worry about standing them up, gluing them together, and praying fervently that they stay together.
 And look at what you can do for Halloween!
 Just make everything look wonky, crooked, throw in a ghost, and whatever other spooky things you can think of. This is a really simple version, but just think of the possibilities: black licorice snakes, spiders, candy corns…the possibilities are endless.
And here’s a really fun idea, whether you do it for Halloween or Christmas: Bake up a bunch of cookies, make up a bunch of Royal Icing in several disposable piping bags, assemble little dishes of candies and sprinkles, and have a cookie decorating party for the kids! Whether it’s an after school get-together or a slumber party, this’ll keep them occupied for a long, long time!
Just have a broom nearby for the cleanup.
And several damp washcloths for icing-caked fingers.
(But that’s part of the fun of the holidays!)


October 9, 2013
Carb Buster Breakfast
 When I was in New York City last weekend, I stayed in this hotel and ordered room service for breakfast from Fireside, the hotel’s restaurant, Saturday morning. I wanted to get something that would keep me going for a good part of the day, as I knew I wouldn’t have time to have lunch, and while my ever-demanding id was begging me to order pancakes or French toast or one of those other naughtily delicious things on room service menus, my eyes instead went to something called a “Carb Buster.” And since Jillian Michaels and I are still in the middle of our fling, I knew she’d love me even more for making such a choice.
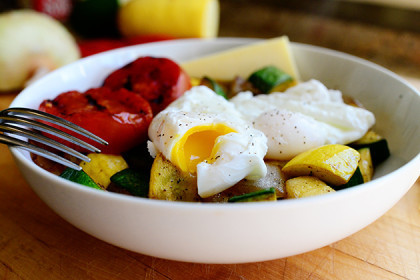
It turned out to be just the ticket! A couple of poached eggs on a bed of delicious veggies, a couple of links of chicken sausage, and a single wedge of cheese, which had softened from sitting on the very warm plate and was perfectly soft and mushy. I wouldn’t exactly call it low-calorie, but it was absolutely scrumptious and definitely gave me what I needed to get on with my day.
Yesterday, I recreated it at home since I hadn’t been able to get it out of my mind since Saturday. I left out the sausage component, as it’s really the poached eggs that are the stars of the show, and of course you can substitute any veggies you happen to have in your fridge: mushroom, bell peppers, etc.
(Oh, and a slice of avocado wouldn’t be shabby at all.)
Here’s how to make it!
 Slice off the tops of a zucchini and a yellow squash.
 Then quarter them lengthwise…
 And cut them into pieces. You need about a cup of each.
 Do the same to half an onion: Chop it into large chunks.
 Then grab a tomato or two (depending on the size) and cut a couple of really thick slices.
 Now, in a skillet, melt a tablespoon of butter or a little olive oil over high heat. Your choice!
 Throw in the onion…
 And stir it around, cooking it for 2 or 3 minutes.
 Throw in the zucchini and squash…
 Sprinkle them with salt and pepper…
 And cook them for about 3 to 4 minutes until they’re golden brown and getting softer. Then just turn off the heat and set the skillet aside.
 If you have a grill pan, place the tomato slices over medium-high heat…
 Until they have nice little grill marks. Then just remove them to a plate and set ‘em aside, too. If you don’t have a grill pan, just throw them into a hot skillet to try to get a little color on them.
 Now it’s time to poach the eggs! Bring a saucepan of water to a very gentle boil, then add a teaspoon of vinegar to the water. After that, use a wooden spoon to stir a whirlpool in the water…
 Then crack an egg…
 And drop it right in the middle of the whirlpool. It’ll slowly spin around in a circle and the whites will eventually fold in on themselves and come together.
 Let the egg cook for about a minute—just long enough to set—then remove it with a slotted spoon and repeat with the other egg. Check the doneness of both yolks; if they seem too soft, just drop them back into the water for another 30-45 seconds until it seems right.
I don’t mind these stringy whites, but you can always pull them off if you want a nice, perfect poached egg.
 To serve it all up, pour the veggies into a bowl or on a plate and place the tomato slices over to the side.
 Then one by one, lay the poached eggs…
 Right on top.
 Slice a wedge of cheese. This is Monterey Jack, but any ol’ cheese will do!
 Place the cheese over on the side, but make sure it’s touching the veggies so it’ll get soft and miraculous.
 So far so good!
 But it needs a little S & P, baby.
This is looking…perfect.
 Time to dig in!
 Oh my lands. Look at that.
Soft egg yolks are my love language.
I feel like I’m looking into the egg’s soul!
Enjoy this, guys. Truth be told, this bowl is enough for two people…
Unless you’re me. In which case, grab a fork and dive in! I will say that I missed having some kind of sausage on the side, so if you’re so inclined, add a link or two!
Here’s the handy printable.
Recipe
Carb Buster Breakfast
Prep Time: 5 Minutes
Cook Time: 10 Minutes
Difficulty: Easy
Servings: 1
Print Recipe
Ingredients
1 Tablespoon Butter Or Olive Oil1/2 cup Diced Zucchini1/2 cup Diced Yellow Squash1/2 whole Medium Onion, Cut Into Chunks Salt And Pepper1 whole Tomato, Sliced Thick2 whole Eggs1 teaspoon Vinegar1 slice Cheese (Monterey Jack, Cheddar, Swiss, Etc) Preparation Instructions
Melt the butter in a medium skillet over medium high heat. Add the onions and cook until 2 to 3 minutes, or until starting to soften. Add the zucchini and squash, sprinkle with salt and pepper, and stir to cook for 3 to 4 minute. Remove from the heat and set aside.
Grill the tomato slices on a grill pan or simply sear them in a hot skillet. Remove and set aside.
Bring a medium saucepan of water to a gentle boil. Add the vinegar. Use a wooden spoon to carefully stir the water into a circular "whirlpool." Crack one egg into the water and allow it to swirl around in the water until the egg begins to set. Let it stay in the water for 1 minute, then remove it with a slotted spoon and set it on a plate. Repeat with the other egg. If eggs need to be cooked longer, just add them back to the water for 30 seconds at a time.
Spoon the vegetables on a plate or in a bowl and set the eggs on top. Lay the tomato slices on the side. Place the cheese slice on the side so that it starts to soften from the heat.
Sprinkle eggs with salt and pepper and serve!
Note: Add a link or two of chicken or pork sausage if desired.
Posted by Ree on October 9 2013

October 7, 2013
Happy Soup Season!
It was nice and brisk and perfect outside this morning.
So much so…that I didn’t want to get out of bed!
My mom is here visiting and today we’re going to cook a few things, and I’m trying to choose one of these soups. I might wind up making them all, as I love them equally.
Soup are like children that way.
I’ve featured many of these here before…but soup season is fast approaching and I don’t want you to miss any of ‘em! Just click on the photos or recipe titles for the individual printables and step-by-steps.
Happy Soup Season, everyone!
(Note: I kept the descriptives to a minimum, as the photos do most of the talking.)
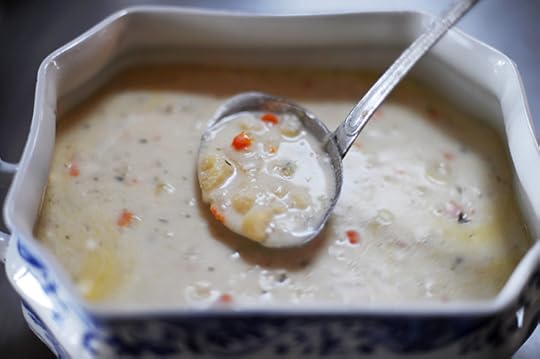
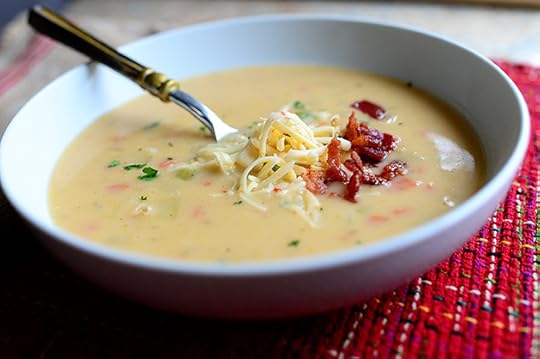 Potato Soup. Heaven.
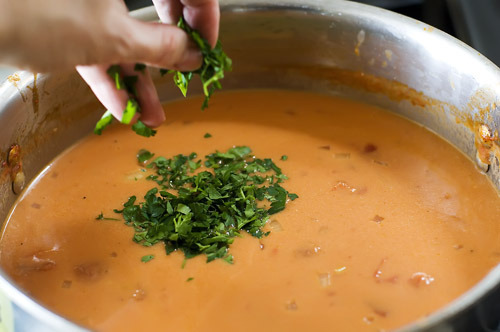 Sherried Tomato Soup. Addictive.
 Cauliflower Soup. Exceedingly comforting.
 Chicken Tortilla Soup. Spicy and lovely.
 French Onion Soup. Crazy, crazy good.
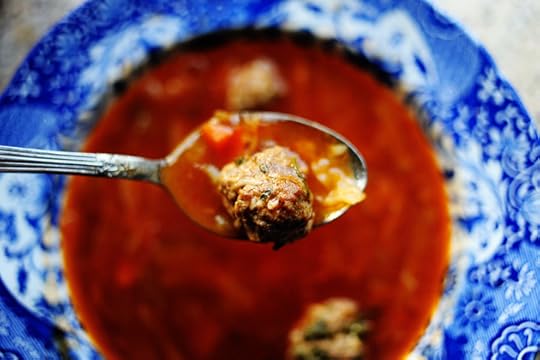 Italian Meatball Soup. Transcendent.
 Tuscan Bean Soup with Shrimp. Hearty times a hundred.
 Chicken and Noodles. Like Grandma used to make.
 Corn Chowder with Chilies. Perfection.
 Corn & Cheese Chowder. Perfection, Chapter Two.
 Italian Chicken Soup. You’ll cry from the bliss.
 Carrot Thyme Soup with Cream. If I could marry a soup, it might be this one. It’s like velvet.
 Sausage, Potato, and Kale Soup. I would trade any of my belongings for a bowl of this right this very second.
 And for the kids? Broccoli Cheese Soup. Ta Die Fer!
Hope you found some new soups you love!

September 30, 2013
Halloween Bark
 There are as many versions of Halloween Bark as there are grains of sand in all the beaches of the world.
And yesterday, even though we’re still a month away from the spookiest day of the year, I decided to whip some up.
And you know what? Halloween is only the second spookiest day of the year. The spookiest day of the year is actually the day I decide to clean out my pickup.
*Shudder*
Here’s how I made the bark yesterday! (And how exciting is it that we’re getting close to the holidays?)
 To make Halloween Bark, you need a bunch of…well, stuff. Some form of melting chocolate is a must (I used widely available almond bark but you can sub good quality chocolate or colored melting candies from the craft store), then you just need stuff to adorn it with: nuts, cookies, pretzels, candies, the kitchen sink, etc. I also used graham crackers as a base, but sometimes I don’t. There’s no right or wrong way to make it. The only wrong way to make it is if you don’t make it.
I realize that made no sense.
(How do you like that freaky mask in the background there? Thought you’d get a kick out of that.)
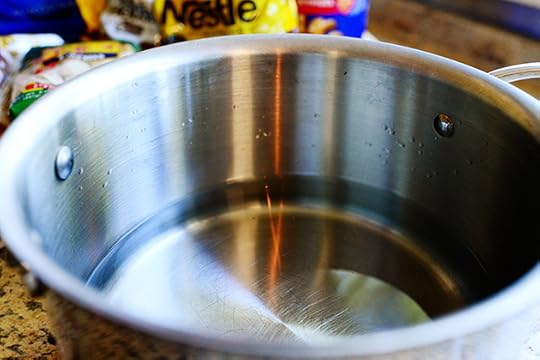 So first, you need to get the double boiler going! And by double boiler, I don’t mean you have to pull out the contraption labeled “Double Boiler” and sold in stores, because ‘dem ‘tings are unnecessary! I mean you get a saucepan and fill it with a little water…
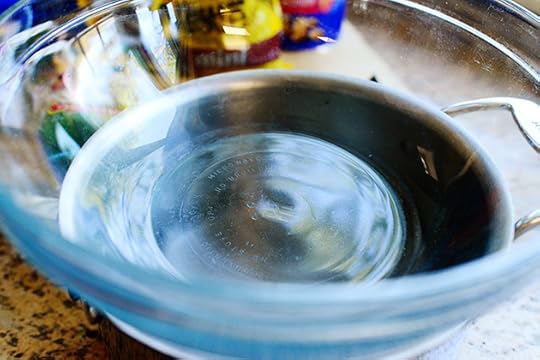 Then you plop a heatproof glass bowl on top…
 Then you grab the almond bark…
 And throw it in the bowl.
 I did a separate bowl of chocolate, for one very important reason: I wanted to do a separate bowl of chocolate.
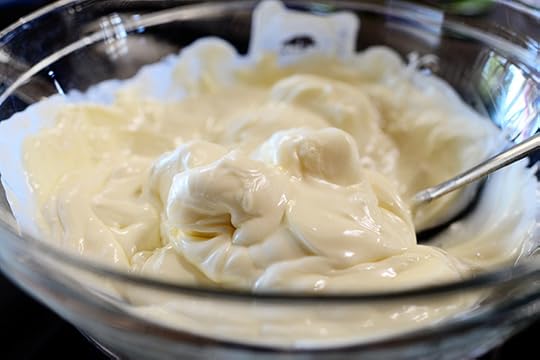 Set the pans over medium-low heat, and when the chocolate starts to soften…
 Stir it around occasionally so it melts smoothly.
 While everything’s melting, prepare all the good stuff: I used pretzel sticks (and chopped them in half later)…
 Then I grabbed some glorious pistachios…
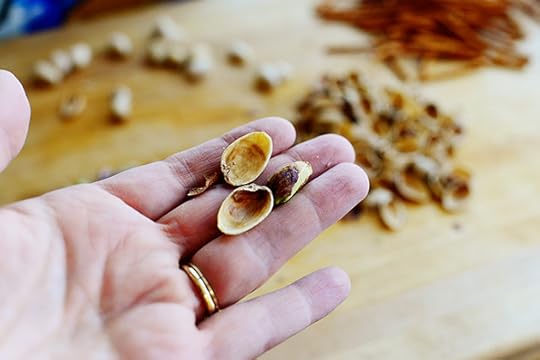 And cracked ‘em open…
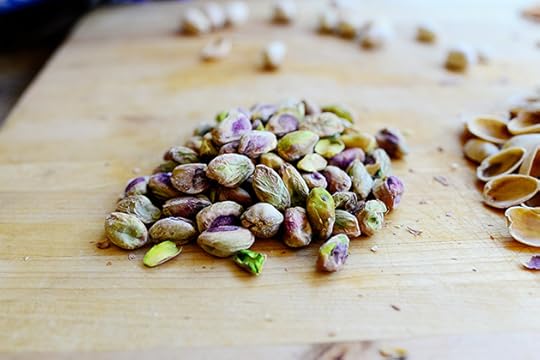 Until I had a great big pile.
 Then I chopped ‘em up a bit.
 I also thought it would be wildly appropriate to grab some Oreos…
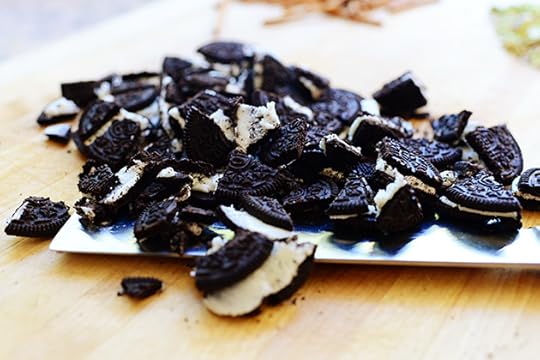 And chop those up, too.
 I also thought mini chocolate chips would be poifect…
 And finally, for a big injection of Halloween color, some Reese’s Pieces—otherwise known as “Reeseeeees Pieceeeees.”
 Now, there are lots of different ways to approach this: The classic way is just to smear a layer of chocolate or almond bark on a pan and sprinkle on a bunch of different toppings. But I love the barks that have a graham cracker base, so that’s what I’m-a-gonna-do.
 Just neatly lay a whole bunch of whole graham crackers on a large baking sheet (I lined the sheet with a baking mat, but you could use parchment…and it wasn’t overly necessary to line the pan, but I did it anyway. I’m just a wild and crazy gal.) Lay them edge to edge so there ain’t no space between ‘em.
 By now the almond bark is totally melted and smooth-a-licious. So just pour it onto the crackers…
 And use an offset spatula to gently spread it all over the surface.
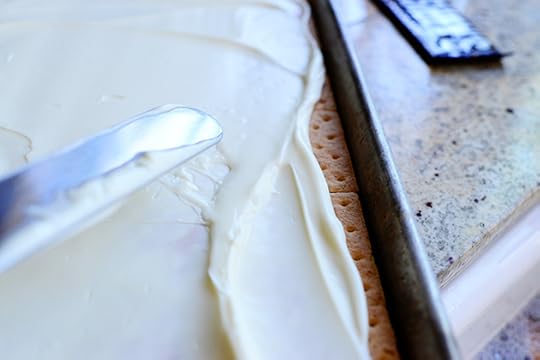 Get it all the way to the edges of the crackers…
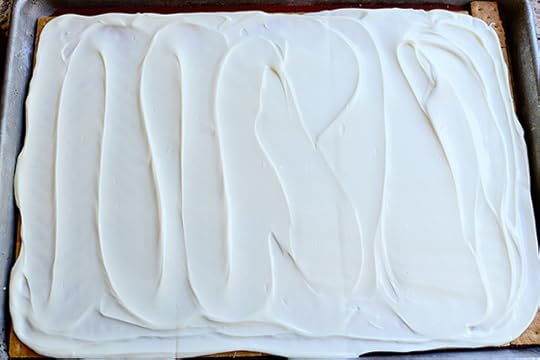 Then even it all up with the spatula, crating in the process an abstract design reminiscent of Picasso’s second cousin’s boyfriend’s uncle’s style.
 Now, while the almond bark is still soft, it’s time to start sprinkling!
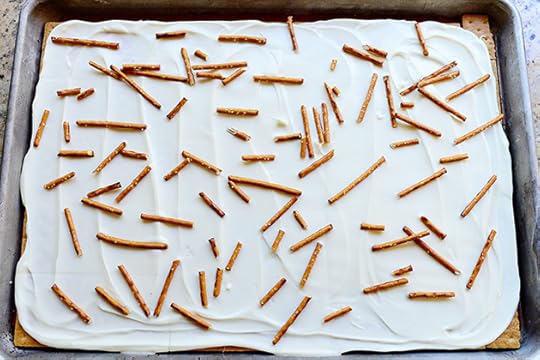 Start a little light; you want to leave plenty of room for other good stuff.
 And by “good stuff,” I mean Oreos.
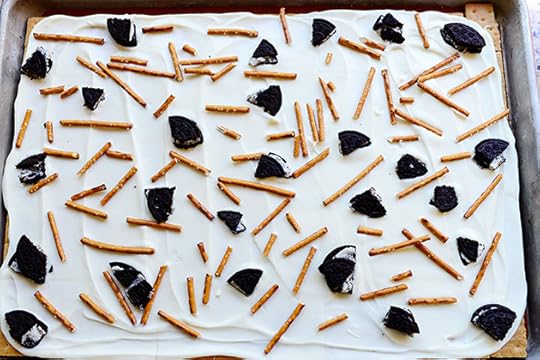 This probably isn’t enough…but in order to fool myself into thinking I’m practicing restraint, I’ll stop here on the Oreos for now.
 Next: The Reeseeeeees Pieceeeeeees!
 This is looking cute!
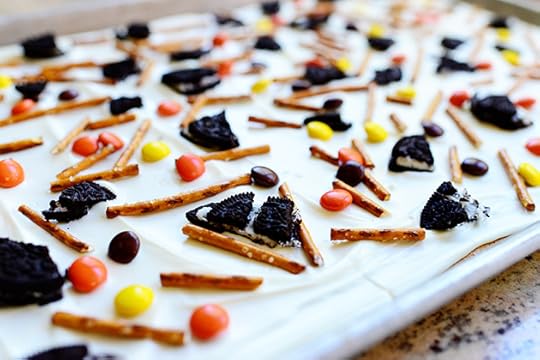 And yummy.
 But I’m not finished yet, man.
 The ‘stachios are just the ticket!
 Ahhh. I love the light green color.
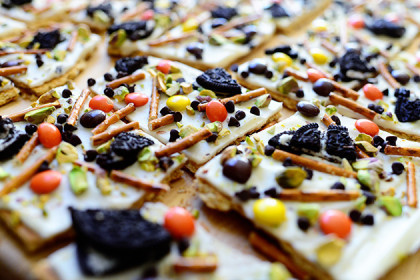
 And…mini chocolate chips give it a fun confetti look.
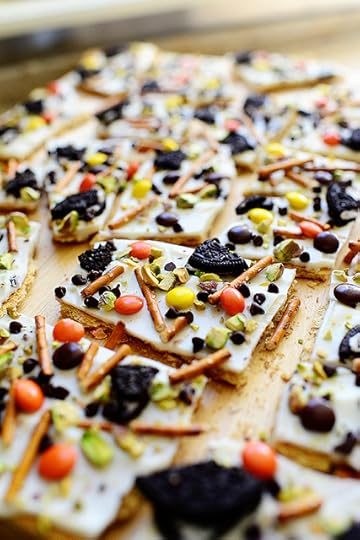
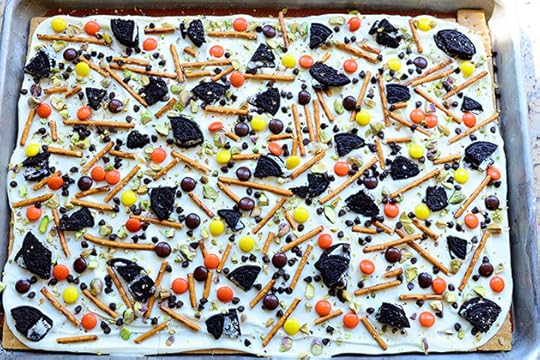 Yep. Just right. Now just run your hand over the top, very lightly pressing in the toppings to make sure they stick. Then pop it in the fridge to make sure it gets nice and set.
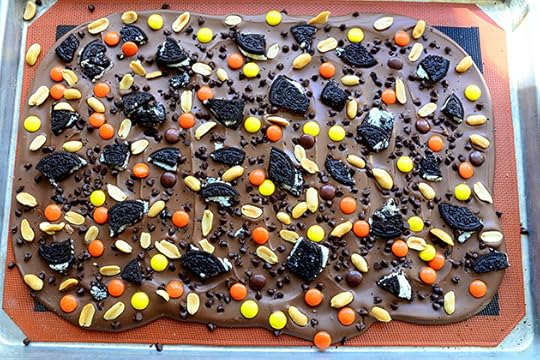
 You can also do a chocolate version sans graham crackers.
Or you can jump in and take a bath in this pile of chocolate.
You decide.
 Oreos, Reeseeeeeeeeeeeees, mini chocolate chips…
 And how ’bout this?
 Peanuts!
Whether it’s peanuts or pretzels, I highly recommend adding some kind of salty ingredient…otherwise the whole thing can be very sweet. (You can even sprinkle a little kosher salt as one of the ingredients. Scandal!)
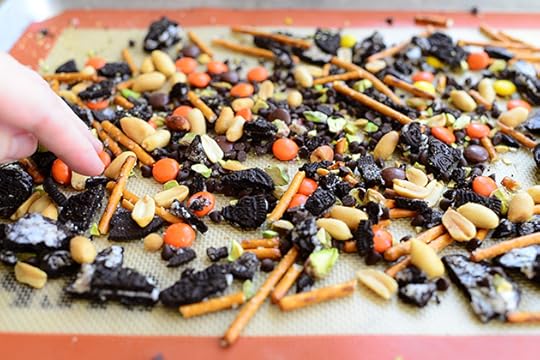 Finally, I had a bunch of miscellaneous stuff left on the cutting board, so here’s a fun method I learned from my friend Recipe Girl a long time ago: Sprinkle it onto a baking mat (or parchment)…
 Then take what’s left of the white almond bark and plop it/spoon it/stream it here and there all over the toppings.
 The point here is to be messy.
I’ve totally got that under control.
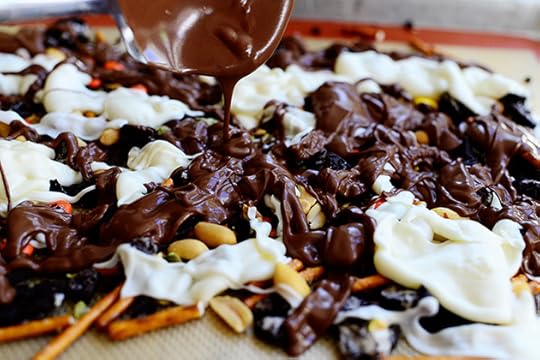 Then go in with the chocolate almond bark and make an even bigger mess.
 Keep going until it’s all covered.
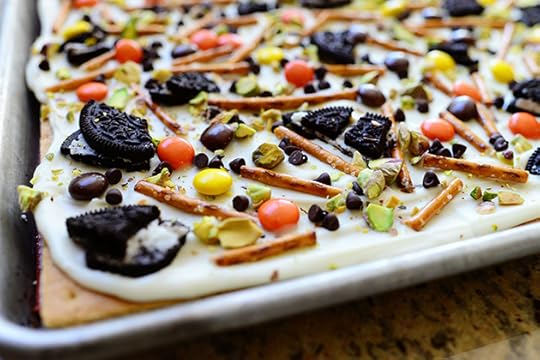
 Refrigerate it until it’s nice and firm, then break it into chunks. This messy one’s really fun!
 But the regular graham cracker version is…well, it’s out of this world.
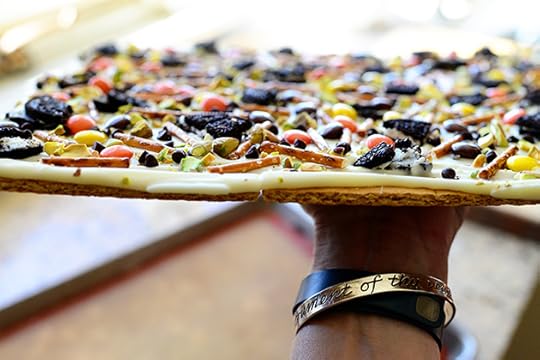 And if you’re really, really careful…the whole darn thing will lift out of the pan.
 Break it into big ol’ pieces…
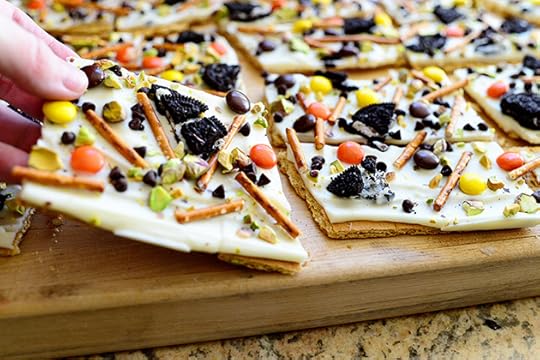 Then break the big pieces into smaller pieces…
 Then break the smaller pieces into manageable pieces.
 Me likey!
 Now just bag it up in small cellophane bags, serve it on a platter, pack ‘em in little gift boxes…whatever makes you smile.
 Or just grab a piece and polish it off.
Halloween Bark is fun! So many different ways you can go about it, and there’s no right or wrong way.
Here are other toppings you can use. No matter what you use, just be sure to lightly press the toppings into the chocolate/almond bark to make sure it will be anchored on.
* Mini marshmallows
* Chocolate bars, broken in pieces
* Gummi bears (or worms…etc.)
* Any crazy sugar cereal (Froot Loops, Apple Jacks, etc.)
* Any chopped nuts
* Granola
* Peanut butter, butterscotch, white chocolate, or peanut butter chips
* Different colors of sprinkles
* Crushed peppermint candies
* Different colors of melted chocolates, drizzled over the top
Have fun with this, friends!
Here’s the handy dandy printable.
Recipe
Halloween Bark
Prep Time: 20 Minutes
Cook Time: 10 Minutes
Difficulty: Easy
Servings: 16
Print Recipe
Ingredients
1 package White Almond Bark16 whole Graham Crackers Pretzel Sticks, Broken In Half Oreo's, Chopped Reese's Pieces Chopped Pistachios Mini Chocolate Chips Other Misc Ingredients: Mini Marshmallows, Candy Corns, M & M's, Colored Sprinkled, Different Nuts, Broken Chocolate Bars Preparation Instructions
Melt the almond bark over a double boiler (I use a glass bowl over a saucepan of simmering water.) Stir until smooth and allow to cool slightly.
Arrange whole graham crackers together on a rimmed baking sheet so that they're butted up against one another. Pour the melted almond bark over the top and use an offset spatula to spread it evenly over the surface.
Sprinkle on pistachios, chocolate chips, pretzels, and Reese's Pieces (along with anything else you'd like to add.) Lightly press all the ingredients with the palm of your hand to make sure they're all anchored on.
Place the pan in the fridge and allow it to set completely. Break the bark into smaller pieces. Serve on a platter or package in small cellophane bags.
Happy Halloween!
Posted by Ree on September 30 2013

September 24, 2013
French Silk Pie, Step-by-Step
 I first posted this French Silk Pie recipe back in the dark ages of 2008, and it remains one of my all-time favorite desserts of all time. I realize that was redundant. But I had to drive home the point, man.
Since I first posted it so very long ago, I thought I’d repost it with updated photos.
 This photo is from 2008. I sincerely hope this gives anyone who might be wanting to pursue food photography extreme hope! Ha.
Anyway, the pie photos on this post were taken in 2012. But aside from updated photos, I also wanted to include a few bolded, bullet-pointed tips to make sure your pie turns out just swell.
Here’s how to make it.
 First, nuke the chocolate and stir it till it’s smooth and melted. Then let it cool completely.
* The chocolate must be cooled completely but still melted/stirrable.
 Place an unbaked pie crust in a pie pan (this is a storebought crust. Scandal!) Ruffle or crimp the edges, then place a piece of parchment in the center and pour beans in the center. This will weigh down the crust when it bakes and keep it from shrinking in the pan.
* After you bake the crust, allow it to cool completely.
* I often use graham cracker or Oreo crust when I make French Silk Pie. It’s delicious and easy!
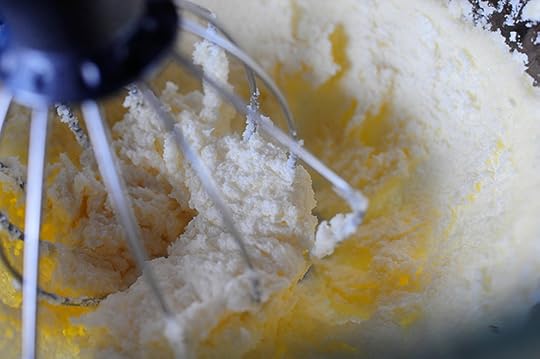 Whip together the butter and sugar until it’s very light and fluffy. Scrape the sides a couple of times, beating after each scrape.
* Beat the butter and sugar until it’s very fluffy, scraping the sides as you go.
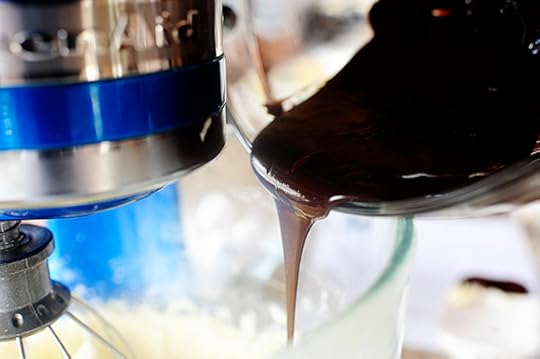 Once the butter/sugar mixture is light and fluffy, turn the mixer on low and slowly drizzle in the melted chocolate until it’s all incorporated. Scrape the sides and mix a couple of times to make sure it’s all combined.
* Remember, it’s very important that the chocolate is no longer warm; if it is, it will affect the mixture adversely and your life will be ruined.
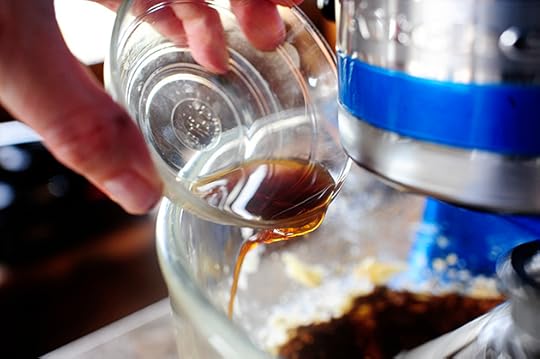 Once the chocolate is totally mixed in, mix in vanilla.
 When you’re finished mixing it at this stage, it should be chocolatey and a bit grainy from the sugar.
* Make sure to scrape the bowl well to make sure all the chocolate, butter, and sugar are totally mixed together.
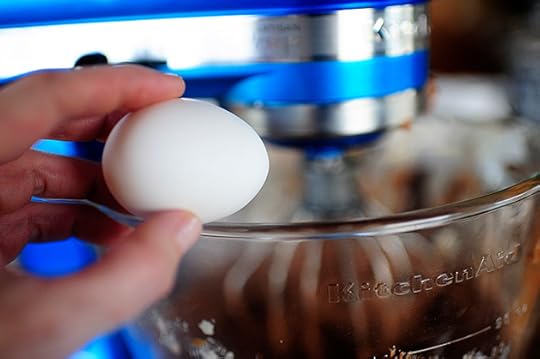 Now comes the fun part! With the mixer on medium speed, you’re going to crack in 4 eggs over a 20 minute period—exactly 5 minutes apart for each egg. So crack in an egg, let it mix for 5 minutes, then crack in the next egg.
* Allow it to mix 5 minutes after each egg addition.
* Stop, turn off the mixer, and scrape before adding the third egg.
* This is best if the eggs are cold out of the fridge.
* Along those lines, if your kitchen is hot/humid, the mixture will not whip as well. If the mixture ever seems to be loose or runny halfway through, stop and stick the bowl in the freezer for 5-10 minutes then resume.
* Note that the eggs in this pie are uncooked. On a personal level, I am generally not concerned about the risk from raw eggs, which is evidently quite low. But for those who are very old, very young, pregnant, or have a compromised immune system, it is generally recommended that uncooked eggs be avoided.
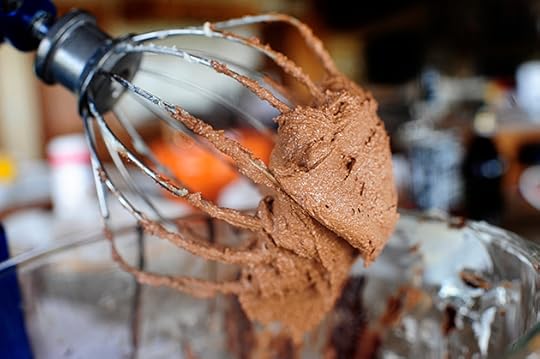
 When you’re finished, the mixture should be light and beautifully silky.
 Plop it into the baked (and cooled!) pie crust and even out the surface.
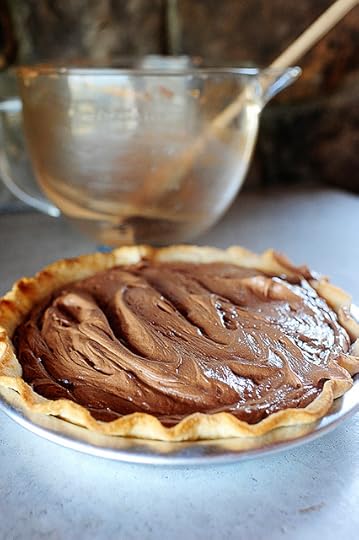 After this, the pie needs to be refrigerated so that it will firm up to the point that you can slice it into neat pieces. While delicious, if you try to cut the pie into slices at this stage, it’s too soft and will be messy.
* It’s very important at this stage to lick the bowl. It’s way too delicious to pass up.
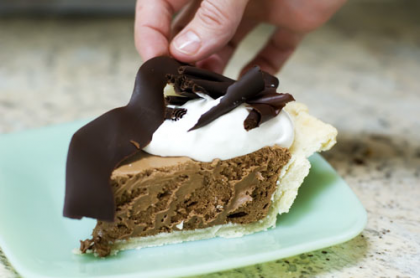
On the show, I covered the whole surface with whipped cream. For this one, I just did a big pile in the middle, then topped with chocolate curls. I actually chilled it with the whipped cream on top so it would all be really cold.
 And there you go. Absolutely dreamy. Absolutely divine. One of the best chocolate experiences you’ll ever have in your life.
Here’s the printable!
Recipe
Delicious Chocolate Pie
Prep Time: 30 Minutes
Cook Time:
Difficulty: Easy
Servings: 8
Print Recipe
Ingredients
4 ounces, weight Unsweetened Baking Chocolate1 cup Salted Butter, Softened1-1/2 cup Sugar1 teaspoon Vanilla Extract4 whole Eggs1 package Baked Pie Shell Preparation Instructions
In small microwave safe bowl melt 4 ounces of unsweetened baking chocolate until stirrable (about 45 seconds on high). Set aside to cool.
In a large bowl with an electric mixer beat 1 cup (2 sticks) of regular (salted) butter and 1 ½ cups of white sugar until fluffy (about 1 to 2 minutes). When melted chocolate is cooled, drizzle it over the butter/sugar mixture. Add 1 teaspoon of vanilla extract. Beat the mixture thoroughly until combined (on a Kitchen Aid mixer, you will be using the whisk attachment).
Turn your mixer to a medium speed and over a period of 15 to 20 minutes add in the four eggs, one at a time, leaving about 5 minutes between each egg addition. Once the pie filling is well mixed, pour it into the baked pie shell, scraping every last speck of it out of the bowl. Smooth out the pie filling and place pie in the refrigerator to chill for at least two hours (preferably longer).
Plop a heap of whipped cream and garnish with a few chocolate curls if you’re feeling sassy.
Posted by Ree on September 24 2013

September 19, 2013
My Favorite Pumpkin Recipes
It’s that time of year! And oh, man…I’m so excited.
As in: Ecstatic.
Here are a few of my favorite pumpkin recipes I’ve posted through the years! As is the case with all my recipe retrospectives, please enjoy and get a kick out of the very wide range in photo quality.
Ha.
Just click on the photos or the individual recipe titles to get to the individual printables!
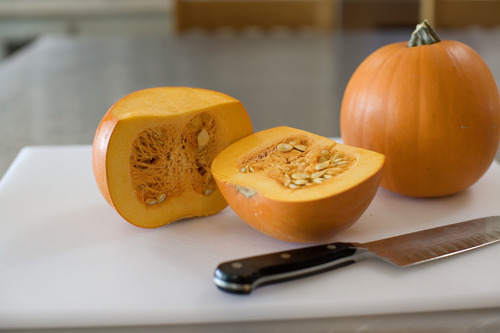 First of all, I use canned pumpkin puree all the time because it really is one of those canned ingredients that is consistent and works just great. But if you have the time to make your own pumpkin puree, it’s really fun! Here’s the method I use.
 Silver Dollar Pumpkin Pancakes. Honestly, I can’t decide whether these are breakfast or dessert. Or lunch. Or dinner.
I guess they can be anything you want them to be.
They are divine little darlings.
 Moist Pumpkin Spice Muffins. Really tasty!
I’ll be posting a pumpkin cream cheese muffin in the next week or so.
My apologies in advance.
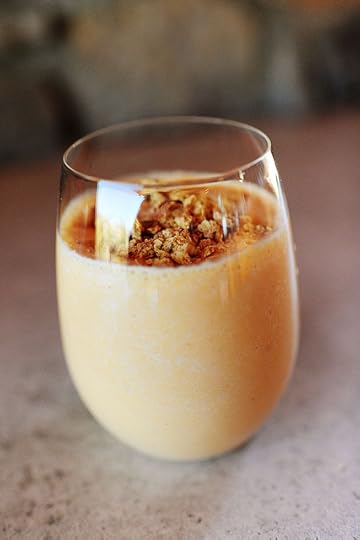 Pumpkin Smoothies. Seriously one of the most delicious pumpkin recipes you’ll ever taste in your life.
I make ‘em on Halloween.
I make ‘em on Thanksgiving morning to keep the scavengers away.
You should make ‘em, too!
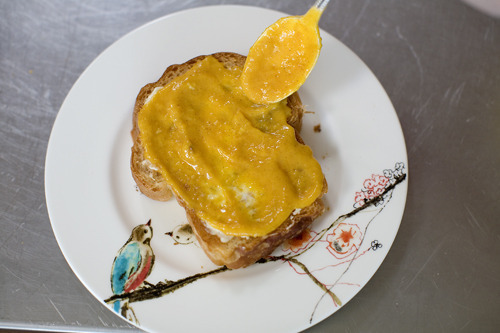 Fresh “Pumpkin Butter.” Yummy on toast!
Or English muffins.
Or bagels.
It’s just yummy, okay?

Oh, dear.
Oh, goodness.
Oh, make it.
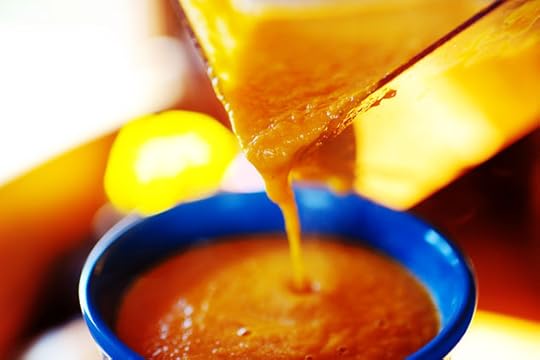
 And, last but not least, this rich and creamy Pumpkin Soup.
It is decadent.
It is addictive.
You’ll gobble it up.
Enjoy, my friends!

September 16, 2013
Dinner Last Night
I had company last night!
I just used an exclamation point because company doesn’t happen very often around here.
People! Other people! Hi, people!
I live in the country. Have I mentioned this before?
Anyway, I thought I’d share what I served.
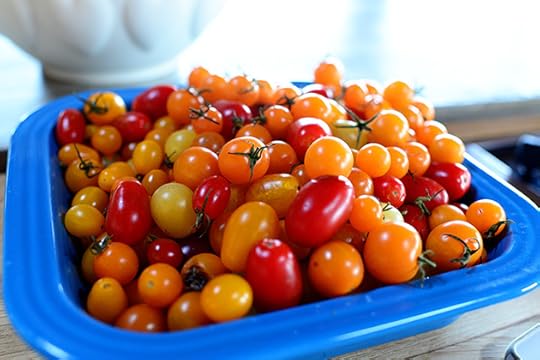 I had a bunch of these lovely tomatoes I’d bought last week, so I decided to make bruschetta.
 Over the past couple of years, whenever I’ve stood there on my Food Network show painstakingly slicing cherry tomatoes one…by one…by one…by one…by one…by one…I’ve received lots of emails from folks telling me about this incredibly nifty trick, and by golly, it really does work. You get two plastic lids. These are from food storage containers, but you can use small Tupperware lids, Cool Whip lids (if you aren’t averse to Cool Whip) or any small/medium plastic lids. Fill one lid with tomatoes.
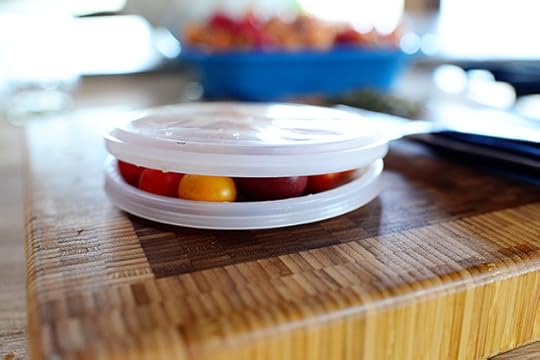 Stick a second lid on top.
 Then, using a serrated knife, carefully slice between the two lids, holding the top lid firm with your hand.
 Tada! All sliced up. So handy!
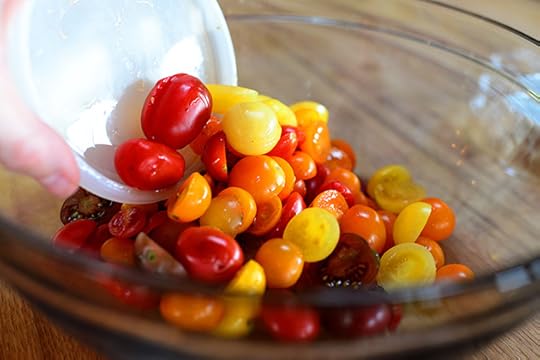 Then into the bowl they go.
 This amount of tomatoes took me about a minute and a half.
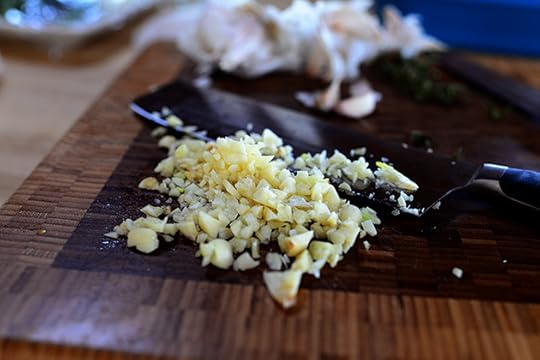 Mince up some garlic.
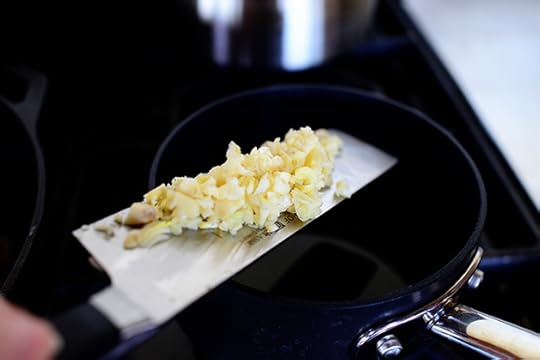 Threw it into a small saucepan with a little olive oil over low heat.
 And let it sit until the garlic started gently sizzling, probably 4 to 5 minutes or so. Then I removed it from the heat and let it cool.
 Meanwhile, I toasted some bread slices in a very buttery skillet. And of course, I burned a few pieces around the edges.
I’m Pioneer Woman. And I burn things.
 When the oil was cool, I drizzled a little over the tomatoes. I also spooned in a little of the garlic, which was nice and mild (relatively speaking) by now.
 I’d grabbed the very last of my basil, which is stalky and wild looking, but it’s September and I can’t pay my garden any more attention, man.
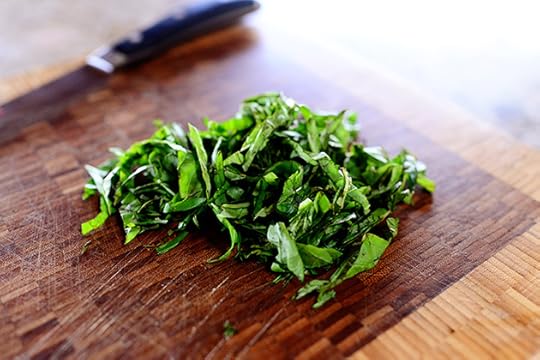 I pulled off a bunch of leaves, rolled ‘em up, sliced ‘em thin…
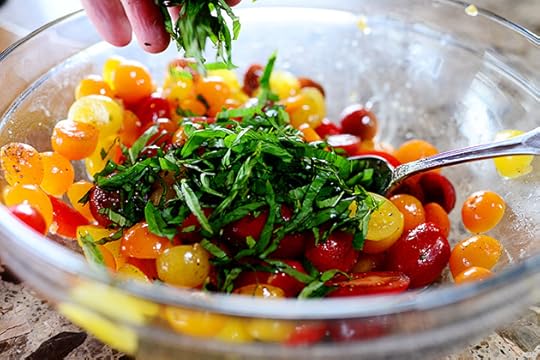 Then threw the basil into the tomatoes, added salt and pepper, and stirred it around. I chilled it for about 30 minutes, then piled it onto the toasted bread slices.
My favorite thing on Earth!
Here’s the recipe:
 Peach Whiskey BBQ Chicken was also on the menu. I added fresh peach slices (note: my online recipe doesn’t include them) after the chicken had cooked for an hour or so. Delicious!
 Oh, and I browned a little butter in an iron skillet, then quickly sauteed thin green beans over high heat. It just took a couple of minutes per batch; I didn’t want to totally cook them through—I just wanted to get them to the bright green stage and leave them a little crisp.
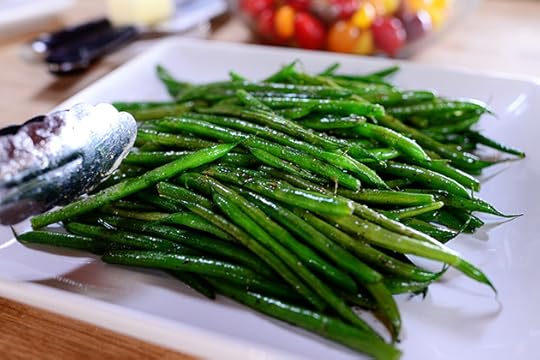 By the way, I don’t like trimming the little pointy ends of the green beans. I think they’re prettier this way.
Plus I’m lazy.
Amen.
To go with it all, I made the heavenly and blissful Creamy Mashed Potatoes. I’ve served the BBQ chicken above with grits, noodles, and even fried potatoes…but nothing is better than mashed.
I think that’s it! Oh, there was also salad with mixed greens, spinach, and a simple balsamic vinaigrette, to which I added a little of the garlic from the olive oil I drizzled over the bruschetta tomatoes.
Bruschetta. Peach Whiskey BBQ Chicken. Creamy Mashed Potatoes. Sauteed Green Beans. Big green salad with vinaigrette. It was a great menu with lots of color. Great for company, as you can actually make the chicken (without the peaches) and the mashed potatoes the day before. Just warm the chicken the next day on the stovetop, adding the peaches then.
Give it a try next time you have humans over!
Love,
P-Widdy

September 13, 2013
My Favorite Knife & Cutting Board (Winners)
The winners of the awesome knife and cutting board are:
#1606 Ro: “My husband has been under the weather, so to cheer him up I made one of his all-time favorites: Quiche Lorraine.”
#10054 Julie M: “I made Curried Butternut Squash Soup and a Green Bean and Garbonzo Bean salad!”
Congratulations, winners! Contact prizes@thepioneerwoman.com to claim your prizes.
 So today, because it’s Friday, and because I love ya, I’m giving away 2 of these Wusthof Nakiri knife (my favorite knife in the world)…
 Along with this beautiful, fabulously useful John Boos end-grain maple cutting board. You will fall madly in love with this thing—it’ll become your best friend, your constant companion, and you’ll love it more the more you use it. It’s as practical as it is beautiful.
This knife and this cutting board will take you far in life!
(Or at least…in the kitchen!)
If you’re interested, just shout out the last thing you cooked in the Comments section of this post—whether it was Kraft Macaroni and Cheese or Thai Duck Curry!
Winners will be selected at random and announced Saturday night.
Good luck!
Not an advertisement. Giveaway sponsored by Pioneer Woman.
Giveaway has ended and comments are now closed.

My Favorite Knife & Cutting Board
So today, because it’s Friday, and because I love ya, I’m giving away 2 of these Wusthof Nakiri knife (my favorite knife in the world)…
Along with this beautiful, fabulously useful John Boos end-grain maple cutting board. You will fall madly in love with this thing—it’ll become your best friend, your constant companion, and you’ll love it more the more you use it. It’s as practical as it is beautiful.
This knife and this cutting board will take you far in life!
(Or at least…in the kitchen!)
If you’re interested, just shout out the last thing you cooked in the Comments section of this post—whether it was Kraft Macaroni and Cheese or Thai Duck Curry!
Winners will be selected at random and announced Saturday night.
Good luck!
Not an advertisement. Giveaway sponsored by Pioneer Woman.
September 9, 2013
Grilled Chicken & Strawberry Salad Wrap
 Would it be a cliché to say “yum” on a cooking website? If so, I’m in big,big trouble.
And furthermore: Yum.
I made this deliciously simple salad after church yesterday, and since I was ravenously ravenous, I decided to introduce some carbs into the picture and make the salad into a wrap. It was so utterly delightful, especially after the ridonkulously hot weekend of soccer, soccer, and soccer. With a little soccer thrown in. It was fresh, crunchy, with a nice combination of protein and fruit and greens…oh, and goat cheese.
Oh, and a few other things, too.
Here’s how I made it!
 Throw a couple of chicken breasts into a ziploc bag and use a rolling pin to pound the thicker areas of the chicken until they’re a uniform thickness.
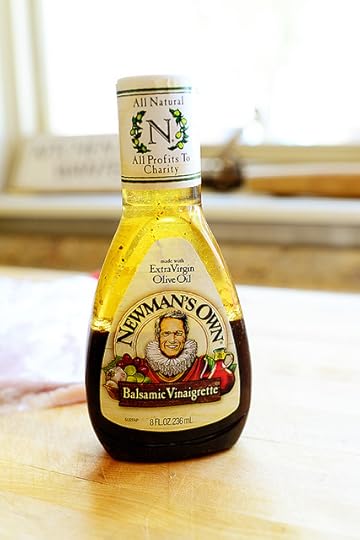 Then, either whip up your favorite balsamic vinaigrette yourself…or grab a dang bottle of Paul Newman’s out of your pantry. Because sometimes life is too short to make your own balsamic vinaigrette.
Now that’s deep, Ree.
 Drizzle a little dressing into the bag with the chicken…
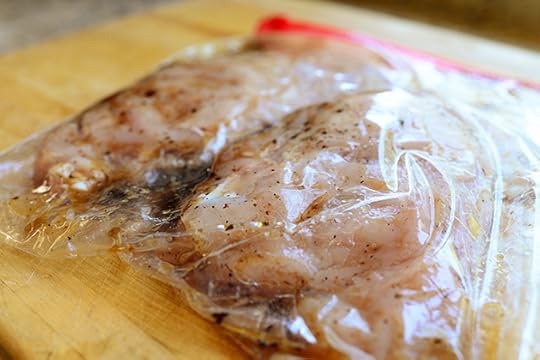 Then seal the bag, squeeze out the air so the dressing is totally coating the chicken, and marinate it in the fridge for an hour or two.
You can use any vinaigrette you want: Raspberry vinaigrette would be lovely!
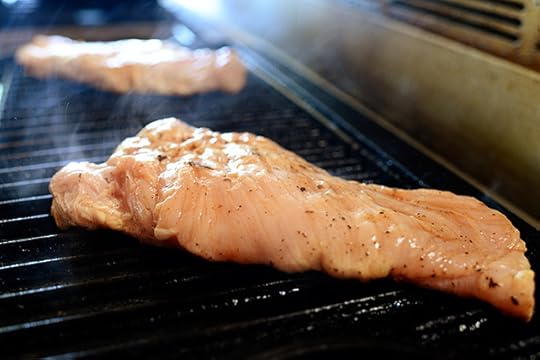 After it’s marinated, cook the chicken on a grill pan (or outside on the grill if you haven’t been at soccer games all weekend).
 A couple of minutes into cooking, rotate the chicken 45 degrees so it’ll have pretty, fancy grill marks.
 Do the same on the other side.
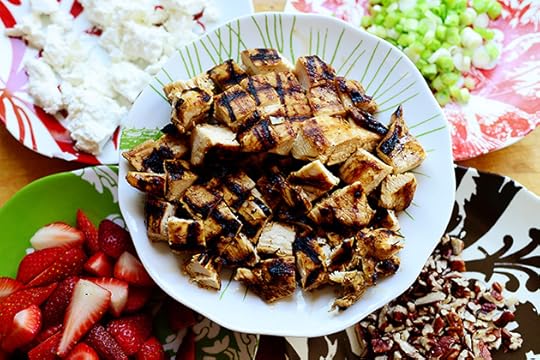
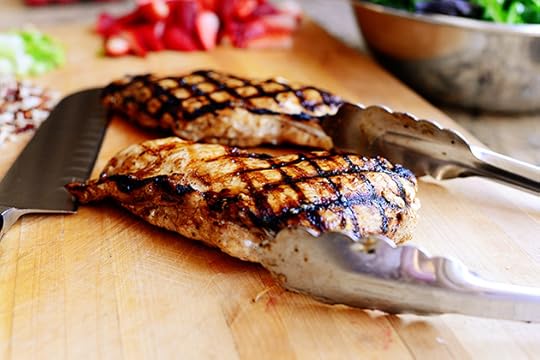 Then, when then chicken’s totally done in the middle, remove it to a board…
 Slice it on a diagonal in one direction…
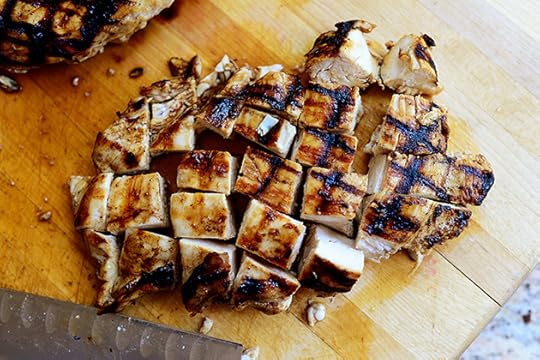 Then again in the other direction.
 Next, grab some lovely, juicy strawberries.
 Hull them, then cut the strawberries into quarters.
 Keep going until you have a nice pile.
And here’s why I like quartering the strawberries: If I were to simply slice them, each slice wouldn’t wind up with much surface area. This way, you see some of the beautiful strawberry skin with each piece of strawberry.
That’s my story and I’m stickin’ to it.
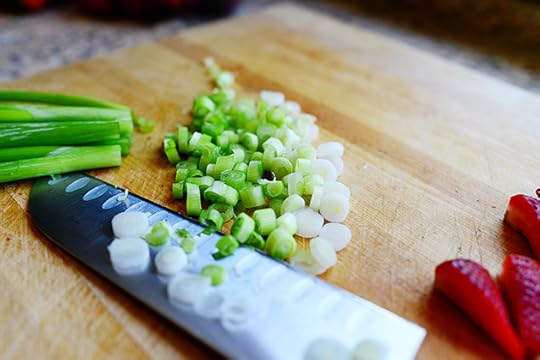 Next, slice up some green onions…
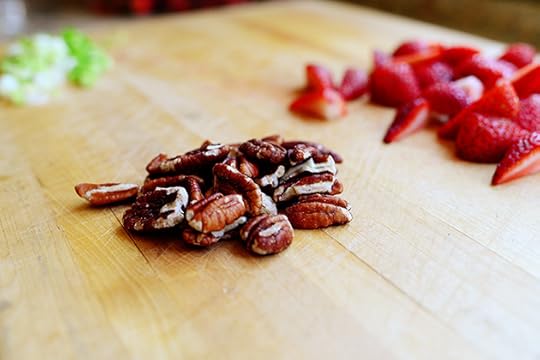 Then grab a few pecans…
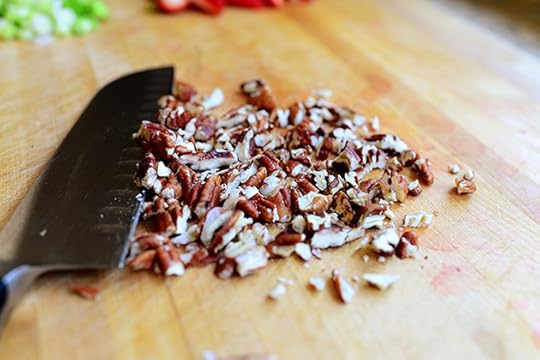 And chop ‘em up.
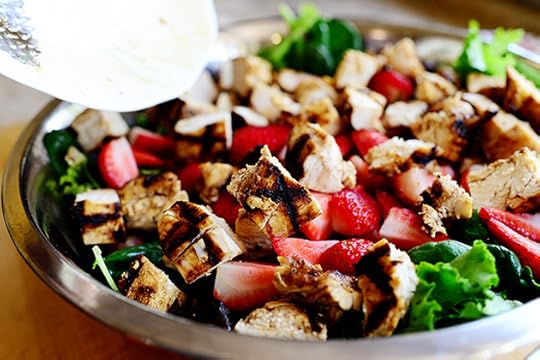
 Last thing: Pour the salad greens into a big ol’ bowl.
 Now you’re ready to assemble the salad, honey baby!
 First, toss the greens in a little salad dressing…
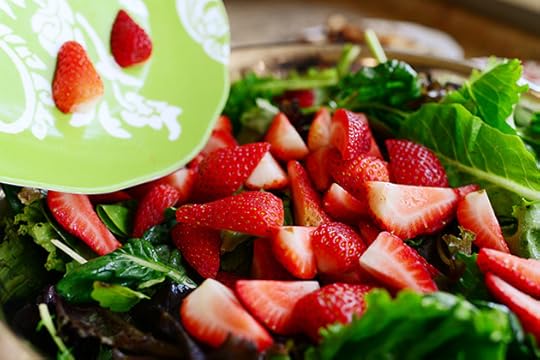 Then add the strawberries…
 The chicken…
 The green onions…
 And the goat cheese.
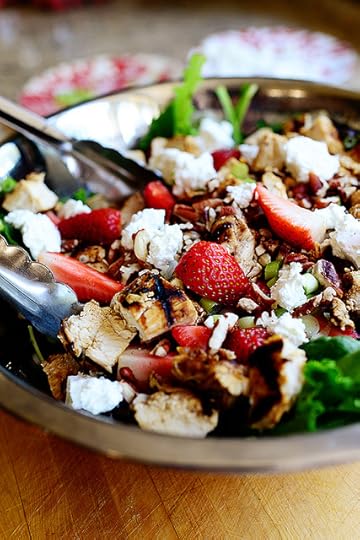 Mmmm. Luscious!
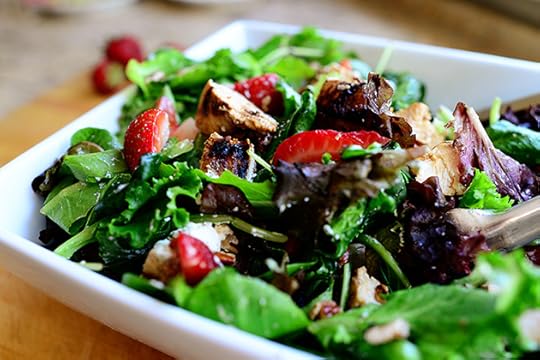 Now, you can toss it all around and serve it like a normal salad…
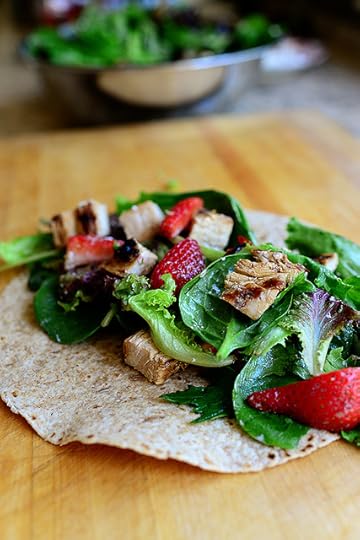
 Or you can make wraps! Start with a flour tortilla. I used whole wheat.
 Lay a generous amount of salad all across the middle.
 You may have to “style” it a little and make sure you have even amounts of strawberries and chicken throughout.
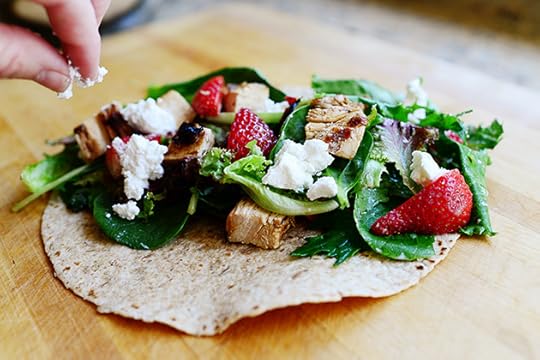 I put a little more goat cheese across the top because goat cheese is my life.
 Roll up the wrap as tightly as you can. You can also roll it like a burrito, where you tuck in the sides, but I like the purty stuff to be visible on both ends.
 Use a really sharp knife to slice it in half…
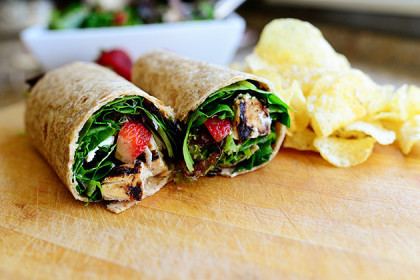
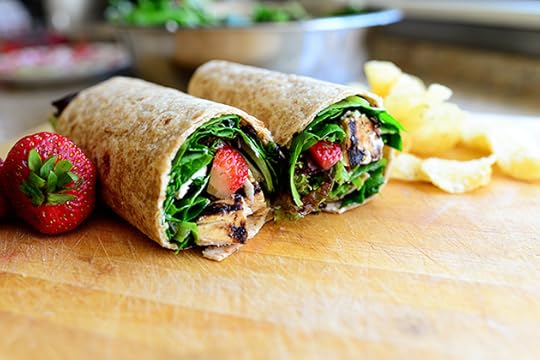 Then serve it with chips and/or fruit.
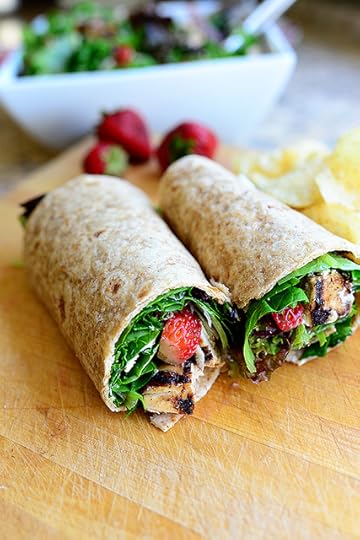 Food like this makes me happy. Try it this week! And you can add in some blueberries if you have some…or even some diced mozzarella. I’ll do that next time!
Here’s the handy dandy printable.
Recipe
Grilled Chicken & Strawberry Salad Wrap
Prep Time: 15 Minutes
Cook Time: 10 Minutes
Difficulty: Easy
Servings: 8
Print Recipe
Ingredients
2 whole Boneless, Skinless Chicken Breasts1 cup Bottled Balsamic Vinaigrette1 whole Package (12 Ounces) Mixed Salad Greens12 whole Medium Strawberries, Hulled And Quartered4 whole Green Onions Sliced (white And Light Green Parts)1/4 cup Pecans, Chopped4 ounces, weight Goat Cheese Crumbled6 whole Large Whole Wheat Tortillas Preparation Instructions
Place the chicken breasts in a large plastic storage bag. Seal the bag, leaving a small opening, then use a rolling pin to pound the breasts until they're a uniform thickness. Pour in half the balsamic vinaigrette, then seal the bag and marinate in the fridge for 1 hour.
After the chicken has marinated, grill it until it's done in the middle, about 5 minutes per side. Remove from the heat and set aside to cool slightly. Dice up the chicken when it's cool enough to handle.
Add the salad greens to a large bowl. Add 1/4 cup of the remaining dressing and toss it to coat the greens. Add the strawberries, chicken, green onions, and pecans. Toss it gently a few times until it's all combined. Top with crumbled goat cheese and toss a couple of times.
Place an equal amount of salad down the middle of each tortilla. Roll up, then slice in half.
Serve wraps with chips and extra strawberries.
Posted by Ree on September 9 2013

Ree Drummond's Blog

- Ree Drummond's profile
- 2036 followers

