
Ree Drummond's Blog, page 38
September 4, 2013
Back-to-School Recipes!
Here are some of my favorite recipes for this incredibly busy time of year, whether you’re looking for kid-friendly breakfasts, lunchbox treats, or easy dinners for the end of the day!
 My Mom’s Muffins. Perfect for breakfast, to pop in the lunchbox, or as an after school snack. If you can keep from slathering butter and jelly all over them like some people around here, they’re really good for you!
 Sour Cream Pancakes. I think I include this recipe on every list I make, but that’s because they’re so good. Perfect for breakfast before the school bus shows up!
 Homemade Granola Bars. I love these things. Great for on-the-go breakfasts or lunchbox snacks.
 Tortilla Rollups. Change up the fillings and/or use whole wheat tortillas. My kids inhale these.
 French Bread Pizzas. Change up the toppings, make ‘em your own! They take no time at all to make.
 Hot Ham and/or Roast Beef Sandwiches. Make a slew of these and store them in the freezer, then pop a few in the oven to warm as you need them. Super handy on busy school/sports/activity days.
 Broccoli-Cheese Soup. Serve in a bread bowl or a regular bowl. This is a favorite in our weird household!
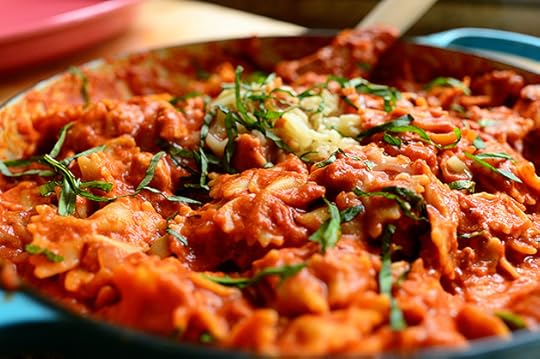 Skillet Chicken Lasagna. Made with bowtie pasta (my favorite) this one-skillet wonder is super quick and easy.
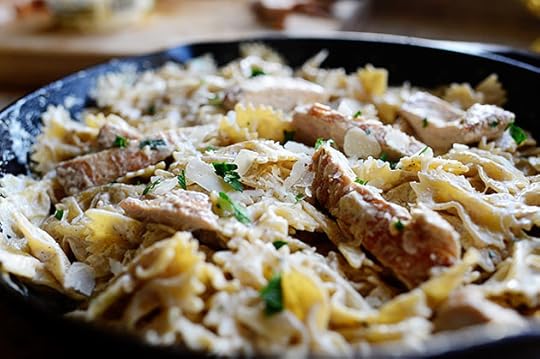 Bowtie Chicken Alfredo. Another one-skillet marvel. Dreamy!
 Baked Ziti. Makes a ton and feeds an army.
 Salisbury Steak, Mashed Potatoes, and Peas. One of my kids’ favorite dinners ever.
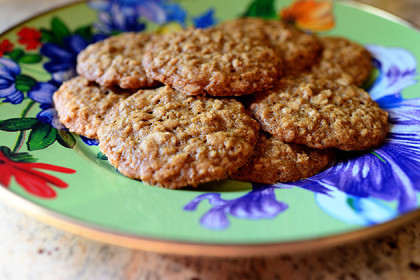
 Brown Sugar Oatmeal Cookies. Perfect for the lunchbox…or just for an after-school snack. Chewy and divine.
 Nutella Krispie Treats. Fun lunchbox treat!
 Another cookie! Chocolate Chocolate White Chocolate Chip Cookies. Amen.
 Oatmeal Whoopie Pies. Lovely!
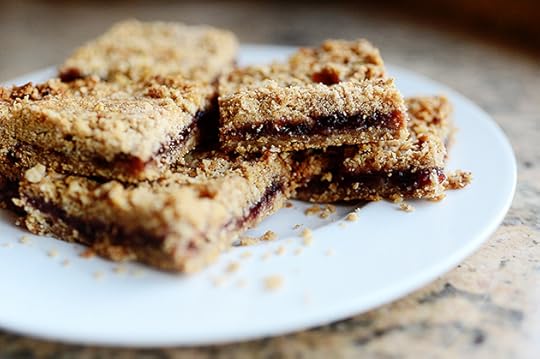 Strawberry Oatmeal Bars. Probably my favorite back-to-school recipe in the world. Easy and delicious!
And here’s my post on Freezer Cooking, which has some great recipes and tips for making things for later:
Happy school time, everyone!


September 2, 2013
Labor Day Mixer Giveaway (Winner Announced!)
The winner of the orange floral mixer is…
#29956 John F. “I did a little yard work and hung out with my lovely wife.”
Congratulations, John! How cool to see a dude win the mixer…especially since you have a sweetie who (hopefully) will love it! Contact prizes@thepioneerwoman.com to claim your prize.
 Today, because it’s Labor Day, because I’m still in Dallas at my daughter’s soccer tournament, and because I love ya, I’m giving away one of these orange floral “PW Edition” KitchenAid mixers that I use on my Food Network show.
 I’ve had this beautiful baby for a few years, but in case you haven’t seen it before, here some peeks!


 (Pssst. I have a new special edition mixer that I’ll be giving away this fall when my new cookbook is released. Stay tuned!)
TO ENTER
To enter this extra special giveaway, just answer the following question in the Comments section of this post:
“What did you do over the weekend?”
Did you catch up on your sleep? Did you go to soccer tournaments like I did? Did you hit the beach? The lake? The swimming pool? The bathtub? Did you catch a move, visit friends, go shopping, or clean the house? Just shout out what you’ve been doing over the long weekend and you’re automatically entered to win the mixer.
THE RULES
One entry per person, please.
Winner will be announced here (on this post) Tuesday night!
Good luck!
Giveaway sponsored by Pioneer Woman.

Labor Day Mixer Giveaway!
Today, because it’s Labor Day, because I’m still in Dallas at my daughter’s soccer tournament, and because I love ya, I’m giving away one of these orange floral “PW Edition” KitchenAid mixers that I use on my Food Network show.
I’ve had this beautiful baby for a few years, but in case you haven’t seen it before, here some peeks!
(Pssst. I have a new special edition mixer that I’ll be giving away this fall when my new cookbook is released. Stay tuned!)
TO ENTER
To enter this extra special giveaway, just answer the following question in the Comments section of this post:
“What did you do over the weekend?”
Did you catch up on your sleep? Did you go to soccer tournaments like I did? Did you hit the beach? The lake? The swimming pool? The bathtub? Did you catch a move, visit friends, go shopping, or clean the house? Just shout out what you’ve been doing over the long weekend and you’re automatically entered to win the mixer.
THE RULES
One entry per person, please.
Winner will be announced here (on this post) Tuesday night!
Good luck!
Giveaway sponsored by Pioneer Woman.
August 28, 2013
Brown Sugar Oatmeal Cookies
 I love cookies.
I love allllllll kinds of cookies.
I especially love cookies I don’t know very well!
(Sorry. About Last Night reference. I was going to say “name that movie,” but it’s such an obscure reference, if any of you had gotten it, I would have completely wigged out. And I don’t want to wig out today. I want to be at peace. I’m glad we had this talk.)
Anyway, I love cookies. And you know what I’m figuring out over time? I love cookies that aren’t very cakey. And I realize that the inference there is that I don’t love cookies that are cakey. And of course, that’s not true. I never met a cookie I didn’t like, whether cakey or crispy or chewy. But in recent days/weeks/months, I’ve really found myself drawn to cookies that are flat-out…well, flat. Whether they’re crispy or chewy, I don’t care. I just love the flat, non-cakey texture.
So yesterday, in between the nine loads of laundry I knocked out (do you know how long it takes to do nine loads of laundry? It takes infinity, that’s how long it takes. And I hate socks more than life itself) I set out to make some flat and chewy oatmeal cookies, partly because I discovered, while cleaning out my pantry in between laundry loads, that I was in possession of six—not four…not five…six—large containers of oats. Why did I have so many oats? What was I trying to prove?
Anyway, it turns out that brown sugar—not the oats—is really the star of the show (hence this recipe’s title) and the result is a dark, magical cookie that’s as good at room temperature as it is warm straight out of the oven.
Here’s how I made ‘em!
 First, soften some buttah. I knew cookies were in my destiny yesterday morning when I woke up, so I took a couple of sticks of butter out of the fridge and set them on the counter. I didn’t know what direction I would head, and I didn’t care.
All I knew was, cookies would somehow be involved.
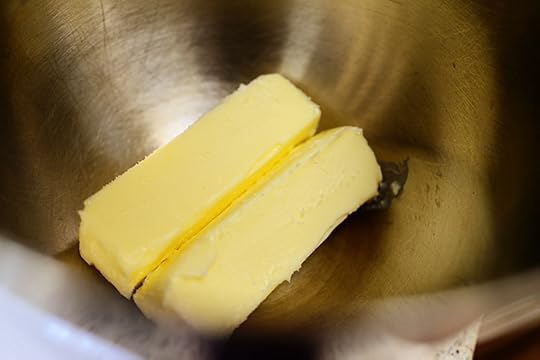 Throw the butter into the mixer.
 Add two big ol’ cups of dark brown sugar.
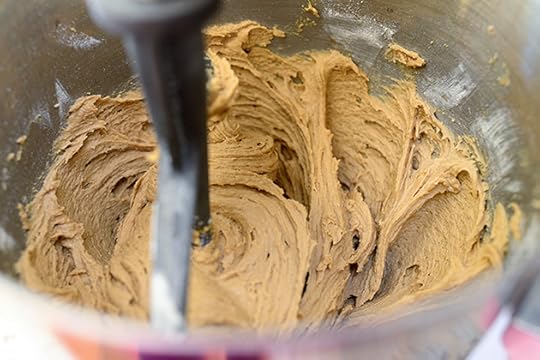
 Then mix it around…
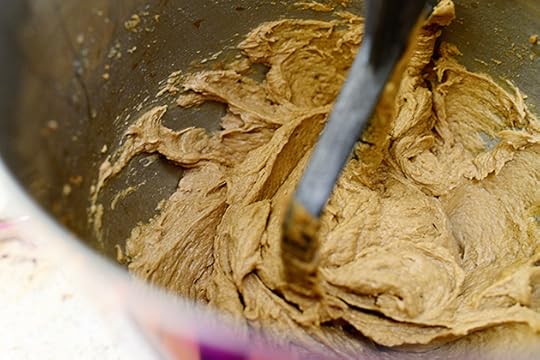
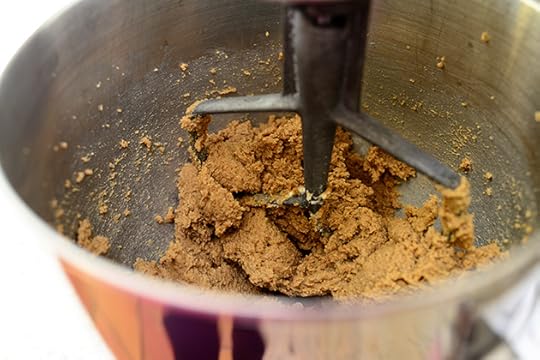 Until it’s a big mushy bowlful of ridiculously delicious wonderfulness that’s you’d really like to spread on a piece of toast.
 Add some vanilla and mix it in…
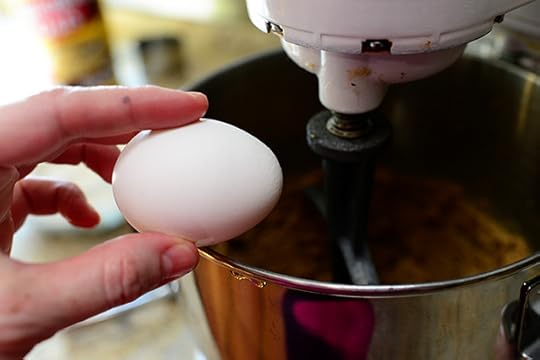 Then crack in an egg and mix it in.
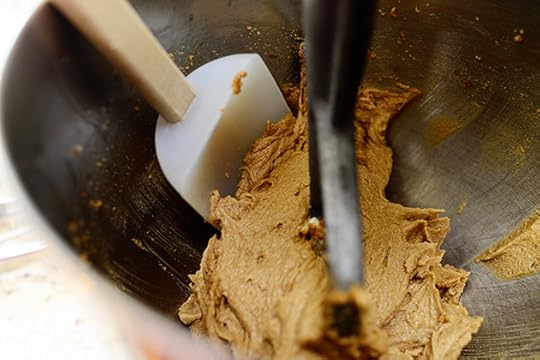 Scrape the sides…
 And beat in another one o’ dem egg thangs.
 Now, in a separate bowl add 1 1/2 cups of flour…
 A teaspoon o’ salt…
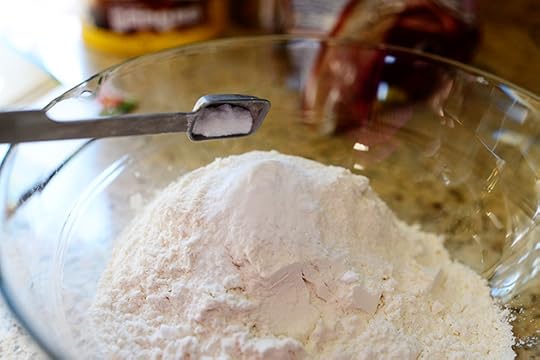 And a halfa (also known as half of) teaspoon of baking soda.
 Add the dry ingredients…
 And mix them in until just combined.
And whatever you do, do NOT eat a quick spoonful of this dough. You will want to. You will want to real, real, bad. But you’ll hate yourself in the morning.
I speak from experience here.
*Burp*
 Now, since these are oatmeal cookies, it is somewhat important at some stage to add oats to the cookie dough. If you do not do this, you will no longer be making oatmeal cookies.
You’re at a crossroads, is what I’m saying. What’s it gonna be?
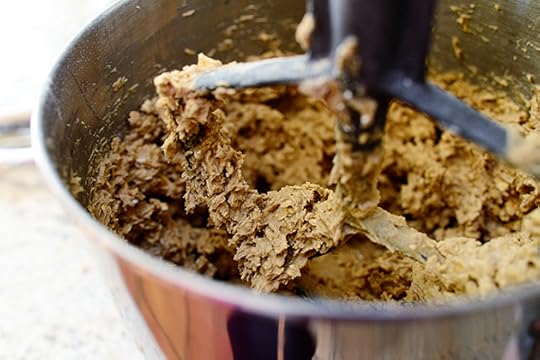 I knew you’d do the right thing!
Oh, and that thing I said a second ago about not eating a quick spoonful of this dough? It’s even harder now.
(Go ahead. Sneak a bite. Hurry! They’re coming.)
Oh, and one more thing: You can add 1/3 to 1/2 cup finely chopped pecans if you’d like. I decided to leave them out and keep things more pure and holy…but nuts would be just lovely.
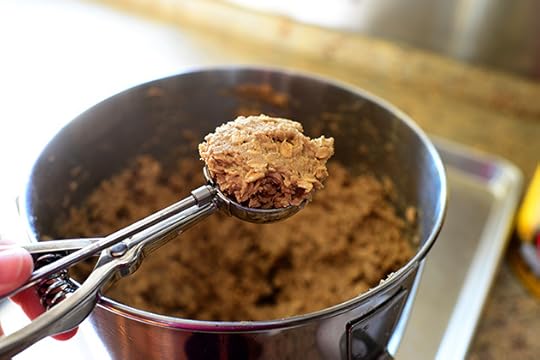 Use a scoop or a spoon…
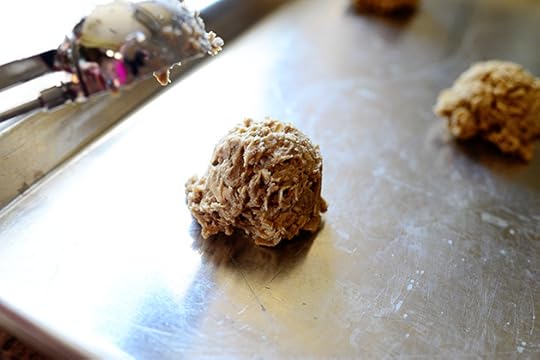 To get the dough on the sheet pan.
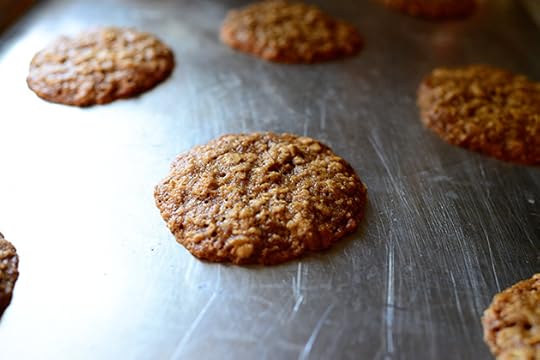 Then bake them at 350 degrees for 12-13 minutes, or until the cookies spread and start turning dark golden brown.
You can bake them a little longer if you want them a little darker and crispier. At 350, they won’t be in danger of burning too quickly.
 Hello, my beautiful love! Come away with me.
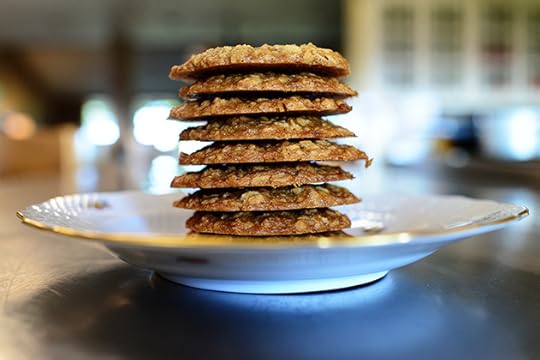
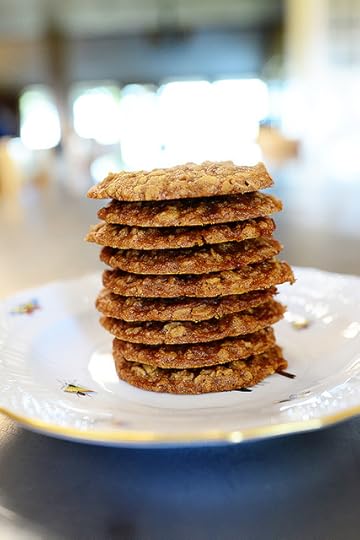 You’ll love these cookies! They’re dark and magical, chewy and dense, delicious and delicious!
When you’re finished playing around and making cookie castles out of them, serve them to someone you love.
I promise you they’ll love you right back!
Here’s the handy dandy printable.
Recipe
Brown Sugar Oatmeal Cookies
Prep Time: 10 Minutes
Cook Time: 15 Minutes
Difficulty: Easy
Servings: 24
Print Recipe
Ingredients
2 sticks (1 Cup) Salted Butter, Softened2 cups Packed Dark Brown Sugar2 teaspoons Vanilla Extract2 whole Eggs1-1/2 cup All-purpose Flour1 teaspoon Salt1/2 teaspoon Baking Soda3 cups Old Fashioned Oats Preparation Instructions
Preheat the oven to 350 degrees.
In the bowl of an electric mixer (or using a hand mixer) beat together the butter and brown sugar until fluffy. Beat in vanilla. Add eggs, one at a time, scraping after each one.
Mix together the flour, salt, and baking soda. Add it in 2 to 3 batches, mixing it until just combined. Mix in the oats until just combined.
Use a teaspoon scoop (or a regular spoon) to drop portions of dough onto a cookie sheet. Bake for 12-13 minutes or until dark and chewy. If you'd like a crispier cookie, just cook a little longer!
Let cool slight on the pan after removing from the oven, then transfer the cookies onto a plate for serving.
* Note: Add 1/2 cup finely chopped nuts to the flour mixture if you'd like a nutty flavor and crunch.
Posted by Ree on August 28 2013

August 26, 2013
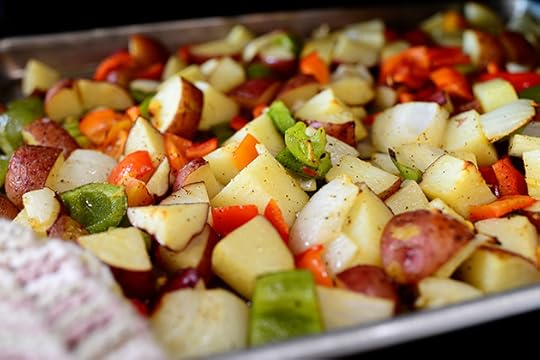
Best Breakfast Potatoes Ever
 I shared this recipe with you a couple of weeks ago in stripped-down, printable form, but I’m just now getting around to doing the step-by-step for you. And everybody knows that a recipe that isn’t accompanied by 10,447 photos of every single step of the preparation and cooking process isn’t even a recipe at all.
So until I took the photos of the process yesterday, these potatoes actually didn’t even exist. I thought they existed all those times I made them for my family and they ate them and told me how much they like them, but little did they know they were just eating air.
I always wondered why these potatoes made them burp so much.
Sorry. I’m in a weird mood this morning.
 You need red potatoes, onions, garlic, and bell peppers. Any color will do ya.
 Slice the potatoes in half.
 Lay the potato halves face down…
 Slice them in half again…
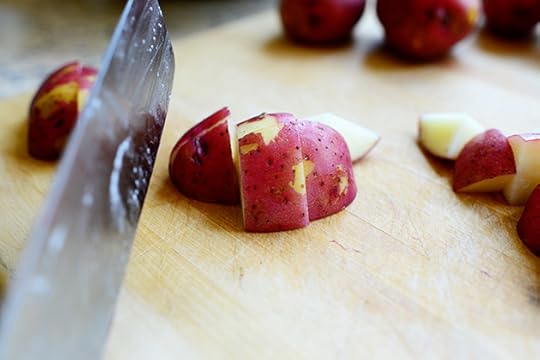 Then slice them in the other direction into chunks.
 Keep going until you have a big ol’ pile of po-ta-toes! (Boil ‘em, mash ‘em, stick ‘em in a stew!)
(Name that movie.)
 Throw ‘em in a big bowl.
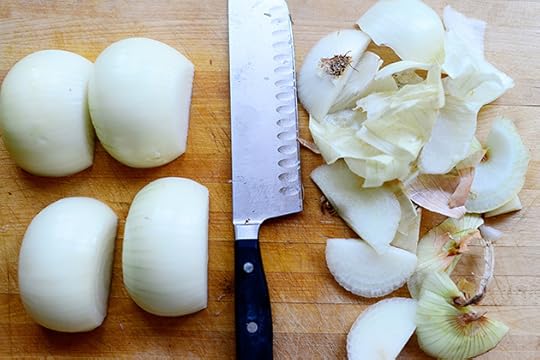 Now peel a couple of onions and slice them in half.
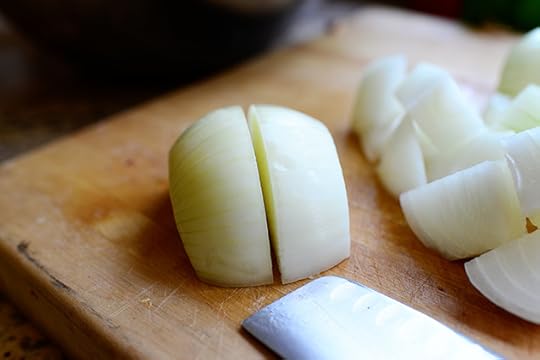 Slice each of the halves in half…
 And slice ‘em in the other direction into chunks.
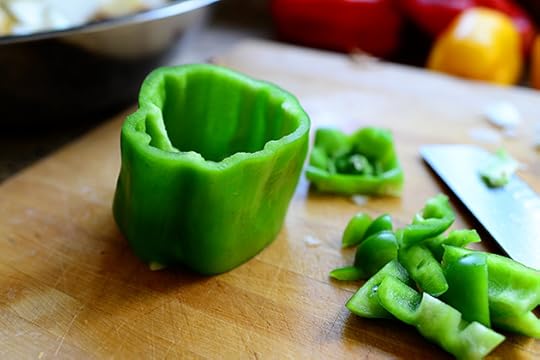 Lop off the top and bottom of a couple of green bell peppers. Cut chunks of the good stuff around the stem, and pull out the innards.
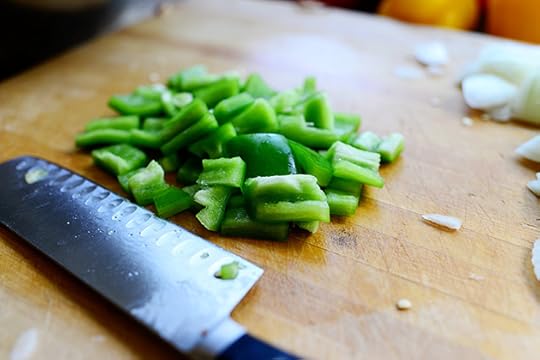 Slice into big strips, then cut the strips into chunks.
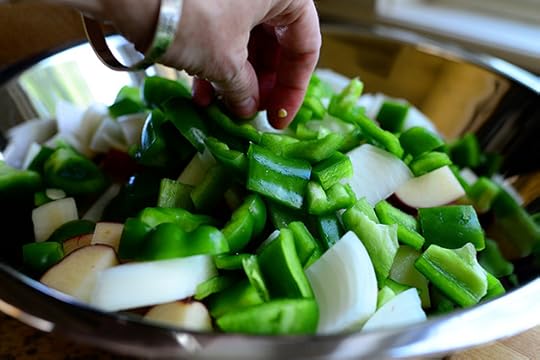 And throw them in.
 Do the same with a couple of red bell peppers: Cut into large chunks…
 And throw it in.
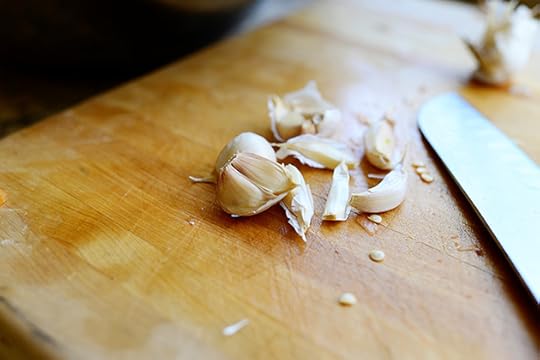 Then grab a few garlic cloves…
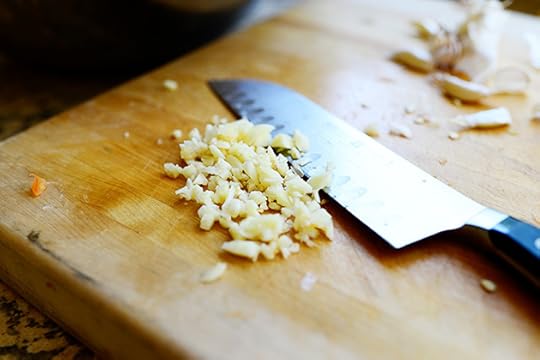 Mince them up…
 And throw them in.
I throw a lot when I cook. Have you ever noticed that?
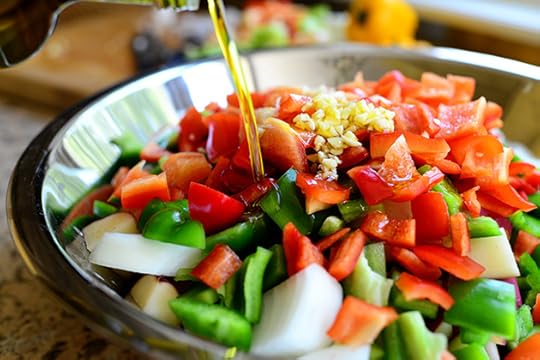 Now, drizzle in a little olive oil…
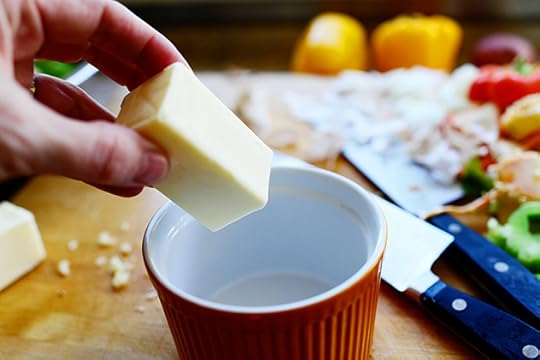 Then put a half a stick of butter into a microwave-safe dish…
 Nuke it till it’s melted…
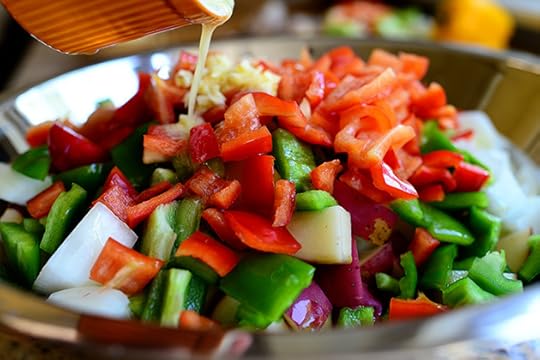 And drizzle it on in, too. The combo of olive oil and butter is luscious and fabuloso and gives me reason to live.
 Next, sprinkle in some salt…
 Some seasoned salt…
 Black pepper…
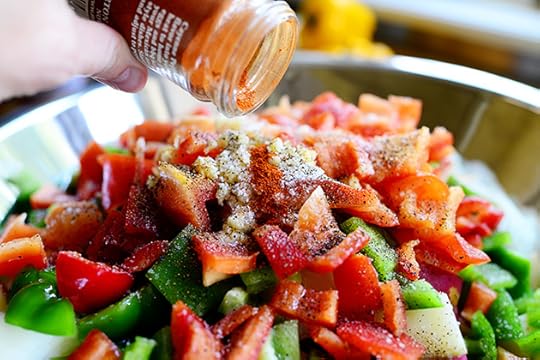 And cayenne pepper for a little BADA-BING!
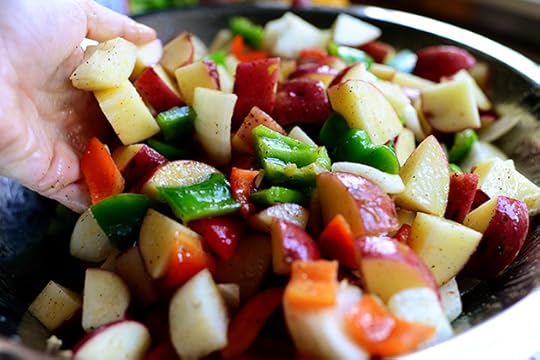 Use your hands to toss it all around until it’s all mixed together.
 Then pour it onto two separate rimmed baking sheets.
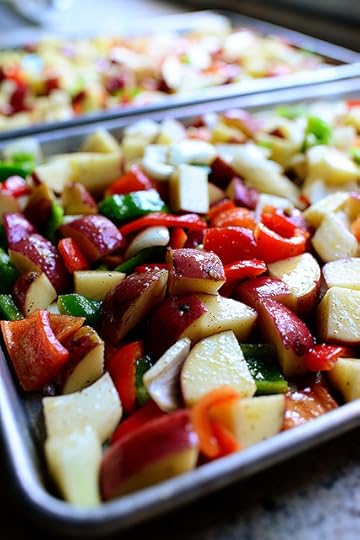 (Note: You can, like, totally cut this recipe in half if you don’t have a houseful of cowboys and cowgirls to feed.)
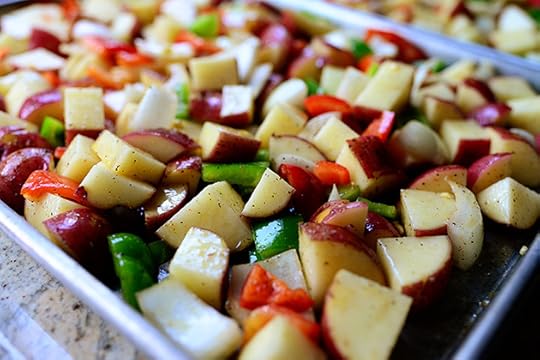 Now just throw the pans into a 425-degree oven for 25 minutes.
 A couple of times, pull the pan out a bit and use a spatula to toss the potatoes around.
 After 25 minutes, crank up the temperature to 500! We’re about to have a little fun here.
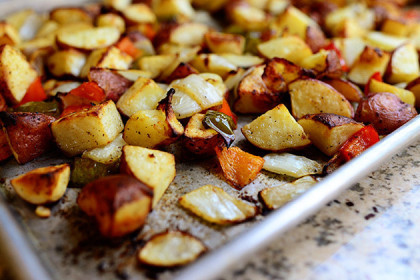
 Roast the potatoes at 500 for a good 15 to 20 minutes, tossing it a couple of times, until the taters are nice and golden with little dark bits here and there.
 Um. Yum?
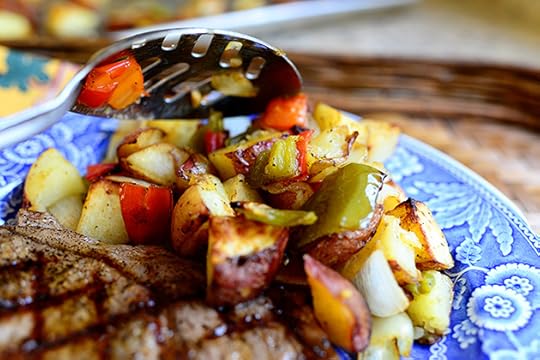 Serve them up with a big, juicy steak!
Or scrambled eggs and bacon.
Or fried chicken!
Or roasted chicken.
Or pancakes.
Or ham.
 Just serve them. Serve them soon!
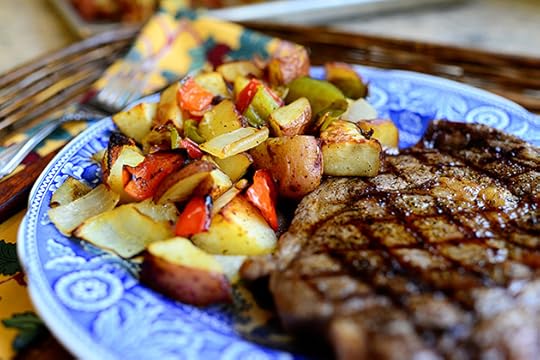 You’ll love, love, love these. They’re simple, easy, and oh so flavorful.
Here’s the handy dandy printable!
Recipe
Best Breakfast Potatoes Ever
Prep Time: 15 Minutes
Cook Time: 45 Minutes
Difficulty: Easy
Servings: 12
Print Recipe
Ingredients
1 bag (5 Pounds) Red Potatoes, Cut Into Chunks4 cloves Garlic, Minced1 whole Onion, Peeled And Roughly Chopped2 whole Green Bell Pepper, Seeded And Roughly Chopped2 whole Red Bell Pepper, Seeded And Roughly Chopped1/4 cup Olive Oil1/2 stick Butter, Melted1 teaspoon Seasoned Salt1/2 teaspoon Cayenne Pepper Kosher Salt And Freshly Ground Black Pepper Preparation Instructions
Preheat the oven to 425 degrees F.
In a large bowl, toss together the potatoes, garlic, onion, green bell pepper, red bell pepper, olive oil, butter, seasoned salt, cayenne pepper and some kosher salt and pepper.
Pour potatoes onto two rimmed baking sheets. Bake for 20 to 25 minutes, shaking the pan twice.
Raise the heat to 500 degrees and bake until crisp and brown, 15 to 20 minutes, tossing twice.
Sprinkle with a little more salt and pepper before serving.
Posted by Ree on August 26 2013

August 22, 2013
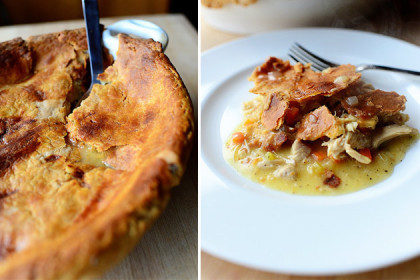
Pot Pie
 It doesn’t get much better than pot pie. It just doesn’t. It’s that brothy gravy…that golden, crisp crust…those tender, flavorful vegetables.
Gosh, gosh, gosh. Times a million. Infinity.
Here’s one I made awhile back. What I love about pot pie is, you can cook the chicken right then and there…or you can use leftover chicken (or turkey) if you have it. You can whip up a pie crust just for the occasion…or you can use a crust you might have languishing in the freezer. Chicken pot pie doesn’t have to be a huge ordeal!
Here’s how I made it.
 Dice up an onion, along with some carrots and celery, then throw them into a pot with a little butter over medium heat.
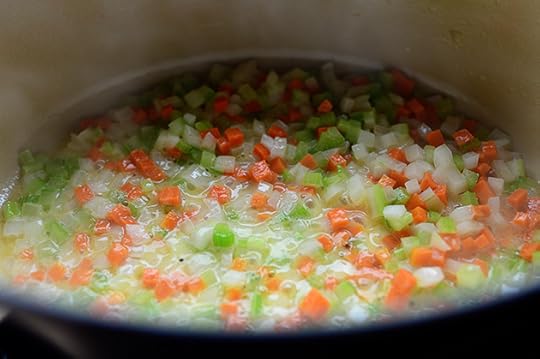 Stir the veggies around and cook them for 3 to 4 minutes, until they just start to soften.
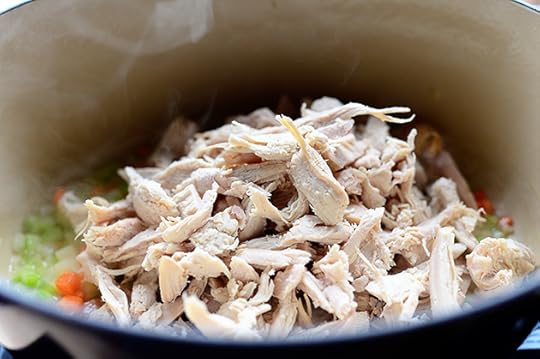 Then throw in the cooked poultry, whether it’s chicken or turkey! I like to have a mix of white and dark meat shredded into big chunks.
You can get the meat by using any of the following methods:
* Boil a whole cut-up fryer for 25-30 minutes. Remove the meat pieces and let them cool until you can handle them, then remove all the meat from the bones with two forks.
* Have a huge Thanksgiving dinner and wrap up the turkey leftovers.
* Roast a chicken in the oven and shred the meat.
* Buy a dang rotisserie chicken at the dang supermarket and call it a day.
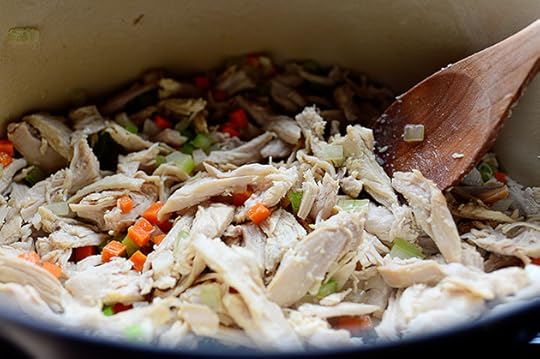 Stir the chicken into the veggies and let it warm up…
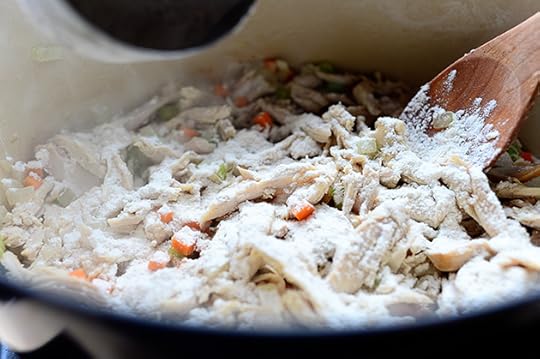 Then sprinkle a little flour all over the top. Stir in the flour and let it soak into the veggie/meat mixture and cook for another minute or so…
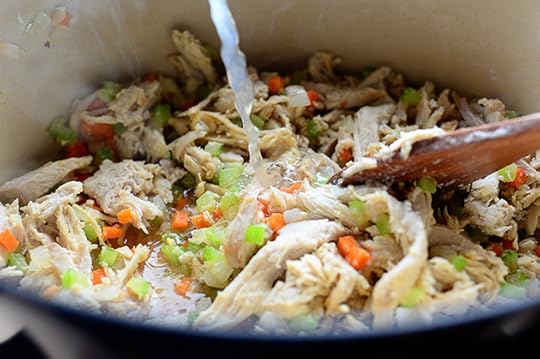 Then pour in some chicken broth! (You can also splash in a little wine at this stage, which I absolutely love, but which I usually don’t do because the five people I live with don’t like the flavor of wine. Please feel sorry for me. Thank you.)
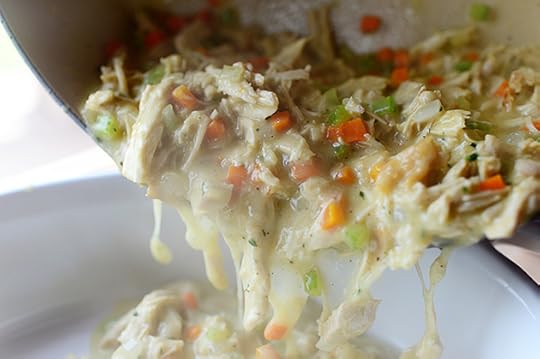
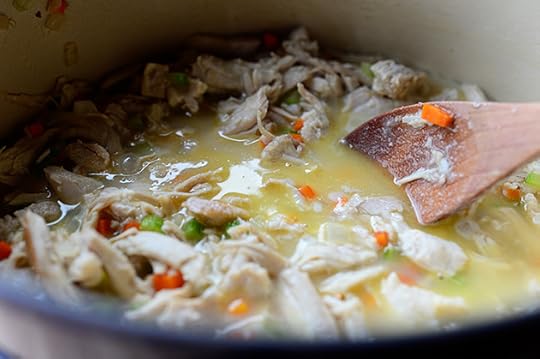 Stir in the broth and let the mixture cook and thicken up for a few minutes.
 Add a little salt and pepper…
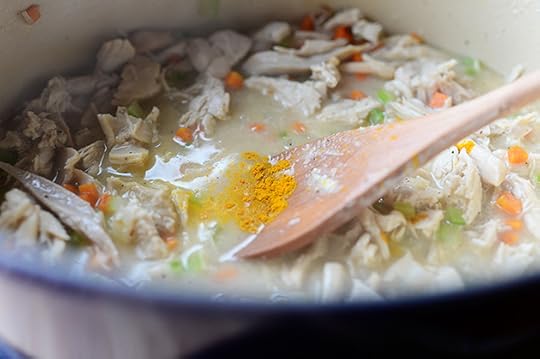 A teeny bit of turmeric…
 A little minced fresh thyme (or parsley…or anything you want!)
 Then stir it all around. Give it a taste and add more of whatever seasonings you like.
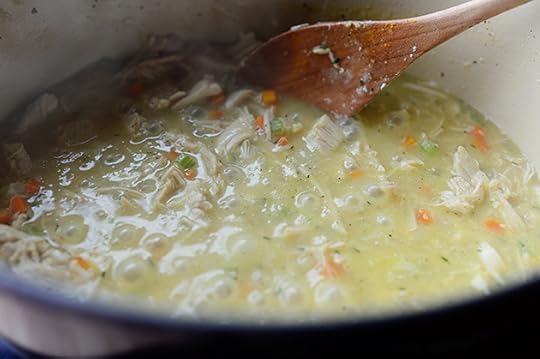
 I like to add a splash of half-and-half or cream for a little creamy richness. But you don’t have to if you don’t want to.
Finally, just let the mixture bubble up until it’s nice and thick, then set it aside for a sec. (If it gets too thick, just splash in a little more broth.)
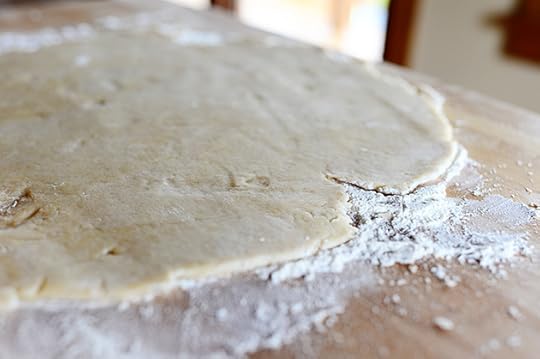 Next, roll out a pie crust on a floured surface…
(Or grab a dang storebought pie crust. I’m the last person on earth that’s gonna judge you.)
 Pour the pot pie mixture into a casserole dish…
 And smooth out the surface.
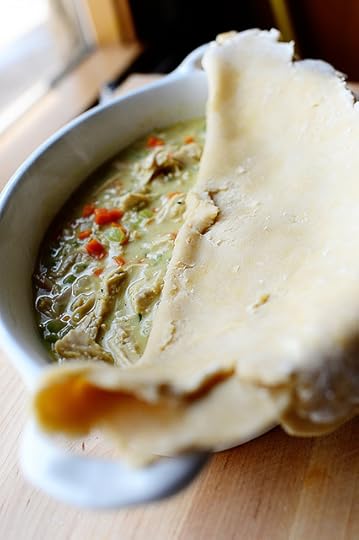 I fold the pie crust in half to make it more mobile, then I lay it on top of the dish…
 And unfold it so that it covers the whole thing.
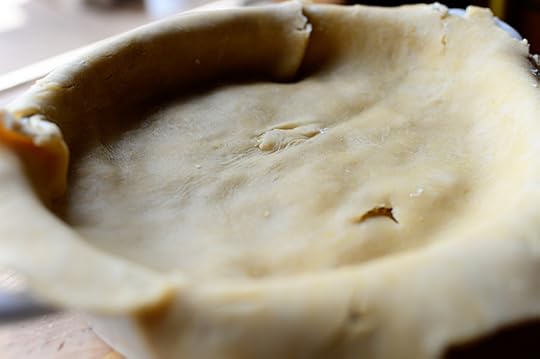
 I’m, like, all about being rustic, so I just press the edges onto the sides of the casserole dish. If it won’t stick, just use some of the egg wash I’m getting ready to show you.
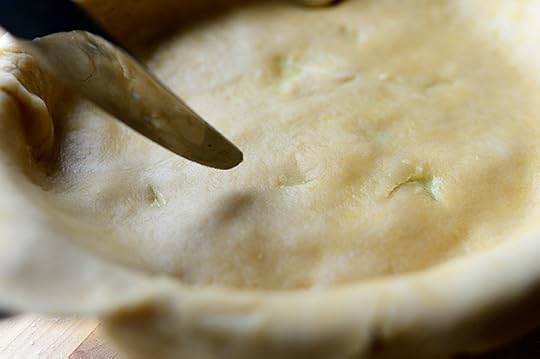 Use a knife to cut little vents all over the surface of the dough.
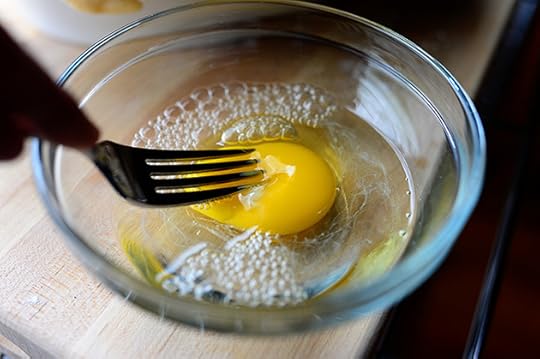 Next combine an egg with a little water and whisk it with a fork…
 Then dip in a brush…
 And brush the egg wash all over the surface.
(Note: It helps if the pot pie filling is a little cooled before you assemble the pie so the crust won’t soften like it is here. But I have an impatience problem.)
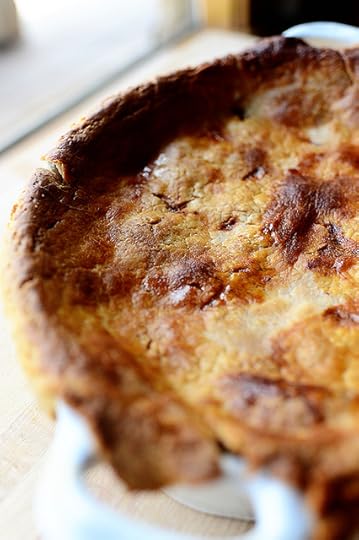 Then—and this is extremely important—put it in the oven, walk away, completely forget about it, and come dangerously close to burning the crust.
But only if you want to be like me.
 Wow. That really was a close call, man!
 But guess what?
 It was absolutely delicious and delectable.
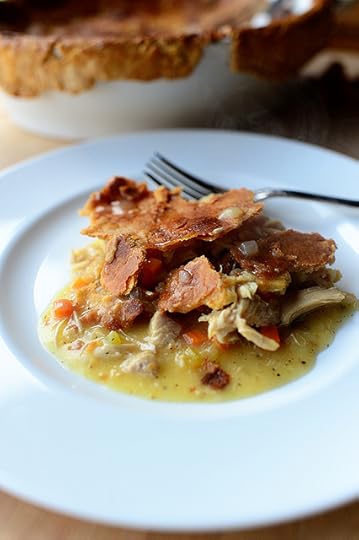
 Honestly, if there’s anything better than pot pie, I haven’t yet found what it is.
A real staple for fall and winter, baby!
(Sorry I called you baby.)
Here’s the handy dandy printable!
Recipe
Pot Pie
Prep Time: 15 Minutes
Cook Time: 45 Minutes
Difficulty: Easy
Servings: 12
Print Recipe
Ingredients
4 Tablespoons Butter1/2 cup Finely Diced Onion1/2 cup Finely Diced Carrot1/2 cup Finely Diced Celery3 cups Shredded Cooked Chicken Or Turkey1/4 cup Flour3 cups Low-sodium Chicken Broth, Plus More If Needed Splash Of White Wine (optional)1/4 teaspoon Turmeric Salt And Pepper, to taste Chopped Fresh Thyme To Taste1/4 cup Half-and-half Or Cream1 whole Unbaked Pie Crust1 whole Egg2 Tablespoons Water Preparation Instructions
Preheat the oven to 375 F.
Melt the butter in a large pot over medium-high heat, then add the onion, carrots, and celery. Stir them around until the onions start to turn translucent, about 3 minutes.
Stir in the chicken or turkey and then sprinkle the flour over the top and stir it until it’s all combined with the turkey and vegetables. Cook for 1 minute, then pour in the chicken broth (and wine if using) and stir it around and let it cook and thicken.
Once it starts to thicken add the turmeric, salt, pepper, and thyme.
Add the half-and-half or cream, then stir the mixture and let it bubble up and thicken, about 3 minutes. If it seems overly thick, splash in a little more broth. Turn off the heat.
Pour the filling into a 2-quart baking dish. Roll out the pie crust on a floured surface and lay it over the top of the dish. Press the dough so that the edges stick to the outside of the pan. Use a knife to cut little vents here and there in the surface of the dough.
Mix together the egg with 2 tablespoons water and brush it all over the surface of the crust. (You will have some egg wash left over.)
Place the pie on a rimmed baking sheet and bake for 25 to 30 minutes, until the crust is deep golden brown and the filling is bubbly. To prevent the crust from getting too brown, you might want to cover it lightly with foil for the first 15 minutes of baking time.
Serve up servings by the (big ol’) spoonful!
Posted by Ree on August 22 2013

August 19, 2013
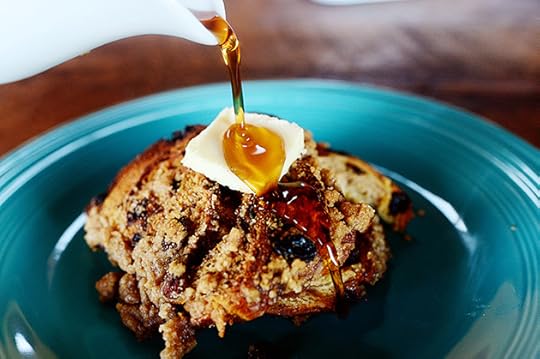
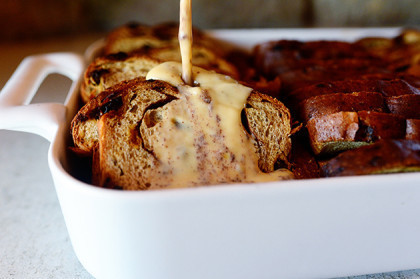
Cinnamon Raisin Baked French Toast
 I have a million baked French toast recipes in my arsenal (there are three in my upcoming cookbook!) because I think there’s nothing easier on a busy morning than grabbing the casserole out of the fridge where it’s been soaking and becoming more delicious overnight, throwing it in the oven, and, an hour or so later, enjoying a piping hot and luscious breakfast that required no effort on your part. At least that morning. Am I making any sense? Goodness, I hope so.
This cinnamony-sweet spin capitalizes on the swirly deliciousness of cinnamon-raisin bread . . . and takes it up a notch. Or two. Or three. Or five million thousand hundred! What really sets this particular casserole apart is leaving the slices of bread whole instead of tearing them; I’ve seen this fun presentation from time to time, whether it’s regular white bread or spicy pumpkin bread at holiday time, and it always makes my heart leap. Also, leaving the slices whole saves you all that effort of tearing the bread into chunks as I do for most all of my other baked French toast versions. Tearing bread into chunks can be very exhausting.
I’m kidding.
I think.
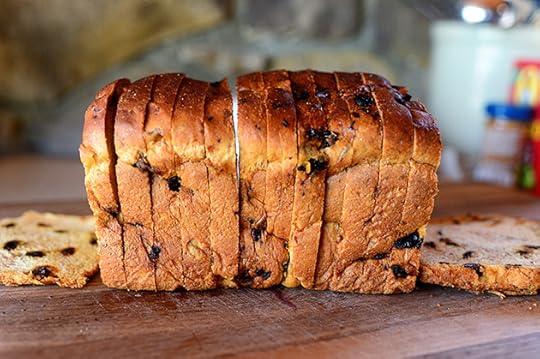 Unwrap the bread…
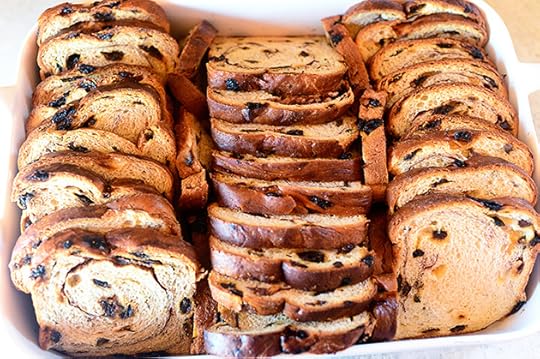 Then lay the slices in rows in a well-buttered baking dish, overlapping the slices and sticking half-pieces in the cracks as needed.
 Whisk together the eggs, milk, cream, sugar, vanilla, and cinnamon . . .
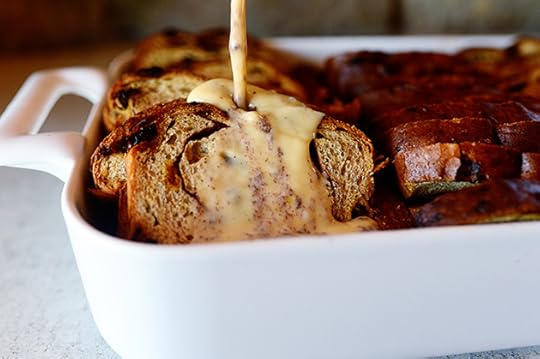 And pour the mixture evenly over all the pieces of bread, soaking the bread as much as possible.
 To make the topping, combine the butter, flour, brown sugar, cinnamon, and salt in a bowl…
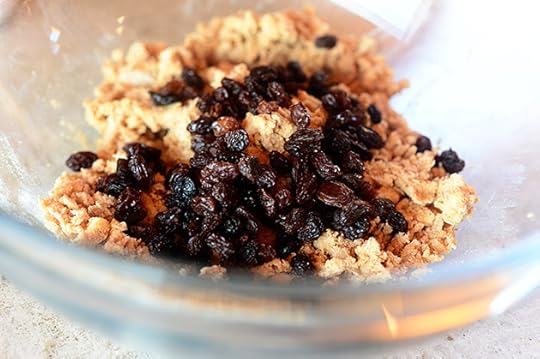 And cut it all together with a pastry cutter. Stir in the raisins…
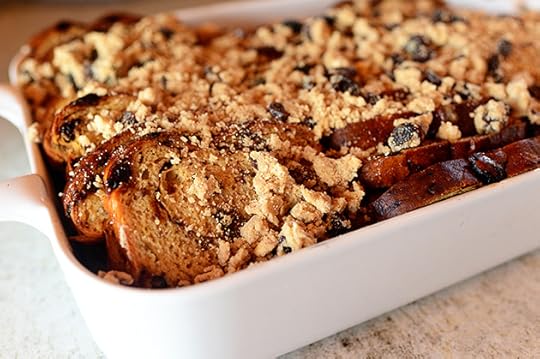 And sprinkle the topping all over the casserole. Cover the pan with foil and refrigerate it for several hours or overnight. This is particularly important with this baked French toast, because the whole pieces of bread aren’t submerged in the liquid and they’ll need time to sufficiently soak up the egg mixture.
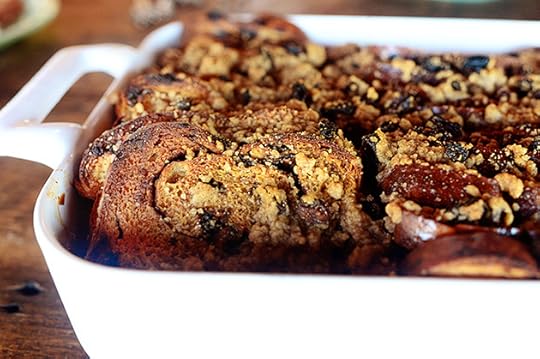 When you’re ready to bake the French toast, preheat the oven to 350°F. Bake the French toast for 45 minutes to 1 hour for a softer texture, or longer for a firmer, crisper texture. It would be best, even though I didn’t do this, to leave it covered for the first 30 minutes of baking so the top won’t get too brown. Mine got a little crispy, but it was still utterly delicious.
 The fun part is serving it up! You can either scoop out big portions with a serving spoon or you can try lifting out individual pieces of bread. They won’t totally hold together…but it’s fun to try!
And try and try and try.
Serve it with softened butter and warm maple syrup.
 And, most of all, a hearty appetite!
Here’s the handy dandy printable.
Recipe
Cinnamon Raisin Baked French Toast
Prep Time: 15 Minutes
Cook Time: 1 Hour
Difficulty: Easy
Servings: 16
Print Recipe
Ingredients
1-1/2 loaf Cinnamon Raisin Bread Butter, For Greasing8 whole Eggs2 cups Whole Milk1/2 cup Heavy Cream1 cup Sugar2 teaspoons Ground Cinnamon2 Tablespoons Vanilla Extract Topping1 stick Cold Butter, Cut Into Pieces1/2 cup Flour1/2 cup Packed Brown Sugar1 teaspoon Ground Cinnamon1/4 teaspoon Salt1/2 cup Raisins Softened Butter, For Serving Warm Maple Syrup, For Serving Preparation Instructions
Unwrap the loaves of bread, then overlap the slices in rows in a well-buttered baking dish.
Whisk together the eggs, milk, cream, sugar, vanilla, and cinnamon, then pour the mixture evenly over all the pieces of bread, soaking the bread as much as possible.
To make the topping, combine the butter, flour, brown sugar, cinnamon, and salt in a bowl and cut it all together with a pastry cutter. Stir in the raisins.
Sprinkle the topping all over the casserole. Cover the pan with foil and refrigerate it for several hours or overnight.
When you’re ready to bake the French toast, preheat the oven to 350°F. Bake the French toast for 45 minutes to 1 hour for a softer texture, or longer for a firmer, crisper texture. Cover with foil for the first 30 minute of baking, then remove it for the remaining baking time.
Serve individual helpings with butter and warm syrup.
Posted by Ree on August 19 2013

August 16, 2013
Pasta Party!
 On tomorrow’s morning’s Food Network episode, we throw my oldest daughter a surprise 16th birthday party. Her friends come, as well as her cousins, grandparents, and siblings…and we all have a really fun time surprising her.
For the food, I knew it had to be pasta because my girl inherited her mother’s passion for carbs. But instead of deciding on one kind of pasta dish, I wound up laying out a big ol’ pasta bar and letting guests assemble their own creations.
It was really fun!
 First I cooked a bunch of pasta, then drained it an tossed it in just a little bit of olive oil to keep it from getting sticky. I did straight up spaghetti…
 Cut, curly rotini…
And I also did wagon wheels, which I love.
And then came zee sauces!
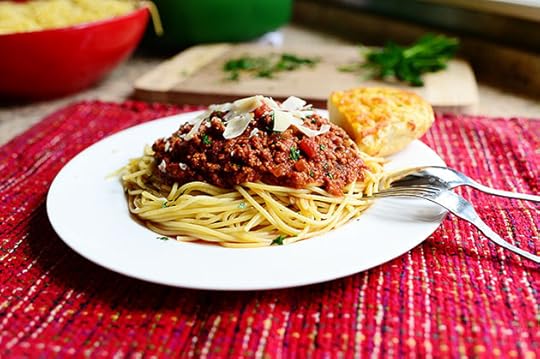 Meat Sauce! Hearty and crowd-pleasing.
 Pesto! Fresh and verdant.
(And by the way, here are some other Uses for Pesto in case you whip up a batch.)
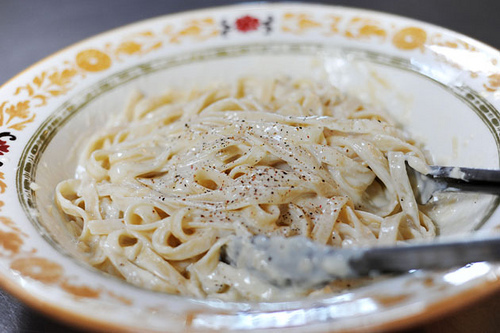 And Alfredo Sauce. Rich and sinful!
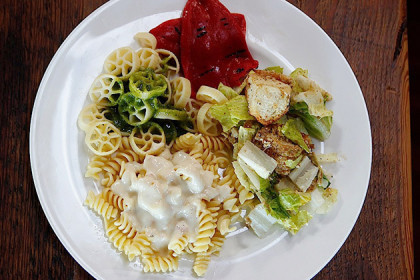
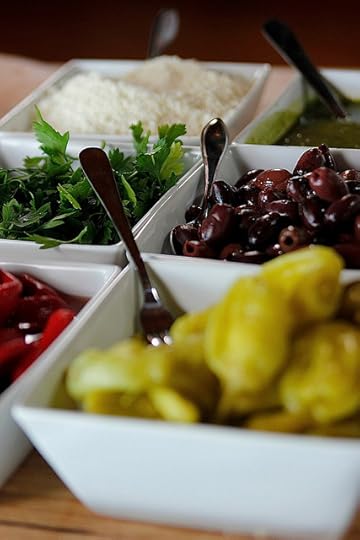 Then I had an assortment of toppings and adornments: Parsley, pepperoncinis, kalamata olives, grated Parmesan, roasted red pepper, etc.
 I also marinated a bunch of chicken breasts, then grilled them and sliced them up into pieces so folks could add it to their alfredo or basil pasta. The marinade was olive oil, lemon juice, dijon, honey, salt and pepper!
 So then everybody just digs in and builds their plates however their heart leads them.
 I did pesto on top of pasta…then spooned a little alfredo on top of it. It became a light green, delicious mess!
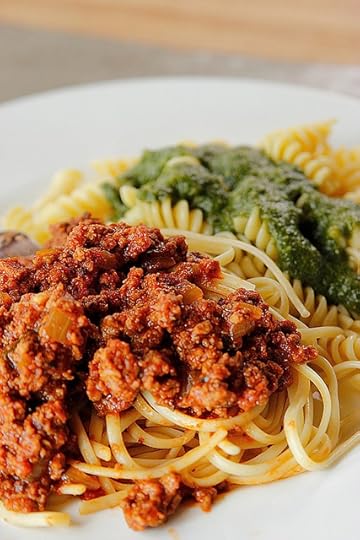 But the meat sauce was what really disappeared.
And then came the birthday “cake.”
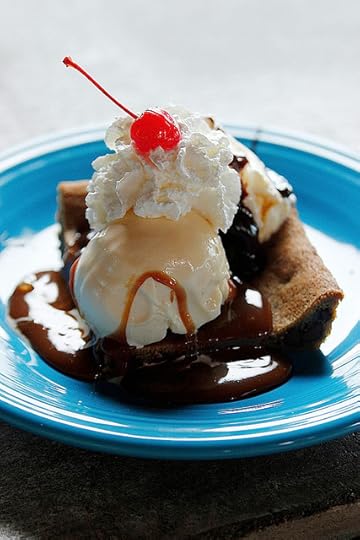 Everyone got one of these.
 And everyone loved them.
Here’s the printable for the pasta bar! For the individual recipes for meat sauce, pesto, and alfredo, just go the individual recipes above. (For the alfredo sauce, just combine all the ingredients in a skillet or saucepan rather than assembling them in a pasta bowl.)
Have fun, guys!
Recipe
Pasta Bar
Prep Time: 2 Hours
Cook Time:
Difficulty: Easy
Servings: 18
Print Recipe
Ingredients
Cooked Spaghetti, Drained And Tossed Lightly In Olive Oil Cooked Rotini, Drained And Tossed Lightly In Olive Oil Wagon Wheel Pasta, Drained And Tossed Lightly In Olive Oil A Pot Of Good, Piping Hot Meat Sauce A Bowl Of Freshly Made Pesto A Pan Of Simmering Alfredo Sauce Grilled Chicken, Sliced A Dish Of Kalamata Olives A Dish Of Grated Parmesan A Dish Of Chopped Parsley A Bowl Of Basil Leaves A Dish Of Pepperoncinis A Dish Of Roasted Red Peppers Preparation Instructions
Lay out everything in a line, making sure the pasta is warm and the sauces (except pesto) are nice and piping hot. Let guests load up however they want. Have fun!
Posted by Ree on August 16 2013

August 12, 2013
Cinnamon Crisps
 First of all, these crisps are about the most delicious things you’ll ever eat.
Second, these crisps are about the easiest things you’ll ever make.
Third, when I was a little girl, I had a stuffed monkey named Womba. His hands Velcroed together and I think I might have worn him as an accessory for the first half of my fourth grade year. Sometimes he was around my shoulders like a cardigan. Sometimes he was around my waist like a belt. Sometimes he was criss-crossed over my shoulder like a purse. And if I was nervous, I’d stroke his soft, fuzzy head and would feel better instantly.
I always wondered why Brad Benz didn’t like me.
Back to my original point: These crisps are about the most delicious things you’ll ever eat. I made them using homemade tortillas to go with cinnamon ice cream (swoon) in my next cookbook…but I also made them last week for a Food Network episode we filmed here on the ranch, and the guys absolutely inhaled them. So yesterday, for a Sunday snack, I made ‘em again using storebought tortillas and served ‘em with storebought vanilla ice cream. And they were still utterly divine.
You won’t believe the simplicity. And you won’t believe how addictive they are!
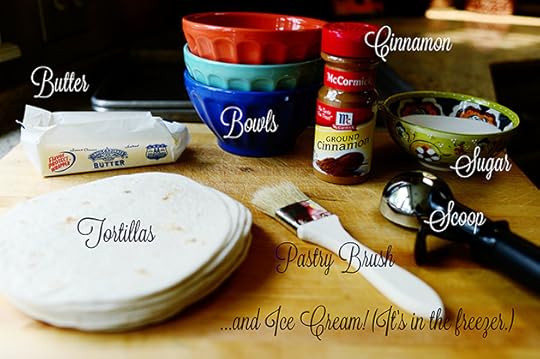 This is what you need!
And you also need to preheat the oven to 350 degrees.
 Add some sugar and ground cinnamon to a bowl.
 Then grab a fork and use it to violently combine the two…
 Until the two are now one!
Did you ever wear a stuffed monkey as an accessory when you were a child? I’m just asking.
(Note: If you’ve ever worn a stuffed monkey as an accessory when you were an adult, I’d rather not know. Thank you.)
 Next, melt some butter.
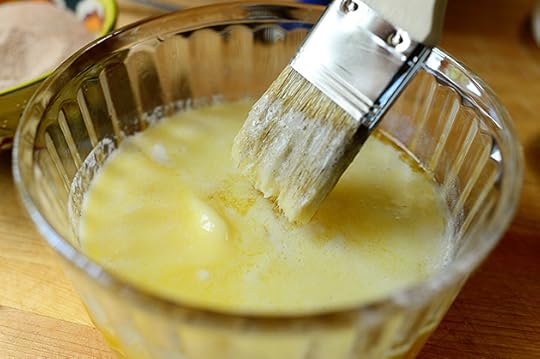 Dip in a pastry brush…
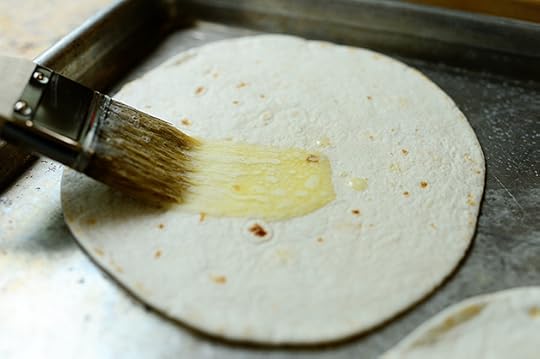 And very, very generously brush the butter on one side of a flour tortilla.
 Basically, you want to douse the sucker. Pretty much the only way you can mess up these things is if you don’t get enough butter on them at this stage.
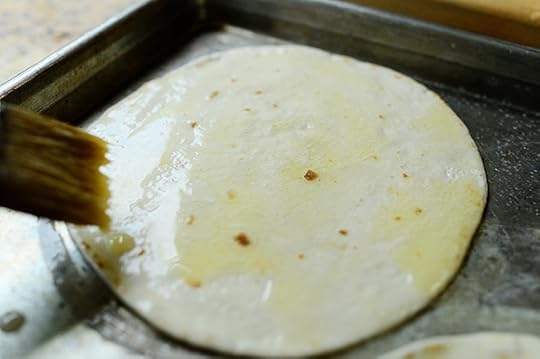
 Then do the same for a couple of other tortillas.
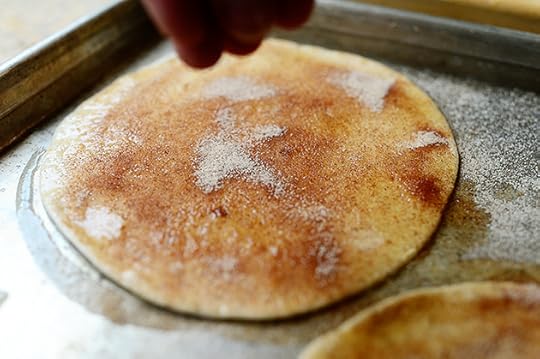 Right away, start sprinkling on the cinnamon sugar. You want it to totally cover the tortilla and mostly be absorbed by the butter. When most of it has been absorbed, sprinkle on a little more!
 Repeat it with the other two tortillas, then flip them all over to the other side.
 And repeat the process with the butter…
 And the sugar. Next, just pop ‘em in the oven for about 15-17 minutes…
And brace yourself.
Just brace yourself.
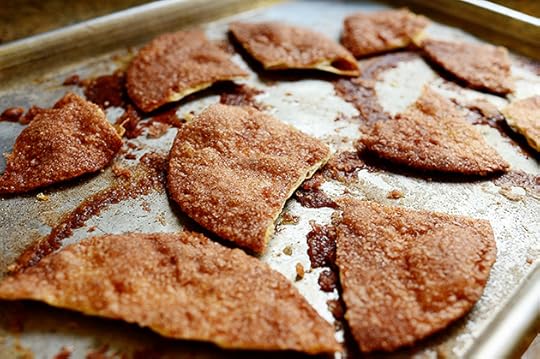
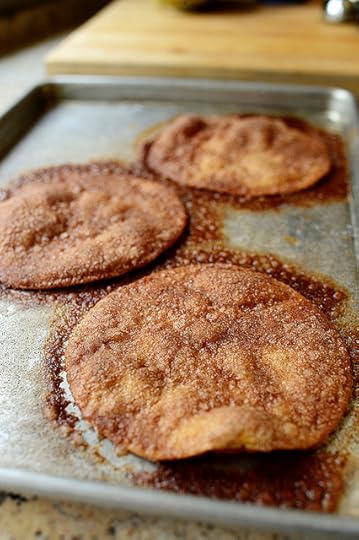 This is what they should look like!
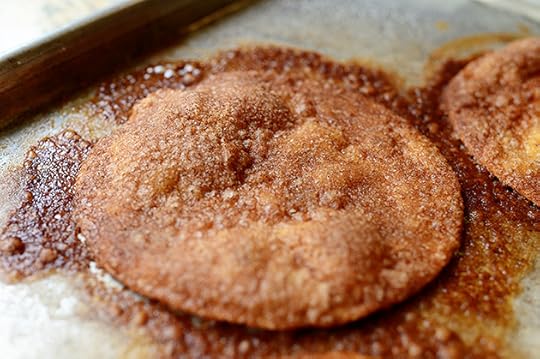 They’re crunchy. They’re crispy. They’re magical.
But you have to put them aside and let them cool completely.
Note: This will be extremely difficult.
So while we wait: Have you ever given your summer camp crush a hug goodbye when you were twelve, then turned around to leave and tripped over a rock and fell, scabbing your knee?
I’m just asking.
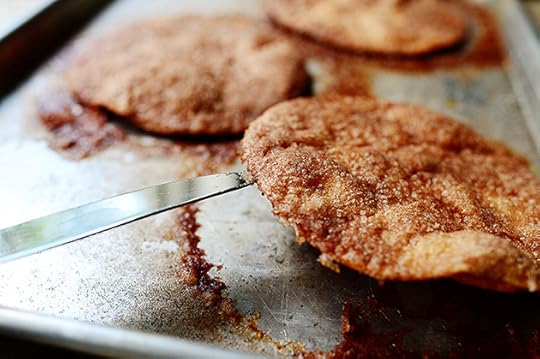 A minute or so after removing the pan from the oven, use a knife to loosen the crisps from the pan so they won’t stick until the end of eternity.
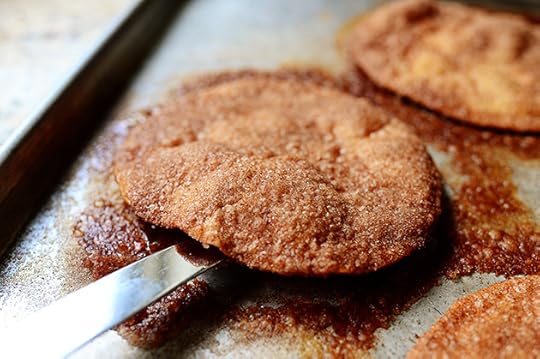 But really, there’s so much butter in these heavenly objects, they really don’t stick that badly.
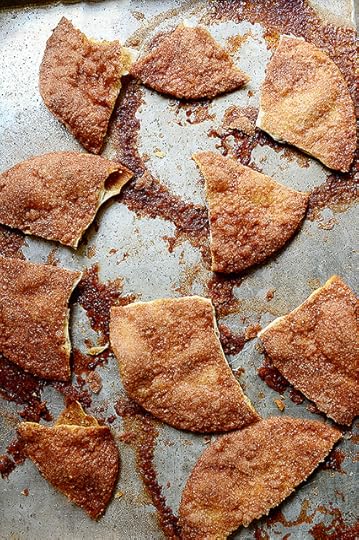
 After they’re totally cooled, break them into pieces. They should be totally crisp and hard, and should break apart pretty neatly.
 You can’t know. You can’t know the deliciousness until you try them. And at this point, you could break them up into smaller pieces, bag them up, and use them as snacks.
 But I have other plans for them.
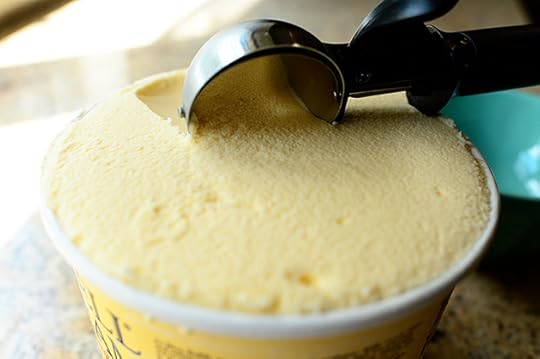 I scream.
 One…two…three…
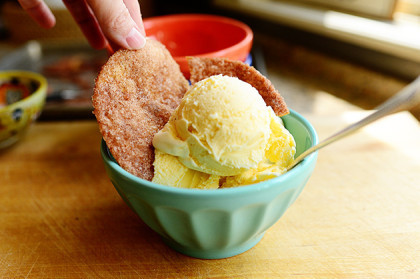
 TA-DA!
 Wondrous. Just a wondrous, wonderful, fabulous combination.
 You can also do smaller dishes of ice cream and have some fun sticking the crisps right in the scoop.
 And use them as spoons!
Goodness gracious, my friends. Make ‘em this week. They’re too good not to. And they’re a complete cinch.
Here’s the handy dandy printable!
Recipe
Cinnamon Crisps
Prep Time: 5 Minutes
Cook Time: 15 Minutes
Difficulty: Easy
Servings: 8
Print Recipe
Ingredients
1 stick Butter, Melted3 whole Flour Tortillas (small Size)1 cup Sugar1 Tablespoon Ground Cinnamon Preparation Instructions
Preheat the oven to 350 degrees.
Mix together the sugar and cinnamon.
Brush butter on one side of the flour tortillas. Sprinkle generously with the cinnamon sugar. Flip tortillas to the other side, then sprinkle on the cinnamon sugar.
Bake for 15-17 minutes until very crisp. Remove from oven and allow to cool completely.
Break into pieces and eat as snacks...or serve with ice cream!
Posted by Ree on August 12 2013

August 8, 2013
Pizza Ree-a
 I made pizza for the show a couple of days ago, and this tomato-basil version with four different cheeses made my skirt fly up, my soul sing, and my spirit soar. It was tremendously delicious, and while I wasn’t able to take step-by-step photos, I was able piece together what I did using process shots from a couple of different archived recipes here: Pizza Dough and Bruschetta.
Because of this, I couldn’t figure out whether to call this pizza “Bruschetta Pizza” (because it is, essentially, bread topped with a tomato-basil mixture) or “Four Cheese Pizza” or “Tomato Basil Pizza” or “Bruschetta Four Cheese Pizza” or what.
So I thought of calling it Pizza alla Ree.
Because when I go to Heaven, this is the pizza I want to eat there.
But then I decided to be all weird and call it Pizza Ree-a.
Get it?
I probably don’t need to worry about this recipe showing up on any Google searches.
 Here’s what you need for the pizza crust.
(These dough process shots are from my Fig-Prosciutto Pizza recipe, which is gloriously good, too!)
 To make the crust, sprinkle yeast over warm water and let it stand for a few minutes.
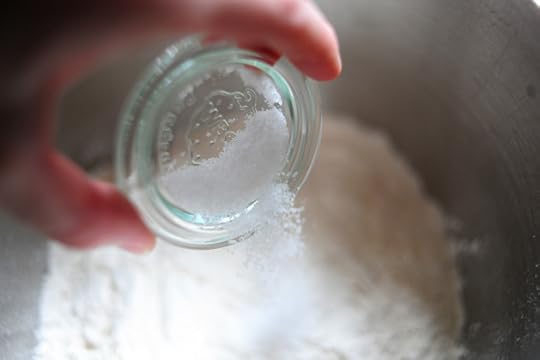 Next, add the salt to the flour.
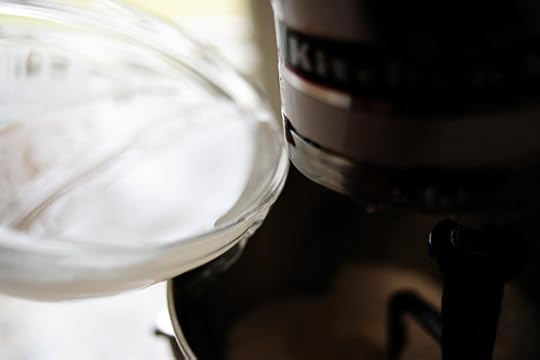
 And stir it around in the mixer for a few seconds.
 Next, with the mixer on low, drizzle in the olive oil.
 Stir it together till the olive oil is worked into the flour.
 Next, pour in the warm water/yeast mixture.
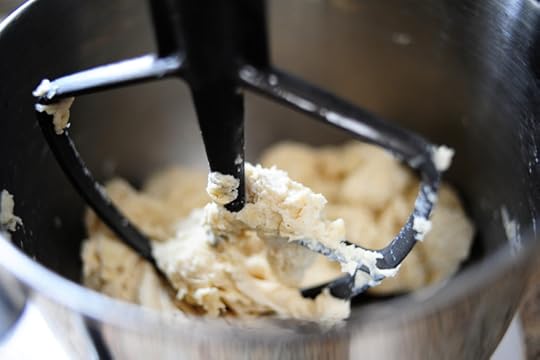 Mix it together until the dough all comes together in a sticky mass.
 Then just cover the bowl with plastic wrap and set it aside for 1 to 2 hours. Or, to really step up the flavor and texture, just park it in the fridge for a few days, sealed in a plastic bag.
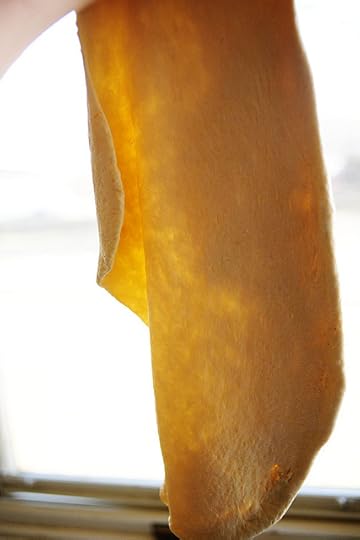
 Yum. Aged to perfection.
 I want this pizza to be as thin as possible, so I just used half of the dough recipe. Just roll it out as thin as you can.
IMPORTANT NOTE: These process shots show my full pizza dough recipe, which I usually divide in half for two pizzas. The printable pizza dough recipe below is for one crust only, so no need to divide it in half. Didn’t want that to be confusing.
 Or, if you’re talented in this arena (and I’m not), shape it and stretch it with your hands.
 Place the dough on a large baking sheet. Drizzle it very lightly with olive oil, and sprinkle very lightly with salt.
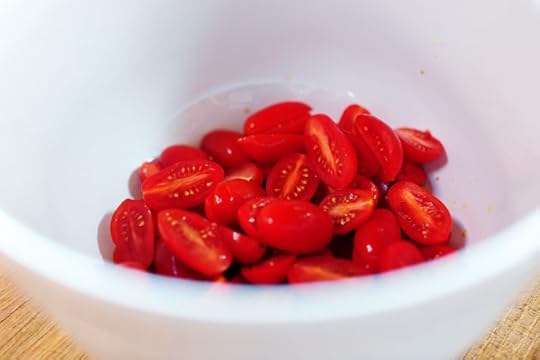
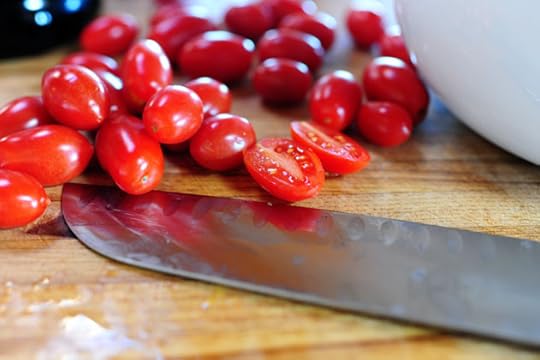 To make the tomato-basil topping, slice the tomatoes in half lengthwise…
(Note: The process shots that follow are from my Bruschetta recipe.)
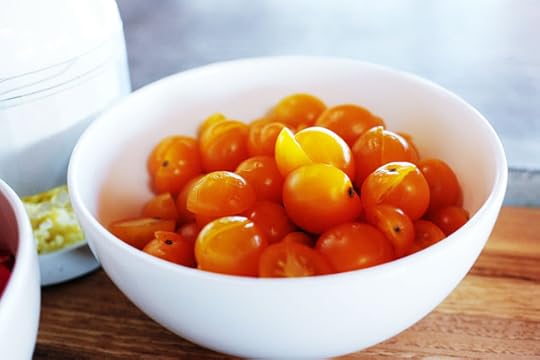 Then do the same with the yellow. Eat two. Repeat as necessary.
 Chop up a bunch of pre-peeled garlic cloves using this chopper contraption, because if you’re like me, this is your new favorite way to quickly chop a bunch of garlic…
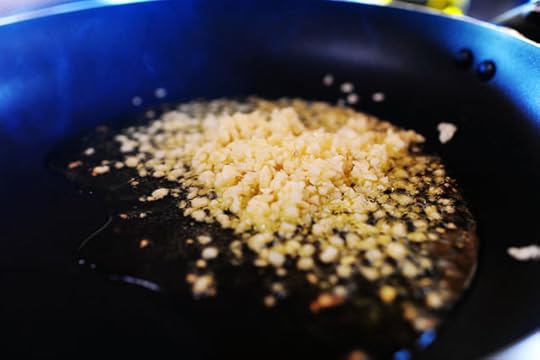 Then heat some olive oil in a small skillet over medium-high heat and throw in the garlic.
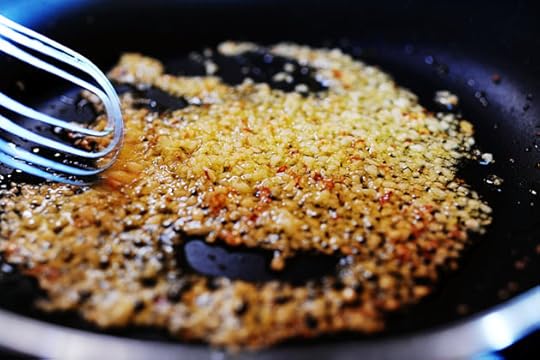 Stir it around for less than a minute, just to get the flavors going and to brown it just a bit…but don’t let it burn!
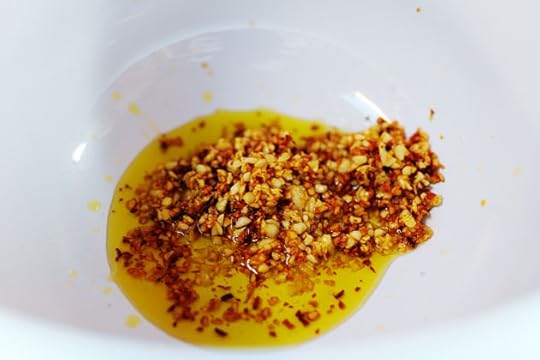 Then throw it—olive oil and all—into a bowl and let it cool for just a bit.
You might stop a few seconds earlier than I did so it’s a little more “golden” than “golden brown.”
Don’t be like me, is what I’m saying.
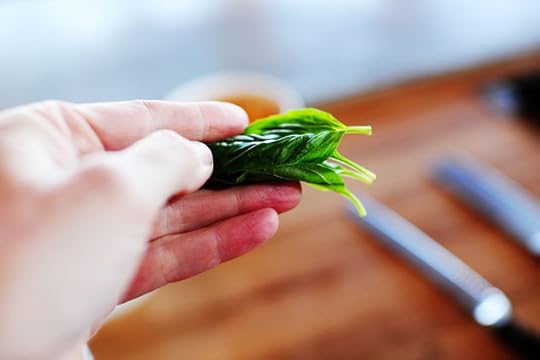 Meanwhile, grab some basil leaves and stack them on top of one another…
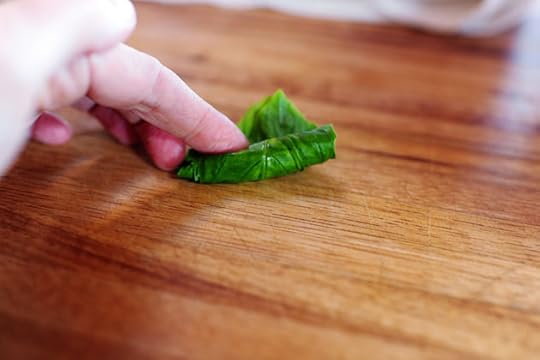 Then roll them up tightly…
 And slice them into strips. You’ll need a whole bunch more than this. I’m just demonstrating.
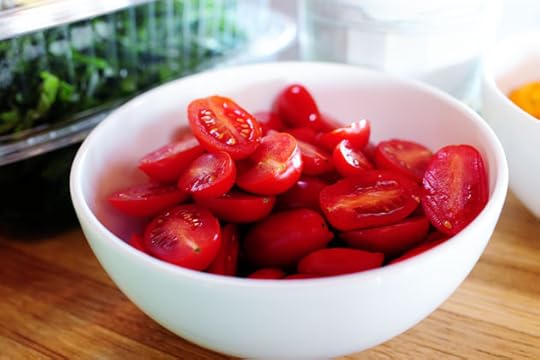
 Next, throw the red tomatoes into the bowl…
 Followed by the yellow tomatoes…
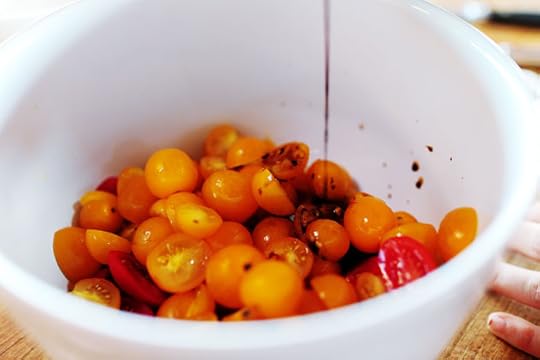 A little balsamic…
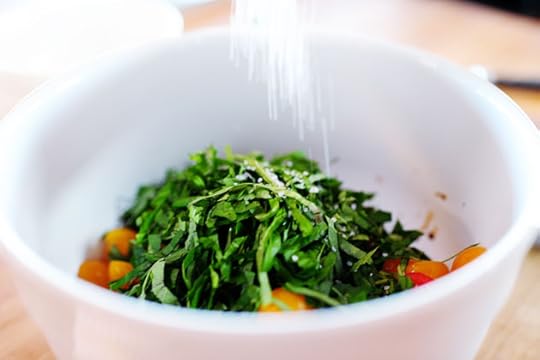 The basil…
 And a little salt and pepper. Not too much salt! Start light and work your way up if necessary.
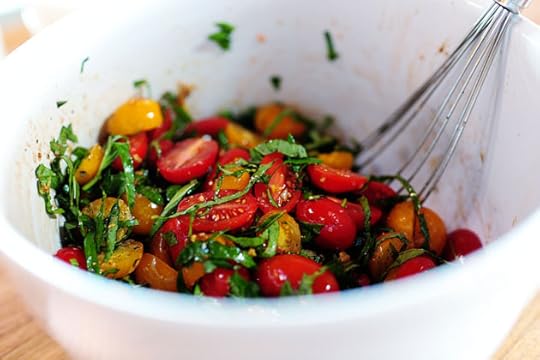 Next, stir it to combine and give it a taste, adding more of whatever you think it needs. I added a bunch more basil…
 And a tiny splash of more balsamic. Then stir it around.
Now SCREEEEEEECH to a halt, because now I don’t have process shots to show you for the rest of the pizza.
But here are the instructions:
1. Spread pesto all over the surface. I used jarred stuff, and it was delicious.
2. Top the pesto with a mixture of four cheeses: Mozzarella, Pecorino Romano, Fontina, and Goat Cheese/Chevre (crumbled)
3. Bake the pizza at 500 degrees for 12-15 minutes.
4. Pull it out of the oven.
5. Sprinkle the tomato-basil mixture all over the top.
6. Serve!
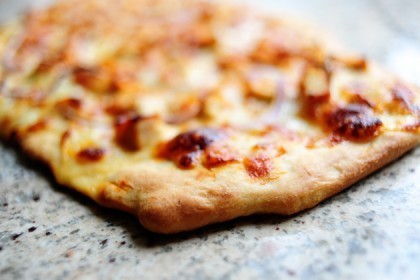
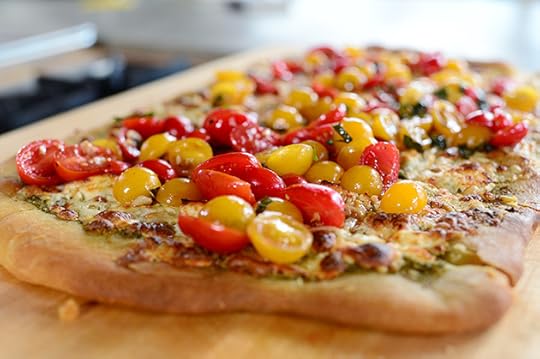 You will absolutely love this. (Note: This was taken about 20 minutes after it came out of the oven…and even then it was ridiculously good. If you eat it while it’s piping hot and the cheese is still almost bubbling, even better.)
The super-thin crust is the star of the show.
But then again, so are the four cheeses.
But then again, so is the tomato-basil mixture.
Here are the printables for both the pizza and the crust!
Recipe
Bruschetta Pizza
Prep Time: 20 Minutes
Cook Time: 15 Minutes
Difficulty: Easy
Servings: 8

Print Recipe
Ingredients
1 whole Unbaked Pizza Crust Olive Oil Salt And Pepper, to taste1/4 cup Prepared Pesto5 cloves Garlic, Minced1 pint Red Grape Tomatoes, Halved Lengthwise1 pint Yellow Grape Tomatoes, Halved Lenthwise1 Tablespoon Balsamic Vinegar16 whole Basil Leaves (chiffonade)6 ounces, weight Mozzarella, Grated1/4 cup Grated Parmesan Or Romano1/2 cup Fontina Cheese4 ounces, weight Goat Cheese Crumbled Preparation Instructions
To make the pizza topping: In a small skillet, heat olive oil over medium-high heat. Add garlic and stir, lightly frying for about a minute, removing before the garlic gets too brown (it can be golden.) Pour into a mixing bowl and allow to cool slightly.
Add tomatoes, balsamic, basil, and salt and pepper to the bowl. Toss to combine, then taste and add more basil if needed, and more salt if needed (don't oversalt, though!) Cover and refrigerate for an hour or two if you have the time.
Preheat the oven to 500 degrees. Roll out the pizza dough as thin as it will go and transfer to an oiled baking sheet. Drizzle a little olive oil on the dough and smear it around with your fingers. Sprinkle with salt and pepper, then spread pesto all over the surface. Mix the cheeses together and sprinkle them all over.
Bake pizza for 12-15 minutes, until crust is golden and topping is bubbly. Remove from oven and spoon on tomato-basil salad.
Cut into squares and serve!
Posted by Ree on August 8 2013
Recipe
One Basic Pizza Crust
Prep Time: 1 Hour
Cook Time:
Difficulty: Easy
Servings: 12
Print Recipe
Ingredients
1 teaspoon (SCANT) Active Dry Yeast3/4 cups Warm Water2 cups All-purpose Flour3/4 teaspoons Kosher Salt3 Tablespoons Olive Oil Preparation Instructions
Sprinkle yeast over 3/4 cups warm (not lukewarm) water. Let stand for a few minutes.
In a mixer, combine flour and salt. With the mixer running on low speed (with paddle attachment), drizzle in olive oil until combined with flour. Next, pour in yeast/water mixture and mix until just combined, and the dough comes together in a sticky mass.
Coat a separate mixing bowl with a light drizzle of olive oil, and form the dough into a ball. Toss to coat dough in olive oil, then cover the bowl tightly with plastic wrap and set it aside for 1 to 2 hours, or store in the fridge until you need it.
Note: it’s best to make the dough at least 24 hours in advance.
Posted by Ree on August 8 2013

Ree Drummond's Blog

- Ree Drummond's profile
- 2036 followers

