
Ree Drummond's Blog, page 31
April 10, 2014
Salisbury Steak Meatballs
 This is a very special recipe for two important reasons: One, it’s delicious, hearty, and comforting. Noodles. Meatballs. No brainer!
Two (and even more importantly!), it is a part of Land O’Lakes’ campaign. Between now and May 31, for every Land O’Lakes recipe (including this one!) that’s pinned (or repinned!) on Pinterest, the Land O’Lakes Foundation will donate nine meals to Feeding America®, which works to fight hunger in the United States. The goal is to donate 2.7 million meals. I participated with Land O’Lakes in Pin a Meal, Give a Meal last year, and it was amazing to see how many people pinned recipes in order to trigger meal donations.
So in a nutshell: Any Land O’ Lakes recipe you pin on Pinterest (including this one!) will trigger a donation of 9 meals to Feeding America®. Pin as many as you want! Here’s their Pinterest page, where you can browse them:
And here’s the Land O’Lakes website, which is brimming with great recipes. You can pin recipes straight from there, too. (At the bottom of this post, I’ve also linked to my other blogging friends who are participating in Pin a Meal, Give a Meal so you can check out their pinnable recipes, too.)
And now for the meat-a-ball recipe! I cooked and photographed it while Land O’ Lakes was visiting last month, and I’ve been eager to post it! I have a hard time sitting on cooking posts, as I have well established in the past. Ha. (I’m working on my patience…I’m working on my patience…I’m working on my patience…)
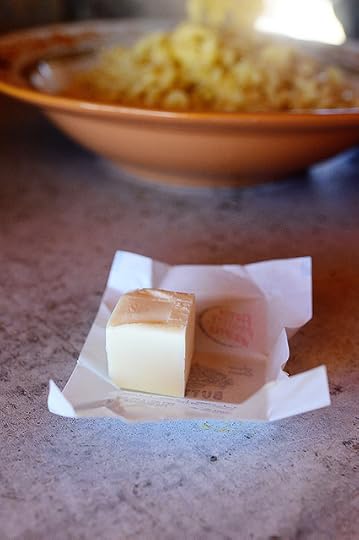
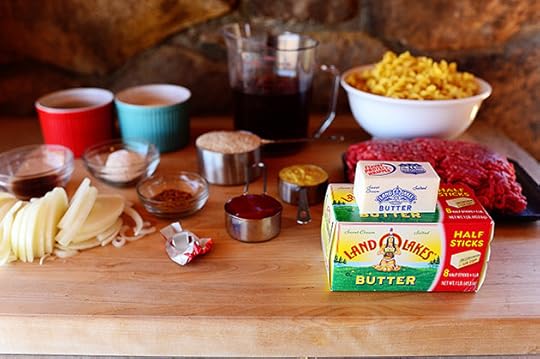 Here’s what you need: 1 Land O Lakes® Butter Half Stick, ground beef, seasoned breadcrumbs, brown mustard, ketchup, beef bouillon, Worcestershire sauce, salt, pepper, onion, beef broth, ketchup, cornstarch, egg noodles, and minced parsley. It’s not a tiny list of ingredients, but most of ‘em are staples!
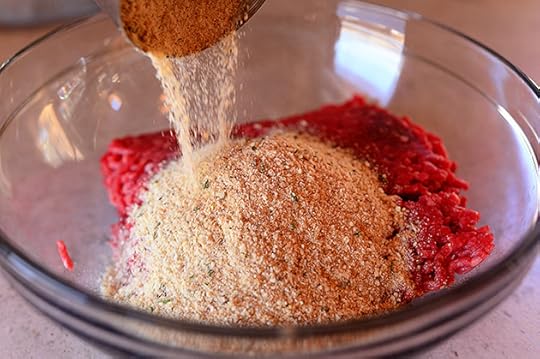 Combine the ground beef and seasoned breadcrumbs in a big ol’ bowl.
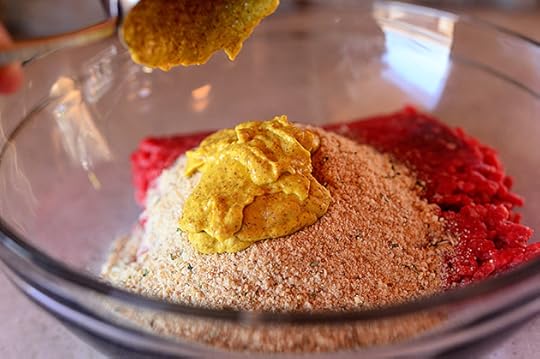 Then add the mustard (adds tang and wonderfulness)…
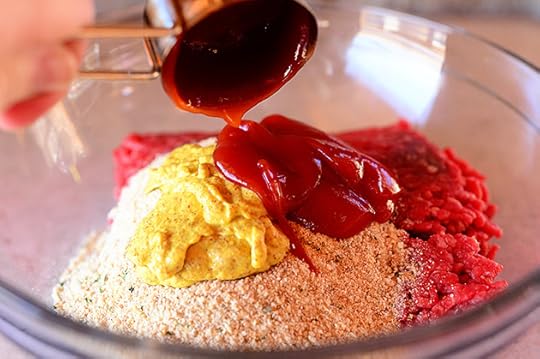 Then add the ketchup (adds flavor and ketchupiness)…
 Next, for a little more savoriness, crumble up the bouillon and add it in. (You can also use powdered beef base if you’ve got that in your pantry.)
 Worcestershire sauce is next…
 Then salt and a good amount of black pepper.
 Use your (very clean) hands to smash it all together, then grab a good 2 tablespoons of the mixture and roll it into neat balls. Repeat until all the meat mixture is rolled up! (Look. You can see me in the scoop. Freaky, man!)
 Now, into a pan or skillet, add half of the half stick of Land O Lakes® Butter. The entire recipe takes just 4 tablespoons…and that is the appeal of the half-sticks. They’re not just to be cute and adorable!
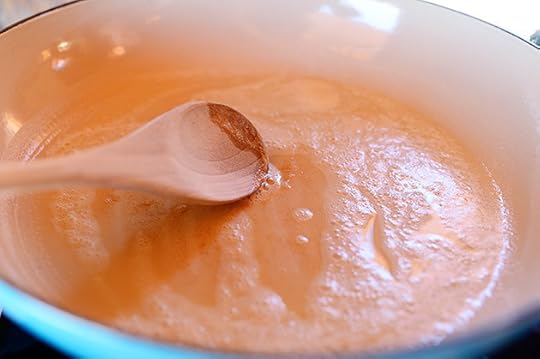 Melt the butter over medium-high heat…
 Then add the meat-a-balls! Depending on the size of your pot, you can do this in either one or two batches. (I did two batches because I didn’t want to crowd the pot too much.)
 Stir the meatballs around the pan…
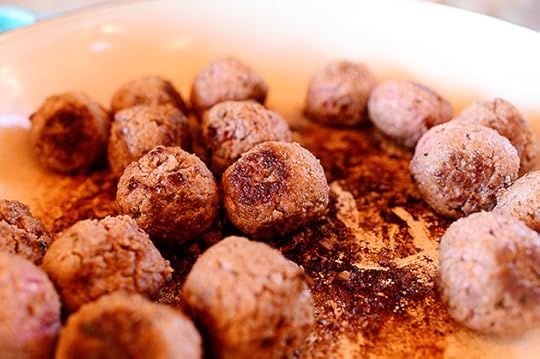 Until they’re nice and brown on the outside. (They don’t need to be done in the middle; they’ll finish cooking later!) Remove them to a plate…
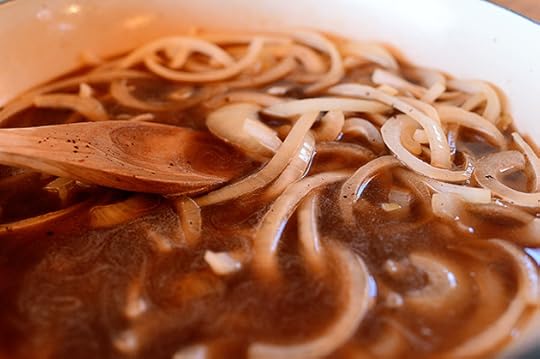
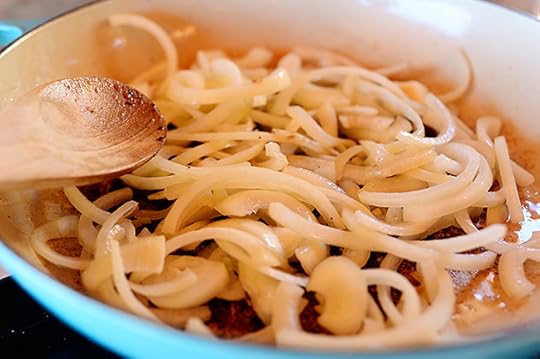 Then throw the onions into the pot and start to sauté them. You’ll want to cook them for a good 2 to 3 minutes until they’re starting to get soft and golden.
 When the onions are starting to get deep golden brown…
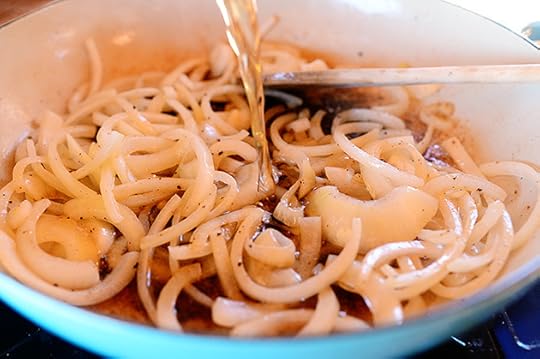
 Pour in the beef broth…
 More ketchup and mustard…
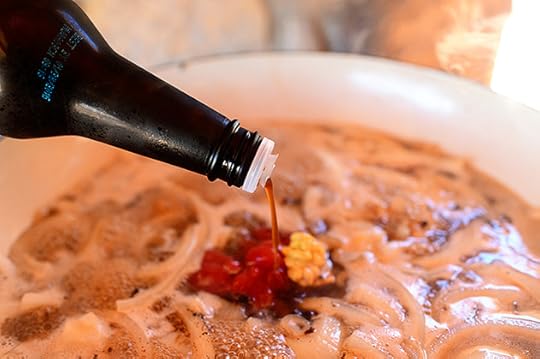 And more Worcestershire. Stir the sauce around, scraping the bottom of the pan to loosen up all the flavorful bits that were left after browning the meatballs. That’s flavor right there!
 Mix up the cornstarch with a little more broth…
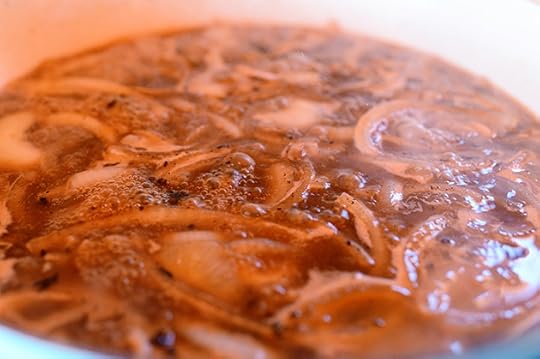 And when the sauce is really bubbling…
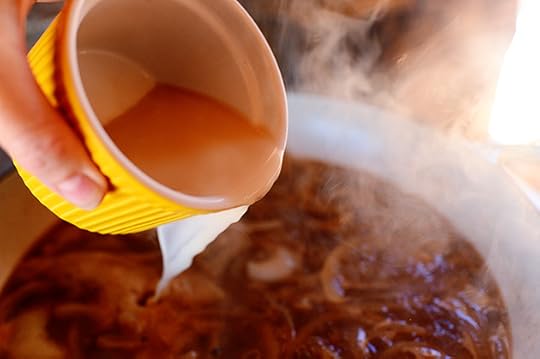 Pour in the cornstarch mixture. Stir it around…
 Then add in the meatballs!
 Let it all simmer for a good 15 minutes or so, until it’s nice and thick and the meatballs are totally cooked through.
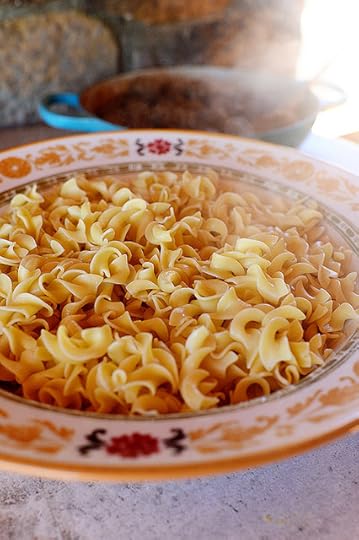
 While it’s simmering, cook and drain the egg noodles and pour them into a large serving bowl…
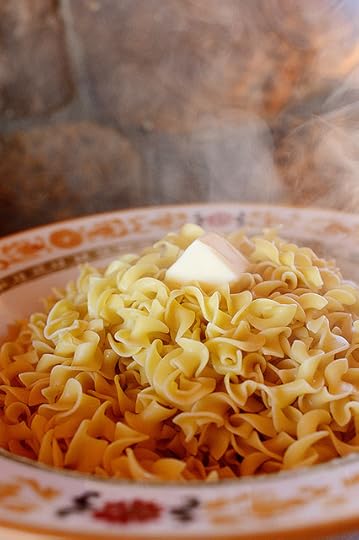 Then top with the other half of the half-stick of butter…
 And toss it around until the noodles are nice and buttery.
 Sprinkle some minced parsley over the noodles…
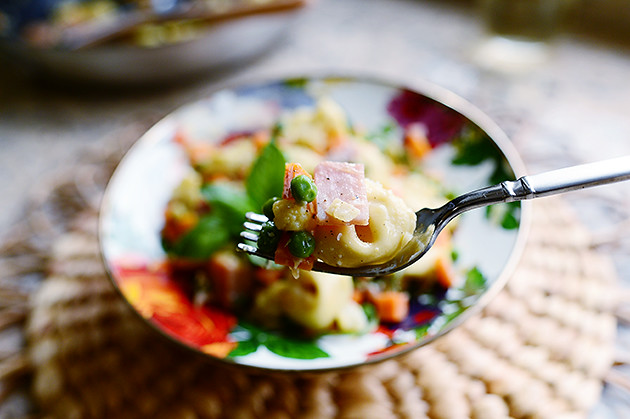
 Then grab spoonfuls of meatballs and sauce…
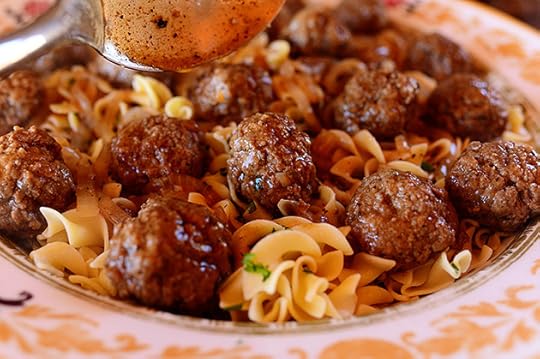 And spoon them all over the noodles.
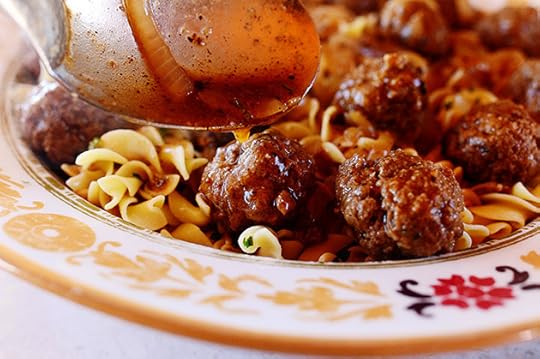 Make sure you get all the sauce on there! It’s part of the glory of this dish. Delicious!
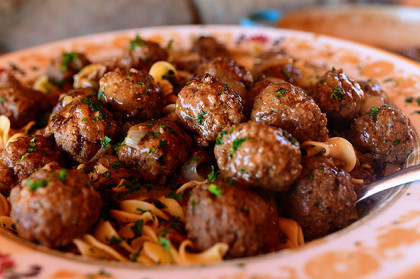
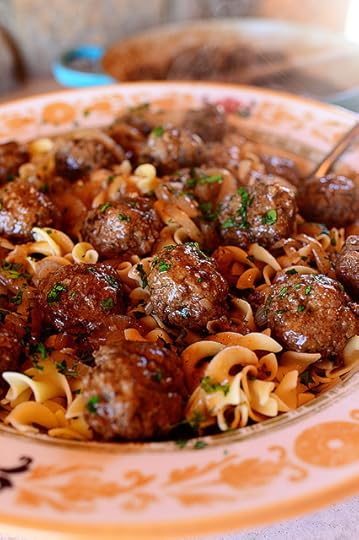 Finally, sprinkle on a little more minced parsley. Dinner is served!
You will love this, guys. Pure and holy comfort food. To the max. Like, totally.
The printable recipe is below, but first, here are some other recipes in the Pin a Meal, Give a Meal campaign:
Raspberry Almond Scones at Two Peas and Their Pod
Gnocchi with Brown Butter Cream Sauce and Kale at The Little Kitchen
Churros with Salted Caramel Sauce at The Novice Chef
Sriracha Garlic Toasts with Shrimp at A Farmgirl’s Dabbles
Mini Chicken Pot Pies at A Spicy Perspective
Strawberry Layer Cake with Amaretto Swiss Meringue Buttercream at Bake at 350
Caramelized Banana Topped Dutch Baby at Fifteen Spatulas
Parmesan Rosemary Brussels Sprouts Bacon Pizza by Picky Palate
If you love ‘em, pin ‘em!
$1 helps provide 9 meals* secured by Feeding America® on behalf of local member food banks. The Land O’Lakes Foundation guarantees a minimum of 2.7 million meals* (monetary equivalent of $300,000.00) to Feeding America and member food banks from March 28 through May 31, 2014.
I have partnered with Land O’Lakes for an exclusive endorsement of
Land O Lakes® Butter for the Kitchen Conversations blogger program. This blog post is sponsored by Land O’Lakes.
And here’s the handy dandy printable!
Recipe
Salisbury Steak Meatballs
Prep Time: 20 Minutes
Cook Time: 20 Minutes
Difficulty: Easy
Servings: 12
Print Recipe
Ingredients
2 pounds Ground Beef3/4 cups Seasoned Breadcrumbs1/4 cup Brown Mustard1/4 cup Ketchup1 teaspoon Powdered Beef Base Or Crumbled Beef Bouillon Cubes1 Tablespoon Worcestershire Sauce1/2 teaspoon Salt1/2 teaspoon Black Pepper1 whole Half Stick (1/4 Cup) Land O' Lakes Salted Butter1 whole Large Onion, Halved And Sliced2-1/2 cups Beef Broth1 Tablespoon Worcestershire Sauce (addition)1 Tablespoon Ketchup (additional)2 Tablespoons Cornstarch Mixed With A Little Beef Broth To Make A Thin Paste1 teaspoon Kitchen Bouquet (optional)1 pound Egg Noodles, Cooked To Al Dente And Drained Minced Fresh Parsley Preparation Instructions
To make the meatballs, combine the first 8 ingredients in a mixing bowl and knead until completely combined. Form into medium-sized meatballs and place on a plate.
Heat a large skillet or dutch oven over medium heat, and then add 2 tablespoons of Land O Lakes® Butter. When melted, add half the meatballs and gently move around the pan to brown. When brown, remove them to a clean plate and repeat with the rest of the meatballs.
In the same skillet, add the onions and cook for 3-4 minutes, until golden brown and starting to soften. In a small bowl, mix ½ cup of beef broth with the cornstarch.
Next add to the skillet 2 cups of the beef broth, Worcestershire sauce, ketchup, and mustard. Stir to scrape the bits off the bottom of the pan. Bring to a gentle boil and add the cornstarch mixture. Return the meatballs to the pan, reduce the heat to low, and allow them to simmer in the sauce for 10 minutes or until meatballs are done and sauce is thick. (Splash in more beef broth if needed for thinning.) To give the sauce a deeper color, add a little Kitchen Bouquet.
Serve meatballs and sauce over a platter of egg noodles, tossed in the remaining 2 tablespoons of Land O Lakes® Butter and sprinkle with minced parsley.
Recipe note: Sauce should be thick and glossy!
Disclosure: This recipe sponsored by Land O' Lakes.
Posted by Ree | The Pioneer Woman on April 10 2014


April 7, 2014
Lemon Lime Pound Cake
 Oh, dear. Oh, my.
Oh, help.
Oh, BEHAVE!
(Name that movie.)
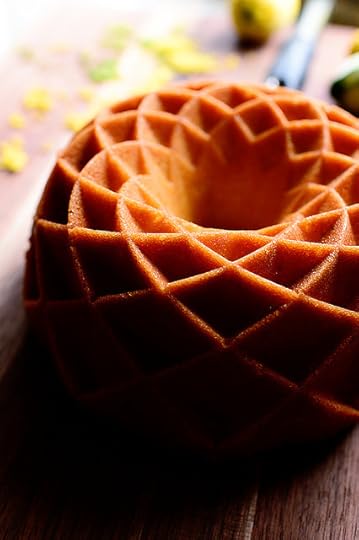
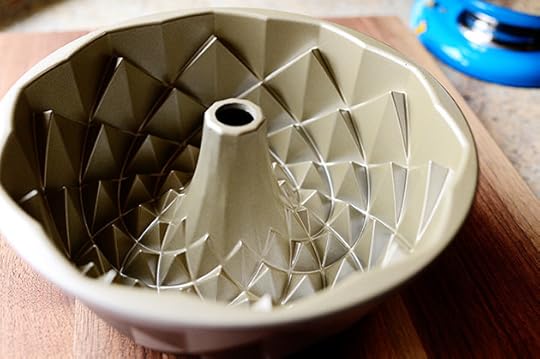 Okay, first of all: the intricate surface of this cake is not due to my superior cake sculpting skills.
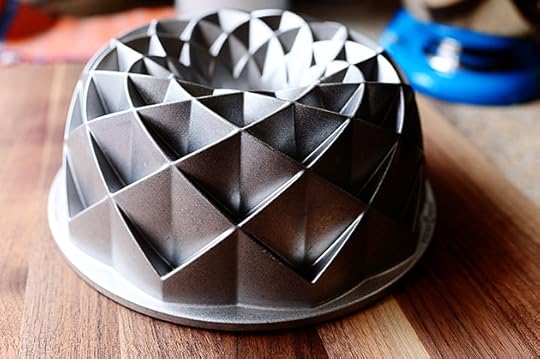 It’s entirely due to this beautiful, brilliant bundt pan, which I bought last week in a fit of culinary impulse while at my favorite restaurant supply store in the big city. I had no idea what I was going to do with it, I just knew I had to make it mine.
Yesterday after we got home from church, I decided to try it out using the classic 7-Up Cake recipe many of us grew up with, which I posted on this website several years ago. It’s as moist and delicious as ever, and for this I gave it a little extra citrus twist, and wound up loving the results.
C’mon! Let’s make it!
I mean bake it!
Let’s go.
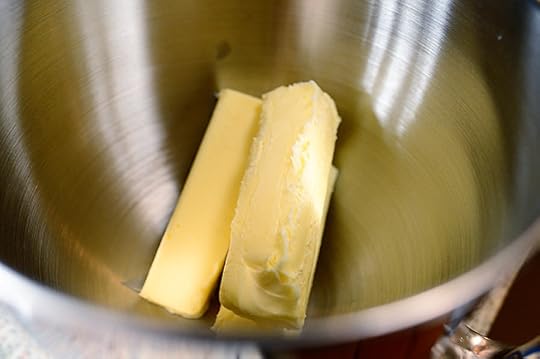 Start with 3 sticks of softened butter. And did you know that if you set cold butter on the countertop above your dishwasher while it runs through the cycle, it hastens the softening process?
It’s true.
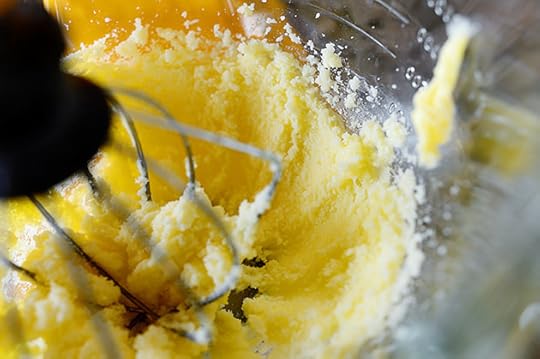
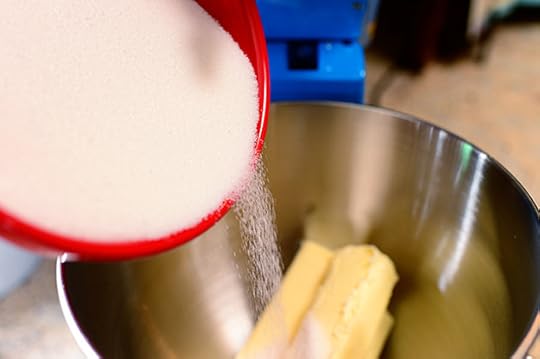 To the 3 sticks of butter, add 3 cups of sugar. (Are we seeing a pattern here?)
 Cream the butter and the sugar together…
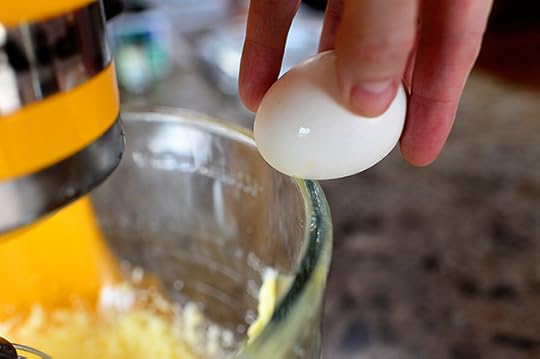
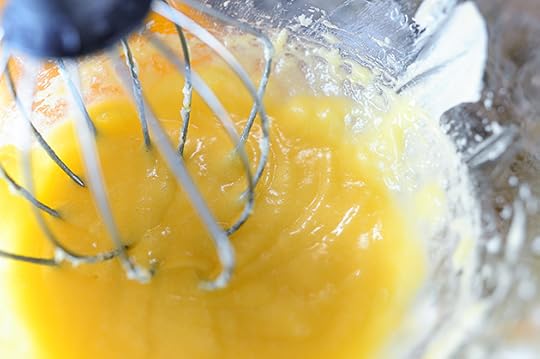
 Then drop in 5 eggs, one at a time, mixing after each one.
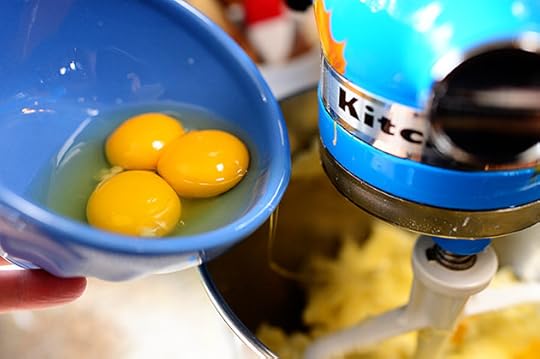 It helps to crack the eggs into a bowl or a small pitcher ahead of time. Lessens the likelihood that you’ll drop some shell in there while the mixer’s going, which lessens the likelihood that you’ll cuss.
Cussing while baking is banned in seventeen states. So the more you can do to prevent it, the better off you’ll be!
 Mix this together until it’s all combined.
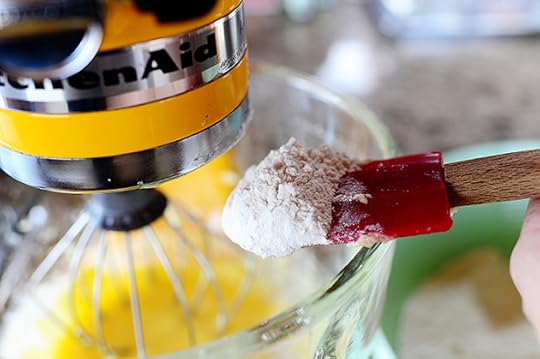
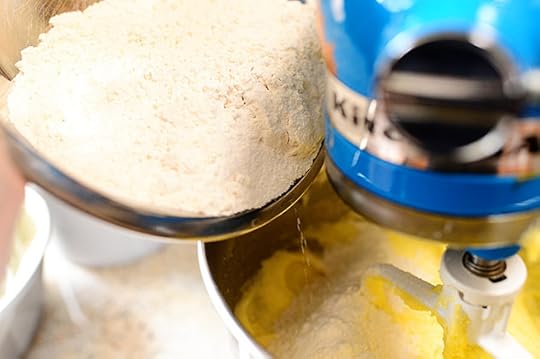 Then, in a separate bowl, combine 3 cups of flour (seeing? pattern? here?) with a little salt and add the dry mixture a cup at a time until it’s mixed together.
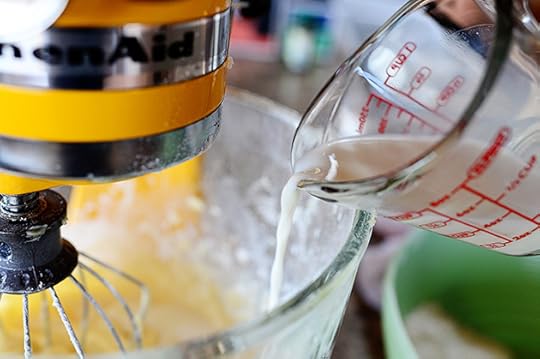
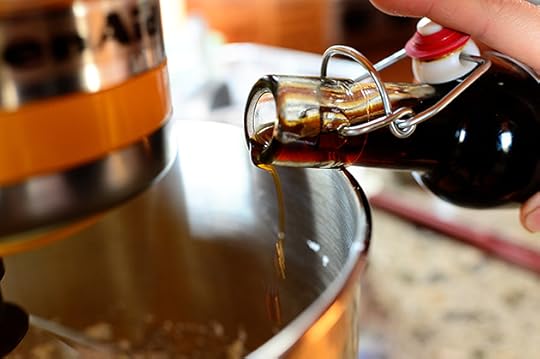
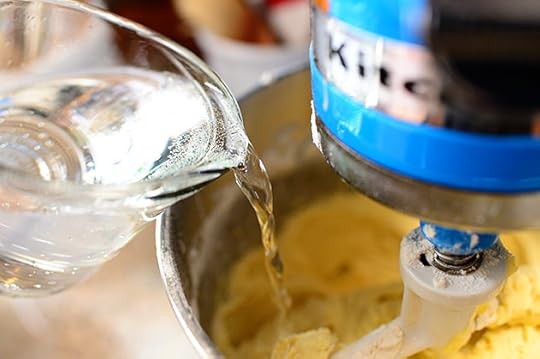 Next, with the mixer on low, pour in some 7-Up! Or Sprite! Or Sierra Mist!
(Or…Orange Crush, anyone?)
(You didn’t hear that from me.)
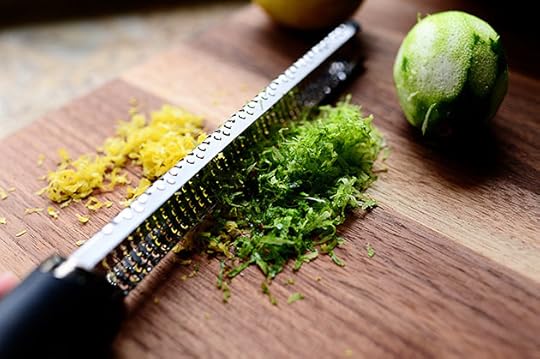 Finally, zest a lemon and a lime…
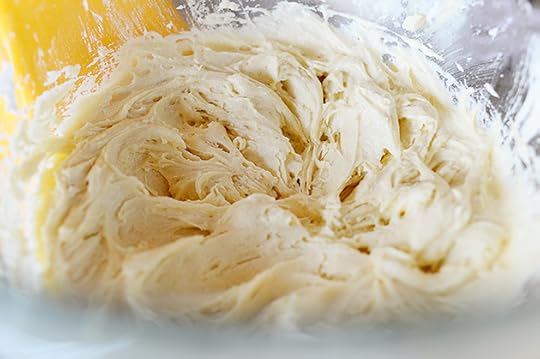
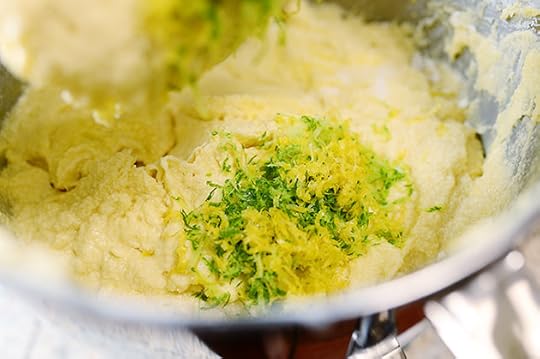 And mix it into the batter. Scrape the sides thoroughly, then mix it again until it’s all combined.
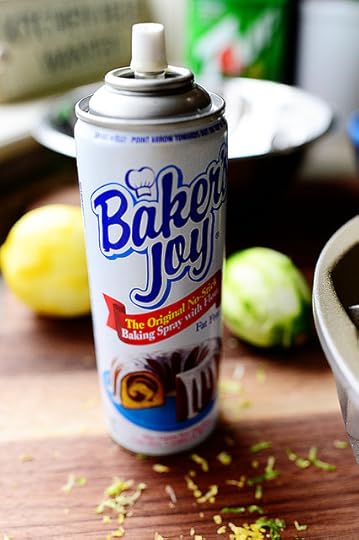 Spray the crazy, wacky bundt pan (or any bundt pan) with baking spray…
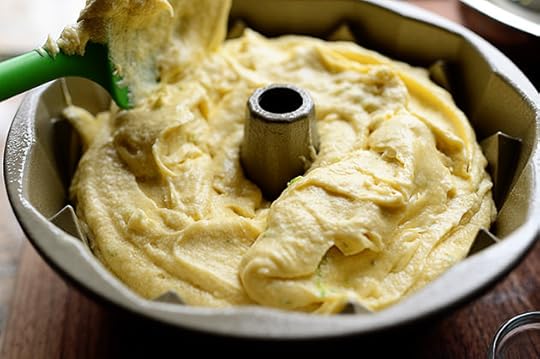 Spoon all the batter into the pan…
 Even out the top…
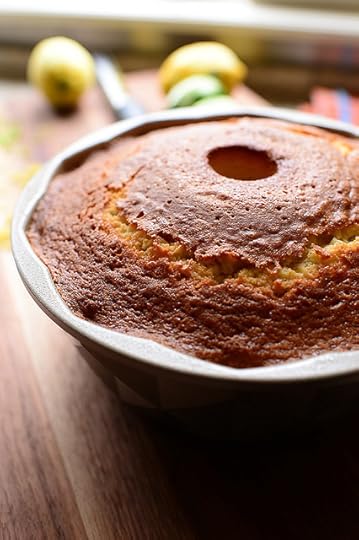 Then bake the cake for a good 1 hour 10 minutes…or a little longer if it needs it! (A toothpick inserted should not come out totally clean; but it shouldn’t be wet with batter.) Then let it cool in the pan for 15 minutes…
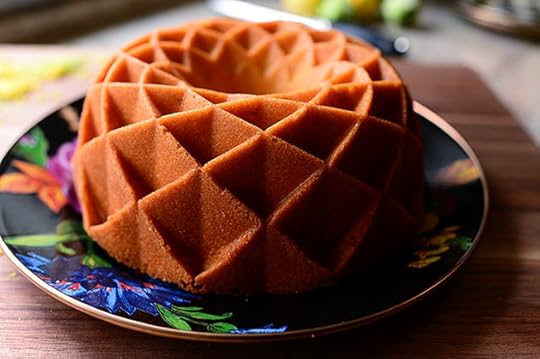
 Before turning it out to cool completely.
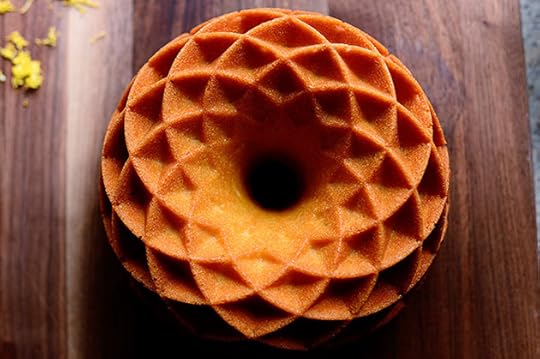 Magical! I love how evenly it browned, and how beautifully golden it is.
This pan is a revelation.
 When it was cool, I put it on a cake platter and got to work on the glaze.
 All I know is, something delicious needs to go in those crevices.
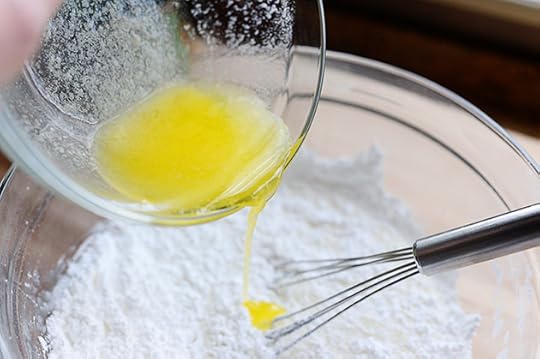
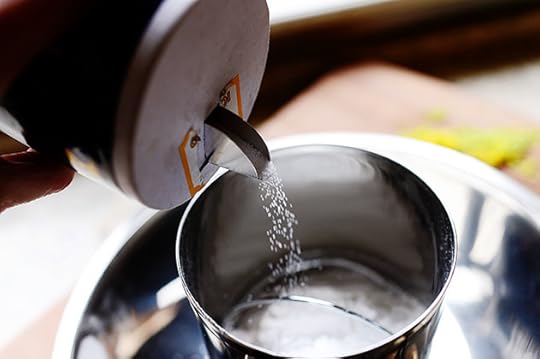 For the glaze, I put some powdered sugar in a sifter with a dash of salt.
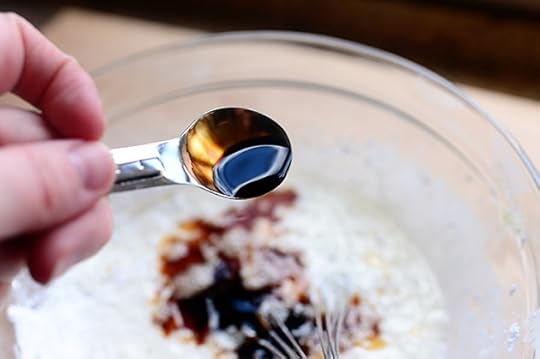
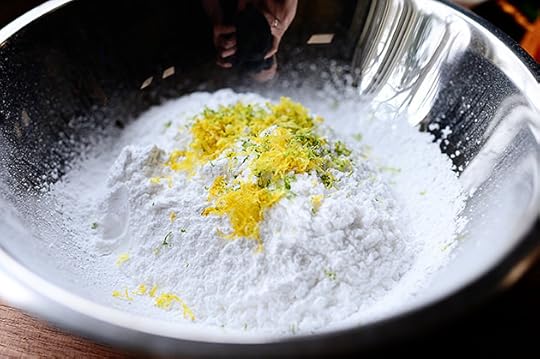 Then, after sifting it, I threw in some more lemon and lime zest…
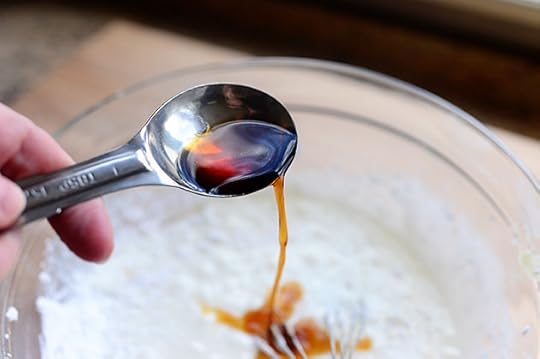
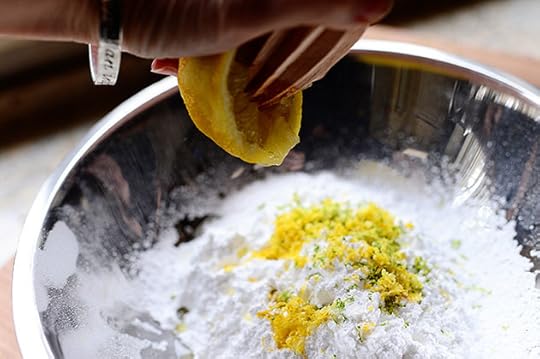 Squeezed in some lemon and lime juice…
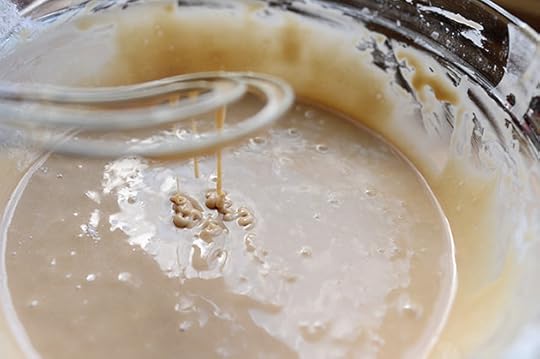
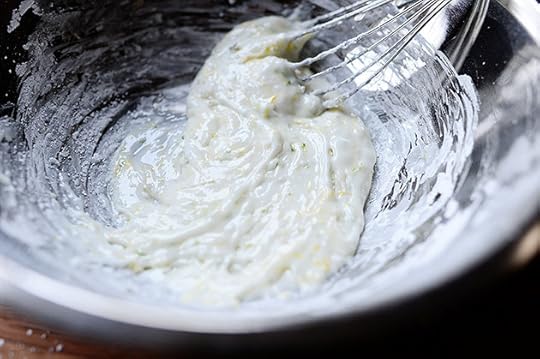 And whisked it around to see where I was. It was almost perfect, but needed to be just a teeny bit thinner.
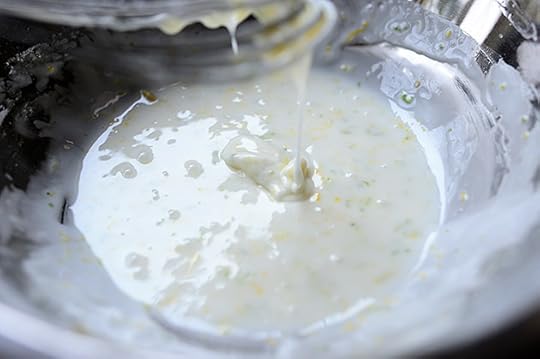 A tablespoon of water later, and it was just right!
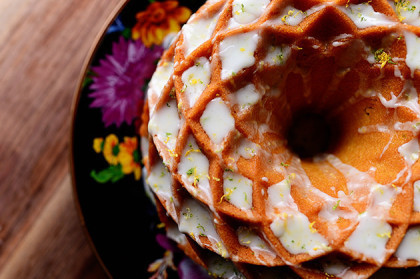
 I just used a spoon to drizzle the glaze all over the place, getting it in all the crevices and letting it drip everywhere.
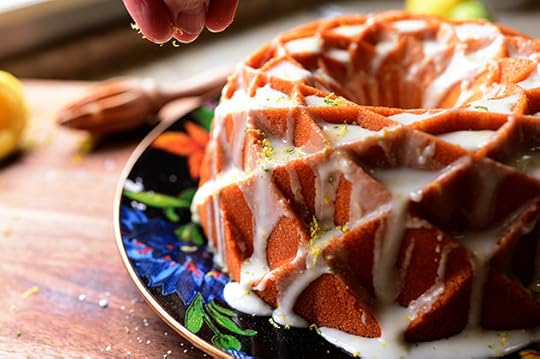 Then I sprinkled on some more zest just to make it purty.
 Honestly, in the end I really couldn’t tell if it was scary or beautiful.
 So I think I’ll just go with scary beautiful!
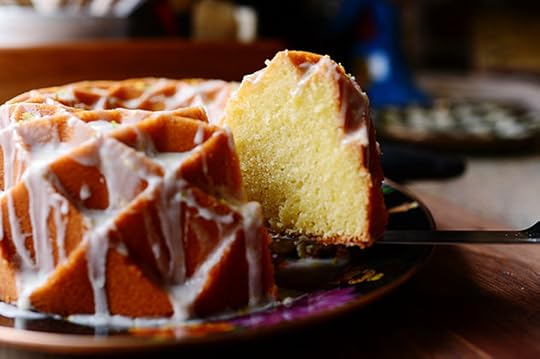 And once I cut into a slice and remembered just how darn good this cake is, I really didn’t care what it looked like.
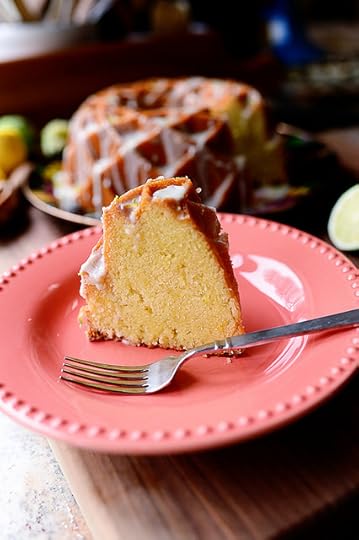 This was delicious. The cake is super moist, but the added zip of the lemon and lime zests really made it extra flavorful.
 And then you have the beautiful surface, which holds yummy little wells of the glaze.
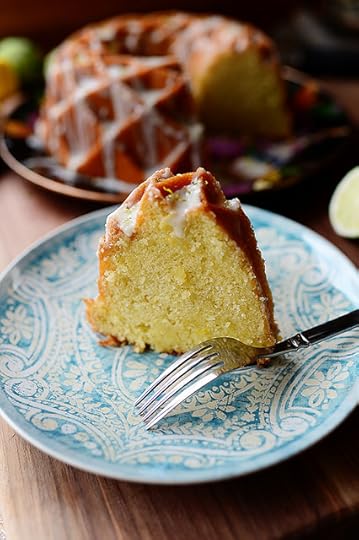 Everyone in the Drummond house loved it!
(They just got a little tired of waiting so that I could snap a photo of every single slice.)
Enjoy this, friends! And be sure to head over to Pioneer Woman Home and Garden to enter to win the beautiful bundt pan…and some other great baking stuff!
Here’s the handy dandy printable.
Recipe
Lemon-Lime Pound Cake
Prep Time: 15 Minutes
Cook Time: 1 Hour15 Minutes
Difficulty: Easy
Servings: 16
Print Recipe
Ingredients
Cake3 sticks Butter3 cups Sugar5 whole Eggs3 cups All-purpose Flour1/2 teaspoon Salt1 cup 7-up1 Tablespoon Lemon Zest1 Tablespoon Lime Zest GLAZE2 cups Powdered Sugar, Sifted1/4 teaspoon Salt1 Tablespoon Lemon Zest, Dried For At Least 30 Minutes1 Tablespoon Lime Zest, Dried For At Least 30 Minutes1 Tablespoon Lemon Juice1 Tablespoon Lime Juice1 Tablespoon Water + More As Needed Preparation Instructions
Preheat oven to 325 degrees.
In the bowl of an electric mixer fitted with the paddle attachment, cream together butter and sugar. Add eggs one at a time, mixing after each addition. Combine flour and salt, then add it 1 cup at a time, mixing after each addition. With the mixer on low, slowly add the 7-Up until combined. Add 1 tablespoon of both lemon and lime zest and mix. Scrape the bowl and mix again.
Thoroughly spray a bundt pan (I used a Jubilee bundt pan) with nonstick baking spray. Add large spoonfuls of batter until the pan is filled, then even out the surface. Bake for 1 hour 10 to 1 hour 15 minutes. Remove the pan from the oven and let it sit in the pan for 15 minutes. Carefully turn it out onto a cake plate and let it cool.
Combine all the glaze ingredients in a bowl and gently whisk until thick but pourable. Use a large spoon to drizzle it all over the cake. Let the glaze set, then slice and serve!
Optional: Sprinkle with a little extra lemon and lime zest.
Posted by Ree | The Pioneer Woman on April 7 2014

March 31, 2014
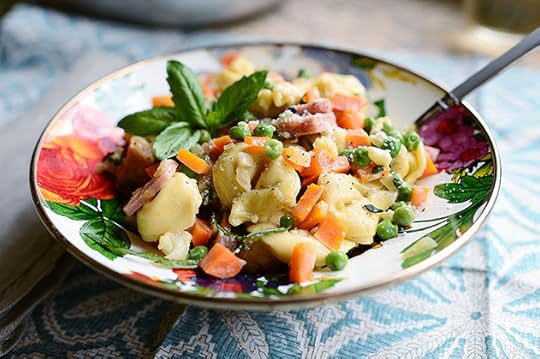
Tortellini Primavera
 I am a lover of any form of pasta primavera, and I pretty much have been for the past 25-plus years. This recipe is a spinoff of the one I posted here back in the dark ages of this cooking website—except instead of big chunks of veggies, I keep them in a fine dice, and instead of penne pasta, I use cheese tortellini—and my two girls and I absolutely devoured it for dinner last night.
Marlboro Man and the boys, meanwhile, had beef and bean burritos. How’s that for reinforcing gender stereotypes on a Sunday evening?
Ha. It wasn’t intentional, man. It just…happens sometimes.
Anyway, back to the pasta: It was delicious! You’ll love it!
Here’s how I made it.
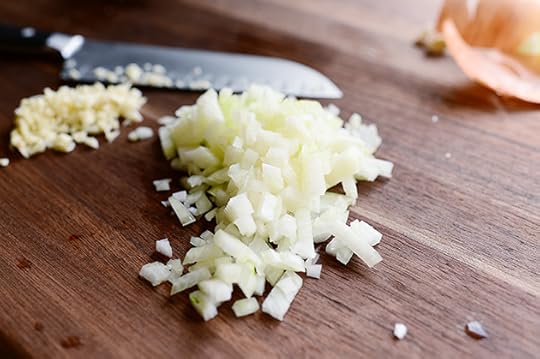 Mince up some onion pretty finely.
Zees ees a somewhat delicate deesh, so I want all the ingredients to be delicate, too!
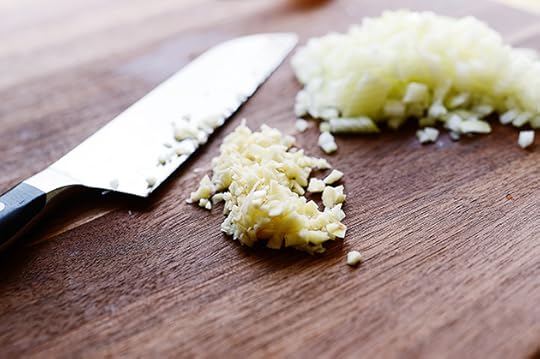 Mince up some garlic, too!
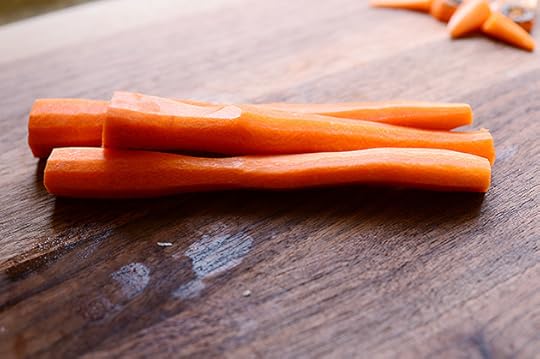 Next, peel some carrots…
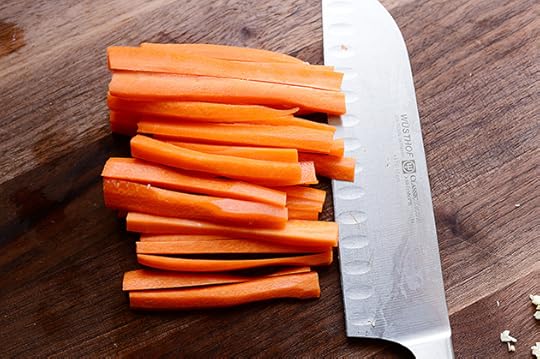 Cut them into matchsticks…
 Then cut the sticks into a dice.
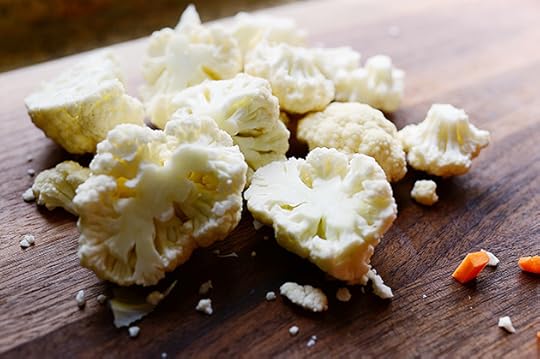 Cut some florets off a head of cauliflower…
 Then break it into very small pieces.
Remember: Zees ees a delicate deesh!
 Grab some frozen peas and have them at the ready…
 Then grab a hunka hunka burning ham…
 And cut it into pieces. Fun fact: I didn’t realize this was sliced ham until after I diced it up!
But ham is ham, man…no matter how you slice it.
Or dice it.
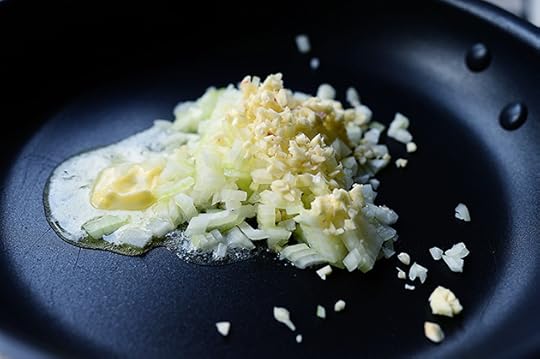 Melt some butter in a large skillet, and throw in the onions and garlic.
 Stir it around and cook it for a minute or so…
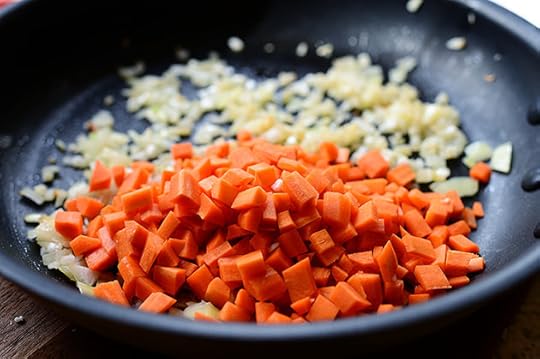 Then throw in the carrots…
 And the cauliflower…
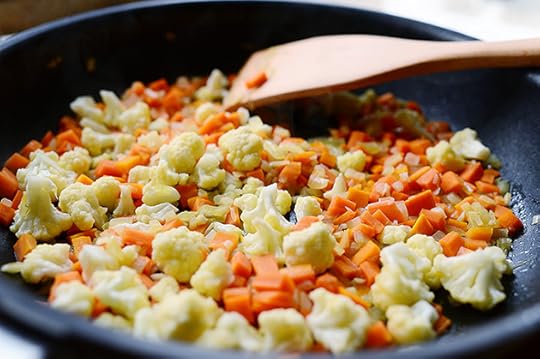 Then stir it and cook it for another minute.
(I’m not cooking anything too long because I want the veggies to remain somewhat crisp and delightful. Not mushy and pitiful.)
(I love how the color of the carrots starts to transfer a bit to the cauliflower. Purty.)
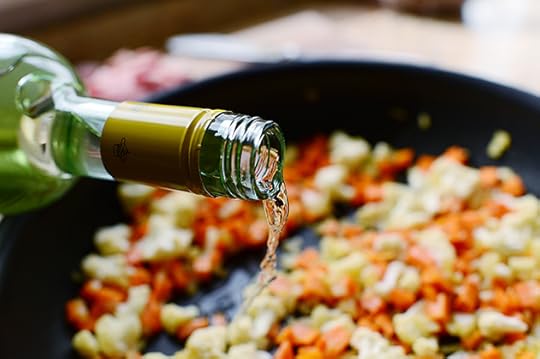 Next, pour in a good splash of white wine…
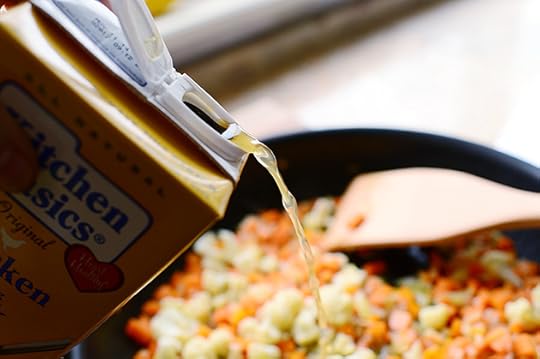 And a splash of broth…
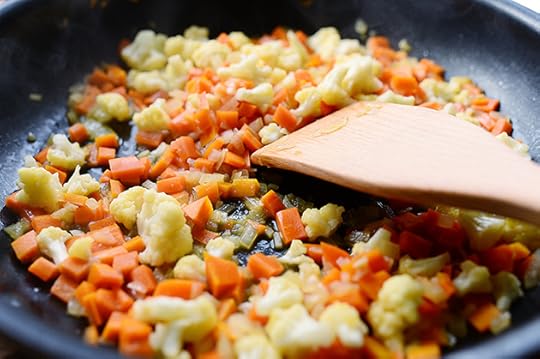 Then cook it for 2 or 3 minutes, or until the liquid is mostly reduced.
 And now for the fun part: pour in some heavy cream…
 Then add a little salt (it doesn’t need much!) and plenty of pepper…
(I repeat: Go easy on the salt. Because of the cheese mixture in the tortellini [not to mention the Parmesan we're about to the sauce], the dish has plenty of salt going on as it is. Taste before adding more than just a sprinkle.)
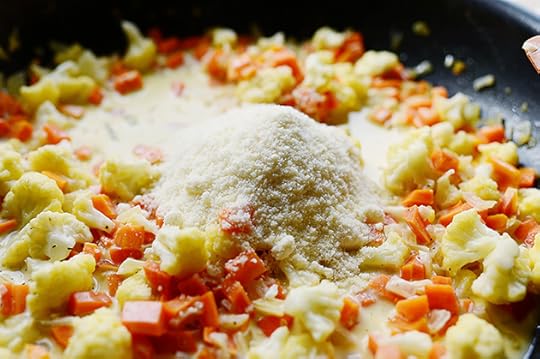 Add about a half a cup of Parmesan…
 Then stir it together and let the sauce bubble up and become magical.
 Oh! I forgot about the tortellini.
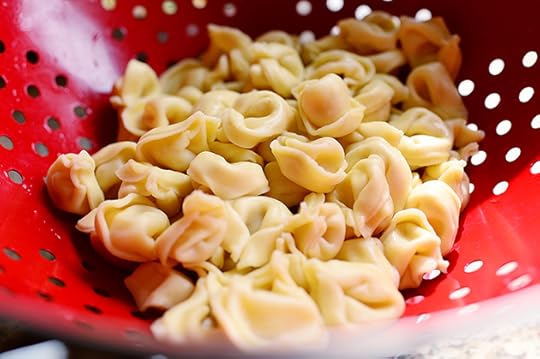 Cook it and drain it and tell it you’ll be right back.
 Back to the sauce: pour the frozen peas right on in…
 Along with the ham.
 Then stir it around so it’s all wonderfully, beautifully, sublimely combined. The peas and ham will heat up pretty quickly if the sauce is nice and hot.
 Grab some basil if you have some.
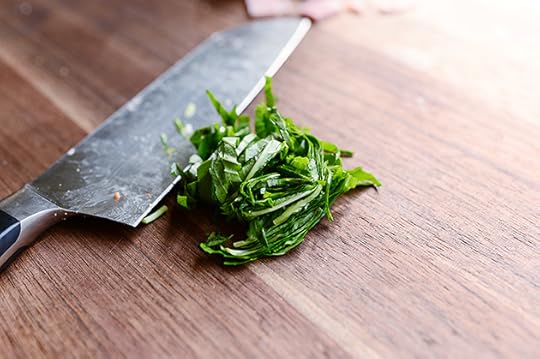 You can chop it up, or you can roll the leaves into a tight roll and slice it really thin.
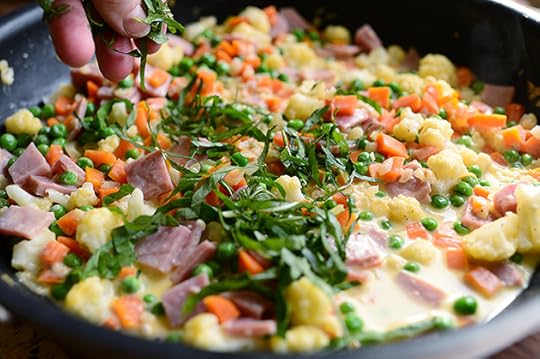 Then just sprinkle it in…
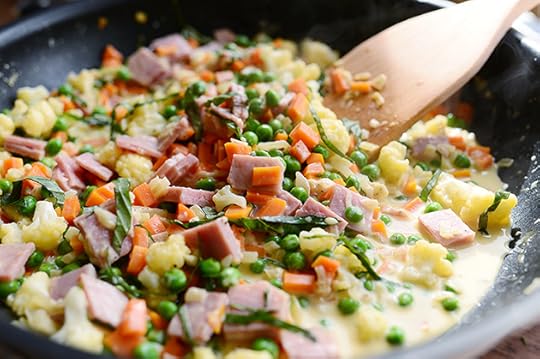 And stir it around.
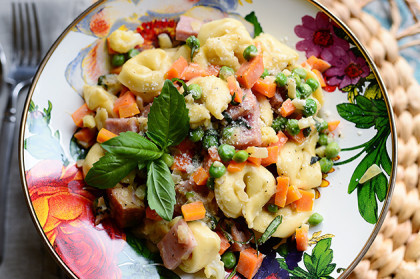
 Now just toss in the tortellini!
 Oh…baby.
 Delicious!
 It’s everything that’s lovely about pasta primavera—crisp spring veggies, flavorful cream sauce—but the tortellini really makes it magical.
 Enjoy every single bite! And you can make this even quicker and easier-er by using frozen peas and carrots. Supah fast!
Some other things you can add:
* Chopped or sliced mushrooms. Saute with the carrots and cauliflower.
* Finely diced red pepper. Not exactly a spring veggie, but it adds pretty color!
* Diced zucchini. Ditto about it not being a spring veggie…but I won’t tell anyone.
* Crumbled goat cheese. Stir into the sauce for a little extra richness.
* Softened cream cheese. Stir into the sauce for a little extra naughtiness.
* And of course, substitute any kind of pasta for the tortellini. Of course, it will then no longer be called Tortellini Primavera. Proceed at your own risk.
 Here’s the handy dandy printable.
Recipe
Tortellini Primavera
Prep Time: 10 Minutes
Cook Time: 15 Minutes
Difficulty: Easy
Servings: 6
Print Recipe
Ingredients
2 Tablespoons Butter1 whole Medium Onion, Finely Diced3 cloves Garlic, Minced3 whole Carrots, Peeled And Diced1 cup Cauliflower, Broken Into Small Pieces1/4 cup White Wine1/4 cup Chicken Broth1/3 cup Heavy Cream1/2 cup Grated Parmesan Cheese Salt And Pepper, to taste8 whole Basil Leaves, Chopped (or Chiffonade)3/4 cups Cooked Ham, Diced1 cup Frozen Peas Extra Parmesan, For Serving Extra Basil, For Serving1 pound Cheese Or Spinach Tortellini Preparation Instructions
Cook tortellini a couple of minutes less than package directions call for. Drain and set aside.
Melt the butter in a large skillet over medium-high heat. Add the onions and garlic and stir to cook for 1 minute. Add the carrots and cauliflower, stir, and cook 1 minute. Splash in wine and broth, then cook for 2 to 3 minutes, until the liquid reduces a bit. Stir in cream and Parmesan and stir.
When the mixture is hot, stir in peas, ham, salt, and pepper. Allow them to heat up in the sauce. When the sauce is hot, stir in the tortellini. Check for seasonings, add more if needed, and serve with extra Parmesan and basil.
Posted by Ree | The Pioneer Woman on March 31 2014

March 27, 2014
Heavenly Hummus Wrap
 I have a confession to make. Are you ready? Here goes.
I have become a room service person.
Now, obviously this doesn’t come into play in my daily life on the ranch. There is no room service offered on the ranch. And if there were room service offered on the ranch, I would have to be the one to make it, and that sort of defeats the whole purpose of room service, which is to press a button on a phone and have food show up on a tray or cart 20 minutes later. But I found as I traveled over the last year—mostly for my cookbook tour last fall—I worked myself into a groove of checking into the hotel, making a beeline for the room, changing into my yoga pants, and quickly ordering something from room service because by the time I got to where I was going, I would be starving. And while room service admittedly isn’t a very economic approach if one travels a lot, I found that during the times I was away from the ranch and feeling homesick, the benefit of being able to curl up in a cozy hotel room and eat something yummy while watching Bravo became part of my survival.
Thank you for letting me share.
Oh, and I have a point: Last week I went to Dallas for one day—and, true to form, ordered room service the second I walked into the room and changed into my yoga pants. And what I ordered, after I scanned the menu for something I wouldn’t normally eat for lunch on the ranch, because I like to try different things—was a hummus wrap. I didn’t have enormous expectations—I mean, how good could a hummus wrap be?—but it sounded decent at the time.
It wound up rocking my ever-loving world, so I recreated it in my own kitchen this week.
I promise, it’ll rock your world, too! Absolutely delicious.
 First, get a big ol’ tortilla ready. Spinach tortillas make the wrap really pretty, but you can use a regular or whole wheat tortilla if you prefer!
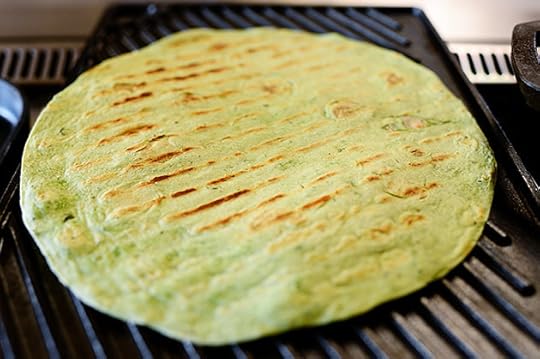 Now, this is totally optional, but this is how the tortilla was prepared for the wrap that I scarfed down in the hotel: I just set it on a grill pan over medium heat for a minute or so, until it got nice grill marks on one side. It’s important, though, not to crisp the tortilla at all—you still need it to be soft and pliable!
You could also just throw it into a skillet for 30-45 seconds or so. Same difference!
Then just set the tortilla to the side and let it cool.
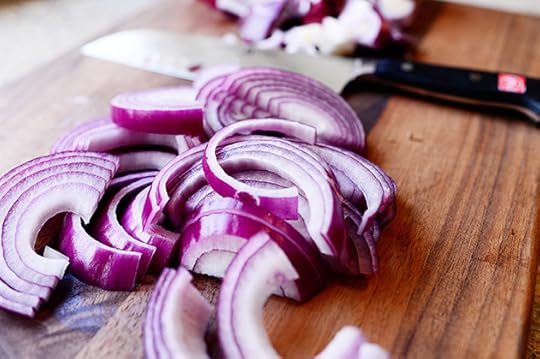 Next, slice up a medium red onion.
“Red onion.” Otherwise known as a dang purple onion.
What the heck is up with that nomenclature?
 Anyway, melt 1 teeny tiny tablespoon—and that doesn’t really make sense, because a tablespoon is a tablespoon. It really isn’t a question of degree—in a skillet over medium-low heat.
 Then throw in the red I mean purple I mean red onions…
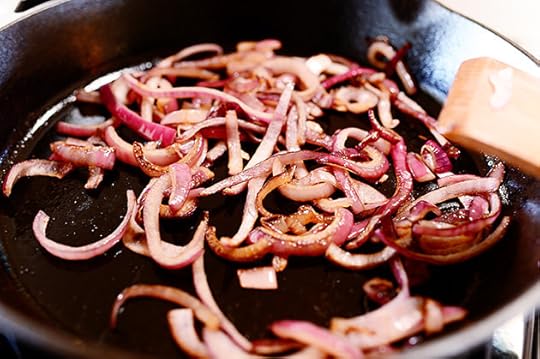 And cook them low and slow, stirring occasionally for a good 10 to 15 minutes, until they’re soft and slightly caramelized. Then just turn off the heat and set them aside to cool slightly.
The flavor of these babies. Oh my.
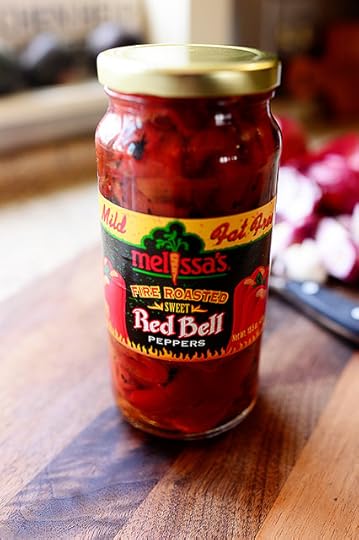 Next, get the other ingredients ready! Grab a jar of roasted red peppers…
(This ain’t no paid advertisement or product placement; it just happens to be the brand I have in the pantry right now.)
 Take out one of the peppers and slice it into strips.
Of course, I could have bought a red bell pepper, roasted it over an open flame, placed it into a bag and let it sweat, then peeled the charred skin off before I sliced it into strips.
But I wanted to eat this century sometime.
 Next, grab a can of artichoke hearts (or you could use the marinated kind if a jar if that’s more your poison)…
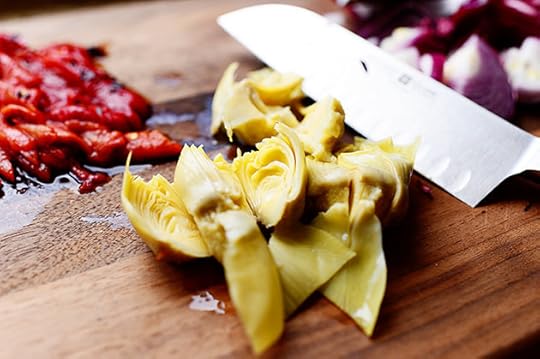 Then slice 2 or 3 hearts in half. (I also used a paper towel to gently squeeze the excess liquid out of the hearts because I think they taste better if you do.)
 Your onions should be cool by now.
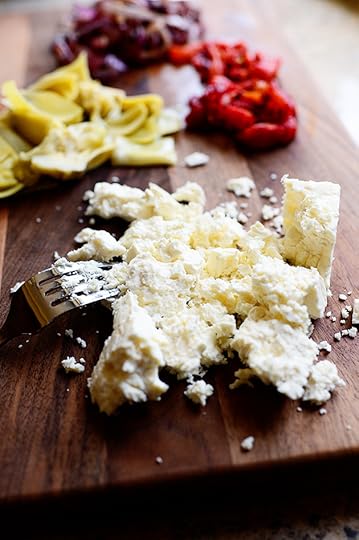 So grab some feta cheese and use a fork to break it into chunks.
I really prefer feta cheese that comes in a block rather than already broken into chunks. It seems fresher and, for some reason, more mild than its crumbly counterpart.
I think the hummus wrap in the hotel might have used goat cheese instead—I can’t remember. But either would be delicious.
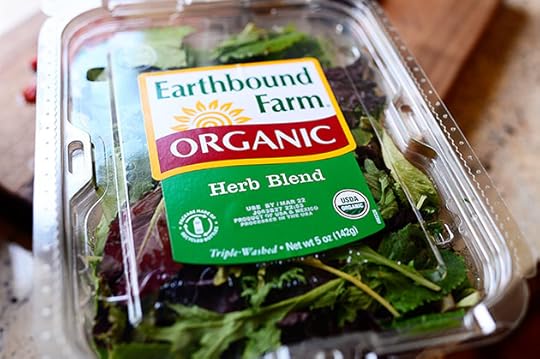 You also need some greens! This is what I had in the fridge.
(Again: Ain’t no paid advertisement. Ain’t no product placement. Ain’t no woman like the one I’ve got.)
(Sorry, I’ve just had that song stuck in my head lately.)
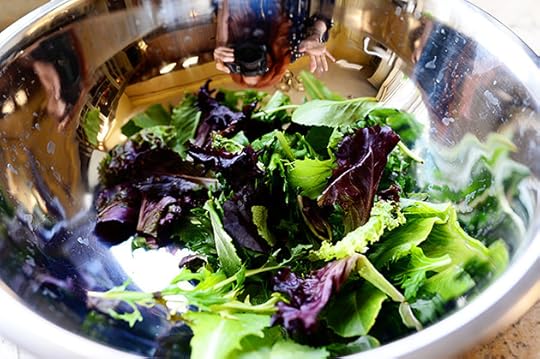 Add a couple of cups of greens to a bowl. (Smile for the camera. I see you!)
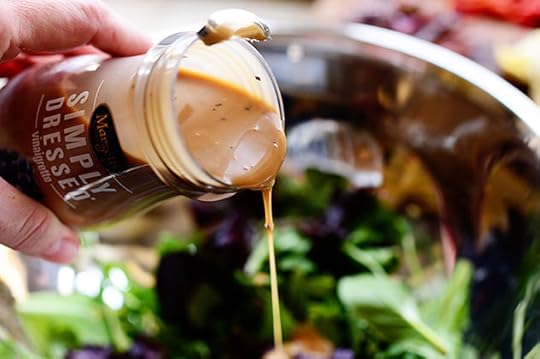 Drizzle in a tablespoon or two of whatever dressing you’d like. This is a vinaigrette I had in the fridge.
(Ain’t no paid advertisement. Ain’t no product placement. Ain’t no sunshine when she’s gone.)
(I’ll stop now.)
 Then just toss the greens so they’re coated.
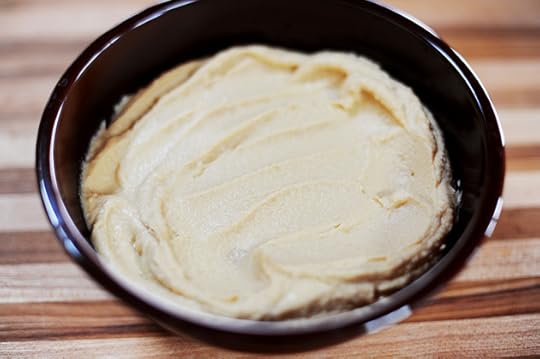
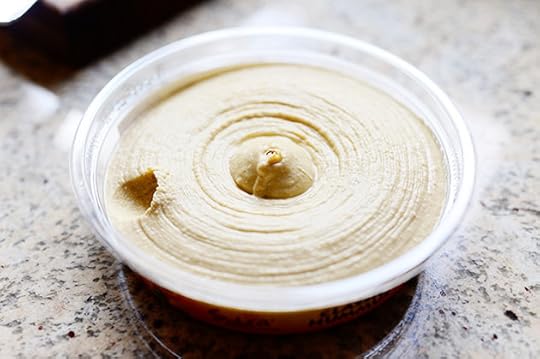 The very last thing you need is hummus! Preferably with your thumbprint in it.
Oops.
 You can make your own hummus if you have the stuff! It’s always better homemade. Here’s my recipe.
But if you do buy hummus, I love the Sabra brand. It doesn’t have that weird vinegary taste that some storebought hummus can have. I love the stuff.
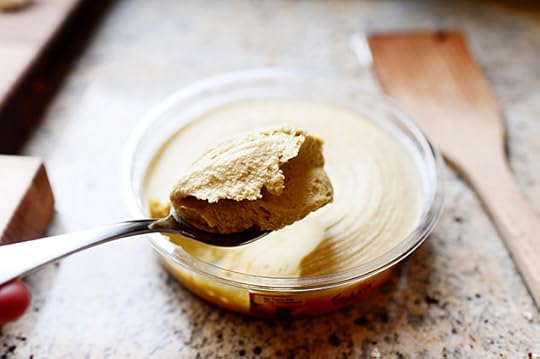 Grab a big ol’ spoonful…
 Schmear it down the middle third of the tortilla…
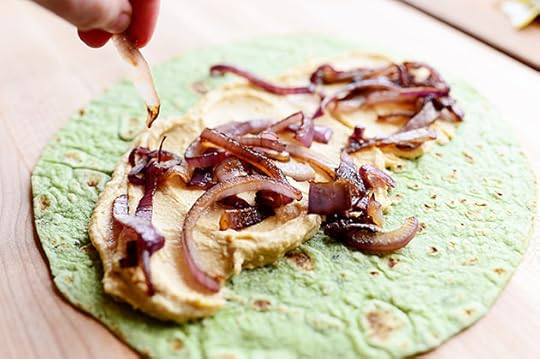 Then start laying on all the stuff! The red onions…
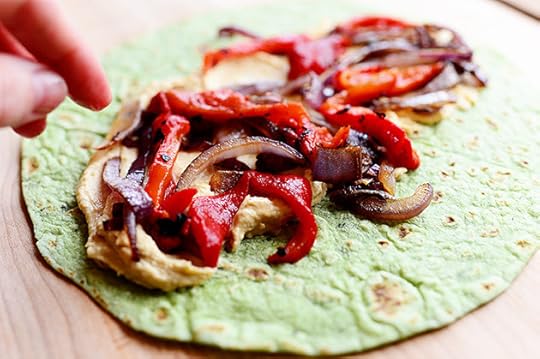 The roasted red pepper strips…
 The artichoke hearts…
 Lookin’ good so far!
 Now all it needs are the salad greens…
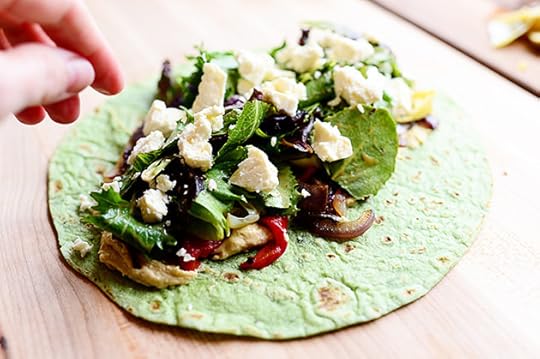 And the feta.
 I could barely get it wrapped!
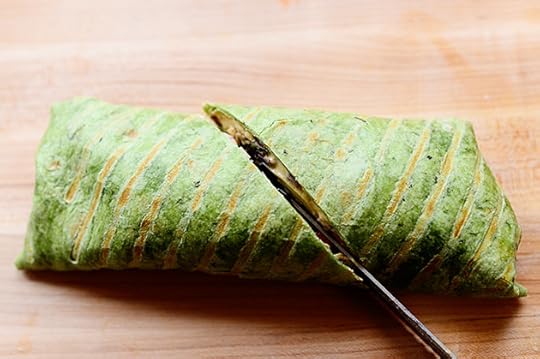 Now just slice it in half…
And totally go for it. You’ll probably want to split this with someone; half was plenty for me!
And I hardly ever say that.
 This was…outstanding—maybe even better than the room service version. And every single thing works—I can’t think of one ingredient I’d want to leave out. The onions, especially, add incredible flavor. Same with the feta…and the vinaigrette-tossed greens…and, of course, the hummus. A flavor explosion!
Hope you enjoy it as much as I did. It really is heavenly.
Here’s the handy dandy printable.
Recipe
Heavenly Hummus Wrap
Prep Time: 10 Minutes
Cook Time: 1Minute
Difficulty: Easy
Servings: 2

Print Recipe
Ingredients
1 Tablespoon Butter Or Olive Oil1/2 whole Red Onion, Halved And Sliced1 whole Spinach Flour Tortilla (large)1/4 cup Hummus (homemade Or Storebought) - More If Needed1 whole Roasted Red Pepper (jarred), Sliced3 whole Canned Artichoke Hearts, Halved2 cups Mixed Greens1 Tablespoon Your Favorite Balsamic Vinaigrette (homemade Or Storebought)1/4 cup Feta Cheese Crumbles Preparation Instructions
Melt the butter in a skillet over medium-low heat. Add the red onions and cook slowly for 10-15 minutes, stirring occasionally, until soft and deep golden brown. Set aside and let them cool slightly.
Grill the tortilla on a grill pan over medium heat for 1 minute, just until it has grill marks on the outside. (If you don't have a grill pan, just use a skillet.) The tortilla should still be soft and pliable; just with a little bit of color! Let the tortilla cool slightly.
To assemble the wrap, spread the hummus down the middle third of the tortilla. Arrange the cooked onion slices and the sliced roasted red peppers all over the hummus. Add the artichoke heart halves. Toss the salad greens in the balsamic dressing, then lay them on the wrap. Finally, sprinkle the crumbled feta all over the greens.
Carefully wrap up the tortilla, tucking in the ends. Slice the wrap down the middle, share with a friend, and chow down!
Posted by Ree | The Pioneer Woman on March 27 2014

March 24, 2014
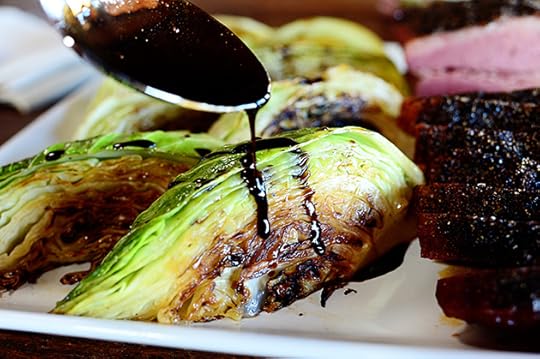
Short Rib Sandwiches
 My unbridled love for short ribs is no secret. I’ve written love sonnets about them here before. Short ribs are amazing and beautiful and magical, and while I don’t make them very often, I love them a little more each time I do. For those of you who don’t know about short ribs, they’re pretty much like the most tender, flavorful pot roast you could ever imagine, and they come on a nice, handy little stick. Okay, bone. You get the idea.
I’ve got a couple of other short rib recipes on my site. There’s Short Ribs with Wine and Cream, and there’s Braised Short Ribs with Polenta, and there’s Short Ribs in Tomato Sauce, and trying to decide which one I like better is like choosing between three of my children. I love short ribs any way I can get ‘em.
Last week I had a package of short ribs in the fridge, and I decided to go the sandwich route.
It turned out to be one of the most profoundly wise decisions of my life.
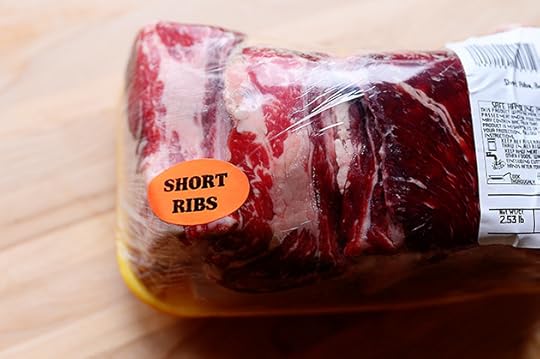 Short ribs! The answer to all of life’s confusion. But a little bit of a warning: these suckers ain’t cheap. Buy them at a supermarket (not a specialty store!) and buy ‘em on sale!
 First, preheat the oven to 300 degrees. Then get everything prepped: Mince up 3 to 4 cloves of garlic…
 Then peel some carrots, cut them into thin matchsticks…
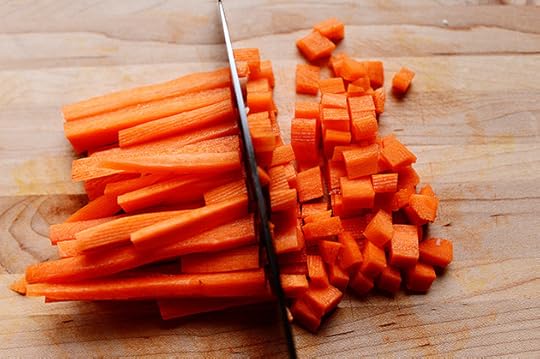 And dice them up.
 Next, dice up some onion!
I love onion and carrot together. And I know celery is supposed to always be a part of this mix…but I’ll be darned if I’m not totally ambivalent about celery. I can take it or leave it. Especially when I don’t have any celery in my refrigerator.
I like to denigrate things I can’t have.
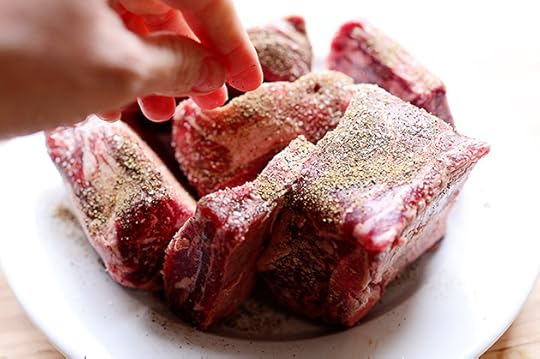 Salt and pepper the short ribs all over…
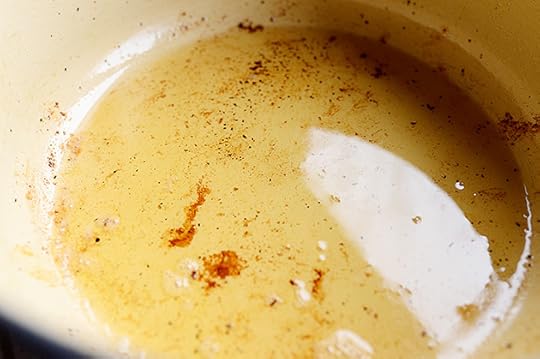
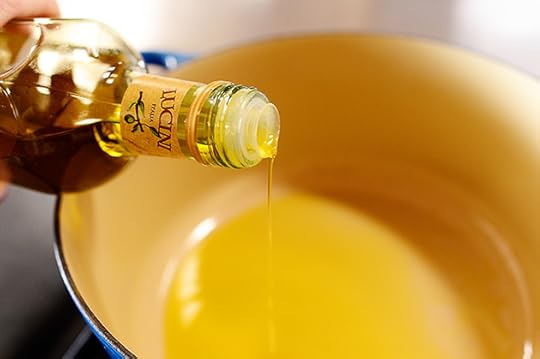 Then heat some olive oil in a heavy pot over high heat…
 And throw in the short ribs.
 Use tongs to turn them so that they’re largely seared on all sides (a hot pan is essential)…
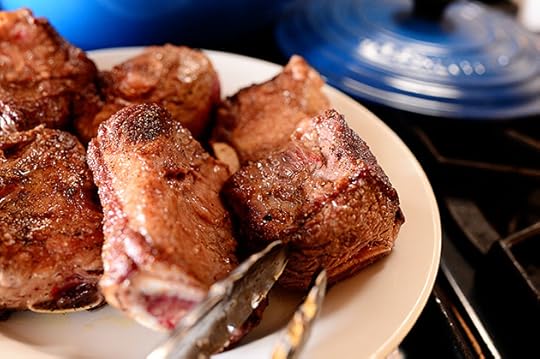 Then, when they’re nice and seared, remove them to a plate…
 And turn down the heat just a bit to medium-high.
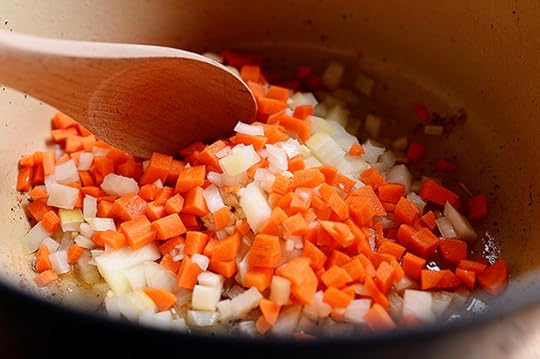 Throw in the onions, carrots, and garlic…
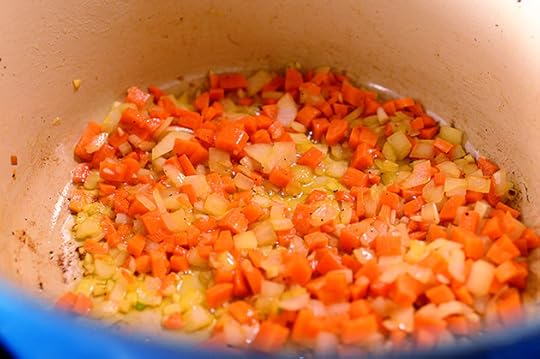 And stir them around to cook them for just a couple of minutes.
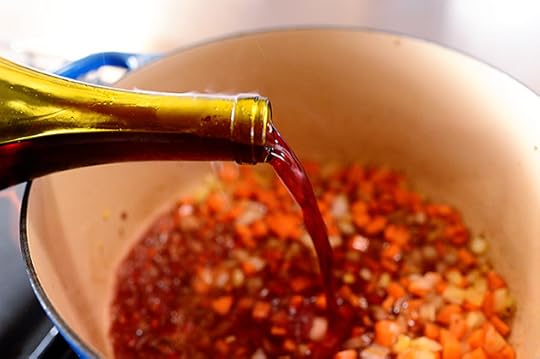 Now, in the 45 years that I’ve been alive on this earth, I’ve learned that nothing brings out the deliciousness of short ribs more than a good amount of red, red wine. So pour in about a cup or so! You won’t be sorry.
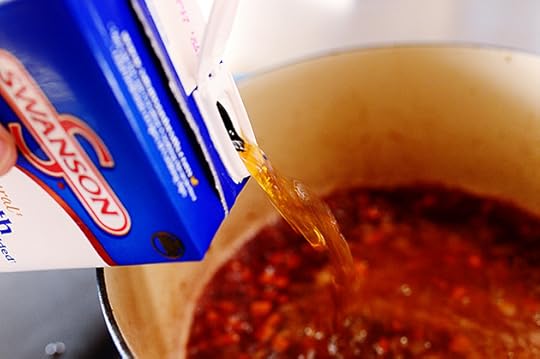 I also like to add beef stock or beef broth. Just gives the whole thing a little more savoriness.
I didn’t realize until just now that “savoriness” is a word! No red squiggly line appeared! I just discovered a word that no one ever knew about before, ever!
I invented Post-Its!
(Name that movie.)
 Now, what you wanna do is let this bubble up and cook for a minute or so.
 Then: the big moment. Nestle the seared short ribs right into the liquid!
 Then just put the lid on the pot and stick it in the oven for 2 1/2 to 3 hours. I set it for 3, but around 2 1/2 hours in, I decided to check it.
 Oh…my…goodness. First of all, they look amazing. Second of all, they look amazing. Third of all, you can not FATHOM how good my house smelled at this point. Beef simmering in red wine and broth. Fourth of all, they look amazing.
I stuck a fork in one of them and thought they just needed a tiny bit longer, so I put the lid back on and stuck them back in the oven for 20 minutes.
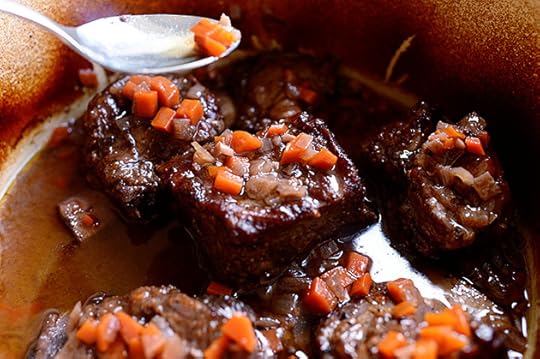 When I pulled them out, I spooned the veggies and liquid all over the top.
Now, at this point, you can just move forward with the shredding and the making of the sandwich.
However, I prefer, if I have time, to refrigerate it to get a lot of the fat off the top. So I let the short ribs cool considerably, then just stuck the lid on the pot and stuck the whole dang thing in the fridge overnight.
 For lunch the next day, I pulled the pot out of the fridge. You’ll see that all the fat has risen to the top and hardened. Now, if you’d rather not have the fat covering the meat and veggies, you can remove the beef and veggies with a slotted spoon before you refrigerate them. (Just store them separately in the fridge.) That way it’s much easier to get the fat off the top.
I didn’t do that, because I just wanted to stick it in the fridge and not mess with it.
 So I just picked around everything and got most of the fat off, leaving a little bit (which never bothers me.)
Is any of this making sense?
I sure hope so.
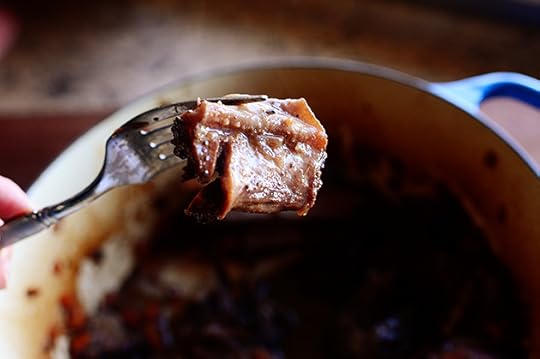
 Then I just heated it up on the stovetop until the liquid and meat were nice and hot! After that, the meat just needed to be taken off the bones and shredded.
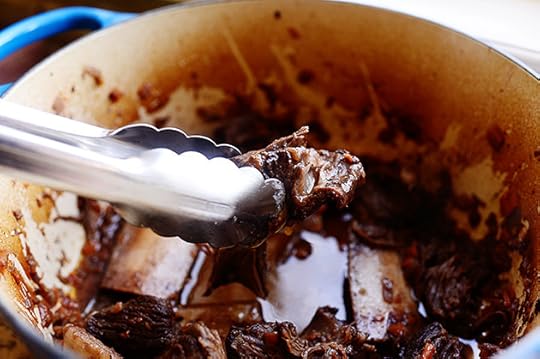
 The meat should literally fall off the bones. You can just get rid of these, or you can use them to make stock, or you can give them to your unapologetically carnivorous dogs.
 You’ll also notice, as you take the meat off the bones, that there is a tough piece of tissue that you can easily separate from the meat. Just get rid of this, too. (Or again: dogs.)
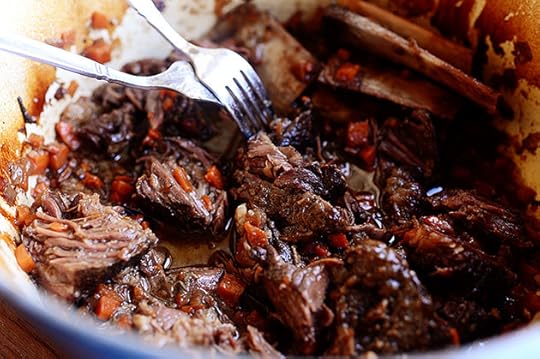 Keep shredding until you have big chunks of short rib meat. (I like to leave mostly chunks rather than completely shredding it.) And that liquid—you can not believe how amazing it is! Getting most of the fat out of there just leaves the pure, adulterated liquid. It is a dadgum miracle.
 Now, you can do whatever size of sandwiches you want! Use little dinner rolls, regular deli rolls, slices of French bread…but I decided to use a crusty baguette. It was one of those brown-and-serve numbers, so I stuck it in the oven for a few minutes so it was nice and crusty on the outside, soft on the inside.
 Then I sliced it down the middle…
 Grabbed the meat…
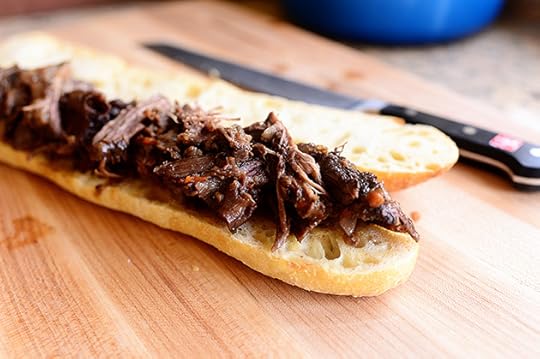 And laid it right on!
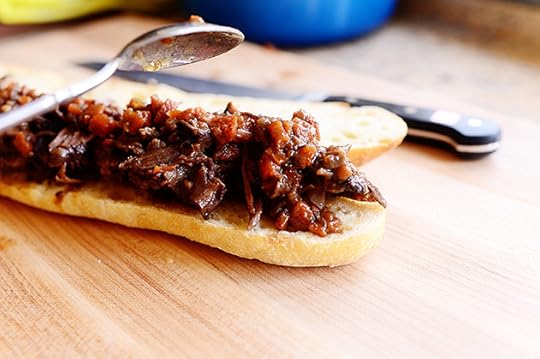 I didn’t want to lose any of the flavor of the cooking liquid, so I spooned the onions/carrots all over the top along with some of the juice.
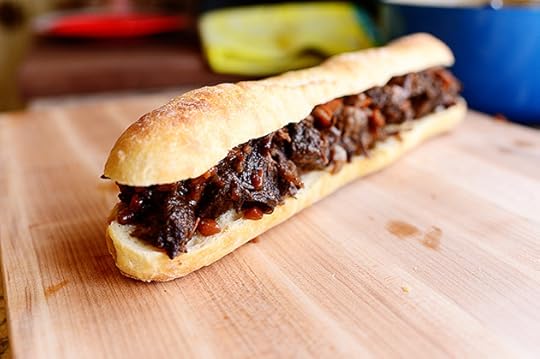 Then the lid went on…
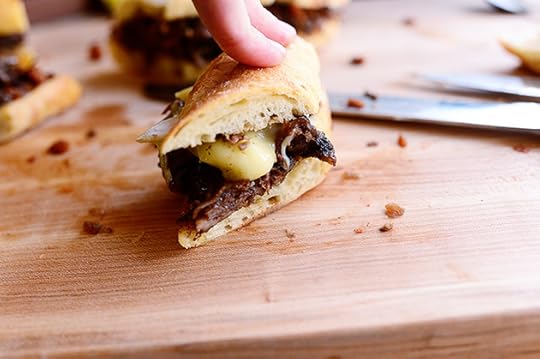
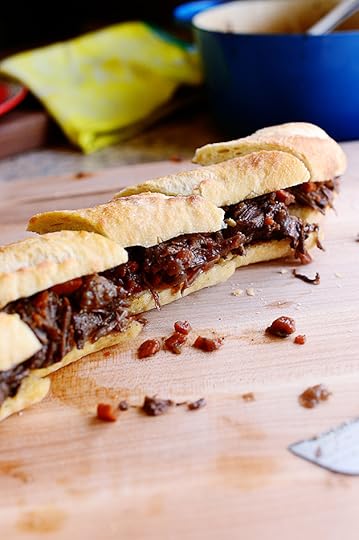 And I sliced it into individual sandwiches.
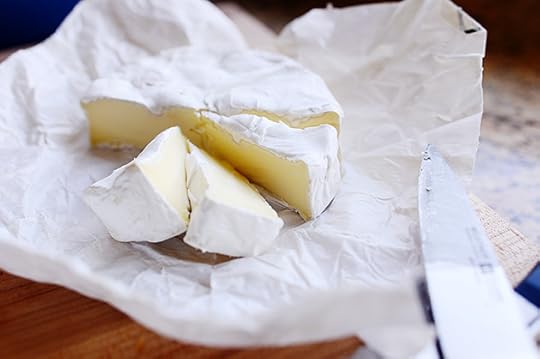 Oh. And if you want to have a little extra fun?
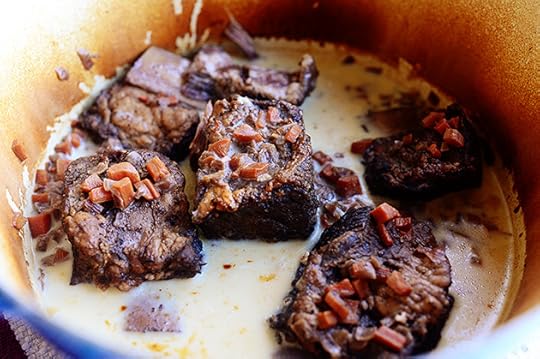
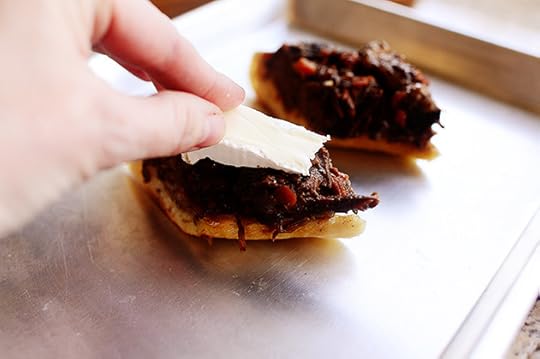 Lay a wedge of Brie on top and stick it under the broiler for a minute.
 I apologize to all mankind and the universe for what I have done.
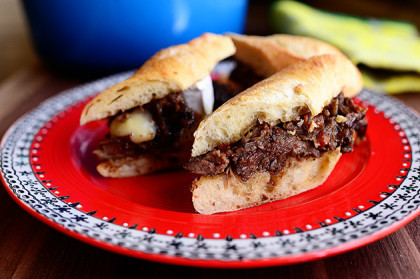
 I put these on a plate to take a pretty picture, but the honest truth is that Marlboro Man and I had already stood at that cutting board a little while before and scarfed down half of them. These were all that were left!
 They’re really that good. If you want to make a sandwich you’ll never, ever forget, buy some short ribs and whip this one up.
 It’ll make a permanent imprint on your soul.
Here’s the handy dandy printable!
Recipe
Short Rib Sandwiches
Prep Time: 5 Minutes
Cook Time: 3 Hours
Difficulty: Easy
Servings: 4
Print Recipe
Ingredients
2-1/2 pounds Beef Short Ribs Salt And Pepper Olive Oil, For Searing1 whole Medium Onion, Finely Diced3 whole Carrots, Finely Diced3 cloves Garlic, Minced1 cup Red Wine1 cup Beef Broth1 whole Baguette Loaf (or Smaller Crusty Buns) Preparation Instructions
Preheat oven to 300 degrees.
Salt and pepper the short ribs. In a heavy pot, heat a couple of tablespoons of olive oil over high heat. Sear the short ribs on all sides over about 2 minutes. Remove to a plate.
Reduce heat to medium high. Add onions, carrots, and garlic and stir to start cooking. After a minute or two, pour in the wine and broth and stir to combine. Set the short ribs back in the pot, put on the lid, and place in the oven for 2 1/2 to 3 hours, or until short ribs are tender and literally falling off the bone.
If you have time, allow them to cool, then store in the fridge for several hours so the fat will congeal on top. Once it's hard, remove it with a spoon and discard (some of the juice and a few pieces of onion and carrot will come out with the fat, but that's okay.) Reheat on the stovetop, then shred the short ribs.
Toast the baguette until warm, then split down the middle. Spoon the short rib meat down the length of the baguette, then spoon the veggies and some sauce over the top. Place the top of the baguette on top, then slice sandwich into pieces with a sharp serrated knife. Serve immediately!
(If you don't have time to refrigerate, you may skim as much fat off as you can, then just shred the short ribs immediately and serve as above.)
Variation: Melt brie cheese on top of the sandwich!
Posted by Ree | The Pioneer Woman on March 24 2014

March 18, 2014
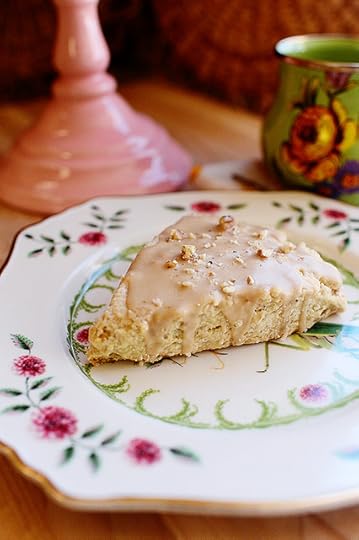
Maple Oat Nut Scones
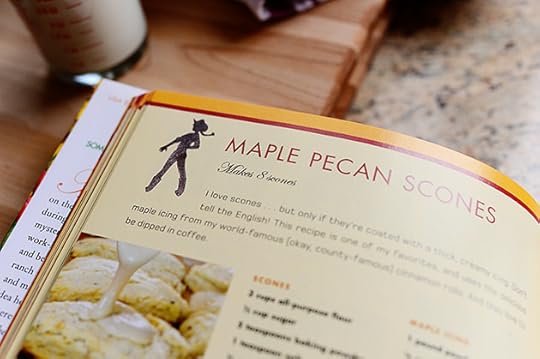 This is a variation of the Maple Nut Scones I put in my very first cookbook years ago, and it’s the same basic recipe I’ve used since 1999, when I first made maple nut scones for my friend Hyacinth when she came over to play one day.
 At the time, I had two babies and had just gotten a new espresso machine and I wanted to duplicate my favorite Starbucks scones ever (do they even still serve this variety?), and boy oh boy…did it work. Hy and I loved every bite.
Fun fact about my espresso machine: It was during the course of my owning this machine that I became aware that I had a condition called PSVT (Paroxysmal Supraventricular Tachycardia). I drank such strong espresso that it sent my heart into 2-minute (sometimes longer) episodes of extremely rapid beating, and the only way for me to get it to stop was to splash ice cold water on my face and pray the rosary. After giving up caffeine and finding the heart-racing episodes were still happening more and more, I had to start taking beta blockers, which made me want to take 24-hour naps every day and not speak, so ultimately I decided to have an curative ablation procedure, where doctors used a catheter to enter my heart and zap the pathway that was causing the electrical instability. It was an outpatient procedure, it totally cured me, and I’ve been enjoying iced coffee every morning ever since.
Oh. I didn’t mean the doctors entered my heart. That would be cramped. I meant they used a catheter to access my heart so they could ablate the pathway causing the problem.
I mean…
Never mind.
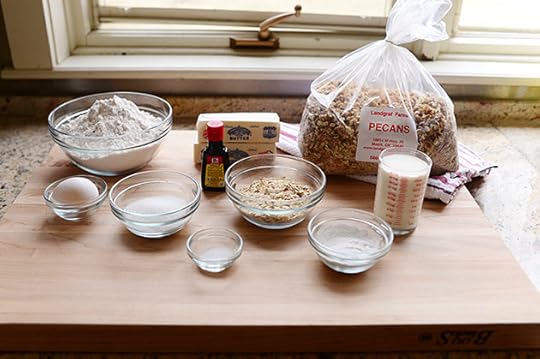 Okay, now that I’ve subjected you to my complete medical history and you have no appetite whatsoever, here’s what you need for the scones! Butter, flour, sugar, baking powder, salt, cream, eggs, maple extract, and oats.
Simple stuff!
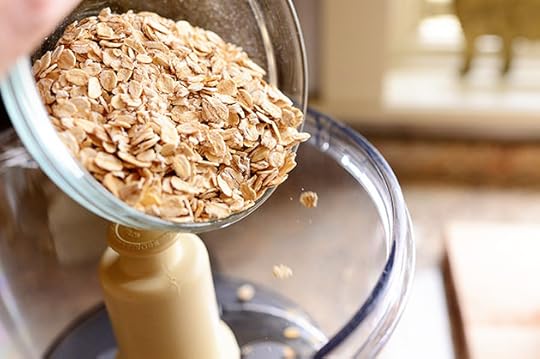 My original scones didn’t have oats in them, so for these I decided to try to be as close to Starbucks as I could: Add some regular oats into a food processor or blender…
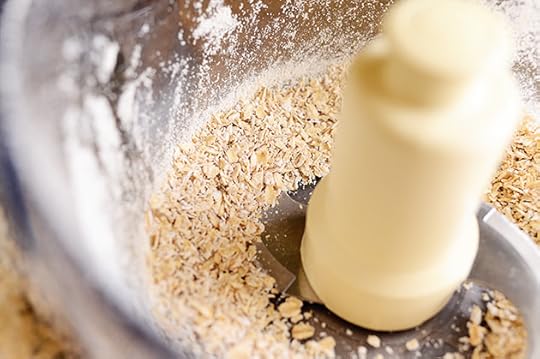 And pulse them until they’re mostly ground up but with some remaining bigger pieces.
 Another little piece of prep: Grab two sticks of cold (right out of the fridge) butter…
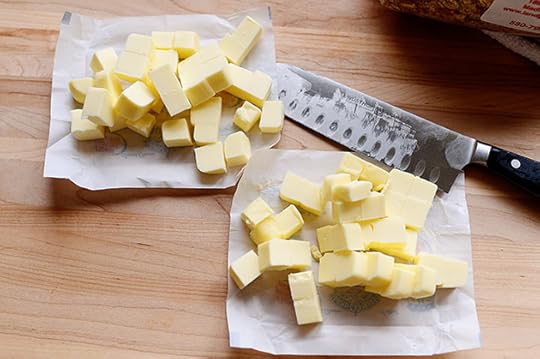 And cut them into small cubes.
 Now, to make the scone mixture: To a bowl, add all-purpose flour…
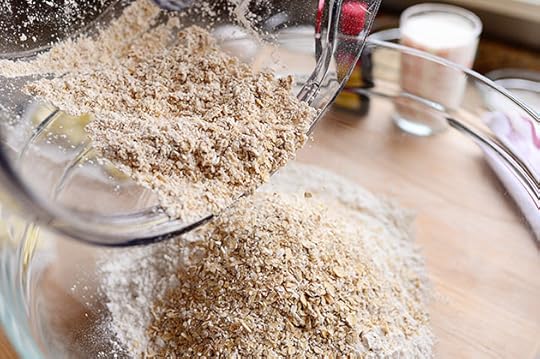 The ground oats…
 Some sugar…
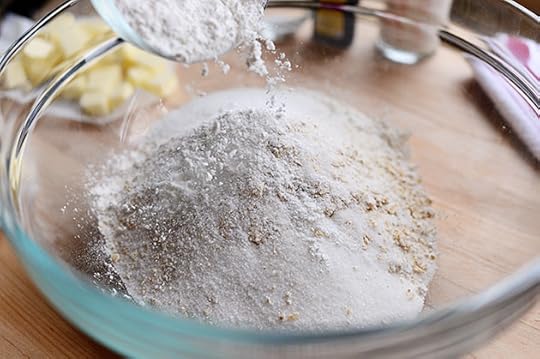 Some baking powder…
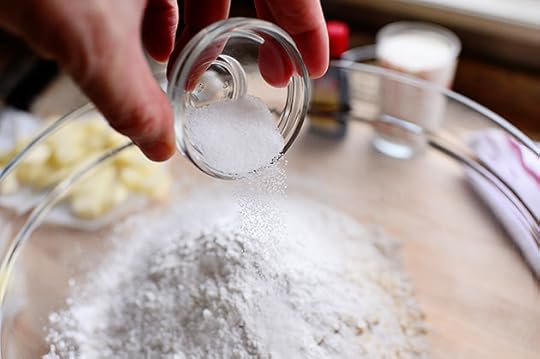 And a leetle bit of salt.
 Then just stir all this together.
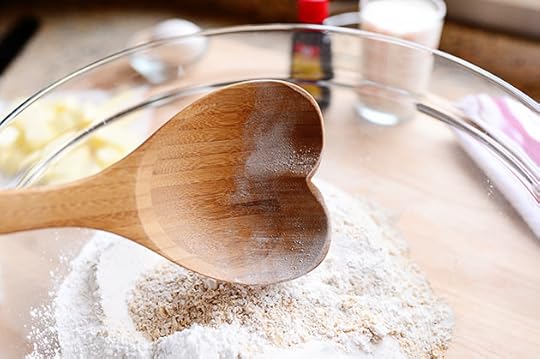 Aw, look at this sweet spoon.
 It was a gift and I love it. (Thank you Maria and Jenny!)
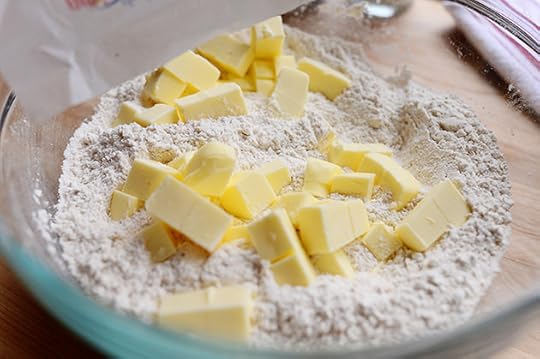 Now, add all the cubed butter to the bowl…
 Grab your trust rusty (or trusty stainless) pastry cutter…
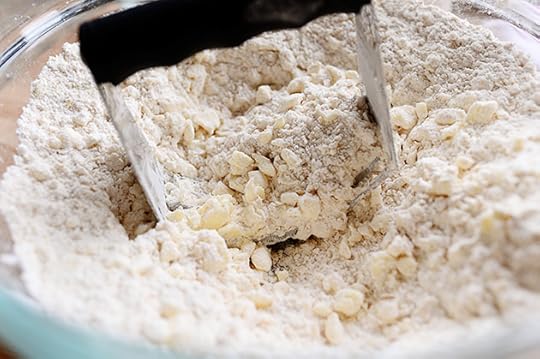 And totally go for it, man. Work the butter into the flour (or the flour into the butter, depending on whether you’re right- or left-brained)…
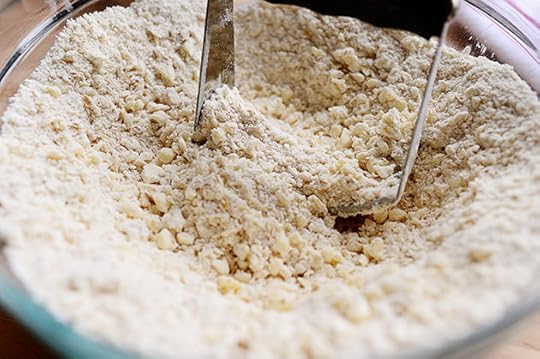 Until it’s totally combined and the mixture resembles coarse crumbs.
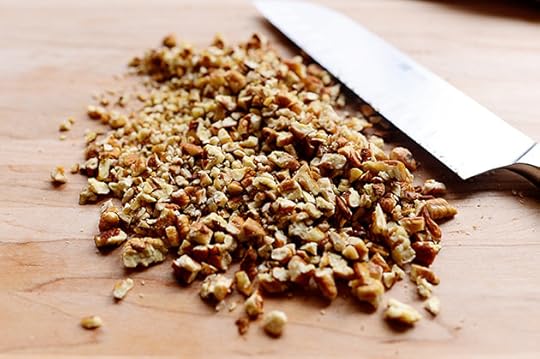 After that, chop up some pecans until they’re pretty fine…
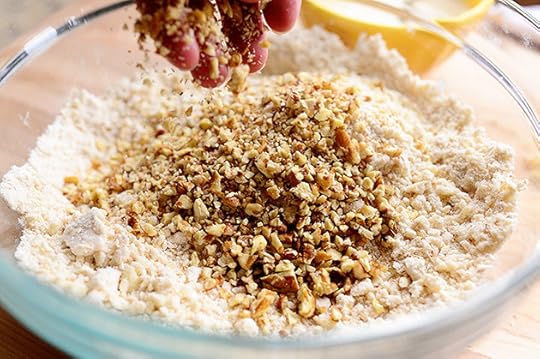 Drop them into the bowl…
 And stir it all together.
 Next, combine an egg with 3/4 cup of heavy cream.
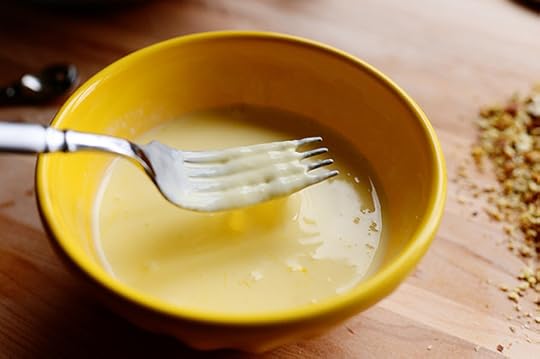 Whisk it together with a fork…
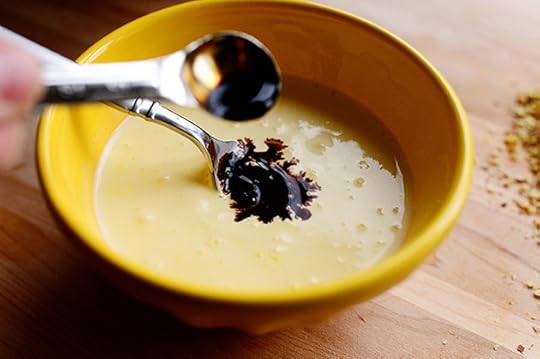 Add some maple extract…
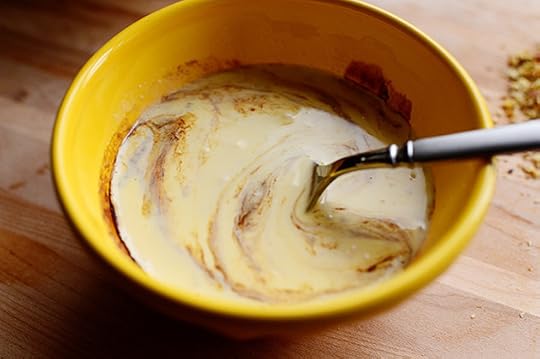 And whisk it in.
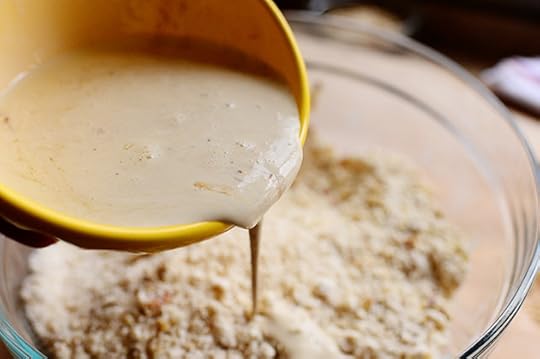 Pour the wet mixture into the flour mixture…
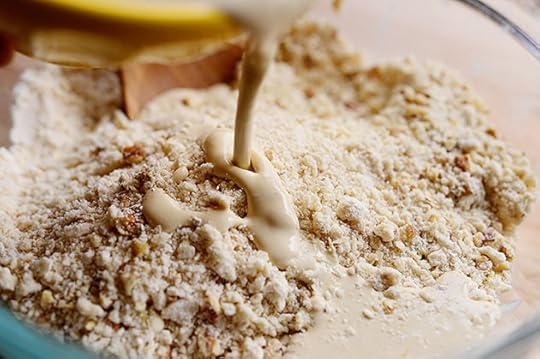 Folding gently as you go.
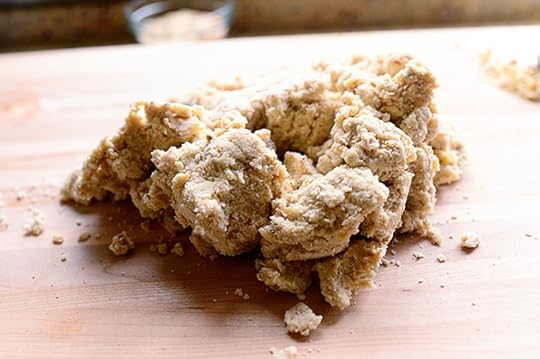
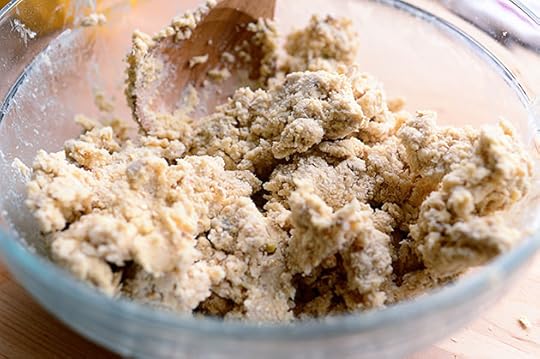 It will start to come together in big, crumbly clumps. Don’t expect an overly wet dough! It shouldn’t be together in one big ball.
Crumbliness is the beauty scones.
 Next, just turn out the dough onto a cutting board or floured surface…
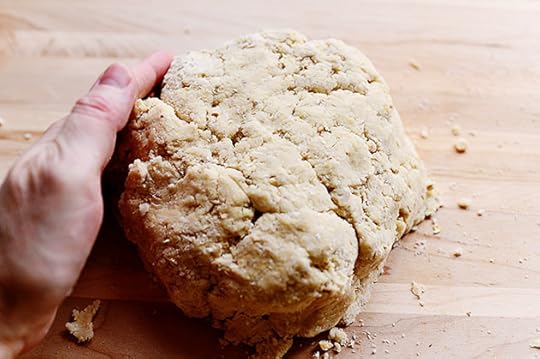 Bring it into a ball with your incredibly veiny, pink, and disturbing-looking hands…
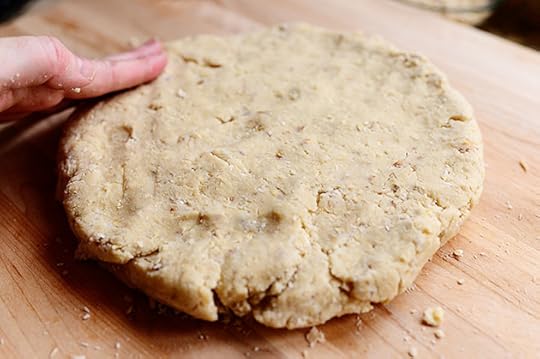 And press it into a circle. You want the top to be lumpy and rustic—not perfectly even and flat.
Kind of like my bottom.
(Sorry. I had to.)
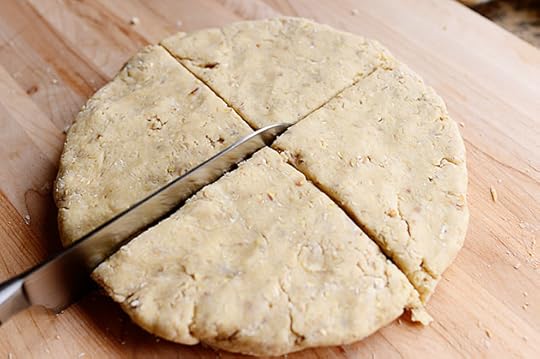 Use a knife to cut a big “X” in the circle.
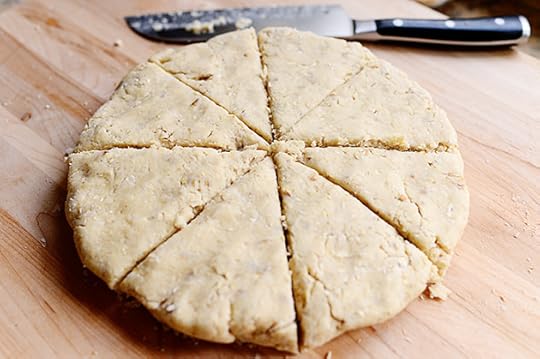 Then cut a big “+” to create 8 equal wedges.
Or you could always cut the “+” first and then the “X.” But be forewarned, the scones will taste totally different if you go this route!
No. Not really.
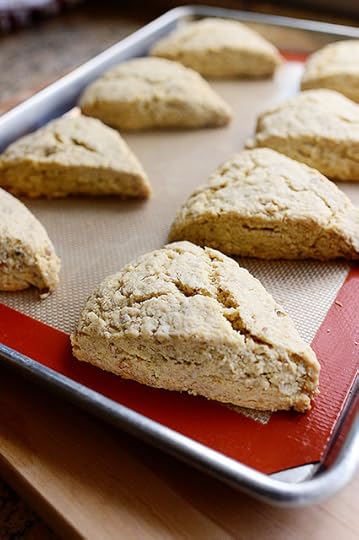
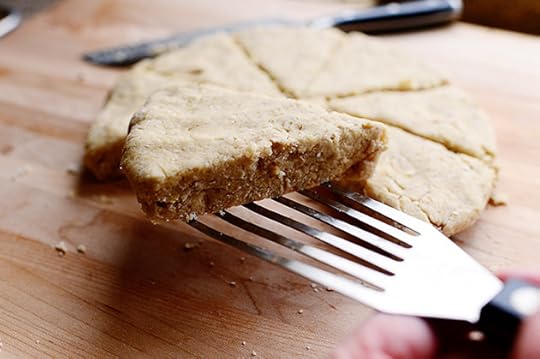 Remove the scones one by one…
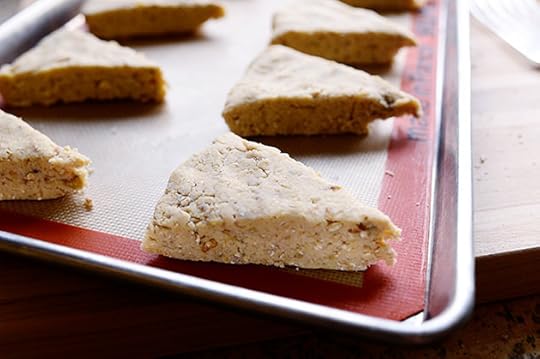 And place them on a baking sheet lined with a baking mat or parchment.
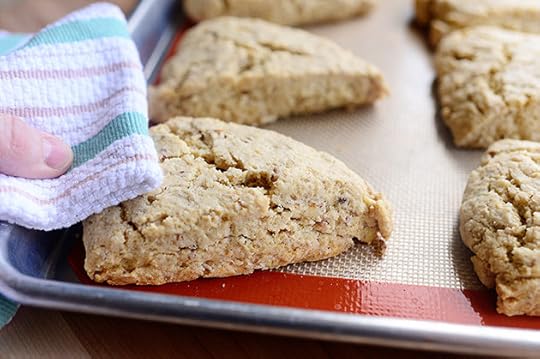 Bake them for about 25 minutes, or until they’re slightly poufed and barely starting to turn golden. Scones are one of those things you really don’t want to get very brown.
 Now just let them cool completely while you make the maple glaze/icing/frosting/drizzle/coating/topping/adornment!
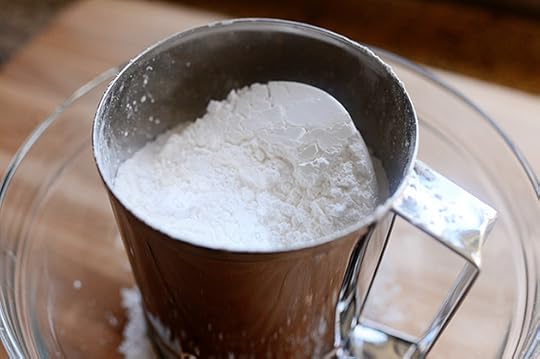 Measure powdered sugar in a sifter…
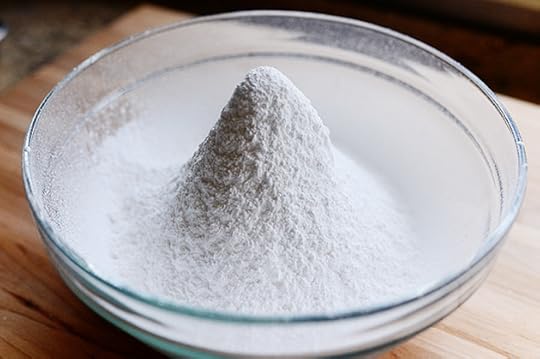 And see if you can sift it while creating an abominable powdered sugar man in the bowl. If the big cone stays intact, tell yourself your life will all turn out fine. If it crumbles and falls halfway through, feel really, really doomed.
You have these little conversations with yourself while you make scones too…right?
Oh, good! Whew.
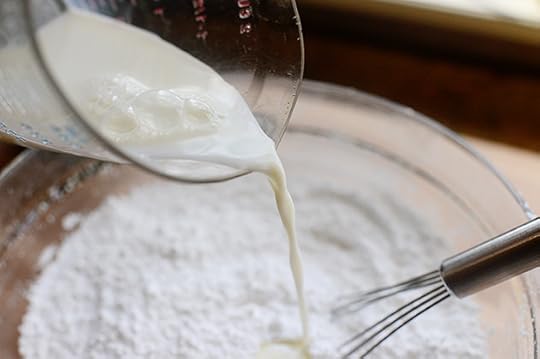 Once you know how the rest of your life is going to turn out, pour in some whole milk…
 And give it a little stir.
 Next, add a little melted butter…
 Then grab a couple of tablespoons of strong coffee…
 And add it in.
 Then add some more maple extract. (This stuff is good! Do not be afraid.)
 Whisk it all together until it’s smooth, and check the consistency. It should be pretty thick but still pourable. If it’s too thin, sift in a little more powdered sugar.
And now. Are you ready to have some fun?
I sure hope so.
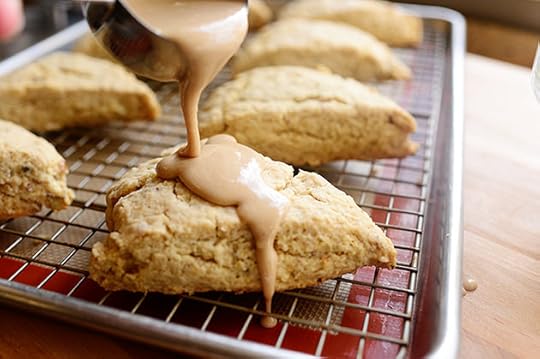 Grab some icing and go for it!
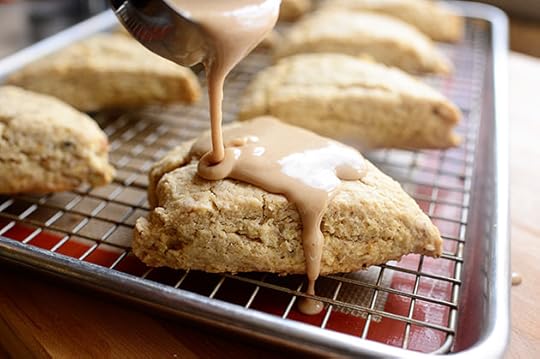 And when I say go for it…
 I mean go for it.
 Like, totally.
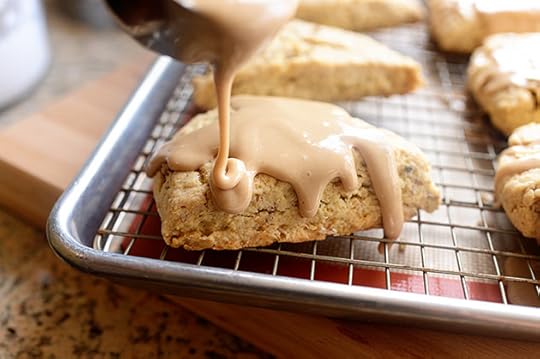
 Keep going until all the scones are coated…
 Then, for a final flourish, sprinkle a few extra pecans on top!
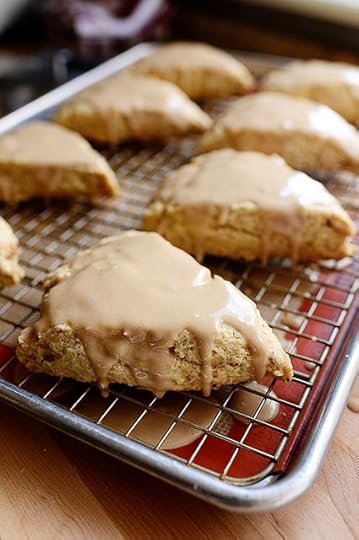
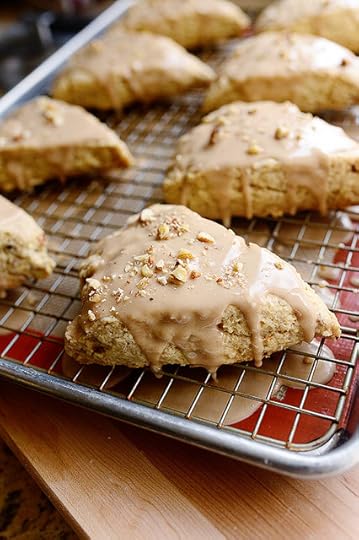 Now just step away, sit on your hands—heck, go on vacation if you have to. Just don’t touch them until the icing is totally set!
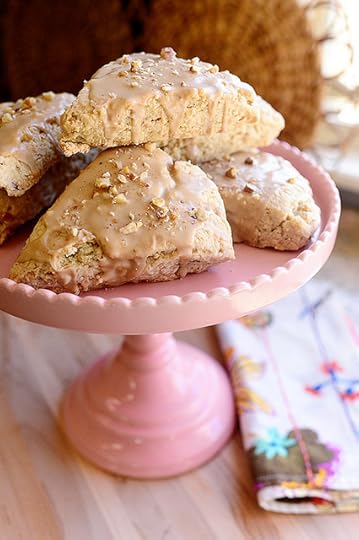 Aw, how pretty! Just stack them on a cake stand or platter, invite your BFF over for coffee…
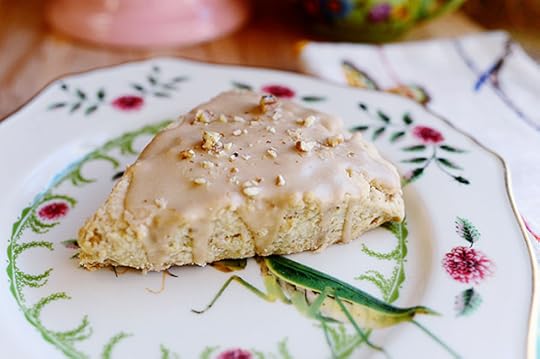
 And serve ‘em on a pretty plate.
These are DIVINE, my friends. I always loved Starbucks’ version, but over the years I’ve become pretty darn partial to these.
Don’t tell Starbucks I said that. I don’t want to get on their bad side.
 Hope you enjoy!
Here’s the handy dandy printable.
Recipe
Maple Oat Nut Scones
Prep Time: 20 Minutes
Cook Time: 22 Minutes
Difficulty: Easy
Servings: 8

Print Recipe
Ingredients
SCONES2-3/4 cups All-purpose Flour1/2 cup Regular Oats, Ground In A Food Processor Or Blender1/3 cup Sugar2 Tablespoons Baking Powder1/4 teaspoon Salt2 sticks (1 Cup) Cold Butter, Cut Into Cubes1/2 cup Pecans, Finely Chopped3/4 cups Heavy Cream (more If Needed)1 whole Egg1 teaspoon Maple Extract Icing5 cups Powdered Sugar1/4 cup Whole Milk2 Tablespoons Melted Butter2 Tablespoons Strong Coffee2 teaspoons Maple Extract Preparation Instructions
Preheat oven to 350 degrees.
In a large bowl, combine flour, ground oats, sugar, baking powder, and salt. Stir to combine.
Add butter pieces and use a pastry cutter to work the butter and dry ingredients together until the mixture resembles coarse crumbs. Stir in the chopped pecans.
Whisk together the cream, egg, and 1 teaspoon maple extract. Pour into flour mixture, stirring gently, until it all comes together. (Mixture will not come together in one cohesive ball; it should be in a few large clumps with some crumbs in the bowl.) If it is overly crumbly and will not come together at all, add a couple of tablespoons of extra cream and work it in.
Turn the dough out onto a cutting board or floured surface and use your hands to press into a 6-to-8-inch circle about 3/4 inch thick. Cut into 8 equal wedges (or you can cut into smaller wedges to get more.) Transfer to a baking sheet lined with a baking mat or parchment and bake for 20-24 minutes, or until poufy and set and just barely golden. (Shouldn't have much color on them at all.) Remove from the oven and allow to cool completely.
Combine all the icing ingredients. Make sure it's thick but still pourable. Drizzle a very generous amount on each one, then sprinkle on a few more chopped pecans. Allow the icing to set completely, then serve.
(Scones will keep nice and fresh for days in a plastic zipper bag.)
Posted by Ree | The Pioneer Woman on March 18 2014

March 17, 2014
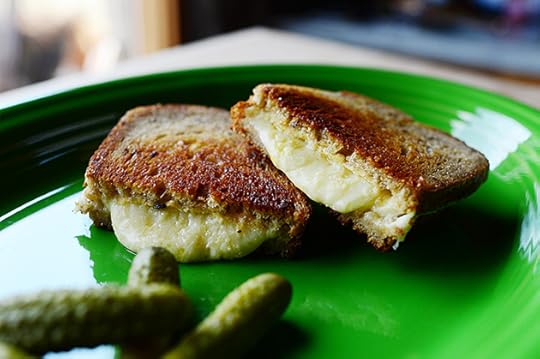
Irish Grilled Cheese
 Remember the mom in the classic 1980′s John Cusack movie “Better off Dead?” Her family was having a French foreign exchange student over for dinner, and she was so very proud to be serving FRENCH (“Fronch”) bread, FRENCH (“Fronch”) fries, and FRENCH (“Fronch”) dressing. What a yummy—and culturally appropriate—feast! (Or not.)
(Raise your hand if you loved that movie. “I…want…my…two…DOLLARS!”)
Well, I have to admit that I sort of take the same approach when I cook for St. Patrick’s Day. Basically, anything that’s green or has the word “Irish” attached to it is fine by me. Case in point: This luscious grilled cheese sandwich, made ultra delicious with unbelievable sharpness of aged IRISH cheddar, a slathering of IRISH mustard (okay, Dijon), and IRISH rye bread (okay, just regular rye bread.)
If you’re looking for a quick-and-easy way to enjoy a Leprechaun Lunch…this is the perfect little treat. (You can always have Corned Beef and Cabbage and Irish Coffee tonight!)
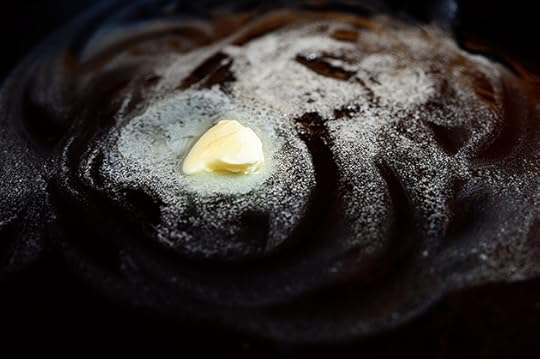 Now, I realize most human beings do not require a tutorial to make a grilled cheese sandwich. But sometimes it’s fun just to watch food being made, so here goes: Melt a little butter in a skillet over medium-low heat.
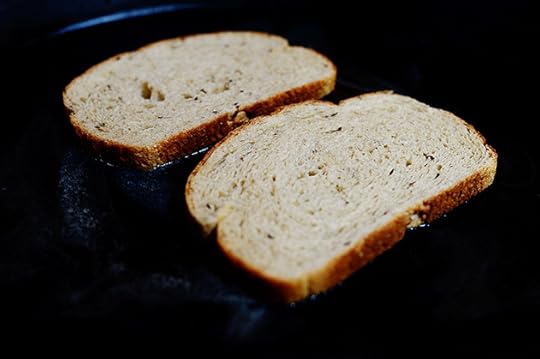 Place the slices of bread in the skillet, allowing it to soak up all the butter. (Or you can spread the bread with softened butter first—whatever floats your boat!)
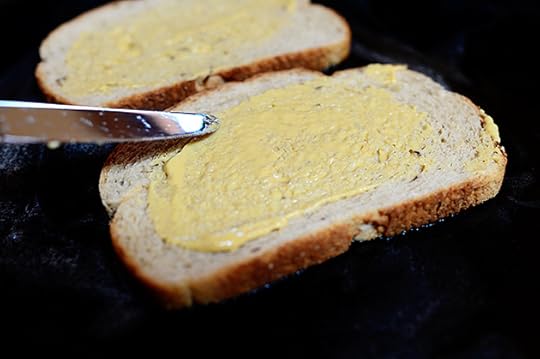 Spread the Dijon on both slices (and you can certainly do this before you put the bread in the skillet! Ha. I forgot until after the bread went in the skillet. I’m cool like that.)
Oh, and this is Dijon because that’s all I had when I made this sandwich fifty years ago, but how wonderful would this be with Irish mustard? Some of them are made with whiskey and stout! Mmmmmm.
 Cut the cheese into thin slices. This is Kerrygold aged Irish cheddar, and it is incredibly delicious. I’ve gone through occasional stages where I eat a big slice of this stuff once a day.
(But of course, regular cheddar or white cheddar is fine.)
 And lay it onto the bread.
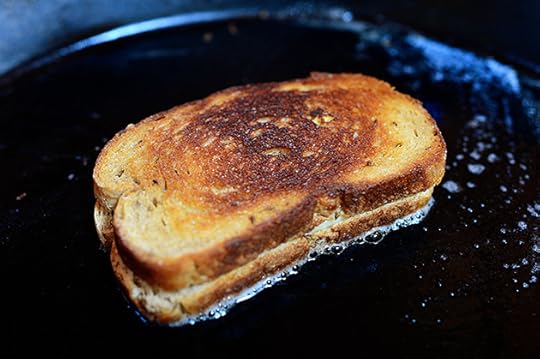 Allow the cheese to melt, then bring the two slices together. Continue grilling to make sure the cheese is lusciously melted and the bread is crisp and golden brown. This requires some babysitting, as you want the cheese to melt…but you don’t want to burn the bread.
Grilled cheese sandwiches should not be entered into unadvisedly or lightly.
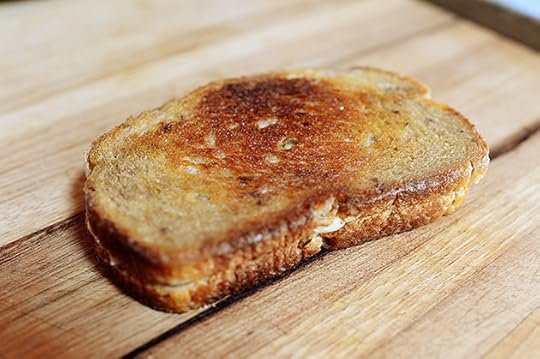 When it’s ooey and gooey, transfer the sandwich to a cutting board…
 And slice it in half.
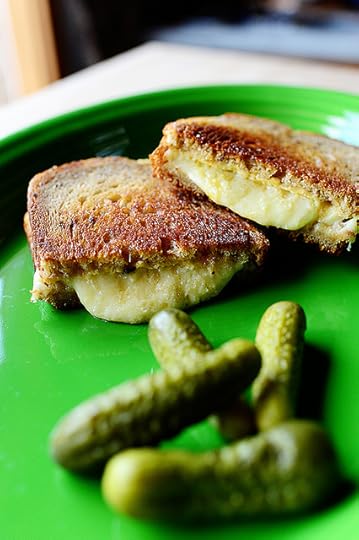 Serve it with small pickles while the cheese is hot and gooey. I love how the mustard flavors the bread but also oozes through the cheese a little.
I love food.
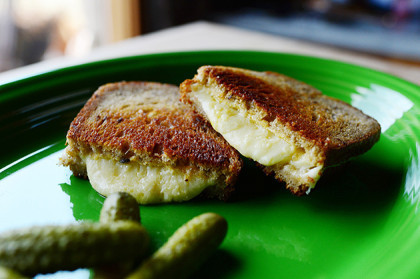
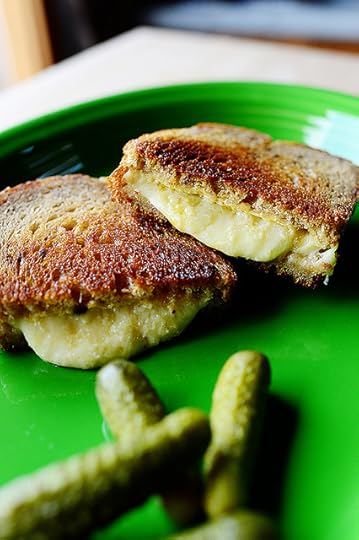 Sooooo delicious! (Who cares whether it’s necessarily Irish or not?)
So simple, you don’t even need a recipe…but here’s the handy dandy printable so you’ll have it!
Recipe
Irish Grilled Cheese
Prep Time: 5 Minutes
Cook Time: 10 Minutes
Difficulty: Easy
Servings: 1
Print Recipe
Ingredients
2 Tablespoons Butter2 slices Rye Bread2 Tablespoons Irish Mustard (Dijon Is Fine, Too)2 ounces, weight Aged Irish Cheddar (I Used Kerrygold) Small Pickles, For Serving Preparation Instructions
Melt the butter in a skillet over medium-low heat.
Place the slices of bread in the skillet, allowing it to soak up all the butter. Spread the mustard on both slices, then cut the cheese into thin slices and lay it on the bread. Allow the cheese to melt, then bring the two slices together and check both sides to make sure they’re crisp and golden brown and the cheese is melted.
Transfer the sandwich to a cutting board and slice it in half. Serve it with small pickles while the cheese is hot and gooey.
Variations
Use pumpernickel bread or pumpernickel-rye swirl bread for a nice, deep color.
Add tomato slices or thinly sliced corned beef to the sandwich.
Posted by Ree | The Pioneer Woman on March 17 2014

March 15, 2014
Irish Hills Cupcakes
 (A long time ago…in a galaxy far, far away…I made these green cupcakes. Centuries later, I’m finally sharing them with you here!)
These cute little numbers remind me of the performance of Brigadoon my mom and I went to see at the local high school when I was a little girl. I’ll never forget the gallant, handsome lad who played the role of Tommy. He sang “Heather on the Hill” to Fiona with such charm and youthful, Irish appeal, and . . .
WAIT. Stop the presses. Never mind.
Brigadoon takes place in Scotland.
Well, you know what? Ireland is green, too! And these cupcakes will remind you of the rolling hills of that gorgeous country like no other dessert will.
They’ll also remind you of Brigadoon!
Even though they probably shouldn’t.
 Preheat the oven to 350°F. Line two 12-cup muffin pans with paper liners. Combine the butter and the sugar in the bowl of an electric mixer fitted with the paddle attachment . . .
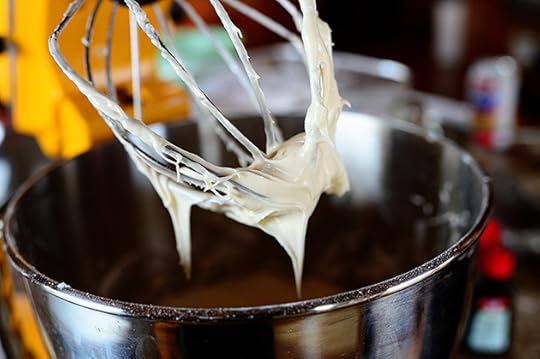
 And cream them together until smooth. Scrape the sides of the bowl halfway through to ensure it’s thoroughly mixed.
 Add the vanilla, then crack in the eggs one at a time, mixing well after each addition . . .
 And mix it until nice and smooth.
 In a separate bowl, mix together flour, baking powder, and salt. Then, with the mixer on low, add one-quarter of the dry ingredients.
 Mix the buttermilk and milk together, then add one-quarter of that mixture to the bowl.
 Continue mixing in the dry ingredients and milk mixture in alternating batches, scraping the sides of the bowl once to make sure it’s all mixed together.
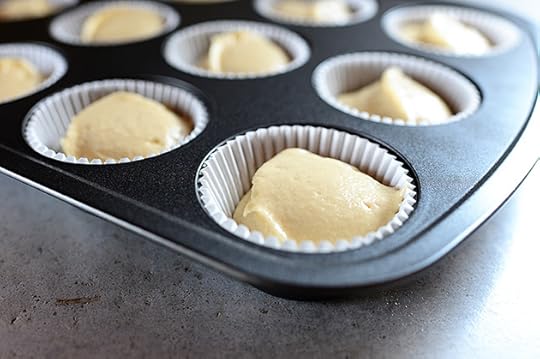 Use a 1⁄4-cup measure or scoop to add the batter to the cup . . .
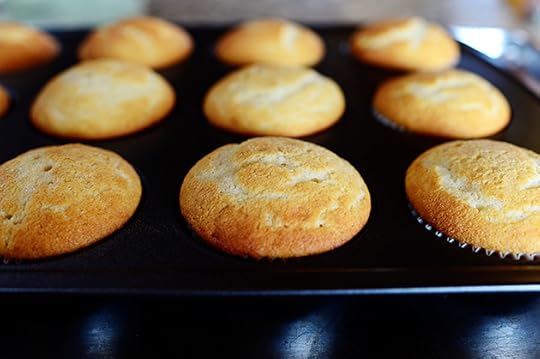 Then bake the cupcakes for about 18 minutes, until they’re poufy and light golden brown. (Psst. These got a little more brown than yours will get! I tried 375 at first, but decided 350 was ultimately better.)
 While the cupcakes are cooling, make the icing! I just made an easy cream cheese version (no butter or anything), but any ol’ buttercream will do, too! Add the cream cheese and powdered sugar to the bowl of a mixer fitted with the whisk attachment.
 Add a teeny splash of vanilla…
 Mix it on high until the frosting is nice and smooth. It should be slightly gooey…where “gooey” means “divine.”
 Add a small amount of green food coloring (how much you add depends on how green you want your frosting!)
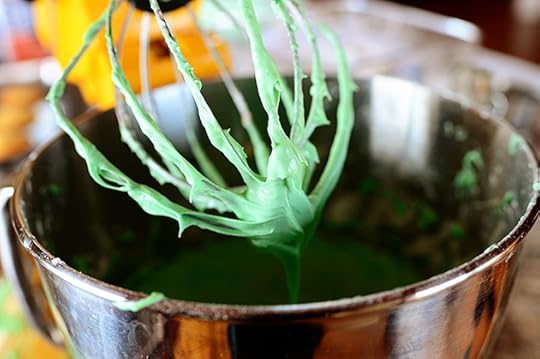 Mix it well until the icing is evenly colored. Add a little more coloring if you like, to get the color nice and deep.
 When you’re ready to ice the cupcakes, place some green sanding sugar in a small dish.
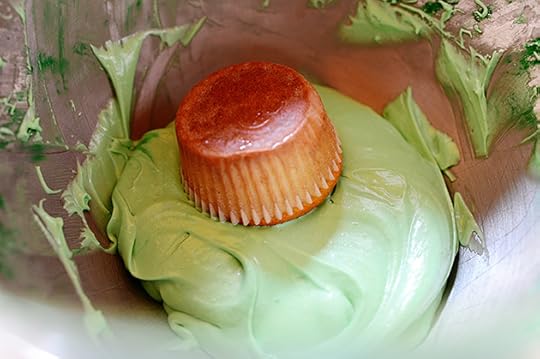 To frost each cupcake, take the easy road by placing it upside down in the frosting . . .
 Then pull it out . . .
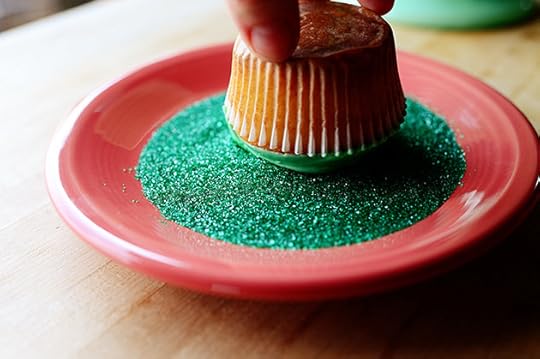 And gently press it into the sanding sugar.
 Roll it around to coat it in the sugar.
 Pretty! By pressing the cupcake into the sugar, you’ll create little “hills” in the surface of the icing.
 Just like Brigadoon! Or not.
 You can also pipe the other half of the cupcakes with a star tip and sprinkle on the sugar for a different look.
 So Pretty! So green!
 So…Irish!
You’ll love these. (And you can change the color to suit any holiday, of course!)
Here’s the handy dandy printable.
Recipe
Irish Hills Cupcakes
Prep Time: 15 Minutes
Cook Time: 18 Minutes
Difficulty: Easy
Servings: 24

Print Recipe
Ingredients
1 cup Softened Butter (2 Sticks)4 whole Eggs2 teaspoons Vanilla3 cups All-purpose Flour4 teaspoons Baking Powder1/2 teaspoon Salt1 cup Whole Milk1/2 cup Buttermilk1 package (8 Ounce) Cream Cheese, Softened3 cups Powdered Sugar, Sifted (more If Needed For Thickening)1 teaspoon Vanilla Green Food Coloring Green Sanding Sugar Preparation Instructions
Preheat oven to 350 degrees. Line 2 12-cup muffin pans with liners.
In a mixer, cream together the butter and sugar until fluffy. Add the vanilla, then add the eggs one at a time, mixing after each addition.
Mix together the milk and buttermilk in a pitcher. In a separate bowl, stir together the flour, baking powder, and salt. Alternate adding the wet and dry ingredients in four batches each, until the batter is thick and smooth.
Add 1/4 cup batter to each muffin cup, then bake for 18 minutes (approximately.) Remove and allow to cool completely.
Make the icing by mixing together the cream cheese, powdered sugar, vanilla, and green food coloring. Add a little more powdered sugar if it seems too thin.
Place the sanding sugar in a small dish. Dip the cupcakes, top side down, in the icing until coated, then dip them in the sanding sugar, gently rolling them to coat. Repeat with the rest of the cupcakes.
For a little variation, pipe icing on half the cupcakes, then sprinkle with sugar.
(Refrigerate if not serving immediately, as icing will be soft.)
Posted by Ree | The Pioneer Woman on March 15 2014

March 13, 2014
Corned Beef and Cabbage
 Before I start with this classic St. Patrick’s Day dish, I have a funny and touching corned beef story to share with you. Early in my marriage, I decided I wanted to try to make my mom’s classic beef brisket, which is marinated in all sorts of savory (salty) ingredients. So I sauntered down to the grocery store, bought one of those brisket things, took it home, and marinated it in things like beef consomme and soy sauce for a good 18 hours before putting in the oven for another 7. And when my husband and I took our first bite of that lovely, tender meat, well…we spit it out and gagged.
Turns out, I’d bought a corned beef brisket instead.
Note to self: Corned beef brisket does not need to be marinated in savory ingredients.
SALT OVERDOSE! BLECH! YUCK! GAG! BAAAAAAAARRRRRRRRRRRRF!
Awwww…wasn’t that a sweet story?
Anyway, corned beef and cabbage is probably the most traditional St. Paddy’s Day dish there is. But you know what? For a traditional holiday dish, there sure are a lots of different ways to spin it. The corned beef can be shredded, shaved, or sliced. The cabbage can be shredded, wedged, or chunked. The brisket can be boiled, braised, or roasted. The beef and cabbage can be slow cooked together, or they can be kept separate.
While I don’t claim this is how St. Patrick would make his corned beef and cabbage—that is, if St. Patrick even ate corned beef and cabbage, which I sort of doubt he did, but it doesn’t really matter in the grand scheme of life—here’s how I like to make mine.
 First and foremost: I use corned beef in the package, because no one in their right mind would ever take the time to salt-cure their own corned beef because that process takes a week to ten days and whole nations have been built in that time. The stuff in the package is lovely!
And salty.
But that’s kind of the whole point.
 Unwrap the brisket and place it fat side up inside the baking dish. If it came with a spice packet, sprinkle it over the top if you want to (or you can just discard the packet), then sprinkle on the black pepper and rub it in.
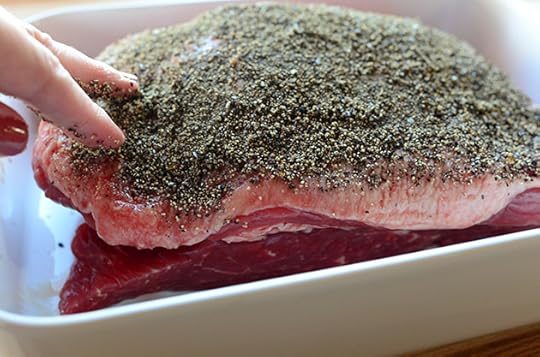 Cover the dish with heavy aluminum foil and place it in a 325 degree oven for 2 1/2 hours, then remove the foil and bake it for at least another 1/2 hour to 45 minutes. This long cooking time is absolutely essential, because if the meat doesn’t cook for a long enough time, it’ll be tough and tragic. And that’s the key to tough cuts of meat like brisket: If they’re tough, they haven’t cooked long enough! (As opposed to good cuts of steak, which have cooked way too long and must be driven from this earth if they’re tough.)
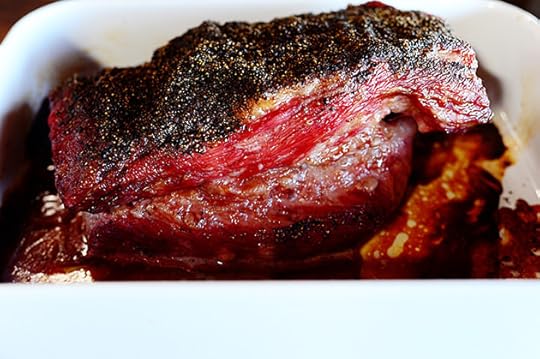 Check the brisket by inserting a fork in the meat after 3 hours. If it goes in really easily, it’s ready; if it meets with any resistance at all, bake it for another 30 minutes or so.
Once the brisket is fork-tender, remove it from the oven and let it rest, covered loosely in foil.
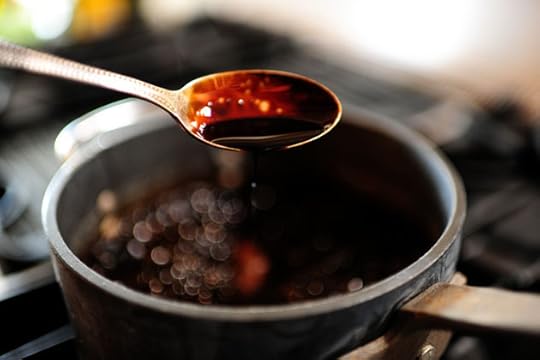 While the brisket is resting, make A balsamic reduction for the cabbage: Combine balsamic vinegar with a little sugar in a small saucepan over medium-high heat. Stir it together and bring the mixture to a boil, then reduce to medium-low and simmer until the mixture is reduced by half and is nice and thick. Your whole house will smell like balsamic vinegar and your kids will run out of the house, but that can sometimes be a good thing if you need a little peace and quiet. Set the balsamic reduction aside till you need it.
(Note: I borrowed the above photo from another post of mine since I’m an airhead and didn’t take a photo of this step when I made the corned beef and cabbage.)
 Next, raise the oven temperature to 350 degrees and start on the cabbage! Cut a head of cabbage (or 2 heads if you want more cabbage) into quarters…
 Then cut each fourth in half to create 8 thin wedges. If there are obnoxiously large chunks of the core visible, you can slice them off, but the core actually helps hold the wedges together, so don’t go too crazy with the knife.
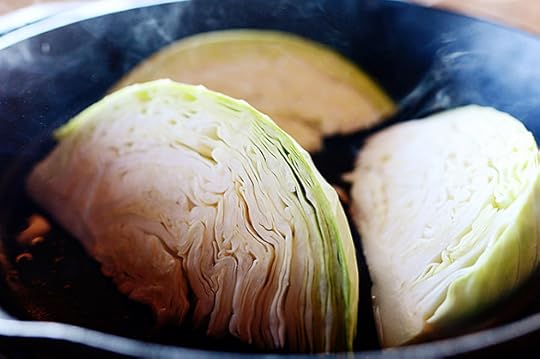 Heat a little olive oil in a large, heavy skillet over medium-high to high heat and add a few pieces of the cabbage.
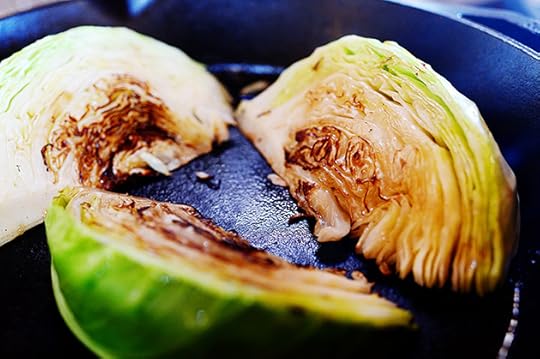 Sear it on both sides until the cabbage gets as much gorgeous color as possible, about 1 minute per side.
 Use a spatula to transfer the cabbage to a rack placed over a baking sheet. Sprinkle the cabbage pieces with salt and pepper, and repeat until all the cabbage is seared.
 Now, just for kicks, pour a little Guinness (or any beer) into the bottom of the pan, then carefully transfer the pan to the oven.
 Bake the cabbage for 20 minutes, or until tender and deeper brown. In my mind, the Guinness gently steams the cabbage and infuses it with its stouty essence.
But in reality, it’s probably just a placebo effect.
Which is totally fine by me!
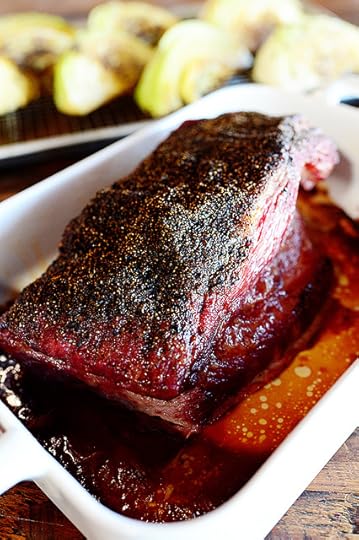 Now, uncover zee brisket!
 Transfer it to a cutting board and slice or shred it up. (I prefer slices in this scenario.) You can go thick with the slices as I did, or you can use a very sharp knife and go super thin.
 Arrange the corned beef and cabbage on a platter together…
 Take generous spoons of the balsamic reduction…
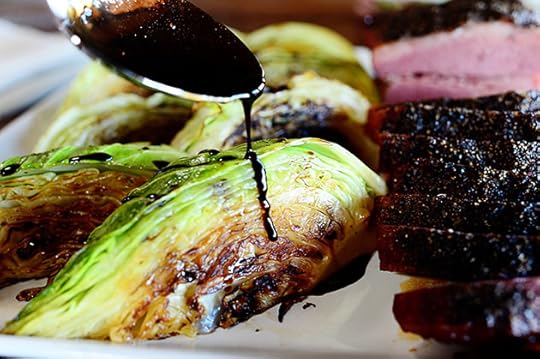 And drizzle it…
All over the cabbage slices. (And you can drizzle some on the meat, too!)
Tender meat, tangy cabbage…this really is a feast for the senses and a great way to celebrate St. Paddy’s Day!
And here are some fun variations:
Serve with a dish of grainy Irish mustard.
Serve with boiled new potatoes.
Shred the corned beef with two forks if you prefer that consistency!
Make a leftover corned beef sandwich with a slice of brisket and a wedge of cabbage on rye. Yum!
Here’s the handy dandy printable!
Recipe
Corned Beef and Cabbage
Prep Time: 20 Minutes
Cook Time: 3 Hours
Difficulty: Easy
Servings: 8
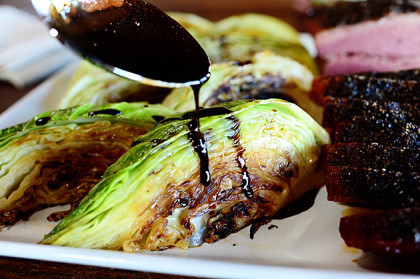
Print Recipe
Ingredients
1 package Corned Beef Brisket (3-4 Pounds)3 Tablespoons Ground Black Pepper1 head Green Cabbage (can Use 2 If You'd Like More) Olive Oil, For Searing1/2 bottle Guinness, Or Any Beer1 cup Balsamic Vinegar2 Tablespoons Sugar (optional) Preparation Instructions
Preheat the oven to 325 degrees.
Unwrap the brisket and place it fat side up inside the baking dish. If it came with a spice packet, sprinkle it over the top, then sprinkle on the black pepper and rub it in. Cover the dish with heavy aluminum foil and place it in the oven for 2 1/2 hours, then uncover and continue baking for 1/2 hour to 45 minutes.
Check the brisket by inserting a fork in the meat. If it goes in easily, it’s ready; if it meets with resistance, bake for another 30 minutes. Once the brisket is fork-tender, remove it from the oven and let it rest, covered loosely in foil.
While the brisket is resting, make the balsamic reduction for the cabbage: Combine the balsamic and the sugar in a small saucepan over medium-high heat. Stir it together and bring the mixture to a boil, then reduce to medium-low and simmer until the mixture is reduced by half and thick. Set it aside.
Raise the oven heat to 350 degrees. Next, make the cabbage: Cut the cabbage into 8 wedges. Heat the olive oil in a large, heavy skillet over medium-high heat and add the cabbage. Sear it on both sides until the cabbage gets as much color as possible, about 1 minute per side. Use a spatula to transfer the cabbage to a rack placed over a baking sheet. Sprinkle the cabbage pieces with salt and pepper. Pour the Guinness (or beer) into the bottom of the pan, then carefully transfer the pan to the oven. Bake the cabbage for 20 minutes, or until tender and deeper brown.
Slice (or shred) the rested beef on a cutting board (it should be very, very tender and almost falling apart.) Then place it on a large platter alongside the cabbage wedges. Take generous spoons of the balsamic reduction and drizzle it all over the cabbage slices.
Serve the corned beef next to the cabbage…and dig in!
Variations
Serve with a dish of grainy mustard.
Serve with boiled new potatoes.
Shred the corned beef with two forks if you prefer that consistency!
Make a leftover corned beef sandwich with a slice of brisket and a wedge of cabbage on rye. Yum!
Posted by Ree | The Pioneer Woman on March 13 2014

March 11, 2014
Irish Coffee
 My mom used to make Irish Coffee all the time, and now that I think of it, it wasn’t always necessarily St. Patrick’s Day when she made it. In fact, I don’t think it was ever St. Patrick’s Day when she made it.
And she’s not even Irish.
MOM! I’M TELLING!
Okay, in all seriousness: I was being totally serious. My mom made Irish Coffee all the time, it was never on St. Patrick’s Day, and she can’t even blame her lineage.
And in closing: I am my mother’s daughter.
Here’s the way I love to make the glorious stuff!
 Before you start making the coffee, whip up some demonic and devilish and sinful topping for the coffee. Add some cold heavy cream to the bowl of a mixer…
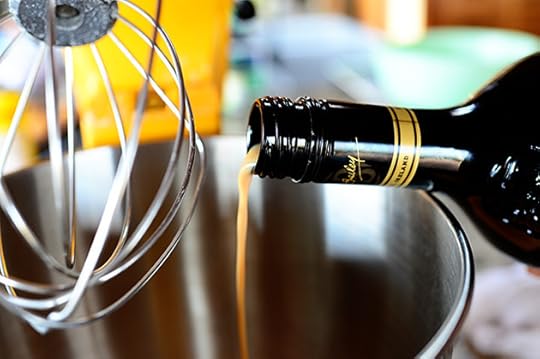 Then splash in some Bailey’s! Bailey’s is basically a liqueur made from Irish whiskey and cream, and you can leave it out if you don’t have any or don’t wanna buy any…it just makes this extra good. (If you don’t use Bailey’s, just add a little sugar and a touch of vanilla!)
 Then just beat it until it’s stiff and sweet and light and fluffy. Set it aside for a sec.
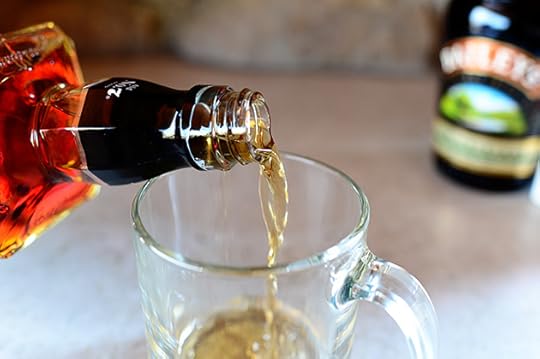 The essential component of Irish coffee is—hiccup—whiskey! And it is at this time that I’m going to admit to you that I did not have Irish whiskey when I made this. So I used Jack Daniels.
But as I poured it into the mug, I danced an Irish jig in my mind. So hopefully that’s okay.
Please don’t hate me. Thank you.
So add about 2 to 3 tablespoons of whiskey to a mug…
 Then add about a tablespoon of brown sugar for some beautiful sweetness.
 Stir the whiskey and brown sugar together, then pour in some nice, strong coffee.
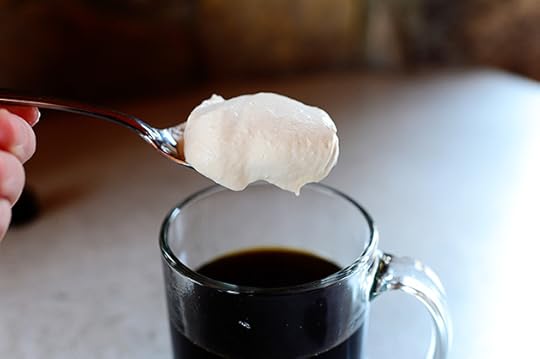 Stir it around to make sure it’s all combined, then grab an enormous dollop of the whipped cream concoction…
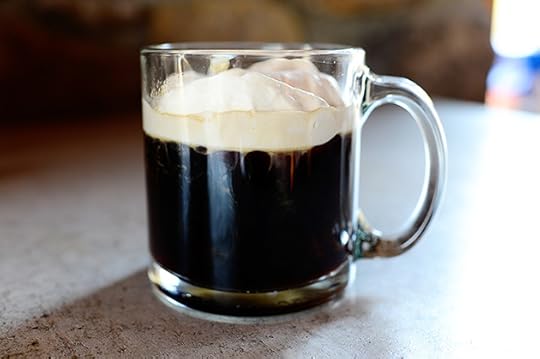 And spoon it right on top.
And you know what? I’m afraid this amount isn’t sufficient.
Ahh…that’s more like it! You want a nice, thick layer of cream so you can sip the coffee through the cream, which will make you a happier, more well-rounded person.
Serve this with Irish Soda Bread (shown!), Guinness Cake…or just a toasted English muffin.
Oops. Maybe not an English muffin. That’s crossing nations.
But I already used Jack Daniels. So I guess it’s all wrong anyway.
(And by wrong, of course, I mean divine.)
More St. Patrick’s Day recipes coming this week!
Love,
Pioneer Woman
Recipe
Irish Coffee
Prep Time: 10 Minutes
Cook Time:
Difficulty: Easy
Servings: 4

Print Recipe
Ingredients
1 cup Heavy Cream3 Tablespoons Bailey's Irish Creme1/2 cup Irish Whiskey (or Any Whiskey)4 Tablespoons Brown Sugar4 cups Strong Hot Coffee Preparation Instructions
With an electric mixer, whip cream and Bailey's together until stiff. Set aside.
Into each of the four large coffee mugs, add 2 tablespoons whiskey, 1 tablespoon of brown sugar, and 1 cup coffee. Top with a very generous layer of the Bailey's whipped cream. (Almost a third of the cup should be taken up by the whipped cream.)
Drink the coffee through the cream! Delicious.
Posted by Ree | The Pioneer Woman on March 11 2014

Ree Drummond's Blog

- Ree Drummond's profile
- 2036 followers

