
Ree Drummond's Blog, page 30
May 5, 2014
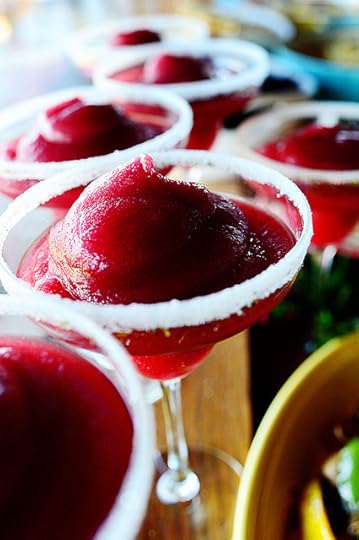
Blackberry Margaritas
 Today is May 5th—also known as Cinco de Mayo! And while it obviously isn’t the most sacred of holidays in our country, it is a great day to celebrate Mexican culture…and Mexican food! Before I start with today’s big, beautiful margarita recipe, here’s my Cinco de Mayo category where I have all the Mexican/Tex-Mex recipes on this site in one place:
Cinco de Mayo recipes on The Pioneer Woman Cooks
From guacamole to Pollo Asado, there’s lots of good stuff there!
And speaking of good stuff…if you think you love margaritas now, just wait until you try this one. Gorgeous, colorful, refreshing, delicious…and purple! You’ll be filled with love immediately.
Note: Tread lightly…and sip slowly! They taste so good, it’s easy to forget there’s booze in there.
Another note: For a non-alcoholic version, just sub ginger ale or 7-Up for the booze!
Here’s how to make ‘em.
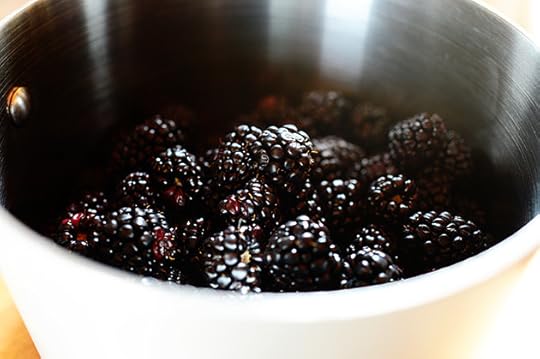 Throw some blackberries into a saucepan. These are juicy, lusciously fresh ones, but you can use frozen if you can’t get fresh!
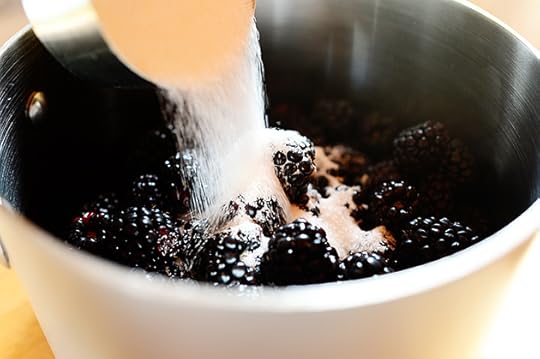 Next, add some sugar. This is a wonderfully sweet, tart, boozy drink.
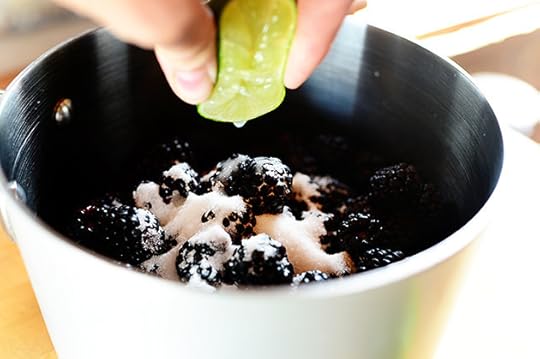 Then squeeze in some lime juice!
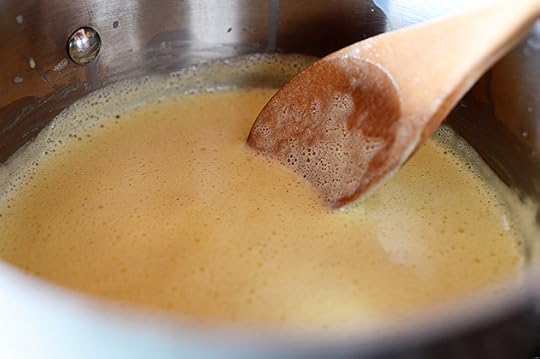
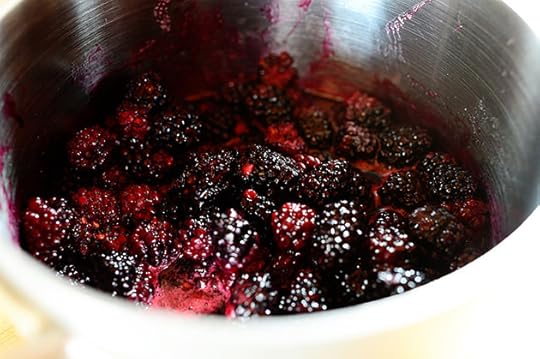 Now just bring it to a gentle boil over medium heat, stirring constantly. Then reduce the heat and let them cook slowly for 20 to 25 minutes, until the mixture is nice and thick. (Note: This photo was taken about halfway through the cooking process. By the end, most of the berries will be broken up and the mixture will be more syrupy.)
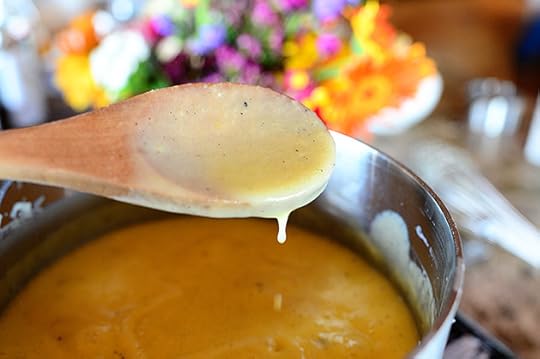
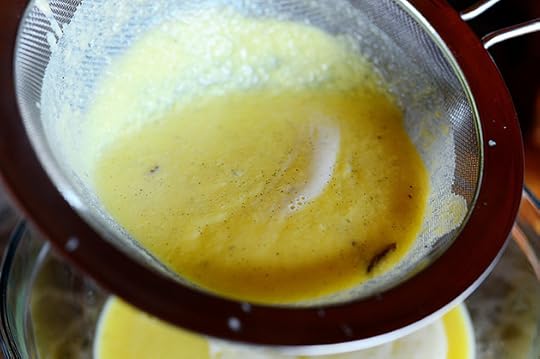
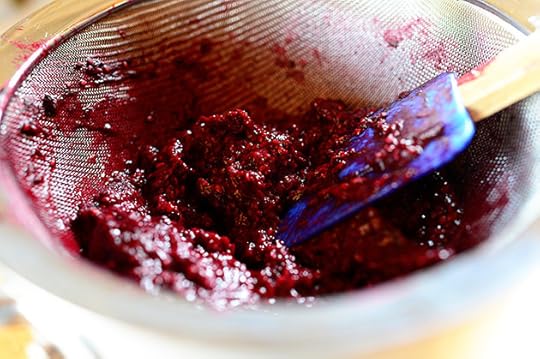 When it’s ready, place a fine mesh strainer over a bowl and strain the berries, pressing to work out as much liquid through as possible. All that should be left behind are seeds and pulp.
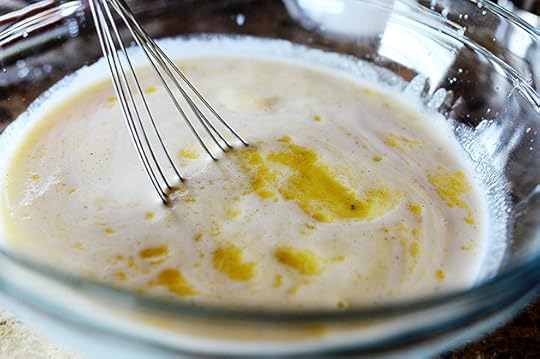
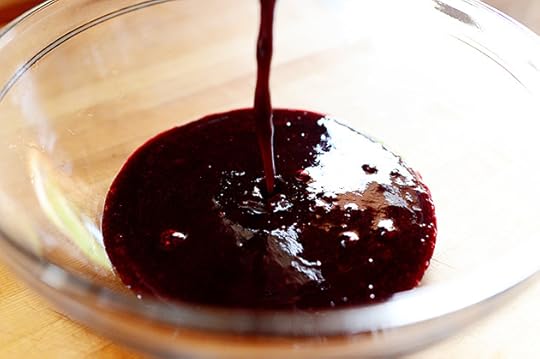 And this is what winds up in the bowl. Just a glorious, thick blackberry liquid. I use this same method whenever I make blackberry ice cream. (Oh…the glory. But that’s another story for another time.) Just refrigerate this until it’s totally cold. You can make it at least a couple of days before you need it!
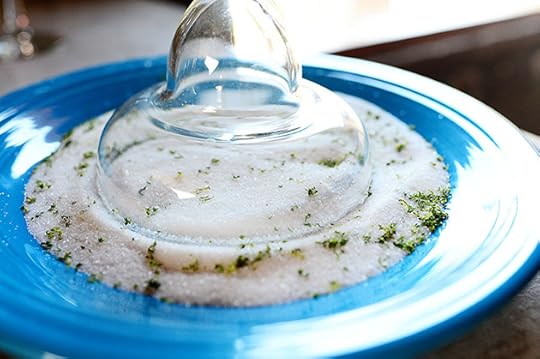
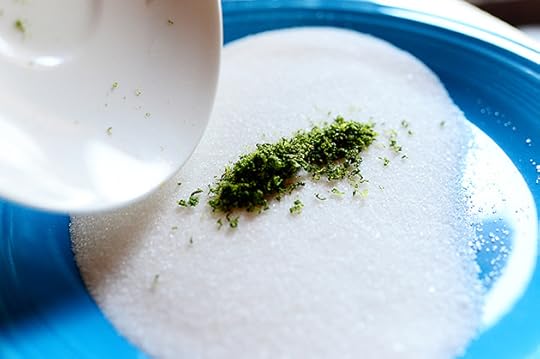 When it’s margarita time, make some lime sugar to go around the rim of the glasses! Throw some lime zest on a plate of sugar. (I zested the lime, then laid out the zest on paper towels for about an hour to dry it a bit. Keeps it from getting clumpy!
 Then I just used my fingers to mix it around until the zest and sugar were totally combined.
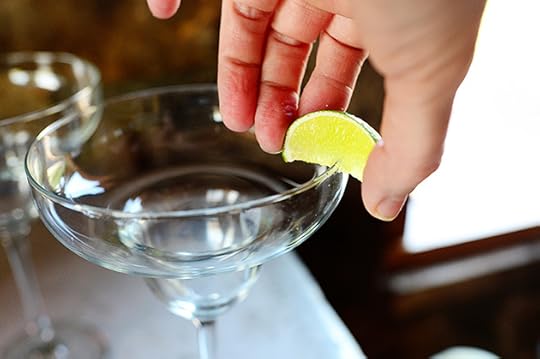 Rub a little wedge of lime around the rims…
 Then dip the rim in the sugar…
 Until it’s coated in the lime sugar.
I’m definitely a sugar-on-the-rim person when it comes to cocktails. So much better than salt!
 When the glasses are all ready, fill the blender with ice and add some tequila…
 Some Triple Sec…
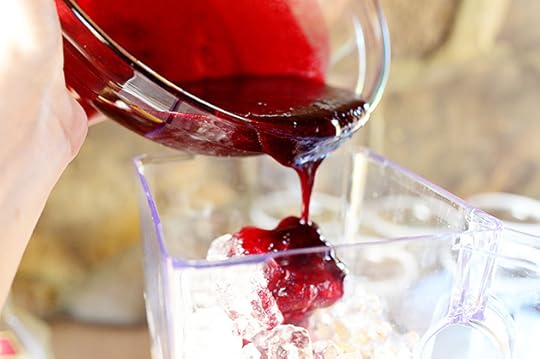 And about half the blackberry puree, along with some lime juice.
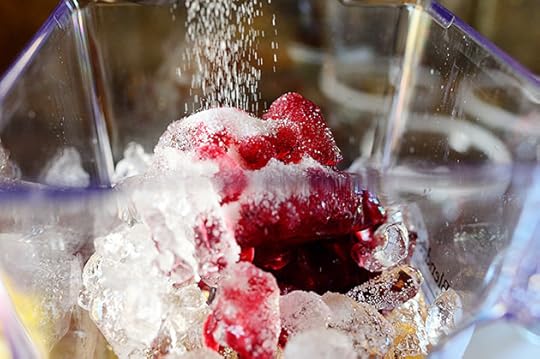 You can also add a little more sugar for a little more sweetness…or you can always taste it after it’s blended and add sugar if you think it needs it.
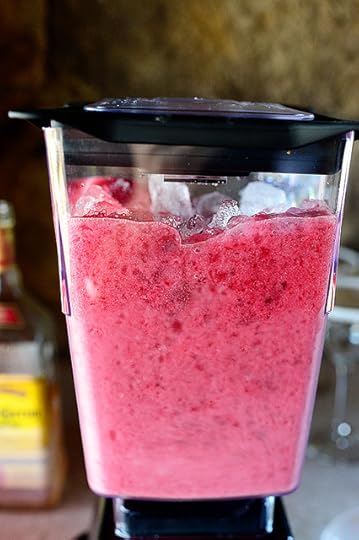 Then blend away!
And pour it into the glasses.
 I have never, ever served these and had a drop left. Everyone loves ‘em!
 Happy Cinco de Mayo!
Recipe
Blackberry Margaritas
Prep Time: 1 Hour
Cook Time: 30 Minutes
Difficulty: Easy
Servings: 12

Print Recipe
Ingredients
BLACKBERRY PUREE4 cups Fresh Blackberries1/2 cup Sugar1 whole Lime, Juiced LIME SUGAR1 cup Sugar Zest Of 3 Limes MARGARITAS2 cups Tequila1/2 cup Triple Sec2 whole Limes, Juiced1/4 cup Sugar (optional) Preparation Instructions
Put the blackberries, 1/2 cup sugar, and juice of 1 lime in a saucepan. Bring it to a boil, stirring constantly, then reduce the heat and simmer for 20 to 25 minutes until thick. Strain through a fine mesh strainer, pressing to get all the liquid out, then place the liquid in the fridge and chill until cold.
To make the lime sugar, zest the 3 limes and lay out on a paper towel to dry for 30 minutes. Add the zest to 1 cup of sugar and mix together. Rub a lime wedge around the rims of margarita glasses and dip in the sugar to coat.
To make the margaritas, fill a blender with ice. Add half the tequila, half the triple sec, the lime juice, and half the blackberry puree. Add a little more sugar if desired. Blend until totally combined and serve. Repeat with another blender full of ice, the rest of the tequila, triple sec, and blackberry puree!
These are utterly delicious!
Posted by Ree | The Pioneer Woman on May 5 2014


May 1, 2014
My Favorite Quick-and-Easy Dinners
When my kids were babies, I thought I was busy.
Then they got bigger. And now I wonder what in tarnation I did with my time back then.
Something has just kicked in. Over the past year, between soccer, football, school work, tournaments, mock trials, and a zillion other things, our kids are busy…which, once I throw in a husband who’s trying to run a cattle ranch, and the fact that the kids are his primary work crew, and the fact that we also shoot our show for Food Network, and the fact that I still have to make time to watch Real Housewives, makes for a nutso household.
And people say the country is bucolic and peaceful. Haha.
My whole food-related point, since this is the Cooking section of my website, is that more and more, I am expanding my arsenal of relatively quick dinners that can be ready in a jiffy.
(Does anyone say “in a jiffy” anymore? Please say yes.)
For quick reference, I put together a bunch of my very favorite quick-and-easy dinners here on The Pioneer Woman Cooks! I hope you find a handful that make your life (or at least your life at dinnertime) easier. Note that for some of these (Pasta Puttanesca, anyone?) I may want to serve some grilled chicken alongside it to satisfy the carnivores in my house. Just tailor each recipe to fit your household!
(Just click on the photos or links below to get to the printable recipes.)
 Beef and Bean Burritos. This remains a favorite supper among Marlboro Man and the kids, and they couldn’t be easier.
 Shrimp Scampi! Oh, my. So delicious, so easy. So good!
 Fried Round Steak. Serve it with mashed potatoes and veggie, or between two pieces of white bread. This is my favorite way to eat round steak. The flavor is amazing.
 Chicken Florentine Pasta. Ahh…one of my favorites. Chicken, tomatoes, spinach, pasta…perfectly simple and good.
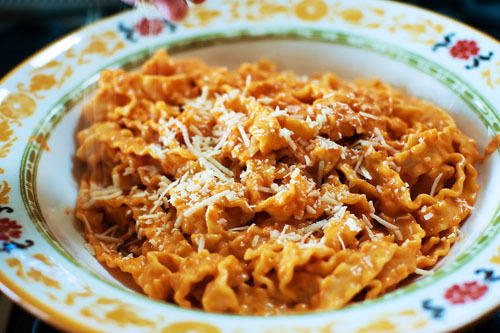
 Roasted Red Pepper Pasta. I use jarred roasted red peppers to make this dish over-the-top quick and easy. Everyone I’ve ever made this for has closed their eyes and sighed. So scrumptious!
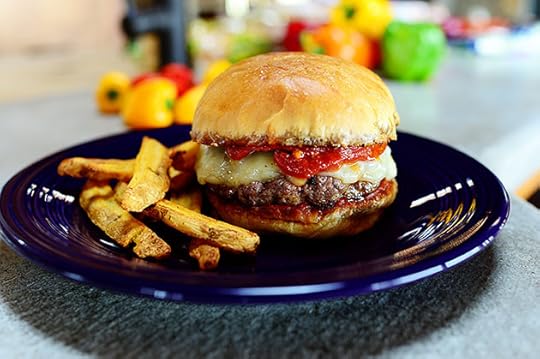 Pepperoni Pizza Burgers. A great way to take regular ol’ burgers to the next level. Just add marinara, pepperoni, and mozzarella!
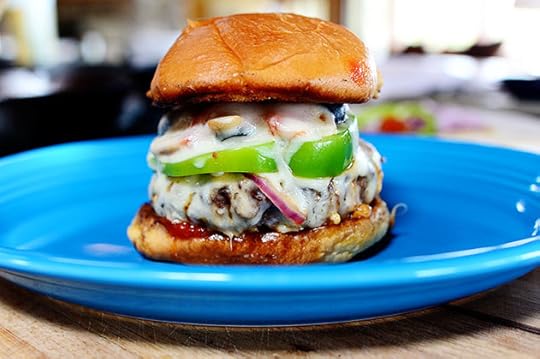 And if that piques your interest…try these Surpreme Pizza Burgers after that. Wow.
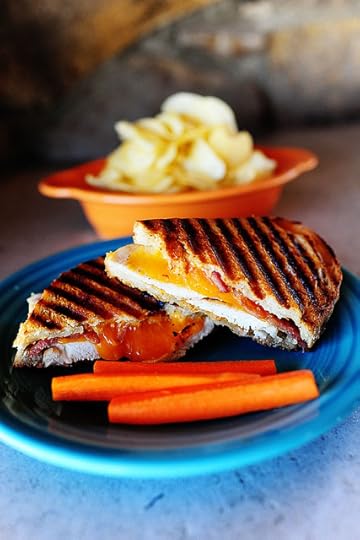 Chicken Bacon Ranch Panini. Couldn’t be easier! (If you don’t have a panini maker, just grill it in a skillet. Yum!)
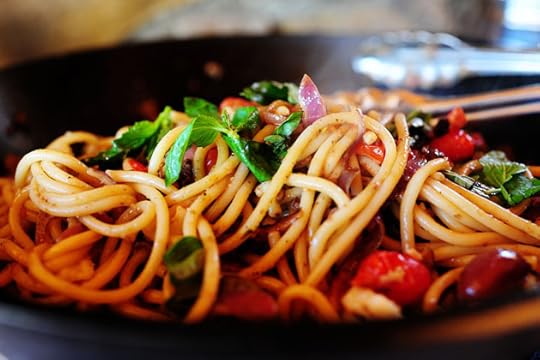 Pasta Puttanesca! Ready in no time, gone in minutes. At least when I’m around.
 Mini Meatball Sandwiches. Another quick-and-easy crowd pleaser. These are great if you have a group of kids over to your house.
 An oldie but a goodie: Pasta with Vodka Sauce! I could eat a whole pan of this. It’s to die for.
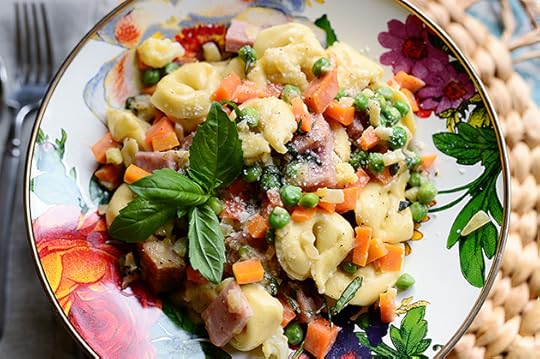 Tortellini Primavera. Use storebought cheese tortellini, make a veggie/ham/Parmesan/cream sauce…and dinner is served!
 Chicken Mozzarella Pasta! Truly one of the easiest and most delicious quick dinner there is. Marlboro Man and the kids love it…and I love it, too!
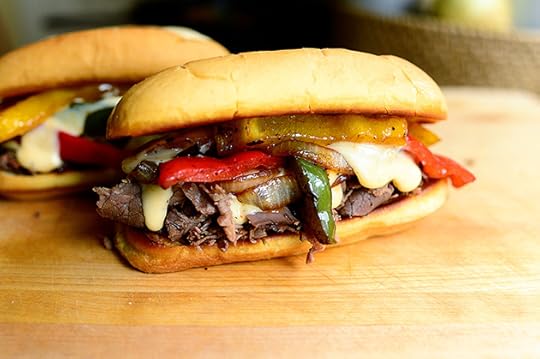 Quick-and-Easy Philly Cheesesteaks. Okay, so they aren’t THE original, authentic cheesesteak…but they’re still utterly delicious.
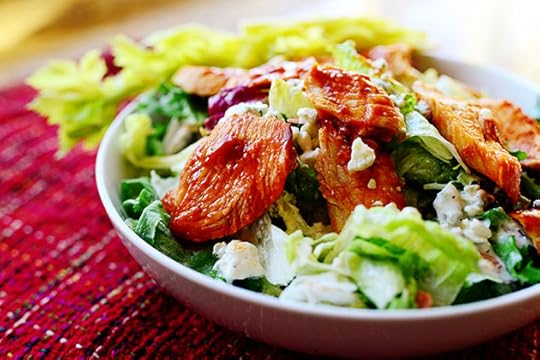 Ooooh. If you haven’t tried this Buffalo Chicken Salad…you’ve gotta make it soon!
 Another main course salad: Chicken Taco Salad. So much flavor, so much texture…so good!
 And mmmmmm…Shrimp Tacos. Fresh, flavorful, fantastic.
 Chicken with Mustard Cream Sauce. Takes sauteed chicken up a notch. Great for guests!
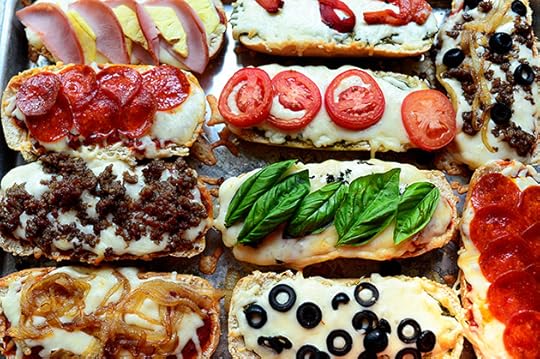 And of course…French Bread Pizzas. The possibilities are endless!
Hope you find some good stuff, friends.

April 28, 2014
Italian Cream Cupcakes
 Italian Cream Cake holds the distinction of being the only thing on Earth that will compel me to buy a bag of shredded flake coconut, which, until I first made this Italian Cream Cake recipe after Billie, a church friend of ours, brought it to our Fourth of July gathering one summer, I had never bought before in my life because coconut just isn’t something that excites me.
That was a really long sentence. And I don’t think it made grammatical sense. I’m exhausted now.
Anyway, I don’t mind the flavor of coconut, which sets it apart from bananas in that banana flavor (along with its texture and sheer existence) makes me want to die a thousand deaths, but I’m just not crazy about the texture…particulary of the shredded, sweet stuff. Never have been.
Except in Italian Cream Cake.
And, after yesterday, Italian Cream…Cupcakes.
Now, I know the nature of a foodblogger is to post photos and a recipe and write something along the lines of “These are so delicious!” And I’ll just warn you that since I am a foodblogger, I’m about to do that very thing. So let me get that over with first:
These are so delicious.
So now let me get onto the specifics: If you think you love Italian Cream Cake…you’ve gotta try it in cupcake form. I wound up loving the cupcake version even better than the cake, and after hours and hours of contemplating and reflecting, I’ve figured out why: The ingredients in this batter result in a nice, golden, every-so-slightly crisp surface, and the cupcakes have a lot more surface area than a piece of cake. So once you get the icing involved, you’ve got a whole lotta deliciousness going on!
Here. Let me show you.
 Start by separating some eggs. Put the yolks in one bowl…
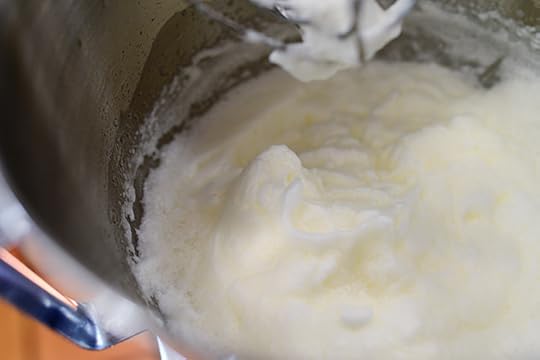 Then put the whites in the bowl of a mixer and beat them until they’re stiff. Transfer them to a separate bowl and set them aside, then clean the bowl to start on the batter (or use a second mixing bowl if you have one.)
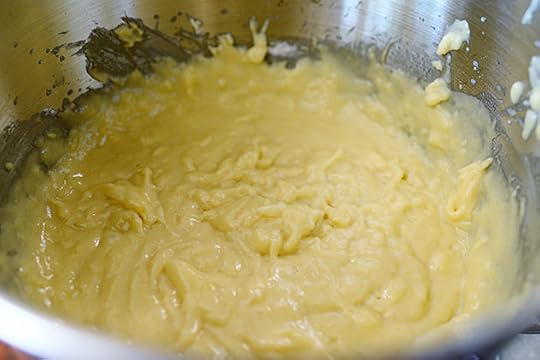
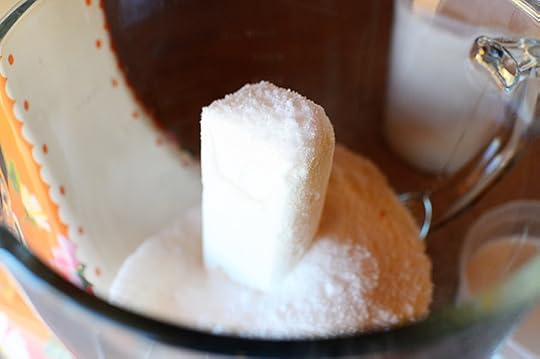
 The batter starts with softened butter and sugar.
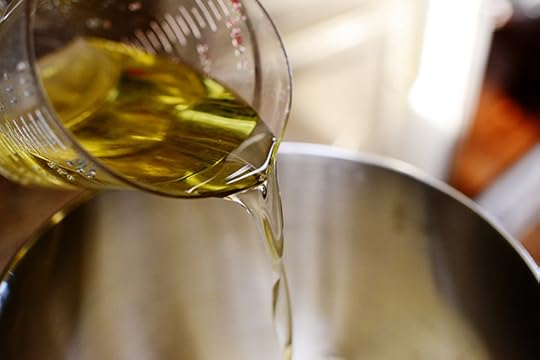 Add a little oil, the beat this together until totally combined.
 Add the yolks to the bowl…
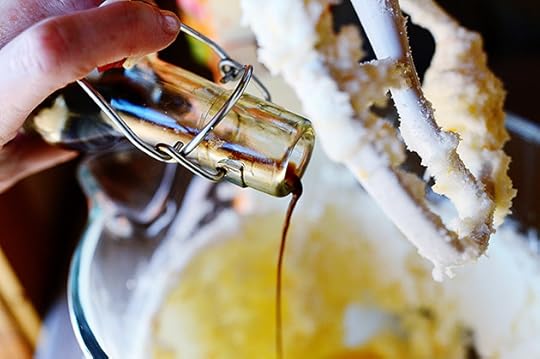
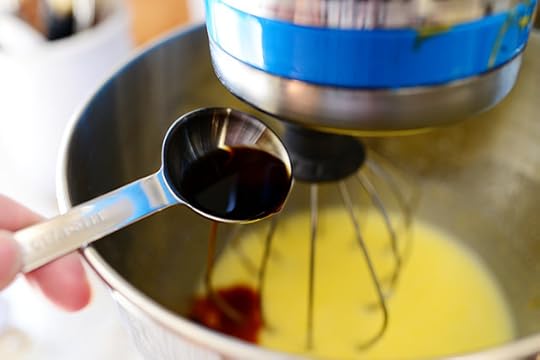 Along with some vanilla. Then beat it together some more.
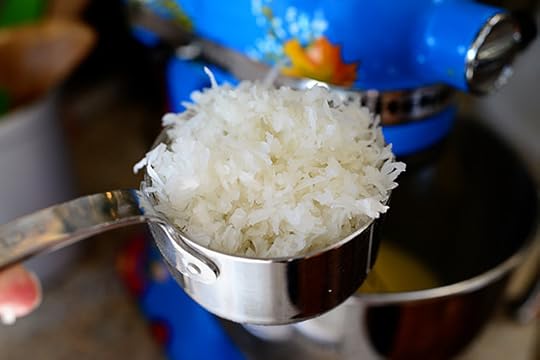 Then measure a good cup of the coconut…
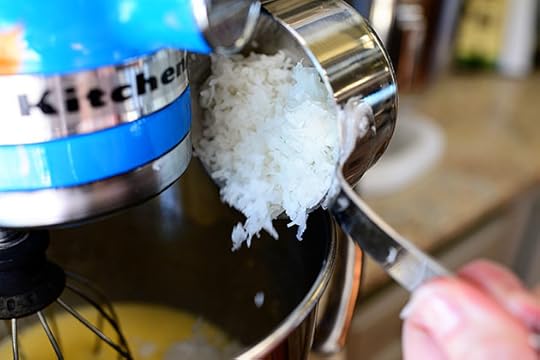 Add it to the bowl…
 And mix it till it’s all combined.
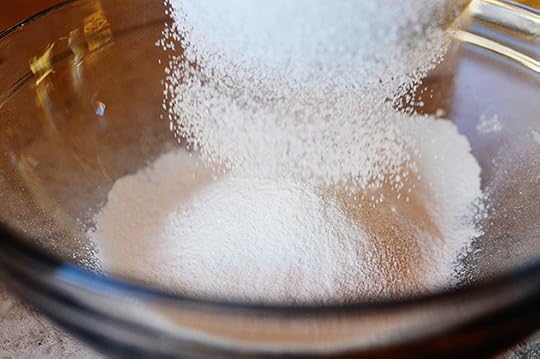
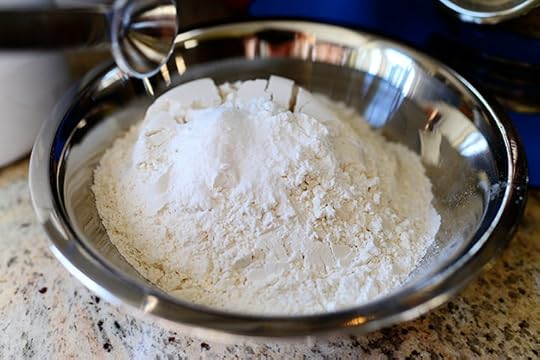 For the dry ingredients, combine flour, baking powder, and baking soda in a bowl…
 And mix it together.
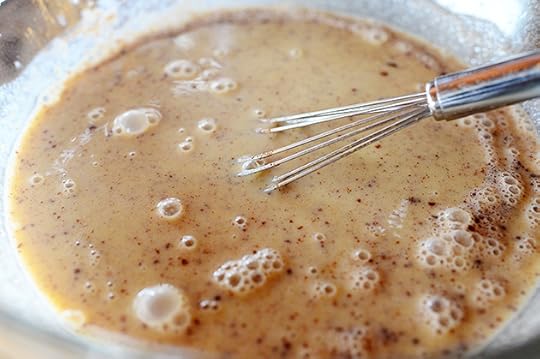
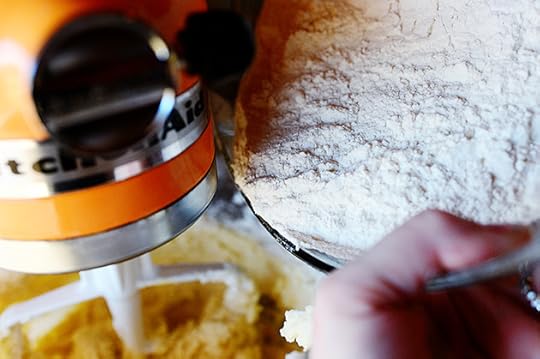
 Now just alternate adding the dry ingredients…
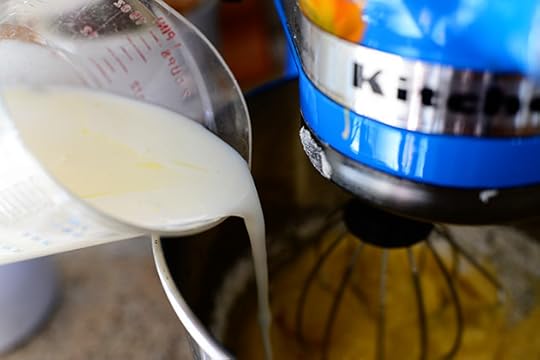 With some buttermilk…
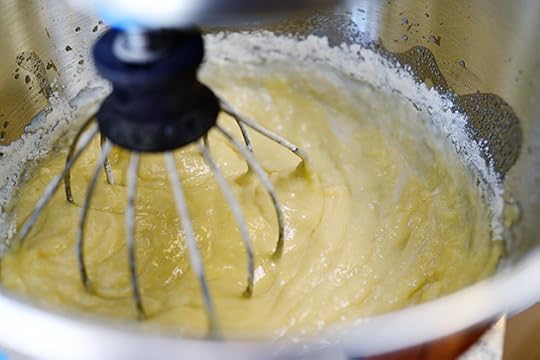 Until it’s all mixed together.
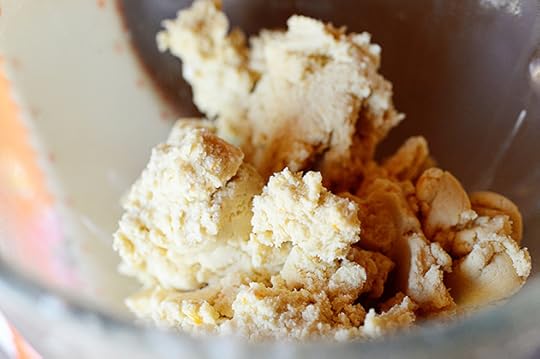
 Give the bowl a scrape and mix it again to make sure everything’s incorporated.
 Then remove the whisk attachment…
 Dump in the egg whites…
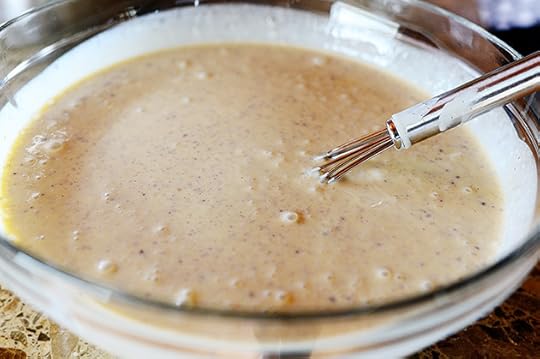
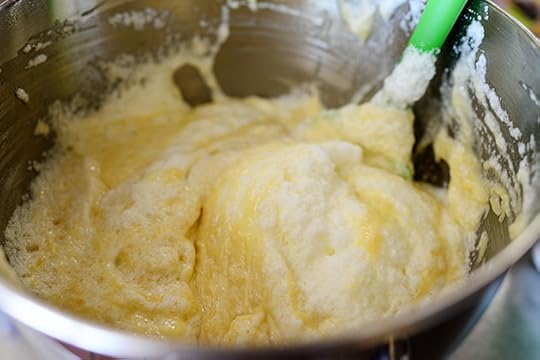 And gently fold them in…
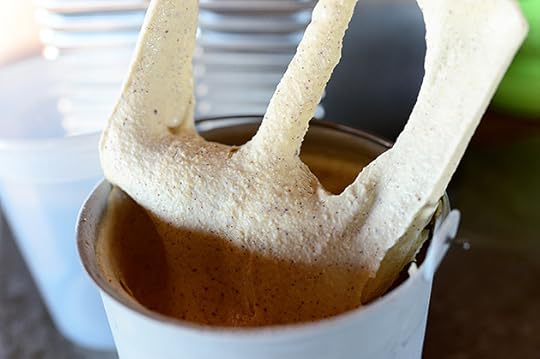
 Until you have a beautiful, light, gorgeous, golden batter!
 Line a muffin pan with paper liners…
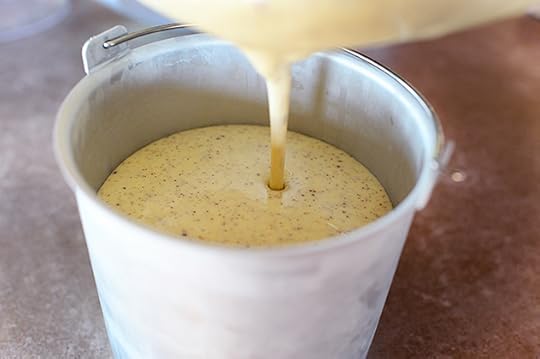
 Fill them 3/4 full with batter…
 And bake them for about 13-14 minutes, or until nice and golden and gorgeous.
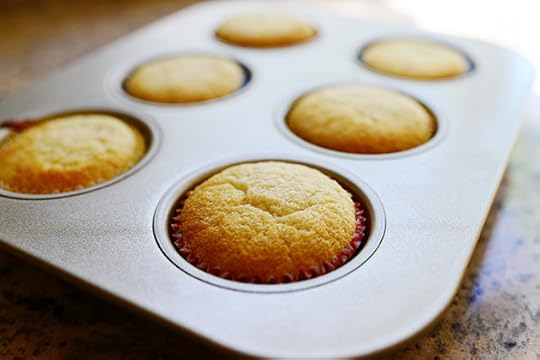 Now, because I couldn’t make up my mind, I did a mix of regular-sized cupcakes…
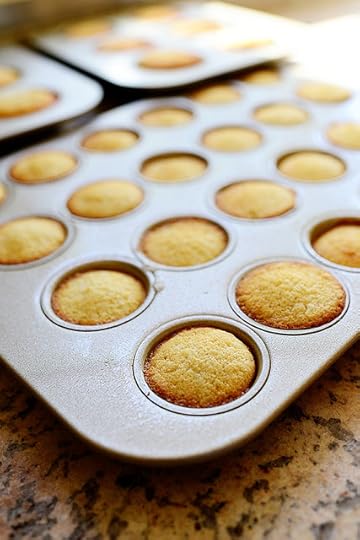 And mini ones.
“It’s a woman’s prerogative to bake a variety of cupcake sizes.” —Confucius
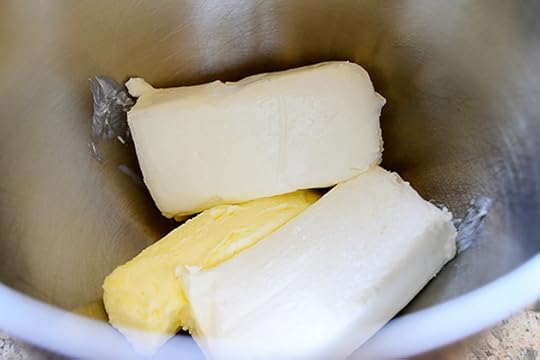 Let the cupcakes cool completely, then whip up the ridonkulously delicious frosting: Add some softened butter and cream cheese to the mixer…
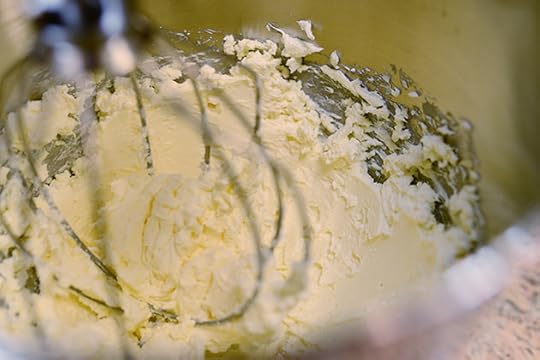 Then whip them together until totally combined.
 Then beat in a whole bunch of sifted powdered sugar, which I am not showing because I am an airhead and neglected to take a photo of that process. But here’s what it looks like after all the powdered sugar is added!
 Add vanilla…
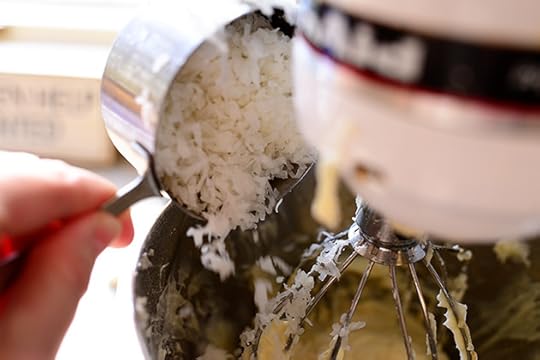 Some coconut…
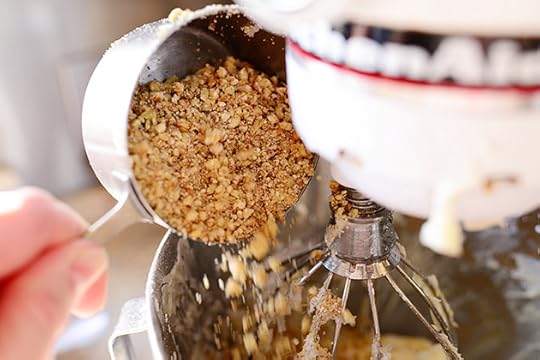 And some finely chopped pecans.
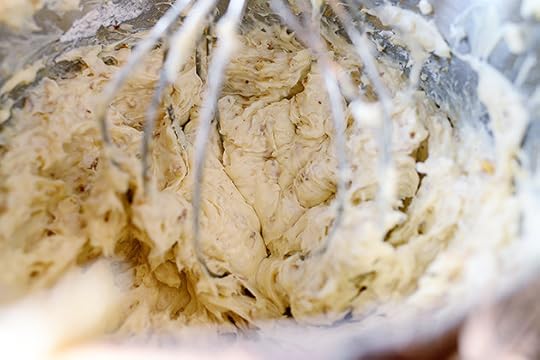 Then mix it all together until it looks like this. Goodness gracious. Delicious!
 To make the frosting operation go faster, I used a scoop to put a dollop of icing on each cupcake…
 Then I used an offset spatula…
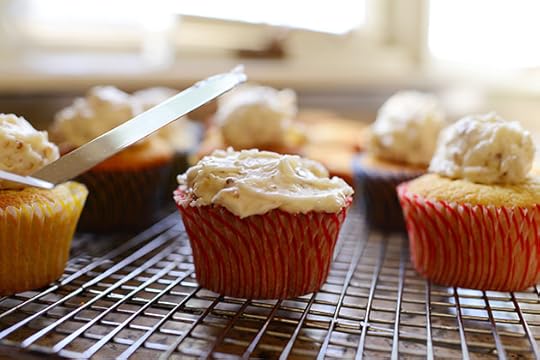 To spread it over the surface.
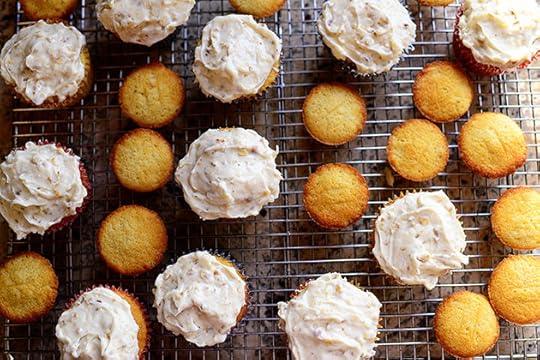 I kept going until all the big ones were done…
 Then I got started on the little ones!
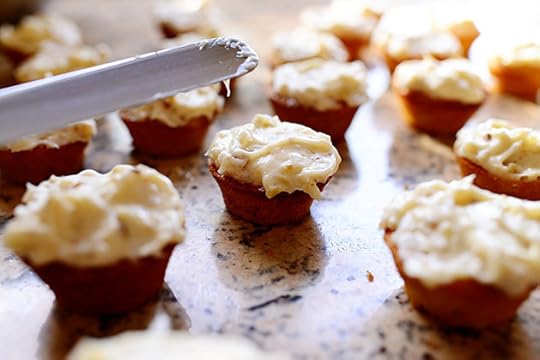 You can use a piping bag if you’d like…but the coconut and nuts make it a pretty imperfect process, and wouldn’t you rather just smear it and be done?
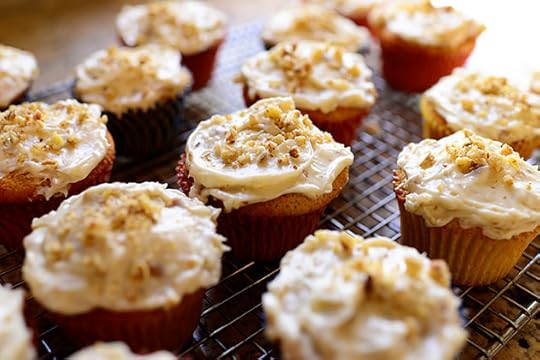
 For a final flourish, sprinkle on some more chopped pecans.
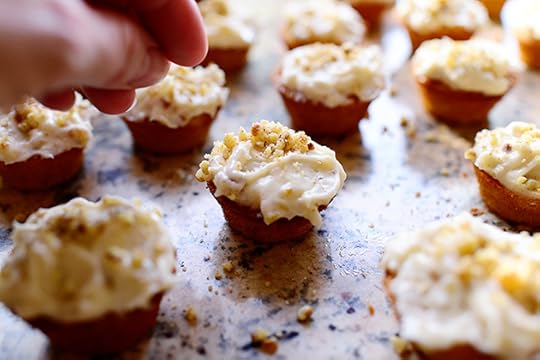 Done!
Done!
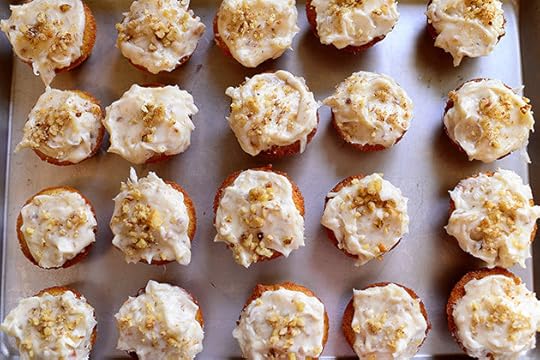 Here are the babies.
And here are the mamas.
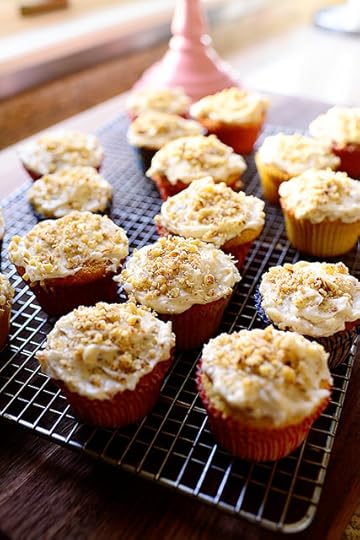 These are totally dreamy! Perfect for a wedding shower, a birthday party…or, in my case, breakfast.
 Here’s the handy dandy printable!
Recipe
Italian Cream Cupcakes
Prep Time: 45 Minutes
Cook Time: 15 Minutes
Difficulty: Easy
Servings: 30

Print Recipe
Ingredients
CUPCAKES5 whole Eggs, Separated1/2 cup Butter, Softened1 cup Vegetable Oil1 cup Sugar1 Tablespoon Vanilla Extract1 cup Sweetened, Flaked Coconut2 cups All-purpose Flour1 teaspoon Baking Soda1 teaspoon Baking Powder1 cup Buttermilk Icing2 packages (8 Ounces Each) Cream Cheese, Softened1/2 cup Butter, Softened2 teaspoons Vanilla Extract2 pounds Powdered Sugar1 cup Finely Chopped Pecans1 cup Sweetened, Flaked Coconut Preparation Instructions
Preheat the oven to 350 degrees. Spray muffin pans (regular or mini) with nonstick baking spray OR line with paper cupcake liners.
In the bowl of an electric mixer fitted with the whisk attachment, beat the egg whites they're stiff. Transfer to another bowl and set aside; clean the mixing bowl and return to the mixer.
Combine the butter, vegetable oil, and sugar in the mixing bowl and mix until light and fluffy. Add the egg yolks and vanilla, the beat until smooth. Add 1 cup of coconut and beat to combine.
Sift together the flour, baking soda, and baking powder in a bowl, then alternate adding the flour mixture with the buttermilk, mixing for a few seconds after each addition. Add the egg whites and use a rubber spatula to fold them into the batter. Add batter to the muffin cups, the bake for 13-14 minutes, or until golden brown on top. Remove from the oven and allow to cool completely.
To make the frosting, whip together the butter and cream cheese until smooth, then sift the powdered sugar and mix it in until combine. Add the vanilla and mix. Add 1 cup of coconut and the pecans, reserving a small amount of pecans for garnish. Mix until totally combined.
Frost cooled cupcakes, then sprinkle extra pecans on top. Refrigerate cupcakes if not serving right away (frosting will soften at room temperature.)
(Thank you, Billie, for the recipe!)
Posted by Ree | The Pioneer Woman on April 28 2014

April 23, 2014
Cinnamon Ice Cream
 To paraphrase the great Will Rogers: I never met an ice cream I didn’t like.
Wait. I take that back. I accidentally had a bite of banana ice cream once, and I can honestly say that I didn’t like that ice cream. Blech! Cough! Gag! Who in the world would put something as demonic as a banana in something as heavenly as ice cream? To this day, I’m still confused. And I’m still gagging.
But aside from that scary, awful, horrible, terrible bite of banana ice cream…I never met an ice cream I didn’t like. And this ice cream—in all its cinnamony sweet goodness—pretty much changed everything I thought I knew about myself and ice cream. Before I made it the first time, I would have said my favorite two flavors of ice cream were coffee and chocolate, in that order. But this totally threw a wrench into that whole thing, and I’ll be darned if this isn’t up there with coffee, fighting violently for first place. It really is that good.
Here’s how to make it.
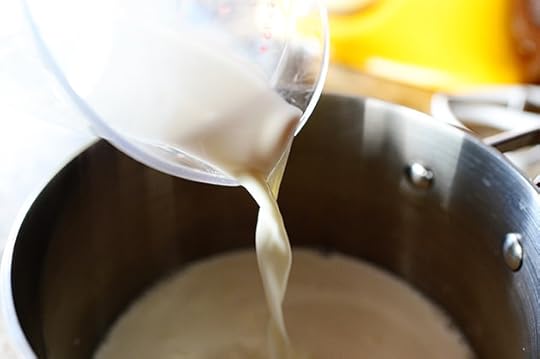 Pour some half-and-half into a medium saucepan…
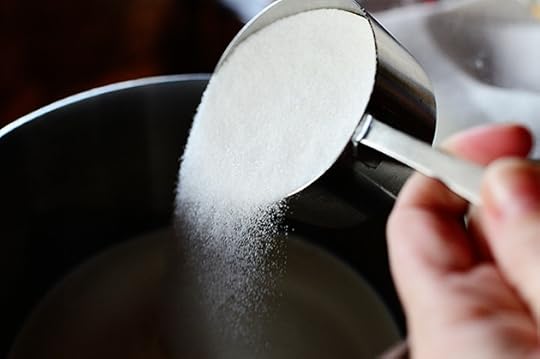 Along with some sugar.
Half-and-half and sugar. Great start to any recipe, I’d say!
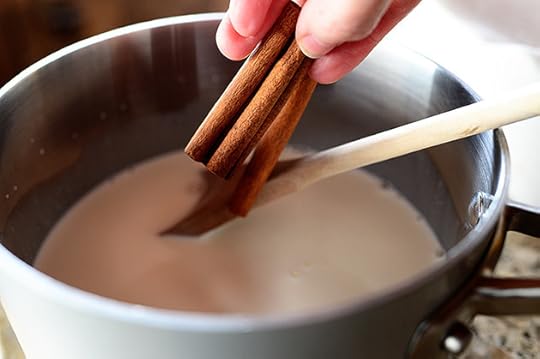 Next, drop some cinnamon sticks in there…
 Then split and scrape all the caviar out of a vanilla bean…
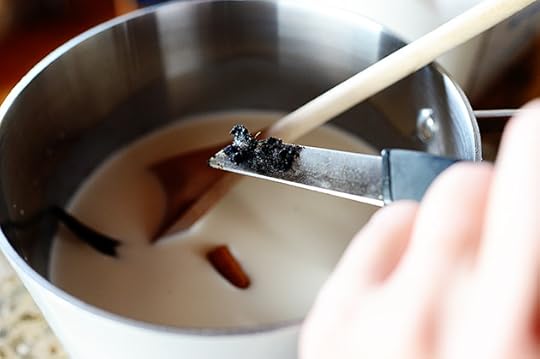 And add it to the saucepan along with the empty pod. (You can also just add a little vanilla extract if you don’t have vanilla beans!)
 Stir this mixture around and let it heat up until very hot but not boiling.
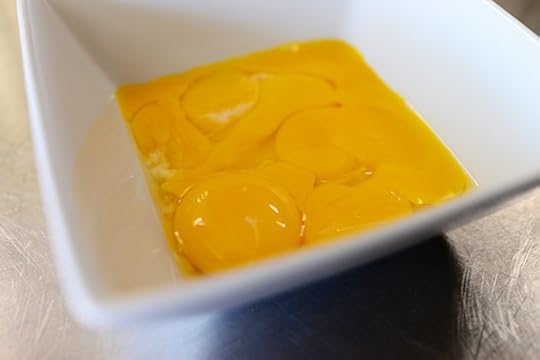
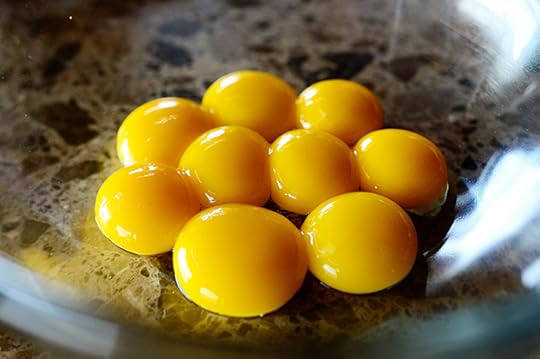 And while it’s heating up, separate some eggs and put the egg yolks in a bowl.
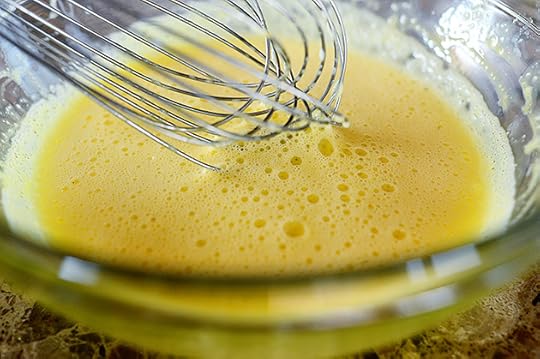
 Use a whisk and whatever strength you can muster to vigorously beat the yolks for a couple of minutes, until they’re slightly lighter in color.
 Now that the half-and-half mixture is nice and hot, remove the cinnamon sticks…
 And the empty vanilla bean pod…
 Then you need to temper the yolks: Grab a ladle full of the hot mixture…
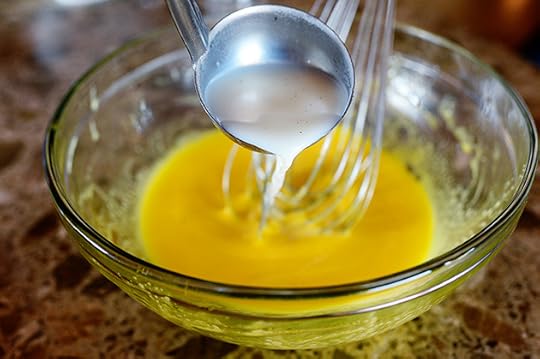 And gently whisk it as you add it in.
 Then do it again with a second ladle full of the mixture. This slowly raises the temperature of the egg yolks so that when they get added to the hot saucepan, they don’t immediately freak out and scramble.
Scrambled egg ice cream is grody! Almost as grody as banana ice cream!
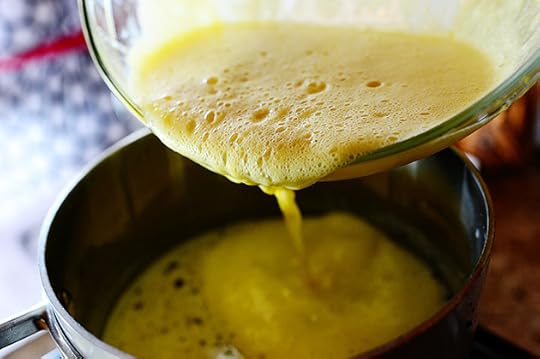 Next, slowly pour the tempered yolks into the saucepan, stirring with a spoon.
 Then just cook it slowly for a couple of minutes…
 Until it’s thick enough to coat the spoon.
 Next, force the mixture through a strainer. You don’t have to do this, but it gets rid of some lumps and larger chunks of vanilla here and there. There are times, though, when I haven’t strained the custard…and the ice cream still winds up being delicious!
How could it not?
 And speaking of “how could it not”…the next thing to do is add heavy cream to the custard.
Whoa. Things are getting serious now.
 Mix this together…
 Then, for good measure, whisk in a little ground cinnamon.
 Now, if I have the time, I like to chill this mixture before adding it to the ice cream machine.
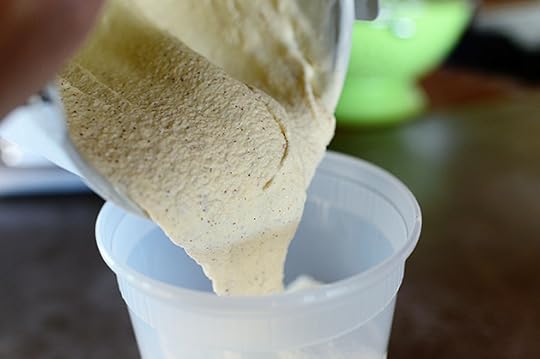
 Then pour it on in…
 And churn it up! My machine takes about an hour to get it to this stage, and since it made twice this amount, I had to do two batches. Some ice cream machines hold more volume—just judge it when you pour it in! I usually fill it about 2/3 to 3/4 full to allow for some expansion while the ice cream freezes.
 Holy…mackerel.
 Now, you can serve it in this soft-serve stage if you like, but I prefer to freeze it from here so it’s firm and scoopable.
Scoopable. That’s a word, right?
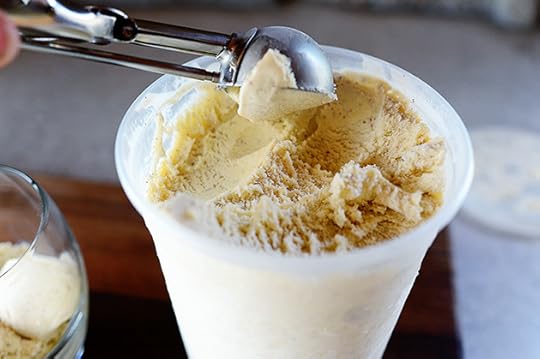 It takes several hours to get to this stage, so if you’re having company over, it’s usually best to make the ice cream at least the day before.
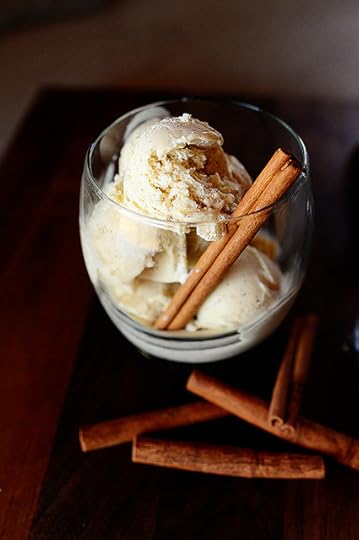
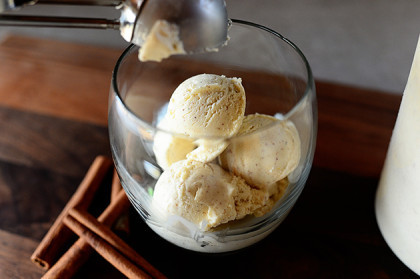
 I like to put smaller scoops in a stemless wine glass…
Along with a cinnamon stick or two, just to make it purty.
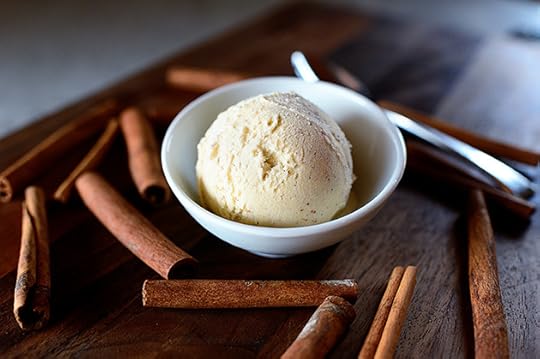
 Or just a big, single scoop in a small bowl is always inviting.
 But it doesn’t really matter how you serve it. Once they take one bite, their eyes will be closed from the sheer bliss of it all.
This ice cream is out-of-this-world, guys! Put it on your list of things to make this summer. You’ll be so glad you did!
Here’s the handy dandy printable. (The recipe is also in my Holiday cookbook if you have it!)
Recipe
Cinnamon Ice Cream
Prep Time: 1 Hour
Cook Time: 20 Minutes
Difficulty: Intermediate
Servings: 12
Print Recipe
Ingredients
3 cups Half-and-half2 cups Sugar3 whole Cinnamon Sticks1 whole Vanilla Bean (or 1 Teaspoon Vanilla Extract)9 whole Egg Yolks3 cups Heavy Cream1-1/2 teaspoon Ground Cinnamon Preparation Instructions
In a medium saucepan over medium-low heat, combine the half-and-half and sugar. Stir it to combine, then add the cinnamon sticks, the caviar from the vanilla bean, and the empty vanilla bean pod. Stir the mixture around and heat it up until it's very hot but not boiling.
Meanwhile, add the egg yolks to a medium bow and whisk them vigorously for about 2 minutes, until the yolks are slightly lighter in color.
Remove and discard the cinnamon sticks and vanilla bean pod from the saucepan. Grab a ladle of the hot half-and-half mixture and drizzle it very slowly into the yolks, whisking them constantly to temper the egg yolks. Repeat with another ladle of the hot liquid. When it's mixed in, slowly pour the entire egg mixture into the pan with the half-and-half, stirring with a spoon. Once added, stir and cook it for 2 minutes or so, until the mixture is thick enough to coat the spoon.
Set a fine mesh strainer over a clean glass bowl and strain the custard. Don't worry if it's a little lumpy!
Add the heavy cream to the bowl, add the ground cinnamon, and stir it all together. Chill the mixture for an hour or so, then pour it into the ice cream machine and process it according to your machine's directions. When it's finished churning, it will be in the soft-serve stage; transfer it to a freezer container and freeze for several hours or overnight until it's frozen firm.
Delicious!
Posted by Ree | The Pioneer Woman on April 23 2014

April 21, 2014
Delicious Easter Leftovers
One of my favorite things about any holiday—Easter included—is the leftover food. I made it a point to keep our dyed eggs refrigerated so that we could enjoy them today (and tomorrow!) And if you made big honkin’ Easter ham yesterday…chances are pretty good you’ve got a leftover hunk.
Here are just a few of my favorite Easter Leftover recipes. (Pssst: There’s a brand new one at the end!)
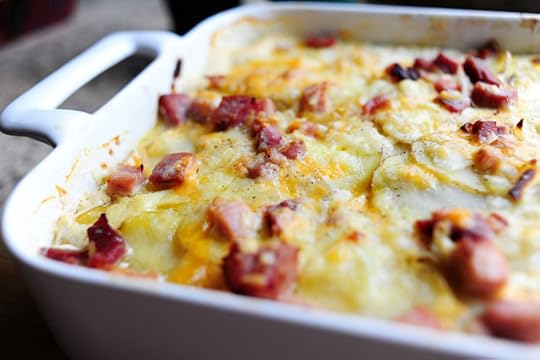 Scalloped Potatoes and Ham. There’s nothing my kids love more than scalloped potatoes and ham, and leftover Easter ham is poifect for it. The version in my holiday cookbook calls for more of a cooked white sauce (which is dreamy), but this one’s a little more pared down and simple. Both are delicious!
 Easter Leftover Sandwich. Quite possibly my favorite use of all the Easter leftovers, this sandwich will rock your world in the most wonderful way. (The egg salad recipe is contained within this recipe.)
 Avocado Egg Salad. Oh my word, this is good. Like, totally.
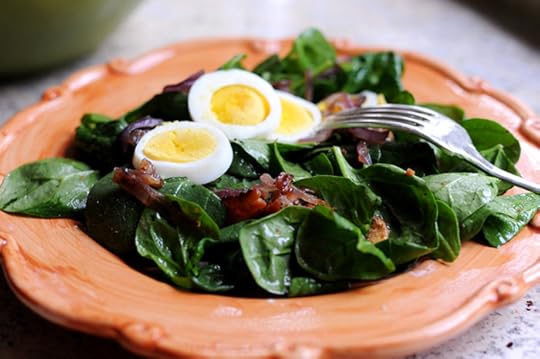 The Best Spinach Salad Ever. I love this salad more than life itself, and the more sliced hard boiled eggs you have on top, the better!
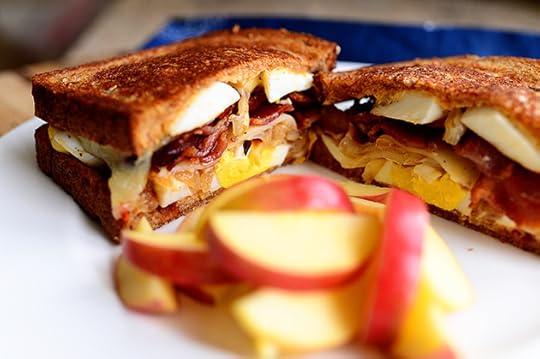 The Ultimate Grilled Cheese Sandwich. Another delicious way to use leftover hard boiled eggs. I love this one!
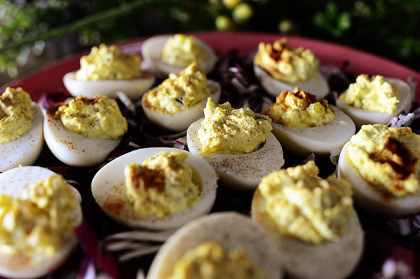
 And how about Deviled Eggs? I have several variations in my holiday cookbook, but here’s the good ol’ basic recipe.
 Peel the eggs, slice them in half, gently squeeze or scoop the yolks into a bowl…
 Then mash the yolks with a fork until they’re totally broken up.
 Add mayo, mustard, salt and pepper…
 And stir it until combined.
 For texture and tang, I like to add chopped pickles (or pickle relish), a little vinegar, and a little pickle juice. Yum!
 Then I just stir it together…
 And fill the eggs. I use two spoons for a more “rustic” (haha) look…
 But you can also whip it to make it smoother and pipe it. Whatever floats your boat!
 Serve them on a bed of red cabbage or radicchio (or kale!) with a sprinkling of paprika.
Deviled eggs are so ding dang addictive. I love them!
All the printable recipes (except the Deviled Eggs; see below) are at the end of each of the individual posts above; just click on the photo or the link for each one!
Here’s the printable recipe for the Deviled Eggs.
Happy Day-After-Easter, friends!
Recipe
Deviled Eggs
Prep Time: 15 Minutes
Cook Time:
Difficulty: Easy
Servings: 24
Print Recipe
Ingredients
12 whole Hard-boiled Eggs, Peeled And Halved1/2 cup (Real) Mayonnaise1 Tablespoon Yellow Mustard (or Dijon) Salt And Pepper, to taste2 teaspoons Finely Chopped Pickles Or Pickle Relish1 teaspoon White Vinegar1 teaspoon Pickle Juice (optional) Paprika, For Serving Preparation Instructions
Remove the yolks from the egg halves and place them into a bowl. Mash the yolks with a fork until they're totally broken up. Add mayonnaise, mustard, salt, and pepper, and stir it/mash it together until totally smooth. Add the pickles, vinegar, and pickle juice, if using. Stir to combine; mixture should be mostly smooth.
Use 2 small spoons (or a piping bag) to place large dollops of the egg mixture into each egg half. Note: If you fill the halves really full, you may have some halves left over.
Serve on a bed or radicchio or red cabbage with a sprinkling of paprika!
Posted by Ree | The Pioneer Woman on April 21 2014

April 18, 2014
Cheddar-Chive Biscuits
 Here’s another of my favorite Easter recipes from my holiday cookbook that came out last fall. Wanted to share today in case you needed a last minute Easter recipe!
I love drop biscuits. My grandmother used to make them and there’s something about them that triggers the “I’m a little girl at Grandma Helen’s house and I’m wearing her velour slippers and her Oscar de la Renta perfumed body lotion and life is safe and warm” response in my brain. I just love them—the texture, the ease of making them, everything.
These beauties are a variation of my standby drop biscuit recipe, and I love them in the springtime.
I also love them in the fall.
You get the picture.
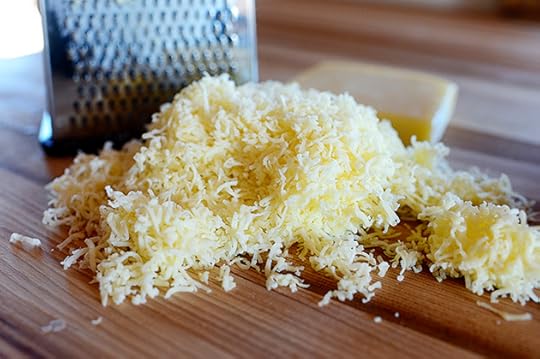 Grate up a whole bunch of cheddar cheese. I used white cheddar, but you can use sharp cheddar—anything you like! And as you can see, I used the fine grate…but it’s all going in the food processor in a minute anyway, so any grate is great.
Ha.
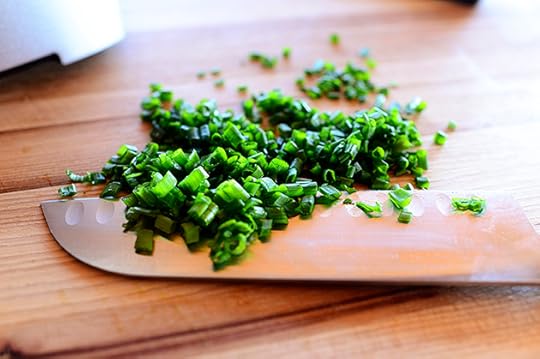 Next, slice up a whole bunch of chives. Truth be told, these are actually the dark parts of green onions, which I sub for chives in a pinch. But if you have fresh chives…splendid!
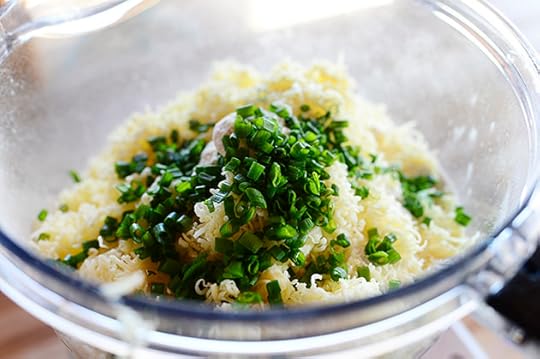 Throw some all-purpose flour, baking powder, and salt into the food processor with the cheese and chives…
 And pulse them a few times to get everything largely mixed together. You’ll still see some flecks of chives, but you won’t be able to distinguish between the flour and the cheese.
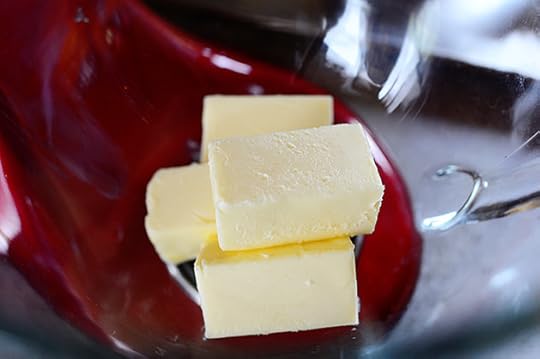
 Next comes the salted butter, which should be very, very cold! I cut it into uniform squares so it would all mix in evenly.
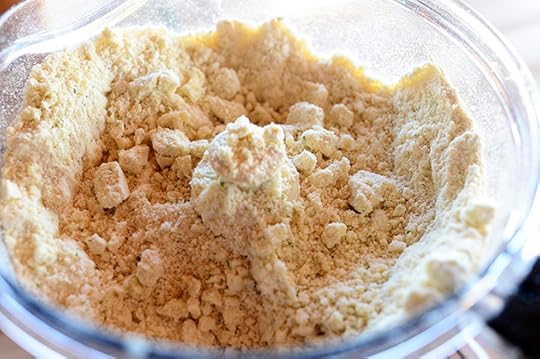 Pulse it several times, until the mixture mostly resembles coarse crumbs but still has a few chunks o’ butter visible.
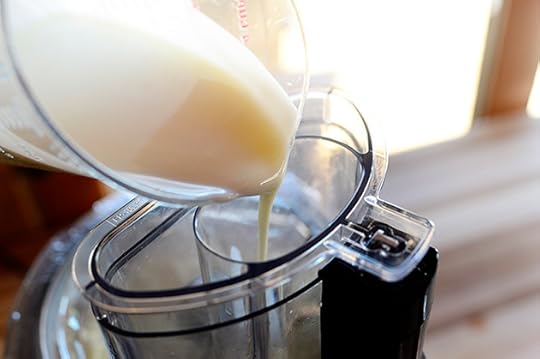 Then pour in buttermilk, pulsing as you go.
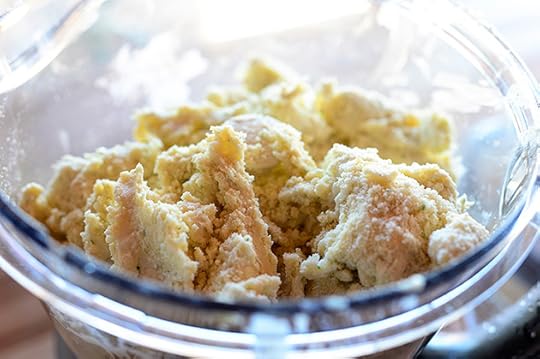 Then stop when the buttermilk has all been added and the dough just barely comes together. You don’t want to keep mixing and mixing the dough, as it will make the biscuits tragic and terrifying. Also, the dough shouldn’t be overly wet. But if it seems ridonkulously dry/crumbly, just add a couple of tablespoons of buttermilk and it should be fine.
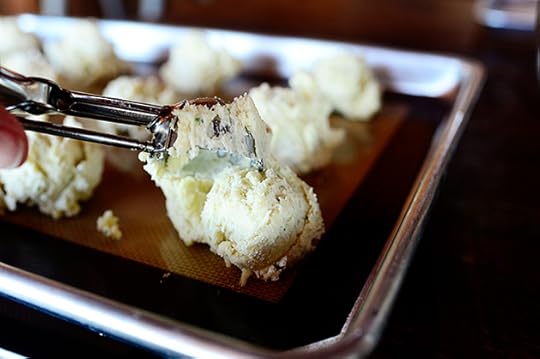 Next, just drop the biscuit dough onto a baking sheet in 1/4 cup (approximately!) portions. You can use two spoons, or you can use a handy scoop like I did here. (Or you can even use muffin pans. Grandma Helen used to!)
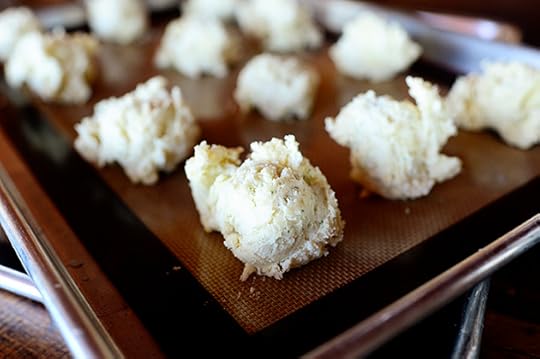 You can see that there are still like flecks of chive throughout. (If you want to have bigger flecks, just wait until the very end to pulse in the chives.) And the cheddar? Well, it’s part of the dough!
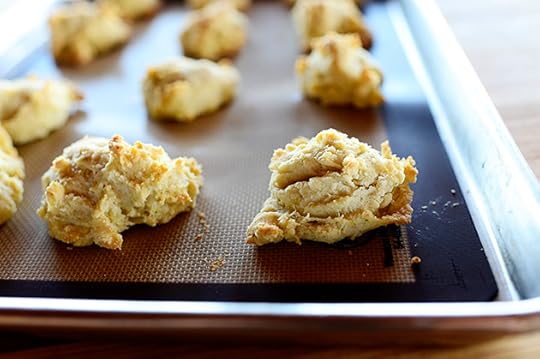 Then just bake ‘em for 12 to 15 minutes, until they’re beautifully golden!
 And you don’t have to do this…
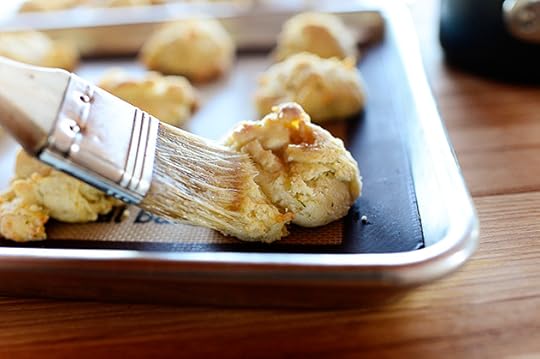 But I like to brush the tops with a leetle melted butter.
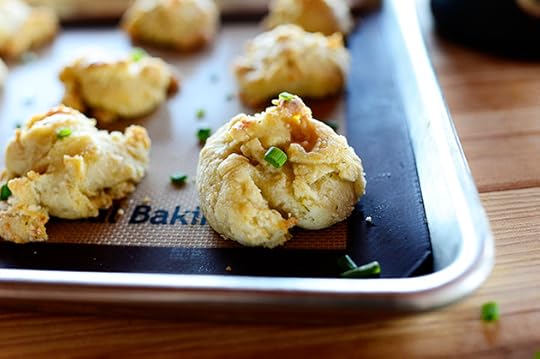 Then, to make ‘em purty, sprinkle on some extra sliced chives (or green onions!)
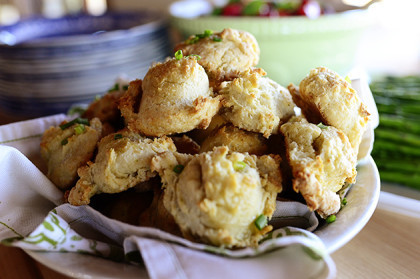
You’ll love these for Easter…or pretty much any day of the year.
And now I’m suddenly missing Grandma Helen. I might have to go track down some Oscar de la Renta perfumed body lotion next time I’m in civilization.
Have a wonderful weekend, friends!
Here’s the handy dandy printable.
Recipe
Cheddar-Chive Drop Biscuits
Prep Time: 15 Minutes
Cook Time: 15 Minutes
Difficulty: Easy
Servings: 30
Print Recipe
Ingredients
6 cups All-purpose Flour1/4 cup Baking Powder3/4 teaspoons Salt8 ounces, weight White Cheddar Cheese, Grated1/3 cup Sliced Chives (or Green Onions)1-1/2 cup Cold Salted Butter, Cut Into Small Pieces, Plus More For Brushing2-1/2 cups Buttermilk Preparation Instructions
NOTE: Recipe can easily be halved.
Preheat oven to 425 degrees.
Combine flour, baking powder, salt, cheese, and chives in a food processor. Pulse until everything's mixed together. Add butter and pulse until mostly incorporated, but with a few remaining chunks of butter. Pour in buttermilk while pulsing, stopping just when the dough comes together. (Add a little more buttermilk if dough is overly dry.)
Drop dough onto a baking sheet in 1/4 cup portions (bigger if you'd like!) and bake for 12-15 minutes, or until golden brown.
Brush with melted butter and sprinkle with more chives!
If you do not have a food processor, cut together the dry ingredients with the butter, then stir in the other ingredients.
Posted by Ree | The Pioneer Woman on April 18 2014

April 16, 2014
Easter Cookies
 This is one of my favorite Easter recipes from my holiday cookbook, so I wanted to share it with you here!
I have a handful of incredibly talented baker friends (Bridget? Are you listening?) who approach decorating sugar cookies with the precision and artistry that Michelangelo applied to the ceiling of the Sistine Chapel…and I’m not even exaggerating. Their icing is smooth and beautiful, their piping techniques flawless. When I hold their cookies in my hands, I feel I’m in the presence of greatness.
My cookies…well, not so much.
I’m from the 1970′s school of cookie decorating. Bake them. Slap some icing on them. Throw some sprinkles in their general direction and hope not too many wind up on the floor. Watch The Brady Bunch and Gilligan’s Island while you eat them with a tall glass of whole milk, which was called “milk” back then, by the way. And fine.
I still do this today.
But that’s another story for another time.
 Add some shortening and sugar to the bowl of a mixer. Shortening, because it’s white, which is symbolic of Easter.
Not really. Shortening, because it’s what my mom always used growing up and I’m sorry to say, but it results in a softer cookie.
But butter can easily be swapped in, and I use it 50% of the time I make these cookies!
Or, if you want to play both sides, use half shortening and half butter. Be a cookie dough diplomat!
 Then zest an orange…
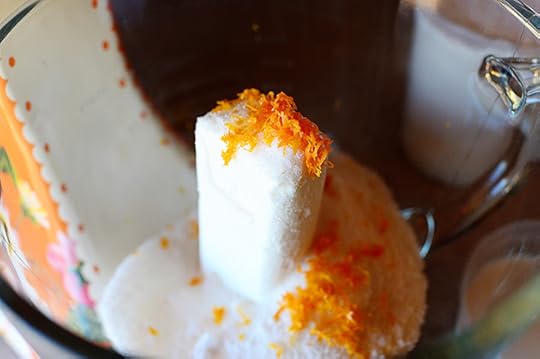 And add it in.
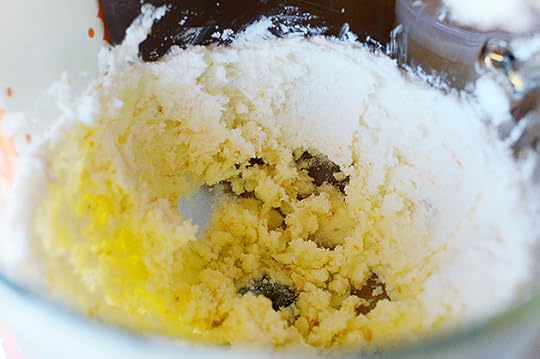 Mix it together…
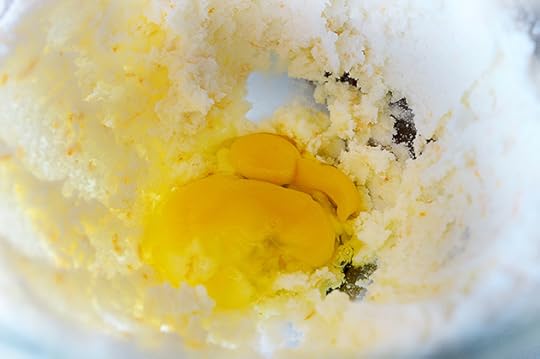 Then add eggs…
 And vanilla, then mix it together again. Scrape the sides with a rubber spatula, then mix it again for a couple of seconds.
 Sift together flour, baking powder, and salt…
 Then alternate adding them…
 With some whole milk…
 And mix it until everything comes together in a big lump and it looks so good that you can hardly keep yourself from eating a big ol’ pinch.
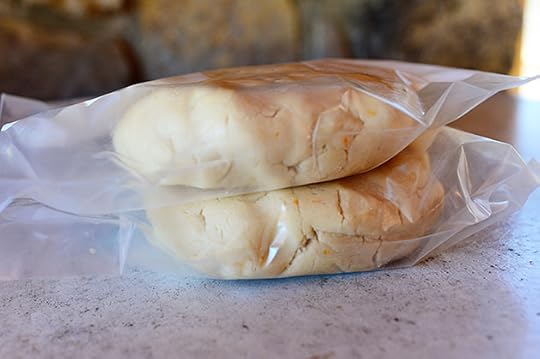 Then just divide the dough in half, form each half into a ball, and flatten the ball slightly into a disc shape. Refrigerate these for at least a couple of hours!
Just keep in mind that if you subbed butter in the dough, it will be too tough to roll out straight out of the fridge (whereas the shortening dough can be rolled immediately.) Just allow a little time for the dough to slightly soften!
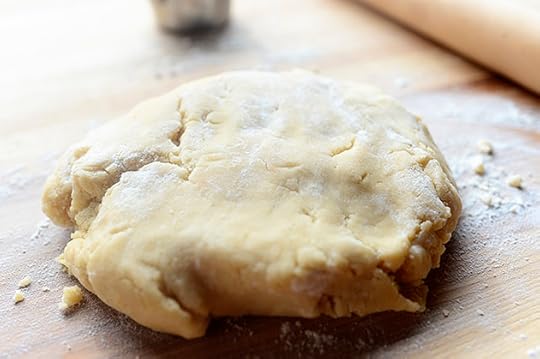 When you’re ready to make the cookies, preheat the oven to 350 degrees and remove one of the discs of dough.
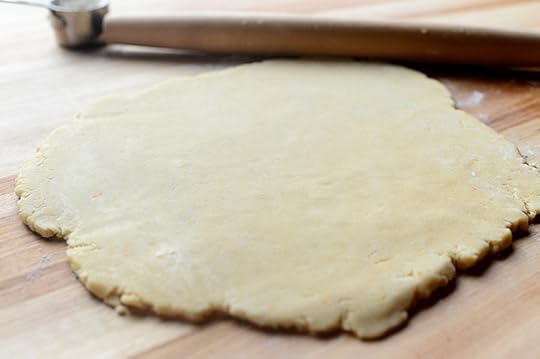 Roll it out on a floured surface …
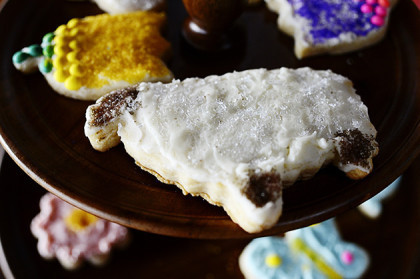
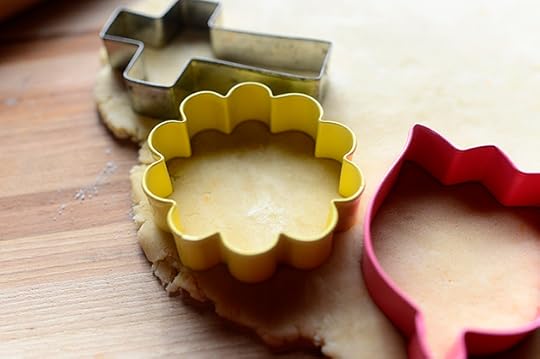 Then cut away! Use a cross, a flower, a lamb, a butterfly…whatever you’ve got.
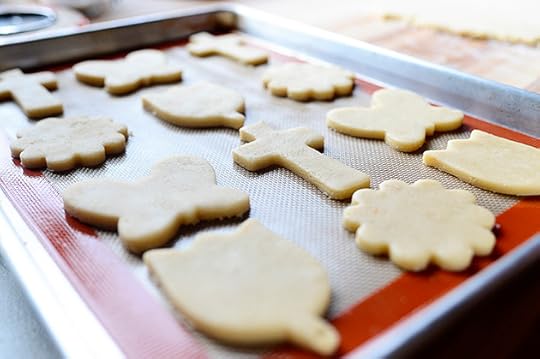 Then just bake ‘em for 9-10 minutes or so.
Pull them out just before the cookies get brown; you want them to be pure and holy!
Then you just have to let them cool.
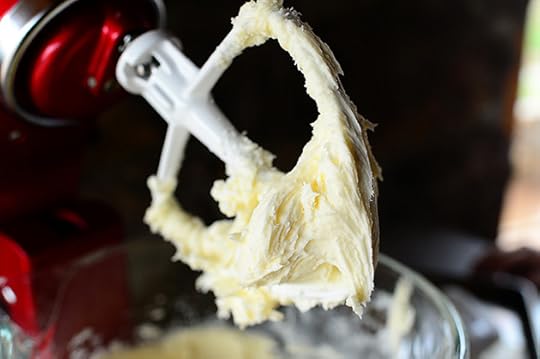
 While they’re cooling, make the luscious easy buttercream frosting, which starts with…buttah! Salted, please.
 Then powdered sugar…
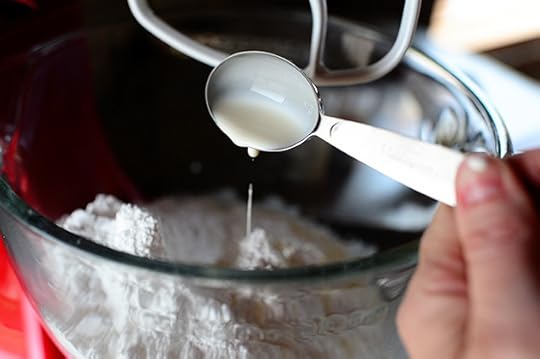 Then a little milk.
 Then just whip it, scrape the bowl, whip it, scrape the bowl, until it’s nice and irresistible.
 Then, for different colors, divide the frosting into different bowls and add drops of food coloring…
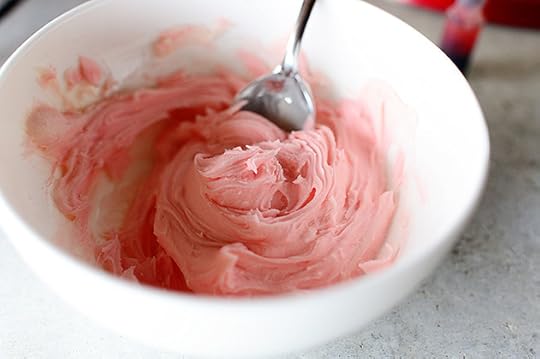 And stir it together.
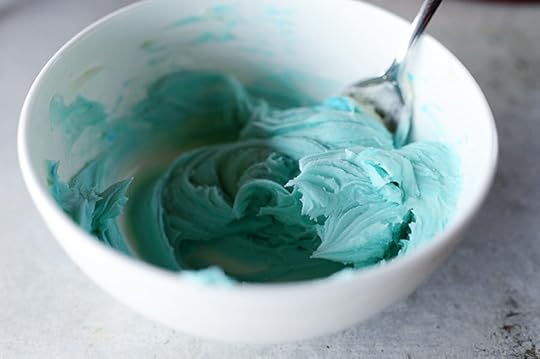 Make as much frosting as you want, mix up as many colors as you want!
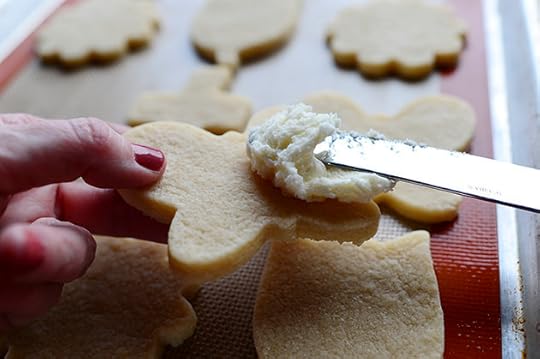 Now, this is where my 1970′s style of cookie decorating comes in: Slap some on…
(And don’t be alarmed that my nails weren’t painted earlier in this post and they are now. These photos were taken on two different days.)
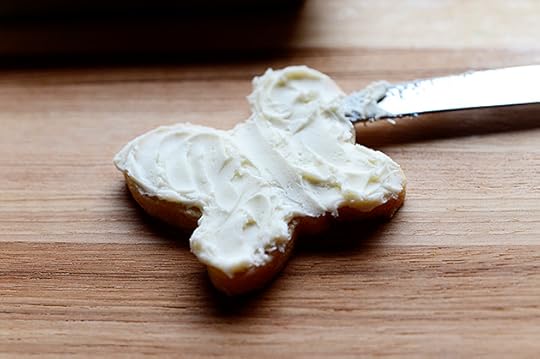 Spread it around, using the knife to make little outlines…
 Then decorate it…
 However you want!
 I love my cross cookie cutter.
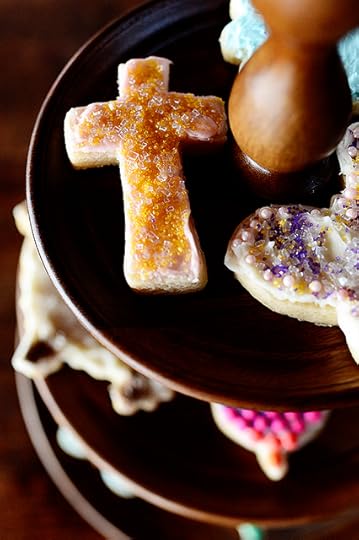 It’s very…crossy.
And Eastery!
 I also love sanding sugar. It’s very sparkly.
 And these candy buttons! They’re fun to play with.
 And don’t get me started on this lamb.
(Brown sanding sugar is highly underrated.)
These are fun. Sweet and imperfect and yummy.
Hope you can whip some up this week!
Here’s the handy dandy printable.
Recipe
Easter Cookies
Prep Time: 20 Minutes
Cook Time: 10 Minutes
Difficulty: Easy
Servings: 24
Print Recipe
Ingredients
1-1/3 cup Shortening Or Softened Butter1-1/2 cup Sugar Zest Of 1 Orange2 whole Eggs1 teaspoon Vanilla Extract4 cups All-purpose Flour3 teaspoons Baking Powder1/2 teaspoon Salt2 Tablespoons Whole Milk2 teaspoons (additional) Whole Milk FROSTING1 cup Salted Butter, Softened4 cups Powdered Sugar1/4 cup Heavy Cream Food Coloring (optional) Miscellaneous Sprinkles And Decorations Preparation Instructions
To make the dough: Add the shortening (or butter), sugar, and zest to the bowl of an electric mixer. Beat until smooth, then add the eggs and vanilla. Beat again, scraping the sides of the bowl halfway through. Sift together the flour, baking powder, and salt. Alternate adding the dry ingredients with the milk until the dough comes together.
Divide the dough in half, then flatten both halves into discs and place them in separate plastic bags. Chill the dough for a couple of hours. (Note that if you use butter in the dough, you won't need to refrigerate it as long; or if you do, you'll need to allow more time for the dough to soften before you roll it out.)
After the dough is chilled, preheat the oven to 375 degrees. Roll out both halves of the dough to 1/3 inch thick and cut out as many cookies as you can. Place the cookies on a baking sheet lined with a baking mat or parchment paper and bake them for 8 to 10 minutes, or until they're just barely done. You want them to be set, but not brown. Remove them from the oven and let them cool completely before decorating.
To make the frosting, beat the butter, sugar, and cream until very light and fluffy. Divide the frosting into smaller portions and color with food coloring as desired. Use a dinner knife to spread the frosting on the cookies, then use sanding sugar, sprinkles, and other decorations to make 'em purty!
Posted by Ree | The Pioneer Woman on April 16 2014

April 14, 2014
Black Bean Soup
 I have several things to say about this recipe I’m sharing today.
First: It has nothing to do with Easter. But I’ll make that up to you.
Second: Oh, was it good.
Third: Beans are my life. Don’t tell anyone.
Finally, this recipe, and the title thereof, raises an important philosophical question that I’ve been wanting to address, and that is this:
WHAT IS THE DIFFERENCE BETWEEN BLACK BEANS AND BLACK BEAN SOUP?
I don’t really expect an answer.
I’m just putting out there.
Here’s how I made the beans. I mean bean soup. I mean beans. I mean bean soup.
 I did a quick soak of the beans because I didn’t decide to make them until after church yesterday. (Otherwise I would have soaked them early in the morning for a few hours.) To do a quick soak, just put the beans in a pot with hot water and bring them to a boil. Boil them for 2 minutes…
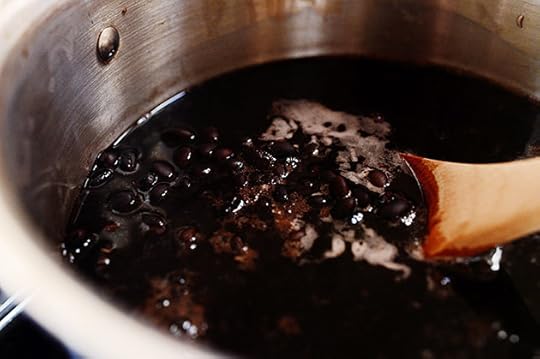 hen turn off the heat and let the beans sit in the water for an hour.
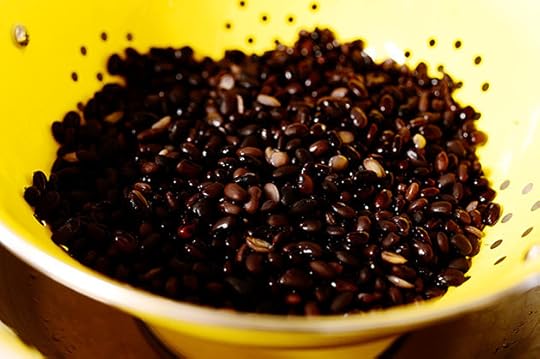 Then just drain them, rinse them in cold water…and it’s as if you’ve soaked them for several hours!
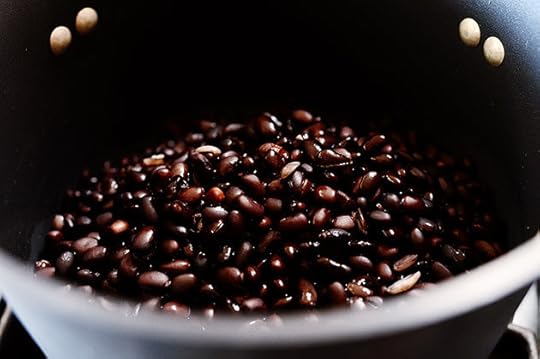 So just put the beans into a medium-sized pot…
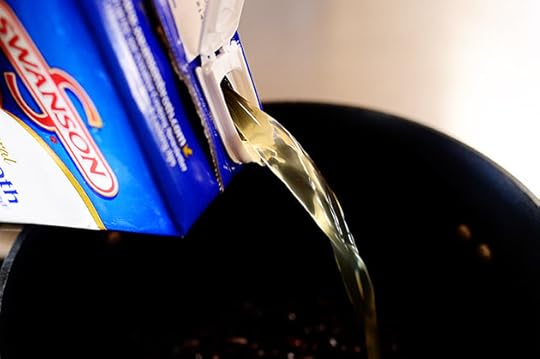 And add 4 cups of low-sodium chicken broth and a cup of water.
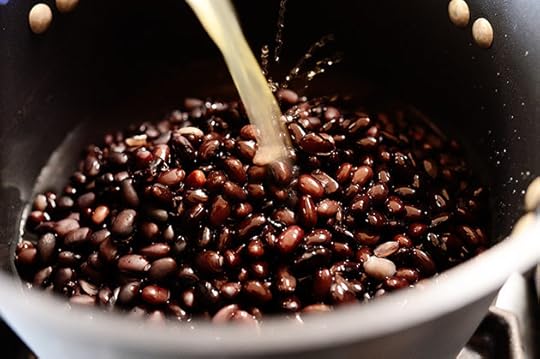 You can certainly use all water if you’d like, but I think using chicken broth (or vegetable broth, if you prefer!) always adds a little more flavor.
Just use the low-sodium or no-sodium stuff or you’ll regret it the rest of your life.
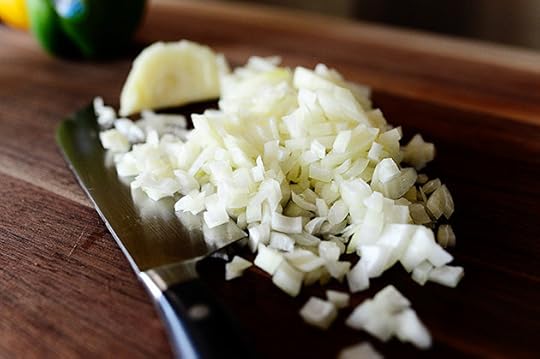 Meanwhile, while the beans were quick-soaking (soaking quick? quickly soaking? soakling quicky? huh?) you chopped up an onion…
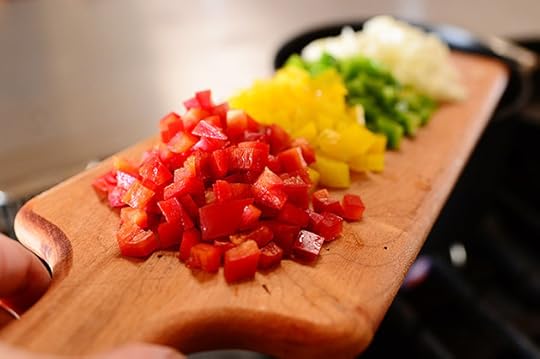
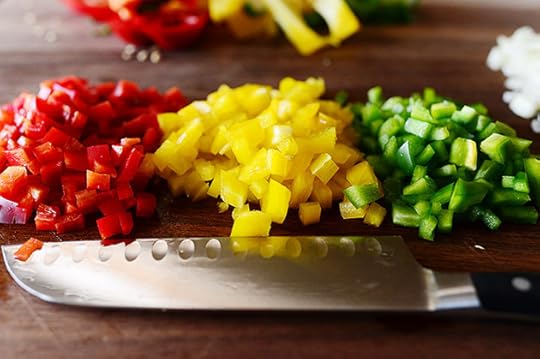 And three colors of bell pepper.
 And garlic! Garlic is a must.
 Add in the garlic and all the veggies…
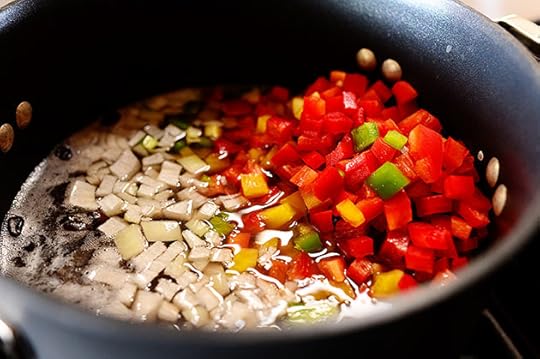 Then turn on the heat…
 And bring everything to a bawl.
Otherwise known as a boil.
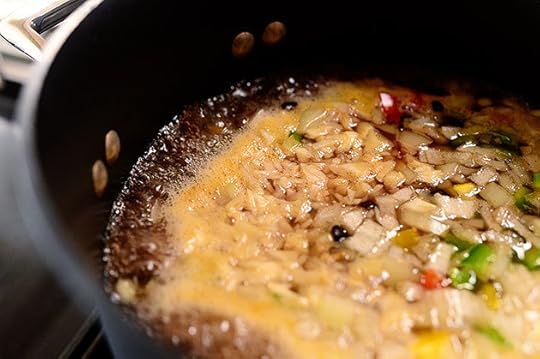
 Then just reduce the heat to low, cover it, and let the baynes (otherwise known as beans) cook for a good 1 1/2 hours or so.
 The beans aren’t done at this point, but they’re getting there!
 At this point, add some seasonings: salt…
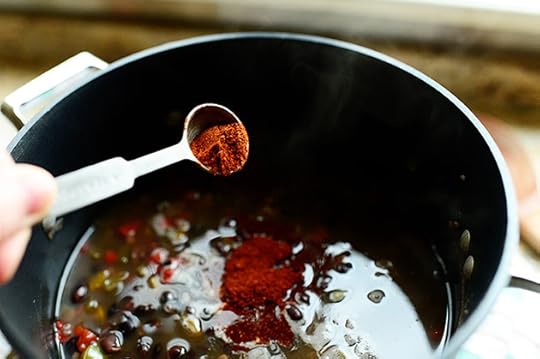 Chili powder…
 And cumin. Really basic, really good!
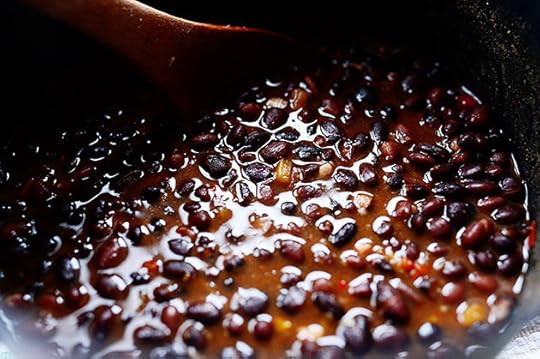 Now just return the pot to the stove for another hour or so (maybe less, maybe more, just watch it) until the liquid level is to your liking. I like really thick, stewy beans…but if you like things a little more liquidy, splash in a little more broth as you go. Do this also if the beans get overly thick while cooking.
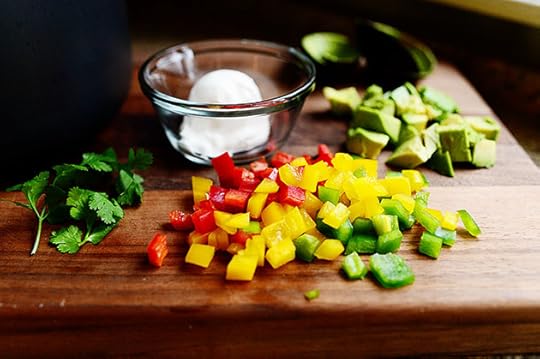 When it’s just about ready, get some fixins ready! Some extra diced bell pepper, sour cream, avocado, cilantro. I was fresh out of limes or I would have cut up some wedges!
But alas. I was limeless.
I hate being limeless.
Limeless is for the birds.
 But there’s no sense in dwelling on what I don’t have; just look at what I do have!
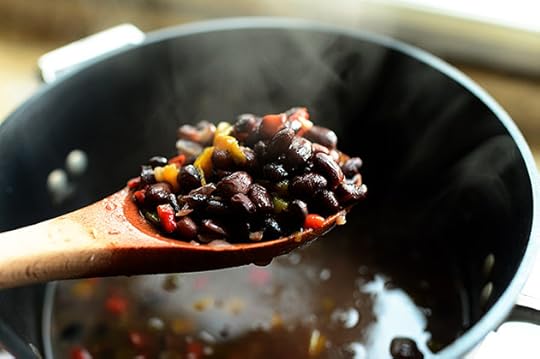
 Ahh…luscious!
And here, you’ll totally understand the point in my headnote above. Beans? Bean soup?
No one really knows which.
 Now. This is totally lovely on its own. Hearty, comforting, satisfying.
 But with sour cream? Sublime.
 And how ’bout a little more diced bell pepper?
And how ’bout a little diced avocado and cilantro?
 And how ’bout…
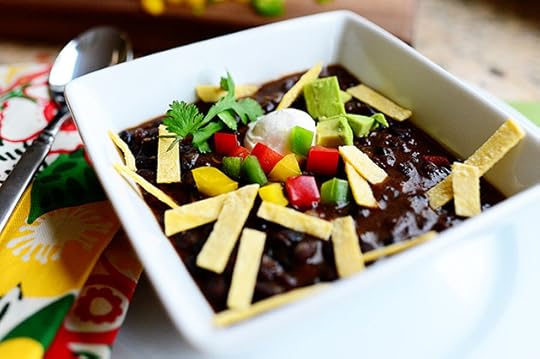 Some strips of corn tortilla?
 To all those questions, my answer is this: Yes, yes, a thousand time yes!
Here’s the handy dandy printable.
Recipe
Black Bean Soup
Prep Time: 2 Hours
Cook Time: 2 Hours
Difficulty: Easy
Servings: 6

Print Recipe
Ingredients
1 pound Dried Black Beans4 cups Low Sodium Chicken Broth2 cups Water3 cloves Garlic, Minced1 whole Medium Onion, Diced1 whole Red Bell Pepper, Seeded And Diced1 whole Green Bell Pepper, Seeded And Diced1 whole Yellow Bell Pepper, Seeded And Diced1 teaspoon Kosher Salt (more To Taste)1-1/2 teaspoon Chili Powder1-1/2 teaspoon Cumin FIXINS Sour Cream Avocado, diced Cilantro Leaves Lime Wedges Corn Tortillas Cut Into Strips Preparation Instructions
Place the beans in a bowl or pot, cover with cold water, and allow to soak overnight *OR* add beans to a medium pot and cover with hot water. Bring to a boil, then boil for 2 minutes. Turn off the heat, cover the pot and allow the beans to sit for 1 hour. Drain the beans and rinse them with cold water.
In a medium pot, add beans, chicken stock, water, onions, and bell peppers. Bring to a boil, then reduce the heat to low, cover, and simmer for 1 1/2 hours. At that time, add salt, chili powder, and cumin and stir. Cover and continue simmering for another 30 minutes to 1 hour, until the liquid level is to your liking (anywhere from very thick to a thinner soup is fine!)
Taste for seasoning and add more of what it needs. Serve soup in a bowl with sour cream, extra diced bell pepper, avocado, cilantro, tortilla strips, and a lime wedge.
Posted by Ree | The Pioneer Woman on April 14 2014

April 11, 2014
Weekend Mixer Giveaway (Winners!)
The winners of the mixer giveaway are…
#1006 Mary Beth J: “Riding in a horse show!”
#40672 Ashley F: “We are chillin in Bama and then driving home to VA on Sunday.”
#77410 Faith: “Working at a garage sale to raise money for a mission trip.”
Congrats, winners! Contact prizes@thepioneerwoman.com to claim your mixer!
 Today, because it’s the start of the weekend, and because I love ya, I’m giving away three (3)of these gorgeous KitchenAid mixers.
What a bright, happy, springy color!
TO ENTER
To enter this giveaway, just shout out your weekend plans in the Comments section of this post, whether you’re tilling up your garden or climbing Mount Everest. (Or staying in and doing spring cleaning!)
One entry per person, please.
I’ll announce winners on Sunday!
Love,
P-Dub

Weekend Mixer Giveaway!
Today, because it’s the start of the weekend, and because I love ya, I’m giving away three (3)of these gorgeous KitchenAid mixers.
What a bright, happy, springy color!
TO ENTER
To enter this giveaway, just shout out your weekend plans in the Comments section of this post, whether you’re tilling up your garden or climbing Mount Everest. (Or staying in and doing spring cleaning!)
One entry per person, please.
I’ll announce winners on Sunday!
Love,
P-Dub
Ree Drummond's Blog

- Ree Drummond's profile
- 2036 followers

