
Ree Drummond's Blog, page 17
July 20, 2015
Two Super Simple Appetizers
 I’m in Colorado with my family for the week. Whenever we come to Colorado, I’m always trying to achieve the perfect balance of grocery buying and restaurant eating. (See this recipe, which I posted when we were here last Februrary.) I wouldn’t say I’ve mastered it yet, but I’m getting better and better.
My brother-in-law Tim and his family often come with us, and one of my favorite things to do (well, among about 946 other favorite things here in beautiful Colorado) is to have a glass of wine with Missy in the evening, along with some kind of munchie or two. Tim and Missy aren’t with us this week, so in honor of my favorite sister-in-law, here are two super simple appetizers along the lines of what we love to enjoy together. They are vacation-friendly, in that they require very few ingredients and very little prep. In fact, it’s hard to call them recipes at all…and that’s exactly what makes them perfect for a vacation!
 I went to Safeway when we arrived on Saturday and bought a very small arsenal of groceries, including two baguettes.
 One was multi-grain…
 One was sourdough.
I sliced half of each baguette, then saved the rest to use for little rounds of cinnamon toast for the kids. Yum!
 I also bought a little block of blue cheese and cut it into small pieces.
 And this stuff! It’s basically fig preserves, even though it’s called fig spread, and I’ve used it for years for everything I can think of to use it for.
(Pssst. See this Fig-Prosciutto Pizza. Amen.)
 Whenever I make any kind of crostini or bruschetta, I always want to crisp up the bread a little bit. So I melted some butter (I bought a two-stick box—the smallest they sold at Safeway!) in a nonstick skillet and toasted up the baguette slices until they were golden and irresistible.
 I let them cool completely, then spread a little of the fig jam on top…
 Then topped them with a nice chunk of blue cheese. Now, blue cheese is definitely strong, so you could just add a few crumbles if you prefer more of a subtle bite of the stuff. Or you could do crumbled feta or even chunks of Parmigiano-Regianno!
Okay, set those aside for a second. We’ll finish them in a bit.
 For the second appetizer, I bought a bag of mini sweet peppers. I love these little things. I halved ‘em, then hollowed ‘em out with a small spoon…
 Then I cracked open two tubs of spreadable cream cheese: This one was a Boursin and the other one was Rondelle. A great vacation shortcut ingerdient fer sher.
 Then I smeared the two different kinds in the different colors of pepper halves.
 As I said: Hardly a recipe at all! But delicious nonetheless, especially if you use taste cream cheese spreads.
 I bought two small packages of fresh herbs at the store: chives and basil. I sliced the basil and sprinkled it over the blue cheese appetizer; then I chopped the chives and sprinkled them over the peppers.
With the leftover basil: I’ll make a tomato salad with the pint of grape tomatoes I bought.
With the leftover chives: I’ll make tasty scrambled eggs.
Mmmm. Pretty on their own.
 But even prettier with Colorado in the background!
Thanks for letting me share. I know these are beyond simple, but sometimes the simplest things are the best.
Here’s the handy dandy printable.
.recipe-actions {
position: relative;
z-index: 2;
}
#pdf-popover {
background: rgba(255,255,255,.9);
border: 1px solid #efeeed;
color: #6e5c3a;
display: none;
font-family: Helvetica, Arial, sans-serif;
right: 20px;
margin: 2px;
padding: 54px 20px 7px 10px;
position: absolute;
top: 0;
width: 380px;
z-index: 10;
}
#pdf-popover form {
margin: 0;
}
#pdf-popover h4 {
background: #b15818;
color: #fff;
font-family: Helvetica, Arial, sans-serif;
font-size: 20px;
font-weight: normal;
left: 3px;
margin: 0;
position: absolute;
padding: 6px 12px;
right: 3px;
top: 3px;
}
#pdf-popover legend {
font-family: Helvetica, Arial, sans-serif;
font-size: 120%;
font-weight: bold;
margin-bottom: 2px;
margin-left: 10px;
text-transform: uppercase;
}
#pdf-popover fieldset {
margin-bottom: 15px;
}
#pdf-popover input[type="checkbox"] {
height: 14px;
margin: 2px 0 10px 10px;
padding-left: 14px;
position: relative;
visibility: visible;
width: 14px;
}
#pdf-popover input[type="checkbox"],
#pdf-popover input[type="radio"] {
margin-left: 10px;
}
#pdf-popover .close {
background: #b15818;
color: #FFFFFF;
cursor: pointer;
height: 35px;
font-size: 16px;
font-weight: bold;
line-height: 26px;
position: absolute;
right: 3px;
text-align: center;
top: 3px;
width: 25px;
z-index: 1;
}
#pdf-popover .button {
background-color: #b15818;
border: 0;
color: #fff;
cursor: pointer;
font-family: Helvetica, Arial, sans-serif;
margin-left: 10px;
padding: 8px 10px;
text-transform: uppercase;
}
x
Print Options
Page size
Letter
3x5
4x6
Text Size
Small
Medium
Large
Content
Include description
Include prep time, etc.
Show image
Recipe
Two Easy Appetizers
Prep Time: 20 Minutes
Cook Time:
Difficulty: Easy
Servings: 8
 Print Recipe
Ingredients
1 whole Baguette, Sliced4 Tablespoons Butter2 Tablespoons Fig Spread Or Fig Preserves (or You Can Use Plum, Apricot, Etc) Blue Cheese, Cut Into Chunks Torn Basil, For Garnish Mini Peppers, Halved And Seeded Softened Cream Cheese Dip (such As Rondelle, Alouette, Or Boursin) Chopped Chives, For Garnish Preparation Instructions
APPETIZER #1: Heat the butter in a nonstick skillet over medium heat. Toast the baguette slices until golden and crisp. Allow to cool, then spread with a little fig spread/preserves. Top with blue cheese chunks. Sprinkle on basil.
APPETIZER #2: Smear the cream cheese spread inside the hollowed out halves of sweet peppers. Sprinkle on chopped chives.
Serve with a cold glass of wine!
Posted by Ree | The Pioneer Woman on


July 15, 2015
Chicken Kale Pasta
 You will love, adore, and stare at this dish. Not only is it beautiful and healthy, it’s really fun to look at! It’s the fraternal twin brother of this Chicken Florentine Pasta, but since I am on such a kale kick these days (which is approximately forty thousand hundred years after everyone else’s kale kick), I had to share this easy variation.
This needs to be your dinner tonight!
 Heat the butter and olive oil in a large skillet over high heat. Add the chicken chunks in a single layer and sprinkle with salt and pepper. Don’t stir for a minute or two in order to allow the chicken to brown on the first side.
 After that time, turn the chicken and brown on the other side. After 30 seconds, stir it around and cook it until it’s done…
 Then remove chicken from the skillet and set it aside.
 Reduce the heat to medium. Add the garlic and quickly stir it to avoid burning.
 After about 30 seconds, pour in the wine…
 And broth.
 Stir the liquid, scraping to deglaze the pan. Allow it to bubble up, then continue cooking it until it reduces by at least half.
 Turn off the heat, then add kale and tomatoes…
 The pasta and the chicken…
 And finally, the Parmesan shavings!
 Toss it to combine.
 The kale will start to wilt/soften as it mixes with the other ingredients.
 Serve it right out of the skillet to hungry folks!
Such a gorgeous and satisfying dish.
Here’s the handy dandy printable!
.recipe-actions {
position: relative;
z-index: 2;
}
#pdf-popover {
background: rgba(255,255,255,.9);
border: 1px solid #efeeed;
color: #6e5c3a;
display: none;
font-family: Helvetica, Arial, sans-serif;
right: 20px;
margin: 2px;
padding: 54px 20px 7px 10px;
position: absolute;
top: 0;
width: 380px;
z-index: 10;
}
#pdf-popover form {
margin: 0;
}
#pdf-popover h4 {
background: #b15818;
color: #fff;
font-family: Helvetica, Arial, sans-serif;
font-size: 20px;
font-weight: normal;
left: 3px;
margin: 0;
position: absolute;
padding: 6px 12px;
right: 3px;
top: 3px;
}
#pdf-popover legend {
font-family: Helvetica, Arial, sans-serif;
font-size: 120%;
font-weight: bold;
margin-bottom: 2px;
margin-left: 10px;
text-transform: uppercase;
}
#pdf-popover fieldset {
margin-bottom: 15px;
}
#pdf-popover input[type="checkbox"] {
height: 14px;
margin: 2px 0 10px 10px;
padding-left: 14px;
position: relative;
visibility: visible;
width: 14px;
}
#pdf-popover input[type="checkbox"],
#pdf-popover input[type="radio"] {
margin-left: 10px;
}
#pdf-popover .close {
background: #b15818;
color: #FFFFFF;
cursor: pointer;
height: 35px;
font-size: 16px;
font-weight: bold;
line-height: 26px;
position: absolute;
right: 3px;
text-align: center;
top: 3px;
width: 25px;
z-index: 1;
}
#pdf-popover .button {
background-color: #b15818;
border: 0;
color: #fff;
cursor: pointer;
font-family: Helvetica, Arial, sans-serif;
margin-left: 10px;
padding: 8px 10px;
text-transform: uppercase;
}
x
Print Options
Page size
Letter
3x5
4x6
Text Size
Small
Medium
Large
Content
Include description
Include prep time, etc.
Show image
Recipe
Chicken Kale Pasta
Prep Time: 10 Minutes
Cook Time: 15 Minutes
Difficulty: Easy
Servings: 8
 Print Recipe
Ingredients
1 pound Penne, Cooked To Al Dente And Kept Hot3 whole Boneless Skinless Chicken Breasts, Cut Into Bite Size Pieces Salt And Pepper, to taste2 Tablespoons Butter2 Tablespoons Olive Oil4 cloves Garlic, Minced3/4 cups Dry White Wine3/4 cups Low Sodium Chicken Broth (more If Needed)1 bunch Kale, Torn Into Small Pieces (stalks Discarded)2 cups Grape Or Cherry Tomatoes, Halved Shaved Parmesan Preparation Instructions
Heat the butter and olive oil in a large skillet over high heat. Add the chicken chunks in a single layer and sprinkle with salt and pepper. Don’t stir for a minute or two in order to allow the chicken to brown on the first side. After that time, turn the chicken and brown on the other side. After 30 seconds, stir it around and cook it until it’s done, then remove chicken from the skillet and set it aside.
Reduce the heat to medium. Add the garlic and quickly stir it to avoid burning. After about 30 seconds, pour in the wine and broth. Stir the liquid, scraping to deglaze the pan. Allow it to bubble up, then continue cooking it until it reduces by at least half.
Turn off the heat, then add kale and tomatoes, the pasta and the chicken, and the Parmesan shavings. Toss it to combine; the kale will start to wilt/soften as it mixes with the other ingredients. Serve it right out of the skillet to hungry folks! Such a gorgeous and satisfying dish.
Posted by Ree | The Pioneer Woman on

July 13, 2015
White Casserole Dish Giveaway (Winners!)
The winners of the white casserole dishes are…
#14797 Marty: “Baked spaghetti”
#24859 Stephanie I: “Baked cabbage au gratin (for my carb free hubby).”
Congratulations, winners! Contact prizes@thepioneerwoman.com to claim your pans!
 I use these white casserole dishes all the time.
They are the best!
 I love them, I adore them, and they’re tough, sturdy, and strong.
And food looks purty in ‘em.
Here are just a couple of examples of the things I like to make in mine!
 Cinnamon Raisin Baked French Toast. Yum.
 Baked Ziti. Swoon.
I could go on and on!
But I’d better get down to business.
GIVEAWAY
Today, because it’s Monday, and because I love ya, I’m giving away two sets of 3 Revol Belle Cuisine Rectangular Baking Dishes: one each of small, medium, and large!
They’re sturdy, they’re strong, and they’re tough.
(They also happen to be pretty. A bonus!)
TO ENTER
To enter the giveaway, just answer the following question in the Comments section of this post:
“What is your favorite thing to bake in a casserole pan?”
When you think about this…the possibilities are endless! Lasagna, Baked Ziti, Chicken Spaghetti, etc., are obvious choices…but what about Baked French Toast? Peach Cobbler?
Just shout out your favorite casserole dish (savory or sweet) and you’re automatically entered to win one of the baking dish sets.
THE RULES
One entry per person, please.
Winners will be announced Tuesday evening.
Good luck!
Giveaway sponsored by Pioneer Woman.

White Casserole Dish Giveaway!
I use these white casserole dishes all the time.
They are the best!
I love them, I adore them, and they’re tough, sturdy, and strong.
And food looks purty in ‘em.
Here are just a couple of examples of the things I like to make in mine!
Cinnamon Raisin Baked French Toast. Yum.
Baked Ziti. Swoon.
I could go on and on!
But I’d better get down to business.
GIVEAWAY
Today, because it’s Monday, and because I love ya, I’m giving away two sets of 3 Revol Belle Cuisine Rectangular Baking Dishes: one each of small, medium, and large!
They’re sturdy, they’re strong, and they’re tough.
(They also happen to be pretty. A bonus!)
TO ENTER
To enter the giveaway, just answer the following question in the Comments section of this post:
“What is your favorite thing to bake in a casserole pan?”
When you think about this…the possibilities are endless! Lasagna, Baked Ziti, Chicken Spaghetti, etc., are obvious choices…but what about Baked French Toast? Peach Cobbler?
Just shout out your favorite casserole dish (savory or sweet) and you’re automatically entered to win one of the baking dish sets.
THE RULES
One entry per person, please.
Winners will be announced Tuesday evening.
Good luck!
Giveaway sponsored by Pioneer Woman.
July 9, 2015
Instafood!
I love Instagram. Love, love, love it. Here’s my account to prove it:
The Pioneer Woman on Instagram
I post all sorts of different kinds of photos on Instagram—the kids, the dogs, the horses, the ranch, my husband, the cows, and my feet. (With shoes on, thankfully.) But one constant category of photos involve…food. There’s no getting around it.
Here are some of my favorite food-related Instafood posts over the past few months! Many of the recipes below can be found here on my cooking website (just use the search bar above); others will be coming soon, whether here on the website or in my new cookbook.
I hope these photos make ya hungry this morning!
A photo posted by Ree Drummond (@thepioneerwoman) on Jan 17, 2015 at 6:43am PST
Lettuce Wraps! I need to post these here soon. I keep forgetting.
A photo posted by Ree Drummond (@thepioneerwoman) on Jan 26, 2015 at 10:18am PST
Chicken Nachos. Yes, yes, a thousand times yes!
A photo posted by Ree Drummond (@thepioneerwoman) on Jan 31, 2015 at 6:28am PST
Homemade Frappuccinos! I like ‘em. I like ‘em a lot.
A photo posted by Ree Drummond (@thepioneerwoman) on Jan 31, 2015 at 7:18am PST
Quiche. With all sorts of wondrous things inside.
A photo posted by Ree Drummond (@thepioneerwoman) on Feb 6, 2015 at 2:21pm PST
Chocolate Fondue! Another one I need to post here soon. How fun are fondue parties. The seventies rocked.
A photo posted by Ree Drummond (@thepioneerwoman) on Feb 7, 2015 at 7:24am PST
Chocolate covered potato chips. I apologize to all mankind.
A photo posted by Ree Drummond (@thepioneerwoman) on Feb 9, 2015 at 6:55am PST
Strawberry Granola Pancakes. Made them in February when we were in Colorado. Loved them then, love them now!
A photo posted by Ree Drummond (@thepioneerwoman) on Mar 2, 2015 at 11:56am PST
Veggie Stir Fry! This’ll be in my new cookbook.
A photo posted by Ree Drummond (@thepioneerwoman) on Mar 2, 2015 at 3:55pm PST
Cashew Chicken! This will, too.
A photo posted by Ree Drummond (@thepioneerwoman) on Mar 12, 2015 at 11:09am PDT
Brownie Cookies. Oh, baby. Yes.
A photo posted by Ree Drummond (@thepioneerwoman) on Mar 19, 2015 at 6:53pm PDT
This breakfast sandwich was a triumph. My mom just made them last weekend and declared them keepers.
A photo posted by Ree Drummond (@thepioneerwoman) on Mar 25, 2015 at 7:57am PDT
Zucchini Noodles! Delightful.
A photo posted by Ree Drummond (@thepioneerwoman) on Mar 30, 2015 at 1:13pm PDT
Pea Salad. Mmmmmm. Remember this?
A photo posted by Ree Drummond (@thepioneerwoman) on Apr 4, 2015 at 7:24am PDT
New cookbook…
A photo posted by Ree Drummond (@thepioneerwoman) on Apr 4, 2015 at 7:08am PDT
New cookbook…
A photo posted by Ree Drummond (@thepioneerwoman) on Apr 11, 2015 at 7:06am PDT
New cookbook! Oh, and here on my website, because I couldn’t wait until October to share it with ya. (Beef Strogranoff.)
A photo posted by Ree Drummond (@thepioneerwoman) on Apr 20, 2015 at 10:18am PDT
Breakfast Patty Melt. What is the world coming to?
A photo posted by Ree Drummond (@thepioneerwoman) on Apr 24, 2015 at 7:20pm PDT
Breakfast Quesadilla. Dang. So good!
A photo posted by Ree Drummond (@thepioneerwoman) on Apr 27, 2015 at 1:26pm PDT
Roasted Carrots with Vinaigrette. Addictive.
A photo posted by Ree Drummond (@thepioneerwoman) on May 13, 2015 at 5:10pm PDT
Oooooh. Homemade caramel sauce!
A photo posted by Ree Drummond (@thepioneerwoman) on May 16, 2015 at 1:43pm PDT
Oooooh. Homemade Hot Fudge! (Coming in the new cookbook!)
A photo posted by Ree Drummond (@thepioneerwoman) on Jun 1, 2015 at 6:32am PDT
Crunchy French Toast. You gotta try it.
A photo posted by Ree Drummond (@thepioneerwoman) on Jul 1, 2015 at 11:45am PDT
Are ya ready? Waffle maker pizza. Katy bar the door.
A photo posted by Ree Drummond (@thepioneerwoman) on Jul 6, 2015 at 9:06am PDT
And these. I included the caption so you’d have the instructions. They’re so deliciously addictive!
Love,
P-Dub

July 7, 2015
Ladd’s Grilled Tenderloin
 My beloved’s grilled beef tenderloins are legendary, and he fixes them two or three times a year, whenever we have a gathering of friends or a special family occasion. We served grilled tenderloin as part of our Fourth of July celebration on Saturday (along with regular steaks and hot dogs!), and wound up with some unused tenderloins that his dad had thawed out for us before the party. This was a lot of expensive beef, and since we couldn’t re-freeze it, Marlboro Man decided to grill them up on Sunday and distribute them to his dad, Tim, our family friend Dave…and, well, ourselves! We ate it for dinner Sunday night, then wrapped it in foil to slice and eat all throughout the week. (Cold sliced tenderloin out of the fridge is one of the things they serve in Heaven.)
I’ve referenced my husband’s grilled tenderloins for years, both here and on my Food Network show, but I’ve never had a chance to take photos of the process…until now!
Here’s how he makes them. They’re definitely not a regular weeknight item because of the high price tag of tenderloin, but if you’ve got a special occasion in your family, this is a serious, serious treat. And keep in mind that depending on the thickness of your slices, a whole tenderloin can feed quite a few people!
 Unwrap the tenderloin (these were whole tenderloins, not the “butt” pieces commonly sold) then slightly pull the sides away from the middle cylinder. (Don’t separate them; just pull them apart.)
Side note: These hands have cradled my babies, delivered calves, wrestled steers to the ground, built fence, thrown footballs, repaired equipment, and held me.
I love these hands.
 What you want to do is expose all that tough silvery membrane you see on the surface of the center cylinder. It’s bad. Really, really bad!
Oh, it’s not poisonous. Just tough, annoying, and…tough. And annoying.
But mostly tough.
But equally annoying.
 Pinch the end of the membrane…
 And carefully work your knife underneath.
 Once the knife loosens enough of the membrane, cut the end loose and pull it up as you use the knife to shave the membrane away from the meat. Your goal is to get rid of as much membrane and as little meat as possible!
 Keep going until you get all the way down to the end…
 Then put it in a pile to discard or, hypothetically speaking, of course, feed it to your dogs thereby sealing your canine friendships for life.
 When Marlboro Man grills tenderloin, he never puts them straight on the grill. The outside would get burned/charred before the meat would have a chance to cook. It’s different than a steak, which is relatively thin and cooks within several minutes. A tenderloin on a nice, hot grill will take about 20 to 30 minutes to cook to medium rare; if it were placed right on the grate of the grill, it wouldn’t have time to cook before the skin turned black.
So he lays them inside these heavy duty foil pans instead. They provide the protection the tenderloins need.
 Oh. And one other thing.
 He douses them with butter. (There are two tenderloins in the pan, and about 3 sticks of melted butter in there. Yes, I said three sticks of butter. Yes, I said three sticks of butter. Yes. I said three sticks. Of butter.)
(But you can just use two sticks if you’re trying to make healthy choices.)
 Now, when Marlboro Man grills tenderloins, he doesn’t use a gourmet blend of herbs and spices.
 He uses McCormick Lemon & Pepper seasoning and Lowry’s seasoned salt.
Amen.
 Then they go right on the grill!
 A little while later, the butter starts to bubble.
And that, my friends, is a beautiful sight.
 About 10 minutes in, he turns them over with really long tongs.
 Then he seasons them again!
A note about seasoning tenderloin: Because the tenderloin will eventually be sliced, each slice will wind up having a relatively small surface area of seasoning. This differs from a steak, where you grill both sides and slice individual bites. IF you overseason a steak, well…you’ll overseason a steak and it will be too much. But it’s difficult to overseason tenderloin because each slice doesn’t wind up with much surface area.
It’s early. I hope this makes sense.
 After that, he just let them cook, turning them probably another two times to let them cook and brown evenly.
 The wind picked up and the grill got a little hot, and the butter almost cooked away, so Marlboro Man did what any self-respecting griller would do. He threw in another stick o’ butter.
(Don’t be alarmed!)
**A note about the butter: You definitely want plenty in there so the tenderloin is almost bathing in butter. But please use caution when it comes to moving the pan(s) off the grill. Don’t fill the pans so full that you risk sloshing the butter and burning yourself, and be sure to wear heavy gloves when you’re moving the pans. Melted butter is very, very hot!
 Now, I should have had a timer and timed precisely how long it took for the tenderloins to be done from the time they went on the grill to the time they left the grill…but it’s impossible to give precise directions because of the variation in grill styles, grill heat, etc. But I would say it was in the range of 25 to 35 minutes.
If you want to be sure (and it’s good to be sure since tenderloin is so pricey and once it’s overdone you can’t undo it), use a heavy duty meat thermometer. They’re sold in supermarkets and take away the guess work. Just insert it sideways into the thickest part of the tenderloin and stop grilling it when it reaches about 125 to 130 degrees for medium-rare to rare.
Keep in mind two things:
1. The temperature of the meat will continue to rise slightly after it’s removed from the grill.
and
2. The thinner end pieces of the tenderloin will be more cooked than the thick center. So if you have guests with varying preferences, you can serve the center slices to those who like it rare, then go out from there.
 Speaking of slices…watch my man slice the tenderloin.
 It’s a glorious thing to behold.
 That right there is beautiful medium-rare doneness.
 And here’s a thicker piece. Still nice and medium rare, a little more toward rare in the center of the slice.
 Grilled tenderloin. It’s a treat beyond all treats. Try it the next time you have a special occasion in your household!
Just don’t overcook them and don’t burn yourself and all will be well in the world.
Here’s the handy dandy printable.
.recipe-actions {
position: relative;
z-index: 2;
}
#pdf-popover {
background: rgba(255,255,255,.9);
border: 1px solid #efeeed;
color: #6e5c3a;
display: none;
font-family: Helvetica, Arial, sans-serif;
right: 20px;
margin: 2px;
padding: 54px 20px 7px 10px;
position: absolute;
top: 0;
width: 380px;
z-index: 10;
}
#pdf-popover form {
margin: 0;
}
#pdf-popover h4 {
background: #b15818;
color: #fff;
font-family: Helvetica, Arial, sans-serif;
font-size: 20px;
font-weight: normal;
left: 3px;
margin: 0;
position: absolute;
padding: 6px 12px;
right: 3px;
top: 3px;
}
#pdf-popover legend {
font-family: Helvetica, Arial, sans-serif;
font-size: 120%;
font-weight: bold;
margin-bottom: 2px;
margin-left: 10px;
text-transform: uppercase;
}
#pdf-popover fieldset {
margin-bottom: 15px;
}
#pdf-popover input[type="checkbox"] {
height: 14px;
margin: 2px 0 10px 10px;
padding-left: 14px;
position: relative;
visibility: visible;
width: 14px;
}
#pdf-popover input[type="checkbox"],
#pdf-popover input[type="radio"] {
margin-left: 10px;
}
#pdf-popover .close {
background: #b15818;
color: #FFFFFF;
cursor: pointer;
height: 35px;
font-size: 16px;
font-weight: bold;
line-height: 26px;
position: absolute;
right: 3px;
text-align: center;
top: 3px;
width: 25px;
z-index: 1;
}
#pdf-popover .button {
background-color: #b15818;
border: 0;
color: #fff;
cursor: pointer;
font-family: Helvetica, Arial, sans-serif;
margin-left: 10px;
padding: 8px 10px;
text-transform: uppercase;
}
x
Print Options
Page size
Letter
3x5
4x6
Text Size
Small
Medium
Large
Content
Include description
Include prep time, etc.
Show image
Recipe
Ladd's Grilled Tenderloin
Prep Time: 15 Minutes
Cook Time: 30 Minutes
Difficulty: Easy
Servings: 12
 Print Recipe
Ingredients
1 whole Beef Tenderloin2 sticks Salted Butter, Melted And Slightly Cooled3 Tablespoons Seaoned Salt, More To Taste3 Tablespoons Lemon & Pepper Seasoning, More To Taste Preparation Instructions
IMPORTANT: Be careful with the melted butter, as it gets very hot on the grill. Use long, heavy tongs and wear heavy gloves when transporting the pan of finished tenderloin.
Using a sharp knife, carefully trim the silvery, tough membrane off the top of the tenderloin, leaving all the sections of the tenderloin intact. Place it into a heavy duty foil roasting pan and pour on the melted butter. Sprinkle on some of the seasonings, then place the pan on the grill.
After the butter starts to get hot, let it cook for a good 10 minutes, then turn it over and season the other side. Turn the tenderloin every 7-8 minutes, or as it starts to brown. If butter cooks away, add more!
Cook the tenderloin, turning occasionally, for a total of 20 to 30 minutes, depending on how thick it is. If using a meat thermometer, remove it when the temperature reaches 125 to 130 degrees.
Transfer the tenderloin to a large baking sheet or cutting board and let it rest for 5 to 10 minutes before slicing. Slice as thin or thick as you'd like!
Posted by Ree | The Pioneer Woman on

Ladd’s Grilled Tenderloin
My beloved’s grilled beef tenderloins are legendary, and he fixes them two or three times a year, whenever we have a gathering of friends or a special family occasion. We served grilled tenderloin as part of our Fourth of July celebration on Saturday (along with regular steaks and hot dogs!), and wound up with some unused tenderloins that his dad had thawed out for us before the party. This was a lot of expensive beef, and since we couldn’t re-freeze it, Marlboro Man decided to grill them up on Sunday and distribute them to his dad, Tim, our family friend Dave…and, well, ourselves! We ate it for dinner Sunday night, then wrapped it in foil to slice and eat all throughout the week. (Cold sliced tenderloin out of the fridge is one of the things they serve in Heaven.)
I’ve referenced my husband’s grilled tenderloins for years, both here and on my Food Network show, but I’ve never had a chance to take photos of the process…until now!
Here’s how he makes them. They’re definitely not a regular weeknight item because of the high price tag of tenderloin, but if you’ve got a special occasion in your family, this is a serious, serious treat. And keep in mind that depending on the thickness of your slices, a whole tenderloin can feed quite a few people!
Unwrap the tenderloin (these were whole tenderloins, not the “butt” pieces commonly sold) then slightly pull the sides away from the middle cylinder. (Don’t separate them; just pull them apart.)
Side note: These hands have cradled my babies, delivered calves, wrestled steers to the ground, built fence, thrown footballs, repaired equipment, and held me.
I love these hands.
What you want to do is expose all that tough silvery membrane you see on the surface of the center cylinder. It’s bad. Really, really bad!
Oh, it’s not poisonous. Just tough, annoying, and…tough. And annoying.
But mostly tough.
But equally annoying.
Pinch the end of the membrane…
And carefully work your knife underneath.
Once the knife loosens enough of the membrane, cut the end loose and pull it up as you use the knife to shave the membrane away from the meat. Your goal is to get rid of as much membrane and as little meat as possible!
Keep going until you get all the way down to the end…
Then put it in a pile to discard or, hypothetically speaking, of course, feed it to your dogs thereby sealing your canine friendships for life.
When Marlboro Man grills tenderloin, he never puts them straight on the grill. The outside would get burned/charred before the meat would have a chance to cook. It’s different than a steak, which is relatively thin and cooks within several minutes. A tenderloin on a nice, hot grill will take about 20 to 30 minutes to cook to medium rare; if it were placed right on the grate of the grill, it wouldn’t have time to cook before the skin turned black.
So he lays them inside these heavy duty foil pans instead. They provide the protection the tenderloins need.
Oh. And one other thing.
He douses them with butter. (There are two tenderloins in the pan, and about 3 sticks of melted butter in there. Yes, I said three sticks of butter. Yes, I said three sticks of butter. Yes. I said three sticks. Of butter.)
(But you can just use two sticks if you’re trying to make healthy choices.)
Now, when Marlboro Man grills tenderloins, he doesn’t use a gourmet blend of herbs and spices.
He uses McCormick Lemon & Pepper seasoning and Lowry’s seasoned salt.
Amen.
Then they go right on the grill!
A little while later, the butter starts to bubble.
And that, my friends, is a beautiful sight.
About 10 minutes in, he turns them over with really long tongs.
Then he seasons them again!
A note about seasoning tenderloin: Because the tenderloin will eventually be sliced, each slice will wind up having a relatively small surface area of seasoning. This differs from a steak, where you grill both sides and slice individual bites. IF you overseason a steak, well…you’ll overseason a steak and it will be too much. But it’s difficult to overseason tenderloin because each slice doesn’t wind up with much surface area.
It’s early. I hope this makes sense.
After that, he just let them cook, turning them probably another two times to let them cook and brown evenly.
The wind picked up and the grill got a little hot, and the butter almost cooked away, so Marlboro Man did what any self-respecting griller would do. He threw in another stick o’ butter.
(Don’t be alarmed!)
**A note about the butter: You definitely want plenty in there so the tenderloin is almost bathing in butter. But please use caution when it comes to moving the pan(s) off the grill. Don’t fill the pans so full that you risk sloshing the butter and burning yourself, and be sure to wear heavy gloves when you’re moving the pans. Melted butter is very, very hot!
Now, I should have had a timer and timed precisely how long it took for the tenderloins to be done from the time they went on the grill to the time they left the grill…but it’s impossible to give precise directions because of the variation in grill styles, grill heat, etc. But I would say it was in the range of 25 to 35 minutes.
If you want to be sure (and it’s good to be sure since tenderloin is so pricey and once it’s overdone you can’t undo it), use a heavy duty meat thermometer. They’re sold in supermarkets and take away the guess work. Just insert it sideways into the thickest part of the tenderloin and stop grilling it when it reaches about 125 to 130 degrees for medium-rare to rare.
Keep in mind two things:
1. The temperature of the meat will continue to rise slightly after it’s removed from the grill.
and
2. The thinner end pieces of the tenderloin will be more cooked than the thick center. So if you have guests with varying preferences, you can serve the center slices to those who like it rare, then go out from there.
Speaking of slices…watch my man slice the tenderloin.
It’s a glorious thing to behold.
That right there is beautiful medium-rare doneness.
And here’s a thicker piece. Still nice and medium rare, a little more toward rare in the center of the slice.
Grilled tenderloin. It’s a treat beyond all treats. Try it the next time you have a special occasion in your household!
Just don’t overcook them and don’t burn yourself and all will be well in the world.
Here’s the handy dandy printable.
.recipe-actions {
position: relative;
z-index: 2;
}
#pdf-popover {
background: rgba(255,255,255,.9);
border: 1px solid #efeeed;
color: #6e5c3a;
display: none;
font-family: Helvetica, Arial, sans-serif;
right: 20px;
margin: 2px;
padding: 54px 20px 7px 10px;
position: absolute;
top: 0;
width: 380px;
z-index: 10;
}
#pdf-popover form {
margin: 0;
}
#pdf-popover h4 {
background: #b15818;
color: #fff;
font-family: Helvetica, Arial, sans-serif;
font-size: 20px;
font-weight: normal;
left: 3px;
margin: 0;
position: absolute;
padding: 6px 12px;
right: 3px;
top: 3px;
}
#pdf-popover legend {
font-family: Helvetica, Arial, sans-serif;
font-size: 120%;
font-weight: bold;
margin-bottom: 2px;
margin-left: 10px;
text-transform: uppercase;
}
#pdf-popover fieldset {
margin-bottom: 15px;
}
#pdf-popover input[type="checkbox"] {
height: 14px;
margin: 2px 0 10px 10px;
padding-left: 14px;
position: relative;
visibility: visible;
width: 14px;
}
#pdf-popover input[type="checkbox"],
#pdf-popover input[type="radio"] {
margin-left: 10px;
}
#pdf-popover .close {
background: #b15818;
color: #FFFFFF;
cursor: pointer;
height: 35px;
font-size: 16px;
font-weight: bold;
line-height: 26px;
position: absolute;
right: 3px;
text-align: center;
top: 3px;
width: 25px;
z-index: 1;
}
#pdf-popover .button {
background-color: #b15818;
border: 0;
color: #fff;
cursor: pointer;
font-family: Helvetica, Arial, sans-serif;
margin-left: 10px;
padding: 8px 10px;
text-transform: uppercase;
}
x
Print Options
Page size
Letter
3x5
4x6
Text Size
Small
Medium
Large
Content
Include description
Include prep time, etc.
Show image
Recipe
Ladd's Grilled Tenderloin
Prep Time: 15 Minutes
Cook Time: 30 Minutes
Difficulty: Easy
Servings: 12
Print RecipeIngredients
1 whole Beef Tenderloin2 sticks Salted Butter, Melted And Slightly Cooled3 Tablespoons Seaoned Salt, More To Taste3 Tablespoons Lemon & Pepper Seasoning, More To Taste Preparation Instructions
IMPORTANT: Be careful with the melted butter, as it gets very hot on the grill. Use long, heavy tongs and wear heavy gloves when transporting the pan of finished tenderloin.
Using a sharp knife, carefully trim the silvery, tough membrane off the top of the tenderloin, leaving all the sections of the tenderloin intact. Place it into a heavy duty foil roasting pan and pour on the melted butter. Sprinkle on some of the seasonings, then place the pan on the grill.
After the butter starts to get hot, let it cook for a good 10 minutes, then turn it over and season the other side. Turn the tenderloin every 7-8 minutes, or as it starts to brown. If butter cooks away, add more!
Cook the tenderloin, turning occasionally, for a total of 20 to 30 minutes, depending on how thick it is. If using a meat thermometer, remove it when the temperature reaches 125 to 130 degrees.
Transfer the tenderloin to a large baking sheet or cutting board and let it rest for 5 to 10 minutes before slicing. Slice as thin or thick as you'd like!
Posted by Ree | The Pioneer Woman on
July 2, 2015
Food to Make on The Fourth!
I can’t believe the Fourth of July is in two short days! We’re gearing up for our annual gathering, where Marlboro Man will grill a bunch of steaks and everyone will bring their favorite potluck dish. I love thinking about food this time of year, and here are some of my favorites! Hope you find something new to make this weekend.
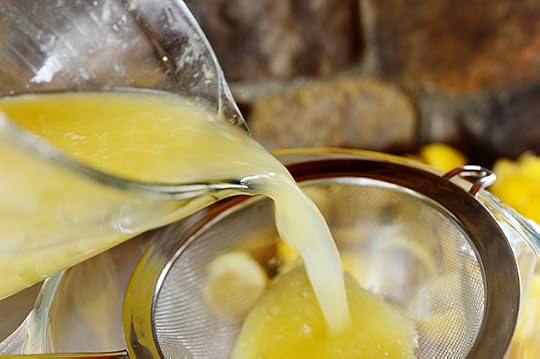 Homemade Lemonade. Fresh and perfect. I love this stuff!
 Blackberry Margaritas! Love these, and you can make batches ahead of time and store them in zipper bags in the fridge.
 If you’re looking for a little bit of frozen, festive fun, these Mango Margaritas will rock your ever-loving existence. I don’t trust myself around these things. So good!
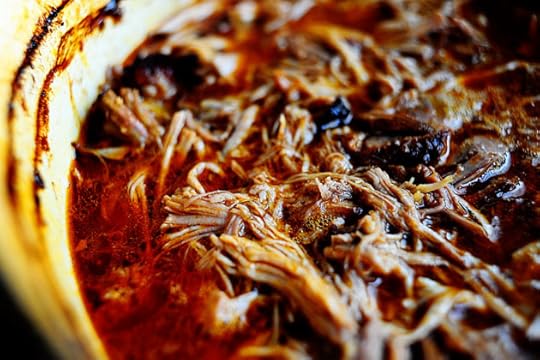 Spicy Dr Pepper Pulled Pork. This is a fantastic Fourth of July recipe, because it’s so easy to make and really feeds a crowd. You can do sandwiches or just serve the meat on its own…and man, is it delicious.
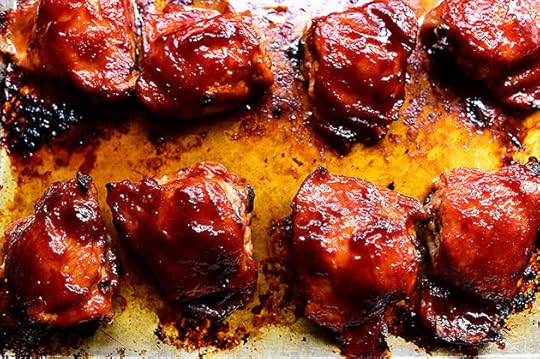 If it rains, or if you just don’t feel like sweating by the grill, this Oven BBQ Chicken is splendiferous! And yes, I know that isn’t a word. But this chicken will make you forget the English language, it’s so good!
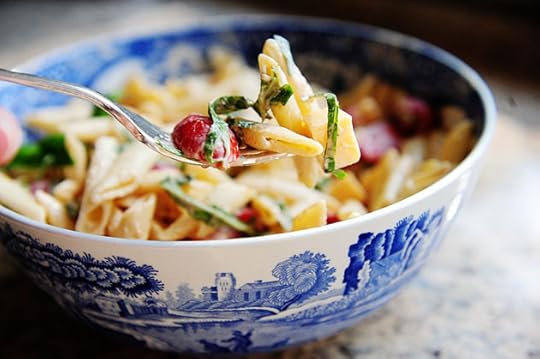 Spicy Pasta Salad with Smoked Gouda, Tomatoes, and Basil. In Heaven, when they serve pasta salad at picnics, this is the one they serve. I’m not kidding.
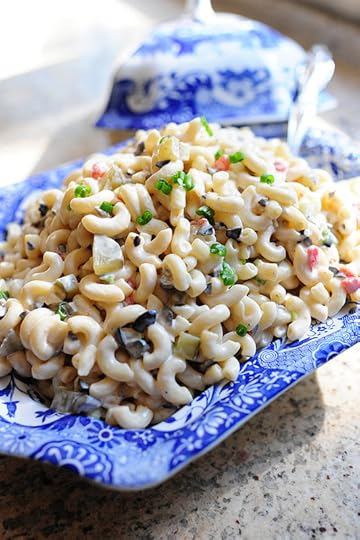 Macaroni Salad. Ooooh, is macaroni salad personal. Between the mayonnaise, the variety of pickles, and what adornments get added, there are many weighty decisions to made. This is macaroni salad the way I like it!
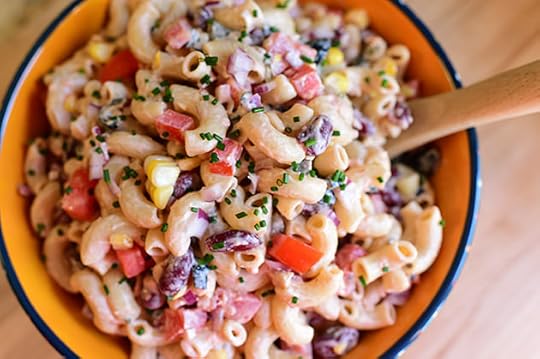 Speaking of macaroni salad, this Mexican Macaroni Salad is simply lovely. Goes with everything!
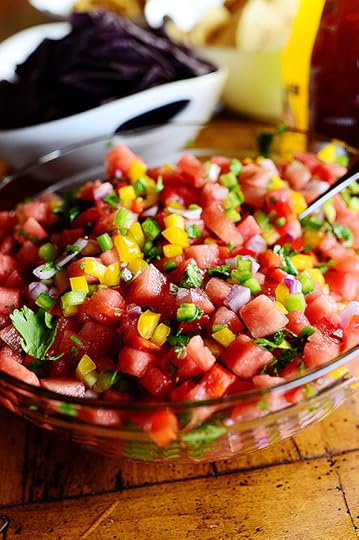 Watermelon Pico de Gallo. This is one of my favorite summertime things. It’s everything that’s fantabulous about pico de gallo, but with a sweet melony (obviously!) edge, and you can serve it with chips or as a side salad. Such a treat!
 Peach Salsa. Super beautiful, super colorful, super fantastic. Serve it with chips or as a garnish for grilled chicken.
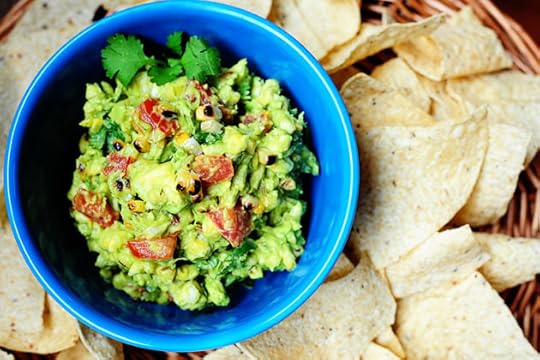 Grilled Corn Guacamole! Yes, please. I want some right now!
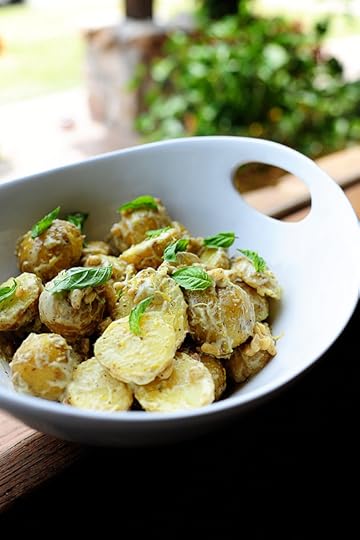 Creamy Lemon Basil Potato Salad. Gorgeous and lovely! A nice twist on regular ol’ potato salad.
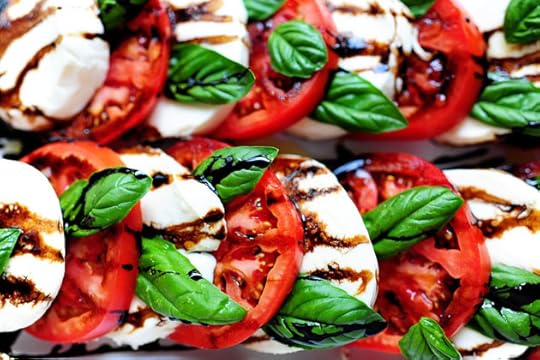 Tomato-Mozzarella Salad. If I had this available to me 365 days a year, I would eat it every day for lunch. It completes me.
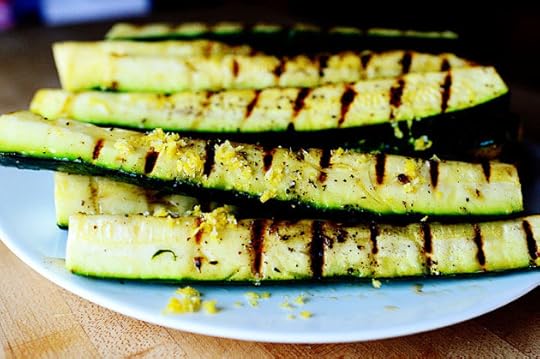 This Grilled Zucchini is utterly addictive. (The secret’s in the lemon salt!)
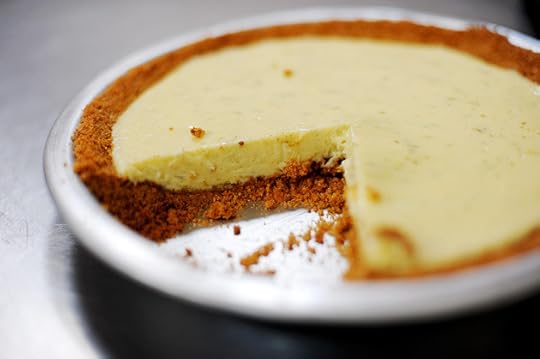 Key Lime Pie, which isn’t really Key Lime Pie at all, but just regular lime pie.
 Hey, this would be fun! Make this Chocolate Strawberry Nutella Cake, but add some blueberries to really bump up the red, white, and blue!
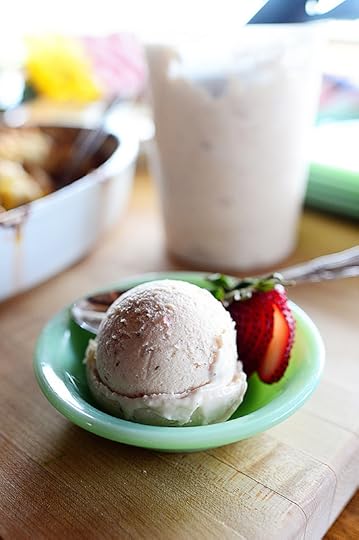 And the Fourth of July just wouldn’t be the same without homemade ice cream of some kind. Strawberry Ice Cream, to be exact!
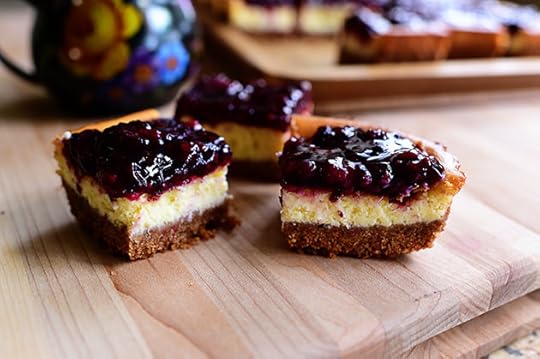 These Blackberry Cheesecake Squares are divine.
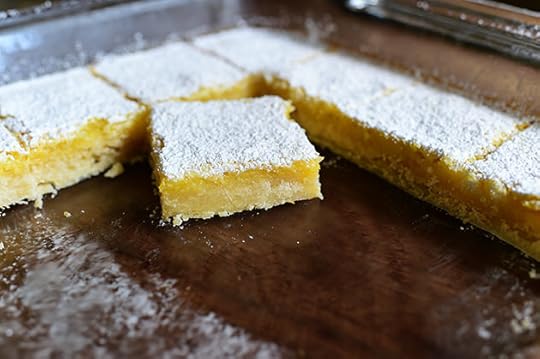 To draw on a recent PW recipe…Lemon Bars! Cool, crisp, perfect for summer.
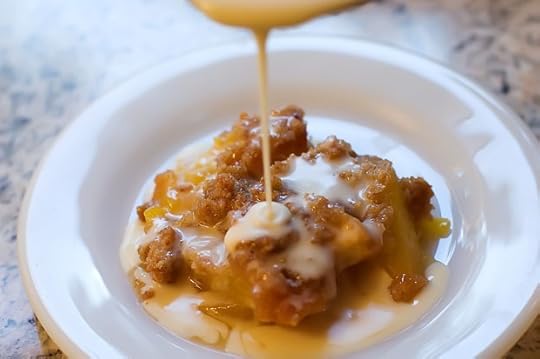 Peach Crisp with Maple Cream Sauce. An absolute summer staple for me, this warm crisp with cold, creamy sauce will make your skirt fly up in the most profound way. It is ridiculously yummy. You’ll want to drink the sauce with a straw.
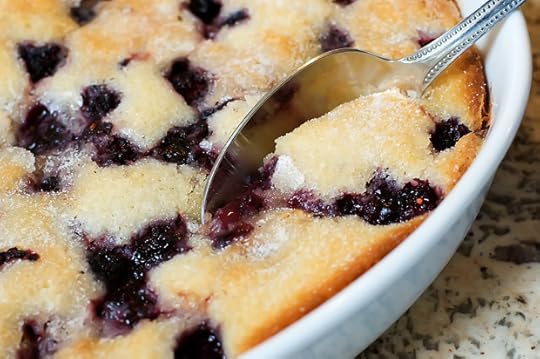 And finally…Blackberry Cobbler the way I like it. Goes with everything.
Hope you have an amazing Fourth of July, friends!

June 29, 2015
Mixed Berry Scones
 It’s the week of Fourth of July, which means I’m scrambling to get the cow poop out of my yard, I’ve got to power wash my porch, I need to start juicing lemons for the millions of gallons of lemonade I need to make, and I’m looking for any way possible to use the metric tons of blueberries and strawberries I have in my fridge right now.
These scones are a beautiful start! Leave ‘em plain, eat ‘em with jam, or glaze ‘em. They’re delicious no matter what!
 Start with some flour and sugar in a bowl…
 And add baking powder…
 Salt…
Salt…
 And mix them together.
 For the wet ingredients, pour a mix of cream and milk into a bowl…
 And crack in an egg…
 Add some vanilla…
 And whisk it together.
 Now, I had the wacky idea to add a little strawberry preserves to the mix. Call me looney and unpredictable!
 Whisk it together…
 And speaking of looney and unpredictable…
 I added a couple of drops of red food coloring. Will the madness never end?
 Speaking of “will the madness never end,” go ahead cut 2 sticks of butter into neat little cubes. Cold butter, please!
 Add it all to the dry ingredients…
 And use a pastry cutter to cut the butter into the dry ingredients until the mixture looks like coarse crumbs or lumpy sand or something in that vicinity.
 Next, you guessed it!
 The wet goes into the dry. Mix gently as you go…
 Then stop when it’s halfway combined and add some berries.
 Mix it until it’s almost all combined, then add a few more and mix them in! Note that this is a little more of a wet scone dough than I usually make—normally, the mixture would be much more crumbly. (I wanted it to be wet enough to hold all the berries in place.)
 Turn the dough onto a floured surface, then sprinkle the top and pat it with flour to make it easier to work with…
 Then use your hands (not a rolling pin!) to form it into a rectangle. I would say this was 6-7 inches by about 15-16 inches…but of course, I wasn’t organized enough to whip out a ruler and measure it.
 Pretty dough, pretty berries!
 Use a pizza cutter (or a knife!) to cut straight down the middle…
 Then make about 4 cuts across, which will leave you with squares…
 Then cut the squares in half diagonally to create triangles.
 Transfer them to a baking sheet…
 And bake them at 350 for about 20 minutes, until set and barely starting to get golden around the edges.
 Transfer them to a cooling rack and let them cool!
 Look how pretty. Now, you can just eat these as they are if you’d like: just serve them with softened butter and jam.
Or…you can top them with a little glaze!
 Start with some melted butter…
 Then add some sifted powdered sugar…
 And a splash of milk…
 And whisk it together until it’s nice and smooth and thick enough to stay where you drizzle it.
 After that…drizzle it!
 Mmmm. Glaze is my life.
 I did little back-and-forth lines, but you could just spoon the glaze straight over the top and let it drip down the sides.
 Just give the glaze a chance to set up, then the scones are good to go!
Where “good to go” means “dig into them with your coffee on Monday morning.”
Which, by the way, I’m about to do right now.
Here’s the handy dandy printable. Enjoy these, friends!
.recipe-actions {
position: relative;
z-index: 2;
}
#pdf-popover {
background: rgba(255,255,255,.9);
border: 1px solid #efeeed;
color: #6e5c3a;
display: none;
font-family: Helvetica, Arial, sans-serif;
right: 20px;
margin: 2px;
padding: 54px 20px 7px 10px;
position: absolute;
top: 0;
width: 380px;
z-index: 10;
}
#pdf-popover form {
margin: 0;
}
#pdf-popover h4 {
background: #b15818;
color: #fff;
font-family: Helvetica, Arial, sans-serif;
font-size: 20px;
font-weight: normal;
left: 3px;
margin: 0;
position: absolute;
padding: 6px 12px;
right: 3px;
top: 3px;
}
#pdf-popover legend {
font-family: Helvetica, Arial, sans-serif;
font-size: 120%;
font-weight: bold;
margin-bottom: 2px;
margin-left: 10px;
text-transform: uppercase;
}
#pdf-popover fieldset {
margin-bottom: 15px;
}
#pdf-popover input[type="checkbox"] {
height: 14px;
margin: 2px 0 10px 10px;
padding-left: 14px;
position: relative;
visibility: visible;
width: 14px;
}
#pdf-popover input[type="checkbox"],
#pdf-popover input[type="radio"] {
margin-left: 10px;
}
#pdf-popover .close {
background: #b15818;
color: #FFFFFF;
cursor: pointer;
height: 35px;
font-size: 16px;
font-weight: bold;
line-height: 26px;
position: absolute;
right: 3px;
text-align: center;
top: 3px;
width: 25px;
z-index: 1;
}
#pdf-popover .button {
background-color: #b15818;
border: 0;
color: #fff;
cursor: pointer;
font-family: Helvetica, Arial, sans-serif;
margin-left: 10px;
padding: 8px 10px;
text-transform: uppercase;
}
x
Print Options
Page size
Letter
3x5
4x6
Text Size
Small
Medium
Large
Content
Include description
Include prep time, etc.
Show image
Recipe
Mixed Berry Scones
Prep Time: 15 Minutes
Cook Time: 20 Minutes
Difficulty: Easy
Servings: 16
 Print Recipe
Ingredients
3 cups Flour1/3 cup Sugar3 teaspoons Baking Powder1/4 teaspoon Salt2 sticks Cold Butter, Cut Into Pieces1 cup Heavy Cream1/4 cup Milk1 whole Egg1 teaspoon Vanilla2 Tablespoons Strawberry Preserves2 drops Red Food Coloring (optional)1/2 cup Chopped Strawberries1/2 cup Blueberries4 Tablespoons Butter, Melted4 cups Powdered Sugar, Sifted1/4 cup Milk, More If Needed For Thinning Preparation Instructions
Preheat the oven to 350 degrees.
Combine the flour, sugar, baking powder, and salt in a large bowl. Add the butter and use a pastry cutter to cut them together until they resemble coarse crumbs.
In a pitcher, mix together the cream, milk, egg, vanilla, strawberry preserves, and red food coloring.
Pour the wet ingredients into the dry ingredients and mix them together until they're halfway combined. Add 3/4 of the berries and stir until mixed. Add the remaining berries and stir until everything is combined.
Turn out the dough onto a floured surface and press it into a rectangle that's about 16 inches tall by about 6 inches wide. Using a floured pizza cutter or knife, cut it in half from top to bottom, then make 3 to 4 cuts across. Cut each square into two triangles. Transfer the scones to a baking sheet lined with a baking mat. Bake for 20 minutes or until done. Remove to a cooling rack and allow them to cool completely.
To make the glaze, whisk together the melted butter, powdered sugar, and milk until smooth and somewhat thick. Place the racks of scones over baking sheets to catch the excess, then use a spoon to drizzle the glaze all over the scones. Allow the glaze to set before serving.
Posted by Ree | The Pioneer Woman on

June 25, 2015
Alex’s Favorite Foods
 Today’s my oldest child Alex’s eighteenth birthday, and starting here in a little bit, the day will be all about her!
Just after she helps her dad haul some hay. Ha.
Alex loves food. She is my child in that regard. So in honor of her birthday, I thought it would be fun to share some of her very favorite things to eat.
 Homemade Chicken and Noodles. Pure, hearty comfort food and Alex just loves it.
 Fried Mozzarella! She loves it whether I make it or Sonic makes it. One of her faves!
 Simple Sesame Noodles. These simple little noodles are so flavorful and so, so easy to make. Eat ‘em as they are or add chicken, beef, or shrimp.
 Pasta with Tomato Cream Sauce. Alex is very much like her mother in that she a) loves pasta and b) loves pasta. And this one is probably both of our favorites.
 Devil Dogs! Anything chocolate is just great with Alex, and these beautiful babies are soooooo good.
 Mmmmm. Shrimp Scampi! Contains all the good things in life.
 Chocolate Chip Caramel Ice Cream Sundae! We had this for her birthday a couple of years ago, and the mere memory has gotten her through some really hard times. Ha.
 Edna Mae’s Sour Cream Pancakes. A lifelong favorite! It will be her go-to pancake recipe for life.
 Cream Cheese Wontons. She loves ‘em!
 Orange Chicken! Ta die fer.
 And finally…mac and cheese of any kind. This shells and cheese is easy and cheesy, but any mac and cheese will do!
Happy Birthday, Alex!

Ree Drummond's Blog

- Ree Drummond's profile
- 2017 followers

