
Ree Drummond's Blog, page 18
June 22, 2015
Lemon Bars
 I love lemon bars, but they often fall by the wayside and get forgotten for months at a time in our house. We’re much more of a chocolate chip cookie/chocolate pie/chocolate sheet cake/chocolate ice cream/chocolate potato chip/chocolate everything household, followed by fruit cobblers and crisps…so I sometimes have to remember to bring lemon bars back into the forefront from time to time. And whenever I do, they always go over well. Translation: They disappear within four minutes.
I’m a little weird about lemon bars, in that I tend not to love them if they’re made mostly of lemon filling with a super thin crust at the bottom. So these have a thicker cookie-like crust and a not-too-thick layer of filling; if you don’t already have a favorite lemon bar recipe, give these a try and see how you like ‘em!
(And if you don’t like ‘em…please send the leftovers my way.)
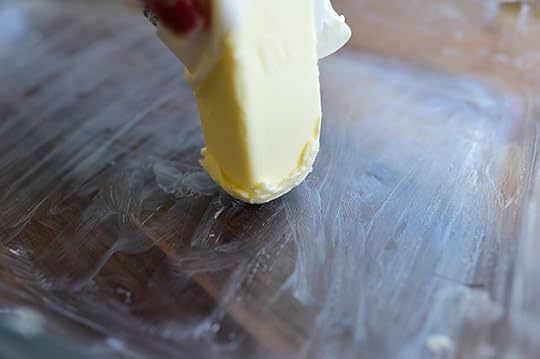 Start by buttering a 9 x 13-inch pan. And when you think you’ve buttered it enough, go ahead and butter it some more!
That’s the kind of mood I’m in this week. Just giving you the heads up.
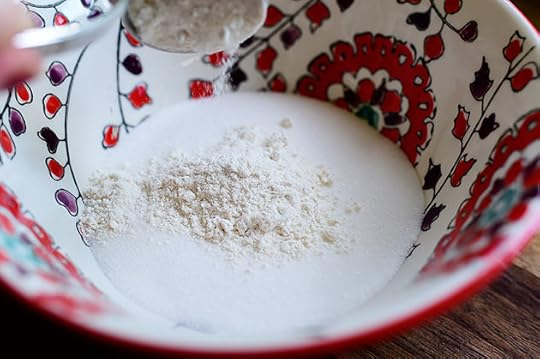
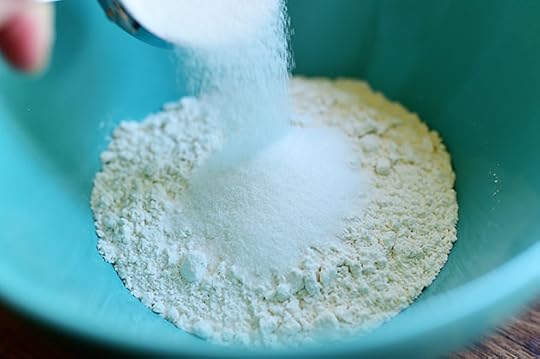 First, make the cookie-licious base for the lemon bars: Combine flour and sugar in a bowl…
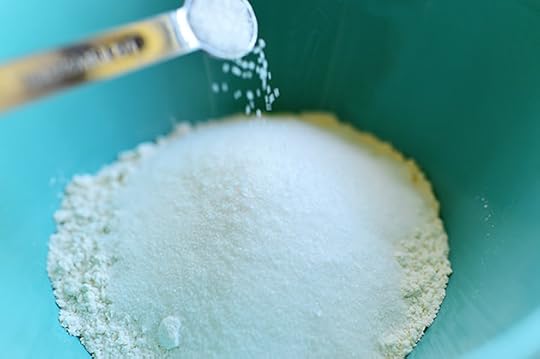 Along with a little salt…
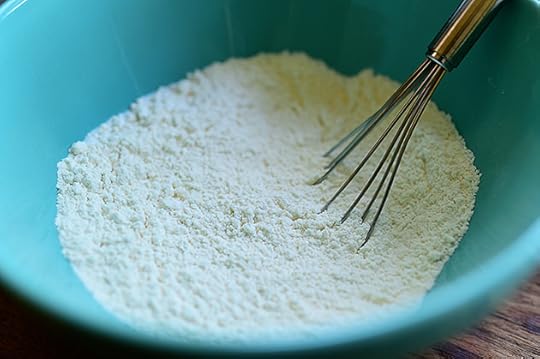 Then whisk it together.
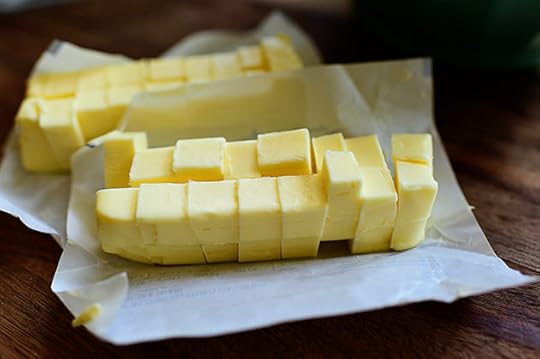 Hello, my darling butter! How was your weekend?
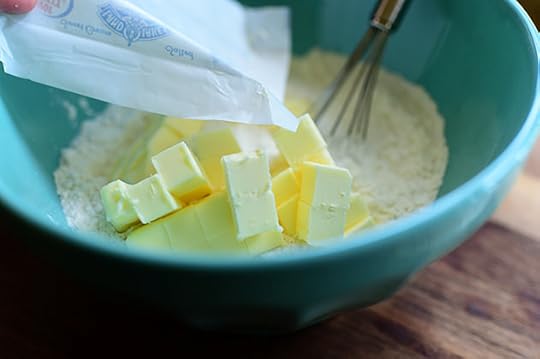 Cut the butter into cubes and angrily throw it into the bowl with the dry ingredients. Make sure the butter is cold!
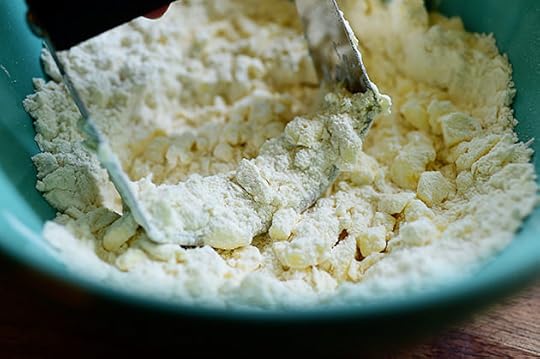 Use a pastry cutter to cut the butter into the dry ingredients…
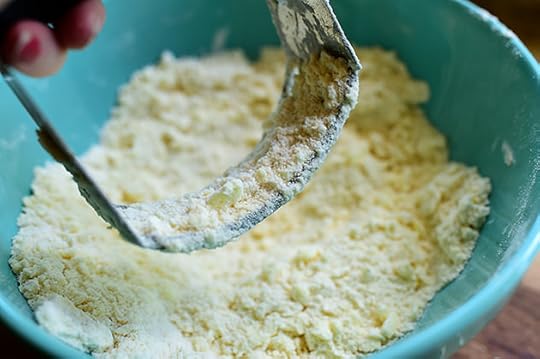 Until the mixture resembles lumpy sand.
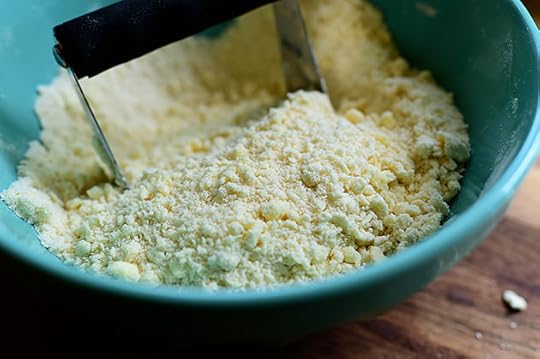 I’m tired of saying “coarse crumbs” to describe the state of the butter/flour mixture after it’s been cut together. So today I’m branching out into new descriptive territory and saying “lumpy sand.”
Next week, who knows? I might be back to “coarse crumbs” again.
Or I might be somewhere like “crumbled madness.”
Time will only tell.
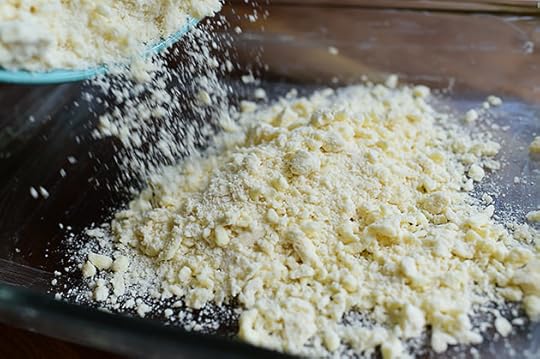 Pour the crumbled madness (oooops! It happened already!) into the buttered dish…
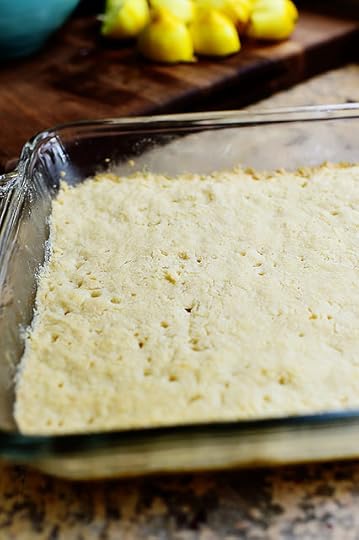
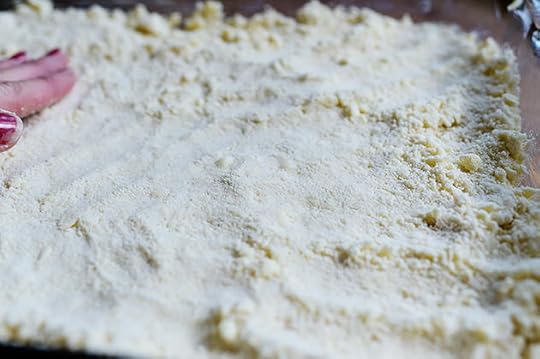 Then use your (very clean!) hands to pat it firmly into the bottom of the pan.
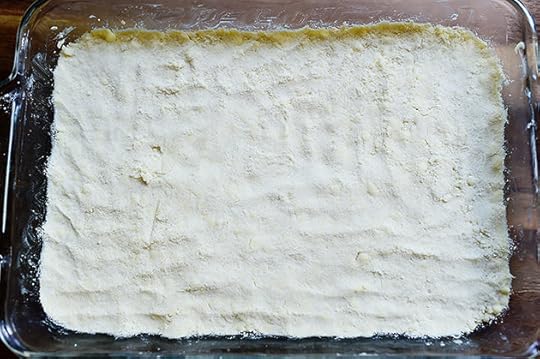 Press along the edges, too, so it’s all evenly packed. Then pop it in a 350 degree oven for 20 minutes to set it slightly—it will get slightly golden around the edges.
 While it’s in the oven, mix up the filling! Whisk together sugar with a little flour…
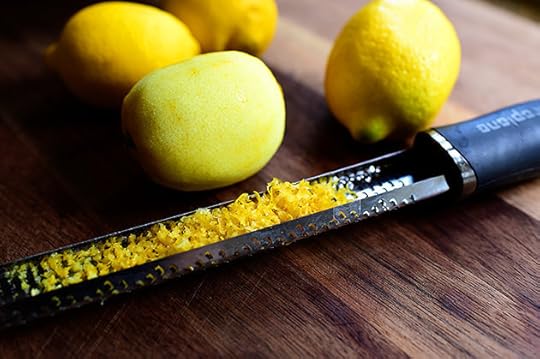 Then zest four small-ish lemons…
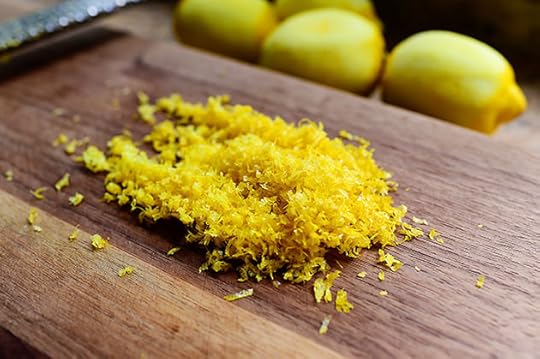 Until you have a nice big pile of the good stuff.
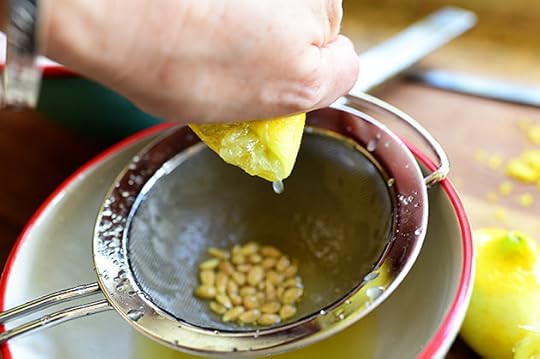 Slice the zested (they always look nekkid to me) lemons in half and squeeze the ever-loving life (I mean juice) out of them.
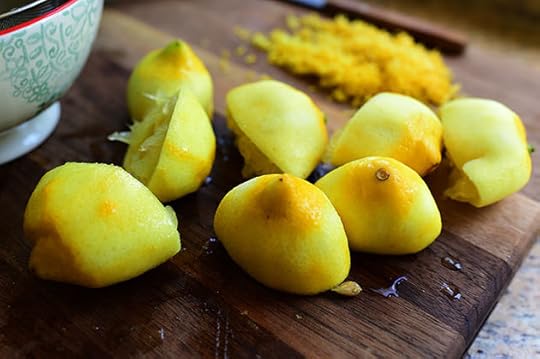 This gives you some idea about the size of lemons. The reason I mention it is that I never remember to measure the lemon juice so I can tell you an actual cup measurement…but if you stick to small/medium lemons, 4 is a good number. Also, I press/roll the lemons on the countertop before I slice them in half, just to make sure I get most of the juice outta there.
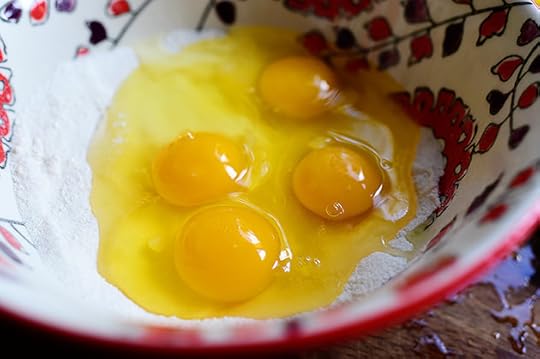 Crack the eggs into the bowl with the sugar/flour mixture…
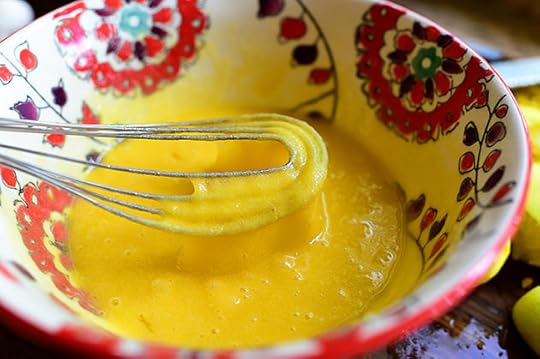 Then whisk it together until it’s all combined.
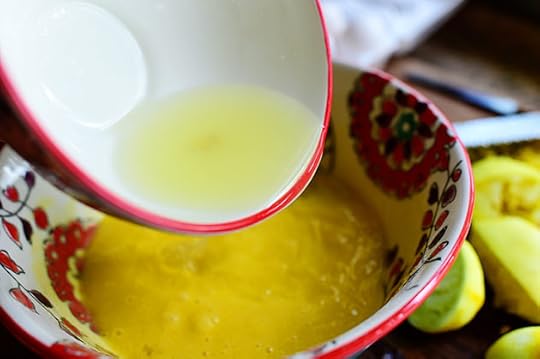 Pour in the juice…
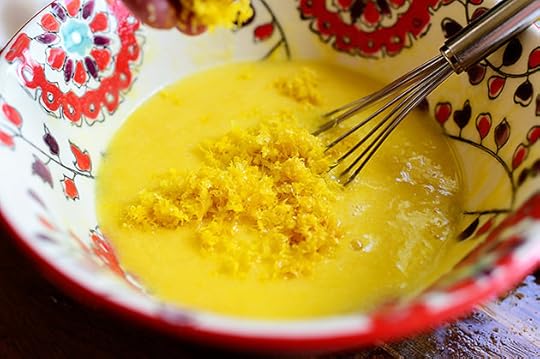 Then violently throw in the zest!
 Whisk it together…and that’s the filling.
 By now, the base is out of the oven and I want to cut a square of it, top it with a little strawberry preserves, and eat it as a snack, which has absolutely nothing to do with this dessert. I’m just telling you where my mind goes sometimes.
I mean all the time.
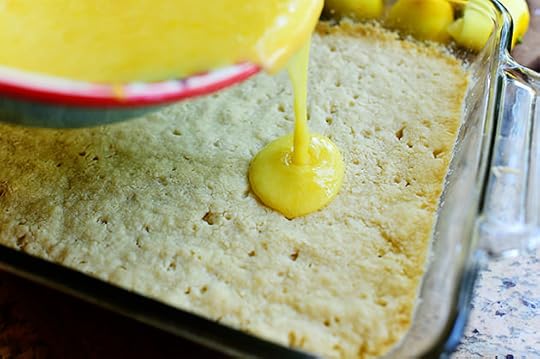 Pour the filling…
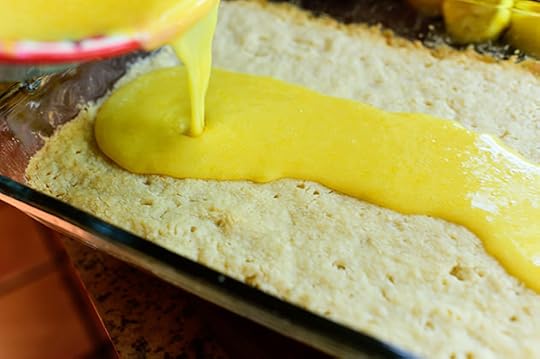 All over the crust…
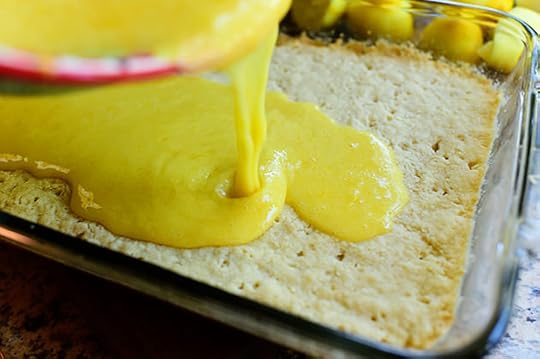 Until it’s totally…
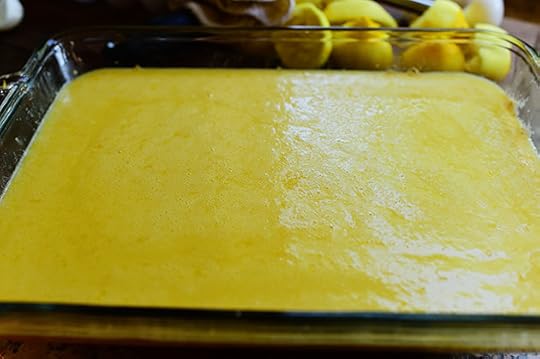 Covering the whole thing. Then put it back into the oven for about 18 to 20 more minutes, until the filling is set.
Now, I have a confession to make. Two, actually.
The first confession is that I forgot to take a photo of the pan when it first came out of the oven.
 The second confession is that the reason I forgot to take the photo is that I was too busy cutting a square out of the warm pan and enjoying a snack rooted in impatience to remember to take the photo.
 I’m just being honest here.
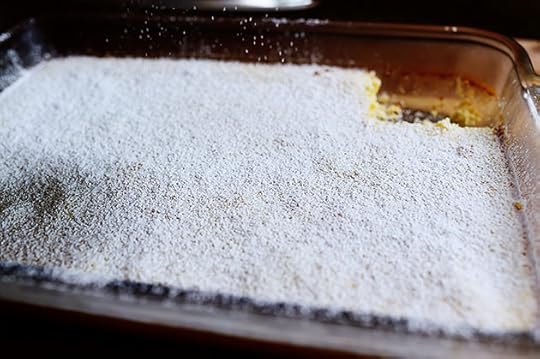
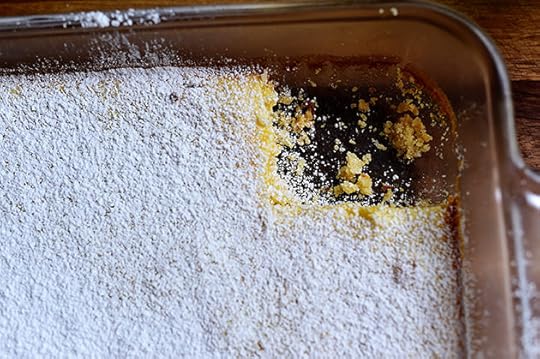
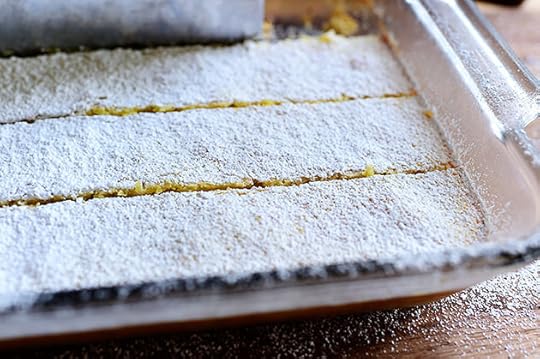 In any event, I let the pan cool slightly, then put it in the fridge for a good 2 hours to let the lemon bars set and chill. Then I sifted powdered sugar liberally over the surface of the bars, then sliced them into neat squares, using none other than…
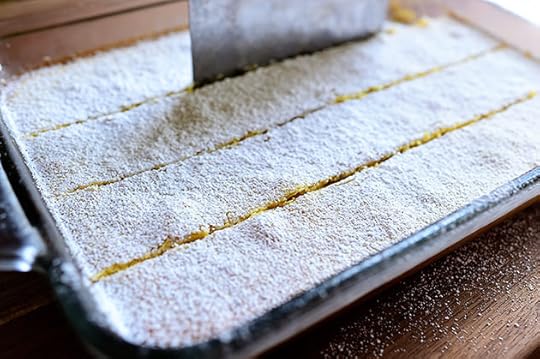 A bench scraper!
A knife works fine too, though.
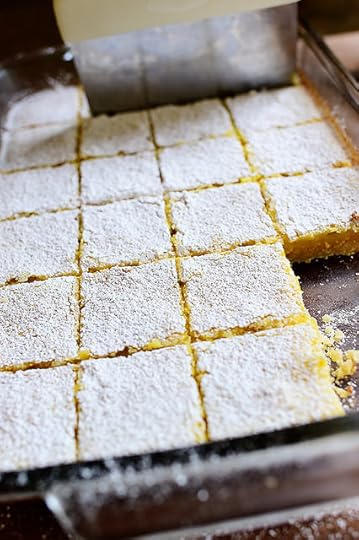 These are nice and sweet and a little rich in a tangy, lemony sense…so I keep the squares sort of medium-sized.
 Yummy! Lemon bars!
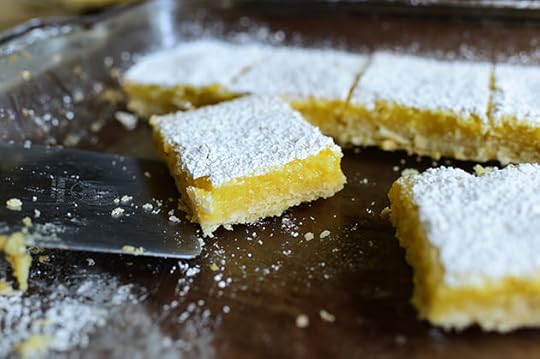
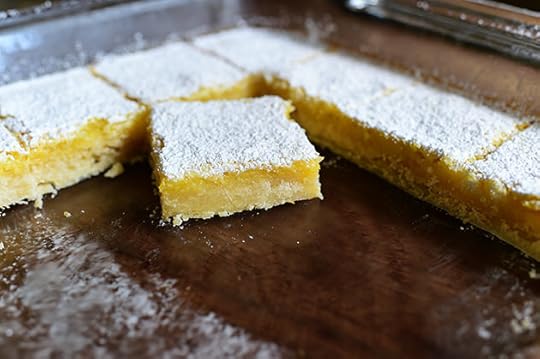 Mmmm. This is just how I like ‘em. Nice, substantial crust, just enough filling…perfect for summer!
Here’s the handy dandy printable.
.recipe-actions {
position: relative;
z-index: 2;
}
#pdf-popover {
background: rgba(255,255,255,.9);
border: 1px solid #efeeed;
color: #6e5c3a;
display: none;
font-family: Helvetica, Arial, sans-serif;
right: 20px;
margin: 2px;
padding: 54px 20px 7px 10px;
position: absolute;
top: 0;
width: 380px;
z-index: 10;
}
#pdf-popover form {
margin: 0;
}
#pdf-popover h4 {
background: #b15818;
color: #fff;
font-family: Helvetica, Arial, sans-serif;
font-size: 20px;
font-weight: normal;
left: 3px;
margin: 0;
position: absolute;
padding: 6px 12px;
right: 3px;
top: 3px;
}
#pdf-popover legend {
font-family: Helvetica, Arial, sans-serif;
font-size: 120%;
font-weight: bold;
margin-bottom: 2px;
margin-left: 10px;
text-transform: uppercase;
}
#pdf-popover fieldset {
margin-bottom: 15px;
}
#pdf-popover input[type="checkbox"] {
height: 14px;
margin: 2px 0 10px 10px;
padding-left: 14px;
position: relative;
visibility: visible;
width: 14px;
}
#pdf-popover input[type="checkbox"],
#pdf-popover input[type="radio"] {
margin-left: 10px;
}
#pdf-popover .close {
background: #b15818;
color: #FFFFFF;
cursor: pointer;
height: 35px;
font-size: 16px;
font-weight: bold;
line-height: 26px;
position: absolute;
right: 3px;
text-align: center;
top: 3px;
width: 25px;
z-index: 1;
}
#pdf-popover .button {
background-color: #b15818;
border: 0;
color: #fff;
cursor: pointer;
font-family: Helvetica, Arial, sans-serif;
margin-left: 10px;
padding: 8px 10px;
text-transform: uppercase;
}
x
Print Options
Page size
Letter
3x5
4x6
Text Size
Small
Medium
Large
Content
Include description
Include prep time, etc.
Show image
Recipe
Lemon Bars
Prep Time: 15 Minutes
Cook Time: 40 Minutes
Difficulty: Easy
Servings: 20
 Print Recipe
Ingredients
2 cups Flour1/2 cup Sugar1/4 teaspoon Salt2 sticks (1 Cup) Salted Butter, Cut Into Small Cubes Filling1-1/2 cup Sugar1/4 cup Flour4 whole Large Eggs Zest And Juice Of 4 Medium-sized Lemons Powdered Sugar, For Sifting Preparation Instructions
For the crust: Preheat the oven to 350 degrees F. Grease a 9-by-13-inch pan with butter.
Stir together the flour, sugar, and salt. Add the butter to the bowl and use a pastry cutter to cut it all together until the mixture resembles fine crumbs. Press into the prepared pan and bake until golden around the edges, about 20 minutes.
For the filling: Stir together the sugar and flour. Crack in the eggs and whisk to combine. Add the lemon zest and juice and mix until combined. Pour over the crust and bake about 20 minutes.
Allow to cool in the fridge for a minimum of 2 hours, then sift powdered sugar over the top before cutting into squares.
(Use an 8 x 10 pan if you'd like the layers to be a little thicker.)
Posted by Ree | The Pioneer Woman on


June 15, 2015
Freddy’s Burgers
 My family loves—I mean loves—Freddy’s Frozen Custard and Steakburgers, otherwise known as “Freddy’s.” A location opened about an hour from the ranch a couple of years ago, and whenever we’re passing through for a soccer game or a grocery trip, it’s a treat to be able to stop and chow down on what is exceptionally delicious fast food.
One of Freddy’s specialties is what they call a Steakburger, which is nothing more than a double cheeseburger…but it’s the way it’s prepared that sets it apart from the rest. And while I can’t exactly duplicate Freddy’s magic at home, since we can’t run out to Freddy’s every time we get a hankerin’, I sure do my best.
Here’s how to make a Freddy’s burger!
 Grab a little bit of ground beef—I’d say 1/4 cup or so—and roll it onto a ball. Place it on a hot skillet or griddle…
 And then, I don’t know how else to say this: You have to smash it flat. If you have a super heavy spatula and great upper body strength you can do it that way, but I grab a large 2-cup measure (or you can just use a large coffee mug) and use it to push the spatula against the beef and flatten the heck out of it. Be careful when you do this that your hand doesn’t get close enough to the cooking surface to get burned.
 You need two of these small, very thin patties per burger. For that reason, it’s hard to make a whole bunch of these at once unless you have a huge griddle or get lots of pans going at once!
But they’re totally worth it.
 Sprinkle them with salt, let them cook over medium high to high heat for just a minute or two, until they’re nice and brown. Then flip them BOTH over.
 About 45 seconds to 1 minute later, lay a piece of cheese on ONE of the patties (I usually choose the one that’s slightly larger if they’re slightly uneven)…
 Then place the second patty right on top. Because they’re so thin, they should be cooked through at this point.
 Within 20 to 30 seconds, this is what’s happening. The patties are so hot that the cheese melts almost instantly.
Oh, and about the cheese: Please use American. Please? It’s the patriotic thing to do.
 Without draining it on paper towels or otherwise pretending to increase the health factor of this burger, place it right on a hamburger bun.
Oh, and about the hamburger buns: Please use the smallest, softest, most mass produced buns you can find. No Kaiser rolls, no artisan sourdough rolls, no ciabatta rolls. It’s the patriotic thing to do.
Another thing about the buns: Freddy’s grills theirs with butter, which undoubtedly contributes to the scrumptiousness. Since the burgers are so, so quick, though, I usually just pull mine right out of the package. Still delicious!
 Then pop on the lid and serve it with ketchup, mustard, pickles, jalapeno slices, tomato slices, onion slices…whatever makes your skirt fly up!
 This is truly a delightful little burger. I can’t make enough of them lately.
 Just ask my kids!
 Oh! And pssst. Serve these with the burgers. You’ll be glad you did.
Here’s the handy dandy printable!
.recipe-actions {
position: relative;
z-index: 2;
}
#pdf-popover {
background: rgba(255,255,255,.9);
border: 1px solid #efeeed;
color: #6e5c3a;
display: none;
font-family: Helvetica, Arial, sans-serif;
right: 20px;
margin: 2px;
padding: 54px 20px 7px 10px;
position: absolute;
top: 0;
width: 380px;
z-index: 10;
}
#pdf-popover form {
margin: 0;
}
#pdf-popover h4 {
background: #b15818;
color: #fff;
font-family: Helvetica, Arial, sans-serif;
font-size: 20px;
font-weight: normal;
left: 3px;
margin: 0;
position: absolute;
padding: 6px 12px;
right: 3px;
top: 3px;
}
#pdf-popover legend {
font-family: Helvetica, Arial, sans-serif;
font-size: 120%;
font-weight: bold;
margin-bottom: 2px;
margin-left: 10px;
text-transform: uppercase;
}
#pdf-popover fieldset {
margin-bottom: 15px;
}
#pdf-popover input[type="checkbox"] {
height: 14px;
margin: 2px 0 10px 10px;
padding-left: 14px;
position: relative;
visibility: visible;
width: 14px;
}
#pdf-popover input[type="checkbox"],
#pdf-popover input[type="radio"] {
margin-left: 10px;
}
#pdf-popover .close {
background: #b15818;
color: #FFFFFF;
cursor: pointer;
height: 35px;
font-size: 16px;
font-weight: bold;
line-height: 26px;
position: absolute;
right: 3px;
text-align: center;
top: 3px;
width: 25px;
z-index: 1;
}
#pdf-popover .button {
background-color: #b15818;
border: 0;
color: #fff;
cursor: pointer;
font-family: Helvetica, Arial, sans-serif;
margin-left: 10px;
padding: 8px 10px;
text-transform: uppercase;
}
x
Print Options
Page size
Letter
3x5
4x6
Text Size
Small
Medium
Large
Content
Include description
Include prep time, etc.
Show image
Recipe
Freddy’s Burgers
Prep Time: 1Minute
Cook Time: 4 Minutes
Difficulty: Easy
Servings: 1
 Print Recipe
Ingredients
4 ounces, weight Ground Beef (roughly) Salt To Taste1 slice American Cheese1 whole Hamburger Bun (small, Standard Size) Preparation Instructions
Heat a griddle over medium-high to high heat. Divide beef in half and roll into rough balls. One at a time, place the beef on the griddle. Place a large (non-slotted) spatula on top and use a coffee mug or large measuring cup to push the spatula and smash the patty very flat. Repeat with the other patty.
Cook them for 1 to 2 minutes, or until they're nice and brown on the first side. Flip them over, wait 45 seconds, the place the slice of cheese on one of the patties. Place the other patty on top of the cheese, give it 15 to 20 seconds to melt, then place directly on the bun.
Serve with ketchup, pickles, mustard, mayo, jalapeno slices, etc.
Posted by Ree | The Pioneer Woman on

June 8, 2015
Marinara Sauce
 I think marinara sauce is one of life’s simple pleasures, and there’s nothing complicated about making your own pot of the stuff. The only thing it requires is a pot, a few ingredients, and a healthy dose of patience; the longer it simmers, the better it is!
Here’s how I made it yesterday. T’was splendid.
 You need chopped onions. A bunch of ‘em.
 Then smash some garlic cloves…
 Pop out the garlic…
 And mince it up!
 Now, carrots are totally an optional ingredient in marinara, but I love them because they add color, texture, and flavor, and since I was the boss of this particular pot of marinara, I decided to add them. Just peel a couple and dice them really fine.
 Crack open a couple of large cans of whole tomatoes…
 Pour them into a bowl…
 Then, one by one, use your very clean hands to squish them to release all the juices and to make sure they’re totally smushed up. Note that it is a literal impossibility to take an attractive picture of your hand squishing a whole tomato if you are over the age of 45, or if you had a wart burned off your upper thumb when you were a young girl and now boast a curious round scar in its place.
So I’ve got two strikes against me there.
 Keep squishing and smushing until the tomatoes are all broken up. Beware that the juice will squirt everywhere, so squeeze gently.
Oh, and you can totally do this over the pot, but it’s nice to do it ahead of time so everything’s ready.
 Now, warm a pot over medium heat and pour in some olive oil.
 Throw in the onions, carrots, and garlic…
 And cook them around until they’re starting to get soft, about 4 to 5 minutes.
 Pour in the tomaters, juice and all…
 And stir it to combine.
Note: If you’d like to have a slightly deeper, saucier sauce, you can add 2 to 3 tablespoons of tomato paste at this stage.
 Herb-wise, I decided to add oregano, but you can add basil, thyme, or whatever floats your boat.
 Just chop it really fine…
 And throw it in. Just keep in mind that the sauce is going to cook for a long time, so whatever herbs you add at this stage will turn brown…so the smaller you chop them up, the better!
 Stir in the herbs, then add salt, pepper, and sugar. Reduce the heat to low and allow it to simmer for 1 1/2 to 2 hours.
 This is about 30 minutes in. Notice the level of the sauce in the pan.
 This is 1 1/2 hours in. It has cooked down quite a bit, which means the flavors have gotten deeper and richer and more glorious and more miraculous.
It also means you need to keep this in mind when planning your quantity of sauce. Since it cooks down quite a bit, if you need to feed a whole buncha people, you might go ahead and double these amounts, which can very easily be done.
 Oh, and around this time I threw in the spaghetti! I was in the mood for long, unwieldy noodles yesterday.
 I like to throw in a pop of green at the end, so I minced up some parsley…
 And threw it in.
 Now, you can just spoon some of the sauce over the pasta and serve it up…
 But I like to put some sauce and pasta into a bowl…
 And toss it around to coat it a bit first.
 That way, when you put the pasta on the plate, it’s got a nice coating of the marinara flavors.
 Then spoon on the sauce!
 Be generous! Be saucy!
 Oh, and Parmesan is a must.
 Serve it like this…
Or with a little sprinkling of parsley to make it purty.
 There are few things I love more than this.
 Enjoy every bite!
Here’s the handy dandy printable.
.recipe-actions {
position: relative;
z-index: 2;
}
#pdf-popover {
background: rgba(255,255,255,.9);
border: 1px solid #efeeed;
color: #6e5c3a;
display: none;
font-family: Helvetica, Arial, sans-serif;
right: 20px;
margin: 2px;
padding: 54px 20px 7px 10px;
position: absolute;
top: 0;
width: 380px;
z-index: 10;
}
#pdf-popover form {
margin: 0;
}
#pdf-popover h4 {
background: #b15818;
color: #fff;
font-family: Helvetica, Arial, sans-serif;
font-size: 20px;
font-weight: normal;
left: 3px;
margin: 0;
position: absolute;
padding: 6px 12px;
right: 3px;
top: 3px;
}
#pdf-popover legend {
font-family: Helvetica, Arial, sans-serif;
font-size: 120%;
font-weight: bold;
margin-bottom: 2px;
margin-left: 10px;
text-transform: uppercase;
}
#pdf-popover fieldset {
margin-bottom: 15px;
}
#pdf-popover input[type="checkbox"] {
height: 14px;
margin: 2px 0 10px 10px;
padding-left: 14px;
position: relative;
visibility: visible;
width: 14px;
}
#pdf-popover input[type="checkbox"],
#pdf-popover input[type="radio"] {
margin-left: 10px;
}
#pdf-popover .close {
background: #b15818;
color: #FFFFFF;
cursor: pointer;
height: 35px;
font-size: 16px;
font-weight: bold;
line-height: 26px;
position: absolute;
right: 3px;
text-align: center;
top: 3px;
width: 25px;
z-index: 1;
}
#pdf-popover .button {
background-color: #b15818;
border: 0;
color: #fff;
cursor: pointer;
font-family: Helvetica, Arial, sans-serif;
margin-left: 10px;
padding: 8px 10px;
text-transform: uppercase;
}
x
Print Options
Page size
Letter
3x5
4x6
Text Size
Small
Medium
Large
Content
Include description
Include prep time, etc.
Show image
Recipe
Marinara Sauce
Prep Time: 10 Minutes
Cook Time: 1 Hour30 Minutes
Difficulty: Easy
Servings: 6
 Print Recipe
Ingredients
1/4 cup Olive Oil1 whole Yellow Or White Onion, Diced5 cloves Garlic, Minced2 whole Large Carrots, Peeled And Finely Diced2 cans (28 Ounces Each) Whole Tomatoes1/2 teaspoon Salt1/2 teaspoon Black Pepper2 teaspoons Sugar (more To Taste)2 Tablespoons Minced Fresh Oregano (optional; Use Whatever Dried Or Fresh Herbs You Like)2 Tablespoons Minced Fresh Parsley, Plus More For Serving Cooked Pasta, For Serving Fresh Parmesan Cheese, For Serving3 Tablespoons Tomato Paste (optional) Preparation Instructions
In a medium pot, heat the olive oil over medium heat. Add the onions, garlic, and carrots and cook for 4 to 5 minutes, stirring occasionally.
Pour the tomatoes and juice in a large bowl and use your hands to gently squish/smush the tomatoes so that the juices are released and they are all broken up. Add the contents of the bowl to the pot and stir. Add the salt, pepper, sugar, and oregano (or other dried or fresh herbs). Reduce the heat to low and simmer, uncovered, for 1 1/2 hours, stirring occasionally.
Add minced fresh parsley at the end and taste/adjust the sauce for seasonings.
Toss with pasta, then serve on top of the pasta with Parmesan and more parsley (or fresh basil if you have it!)
(Note: If you like a slightly deeper flavor, add the optional tomato paste when you add the tomatoes.)
Posted by Ree | The Pioneer Woman on

June 1, 2015
Crunchy French Toast
 I just have one word to describe this French toast: Oh my.
And okay, that was two words. But that’s how good this French toast is. It causes me to lose complete track of how many words I’m using. It also causes me to stop what I’m doing and reflect on each and every bite of what I’m eating, which is the crispiest, crunchiest, most delightful French toast known to mankind.
You have got to try this soon, soon, soon! And that means now.
 Crack some eggs into a dish…
 With some half and half, or milk if you’re more sensible than me.
But please use half-and-half.
 Violently whisk it together…
 Then splash in a little vanilla. This will impact your life in a very positive way.
Never, ever, ever make French toast, pancakes, or waffles without vanilla.
 Speaking of impacting your life in a very positive way, a little sugar would also be good at this stage.
Let me take this opportunity to alert you that one slice of this French toast is plenty for one person. My goodness gracious, is it ever tasty.
 Finally, add a little cinnamon…
 And violently whisk it together once more. Set this aside.
 In a separate dish, make the crunchy coating! I reached for the Panko breadcrumbs, even though I almost always use them in savory settings (mac and cheese topping, fried mozzarella coating, chicken cutlet breading, and so on). Pour about a cup into the dish…
 And (yes) add some sugar…
 And cinnamon…
 And mix it together until everything is totally combined.
 And if that wasn’t enough, drizzle in a little melted butter…
 And stir it into the crumbs with a fork, mushing and mixing until all the crumbs are lightly coated in the butter.
 Now, thank goodness, it’s time to make the toast! I’m using good ol’ American supermarket-style soft mushy mass produced whole wheat sandwich bread to prove that crusty, artisan bread is absolutely not necessary when making delectable French toast.
I’m also using it because that’s all I had.
 Quickly throw the bread into the egg mixture, turning it over to coat.
 Lift it out, letting the excess drip off…
 Then immediately set it in the dish with the sweetened, flavored panko crumbs, pressing very lightly to encourage the crumbs to adhere to the first side.
 Turn it over and press to coat the other side…
 And set it on a plate while you do the rest. Keep going until you run out of bread or egg mixture or crumb coating…whichever comes first!
 Now. Sometimes when I post recipes here, I list steps that are optional. Please note: *This is not one of those times.* Melt a generous amount of butter in a (preferably nonstick) skillet. And that’s an order.
And when I say “generous amount,” I don’t mean a tablespoon. I mean several tablespoons—enough that the butter will swirl around and move in the pan a bit. And that’s because you need enough butter in the skillet to really bubble up and sizzle around the crumb coating; if the skillet’s too dry, the crumbs won’t be able to live the life they were born to live.
 Place the French toast in the skillet and cook it over medium-low heat for about 4 to 6 minutes, watching like a hawk the whole time. If the crumb coating seems to be browning too fast, reduce the heat a bit. You want to give the inside of the French toast time to cook and set a bit before the crumbs get too brown, so it’s a bit of a balancing act!
 Flip them over when the crunchy coating is deep golden and crisp (but not burned!) and let the toast cook for 3 or so minutes on the other side. (Add more butter to the pan if it gets too dry.)
 To serve, put a pat of butter on top along with some strawberry slices.
 How lovely and inviting does this look?
 It’s about to get lovelier and invitinger.
 You know what’s especially delicious about this dang darn ding durn French toast? The edges.
 Holy crunchiness! If I’d had a sleeping baby in the house, this definitely would’ve woken him up!
 (Pssst. How about serving this for dessert with whipped cream and caramel sauce? Okay? Okay.)
Here’s the handy dandy printable, friends! This truly is a treat beyond treats.
.recipe-actions {
position: relative;
z-index: 2;
}
#pdf-popover {
background: rgba(255,255,255,.9);
border: 1px solid #efeeed;
color: #6e5c3a;
display: none;
font-family: Helvetica, Arial, sans-serif;
right: 20px;
margin: 2px;
padding: 54px 20px 7px 10px;
position: absolute;
top: 0;
width: 380px;
z-index: 10;
}
#pdf-popover form {
margin: 0;
}
#pdf-popover h4 {
background: #b15818;
color: #fff;
font-family: Helvetica, Arial, sans-serif;
font-size: 20px;
font-weight: normal;
left: 3px;
margin: 0;
position: absolute;
padding: 6px 12px;
right: 3px;
top: 3px;
}
#pdf-popover legend {
font-family: Helvetica, Arial, sans-serif;
font-size: 120%;
font-weight: bold;
margin-bottom: 2px;
margin-left: 10px;
text-transform: uppercase;
}
#pdf-popover fieldset {
margin-bottom: 15px;
}
#pdf-popover input[type="checkbox"] {
height: 14px;
margin: 2px 0 10px 10px;
padding-left: 14px;
position: relative;
visibility: visible;
width: 14px;
}
#pdf-popover input[type="checkbox"],
#pdf-popover input[type="radio"] {
margin-left: 10px;
}
#pdf-popover .close {
background: #b15818;
color: #FFFFFF;
cursor: pointer;
height: 35px;
font-size: 16px;
font-weight: bold;
line-height: 26px;
position: absolute;
right: 3px;
text-align: center;
top: 3px;
width: 25px;
z-index: 1;
}
#pdf-popover .button {
background-color: #b15818;
border: 0;
color: #fff;
cursor: pointer;
font-family: Helvetica, Arial, sans-serif;
margin-left: 10px;
padding: 8px 10px;
text-transform: uppercase;
}
x
Print Options
Page size
Letter
3x5
4x6
Text Size
Small
Medium
Large
Content
Include description
Include prep time, etc.
Show image
Recipe
Crunchy French Toast
Prep Time: 5 Minutes
Cook Time: 10 Minutes
Difficulty: Easy
Servings: 4
 Print Recipe
Ingredients
3 whole Eggs1/4 cup Half-and-half1 teaspoon Vanilla Extract1/2 teaspoon Ground Cinnamon1/3 cup Sugar4 slices Whole Wheat Bread (or Any Bread)1 cup Panko Breadcrumbs1 stick Salted Butter, Melted Softened Butter And Maple (or Pancake) Syrup, For Serving Preparation Instructions
In a pie pan, whisk together the eggs, half-and-half, half the sugar, and half the cinnamon. Set aside.
In a separate pie pan, stir together the panko breadcrumbs with the rest of the sugar and cinnamon. Use a fork to stir in 2 tablespoons of the butter so that the crumbs are slightly moist. Set aside.
In a large nonstick skillet, heat the rest of the melted butter over medium-low heat.
One by one, dunk the bread in the egg mixture (turning to coat), then lay them in the dish with the panko crumbs, turning them over and pressing them gently so that they stick and totally cover the surface.
Place them into the skillet with the butter and let them cook on the first side for 5 to 6 minutes, watching closely to make sure the crumbs don't burn. (If they start to darken too fast, turn the heat slightly lower and watch.) Turn them over and let them cook for 3 minutes on the other side.
Transfer the pieces to individual plates and serve with butter and syrup. Delicious!
Posted by Ree | The Pioneer Woman on

May 25, 2015
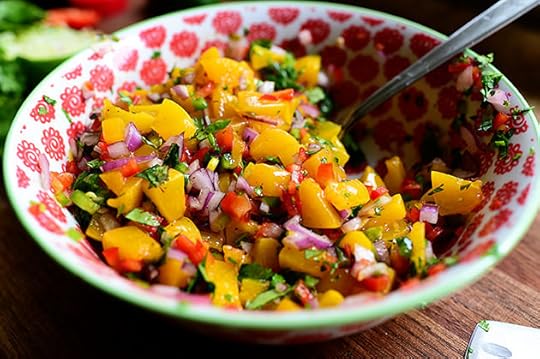
Peach Salsa
 The first time I ever tried peach salsa was in 1993. Don’t ask me how I’m able to remember these things. Honestly, on a scale of 1 to 10 in terms of daily forgetfulness, I would say I rank upwards of 8 or 9. It’s only because I now faithfully use a to-do app on my phone that I am able to function as a normal person, but my natural state is scatterbrained forgetfulness. I do, however, have this very strange area of my brain that hangs onto details in the distant past: Specific things I wore on dates with Marlboro Man, for instance. Every word of every episode of The Brady Bunch. And exactly when and where I ate certain things for the first time.
The peach salsa I ate in 1993 was part of a gift basket my mom had received from a friend for Christmas. It was stuffed with things like chocolates and vacuum-sealed smoked salmon, and there was a jar of peach salsa with a bag of blue corn chips. The salsa was heavenly and sweet and spicy, and it’s really a shame my mom never got to try it because I think I singlehandedly polished it off myself.
Here’s a version that’s close to the original, though you never really can completely recreate the first time you ever try something delicious, can you?
(But trying sure is fun!)
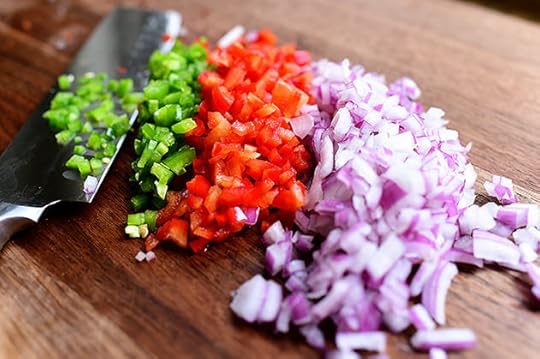
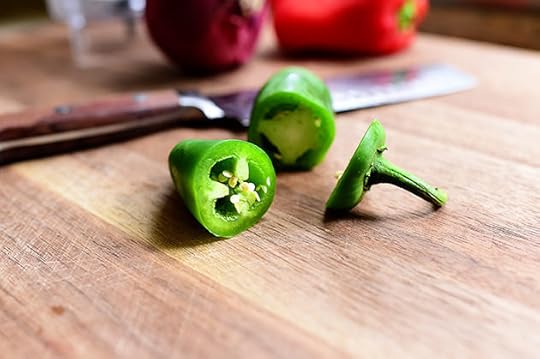 Lop off the top and bottom of a jalapeno and dice it up very fine. Include some seeds/membranes if you want some brow-sweating heat…leave them out if you’d like to keep things more mild.
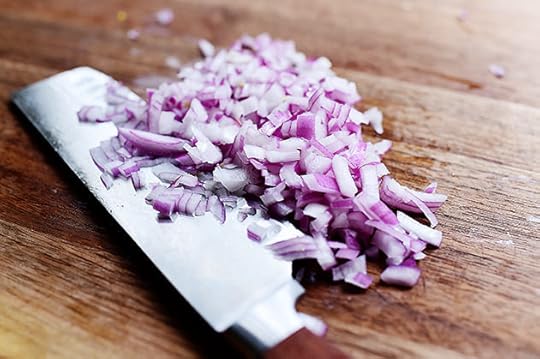 Dice up some onion. I used red onion because the color is so beautimous with the orange peaches…but of course, you could just use yellow or white onions, too.
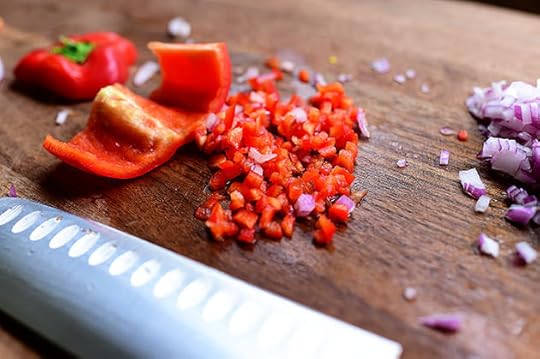 Red bell pepper! Seed and dice it up. I almost used jarred pimentos because I’m open-minded that way…but I had a red bell pepper, so I decided to take a walk on the wild side and live the life I was born to live.
 True confession: When I have made this before, I’ve thrown the jalapeno, onion, and bell pepper into the food processor to get them really pulverized before adding them to the peaches, but GUESS WHAT? I think my food processor was struck by lightning during the storms on Saturday because when I tried to use it to make a graham cracker crust yesterday after church, it was unresponsive.
Dead.
Oh, the humanity!
 Guess what?
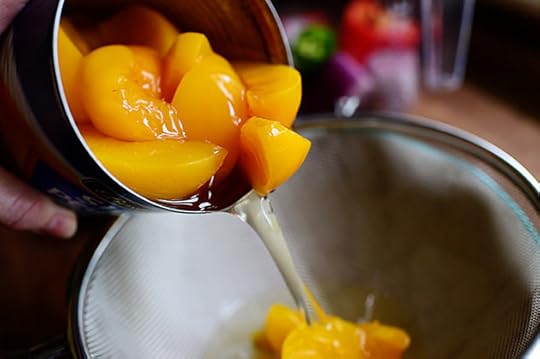
 I’m using canned peaches. Please don’t be mad at me. I have two very good reasons:
1. Peaches are not in season yet.
2. Even if peaches were in season, canned peaches are perfectly permissible when making peach salsa! They’re tender and sweet and make for a lovely consistency.
Amen.
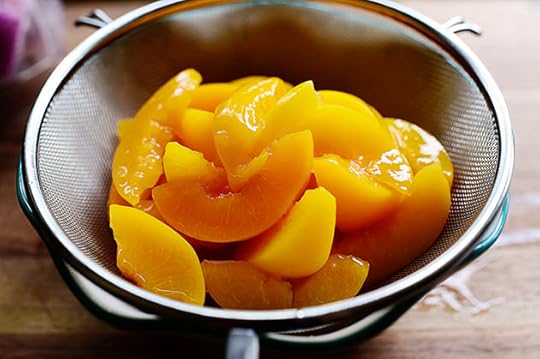
 Drain the peaches, reserving the juice, and grab a few at a time…
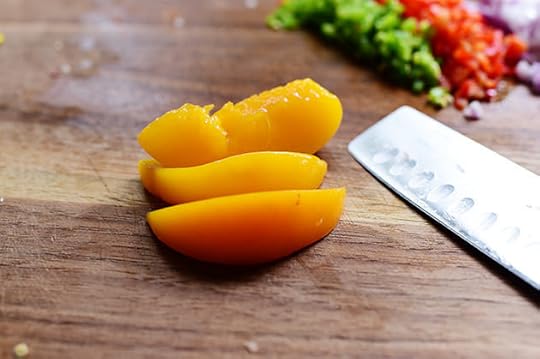
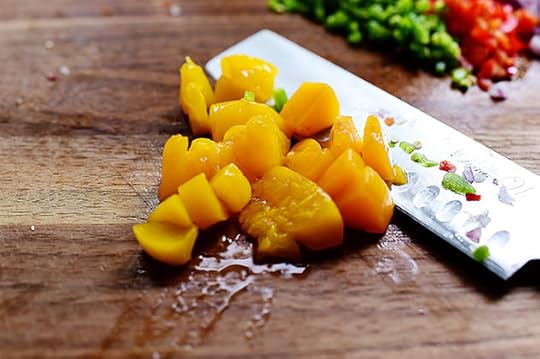 And cut them into small pieces.
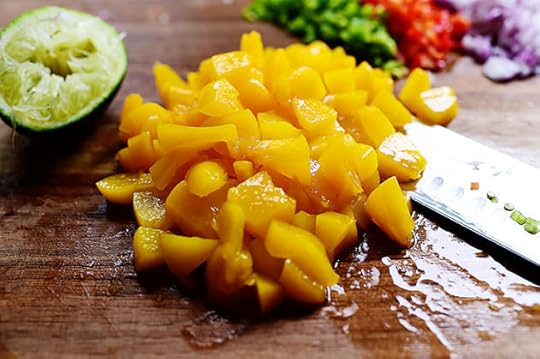 Keep going until you have a pile!
Note: I have also made peach salsa where everything goes into the food processor (well, back in the old days when I had a food processor), but I wouldn’t recommend this method because the peaches are so soft and break up so easily, you lose the beauty of those sweet, juicy bites. I mean bits. I mean bites.
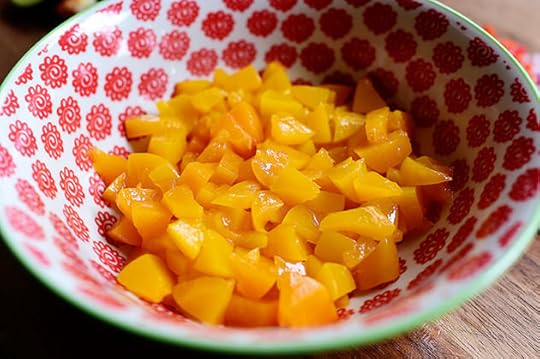 Throw the peaches in a bowl…
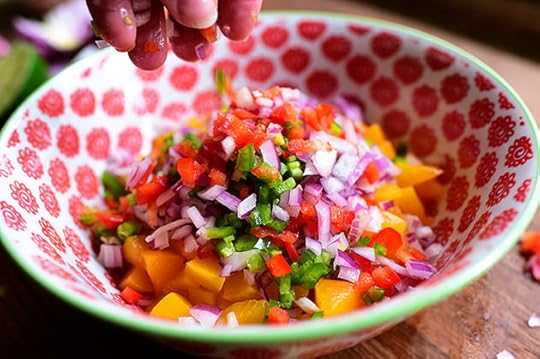 Then toss in the lovely trio of jalapeno, onion, and bell pepper.
 Squeeze in some lime juice (it balances the sweet)…
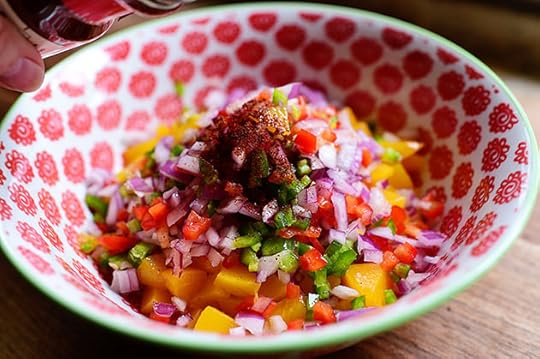 Then, just for kicks (and for a kick), sprinkle in some chili powder! Not much—a little dab will do ya.
Or a sprinkle, in this case.
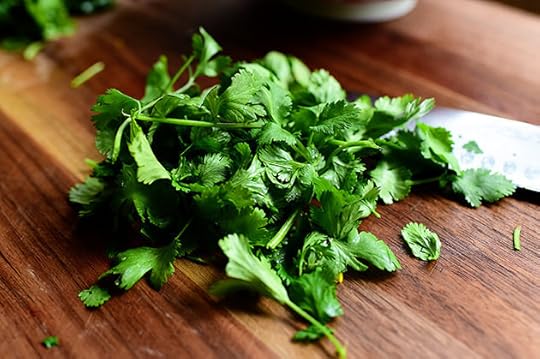 Cilantro makes everything perfect! Grab a handful and chop it up…
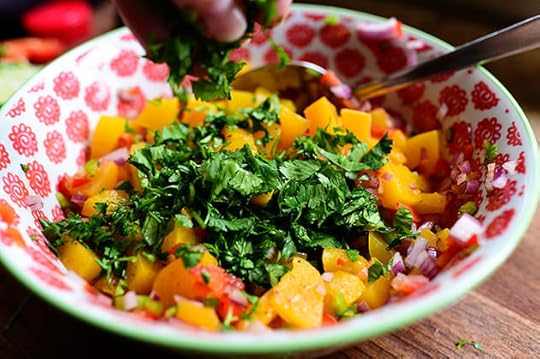 Then sprinkle it in…
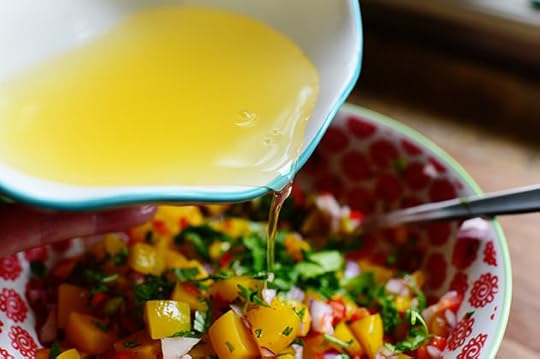 And (this is totally optional) drizzle in a little bit of the reserved juice.
 Stir it to combine, give it a taste…
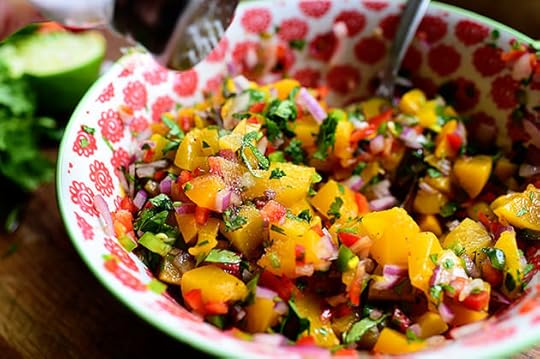 And add a little salt if you think it needs it.
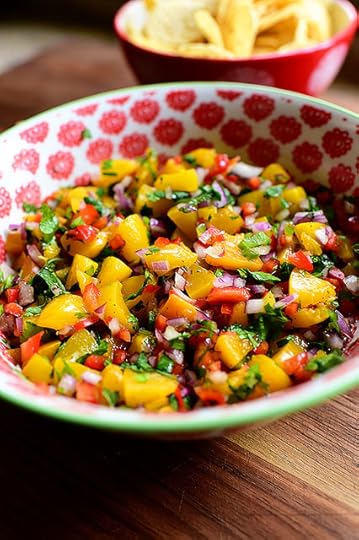 So lovely! Now, the salsa is actually better if you refrigerate it for a bit, so give your kids the bag of tortilla chips and tell them to keep them from you for at least two hours, no matter how hard you beg.
Actually, never mind. That would never work in my house. They’d take the chips and eat them all.
(Boys, I’m talking to you…)
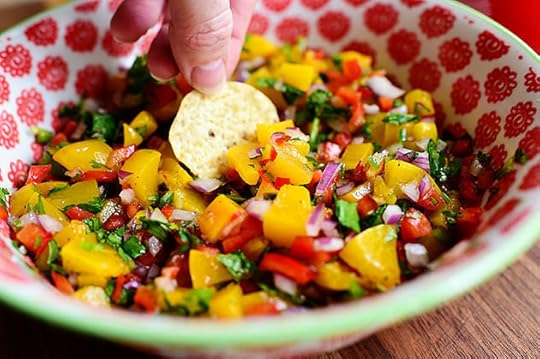 This is so delicious. A sweet and delightful treat, and so delicious with tortilla chips of any kind.
It’s also a great topper for grilled chicken or fish.
It’s also yummy on a big, honkin’ quesadilla.
Here’s the handy dandy printable!
.recipe-actions {
position: relative;
z-index: 2;
}
#pdf-popover {
background: rgba(255,255,255,.9);
border: 1px solid #efeeed;
color: #6e5c3a;
display: none;
font-family: Helvetica, Arial, sans-serif;
right: 20px;
margin: 2px;
padding: 54px 20px 7px 10px;
position: absolute;
top: 0;
width: 380px;
z-index: 10;
}
#pdf-popover form {
margin: 0;
}
#pdf-popover h4 {
background: #b15818;
color: #fff;
font-family: Helvetica, Arial, sans-serif;
font-size: 20px;
font-weight: normal;
left: 3px;
margin: 0;
position: absolute;
padding: 6px 12px;
right: 3px;
top: 3px;
}
#pdf-popover legend {
font-family: Helvetica, Arial, sans-serif;
font-size: 120%;
font-weight: bold;
margin-bottom: 2px;
margin-left: 10px;
text-transform: uppercase;
}
#pdf-popover fieldset {
margin-bottom: 15px;
}
#pdf-popover input[type="checkbox"] {
height: 14px;
margin: 2px 0 10px 10px;
padding-left: 14px;
position: relative;
visibility: visible;
width: 14px;
}
#pdf-popover input[type="checkbox"],
#pdf-popover input[type="radio"] {
margin-left: 10px;
}
#pdf-popover .close {
background: #b15818;
color: #FFFFFF;
cursor: pointer;
height: 35px;
font-size: 16px;
font-weight: bold;
line-height: 26px;
position: absolute;
right: 3px;
text-align: center;
top: 3px;
width: 25px;
z-index: 1;
}
#pdf-popover .button {
background-color: #b15818;
border: 0;
color: #fff;
cursor: pointer;
font-family: Helvetica, Arial, sans-serif;
margin-left: 10px;
padding: 8px 10px;
text-transform: uppercase;
}
x
Print Options
Page size
Letter
3x5
4x6
Text Size
Small
Medium
Large
Content
Include description
Include prep time, etc.
Show image
Recipe
Peach Salsa
Prep Time: 15 Minutes
Cook Time:
Difficulty: Easy
Servings: 6
 Print Recipe
Ingredients
2 cans (28 Ounce) Peaches In Syrup, Drained, Juice Reserved1 whole Medium Red Onion, Diced Very Fine1 whole Red Bell Pepper, Seeded And Diced Very Fine1 whole Jalapeno, Seeded And Minced (include Some Seeds For Spice)1/2 bunch Cilantro, Chopped1/4 teaspoon Chili Powder (more To Taste) Dash Of Salt Preparation Instructions
Chop the peaches into small pieces and throw them into a bowl with all the other ingredients. Stir and add a splash of the reserved juice. Taste and add a little more salt and chili powder if you prefer.
Cover with plastic wrap and refrigerate for at least 1 hour before serving. Serve with tortilla chips!
Posted by Ree | The Pioneer Woman on

May 22, 2015
Memorial Day is Delicious!
I usually share a roundup of Memorial Day-friendly recipes on the Friday before, because Memorial Day is the kickoff for summer holidays.
 Restaurant Style Salsa. Make it by the gallon! Truly the best salsa in the universe.
 Grilled Corn Guacamole. Dangerously addictive.
 Watermelon Pico de Gallo. Serve this with chips or as a salad with grilled chicken!
 Blackberry Margaritas. Time to celebrate summer!
 Homemade Lemonade. Serve it as is or add a strawberry or blackberry puree.
 Barbecue Chicken Legs. So simple because it’s made in the oven, not on the grill.
 Spicy Dr Pepper Ribs. Rib-stickin’, man-pleasin’…and woman pleasin’, too.
 Beef Fajitas. Party!
 BBQ Chicken Sandwiches with Cilantro Slaw. So much flavor!
 Caprese Salad. An eternal favorite of mine.
 Quinoa with Tomato, Basil, and Mozzarella. It will sell you on quinoa forever.
 Spicy Pasta Salad with Smoked Gouda, Tomatoes, and Basil. One bite and you’ll be sold.
 Grilled Zucchini with Lemon Salt. I adore this stuff—it’s lovely.
 Strawberry Sparkle Cake. Takes a little finesse, but the results are so much fun.
 Key Lime (Sorta) Pie…okay, so I don’t use real key limes. It’s still good!
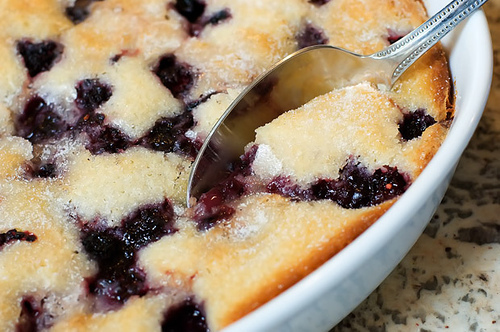 And finally, Blackberry Cobbler. Deliciously simple!
 And speaking of festive and fun, this Deep Dish Fruit Pizza. The original uses storebought sugar cookie dough, but I use homemade. Both are delicious!
Have a safe, happy, scrumptious holiday weekend, everyone!
Love,
Ree

May 18, 2015
Homemade Chicken Nuggets
 Chicken nuggets. What can we say about them? They’re so simple, so ubiquitous, such a steady component in the diet of American kids. And okay—American kids’ parents. And the choices—they’re abundant! From fast food restaurants to big bulk bags in the freezer section of the grocery store, there are countless chicken nuggets to choose from in this great land of ours. But I’ll let you in on a little secret: The best chicken nuggets are ones you make yourself.
For one thing, you can see exactly what’s goin’ in ‘em.
For another thing, you can make as many as you want. No deciding whether you want the 4, 6, or 10 pack!
For another, they’re completely fresh and delicious.
For yet another, there’s a cow in my yard right now.
(That last thing had nothing to do with anything. I just thought I’d share.)
Let’s make these chicken nuggets, baby! They are seriously the best in the west.
 One secret to these chicken nuggets is the size of the chicken pieces: You want them to be small enough to allow the chicken to cook through before the breading gets too dark. So cut the chicken breasts into 1/2 inch strips…
 Then cut them into bite-sized pieces.
 Keep going until you have a pile! Two big chicken breasts will go a long way.
 Once you’ve got the chicken all cut up, make the assembly line for the breading: In one bowl, add some flour and seasoned salt…
 Along with some salt and pepper.
 Stir it together with a fork and set it aside.
 In a separate bowl, crack two eggs…
 Add a little water…
 And whisk them together. Set these aside, too.
 In a third bowl, pour a couple cups of seasoned breadcrumbs. You can use plain ones, too, but I love the seasoned ones because they’re so…well…seasoned!
A note: While I love panko breadcrumbs, they tend to burn before the chicken has a chance to cook. Regular breadcrumbs are definitely the way to go!
 To bread the chicken, grab a few pieces at a time and throw them into the flour.
 Roll them around to dredge them, then shake off the excess.
 Drop them into the egg wash…
 Quickly remove them…
 Then drop them into the breadcrumbs…
 And toss them to coat.
 As you bread the chicken, set them on a plate or baking sheet…
 Then keep going until you’ve got all the chicken breaded.
And hey! Guess what? You can totally flash freeze the breaded chicken, then pop them into a large zipper bag and store them in the freezer for up to six months.
But I’m in the mood for chicken nuggets and I don’t want to wait that long.
Oh…another quick note: This is a completely different breading approach from the one I use for Homemade Chicken Strips, which is more of a traditional fried chicken breading. Both are delicious, but this breadcrumb coating is my favorite for the small, bite-sized nuggets.
Amen.
 Heat some vegetable oil in a large skillet over medium-low to medium heat. To test the oil to see if it’s ready, drop in a few breadcrumbs. If they sizzle gently, the oil’s ready! (If they brown very quickly, the oil’s too hot.) When the oil is perfect, carefully drop in a few pieces at a time.
Let them cook for a minute (or a little longer) on the first side…
 Then use metal tongs to turn them over and let them finish browning on the other.
You don’t want the nuggets to brown too quickly—the chicken needs a chance to cook through—so keep the oil at a nice, steady temp.
 When the breading is nice and deep golden, remove the nuggets to a paper towel lined plate…
 And keep going until all the nuggets are done. Yum!
 Serve them with little dishes of ketchup, mustard, honey mustard, barbecue sauce, or whatever makes your skirt fly up. You’ll love these! They’re delightful.
Here’s the handy dandy printable!
.recipe-actions {
position: relative;
z-index: 2;
}
#pdf-popover {
background: rgba(255,255,255,.9);
border: 1px solid #efeeed;
color: #6e5c3a;
display: none;
font-family: Helvetica, Arial, sans-serif;
right: 20px;
margin: 2px;
padding: 54px 20px 7px 10px;
position: absolute;
top: 0;
width: 380px;
z-index: 10;
}
#pdf-popover form {
margin: 0;
}
#pdf-popover h4 {
background: #b15818;
color: #fff;
font-family: Helvetica, Arial, sans-serif;
font-size: 20px;
font-weight: normal;
left: 3px;
margin: 0;
position: absolute;
padding: 6px 12px;
right: 3px;
top: 3px;
}
#pdf-popover legend {
font-family: Helvetica, Arial, sans-serif;
font-size: 120%;
font-weight: bold;
margin-bottom: 2px;
margin-left: 10px;
text-transform: uppercase;
}
#pdf-popover fieldset {
margin-bottom: 15px;
}
#pdf-popover input[type="checkbox"] {
height: 14px;
margin: 2px 0 10px 10px;
padding-left: 14px;
position: relative;
visibility: visible;
width: 14px;
}
#pdf-popover input[type="checkbox"],
#pdf-popover input[type="radio"] {
margin-left: 10px;
}
#pdf-popover .close {
background: #b15818;
color: #FFFFFF;
cursor: pointer;
height: 35px;
font-size: 16px;
font-weight: bold;
line-height: 26px;
position: absolute;
right: 3px;
text-align: center;
top: 3px;
width: 25px;
z-index: 1;
}
#pdf-popover .button {
background-color: #b15818;
border: 0;
color: #fff;
cursor: pointer;
font-family: Helvetica, Arial, sans-serif;
margin-left: 10px;
padding: 8px 10px;
text-transform: uppercase;
}
x
Print Options
Page size
Letter
3x5
4x6
Text Size
Small
Medium
Large
Content
Include description
Include prep time, etc.
Show image
Recipe
Chicken Nuggets
Prep Time: 10 Minutes
Cook Time: 10 Minutes
Difficulty: Easy
Servings: 4
 Print Recipe
Ingredients
2 whole Boneless, Skinless Chicken Breasts, Cut Into Small Pieces1 cup All-purpose Flour1 Tablespoon Seasoned Salt (such As Lawry's) Salt And Black Pepper To Taste2 whole Eggs2 Tablespoons Water2 cups Seasoned Breadcrumbs Vegetable Oil, For Frying Ketchup And Mustard, For Serving Preparation Instructions
First, make the breading assembly line: In one bowl, stir together the flour, seasoned salt, salt and pepper. In a separate bowl, beat the eggs and water. In a third bowl, add the breadcrumbs. Bread a few pieces of chicken at a time by dredging them with flour, then quickly dunking them in the egg mixture, then rolling them in the breadcrumbs until they're coated. Shake off the excess and place them on a plate or pan as you bread the rest.
In a large nonstick skillet over medium heat (place the skillet on the backburner!), heat 1 1/2 to 2 inches of vegetable oil over medium-low to medium heat. (You want it to be hot enough to sizzle gently when you add the chicken, but not so hot that it browns too quickly.)
Carefully drop in 8 to 10 pieces of chicken and use metal tongs to spread them out to give them room. Let them fry on the first side for a minute or so, then carefully turn them over to brown on the other side. The chicken should cook until the breadcrumbs are deep golden brown, about 2 to 3 minutes total; if the chicken pieces are small, this should be enough time for the chicken to cook through.
Remove the chicken to a paper towel lined plate and repeat with the rest of the chicken until it's all fried. Serve warm with ketchup and/or mustard!
Posted by Ree | The Pioneer Woman on

May 15, 2015
Strawberry Sauce
 I love ice cream. (Duh. I’m a human being walking this earth, after all!) Unless bananas are involved (yuck! blech! ugh!), I will pretty much inhale any kind of ice cream put in front of me.
Add a luscious sauce of some kind and I’m a total goner. Hot fudge, caramel…I’ll take it all. And I’m particularly partial to this strawberry version. Totally simple, extremely basic…and that’s exactly what I love about it. This sauce is perfect over vanilla, strawberry, or chocolate ice cream…but it’s also positively yummy over waffles, pancakes, and crepes.
Here’s how to make it!
 Start with…wait for it…strawberries!
 Hull them and throw them into a saucepan…
 Along with some sugar…
 A teeny bit of vanilla…
 And some lemon juice.
 Turn the stove on medium high and stir the strawberries gently as they start to heat up.
 Before you know it, they’ll be bubbling away!
 You just want to let them gently (as opposed to violently) boil for a good 5 minutes, until the strawberries are totally soft and have shrunk down quite a bit.
 Turn off the heat…
 And use a potato masher to smush them to smithereens.
 Keep going until they’re totally broken up and the mixture is a soupy mess.
 Totally optional! A drop or two or three of red food coloring. This is absolutely not necessary at all, but if you want the sauce to have that super bright red color that you see in ice cream shops, it will help it along just a tad.
 Now, there would be nothing at all wrong with serving the strawberry sauce as it is now. Just spoon it over vanilla ice cream and store the rest in the fridge. But if I have a little time, here’s what I like to do: Pour it into a fine mesh strainer over a bowl…
 Then use a spoon to stir it and help it strain through the mesh.
 This is the luscious stuff that’s winding up in the bowl…
 And this is what the fruit looks like once all the liquid is out. Kind of gross, but totally delicious, so hang onto it for just a bit.
 Use a spoon to skim off as much of the foam as you can.
 Keep going, taking your time so you only get the foam and not any of the glorious syrup.
 Put the foam in a bowl…then eat it with a spoon! Ha. I always do that when I make jelly.
 Meantime, pour the sauce back into the same saucepan (no need to clean the pan, as a little of the pulp is fine.)
 And bring it to a boil again, letting it bubble up and cook on medium-high for another 3 minutes or so.
 Turn off the heat, and hey! Skim off any more foam that’s risen to the surface.
And by the way: The foam is totally fine to leave in the sauce. It doesn’t hurt it at all. I just like to skim off the excess to look busy.
 Pour it into a jar or pitcher…and that’s the sauce! At this point, you have a few options:
* Dish up some ice cream and serve it right away.
* Refrigerate it and let it thicken, then serve it cold over ice cream later.
* Add back in a little bit of the pulp and serve it right away.
* Add back in a little bit of the pulp and refrigerate it, then serve it cold over ice cream later.
* Reheat it after refrigerating it and serve it warm over ice cream later.
It’s nice to have choices in life. Ha.
Let me show you a couple of the scenarios above.
 Vanilla ice cream in a bowl.
 Plain sauce straight out of the bowl with no pulp added. It will be on the thin side at this stage, but it’s still very delicious.
 I like to add a little bit of the pulp back into the sauce. (This is probably just 1/4 to 1/3 of the pulp.)
 Gives the sauce a little bit of chunkiness and texture without it being a really thick strawberry preserves.
 Mmmm. So, so good. Vanilla ice cream with strawberry…how much better can life get, I ask you?
Now, this is the sauce after being refrigerated overnight. Nice and thick and glossy—I like to serve it cold, right on top of the ice cream.
 You can also warm it up just a tad after refrigerating it if you prefer.
Delicious no matter what the approach!
Here’s the handy dandy printable.
.recipe-actions {
position: relative;
z-index: 2;
}
#pdf-popover {
background: rgba(255,255,255,.9);
border: 1px solid #efeeed;
color: #6e5c3a;
display: none;
font-family: Helvetica, Arial, sans-serif;
right: 20px;
margin: 2px;
padding: 54px 20px 7px 10px;
position: absolute;
top: 0;
width: 380px;
z-index: 10;
}
#pdf-popover form {
margin: 0;
}
#pdf-popover h4 {
background: #b15818;
color: #fff;
font-family: Helvetica, Arial, sans-serif;
font-size: 20px;
font-weight: normal;
left: 3px;
margin: 0;
position: absolute;
padding: 6px 12px;
right: 3px;
top: 3px;
}
#pdf-popover legend {
font-family: Helvetica, Arial, sans-serif;
font-size: 120%;
font-weight: bold;
margin-bottom: 2px;
margin-left: 10px;
text-transform: uppercase;
}
#pdf-popover fieldset {
margin-bottom: 15px;
}
#pdf-popover input[type="checkbox"] {
height: 14px;
margin: 2px 0 10px 10px;
padding-left: 14px;
position: relative;
visibility: visible;
width: 14px;
}
#pdf-popover input[type="checkbox"],
#pdf-popover input[type="radio"] {
margin-left: 10px;
}
#pdf-popover .close {
background: #b15818;
color: #FFFFFF;
cursor: pointer;
height: 35px;
font-size: 16px;
font-weight: bold;
line-height: 26px;
position: absolute;
right: 3px;
text-align: center;
top: 3px;
width: 25px;
z-index: 1;
}
#pdf-popover .button {
background-color: #b15818;
border: 0;
color: #fff;
cursor: pointer;
font-family: Helvetica, Arial, sans-serif;
margin-left: 10px;
padding: 8px 10px;
text-transform: uppercase;
}
x
Print Options
Page size
Letter
3x5
4x6
Text Size
Small
Medium
Large
Content
Include description
Include prep time, etc.
Show image
Recipe
Strawberry Sauce
Prep Time: 15 Minutes
Cook Time: 10 Minutes
Difficulty: Easy
Servings: 12
 Print Recipe
Ingredients
2 pounds Strawberries, Hulled1 cup Sugar1 teaspoon Vanilla1/2 whole Lemon, Juiced A Couple Drops Red Food Coloring (optional) Preparation Instructions
Place all the ingredients in a medium saucepan over medium-high heat. Bring to a gently boil, stirring constantly, and allow the strawberries to cook for a good 5 minutes, or until the strawberries are very soft. Turn off the heat and use a potato masher to completely smush them to smithereens. Pour the mixture into a fine mesh strainer placed over a bowl. Use a spoon to stir the fruit so the liquid is forced through. Continue until most all of the liquid is in the bowl. Set the pulp aside in case you want to add some of it back to the finished sauce.
Skim as much foam off the sauce as you can. Pour the skimmed sauce back into the same saucepan and boil again for 3 minutes over medium-high heat. Skim any more foam that has formed on the surface, then allow the sauce to cool slightly before pouring it into a pitcher or jar. Add a little of the pulp back into the sauce if you like the texture, or just leave it plain.
Serve warm over vanilla ice cream, or refrigerate it to thicken and serve it cold. (You can reheat the sauce after refrigerating if you like.)
Posted by Ree | The Pioneer Woman on

May 12, 2015
Strawberry Mini-Muffins
 I’m doing some blog cooking today and tomorrow, so I’ll have some new recipes to share with you in the coming days and weeks. Meanwhile, I posted a new recipe over on Land O’ Lakes and I wanted to share it here to make sure you saw it! They’re Strawberry Mini-Muffins with a yummy, tart strawberry butter to spread on them when they’re warm. That’s the breakfast/muffin approach…but you could also sift some powdered sugar into the strawberry butter when you mix it up to make it more of a sweet butter (also known as FROSTING. Ha.)
Here’s the link to the step-by-step recipe for the sweet little pink wonders.
 You’ll love ‘em.

May 11, 2015
National Eat What You Want Day
Official food days crack me up. There’s everything from National Tater Tot day to National Whipped Cream day, and they’re always fun to hear about. (Not to mention observe. Ha.)
I just found out that today is National Eat What You Want Day, and in honor of that, here are some recipes to help you celebrate!
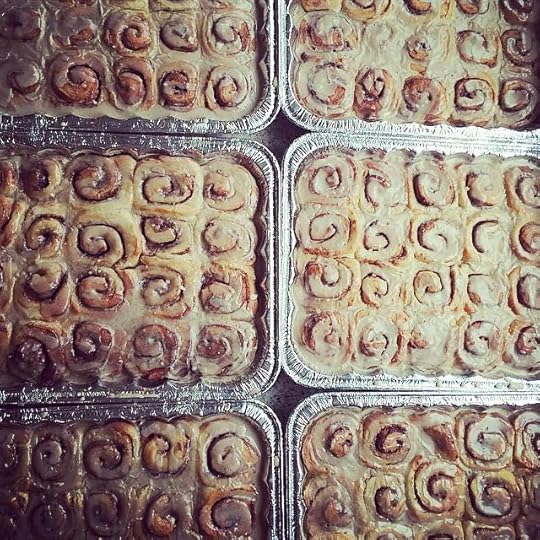 Cinnamon Rolls! Go for it.
 Chocolate Peanut Butter Pie. You know you want it.
 Grilled Rib-Eye Steak with Onion-Blue Cheese Sauce. Words can’t describe it. It is beyond everything.
 Tres Leches Cake. I think if I could have any one dessert the rest of my natural born life, it would be this one. To. Die. FOR!
 Homemade Doughnuts. How fun would it be to eat doughnuts without guilt today?
 Malted Milk Chocolate Chip Cookies. Thin, crispy, and marvelous.
 Devil Dogs. Tremendously naughty! And so much fun!
 Knock You Naked Brownies. These are wrong. So very, very wrong.
 French Fries. Yes!
 Sweet Potato Fries. Double yes.
 Thin Fries. Triple yes!
I must have fries right now.
 Chocolate Chip Caramel Ice Cream Sundae. You deserve this!
 Drop Biscuits and Sausage Gravy. So wrong, it’s right.
 Orange Vanilla Monkey Bread. Enter at your own risk. This is irresistible.
 This cake. I don’t know what to say except make it. Make it now.
 Mocha Brownies. The frosting is as thick as the brownies themselves! I’m a rebel that way.

 And another brownie recipe: Crazy Brownies! The name says it all.
 Chocolate Chunk Cookies. Browned butter makes these irresistible.
 Homemade Frappuccino. Such a treat!
No go eat what you want!
(Well…within reason.)
Love,
Pioneer Woman

Ree Drummond's Blog

- Ree Drummond's profile
- 2016 followers

