
Ree Drummond's Blog, page 21
February 23, 2015
Broccoli with Cheese Sauce
 My boy Bryce loves broccoli with cheese sauce so much that there’ve been times I’ve actually feared he would turn into broccoli with cheese sauce. That’s a really bizarre old wives’ tale, isn’t it? That if you eat too much of something, you’ll turn into what you’re eating? Though sometimes it’s definitely fitting: for instance, that time I ate an entire bag of jumbo marshmallows at youth group when I was eleven. I actually did turn into a marshmallow. It was a very mushy time for me.
Anyway, I join with B-Man in his love of this perfect veggie-cheese combo. It’s delicious, and the cheese sauce can be used in any number of different ways. If you can look past any biases you might harbor relating to certain orange-colored processed cheese products manufactured in the shape of rectangular logs, you’ll love it for life!
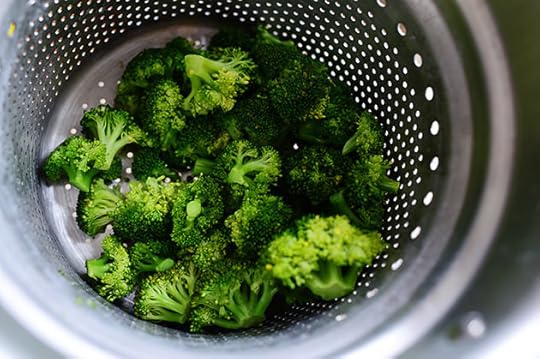 First, steam the broccoli over simmering water for 3 to 4 minutes, until slightly tender but not overly soft.
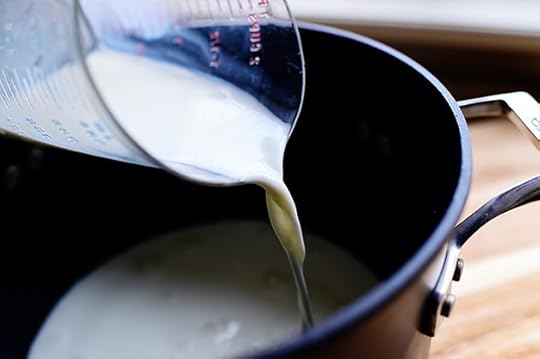 Next, to make the sauce, pour the milk into a saucepan (nonstick is good!)…
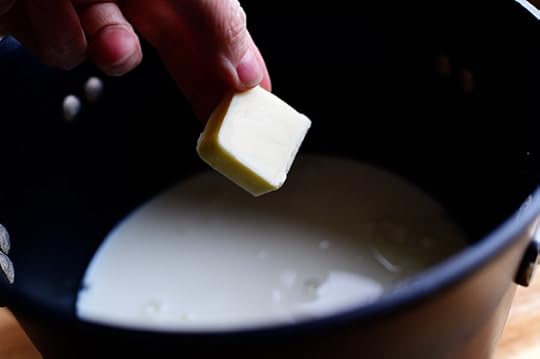 Then add the butter.
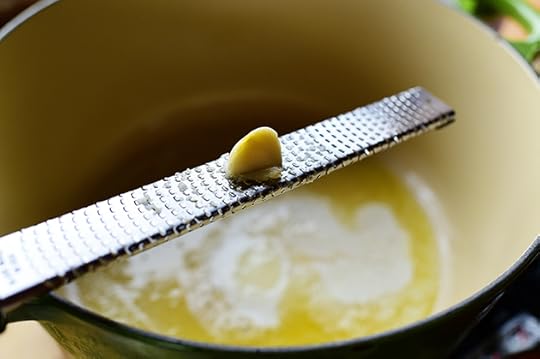
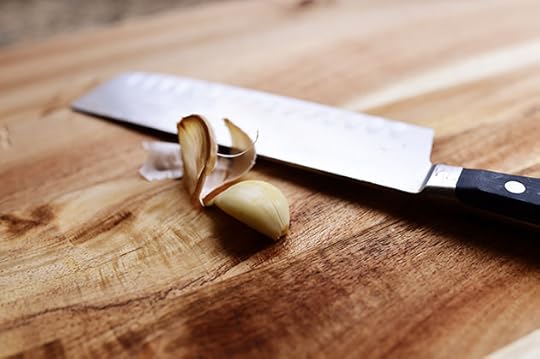 If you want to add a nice garlic flavor, peel a clove of garlic…
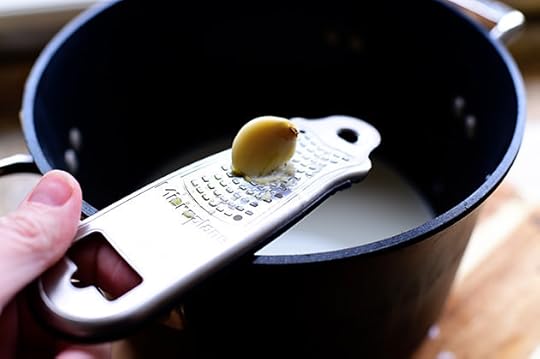 Then grate it or press it (so there aren’t any garlic chunks in the sauce) then set the pan over medium-low heat until the butter is melted and the mixture is hot.
About the garlic: Use it with caution! My crew loves the flavor of it in this sauce, but it can come across a little strong for little kiddos.
 Next, cut that there Velveeta into cubes, and do it proudly…
 Then grate up…
 The other two cheeses. And now you’re ready to get into some trouble!
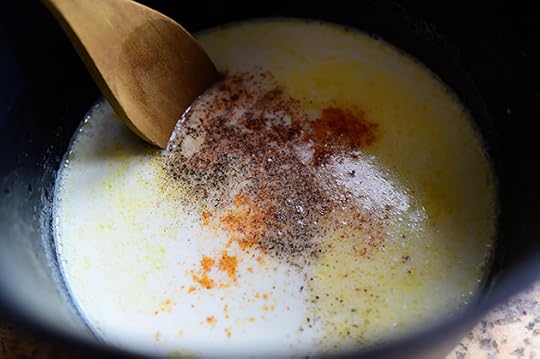 Stir in a little seasoned salt, pepper, salt, and chili powder…
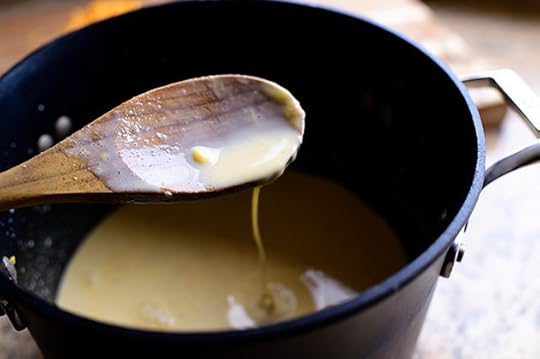 Then add the Velveeta and stir it until it’s melted and silky.
About the Velveeta: Don’t hate! Appreciate.
And you can add/sub any cheese you want: pepper jack, Fontina, goat cheese…anything. It’s just that the Velveeta gives it a creaminess no mere mortal can attain, and besides that, it’ll make you feel like a rebel.
 Add the cheddar and Monterey Jack…
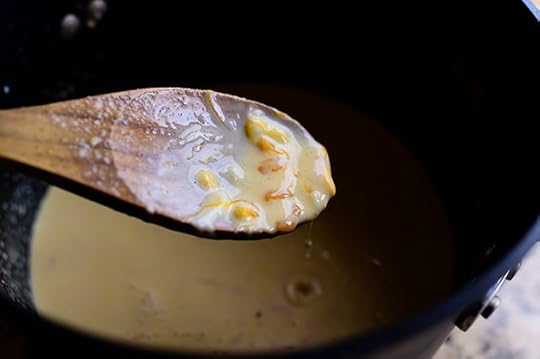 And stir it slowly…
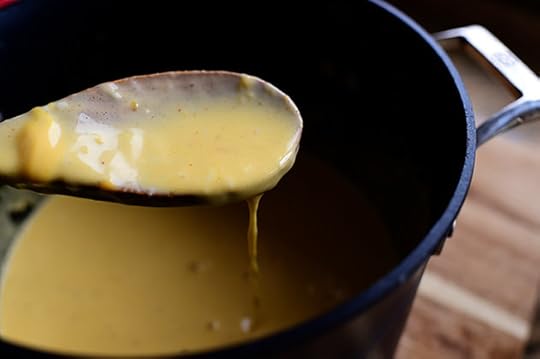 While everything melts together. This’ll take a few minutes, so just stir it and think about your to-do list, which includes eating this cheese sauce very, very soon.
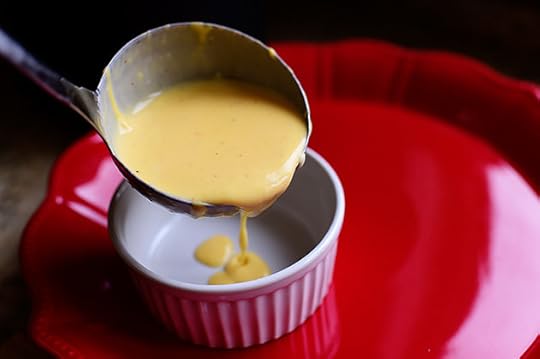 While it’s nice and hot, ladle the sauce into ramekins…
 Sprinkle a little chili powder on top, just for kicks…
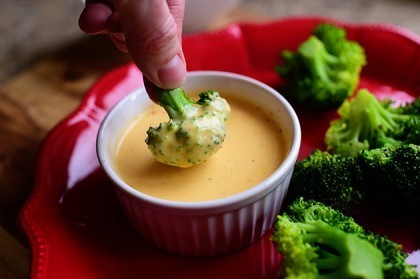
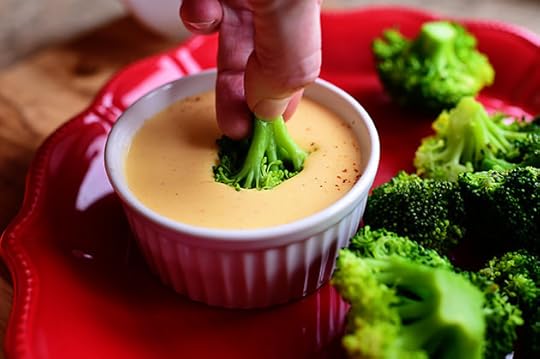 And dig right in!
 One of the very best side dishes (or snacks) in the world.
Variations
• Use pepper jack, goat cheese, or any kind of cheese you’d like in place of the cheddar and/or Monterey Jack.
• Stir chopped chives or other herbs into the cheese sauce
• Serve with steamed broccoli, asparagus, or carrots.
Here’s the handy dandy printable!
.recipe-actions {
position: relative;
z-index: 2;
}
#pdf-popover {
background: rgba(255,255,255,.9);
border: 1px solid #efeeed;
color: #6e5c3a;
display: none;
font-family: Helvetica, Arial, sans-serif;
right: 20px;
margin: 2px;
padding: 54px 20px 7px 10px;
position: absolute;
top: 0;
width: 380px;
z-index: 10;
}
#pdf-popover form {
margin: 0;
}
#pdf-popover h4 {
background: #b15818;
color: #fff;
font-family: Helvetica, Arial, sans-serif;
font-size: 20px;
font-weight: normal;
left: 3px;
margin: 0;
position: absolute;
padding: 6px 12px;
right: 3px;
top: 3px;
}
#pdf-popover legend {
font-family: Helvetica, Arial, sans-serif;
font-size: 120%;
font-weight: bold;
margin-bottom: 2px;
margin-left: 10px;
text-transform: uppercase;
}
#pdf-popover fieldset {
margin-bottom: 15px;
}
#pdf-popover input[type="checkbox"] {
height: 14px;
margin: 2px 0 10px 10px;
padding-left: 14px;
position: relative;
visibility: visible;
width: 14px;
}
#pdf-popover input[type="checkbox"],
#pdf-popover input[type="radio"] {
margin-left: 10px;
}
#pdf-popover .close {
background: #b15818;
color: #FFFFFF;
cursor: pointer;
height: 35px;
font-size: 16px;
font-weight: bold;
line-height: 26px;
position: absolute;
right: 3px;
text-align: center;
top: 3px;
width: 25px;
z-index: 1;
}
#pdf-popover .button {
background-color: #b15818;
border: 0;
color: #fff;
cursor: pointer;
font-family: Helvetica, Arial, sans-serif;
margin-left: 10px;
padding: 8px 10px;
text-transform: uppercase;
}
x
Print Options
Page size
Letter
3x5
4x6
Text Size
Small
Medium
Large
Content
Include description
Include prep time, etc.
Show image
Recipe
Broccoli with Cheese Sauce
Prep Time: 5 Minutes
Cook Time: 15 Minutes
Difficulty: Easy
Servings: 6
 Print Recipe
Ingredients
2 heads Broccoli Cut Into Florets2 cups Whole Milk1 Tablespoon Butter1 clove Garlic, Optional1/2 teaspoon Seasoned Salt1/2 teaspoon Black Pepper, More To Taste1/4 teaspoon Salt1/4 teaspoon Chili Powder (more To Taste)12 ounces, weight Velveeta Cut Into Cubes4 ounces, weight Sharp Cheddar Cheese, Grated4 ounces, weight Monterey Jack Cheese, Grated Preparation Instructions
Steam the broccoli florets for 3 to 4 minutes, or until slightly tender but not overly soft.
To make the sauce, heat the butter and milk over medium-low heat until hot. Stir in the garlic (if using), seasoned salt, black pepper, salt, and chili powder. Add the Velveeta and stir it until it's melted and creamy. Stir in the cheddar and Monterey jack until melted. Taste and adjust seasonings.
Serve ramekins of cheese sauce with warm broccoli florets.
Posted by Ree | The Pioneer Woman on February 23 2015


February 18, 2015
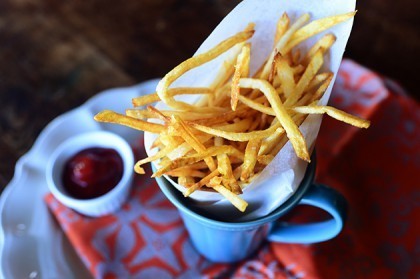
Thin Fries
 My entire family is addicted to these super-thin fries, and I don’t remember an instance I’ve made them when a single dang fry was left. And usually when I plan on making them, I try not to let the word get out until the last batch is being fried—otherwise they disappear sooner than I can get them on the table. Crazy fry-loving hooligans!
IMPORTANT: Please be careful when frying with hot oil. Keep the pot on the backburner so little kiddos won’t get hurt.
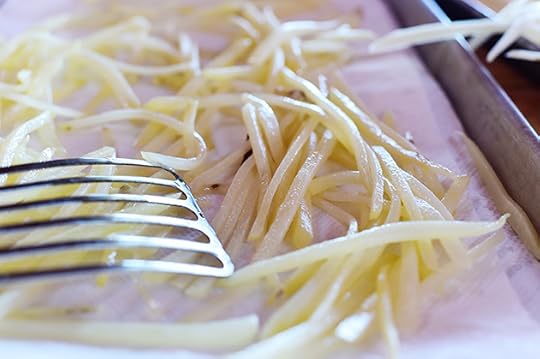
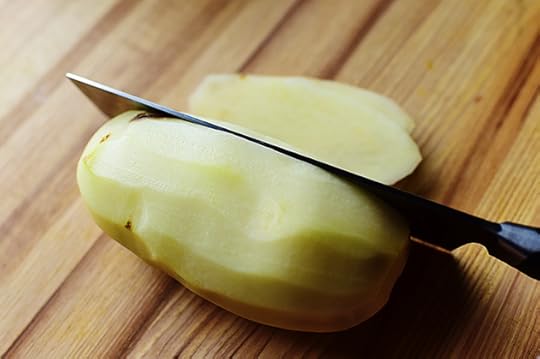 Peel and rinse the potatoes, then slice them into thin pieces.
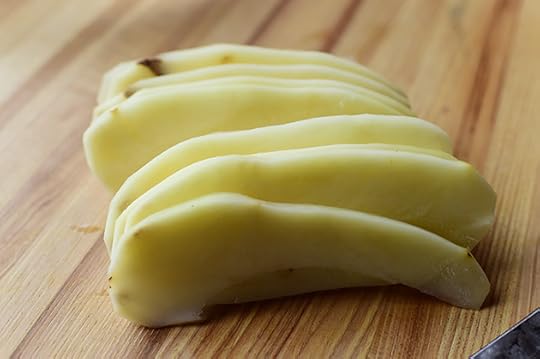 Depending on the size of the potatoes, you’ll get about 4 to 6 slices.
(Note that this is all much easier if you have a good, sharp knife!)
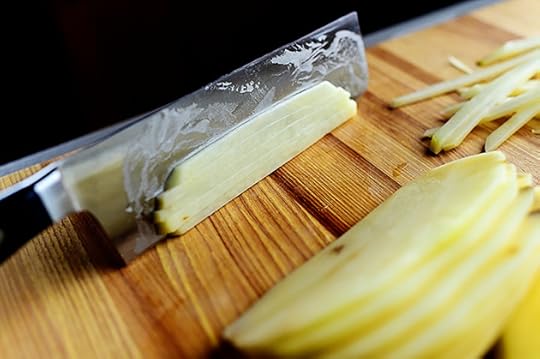 Next, stack a few pieces at a time and slice them into thin sticks.
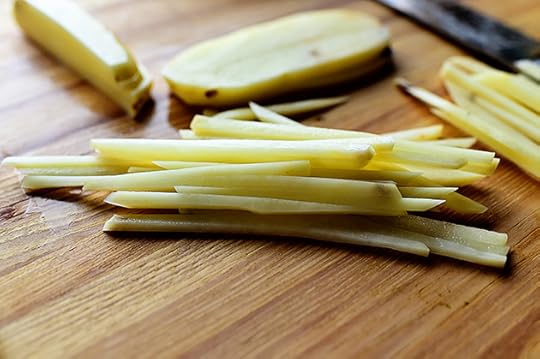 Take your time to get them nice and thin.
Again…a sharp knife helps!
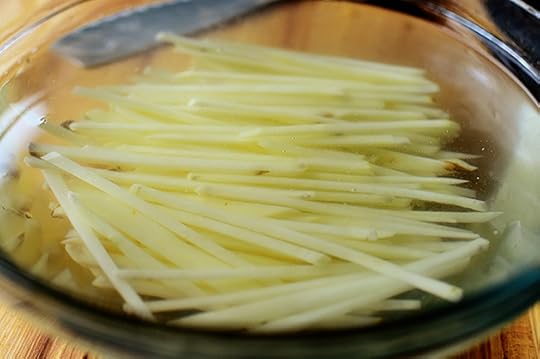 Place the fries in a large bowl and cover them with cold water. Swish them around to get off the extra starch, then pour off the starchy water and replace it with fresh. Do this once more, covering with fresh water and setting them aside to soak for 2 to 3 hours.
You can also stick them in the fridge, covered in plastic wrap, and let them soak for up to 3 days. I’ve sliced the fries then gotten distracted or busy and didn’t get around to frying them until 2 or 3 days later, and I’m always amazed at how well the potatoes hold up.
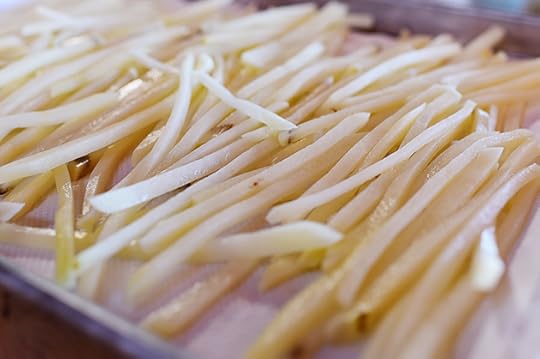 When you’re ready to make the fries, drain off the water and lay them on baking sheets lined with paper towels. Blot them with more paper towels to dry them as much as you can. Water and hot oil do not make very good bedfellows, so really blot until you cain’t blot no more!
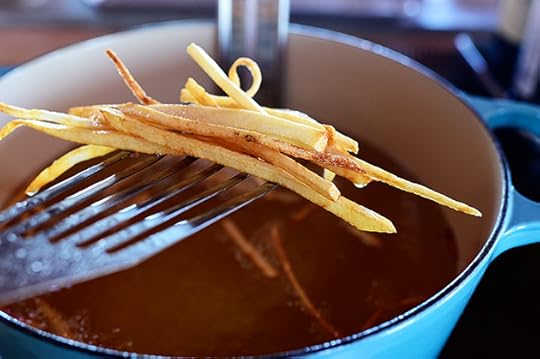
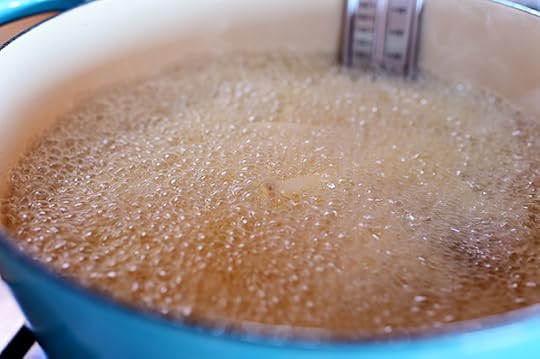 Heat a few inches of oil in a heavy pot to 300 degrees (use a deep fry thermometer to make sure the temperature is accurate.) In 3 or 4 batches, use tongs to place a small amount of fries into the oil and until the potatoes are soft but not at all starting to brown, about 2 minutes per batch.
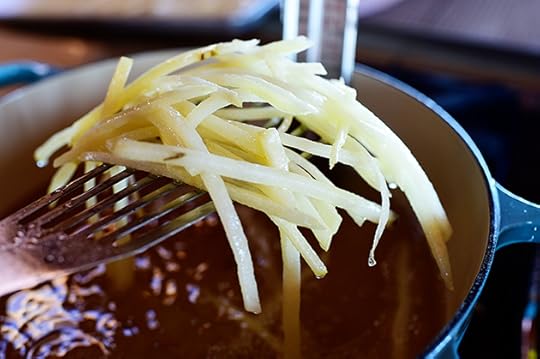 Remove each batch…
 And drain them on new/dry paper towels. They won’t be done at this point! This is just the first frying.
 Now, when all the potatoes have had their initial frying, turn up the heat until the oil reaches 400 degrees…
 And when the oil’s hot, start frying the potatoes in batches again…
 This time cooking them until they’re golden and slightly crisp.
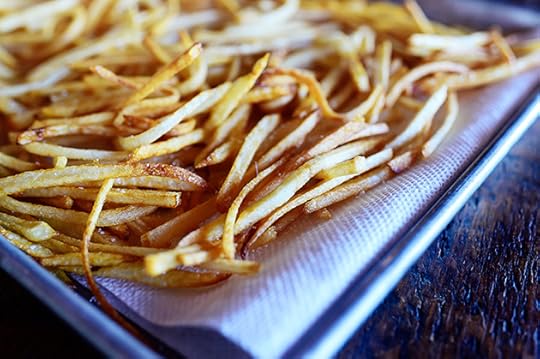 Remove them from the oil and drain them on paper towels.
 Then sprinkle them generously with salt.
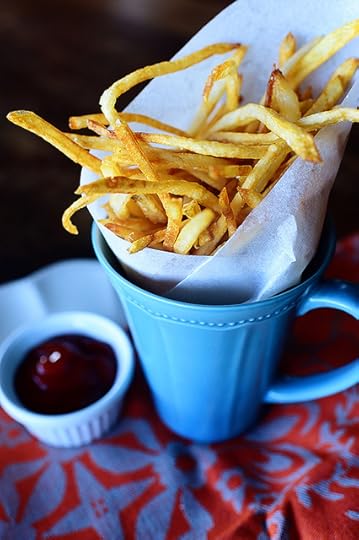 A little parchment rolled up in a mug makes a cute home for the fries!
(Albeit a very temporary home.)
Dig in!
Here’s the handy dandy printable.
.recipe-actions {
position: relative;
z-index: 2;
}
#pdf-popover {
background: rgba(255,255,255,.9);
border: 1px solid #efeeed;
color: #6e5c3a;
display: none;
font-family: Helvetica, Arial, sans-serif;
right: 20px;
margin: 2px;
padding: 54px 20px 7px 10px;
position: absolute;
top: 0;
width: 380px;
z-index: 10;
}
#pdf-popover form {
margin: 0;
}
#pdf-popover h4 {
background: #b15818;
color: #fff;
font-family: Helvetica, Arial, sans-serif;
font-size: 20px;
font-weight: normal;
left: 3px;
margin: 0;
position: absolute;
padding: 6px 12px;
right: 3px;
top: 3px;
}
#pdf-popover legend {
font-family: Helvetica, Arial, sans-serif;
font-size: 120%;
font-weight: bold;
margin-bottom: 2px;
margin-left: 10px;
text-transform: uppercase;
}
#pdf-popover fieldset {
margin-bottom: 15px;
}
#pdf-popover input[type="checkbox"] {
height: 14px;
margin: 2px 0 10px 10px;
padding-left: 14px;
position: relative;
visibility: visible;
width: 14px;
}
#pdf-popover input[type="checkbox"],
#pdf-popover input[type="radio"] {
margin-left: 10px;
}
#pdf-popover .close {
background: #b15818;
color: #FFFFFF;
cursor: pointer;
height: 35px;
font-size: 16px;
font-weight: bold;
line-height: 26px;
position: absolute;
right: 3px;
text-align: center;
top: 3px;
width: 25px;
z-index: 1;
}
#pdf-popover .button {
background-color: #b15818;
border: 0;
color: #fff;
cursor: pointer;
font-family: Helvetica, Arial, sans-serif;
margin-left: 10px;
padding: 8px 10px;
text-transform: uppercase;
}
x
Print Options
Page size
Letter
3x5
4x6
Text Size
Small
Medium
Large
Content
Include description
Include prep time, etc.
Show image
Recipe
Thin Fries
Prep Time: 3 Hours
Cook Time: 20 Minutes
Difficulty: Easy
Servings: 6
 Print Recipe
Ingredients
6 whole Russet Potatoes, Peeled Vegetable Or Peanut Oil For Frying Salt Ketchup, For Serving Preparation Instructions
Peel and rinse the potatoes, then slice them into thin pieces. Next, stack a few pieces at a time and slice them into thin sticks. Place the fries in a large bowl and cover them with cold water. Swish them around to get off the extra starch, then pour off the starchy water and replace it with fresh. Do this once more, covering with fresh water and setting them aside to soak for 2 to 3 hours.
When you're ready to make the fries, drain off the water and lay them on baking sheets lined with paper towels. Blot them with more paper towels to dry them as much as you can.
Heat a few inches of oil in a heavy pot to 300 degrees (use a deep fry thermometer to make sure the temperature is accurate.) In 3 or 4 batches, use tongs to place a small amount of fries into the oil and until the potatoes are soft but not at all starting to brown, about 2 minutes per batch. Remove each batch and drain them on new/dry paper towels. They won't be done at this point! This is just the first frying.
Now, when all the potatoes have had their initial frying, turn up the heat until the oil reaches 400 degrees. And when the oil's hot, start frying the potatoes in batches again until the fries are golden brown. When they're all done, sprinkle them generously with salt and dig in!
Posted by Ree | The Pioneer Woman on February 18 2015
February 12, 2015
Recipes from the Chocolate Episode!
Last Saturday was my “Chocolate Confessional” show on Food Network, and I wanted to share all four of the recipes here since Valentine’s Day is…well, two days away!
I love each and every one of these treats.
 Chocolate Pie. Chocolate pie doesn’t get any better than this. Serve it plain and unadorned or piled high with whipped cream, chocolate syrup, caramel sauce, and sprinkles. Super easy and always a hit.
 Chocolate Valentine Cookies. Have some fun with these! I do a powdered sugar stencil, but I also love a pink buttercream or melted white chocolate piped in pretty designs. The perfect way to say “I love you.”
 Chocolate Fondue. Oh, yes. Serve it with dried fruit, fresh fruit, cubes of angel food or pound cake. Just serve it. Your friends will never leave! (Whether or not this is a good thing is up to you to decide.)
 And yes—don’t adjust your screens. Chocolate Covered Potato Chips are exactly what you’re looking at. Try them…just once! Use chocolate almond bark or a fine French chocolate, whatever your poison.
February 9, 2015
Strawberry Granola Pancakes
 I am in Colorado with my two middle children and their two friends right now. I’m not sure what the cause of this is, but every time I come to Colorado, I strongly and constantly crave two things: granola and yogurt. And when I say “crave,” I mean I could wake up and eat granola and yogurt, then I could have a snack of granola and yogurt mid-morning, then I could eat granola and yogurt for lunch…and this goes all the way into the evening, when I have granola and yogurt just before I go to bed. Right after I have that double-dip chocolate ice cream cone. But that’s another story for another time.
Yesterday, I whipped up some dang delicious pancakes that incorporated both my mountain loves. Bryce, his friend Patrick, and I gobbled them up. And they were a cinch to make!
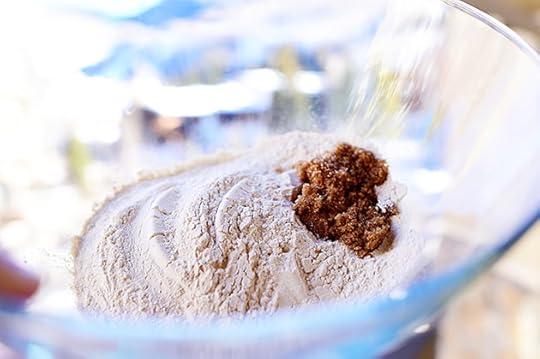 I added whole grain pancake mix to a bowl and added a little brown sugar, because I’m a rebel that way. (I used pancake mix to make it easy, but you could whip up your own favorite pancake recipe and just start with the strawberry preserves you’ll see in a sec.)
 Stir that together, then add milk…
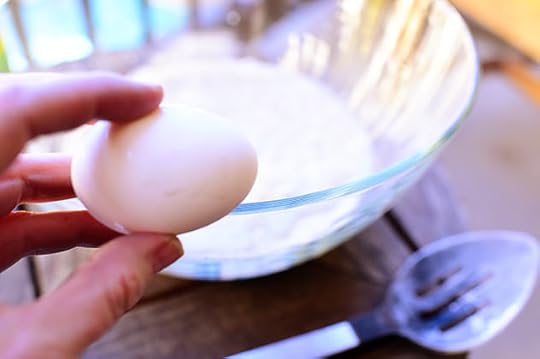 Eggs…
Eggs…
 And a little oil.
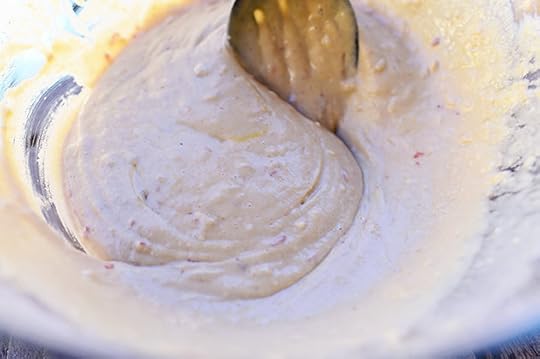
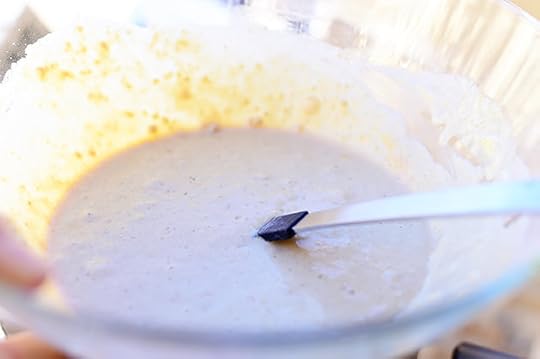 Then stir it together.
Basically, you just witnessed me prepare the pancake mix according to the box instructions, with a little brown sugar added! So again: Up until this point, you can just make whatever pancake recipe you like. (With a little brown sugar added.)
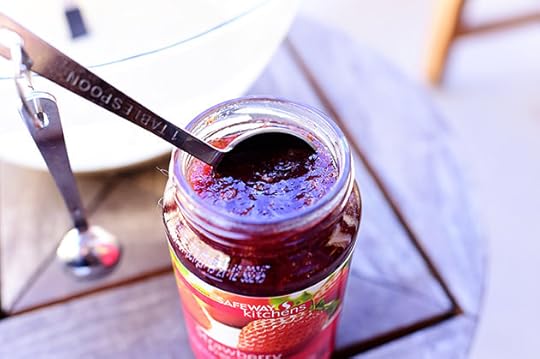 I wanted to give it a strawberry flavor beyond just the strawberries I’ll be adding in a minute, so I grabbed a big tablespoon of strawberry preserves…
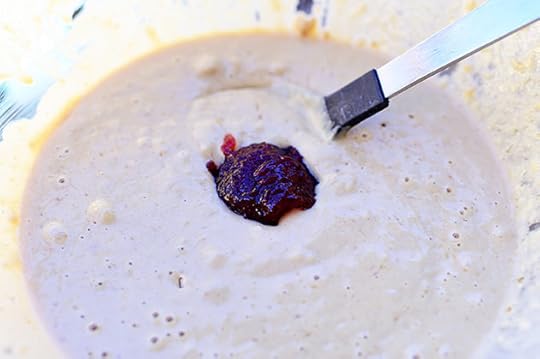 Violently threw it in…
 And stirred it all together. (You could add a second tablespoon to really drive the point home if you’d like.)
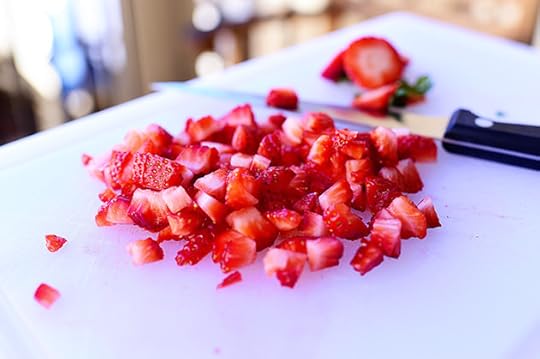 Next, I chopped up some strawberries…
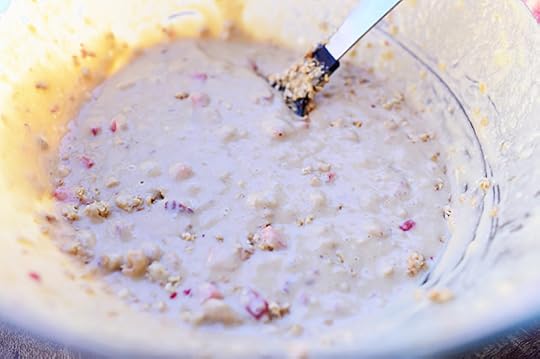
 Stirred them in…
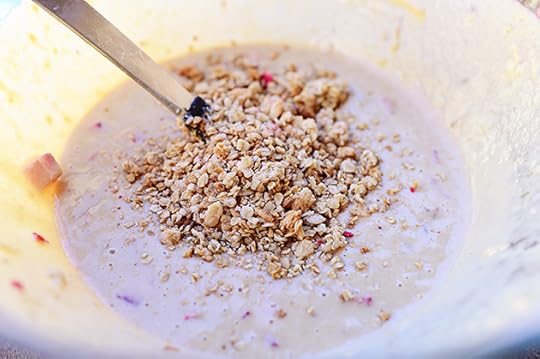 Then added some granola! The variety of granola I bought at the store was mostly broken up with a few bigger chunks; I saved some of the bigger chunks to sprinkle over the pancakes at the end.
 Stir it around and see what it looks like; if you want it to be chunkier and granola-ier, add a little more! There are no rules.
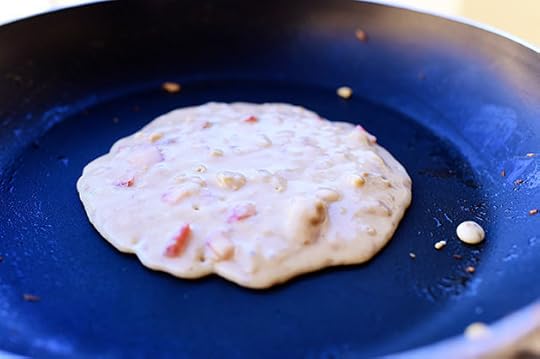 You can do smaller pancakes and do a stack, or you can do bigger ones like I did.
It was a big pancake kind of day.
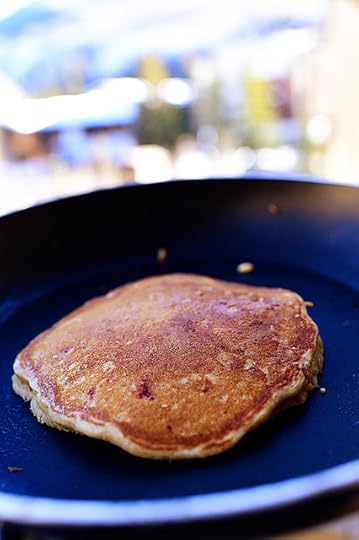 Cook ‘em until dark golden on both sides!
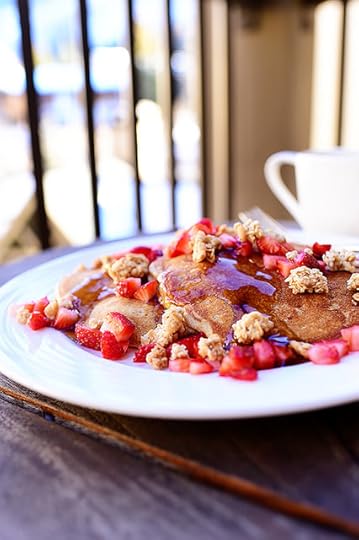
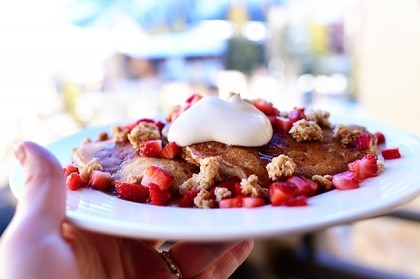
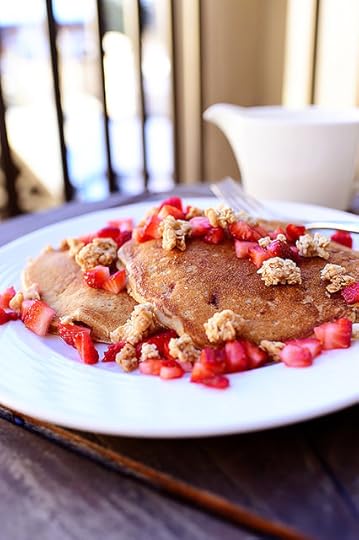 And this is how I served ‘em. Chopped strawberries, granola chunks…
 And of course. Syrup, anyone?
 But…but there’s still something missing.
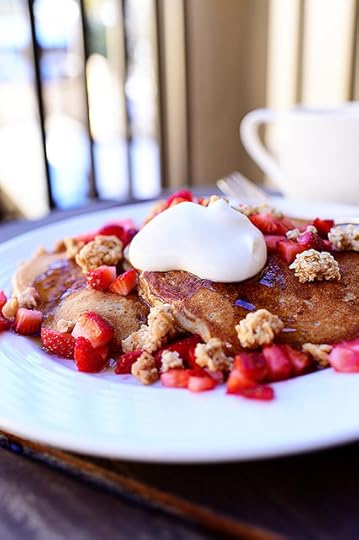 YOGURT! Come to mama.
Granola and yogurt! Score. A direct hit.
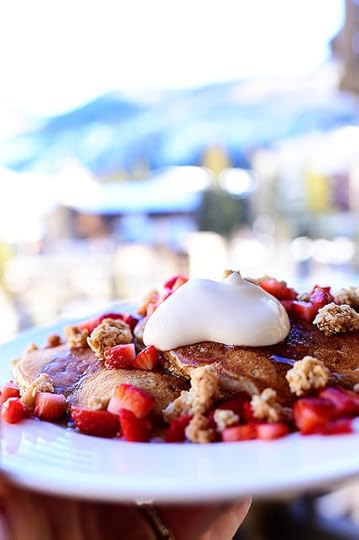 *Gratuitous mountain background shot*
The earth is a beautiful place.
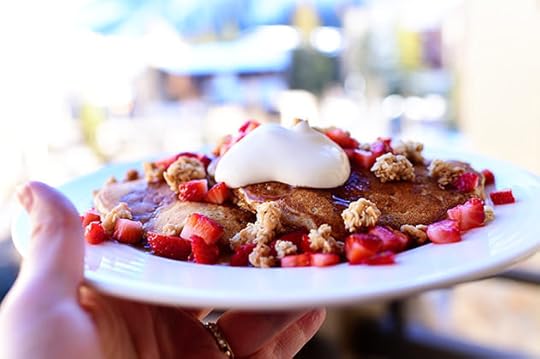 This plate is a beautiful place, too!
You’ll love these, guys. And you can use regular pancake batter, but there was something about the whole grain pancakes that really complemented the strawberries and granola. They were delicious!
Here’s the handy handy printable. I’ll share more made-while-I’m-in-the-mountains recipes as I make ‘em! I’ll try not to include granola and yogurt in all of them, but I can’t make any promises.
.recipe-actions {
position: relative;
z-index: 2;
}
#pdf-popover {
background: rgba(255,255,255,.9);
border: 1px solid #efeeed;
color: #6e5c3a;
display: none;
font-family: Helvetica, Arial, sans-serif;
right: 20px;
margin: 2px;
padding: 54px 20px 7px 10px;
position: absolute;
top: 0;
width: 380px;
z-index: 10;
}
#pdf-popover form {
margin: 0;
}
#pdf-popover h4 {
background: #b15818;
color: #fff;
font-family: Helvetica, Arial, sans-serif;
font-size: 20px;
font-weight: normal;
left: 3px;
margin: 0;
position: absolute;
padding: 6px 12px;
right: 3px;
top: 3px;
}
#pdf-popover legend {
font-family: Helvetica, Arial, sans-serif;
font-size: 120%;
font-weight: bold;
margin-bottom: 2px;
margin-left: 10px;
text-transform: uppercase;
}
#pdf-popover fieldset {
margin-bottom: 15px;
}
#pdf-popover input[type="checkbox"] {
height: 14px;
margin: 2px 0 10px 10px;
padding-left: 14px;
position: relative;
visibility: visible;
width: 14px;
}
#pdf-popover input[type="checkbox"],
#pdf-popover input[type="radio"] {
margin-left: 10px;
}
#pdf-popover .close {
background: #b15818;
color: #FFFFFF;
cursor: pointer;
height: 35px;
font-size: 16px;
font-weight: bold;
line-height: 26px;
position: absolute;
right: 3px;
text-align: center;
top: 3px;
width: 25px;
z-index: 1;
}
#pdf-popover .button {
background-color: #b15818;
border: 0;
color: #fff;
cursor: pointer;
font-family: Helvetica, Arial, sans-serif;
margin-left: 10px;
padding: 8px 10px;
text-transform: uppercase;
}
x
Print Options
Page size
Letter
3x5
4x6
Text Size
Small
Medium
Large
Content
Include description
Include prep time, etc.
Show image
Recipe
Strawberry Granola Pancakes
Prep Time: 10 Minutes
Cook Time: 10 Minutes
Difficulty: Easy
Servings: 4
 Print Recipe
Ingredients
2 cups Whole Grain Pancake Mix2 Tablespoons Brown Sugar1-1/2 cup Milk2 whole Eggs2 Tablespoons Vegetable Oil1 Tablespoon (heaping) Strawberry Preserves8 whole Strawberries, Chopped1/2 cup Granola (more To Taste!) Extra Chopped Strawberries, For Serving Extra Granola Clusters, For Serving Warm Pancake Syrup, For Serving Vanilla Or Honey-flavored Yogurt, For Serving Preparation Instructions
Make the pancake batter by stirring together the pancake mix, brown sugar, milk, eggs, and oil until combined. Stir in the strawberry preserves, then stir in the strawberries and granola, adding more of either if you'd prefer. (Hold back some chopped strawberries for serving.)
Heat a nonstick skillet or griddle over medium heat. Add a little butter to the pan and fry the cupcakes on both sides until golden. Serve with strawberries, granola, syrup, and yogurt on top.
NOTE: I followed the package instructions for the pancake mix I used. Just follow the package as it states, then add the strawberry preserves and proceed with this recipe from there.
Posted by Ree | The Pioneer Woman on February 9 2015
February 3, 2015
Veggie Chili
 Good veggie chili is so darn good that you won’t even notice there’s no meat in it! This pot of goodness is chock full of all the good things in life: veggies, beans, and a lot of spice.
Definitely one of my favorite meatless marvels on the planet! (And be sure to look at the variations/serving suggestions at the end. It can do many different things!)
Here’s how to make it, baby.
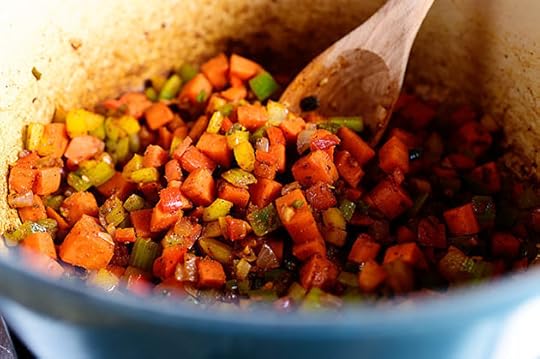
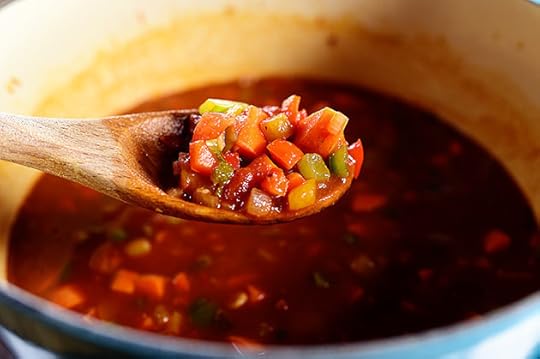
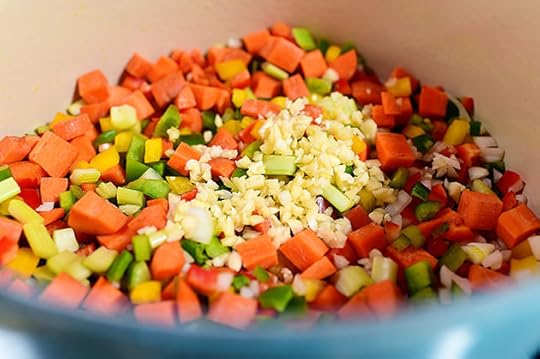 In a large pot over medium-high heat, heat a little olive oil, then add onion, garlic, bell pepper, jalapeno, carrots, and celery…
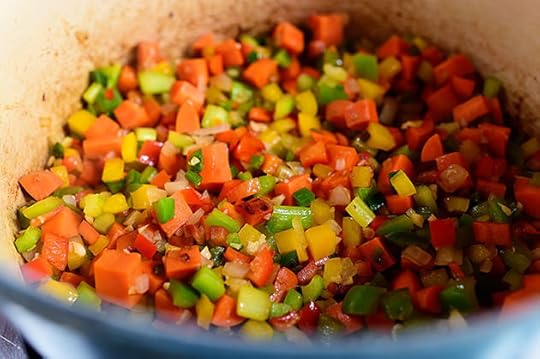 And cook, stirring occasionally, until they start to turn deep golden brown, about 5 to 7 minutes.
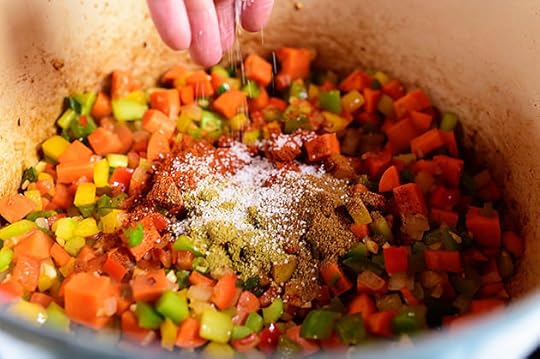 Add some salt, oregano, cumin, and chili powder…
 And cook for another 2 minutes to deepen the flavors.
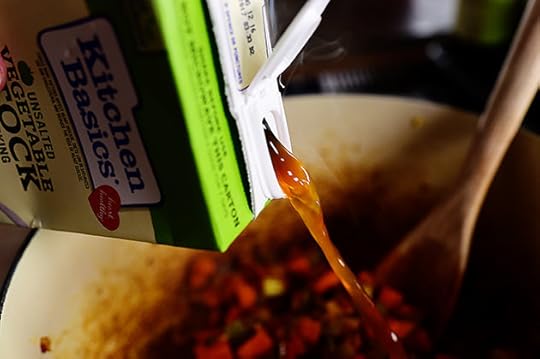 Pour in some vegetable broth (and if you can find this brand, I love it. Deep color, great flavor!)
(This is not a paid advertisement.)
(Ha.)
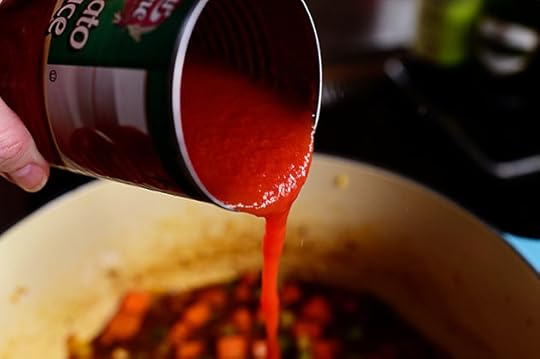 Along with some tomato sauce…
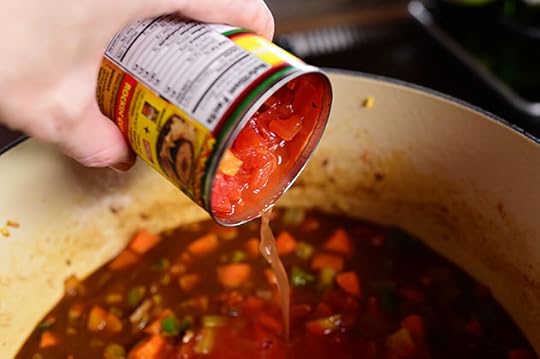 And a can of diced tomatoes and chilies, also known as Ro-tel.
Did you know a lot of people don’t know what Ro-tel is?
When I started shooting my Food Network show, the crew from England had never heard of it.
And hilariously, a couple of people from the East Coast hadn’t heard of it, either.
I felt so sorry for them when they told me that. Ro-tel is life!
 Stir this around…
 Then let this mixture come to a boil. Reduce the heat to low, cover the pot, and simmer for 30 minutes, stirring every now and then.
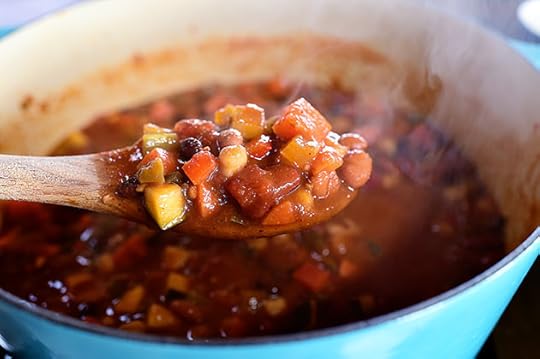
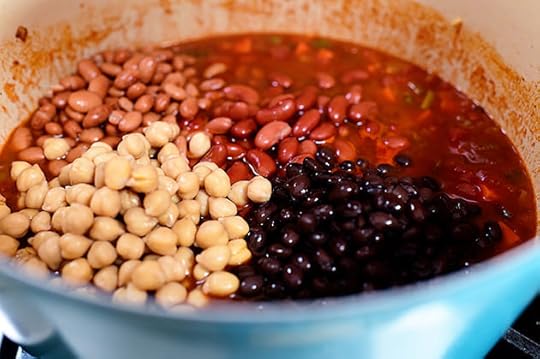 After 30 minutes, add a buncha beans! I did canned kidney, pinto, black, and garbanzo beans, which I drained and rinsed first—but you can use one variety or ten varieties, whatever your approach to bean life is.
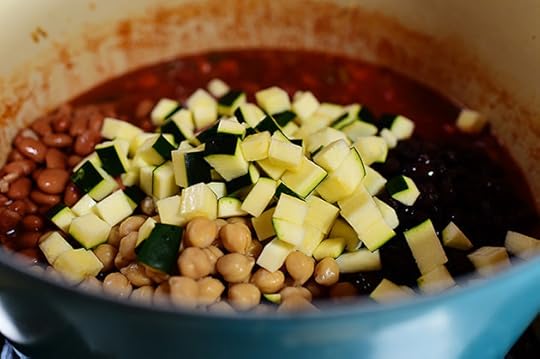 At this point, you also want to add some diced zucchini!
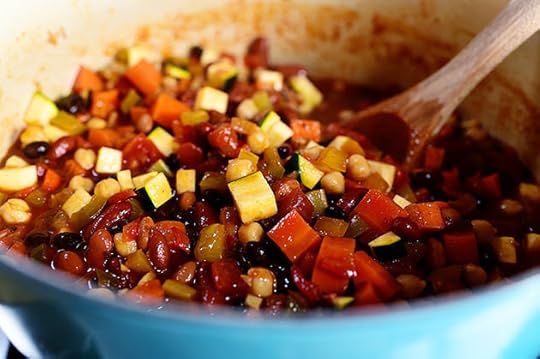 Stir it all together, then cover the pot and let it simmer for another 30 minutes.
Patience is a virtue!
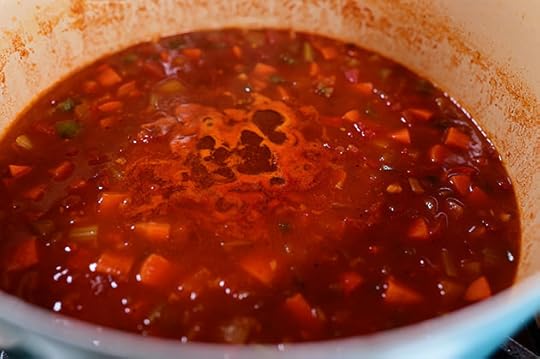
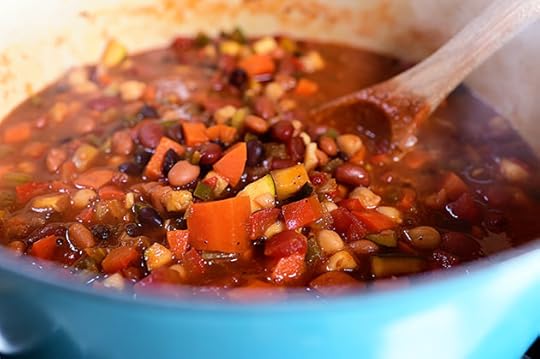 Oh my WORD, look how yummy.
But it’s still not quite done!
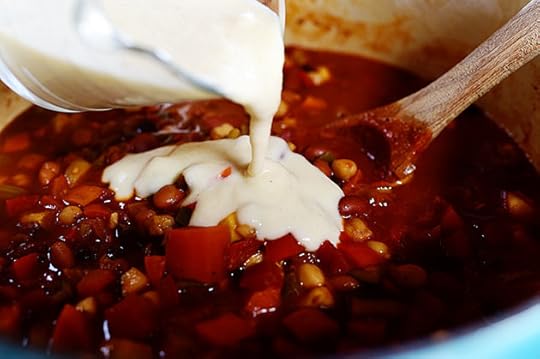 My favorite chili addition: Mix a little masa (corn flour) with a little warm water to form a paste, then pour it into the chili. It thickens it up a bit, and it also adds delicious corn flavor to the chili. Yum!
 Simmer it for 15 more minutes until it’s thick and rich and perfect! Taste and adjust the seasonings, adding more of whatever it needs.
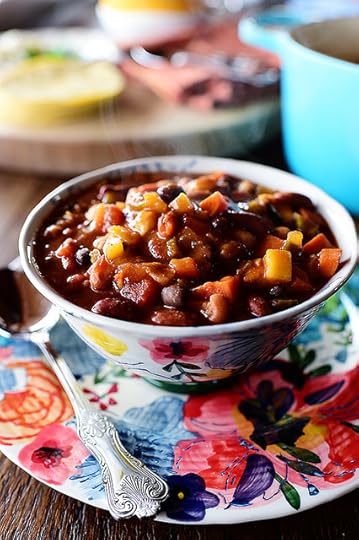 Serve the veggie chili plain and unadorned…
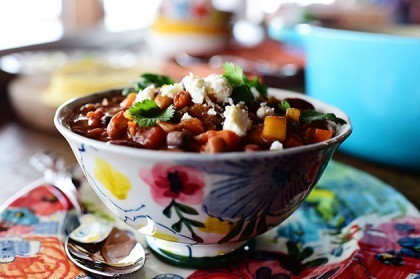
 Or with crumbled Cotija and cilantro leaves. Divine!
Here are some variations and serving suggestions:
Variations
• Add 2 tablespoons tomato paste for a richer tomato flavor.
• Substitute 1 cup of the stock with a bottle of Mexican beer.
• Add chopped mushrooms, diced butternut squash, parsnips, or any vegetable you’d like.
• Top with a big spoonful of pico de gallo or chopped tomatoes.
• Top with a dollop of sour cream.
• Top with grated sharp cheddar.
Serve
• With corn or flour tortillas
• With corn chips or tortilla chips, for dipping
• With baked potatoes
• On top of a plate of cheese nachos
• Inside crisp taco shells with cheese, lettuce, and tomatoes
Enjoy this, friends! Here’s the handy dandy printable.
.recipe-actions {
position: relative;
z-index: 2;
}
#pdf-popover {
background: rgba(255,255,255,.9);
border: 1px solid #efeeed;
color: #6e5c3a;
display: none;
font-family: Helvetica, Arial, sans-serif;
right: 20px;
margin: 2px;
padding: 54px 20px 7px 10px;
position: absolute;
top: 0;
width: 380px;
z-index: 10;
}
#pdf-popover form {
margin: 0;
}
#pdf-popover h4 {
background: #b15818;
color: #fff;
font-family: Helvetica, Arial, sans-serif;
font-size: 20px;
font-weight: normal;
left: 3px;
margin: 0;
position: absolute;
padding: 6px 12px;
right: 3px;
top: 3px;
}
#pdf-popover legend {
font-family: Helvetica, Arial, sans-serif;
font-size: 120%;
font-weight: bold;
margin-bottom: 2px;
margin-left: 10px;
text-transform: uppercase;
}
#pdf-popover fieldset {
margin-bottom: 15px;
}
#pdf-popover input[type="checkbox"] {
height: 14px;
margin: 2px 0 10px 10px;
padding-left: 14px;
position: relative;
visibility: visible;
width: 14px;
}
#pdf-popover input[type="checkbox"],
#pdf-popover input[type="radio"] {
margin-left: 10px;
}
#pdf-popover .close {
background: #b15818;
color: #FFFFFF;
cursor: pointer;
height: 35px;
font-size: 16px;
font-weight: bold;
line-height: 26px;
position: absolute;
right: 3px;
text-align: center;
top: 3px;
width: 25px;
z-index: 1;
}
#pdf-popover .button {
background-color: #b15818;
border: 0;
color: #fff;
cursor: pointer;
font-family: Helvetica, Arial, sans-serif;
margin-left: 10px;
padding: 8px 10px;
text-transform: uppercase;
}
x
Print Options
Page size
Letter
3x5
4x6
Text Size
Small
Medium
Large
Content
Include description
Include prep time, etc.
Show image
Recipe
Veggie Chili
Prep Time: 15 Minutes
Cook Time: 1 Hour30 Minutes
Difficulty: Easy
Servings: 12
 Print Recipe
Ingredients
2 Tablespoons Olive Oil4 cloves Garlic, Minced1 whole Large Onion, Diced1 whole Red Bell Pepper, Seeded And Diced1 whole Yellow Bell Pepper, Seeded And Diced1 whole Green Bell Pepper, Seeded And Diced2 whole Carrots, Peeled And Diced2 stalks Celery, Diced1 whole Jalapeno, Seeded And Finely Diced3 cups Vegetable Broth (can Sub Chicken Or Beef Broth If You Prefer)1 can (12 To 14 Ounces) Plain Tomato Sauce1 can (10 Ounce) Ro-tel (diced Tomatoes And Chiles)1/2 teaspoon Salt, More To Taste1 teaspoon Ground Oregano1 Tablespoon Ground Cumin2 Tablespoons Chili Powder (more To Taste)1 can (14 Ounces) Kidney Beans, Drained And Rinsed1 can (14-ounce) Pinto Beans, Drained And Rinsed1 can Garbanzo Beans, Drained And Rinsed1 can Black Beans, Drained And Rinsed1 whole Large Zucchini (or 2 Medium Zucchini), Diced1/4 cup Masa (corn Flour) Or Regular Cornmeal1/2 cup Warm Water Cotija Cheese, For Serving (optional) Pico De Gallo, For Serving (optional) Cilantro Leaves, For Serving (optional) Preparation Instructions
In a large pot, heat the oil over medium heat. Add the garlic, onion, 3 colors of bell pepper, carrots, celery, and jalapeno, then cook for about 5 minutes, stirring occasionally, until starting to soften. Add the oregano, cumin, chili powder, and salt. Stir and cook for a few more minutes.
Pour in the broth, tomato sauce, and Ro-tel. Stir, bring to a boil, then reduce the heat to low, cover, and simmer for 30 minutes. Add the beans and zucchini, stir, then cover and simmer for 30 more minutes.
Mix the masa with the warm water and stir it into the pot. Simmer for 15 more minutes. Taste and adjust seasonings.
Serve with Cotija cheese, pico de gallo, and cilantro.
Variations
• Add 2 tablespoons tomato paste for a richer tomato flavor.
• Substitute 1 cup of the stock with a bottle of Mexican beer.
• Add chopped mushrooms, diced butternut squash, parsnips, or any vegetable you’d like.
• Top with a big spoonful of pico de gallo or chopped tomatoes.
• Top with a dollop of sour cream.
• Top with grated sharp cheddar.
Serve
• With corn or flour tortillas
• With corn chips or tortilla chips, for dipping
• With baked potatoes
• On top of a plate of cheese nachos
• Inside crisp taco shells with cheese, lettuce, and tomatoes
Posted by Ree | The Pioneer Woman on February 3 2015
January 29, 2015
Super Bowl Food!
The Super Bowl is this Sunday, and man oh man…I can not wait. Part of this is because I love a good football game…and part of it is that I love Super Bowl food.
For my entire archive of Super Bowl-friendly foods, click here: Super Bowl Recipes on The Pioneer Woman Cooks.
To make it easy, though, I’m listing some of my very favorites here. I link to some of these every year…but that’s ’cause they’re so darn good.
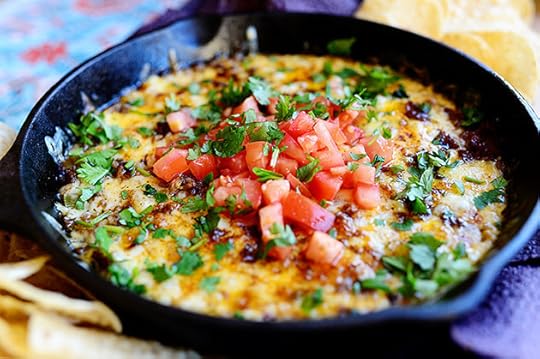 Queso Fundido! Absolutely to die for, and very pretty, too.
 Dark Chocolate Brownies. Rich, chocoholic-pleasing brownie that require a glass of milk!
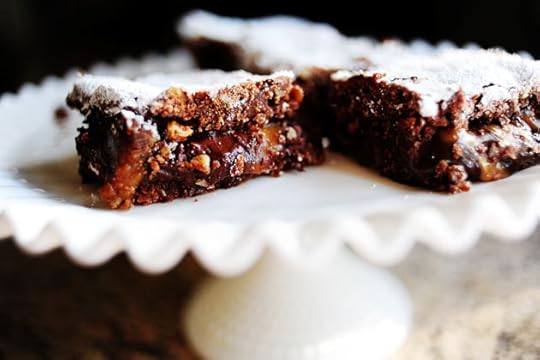 And speaking of brownies…holy moly. These Knock You Naked Brownies are all that. If you ain’t tried them…you ain’t lived.
 If you’re needing to feed a crowd, this Spicy Dr Pepper Pulled Pork is ridiculously perfect. Sweet, spicy, and superb.
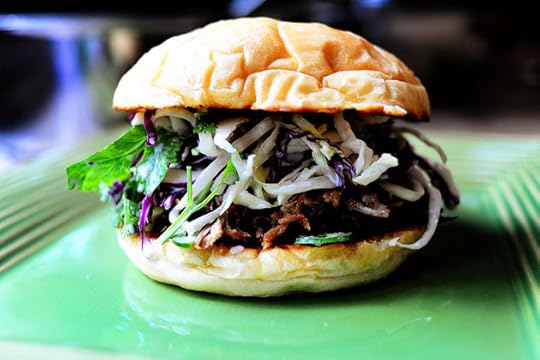 If you make the shredded pork, you can also whip up an easy cilantro slaw and make these luscious sandwiches. Just lay out the pork, the slaw, and buns and let everyone serve themselves!
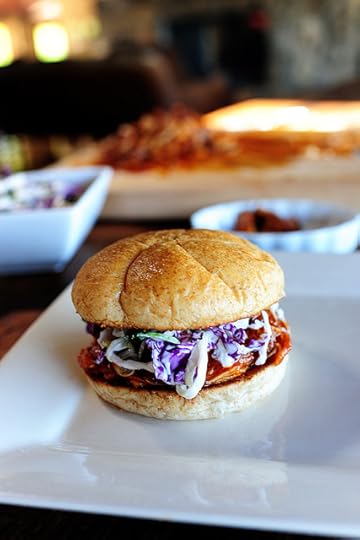 You could also make the cilantro slaw, but go the Barbecue Chicken Sandwich route instead. I want to marry these.
 If you’re looking for a throwback to the early eighties, this Mexican Layer Dip is a retro fave.
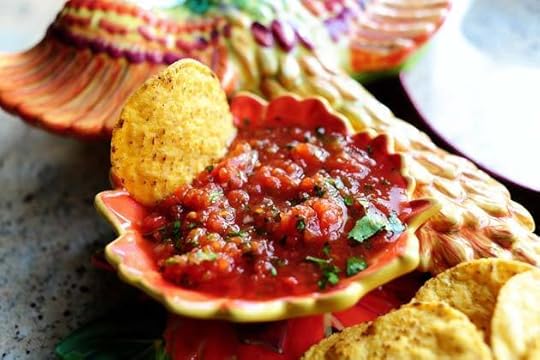 If you’re needing good ol’ chips and salsa, look no further than this Restaurant Style Salsa, a longtime favorite recipe on this website. Turns out perfect every single time.
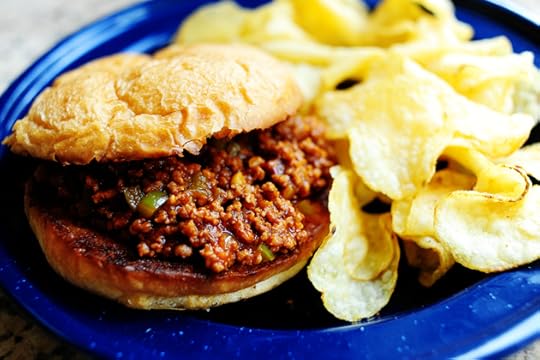 Sloppy Joes are also a good choice for serving a crowd. Make up a big pot, throw some buns in a basket, and tell your football guests to dive in.
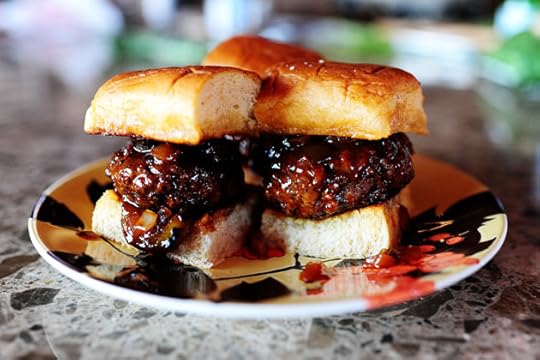 I have several slider recipes on my site, but these Spicy Whiskey BBQ Sliders are probably my faves. Saucy, spicy, and wonderful.
 Grilled Corn Guacamole, which will make you cry from bliss while you’re watching Super Bowl commercials.
 Peanut Butter Sheet Cake with Chocolate Icing. OH MY WORD.
 Chipotle Chicken Chili. Beyond hearty, beyond scrumptious.
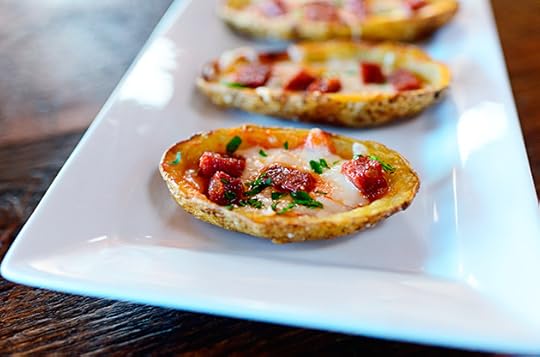 Pizza Potato Skins. Everything you love about Potato Skins, but with a pizza edge.
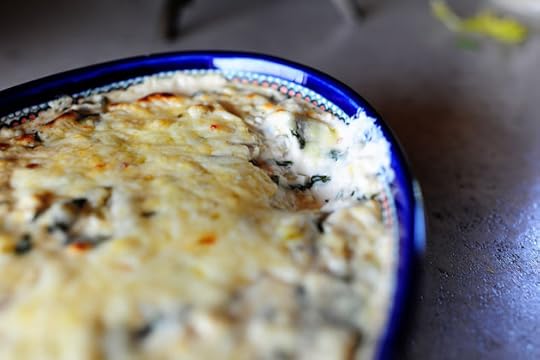 Oooooh. I’ll take this Spinach Artichoke Dip! It’s ta die fer.
Again, here’s the full Super Bowl archive if you want to browse: Super Bowl Recipes.
Hope you have a happy Super Bowl Sunday, everyone!
January 26, 2015
Chicken Nachos
 It’s Super Bowl week, and you know what that means: NACHOS!
I mean, come on. It really is all about the nachos.
(Don’t tell the Seahawks and Patriots I said that.)
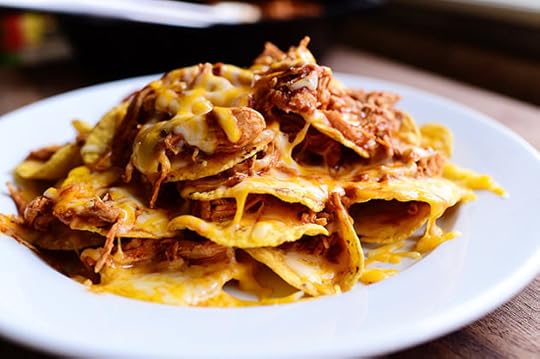
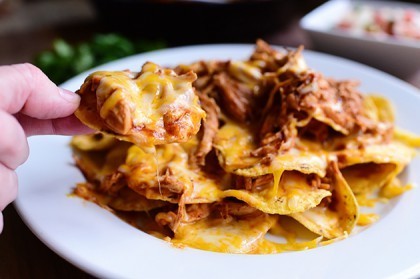
Here’s the step-by-step recipe for the luscious Chicken Nachos I made on Saturday’s football-centric episode of my Food Network show! The chicken is super flavorful and every-so-slightly spicy, and piled on chips with a bunch of melted cheese, it’s about the best football food you can ask for. As I pointed out on the show, you can leave the nachos plain and unadorned in their most basic state (as shown above), or you can pile on a bunch of fixins to make them all yours. (And the meat is also perfect for tacos, quesadillas, burritos…anything!)
Here’s how to make the nachos, baby.
(Sorry I called you baby.)
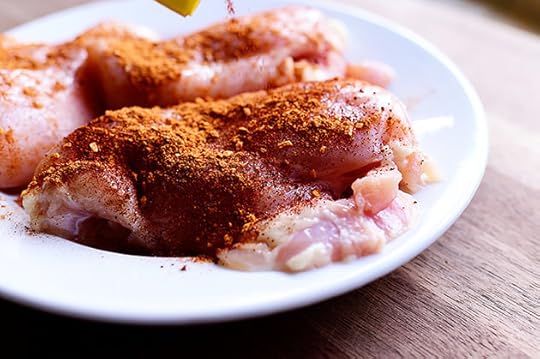 Grab 3 or 4 boneless, skinless chicken breasts (I only had 3 thawed out, but the recipe calls for 4) and sprinkle them generously with a packet of taco seasoning. If you’d rather make your own, just throw together a mix of chili powder, onion salt, cumin, garlic powder, and paprika until it looks right. Either way, you want to coat the heck out of the chicken because the seasoning will also eventually flavor the sauce.
 For good measure, I also sprinkled on some additional chili powder. I wanted the chicken to have plenty of kick!
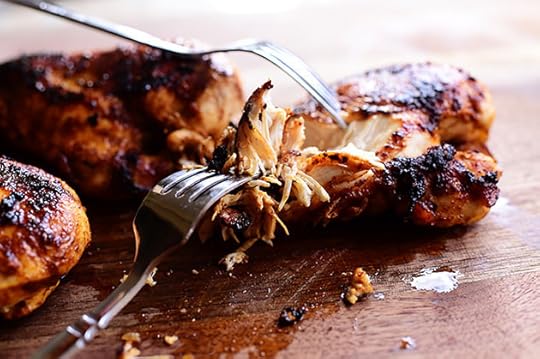
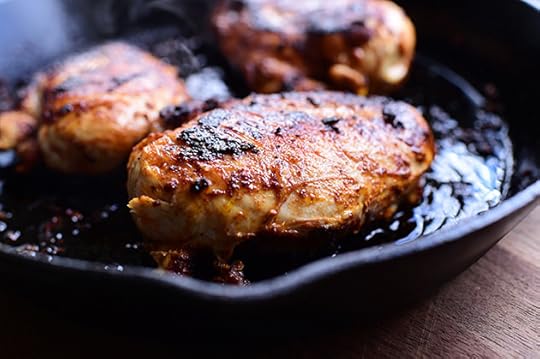 Heat about 1/4 cup olive oil in a heavy skillet over medium to medium-high heat and cook the chicken on both sides until it’s totally done in the middle. I actually started it on medium-high and it got a little brown, so I finished it off on medium.
Don’t worry about the chicken getting nice and brown on the outside, though. We’re a-gonna shred it here in a little bit, and that’ll just give it more flavor.
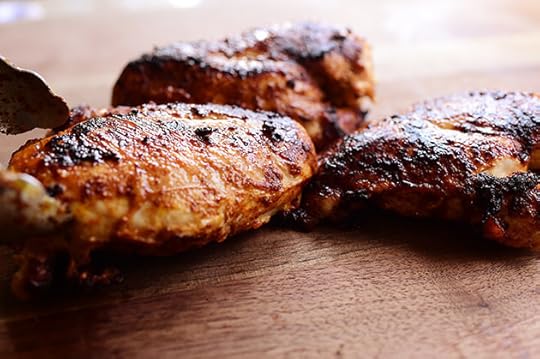 When it’s done, remove the chicken to a cutting board and let it rest for a minute.
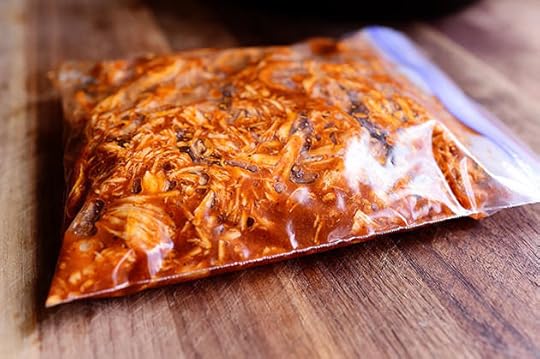
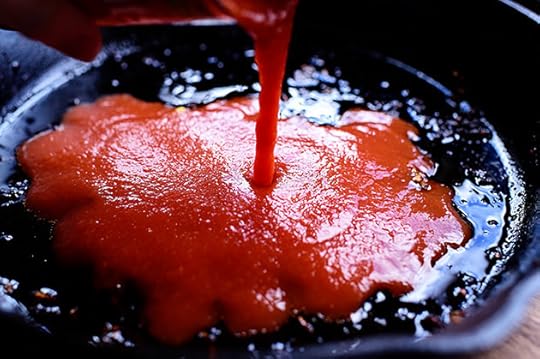 Without cleaning the skillet at all (you want all that flavor the chicken left behind) pour in an 8-ounce can of tomato sauce…
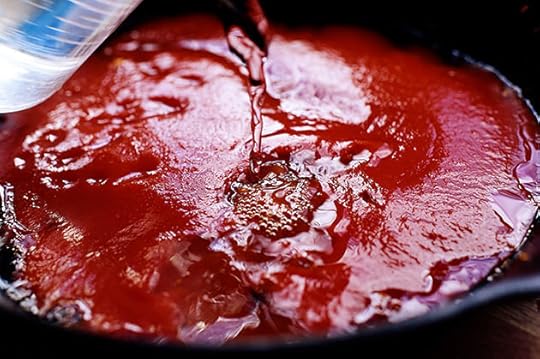 And 2 cups of hot water.
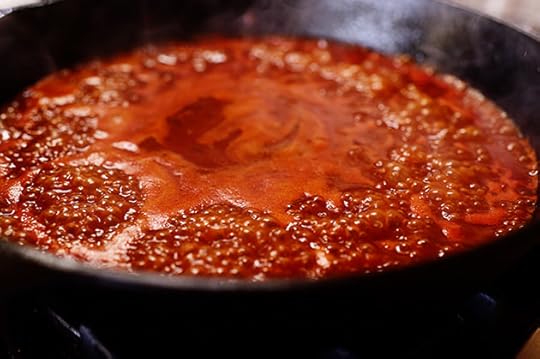 Whisk it around and let it come to a gentle boil…
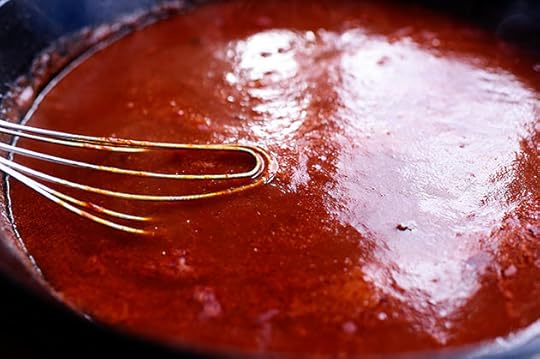 Then reduce the heat to low.
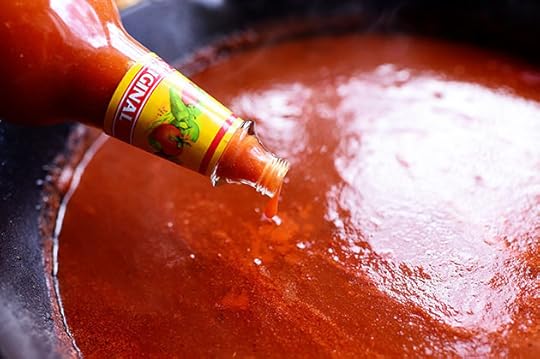 Oh! And here’s where you can taste and doctor the sauce a bit. I added several dashes of my favorite hot sauce in the world, and I also added a little salt.
 Next, use two forks…
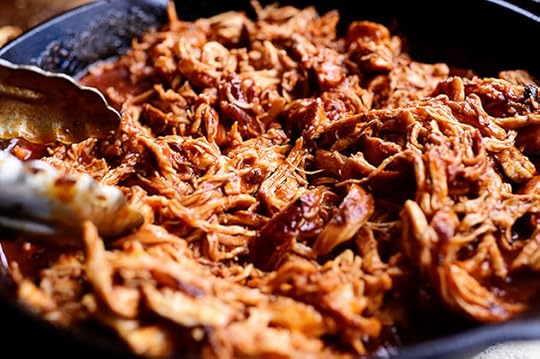
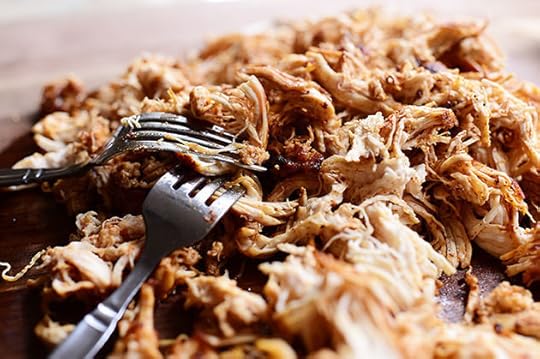 To shred up all that gorgeous chicken. Shred it into bigger chunks if you like, but I like to keep going until it’s pretty fine.
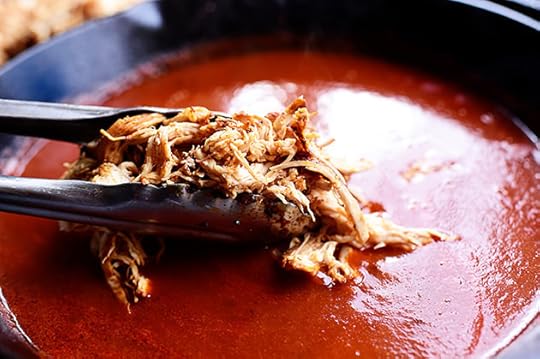 Then just plunk all the chicken…
 Right into the simmering sauce.
 Toss the meat to completely coat it in the sauce…
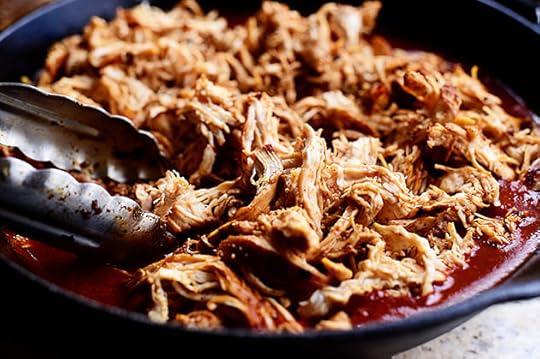
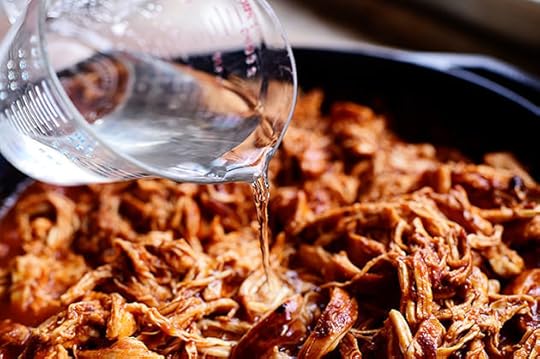 It should be fine, but if you think the sauce is a little bit thick, feel free to pour in a little more hot water until it gets to the sauciness you want.
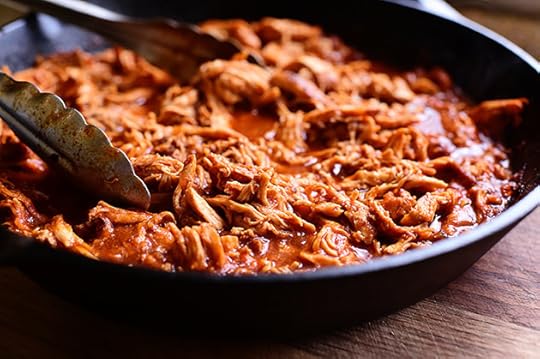 Let it simmer for a bit…and poifect! Absolutely poifect. Saucy, slightly spicy, flavorful…and ready to go.
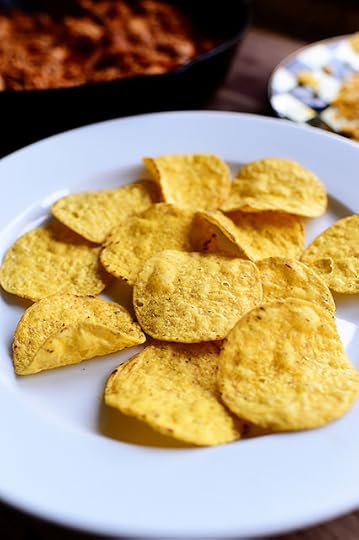 It’s…nacho time!
 Do a layer of chips and cheese…
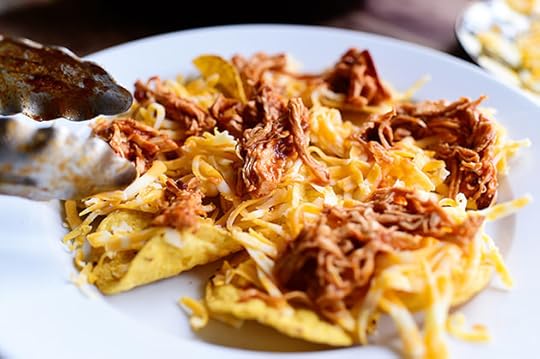 A layer of chicken…
(Note: you can get a lot messier with the chicken if you want. I just didn’t want to freak you out.)
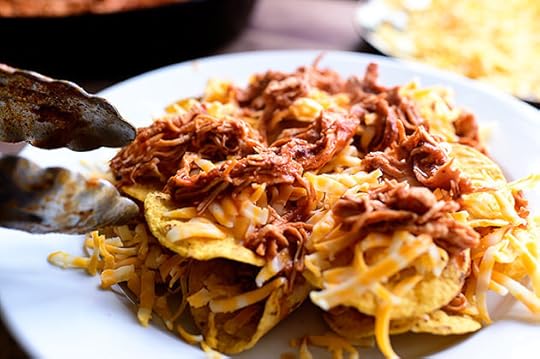 Then goes another layer of chips, cheese, and chicken…
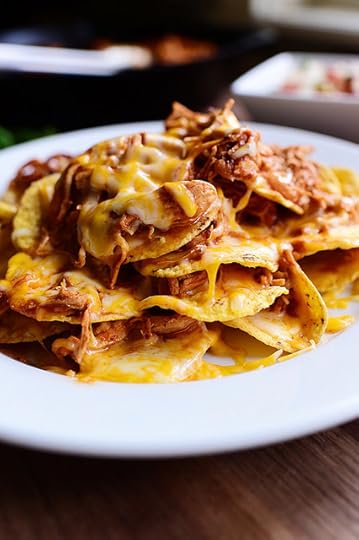
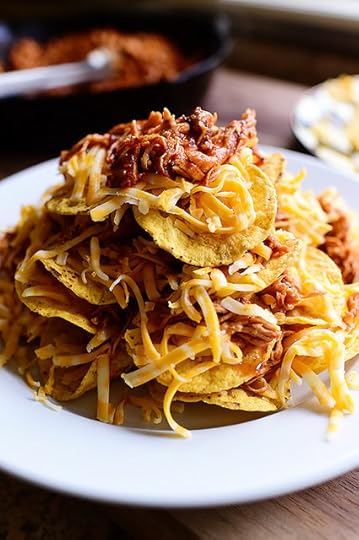 Then just keep on going, making each layer a little smaller, until you have a chicken nacho mountain in front of you and you’re on the verge of feeling embarrassed, but in a good way.
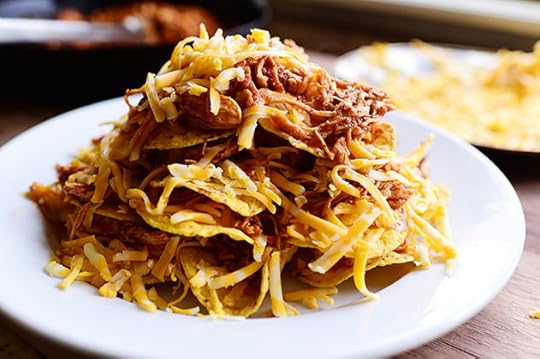 Now it goes into either a 350 degree oven or a microwave…
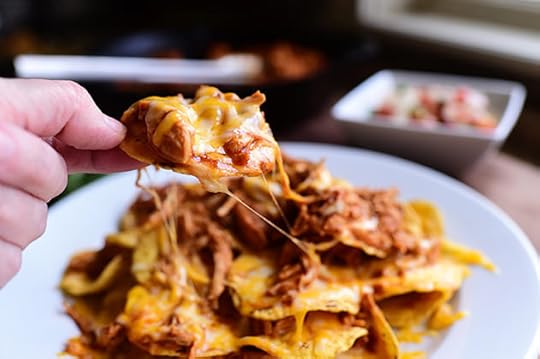
 Until it’s ooey, gooey, and the cheese is all melted.
 You want to make my husband happy? Stick this in front of him while he’s watching a football game.
Just a little inside tip for you in case it ever comes up.
 And okay. It makes me happy, too. And I don’t even need the football game!
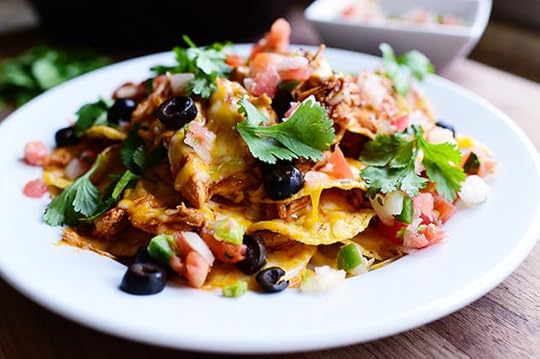 Disclaimer: You can definitely doctor up the nachos however you want: pico de gallo, olives, sour cream, guacamole, cilantro…anything goes.
But there’s nothing like the original.
 And psst. Stick the extra meat in the fridge! It can be used for tacos, pizza, quesadillas, etc.
Here’s the handy dandy printable!
.recipe-actions {
position: relative;
z-index: 2;
}
#pdf-popover {
background: rgba(255,255,255,.9);
border: 1px solid #efeeed;
color: #6e5c3a;
display: none;
font-family: Helvetica, Arial, sans-serif;
right: 20px;
margin: 2px;
padding: 54px 20px 7px 10px;
position: absolute;
top: 0;
width: 380px;
z-index: 10;
}
#pdf-popover form {
margin: 0;
}
#pdf-popover h4 {
background: #b15818;
color: #fff;
font-family: Helvetica, Arial, sans-serif;
font-size: 20px;
font-weight: normal;
left: 3px;
margin: 0;
position: absolute;
padding: 6px 12px;
right: 3px;
top: 3px;
}
#pdf-popover legend {
font-family: Helvetica, Arial, sans-serif;
font-size: 120%;
font-weight: bold;
margin-bottom: 2px;
margin-left: 10px;
text-transform: uppercase;
}
#pdf-popover fieldset {
margin-bottom: 15px;
}
#pdf-popover input[type="checkbox"] {
height: 14px;
margin: 2px 0 10px 10px;
padding-left: 14px;
position: relative;
visibility: visible;
width: 14px;
}
#pdf-popover input[type="checkbox"],
#pdf-popover input[type="radio"] {
margin-left: 10px;
}
#pdf-popover .close {
background: #b15818;
color: #FFFFFF;
cursor: pointer;
height: 35px;
font-size: 16px;
font-weight: bold;
line-height: 26px;
position: absolute;
right: 3px;
text-align: center;
top: 3px;
width: 25px;
z-index: 1;
}
#pdf-popover .button {
background-color: #b15818;
border: 0;
color: #fff;
cursor: pointer;
font-family: Helvetica, Arial, sans-serif;
margin-left: 10px;
padding: 8px 10px;
text-transform: uppercase;
}
x
Print Options
Page size
Letter
3x5
4x6
Text Size
Small
Medium
Large
Content
Include description
Include prep time, etc.
Show image
Recipe
Chicken Nachos
Prep Time: 5 Minutes
Cook Time: 20 Minutes
Difficulty: Easy
Servings: 12
 Print Recipe
Ingredients
4 whole Boneless, Skinless Chicken Breasts2 Tablespoons Taco Seasoning2 Tablespoons Chili Powder Salt As Needed1/4 cup Olive Oil1 can (8 Ounces) Tomato Sauce2 cups Hot Water Several Dashes Hot Sauce Good Tortilla Chips Cheddar Jack Cheese, Freshly Grated Optional: Pico De Gallo, Sour Cream, Sliced Black Olives, Sliced Green Onions, Cilantro Leaves, Guacamole, Etc. Preparation Instructions
Sprinkle both sides of the chicken breasts with the taco seasoning and chili powder. Rub in the seasoning as much as you can.
Heat the olive oil in a heavy skillet over medium heat. Cook the chicken breasts on both sides until deep golden and totally done in the middle, about 4 minutes per side. Remove from the skillet and let rest for a few minutes.
Whisk in the tomato sauce and the hot water (plus the hot sauce) and bring to a gentle boil. Reduce the heat to low and keep warm. Taste and adjust seasonings (may need salt, depending on the taco seasoning you use.)
Shred the chicken with 2 forks and transfer the shredded chicken to the sauce. Toss to coat it in the sauce and allow to simmer for a few minutes.
To build the nachos, build several layers of chips, cheese, and chicken, ending with a small layer on top. Microwave the dish (or put it in a 350 degree oven if ovenproof) until the cheese is totally melted.
Serve as is or add whatever extras you'd like! Dive into it immediately.
Posted by Ree | The Pioneer Woman on January 26 2015
January 21, 2015
Butterscotch Pudding
 I had a busy day yesterday because I’m getting ready to start shooting more Food Network episodes on the ranch, and by late afternoon I had a little block of time alone in the house before I had to to run Bryce to the end of our road to meet Marlboro Man, who had to run him to his out-of-town basketball game, before I had to drive the other direction to our town to pick up Todd at basketball practice, just after my girls left for soccer practice in yet another town. And by the way, I have no idea what I was thinking when the kids were all babies and toddlers and I thought life was—ahem—”busy.” Oh my word, oh my word, oh my lands. The sports. The practices. The games. The driving. The coordinating. The remembering who is where. The praying you don’t forget to pick up someone, feed someone, or make sure they have clean underwear.
(I’m pretty good at two of those last three things. I won’t say which two.)
Anyway, during this small window of free time, I was struck suddenly with a massive craving for something sweet; as in, I had to have something sweet fast or I was going to start getting anxious. And I’m not quite sure how this happened, but as I searched for the perfect treat to eat, I discovered, to paraphrase the Good Book, that my kitchen was without sweets and void, and darkness was upon the face of my pantry. I’d been so busy getting groceries ready for real meals that I’d inadvertently let the dessert stores deplete, and I decided to make a quick batch of pudding. It was either that or grab the container of Nutella and a very large spoon.
I was originally thinking Chocolate Pudding, which is really just the Chocolate Pie Filling I always make, but then I decided to make Butterscotch Pudding instead! It requires the simplest of changes: rather than white sugar, I use brown…and I leave out the chocolate. Simple as pie!
I mean pudding.
I mean here’s how to make it.
 Into a medium (preferably nonstick) skillet, throw in some brown sugar…
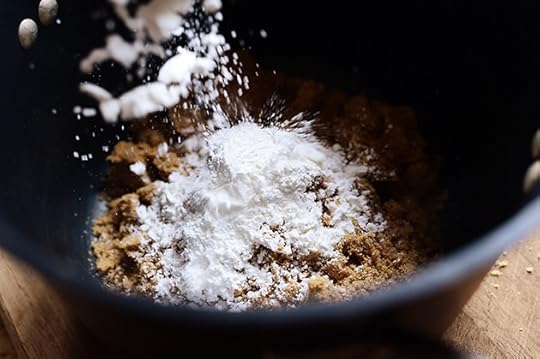 Then add some cornstarch…
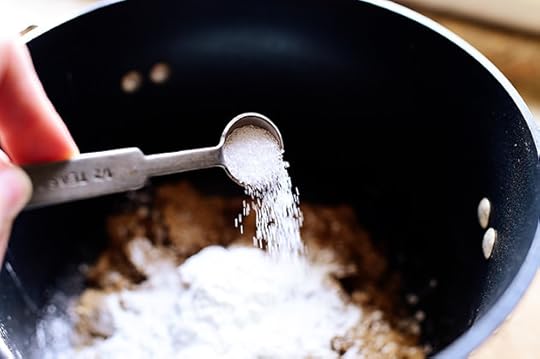 And some salt.
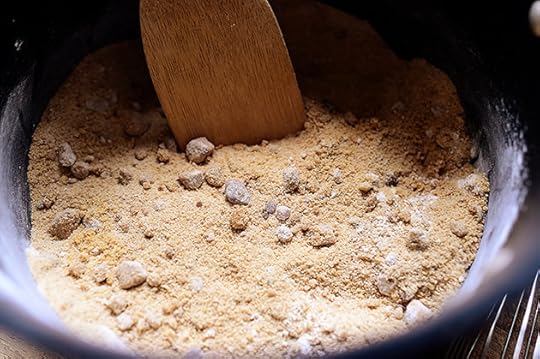 Ooooh. Look how awesomely cool I am with my brown sugar lumps!
It happens.
And when it does, don’t let it break your spirit. Just rock those brown sugar lumps like you totally planned on them being there!
Ha.
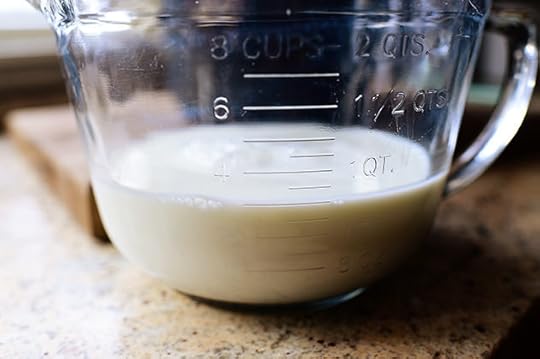 Now, for the liquid: in a pitcher, measure 3 cups of whole milk. Now, this is where I had a panic episode (well, as much as a person can panic about pudding, which in my case is quite profoundly) when I discovered that all the whole milk was gone and I only had 2%. I’m really batting a thousand with stocking my kitchen, aren’t I? Anyway, everything turned out fine, but just know that using whole milk is always best when you make pudding because that little bit of extra fat really sends it over the edge, creaminess-wise.
And to be honest, I wouldn’t fault you if you added 2 tablespoons of heavy cream to the whole milk. Ahem. Optional!
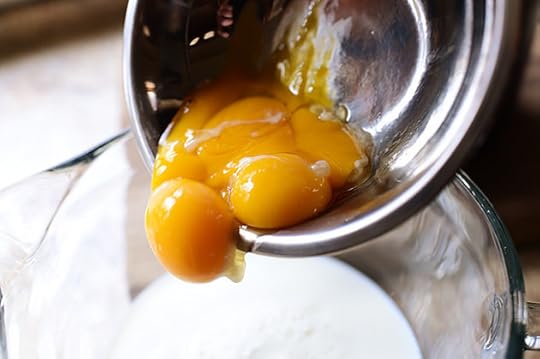 Into the milk goes 4 egg yolks, then just whisk it together until it’s combined.
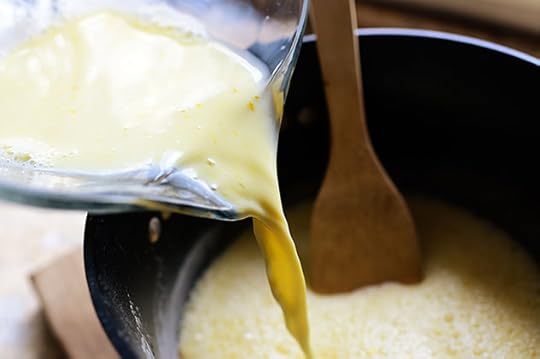 Pour the milk/egg mixture into the pan…
 Stir it together…
(Oh, and I also wouldn’t fault you if you added a tiny splash of scotch whiskey to the liquid.)
(Just saying.)
 Then turn the stove to medium heat and commit the next 8 to 10 (give or take) minutes of your life to gently stirring the pudding.
 It will take a little while for the concoction to start to heat up. In fact, it will seem like forever, especially if you’re in the mood for butterscotch pudding, which I most definitely WAS yesterday.
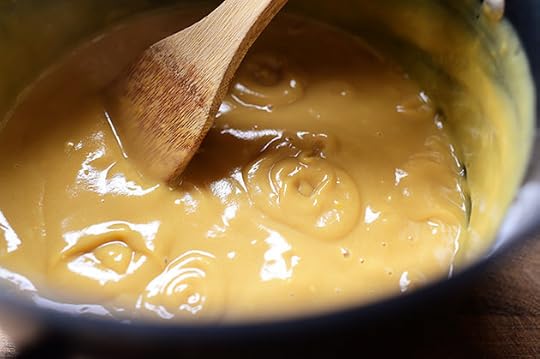 But then, out of the clear blue sky, it will get hot enough to start to bubble violently and get thick. Let it cook/bubble like this for a good 30 seconds until it reaches pudding consistency…
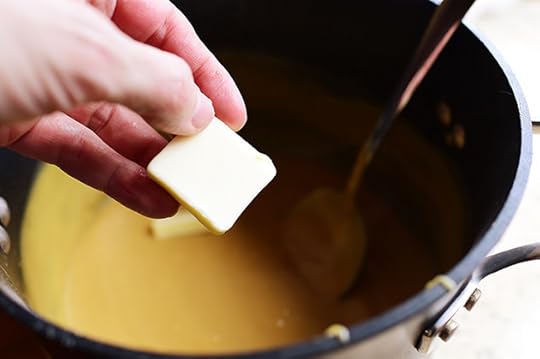 Then remove it from the stove and stir in 2 tablespoons of butter until it’s all melted.
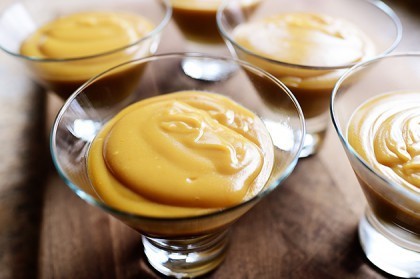
 Spoon it into the dishes you want to serve the pudding in: Cute little dessert glasses, demitasse cups, ramekins, small bowls…whatever you want! Then refrigerate them, covered in plastic wrap, for a good hour—two if you can wait.
(Or, who am I kidding? Just eat it warm right out of the pan.)
(Or—how about this? Make a chocolate cookie pie crust and turn this into a Butterscotch Pie.)
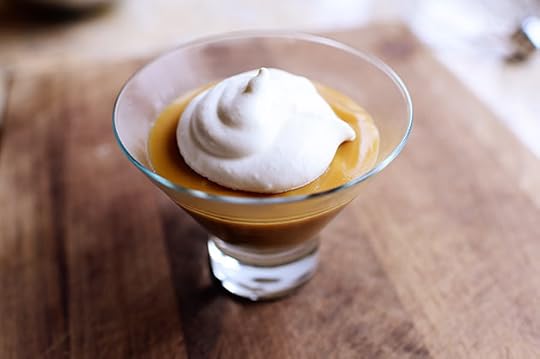 Plain, unsweetened whipped cream is always a good idea. (The pudding is plenty sweet on its own!)
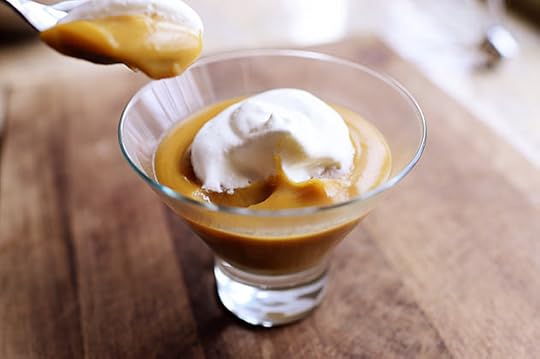 Such a treat, whether warm or cold! (And for the record, I ate it warm. I couldn’t wait. It’s the kind of gal I am.)
Here’s the handy dandy printable!
.recipe-actions {
position: relative;
z-index: 2;
}
#pdf-popover {
background: rgba(255,255,255,.9);
border: 1px solid #efeeed;
color: #6e5c3a;
display: none;
font-family: Helvetica, Arial, sans-serif;
right: 20px;
margin: 2px;
padding: 54px 20px 7px 10px;
position: absolute;
top: 0;
width: 380px;
z-index: 10;
}
#pdf-popover form {
margin: 0;
}
#pdf-popover h4 {
background: #b15818;
color: #fff;
font-family: Helvetica, Arial, sans-serif;
font-size: 20px;
font-weight: normal;
left: 3px;
margin: 0;
position: absolute;
padding: 6px 12px;
right: 3px;
top: 3px;
}
#pdf-popover legend {
font-family: Helvetica, Arial, sans-serif;
font-size: 120%;
font-weight: bold;
margin-bottom: 2px;
margin-left: 10px;
text-transform: uppercase;
}
#pdf-popover fieldset {
margin-bottom: 15px;
}
#pdf-popover input[type="checkbox"] {
height: 14px;
margin: 2px 0 10px 10px;
padding-left: 14px;
position: relative;
visibility: visible;
width: 14px;
}
#pdf-popover input[type="checkbox"],
#pdf-popover input[type="radio"] {
margin-left: 10px;
}
#pdf-popover .close {
background: #b15818;
color: #FFFFFF;
cursor: pointer;
height: 35px;
font-size: 16px;
font-weight: bold;
line-height: 26px;
position: absolute;
right: 3px;
text-align: center;
top: 3px;
width: 25px;
z-index: 1;
}
#pdf-popover .button {
background-color: #b15818;
border: 0;
color: #fff;
cursor: pointer;
font-family: Helvetica, Arial, sans-serif;
margin-left: 10px;
padding: 8px 10px;
text-transform: uppercase;
}
x
Print Options
Page size
Letter
3x5
4x6
Text Size
Small
Medium
Large
Content
Include description
Include prep time, etc.
Show image
Recipe
Butterscotch Pudding
Prep Time: 1 Hour
Cook Time: 10 Minutes
Difficulty: Easy
Servings: 6
 Print Recipe
Ingredients
1-1/2 cup Brown Sugar, Light Or Dark Is Fine1/4 cup Cornstarch1/2 teaspoon Salt3 cups Whole Milk4 whole Large Egg Yolks (discard Or Save Whites For Another Use)2 Tablespoons Butter Unsweetened Whipped Cream Preparation Instructions
Gently whisk together the brown sugar, cornstarch, and salt in a medium nonstick pan.
In a separate pitcher or bowl, whisk together the milk and egg yolks. Pour it into the pan with the brown sugar mixture and stir to combine.
Turn on the heat to medium and cook, stirring gently, until the mixture just starts to bubble up/get very thick. (This can take a good 10 minutes or so.) When it reaches pudding consistency, stir in the butter until melted, then remove it from the heat and spoon it into bowls, glasses (be careful; mixture is hot), demitasse cups, etc. Chill the pudding for at least 1 hour or until very cold.
Top with unsweetened whipped cream and serve!
Posted by Ree | The Pioneer Woman on January 21 2015
January 19, 2015
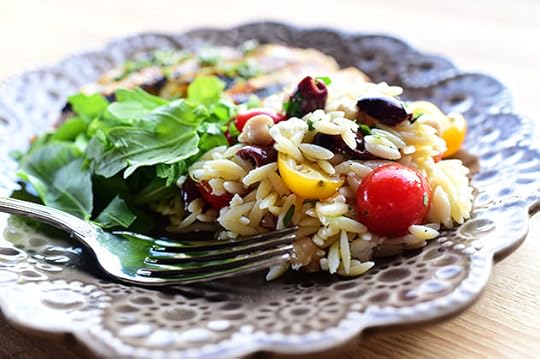
Mediterranean Orzo Salad
 I love a good orzo salad, and this is one of my favorites because it’s tangy and fresh and there are approximately fourteen million fun ingredients…so it goes with pretty much everything!
You know what Confucius always said: “There’s just something about that orzo!”
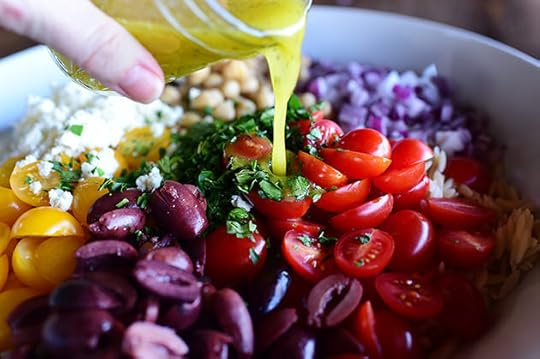
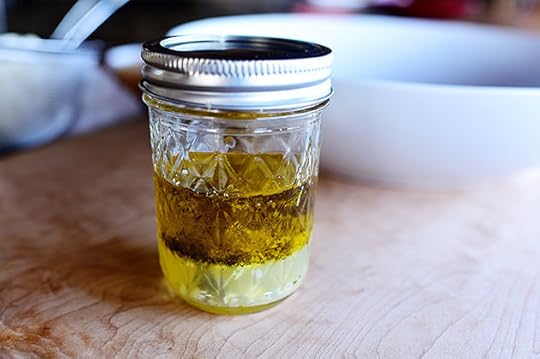 First, make the delicious dressing (alliteration alert): Combine the olive oil, lemon juice, garlic, salt, and pepper in a jar…
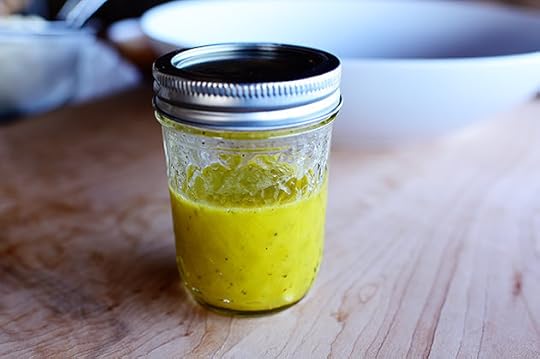 And shake it for approximately 38.5736222 seconds to combine. Give or take a year.
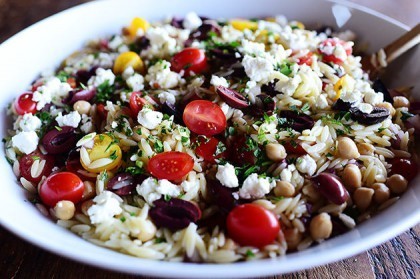
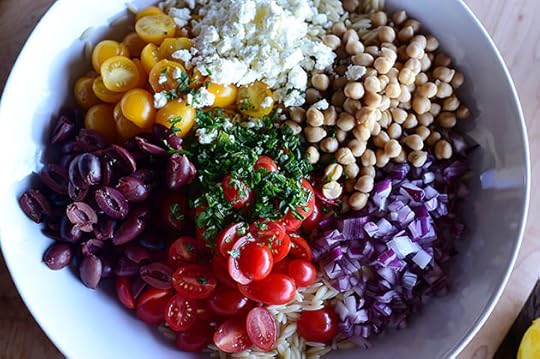 Place the cooked, cooled orzo into a large bowl with all the other ingredients. As you can see, there are so many “other ingredients” that you can barely see the poor orzo, but trust me…it’s there! You can see it peeking out from beneath the tomatoes.
I added tomatoes (yellow and red), red onion, garbanzo beans (yum!), pitted kalamata olives, feta cheese, and parsley! But you can add cucumbers, other olives…anything you want.
Oh, and a note about orzo. It grows when it cooks, man! Seriously, you can start with just a tiny little container of the stuff and pretty soon you have to move out of your house because the orzo has taken over. So just be sure to gauge how much orzo you have relative to the other ingredients, and adjust according to your taste or mood or astrological sign.
 Pour over the dressing and toss it all together, making sure it’s all combined. Then it’s always nice to pop it in the fridge for at least an hour, just to let all the flavors meld. Oh, and give it a taste.
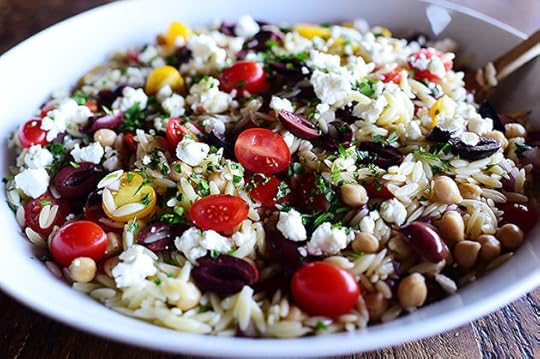
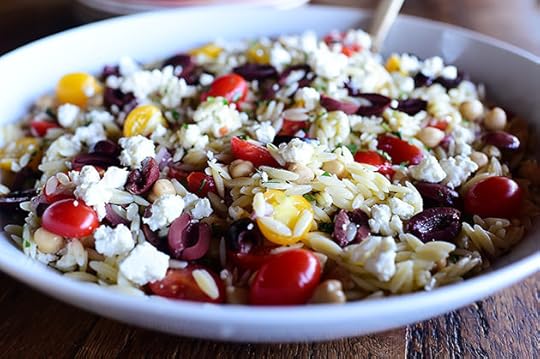 When you serve it, throw a little more feta on top for good luck. Or good measure. Or good will. Or all of the above!
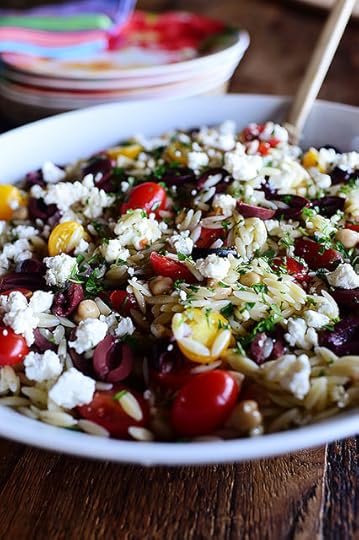 And a little extra parsley makes it even purtier.
 Variations
• Add Parmesan shavings
• Add diced grilled chicken
• Add sliced cucumbers
 Serve with:
• Burgers
• Grilled Chicken
• Grilled Vegetables
• Roasted chicken legs for a picnic
Here’s the handy dandy printable!
.recipe-actions {
position: relative;
z-index: 2;
}
#pdf-popover {
background: rgba(255,255,255,.9);
border: 1px solid #efeeed;
color: #6e5c3a;
display: none;
font-family: Helvetica, Arial, sans-serif;
right: 20px;
margin: 2px;
padding: 54px 20px 7px 10px;
position: absolute;
top: 0;
width: 380px;
z-index: 10;
}
#pdf-popover form {
margin: 0;
}
#pdf-popover h4 {
background: #b15818;
color: #fff;
font-family: Helvetica, Arial, sans-serif;
font-size: 20px;
font-weight: normal;
left: 3px;
margin: 0;
position: absolute;
padding: 6px 12px;
right: 3px;
top: 3px;
}
#pdf-popover legend {
font-family: Helvetica, Arial, sans-serif;
font-size: 120%;
font-weight: bold;
margin-bottom: 2px;
margin-left: 10px;
text-transform: uppercase;
}
#pdf-popover fieldset {
margin-bottom: 15px;
}
#pdf-popover input[type="checkbox"] {
height: 14px;
margin: 2px 0 10px 10px;
padding-left: 14px;
position: relative;
visibility: visible;
width: 14px;
}
#pdf-popover input[type="checkbox"],
#pdf-popover input[type="radio"] {
margin-left: 10px;
}
#pdf-popover .close {
background: #b15818;
color: #FFFFFF;
cursor: pointer;
height: 35px;
font-size: 16px;
font-weight: bold;
line-height: 26px;
position: absolute;
right: 3px;
text-align: center;
top: 3px;
width: 25px;
z-index: 1;
}
#pdf-popover .button {
background-color: #b15818;
border: 0;
color: #fff;
cursor: pointer;
font-family: Helvetica, Arial, sans-serif;
margin-left: 10px;
padding: 8px 10px;
text-transform: uppercase;
}
x
Print Options
Page size
Letter
3x5
4x6
Text Size
Small
Medium
Large
Content
Include description
Include prep time, etc.
Show image
Recipe
Mediterranean Orzo Salad
Prep Time: 2 Hours
Cook Time:
Difficulty: Easy
Servings: 12
 Print Recipe
Ingredients
1/4 cup Extra Virgin Olive Oil1 whole Lemon, Juiced1 clove Garlic, Minced Salt And Pepper, to taste12 ounces, weight Orzo Pasta, Cooked, Drained, And Cooled1 cup Red Grape Or Cherry Tomatoes1 cup Yellow Grape Or Cherry Tomatoes1 cup Kalamata Olives, Halved1 cup Crumbled Feta Cheese1 cup Chickpeas, Drained.1/2 whole Red Onion, Diced3 Tablespoons Minced Fresh Parsley Preparation Instructions
In a jar or bowl, mix together the olive oil, lemon juice, garlic, salt, and pepper until totally combined.
Place the orzo and all the other ingredients in a large mixing bowl and pour the dressing over the top. Stir to combine, taste and adjust seasonings, and refrigerate at least an hour before serving. Top with more feta and parsley and serve as a main dish salad or with grilled chicken, fish, or burgers!
Posted by Ree | The Pioneer Woman on January 19 2015
January 12, 2015
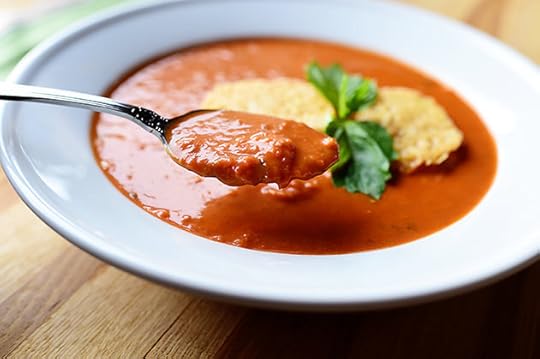
Tomato Soup with Parmesan Croutons
 I made this luscious soup on Saturday’s “Souper Good” episode on Food Network, and it’s also going to be in my next cookbook, which, if I play my cards right (translation: if I get it done), will be out this fall. But it’s so scrumptious, warm, satisfying, and luscious, I wanted to share the recipe here so you could benefit from all the soupy goodness now, not next winter! (Saving recipes for a later time has never been my strong suit. But you probably already knew that.)
Here’s the step-by-step recipe, friends! (And psssst. As good as the soup is, the croutons are just as yummy.)
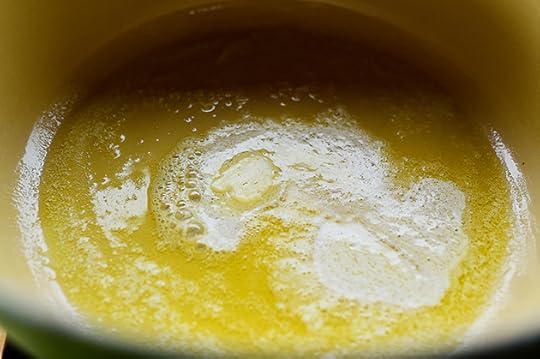 In a big ol’ pot, melt some butter with some olive oil over medium-high heat…
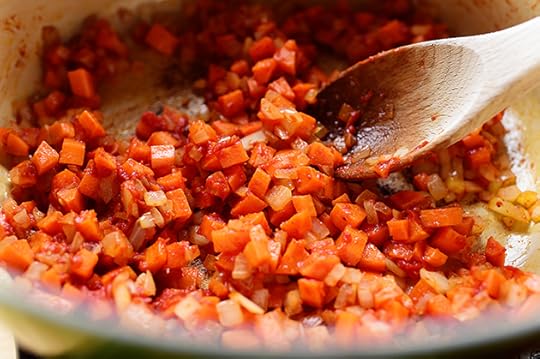
 Then grate in some garlic (or mince it and throw it in)…
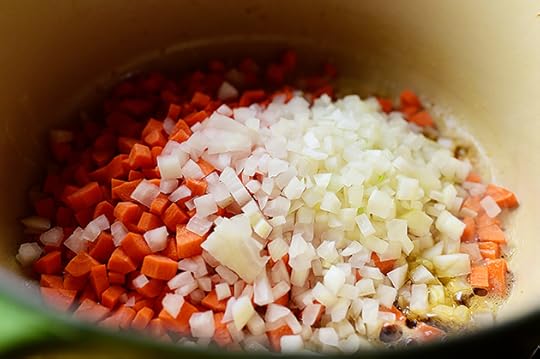 Along with some diced carrots and onions.
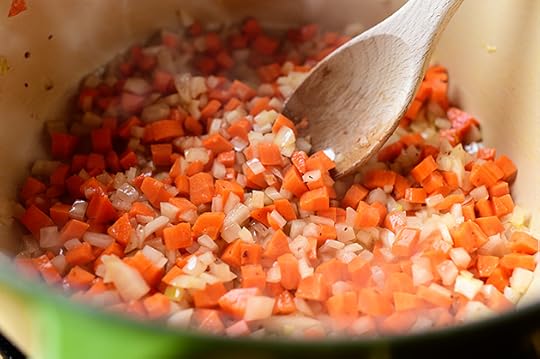 Stir the veggies around and cook ‘em for about 5 minutes or so, until they start to soften.
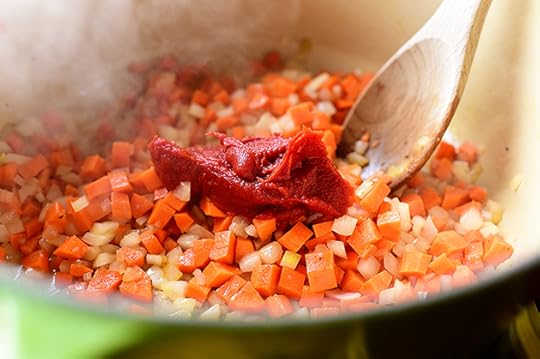 Now, to get the tomato flavor going, plop in some tomato paste…
 And stir it into the veggies, letting it cook and release its flavor for a couple o’ minutes.
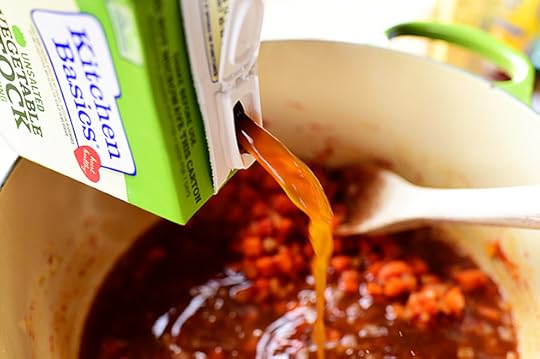 Next, add a cup of water along with a bunch of broth! I used this gorgeous vegetable broth, which has a nice, deep color, but you can use chicken or beef broth…whatever you’ve got on hand.
 Stir it around, bring it to a boil, then reduce the heat, cover the pot, and let it simmer for 15 to 20 minutes.
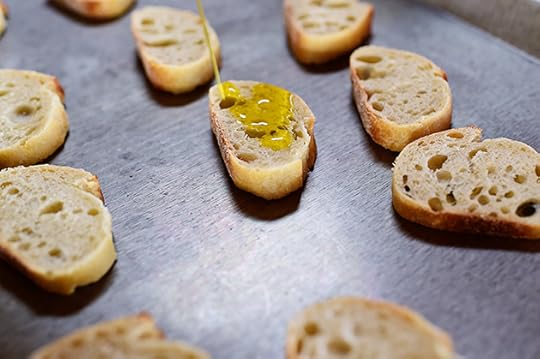 While it’s simmering, make the croutons! And you can do this well in advance if you want. They freeze really well! Cut a baguette into rounds, then drizzle them with a little olive oil.
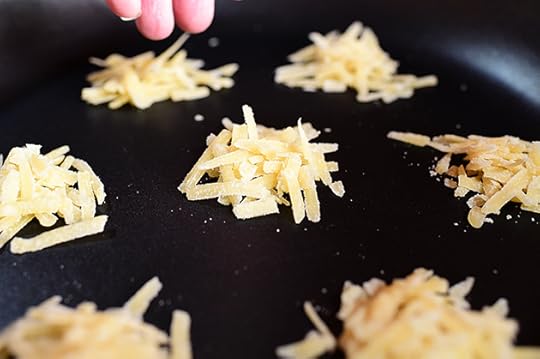 Grate some Parmesan cheese and put little piles (probably a tablespoon or so?) in a nonstick (if you have it) skillet.
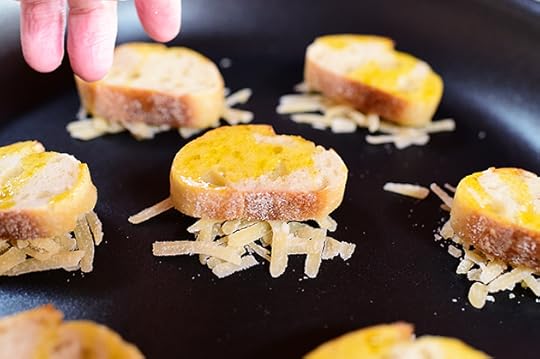 Lay a crostini round on each Parmesan pile…and THEN turn the heat to medium. If you turn on the heat before you start laying on the Parmesan, the crostini won’t stick to the cheese as well and then everything will be roont. (Translation: “ruined.”)
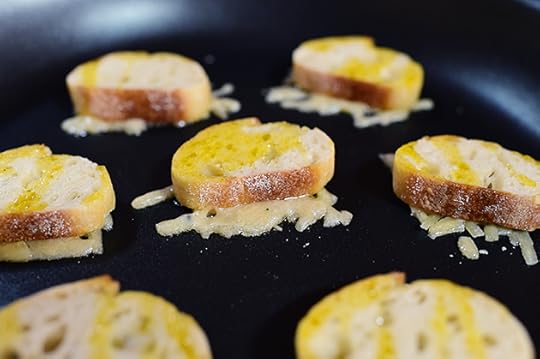 Pretty soon, the cheese will start to melt…
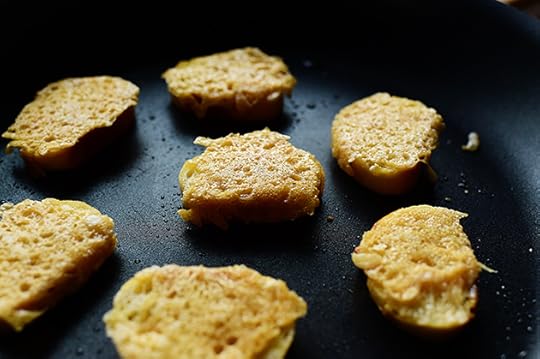 And when it’s nice and melted and starting to bubble, carefully flip the croutons over to toast a bit on the other side.
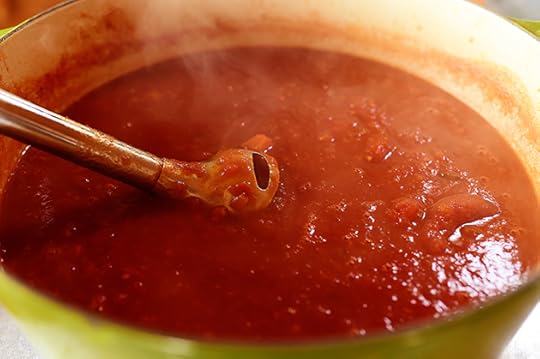 And guess what? The soup is done! You can serve it as is, but there might be some mighty big chunks of tomatoes and carrots in there. So I like to stick in the immersion blender and puree it about halfway.
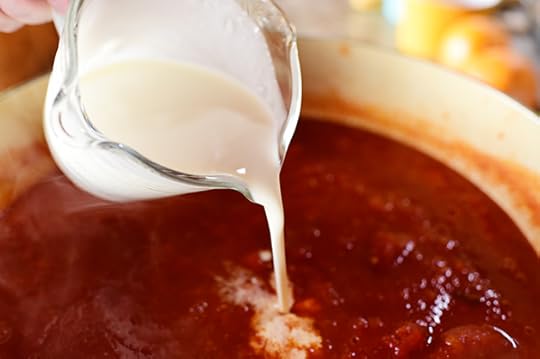 Then I just pour in a little cream (I didn’t use this full amount!) to soften (flavor-wise) the tomatoes a bit and to give the soup a little, well, creaminess.
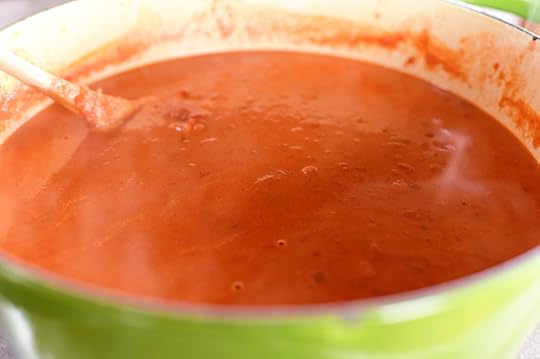 Stir it around and let it cook for a few more minutes…
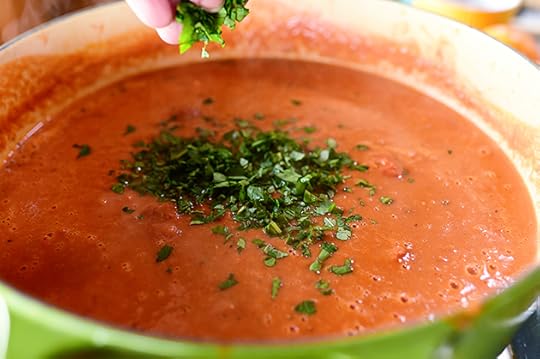 Then sprinkle in some chopped basil!
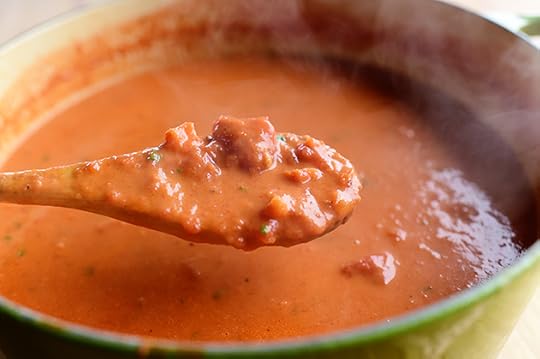 Oh, dear. How good does this look?
That was a rhetorical question.
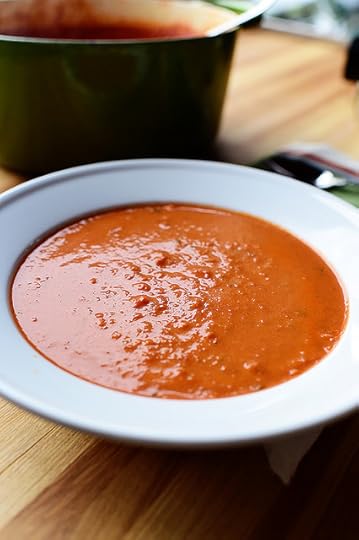 Serve it in a bowl…
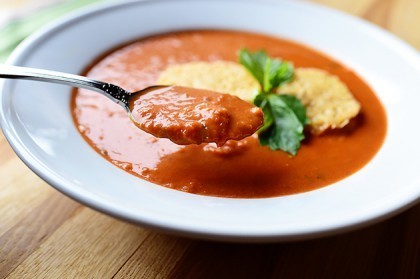
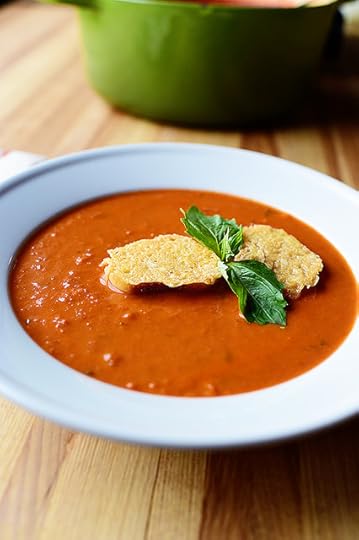 With a couple of croutons and a little more basil.
This is very, very yummy.
And who am I kidding? I ate four croutons.
Okay, five.
Six, okay? I ate six croutons.
I mean seven.
Here’s the handy dandy printable!
.recipe-actions {
position: relative;
z-index: 2;
}
#pdf-popover {
background: rgba(255,255,255,.9);
border: 1px solid #efeeed;
color: #6e5c3a;
display: none;
font-family: Helvetica, Arial, sans-serif;
right: 20px;
margin: 2px;
padding: 54px 20px 7px 10px;
position: absolute;
top: 0;
width: 380px;
z-index: 10;
}
#pdf-popover form {
margin: 0;
}
#pdf-popover h4 {
background: #b15818;
color: #fff;
font-family: Helvetica, Arial, sans-serif;
font-size: 20px;
font-weight: normal;
left: 3px;
margin: 0;
position: absolute;
padding: 6px 12px;
right: 3px;
top: 3px;
}
#pdf-popover legend {
font-family: Helvetica, Arial, sans-serif;
font-size: 120%;
font-weight: bold;
margin-bottom: 2px;
margin-left: 10px;
text-transform: uppercase;
}
#pdf-popover fieldset {
margin-bottom: 15px;
}
#pdf-popover input[type="checkbox"] {
height: 14px;
margin: 2px 0 10px 10px;
padding-left: 14px;
position: relative;
visibility: visible;
width: 14px;
}
#pdf-popover input[type="checkbox"],
#pdf-popover input[type="radio"] {
margin-left: 10px;
}
#pdf-popover .close {
background: #b15818;
color: #FFFFFF;
cursor: pointer;
height: 35px;
font-size: 16px;
font-weight: bold;
line-height: 26px;
position: absolute;
right: 3px;
text-align: center;
top: 3px;
width: 25px;
z-index: 1;
}
#pdf-popover .button {
background-color: #b15818;
border: 0;
color: #fff;
cursor: pointer;
font-family: Helvetica, Arial, sans-serif;
margin-left: 10px;
padding: 8px 10px;
text-transform: uppercase;
}
x
Print Options
Page size
Letter
3x5
4x6
Text Size
Small
Medium
Large
Content
Include description
Include prep time, etc.
Show image
Recipe
Tomato Soup with Parmesan Croutons
Prep Time: 10 Minutes
Cook Time: 30 Minutes
Difficulty: Easy
Servings: 12
 Print Recipe
Ingredients
SOUP1 Tablespoon Butter1 Tablespoon Olive Oil1 clove Garlic, Minced Fine Or Grated1 whole Onion, Finely Diced3 whole Large Carrots, Peeled And Finely Diced2 Tablespoons Tomato Paste3 cans (28 Ounces Each) Whole Tomatoes32 ounces, fluid Vegetable Or Chicken Broth1 cup Water2 Tablespoons Minced Fresh Parsley1/2 cup Heavy Cream Salt And Pepper, to taste2 Tablespoons Chopped Fresh Basil Croutons1/2 whole Baguette, Sliced Into Rounds1/2 cup Freshly Shredded Parmesan Cheese Fresh Basil, For Garnish Preparation Instructions
In a large pot, heat butter and oil over medium-high heat, then add onion, garlic, and carrots. Stir and cook for 5 minutes. Add tomato paste and stir it in, cooking for another 2-3 minutes. Add canned tomatoes with their juice, broth, water, and parsley. Stir together and bring to a boil, then reduce the heat, cover the pot, and simmer for 15-20 minutes, longer if you have time. Use an immersion blender to puree, still leaving some texture to the tomatoes. Add cream, salt, pepper, and basil, and simmer for another 5 minutes.
To make the croutons, drizzle crostini rounds lightly with olive oil. Place little piles of Parmesan in a nonstick skillet. Place a crostini round on top of each pile. Turn on the heat to medium. Press with a spatula as you melt the cheese into each round. When set, flip to the other side to toast.
Serve soup with one or two croutons on top and a little bit of basil.
NOTE: Recipe can easily be halved!
Posted by Ree | The Pioneer Woman on January 12 2015
Ree Drummond's Blog

- Ree Drummond's profile
- 2017 followers

