
Ree Drummond's Blog, page 25
October 8, 2014
Chocolate Pie
 Whenever my husband, the strapping stallion I call Marlboro Man, imagines chocolate pie—and I imagine that he imagines it frequently, because it’s one of his favorite desserts—he doesn’t think of French Silk Pie or Chocolate Chiffon Pie or Chocolate Chess Pie or any other variation. He thinks of this one. This is just good ol’ basic, can’t-go-wrong, everyone-loves-it, super-easy-to-make, been-around-forever chocolate pie with a pudding filling, and my beloved could seriously eat a slice every day of his life and never get bored.
I could too, I might add.
And speaking of that: This pie is always one of those things that drives home to me the differences between Marlboro Man and me, and let me explain: In no universe would he ever, ever consider adorning his chocolate pie with anything. Not whipped cream, not fruit, not nuts, not sauces…nothing. To him, that would mar the beautiful simplicity of this luscious dessert and he sees absolutely no logical reason for it.
I, on the other hand, will keep adding stuff to the top of my chocolate pie until my fridge is empty, my pantry is cleaned out, and the cows come home.
Differences make the world go ’round!
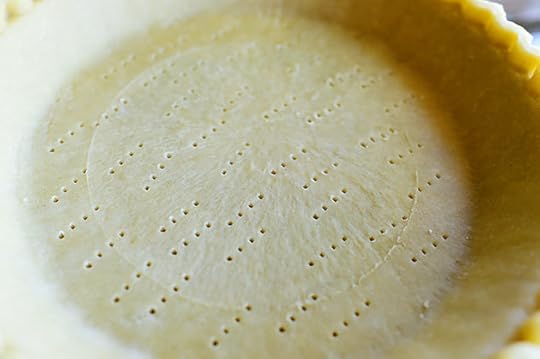 Now, the first step to making this homemade pie is to put a storebought frozen pie crust into the oven. Ha. At least that’s what I did. I was out of my frozen crusts and I didn’t feel like making one on the spot, so I used a storebought frozen one.
I am not ashamed.
 Now, if you really want to impress your friends, forget about the pie crust and come close to burning it, as I did above.
They’ll be amazed at your talent!
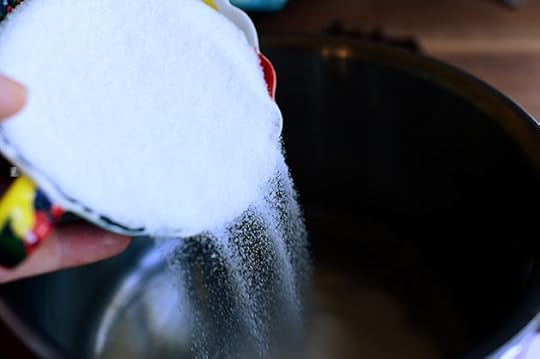 All of that’s about to be forgotten, though, when you make this luscious pie filling, which is nothing more than chocolate pudding. (So consider this a chocolate pudding recipe, too!) Start by putting sugar into a saucepan…
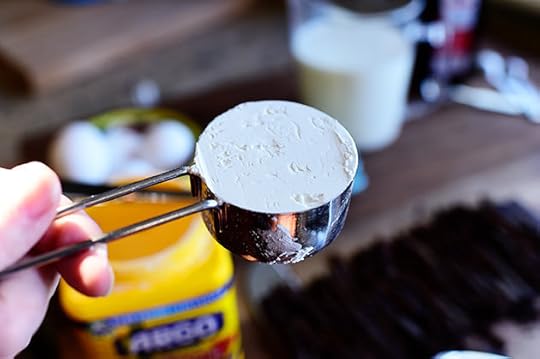 With some cornstarch…
 As a thickener.
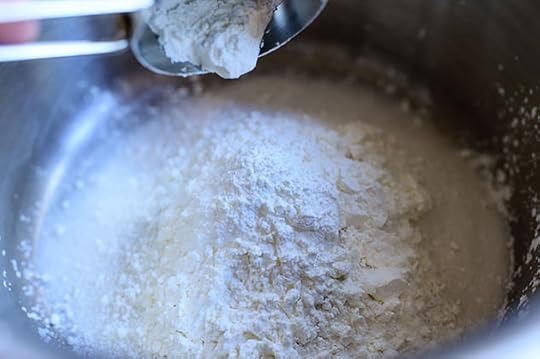
 Add a little salt (about a fourth a teaspoon; don’t be thrown off by the 1/2 teaspoon measure you see here, as I only added half. Don’t be like me)…
 Stir it together gently—I say gently, because if you stir it violently or vigorously, you will create a cloud of cornstarch in your kitchen! And who needs that?!?
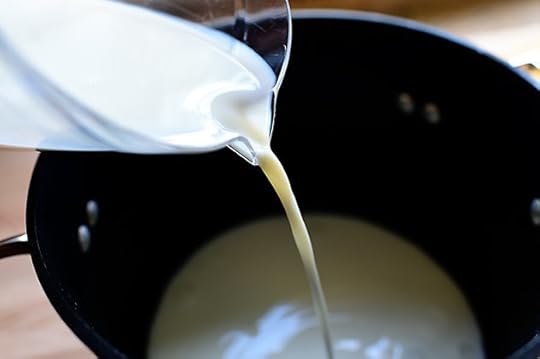
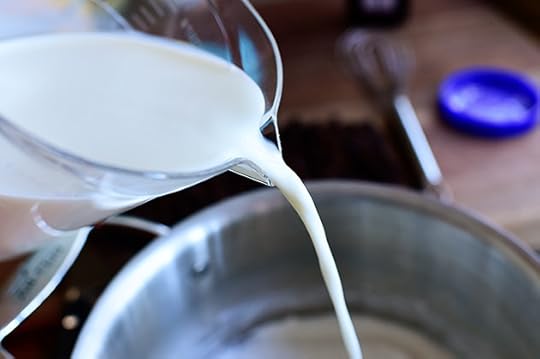 Now, pour in some whole milk. Normally, I’d say “or you can use 2% or skim milk” but in this case, I absotively, posilutely insist that you use whole milk! You must! It makes the pie creamier and gives it the texture it needs. You can always use the skim milk on your Wheaties tomorrow!
Sorry for being bossy.
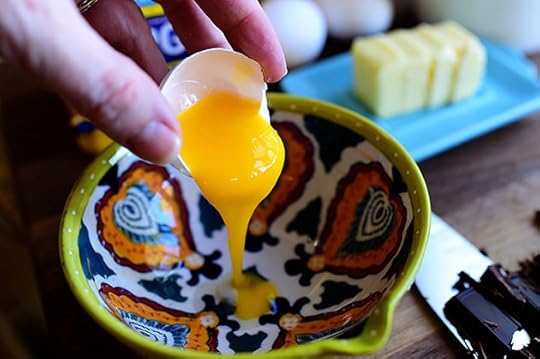 Separate four eggs…
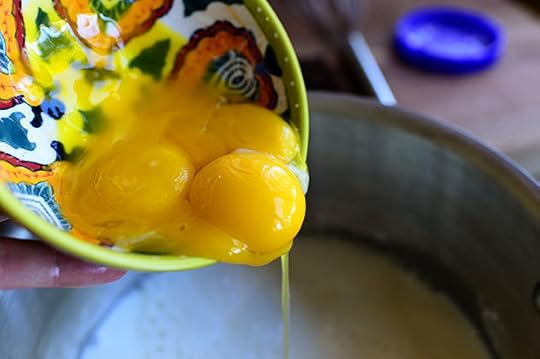 Pour in the yolks…
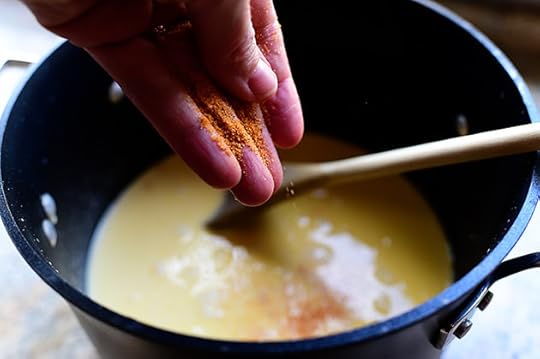
 Then stir it together and start heating it up over medium heat, stirring very gently but constantly.
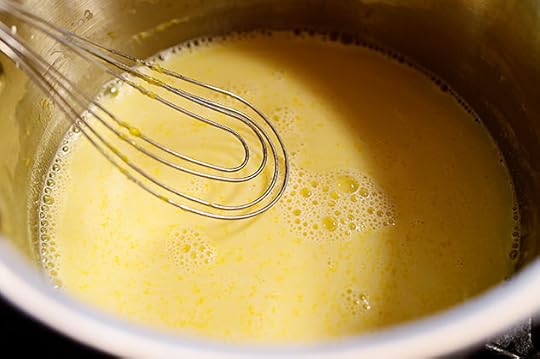 The bubbles will calm down and it will start to heat up and thicken. This will seem to take forever at first…
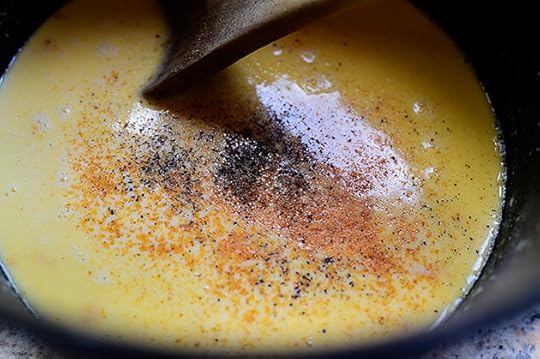
 But then, before you know it, it starts to bubble/boil! And AS SOON as this happens, you need to remove it from the heat.
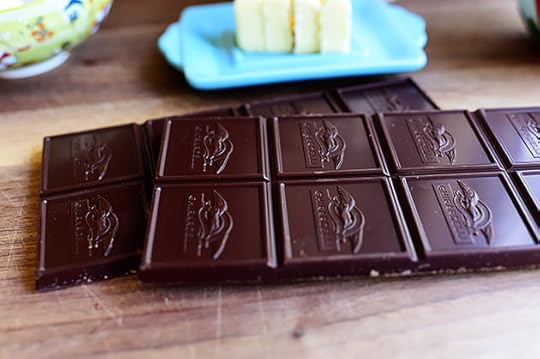 Oh! I forgot to tell you that way earlier, I grabbed some bittersweet chocolate…
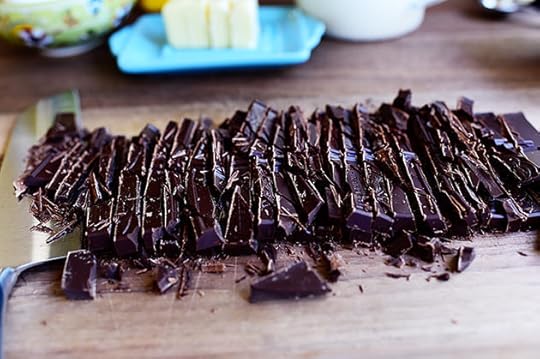 And chopped it really finely.
(Note on the chocolate: I have tried this pie with cocoa powder, with semi-sweet chocolate, with unsweetened chocolate…and I prefer bittersweet. You can play around with the different chocolates to see what you like.)
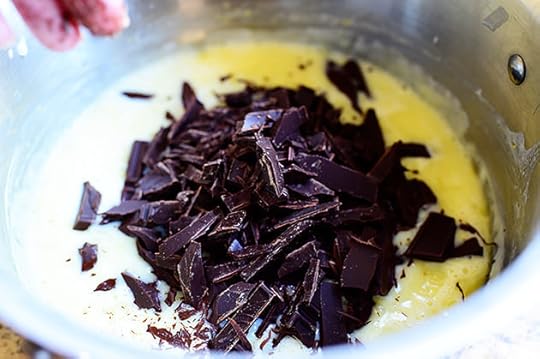 It’s important to have the chocolate all chopped and ready ahead of time, because the second you pull the filling/pudding off the heat, you’ll want to throw it right in…
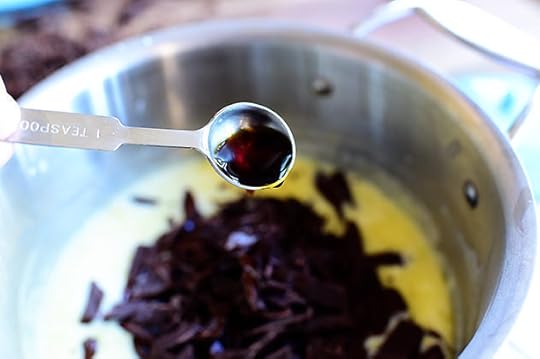 With some vanilla…
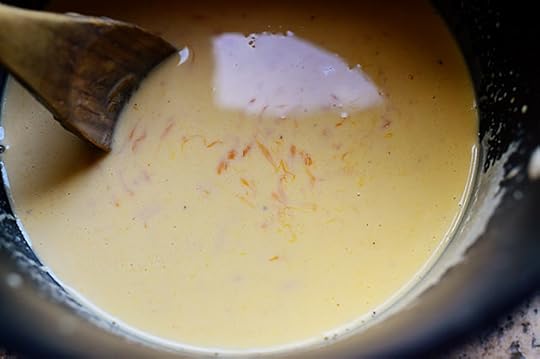
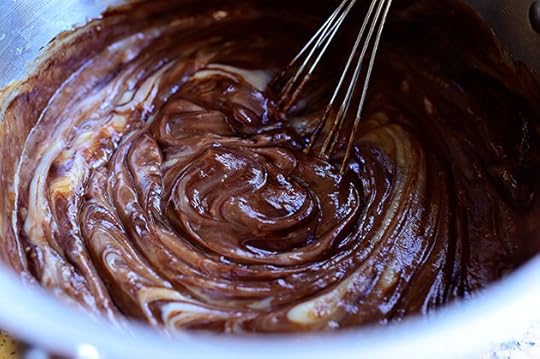 And stir it around to start melting the chocolate, which will happen pretty much instantly because of how hot and lovely it is.
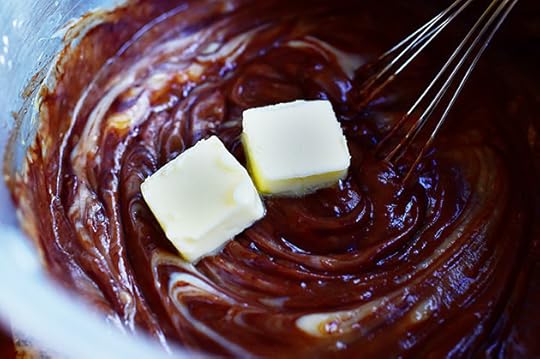 The final step, of course, is to add a little butter for silkiness, flavor, and richness…
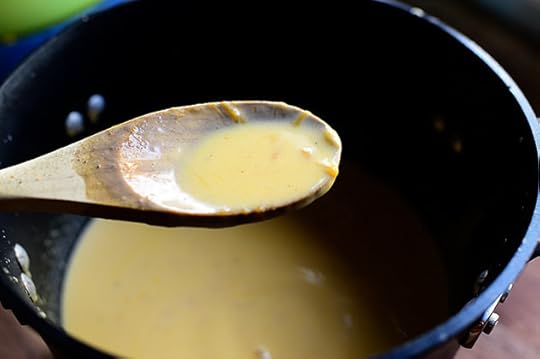
 And stir it until it melts. Again, this should only take about 4.2 seconds.
 Pour it into the baked (and cooled!) pie shell…
 Then smooth it out, lick whatever you use to smooth it, and pop the pie in the fridge (uncovered) for at least 3-4 hours. You want it to be totally cool and set!
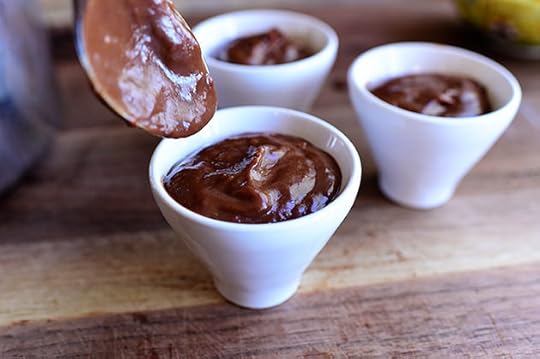 This filling amount is enough for a deep-dish pie crust, so when I use a standard crust, I always have a little filling left over. So I just scoop it into little cups…
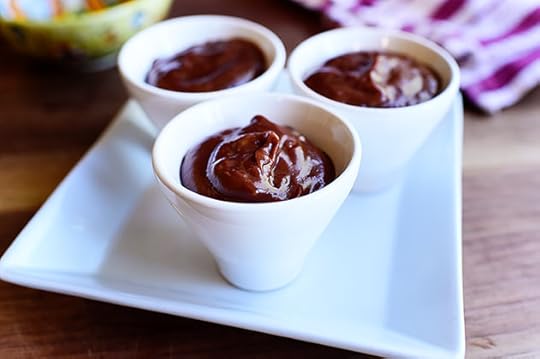 And stick those in the fridge. Ready-to-go pudding!
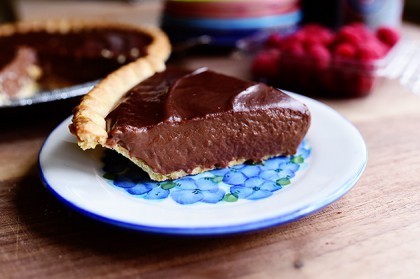
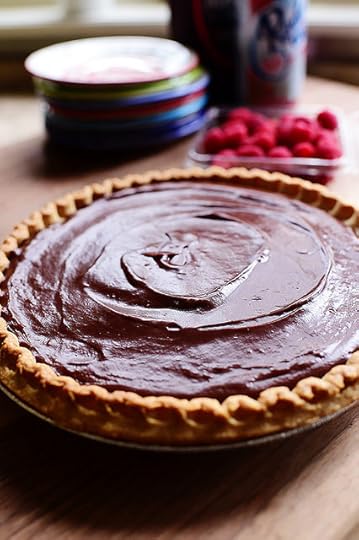 At long last! The pie is chilled and ready. And gorgeous. And seductive. And irresistible.
Just like Marlboro Man.
Heh heh.
(Sorry.)
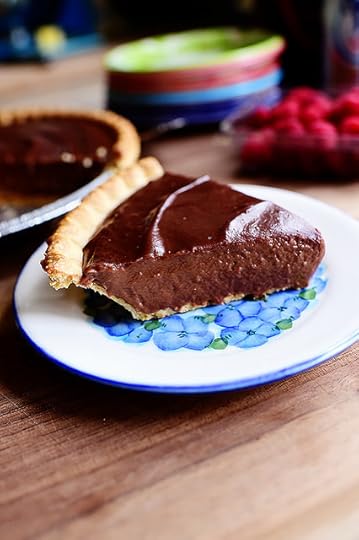
 Cut a nice, big wedge…
And, if you’re serving it to my husband, just stick it on a plate.
 Positively perfect pie!
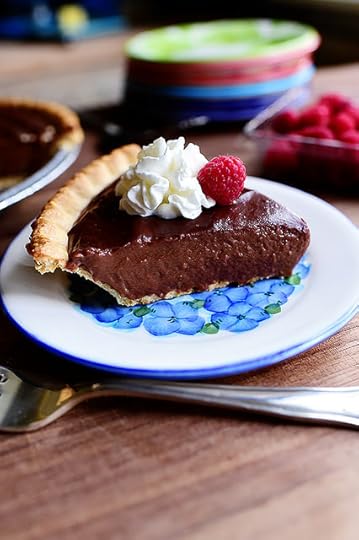 If I’m eating it, though? Oh, how about some squirt whipped cream and a raspberry?
 How about some chocolate syrup?
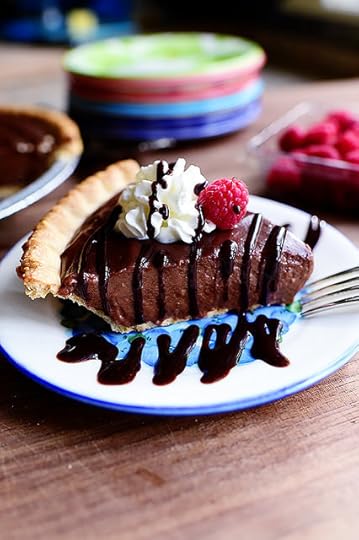 I actually forced myself to stop there, but I could have gone nuts (literally): Chopped pecans, chopped walnuts…and man, oh man, a drizzle of caramel sauce would be just decadent.
Here’s the handy dandy printable. Make it today! It’s the easiest pie there is. (Note that you could change it up and do an Oreo or graham cracker crust—totally delicious, too.)
Enjoy!
.recipe-actions {
position: relative;
z-index: 2;
}
#pdf-popover {
background: rgba(255,255,255,.9);
border: 1px solid #efeeed;
color: #6e5c3a;
display: none;
font-family: Helvetica, Arial, sans-serif;
right: 20px;
margin: 2px;
padding: 54px 20px 7px 10px;
position: absolute;
top: 0;
width: 380px;
z-index: 10;
}
#pdf-popover form {
margin: 0;
}
#pdf-popover h4 {
background: #b15818;
color: #fff;
font-family: Helvetica, Arial, sans-serif;
font-size: 20px;
font-weight: normal;
left: 3px;
margin: 0;
position: absolute;
padding: 6px 12px;
right: 3px;
top: 3px;
}
#pdf-popover legend {
font-family: Helvetica, Arial, sans-serif;
font-size: 120%;
font-weight: bold;
margin-bottom: 2px;
margin-left: 10px;
text-transform: uppercase;
}
#pdf-popover fieldset {
margin-bottom: 15px;
}
#pdf-popover input[type="checkbox"] {
height: 14px;
margin: 2px 0 10px 10px;
padding-left: 14px;
position: relative;
visibility: visible;
width: 14px;
}
#pdf-popover input[type="checkbox"],
#pdf-popover input[type="radio"] {
margin-left: 10px;
}
#pdf-popover .close {
background: #b15818;
color: #FFFFFF;
cursor: pointer;
height: 35px;
font-size: 16px;
font-weight: bold;
line-height: 26px;
position: absolute;
right: 3px;
text-align: center;
top: 3px;
width: 25px;
z-index: 1;
}
#pdf-popover .button {
background-color: #b15818;
border: 0;
color: #fff;
cursor: pointer;
font-family: Helvetica, Arial, sans-serif;
margin-left: 10px;
padding: 8px 10px;
text-transform: uppercase;
}
x
Print Options
Page size
Letter
3x5
4x6
Text Size
Small
Medium
Large
Content
Include description
Include prep time, etc.
Show image
Recipe
Chocolate Pie
Prep Time: 4 Hours
Cook Time: 10 Minutes
Difficulty: Easy
Servings: 10
 Print Recipe
Ingredients
1 whole Pie Crust, Baked And Cooled (or Can Use Oreo Or Graham Cracker Crust)1-1/2 cup Sugar1/4 cup Cornstarch1/4 teaspoon Salt3 cups Whole Milk4 whole Egg Yolks6-1/2 ounces, weight Bittersweet Chocolate, Chopped Finely2 teaspoons Vanilla Extract2 Tablespoons Butter Whipped Cream, For Serving Preparation Instructions
Combine the sugar, cornstarch, and salt in a medium saucepan. Stir or whisk together.
Pour in milk and egg yolks, and whisk together.
Stir over medium heat until the mixture just barely comes to a boil, about 6-8 minutes (maybe less, maybe more; just watch it!) The second it starts to bubble and thicken remove it from the heat. Add the chocolate, vanilla, and butter, and stir until everything is beautifully combined.
Pour the pudding into the pie crust (if there is extra, spoon it into small dishes) and place in the fridge to chill for 4 hours uncovered.
Cut into slices and serve with whipped cream!
Posted by Ree | The Pioneer Woman on October 8 2014


October 6, 2014
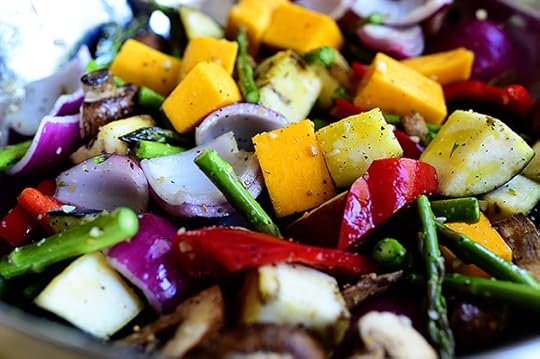
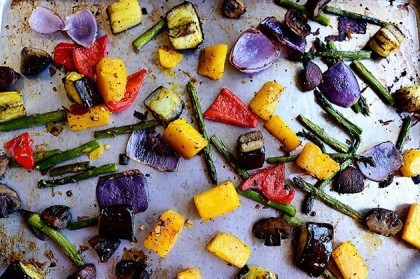
Beautiful Roasted Vegetables
 I was in the big city last week, and I decided about an hour into my errands that I was hungry. So I stopped at a lovely grocery store that’s been in Tulsa forever, because they have a little section of to-go foods that I love, and I can usually find something delicious that isn’t a burger. I love burgers and all, but when I go to civilization and need to grab something quick to eat, a burger isn’t at the top on my list. I can always get one in our small town! Or, of course…I can make one at home. We live on a ranch, man.
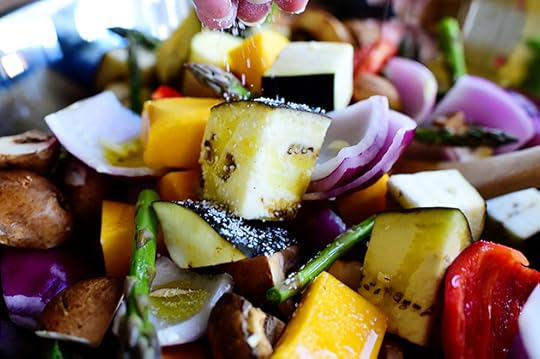
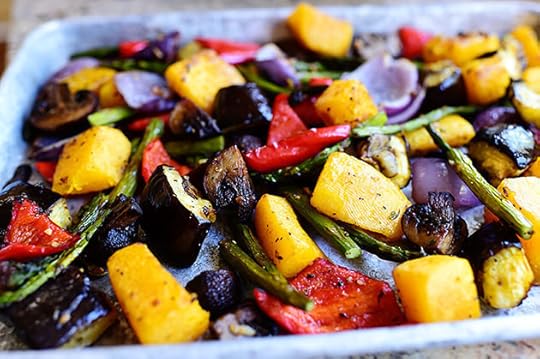
One of the 700 things I chose at the market was a little package of gorgeous roasted vegetables. We all know how to roast vegetables, of course, but I thought this assortment was so uniquely beautiful, and I loved that they really didn’t care about all the vegetables came from the same season. Spring vegetables were mixed with fall vegetables, dogs and cats were living together, and it turned out to be utterly delicious.
Yesterday I made a batch! Here’s the step-by-step recipe.
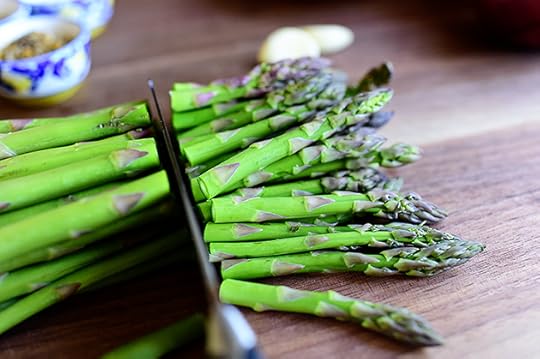 Slice some asparagus into pieces: I cut off the tips, then the center section, then I discard the rough ends.
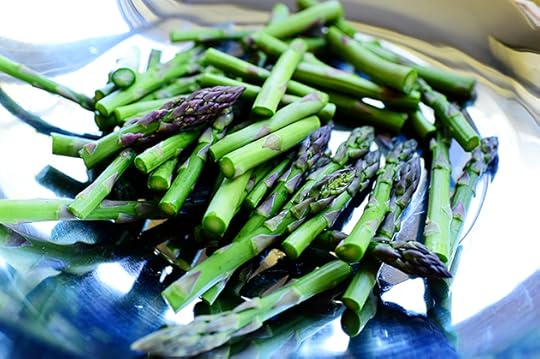 Then I throw the asparagus into a big bowl.
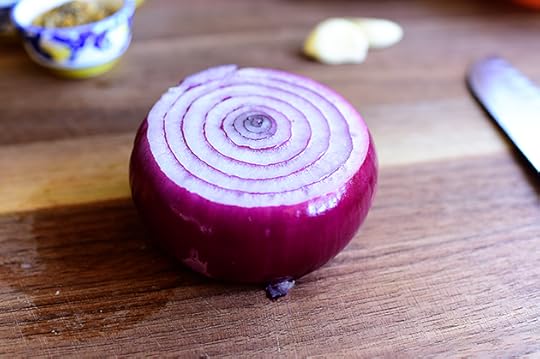 Then I peeled a red onion…
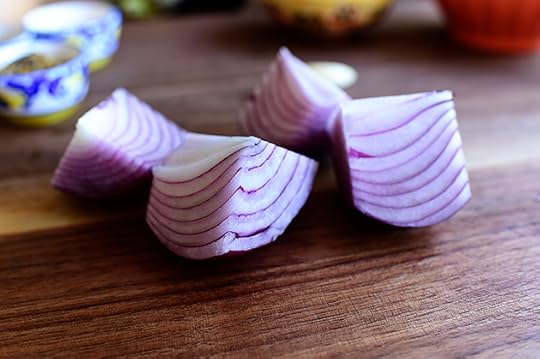 Cut it into wedges…
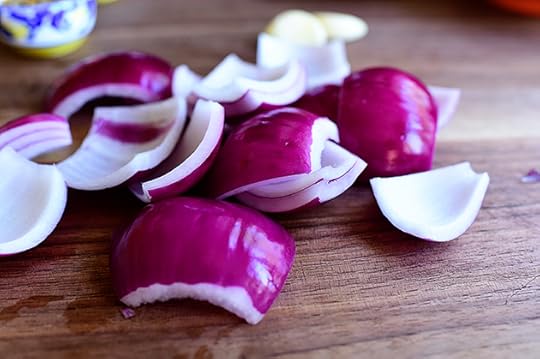 Broke them into pieces…
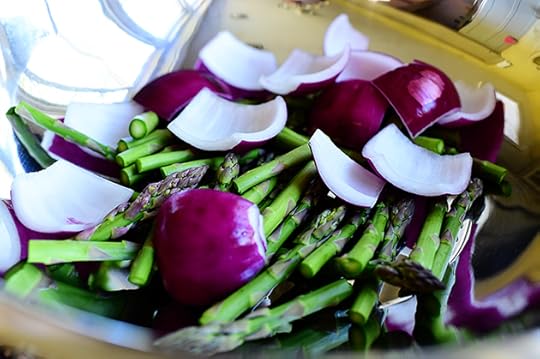 And threw them in the bowl.
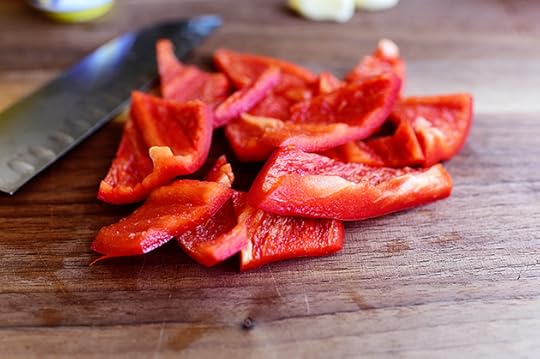 I lopped off the top and bottom of a red bell pepper, then chopped it into large, rough pieces…
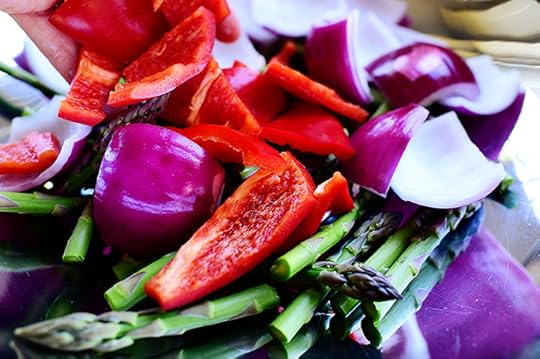 And threw those in. The colors are getting gorgeous!
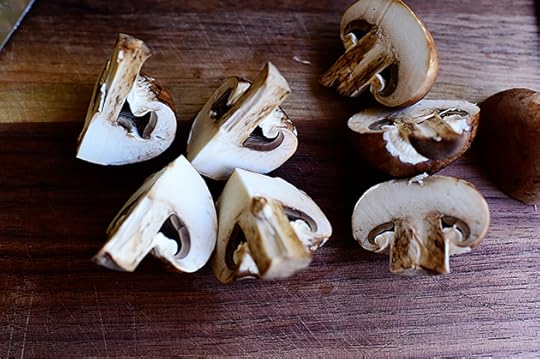 Next up: mushrooms! If they were big, I cut them into quarters…if they were not so big, I cut them in half.
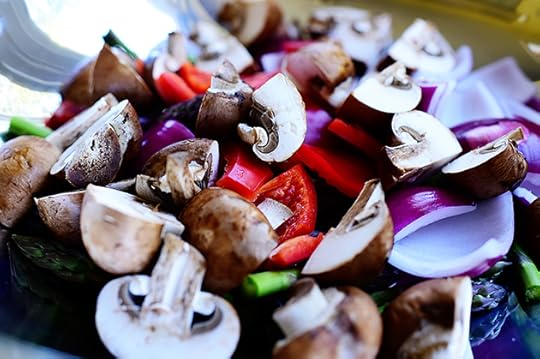 And just threw them into the beautiful mix.
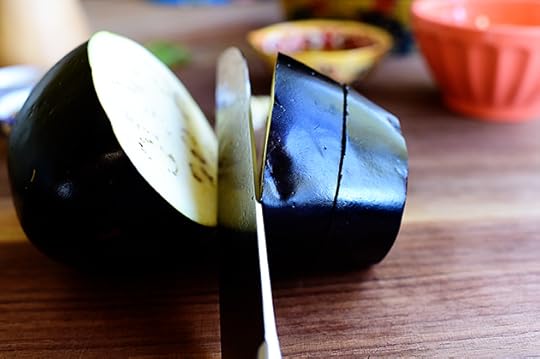 Now, if you think you don’t like eggplant, please give me just a moment of your time. I beg you, I implore you—please try one in this dish. Roasted eggplant is one of life’s sheer pleasures, and it converts even the staunchest anti-eggplant humans. Just slice it into thick rounds…
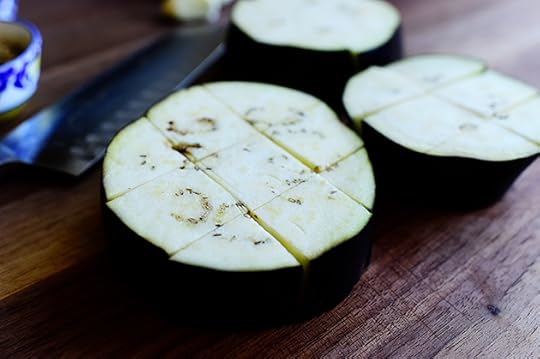 Then cut each round into chunks. I usually discard the center piece because I like each bite of eggplant to have the beautiful skin on it.
 Throw it into the bowl. You’re gonna love it!
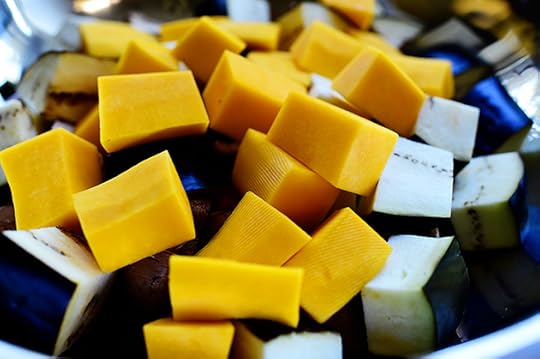
 I loved the pieces of butternut squash in the veggie assortment: It was gorgeous, and roasted butternut squash makes my skirt fly up in a major way.
 Peel off the hard skin…
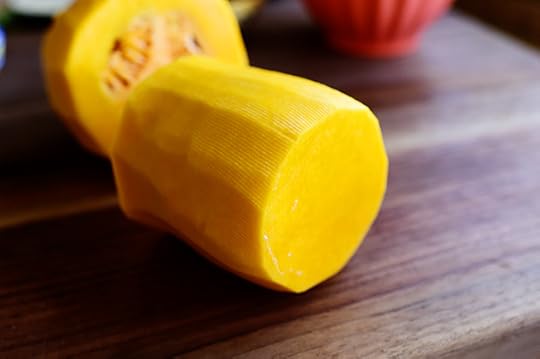 Then cut off the narrower top portion. It’s the perfect amount! (Save the other half in a ziploc in the fridge.)
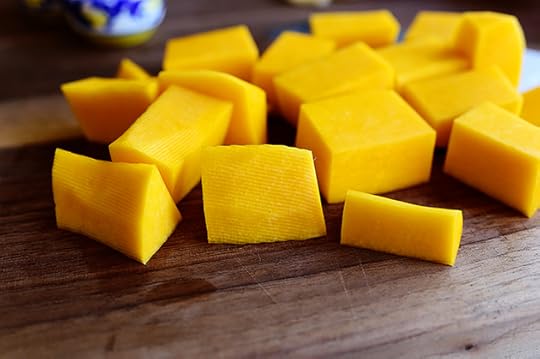 Cut the hunk into strips, then cut the strips into large chunks…
 And throw them in.
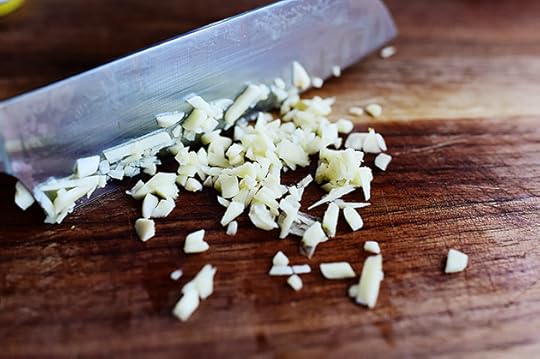 For majah flavah, mince up some garlic…
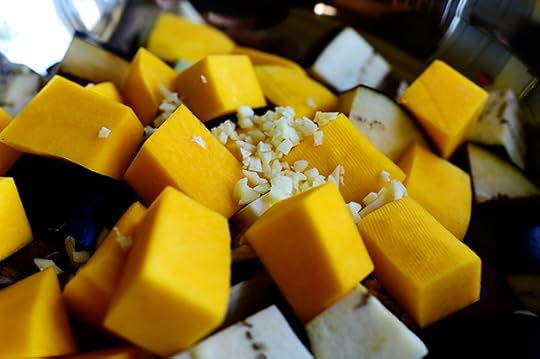 And throw it in, too.
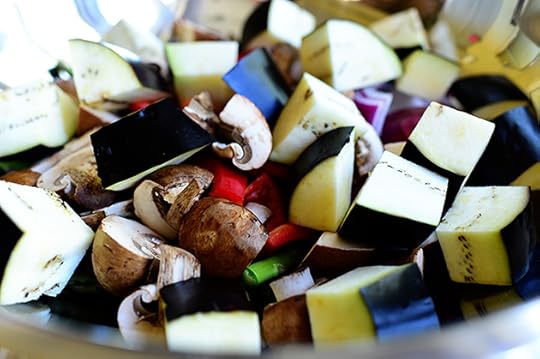
 Toss it all together and behold the gorgeousness! Love this combination. And actually, I forgot to add carrots—the assortment at the grocery store had them. It also had small potatoes, which I chose to leave out. Other than that, pretty much the same!
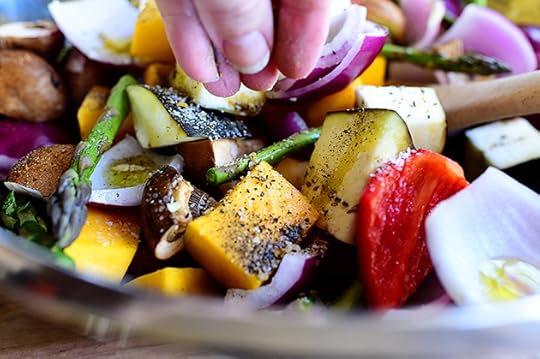
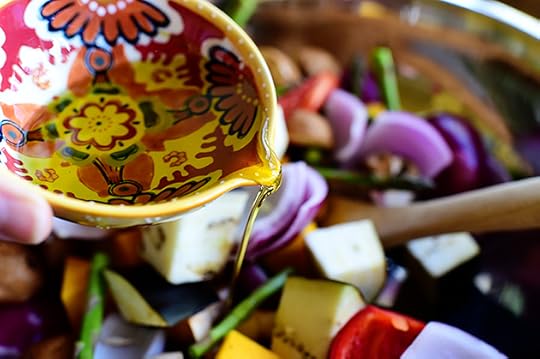 Now, drizzle in some olive oil…
 Then some salt…
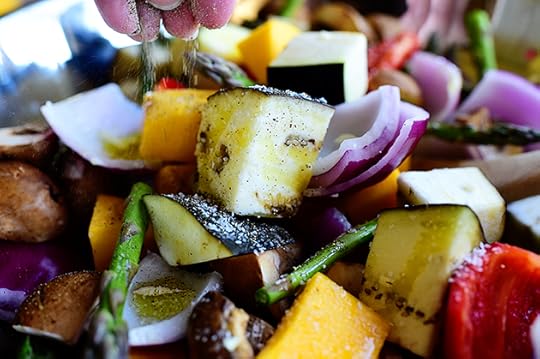 Pepper…
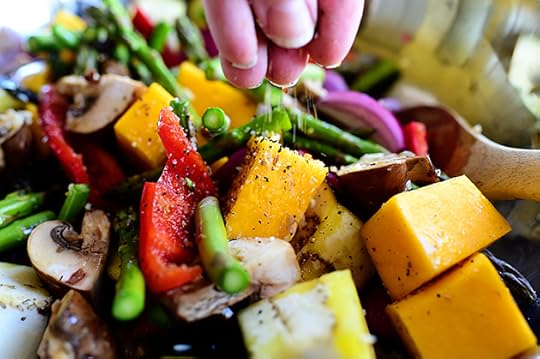
 And whatever other seasonings or herbs you’d like!
 I’ll tell you the crazy thing I used if you promise not to tell anyone: Montreal steak seasoning. Ha. It’s delicious!
 Now just toss it all together to make sure the olive oil and seasonings are coating everything…
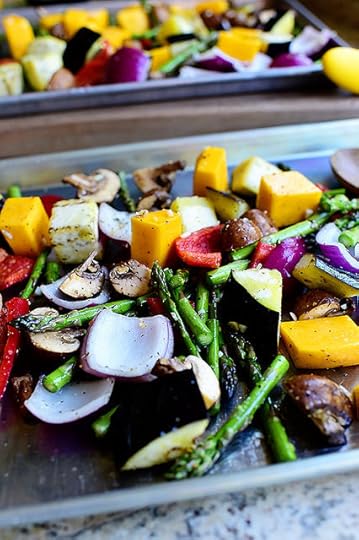 Then get them onto two baking sheets and shake them to spread everything out (I didn’t show the spread-everything-out step.) I use two baking sheets because I don’t want to crowd the veggies. If they’re crowded, they won’t roast as easily and beautifully.
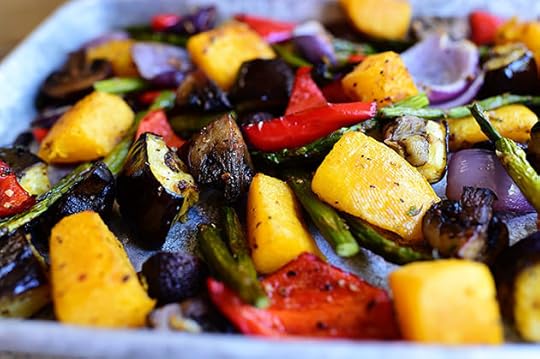
 I roasted them at 450 degrees (yes, 450 degrees!) for about 20 minutes, shaking the pans at least twice during the cooking process so the veggies wouldn’t stick and burn. Be sure to check the veggies as they cook, and just keep going until they’re nice and lovely with dark bits around the edges.
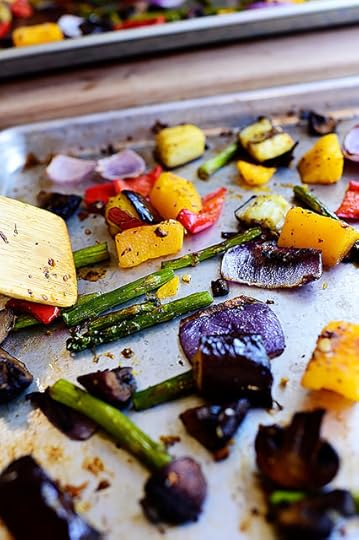 Gorgeous!
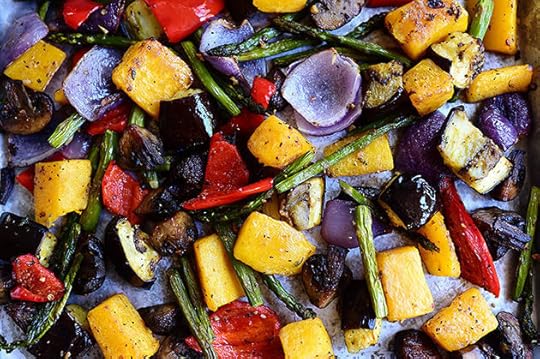
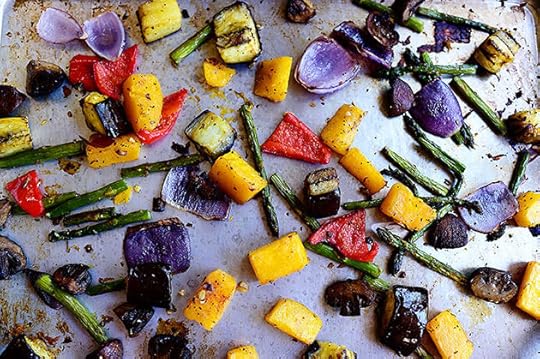 This is how spread out they were as they roasted. They needed space, man.
 My daughter Alex was getting ready to head to town to hang out with her BFF Meg, so I piled half the veggies onto a smaller baking sheet…
 Because I knew Meg’s mom, Hyacinth, would love these.
 Here’s what you can do with these: Serve them as a side dish, pile them on a sandwich or inside a panini, or puree them and make soup.
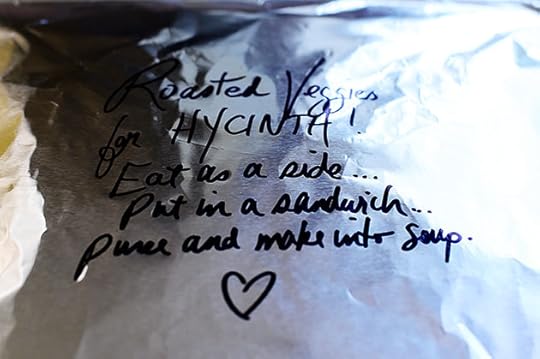 And that’s exactly what I told Hyacinth. (Update: She called me this morning to tell me she’s making soup!)
Here’s the handy dandy printable. Enjoy these gorgeous veggies! They keep really well in the fridge, so you can munch on them all week.
.recipe-actions {
position: relative;
z-index: 2;
}
#pdf-popover {
background: rgba(255,255,255,.9);
border: 1px solid #efeeed;
color: #6e5c3a;
display: none;
font-family: Helvetica, Arial, sans-serif;
right: 20px;
margin: 2px;
padding: 54px 20px 7px 10px;
position: absolute;
top: 0;
width: 380px;
z-index: 10;
}
#pdf-popover form {
margin: 0;
}
#pdf-popover h4 {
background: #b15818;
color: #fff;
font-family: Helvetica, Arial, sans-serif;
font-size: 20px;
font-weight: normal;
left: 3px;
margin: 0;
position: absolute;
padding: 6px 12px;
right: 3px;
top: 3px;
}
#pdf-popover legend {
font-family: Helvetica, Arial, sans-serif;
font-size: 120%;
font-weight: bold;
margin-bottom: 2px;
margin-left: 10px;
text-transform: uppercase;
}
#pdf-popover fieldset {
margin-bottom: 15px;
}
#pdf-popover input[type="checkbox"] {
height: 14px;
margin: 2px 0 10px 10px;
padding-left: 14px;
position: relative;
visibility: visible;
width: 14px;
}
#pdf-popover input[type="checkbox"],
#pdf-popover input[type="radio"] {
margin-left: 10px;
}
#pdf-popover .close {
background: #b15818;
color: #FFFFFF;
cursor: pointer;
height: 35px;
font-size: 16px;
font-weight: bold;
line-height: 26px;
position: absolute;
right: 3px;
text-align: center;
top: 3px;
width: 25px;
z-index: 1;
}
#pdf-popover .button {
background-color: #b15818;
border: 0;
color: #fff;
cursor: pointer;
font-family: Helvetica, Arial, sans-serif;
margin-left: 10px;
padding: 8px 10px;
text-transform: uppercase;
}
x
Print Options
Page size
Letter
3x5
4x6
Text Size
Small
Medium
Large
Content
Include description
Include prep time, etc.
Show image
Recipe
Beautiful Roasted Vegetables
Prep Time: 15 Minutes
Cook Time: 20 Minutes
Difficulty: Easy
Servings: 8
 Print Recipe
Ingredients
1 bunch Asparagus, Ends Cut Off, Sliced Into 2-3 Inch Pieces1 whole Red Onion, Peeled And Cut Into Large Chunks1 whole Red Bell Pepper, Seeded And Cut Into Large Chunks8 ounces, weight Mushrooms (any Kind), Quartered Or Halved Depending On Size1 whole Medium-sized Eggplant, Cut Into Large Chunks1/2 whole Butternut Squash, Peeled And Cut Into Large Chunks3 cloves Garlic, Minced Salt And Pepper, to taste1 teaspoon Montreal Steak Seasoning Or Any Other Seasonings Or Herbs1/3 cup Olive Oil Preparation Instructions
Preheat oven to 450 degrees.
Combine all the prepped veggies in a large bowl. Drizzle in the olive oil, then season with salt, pepper, and other seasonings of your choice. Toss to coat.
Arrange on two baking sheets, spreading the veggies out to give them room. Roast for 20 minutes, shaking the pans at least twice during that time. If needed, roast for an additional 5-10 minutes, until veggies are nicely roasted.
Serve immediately or keep in the fridge for when you need them!
Posted by Ree | The Pioneer Woman on October 6 2014

October 1, 2014
Orange Crush Cake
 It’s the simple things in life, I tell ya.
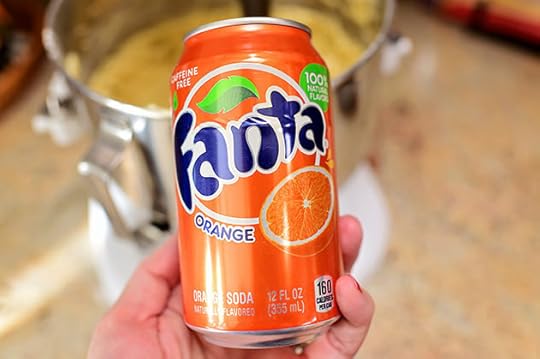
I made this cake last week on a whim. It’s pretty much the same cake recipe as this Perfect Pound Cake recipe, which is the same basic cake recipe as this Lemon-Lime Pound Cake recipe, but instead of using lemon-lime pop like Sprite or 7-Up as the other two do, I used Orange Crush. Except it wasn’t actually Orange Crush. It was Fanta Orange.
Are you confused yet? Because I sure am.
So here’s what happened: I used orange pop instead of lemon-lime pop, and while I thought the finished product was good and all, I didn’t find that it tasted all that different from the original lemon-lime version. It certainly didn’t have an overwhelming, distinctively orange flavor. But then Marlboro Man and my boys sauntered into the kitchen, took a bite of the cake, and declared it one of the best cakes they’ve ever tasted, and they love the orange flavor, and mama, please continue to make this delicious orange cake for the rest of our lives.
Ha.
Bottom line: This cake is good! Not wildly different from the original, but it’s kind of like choosing between two different pairs of identical-fitting jeans: One with an antique wash, one with a dark wash. It’s just a way to subtly change things up if you’re bored one day!
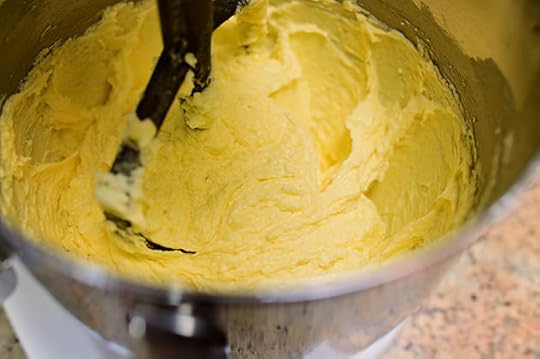
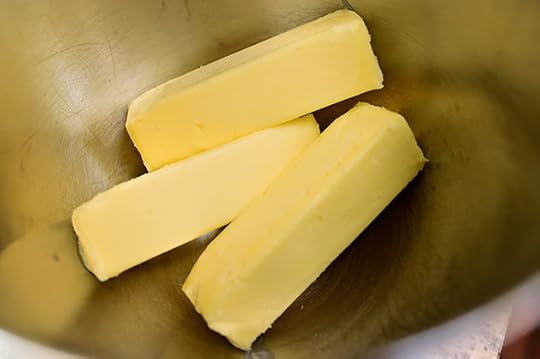 Add three sticks of butter to the bowl of a mixer.
Yes, I said three sticks.
Yes, I said of butter.
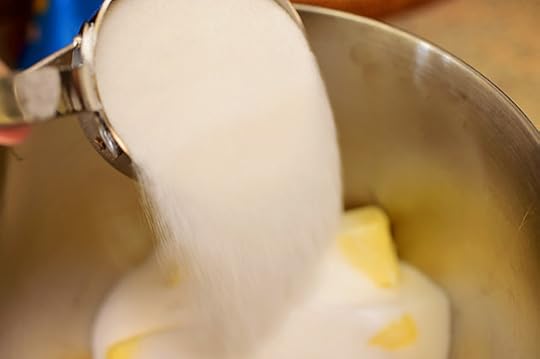 Add three cups of sugar.
Yes, I said three cups.
Yes, I said of sugar.
Okay, I’ll stop now.
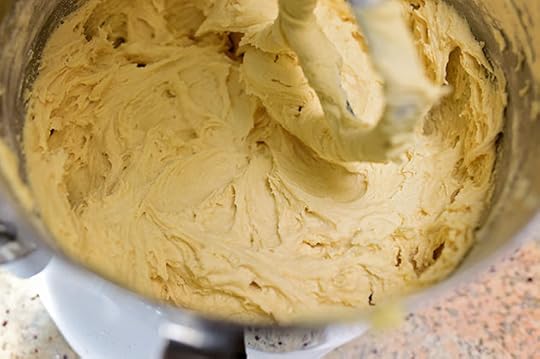
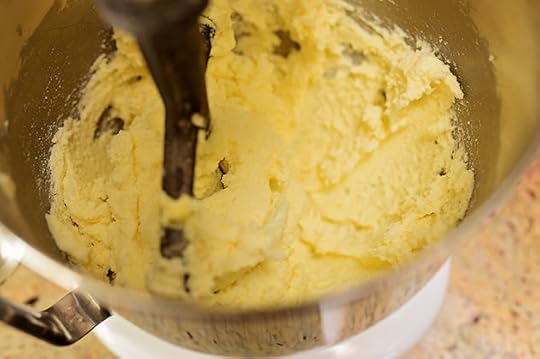 Mix it until it’s all combined…
 Then, and I didn’t show this because I’m an airhead, crack in 5 eggs, letting each one mix in before adding the next one.
Yes, I said 5 eggs.
Oh, never mind.
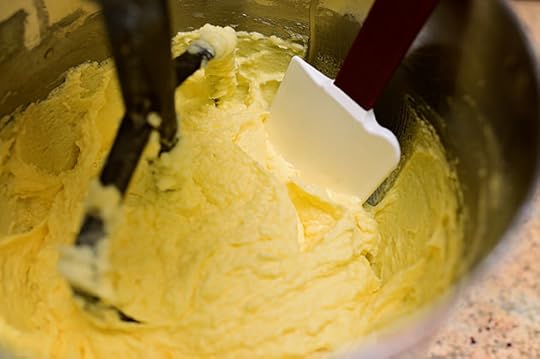 Halfway through, scrape the bowl thoroughly…
 Then mix it again until it’s all fluffy and marvelous.
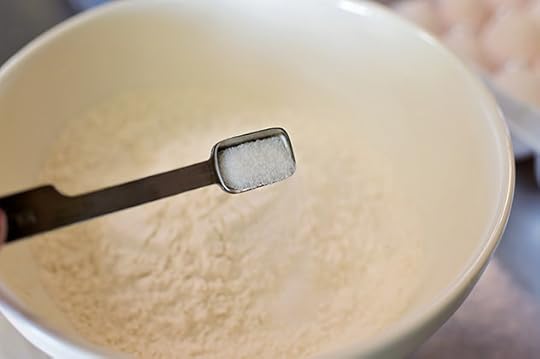 Add some flour to a bowl with some salt…
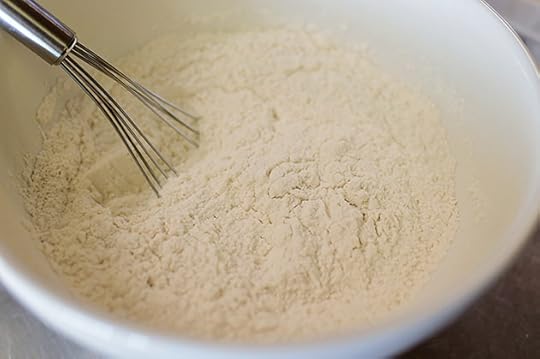 And mix it together.
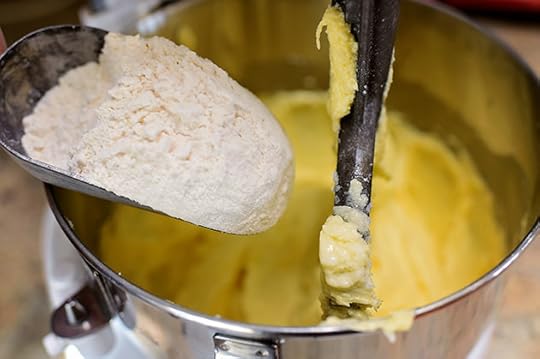 Then, with the mixer on low, add the flour mixture in increments…
 Letting it mix in after each addition.
 And now it’s time to party.
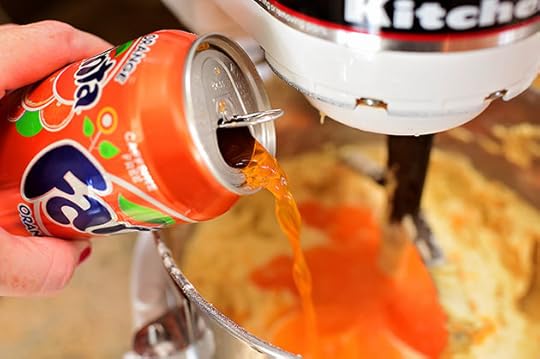 Add about 1 cup plus 2 tablespoons of Orange Crush, otherwise known as Fanta Orange, otherwise known as whatever orange soda you can get your mitts on.
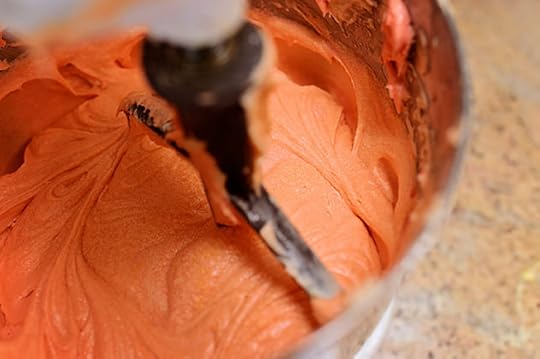
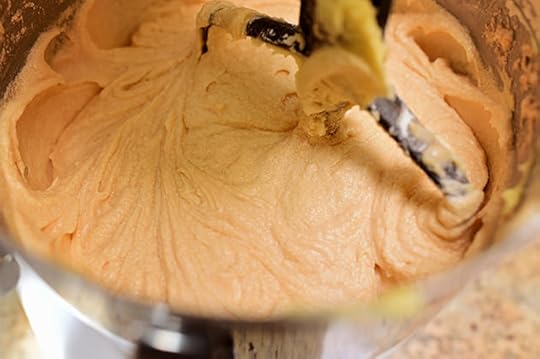 Mix it around, scrape the bowl, mix it again. Now, the color is nice—kind of light orange. Otherwise known as “peach.” But I’m afraid if I say “peach” it would confuse things since this is technically an orange cake. So I’ll just say “light orange” if it’s okay with you.
I’m so glad we had this talk.
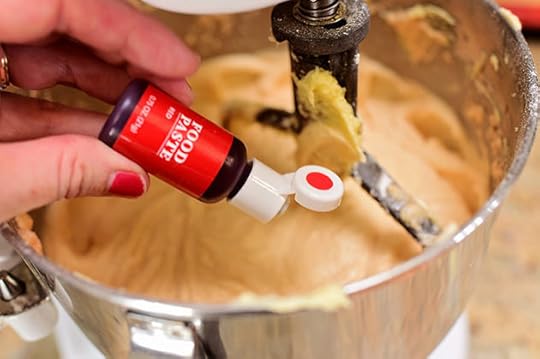 Anyway, I decided “light orange” wasn’t enough for me, so I decided to add a little orange food coloring. However, seeing that I didn’t have any orange food coloring, I added a little red and yellow.
Still confused? Good. Me, too.
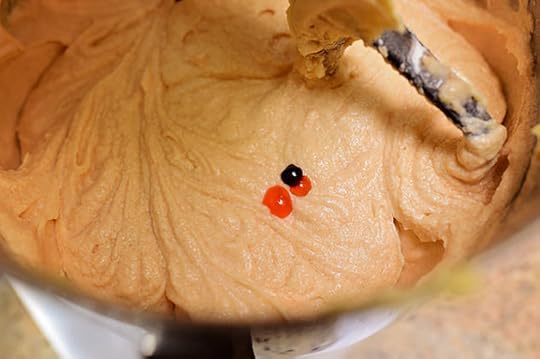 Just a teeny bit!
 Any more orange than this and it would be…well, it would be too orange. I’ll stop there!
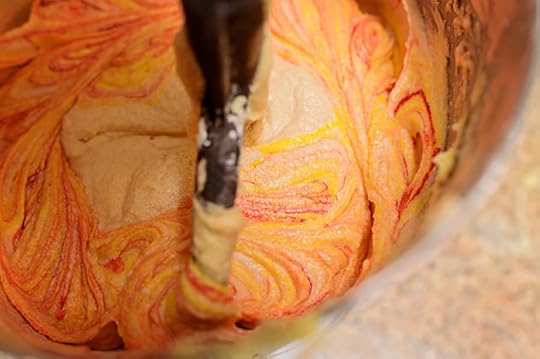
 And listen: The orange food coloring is, like, totally optional. Just add it if you want a little more color saturation.
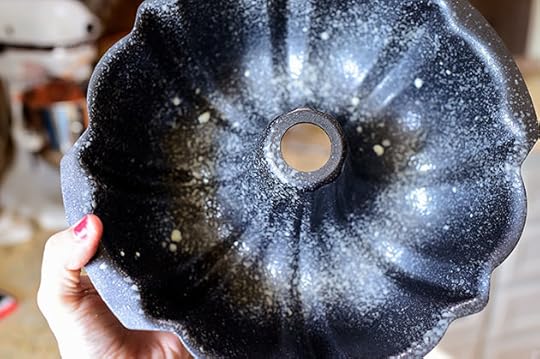 Spray the heck out of a bundt pan with nonstick baking spray…
(Oh, and please take a moment to admire my manicure, which I have clearly maintained and kept lovely.)
(Not.)
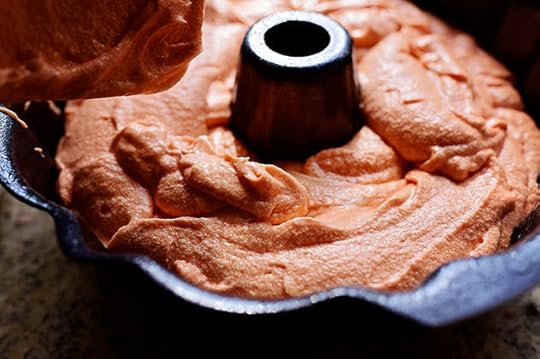 Then pile in the orange batter.
 Use a spatula to smooth out the surface…
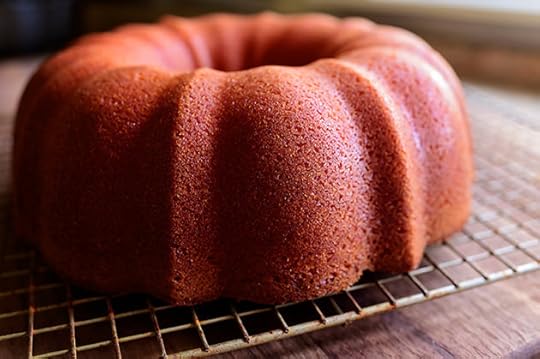
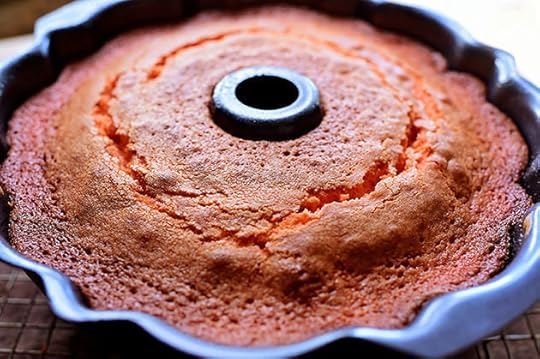 Then bake it till it’s golden brown and wonderful.
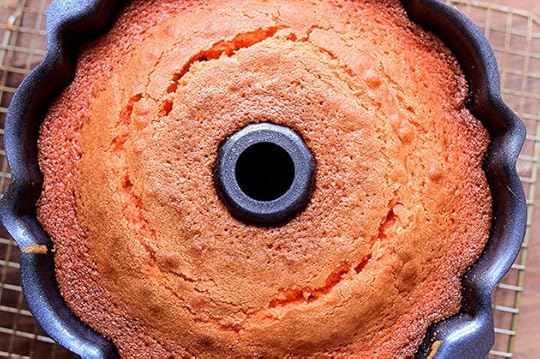 Lovely! Now just let it cool for about 5 minutes…
 Then turn it out onto a cooling rack and let it cool completely.
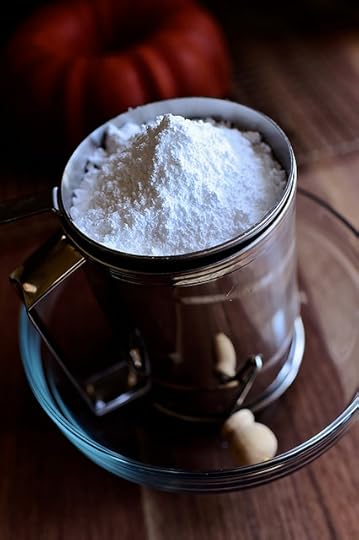 When it’s all cooled, make the glaze: Add some powdered sugar to a sifter…
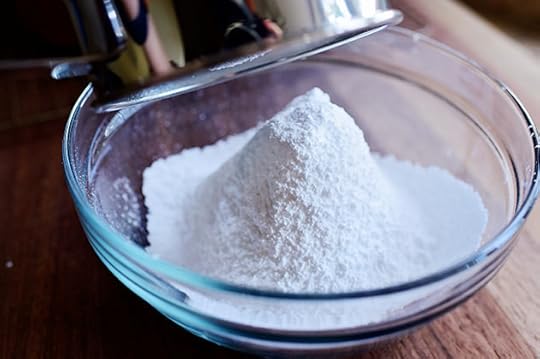 Sift it into a bowl, then add a pinch of salt.
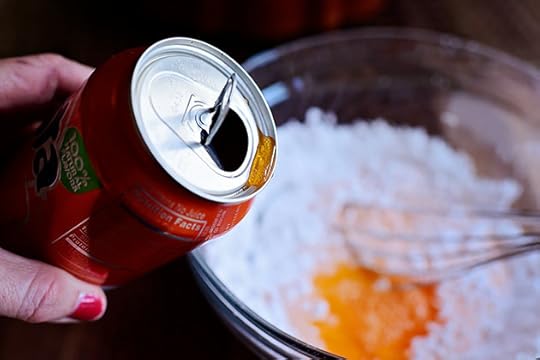 Then use your very disturbing pink alien hand to pour in a little of the orange pop. You should still have some left in the can.
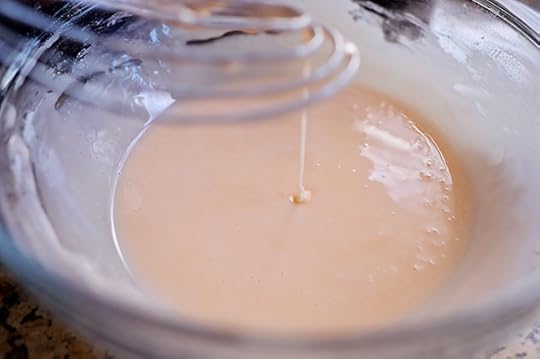 Whisk it together and check the consistency. See how the string of glaze disappears pretty quickly into the bowl? That means it’s pretty thin, and will pretty much disappear into the cake once you drizzle it on.
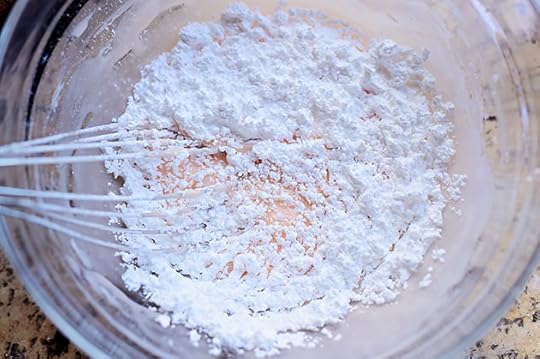 I wanted it to be thick enough to stick to the surface of the cake, so I sifted in a little more powdered sugar.
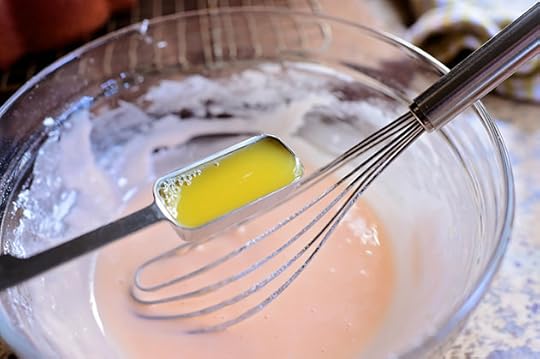 I wanted to see if orange juice would add a little extra orange flavor to the glaze…and it did! Just a tablespoon or so.
But then I had to sift in more powdered sugar to thicken it up again. But just keep going until it’s right.
 Zee cake ees ready!
 So just drizzle it on. Now, if I’d been smart, I would have put a sheet pan under the cake to catch all the excess. Since I’m not, I had to move the cake, use a spatula to scrape up all that excess, and put it back in the bowl.
Either way, plan to catch the excess and reuse it if you can.
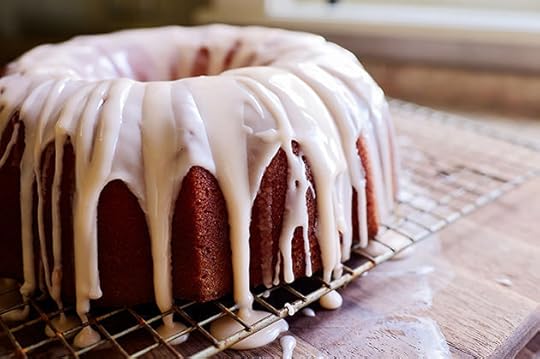 Hey, it ain’t the prettiest thing in the world…
 But man, was it ever good.
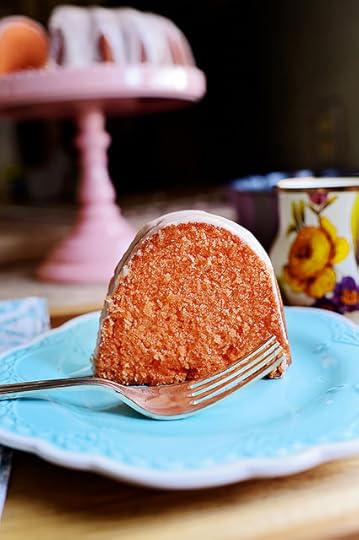
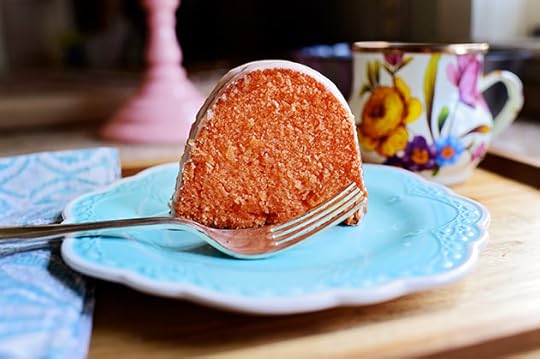 Serve it with coffee, serve it with milk…
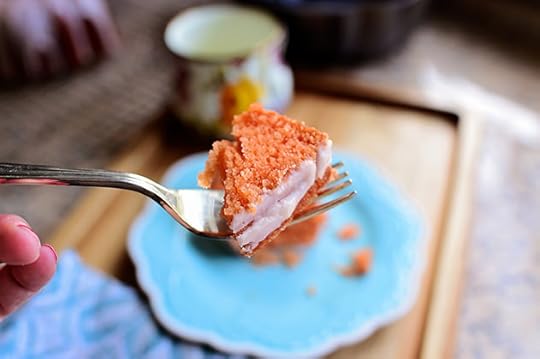 Just serve it. It’s very, very moist and lovely.
The boys devoured it, the girls devoured it, Marlboro Man devoured it…
And okay. I had a slice or two. And I have no regrets.
Here’s the handy dandy printable, friends!
.recipe-actions {
position: relative;
z-index: 2;
}
#pdf-popover {
background: rgba(255,255,255,.9);
border: 1px solid #efeeed;
color: #6e5c3a;
display: none;
font-family: Helvetica, Arial, sans-serif;
right: 20px;
margin: 2px;
padding: 54px 20px 7px 10px;
position: absolute;
top: 0;
width: 380px;
z-index: 10;
}
#pdf-popover form {
margin: 0;
}
#pdf-popover h4 {
background: #b15818;
color: #fff;
font-family: Helvetica, Arial, sans-serif;
font-size: 20px;
font-weight: normal;
left: 3px;
margin: 0;
position: absolute;
padding: 6px 12px;
right: 3px;
top: 3px;
}
#pdf-popover legend {
font-family: Helvetica, Arial, sans-serif;
font-size: 120%;
font-weight: bold;
margin-bottom: 2px;
margin-left: 10px;
text-transform: uppercase;
}
#pdf-popover fieldset {
margin-bottom: 15px;
}
#pdf-popover input[type="checkbox"] {
height: 14px;
margin: 2px 0 10px 10px;
padding-left: 14px;
position: relative;
visibility: visible;
width: 14px;
}
#pdf-popover input[type="checkbox"],
#pdf-popover input[type="radio"] {
margin-left: 10px;
}
#pdf-popover .close {
background: #b15818;
color: #FFFFFF;
cursor: pointer;
height: 35px;
font-size: 16px;
font-weight: bold;
line-height: 26px;
position: absolute;
right: 3px;
text-align: center;
top: 3px;
width: 25px;
z-index: 1;
}
#pdf-popover .button {
background-color: #b15818;
border: 0;
color: #fff;
cursor: pointer;
font-family: Helvetica, Arial, sans-serif;
margin-left: 10px;
padding: 8px 10px;
text-transform: uppercase;
}
x
Print Options
Page size
Letter
3x5
4x6
Text Size
Small
Medium
Large
Content
Include description
Include prep time, etc.
Show image
Recipe
Orange Crush Cake
Prep Time: 15 Minutes
Cook Time: 1 Hour10 Minutes
Difficulty: Easy
Servings: 12
 Print Recipe
Ingredients
Cake3 sticks Butter, Softened3 cups Sugar5 whole Eggs3 cups All-purpose Flour1/2 teaspoon Salt1 cup Orange Crush, Fanta Orange, Or Other Orange Pop (not Sugar Free)2 Tablespoons (additional) Orange Crush2 drops Orange Food Coloring (optional)1 Tablespoon Orange Zest (optional, Would Bump Up The Orange Flavor) GLAZE3 cups Powdered Sugar (more If Needed), Sifted Pinch Of Salt1/4 cup Orange Pop (more If Needed)1 Tablespoon Orange Juice1 teaspoon Orange Zest (optional) Preparation Instructions
Preheat oven to 325 degrees.
In the bowl of an electric mixer fitted with the paddle attachment, cream together butter and sugar. Add eggs one at a time, mixing after each addition. Combine flour and salt, then add it 1 cup at a time, mixing after each addition. With the mixer on low, slowly add 1 cup plus 2 tablespoons orange pop until combined. Add orange food coloring if you want to deepen the orange color; add orange zest if you want to deepen the orange flavor.
Thoroughly spray a bundt pan with nonstick baking spray. Add large spoonfuls of batter until the pan is filled, then even out the surface. Bake for 1 hour to 1 hour 10 minutes, or until a toothpick comes out clean. Remove the pan from the oven and let it sit in the pan for 5 minutes. Carefully turn it out onto a cooling rack and let it cool.
Combine all the glaze ingredients in a bowl and gently whisk until thick (you might need to adjust the quantities here and there). Use a spoon to drizzle it all over the cake. Let the glaze set, then slice and serve!
Optional: Sprinkle with a little extra orange zest
Optional: Add a small amount of orange extract instead of zest.
Posted by Ree | The Pioneer Woman on October 1 2014

September 29, 2014
Homemade Frappuccino!
 Guess what? I have something to tell you! It’s very important. Are you ready? Here goes.
Today is National Coffee Day!
No really. It is. And while we’re on the subject, what entity decides official days in our world? National Pancake Day, National Meatball Day, National Spam Day…who determines these? Is there a government committee? Or is it just Twitter? Let me know when you find out.
And in the meantime…here are three very simple homemade versions of Starbucks’ famous blended Frappuccinos! They’re surprisingly easy to whip up at home, which is essential for me considering the closest Starbucks is five trillion thousand million hundred miles from my house.
Feel sorry for me, please.
Thank you.
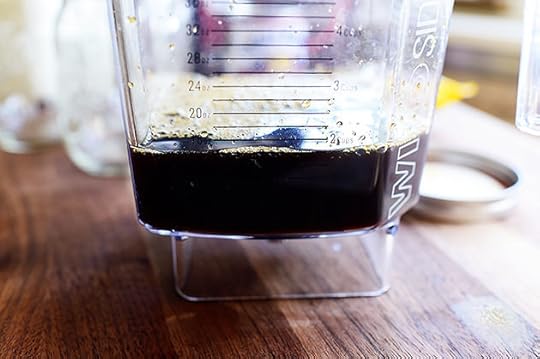
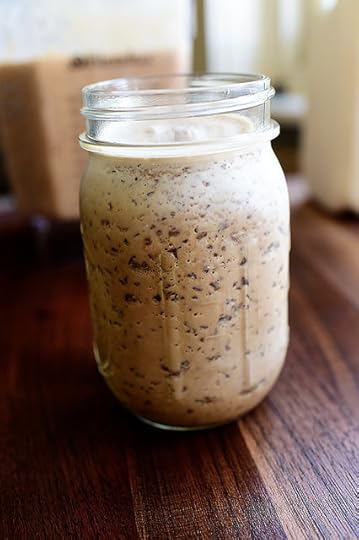
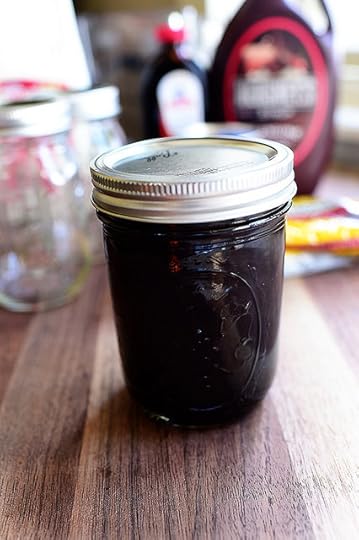 First, you need really strong—and I mean, strong—coffee that’s been chilled. I’m fresh out of the coffee concentrate I usually like to keep in my fridge, so I just brewed some extremely strong coffee (have I mentioned it needs to be strong?), poured it into a mason jar, and popped it in the fridge until it was really cold.
(But if you have time…use this recipe to make a large amount of cold brew concentrate! You’ll be glad you did.)
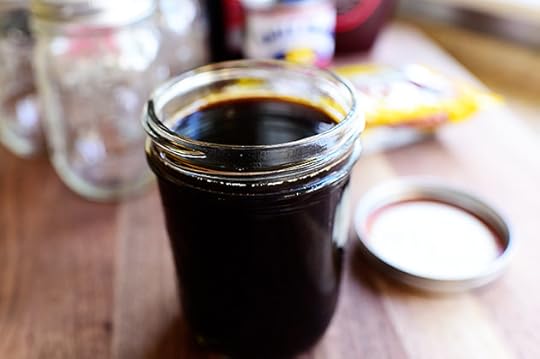 The coffee basically needs to be too strong for the average person to drink straight—and actually, too strong for the average person to drink with a little cream and sugar added! You have to account for the dilution that will happen when you blend it all with ice and milk; you still wanna taste that beautiful coffee flavor when the Frappuccinos are all ready!
So (at the risk of beating a dead horse)…strong, okay?
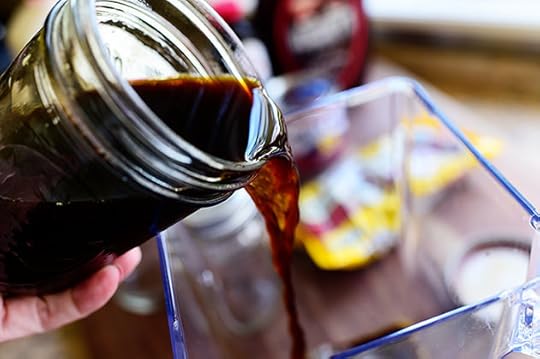 Start by pouring the concentrate into a blender.
 Oh boy oh boy oh boy. I’m already getting excited.
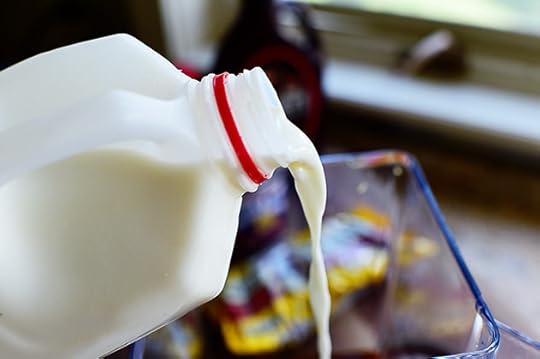 Now for the milk! I used whole milk because I have issues of rebellion stemming from my childhood, but you can certainly use 2%, 1%, or even nonfat milk!
Just be sure to splash in some heavy cream if you do that.
Ha.
 Don’t add milk to the point of it being super creamy; it still needs to be really strong and coffee-ish.
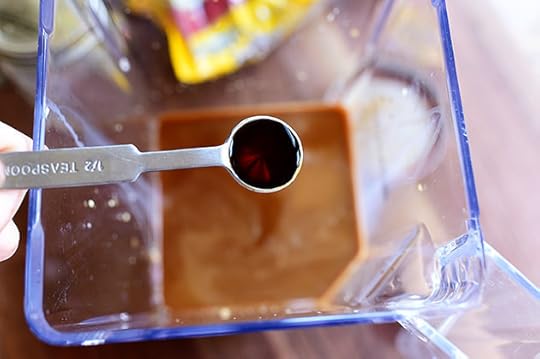 Now, for a little added touch of deliciousness, add some vanilla!
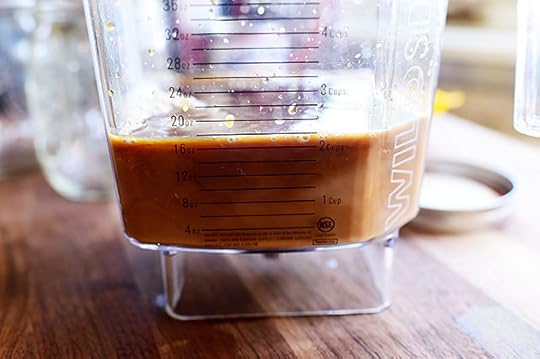
 And for the sweetness…
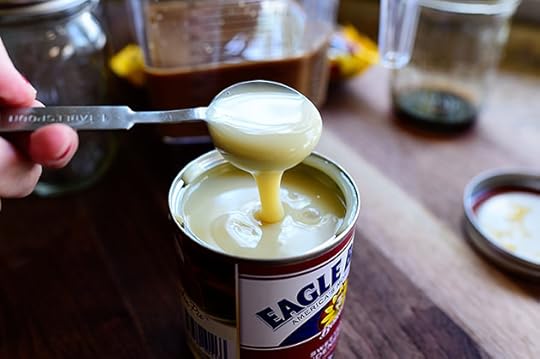 Sweetened condensed milk. The nectar of the gods!
 Now, you can always add straight sugar or a simple syrup. I just like using sweetened condensed milk because, well…issues from my childhood.
And it’s just so darn delicious.
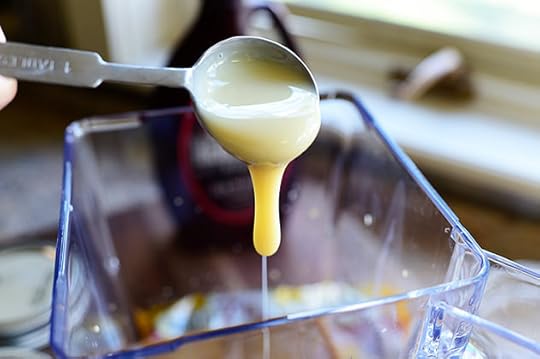
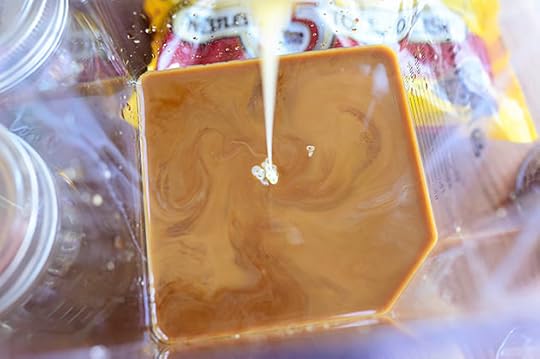 Add about a fourth a cup…or a little more, depending on your taste.
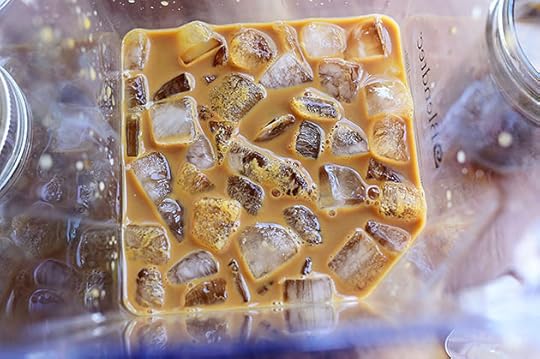 Now you just need ice. This is only half the quantity I used; you pretty much need to top off the whole blender.
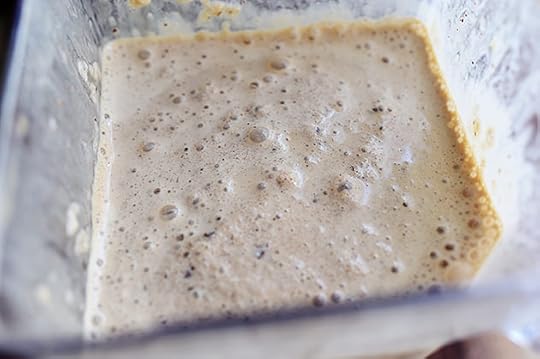
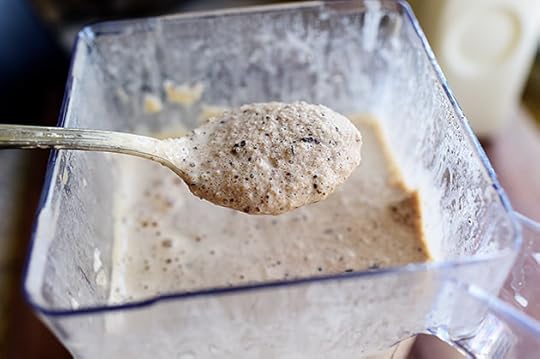
 Then just blend the heck out of it until the ice is totally broken up and the Frappuccino is nice as smooth.
Well, as smooth as it can be with all that nice, crunchy ice.
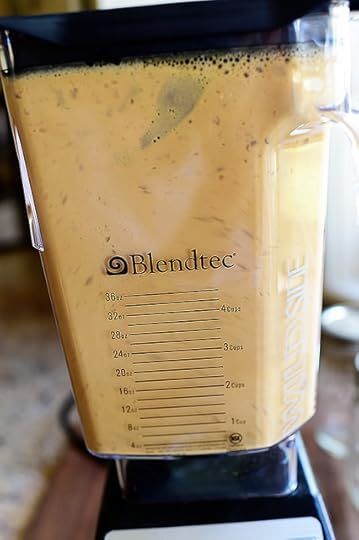
 This is perfect.
 You can add more ice, more milk, or more coffee concentrate depending on what it needs and what consistency you want. I like it pretty icy and thick like this, so I’m just gonna go for it.
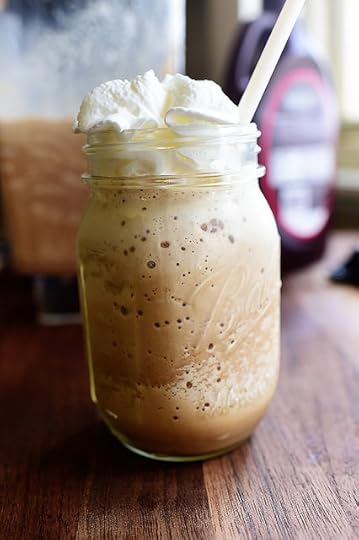
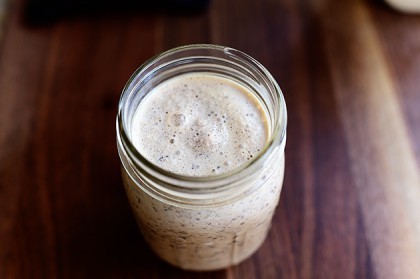
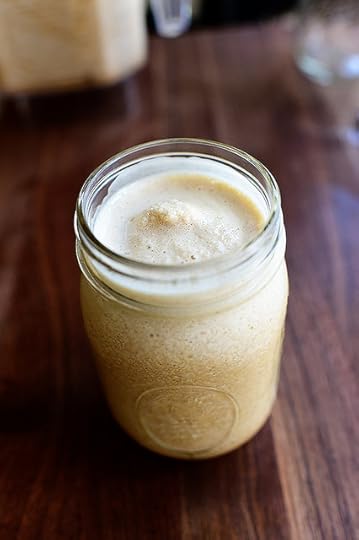 Now that right there is a Frappuccino. Eat it with a spoon, sip it with a straw…whatever makes your skirt fly up.
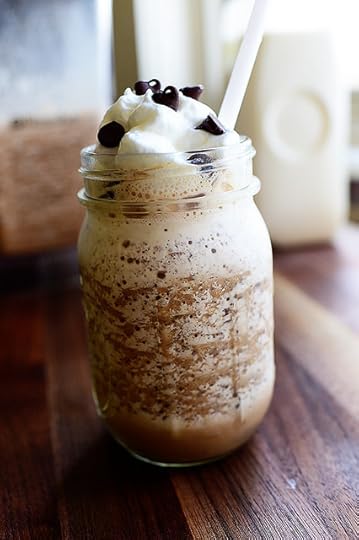
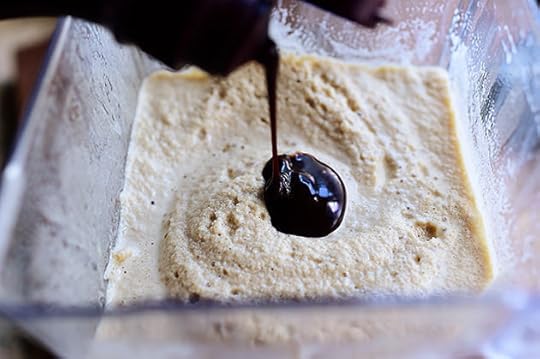 Now, to make a MOCHA Frappuccino, all you need to do is add a good amount of chocolate syrup. Just like I’ve been driving home the point ad nauseam that you really want to taste the coffee flavor…you also really want to taste the chocolate flavor.
Flavor, flavor, flavor!
Oh, and one more thing: flavor.
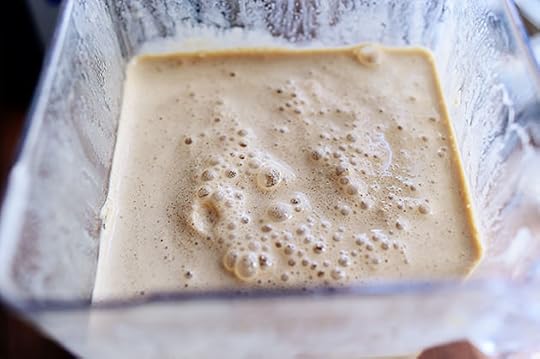 Blend it, taste it, add more, blend it taste it…until it’s perfect.
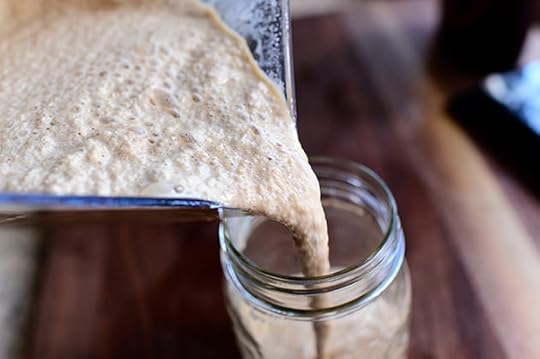 Into a glass…
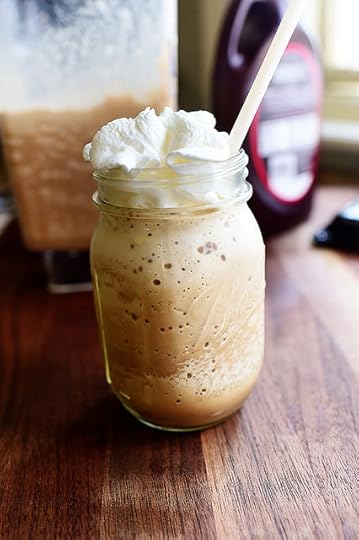 And this definitely warrants whipped cream. Oh, and full disclosure: This is Reddi Wip.
I feel cleansed having told you that.
 Oh, what a beautiful sight.
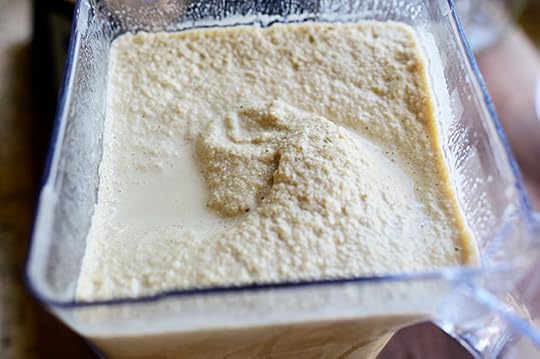
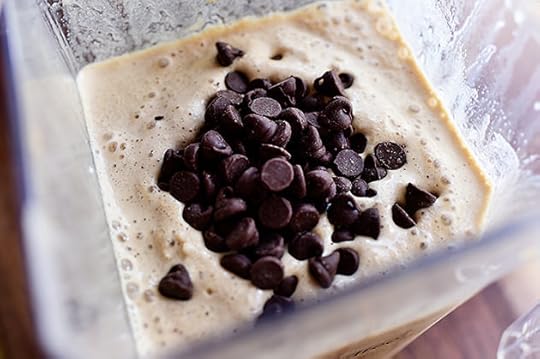 But wait! There’s more! How about a Mocha CHIP Frappuccino? Just add a good amount of chocolate chips…
 And blend it until the chocolate is broken up into tiny bits.
(Do your kids ever get the Double Chocolaty Chip Frappuccinos at Starbucks? Mine do, and before I hand them back into the back seat, I drink half of them first. Delicious!)
 All of these Frappuccinos are treats…but this is definitely in the decadent category. The bits of chocolate are glorious.
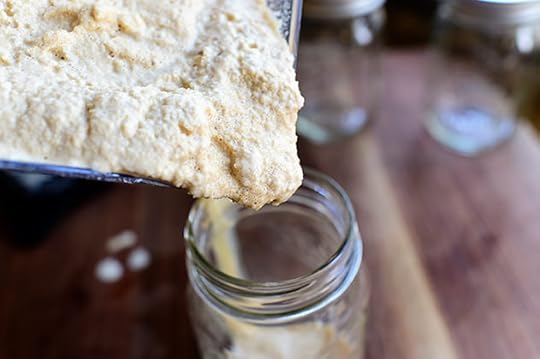
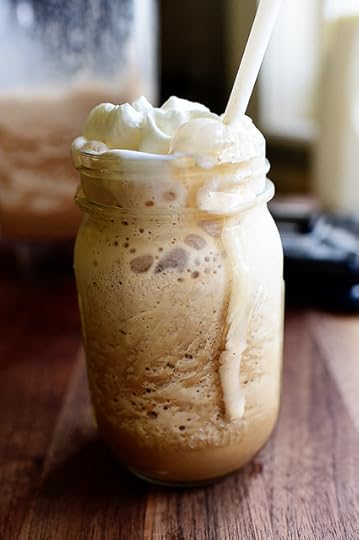
 Pour it in the glass, and get very excited. This is gonna be good.
 I probably could have blended it a little bit more to break up the chocolate. But I think I can surge on in spite of this hiccup. With the help of family and friends…I’ll make it.
 Whipped cream, chocolate chips (or you can drizzle on more chocolate syrup)…and you’re good to go! (Here, it has sat for a few minutes and you can see all the sedimentary layers of deliciousness. Sigh.)
Happy National Coffee Day, everyone! I hope you’re celebrating in grand style.
Here’s the handy dandy printable.
.recipe-actions {
position: relative;
z-index: 2;
}
#pdf-popover {
background: rgba(255,255,255,.9);
border: 1px solid #efeeed;
color: #6e5c3a;
display: none;
font-family: Helvetica, Arial, sans-serif;
right: 20px;
margin: 2px;
padding: 54px 20px 7px 10px;
position: absolute;
top: 0;
width: 380px;
z-index: 10;
}
#pdf-popover form {
margin: 0;
}
#pdf-popover h4 {
background: #b15818;
color: #fff;
font-family: Helvetica, Arial, sans-serif;
font-size: 20px;
font-weight: normal;
left: 3px;
margin: 0;
position: absolute;
padding: 6px 12px;
right: 3px;
top: 3px;
}
#pdf-popover legend {
font-family: Helvetica, Arial, sans-serif;
font-size: 120%;
font-weight: bold;
margin-bottom: 2px;
margin-left: 10px;
text-transform: uppercase;
}
#pdf-popover fieldset {
margin-bottom: 15px;
}
#pdf-popover input[type="checkbox"] {
height: 14px;
margin: 2px 0 10px 10px;
padding-left: 14px;
position: relative;
visibility: visible;
width: 14px;
}
#pdf-popover input[type="checkbox"],
#pdf-popover input[type="radio"] {
margin-left: 10px;
}
#pdf-popover .close {
background: #b15818;
color: #FFFFFF;
cursor: pointer;
height: 35px;
font-size: 16px;
font-weight: bold;
line-height: 26px;
position: absolute;
right: 3px;
text-align: center;
top: 3px;
width: 25px;
z-index: 1;
}
#pdf-popover .button {
background-color: #b15818;
border: 0;
color: #fff;
cursor: pointer;
font-family: Helvetica, Arial, sans-serif;
margin-left: 10px;
padding: 8px 10px;
text-transform: uppercase;
}
x
Print Options
Page size
Letter
3x5
4x6
Text Size
Small
Medium
Large
Content
Include description
Include prep time, etc.
Show image
Recipe
Homemade Frappuccino
Prep Time: 5 Minutes
Cook Time:
Difficulty: Easy
Servings: 6
 Print Recipe
Ingredients
12 ounces, fluid Very Strong Brewed Coffee Or Espresso, Chilled8 ounces, fluid Whole Milk1/3 cup Sweetened, Condensed Milk1 teaspoon Vanilla Extract1/4 cup Chocolate Syrup1/2 cup Semi-sweet Chocolate Chips (more If Desired!) Whipped Cream1/4 cup Half-and-half (optional) Preparation Instructions
To make Vanilla Frappuccino: Add coffee, milk, sweetened condensed milk, and vanilla to a blender. Top off blender with ice and blend until smooth and icy. (Add half-and-half if you'd like it to be a little richer and creamier.) Serve in a glass with whipped cream on top.
To make Mocha Frappuccino: Add coffee, milk, sweetened condensed milk, vanilla, and chocolate syrup to a blender. Top off blender with ice and blend until smooth and icy. (Add half-and-half if you'd like it to be a little richer and creamier.) Serve in a glass with whipped cream on top.
To make a Mocha Chip Frappucchino: Add coffee, milk, sweetened condensed milk, vanilla, chocolate syrup, and chocolate chips to a blender. Top off blender with ice and blend until smooth and icy, with tiny chocolate bits throughout. (Add half-and-half if you'd like it to be a little richer and creamier.) Serve in a glass with whipped cream on top, and drizzle the whipped cream with chocolate syrup or dot with more chocolate chips.
Posted by Ree | The Pioneer Woman on September 29 2014

September 22, 2014
Black Bean Burger
 My husband and I celebrated our wedding anniversary yesterday, and I’d say as marriages go, ours is pretty darn good. We have four kids, work pretty hard, and spend most of our time together, which is just fine with us since we really like each other and all that.
Now, I will confess that there has been one steady source of marital conflict through the years, and that is the fact that I gosh darn love a good meatless burger. I can’t really explain it. It must be a throwback to my vegetarian days. I don’t know…I just love them. And I’ll never, ever forget the time, very early in our marriage, that Marlboro Man and I went out to eat and I ordered—gasp—a veggie burger from the menu. The look on his face—I’ll never, ever forget it. From where he stood, he didn’t even know burgers without meat existed. In his experience, a burger was meat, much like air was oxygen or rain was water. It sent shockwaves through his being, and it shook our foundation to the core.
Over the years, I’ve tried to help my beloved cattle rancher husband understand my position: That my love of meatless burgers has no hidden meaning. It doesn’t mean I don’t also love big, beefy burgers. It doesn’t mean I’m going to start making the family drink shots of wheat grass juice every morning. I just like the taste of weird, mushy concoctions meant to resemble hamburger patties. Call me wacky!
I love you, Marlboro Man.
But I also love meatless burgers.
And I know in my heart that those two things can coexist.
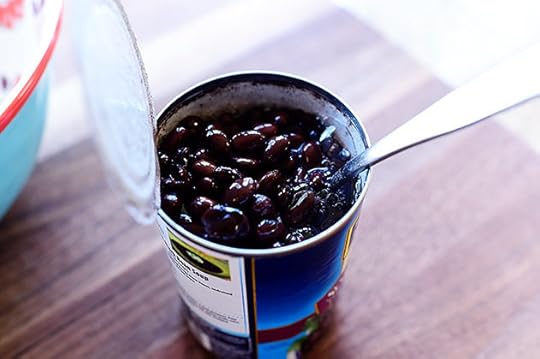 On the show I used this homemade black bean recipe, but it’s much easier just to crack open a couple of cans of seasoned black beans. Honestly, either one works great! So if you have a last-minute hankering for black bean burgers, you don’t have to wait four hundred years while you cook a batch from scratch.
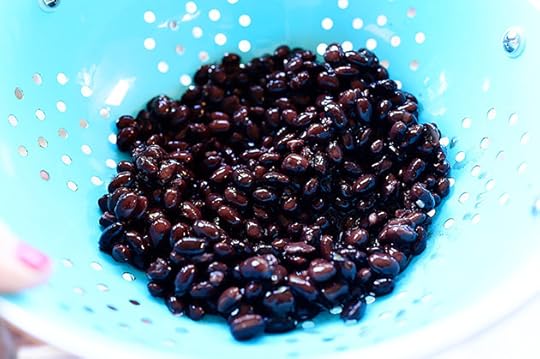 Now, I drain the black beans…but I don’t rinse them. I want to have a little bit of that natural bean liquid to work with.
“I want to have a little bit of that natural bean liquid to work with.”
When I was sixteen and wearing Guess jeans and Cyndi Lauper neon fingerless gloves, I never would have believed that I would ever utter—let alone type—the aforementioned sentence.
Life is a journey.
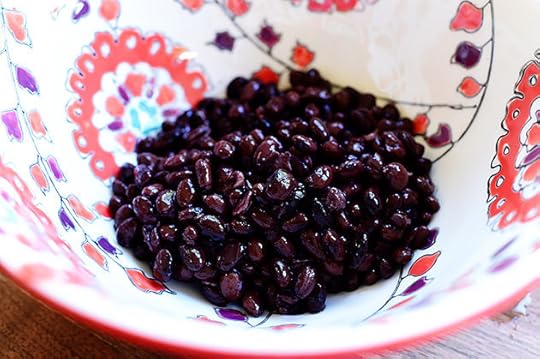 Pour the beans into a bowl…
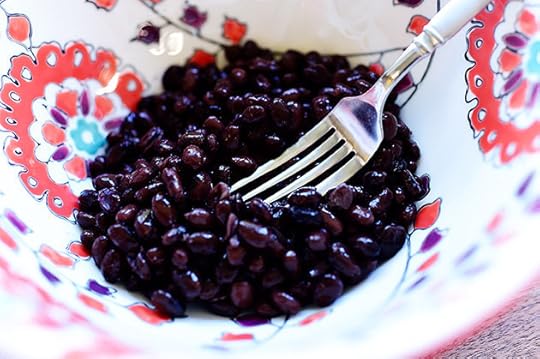 Then use a fork…
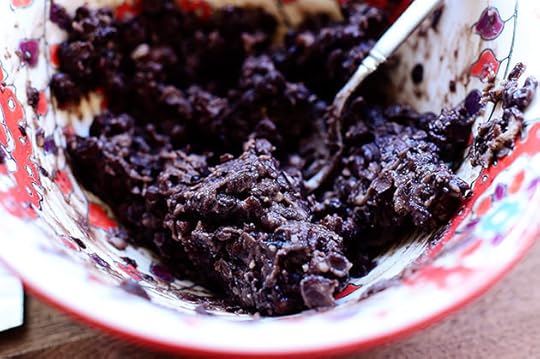 To mash ‘em up.
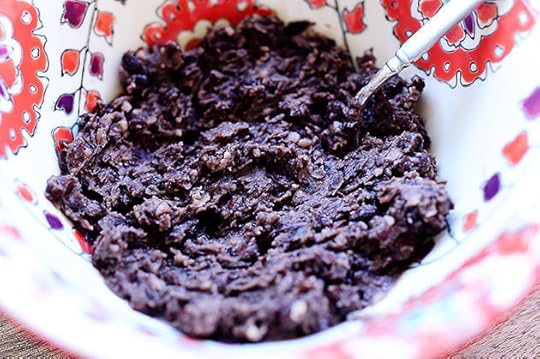 Basically, you want to mash them up until they’re pretty mushy, but still have some whole bean pieces throughout.
So sorta mushy.
But not totally mushy.
But kinda mushy.
But not completely mushy.
Thank you for listening.
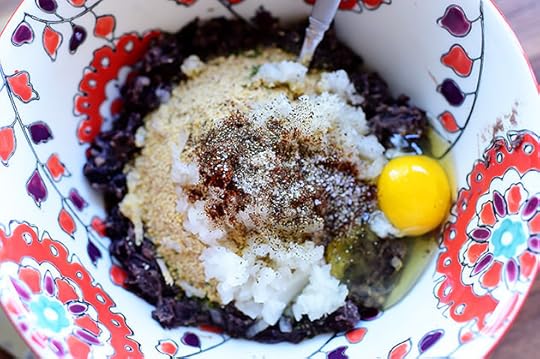
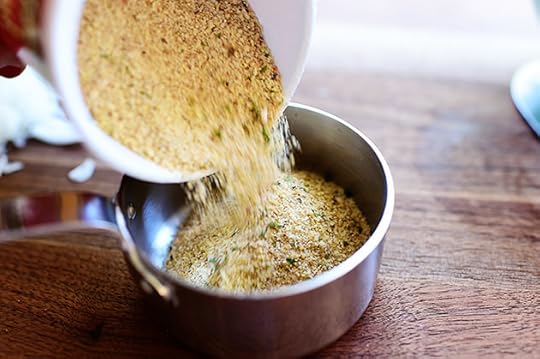 To bring in a little substance and texture, measure 1 cup of seasoned breadcrumbs…
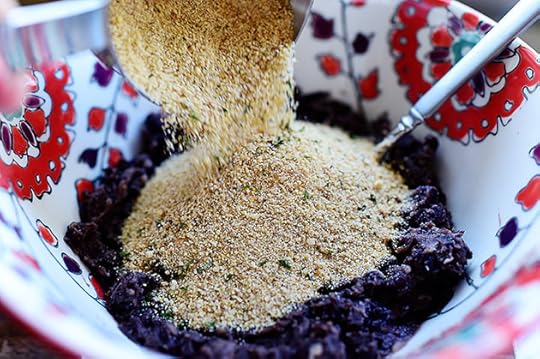 And pour them in with the beans.
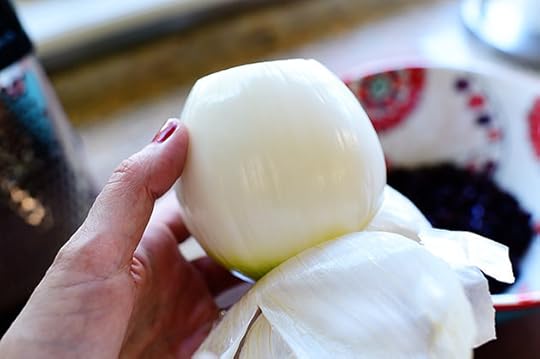 Now, for extra delicousness, peel an onion…
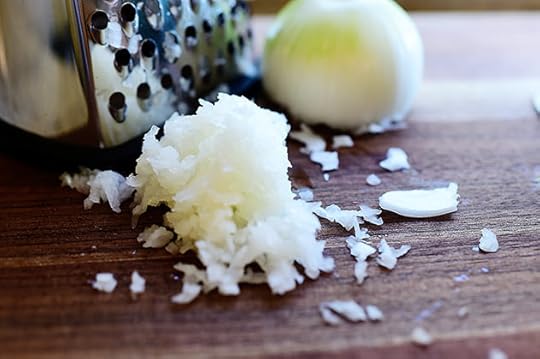
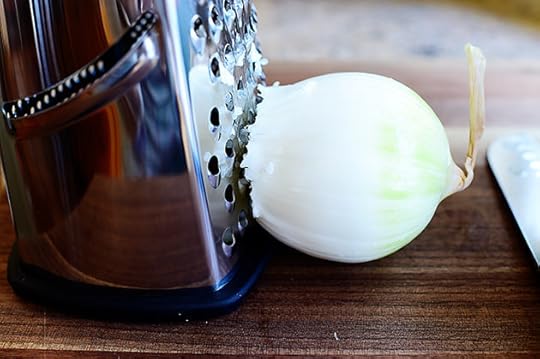 And grate it up.
 I love grating onion whenever I want the flavor of onion, but don’t want big chunks of onion getting in the way of my happiness.
Solutions. I’m all about solutions, people.
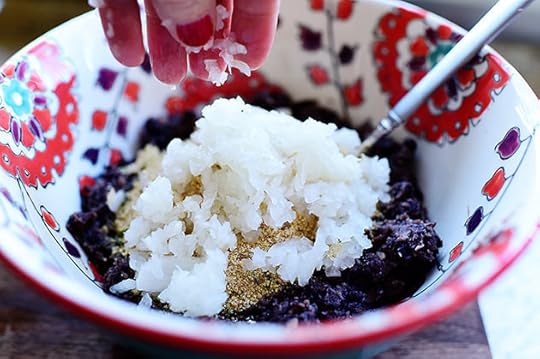 Throw in the grated onion…
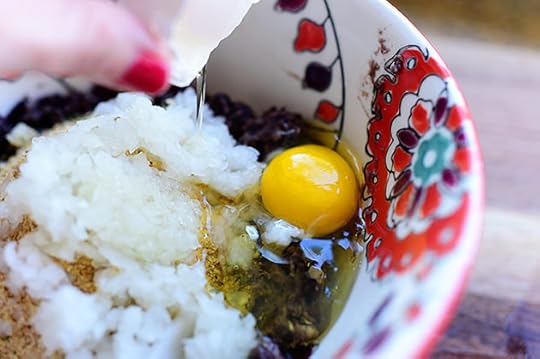 Then, to bind it all together, crack in an egg! It’s the right thing to do.
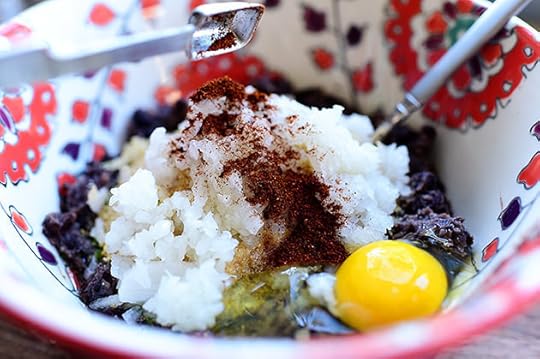 Now, I like to spice things up a bit because I’m a middle child and have issues with my third grade teacher. Not really. I just like spicy food. So I add a little chili powder!
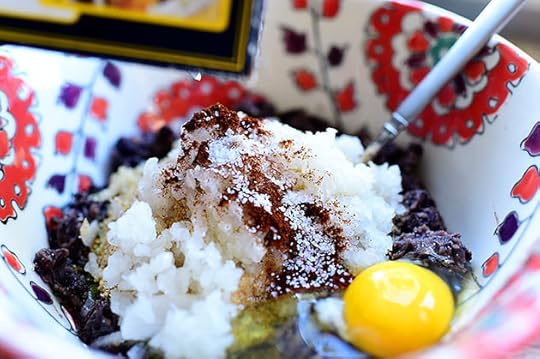 Then, for kicks, some salt…
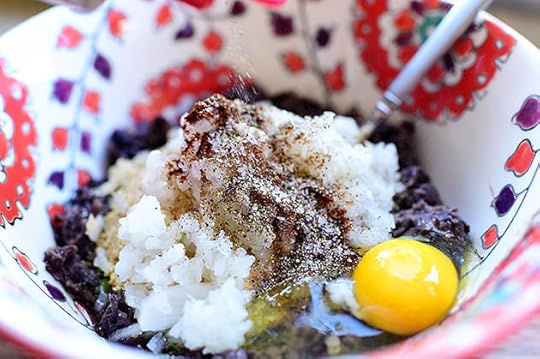 And pepper.
 And that right there is a bowl full of deliciousness, baby.
You’re just gonna have to trust me here.
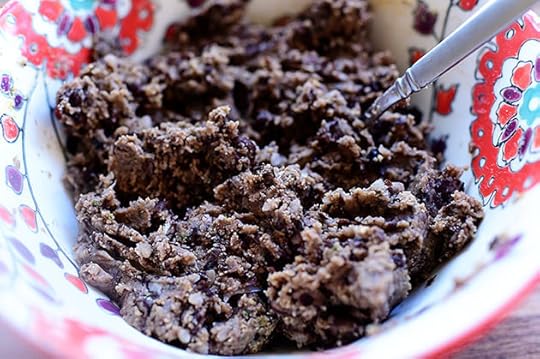 Now, smush it all together until it’s all mixed together…
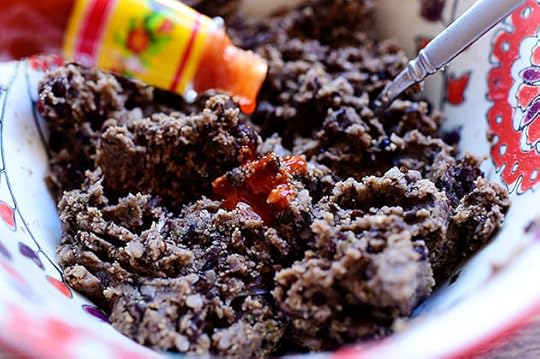 Then, because I was feeling sassy, I added in a little hot sauce.
Now hear this: A little spice, when it comes to black bean burgers, is really, realllllllly nice.
Now I just want to let the mixture sit for about 5 minutes so it can figure out the meaning of life. While that happens, I’ll get the skillet ready!
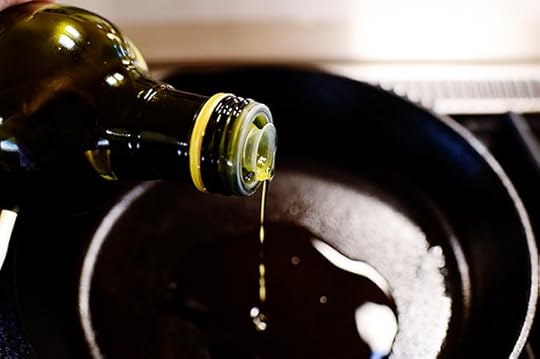 Drizzle in a little olive oil…
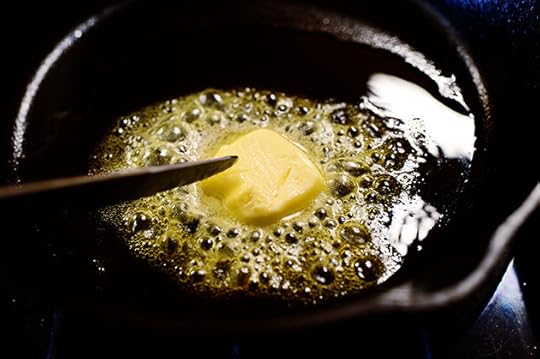 And a little buttah for flavah.
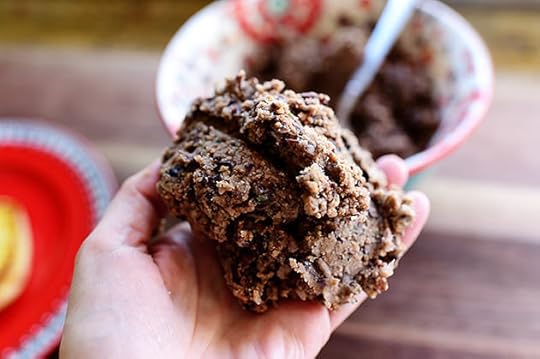 Now, grab a hunk of the bean mixture…
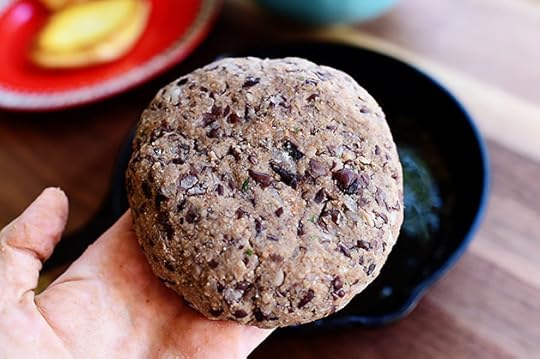 Form it into a nice, neat patty…
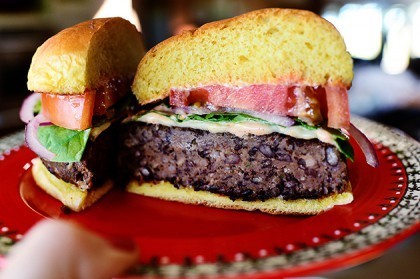
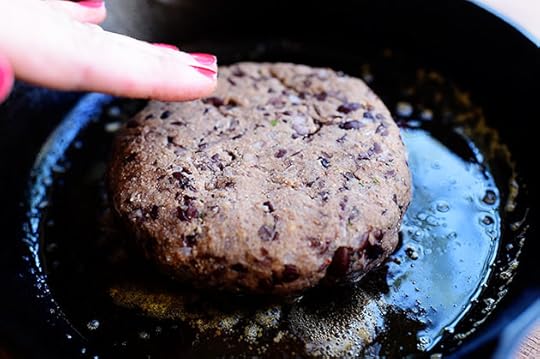 And throw it into the skillet. Now, a note about the size of the patty: Black bean burgers are different from regular beef burgers in that they don’t shrink at all when they cook. So whatever size you make ‘em when they go into the skillet will be the size they are when they come out. So if you’re in the habit of making burger patties a little larger than the bun to allow for shrinkage, beware!
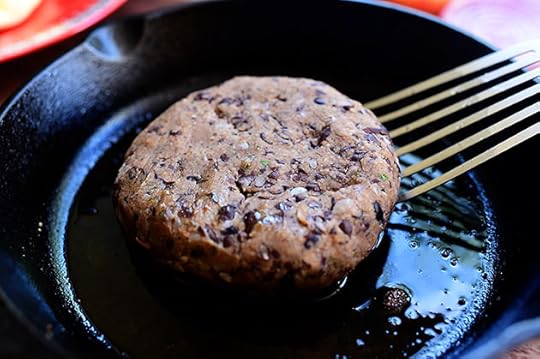 Now, I cook the burger on pretty low heat, because I want the middle to get heated through without burning the outside surface.
“Outside surface” is totally redundant, by the way.
 So after about 4 to 5 minutes, flip the burger over to the other side and let it cook another 4 to 5 minutes.
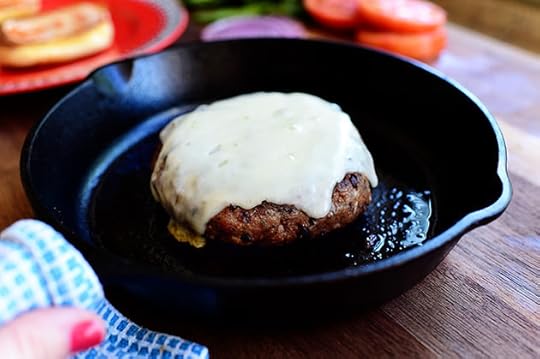
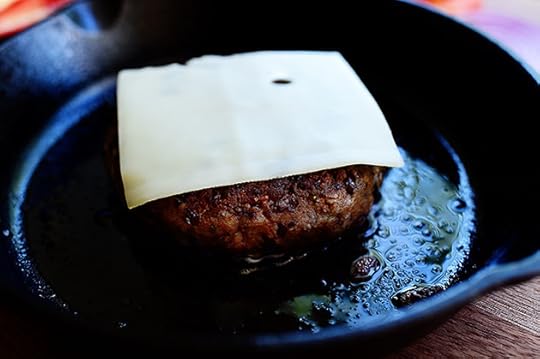 Then, to really drive home the lusciousness, I added a couple of slices of Swiss cheese.
 After a couple of minutes, I inverted a second skillet on top of the first skillet in order to hasten the cheese melting process.
“Inverted a second skillet on top” – Otherwise known as “a lid.”
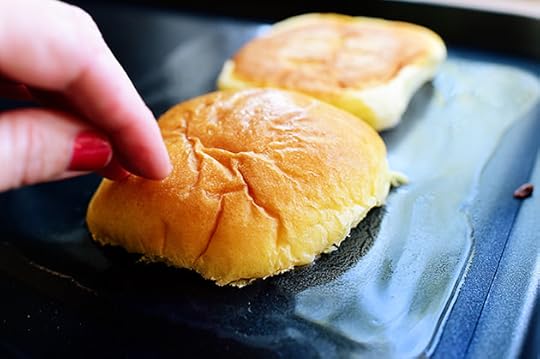 Now, during the whole cooking process, I got other burger stuff ready: I grilled a bun with a little butter on a griddle…
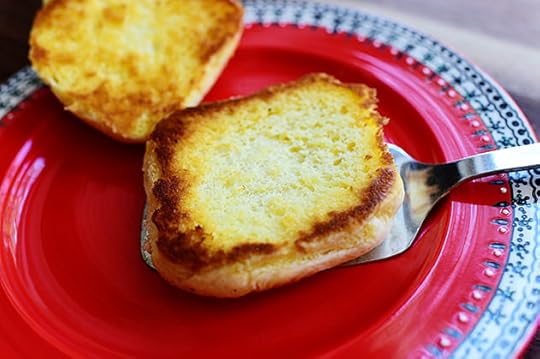 Until it was a nice, lovely golden brown.
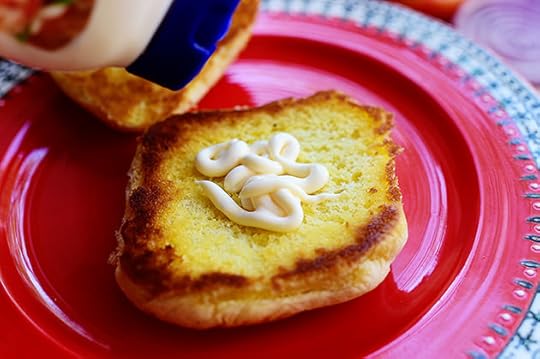 You can dress the burger however you’d like! I used mayo, not to be confused with Miracle Whip, which we all know is what they serve in Hades…
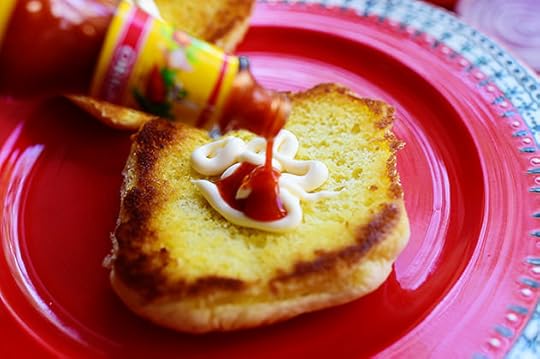 And some hot sauce. I seriously think I have a problem. Either my body or my psyche needs hot sauce in the worst way. (Pssst. You can use ketchup if you’re more emotionally sound than I!)
 Spread it around until it’s all swirly and magnificent.
And are you ready to see the burger now?
Are you sure?
Are you sure you’re sure?
 Tada! Man, you’d never know there’s not an ounce of meat in this sucker. And the Swiss cheese is the perfect…well, icing on the cake.
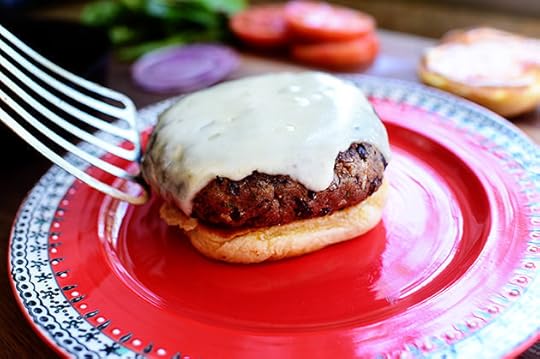 Put it on the bottom bun…
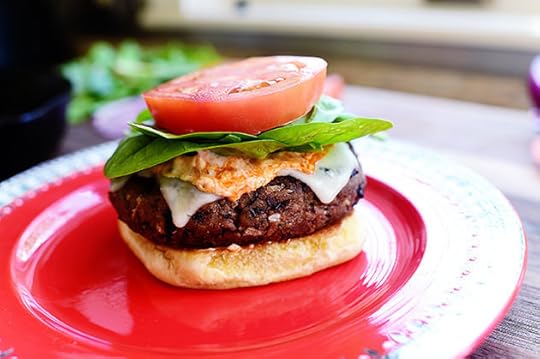 Then I spooned on a little more mayo/hot sauce mixture, followed by some lettuce, and a big slice of tomato.
 And the top half of the bun, of course!
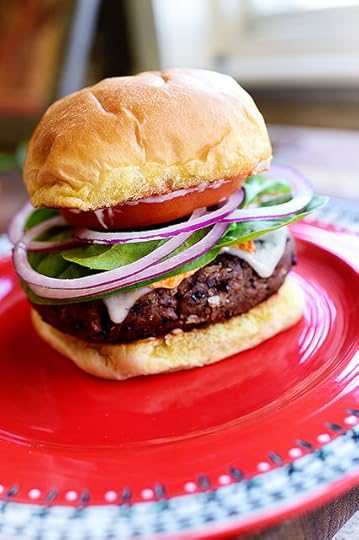 Then I realized I forgot the onion—which made everything utterly perfect.
So delicious, and half of this baby was totally satisfying. You can also cut out a lot of the bread (remember that the bean mixture also has breadcrumbs in it) by forgoing the bun and just eating the cheesy patty by itself.
Here’s the handy dandy printable!
.recipe-actions {
position: relative;
z-index: 2;
}
#pdf-popover {
background: rgba(255,255,255,.9);
border: 1px solid #efeeed;
color: #6e5c3a;
display: none;
font-family: Helvetica, Arial, sans-serif;
right: 20px;
margin: 2px;
padding: 54px 20px 7px 10px;
position: absolute;
top: 0;
width: 380px;
z-index: 10;
}
#pdf-popover form {
margin: 0;
}
#pdf-popover h4 {
background: #b15818;
color: #fff;
font-family: Helvetica, Arial, sans-serif;
font-size: 20px;
font-weight: normal;
left: 3px;
margin: 0;
position: absolute;
padding: 6px 12px;
right: 3px;
top: 3px;
}
#pdf-popover legend {
font-family: Helvetica, Arial, sans-serif;
font-size: 120%;
font-weight: bold;
margin-bottom: 2px;
margin-left: 10px;
text-transform: uppercase;
}
#pdf-popover fieldset {
margin-bottom: 15px;
}
#pdf-popover input[type="checkbox"] {
height: 14px;
margin: 2px 0 10px 10px;
padding-left: 14px;
position: relative;
visibility: visible;
width: 14px;
}
#pdf-popover input[type="checkbox"],
#pdf-popover input[type="radio"] {
margin-left: 10px;
}
#pdf-popover .close {
background: #b15818;
color: #FFFFFF;
cursor: pointer;
height: 35px;
font-size: 16px;
font-weight: bold;
line-height: 26px;
position: absolute;
right: 3px;
text-align: center;
top: 3px;
width: 25px;
z-index: 1;
}
#pdf-popover .button {
background-color: #b15818;
border: 0;
color: #fff;
cursor: pointer;
font-family: Helvetica, Arial, sans-serif;
margin-left: 10px;
padding: 8px 10px;
text-transform: uppercase;
}
x
Print Options
Page size
Letter
3x5
4x6
Text Size
Small
Medium
Large
Content
Include description
Include prep time, etc.
Show image
Recipe
Black Bean Burgers
Prep Time: 10 Minutes
Cook Time: 10 Minutes
Difficulty: Easy
Servings: 4
 Print Recipe
Ingredients
2 cans (14.5 Each) Seasoned Black Beans1 cup Seasoned Breadcrumbs1/4 cup Grated White Onion1 whole Egg1/2 teaspoon Chili Powder Salt And Pepper Hot Sauce (I Used Choloula)8 slices Swiss Cheese Olive Oil, For Frying Butter, For Frying And Grilling4 whole Kaiser Rolls Or Good Hamburger Buns Mayonnaise Lettuce Or Other Greens Sliced Tomato Preparation Instructions
Drain, but do not rinse, the black beans. Place them in a bowl and use a fork to mash them. Keep mashing until they're mostly broken up, but still have some whole beans visible. Add the breadcrumbs, onion, egg, chili powder, salt, pepper, and hot sauce. Stir until everything is combined, then let the mixture sit for 5 minutes.
Heat a tablespoon or two of olive oil with an equal amount of butter in a skillet over medium-low heat. Form the bean mixture into patties slightly larger than the buns you're using (the patties will not shrink when they cook.) Place the patties in the skillet and cook them about 5 minutes on the first side. Flip them to the other side, place 2 slices of cheese onto each patty, and continue cooking them for another 5 minutes, or until the burgers are heated through. (Place a lid on the skillet to help the cheese melt if needed.)
Grill the buns on a griddle with a little butter until golden. Spread the buns with mayonnaise and hot sauce, then place the patties on the buns. Top with lettuce and tomato, then pop on the lids!
Yum.
Posted by Ree | The Pioneer Woman on September 22 2014

September 19, 2014
My Favorite Chicken Recipes
Happy Friday, friends! Today, in true round-up form, I wanted to share a handful of my very favorite chicken dishes! Hope you find a few that make your skirt fly up.
Unless you don’t wear skirts. And then…well, use your imagination.
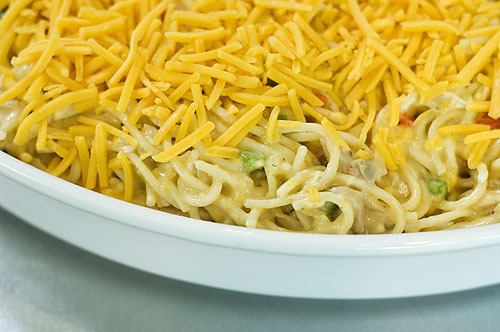 Chicken Spaghetti. What can I say? It’s one of the most luscious comfort food casseroles on earth, and while it takes a little while to make, I often double up and make two (or even four if I’m feeling ornery!) and put the extras in the freezer. Marlboro Man loves it, the kids love it…and I more than love it. It says “home” to me.
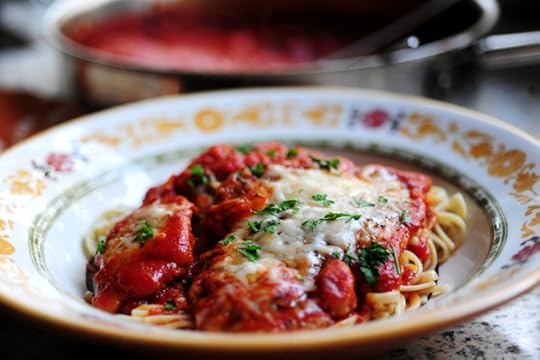 Chicken Parmesan. At his request, I just made this for Bryce’s birthday dinner and was once again reminded (when I saw the empty plates afterward) of how delicious and crowd-pleasing this dang dish is.
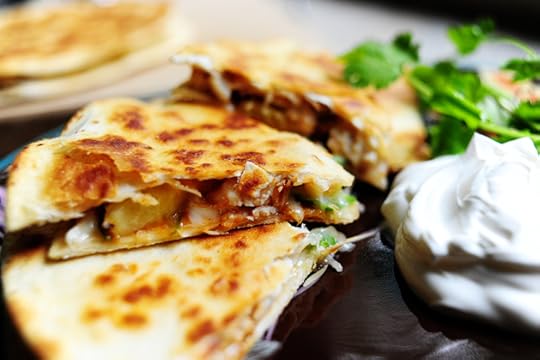 Grilled Chicken and Pineapple Quesadillas. I first had them on vacation a few years ago, and I love them every bit as much now. The pineapple adds such deliciousness!
 Or, if you want a more plain, pared-down approach, these basic Chicken Quesadillas I posted last week are always a winner winner chicken dinner.
 Homemade Chicken and Noodles. Oh my gosh—yes, yes, yes, yes, yes. If I could dive right into a pot of anything right now, it would be this. Basically more like a chicken noodle stew than a soup, this has “comfort” written all over it. You will swoon over the wholesome goodness of this.
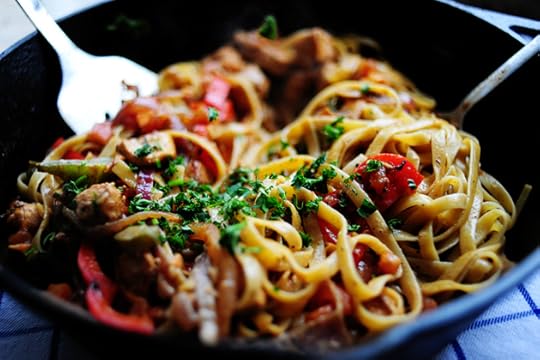 Cajun Chicken Pasta! A well-loved recipe on this website (and in my house!) for years. Lots of flavor, lots of awesomeness. I want this for breakfast right now.
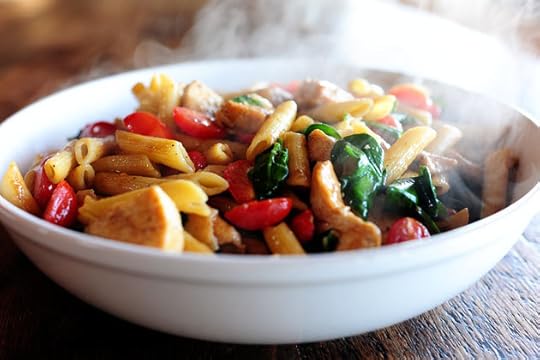 Speaking of pasta…this Chicken Florentine Pasta is gorgeous and flavorful and so quick, you won’t even know you cooked anything. The hot pasta and chicken are combined with uncooked spinach and tomatoes…and before you know it, dinner’s on the table. It’s like magic! (Pssst. Sub kale if you’d prefer. It’s yummy, too!
September 17, 2014
My Favorite Blender (Winners!)
The winners of the blender are:
#1104 April: “Atlanta Braves!”
#4253 T.Ella: “NY Yankees!”
#43175 Trica A: “San Francisco 49ers.”
Congratulations, winners! Contact prizes@thepioneerwoman.com to claim your prizes.
 Today, because I’m back from my trip, because I slept until 6:30 am and it felt really nice, because the weather is getting cooler, and because I love ya, I’m giving away three (3) Blentec blenders, each with an extra blender pitcher to make life worth living on busy cooking days!
I love this blender. It’s the one I use. It brings me much happiness and joy. (In the kitchen, anyway.)
To enter, just answer the following question in the Comments section of this post:
“What’s your favorite professional sports team?”
We’ve got Fantasy Football coming out of our ears here, so NFL Football is the number one topic of discussion. So what about you? What is your favorite pro sports team right now, whether it’s NFL, NBA, MLB, NHL, etc? Just name it in a comment and you’re automatically entered to win.
(If you don’t watch sports of any kind, no problem! Just say so in the comments and you’re fine.)
One entry per person, please.
Winners will be announced Thursday!
Giveaway sponsored by Pioneer Woman.
Winners have been announced and giveaway is now closed.

My Favorite Blender!
Today, because I’m back from my trip, because I slept until 6:30 am and it felt really nice, because the weather is getting cooler, and because I love ya, I’m giving away three (3) Blentec blenders, each with an extra blender pitcher to make life worth living on busy cooking days!
I love this blender. It’s the one I use. It brings me much happiness and joy. (In the kitchen, anyway.)
To enter, just answer the following question in the Comments section of this post:
“What’s your favorite professional sports team?”
We’ve got Fantasy Football coming out of our ears here, so NFL Football is the number one topic of discussion. So what about you? What is your favorite pro sports team right now, whether it’s NFL, NBA, MLB, NHL, etc? Just name it in a comment and you’re automatically entered to win.
(If you don’t watch sports of any kind, no problem! Just say so in the comments and you’re fine.)
One entry per person, please.
Winners will be announced Thursday!
Giveaway sponsored by Pioneer Woman.
September 15, 2014
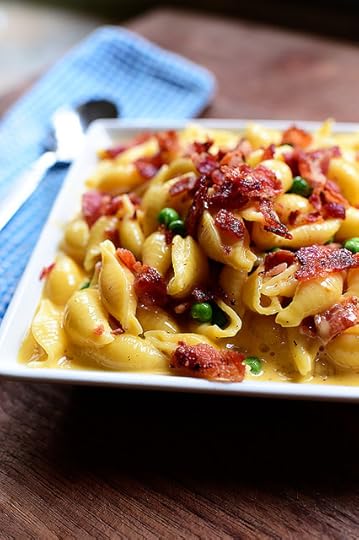
Shells & Cheese (with Bacon & Peas)
 Sometimes you feel like making macaroni and cheese that involves whipping up a roux, then making a white sauce, then adding cheese to make it a cheese sauce.
And sometimes you don’t.
This ultra-simple, kid-friendly recipe for pasta shells and cheese is absolutely scrumptious and so darn easy to make.
The secret’s in the (artisan cheese) sauce.
Just you wait, ‘enry ‘iggins. Just you wait…
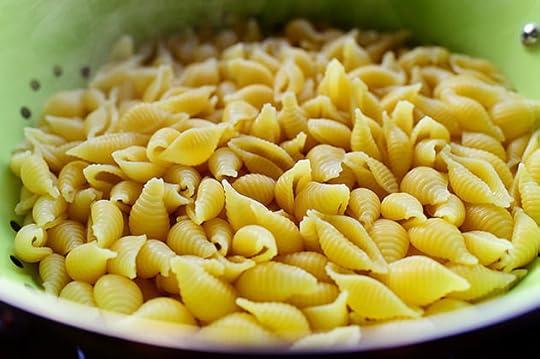
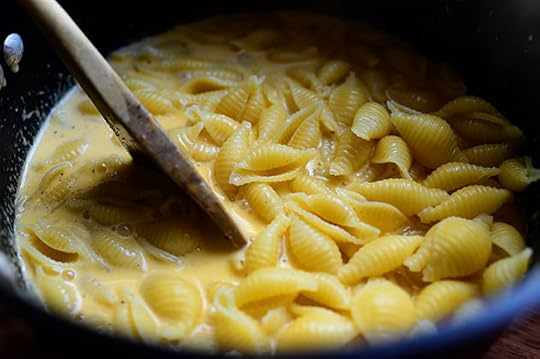
 First, boil up some pasta! These are just good ol’ medium pasta shells, but you can use the small shells if you want.
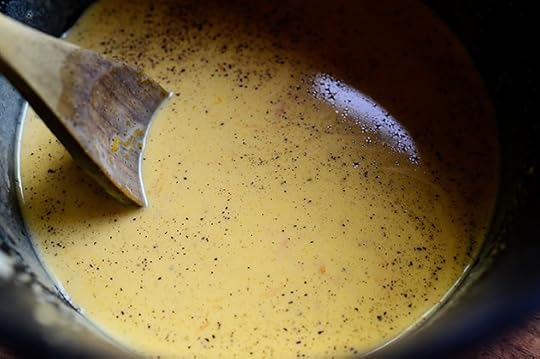
 Next, make the gourmet cheese sauce: Add 2 cups of milk (I used 2%) to a saucepan…
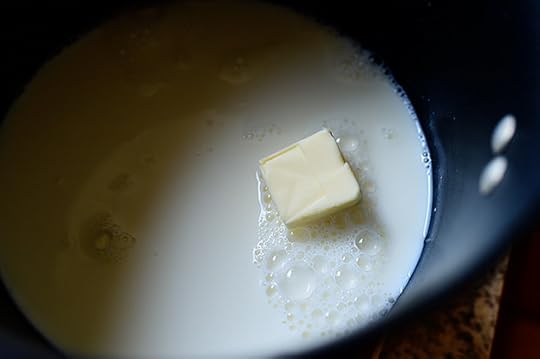 And add a pat or two of buttah! And that’s basically the basic basis for the cheese sauce, basically. Note that there’s no flour, there’s no roux, and there’s no white sauce. And that’s what’s so beautifully simple about this recipe!
 Heat this mixture over medium-low heat until the milk is heated and the butter is melted.
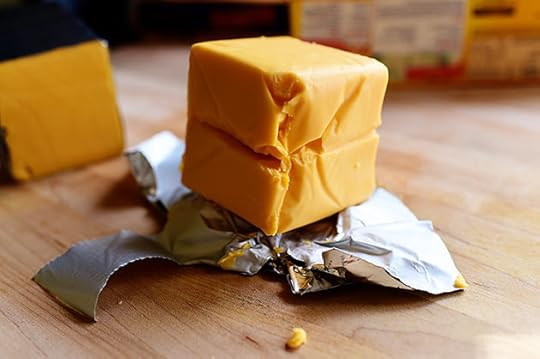 And now, for the artisan cheese blend, which you can only get from specialty gourmet mail order catalogs: Start with a hunka hunka burnin’ Velveeta. And actually, it would be best if it wasn’t burnin’. Just straight out of the tight foil wrapper is best.
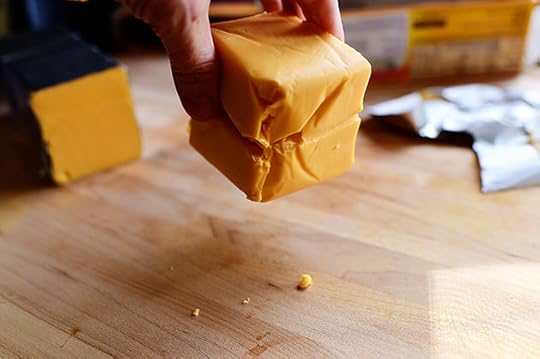 And by the way…have you ever, just for fun, suspended a hunk of Velveeta from a height of a few inches, then released the Velveeta to see if it would bounce?
Try it sometime. It might make you giggle.
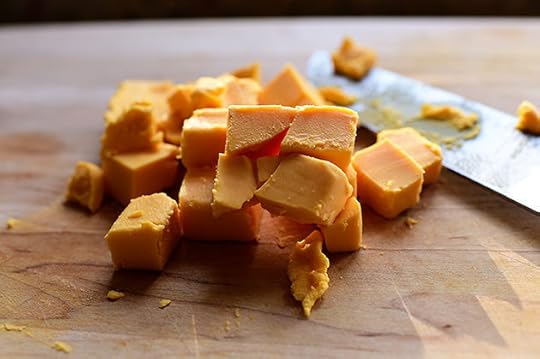 After you play a few rounds of bouncy ball, go ahead and cut it into cubes.
 Then, to redeem what you’ve just done, grate up a nice amount of sharp cheddar. (On the show I used cheddar-jack, which is delicious, but I love the sharpy sharpiness of the sharper sharp cheddar.)
(I’m in a little bit of a mood today. Can you tell?)
 Now, making sure the milk/butter combo is nice and heated, drop in the Velveeta.
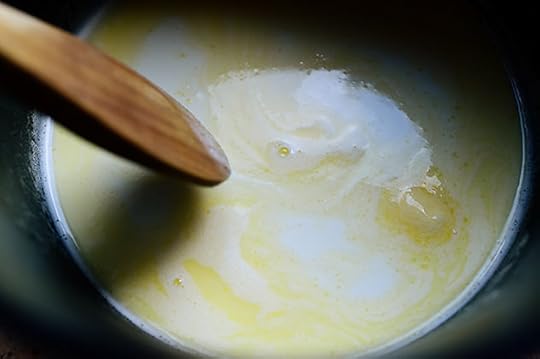
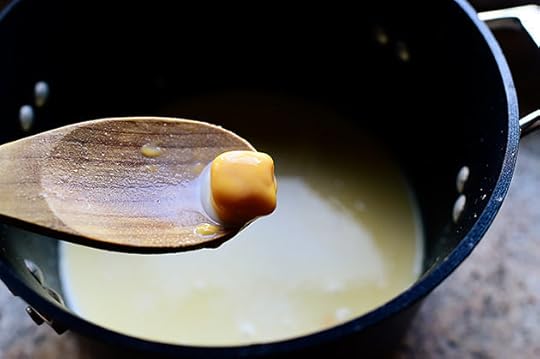 Stir it around until the pieces soften…
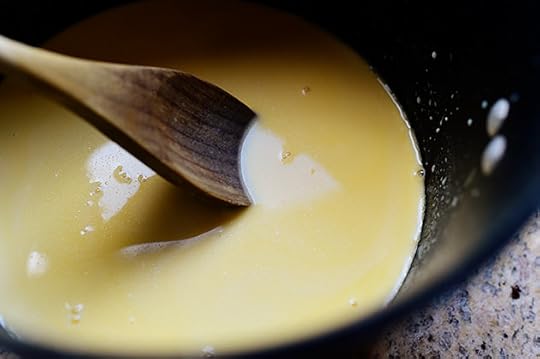 And eventually melt into a golden, wonderful sauce.
 Okay: Redemption time again! Drop in the grated cheddar.
 This is what you call the best of both worlds. The creaminess of the Velveeta + the natural sharpness of the cheddar = TruLuv4Evr.
 Stir it around until the cheddar begins to melt, then add in some seasoned salt. I use Lowry’s, but you can use whatever salt blend you like to reach for during your life’s journey. (Even lemon pepper would be lovely!) Just don’t leave this out; it makes a really nice difference.
 Another essential: black pepper! Really go for it, too. A lot goes a little way. Or something like that. Ha.
 Stir it around until the cheese is largely melted…
 Then give it a taste…
 And add more of whatever you think the sauce needs. Be sure you add enough seasoned salt for the whole thing to be really, really flavorful!
(Pssst. You could also press in a clove of garlic and let it heat up with the butter and the milk. That would be crazy good!)
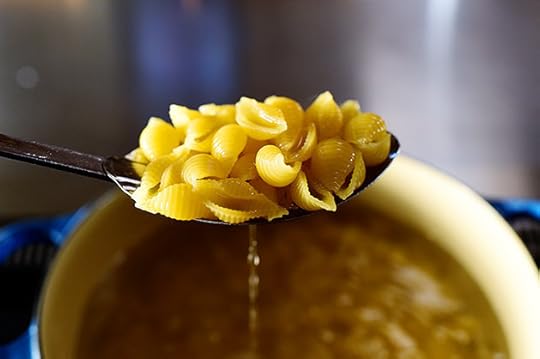 Cook the pasta until it’s al dente (this isn’t quite there, so I kept cooking it for a little while.)
 Then drain it…
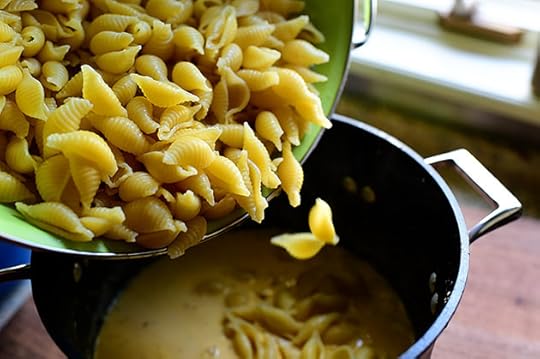 And pour it right into the sauce!
Oh, the excitement.
Oh, the promise.
Oh, the impatience.
Oh, the AGONY.
 Now just stir it around…
 Until the shells are all coated in the sauce.
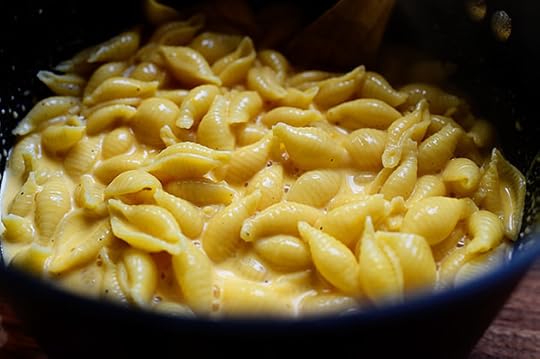 Now, look at this pan of wonder. It’s somewhat saucy/soupy, and that’s just the way you want it! It will actually thicken a bit as it sits (not that it will sit very long) so if it’s a little soupy/saucy to begin with, there’s a little room to work with.
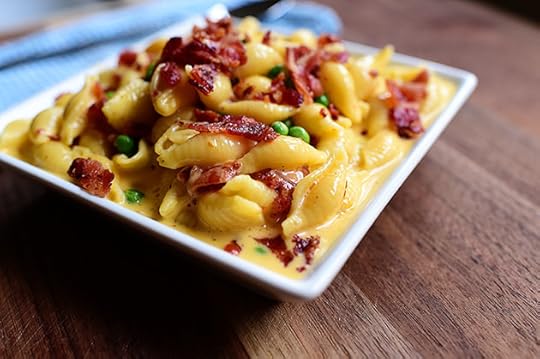
 So there it is—the basic, ridonkulously easy, crazily delicious Shells & Cheese. Serve it up like this in all its glory…
Or you can have a little more fun with it.
 Earlier, when I put the pasta water on to boil, I fried up some bacon.
 Then I threw it on the cutting board…
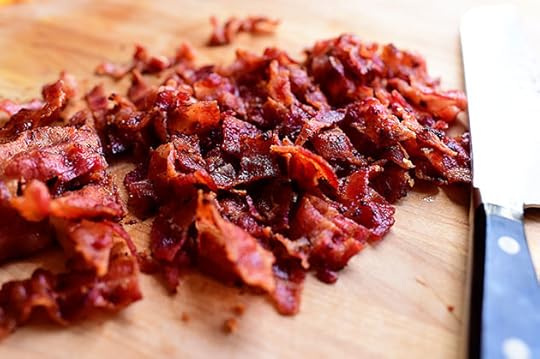 And chopped it up. But before I added it to the pan…
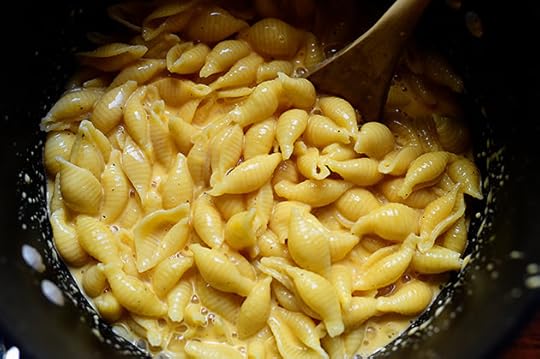
 I grabbed a bag of frozen peas and poured them right in, ice crystals and all. No need to thaw them first!
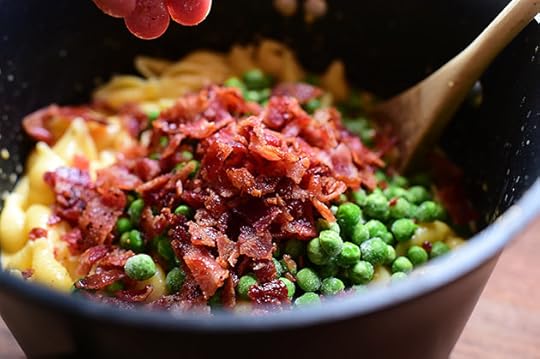 Then in goes the bacon.
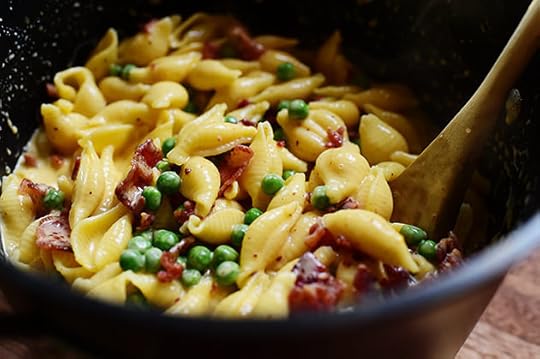 And I just stirred it around.
 Good grief. How lovely does this look?
And maybe “lovely” isn’t the most fitting adjective. Lovely is what you call a salad or a berry dessert or a fizzy drink. I’ll try again.
How gooooooooood does this look?
There. That’s better.
And here are some other things you could stir in: Caramelized onions, finely diced jalapenos, pimientos, halved grape tomatoes…the list goes on!
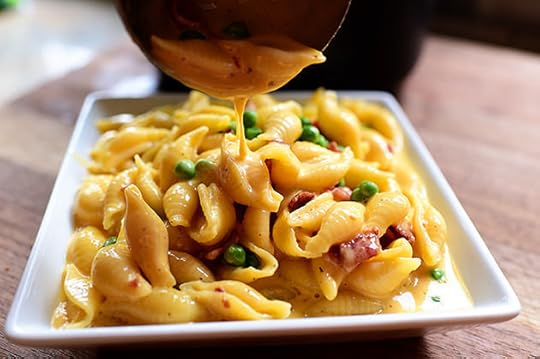 Dish it up…and when you do, make sure you get plenty of extra sauce in there.
 A little extra bacon sprinkled over the top makes the world go ’round.
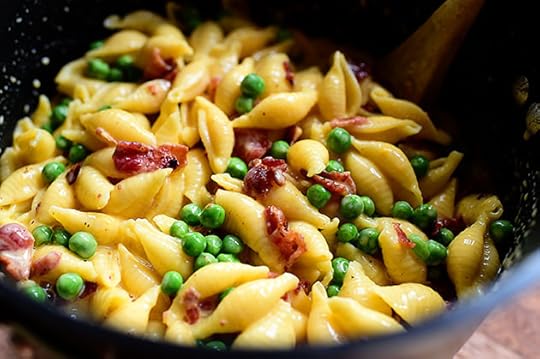
 Whoa. Whoa whoa whoa. Like, seriously. Whoa. It’s almost exactly like Pasta Carbonara!
Except…not.
 I’m in love.
Now, just a note: The peas really assert themselves once you mix them in, so start a little light, give it a taste, and you can always add more. I happen to love the flavor of peas, but if you’re on the fence, tread lightly at first.
This is my serving. Just kidding! Hahaha.
(At least I think I’m kidding.)
Enjoy this, my friends! Here’s the handy dandy printable!
Recipe
Shells & Cheese (with Bacon & Peas)
Prep Time: 5 Minutes
Cook Time: 20 Minutes
Difficulty: Easy
Servings: 6

Print Recipe
Ingredients
12 ounces, weight Small Or Medium Pasta Shells2 cups 2% Milk1 Tablespoon Butter8 ounces, weight Velveeta, Cut Into Cubes (I Actually Used About 10-12 Ounces!)2 cups Grated Sharp Cheddar Cheese (more To Taste!)1/4 teaspoon Seasoned Salt, More To Taste1/2 teaspoon Black Pepper1/2 cup Frozen Peas (more To Taste)8 slices Thin Bacon, Fried Crisp And Chopped Preparation Instructions
Cook pasta according to package instructions for al dente (do not overcook). Drain and set aside.
In a large pot heat the milk and butter over medium-low heat. Turn off the heat, then add Velveeta and stir until completely smooth and melted. Stir in the grated cheddar, then add seasoned salt and pepper. Stir until combined, then taste it and add more seasonings if needed.
Add cooked pasta and stir until coated. It will be soupy and saucy, but will thicken slowly.
If desired, stir in frozen peas (they will thaw) and bacon. Serve immediately.
Posted by Ree | The Pioneer Woman on September 15 2014

September 10, 2014
Chicken Quesadillas
 Chicken Quesadillas are absolutely a go-to recipe in our household, but while I’ve made them on my show (and have posted different variations of quesadillas here through the years), I just realized yesterday that I’ve never posted the recipe! I’m organized and on top of things like that.
Here it is! Such a simple recipe, but always delicious results. And always very, very family friendly.
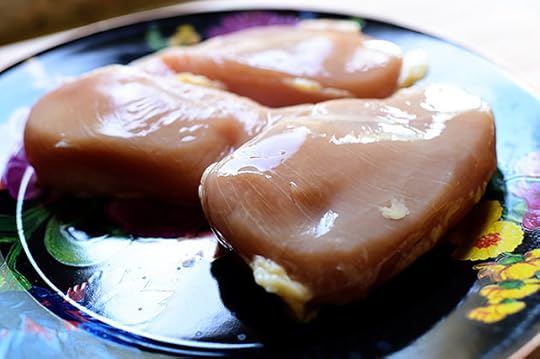 Start with three boneless, skinless chicken breasts.
 Sprinkle them generously with whatever you’d like: taco seasoning, Cajun seasoning, or just a mix of chili powder, cumin, seasoned salt, etc. You just want them really flavorful!
 Heat some oil in a skillet over medium to medium-high heat…
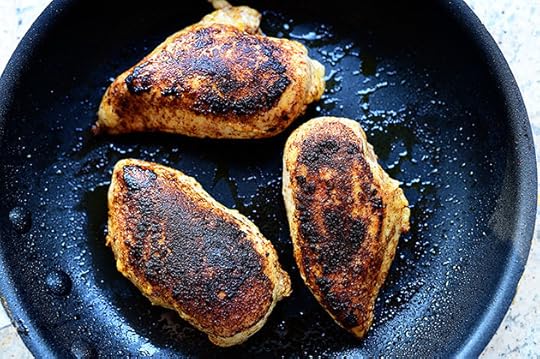 And cook them on both sides until they’re nice and brown on the surface and totally cooked in the middle.
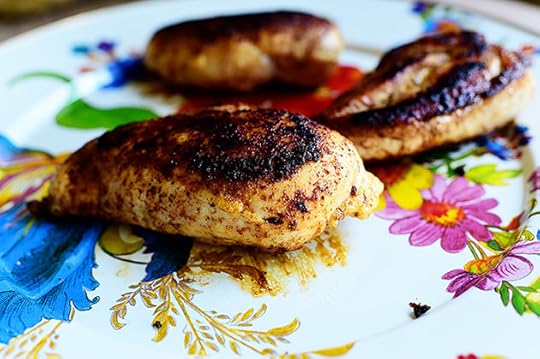 Then remove them from the heat and let them cool slightly.
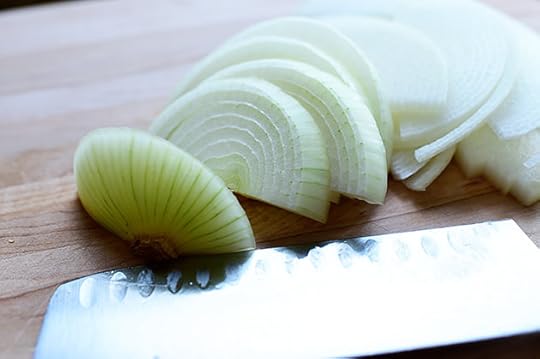 Next, slice a big, honkin’ onion into thick slices…
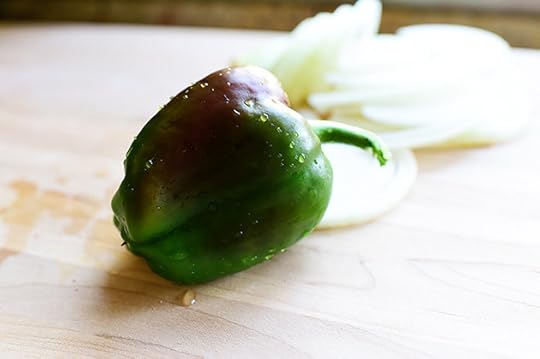 Then grab a big bell pepper (this one’s from my garden!)…
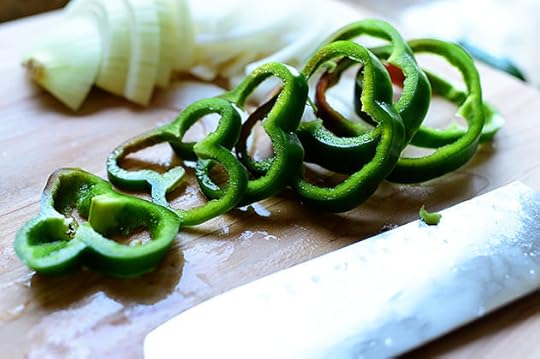 And cut it into slices.
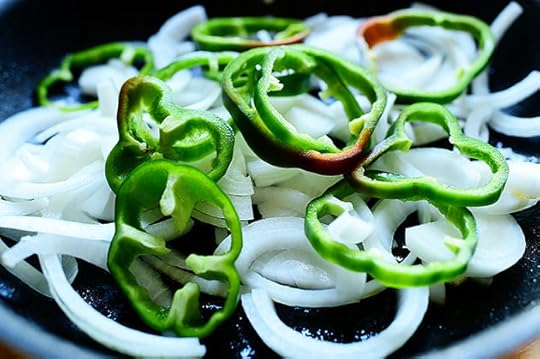 Set the same skillet over medium to medium-high heat (don’t clean it! You want all that gunk in there) and throw in the veggies…
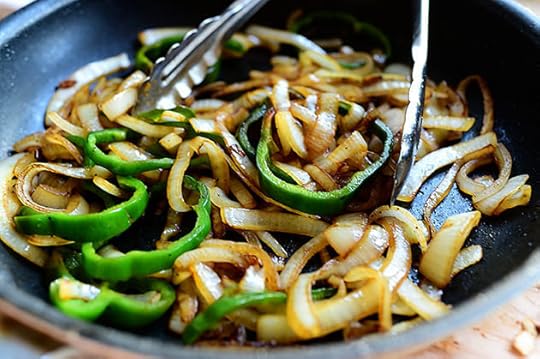 And cook them until they’re nice and brown. And you can have fun with the veggies! Do different colors of bell pepper, add sliced mushroom, zucchini…any veggies will do.
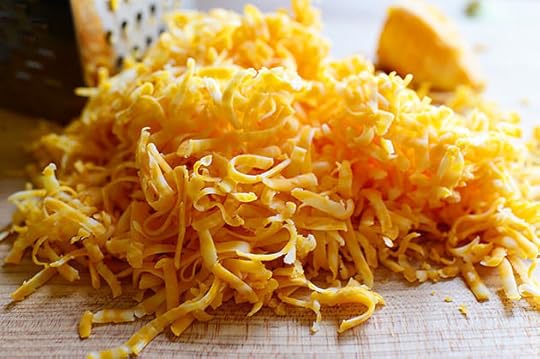 Finally, grate up a whole buncha cheese (cheddar-jack, straight jack, even pepper-jack will work)…
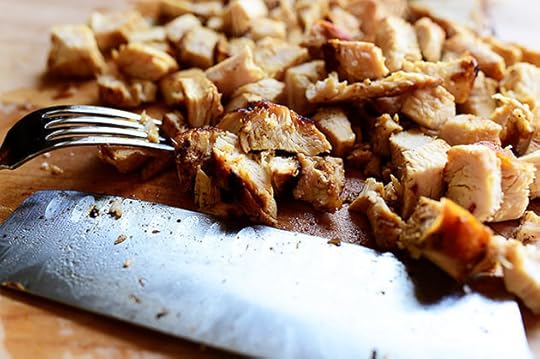 And dice up the chicken into small pieces.
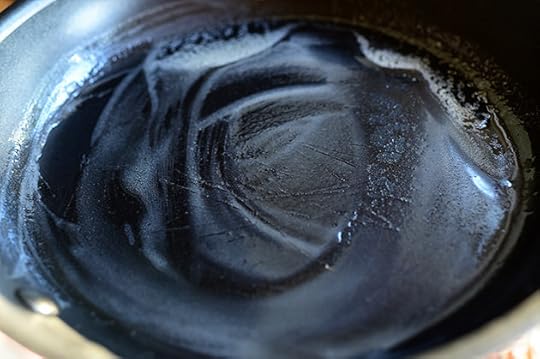 Now it’s time to build the quesadillas! You can use a huge griddle and do them all at once, or you can use a small skillet and do them one at a time. Heat some butter over medium heat…
 Drop in a flour tortilla (or, heck, a corn tortilla if you prefer)…
 Lay on a good amount of cheese…
 Some of the veggies…
 And several pieces of the chicken.
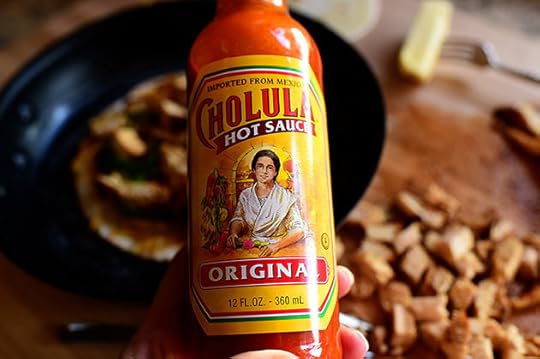 Then, to make it extra delicious, grab some hot sauce…
 And add several dashes.
 Wow. Whoa. Wow. This looks amazing.
 Finally, sprinkle on a teeny bit more cheese…
 And pop on the lid! (I had smeared it in the melted butter before I put the bottom tortilla in the skillet.)
 Cook it until the bottom tortilla is golden and slightly crisp and lovely. Cook the bottom until it is, too, and until the filling is all melted and gooey.
 Remove the quesadilla to a cutting board and slice it in half (I used a pizza cutter)…
 Then into small wedges.
This is where my family is pretty much lined up at the stove, eyes wide, hunger emanating from their beings.
And this is where I lovingly respond, “HOLD YOUR HORSES! GEESH!!!!!”
Or something like that.
 I like to put a little dollop of sour cream in the center…
 And I usually like to spoon on salsa, but this time I did tomatoes…
 And, for the adventurous among us, a couple of slices of fresh jalapeno.
Here’s the handy dandy printable! And speaking of that, I just added a brand new print feature on the recipes here on Pioneer Woman and over on Tasty Kitchen. Let me know how you like it—I tried to make it a little more streamlined and user-friendly! NOTE: If the print feature does not work for you, will you please leave a comment and describe what happens (along with your operating system and browser)? It will help me make sure all is running smoothly!
Enjoy, friends.
Recipe
Chicken Quesadillas
Prep Time: 10 Minutes
Cook Time: 30 Minutes
Difficulty: Easy
Servings: 6

.recipe-actions {
position: relative;
z-index: 2;
}
#pdf-popover {
background: rgba(255,255,255,.9);
border: 1px solid #efeeed;
color: #6e5c3a;
display: none;
font-family: Helvetica, Arial, sans-serif;
right: 20px;
margin: 2px;
padding: 54px 20px 7px 10px;
position: absolute;
top: 0;
width: 380px;
}
#pdf-popover form {
margin: 0;
}
#pdf-popover h4 {
background: #b15818;
color: #fff;
font-family: Helvetica, Arial, sans-serif;
font-size: 20px;
font-weight: normal;
left: 3px;
margin: 0;
position: absolute;
padding: 6px 12px;
right: 3px;
top: 3px;
}
#pdf-popover legend {
font-family: Helvetica, Arial, sans-serif;
font-size: 120%;
font-weight: bold;
margin-bottom: 2px;
margin-left: 10px;
text-transform: uppercase;
}
#pdf-popover fieldset {
margin-bottom: 15px;
}
#pdf-popover input[type="checkbox"] {
height: 14px;
margin: 2px 0 10px 10px;
padding-left: 14px;
position: relative;
visibility: visible;
width: 14px;
}
#pdf-popover input[type="checkbox"],
#pdf-popover input[type="radio"] {
margin-left: 10px;
}
#pdf-popover .close {
background: #b15818;
color: #FFFFFF;
cursor: pointer;
height: 35px;
font-size: 16px;
font-weight: bold;
line-height: 26px;
position: absolute;
right: 3px;
text-align: center;
top: 3px;
width: 25px;
z-index: 1;
}
#pdf-popover .button {
background-color: #b15818;
border: 0;
color: #fff;
cursor: pointer;
font-family: Helvetica, Arial, sans-serif;
margin-left: 10px;
padding: 8px 10px;
text-transform: uppercase;
}
x
Print Options
Page size
Letter
3x5
4x6
Text Size
Small
Medium
Large
Content
Include description
Include prep time, etc.
Show image
Print Recipe
Ingredients
3 whole Boneless, Skinless Chicken Breasts2 Tablespoons Taco Or Tex-mex Seasoning Vegetable Or Olive Oil For Frying1 whole Large Onion1 whole Large Bell Pepper (color Of Your Choice)12 whole Small Flour Tortillas (fajita Size)2-1/2 cups Grated Cheddar-Jack Cheese (or Straight Jack) Hot Sauce (I Used Cholula) Butter, For Frying Salsa, For Serving Sour Cream, For Serving Cilantro, For Serving Jalapeno Slices, For Serving Preparation Instructions
Heat vegetable oil or olive oil in a skillet over high heat. Sprinkle both sides of the chicken with taco seasoning. Add the chicken to the skillet and saute over medium-high heat until done, about 4 minutes per side. Remove from the skillet, allow to cool slightly, and dice into cubes. Set aside.
In the same skillet over medium-high heat, throw in the onions and peppers and cook until the veggies are golden brown, 3 to 4 minutes. Remove and set aside.
Melt 1/2 tablespoon of the butter in a separate skillet or griddle over medium heat and lay a flour tortilla in the skillet. Build the quesadillas by laying a good amount of grated cheese on the bottom tortilla, and then arranging the chicken and cooked peppers on the cheese. Top with a little more grated cheese and top with a second tortilla.
When the tortilla is golden on the first side, carefully flip the quesadilla to the other side, adding another 1/2 tablespoon butter to the skillet at the same time. Continue cooking until the second side is golden.
Repeat with the remaining tortillas and fillings. Cut into wedges and serve with salsa, sour cream, jalapeno slices, and cilantro.
Posted by Ree | The Pioneer Woman on September 10 2014

Ree Drummond's Blog

- Ree Drummond's profile
- 2028 followers

