
Ree Drummond's Blog, page 24
November 10, 2014
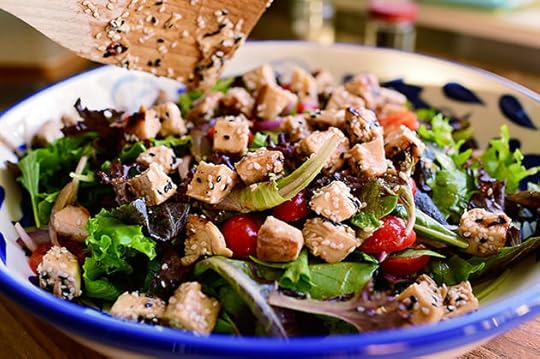
Sesame Chicken Salad
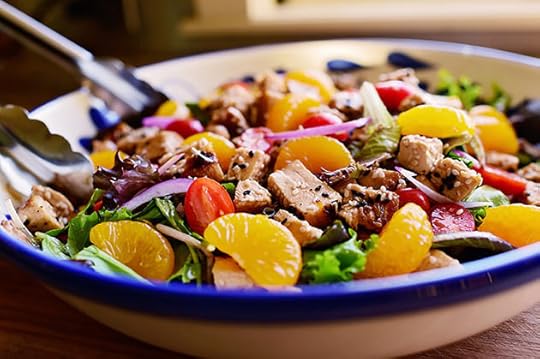 I ordered a salad similar to this one while Paige and I were in Kansas for a soccer tournament last weekend. We had gone back to the hotel room after her Sunday morning game and planned to take advantage of being in civilization by getting all spiffed up and going out for lunch at an area restaurant, then doing a little shopping.
Instead, once we got back to the room, we took off our shoes, splayed out on the bed, and decided to order room service. I mean, we don’t get the opportunity to go out to eat in restaurants together on a daily basis…but we SURE don’t get the opportunity to order room service. So we picked the greater of two luxuries—room service—and enjoyed every darn bite.
And instead of shopping, we stayed in the room until it was time to leave for her final game late that afternoon. We’re so cool! Ha.
Here’s my take on the room service salad I ordered. The flavors are yummy, but the colors are just gorgeous, too. I’m ready to make it again!
Note: I’m getting ready to start posting more holiday-friendly recipes, so this salad is the calm before the storm! Enjoy every cool, crisp bite.
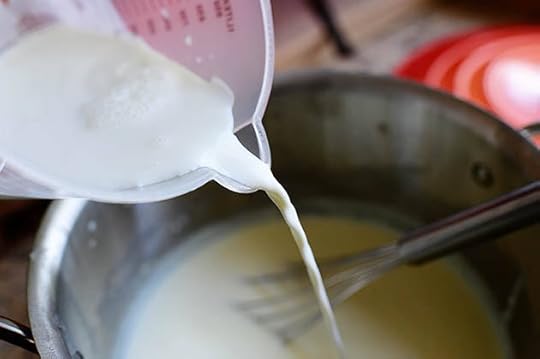
 First, make the dressing: I used the blender because I was feeling lazy and didn’t want to use a whisk. Start with olive oil…
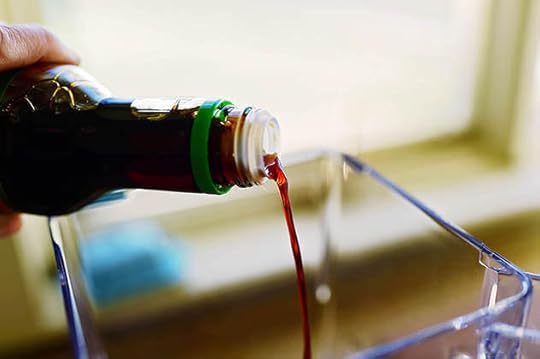 Low-sodium soy sauce…
 Rice vinegar (or just regular white vinegar is fine)…
 Then grate in some garlic (or just chop it—whatever you prefer!)
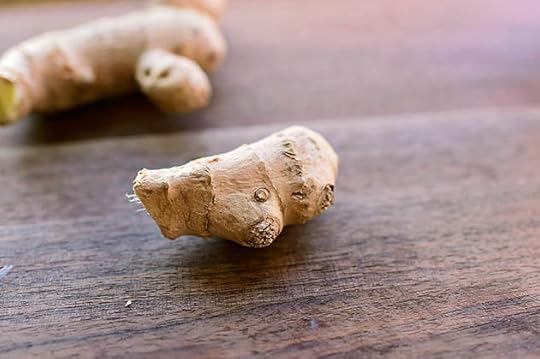 Next, grab a little piece of ginger…
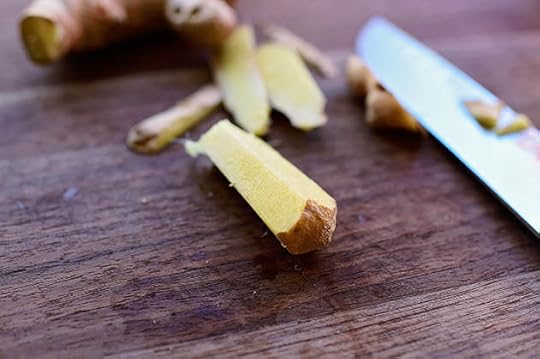 Slice off the skin…
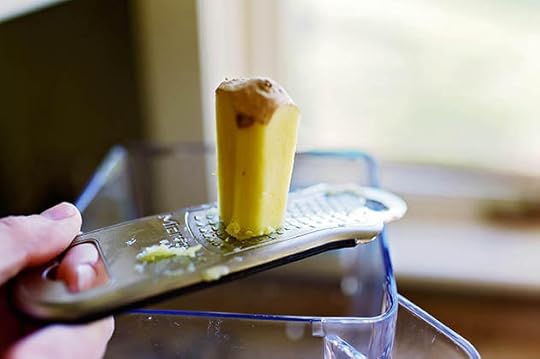 And grate it up.
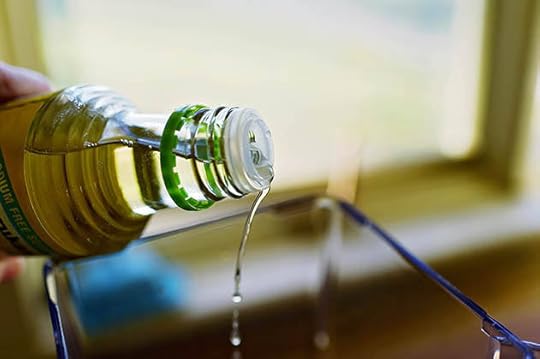
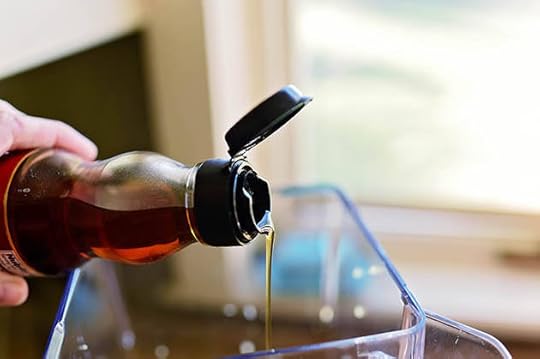 Next, some toasted sesame oil, also known as Heaven in a Little Glass Bottle.
I love this stuff.
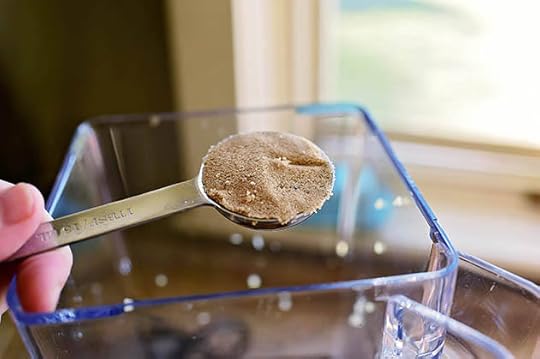 Then, for some sweetness, some brown sugar. You can also use regular sugar…or honey. Whatever your poison.
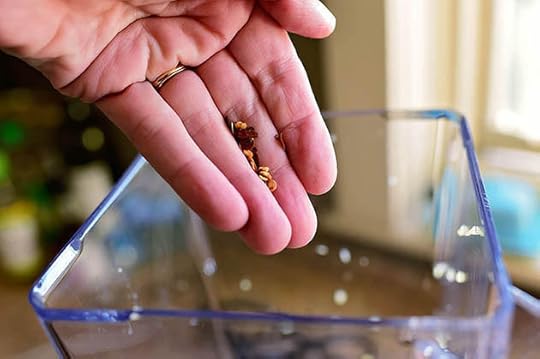 I like a little heat, so I sprinkled in some red pepper flakes.
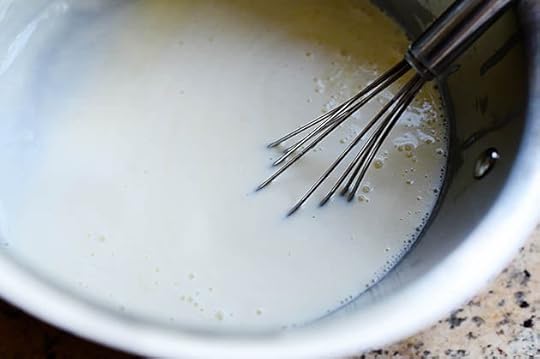
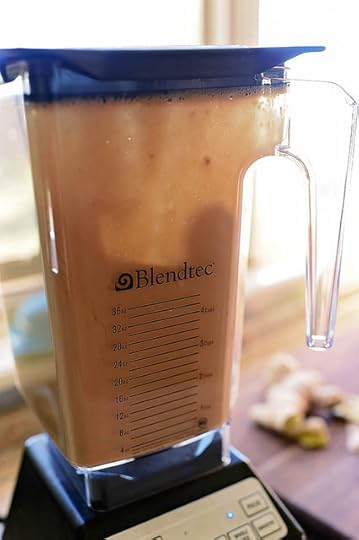 Then I let the blender do all the work.
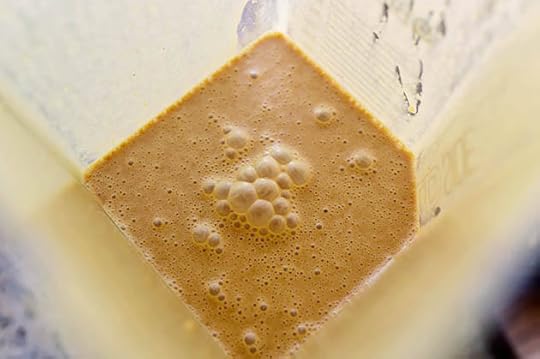 Yum! Now, give it a taste and add more of whatever it needs. I added a little more vinegar and sugar, then it was just perfect.
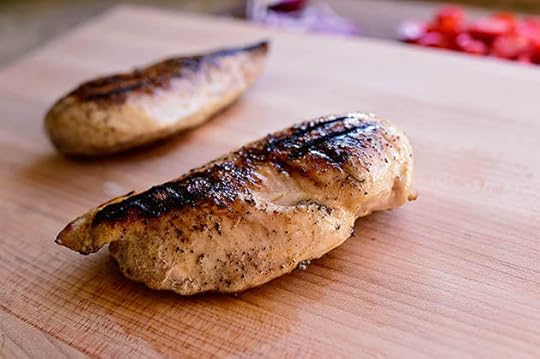
 Now that the dressing’s ready, get the chicken ready: I just salted and peppered a couple of chicken breasts and threw them on a grill pan. You can also just saute them…or you can roast them. Whatever works in your kitchen and your life!
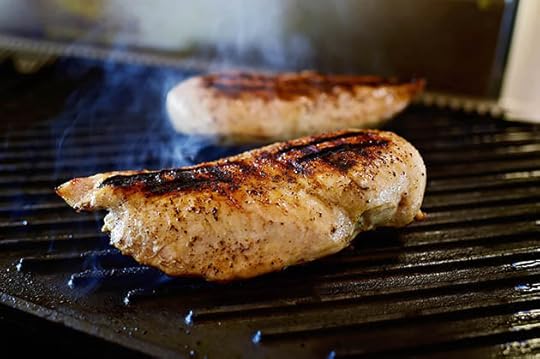 Just make sure the chicken has some nice color on the outside, and that it’s done in the center.
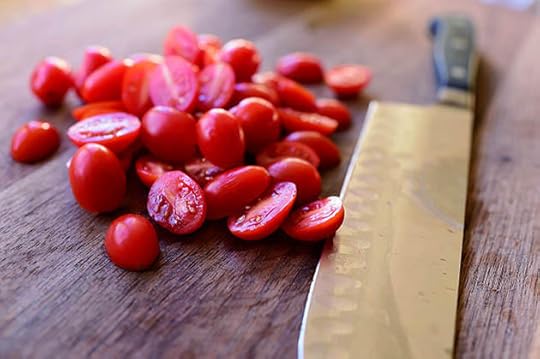 While it’s finishing cooking, get the other salad ingredients ready: Halve a bunch of grape tomatoes…
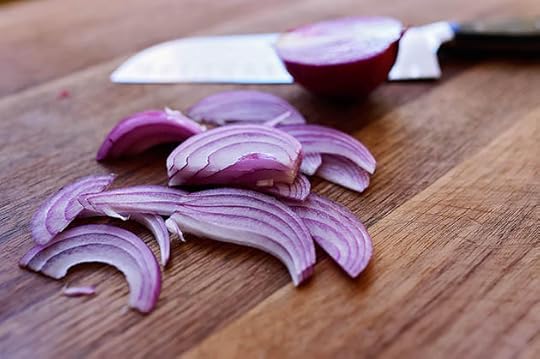 Slice up a purple onion…
 And drain some mandarin oranges. Gorgeous color!
 The chicken’s done, so let it rest for a few minutes…
 Then slice it up…
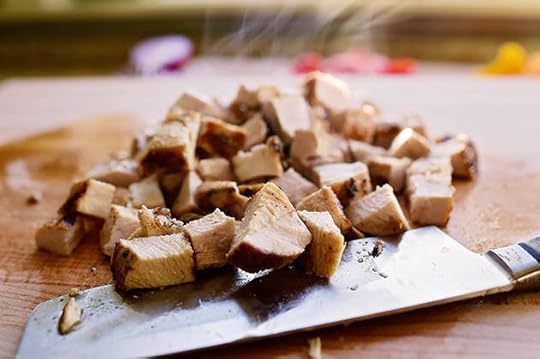 And cut it into cubes.
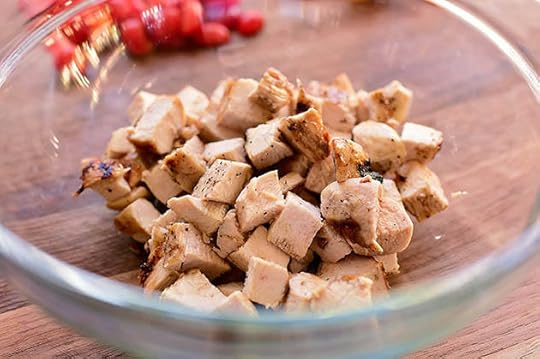 Put it into a bowl…
 And pour on about a third of the dressing.
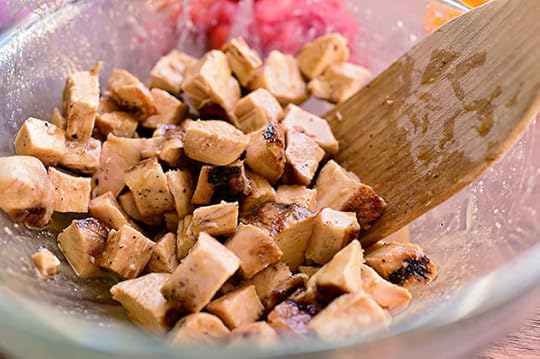 Toss it around to coat it…
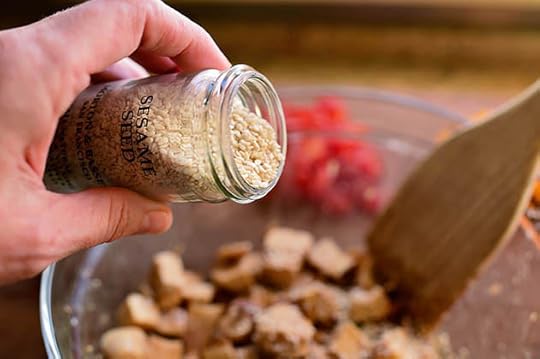 And then…this is the fun part! Pour in some regular sesame seeds…
 And some black sesame seeds, just for kicks!
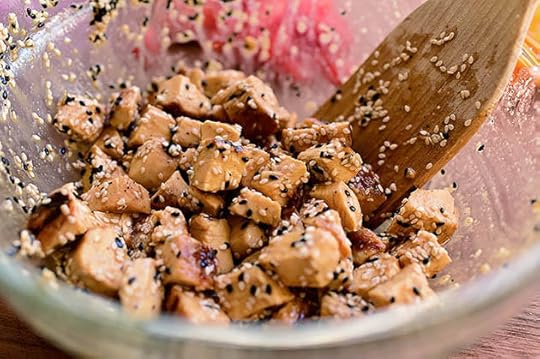 Then toss the chicken to coat it in the seed. Gives ‘em a nice crunch.
(Note: If you have time, you can lightly toast the seeds in a little skillet first.)
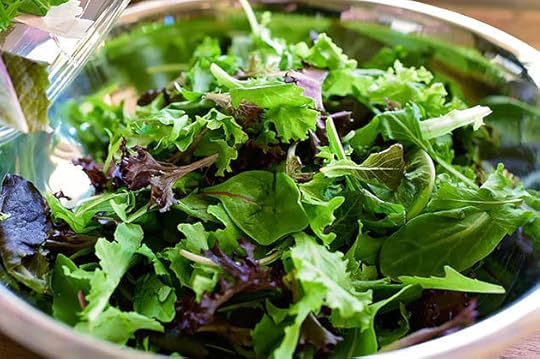 Now it’s time to assemble the salad: Throw some greens into a bowl…
 With the red onion…
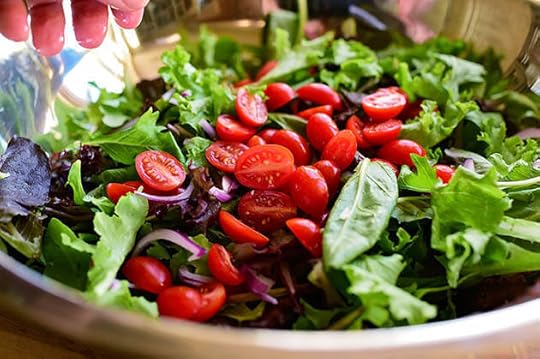 And the tomatoes.
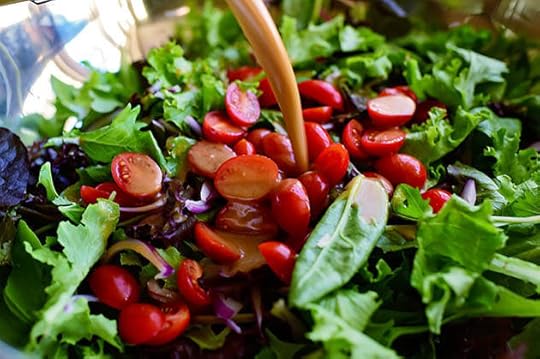 Pour on a little bit of the dressing…
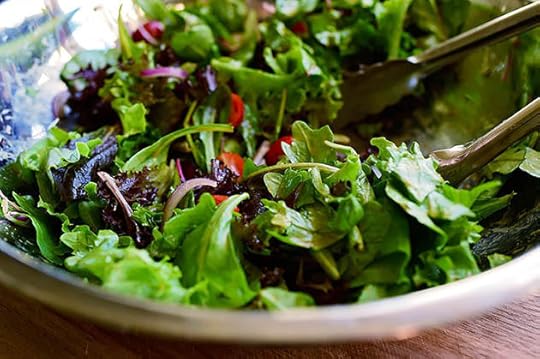 And toss it to combine. You can add more dressing at this point if it needs it, or you can save whatever’s left for a future use.
 Pour this into a serving bowl (or just leave it in the same bowl!)
 Arrange all the chicken on top…
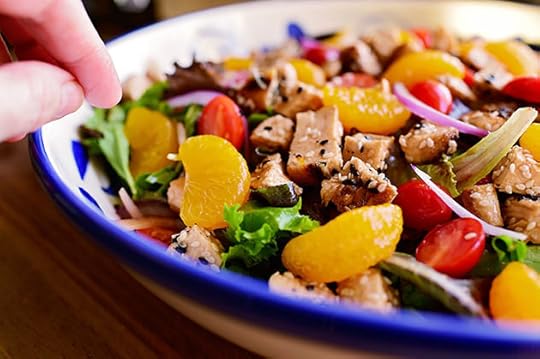 Followed by the mandarin oranges.
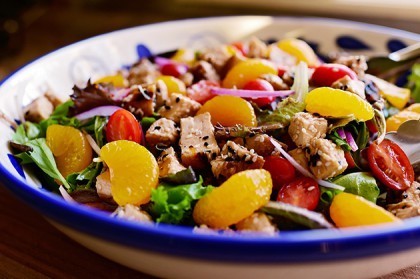
 What a stunner!
 Gorgeous for lunch, gorgeous for dinner, gorgeous for a late morning room service lunch after a Sunday soccer game.
Make it soon; you’ll love it!
Here’s the handy dandy printable.
.recipe-actions {
position: relative;
z-index: 2;
}
#pdf-popover {
background: rgba(255,255,255,.9);
border: 1px solid #efeeed;
color: #6e5c3a;
display: none;
font-family: Helvetica, Arial, sans-serif;
right: 20px;
margin: 2px;
padding: 54px 20px 7px 10px;
position: absolute;
top: 0;
width: 380px;
z-index: 10;
}
#pdf-popover form {
margin: 0;
}
#pdf-popover h4 {
background: #b15818;
color: #fff;
font-family: Helvetica, Arial, sans-serif;
font-size: 20px;
font-weight: normal;
left: 3px;
margin: 0;
position: absolute;
padding: 6px 12px;
right: 3px;
top: 3px;
}
#pdf-popover legend {
font-family: Helvetica, Arial, sans-serif;
font-size: 120%;
font-weight: bold;
margin-bottom: 2px;
margin-left: 10px;
text-transform: uppercase;
}
#pdf-popover fieldset {
margin-bottom: 15px;
}
#pdf-popover input[type="checkbox"] {
height: 14px;
margin: 2px 0 10px 10px;
padding-left: 14px;
position: relative;
visibility: visible;
width: 14px;
}
#pdf-popover input[type="checkbox"],
#pdf-popover input[type="radio"] {
margin-left: 10px;
}
#pdf-popover .close {
background: #b15818;
color: #FFFFFF;
cursor: pointer;
height: 35px;
font-size: 16px;
font-weight: bold;
line-height: 26px;
position: absolute;
right: 3px;
text-align: center;
top: 3px;
width: 25px;
z-index: 1;
}
#pdf-popover .button {
background-color: #b15818;
border: 0;
color: #fff;
cursor: pointer;
font-family: Helvetica, Arial, sans-serif;
margin-left: 10px;
padding: 8px 10px;
text-transform: uppercase;
}
x
Print Options
Page size
Letter
3x5
4x6
Text Size
Small
Medium
Large
Content
Include description
Include prep time, etc.
Show image
Print
Recipe
Sesame Chicken Salad
Prep Time: 15 Minutes
Cook Time: 15 Minutes
Difficulty: Easy
Servings: 6
 Print Recipe
Ingredients
2 whole Boneless, Skinless Chicken Breasts Salt And Pepper Olive Oil, For Grilling Or Sauteeing2/3 cups Olive Oil1/4 cup Low Sodium Soy Sauce1/4 cup Rice Wine Vinegar (or White Vinegar)2 cloves Garlic, Minced2 Tablespoons Minced Fresh Ginger1 teaspoon Toasted Sesame Oil2 Tablespoons Brown Sugar (more To Taste) Pinch Of Crushed Red Pepper Flakes1 package (10 Ounces) Mixed Greens1/2 whole Red Onion, Sliced Very Thin1 cup Red Grape Tomatoes, Halved1 can Mandarin Oranes, Drained1 Tablespoon Sesame Seeds1 Tablespoon Black Sesame Seeds Preparation Instructions
To make the dressing: Put olive oil, soy sauce, vinegar, garlic, ginger, sesame oil, brown sugar, and crushed red pepper flakes into a blender. Blend until completely emulsified. Taste the dressing and adjust to your taste (I usually add more vinegar and brown sugar but tastes may vary.) (Note: Can make the dressing in advance to allow flavors to develop.)
Salt and pepper both sides of the chicken and heat olive oil in a skillet or on a grill pan. Cook the chicken on both sides over medium heat until it has nice color on the surface and is totally cooked through, about 10 minutes. Remove from heat, allow to rest for 5 minutes, and cut into cubes.
Place the cubed chicken into a bowl and pour 1/3 of the dressing over it, tossing to coat. Allow to sit for a few minutes, then sprinkle both colors of sesame seeds over the chicken and toss so that the seeds stick to the chicken. Add more seeds if you prefer a thicker coating.
To assemble the salad, place the salad greens, sliced onion, and the halved tomatoes in a large bowl. Pour on half the remaining dressing, reserving the rest if you'd like more later. Toss to coat. Arrange chicken, mandarin oranges all over the greens. Serve immediately.
Note: Wait until just before serving to toss the salad!
Posted by Ree | The Pioneer Woman on November 10 2014


November 6, 2014
Butternut Squash and Kale
 This is one of my absolute favorite veggie combinations, and it doesn’t matter how much of it I make…it disappears before I can say “Butternut Squash and Kale.”
See? It’s gone again! Now I have to make more.
The below process photos come from my Butternut Squash and Kale Quesadillas recipe I posted way back in January 2013, as well as the Butternut Squash Risotto I posted around that same time. I wanted to post just the veggie mixture as a separate recipe today, for the following reasons:
a) Butternut squash is, like, totally the rage this time of year.
b) The color combination of these two veggies is, like, totally gorgeous.
c) If someone comes to this here website o’ mine looking for veggie side dish ideas, they won’t, like, find this as a standalone since it’s merely part of quesadilla and risotto recipes.
d) I’m making this veggie combo later today, so, like, I had it on the brain.
e) I’m a Capricorn.
Sound reasoning, I’d say!
Now, after I post the veggie recipe below, I’ll give you some ideas of other ways you can use it…so don’t leave me forever until you read that first.
Thank you for your cooperation.
 Start by cutting up a butternut squash, which is a little intimidating. But it doesn’t have to be! Just follow the next eighty-seven steps and you’ll be fine!
Just kidding. There aren’t that many steps.
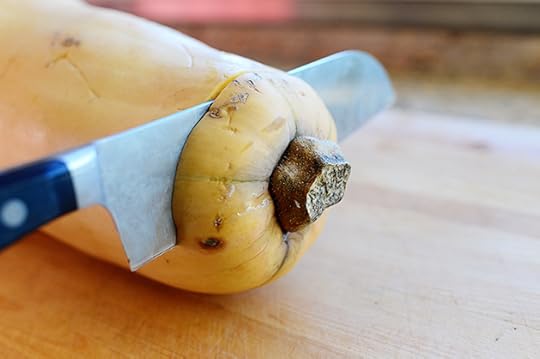 First, lop off the top of the squash…
 Then lop off the bottom.
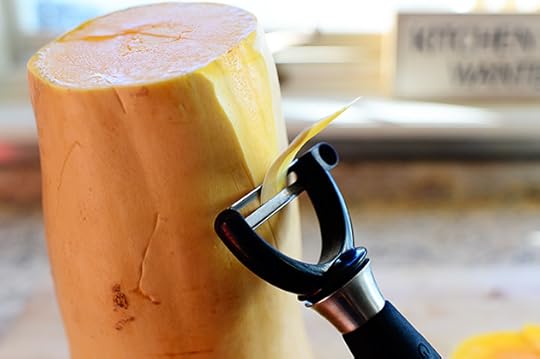 Use a potato or vegetable peeler to peel off the skin, which comes off really easily.
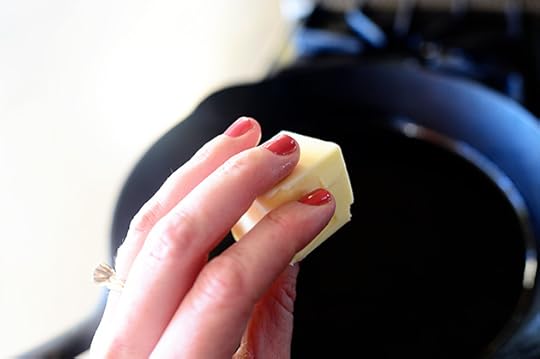
 (Note from today: I was very proud of my nails back in January 2013, as you can see. I kept showing them off.)
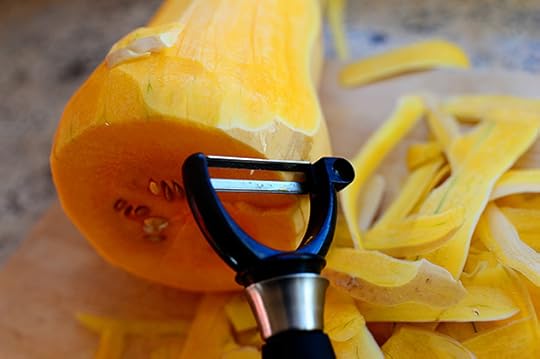 Keep working on the skin…
 Until you see no more sign of it. Just pure, unadulterated butternut squash.
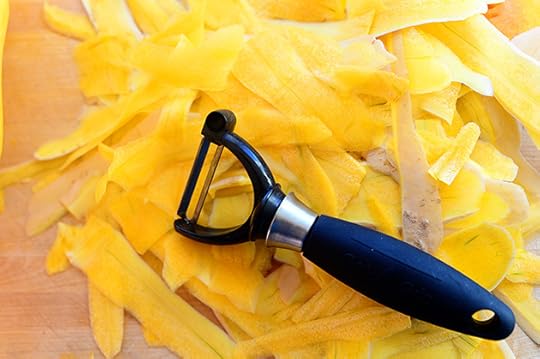 You can throw this away if you want, or throw it in the compost heap.
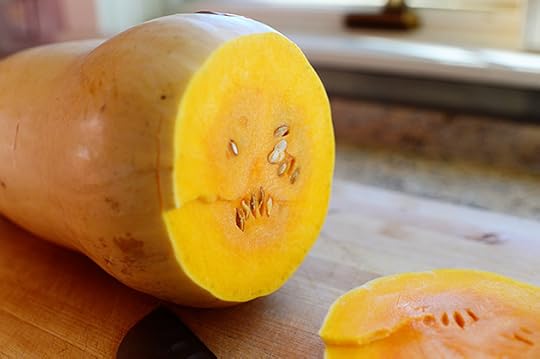
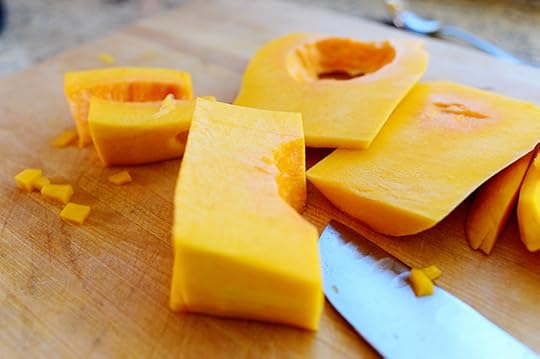
 Now, cut the squash in half where the skinner part meets the larger part.
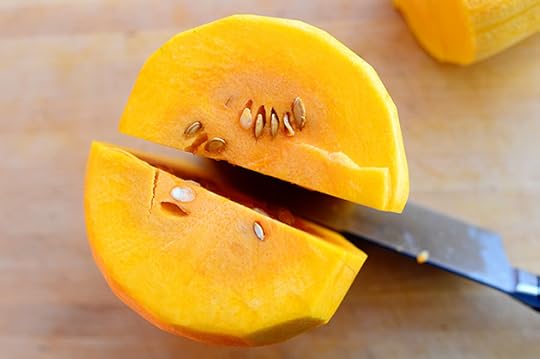 Slice both pieces down the middle…
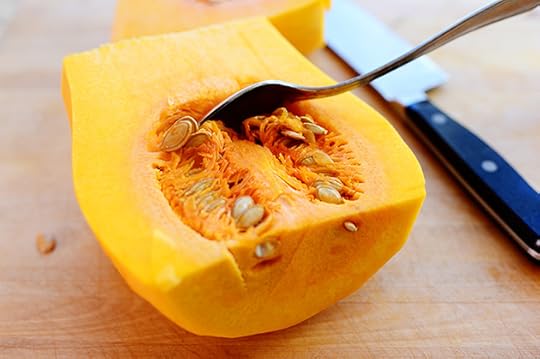 Then use a spoon to scoop the seeds and pulp out of the larger pieces. (The other end of the squash doesn’t have any seeds/pulp, so you won’t have to worry about that.)
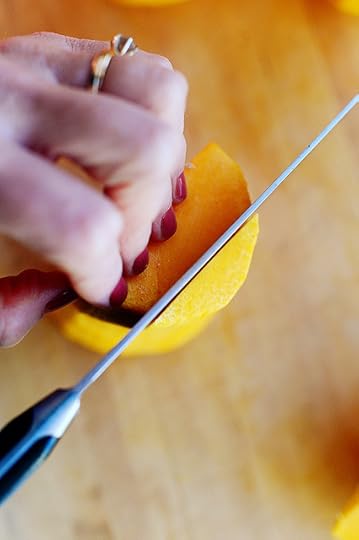 Slice the chunks of squash into large slices…
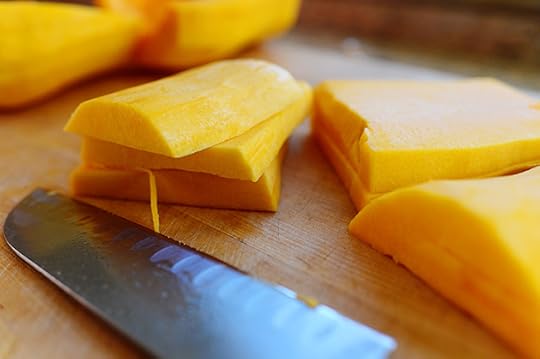 Then stack them up…
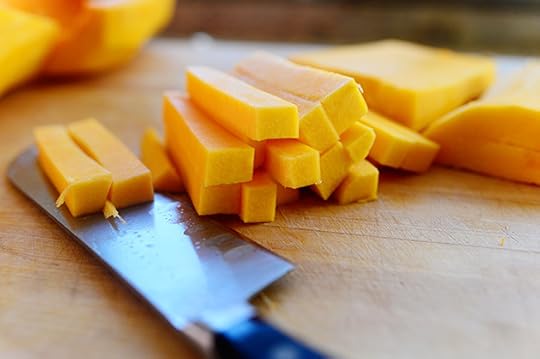 And cut the stacks into sticks.
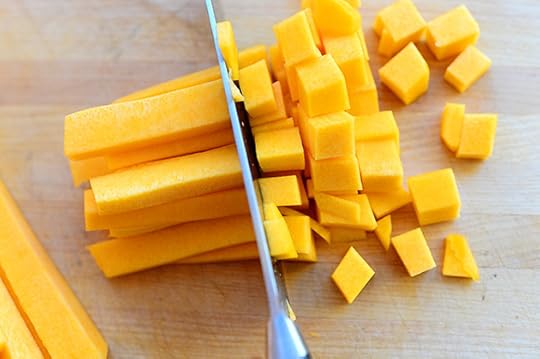 Then rotate the sticks and cut them into a nice, neat dice!
 No matter what your chunks look like, just cut them into sticks and cut the sticks into a dice…
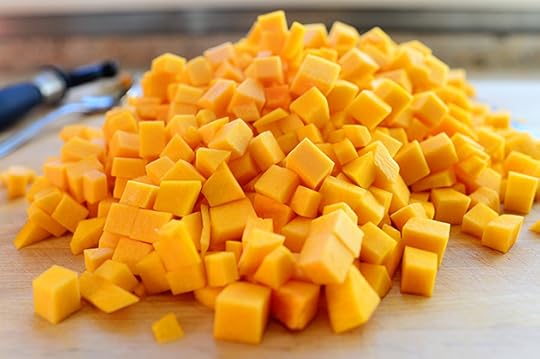 Until the whole dang squash is diced.
 (Gratuitous nail shot again. Sorry.)
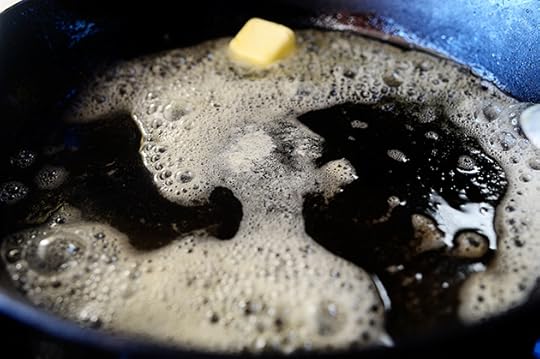 Throw some butter and olive oil into a big ol’ skillet…
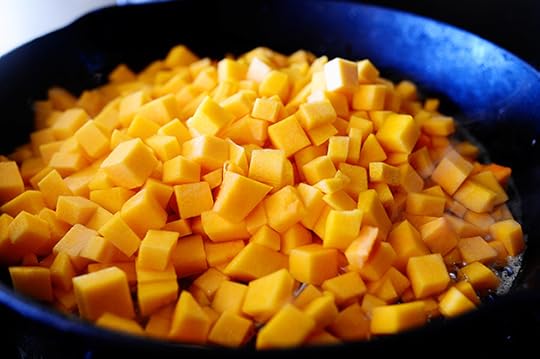 And throw in the squash. I actually wound up doing two skillets because I wanted the squash to get some nice color and not be crowded. Note that for the printable recipe below, I call for only half the squash…which is still plenty!
 Sprinkle a good amount of salt in the skillet.
 Then add a good amount of pepper.
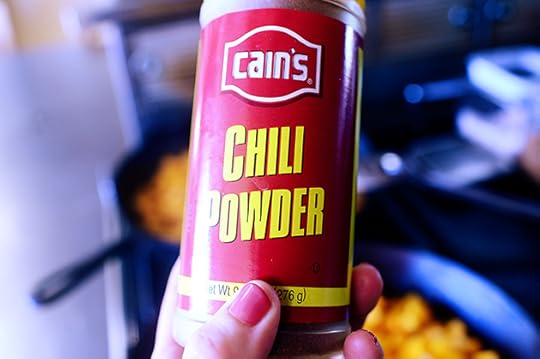 And then this: chili powder!
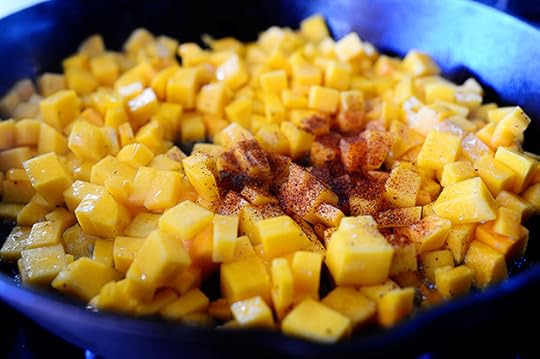 It gives the squash a nice spice, a nice edge, a nice addition of danger, a nice level of risk. I’ll stop now.
 Cook the squash over high heat, using a spatula to turn it over gently from time to time, until it’s nice and deep golden brown.
 Remove it to a plate and set it aside for a bit.
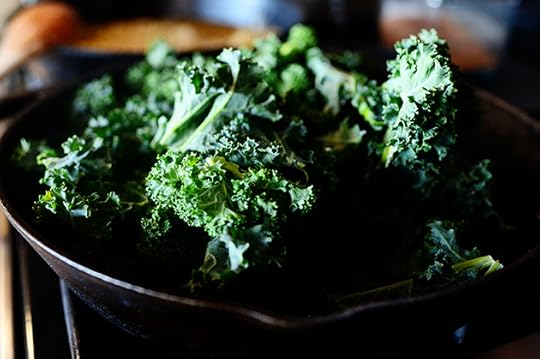
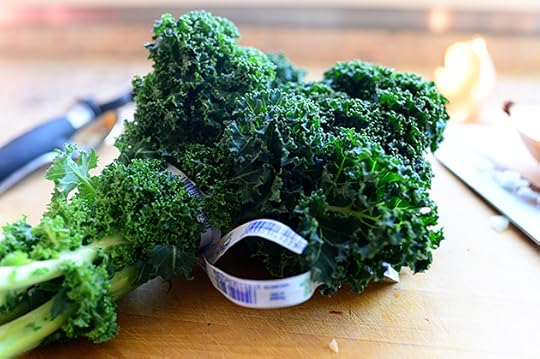 Next, grab the kale! And oh…if you don’t know kale very well (or if your only experience with kale is halfheartedly admiring it as a salad bar garnish) you must dive into the world.
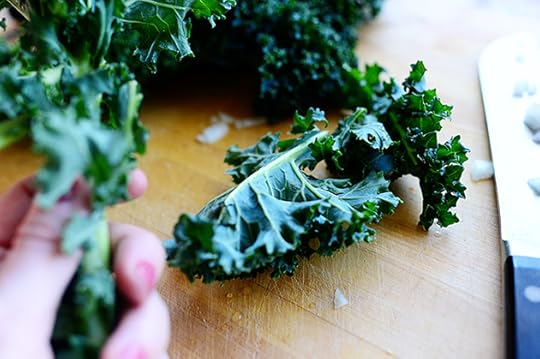 I just tear the kale off of the stalks in pieces…
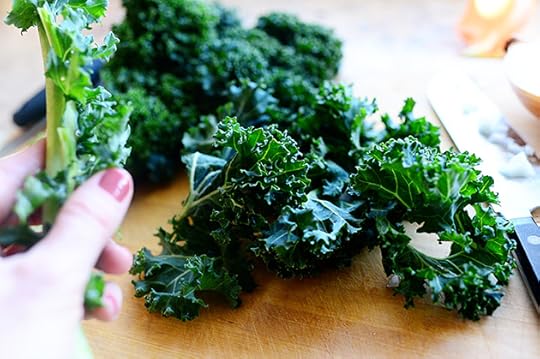 Using my freshly manicured hand to grasp the stalks as I go. (Ha.)
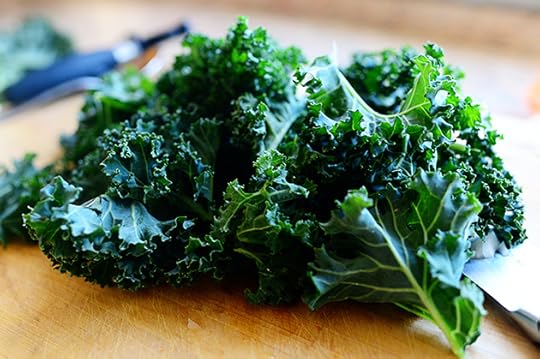 Keep going until you have a nice big pile of kale.
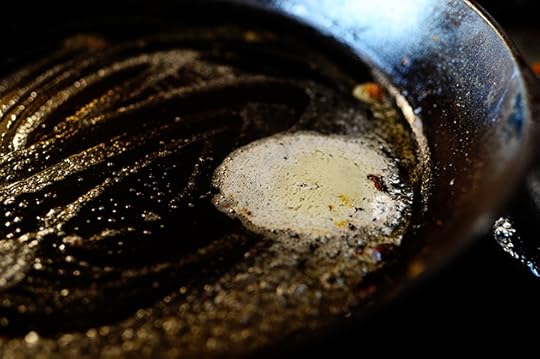 Throw a little extra butter into the skillet and crank the heat to medium to medium-high.
 Then throw in the kale…
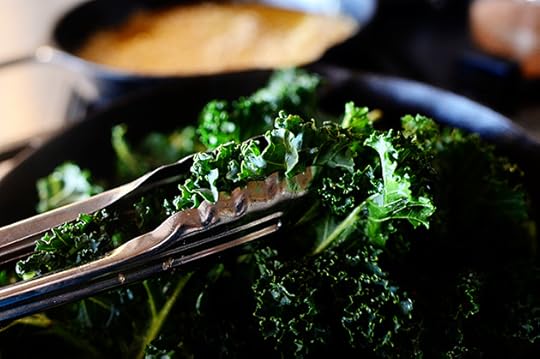 And toss it around with tongs.
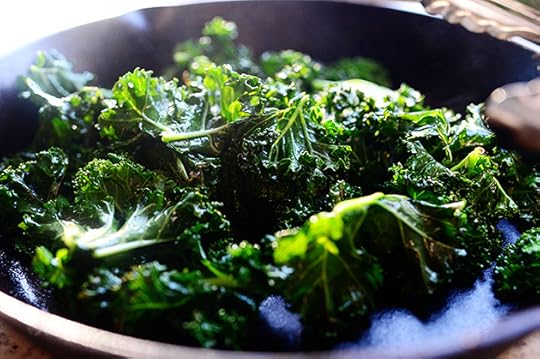 Cook it for a few minutes, then remove the skillet from the heat.
One of the things I love about kale is how well it holds up when it cooks. Even though I love spinach, it only takes a short time before it wilts, then just a little more time before it’s really soggy and mushy. Kale, on the other hand, stays crisp longer.
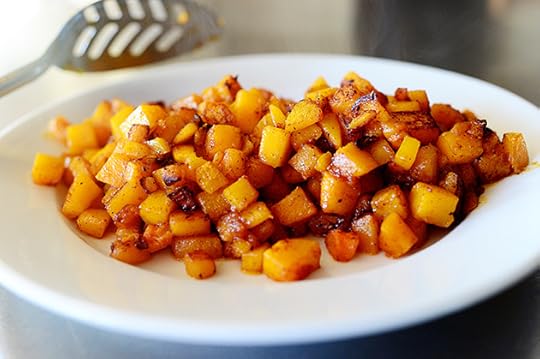
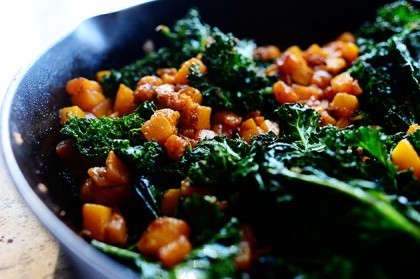
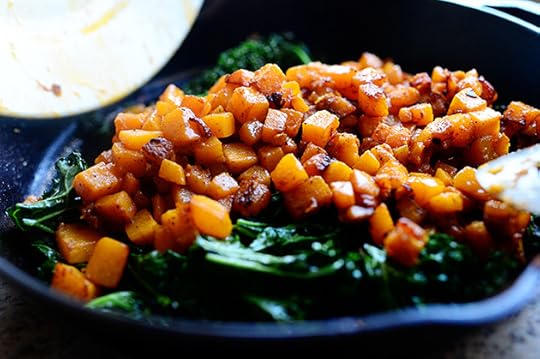 Next, just add the squash to the kale…
And gently toss it around. Isn’t this just a gorgeous color combination? Deep, rich, lovely, and so tasty, you won’t be able to control yourself.
WHAT TO DO WITH THE VEGGIE MIXTURE
Here are some things you can do with the veggie mixture!
1. Serve it on a plate as is! You won’t regret it.
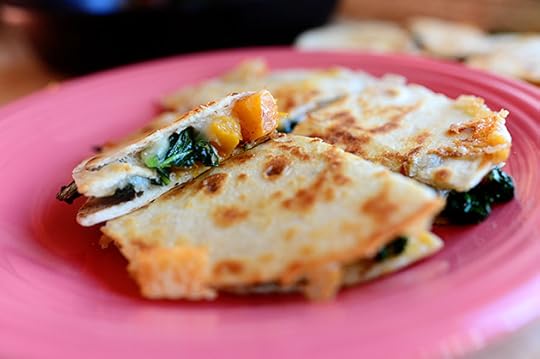 2. Make Butternut Squash and Kale Quesadillas. Unbelievably glorious.
3. Put the mixture inside a panini or grilled cheese. Utter heaven.
4. Slice up a baguette, drizzle the pieces with olive oil, lightly toast them in the oven, then spread each slice with a little goat cheese or flavored cream cheese, spoon a little of the veggie mixture on each one, and serve them as an appetizer with cold white wine. Yum!
5. Puree the cooked squash in some chicken broth to make a soup, splash in a little cream, then throw in the kale after the soup is ready. Butternut Squash and Kale Soup!
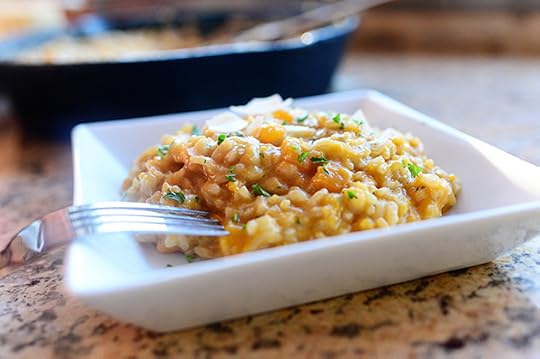 6. Follow this risotto recipe, but include the kale to make it gorgeous and green.
6. Grill some chicken, put it inside pita bread, stuff it full with the squash/kale mixture, and spoon in a yogurt/herb mixture as a dressing. Yum! That just sounded good for some reason.
7. Make a simple skillet pasta dish:
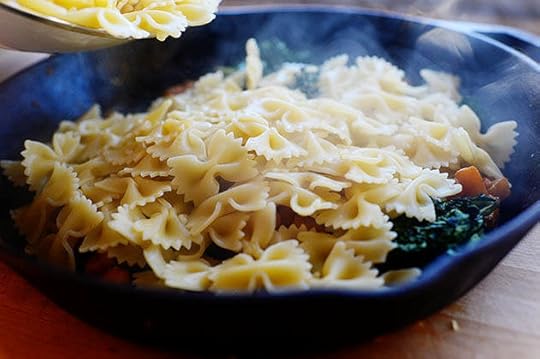 Just dump some cooked bowtie pasta right into the skillet…
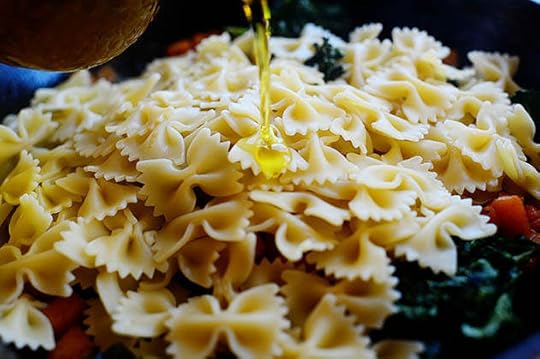 Then drizzle in a little olive oil…
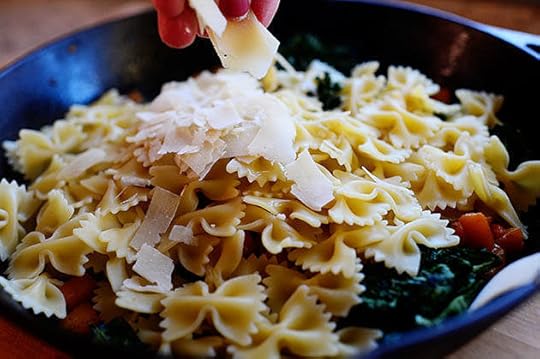 Add some Parmesan…
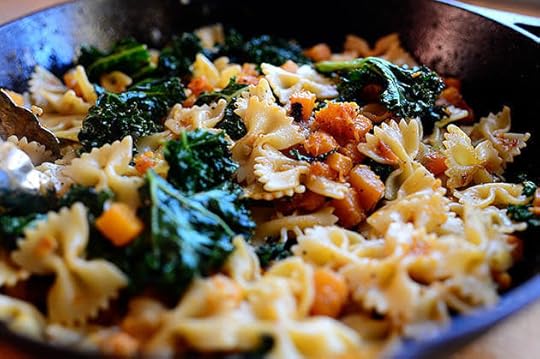 And toss it all together.
Here’s the handy dandy printable for the veggie mixture. Go have fun with it this weekend!
.recipe-actions {
position: relative;
z-index: 2;
}
#pdf-popover {
background: rgba(255,255,255,.9);
border: 1px solid #efeeed;
color: #6e5c3a;
display: none;
font-family: Helvetica, Arial, sans-serif;
right: 20px;
margin: 2px;
padding: 54px 20px 7px 10px;
position: absolute;
top: 0;
width: 380px;
z-index: 10;
}
#pdf-popover form {
margin: 0;
}
#pdf-popover h4 {
background: #b15818;
color: #fff;
font-family: Helvetica, Arial, sans-serif;
font-size: 20px;
font-weight: normal;
left: 3px;
margin: 0;
position: absolute;
padding: 6px 12px;
right: 3px;
top: 3px;
}
#pdf-popover legend {
font-family: Helvetica, Arial, sans-serif;
font-size: 120%;
font-weight: bold;
margin-bottom: 2px;
margin-left: 10px;
text-transform: uppercase;
}
#pdf-popover fieldset {
margin-bottom: 15px;
}
#pdf-popover input[type="checkbox"] {
height: 14px;
margin: 2px 0 10px 10px;
padding-left: 14px;
position: relative;
visibility: visible;
width: 14px;
}
#pdf-popover input[type="checkbox"],
#pdf-popover input[type="radio"] {
margin-left: 10px;
}
#pdf-popover .close {
background: #b15818;
color: #FFFFFF;
cursor: pointer;
height: 35px;
font-size: 16px;
font-weight: bold;
line-height: 26px;
position: absolute;
right: 3px;
text-align: center;
top: 3px;
width: 25px;
z-index: 1;
}
#pdf-popover .button {
background-color: #b15818;
border: 0;
color: #fff;
cursor: pointer;
font-family: Helvetica, Arial, sans-serif;
margin-left: 10px;
padding: 8px 10px;
text-transform: uppercase;
}
x
Print Options
Page size
Letter
3x5
4x6
Text Size
Small
Medium
Large
Content
Include description
Include prep time, etc.
Show image
Recipe
Butternut Squash and Kale
Prep Time: 10 Minutes
Cook Time: 10 Minutes
Difficulty: Easy
Servings: 8
 Print Recipe
Ingredients
1/2 whole Butternut Squash; Peeled, Seeded And Cubed2 Tablespoons Butter1 Tablespoon Olive Oil1/2 teaspoon Kosher Salt Black Pepper To Taste1/4 teaspoon Chili Powder (more To Taste)1 bunch Kale, Leaves Torn, Stalks Discarded Preparation Instructions
Heat 1 tablespoon butter and olive oil in a large skillet over high heat. Add squash and sprinkle with salt, pepper, and chili powder. Cook for several minutes, turning gently with a spatula, until squash is deep golden brown and tender (but not falling apart.) Remove to a plate and set aside.
In the same skillet, melt 1 tablespoon of butter over medium-high heat and add in the kale. Toss it around with tongs and cook it for 3 to 4 minutes. Add in the cooked squash and gently toss together.
Serve as a side dish with chicken or beef, as a main veggie dish, or as a filling for quesadillas or sandwiches.
Posted by Ree | The Pioneer Woman on November 6 2014

November 4, 2014
Holiday Cookbook + Mixer Giveaway (Winners!)
Note: Because of the huge response, I have added a second cookbook + mixer for a total of two prizes!
The winners are…
#11595 Alicia S. “It is really hard to pick only one thing but I guess I will have to say the stuffing.”
#105698 Dawn D: “Definitely my mother’s homemade bread stuffing & mashed turnip and carrots…”
Big congrats to the winners! Contact prizes@thepioneerwoman.com to claim your prizes.
I’ll have more cookbook + mixer giveaways during the upcoming holiday season!
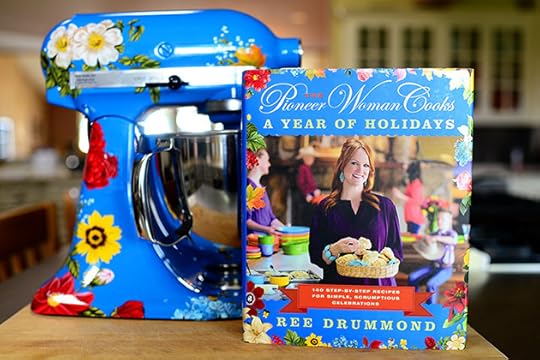 Today, because it’s officially November and because I’m officially darn excited about the food that awaits us this month, I’m giving away one of these fabulous Pioneer Woman Holiday Edition Mixers along with a signed copy of my holiday cookbook!
My holiday cookbook came out this time last year (I can’t believe a year has passed already!), and I had so much fun putting it together. In addition to several of my other favorite holidays throughout the year, it has an epic Thanksgiving section with my very favorite recipes from Turkey Day. Here are a few peeks of the Thanksgiving recipes in the book:
 Roasted Turkey. Of course!
 Giblet Gravy. To die for!
 Cranberry Sauce. Quick and simple!
 The best mashed potatoes ever. Yes, please.
 There are several dressing/stuffing recipes in the book. This is one of my faves.
 And other side dishes, including Green Beans with Tomatoes. A lifelong favorite of mine.
 Easy no-knead dinner rolls. Heavenly!
 And don’t even get me started on the pies. The best part!
Here are a few place you can find the cookbook in case you need to arm yourself for all the upcoming food holidays!
Amazon
Barnes and Noble
Books-a-Million
Hastings
Walmart
 And as for the mixer…I had it designed especially to celebrate the launch of my cookbook. In case you missed it last year, here are a few peeks!
 It’s got pretty flowers here…
 And there…
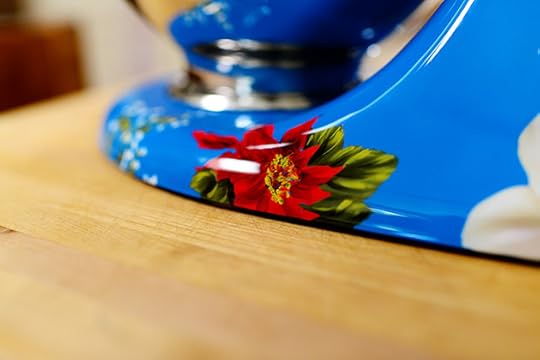 And, because it’s a holiday mixer, a poinsetta here…
 and an Easter lily there.
I love this mixer. So fun and festive.
TO ENTER
 To enter the giveaway, just answer the following question in the Comments section of this post:
“What is your absolute favorite dish on the Thanksgiving table?”
I know this is an impossible question to answer, but if you had to pick, what is the one Thanksgiving dish you couldn’t possibly do without? (We’ll say Turkey and Gravy are a given.)
THE RULES
One entry per person, please.
I’ll announce the winner Wednesday night!
Lots of Love,
P-Dub
Custom KitchenAid mixer created by the amazing Nicole at Un Amore!
Winners have been announced and comments are now closed.

Holiday Cookbook + Mixer Giveaway!
Today, because it’s officially November and because I’m officially darn excited about the food that awaits us this month, I’m giving away one of these fabulous Pioneer Woman Holiday Edition Mixers along with a signed copy of my holiday cookbook!
My holiday cookbook came out this time last year (I can’t believe a year has passed already!), and I had so much fun putting it together. In addition to several of my other favorite holidays throughout the year, it has an epic Thanksgiving section with my very favorite recipes from Turkey Day. Here are a few peeks of the Thanksgiving recipes in the book:
Roasted Turkey. Of course!
Giblet Gravy. To die for!
Cranberry Sauce. Quick and simple!
The best mashed potatoes ever. Yes, please.
There are several dressing/stuffing recipes in the book. This is one of my faves.
And other side dishes, including Green Beans with Tomatoes. A lifelong favorite of mine.
Easy no-knead dinner rolls. Heavenly!
And don’t even get me started on the pies. The best part!
Here are a few place you can find the cookbook in case you need to arm yourself for all the upcoming food holidays!
Amazon
Barnes and Noble
Books-a-Million
Hastings
Walmart
And as for the mixer…I had it designed especially to celebrate the launch of my cookbook. In case you missed it last year, here are a few peeks!
It’s got pretty flowers here…
And there…
And, because it’s a holiday mixer, a poinsetta here…
and an Easter lily there.
I love this mixer. So fun and festive.
TO ENTER
To enter the giveaway, just answer the following question in the Comments section of this post:
“What is your absolute favorite dish on the Thanksgiving table?”
I know this is an impossible question to answer, but if you had to pick, what is the one Thanksgiving dish you couldn’t possibly do without? (We’ll say Turkey and Gravy are a given.)
THE RULES
One entry per person, please.
I’ll announce the winner Wednesday night!
Lots of Love,
P-Dub
Custom KitchenAid mixer created by the amazing Nicole at Un Amore!
October 30, 2014
Chocolate Butterscotch Caramel Bars
 I had something similar to these bars at this market in Tulsa a few weeks ago, and I found them very delightful, delicious…and rich. I bought just one of what they called “Monster Bars,” and it was so decadent, it actually took me four years to finish it off!
Okay, not four years. More like four hours.
And okay, it was more like an hour.
Thirty minutes, okay? It took me thirty minutes to eat the whole thing.
(But for me, that’s a very, very, very long time.)
(And fine. It was more like twenty minutes.)
Here’s my version! They’re really fun to eat, pretty durn easy to make, and super-duper fun.
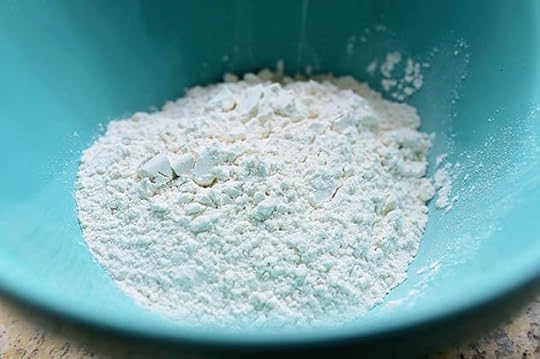 I started out by making a big of an oatmeal base, and I used the same mixture I use with my Strawberry Oatmeal Bars. And that’s flour…
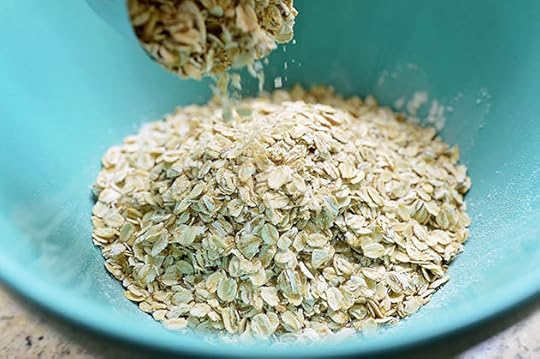 Regular oats…
 Brown sugar…
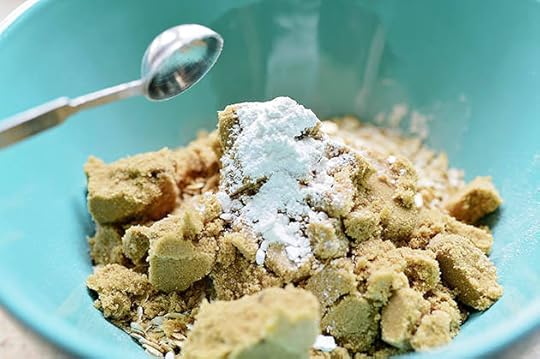 Baking powder…
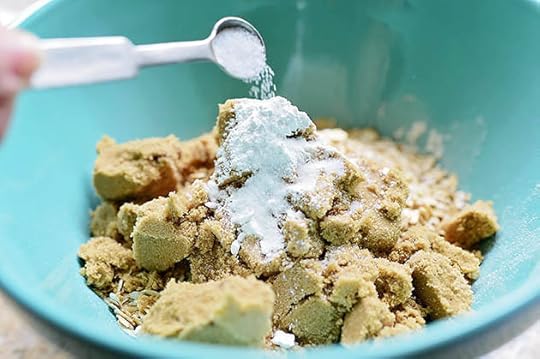 And salt! Simple and lovely. Now stir all this together…
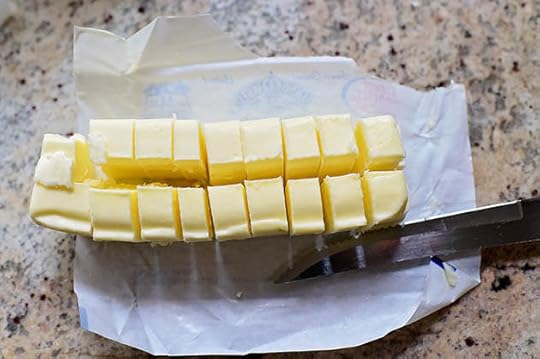 Cut up some cold butter…
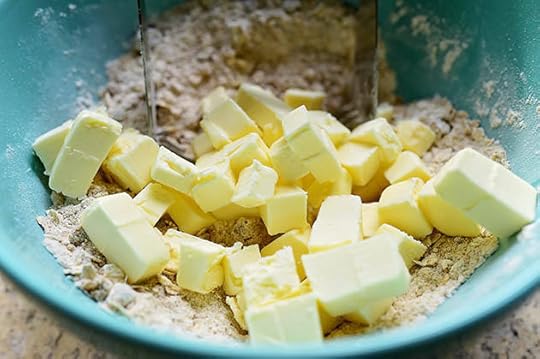 Add it to the bowl…
 And cut this all together.
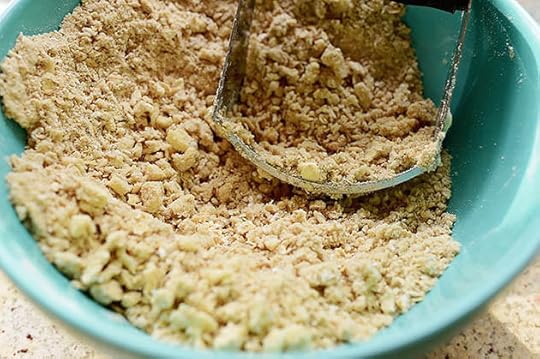
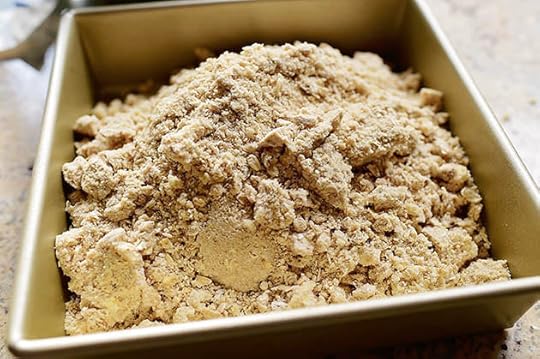 And now for a cautionary, don’t-be-like-me tale: I was in a hurry and was also feeling lazy, so I hurriedly threw the mixture into the food processor to pulse it up rather than put forth the hard work with the pastry cutter. I mean, sometimes I just don’t feel like fighting the good fight anymore. But it was not a good idea, because the food processor instantly—and I mean, lickety-split—pulverized the oatmeal. Still delicious, of course, but you really want to be able to see those pieces of oatmeal.
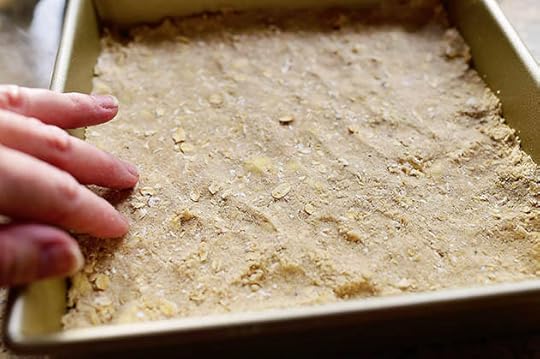 Press it into a pan. I used a nonstick square pan, but it did result in quite a hefty crust. If you’d like a thinner crust—and if you’d like to wind up with more square bars—feel free to use an 8 x 10 inch pan OR a 9 x 13 inch pan. If you’re not using a nonstick pan, grease the pan thoroughly first!
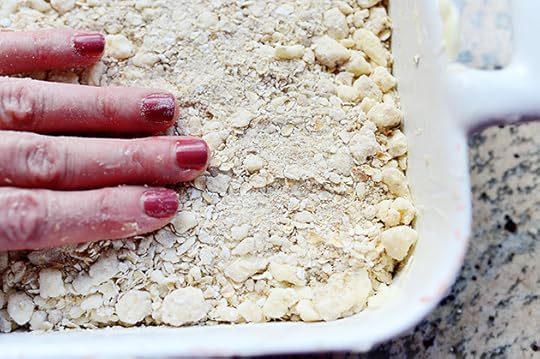 By the way, here’s what the crust looked like in my Strawberry Oatmeal Bars post. It’s what happens when I feel like fighting the good fight and don’t take tragic shortcuts.
Live and learn.
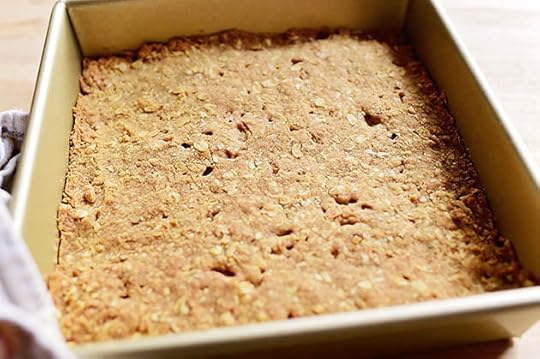 Now just bake the crust until it’s totally done and golden brown and perfect. Note that if you use a larger pan, it won’t take quite as long to bake since it’ll be thinner.
Now just set the base aside for a sec. Don’t do this too far ahead of time, though, because you still want it to be nice and warm when you move on with the rest of the recipe.
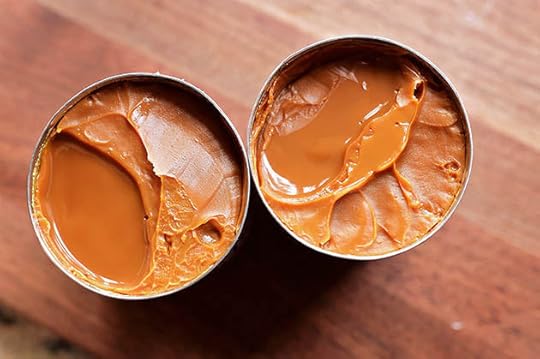 Now, crack open a couple of cans of dulce de leche. I used Nestle La Lechera, but you can find canned dulce de leche in lots of different brands in the Hispanic Foods aisle of the supermarket.
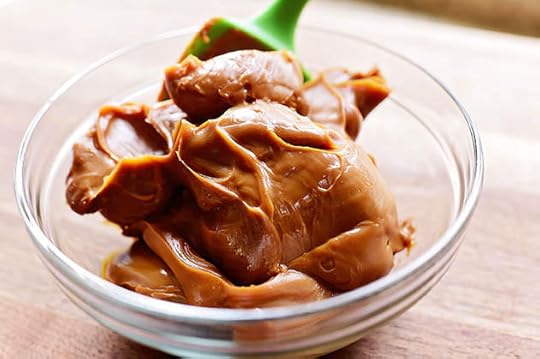 It’s really luscious stuff. Just get it into a bowl…
 And microwave it a bit just to soften it up a little.
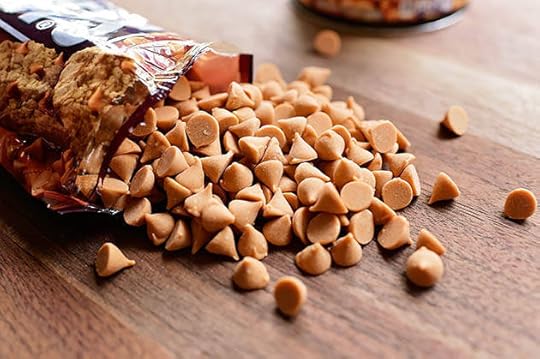
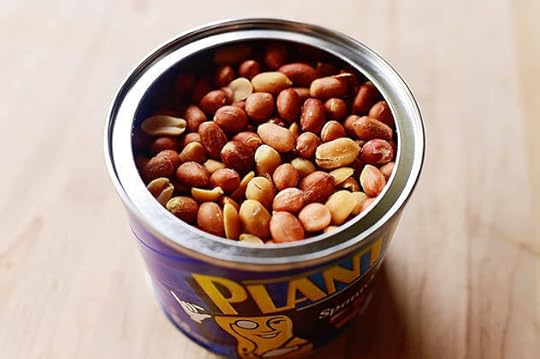 Meanwhile, grab the other stuff you need! Spanish peanuts…
 Butterscotch chips…
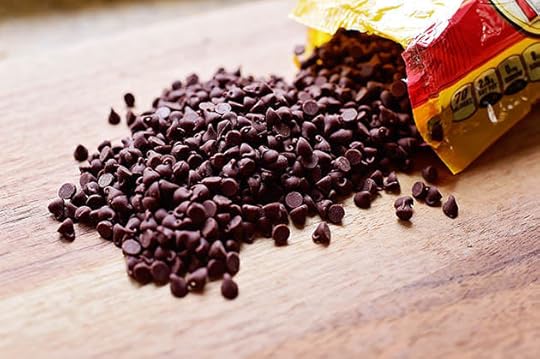 And mini chocolate chips.
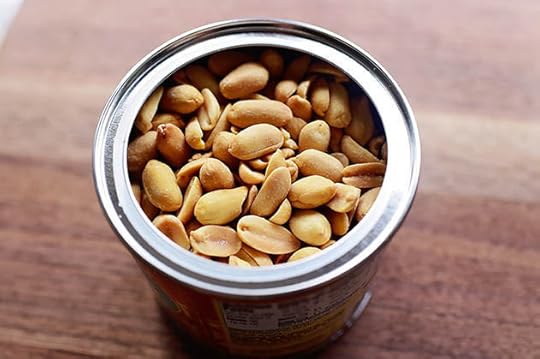 Now, you can use regular salted peanuts if you don’t like the ones with the red skin…but I like the small size of the Spanish peanuts, and the red skins make everything a little more weird and interesting.
 And now? AND NOW? Well, we’re about to have some fun.
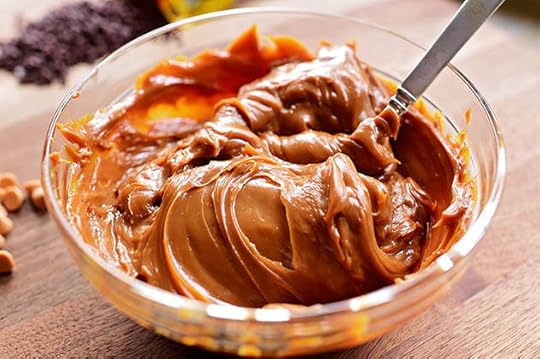
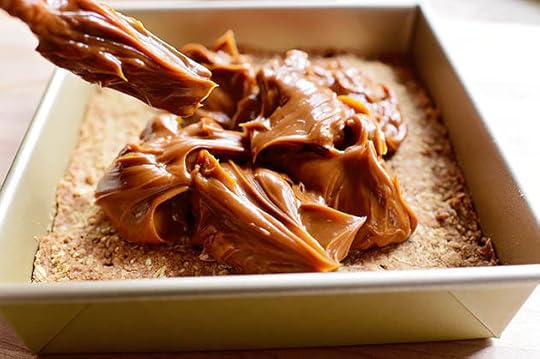
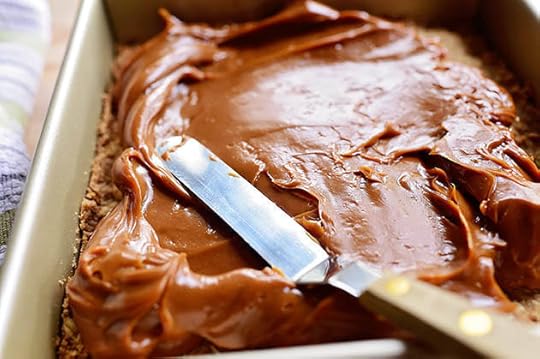 Plop the warm dulce de leche onto the warm oatmeal base, and use an offset spatula to spread it all over the surface.
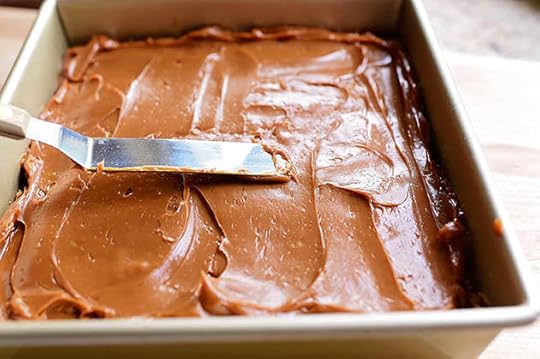 Get it all the way out to the corners and even out the surface so it’s flat.
(And you can see that if you go with a bigger pan, you should probably have a third can of dulce de leche on hand so it covers the surface. Just sayin’.)
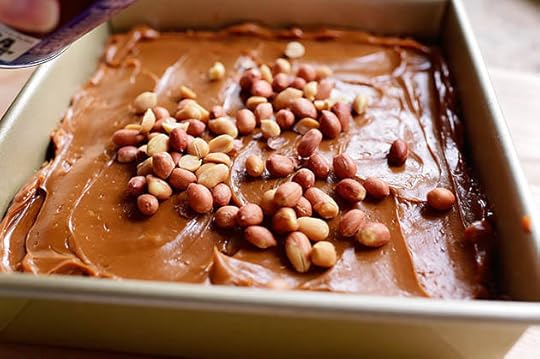 Now, sprinkle on the Spanish peanuts…
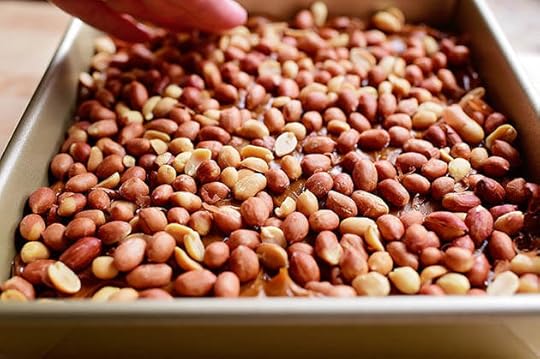 Until they totally cover the caramel.
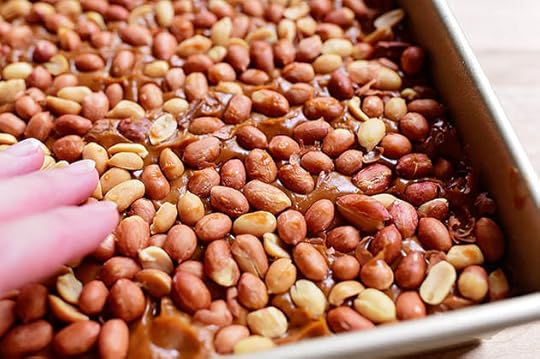 Use your hands to very lightly press the peanuts so that they sink into the caramel a little. Basically, you want to anchor them all in there.
Oh, and if you don’t like peanuts…well, these aren’t the bars for you!
 Next, a generous sprinkling of butterscotch chips…
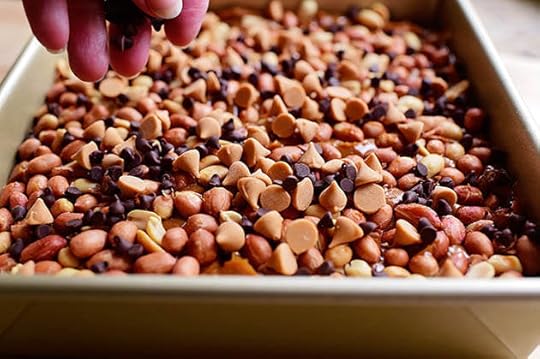 Followed by a generous sprinkling of the mini chocolate chips!
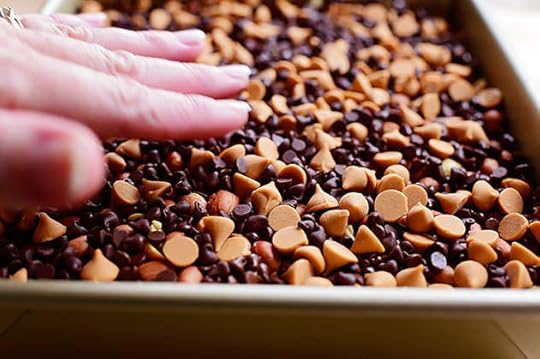 Now, again…press very lightly. The idea here is just to anchor/cement everything together.
 The warmth of the cookie base and the caramel should be sufficient to soften the butterscotch and chocolate chips enough for them to barely melt without losing their shape…then stick together as they cool. I sure hope that makes sense.
If things aren’t warm enough to accomplish this, just set the pan into the oven for 30 seconds or so, just to soften them up enough to stick together.
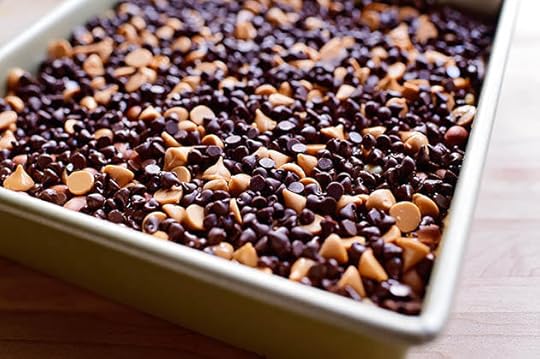
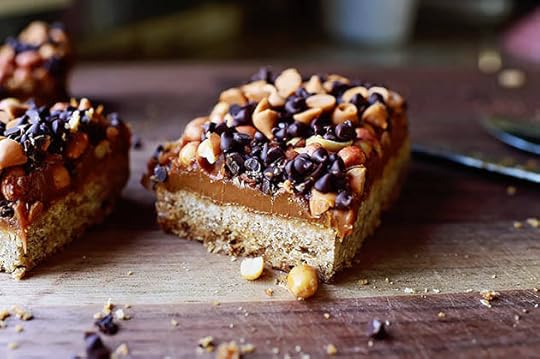
And then—this is important!—stick the pan in the fridge and chill it for at least 2 to 3 hours. This helps everything set and makes it much easier to slice up the bars.
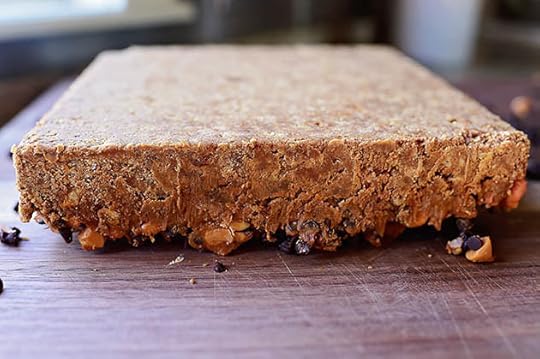 Gently turn it out of the pan. When you do this, you’ll lose a few stray chips, but for the most part, everything should hold together.
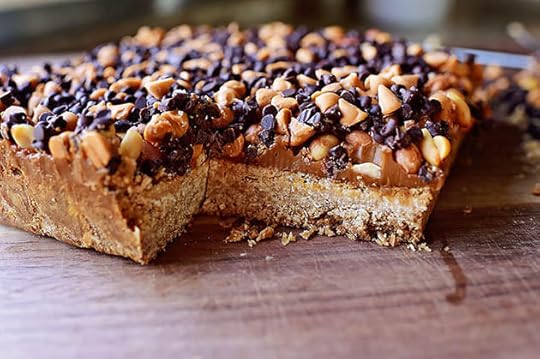 Then turn it over, cut a square, and eat it before you even know what hit you.
Also, take note that most of the chips stayed intact when I flipped this upside down—the pressing/sticking together is important!
 Continue slicing everything into long bars…and then into individual bars. This is much easier with a long, serrated bread knife, by the way!
 Um…I probably don’t need to tell you this, but these are really delicious.
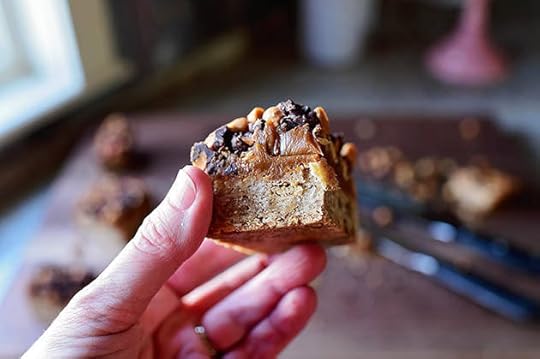 The yummy oatmeal base, the creamy caramel, the mix of salty peanuts, butterscotch, and chocolate…wow.
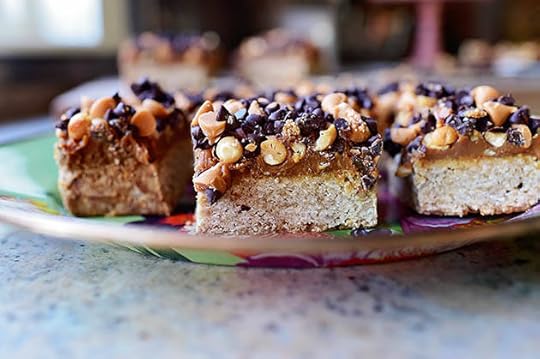
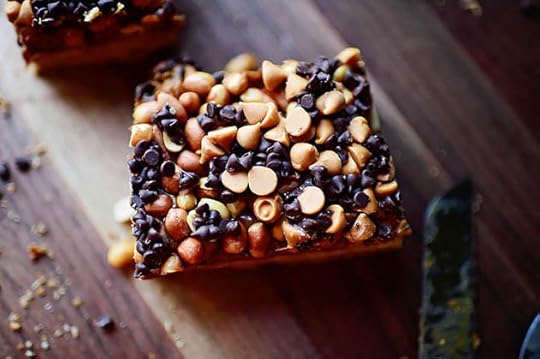 A square this big would feed all of Rhode Island. I’m not kidding…they’re incredibly rich.
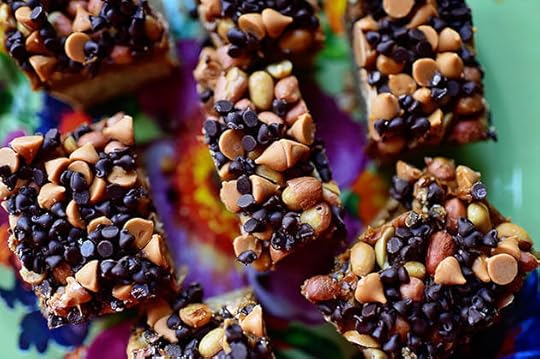 So smaller squares or rectangles are recommended!
 Serve them cold or at room temperature…with a glass of milk, of course.
Here’s the handy dandy printable! Try them sometime soon.
.recipe-actions {
position: relative;
z-index: 2;
}
#pdf-popover {
background: rgba(255,255,255,.9);
border: 1px solid #efeeed;
color: #6e5c3a;
display: none;
font-family: Helvetica, Arial, sans-serif;
right: 20px;
margin: 2px;
padding: 54px 20px 7px 10px;
position: absolute;
top: 0;
width: 380px;
z-index: 10;
}
#pdf-popover form {
margin: 0;
}
#pdf-popover h4 {
background: #b15818;
color: #fff;
font-family: Helvetica, Arial, sans-serif;
font-size: 20px;
font-weight: normal;
left: 3px;
margin: 0;
position: absolute;
padding: 6px 12px;
right: 3px;
top: 3px;
}
#pdf-popover legend {
font-family: Helvetica, Arial, sans-serif;
font-size: 120%;
font-weight: bold;
margin-bottom: 2px;
margin-left: 10px;
text-transform: uppercase;
}
#pdf-popover fieldset {
margin-bottom: 15px;
}
#pdf-popover input[type="checkbox"] {
height: 14px;
margin: 2px 0 10px 10px;
padding-left: 14px;
position: relative;
visibility: visible;
width: 14px;
}
#pdf-popover input[type="checkbox"],
#pdf-popover input[type="radio"] {
margin-left: 10px;
}
#pdf-popover .close {
background: #b15818;
color: #FFFFFF;
cursor: pointer;
height: 35px;
font-size: 16px;
font-weight: bold;
line-height: 26px;
position: absolute;
right: 3px;
text-align: center;
top: 3px;
width: 25px;
z-index: 1;
}
#pdf-popover .button {
background-color: #b15818;
border: 0;
color: #fff;
cursor: pointer;
font-family: Helvetica, Arial, sans-serif;
margin-left: 10px;
padding: 8px 10px;
text-transform: uppercase;
}
x
Print Options
Page size
Letter
3x5
4x6
Text Size
Small
Medium
Large
Content
Include description
Include prep time, etc.
Show image
Print
Recipe
Chocolate Butterscotch Caramel Bars
Prep Time: 15 Minutes
Cook Time: 35 Minutes
Difficulty: Easy
Servings: 12
 Print Recipe
Ingredients
1-1/2 cup All-purpose Flour1-1/2 cup Quick Oats1 cup Packed Brown Sugar1 teaspoon Baking Powder1/4 teaspoon Salt1-3/4 stick Cold (salted) Butter, Cut Into Pieces2 cans (13.5 Ounces Each) Dulce De Leche (I Used Nestle La Lechera) Spanish Peanuts Butterscotch Chips Mini Chocolate Chips Preparation Instructions
Preheat the oven to 350 degrees. Spray a 9 x 9, 8 x 10, or 9 x 13-inch baking dish with baking spray. (Or you can line with aluminum foil.)
***Note: If you use a rectangular pan, you may need an additional can of dulce de leche to cover the surface.
Mix together the flour, oats, brown sugar, baking powder, and salt. Cut in the butter with a pastry cutter until it resembles coarse crumbs. Sprinkle the mixture into the pan and pat lightly to pack it slightly.
Bake until light golden brown on top and done in the middle, about 30 to 35 minutes, watching to make sure it doesn't burn. Remove from the oven and allow to cool for 15 minutes.
Spoon the dulce de leche into a microwave safe bowl and nuke it for 45 seconds, just to slightly soften it. Scoop it on top of the oatmeal base and use an offset spatula to spread it out to the edges and into an even layer. Sprinkle on a layer of peanuts so that they completely cover the caramel, and use your hands to gently press them into the caramel. Sprinkle on the butterscotch chips and the mini chocolate chips in generous layers.
Note: The warmth of the cookie base and the caramel should slightly soften the butterscotch and chocolate chips. When that happens, use your hands to very gently press the chips just enough to anchor them together (but not enough to misshape them.) If the pan isn't warm enough, pop it into the oven for 30 seconds or so and gently press the chips to anchor them together.
Chill the bars for 2 to 3 hours to make them easy to slice. Turn them out onto a cutting board and use a long serrated knife to cut into small squares (they're rich!)
Serve cold or at room temperature.
Posted by Ree | The Pioneer Woman on October 30 2014

October 27, 2014
Sweet Potato Fries
 I made sweet potato fries in the oven yesterday, and I snacked on them while watching an episode of “Forensic Files” on HLN as my boys watched football in the living room. And while we’re on the subject of forensics, how and why anyone ever believes they are going to get away with any crime just astounds me. Men and women with tweezers, microscopes and Luminol are way too adept and smart to let that happen!
Thank you for listening to my documentary television-related proclamations.
And thank you in advance for making sweet potato fries sometime this week! It will make me happy knowing that you’re enjoying one of the best snacks in the world.
 Grab some sweet potato fries…
 Peel off the skin…
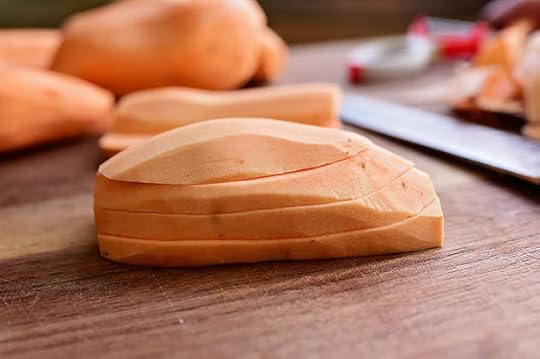 And cut the taters into 4 to 5 slices. (Just be careful, as sweet potatoes can be a little harder than regular potatoes. Don’t cut yourself!)
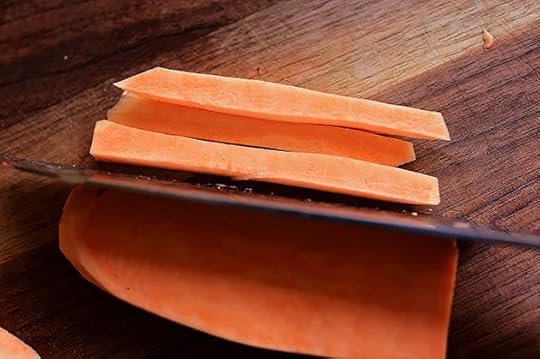 Then just stack up 2 or 3 slices at a time and cut in the other direction to create sticks.
 You can cut the sticks as thick or thin as you’d like, and you can also cut the potato slices in half before cutting sticks if you want a whole bunch of bite-sized sweet potato fries. Up to you!
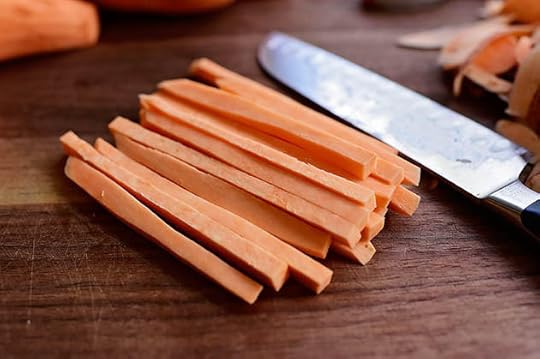
 Throw them all in a bowl and set them aside for a sec…
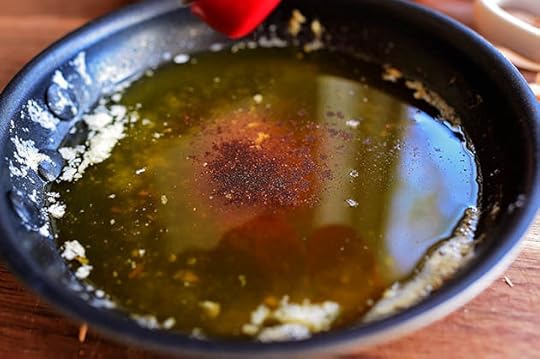
 While you melt some butter! I let this go just a little past the melted stage until it was slightly browned.
 Then, and this isn’t mandatory, skim the foam off the top.
 Now, you can just discard this if you’d like…or you can be weird like me and add it to the mashed potatoes you made for dinner later that night.
Again: Up to you!
But I’d highly recommend the latter.
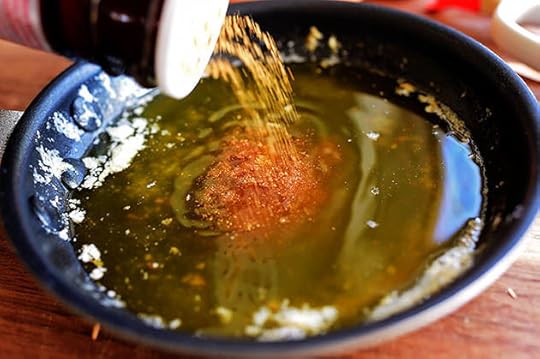 Now, just season up the butter: I used seasoned salt…
 Chili powder…
 And black pepper. Also, throw in a couple of cloves of pressed garlic! Heavenly.
(Use any spices you’d like! Paprika, onion powder, steak seasoning, cumin…anything goes.)
 Stir this around until it’s all mixed together…
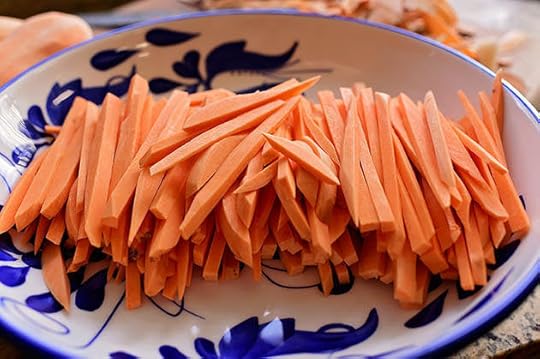
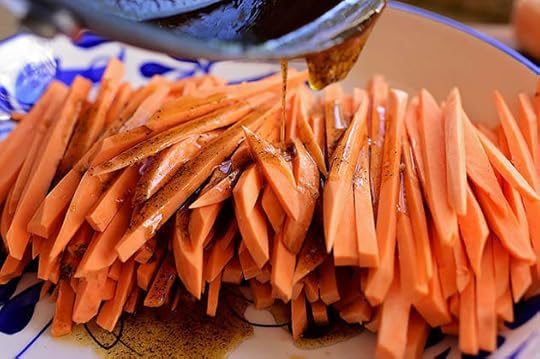 Then pour it over the sweet potatoes, making sure to get all the flecks and specks.
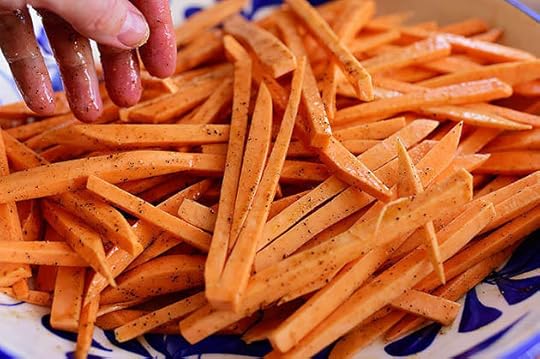 Toss them around with your hands…
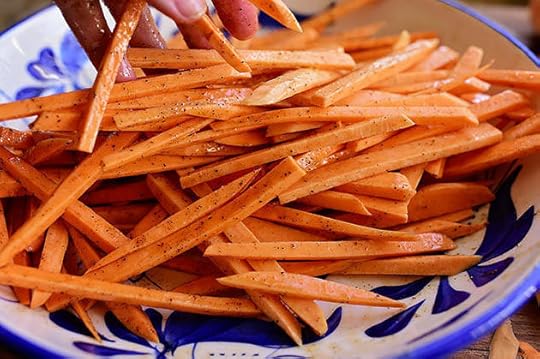 Until they’re all fully coated.
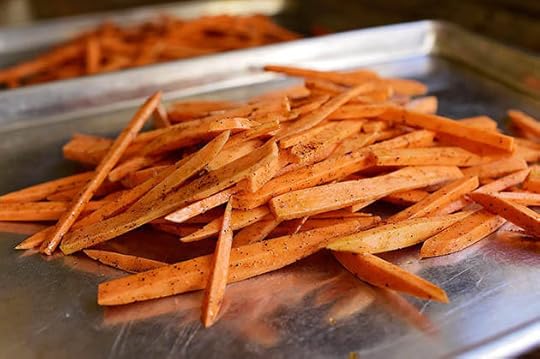 Then pour the sweet potatoes onto two baking sheets…
 And shake them around so that they’re not crowded on the pan.
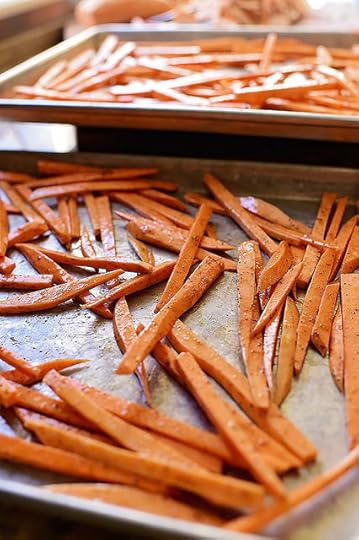
 Then just pop ‘em in a hot (450 degree) oven for about 15 minutes, shaking the pans once or twice during the cooking. They should be sizzling when you take them out!
 I like to leave them on the pan for about 3-5 minutes before I take them off…
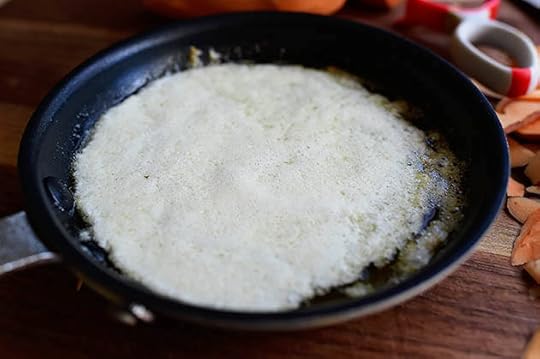
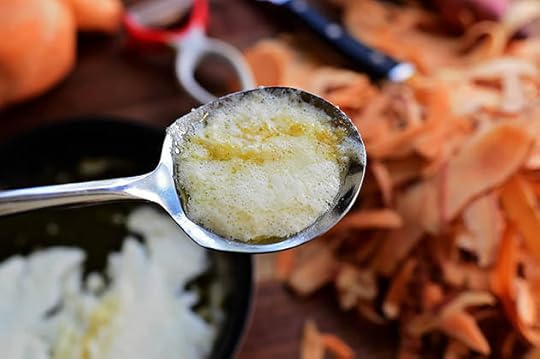
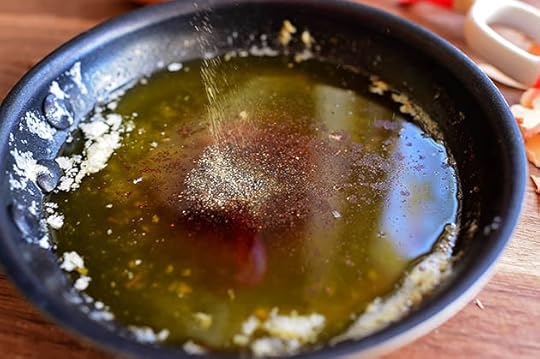
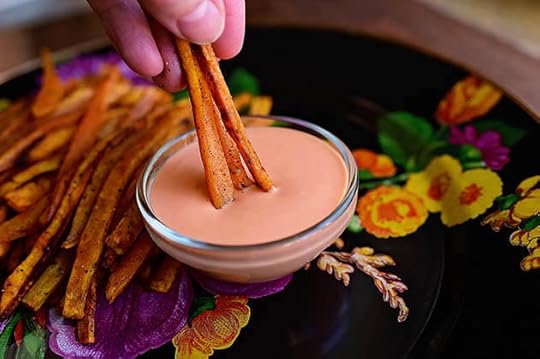
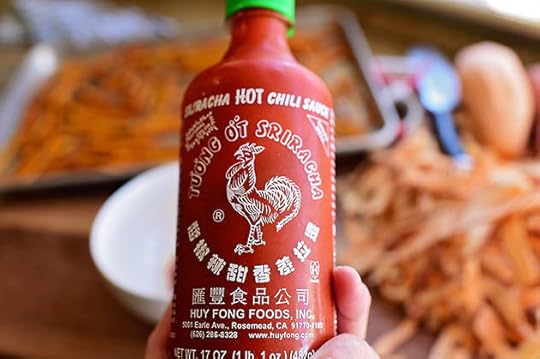 And that’s the perfect amount of time to whip up some dipping sauce! Grab some Sriracha if you have it. And I sincerely hope that you have it.
Sriracha is my life.
(But you can also use plain ol’ ketchup!)
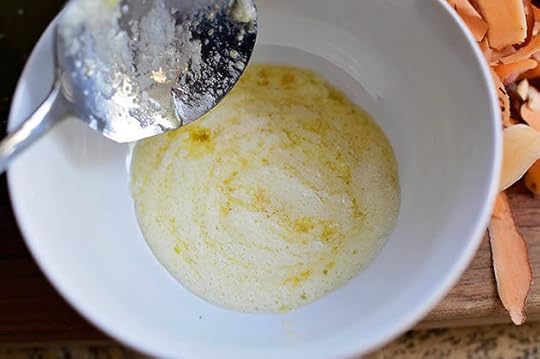
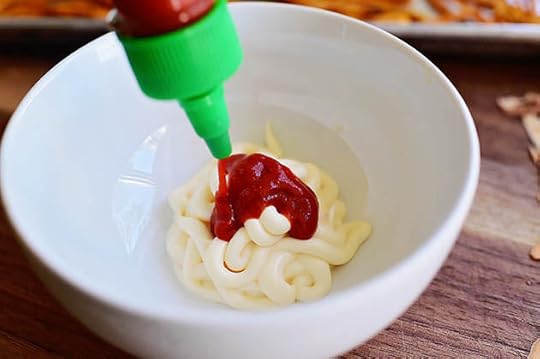 Mix 3 parts mayonnaise with 1 part Sriracha or ketchup…
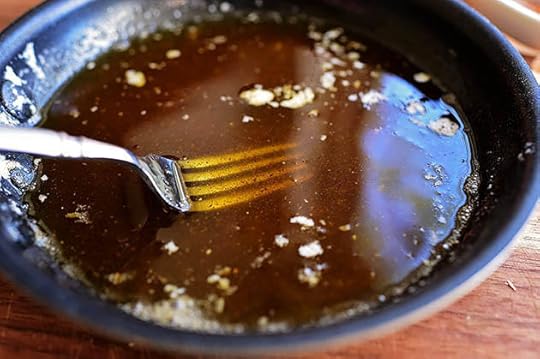
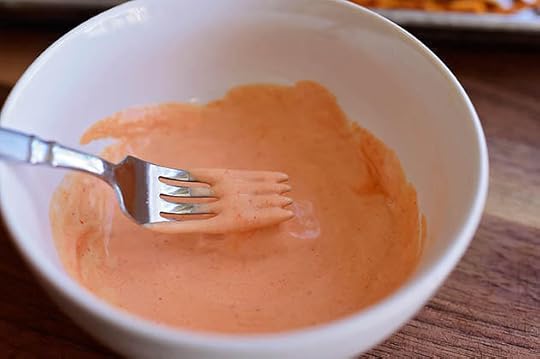 And mix it together with a fork until it’s a beautiful shade of salmon pink.
If you used Sriracha, this is Spicy Mayo.
If you used ketchup, this is “Fry Sauce!”
Then just serve up the fries alongside a dish of the beautiful sauce.
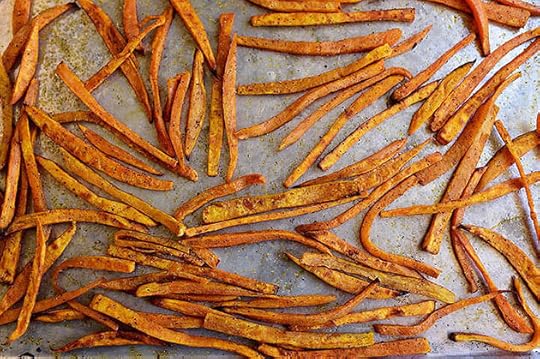
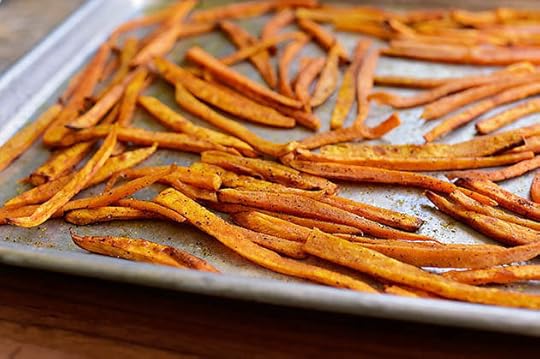
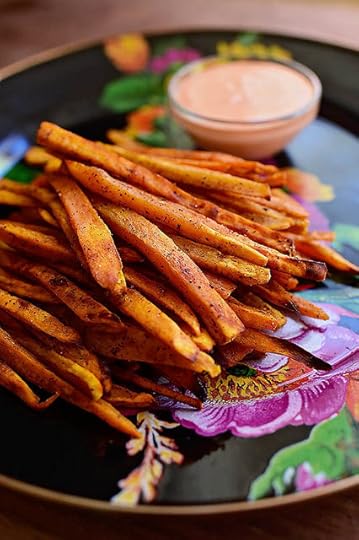 Mmmm. I love sweet potato fries, especially when they’re on the thin side like this. Note that when they are baked in the oven, they aren’t going to be overly crisp as they would be if you were to fry them in oil…but because sweet potatoes are so naturally beautiful, they’re still delicious baked.
 Make them for a snack or side dish this week! You’ll absolutely love ‘em.
Here’s the handy dandy printable!
.recipe-actions {
position: relative;
z-index: 2;
}
#pdf-popover {
background: rgba(255,255,255,.9);
border: 1px solid #efeeed;
color: #6e5c3a;
display: none;
font-family: Helvetica, Arial, sans-serif;
right: 20px;
margin: 2px;
padding: 54px 20px 7px 10px;
position: absolute;
top: 0;
width: 380px;
z-index: 10;
}
#pdf-popover form {
margin: 0;
}
#pdf-popover h4 {
background: #b15818;
color: #fff;
font-family: Helvetica, Arial, sans-serif;
font-size: 20px;
font-weight: normal;
left: 3px;
margin: 0;
position: absolute;
padding: 6px 12px;
right: 3px;
top: 3px;
}
#pdf-popover legend {
font-family: Helvetica, Arial, sans-serif;
font-size: 120%;
font-weight: bold;
margin-bottom: 2px;
margin-left: 10px;
text-transform: uppercase;
}
#pdf-popover fieldset {
margin-bottom: 15px;
}
#pdf-popover input[type="checkbox"] {
height: 14px;
margin: 2px 0 10px 10px;
padding-left: 14px;
position: relative;
visibility: visible;
width: 14px;
}
#pdf-popover input[type="checkbox"],
#pdf-popover input[type="radio"] {
margin-left: 10px;
}
#pdf-popover .close {
background: #b15818;
color: #FFFFFF;
cursor: pointer;
height: 35px;
font-size: 16px;
font-weight: bold;
line-height: 26px;
position: absolute;
right: 3px;
text-align: center;
top: 3px;
width: 25px;
z-index: 1;
}
#pdf-popover .button {
background-color: #b15818;
border: 0;
color: #fff;
cursor: pointer;
font-family: Helvetica, Arial, sans-serif;
margin-left: 10px;
padding: 8px 10px;
text-transform: uppercase;
}
x
Print Options
Page size
Letter
3x5
4x6
Text Size
Small
Medium
Large
Content
Include description
Include prep time, etc.
Show image
Recipe
Sweet Potato Fries
Prep Time: 15 Minutes
Cook Time: 15 Minutes
Difficulty: Easy
Servings: 8
 Print Recipe
Ingredients
6 whole Sweet Potatoes, Peeled And Cut Into Thin Sticks1 stick Salted Butter2 cloves Garlic, Pressed1 teaspoon Seasoned Salt (or Plain Salt)1 teaspoon Chili Powder1/2 teaspoon Black Pepper1/2 cup Mayonnaise1/4 cup Ketchup OR Sriracha (if You Like It Spicy!) Preparation Instructions
Preheat the oven to 450 degrees.
Melt the butter and add garlic, seasoned salt, chili powder, and black pepper. Stir with a fork.
In a large bowl, toss the sweet potatoes in the butter/seasoning mixture. Arrange on two baking sheets and bake in the oven for 15 to 20 minutes, shaking the pans halfway through, until the fries are sizzling. Remove from the oven and allow to sit on the pan for 5 minutes.
Mix the mayonnaise with the ketchup (or Sriracha). Serve fries with the dipping sauce!
Note: Sweet potatoes will be nice and cooked, but not overly crisp.
Posted by Ree | The Pioneer Woman on October 27 2014

October 20, 2014
Cheesy Cauliflower Soup
 Yesterday I made a cheesy version of my mom’s cauliflower soup because the weather outside, while still beautiful, has been just barely chilly enough to trigger the I NEED SOUP NOW mechanism in my central nervous system, and a creamy, comforting soup just sounded good to me. It’s simple, flavorful, slightly rich but not crazily so…
And it has cauliflower in it. And that’s reason enough for me.
Cauliflower is my boyfriend right now.
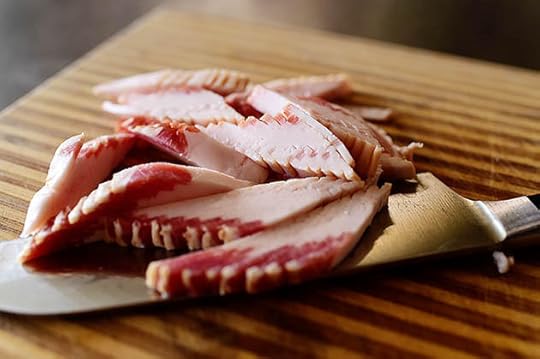 Start by cutting several slices of thin bacon into small bits…
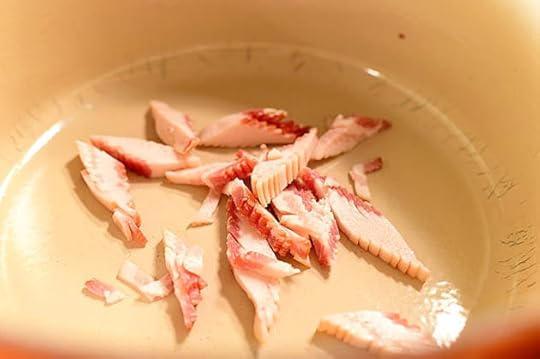 And throwing them into a pot.
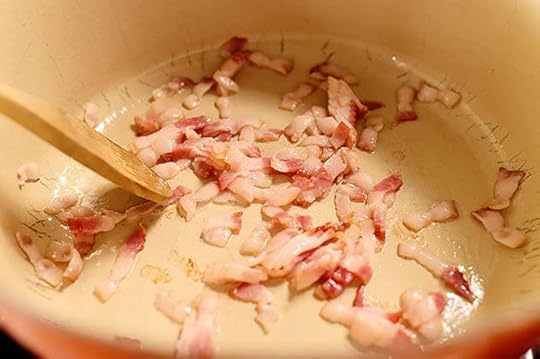 Fry them up…
 Until they’re nice and crisp…
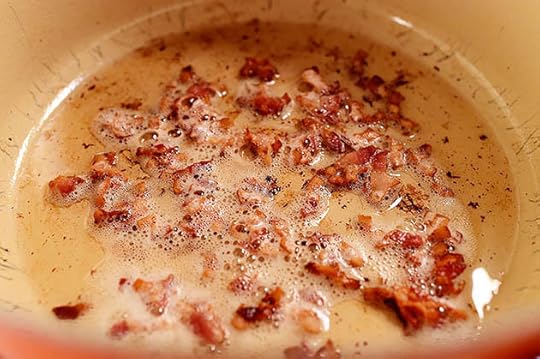
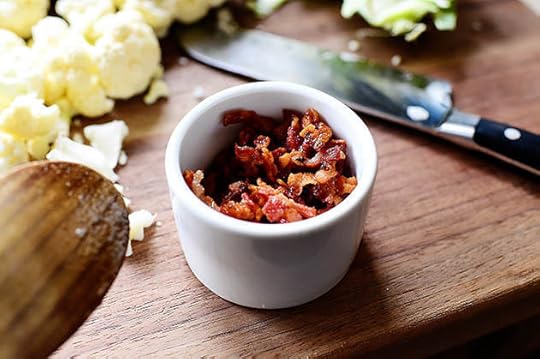 Then take the bacon out of the pot…
 And drain the grease out of the pan. Now, you can discard this or you can pour it on top of the 407 sedimentary layers of bacon grease you have in a large jar in your fridge…whatever you prefer.
(I won’t tell you which choice I made.)
 Meanwhile…
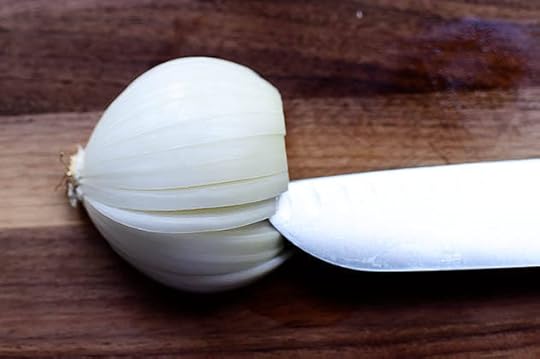
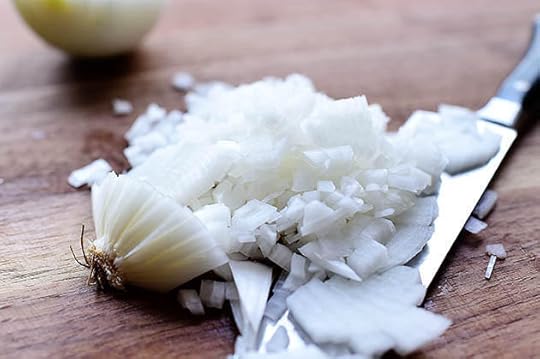 Dice up an onion!
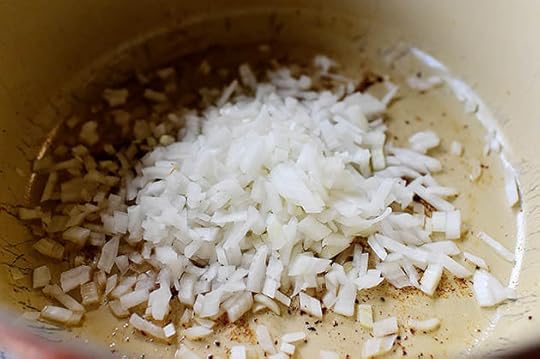 Then throw it in the pan…
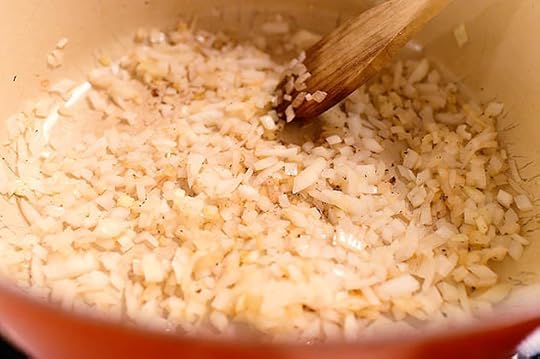 And cook it for a few minutes over medium-high heat, until the onions are soft and golden brown.
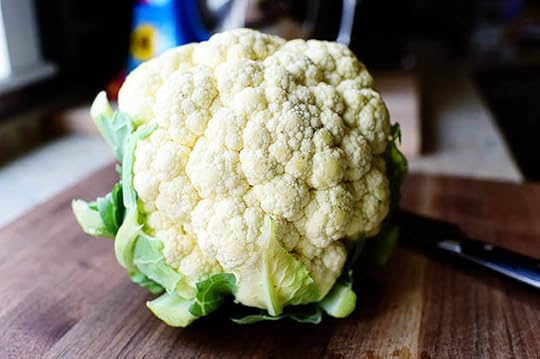 Now, when you make cauliflower soup, it’s generally helpful to have a head of cauliflower nearby.
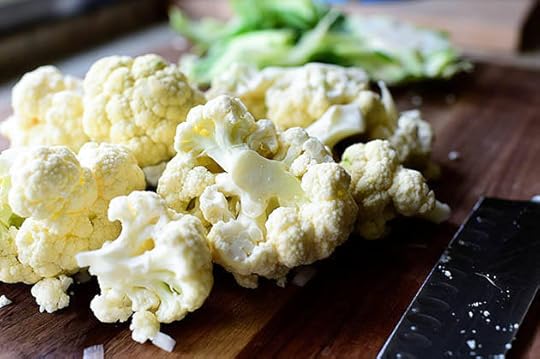 Break it into large pieces…
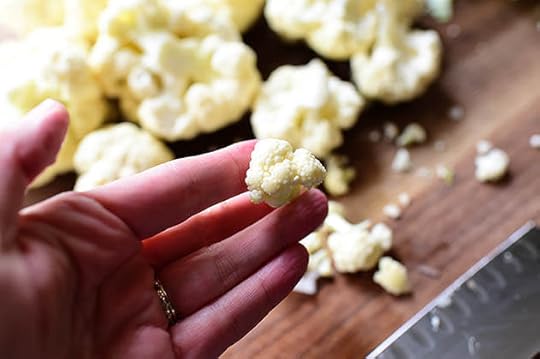 Then into smaller florets…
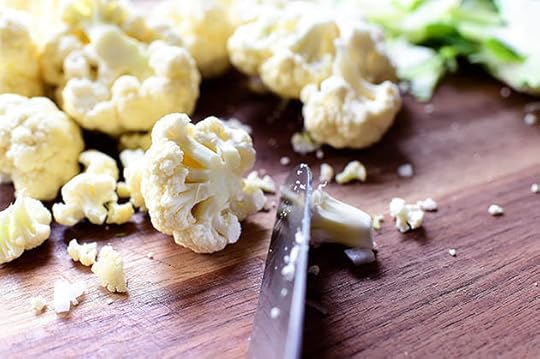 Lopping off the thick stalks along the way.
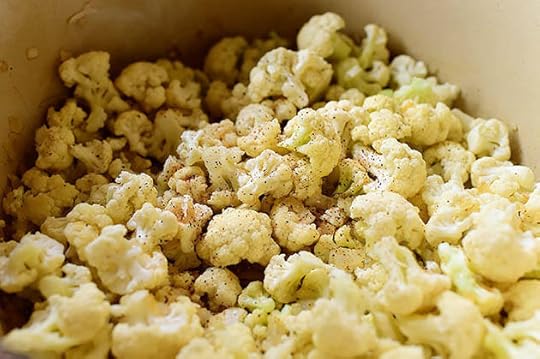 Throw the cauliflower into the pot and sprinkle with a little Cajun seasoning. (Or any seasoning you like!)
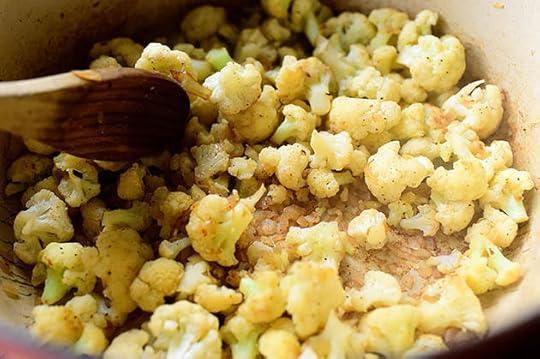 Then just cook it for a few minutes, until the cauliflower gets some great color.
 Then pour in a whole bunch of chicken broth! No sodium is best, because you can always add salt later…but low sodium is fine, too. (The Cajun spice mix I used had plenty of salt in it, so this could have gotten pretty salty pretty fast.)
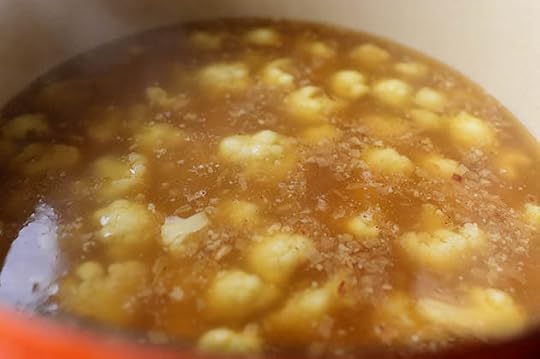 Next, just simmer the cauliflower/broth mixture for about 15-20 minutes with the lid on.
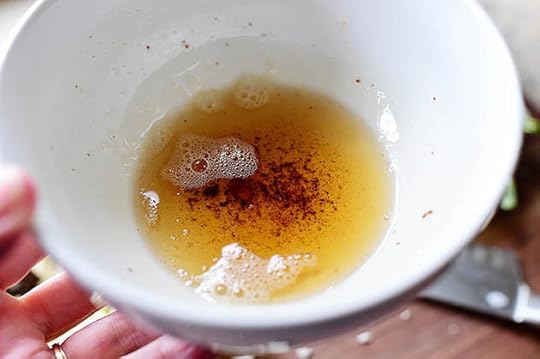
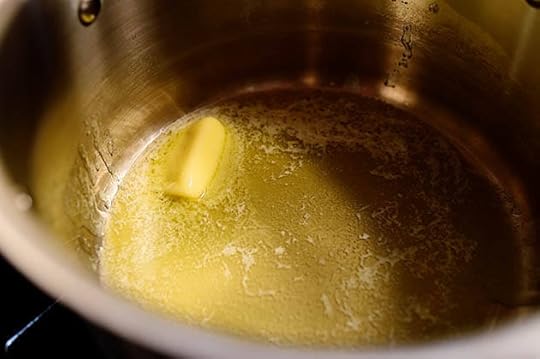 Now, while the soup is simmering, make a simple white sauce in a separate saucepan: Melt a little butter…
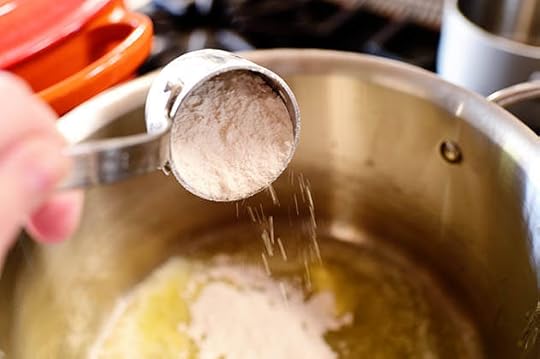 Then sprinkle in a little flour…
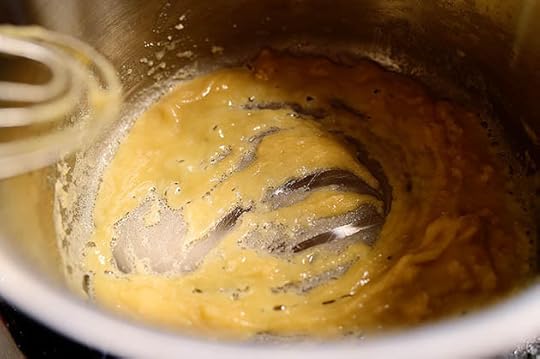 Whisk it into a paste and cook for a minute…
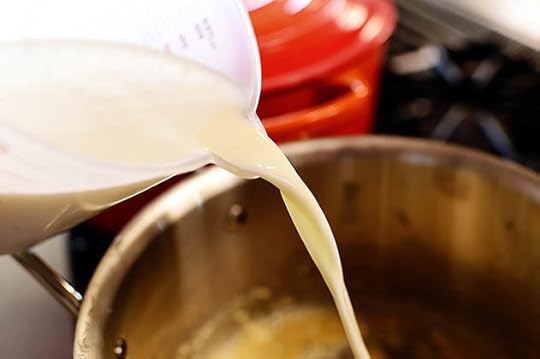 Then pour in some milk.
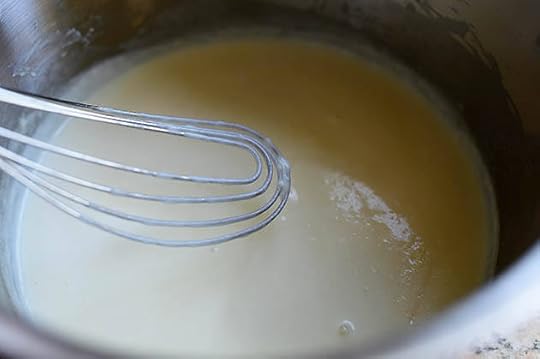 Cook it over medium heat, whisking it continually, until it’s nice and thick.
 Then, to make it even more luscious and rich, pour in some half-and half…
 And stir it together.
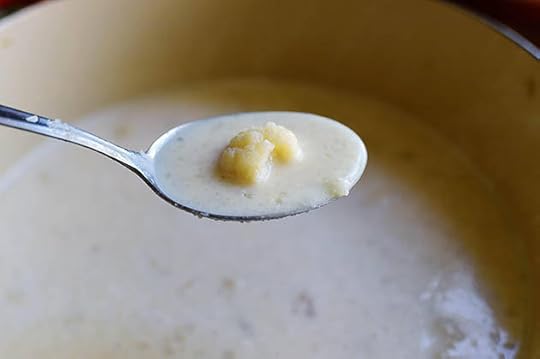
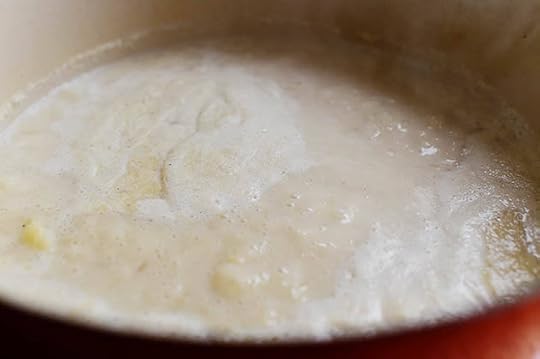
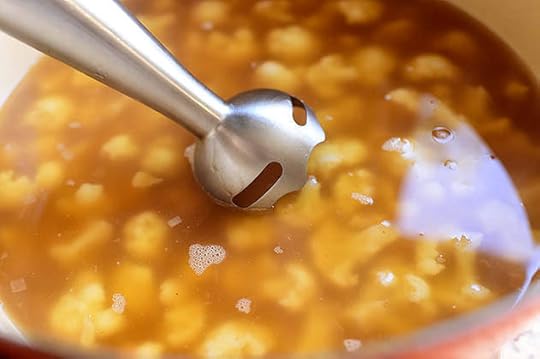 At this point, puree the soup a bit! I’m using an immersion blender, because it’s easy…but you can transfer half the soup to a regular blender, too. Just be careful not to fill it too full with the hot soup, since it will expand when you blend it.
The goal here is to puree the soup about halfway to 2/3 of the way through so that you have a slightly pureed cauliflower texture with some chunks of cauliflower left.
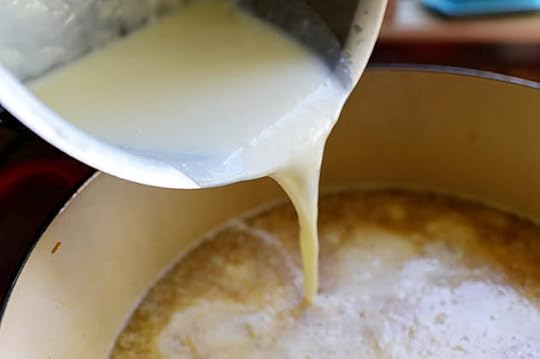 Next, pour in the white sauce, baby.
***Note: If you’d rather leave out the flour, you can just add the milk and half-and-half to the soup without making the roux. It will result in a thinner soup, but it’s still delicious! Pureeing the cauliflower all the way helps thicken the soup a bit.
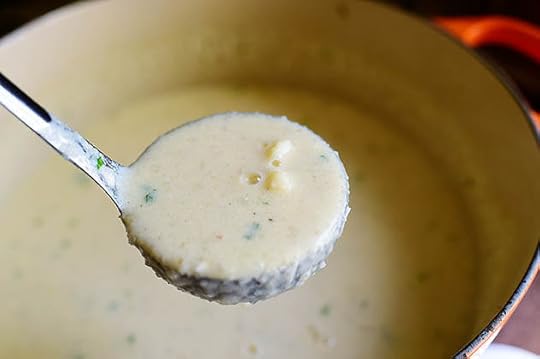
 Mmmm. Looking good so far!
 Just return the pot to the stove and bring it to a gentle boil for about 5 minutes. It won’t be overly thick—just moderately so—so if you’d like a slightly thicker soup, just whisk a little extra flour in a little extra milk, then pour it in and let it cook for a few more minutes.
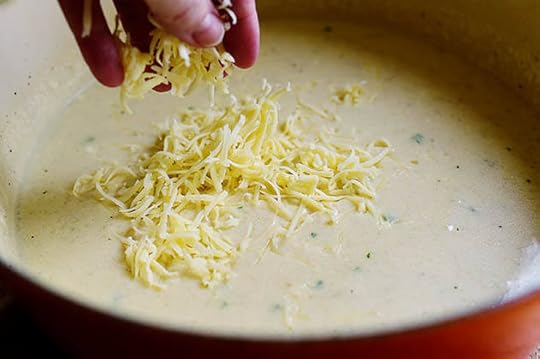
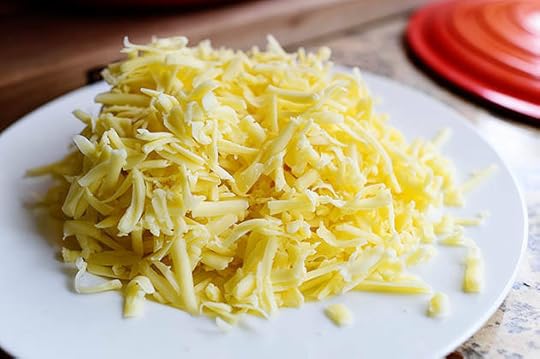 Remove it from the heat and grate up a bunch of cheese, please! I used Monterey Jack, but I think Pepper Jack would be utterly amazing, as would straight cheddar, cheddar-jack…anything goes!
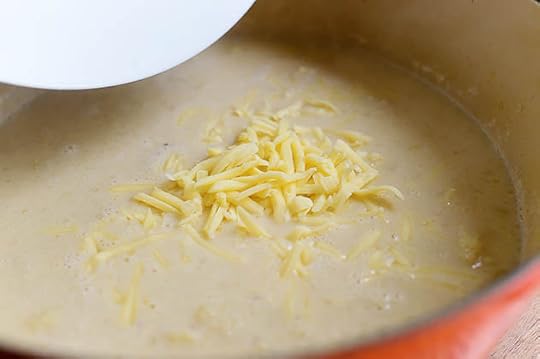 Toss it on in there…
 Then—as if it weren’t crazily decadent enough—some sour cream. Just a little dab will do ya!
(Pssst. Name that old hair product.)
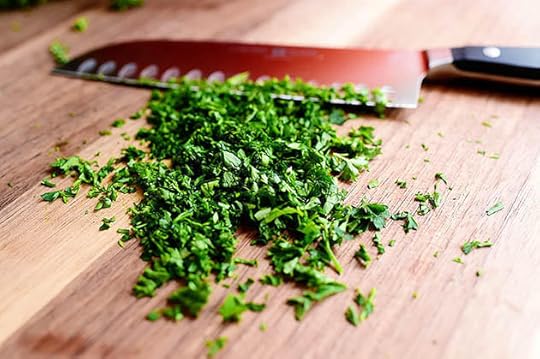 Then mince up some parsley…
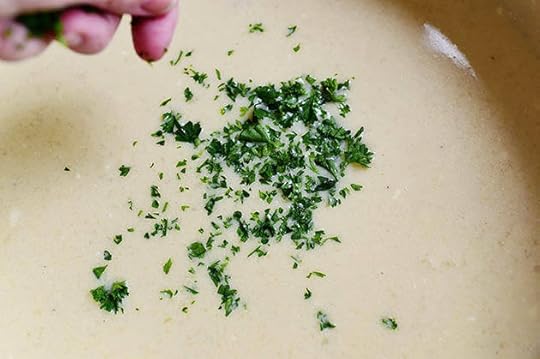 And sprinkle it in.
 Taste the seasonings and add more of whatever it needs. I added black pepper!
 And why not? A little more cheese.
 Basically, just mess with it until your soul is happy.
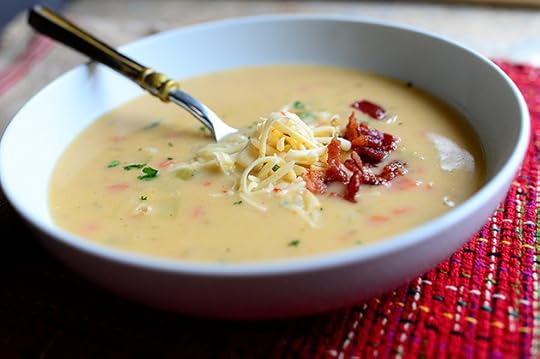
 Then serve it up alongside some warm wheat rolls.
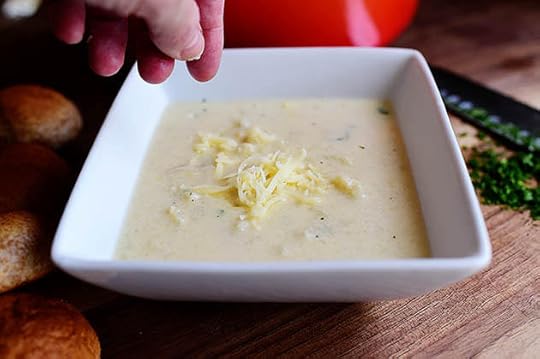 And okay, top it with a little extra cheese.
 And alright, sprinkle on a little extra parsley.
 And what the heck…
 Sprinkle on some bacon bits!
 Done, done, and…
 Sllllluuuuuuurrrrrrrrrrrrp!
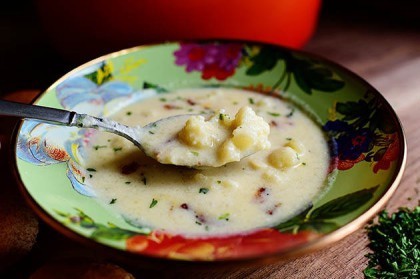
 Oh, and here’s the part where I realized that when I photographed my Perfect Potato Soup back in 2013, the finished bowl looks very similar (even though the soups couldn’t be more different.)
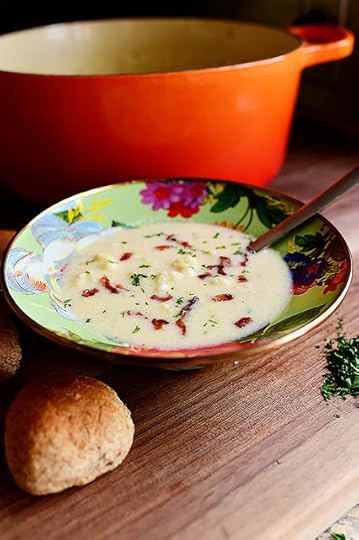 So I grabbed a different bowl, just so I could sleep last night, and snapped another photo or two.
Mmmmmm. “And the girl was happy…”
Here’s the handy dandy printable!
.recipe-actions {
position: relative;
z-index: 2;
}
#pdf-popover {
background: rgba(255,255,255,.9);
border: 1px solid #efeeed;
color: #6e5c3a;
display: none;
font-family: Helvetica, Arial, sans-serif;
right: 20px;
margin: 2px;
padding: 54px 20px 7px 10px;
position: absolute;
top: 0;
width: 380px;
z-index: 10;
}
#pdf-popover form {
margin: 0;
}
#pdf-popover h4 {
background: #b15818;
color: #fff;
font-family: Helvetica, Arial, sans-serif;
font-size: 20px;
font-weight: normal;
left: 3px;
margin: 0;
position: absolute;
padding: 6px 12px;
right: 3px;
top: 3px;
}
#pdf-popover legend {
font-family: Helvetica, Arial, sans-serif;
font-size: 120%;
font-weight: bold;
margin-bottom: 2px;
margin-left: 10px;
text-transform: uppercase;
}
#pdf-popover fieldset {
margin-bottom: 15px;
}
#pdf-popover input[type="checkbox"] {
height: 14px;
margin: 2px 0 10px 10px;
padding-left: 14px;
position: relative;
visibility: visible;
width: 14px;
}
#pdf-popover input[type="checkbox"],
#pdf-popover input[type="radio"] {
margin-left: 10px;
}
#pdf-popover .close {
background: #b15818;
color: #FFFFFF;
cursor: pointer;
height: 35px;
font-size: 16px;
font-weight: bold;
line-height: 26px;
position: absolute;
right: 3px;
text-align: center;
top: 3px;
width: 25px;
z-index: 1;
}
#pdf-popover .button {
background-color: #b15818;
border: 0;
color: #fff;
cursor: pointer;
font-family: Helvetica, Arial, sans-serif;
margin-left: 10px;
padding: 8px 10px;
text-transform: uppercase;
}
x
Print Options
Page size
Letter
3x5
4x6
Text Size
Small
Medium
Large
Content
Include description
Include prep time, etc.
Show image
Recipe
Cheesy Cauliflower Soup
Prep Time: 15 Minutes
Cook Time: 30 Minutes
Difficulty: Easy
Servings: 10
 Print Recipe
Ingredients
4 slices Thin Bacon, Cut Into Small Bits1 whole White Onion, Finely Diced1 head Cauliflower, Broken Into Small Florets1/2 teaspoon Cajun Spice, More To Taste1/2 teaspoon Black Pepper2 quarts Low Sodium Chicken Broth1/2 stick Butter1/4 cup Flour2 cups Whole Milk1 cup Half-and-half1/4 cup Sour Cream3 cups Grated Monterey Jack Cheese, More To Taste2 Tablespoons Minced Parsley Salt As Needed Preparation Instructions
In a large pot, fry the bacon pieces over medium-high heat until crisp. Remove the bits from the pan and drain on a paper towel. Pour off the grease and return the pan to stove, leaving the bacon bits to the side for now.
Add onions and cook over medium-high heat for 3-4 minutes. Add cauliflower, sprinkle with Cajun spice and black pepper, and stir, cooking for another 3 to 4 minutes, or until the cauliflower starts turning golden brown. Pour in chicken broth, stir, and reduce the heat to simmer. Cook for 15 minutes. After that time, you can use an immersion blender to puree slightly or all the way if you prefer. (Or use a regular blender; just don't fill too full.)
In a separate saucepan or skillet, melt the butter. Sprinkle in the flour and whisk to form a paste. Pour in the milk, then continue cooking until it becomes thick. Remove from the heat and stir in the half and half.
Pour the white sauce into the soup. Turn the heat to medium-high and bring back to a boil for 3-5 minutes. Reduce the heat to low and stir in the sour cream and cheese until fully melted. Stir in the parsley.
Taste and adjust seasonings. Serve with a little extra cheese, a sprinkle of bacon, and a sprinkle of parsley.
Posted by Ree | The Pioneer Woman on October 20 2014

October 15, 2014
Self-Rising Biscuits
 This is a very old, very easy biscuit recipe for those times you don’t have a second to waste. They’re sometimes called Southern Biscuits, sometimes called Southern Buttermilk Biscuits, sometimes called 3-Ingredient Biscuits (even though, if you add salt, there are four!)…but I know them as Self-Rising Biscuits, because self-rising flour is, of course, the star of the show.
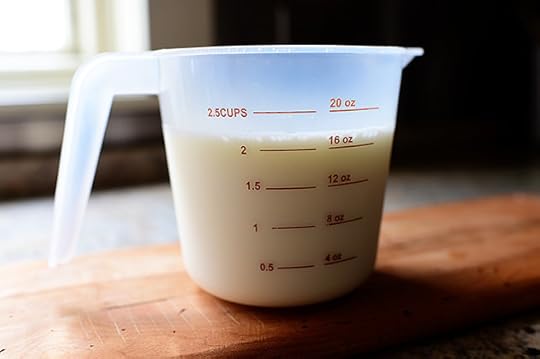 Now, the original recipe calls for buttermilk, but of course, I never have any buttermilk in my fridge. So I made my own by measuring close to the amount of milk I needed…
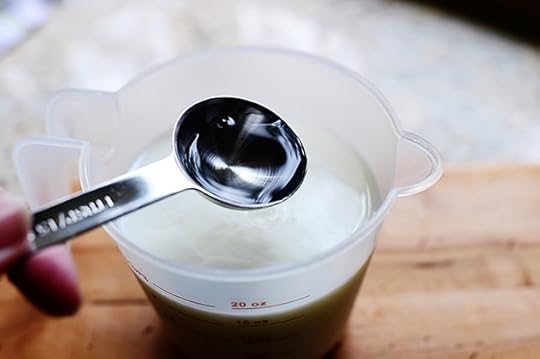 Adding white vinegar…
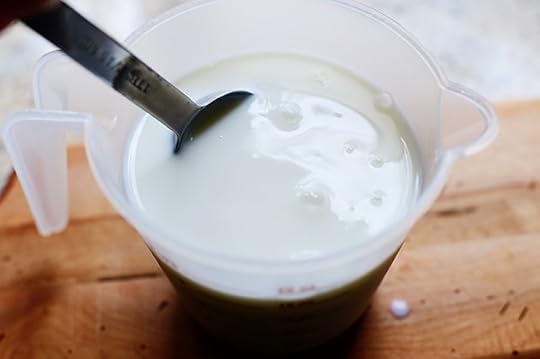 Stirring it together, and letting it sit.
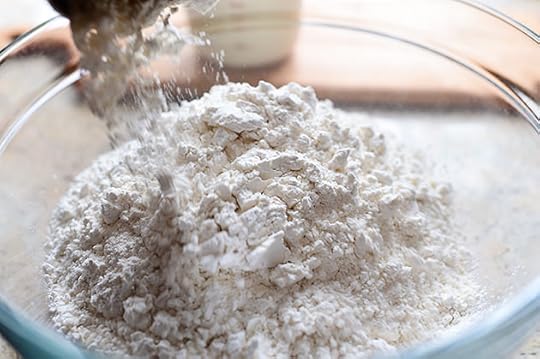 The simplicity of the dry ingredients is what makes this biscuit recipe such a winner: It’s just self-rising flour…
 And salt!
Important Note: If you wind up using cold salted butter instead of shortening or lard (see below), you can either omit the salt entirely or just add about 1/2 teaspoon instead.
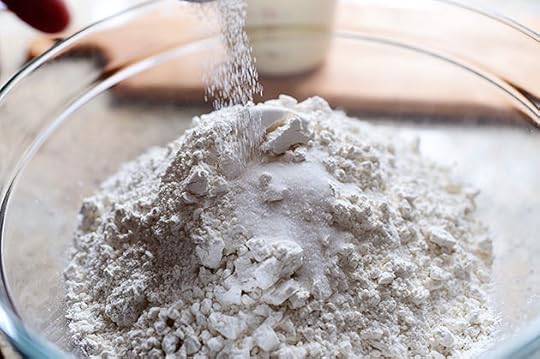
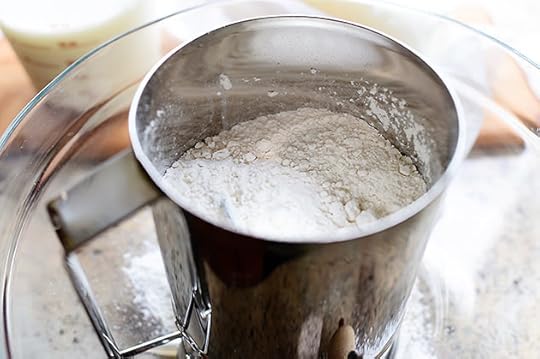 Just scoop it in batches into a sifter…
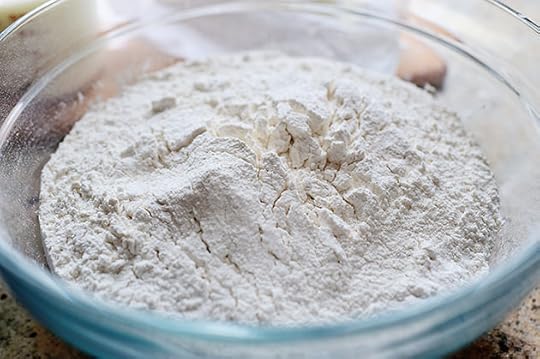 And sift it all together.
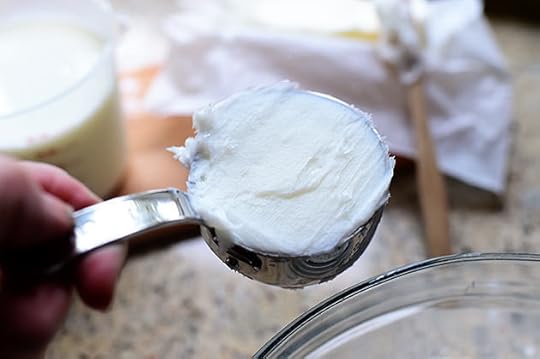 Now it’s time to play another round of Choose! Your! Fat! You can use cold butter (delicious), vegetable shortening (it’ll do), or—take a deep breath—lard. I’m using lard, but a mixture of lard and butter (or shortening and butter) is a good compromise, too.
(You can buy little tubs or boxes of lard at most supermarkets.)
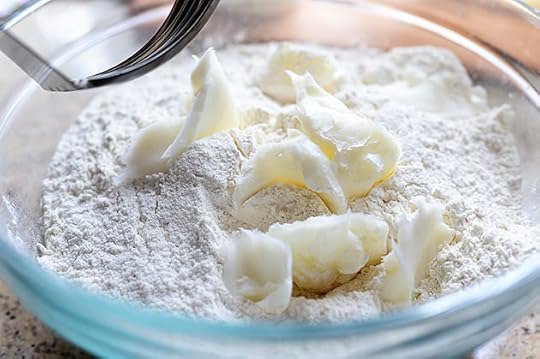 Throw in the fat…
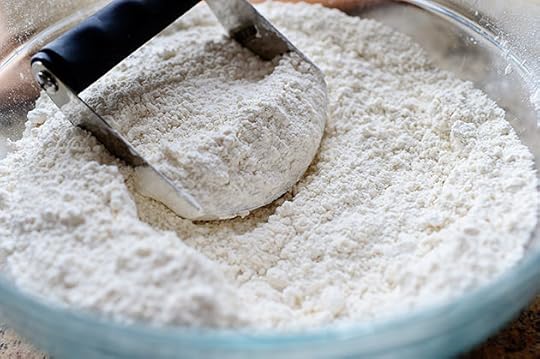 And use a pastry cutter to mix it all together.
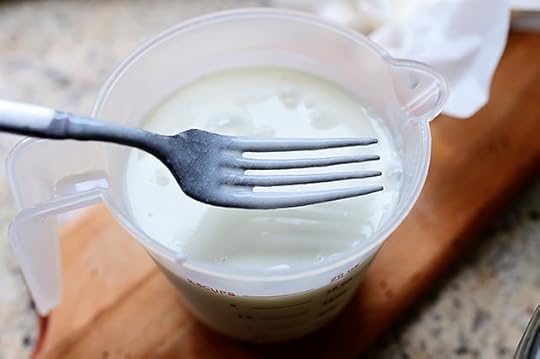 Now, after sitting for a few minutes, the milk has become buttermilk! It’s one of my favorite shortcuts. And actually, it isn’t even a shortcut. It takes longer than just pulling a jug of buttermilk out of the fridge. But then again, it takes longer for me to drive to dang town and get a dang gallon of dang buttermilk than it does for me to mix milk and vinegar together.
So as I was saying, it’s one of my favorite shortcuts.
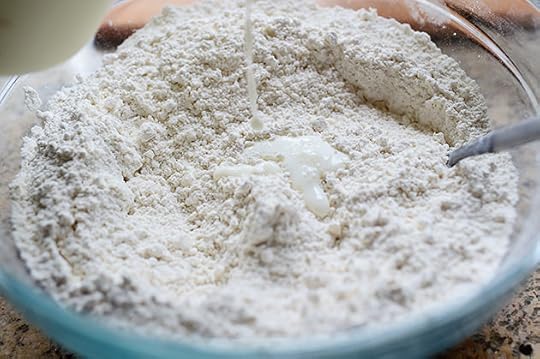 Just drizzle it in, slowly stirring…
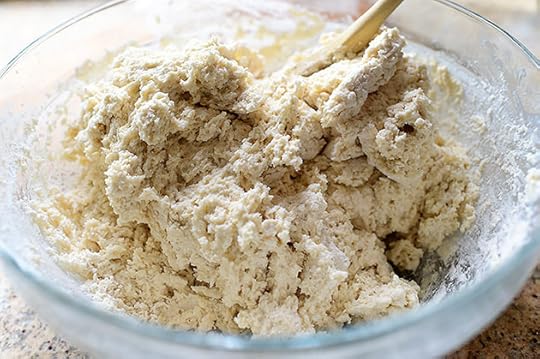 Until it all comes together. You’ll immediately see a little difference in the dough because of all the magic of the self-rising flour. So easy!
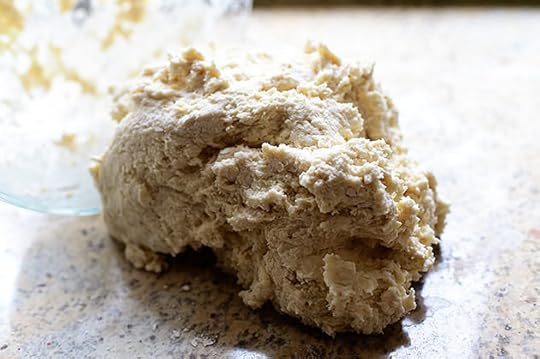 As soon as it comes together, turn out the dough onto a floured surface…
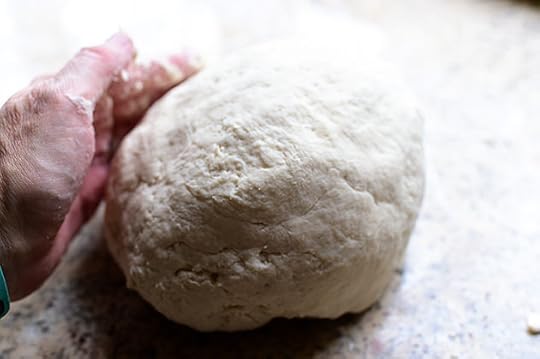 And knead it about 10 to 15 times (sprinkle on some flour if you need to) so it will come together in a ball.
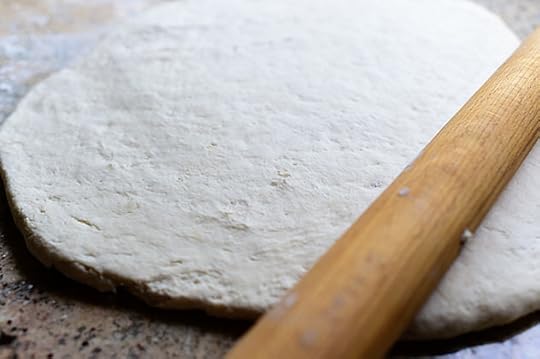 Then just roll it out! How thick you roll it really depends on how high you want the biscuits; they will rise pretty rapidly in the oven, so if you cut them too thick, they might be a little too high! Too thin, though, and you’ll stunt their growth. So about 1/3 to 1/2 inch is probably good!
 I used a mini cutter, but of course, you can do any size of biscuit you want.
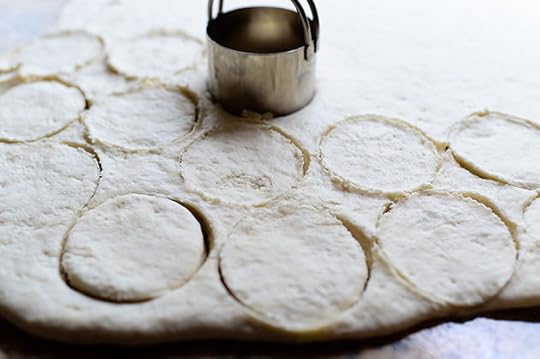 Just cut them as close together as you can…
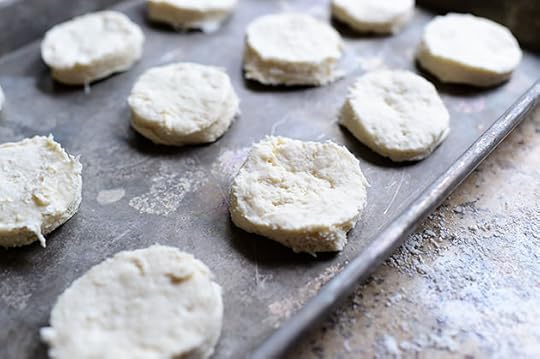 And get them onto a pan.
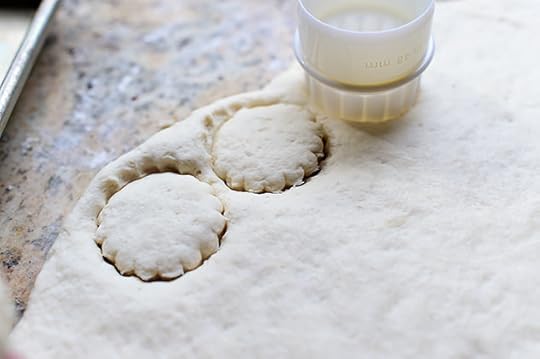 I also used a fluted cutter, just for kicks.
 Cute!
Cute!
They go into a really hot oven—about 475—and don’t take long to bake, of course. How long they bake depends entirely on the size of the biscuits, so start at about 8 to 10 minutes for mini biscuits and work your way up from there.
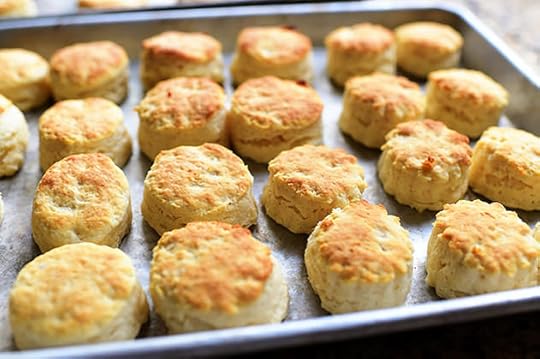
 Aren’t they lovely?
But just one thing…
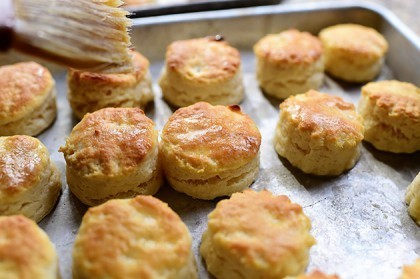
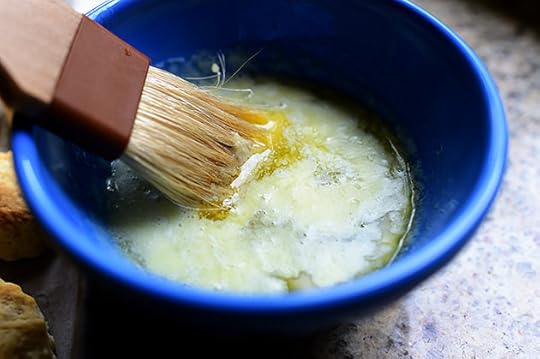 They are begging for melted butter.
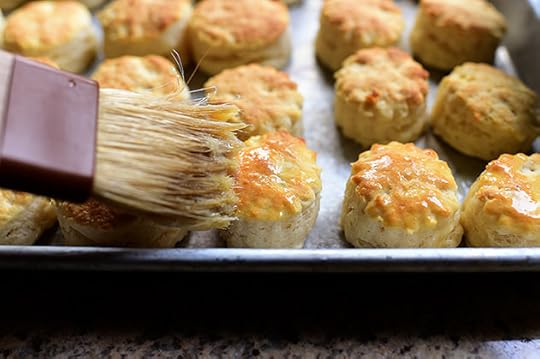 Just slather the tops generously; this is not the time to practice restraint!
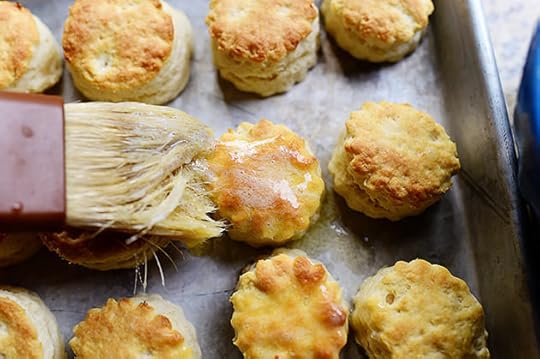 Oh, my dear goodness. So phenomenally easy and so delicious. If you need biscuits in a hurry, this recipe is the way to go!
Here’s the handy dandy printable.
.recipe-actions {
position: relative;
z-index: 2;
}
#pdf-popover {
background: rgba(255,255,255,.9);
border: 1px solid #efeeed;
color: #6e5c3a;
display: none;
font-family: Helvetica, Arial, sans-serif;
right: 20px;
margin: 2px;
padding: 54px 20px 7px 10px;
position: absolute;
top: 0;
width: 380px;
z-index: 10;
}
#pdf-popover form {
margin: 0;
}
#pdf-popover h4 {
background: #b15818;
color: #fff;
font-family: Helvetica, Arial, sans-serif;
font-size: 20px;
font-weight: normal;
left: 3px;
margin: 0;
position: absolute;
padding: 6px 12px;
right: 3px;
top: 3px;
}
#pdf-popover legend {
font-family: Helvetica, Arial, sans-serif;
font-size: 120%;
font-weight: bold;
margin-bottom: 2px;
margin-left: 10px;
text-transform: uppercase;
}
#pdf-popover fieldset {
margin-bottom: 15px;
}
#pdf-popover input[type="checkbox"] {
height: 14px;
margin: 2px 0 10px 10px;
padding-left: 14px;
position: relative;
visibility: visible;
width: 14px;
}
#pdf-popover input[type="checkbox"],
#pdf-popover input[type="radio"] {
margin-left: 10px;
}
#pdf-popover .close {
background: #b15818;
color: #FFFFFF;
cursor: pointer;
height: 35px;
font-size: 16px;
font-weight: bold;
line-height: 26px;
position: absolute;
right: 3px;
text-align: center;
top: 3px;
width: 25px;
z-index: 1;
}
#pdf-popover .button {
background-color: #b15818;
border: 0;
color: #fff;
cursor: pointer;
font-family: Helvetica, Arial, sans-serif;
margin-left: 10px;
padding: 8px 10px;
text-transform: uppercase;
}
x
Print Options
Page size
Letter
3x5
4x6
Text Size
Small
Medium
Large
Content
Include description
Include prep time, etc.
Show image
Recipe
Self-Rising Biscuits
Prep Time: 10 Minutes
Cook Time: 10 Minutes
Difficulty: Easy
Servings: 24
 Print Recipe
Ingredients
2-1/3 cups Whole Milk3 Tablespoons White Distilled Vinegar6 cups Self-rising Flour, Plus More For Kneading1-1/2 teaspoon Salt3/4 cups Lard (OR Butter OR Shortening OR A Combination) Melted Salted Butter, For Brushing Preparation Instructions
(Important note: You may substitute 2 1/2 cups buttermilk for the milk/vinegar mixture.)
(Important note #2: If you use salted butter instead of shortening/lard, decrease the amount of salt you add.)
Preheat the oven to 475 F.
In a measuring pitcher, combine milk and vinegar. Stir together and set aside for 10 minutes. Note: You can use 2 1/2 cups buttermilk instead of the milk and vinegar if you have some on hand.
In a large bowl sift together the flour and salt. Use a pastry cutter to cut in the lard (or butter or shortening or both) until the mixture resembles coarse crumbs.
Pour the wet ingredients into the dry ingredients, stirring gently with a fork or wooden spoon until it all comes together. Flour the surface, then turn out the dough and knead 10-15 times, adding a little flour so it's less sticky.
Roll out dough to 1/3 to 1/2 inch thick and use a biscuit cutter to cut medium to small circles. Place on a baking sheet 1/2 inch apart and bake for approximately 10 minutes, or until golden brown on top. Remove from oven and immediately brush on melted butter. To die for!
***Baking time will vary depending on the size of the biscuit cutter you use. I made mini biscuits, which took about 9 to 10 minutes. Larger biscuits will take longer, so keep an eye on them as they bake.
Posted by Ree | The Pioneer Woman on October 15 2014

October 13, 2014
Knife + Cutting Board Giveaway (Winners!)
The winners of the knives and cutting boards are…
#6414 Tammy L. “Family time!”
#36763 Marylu: “I went to the Kansas City Renaissance Faire last weekend…what a great time!”
#50002 Jill: “Went to a wedding and saw lots of old friends.”
Congratulations, winners! Contact prizes@thepioneerwoman.com to claim your prizes.
 Today, because it’s Monday, because it’s pouring down rain on the ranch, and because I love ya…
 I’m giving away three (3) of these Wusthof Nakiri knives (my favorite knife in the world)…
 Along with a beautiful, fabulously useful John Boos end-grain maple cutting board. You will fall madly in love with this board—it’ll become your best friend, your constant companion, and you’ll love it more the more you use it. It’s as practical as it is beautiful.
This knife and this cutting board will take you far in life! Er…in the kitchen.
To enter, just shout out what you did over the weekend in the Comments section of this post—whether you climbed Mount Everest or stayed in and read a book.
Winners will be selected at random and announced Tuesday night.
Good luck!
Giveaway sponsored by Pioneer Woman.
Winners have been announced and comments are closed.

Knife + Cutting Board Giveaway!
Today, because it’s Monday, because it’s pouring down rain on the ranch, and because I love ya…
I’m giving away three (3) of these Wusthof Nakiri knives (my favorite knife in the world)…
Along with a beautiful, fabulously useful John Boos end-grain maple cutting board. You will fall madly in love with this board—it’ll become your best friend, your constant companion, and you’ll love it more the more you use it. It’s as practical as it is beautiful.
This knife and this cutting board will take you far in life! Er…in the kitchen.
To enter, just shout out what you did over the weekend in the Comments section of this post—whether you climbed Mount Everest or stayed in and read a book.
Winners will be selected at random and announced Tuesday night.
Good luck!
Giveaway sponsored by Pioneer Woman.
Ree Drummond's Blog

- Ree Drummond's profile
- 2017 followers

