
Ree Drummond's Blog, page 27
August 12, 2014
Pesto, Tomato, and Mozzarella Sandwich
 I returned home from Colorado on Sunday to find that my garden, in the week I’d been gone, had gone berserk. The Oklahoma heat had fully set in, which made my peppers, tomatoes, and other full-sun plants very, very happy. But nothing—nothing—went as crazy while I was gone as my basil. It’s huge, it’s abundant, and when I saw it, I knew that I needed to spend time on Monday making pesto. In fact, I could probably make a few batches every day this week and still have plenty of basil to last me the rest of the summer.
Translation: I am a happy, happy woman. I’ve had bad basil years in the past, but this bumper crop is completely erasing those dark memories.
Here’s how I made my pesto…and the glorious sandwich that followed! It was utterly delicious, I’ll probably have one for lunch again today.
 First, to make the pesto, I removed a whole bunch of basil leaves from the stalks.
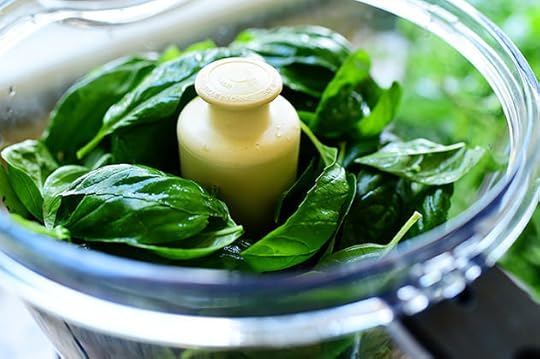 And filled the bowl of the food processor with them. I’d say probably about 5-6 cups of leaves…possibly more! (I didn’t measure.)
 Now, pesto traditionally uses pine nuts for flavor and texture, but my sister Betsy was visiting and she’s allergic to pine nuts! She’s also allergic to walnuts. She’s also allergic to pecans. So I grabbed the package of raw almonds I’d been snacking on over the past week…
 Chopped some up…
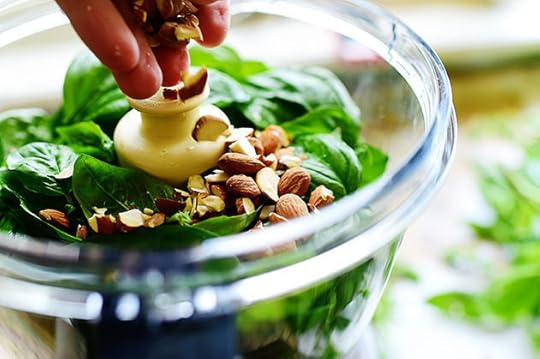 And threw them in with the basil.
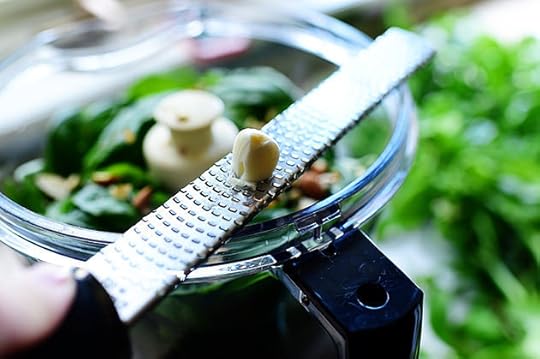 I wanted to add a little garlic without there being big chunks in the pesto, so I grated a clove in with a microplane zester.
 It’s my favorite trick these days!
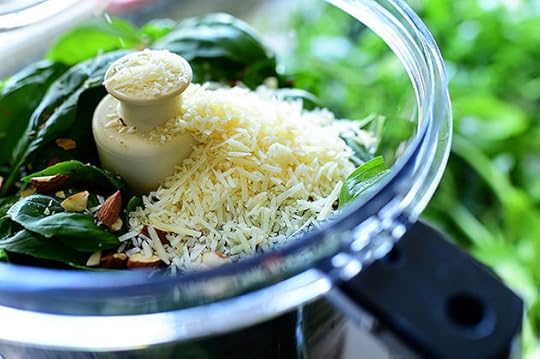 Then, for more flavor and texture, some shredded Parmesan cheese. (This is the packaged stuff from the grocery store! It works, baby.)
 And finally…just a little bit of salt.
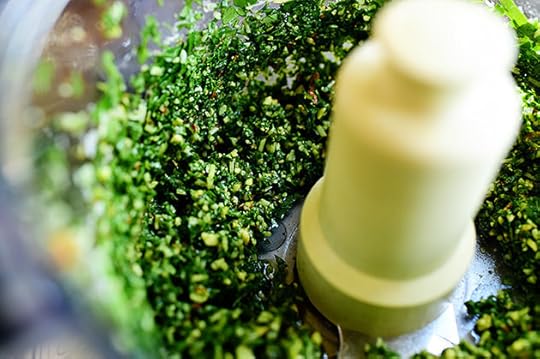
 Now it’s just about processing all the ingredients while you slowly drizzle in olive oil. And you’d think it wouldn’t take very much…
 But this is what it looks like after 1/2 cup. Not there yet! Too dry.
 This is after a cup of olive oil has been added. Much more like it!
 And then I added a tiny bit more. Making pesto is really by feel; you just add olive oil until the consistency’s right, then you taste and add more of what it needs.
This needed zero tweaking; it was yummy!
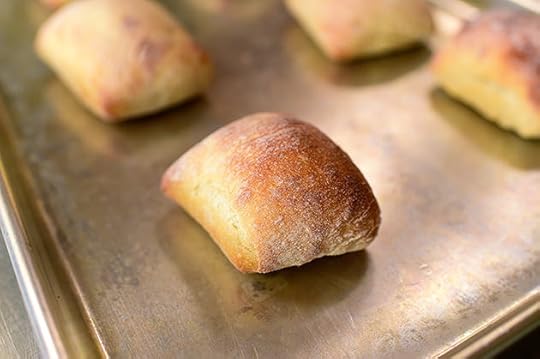 Meanwhile, for the sandwich, I put some ciabatta heat-and-serve rolls on a baking sheet and baked them for about 10 minutes, until they were nice and crispy.
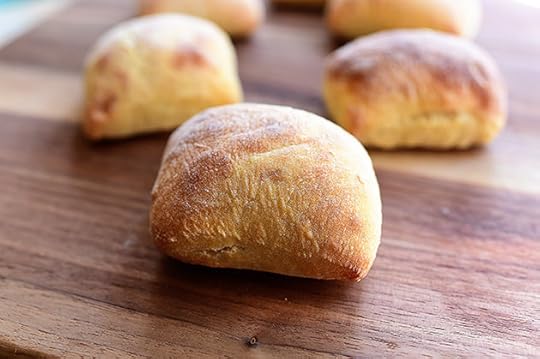 Then I set them aside to cool completely.
 When it was time to build the sandwich, I sliced up a ball of fresh mozzarella…
 As well as a big, ripe tomato. Thick slices are the key!
 Then I grabbed the luscious, verdant basil…
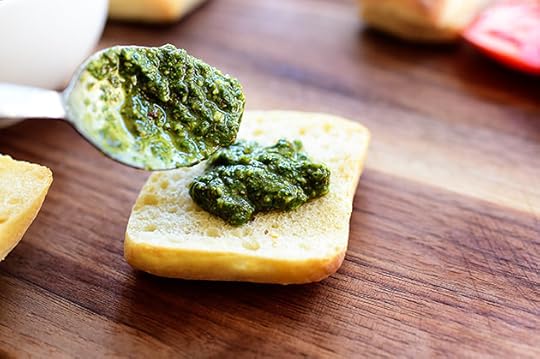 Spooned some on each half of the roll…
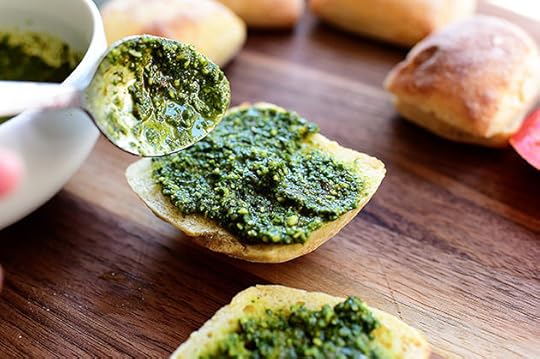 And spread it into an even layer.
I’m not afraid to lay on the pesto! That’s where the flavor is, baby.
 I laid a tomato slice on the bottom half…
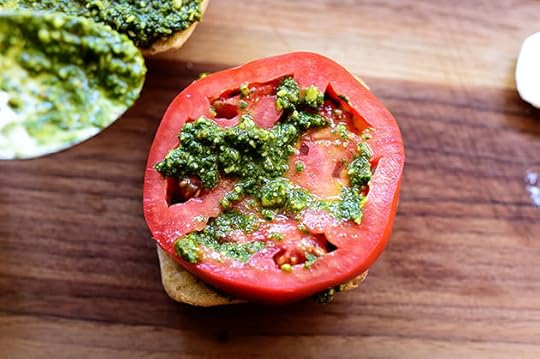 Then, because I’m a pesto freakazoid, I smeared on a little more pesto.
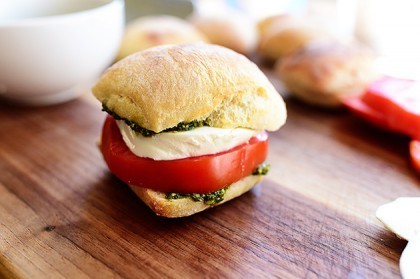
 Next: a thick slice of mozzarella…
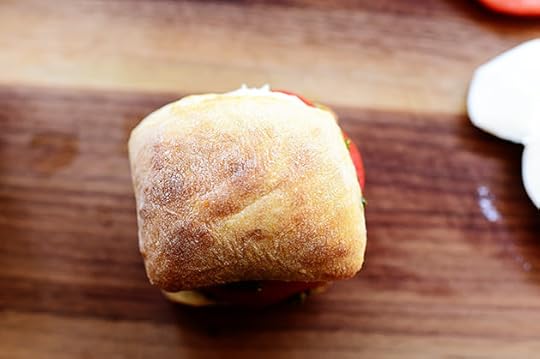 And the top half of the bun.
 Divine!
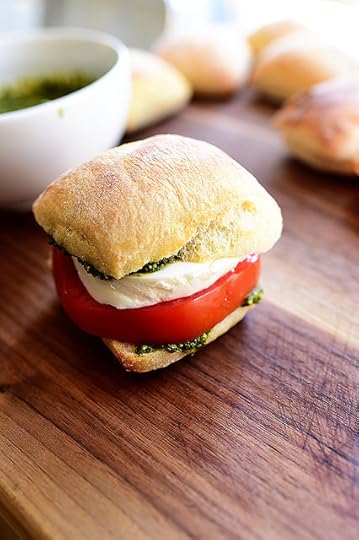 From here, you can go ahead and chow down…or you can press this in a panini maker for more of a grilled cheese approach.
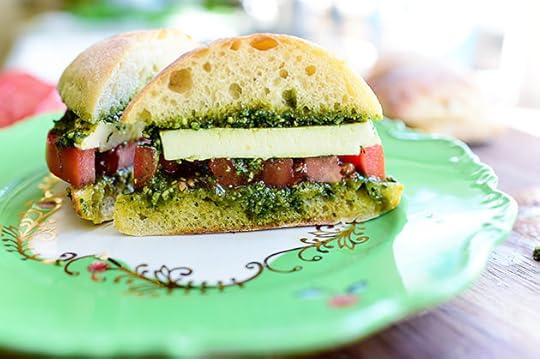 I like it cold…just like this. The pesto seeps into the bread, the juices of the tomato seep into the bread…
And, well…it’s pretty much an otherworldly experience. So delicious, so fresh, so flavorful! You’ll love it.
Here’s the handy dandy printable.
Recipe
Pesto, Tomato, and Mozzarella Sandwich
Prep Time: 15 Minutes
Cook Time:
Difficulty: Easy
Servings: 4
Print Recipe
Ingredients
6 cups Basil Leaves (more If Needed!)1/4 cup Rougly Chopped Raw Almonds (can Sub Pine Nuts, Walnuts, Or Pecans)1/3 cup Shredded Parmesan Cheese1 clove Garlic, Peeled1/4 teaspoon Salt1 cup Olive Oil (more If Needed For Consistency)4 whole Ciabatta Rolls, Crisped In Oven According To Package Directions, Then Cooled1 whole Large Tomato, Sliced Thick4 ounces, weight Fresh Mozzarella Preparation Instructions
To make the pesto, add the basil, almonds, Parmesan, and salt to the bowl of a food processor or a blender. Use a microplane zester to grate in the garlic cloves (or use a garlic press.) Turn the machine on and drizzle in the olive oil until totally incorporated. Check the consistency of the basil, then add either more olive oil or more basil leaves, depending on what it needs. Set aside or refrigerate until needed.
To build the sandwich, spread some pesto on both halves of each ciabatta roll. Lay a thick tomato slice on the bottom halves, followed by a thick slice of mozzarella. Top with the other ciabatta halves and serve immediately!
* Can press sandwiches in a panini press if preferred!
Posted by Ree | The Pioneer Woman on August 12 2014


August 8, 2014
Berry, Berry Good!
I’ll be headed home from Colorado Sunday, and I’ll have new recipes to share here on P-Widdy Cooks next week!
Meantime, while we still have a little summertime left, I wanted to share some of my favorite berry recipes here on The Pioneer Woman Cooks. If you have berries on the brain…these links will make you happy. Berry, berry happy.
(Click on the photos or links to go to the individual step-by-steps!)
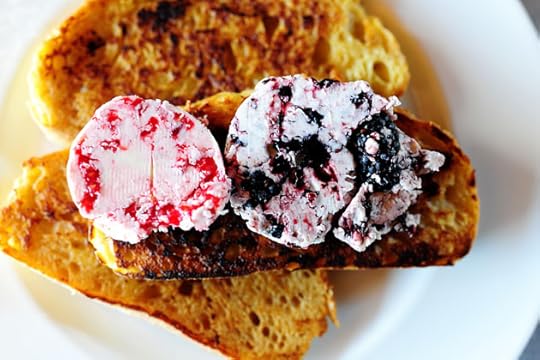 French Toast with Berry Butter. Beautiful and tasty!
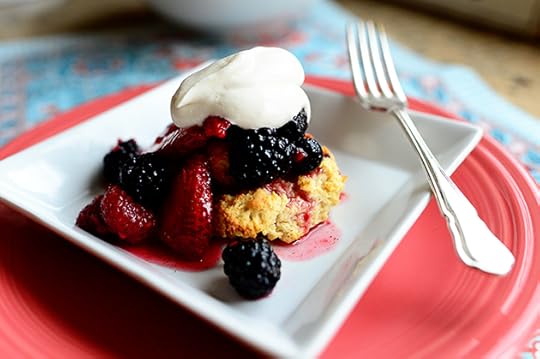 Mixed Berry Shortcake. Syrupy berries on a sweet biscuit. Perfection!
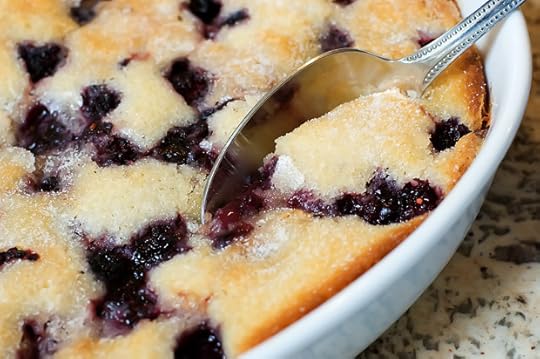 Blackberry Cobbler. Such a cinch, such a delight!
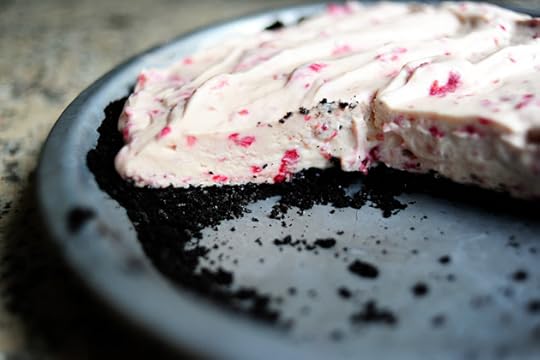 Raspberry Cream Pie. Another easy dessert that’s perfect for summer.
 Lemon Blueberry Pancakes. A favorite ’round these parts!
 Another pancake/berry option: Cornmeal Pancakes with luscious blackberry syrup. To die for!
 Grilled Chicken & Strawberry Wrap. Berries don’t have to be just for desserts!
 Ooooh. How about Blackberry Margaritas this weekend? Come to mama!
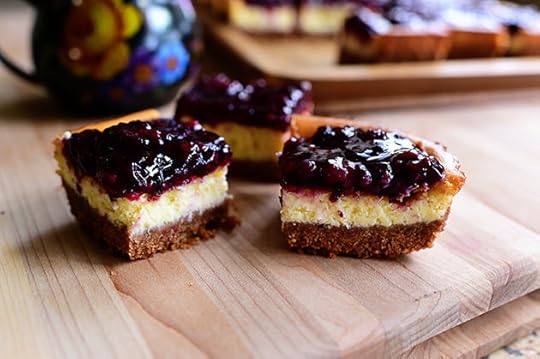 Blackberry Cheesecake Squares. Positively delicious. Try them ASAP!
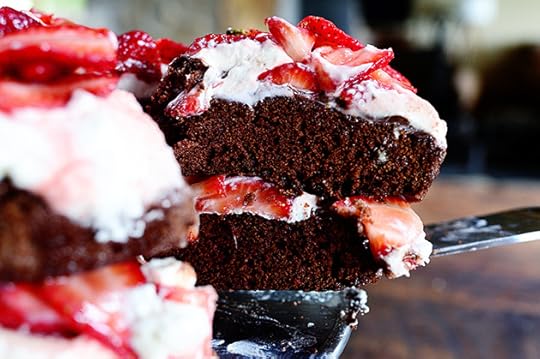 Chocolate Strawberry Nutella Cake. If you’ve got a birthday in your household anytime soon…this is the cake to make!
 And, on a more recent note, these super easy, exceedingly lovely Mini Blueberry Galettes.
Hope you find something berrylicious to make this weekend!
Lots of love,
P-Widdy-Dub-Diddy

August 5, 2014
My White Rectangular Casserole Dishes (Winners!)
The winners of the sets of casserole dishes are:
#5537 Sandy A: “Cinnamon rolls.”
#14584 Maria R: “Baked ziti and Carmel covered brownies!! So delicious.”
#47316 Nikki: “Stuffed shells.”
Congratulations, winners! Contact prizes@thepioneerwoman.com to claim your dishes. I know you’ll love ‘em.
 I use these white casserole dishes all, all, all, all, all, all the time.
Have I mentioned all the time?
 I love them, I adore them, and they’re tough, sturdy, and strong.
And food looks purty in ‘em.
Here are just a couple of examples of the things I like to make in mine!
 Cinnamon Raisin Baked French Toast. Yum.
 Baked Ziti. Swoon.
I could go on and on!
But I’d better get down to business.
GIVEAWAY
Today, because I love ya, I’m giving away three sets of 3 Revol Belle Cuisine Rectangular Baking Dishes: one each of small, medium, and large!
TO ENTER
To enter the giveaway, just answer the following question in the Comments section of this post:
“What is your favorite dish that’s made in a casserole pan?”
When you think about this…the possibilities are endless! Lasagna, Baked Ziti, Chicken Spaghetti, etc., are obvious choices…but what about Baked French Toast? Peach Cobbler?
Just shout out your favorite casserole dish (savory or sweet) and you’re automatically entered to win one of the baking dish sets.
THE RULES
One entry per person, please.
Winners will be announced Wednesday.
Good luck!
Giveaway sponsored by Pioneer Woman.

My White Rectangular Casserole Dishes
I use these white casserole dishes all, all, all, all, all, all the time.
Have I mentioned all the time?
I love them, I adore them, and they’re tough, sturdy, and strong.
And food looks purty in ‘em.
Here are just a couple of examples of the things I like to make in mine!
Cinnamon Raisin Baked French Toast. Yum.
Baked Ziti. Swoon.
I could go on and on!
But I’d better get down to business.
GIVEAWAY
Today, because I love ya, I’m giving away three sets of 3 Revol Belle Cuisine Rectangular Baking Dishes: one each of small, medium, and large!
TO ENTER
To enter the giveaway, just answer the following question in the Comments section of this post:
“What is your favorite dish that’s made in a casserole pan?”
When you think about this…the possibilities are endless! Lasagna, Baked Ziti, Chicken Spaghetti, etc., are obvious choices…but what about Baked French Toast? Peach Cobbler?
Just shout out your favorite casserole dish (savory or sweet) and you’re automatically entered to win one of the baking dish sets.
THE RULES
One entry per person, please.
Winners will be announced Wednesday.
Good luck!
Giveaway sponsored by Pioneer Woman.
July 31, 2014
Le Creuset Giveaway! (Winners)
The winners of the Le Creuset sets are…
#4404 Carolyn: “C. S. Lewis…”
#5047 Whit H: “I would have dinner with my Papa.”
#21765 Erin D: “Definitely Jesus Christ! Although I would probably be too overwhelmed by emotion to actually eat anything…”
Congrats, winners! Contact prizes@thepioneerwoman.com to claim your cookware sets!
 Today, because I love ya, I’m giving away 3 of these sets of Le Creuset cookware in this gorgeous “Caribbean” blue color.
Included in the set are a 3 1/2 quart French oven, a 1 3/4 quart saucepan, and a 9-inch skillet. Good stuff, Maynard!
TO ENTER
To enter the giveaway, just answer the following question in the Comments section of this post:
“If you could have dinner tonight with one person from throughout the history of time, whom would it be?”
If you could choose any dinner guest in the universe, whom would you select? Would it be a famous figure in history? Would it be someone in your family you never had a chance to know? Someone you always wanted to meet? Just shout out your ideal dinner date and you’re automatically entered to win the Le Creuset set.
THE RULES
One entry per person, please
Winners will be announced Friday.
Good luck!
Giveaway sponsored by Pioneer Woman.

Le Creuset Giveaway!
Today, because I love ya, I’m giving away 3 of these sets of Le Creuset cookware in this gorgeous “Caribbean” blue color.
Included in the set are a 3 1/2 quart French oven, a 1 3/4 quart saucepan, and a 9-inch skillet. Good stuff, Maynard!
TO ENTER
To enter the giveaway, just answer the following question in the Comments section of this post:
“If you could have dinner tonight with one person from throughout the history of time, whom would it be?”
If you could choose any dinner guest in the universe, whom would you select? Would it be a famous figure in history? Would it be someone in your family you never had a chance to know? Someone you always wanted to meet? Just shout out your ideal dinner date and you’re automatically entered to win the Le Creuset set.
THE RULES
One entry per person, please
Winners will be announced Friday.
Good luck!
Giveaway sponsored by Pioneer Woman.
July 28, 2014
Mini Blueberry Galettes
 So here’s the torture I’m faced with anytime I have to figure out what to call a recipe: Basically, what these are are mini flat blueberry pies. But when I typed “Mini Flat Blueberry Pies” I didn’t really think it rolled off the tongue. So then I typed “Mini Blueberry Pies” and I thought that was nice and simple, especially because I have a hangup about not wanting to create overly long recipe titles (i.e. “Miniature Flat Blueberry Pies with Fresh Lemon Zest, Sweetened Whipped Cream and Mint”) but the problem is that “Mini Blueberry Pies” isn’t exactly accurate. To me, a mini blueberry pie would be a pie made in a muffin tin or a ramekin—while a mini flat blueberry pie would be just that: a mini flat blueberry pie.
So then we’re back to square one: I don’t like the way “Mini Flat Blueberry Pies” sounds. Or reads. Or walks. Or talks.
So then I decided to rearrange the words. Mini Blueberry Flat Pies. Flat Mini Blueberry Pies. Pie Mini Flat Blueberry. None of them clicked for me.
So in the end, I decided to call them Mini Blueberry Galettes, since a galette is basically a flat pie, and since that title uses only three words and helps me sleep more soundly at night. Except “galette” isn’t actually a word I really like to use very often, because to me it’s so much easier just to say “flat pie.”
Be glad you don’t have to live in my head. It’s a complete mess in here.
Here’s the recipe for the miniature flat blueberry pastry pie galette things! They’re delightful…despite the mighty struggle it took for me to name them.
 First, make the blueberry mixture: Add blueberries to a bowl…
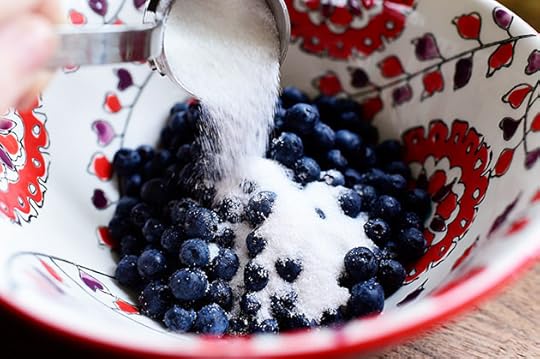 With 1/4 cup sugar. A good start, I’d say!
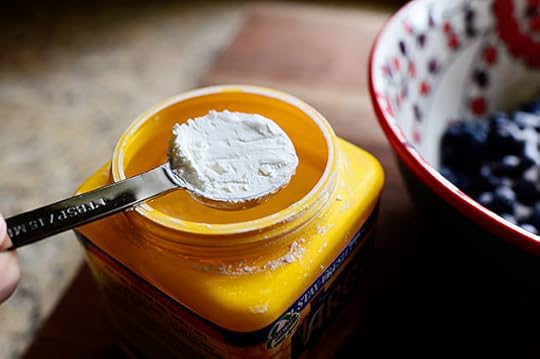 Now, the blueberry mixture needs a little help thickening up, so grab some cornstarch…
 And add that in.
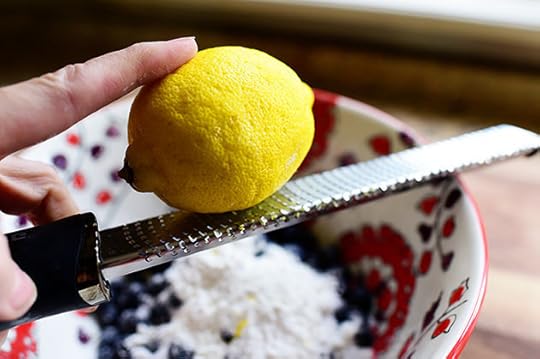 Next, grab a lemon and a zester. And yes, my index finger looks very weird laying very rigid and straight atop this lemon. But these are the maneuvers I have to execute in order to use one hand to take a photo of myself holding a lemon and a zester with the other hand.
The plight of a foodblogger. Between this and trying to figure out how to describe a recipe in three words or less, my blood pressure is through the roof!
Not really.
 Add the lemon zest…
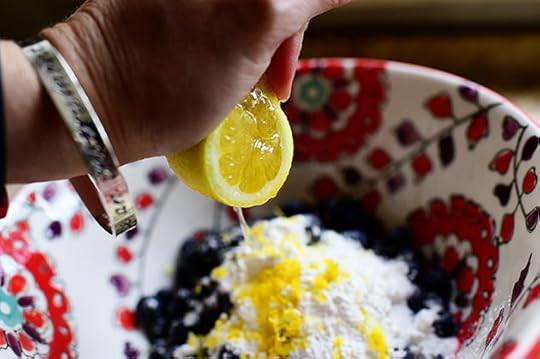 Then squeeze in the juice of half of it…
 And stir it around a bit.
 Then add a little vanilla for a bit more deliciousness…
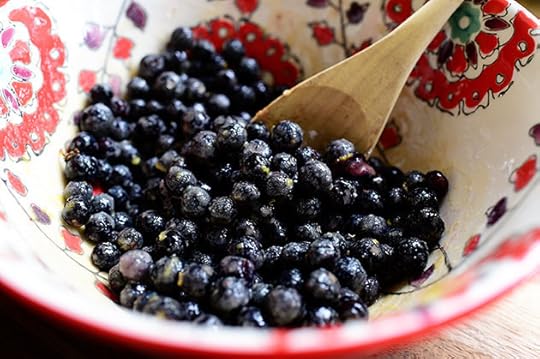 And stir the berries around until all the other ingredients are totally combined. Set this aside for a minute, and try with all your might not to eat any of the berries, because they’re exceedingly irresistible at this stage.
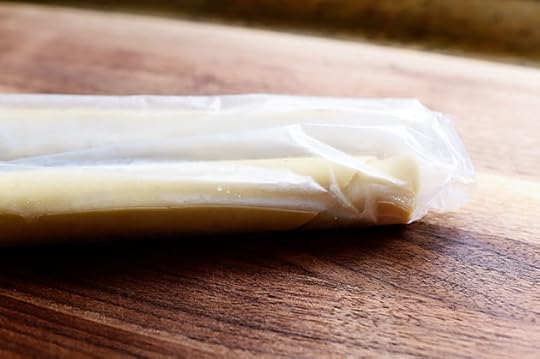 Okie dokie…pie crust purists, avert your eyes! And let me just say one thing: I actually very, very, very rarely use storebought pie crust. There’s nothing terribly wrong with it, but I just find it easy to make homemade pie crust and the storebought stuff is never as flaky and rustic/homemade as the stuff you make yourself. But for some reason, the storebought stuff works really, really well with these mini flat pies. The dough holds together really well through all the folding over and fiddling, and besides that…it’s so darn quick!
So use your own crust if you’d like…but just for kicks, try it with the storebought stuff first! Take a walk on the wild side.
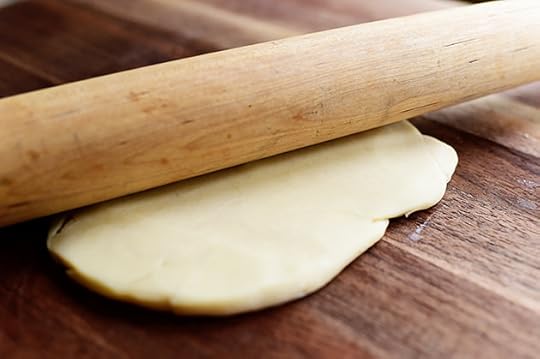
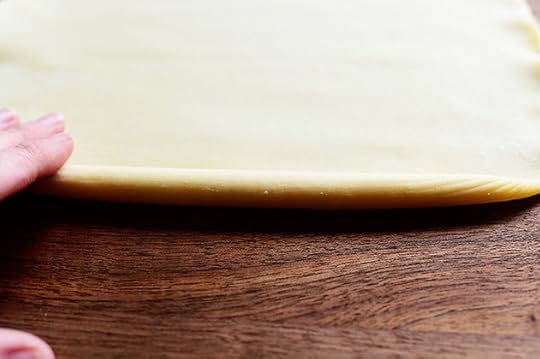 One at a time, roll out the two crusts. And by “roll out,” I do not mean fish the rolling pin out of your cabinet and use it to form a ball of dough into a flat disk. I mean place the roll on a surface and use your fingertips to roll it out.
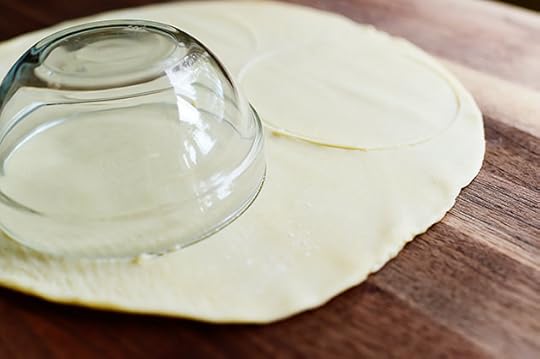
 Now, if you have a 5-inch round cutter, you can use it. Or you can just find a bowl with a 5-inch rim…
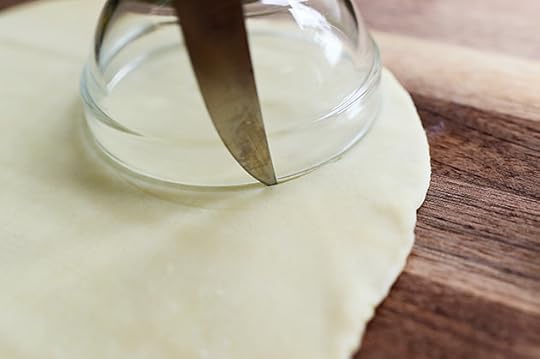 And use a sharp knife to cut around it.
 You should get three 5-inch cuts per round of dough (so, six total for the package.)
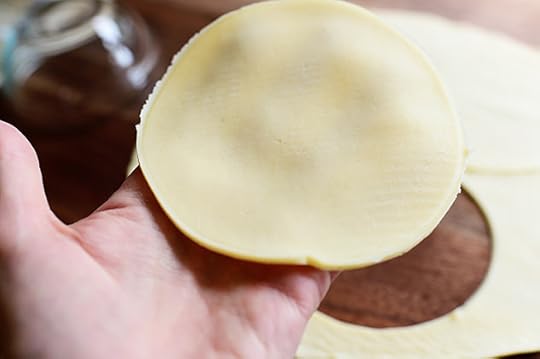 Then just lift up the circles…
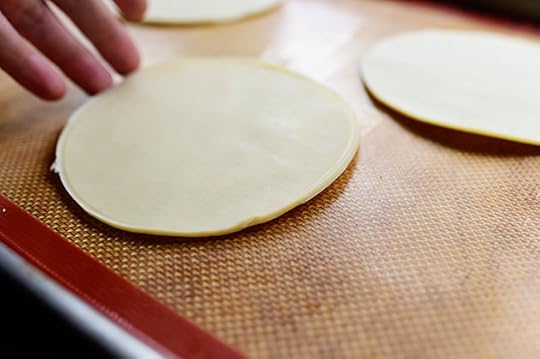 And place them on 2 baking sheets lined with baking mats.
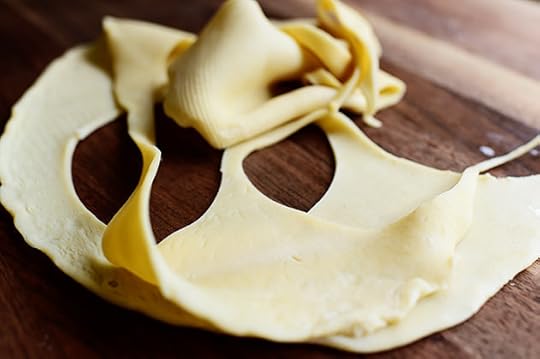 Now, you’ll have scraps left over…
 So you can roll it out and you’ll get two more circles out of the deal!
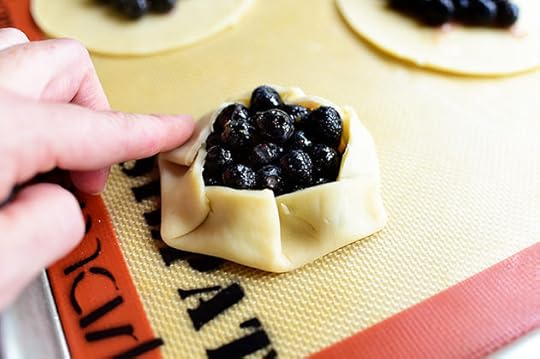
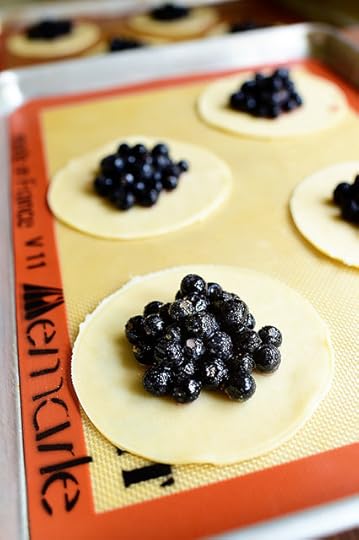 Use a 1/4 cup measure (and scantly fill it) to place the blueberries onto the center of each round. (Give the berries another stir before you measure so all the juices are distributed!)
 Then, one by one, fold the rim of the dough over toward the berries.
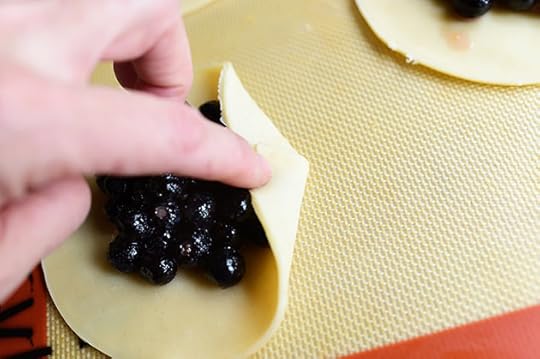 Fold up one little bit, the fold up the little bit next to it…
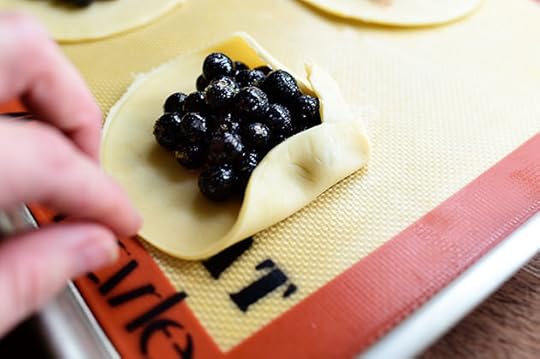 Then fold up the little bit next to that, pressing lightly as you go.
 Keep going until you’ve got all the dough folded up and you have a cute little mini flat pie.
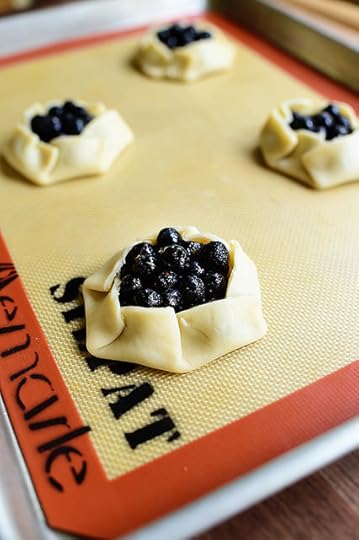 Adorable! Here’s one pan.
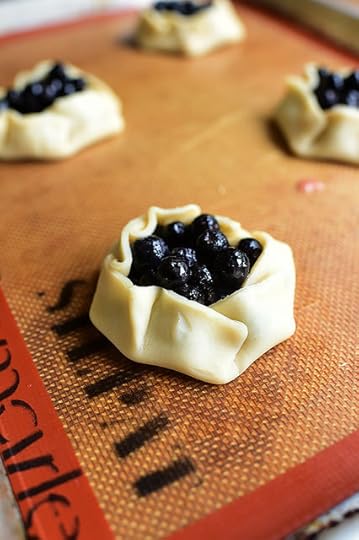 Here’s another pan.
 Now just mix an egg with a little water….
 Lightly brush the dough…
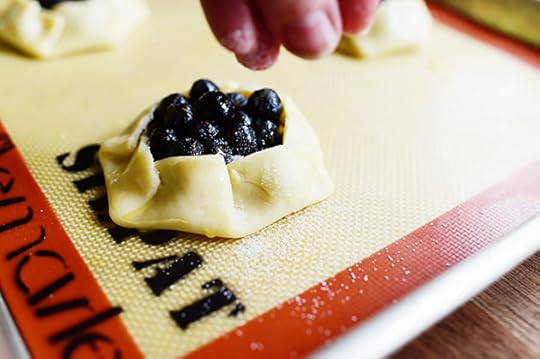 And sprinkle it lightly with sugar.
 The sugar just gives the crust a little pop of sweetness…and a little sparkle, too.
Now just pop the pans in the oven…
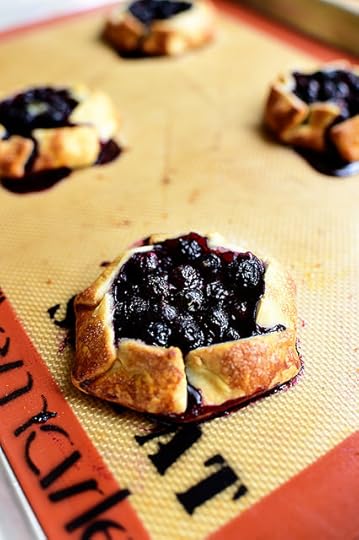 And bake ‘em until they’re golden and bubbly! And don’t be concerned about the natural juices that bubble up and wind up on the pan. It’s just a sign of the deliciousness to come.
 I let them cool for about 5 minutes on the baking sheets, then transferred them to a platter to cool slightly. (I don’t want them to stick to the pan, and because of the juices, I wanted to loosen them pretty quickly.)
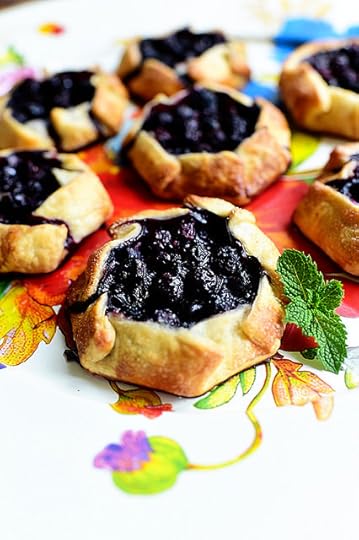 A little sprig of mint always makes everything purtier.
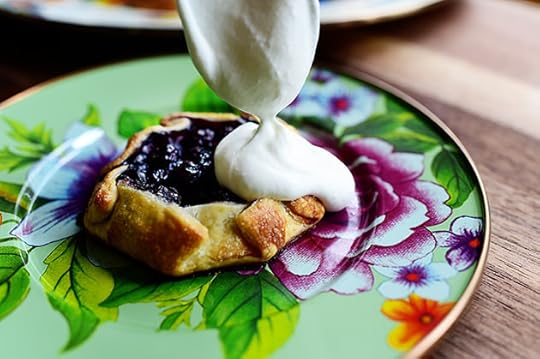 And so does a dollop of whipped cream!
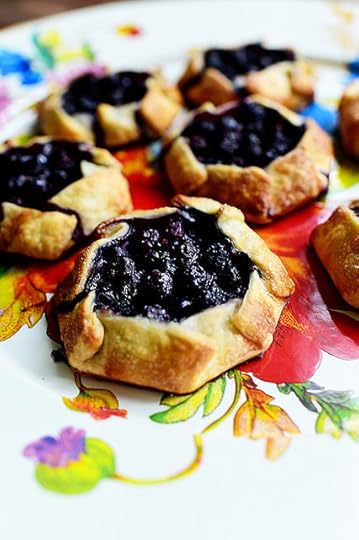
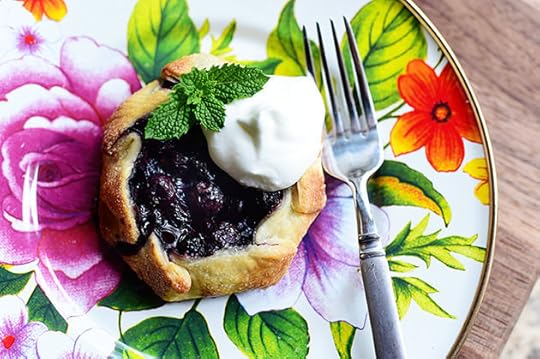 Mmmmm. So lovely! What I love about them is that they’re nice and compact, so you can have a nice sweet treat that isn’t overly huge or decadent. And they’re gorgeous enough for company…and, of course, such a cinch to make.
Here’s the handy dandy printable!
Recipe
Mini Blueberry Galettes
Prep Time: 10 Minutes
Cook Time:
Difficulty: Easy
Servings: 8

Print Recipe
Ingredients
1 package Storebought Pie Crust (2 Rounds Of Dough)2 cups Blueberries (generous)1/4 cup Sugar, Plus Extra For Sprinkling2 Tablespoons Cornstarch1 whole Lemon1 teaspoon Vanilla Extract Pinch Of Salt1 whole Egg1 Tablespoon Water Whipped Cream, For Serving Preparation Instructions
Preheat oven to 425 degrees.
Stir together blueberries, sugar, cornstarch, 1 teaspoon lemon zest, juice of half the lemon, vanilla, and salt in a bowl. Set it aside once it's all combined.
Unroll the two discs of dough. Using a 5-inch round pastry cutter (or you can trace a knife around a 5-inch bowl) cut three rounds of pastry from each disc. Re-roll the scraps and cut 2 more. Place them on 2 baking sheets lined with a baking mat or parchment (4 rounds each pan). Evenly distribute the blueberry mixture between the six discs (approximately 1/4 cup per round).
Gently fold the over the edges of each crust, folding the dough in on itself to create a small rim of crust.
Make an egg wash by beating together the egg and water. Brush edges of each pie with the egg wash and sprinkle the crust with sugar.
Bake for 15 minutes until golden and bubbly. Remove from the oven and allow pies to sit on the pan (they will leak a little juice while baking, but this is fine!) for 5 minutes. Remove to a platter and allow to cool.
Serve warm or at room temperature with a dollop of whipped cream. Divine!
Posted by Ree | The Pioneer Woman on July 28 2014

July 23, 2014
Panzanella
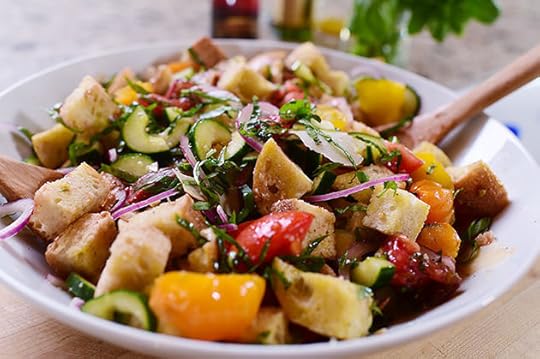 I made Panzanella this week for a segment on a future Food Network episode, and I was reminded once again just how much I love and adore it. In a nutshell, Panzanella is tomato-bread salad. I imagine it was originally created as a way to use up old, staling bread, as that is Panzanella’s key component. And I can’t remember the first time I ever tried it, but Panzanella has been one of my favorite delights for years and years. There’s just something special about it.
I happened to have my camera with me the other day when I was making it, so I snapped photos of the Panzanella here and there! The photos aren’t quite complete as they would be if I’d been all by my lonesome, but I think I got enough to illustrate the process.
Make Panzanella soon! With all the tomatoes and basil around, it’s definitely a summertime dish.
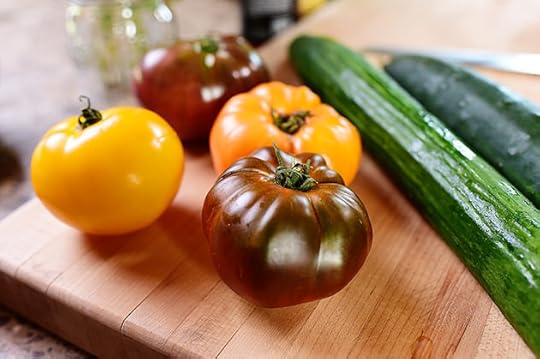 Start with an English cucumber and a few assorted tomatoes. These are heirlooms, and I would like to state from the record that they did not come from my garden. They came from the store. I haven’t had much luck growing heirlooms the last couple of years, but I still think they’re so weird and interesting.
Basically, you can use any tomato combination you want! Even if you just do a mix of red and yellow, it’ll still be lovely.
 Just cut the tomatoes into wedges…
 And throw them into a bowl.
 Halve and seed the cucumber, then slice it up and throw it into the bowl.
 Slice a red onion really thin, and throw those in, too! And you don’t have to slice them thinly if you like big, thick bites of raw onion in your life. Which I don’t. Which is why I slice raw onions really thin.
Thank you for listening.
 Next, throw in the bread!
And here’s the deal with the bread: Traditionally, it would be day-old, stale bread that naturally would have hardened a bit on its own. But bread never lasts that long in my house, so I hastened things along by cutting a crusty loaf of Italian bread into cubes, lightly drizzling it with olive oil, and crisping in a 275 degree oven for about 25 minutes or so. I did that well in advance and let the bread cool completely before throwing it in with the veggies.
 Now, toss all this together and set it aside for a sec.
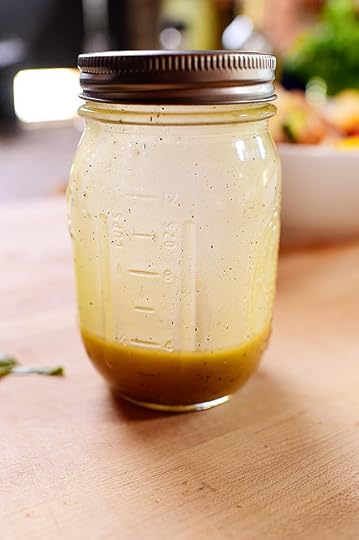 Whip up a quick vinaigrette: 1/4 cup olive oil, 1 tablespoon red wine vinegar, salt and pepper. Shake. Do the Hokey Pokey. Turn yourself about.
That’s what it’s all about.
(And you can use balsamic instead if you want to have that kind of flavor going on.)
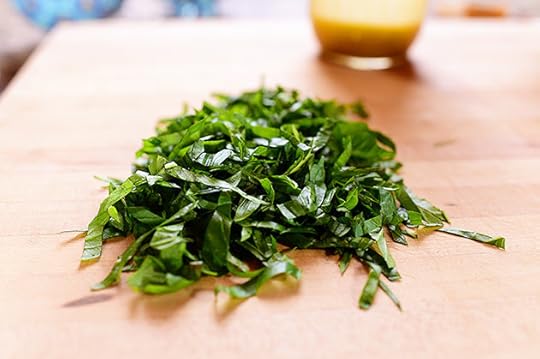 Next, chiffonade a WHOLE bunch of basil and toss it in. And I would like to state for the record that this basil is from my garden.
It’s a-comin’ out of my ears!
 Now just slowly drizzle in the dressing, tossing everything gently as you go. And I usually start with about 3/4 of the dressing first, then add more if I think it needs it.
 And now, this is the tough part: You must now summon the patience required to wait at least an hour to dive in. It’s tough. It’s difficult. It’s darn hard. But the salad needs to sit for a bit in order for the tomatoes to give off a little juice and the bread to soak up all the delicious goodness.
Important Note! Often I hear from folks who haven’t ever tried Panzanella that they’re worried about the bread being soggy. This isn’t the case! The idea is to use very crusty Italian bread that has some substance to it—it never gets soggy, it just gets moistened by the glorious dressing and the juices from the tomatoes.
I promise!
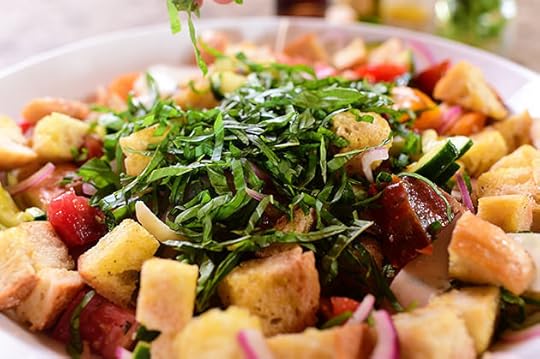 I wound up adding even more basil…
 And, because I was feeling ornery, some Parmesan shavings.
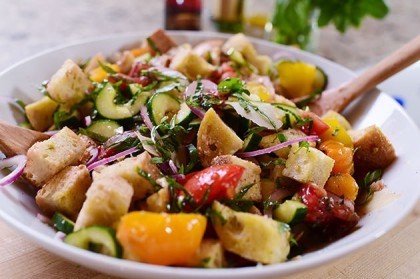
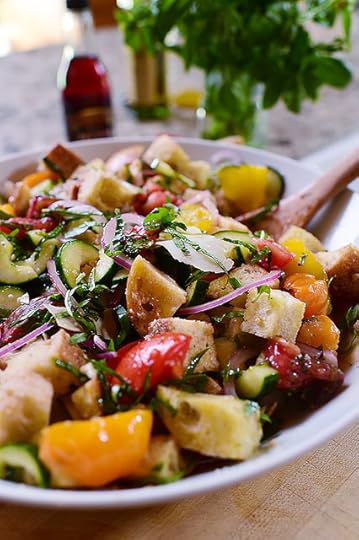 Lovely, gorgeous…and delicious! After I shot this recipe and the salad had sat a bit, we put it on the snack table with some bowls and forks, and it lasted approximately eleven seconds. Absolute deliciousness!
(Note: You can also check out Georgia Pellegrini‘s Tomato Bread Salad for a slightly different approach. Yum!)
Here’s the handy dandy printable.
Recipe
Panzanella
Prep Time: 10 Minutes
Cook Time: 20 Minutes
Difficulty: Easy
Servings: 8
Print Recipe
Ingredients
1 loaf Very Crusty Italian Bread1 whole English Cucumber, Halved, Seeded And Sliced6 whole Assorted Tomatoes, Cut Into Wedges1/2 whole Red Onion Very Thinly Sliced1/4 cup Olive Oil1 Tablespoon Red Wine Vinegar Salt And Pepper25 whole Basil Leaves, Chiffonade (more To Taste) Parmesan Shavings Olive Oil, For Drizzling Preparation Instructions
Preheat the oven to 275. Cut the bread into 1-inch cubes, arrange on a baking sheet, and drizzle lightly with olive oil. Place the pan in the oven for 20-25 minutes to slightly crisp (“stale”) the bread without toasting it. Remove and allow to cool.
In a large bowl, combine bread, cucumber, tomatoes, and onion. In a small jar, shake together the olive oil, vinegar, salt and pepper. Pour over the salad ingredients, tossing gently. Add basil and Parmesan shavings and toss again. Cover and allow to sit at room temperature for an hour or two before serving.
Sprinkle with more salt and pepper and serve.
Posted by Ree | The Pioneer Woman on July 23 2014

July 21, 2014
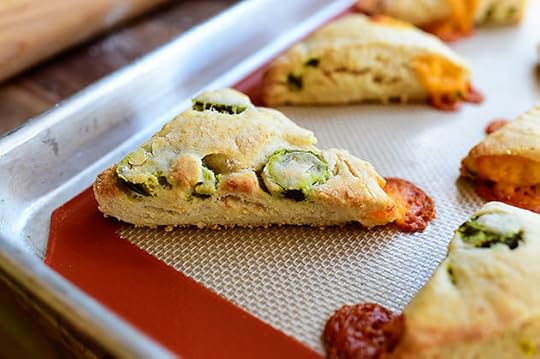
Jalapeño Cheddar Scones
 I was shooting a new episode of my Food Network episode on Saturday, and I made a batch of Lemon Rosemary Scones. If you haven’t made them yet, please do so soon because they will rock your ever-loving world. But that’s not the point of this post.
The point of this post is to tell you that because I made Lemon Rosemary Scones on Saturday, I still had scones on the brain. So yesterday after church, I whipped up a savory, spicy version that made my heart go pitter-pat, made my skirt fly up, and pretty much made my Sunday a little brighter.
And cheesier.
And spicier.
These little scones are perfect alongside a pot of chili, stew, or soup…or they’re a nice little mid-afternoon treat. (I plan to have one for breakfast this morning myself…but I have an unnatural love for jalapeños. I need more and more.)
 Add some flour, baking powder, and salt into a sifter…
 And sift it into a bowl.
 Now, cut up some UNSALTED butter into small cubes. I put UNSALTED butter in all caps, because I very rarely use it and I wanted to make sure you saw that it needed to be UNSALTED butter. And the reason it needs to be unsalted butter is that the scones have cheese in them, and the cheese adds additional salt to the mix.
Geez, I talk a lot.
 Use a pastry cutter to work the butter into the dry ingredients…
 Until the mixture resembles coarse crumbs.
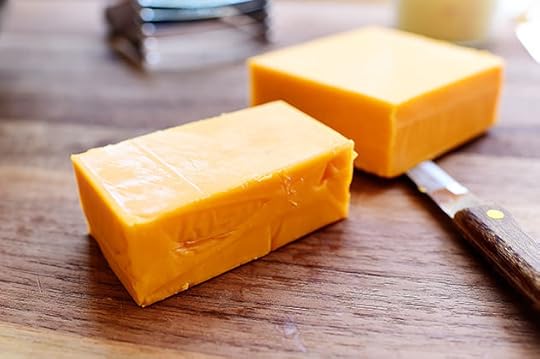 Now, grab a hunka hunka burnin’ cheddar.
Well, it’s best if it isn’t burning. If it’s burning, the following steps will be quite difficult.
So basically, don’t listen to me.
 Cut it into sticks…
 Then cut the sticks into a dice and add them to the bowl!
 Toss them around the flour mixture.
 Next, grab some jarred jalapeño slices…
 Throw them into the bowl…
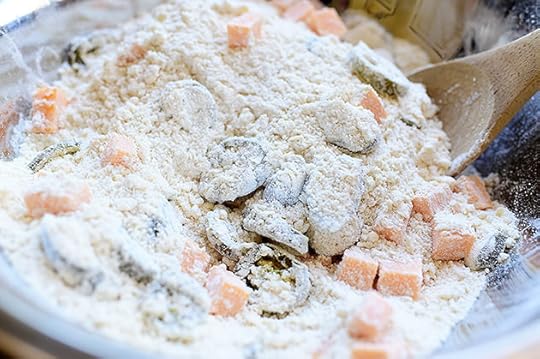 And toss them around, too.
 Now just mix together some heavy cream, some milk, and an egg…
 And pour it into the bowl, stirring gently…
 Until the dough all comes together. It’ll be a little sticky and crumbly, and that’s exactly what scone dough should look like!
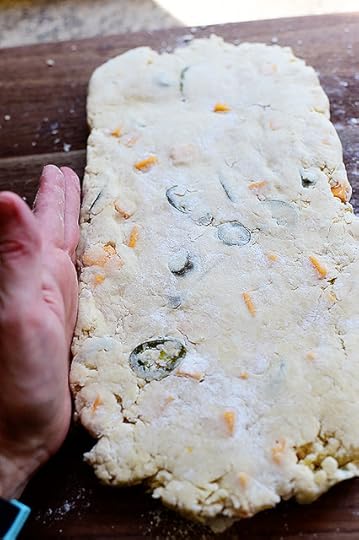
 Turn it out onto a board…
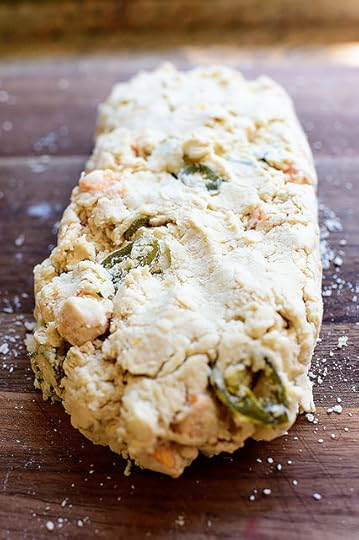 And use your hands to press it into a rough rectangle shape.
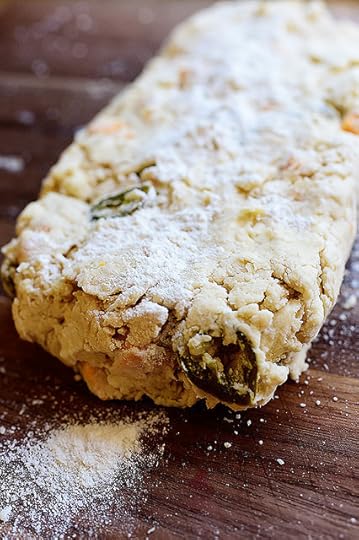 Sprinkle the top with flour…
 Then roll it out into a larger, neater rectangle…
 Using your hands along the way…
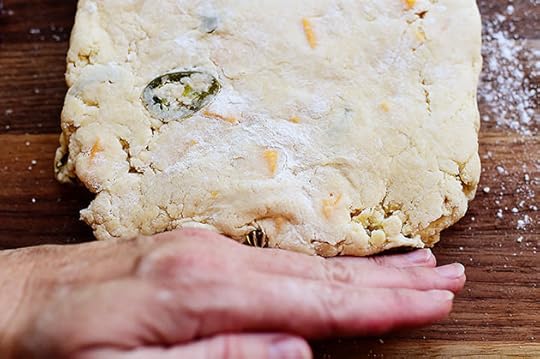 To keep it in shape.
And this is exactly why, months later, I find last Thanksgiving’s pie crust stuck between the prongs of my ring.
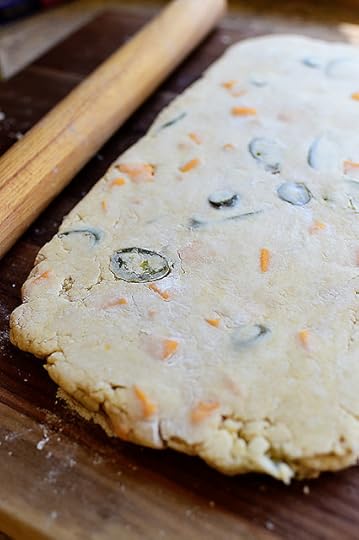 When it’s a nice, neat rectangle…
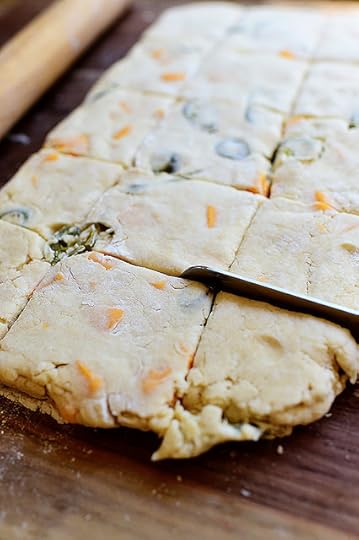 Use a serrated knife to cut it into squares…
 Then cut each square in half diagonally.
 Set them on a baking sheet lined with a baking mat or parchment.
 Then bake them for about 14-17 minutes…
 Until they’re nice and golden on top!
 Then melt just a little bit of butter…
 And brush it on the top.
 Yummy! And don’t be concerned if the cheese oozes out a bit. It’s messy…but it’s delicious!
 And just look at what’s inside. Yum.
 Serve them on a board at room temperature…
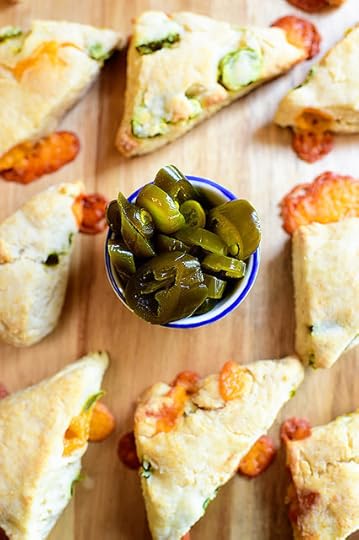 With a dish of jalapenos for those who want even more spice.
Translation: For me.
 Enjoy these, my friends! They’re perfect with soup, chili, stew…or just as a little snack on their own.
Here’s the handy dandy printable!
Recipe
Jalapeño Cheddar Scones
Prep Time: 10 Minutes
Cook Time: 20 Minutes
Difficulty: Easy
Servings: 32

Print Recipe
Ingredients
3-1/2 cups All-purpose Flour1 Tablespoon Baking Powder1/2 teaspoon Salt12 Tablespoons Cold Unsalted Butter, Cut Into Small Cubes1/3 pound Sharp Cheddar Cheese, Cut Into Small Cubes1/2 cup Jarred Jalapeño Slices (more To Taste!)1/2 cup Heavy Cream1/2 cup Milk1 whole Egg1 Tablespoon Jalapeño Juice (from The Jar), Optional Preparation Instructions
Preheat the oven to 375 degrees (convection) or 400 degrees (standard).
Sift together the flour, baking powder, and salt. Add cubes of butter and use a pastry cutter to completely work the butter into the dry ingredients until there are no large chunks of butter visible. (Mixture should resemble coarse crumbs. Add the cheddar cubes and jalapeño slices and toss to coat.
Mix together the cream, milk, egg, and jalapeño juice. Pour over the flour/butter mixture, stirring gently, until the dough all comes together. (It will be slightly dry/crumbly.)
Turn out onto a floured surface and use your hands to press into a rough rectangle shape. Sprinkle the top with flour and roll to about 8 inches by 16 inches. Use a serrated knife to cut into 15 squares, then cut each square in half on a diagonal to create 30 small triangles.
Transfer to a baking sheet lines with a baking mat or parchment, then bake for 14-17 minutes, or until lightly golden. (Cheese will bubble out a bit. This is fine!)
Serve at room temperature with extra jalapeños.
Posted by Ree | The Pioneer Woman on July 21 2014

July 14, 2014
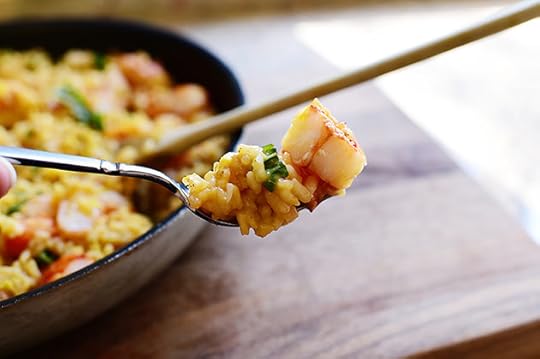
Lemon Basil Shrimp Risotto
 I wanted to share another one of the recipes I made with some of the roughly five trillion pounds of leftover gigantic shrimp from our Fourth of July party. And I shouldn’t even be calling it leftover shrimp. That would imply that I actually used some of the shrimp at our Fourth of July party, and that some of the shrimp was left over. But in fact, I didn’t use any of it at our Fourth of July party. I didn’t use any of it, because I have my limits when it comes to being able to cognitively multi-task and I completely forgot about it. And I didn’t even realize I had forgotten about it until well after the party, when I opened my fridge to try to figure out what to have for breakfast and was greeted by roughly five trillion pounds of shrimp instead.
So I guess I should be calling it neglected shrimp. Not leftover shrimp.
And no matter what it’s called, I just knew that if I didn’t figure out some ways to use it up tout de suite, I would soon have a malodorous fridge. So along with this Coconut Curry Shrimp, which seriously made my skirt fly up, I also made a batch of this bright and lovely risotto, whose leftovers I ate all throughout last week. There I go using the “leftover” word again. Except in this case, it’s accurate.
I’m so glad we had this talk.
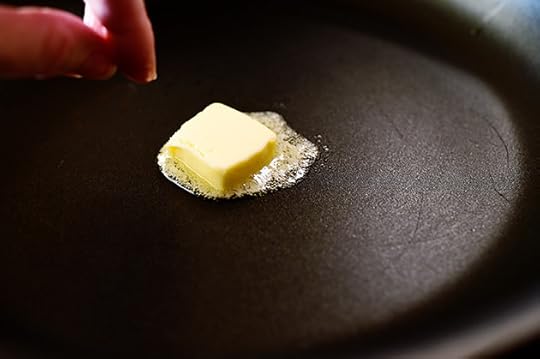 Melt a little butter in a skillet…
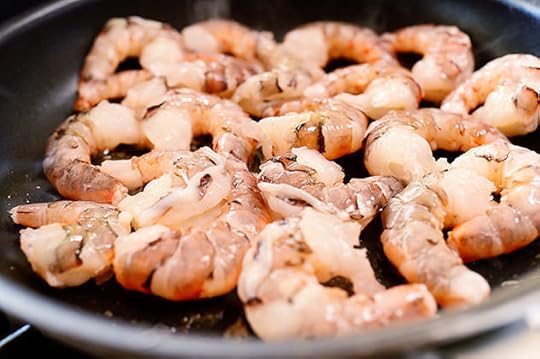 Then throw in a nice layer of peeled, deveined shrimp! Doesn’t matter what size you use; this is U10 (under 10 shrimp per pound) and they result in big chunks of shrimp after chopping, but you can use any size of shrimp your heart desires. You can even use tiny ones and leave ‘em whole at the end! Or you can use huge ones and chop ‘em up at the end. Or you can use medium ones and be riddled with confusion about whether to chop ‘em or leave ‘em whole at the end.
The world is your oyster.
Oyster? This is getting really confusing.
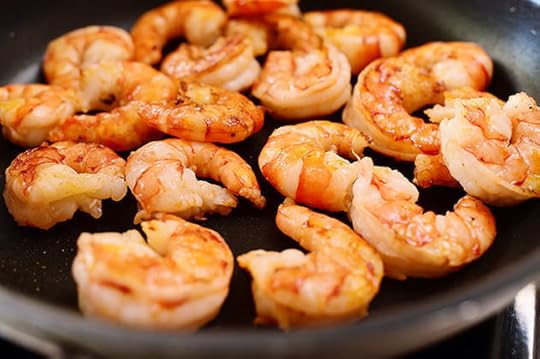 Turn the shrimp over halfway through and cook it until it’s opaque, about 3 minutes total.
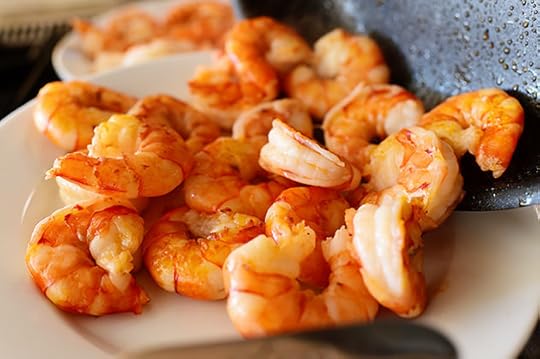 Then throw ‘em onto a plate for a bit.
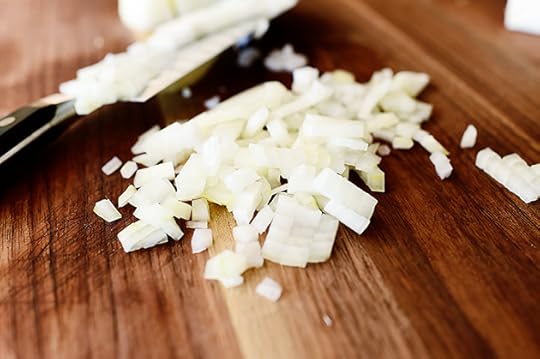 Now, chop up some onion…
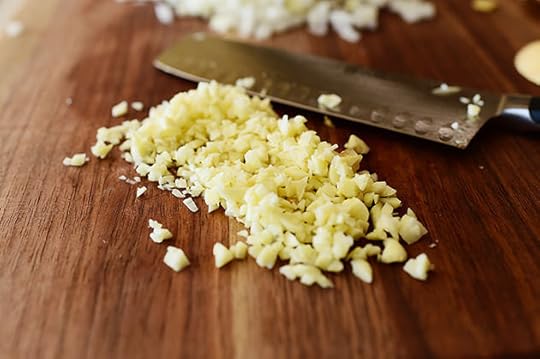 Mince up some garlic…
 And throw ‘em both into the same skillet you used to cook the shrimp. Stir and cook the onion and garlic for 2 to 3 minutes, or until the onions are translucent.
 Then pour in some Arborio rice…
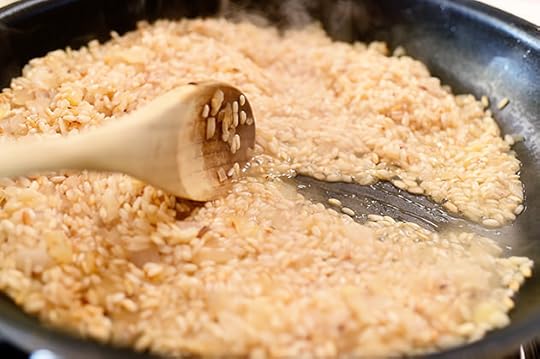
 And stir/cook it around for a couple of minutes. And whatever you do, don’t walk away from the skillet and forget about it like a certain 40-something redhead in rural Oklahoma did. It’s best if the rice doesn’t get brown like this.
But actually, it turned out fine.
So basically, don’t listen to anything I say and you’ll be good to go.
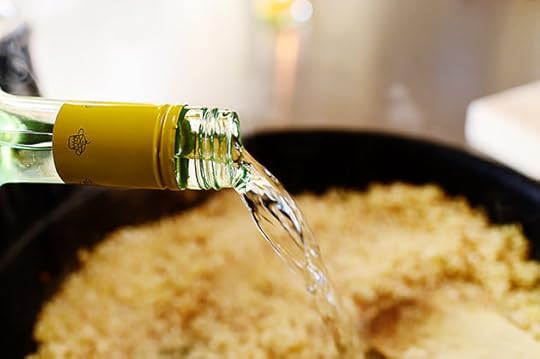 Now, when I make risotto, I like to start by adding a nice amount of white wine! It makes the finished risotto extra delicious, and…well, it’s wine. You don’t always have to have a good reason for it.
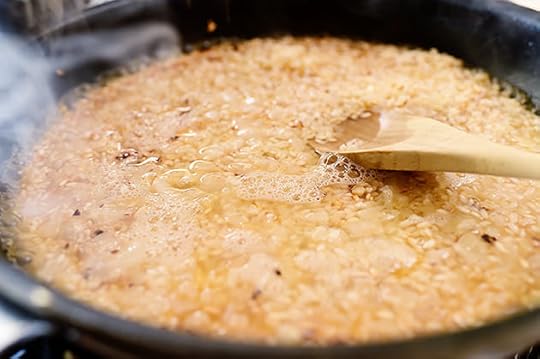 Then you just have to be patient for a few minutes, giving it a gentle stir or two…
 Until the wine is pretty much all absorbed.
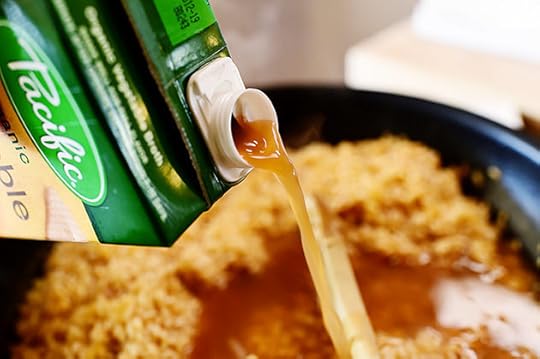
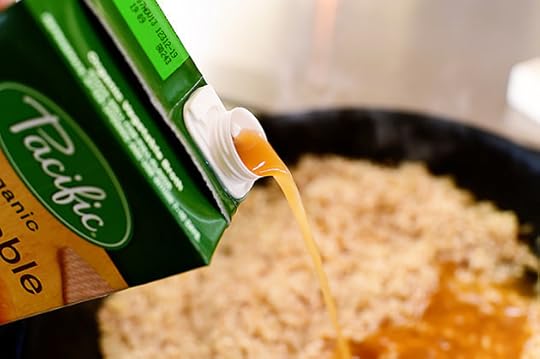 Now it’s time for the broth! Just add it in 1/2 to 1 cup increments, stirring and letting it absorb before the next addition. I used this vegetable broth, which I love because it has a nice deep yellow/orange tint to it…but any broth—vegetable, chicken, or even seafood—will do.
Note: Normally, normal people who normally want to take the normal route will heat up the broth in a saucepan before adding it. But I didn’t want to work that hard.
 Now just let this cook…
 Until the rice is absorbed…
 Then add some more! Just continue this process until you’ve added about 4 to 5 cups of broth…more if it needs it.
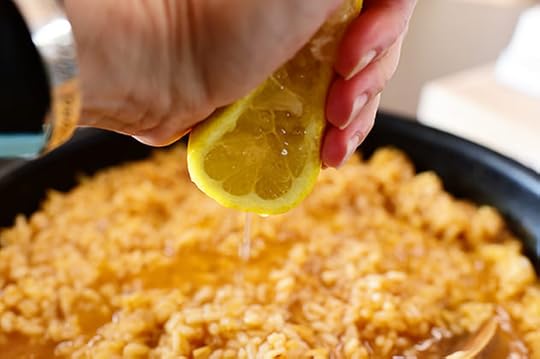 And along the way, squeeze in some lemon juice and add some salt and pepper.
 Eventually, it will look like this. Gorgeous!
Now, note that if you use a different brand of vegetable broth, or if you use chicken broth, the color of the risotto will be lighter. In that case, if you’d like the risotto to have a nice golden tinge, sprinkle in a really small amount of turmeric!
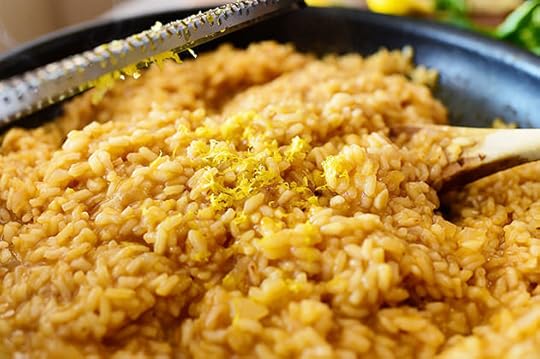 At the very end, when the rice is perfect and tender but still has a little bite to it, add some lemon zest. Gives it a little extra zip.
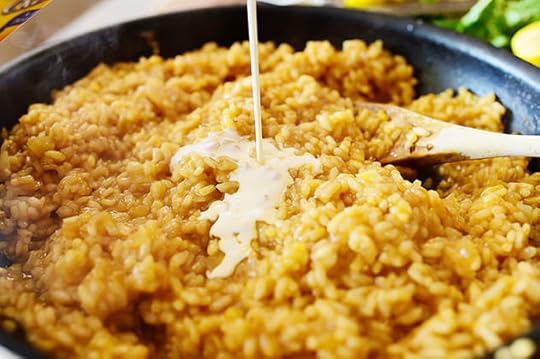 And now, what you are about to see may shock you. Risotto is inherently creamy and normally doesn’t require cream. But of course, I’d never let that stop me. Just add in a tablespoon or two! It won’t do ya no harm, man.
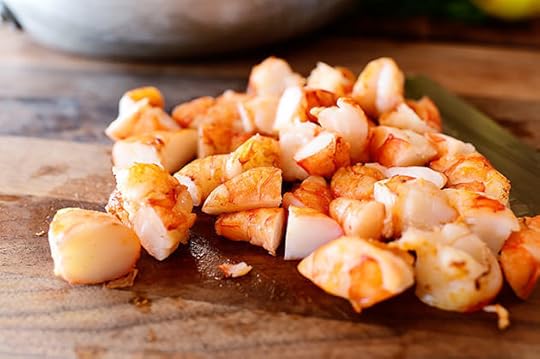 Now, chop up the shrimp…
 Chop up some basil…
 And throw both in with the luscious, creamy, dreamy, lemony risotto!
What a lovely sight.
 Then just fold it all together…
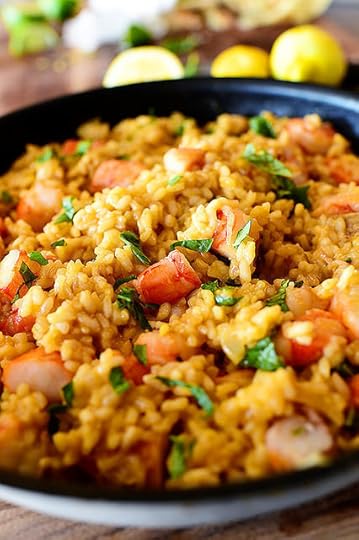 And dinner is served!
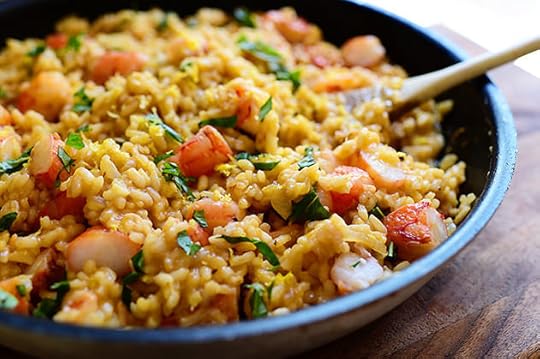 Oh, and I forgot: Sprinkle on some more lemon zest…
 And a little more pepper.
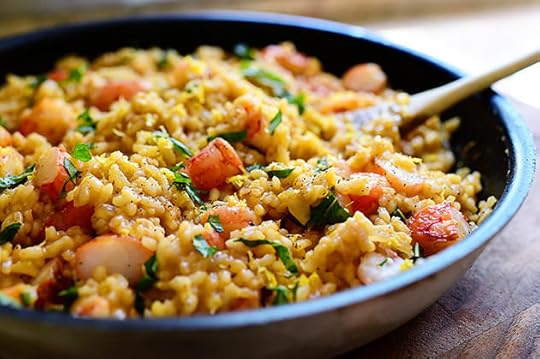
 And go for it!
(Oh, and grated Parmesan is delicious, too. But I forgot to take a photo of that part. Something about slurping down this yumminess made me a little distracted.)
Enjoy this, friends! It’s a bowlful of bliss.
Here’s the handy dandy printable.
Recipe
Lemon Basil Shrimp Risotto
Prep Time: 5 Minutes
Cook Time: 30 Minutes
Difficulty: Easy
Servings: 12

Print Recipe
Ingredients
2 Tablespoons Butter1-1/2 pound Shrimp (I Used U10 Size; Huge!)1 whole Onion, Finely Diced4 cloves Garlic, Minced2 cups Arborio Rice1 cup Dry White Wine5 cups Vegetable Broth, Heated (give Or Take)1 whole Lemon, Zested And Juiced1/2 teaspoon Salt1 teaspoon Black Pepper2 Tablespoons Heavy Cream18 whole Basil Leaves, Chopped Plus Extra For Serving Grated Parmesan Cheese For Sprinkling Preparation Instructions
Heat the butter in a large skillet over medium-high heat. Add shrimp in a single layer and cook both sides until opaque in the middle, about 3 minutes. Remove to a cutting board and chop roughly. Set aside.
Return the skillet to the stovetop (do not wash it) and add the onion and garlic. Stir and cook for 2 to 3 minutes, or until onion starts to turn translucent. Reduce heat to medium-low. Add dry Arborio rice to the pan and stir it around for a couple of minutes, taking care not to burn it. Pour in wine and stir gently, allowing the rice to absorb the liquid. After the wine is absorbed, begin adding warm broth 1/2 cup to 1 cup at a time, allowing the rice to cook and absorb the liquid each time. Stir occasionally as you go, and add the salt and pepper during one of the broth additions. After 4 cups of broth have been absorbed, taste the rice. It should have a slight bite, but if it seems undercooked, add additional broth and cook it until it absorbs until the risotto is the perfect doneness.
Zest and juice the lemon and add both the zest and the juice to the risotto toward the end of cooking. Stir in the heavy cream, the basil, and serve immediately with extra lemon zest and Parmesan cheese on top.
Posted by Ree | The Pioneer Woman on July 14 2014

Ree Drummond's Blog

- Ree Drummond's profile
- 2036 followers

