Ree Drummond's Blog, page 15
September 16, 2015
Seasoned Buttery Crackers
Mmmmm. These crackers! These really are delicious and so simple to make. I really don’t know what happens in the oven to make these little numbers so otherworldly…but something definitely does happen. They’re perfect as a snack or with a yummy bowl of soup. Or crumbled on a salad!
Make ’em ASAP.
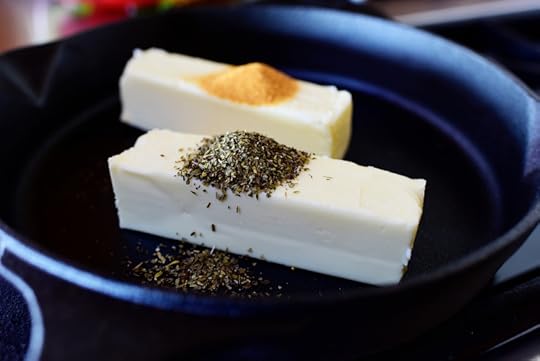 First, do something really crazy-fun: Throw 2 sticks of butter into a skillet and violently sprinkle on whatever seasonings you want! I used seasoned salt (Lawry’s is usually my poison) and good ol’ Italian seasoning, but you can violently sprinkle on anything from lemon pepper to oregano to Montreal seasoning to paprika.
I would definitely recommend that one of the seasonings is some kind of salt blend to the finished crackers are ultra-savory.
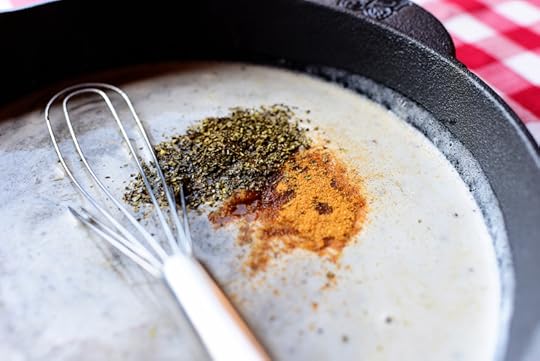 Melt the butter and whisk in the seasonings so they’re all mixed in.
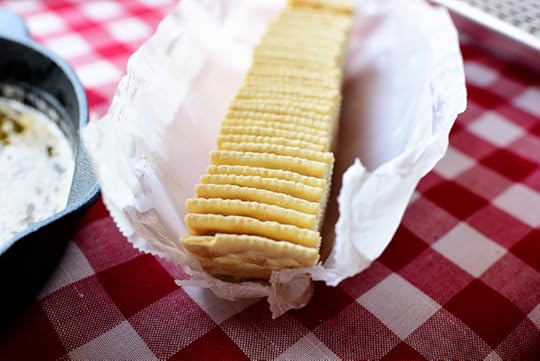 Next, rip open a sleeve o’ saltines…
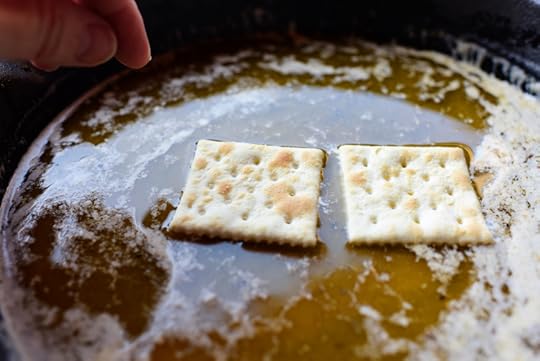 Then, two at a time (I say that because we humans only have two hands; if we had three hands, I would say three at a time. If we had four hands, I would get a lot more sleep at night because I’d get more work done earlier in the day), drop in crackers…
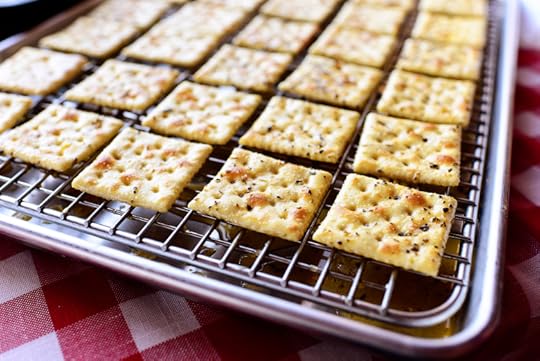 And place them on a rack on top of a baking sheet.
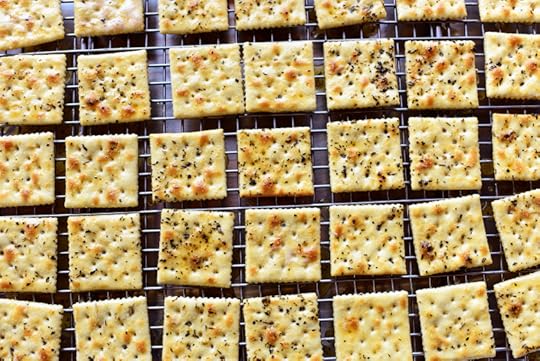 (If you want to cheat and sneak a couple now, I won’t hold it against you. But if you can muster up the patience…oh, man. You will be rewarded.)
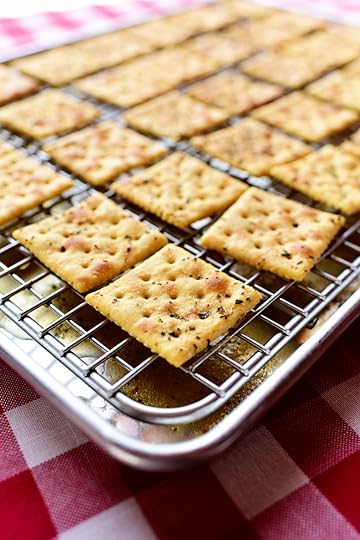 Bake them in a 275-degree oven for about 20 minutes or so, watching them in the last 5 minutes to make sure they don’t start to get too brown. They should be golden and toasty!
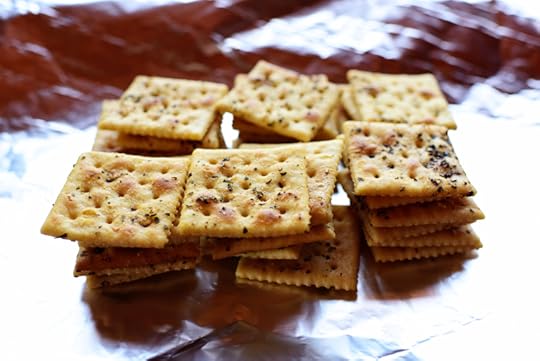 Let them cool completely, then package them in a parcel of foil…
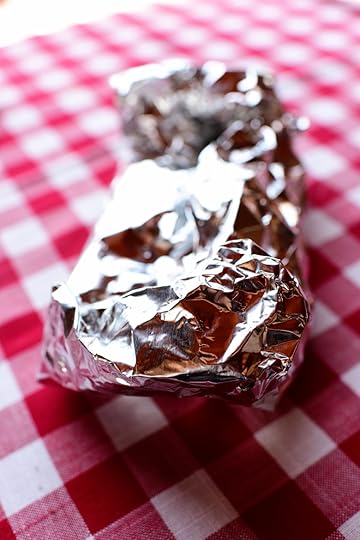 And delivery them to a friend along with a nice pot of soup.
You’ll love these crackers! Simplicity at its finest. And delicious-est.
(I love making up words in the middle of the week.)
Here’s the handy dandy printable!


September 14, 2015
7-Can Soup by Ree
I made this soup on my Food Network show a few weeks ago, and it’s seriously one of those recipes that makes a person say phrases like, “Uh…could you repeat that?” and “Whaaaaa?” and “Crazytown!” and other questions/exclamations that convey surprise over how such a simple list of ingredients could result in something so, so good. 7-Can Soup has been around for a long time, and no two recipes are identical, but they basically amount to this:
* 7 cans of whatever you want. Don’t drain the cans. Just violently throw them into the pot.
* Some kind of gourmet cheese stirred in at the end. And just a warning: My choice of cheese is a little intimidating in its level of sophistication, so I apologize in advance.
Not.
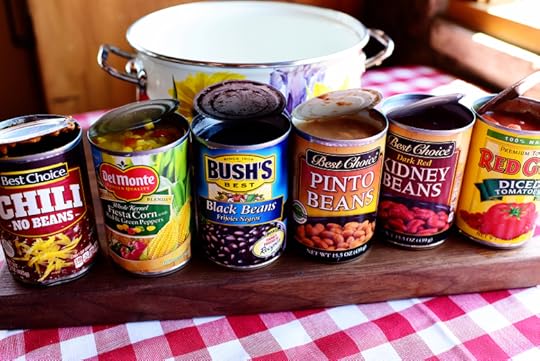 Here are the cans you need for seven can soup! And you can change it up, swap, sub, switch…whatever cans you’d like to use!
From left to right, here are my crazy choices: canned chili (which admittedly is one of the most questionable-looking canned foods known to man), canned corn (I used the Fiesta kind!), canned black beans, canned pinto beans, canned kidney beans, and diced tomatoes.
Now, you may notice that there are only six cans in this photo. That is because I had forgotten to put the can of Ro*tel in the picture. (But I didn’t forget to put it in the soup. It just took me awhile to remember!)
Everything will all make sense in a minute or two, when I actually add an eighth ingredient to the 7-Can Soup that isn’t even a canned ingredient at all, so come to think of it, it won’t make sense in a minute or two.
But that’s what makes life thrilling around my house.
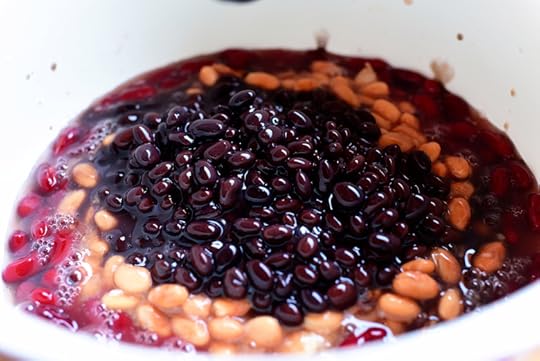 Crack open all the cans and starting pouring them into a pot…
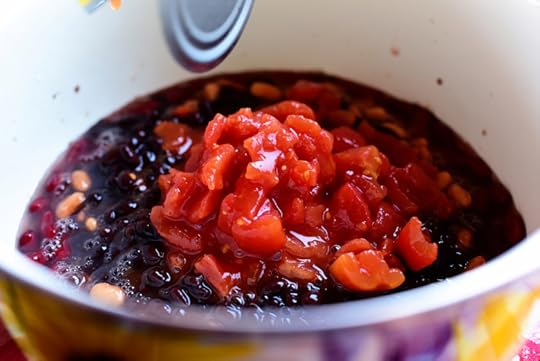 And the magical thing about this soup…
 Is that you don’t even have to drain the cans!
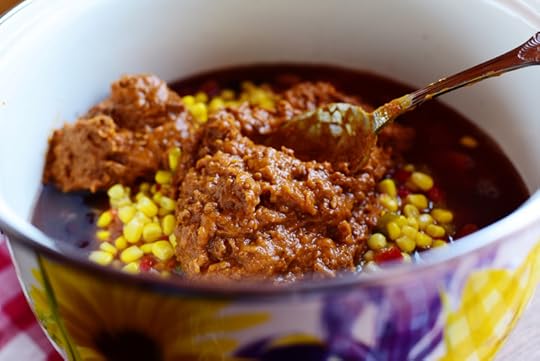 And I give you permission to chuckle as you pour in the chili. It’s just so…not a vision of loveliness.
But it is a vision of tastiness! I promise you that.
 Stir everything together, bring it to a gentle boil…
 And let it simmer for 10 to 15 minutes, until nice and piping hot.
And then…
And then?
Now, the instructions below will tell you to dice the Velveeta and add it in.
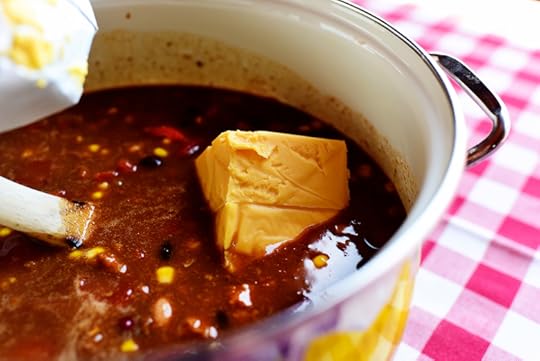
But I love the bold courage of throwing tossing it into the pan in one huge hunk.
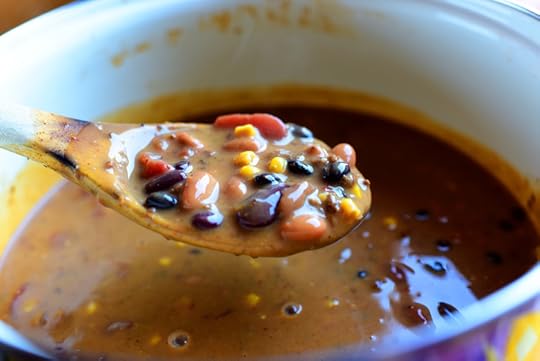 Reduce the heat to low and stir the soup until the Velveeta is totally melted. It’ll turn the base gorgeously creamy and you’ll want to dive right in. You will!
 Dish it up and add a little cilantro if you have some lying around.
 You may be in shock right now. You may be in disbelief. But you’ve gotta give this one a try. It’s curiously delicious!
Here’s the handy dandy printable.


7-Can Soup
I made this soup on my Food Network show a few weeks ago, and it’s seriously one of those recipes that makes a person say phrases like, “Uh…could you repeat that?” and “Whaaaaa?” and “Crazytown!” and other questions/exclamations that convey surprise over how such a simple list of ingredients could result in something so, so good. 7-Can Soup has been around for a long time, and no two recipes are identical, but they basically amount to this:
* 7 cans of whatever you want. Don’t drain the cans. Just violently throw them into the pot.
* Some kind of gourmet cheese stirred in at the end. And just a warning: My choice of cheese is a little intimidating in its level of sophistication, so I apologize in advance.
Not.
 Here are the cans you need for seven can soup! And you can change it up, swap, sub, switch…whatever cans you’d like to use!
From left to right, here are my crazy choices: canned chili (which admittedly is one of the most questionable-looking canned foods known to man), canned corn (I used the Fiesta kind!), canned black beans, canned pinto beans, canned kidney beans, and diced tomatoes.
Now, you may notice that there are only six cans in this photo. That is because I had forgotten to put the can of Ro*tel in the picture. (But I didn’t forget to put it in the soup. It just took me awhile to remember!)
Everything will all make sense in a minute or two, when I actually add an eighth ingredient to the 7-Can Soup that isn’t even a canned ingredient at all, so come to think of it, it won’t make sense in a minute or two.
But that’s what makes life thrilling around my house.
 Crack open all the cans and starting pouring them into a pot…
 And the magical thing about this soup…
 Is that you don’t even have to drain the cans!
 And I give you permission to chuckle as you pour in the chili. It’s just so…not a vision of loveliness.
But it is a vision of tastiness! I promise you that.
 Stir everything together, bring it to a gentle boil…
 And let it simmer for 10 to 15 minutes, until nice and piping hot.
And then…
And then?
Now, the instructions below will tell you to dice the Velveeta and add it in.
But I love the bold courage of throwing tossing it into the pan in one huge hunk.
 Reduce the heat to low and stir the soup until the Velveeta is totally melted. It’ll turn the base gorgeously creamy and you’ll want to dive right in. You will!
 Dish it up and add a little cilantro if you have some lying around.
 You may be in shock right now. You may be in disbelief. But you’ve gotta give this one a try. It’s curiously delicious!
Here’s the handy dandy printable.


September 8, 2015
Cayenne Cheddar Breakfast Biscuits by Ree
There are biscuit sandwiches…and then there are OH MY GOODNESS, BISCUIT SANDWICHES!!!!!
This one happens to be in the latter category.
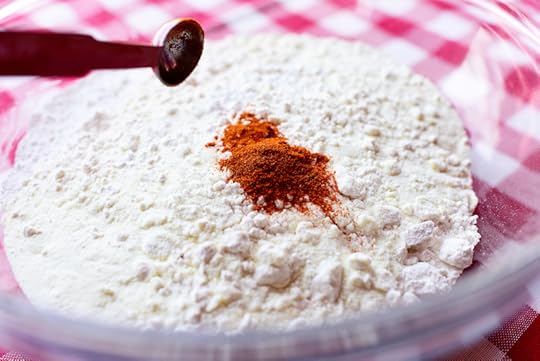
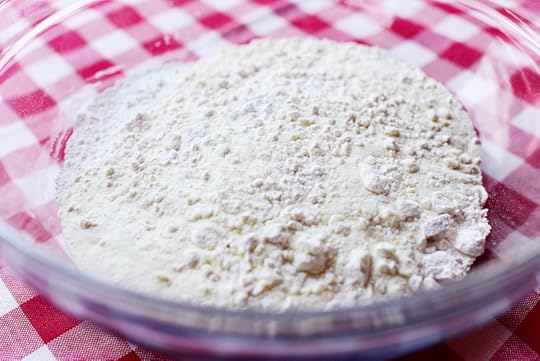 Start with the dry ingredients for the biscuits: flour, powdered milk, and sugar…
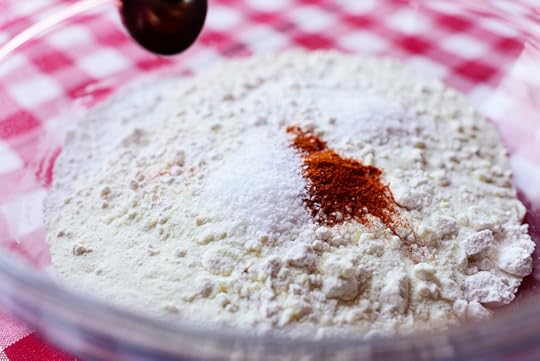 Baking powder, cream of tartar, and kosher salt.
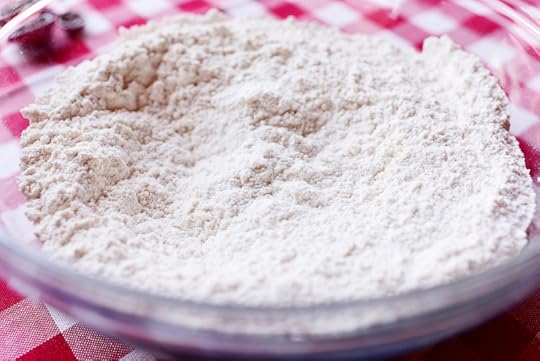 Stir it all together and set it aside for a sec!
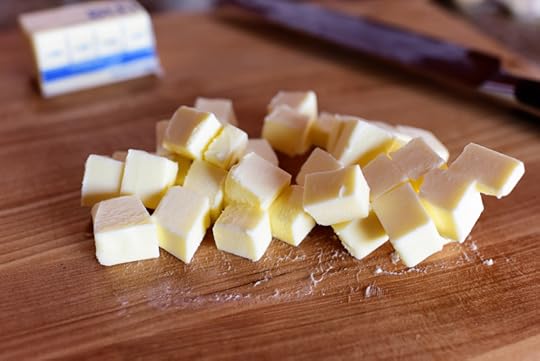 Cut a stick of super cold butter into little cubes…
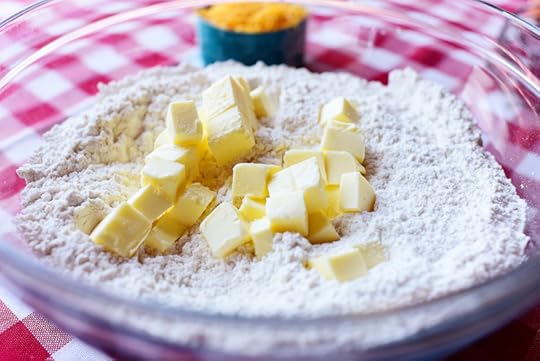 Then throw it into the dry ingredients along with (not shown because I’m an airhead) the same amount of vegetable shortening. (Pssst. You can use all butter if you prefer!)
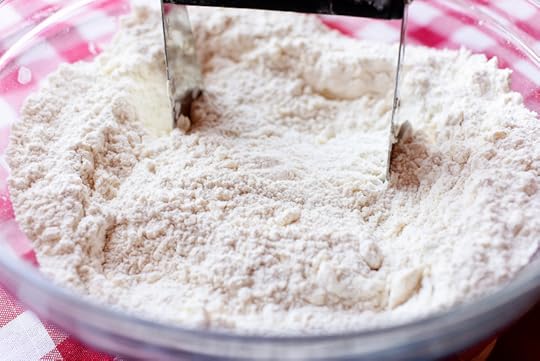 Cut the butter into the dry ingredients…
 Then add the grated cheddar (I used the fine side of the grater)…
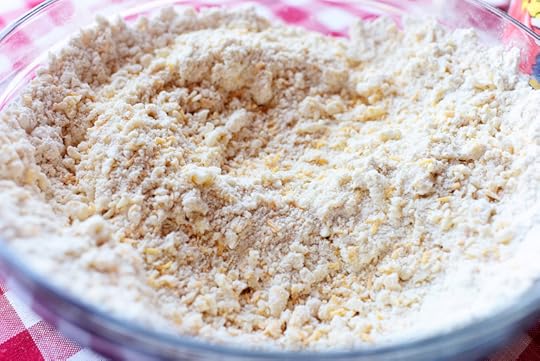 And finish cutting it all together.
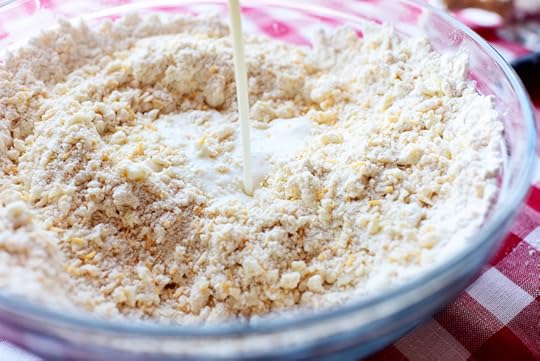
 And stir it gradually until it all comes together. You might stop a little short of adding all the buttermilk if it seems moist enough, or you may want to add an extra splash of buttermilk if it seems too dry. This is a slightly wet biscuit dough; it shouldn’t be overly dry and crumbly.
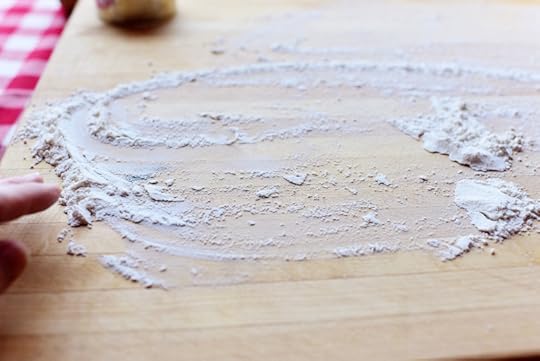 Spread a little flour on the countertop…
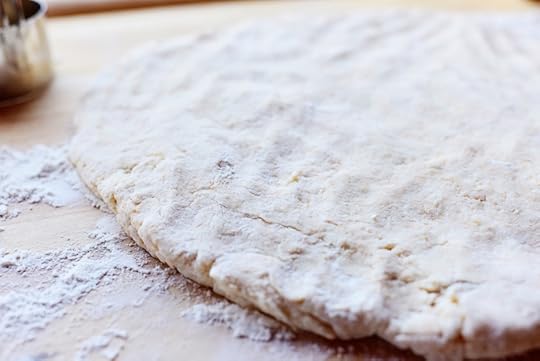 And use your fingers to press the dough into a circle about 1 1/2 inches thick. This was a little too thin; don’t be afraid, as I apparently was, to keep the dough on the thick side. That said, I usually prefer for biscuits to be a little more on the thin side when they’re going to be used to build sandwiches. That way you can focus on all the ingredients in the sandwich and not just the two huge pieces of bread on the top and bottom.
Not that I overthink this stuff or anything.
 Use a biscuit cutter or a glass to cut circles (you can dip the cutter in flour if it gets sticky like this one is!)
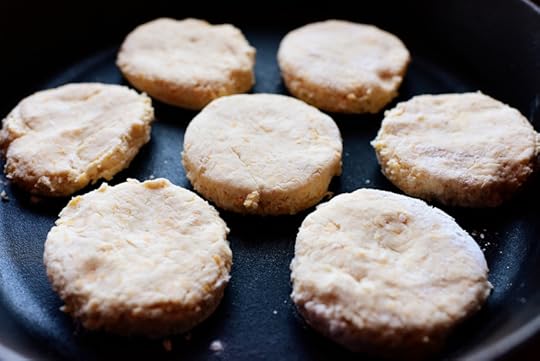 Put ’em in an iron skillet or baking pan…
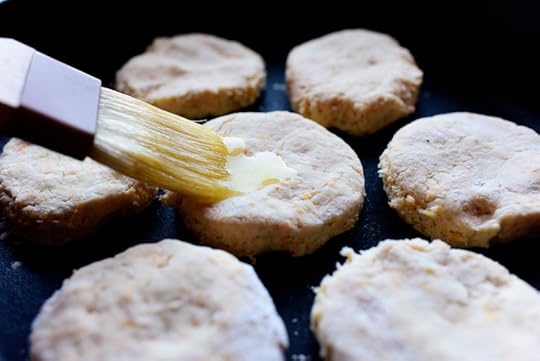 Brush ’em with melted butter, and bake ’em at 450 (hot hot!) for 10 to 12 minutes, watching them toward the end to make sure they don’t burn.
 Meanwhile, fry some sausage! These are actually regular pre-formed sausage patties that I flattened and pressed into a larger size as they fried. Basically, you want to fry larger, thinner patties of sausage so they’ll fill the size of the biscuits: It’s probably best to use a regular package of sausage and form the patties yourself so you can get them to be the size you want!
 Fry them until done in the middle and nice and brown on the outside, then set them aside for a sec.
Then, Chapter 2 in the “Not Pictured Because I’m an Airhead” series, fry some eggs! I have absolutely no explanation for why I did not get a picture of this when I am somehow able to capture pictures of every other minute detail of my life, but as Pat Conroy wrote in The Prince of Tides, “It is the mystery of life that sustains me now.”
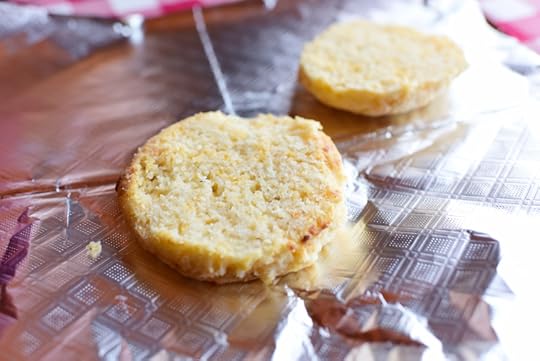 Basically, you want to have everything ready when the biscuits come out of the oven so that they’re warm when you split them in half.
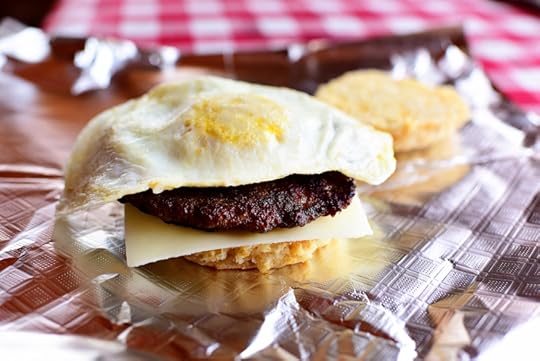
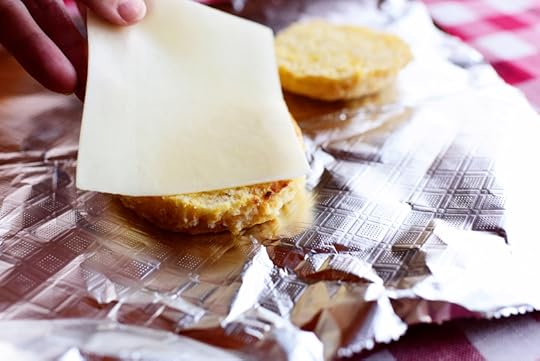 Lay a slice of white cheddar (or any kind of cheese you want!) on the bottom half of the biscuit…
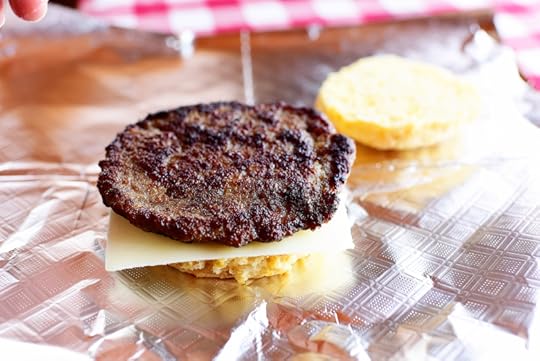 Lay a piece of sausage on top of that…
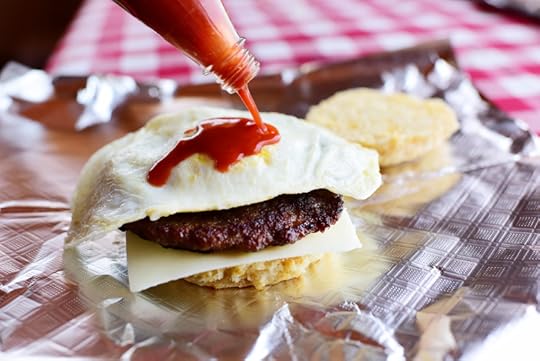 And (the kicker!) a good amount of hot sauce! Don’t skip this part; it makes the sandwich ultra irresistible.
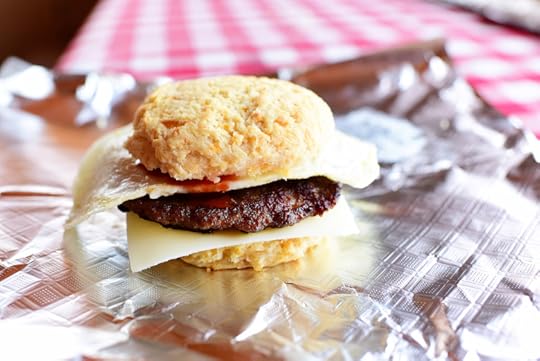 Pop on the lid, then you can eat/serve it right away…
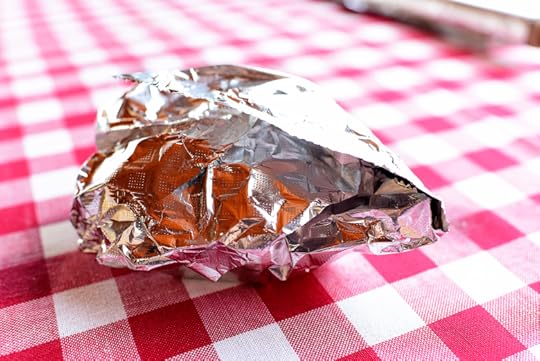 Or (even better if you have the time) wrap them in foil for a bit. This seals in the warmth and allows the cheese to melt and everything to settle in and become miraculous.
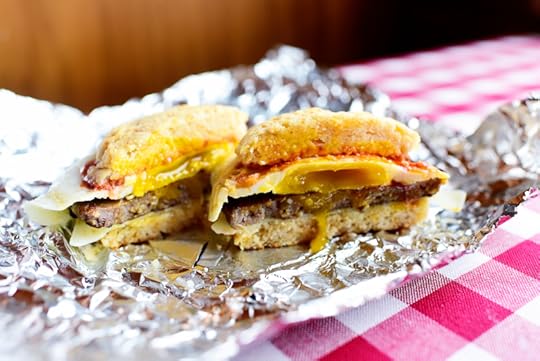 And when I say miraculous, I mean…
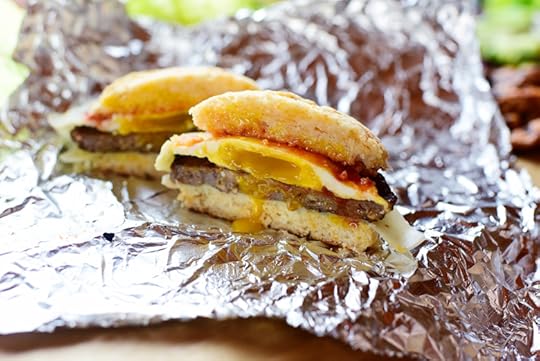 Completely and utterly miraculous.
Where would my life be without egg yolk? I shudder to think.
The handy dandy printable is right here, or you can also find it in the right sidebar at the top of the recipe!


Cayenne Cheddar Breakfast Biscuits
There are biscuit sandwiches…and then there are OH MY GOODNESS, BISCUIT SANDWICHES!!!!!
This one happens to be in the latter category.
 Start with the dry ingredients for the biscuits: flour, powdered milk, and sugar…
 Baking powder, cream of tartar, and kosher salt.
 Stir it all together and set it aside for a sec!
 Cut a stick of super cold butter into little cubes…
 Then throw it into the dry ingredients along with (not shown because I’m an airhead) the same amount of vegetable shortening. (Pssst. You can use all butter if you prefer!)
 Cut the butter into the dry ingredients…
 Then add the grated cheddar (I used the fine side of the grater)…
 And finish cutting it all together.
 And stir it gradually until it all comes together. You might stop a little short of adding all the buttermilk if it seems moist enough, or you may want to add an extra splash of buttermilk if it seems too dry. This is a slightly wet biscuit dough; it shouldn’t be overly dry and crumbly.
 Spread a little flour on the countertop…
 And use your fingers to press the dough into a circle about 1 1/2 inches thick. This was a little too thin; don’t be afraid, as I apparently was, to keep the dough on the thick side. That said, I usually prefer for biscuits to be a little more on the thin side when they’re going to be used to build sandwiches. That way you can focus on all the ingredients in the sandwich and not just the two huge pieces of bread on the top and bottom.
Not that I overthink this stuff or anything.
 Use a biscuit cutter or a glass to cut circles (you can dip the cutter in flour if it gets sticky like this one is!)
 Put ’em in an iron skillet or baking pan…
 Brush ’em with melted butter, and bake ’em at 450 (hot hot!) for 10 to 12 minutes, watching them toward the end to make sure they don’t burn.
 Meanwhile, fry some sausage! These are actually regular pre-formed sausage patties that I flattened and pressed into a larger size as they fried. Basically, you want to fry larger, thinner patties of sausage so they’ll fill the size of the biscuits: It’s probably best to use a regular package of sausage and form the patties yourself so you can get them to be the size you want!
 Fry them until done in the middle and nice and brown on the outside, then set them aside for a sec.
Then, Chapter 2 in the “Not Pictured Because I’m an Airhead” series, fry some eggs! I have absolutely no explanation for why I did not get a picture of this when I am somehow able to capture pictures of every other minute detail of my life, but as Pat Conroy wrote in The Prince of Tides, “It is the mystery of life that sustains me now.”
 Basically, you want to have everything ready when the biscuits come out of the oven so that they’re warm when you split them in half.
 Lay a slice of white cheddar (or any kind of cheese you want!) on the bottom half of the biscuit…
 Lay a piece of sausage on top of that…
 And (the kicker!) a good amount of hot sauce! Don’t skip this part; it makes the sandwich ultra irresistible.
 Pop on the lid, then you can eat/serve it right away…
 Or (even better if you have the time) wrap them in foil for a bit. This seals in the warmth and allows the cheese to melt and everything to settle in and become miraculous.
 And when I say miraculous, I mean…
 Completely and utterly miraculous.
Where would my life be without egg yolk? I shudder to think.
The handy dandy printable is right here, or you can also find it in the right sidebar at the top of the recipe!


September 7, 2015
Labor Day Faves! by Ree
It’s Labor Day, which is, symbolically, the last summer holiday of the year…and the day of the year that I suddenly feel compelled to drink all the lemonade and eat all the watermelon I can get my hands on. Along those lines, I wanted to share a link to all my very favorite summertime/Labor Day recipes. Hope you find something scrumptious to make!
Labor Day Recipes on The Pioneer Woman Cooks!
Have a fun, safe day, everyone!


Labor Day Faves!
It’s Labor Day, which is, symbolically, the last summer holiday of the year…and the day of the year that I suddenly feel compelled to drink all the lemonade and eat all the watermelon I can get my hands on. Along those lines, I wanted to share a link to all my very favorite summertime/Labor Day recipes. Hope you find something scrumptious to make!
Labor Day Recipes on The Pioneer Woman Cooks!
Have a fun, safe day, everyone!


September 2, 2015
PB&J Streusel Muffins by Ree
Basically, I’m out to figure out how many thousands of ways I can top an English muffin. You can go the tuna melt route, the mini apple pie route, the apple peanut butter delight route, and lots of other routes. And avenues. And directions.
This is probably the simplest route: Peanut butter and jelly with a nice streusel topping.
Viewer warning: The recipe you are about to see is very, very simple.
 First, make some streusel topping: butter, flour, salt, brown sugar, and some oats. (Tip: It needs the salt!) Use a pastry cutter to mix it all together, or wait until the end to stir in the oats if you’d rather them be more whole.
 Spread some peanut butter and a little jelly on the top of some English muffins…
 Then pile the streusel on top.
 Bake them at 325 for about 10 minutes, then turn the heat up to 350 and let them go for another couple of minutes, or until golden brown on top.
 Let them cool a little bit before you serve them (the peanut butter and jelly is a little hot coming out of the oven) and serve them with a big ol’ glass of milk.
A perfectly lovely, and ridonkulously simple, after school snack!


PB&J Streusel Muffins
Basically, I’m out to figure out how many thousands of ways I can top an English muffin. You can go the tuna melt route, the mini apple pie route, the apple peanut butter delight route, and lots of other routes. And avenues. And directions.
This is probably the simplest route: Peanut butter and jelly with a nice streusel topping.
Viewer warning: The recipe you are about to see is very, very simple.
 First, make some streusel topping: butter, flour, salt, brown sugar, and some oats. (Tip: It needs the salt!) Use a pastry cutter to mix it all together, or wait until the end to stir in the oats if you’d rather them be more whole.
 Spread some peanut butter and a little jelly on the top of some English muffins…
 Then pile the streusel on top.
 Bake them at 325 for about 10 minutes, then turn the heat up to 350 and let them go for another couple of minutes, or until golden brown on top.
 Let them cool a little bit before you serve them (the peanut butter and jelly is a little hot coming out of the oven) and serve them with a big ol’ glass of milk.
A perfectly lovely, and ridonkulously simple, after school snack!


August 31, 2015
Lettuce Wraps by Ree
Lettuce wraps are everything. Absolutely everything. And I know they’ve been around forever, and I know they’re everywhere, and I know I shouldn’t have worn turquoise mascara when I got my senior pictures taken back in the eighties. I get that. But I’m not sorry.
(For the lettuce wraps or the turquoise mascara.)
Here’s how I like to make them!
 First, make the marinade for the chicken, which is the cat’s meow, the bomb, and Heaven. It starts with hoisin sauce…
 Next, squeeze in a little Sriracha, also known as I Love the Stuff.
 A little rice wine vinegar (or heck, any vinegar!) is good…
 And some minced garlic and minced ginger.
 Next, just slice a couple of boneless, skinless chicken breasts into strips…
 And add them to the marinade, tossing it around to coat it. Then cover it and pop it in the fridge for a couple of hours. You’ll be soooooo glad you did.
 After that time, grill them on a grill pan (or you can saute them…)
 Until they’ve got fabulous grill marks and are totally cooked through.
 Oh, and one more thing! Grab a package of those super thin cellophane noodles and pour boiling water over them in a bowl.
 Read the package to see how long they need to sit; it doesn’t take long at all for them to be soft and tender and magical. Then rinse them in cold water so they’ll stop cooking…but also so they’ll be cool!
 Gracious. Will you look at that chicken for a sec?
Oh, and what the heck, go ahead…take two secs!
 Pile it on a board with shredded carrots (these are the packaged ones), sliced red cabbage, cilantro leaves, julienne cucumbers, and of course…lettuce leaves.
Or don’t, depending on how hungry you are.
 Oh! Chopped peanuts! (Cashews are good, too!)
Oh, and another thing: Bean sprouts. Love those in lettuce wraps. I just didn’t have any.
 To build the beautiful babies, grab a lettuce leaf and drizzle in a little sweet chili sauce…
 Lay on a couple of pieces of chicken…
 Then throw on everything else: noodles, carrots, cabbage, cucumbers, cilantro, peanuts, a little more chili sauce (or hoisin or soy or Sriracha.)
(I didn’t take a photo of the lettuce wrap—or me—after I took my first bite. It wasn’t pretty.)
(But it sure tasted pretty.)
Enjoy, friends!
___________________
Note: The printable recipe is at the top of this post, over on the right sidebar. You can also access the printable recipe here:
Lettuce Wraps Printable Recipe
I’m still working to get the actual printable put into the post itself, but in the meantime, here’s the straight-up recipe if you’d like to see what’s in it!
Lettuce Wraps
Ingredients
1/3 cup Hoisin Sauce
1/3 cup Soy Sauce
2 Tablespoons Grated Ginger
1 Tablespoon Sriracha
1 Tablespoon Rice Wine Vinegar
3 cloves Garlic, Grated
2 whole Boneless, Skinless Chicken Breasts, Cut Into Strips
1/4 cup Chopped Cilantro
8 whole Butter Lettuce Leaves
1 cup Bean Sprouts
1 cup Thinly Sliced Red Cabbage
1 cup Julienne Carrots
1 cup Cucumber Slices
2 Tablespoons Chopped Peanuts
1 cup Cooked Thin Rice Noodles
Sweet Chili Sauce, For Serving
Instructions
For the chicken and marinade: Mix the hoisin sauce, soy sauce, grated ginger, Sriracha, rice wine vinegar and grated garlic in a large bowl or resealable plastic bag. Add the chicken strips and marinate, refrigerated, for 2 hours.
Heat a grill pan over medium-high heat.
Remove the chicken strips from the marinade and grill until cooked through, about 2 minutes per side. Transfer to a serving platter and sprinkle with the peanuts and cilantro.
For the lettuce and fillings: Set out the lettuce, bean sprouts, cabbage, carrots, cucumbers and rice noodles on the serving platter.
To assemble, use the butter lettuce leaves to contain the chicken and fillings. Add some chili and hoisin sauce, then roll them up and eat!


Ree Drummond's Blog
- Ree Drummond's profile
- 2016 followers


