
Ree Drummond's Blog, page 13
December 8, 2015
Red and Green Stuffed Shells by Ree
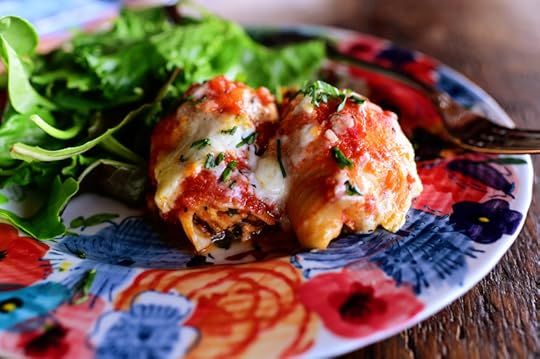 This is one of my favorite recipes from my new cookbook (well, one of about 140 favorite recipes from my new cookbook—ha! I love food) and I wanted to share it with you because the title sounds very Christmasy AND it happens to be out-of-this-world yummy. It also happens to be a fabulous dish for the freezer: You can make it now, freeze it unbaked, then save it for one of those busy days during Christmastime when you don’t have time to make dinner but your family is banging their forks on the table.
Oh…that doesn’t happen to you? Oh. Never mind.
Here’s how to make this delightful dinner!
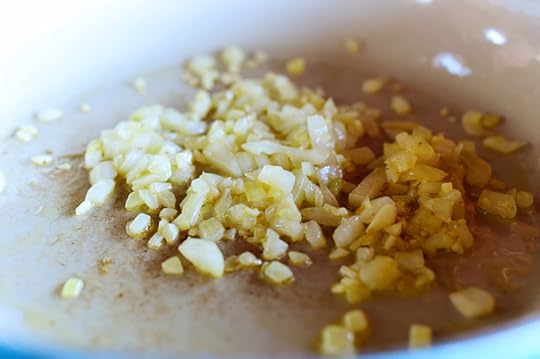 Heat olive oil in a large skillet over medium heat. Add diced onion and minced garlic, and saute it until the onion starts to soften, about 4.992839948 minutes.
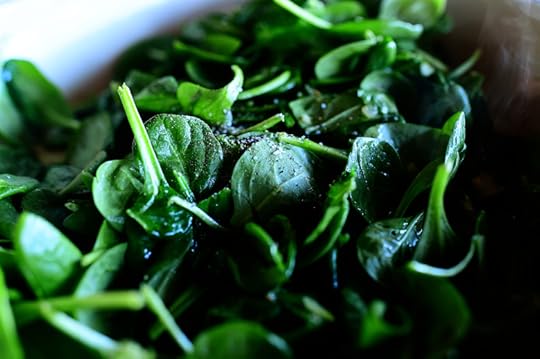 Add some baby spinach…
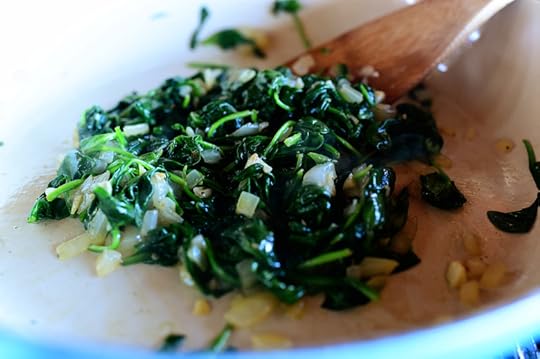 And cook it, stirring constantly, until it’s lightly wilted, about 2.33049488787 minutes.
Okay, fine. I’ll round up/down next time. I just like to be precise, man!
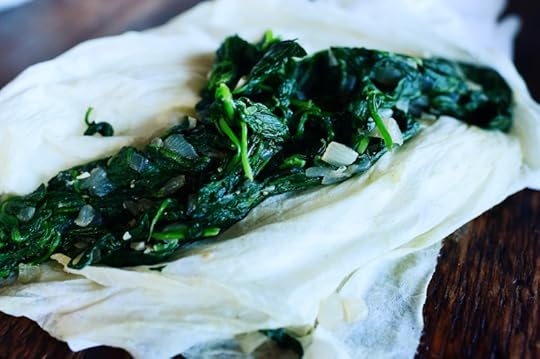 Let it cool a bit, then place the spinach inside a few paper towels and squeeze out as much liquid as you possibly can.
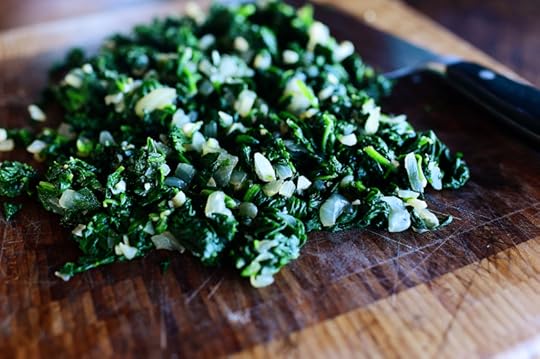 Give it a rough chop and set it aside.
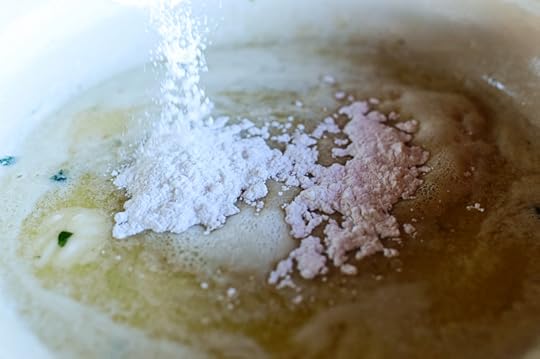 Now, back to the skillet you sauteed the spinach in: Turn the heat to medium-low, then melt some butter and sprinkle some flour over the top.
 Whisk it together to make a roux, then cook it for a minute or two, stirring gently.
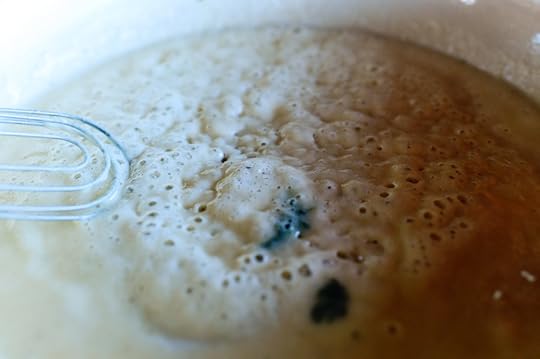
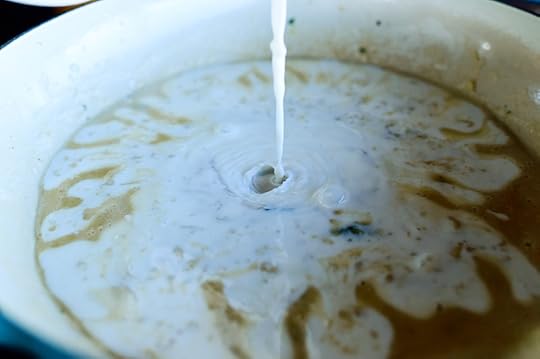 Slowly add milk, whisking out lumps as you go…
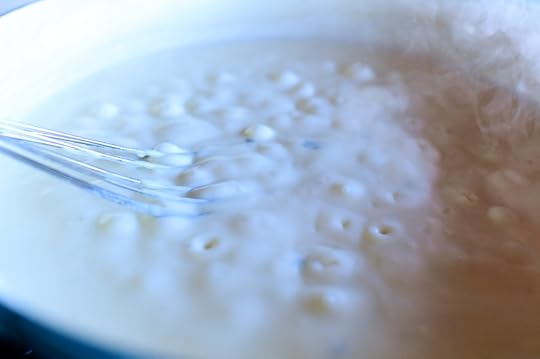 And cook it until the white sauce is thickened, about 4 to 5 minutes.
See? I rounded!
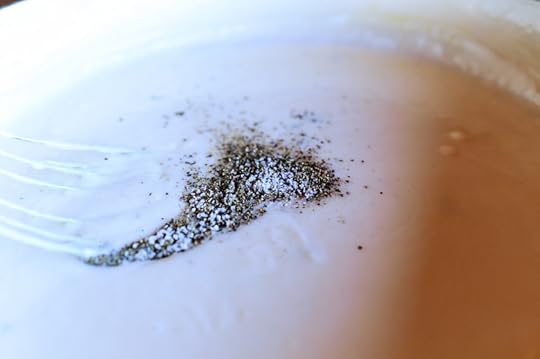 Turn off the heat and add salt and pepper…
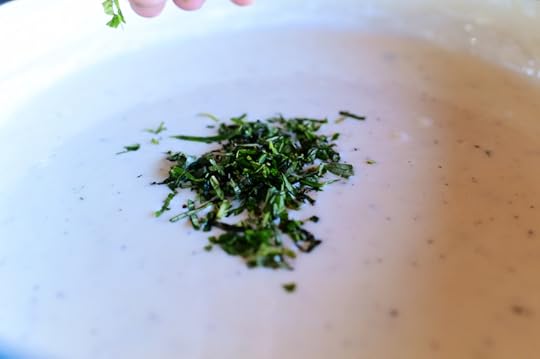 And some basil and parsley! Stir it around and set it aside (you can add another 1/4 cup milk if it gets too thick!)
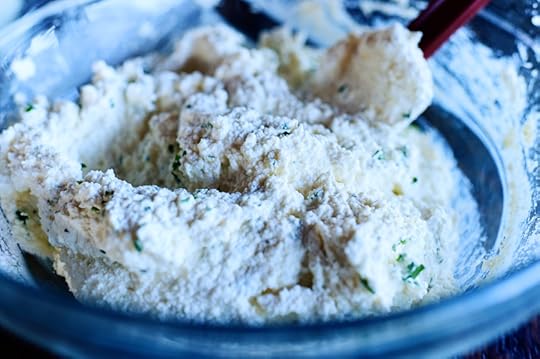 Now you need the cheese mixture! Ricotta, Parmesan, egg, a little more basil and parsley, a little salt and pepper…
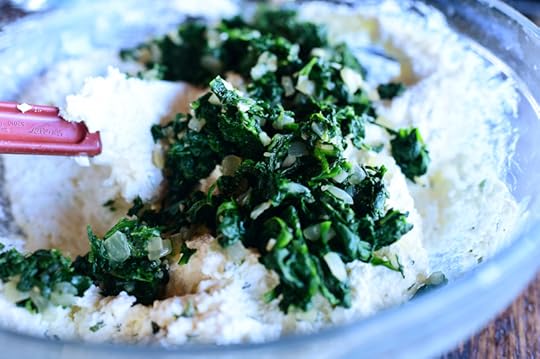 Then drop in the spinach…
 And stir it in. (And, if you’re me, eat a big spoonful. Raw eggs don’t scare me.)
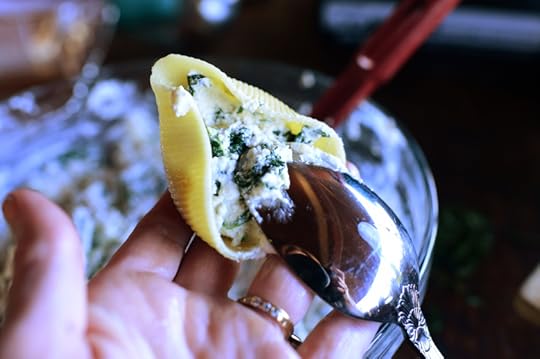 Now grab some jumbo cooked pasta shells (let ’em cool) and use a spoon to smear the spinach/cheese mixture inside. Stuff ’em generously!
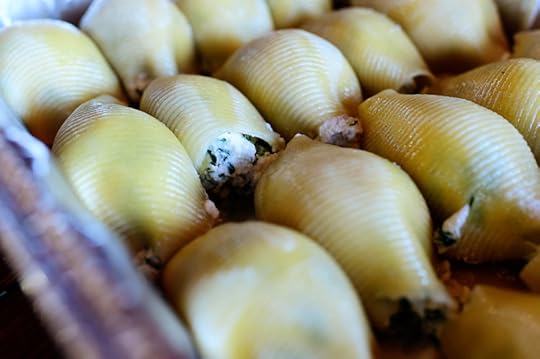 Place ’em seam side down in a 9 x 13 pan, whether it’s foil or ceramic. (Put a little marinara sauce in the bottom of the pan first.)
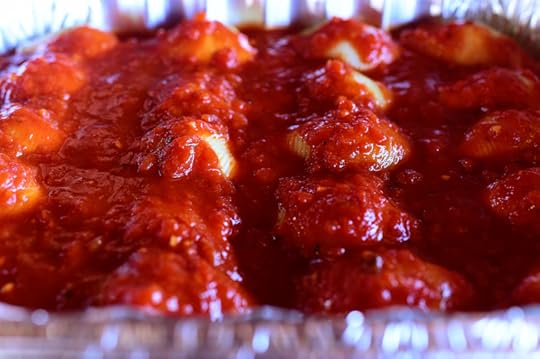 Pour the rest of the marinara evenly over the shells (but do not spread it into an even layer.)
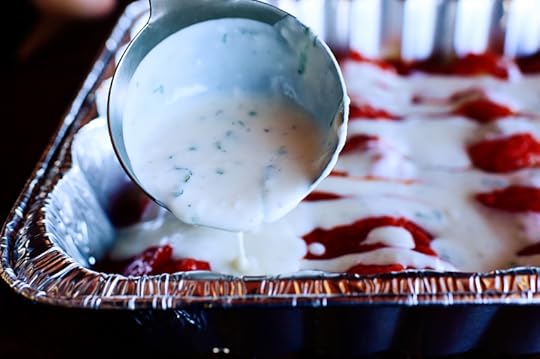 Then ladle the white sauce over the marinara in a zig-zag/line design.
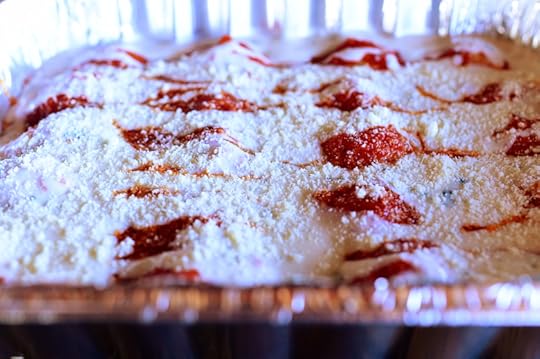 Finally, sprinkle on some extra Parmesan! You could even top it with mozzarella…but it’s delicious as it is.
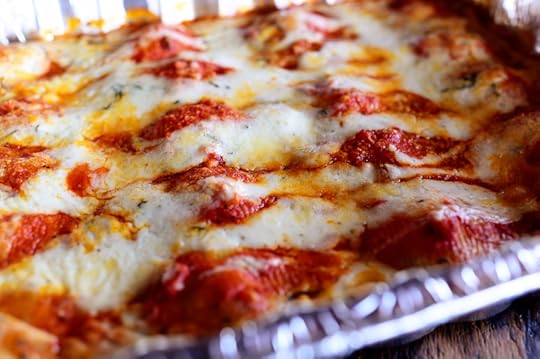 If you’re baking it right away, preheat the oven to 375 degrees and bake the shells for 25 to 30 minutes, or until hot and bubbly. (If you’d rather freeze it, cover the pan of unbaked shells tightly with heavy foil and freeze for up to 6 months. Then bake it in a preheated 375 degree oven for 1 hour 30 minutes, then remove the foil and bake for another 10 to 30 minutes more, depending on how frozen it was. Alternatively, you can thaw the pan in the refrigerator for 24 to 48 hours, then bake as directed.)
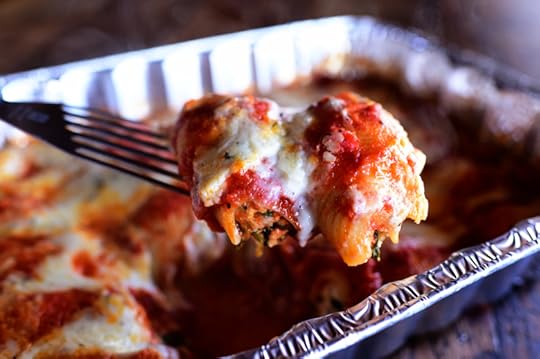 Serve 2 to 3 shells at a time!
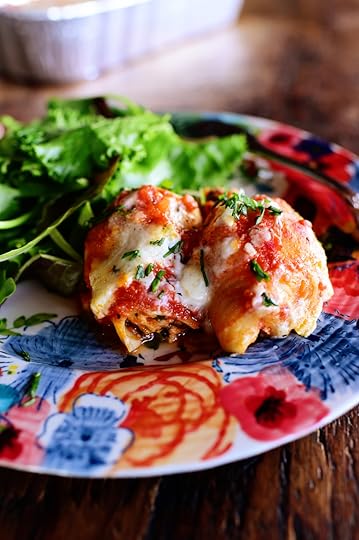 Wowzers.
 Wowzers!
Here’s the handy dandy printable.


December 2, 2015
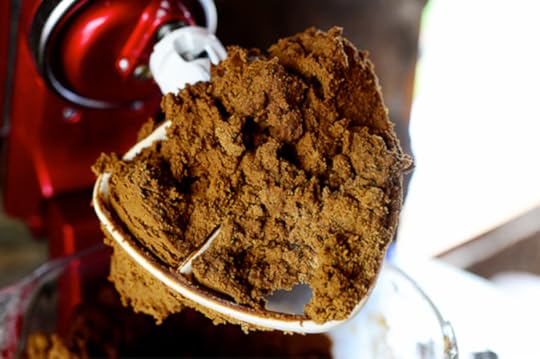
Video: Gingerbread Cookies by Ree
 You may remember that last year we did an hour-long Cowboy Christmas special on Food Network. It was so much fun—we had a party at our building in town and had a blast. Part of the gathering involved a kids’ activity table where little cuties decorated a bunch of gingerbread cookies, and I’d highly recommend doing this if you’re hosting a holiday party where little ones come along. It captured their attention and even though it was a little messy (heck, it would have been messy if adults were decorating!) it wound up being such a fun memory. And there were cookies to eat at the end!
 The Cowboy Christmas special will re-air later this month, but in the meantime, here is the video for the cookies. Hope you enjoy it—Alex and Paige helped me!
(BTW, if you aren’t able to view the video, would you mind dropping me a comment with your browser information and what’s happening? I want to make sure I can fix any issue that’s going on.)


Video: Cowboy Christmas Gingerbread Cookies by Ree
You may remember that last year we did an hour-long Cowboy Christmas special on Food Network. It was so much fun—we had a party at our building in town and had a blast. Part of the gathering involved a kids’ activity table where little cuties decorated a bunch of gingerbread cookies, and I’d highly recommend doing this if you’re hosting a holiday party where little ones come along. It captured their attention and even though it was a little messy (heck, it would have been messy if adults were decorating!) it wound up being such a fun memory. And there were cookies to eat at the end!
The Cowboy Christmas special will re-air later this month, but in the meantime, here is the video for the cookies. Hope you enjoy it—Alex and Paige helped me!
(BTW, if you aren’t able to view the video, would you mind dropping me a comment with your browser information and what’s happening? I want to make sure I can fix any issue that’s going on.)
November 30, 2015
Nutella Wontons by Ree
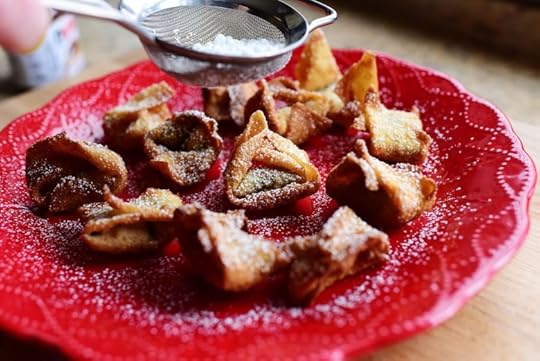 These crispy, sweet, luscious little fried wontons are the dessert version of these cream cheese wontons I posted a couple of years ago! I have a real weakness for anything fried in a wonton, whether it’s sweet or savory, and these little Nutella wonders are great for the holidays!
Best thing is, they really don’t take any time at all to make.
And c’mon. They’re filled with Nutella! That means they’re gonna be good.
 First, grab a package of wonton wrappers. These are typically sold in the produce section of supermarkets, and you just need to keep in mind that after you open the package, they dry out really fast. So grab a few, then cover the rest so they won’t get dry (and therefore become hard to work with.)
Sorry to be bossy.
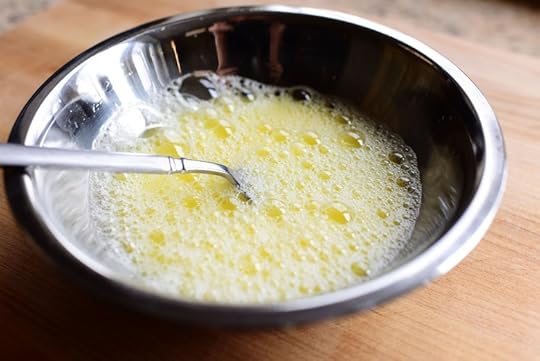 You’re also gonna want to whip up a simple egg wash: 1/2 cup water and 1 egg. Mix with a fork. Done!
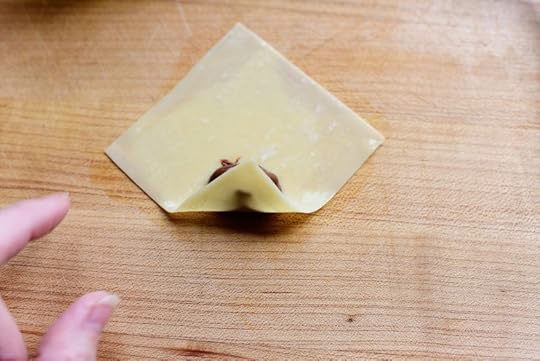
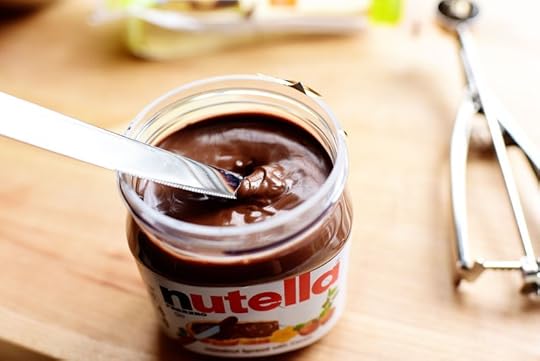 Lay out one wonton wrapper, then use a dinner knife to grab a small amount—probably 1/2 teaspoon or so—of Nutella.
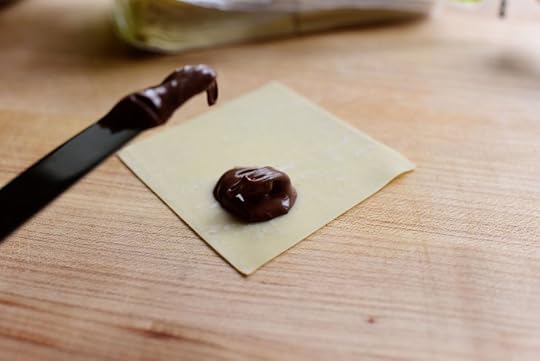 Smear it onto one corner of the wrapper, leaving a little bit of space from the edge. (You’ll likely need a second knife to scrape it off the first.) And sorry to be bossy again, but try not to smear Nutella all over the wonton wrapper (and your neighborhood) in the process.
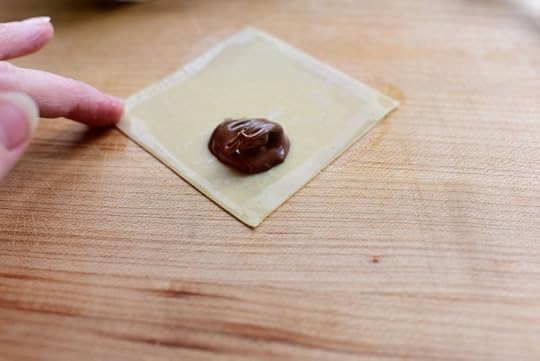 Dip your finger (either your middle or ring finger will be fine; if you use your index or pinkie finger, the wontons will not turn out right. Just kidding) into the egg wash and smear a little border around the edges of the wrapper.
 Fold up the corner…
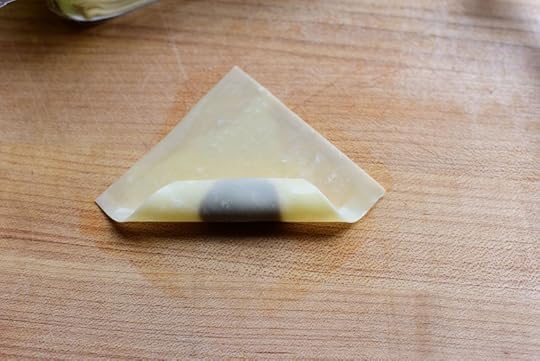 And roll it semi-snugly into a roll until it’s a little past the halfway point (in this photo it’s a little short of the halfway point.)
You could probably add a little more Nutella than I used; I was trying to keep the wontons from popping open in the oil, but a little more would be fine.
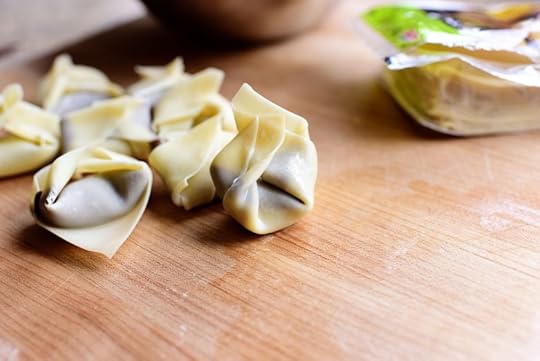
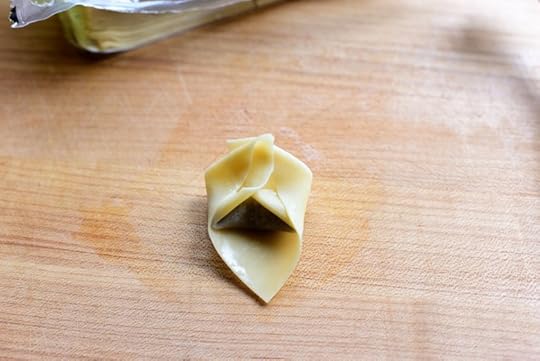 Grab the two ends and bend them backward until they meet and “hold hands” as my friend Jaden describes it. Hold the ends together for a few seconds so they stick.
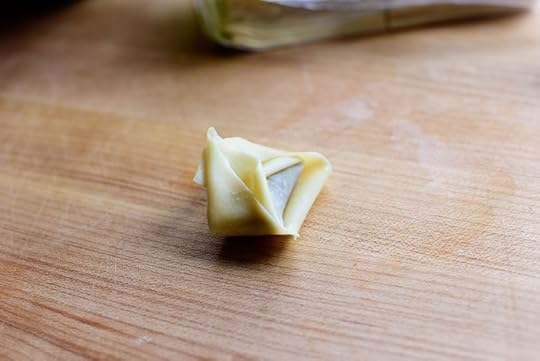 Then I tuck the little end backward so the whole wonton is nice and neat. Done!
Pssst. You can see this method in my post about making cream cheese wontons, too. There are a couple more photos that might help explain it even further!
 Now act as quickly as you can (to avoid them drying out) to assemble a few more wontons…
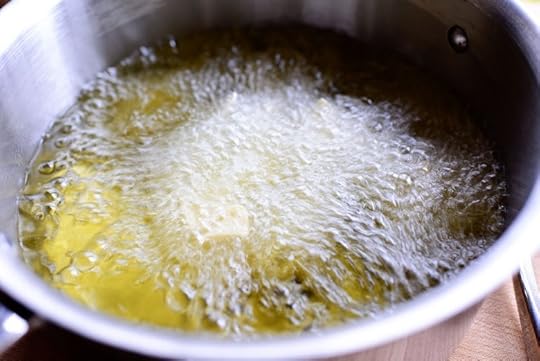 And fry them in oil for about 45 seconds or so! This is regular vegetable oil heated to about 350…but peanut oil works really well, too. Use a metal spatula to carefully move them around to make sure they brown evenly.
Note: If you have kids in the house, please put the pan of oil on the back burner! It’s the safest way to go.
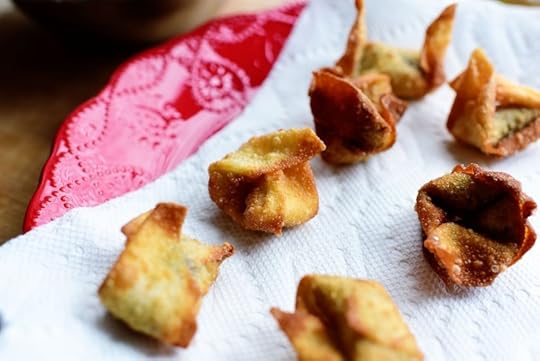 As soon as you see them getting nice and golden, remove them to a paper towel-lined plate so the excess oil will drain.
 Aren’t they cute? Then just fry some more while these sit. Note that you won’t want to eat these as soon as they come out of the oil—it’s best if you wait at least a couple of minutes to ensure the Nutella isn’t too hot.
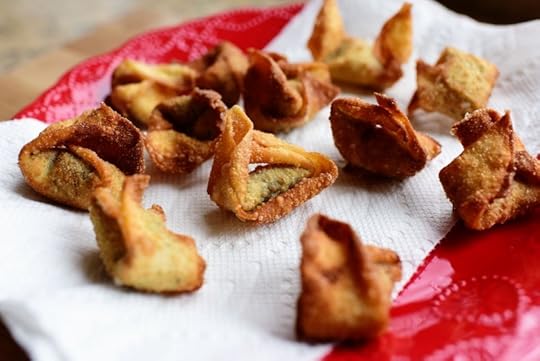
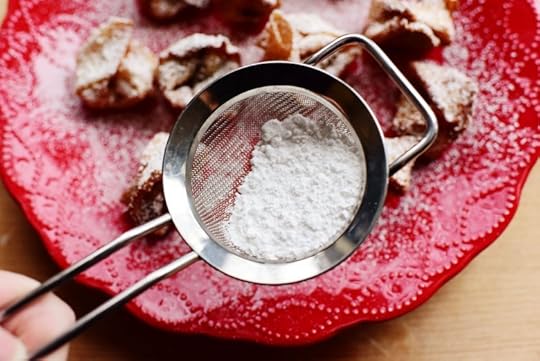 And there’s one last thing you want to do before eating (or serving) them: Put a little powdered sugar in a sifter…
 And sprinkle it over the wontons!
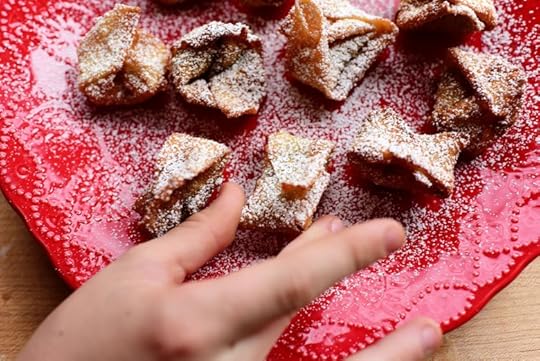 I was doing a really good job being patient…but Todd couldn’t stand it any more.
 Times three.
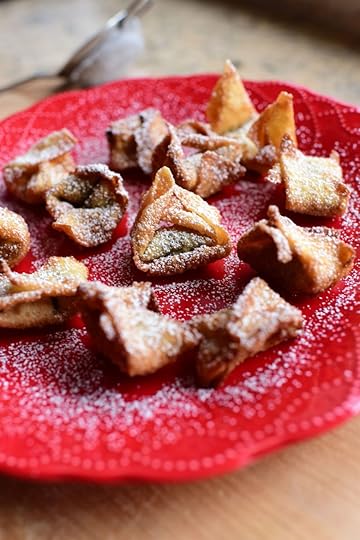
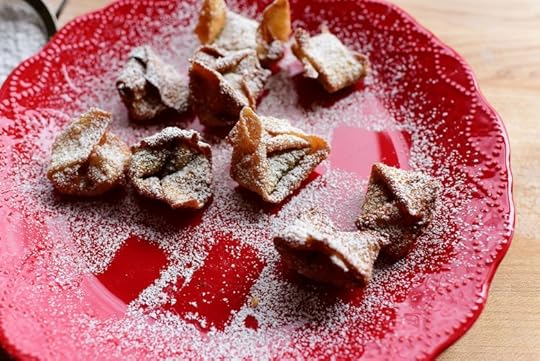
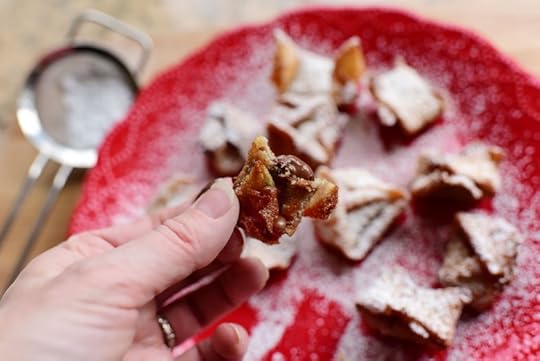 Nutella Wontons! They’re super tasty. A really fun and easy treat.
Here’s the handy dandy printable!


November 25, 2015
Cooking Video: Cloverleaf Rolls by Ree
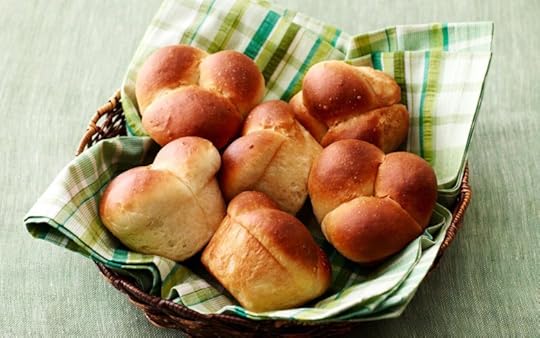 Image: Parade Magazine
These no-knead rolls have been featured here on my website (years ago! Just check out the photos. Haha), on Parade Magazine, and on my Food Network show. And that’s because they’re a cinch to make and always turn out nice and cloverleaf rolly. If that’s a word.
The video is below! Or, if you prefer, here is the original post and printable: No-Knead Dinner Rolls: Step-by-Step and Printable


November 24, 2015
Cooking Video: Caramel Apple Pie by Ree
 Hi, friends! I’ve been wanting to share occasional video clips from my various Food Network episodes, so you could catch some recipes that you might have missed here and there. And so you can see my various cosmetic experiments, but that’s another story for another time.
Let me know what you think! This particular recipe video involves my whipping up a Caramel Apple Pie. Here’s the old step-by-step post if you’d like the printable recipe.
If this video works for you, I’ll post more Thanksgiving-friendly clips in a bit!


November 19, 2015
Thanksgiving Recipes for You! by Ree
 I can’t believe Thanksgiving is next week! I hope you’ve been checking out all the amazing posts over on Food & Friends—I’ve found more than a couple of things that I’m dying to try.
Food & Friends – Thanksgiving Recipes
Seriously, you owe it to yourself to browse through the Food & Friends recipes. The gals are pulling out all the stops!
 Meanwhile, here is the big, bad (meaning yummy) archive of all my Thanksgiving-friendly posts to date. Some are recipes for the meal itself, and some are actually Thanksgiving leftover recipes. It’s never too early to start planning what you’re going to eat on Black Friday! Ha.
The Pioneer Woman – Thanksgiving Recipes
Hope you enjoy browsing the extreme tastiness! There will be more recipes and instructions in the coming days.


November 16, 2015
Beautiful Brussels Sprouts by Ree
 First things first: My new Thanksgiving special will air tonight on Food Network at 8 Eastern/7 Central! I hope you love it. It’s called P-Widdy’s Totally Awesome Turkey Day Special and it’ll be lots of fun.
Okay, that’s not the title. The title is actually Ree’s Totally Tubular Thanksgiving Special!
Okay, that’s not the title. The title is actually Pioneer Woman’s Ultimate Thanksgiving. No, really. It is!
 And here’s one of the recipes you’ll see if you tune in. (Pssst. It’s a keeper.)
Here’s how to make it!
 First, dice up a butternut squash! I didn’t take step-by-step photos of this process, but you can look at the process shots on this post from 2014, as it’s exactly what I did here! And please note my nails in that post. Thank you.
 Next, prep some Brussels sprouts (unless you can buy them already prepped where you live, in which case can I come live with you?)
 First, slice off the tough end of the sprout.
 Then slice the sprout in half (from top to bottom, not across.)
 After that, you have to peel off the outer layer of the sprouts, which is somewhat tedious. But the sprouts will be worth every tear!
 Keep going until you have the amount you need, and throw away (or compost) all the scraps.
 You’ll need a red onion, too! It’s pretty and purple (despite its moniker) and makes the dish extra gorgeous. Slice the onion in half, slice off the ends, then peel off the outer skin and pull out the inner core.
 Slice the halves in half again…
 Then cut them into sorta small wedges.
Oh! This brings me to something I wanted to tell you: The size of Brussels sprouts can vary widely, so prep the sprouts first, then dice the squash and cut up the onion accordingly. You want everything to be the same general size.
 Next, pile the sprouts on a rimmed baking sheet…
 Along with the squash and the onion! Look at those gorgeous colors.
 Next, drizzle olive oil all over the veggies…
 Sprinkle them with salt and pepper…
 Then, just for kicks, sprinkle on some chili powder!
 It just adds a hint of flavor and a little zip.
 Use your hands to toss them all around…
 Then pop the veggies into a 425 degree oven for about 20 to 25 minutes, shaking it once or twice during the process. Watch them, as you want the veggies to be tender but you don’t want the Brussels sprouts to start to turn too yellowish-green.
 They’re ready!
So pile them all on a platter…
 And then—and this is totally optional!—grab a bottle of pomegranate sauce, otherwise known as pomegranate molasses because of the dark, thick, rich color and consistency! I learned this trick from Bobby Flay many moons ago, when he traveled to the ranch for our Thanksgiving Throwdown, and I’ve been drizzling my sprouts with the stuff ever since!
You can also do a balsamic glaze instead, which gives it a nice bite. Instructions for that glaze are here, or here. Yum!
 Just drizzle over as much as you want. It’s sweet and a little tangy and highly magical.
 Both the pomegranate sauce and the balsamic glaze work really well, so you really can’t go wrong.
 To finish everything off…
 Sprinkle on some pomegranate seeds at the end. So pretty!
 This is a masterpiece for your Thanksgiving table. It’ll make everything look gawgeous.
Here’s the handy dandy printable. I can’t believe Thanksgiving is next week!


November 9, 2015
Pepperoni Chicken by Ree
 Here’s what this recipe isn’t: fussy, complicated, complex, difficult, elaborate, laborious, burdensome, or tricky.
Here’s what this recipe is: fast, simple, tasty, easy, versatile, satisfying, and speedy.
Let’s make it and I’ll show ya!
 Start with a couple of chicken breasts (the recipe calls for 2, but I just cooked 1 for these photos.)
 Use a knife to carefully slice the chicken breasts in half across the middle (it’s easier if you hold your other palm firmly against the top of the breast while you slice with the other hand)…
 So that you wind up with 2 thinner chicken cutlets. Whenever I’m cooking a recipe that leaves chicken breasts “whole,” I so often slice them in half like this. They cook more evenly that way and don’t dry out as much!
 Season them with salt and pepper and lay them in a skillet with some olive oil and butter over medium to medium-high heat.
 When the first side is nice and deep golden…
 Flip them over and finish cooking them on the other side until they’re cooked through and beautiful.
 Remove them to a plate and set them aside for a minute.
 Into the same skillet (don’t clean it, obviously!) pour in some marinara sauce. You can spend some extra time to make your own sauce by adding crushed tomatoes, sugar, seasonings, etc, but a jar works well, too!
 Stir the sauce and let it heat up and start to bubble, then nestle the chicken breasts in the sauce.
 Now here’s where things start to get crazy, otherwise known as shocking, otherwise known as mind-blowing, otherwise known as cray, otherwise known as totes cray, depending on your age group: Open up a package of pepperoni slices and lay them all over the top of each chicken breast!
Um, the mild flavor of chicken combined with the salty wonder of pepperoni? It’s a match made in Heaven.
 Next, lay a slice of mozzarella cheese over the top of each piece of chicken, then cover the skillet (if you don’t have a lid that fits, just lay a baking sheet over the pan!)…
 And let it bubble up until the cheese is totally melted.
Oh, baby.
 Mince up some parsley…
Sprinkle it over the top…
 And dinner is served! How simple was that?
 How you serve it is up to you: You can cook some pasta and spoon over some sauce…
 Then grab the chicken…
 And lay it right on!
 Or you can serve the pepperoni chicken with a side salad and pull back on the carbs.
Or you can lay the pepperoni chicken in a toasted sub roll and eat it as a sandwich!
We’re getting ready to get into a lot of holiday cooking, so I hope you’ve enjoyed this nice, quick recipe this morning.
Here’s the handy dandy printable!


November 6, 2015
Dorm Room Dining! by Ree
 I don’t always post teasers for upcoming Food Network episodes of mine, but wanted to post about tomorrow’s show because I think you’ll find it lots of fun! It’s called “Dorm Room Dining,” and aside from accomplishing the task of helping me emotionally and psychologically deal with Alex’s departure to college this fall, it also offers some really fun ideas for making yummy food whether you’re in a dorm room, a boat, a small apartment…or yes, even a regular home! There are some clever ideas for fixing food without tons of pots, pans, bowls, and tools, and I think you’ll get a kick out of it. Here’s the info:
The Pioneer Woman on Food Network: Saturday, November 7 at 10 Eastern/9 Central!
Happy Friday, friends, and thanks for being patient during my busy week/month/millennium! I’ll have a delicious new recipe post up on Monday morning.
Love,
P-Dub


Ree Drummond's Blog

- Ree Drummond's profile
- 2016 followers

