Ree Drummond's Blog, page 16
August 31, 2015
Lettuce Wraps
Lettuce wraps are everything. Absolutely everything. And I know they’ve been around forever, and I know they’re everywhere, and I know I shouldn’t have worn turquoise mascara when I got my senior pictures taken back in the eighties. I get that. But I’m not sorry.
(For the lettuce wraps or the turquoise mascara.)
Here’s how I like to make them!
 First, make the marinade for the chicken, which is the cat’s meow, the bomb, and Heaven. It starts with hoisin sauce…
 Next, squeeze in a little Sriracha, also known as I Love the Stuff.
 A little rice wine vinegar (or heck, any vinegar!) is good…
 And some minced garlic and minced ginger.
 Next, just slice a couple of boneless, skinless chicken breasts into strips…
 And add them to the marinade, tossing it around to coat it. Then cover it and pop it in the fridge for a couple of hours. You’ll be soooooo glad you did.
 After that time, grill them on a grill pan (or you can saute them…)
 Until they’ve got fabulous grill marks and are totally cooked through.
 Oh, and one more thing! Grab a package of those super thin cellophane noodles and pour boiling water over them in a bowl.
 Read the package to see how long they need to sit; it doesn’t take long at all for them to be soft and tender and magical. Then rinse them in cold water so they’ll stop cooking…but also so they’ll be cool!
 Gracious. Will you look at that chicken for a sec?
Oh, and what the heck, go ahead…take two secs!
 Pile it on a board with shredded carrots (these are the packaged ones), sliced red cabbage, cilantro leaves, julienne cucumbers, and of course…lettuce leaves.
Or don’t, depending on how hungry you are.
 Oh! Chopped peanuts! (Cashews are good, too!)
Oh, and another thing: Bean sprouts. Love those in lettuce wraps. I just didn’t have any.
 To build the beautiful babies, grab a lettuce leaf and drizzle in a little sweet chili sauce…
 Lay on a couple of pieces of chicken…
 Then throw on everything else: noodles, carrots, cabbage, cucumbers, cilantro, peanuts, a little more chili sauce (or hoisin or soy or Sriracha.)
(I didn’t take a photo of the lettuce wrap—or me—after I took my first bite. It wasn’t pretty.)
(But it sure tasted pretty.)
Enjoy, friends!
___________________
Note: The printable recipe is at the top of this post, over on the right sidebar. You can also access the printable recipe here:
Lettuce Wraps Printable Recipe
I’m still working to get the actual printable put into the post itself, but in the meantime, here’s the straight-up recipe if you’d like to see what’s in it!
Lettuce Wraps
Ingredients
1/3 cup Hoisin Sauce
1/3 cup Soy Sauce
2 Tablespoons Grated Ginger
1 Tablespoon Sriracha
1 Tablespoon Rice Wine Vinegar
3 cloves Garlic, Grated
2 whole Boneless, Skinless Chicken Breasts, Cut Into Strips
1/4 cup Chopped Cilantro
8 whole Butter Lettuce Leaves
1 cup Bean Sprouts
1 cup Thinly Sliced Red Cabbage
1 cup Julienne Carrots
1 cup Cucumber Slices
2 Tablespoons Chopped Peanuts
1 cup Cooked Thin Rice Noodles
Sweet Chili Sauce, For Serving
Instructions
For the chicken and marinade: Mix the hoisin sauce, soy sauce, grated ginger, Sriracha, rice wine vinegar and grated garlic in a large bowl or resealable plastic bag. Add the chicken strips and marinate, refrigerated, for 2 hours.
Heat a grill pan over medium-high heat.
Remove the chicken strips from the marinade and grill until cooked through, about 2 minutes per side. Transfer to a serving platter and sprinkle with the peanuts and cilantro.
For the lettuce and fillings: Set out the lettuce, bean sprouts, cabbage, carrots, cucumbers and rice noodles on the serving platter.
To assemble, use the butter lettuce leaves to contain the chicken and fillings. Add some chili and hoisin sauce, then roll them up and eat!


August 28, 2015
Edna Mae’s Escalloped Cabbage by Ree
This is a version of a recipe from my husband’s beloved grandmother, Edna Mae. And that means just one thing: It is going to be splendidly delicious! All things from Edna Mae generally are. It’s a cheesy, satisfying cabbage casserole that’s perfect as a side dish with things like beef brisket or roasted chicken, and it’s also delicious served with a salad and a chunk of bread.
Warning: There’s an ingredient in this casserole that might be offensive to some. But it also might be delicious to others, so it all evens out in the end! Ha.
But seriously…this is delicious! You will love every bite.
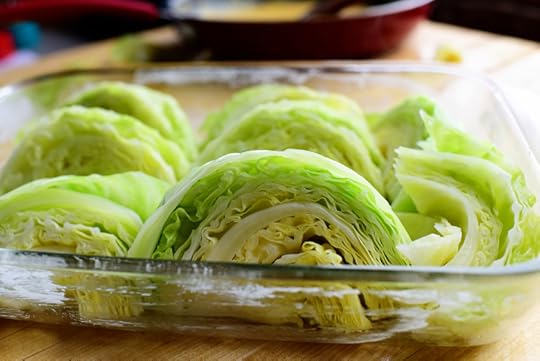
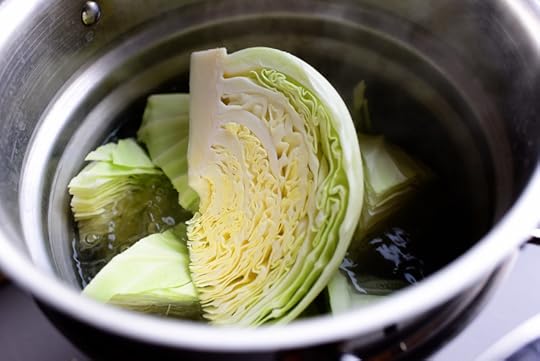 First, par-boil some cabbage wedges! They just need a couple of minutes.
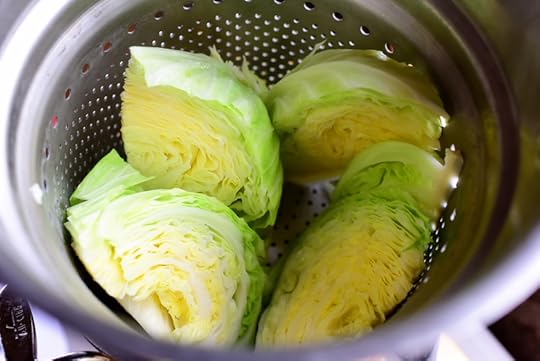 You don’t want them totally cooked and soft, just slightly tender.
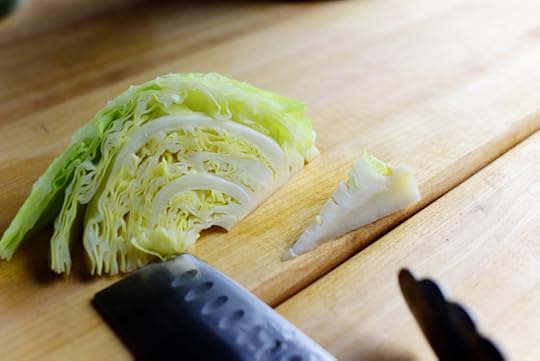 Remove them from the pan, then slice off the hard core. I leave it on when I boil the cabbage so the wedges don’t fall to pieces.
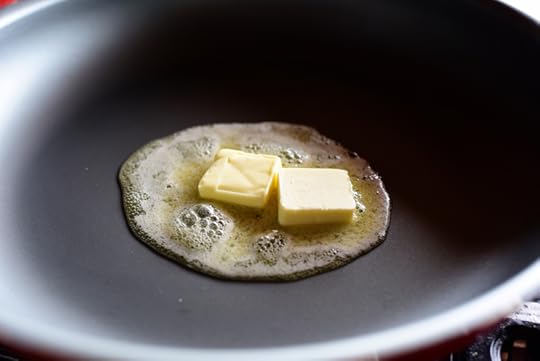 Melt some butter in a skillet (nonstick works well!)
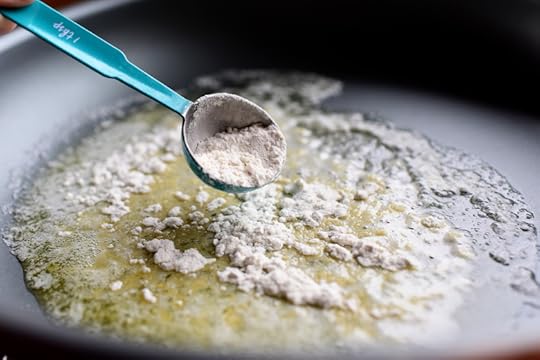 When it’s melted, sprinkle in some flour…
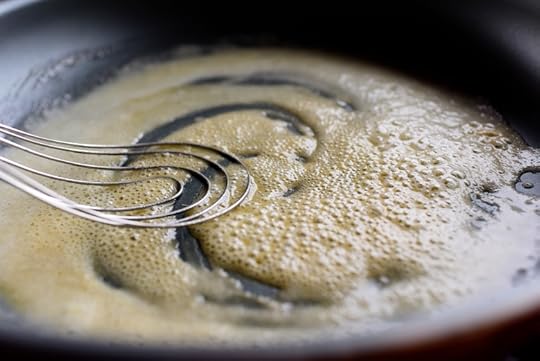
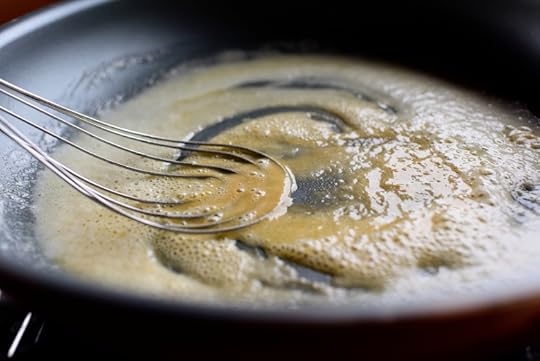 And keep whisking it until it starts to turn golden brown.
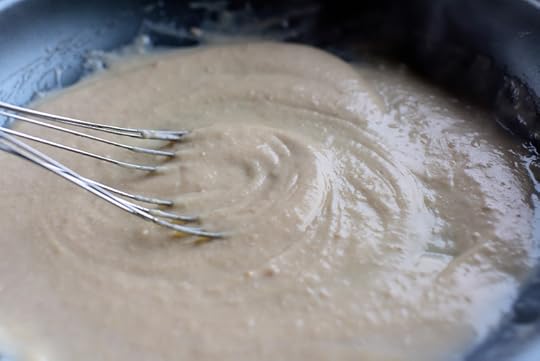 Then whisk it around and let it cook until it’s thick, about a minute or two.
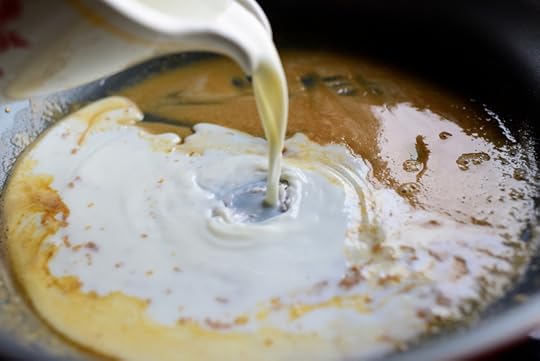
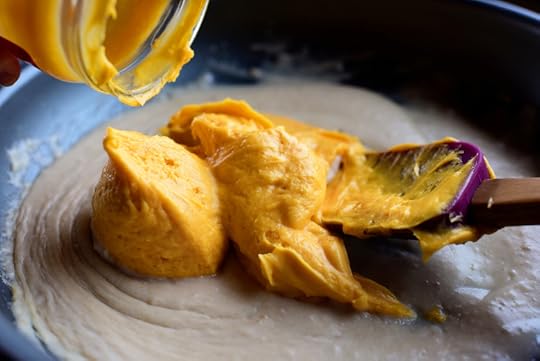 Then (warning!) just crack open a jar of Cheez Wiz (yes, Cheez Wiz! Edna Mae says so) and plop it right into the pan.
Now I know this is not the most beautiful sight in the world.
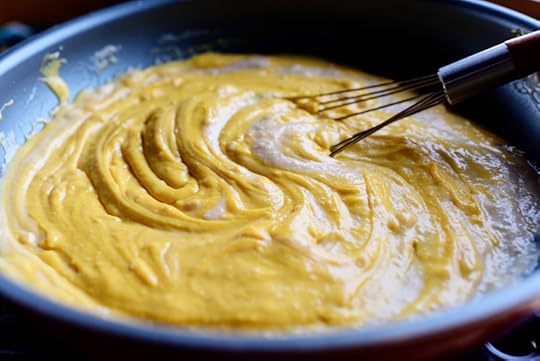 But it gets better here in a minute…promise!
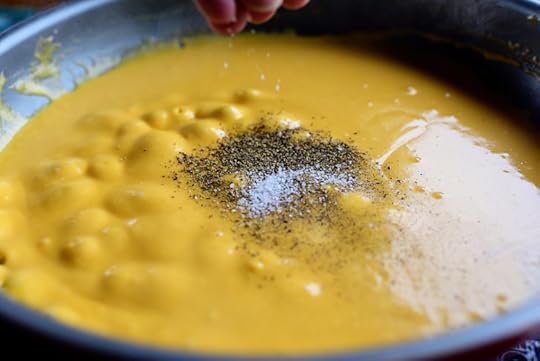 Sprinkle in some salt and pepper and stir them in…
 Then add some grated pepper jack cheese…
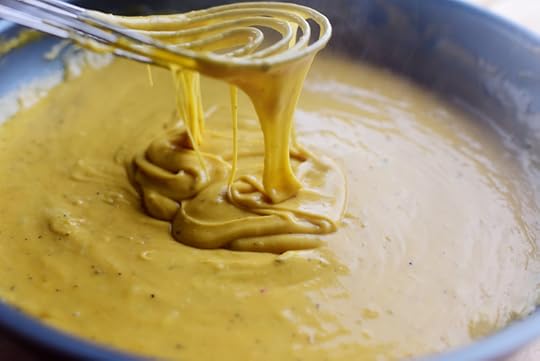 And stir it until everything’s glorious and ridiculous.
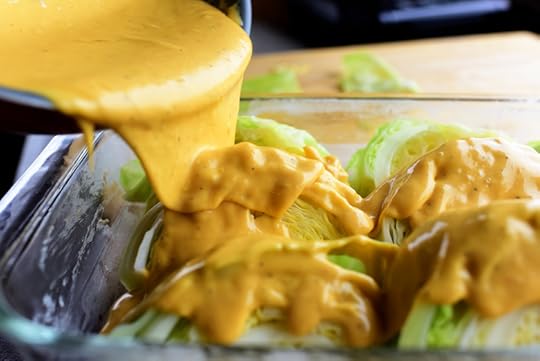
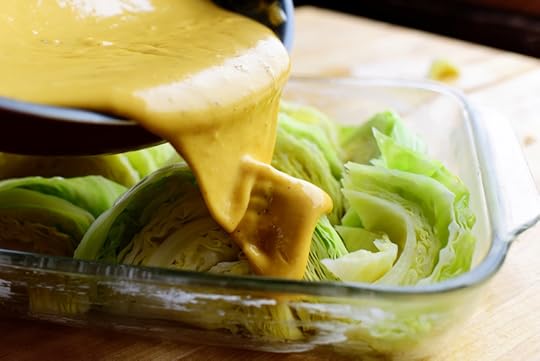 And yep…you guessed it! Pour the luscious, velvety cheese sauce…
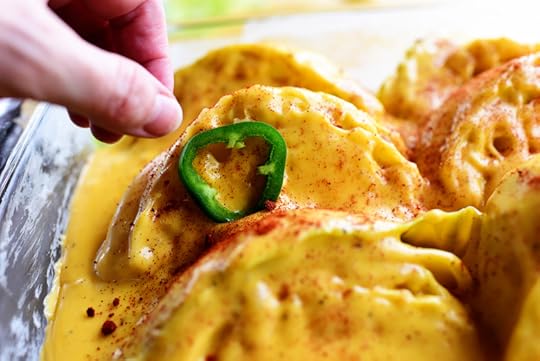
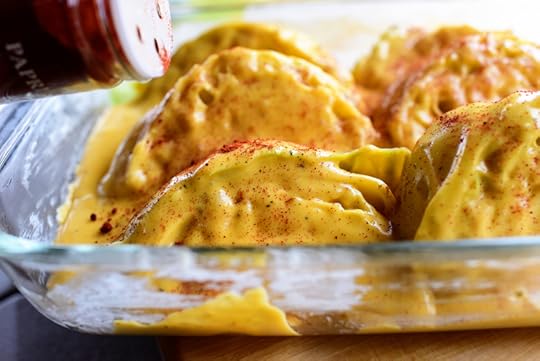 Sprinkle on some paprika for a little color and flavor…
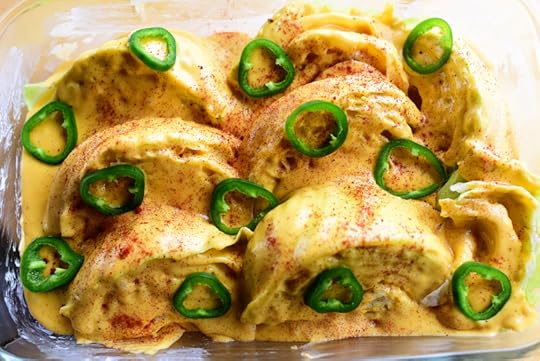 All over the top. I sliced the jalapenos, then cut out the seeds and membranes so they wouldn’t be overwhelmingly spicy. You can also used jarred jalapenos if you prefer! Or you can leave out the jalapenos altogether. The choice is yours!
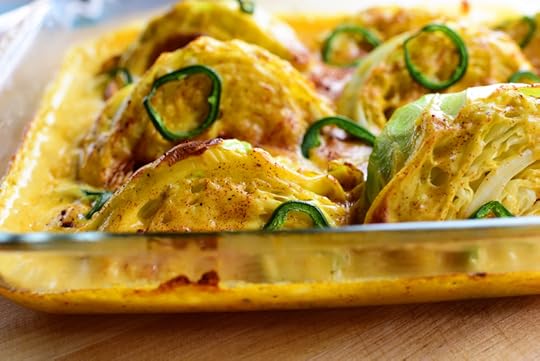 Bake the casserole until it’s hot and bubbly and lovely! And the great thing about it is, you don’t necessarily have to serve it right out of the oven. If it sits for 20 minutes or so, I think it actually gets better and better.
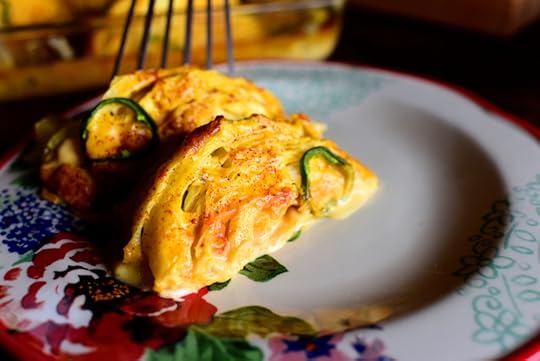 And I know this is supposed to be a side dish and all…
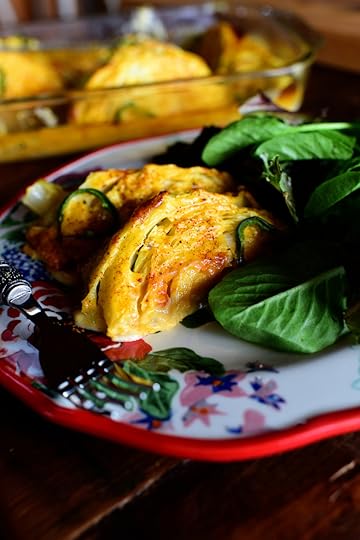 But sometimes this really feels like a meal in itself.
Enjoy this, friends! It’s a blast from the past that’s stood the test of time.
Note: The new printables for recipes can be found in the upper right sidebar. We’re still tweaking this so they’re easier to use, so in the meantime, here’s the link to the printable recipe on Tasty Kitchen. Enjoy, friends!
Escalloped Cabbage: Printable Recipe


Edna Mae’s Escalloped Cabbage
This is a version of a recipe from my husband’s beloved grandmother, Edna Mae. And that means just one thing: It is going to be splendidly delicious! All things from Edna Mae generally are. It’s a cheesy, satisfying cabbage casserole that’s perfect as a side dish with things like beef brisket or roasted chicken, and it’s also delicious served with a salad and a chunk of bread.
Warning: There’s an ingredient in this casserole that might be offensive to some. But it also might be delicious to others, so it all evens out in the end! Ha.
But seriously…this is delicious! You will love every bite.
 First, par-boil some cabbage wedges! They just need a couple of minutes.
 You don’t want them totally cooked and soft, just slightly tender.
 Remove them from the pan, then slice off the hard core. I leave it on when I boil the cabbage so the wedges don’t fall to pieces.
 Melt some butter in a skillet (nonstick works well!)
 When it’s melted, sprinkle in some flour…
 And keep whisking it until it starts to turn golden brown.
 Then whisk it around and let it cook until it’s thick, about a minute or two.
 Then (warning!) just crack open a jar of Cheez Wiz (yes, Cheez Wiz! Edna Mae says so) and plop it right into the pan.
Now I know this is not the most beautiful sight in the world.
 But it gets better here in a minute…promise!
 Sprinkle in some salt and pepper and stir them in…
 Then add some grated pepper jack cheese…
 And stir it until everything’s glorious and ridiculous.
 And yep…you guessed it! Pour the luscious, velvety cheese sauce…
 Sprinkle on some paprika for a little color and flavor…
 All over the top. I sliced the jalapenos, then cut out the seeds and membranes so they wouldn’t be overwhelmingly spicy. You can also used jarred jalapenos if you prefer! Or you can leave out the jalapenos altogether. The choice is yours!
 Bake the casserole until it’s hot and bubbly and lovely! And the great thing about it is, you don’t necessarily have to serve it right out of the oven. If it sits for 20 minutes or so, I think it actually gets better and better.
 And I know this is supposed to be a side dish and all…
 But sometimes this really feels like a meal in itself.
Enjoy this, friends! It’s a blast from the past that’s stood the test of time.
Note: The new printables for recipes can be found in the upper right sidebar. We’re still tweaking this so they’re easier to use, so in the meantime, here’s the link to the printable recipe on Tasty Kitchen. Enjoy, friends!
Escalloped Cabbage: Printable Recipe


August 17, 2015
No-Bake Peanut Butter Bars by Ree
I made these on a recent episode of my Food Network show, and they’re too tasty for words! They’re a super-simple no-bake bar that uses mostly pantry ingredients, and they’re a great treat to have in the fridge for after-school snacks…or, in my case, after breakfast snacks.
But that’s more my issue than yours.
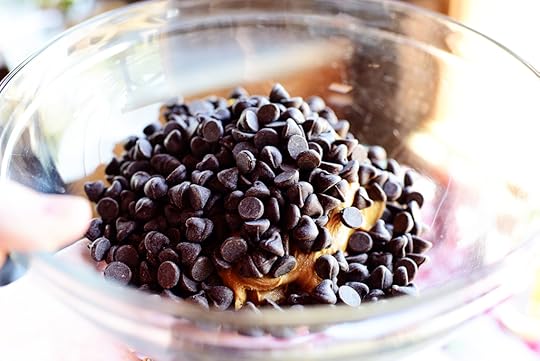 First, make the chocolatey peanut buttery topping! Put some chocolate chips in a bowl with some creamy peanut butter…
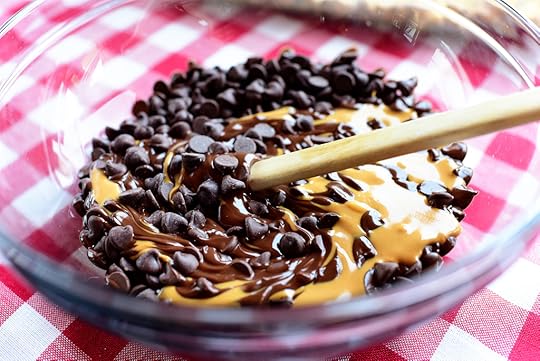 Microwave it for a minute or two…
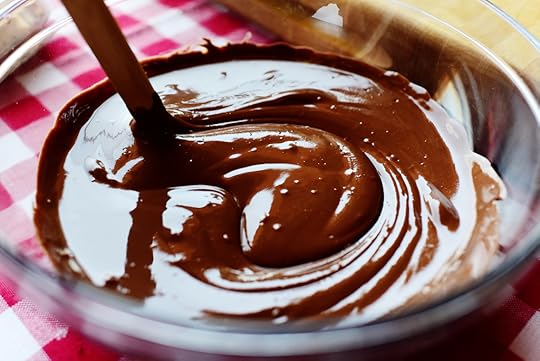 Then stir it until it’s smooth, silky, and you feel like diving in and going swimming. Set this aside to cool slightly while you whip up the bar mixture!
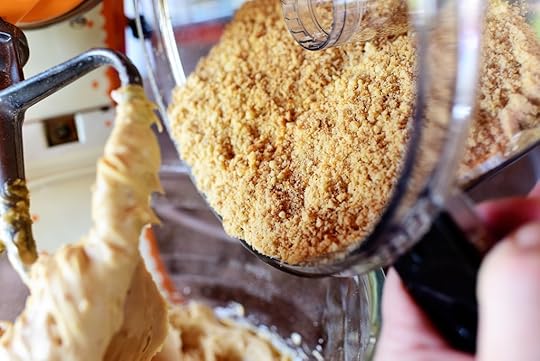
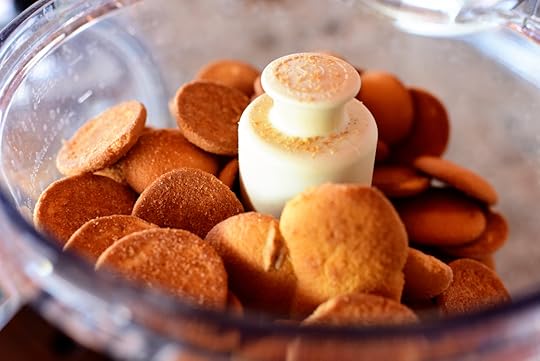 Throw a box of vanilla wafers into the bowl of a food processor (or a large ziploc bag)…
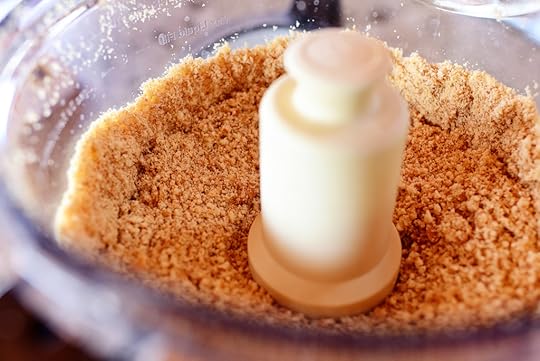 And pulverize them into fine crumbs. When I made them on the show, I kept the crumbs a bit chunky, and that’s delicious, too! Set the crumbs aside for a minute…
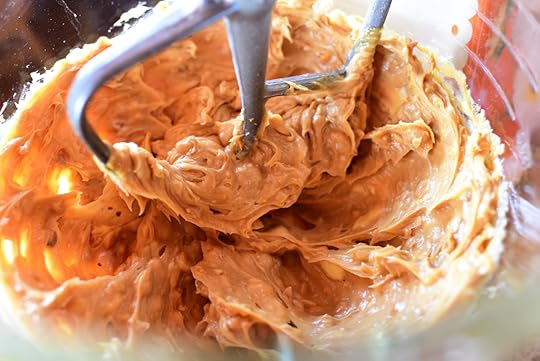
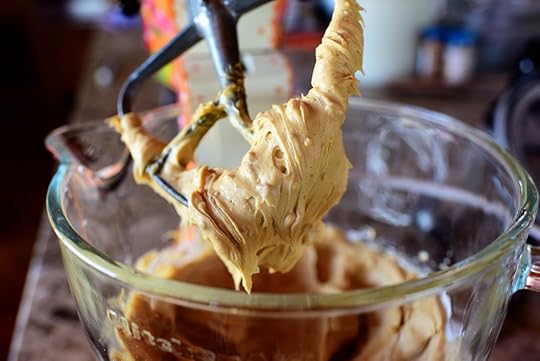
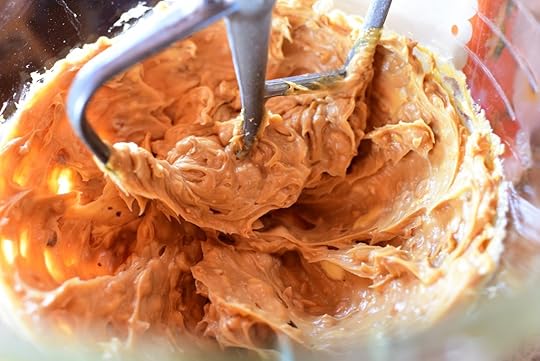
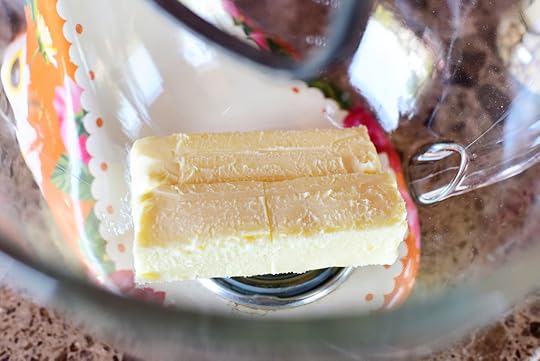 Then throw 2 sticks of nice, soft butter into the bowl of a mixer.
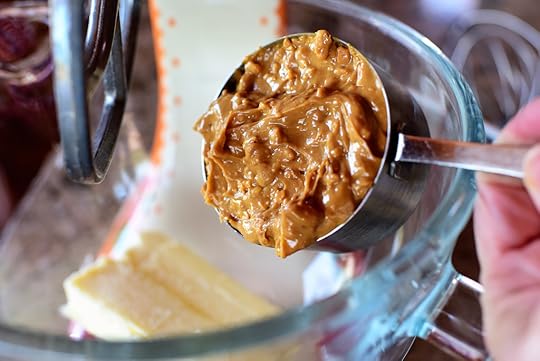 Add a cup of chunky peanut butter…
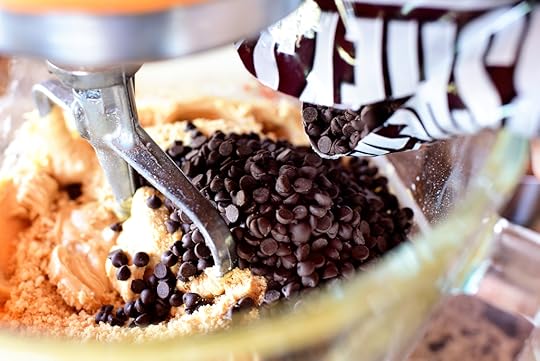 And a bag of a mini-chocolate chips!
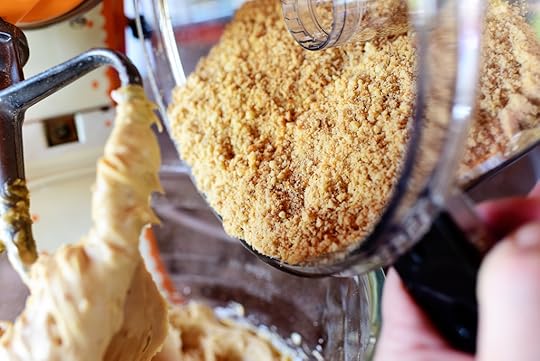
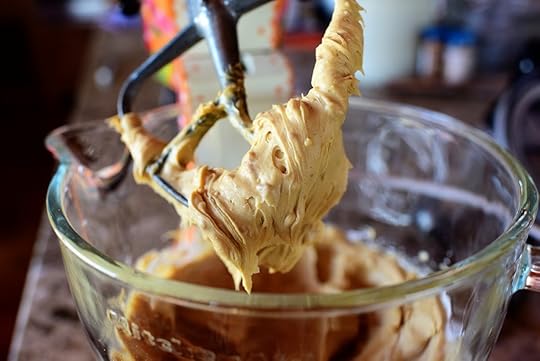
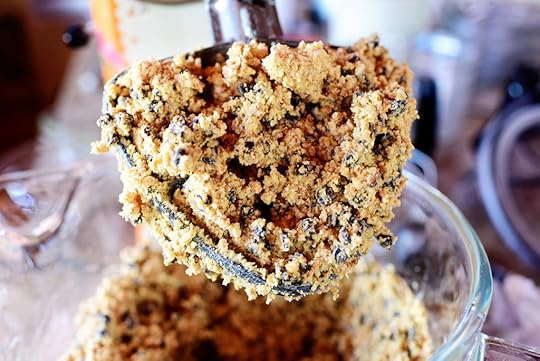 Then mix it until the crumbs and the chocolate chips just barely come together.
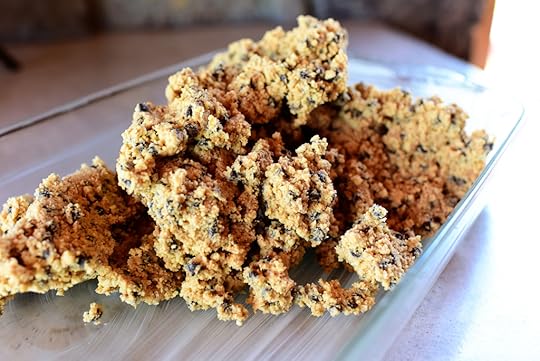 Butter a 9 x 13-inch dish and dump the mixture right in…
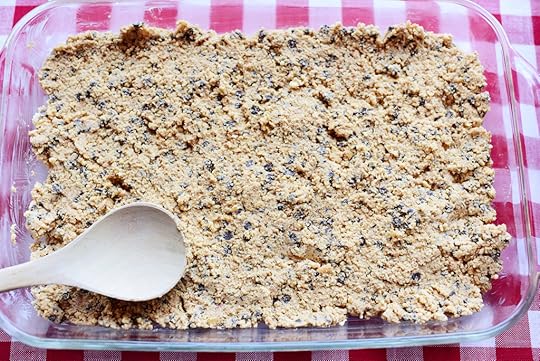 Then press it with a spoon or spatula…
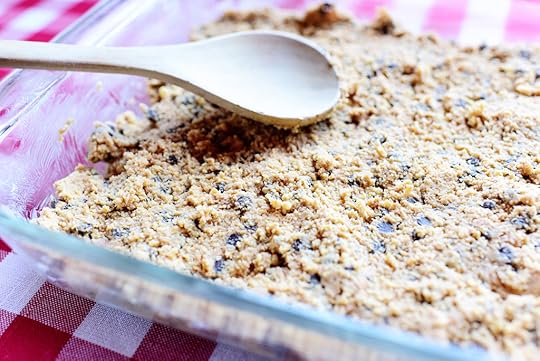 Until it’s in a nice, even layer.
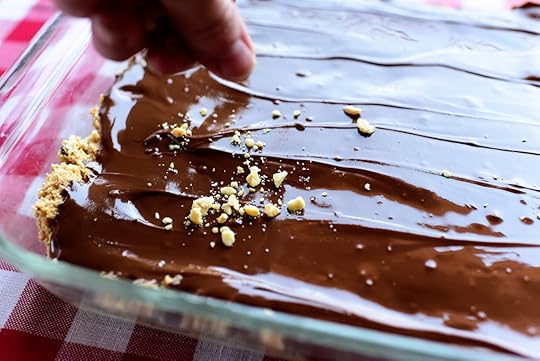
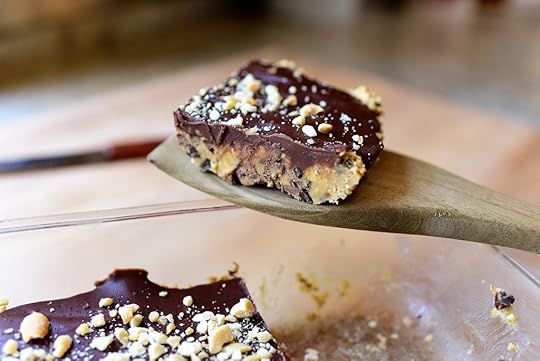
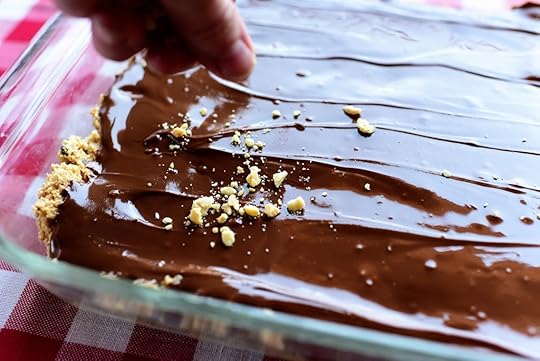
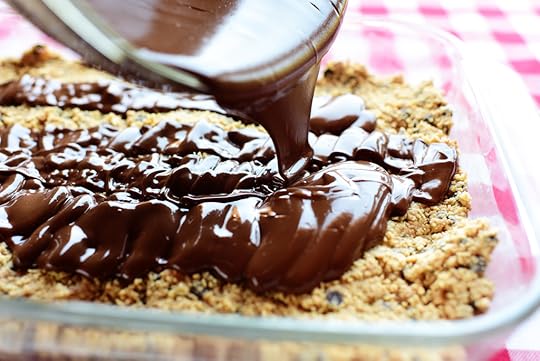 Then, you guessed it, pour the chocolate/peanut butter mixture all over the top…
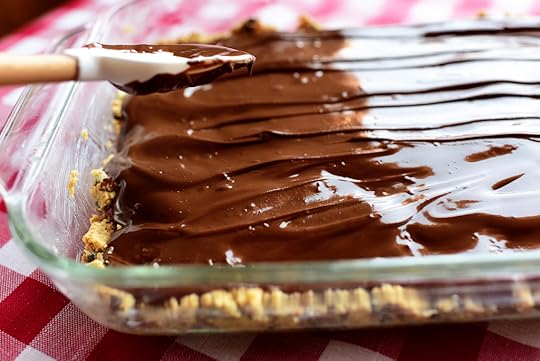 And spread it into a thin layer, until it coats every last crumb.
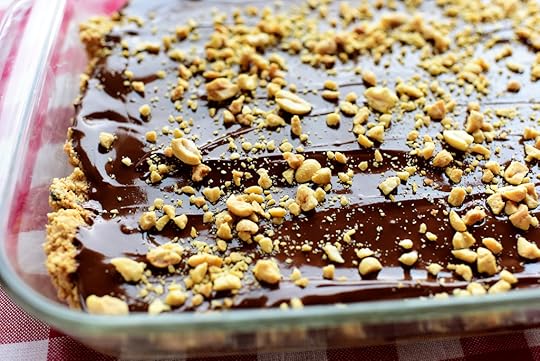
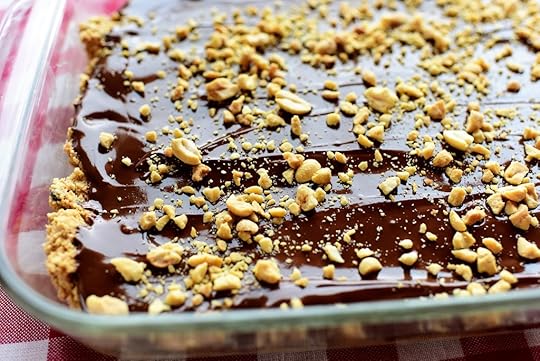
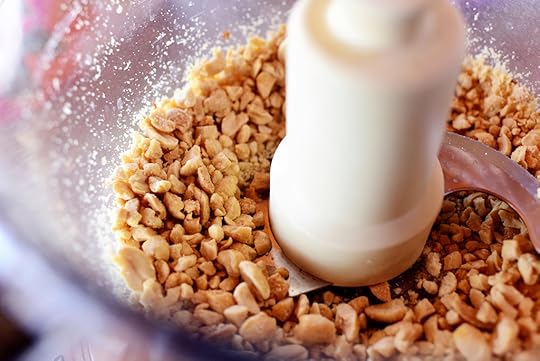 Crush up some peanuts…(or pretzels!)…
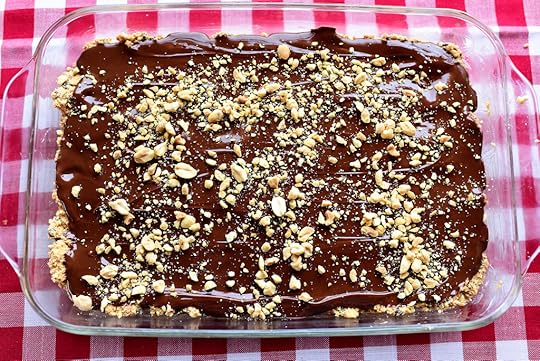 Oh, yum. Double yum. Triple yum!
But you can’t eat them yet. You have to pop the pan in the fridge to set the chocolate topping as well as the bars themselves. Just an hour or two! Patience is a virtue!
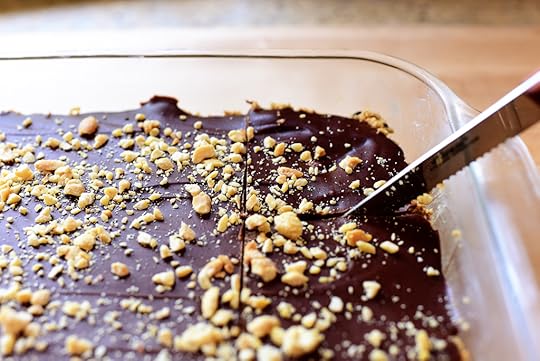 Once they’re set, you can cut them into squares.
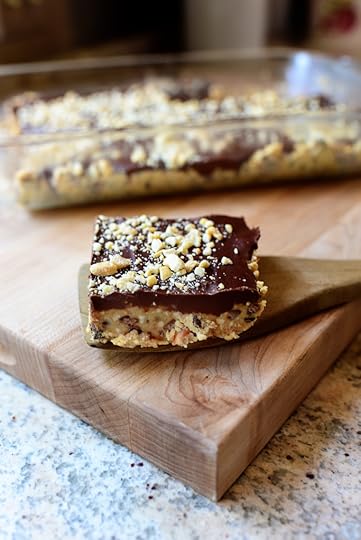 These are so good, friends. Cut ’em big, cut ’em small…and enjoy every bite!
Grab the recipe from the sidebar, or here’s the link to the printable recipe on Tasty Kitchen. Enjoy, friends!
No-Bake Peanut Butter Bars: Printable Recipe


No-Bake Peanut Butter Bars
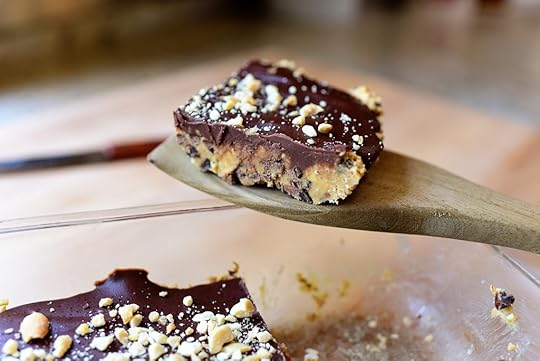 I made these on a recent episode of my Food Network show, and they’re too tasty for words! They’re a super-simple no-bake bar that uses mostly pantry ingredients, and they’re a great treat to have in the fridge for after-school snacks…or, in my case, after breakfast snacks.
But that’s more my issue than yours.
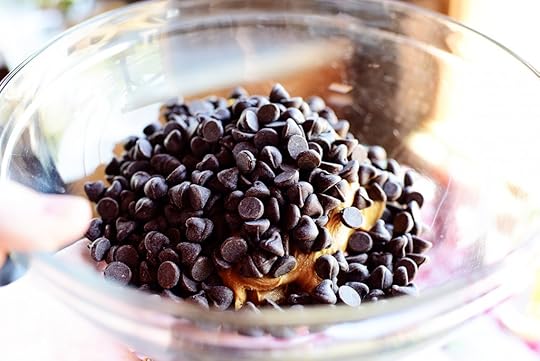 First, make the chocolatey peanut buttery topping! Put some chocolate chips in a bowl with some creamy peanut butter…
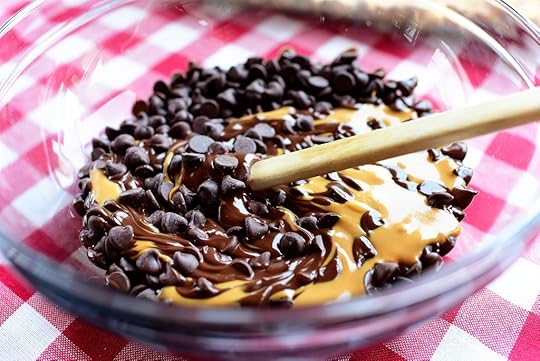 Microwave it for a minute or two…
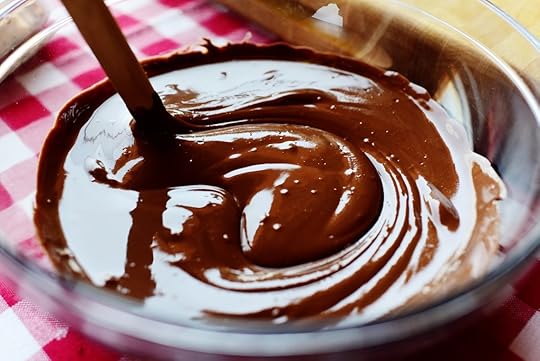 Then stir it until it’s smooth, silky, and you feel like diving in and going swimming. Set this aside to cool slightly while you whip up the bar mixture!
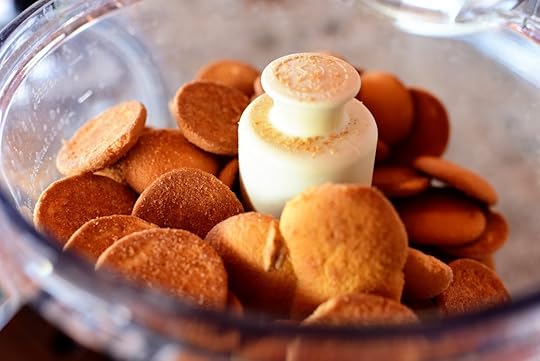 Throw a box of vanilla wafers into the bowl of a food processor (or a large ziploc bag)…
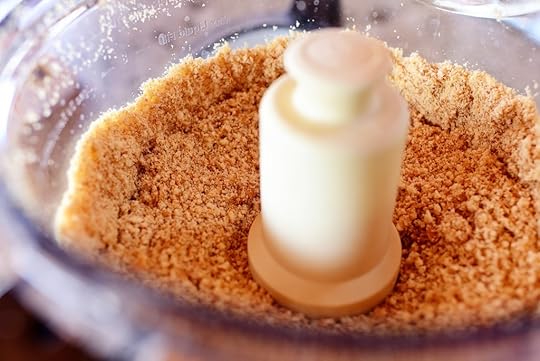 And pulverize them into fine crumbs. When I made them on the show, I kept the crumbs a bit chunky, and that’s delicious, too! Set the crumbs aside for a minute…
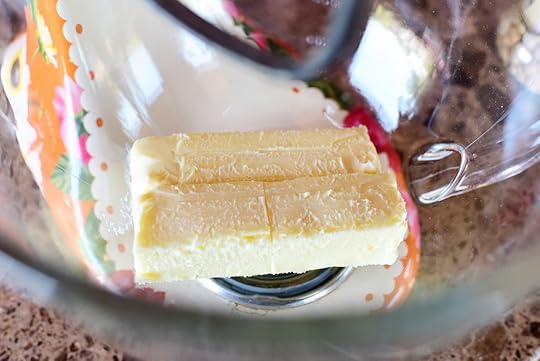 Then throw 2 sticks of nice, soft butter into the bowl of a mixer.
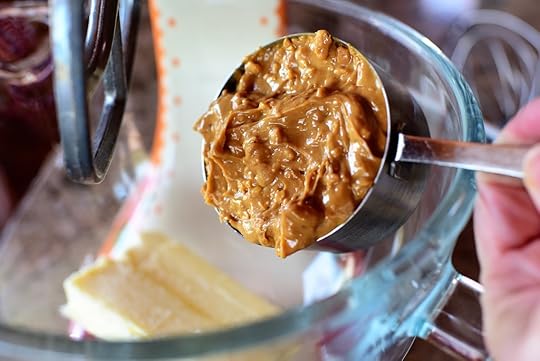 Add a cup of chunky peanut butter…
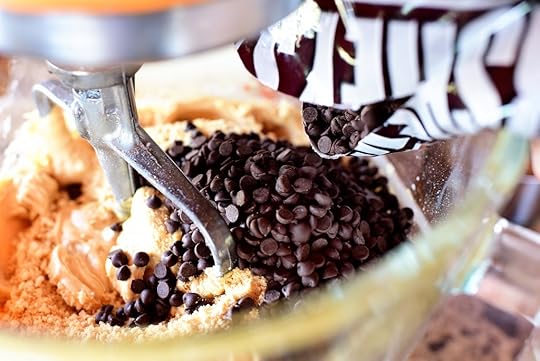 And a bag of a mini-chocolate chips!
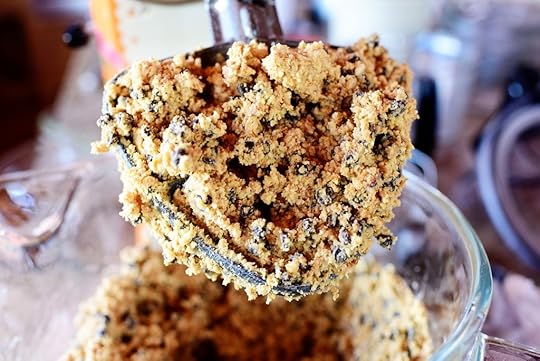 Then mix it until the crumbs and the chocolate chips just barely come together.
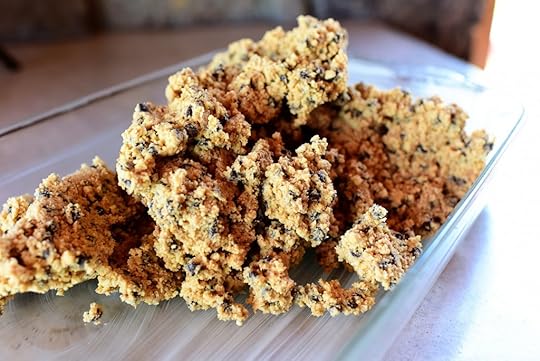 Butter a 9 x 13-inch dish and dump the mixture right in…
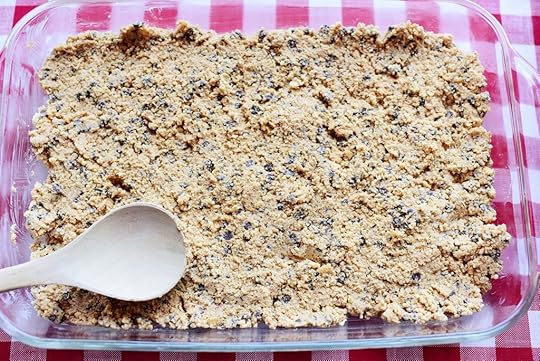 Then press it with a spoon or spatula…
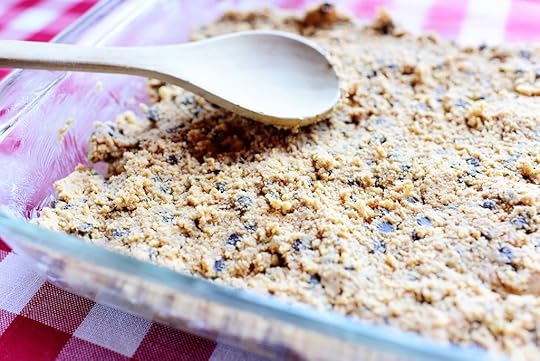 Until it’s in a nice, even layer.
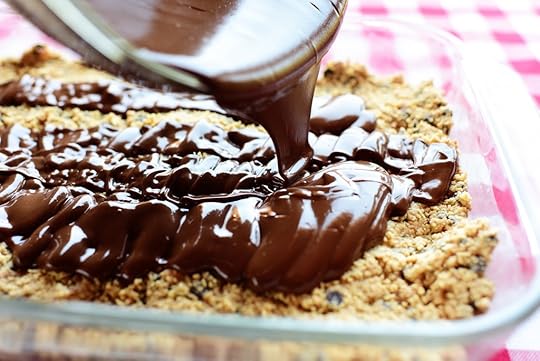 Then, you guessed it, pour the chocolate/peanut butter mixture all over the top…
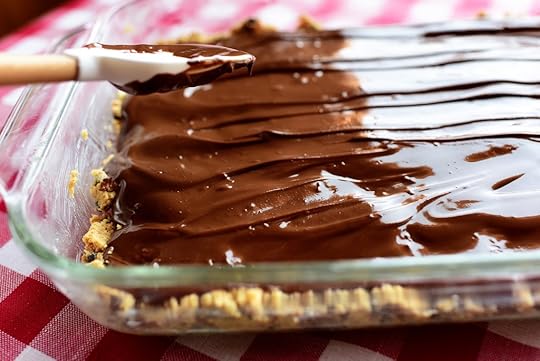 And spread it into a thin layer, until it coats every last crumb.
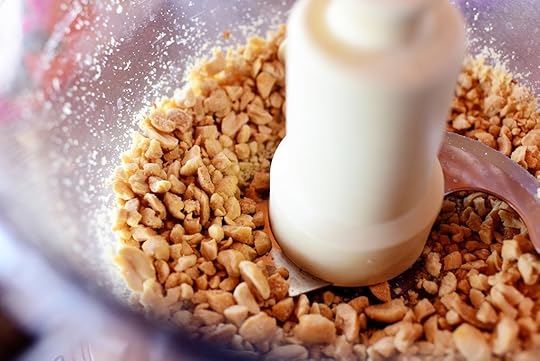 Crush up some peanuts…(or pretzels!)…
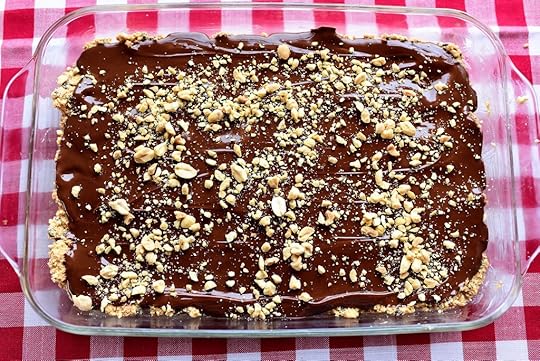 Oh, yum. Double yum. Triple yum!
But you can’t eat them yet. You have to pop the pan in the fridge to set the chocolate topping as well as the bars themselves. Just an hour or two! Patience is a virtue!
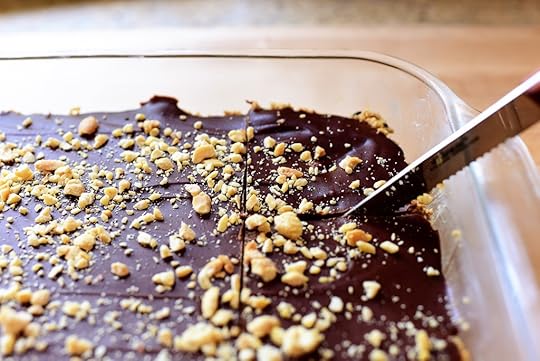 Once they’re set, you can cut them into squares.
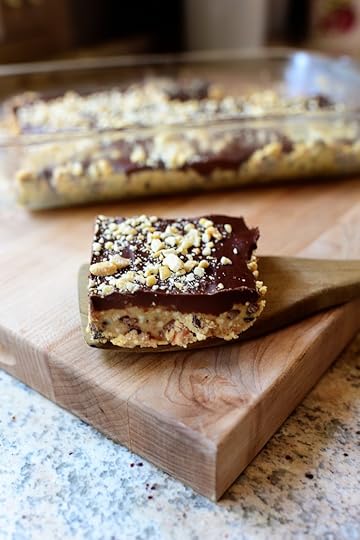 These are so good, friends. Cut ‘em big, cut ‘em small…and enjoy every bite!
Here’s the handy dandy printable.
.recipe-actions {
position: relative;
z-index: 2;
}
#pdf-popover {
background: rgba(255,255,255,.9);
border: 1px solid #efeeed;
color: #6e5c3a;
display: none;
font-family: Helvetica, Arial, sans-serif;
right: 20px;
margin: 2px;
padding: 54px 20px 7px 10px;
position: absolute;
top: 0;
width: 380px;
z-index: 10;
}
#pdf-popover form {
margin: 0;
}
#pdf-popover h4 {
background: #b15818;
color: #fff;
font-family: Helvetica, Arial, sans-serif;
font-size: 20px;
font-weight: normal;
left: 3px;
margin: 0;
position: absolute;
padding: 6px 12px;
right: 3px;
top: 3px;
}
#pdf-popover legend {
font-family: Helvetica, Arial, sans-serif;
font-size: 120%;
font-weight: bold;
margin-bottom: 2px;
margin-left: 10px;
text-transform: uppercase;
}
#pdf-popover fieldset {
margin-bottom: 15px;
}
#pdf-popover input[type="checkbox"] {
height: 14px;
margin: 2px 0 10px 10px;
padding-left: 14px;
position: relative;
visibility: visible;
width: 14px;
}
#pdf-popover input[type="checkbox"],
#pdf-popover input[type="radio"] {
margin-left: 10px;
}
#pdf-popover .close {
background: #b15818;
color: #FFFFFF;
cursor: pointer;
height: 35px;
font-size: 16px;
font-weight: bold;
line-height: 26px;
position: absolute;
right: 3px;
text-align: center;
top: 3px;
width: 25px;
z-index: 1;
}
#pdf-popover .button {
background-color: #b15818;
border: 0;
color: #fff;
cursor: pointer;
font-family: Helvetica, Arial, sans-serif;
margin-left: 10px;
padding: 8px 10px;
text-transform: uppercase;
}
x
Print Options
Page size
Letter
3x5
4x6
Text Size
Small
Medium
Large
Content
Include description
Include prep time, etc.
Show image
Recipe
No-Bake Peanut Butter Bars
Prep Time: 20 Minutes
Cook Time:
Difficulty: Easy
Servings: 20
 Print Recipe
Ingredients
2 cups Semi-Sweet Chocolate Chips1/2 cup Creamy Peanut Butter2 sticks Butter, Softened, Plus More For Greasing The Pan1 cup Chunky Peanut Butter2 cups Powdered Sugar1 box (12-ounces) Vanilla Wafers1 bag (12 Ounces) Semi-sweet MINI Chocolate Chips1/2 cup Chopped Peanuts Preparation Instructions
For the topping: Using a double boiler or a microwave, melt the chocolate chips and creamy peanut butter. Allow to cool for a couple of minutes while you make the bars.
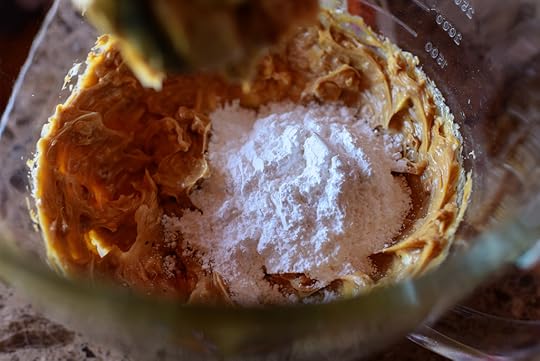
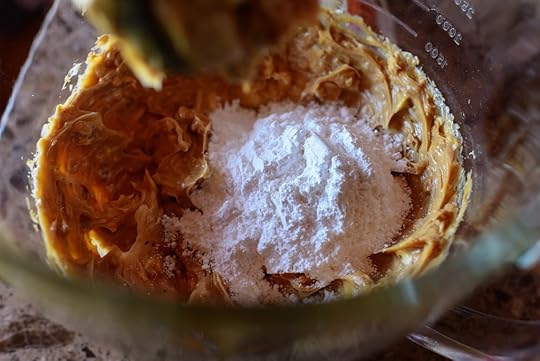
For the filling: Grease a 9-by-13-inch pan with some butter. Using a stand or electric hand mixer, mix together the butter and chunky peanut butter until smooth. Stir in the powdered sugar a cup at a time.
Add the vanilla wafers to a food processor and process until they are in crumbs. Then add the crumbs and mini chocolate chips to the peanut butter mixture. Spread it evenly into the buttered pan and set aside.
Pour the topping over the base. Spread it out evenly and sprinkle over the chopped peanuts. Refrigerate for at least 1 hour, then cut into 20 bars.
Keep refrigerated, as the bars and chocolate will soften at room temperature.
Posted by Ree | The Pioneer Woman on

August 14, 2015
Apple-Pecan Mini Pies by Ree
This is a variation of the Apple Peanut Butter Delights I posted awhile back, but these have a scrumptious apple pie flavor that’ll knock your apple pie-loving socks off. I made them on a whim last week when Todd had a friend over and was surprised by how tasty the little suckers were. It’s the simple things in life, I tell ya!
These aren’t pies at all, of course, as they’re made with English muffins. But it really doesn’t matter what you call them. It only matters that you make them. And, of course, eat them!
(That last part is essential.)
 Slice a chunk off of an apple…
 Then, in a bowl, add some sugar…
 And stir it all together. (Psst. You can add a little nutmeg, too. Or allspice. Or cloves. Or anything you like to add to apple pie.)
 Now, grab some English muffins. I used really nice whole wheat ones, because they allow me to convince myself that this treat is actually health food. No, I’m not kidding. Smear on some softened butter…
 Then sprinkle on some brown sugar…
 Then arrange some apple slices and pecan halves over the top in whatever configuration or quantity you’d like! (Later I upped the apple amounts, FYI.)
 Now sprinkle on a good amount of the cinnamon-sugar mixture.
 Try not to eat it yet! It’s gonna get soooooo much better.
 Build as many as you want, then put them on a baking sheet…
 Bake them at 350 for about 7-8 minutes…
 Then turn on the broiler and broil them for about 1 to 2 minutes, watching the whole time, until the top starts to bubble and caramelize. This is really, really tricky because the pecans can burn within a matter of seconds if you’re not careful. So again—watch like a hawk!
 Oh, and one other thing: OH MY WORD. So simple, but so remarkably tasty. You can drizzle on a little honey for extra sweetness, too.
 I ate one. And then I ate another one. Then I left the house because I didn’t trust myself not to eat another. They were yummy.
Grab the recipe from the sidebar, or follow the link below to the printable recipe on Tasty Kitchen. Enjoy!
Apple-Pecan Mini Pies: Printable Recipe


Apple-Pecan Mini Pies
 This is a variation of the Apple Peanut Butter Delights I posted awhile back, but these have a scrumptious apple pie flavor that’ll knock your apple pie-loving socks off. I made them on a whim last week when Todd had a friend over and was surprised by how tasty the little suckers were. It’s the simple things in life, I tell ya!
These aren’t pies at all, of course, as they’re made with English muffins. But it really doesn’t matter what you call them. It only matters that you make them. And, of course, eat them!
(That last part is essential.)
 Slice a chunk off of an apple…
 Then, in a bowl, add some sugar…
 And stir it all together. (Psst. You can add a little nutmeg, too. Or allspice. Or cloves. Or anything you like to add to apple pie.)
 Now, grab some English muffins. I used really nice whole wheat ones, because they allow me to convince myself that this treat is actually health food. No, I’m not kidding. Smear on some softened butter…
 Then sprinkle on some brown sugar…
 Then arrange some apple slices and pecan halves over the top in whatever configuration or quantity you’d like! (Later I upped the apple amounts, FYI.)
 Now sprinkle on a good amount of the cinnamon-sugar mixture.
 Try not to eat it yet! It’s gonna get soooooo much better.
 Build as many as you want, then put them on a baking sheet…
 Bake them at 350 for about 7-8 minutes…
 Then turn on the broiler and broil them for about 1 to 2 minutes, watching the whole time, until the top starts to bubble and caramelize. This is really, really tricky because the pecans can burn within a matter of seconds if you’re not careful. So again—watch like a hawk!
 Oh, and one other thing: OH MY WORD. So simple, but so remarkably tasty. You can drizzle on a little honey for extra sweetness, too.
 I ate one. And then I ate another one. Then I left the house because I didn’t trust myself not to eat another. They were yummy.
Here’s the handy dandy printable!
.recipe-actions {
position: relative;
z-index: 2;
}
#pdf-popover {
background: rgba(255,255,255,.9);
border: 1px solid #efeeed;
color: #6e5c3a;
display: none;
font-family: Helvetica, Arial, sans-serif;
right: 20px;
margin: 2px;
padding: 54px 20px 7px 10px;
position: absolute;
top: 0;
width: 380px;
z-index: 10;
}
#pdf-popover form {
margin: 0;
}
#pdf-popover h4 {
background: #b15818;
color: #fff;
font-family: Helvetica, Arial, sans-serif;
font-size: 20px;
font-weight: normal;
left: 3px;
margin: 0;
position: absolute;
padding: 6px 12px;
right: 3px;
top: 3px;
}
#pdf-popover legend {
font-family: Helvetica, Arial, sans-serif;
font-size: 120%;
font-weight: bold;
margin-bottom: 2px;
margin-left: 10px;
text-transform: uppercase;
}
#pdf-popover fieldset {
margin-bottom: 15px;
}
#pdf-popover input[type="checkbox"] {
height: 14px;
margin: 2px 0 10px 10px;
padding-left: 14px;
position: relative;
visibility: visible;
width: 14px;
}
#pdf-popover input[type="checkbox"],
#pdf-popover input[type="radio"] {
margin-left: 10px;
}
#pdf-popover .close {
background: #b15818;
color: #FFFFFF;
cursor: pointer;
height: 35px;
font-size: 16px;
font-weight: bold;
line-height: 26px;
position: absolute;
right: 3px;
text-align: center;
top: 3px;
width: 25px;
z-index: 1;
}
#pdf-popover .button {
background-color: #b15818;
border: 0;
color: #fff;
cursor: pointer;
font-family: Helvetica, Arial, sans-serif;
margin-left: 10px;
padding: 8px 10px;
text-transform: uppercase;
}
x
Print Options
Page size
Letter
3x5
4x6
Text Size
Small
Medium
Large
Content
Include description
Include prep time, etc.
Show image
Recipe
Apple-Pecan Mini Pies
Prep Time: 5 Minutes
Cook Time: 10 Minutes
Difficulty: Easy
Servings: 8
 Print Recipe
Ingredients
1/2 cup Sugar2 teaspoons Ground Cinnamon Dash Of Salt8 whole Whole Wheat English Muffins8 Tablespoons Softened Butter1/3 cup Brown Sugar1 whole Large Granny Smith Apple, Sliced Thin Pecan Halves Preparation Instructions
Preheat the oven to 350 degrees.
In a bowl, mix together the sugar, cinnamon, and salt. set aside.
Split the English muffins and spread the halves with butter. Sprinkle with brown sugar. Arrange the apple slices and pecan halves in a design on top. Sprinkle with cinnamon sugar mixture.
Place the muffins on a baking sheet and bake them for 7 to 8 minutes. Turn on the broiler and broil for 1 to 2 minutes until the sugar starts to caramelize, watching the entire time to make sure the pecans don't burn.
Remove and allow to sit for 5 minutes before serving. (Can also be served at room temperature.)
Posted by Ree | The Pioneer Woman on

August 10, 2015
Chickpea Curry
 This is an utterly scrumptious, super-flavorful pantry meal that happens to be one of the fastest ways to satisfy a curry craving that might strike you here or there. I love chickpeas, but I mostly eat them cold, whether whole in salads or pureed in hummus. I forget how delightful they are in soups and sauces. And, unless the rumors are untrue, chickpeas are exceedingly good for you!
Here’s how to make Chickpea Curry, one of my favorite pantry dishes of all time. If you’re a fan of curry, you’ll slurp up every bite.
If you aren’t a fan of curry, this one might just turn you around!
 Heat a little vegetable oil in a skillet over medium heat and throw in the diced onion and a little salt and pepper. Saute it for a few minutes, stirring it around, until the onions starts to soften and turn golden.
 Then, get ready for the fragrance! Sprinkle curry powder over the onions! It’ll be the best decision you make all week.
 Best decision you’ll make all week #2: Add minced garlic at this stage, too.
Thank you for listening.
 Keep sauteing the onions as they become coated in the curry powder.
 The beautiful flavor of the curry will be released and get a little toasty and miraculous in the process.
Note: Your kitchen smells like heaven right about now.
 After a good minute or so, pour in some vegetable broth.
 Stir it all together, then turn up the heat to medium-high and let the mixture start to bubble. Add a little more salt and pepper, then let it cook like this for a good minute or two, until the liquid starts to reduce…
 Then crack open a can of coconut milk (give it a good shake first!) and pour it in.
Coconut milk. I can’t say enough about it. It’s mysterious, creamy, tasty, and wonderful.
 Stir in the coconut milk, then squeeze in a little honey…
 And, the kicker: Sriracha (or any hot chili paste or sauce.) The sauce really needs a little spice, and Sriracha has a nice flavor and tang to it.
Note: One other ingredient I often like to use with this is lime juice! But it’s difficult to add lime juice to this dish when one is out of limes. But if you have lime juice—use it, use it, use it! It will be the third best decision you make all day.
(Lots of good decisions with this recipe!)
 Now, the sauce needs to bubble up and cook again—probably two to three more minutes, just to thicken it up slightly.
 The chickpeas also need to go in! Two cans. Drained and rinsed.
 Mmmm. Turn the heat to low and let it simmer away!
 Meanwhile—I forgot to tell you!—I cooked some basmati rice, which is something that pretty much makes my whole day. I love the stuff. Pile it on a plate…
 Then spoon on the curry, making sure to get plenty of the sauce along with the chickpeas.
 A few cilantro leaves are nice, too. The flavors really go together! And again, if you’re one of those lucky humans that has limes in his/her fridge, serve a couple of wedges on the side.
 This is an absolute dream, friends. A dream you’ll never want to wake from!
(Not to be dramatic or anything. Ha.)
Here’s the handy dandy printable. Have a wonderful Monday, friends!
.recipe-actions {
position: relative;
z-index: 2;
}
#pdf-popover {
background: rgba(255,255,255,.9);
border: 1px solid #efeeed;
color: #6e5c3a;
display: none;
font-family: Helvetica, Arial, sans-serif;
right: 20px;
margin: 2px;
padding: 54px 20px 7px 10px;
position: absolute;
top: 0;
width: 380px;
z-index: 10;
}
#pdf-popover form {
margin: 0;
}
#pdf-popover h4 {
background: #b15818;
color: #fff;
font-family: Helvetica, Arial, sans-serif;
font-size: 20px;
font-weight: normal;
left: 3px;
margin: 0;
position: absolute;
padding: 6px 12px;
right: 3px;
top: 3px;
}
#pdf-popover legend {
font-family: Helvetica, Arial, sans-serif;
font-size: 120%;
font-weight: bold;
margin-bottom: 2px;
margin-left: 10px;
text-transform: uppercase;
}
#pdf-popover fieldset {
margin-bottom: 15px;
}
#pdf-popover input[type="checkbox"] {
height: 14px;
margin: 2px 0 10px 10px;
padding-left: 14px;
position: relative;
visibility: visible;
width: 14px;
}
#pdf-popover input[type="checkbox"],
#pdf-popover input[type="radio"] {
margin-left: 10px;
}
#pdf-popover .close {
background: #b15818;
color: #FFFFFF;
cursor: pointer;
height: 35px;
font-size: 16px;
font-weight: bold;
line-height: 26px;
position: absolute;
right: 3px;
text-align: center;
top: 3px;
width: 25px;
z-index: 1;
}
#pdf-popover .button {
background-color: #b15818;
border: 0;
color: #fff;
cursor: pointer;
font-family: Helvetica, Arial, sans-serif;
margin-left: 10px;
padding: 8px 10px;
text-transform: uppercase;
}
x
Print Options
Page size
Letter
3x5
4x6
Text Size
Small
Medium
Large
Content
Include description
Include prep time, etc.
Show image
Recipe
Chickpea Curry
Prep Time: 5 Minutes
Cook Time: 20 Minutes
Difficulty: Easy
Servings: 6
 Print Recipe
Ingredients
2 cups Basmati Rice2 Tablespoons Vegetable Oil1 whole Large Onion, Diced Fine Salt And Pepper, to taste2 teaspoons Curry Powder, Any Variety2 cloves Garlic, Minced1 cup Vegetable Stock2 cans Chickpeas, Drained And Rinsed1 can (13.5 Ounce) Coconut Milk1 Tablespoon Honey, More To Taste1 Tablespoon Sriracha Or Hot Sauce (more To Taste) Lime Wedges, For Serving (optional) Cilantro Leaves, For Garnish Preparation Instructions
Cook the basmati rice according to the package instructions.
Heat the oil in a medium skillet over medium-low heat. Add the onions, season with salt and pepper and cook for a few minutes, until the onions are soft and starting to turn golden. Sprinkle in the curry powder and garlic and stir, cooking for another minute or so. Pour in the vegetable stock and stir to scrape up all the brown bits in the pan. Add the coconut milk, honey and a squirt of sriracha. Bring to a boil, add the chickpeas, reduce the heat, and simmer for 10 minutes. Taste and adjust the seasoning, adding more salt, honey, or Sriracha (or lime juice, if using.)
Serve the curry over the rice. Garnish with the cilantro.
Posted by Ree | The Pioneer Woman on

August 3, 2015
Coffee is My Life
Good or bad, right or wrong, I wouldn’t want to live in a world without coffee. I start each morning with iced coffee, and it’s the best way to start the day.
Here are some of my favorite coffee recipes throughout the years! Some are drinks, some are sweets, all are heavenly.
 Perfect Iced Coffee. This is the step-by-step recipe for coffee concentrate, which can be made in bulk and used over a period of weeks. Saves lots of coffee shop bucks!
 Homemade Frappuccino. Yum! Yum yum yum yum yum yum yum!
To summarize: Yum.
 Dulce de Leche Coffee. It’s still a little warm outside for a drink like this (not that I ever let that stop me!) but once the colder months move in, you’re gonna wanna try this one!
 Mocha Silk Pie. Just like French Silk Pie, but with a coffee twist. To die for.
 Chocolate Chunk Cookies! Browned butter is the star…but a hint of coffee sends ‘em over the top!
Yay for coffee! Hope you try one (or two!) of these this week.

July 27, 2015
Strawberry Pretzel Pie
 I made this pie on an episode of my Food Network show a few months ago, but just realized over the weekend that I’d never made it here! Strawberries and pretzels are actually not an uncommon dessert combination, and this pie is such a lovely summertime masterpiece. The sweet strawberries are so lovely: they’re coated in a sugar/Jello mixture that diners have used for decades (that’s how the strawberries get that gorgeous shiny surface) but the pretzel crust, friends. Oh, goodness. It is tremendously yummy and as you’ll see from my warning below, it makes a delicious snack. So make sure you’re not hungry when you make the crust!
(Not that that will stop you from wanting to eat it anyway. Ahem.)
Here’s how to make this pretty pie!
 The Cast of Characters: Pretzels, brown sugar, butter, strawberries, sugar, strawberry Jello, cornstarch, cream (for whipped cream), and water (not pictured.)
 First, make the pretzel crust!
 Pour some pretzel sticks into a zipper bag…
 Then seal the bag with a little bit of an opening in the corner to keep it from exploding, and pound the pretzels using a rolling pin (or you can use a can!) It’s a little difficult to describe how much to break up the pretzels; basically, you want to have some nice, ground pretzels…but you also want to have some visible pretzel pieces.
 Put the pretzels into a bowl with some brown sugar…
 And stir it until this is all mixed together.
 Melt the butter and pour it slowly into the bowl, mixing as you go along…
 Until you have this crazy-delicious mixture, which is slightly moist and extremely delicious.
Warning: Do not taste this with a spoon! It will be the biggest mistake of your entire life. You won’t be able to stop eating it and you’ll be left without a pie crust, which means you either won’t be able to make pie or you’ll have to make another pie crust, which will also tempt you to eat it with a spoon, and then you have a vicious (but very tasty) cycle.
 Pour the pretzel mixture into a pie pan. I’m using a metal pan, but if you have a glass one handy, it would be nice to use for this pie since it allows you to see all the pretzel craziness.
 Press it into the bottom of the pan and up the sides.
 Then bake it at 350 degrees for about 5 to 7 minutes until it’s toasted and golden, and until your kitchen smells like Heaven. Then take it out and let it cool.
 While the crust is cooking, make the filling!
 Combine sugar, cornstarch and the Jello powder in a medium saucepan…
 Then pour in water and mix it together.
 Bring it to a gentle boil, stirring constantly, then reduce the heat and allow it to cook and thicken for another minute or two.
 Remove it from the heat and—this is the important part—let it cool for a good 10 to 15 minutes, stirring occasionally so it doesn’t form a film on top or around the edge.
 While it’s cooling, hull and halve a buncha strawberries! I have made this pie with whole strawberries before, and while it looks gorgeous, it’s a little crazy fitting all the big strawberries in the pie. So halving them is a nice compromise.
 Once the mixture is cool (confession: I didn’t wait long enough because I was chasing sunlight), place the strawberries in a bowl and pour the syrup over the top. You may not need it all, so don’t be afraid to stop short. You can always use the extra to spoon over the berries if they need it!
 Gently stir the strawberries until they’re totally coated in the syrup.
 Then again, let the berries sit for a good 5 minutes until the liquid is starting to set.
 Heap the berries into the pie crust! I get involved and arrange some of the halves facing down because that’s the pretty side.
 You can spoon a little bit of the syrup on the surface of the strawberries. Just keep in mind that if there’s a lot of excess syrup, it will wind up in the bottom of the pie, on top of the crust, which can sometimes make it soggy. This is why it’s important to let the syrup cool, and then to let the berries sit in the syrup, before they go on the crust.
 But wait! You have to chill it. The berries are pretty much coated in a Jello mixture, after all, and it needs to set. So refrigerate it for at least 3 to 4 hours (uncovered). You’ll be glad you did.
 When it comes time to cutting it into wedges, well…good luck. Ha! But really, it should be much easier if you chill it and use a small, sharp knife. I only chilled mine for about 45 minutes, so it was a little…challenging.
 It was still completely delicious! Pretty, crunchy, sweet, salty…the total package.
Here’s the handy dandy printable!
.recipe-actions {
position: relative;
z-index: 2;
}
#pdf-popover {
background: rgba(255,255,255,.9);
border: 1px solid #efeeed;
color: #6e5c3a;
display: none;
font-family: Helvetica, Arial, sans-serif;
right: 20px;
margin: 2px;
padding: 54px 20px 7px 10px;
position: absolute;
top: 0;
width: 380px;
z-index: 10;
}
#pdf-popover form {
margin: 0;
}
#pdf-popover h4 {
background: #b15818;
color: #fff;
font-family: Helvetica, Arial, sans-serif;
font-size: 20px;
font-weight: normal;
left: 3px;
margin: 0;
position: absolute;
padding: 6px 12px;
right: 3px;
top: 3px;
}
#pdf-popover legend {
font-family: Helvetica, Arial, sans-serif;
font-size: 120%;
font-weight: bold;
margin-bottom: 2px;
margin-left: 10px;
text-transform: uppercase;
}
#pdf-popover fieldset {
margin-bottom: 15px;
}
#pdf-popover input[type="checkbox"] {
height: 14px;
margin: 2px 0 10px 10px;
padding-left: 14px;
position: relative;
visibility: visible;
width: 14px;
}
#pdf-popover input[type="checkbox"],
#pdf-popover input[type="radio"] {
margin-left: 10px;
}
#pdf-popover .close {
background: #b15818;
color: #FFFFFF;
cursor: pointer;
height: 35px;
font-size: 16px;
font-weight: bold;
line-height: 26px;
position: absolute;
right: 3px;
text-align: center;
top: 3px;
width: 25px;
z-index: 1;
}
#pdf-popover .button {
background-color: #b15818;
border: 0;
color: #fff;
cursor: pointer;
font-family: Helvetica, Arial, sans-serif;
margin-left: 10px;
padding: 8px 10px;
text-transform: uppercase;
}
x
Print Options
Page size
Letter
3x5
4x6
Text Size
Small
Medium
Large
Content
Include description
Include prep time, etc.
Show image
Recipe
Strawberry Pretzel Pie
Prep Time: 4 Hours
Cook Time: 10 Minutes
Difficulty: Easy
Servings: 8
 Print Recipe
Ingredients
4 cups Pretzel Sticks1 stick (8 Tablespoons) Butter, Melted1/3 cup Brown Sugar1-1/2 cup Sugar3 Tablespoons Cornstarch1 package (3.5 Ounce) Strawberry-flavored Jello1-1/2 cup Water3 pints Strawberries, Hulled And Halved Unsweetened Whipped Cream Preparation Instructions
For the pretzel crust: Preheat the oven to 350 degrees F.
Crush the pretzels in a large resealable plastic bag with a rolling pin. Mix in a bowl with the butter and brown sugar. Press into a pie pan and bake for 8 minutes. Remove and set aside to cool.
For the strawberry filling: Put 1 1/2 cups water, the granulated sugar, cornstarch and gelatin powder in a saucepan. Stir together and bring to a boil. Reduce the heat and cook until it starts to thicken, about 2 to 3 minutes, then remove from the heat. Let the liquid cool for a good 10-15 minutes, stirring occasionally.
Put the strawberries in a bowl and pour over the sauce, gently tossing together. Allow to sit for 5-7 minutes, then carefully pile the coated strawberries into the cooled pie crust. Spoon over a little leftover sauce if needed, and refrigerate, uncovered, for 4 hours.
Cut into slices and serve with whipped cream. (Unsweetened is nice because the pie is so sweet!)
Posted by Ree | The Pioneer Woman on

Ree Drummond's Blog
- Ree Drummond's profile
- 2016 followers


