
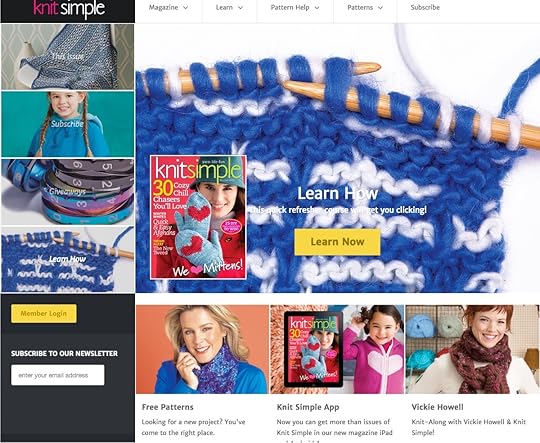
Vickie Howell's Blog: Vickie Howell's Website, page 47
January 13, 2016
Monetize Your Craft
 Are you a maker, knitter, crocheter, artist, designer, sewist, or otherwise creative type who wants to learn how to monetize their craft? This could mean just bringing in a few extra bucks of “fun money” for the household, a little more cash to supplement the family income, or going all-in on a crafty career. Regardless of your personal goal, my upcoming Creative Live course, Monetize Your Craft is for you!
Let’s face it, most creative types would much prefer creating art than trying to make money from it. To quote comedian David Cross though, “You can’t pay the mortgage with indie street cred.” The truth is, that being creative is a gift, but being able to create a living for oneself is a necessity — and one that requires a whole lotta hustle. This course is designed to inspire the drive to not only make, but me a money maker as well.
Here’s a quick video where I fill you in a bit more on the class.
Watch the course live on February 4th, or recorded anytime after that. It’s your education on your time schedule, and I’m just happy to be a part of it. RSVP today!
In the San Francisco area? Come be a part of our live, studio audience for the course. Learn more here.
xx,
Vickie


January 4, 2016
Vickie’s YouTube Channel!
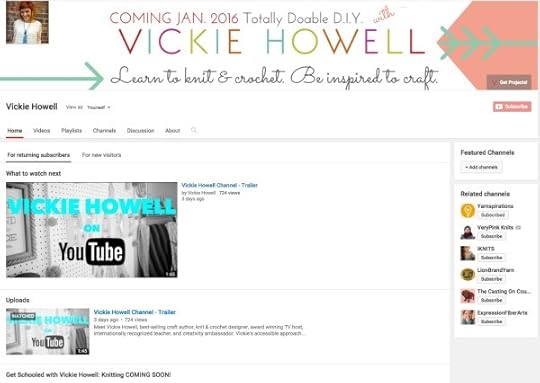
Psst! Coming later this month, I’ll finally have a regularly updated YouTube Channel you can count on for high-quality, learn to knit, crochet & craft videos. Watch my trailer, and then purty please go here to subscribe (so I don’t have to launch to the sound of crickets ;-)).
Happy New Year!
xx,
Vickie
Coming Soon: Vickie’s YouTube Channel!
Psst! Coming later this month, I’ll finally have a regularly updated YouTube Channel you can count on for high-quality, learn to knit, crochet & craft videos. Watch my trailer, and then purty please go here to subscribe (so I don’t have to launch to the sound of crickets ;-)).
Happy New Year!
xx,
Vickie
December 28, 2015
Knit the New Year!


I know it’s cliché, but the older I get the faster the years go and 2015 was no exception. I feel like I was just welcoming the last year, but it’s already time to ring in the next! I’m looking forward to 2016, though — and, as with most things in life, I choose to celebrate by putting yarn to needles.
This week’s project is simple: knitterly numbers to kick of ’16. It’s a soft, pop of color that’ll act as a sign (both literally and figuratively) of good things to come. Knit on for the new year, wontcha? Here’s how to make a knit-covered wire 2016!
Materials
Wire hanger
Wire cutters
Pliers
Tape
Worsted weight yarn
2, Size U.S. 5 (3.75 mm) Clover Takumi Double-pointed Needles (dpns)
Clover Tapestry Needle
How-to:

Using wire cutters, snip off hook portion of hanger.
Using hands and piers (and photos as guide), bend hanger into shape of “2016”.

You most likely will need to cut off a piece of hanger to create “belly” of the number 6. Shape wire and tape it to the “stem” portion of number 6. It doesn’t have to be super secure, as the knitting will ultimately be what holds it into place.
Using yarn and Takumi dpn, CO 3 sts.
Work i-Cord over wire number shape as follows:
Knit 3 sts. Slide sts to the opposite end of the needle, and switch hands so that the needle with the sts is in your left hand. The working yarn will appear to be at the wrong end of the row.
Holding piece in front of the top end of the number 2, bring the yarn behind the wire and the stitches and begin knitting again. The strand of yarn stretched across the back will encompass the wire.

Continue in this manner until all numbers are knit over, stopping and sewing down when necessary, then restarting. Take a deep breath, because this requires a bit of patience and perseverance.
BO. Weave in ends.

Here’s wishing you a 2016 filled with peace, love and bamboo knitting needles. Happy New Year!
xx,
Vickie
Yarn Arts Ambassador, Clover
December 22, 2015
Deck Your Gifts with Yarn!
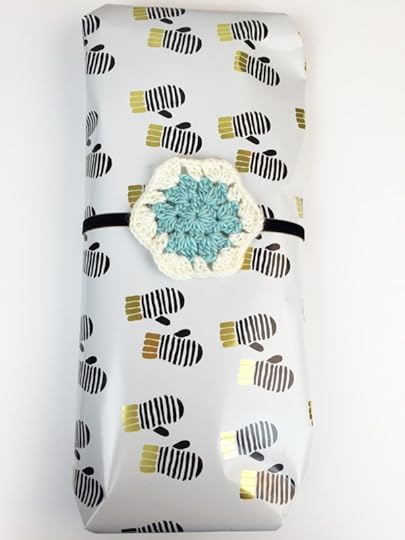
We are days away from handing over our handmade holiday gifts. Just because we’ve finished knitting and crocheting these, though doesn’t mean we’re done with yarn play. Adding a little fiber-y touch to the packaging of presents makes for a sweet statement of time spent thinking out your gift’s recipient. Here are 5 ways to incorporate yarn into your wrapping this holiday week!
Put a hex on it. Or a hexaGON, as it were. I love the hexi granny shape, and a single motif (paired with velvet ribbon) makes a great topper for a gift. I used Sheep(ish) yarn, and the motif pattern by my designer friend Nicole, from Yarnspirations.
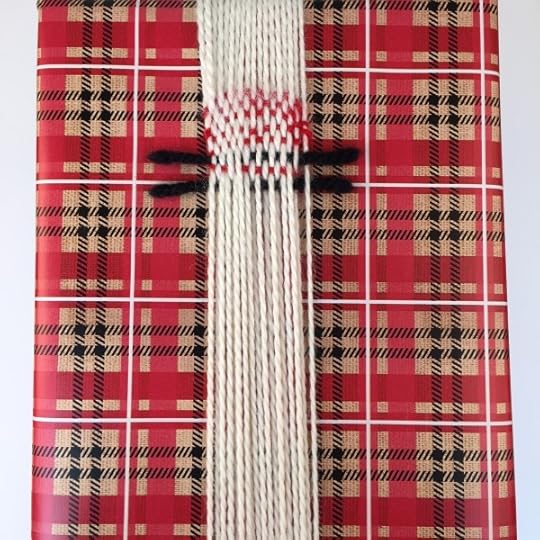 Make it un be-weavable. Wrap yarn 15-20 times around package; using a tapestry needle and contrasting yarn weave over and under the wrapped yarn for as many rows as desired.
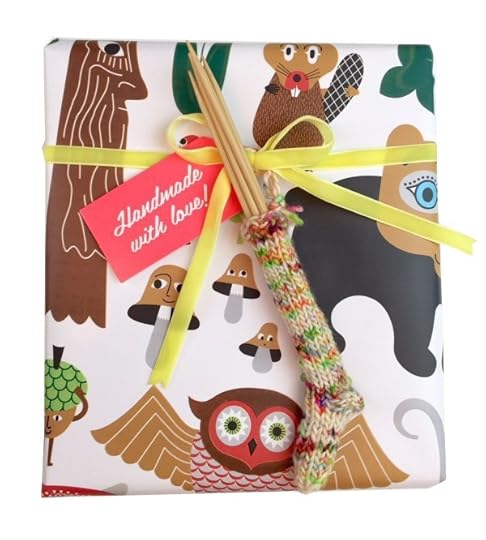 Knit a wee stocking for it. Part ornament, part adornment a small knitted stocking is an adorable addition to any package. This version will hold a set of double-pointed needles, a couple of colored pencils, or even a candy cane. Get the pattern .

Put a pom on it! I used the Clover Pompom Maker, and worsted-weight yarn paired with some Midori ribbon to decorate this pressie.
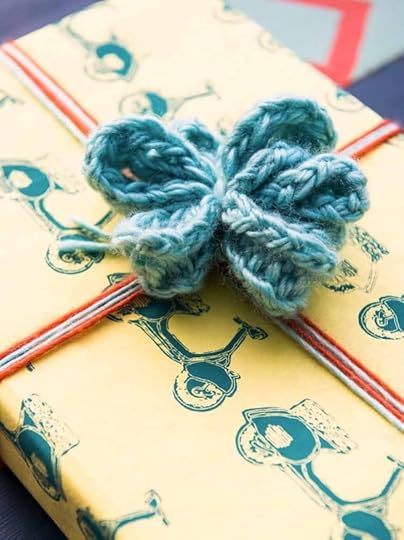
Let your fingers to the knitting. A finger knit strip, folded and sewn into a flower shape makes for a cheery presentation for any present! Learn how to finger knit and get project directions for this adornment in my book, Finger Knitting Fun.
Happy wrapping!
xx,
Vickie
December 14, 2015
This Way, That Way Cowl


It’s been unseasonably hot here in Austin, TX lately, which is kind of a bummer when you’re wanting to be in the wintery spirit. I was thrilled this weekend though, when a momentary shiver made it’s way through our city. To take advantage of the chill I knew I had to act fast (our Mother Nature is a fickle lass), so I immediately grabbed some bulky yarn, my Takumi Adjustable Needle set and cast-on for a quickie cowl. I then spent a lovely day watching my arrow motif coming together while feeling the wool slide off the warm, bamboo needles. My finished project is one that I’m sharing with you today: a simple, graphic neck warmer that’s totally DIY-able (and giftable) for this holiday season…and beyond.
For those who live in colder climates: I wish you many, cozy days in the This Way, That Way Cowl. For the rest of us, let’s just have fun with the process of working with great tools, and having a cool piece to at least, stare at longingly. 
December 8, 2015
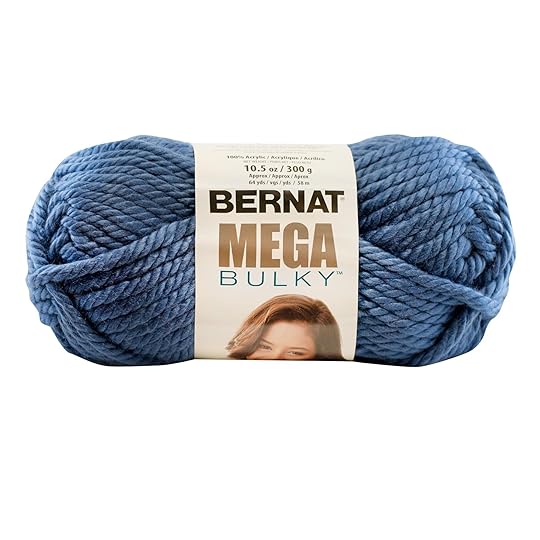
3-Hour Mega Cowl Knit-Along!
Need a holiday present almost immediately? No worries; I’ve got your back! Our next, Knit Simple Knit-along is designed for all of us, super-duper, last minute gift makers. The Mega Cowl is made with Mega Bulky yarn and huge needles, so it works up in just a few hours. The lacey stitch pattern keeps the weight of the piece down, while adding interest. This is a big knit piece, that’ll be a big hit with your fashion-forward friends!
AS SEEN IN
This go-’round we’re posting supply, WIP (work in progress) and finished photos on my Facebook page (facebook.com/vickiehowell). The KAL officially starts 12/15, but you can start posting, and “I’m in!” here on this blog and/or the event invitation page, and sharing supplies as you get them.
***NOTE: Order supplies from Yarnspirations.com, and receive a 20% discount. Use code: MEGACOWL, a t checkout!***
Here’s what you’ll need:
Pattern (Knit Simple Magazine, Winter 2015)
2 Balls Bernat Mega Bulky
Size US. 35 (19mm) needles
Looking forward to making this with you.
Happy, handmade holidays!
xx,
Vickie
November 24, 2015
Needle Felted Tree Ornaments

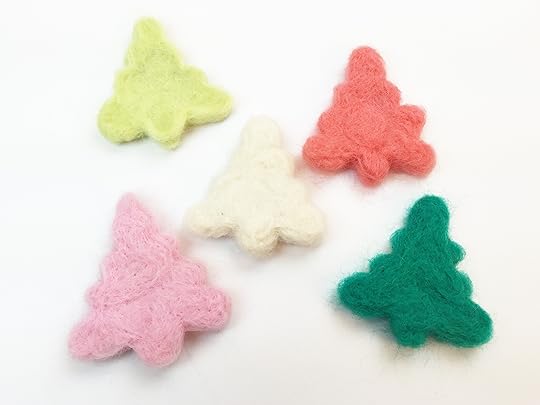
Holiday ornaments are not only great for decking the halls; they also make lovely present toppers, or even great gifts in and of themselves. Handmade versions are extra sweet because they’re both fun to make and receive! Today I spent a really nice day in my studio making several ornaments, while revisiting a craft I hadn’t spent time with in a while: needle felting. Before this project, I’d never worked with anything other than just a plain, ol’ needle and upholstery foam matting. After using the Clover Felting Needle Tools & Mat, though I feel like I’d totally been roughing it until now! It’s so much quicker (and more satisfying) to turn roving into shapes, when you have easy-to-hold (multiple!) needles, and great-grasp bristles. The result of this afternoon’s fiber foray are these kitschy-cute trees, which I guarantee will have you addicted to ornamentation. Happy Fa-la-la-la felting! xx, Vickie
Materials
Tree-shaped Cookie Cutter
Clover Natural Wool Roving (in desired colors)
Clover Felting Needle Tool
Clover Pens Style Needle Felting Tool
Clover Large Needle Felting Mat
Various Trimmings
Hot Glue Gun & Glue and/or Sewing Needle & Thread
Scissors
String or Twine
Clover Tapestry Needle

How-to:
Place cookie cutter on Felting Mat
Lay a small amount of roving inside of cookie cutter frame; use Felting Needle Tool to “pounce” up and down on roving to felt. Add more roving as necessary, building up the depth of the felt to about 1/4″/.5 cm.

Once the main portion of your tree is felted the way you want it, use the Pen Style Needle Felting Tool to felt roving in the corners of the ornament where the larger tool couldn’t get to.
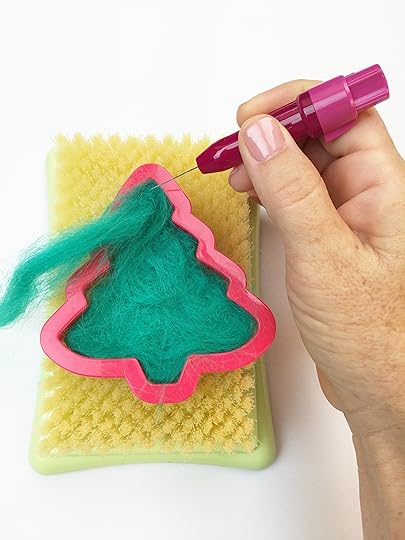
Remove cookie cutter; use Pen Style Needle Felting Tool to further define shape.

Peel felted tree from Needle Felting Mat. Use scissors to trim any fly-away fibers. You’ll now how a marshmallow-looking, little tree. I dare you not to find it adorable!
Decorate by adding trimmings by either hot gluing, hand sewing, or needle felting ribbons or natural fibers to your tree.
Tip: the scrapbooking section is a great place to find pretty decorations for your wee trees!

Cut a length of twine or string, and using Tapestry Needle to punch a hole, thread through top of tree. Tie knot.

November 11, 2015
Cable Star Cowl Pattern

For the entire month of November, I’m running a Fall Knitting & Crochet Photo a Day Challenge on Instagram. Before now I hadn’t hosted one of these events before, but now that I know what I’d been missing this one definitely won’t be my last. I’ve been so inspired by the 1200 (and counting) posts from people all around the world — these small glimpses into people’s stitching lives have renewed my love for our community!
How it works is that every day there’s a photo prompt (go here to see full list) for participants to use as a jumping-off point. They can interpret it in any way they choose, then post a picture with the hashtag #VHphotoaday (which helps us all find them). That’s all there is to it! If you’d like to join, please do at any time. It doesn’t matter if you haven’t posted for earlier prompts, or even if you only post for a few for the entire month. The point is to inspire and be inspired by fellow, knitting and crochet lovers.
Today’s photo prompt is: “Texture”, which is also what inspired this project post. Since it’s gift-making time, I wanted to come up with another, quick-but-cool project to knit for yourself or others. The texture is created with a combination of Star Stitch and cables, visually punctuated by the striations of the kettle-dyed yarn.
Thanks to the ease of my favorite, bamboo needles (from the Takumi Combo Set), and the chunkiness of the yarn this project packs a lot of punch into a small amount of time. This means you can make one for everyone you know, or in every color of your wardrobe. Enjoy! xx, Vickie
CABLE STAR COWL
Materials
1 hank (approx 90 yds/ 82 m), Super Bulky Merino Wool. I used this.
Size U.S. 13 (9 mm) Clover Takumi Bamboo Knitting Needles
Clover Jumbo Cable Needle
Clover Super Jumbo Tapestry Needle

Finished Measurements
6″/15 cm wide x 24″/61 cm circumference, blocked.
Note: to make a longer, eternity scarf version: use additional hank of yarn and double the length.
Special Stitches
MS = Make Star
Purl 3 stitches together, leaving them on the LH needle; YO, purl the same 3 stitch together again; let stitches drop off of LH needle. Star Stitch made.
C6B = Slip 3 sts onto cable needle and let fall back, k3 from LH needle, k3 from cable needle.
C6F = Slip 3 sts onto cable needle and let fall front, k3 from LH needle, k3 from cable needle.
Directions
CO 21 sts.
Rows 1 & 3 (RS): Knit.
Row 2: P1, *MS, p1; rep from * to end.
Row 4: P3, MS *p1, MS; rep from * to last 3 sts, p3.
Rows 5-16: Repeat Rows 1-4, 3 times more.
Row 17: K4, C6B, k1, C6F, k4.
Rows 18 & 20: Purl.
Row 19: Knit.

Repeat Rows 1-20 until piece measures 24″/61 cm, or desired length.
BO.
Finishing
Seam short ends together. Block piece.

November 1, 2015
Photo A Day Challenge!

I’m hosting my very first, Photo-A-Day Challenge for knitters and crocheters on Instagram! Join me every day (or any day — no pressure!) by posting a photo that corresponds with your interpretation of the day’s prompt. Hashtag each post with #VHPHOTOADAY, so that all participants can find your photos. All entrants will be eligible to win 1 of 3 prizes!
Hope to see you there!
xx,
Vickie
@VickieHowell


