
Vickie Howell's Blog: Vickie Howell's Website, page 2
May 5, 2025
Join me for the Knit Collage KAL!
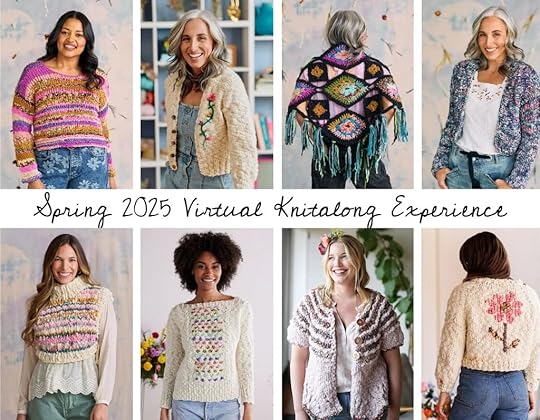
My Next Make
You guys! One of my goals after closing YarnYAY! and no longer being burnt out from having 80-hour work weeks has been to find my way back to loving yarn-crafting again. Building the more inclusive and intimate experience of Stitchwell Social Club has been one way to do that. The other, though, is finally taking a moment to knit from someone else’s patterns, simply for pleasure. So, for the first time ever, I’m joining a KAL that’s not my own Amy Small is a longtime friend who’s been a guest on The Knit Show, has been part of two YarnYAY! boxes, and supplied me with yarn for two of my books and many other projects. I am a big fan of her company and love her as a person. All that to say, as of this morning, I’m part of the Knit Collage Spring KAL. Twenty years into being a professional knitter, I don’t get a lt of firsts, so I’m excited!

There were so many gorgeous projects to choose from, but I decided to go with the Every Day Yay Embroidered Cardi because A.) I love a multi-craft project and B.) between Austin weather and irregular, middle-aged lady body temperatures, I prefer garments I can layer. If those sound like practical reasons, you’re right. Not to worry, though, I evened that out by choosing a palette that’s anything but!
The other, never-before thing I’m doing is becoming a Knit Collage affiliate. Over the years, countless companies have asked if I was interested in their programs, but I was always busy collaborating with many brands, so it wouldn’t have made sense. Now, though, I figure, why not team up with a brand I’ve genuinely loved for almost a decade?
Technically, the KAL/CAL kit sales closed last month, but Amy graciously offered to keep them open through May 7th for my community only (literally, y’all are the only ones who will be able to get to the collection now.) If you’re interested in any of the thirteen project options to choose from, we can work on our projects together in the Knit Collage Community. No pressure, but if you’re interested, please use my link to purchase so you’re certain to have access. Thank you!
The KAL/CAL official start date is May 6th, so there’s still time to participate (even if you start a wee bit later, you’ll still have access to all of the classes that accompany each garment) to order your supplies and join us. I can hardly wait for my kit to come, and to KAL with you all!
xx,
Vickie
The post Join me for the Knit Collage KAL! appeared first on Vickie Howell.


April 30, 2025
Knitting Trends 2025 | Free Session!

Knitting Trends 2025 mini-session. Recently, I was asked to put together a report for an industry organization and thought it would be fun to now share a version of it with my yarn-craft community.
Ever wondered what knitting techniques, garments and styles are popular right now, and what outside aesthetics and culture might influence that popularity?

Please join me this Saturday, May 3rd at 11amCT for a FREE Zoom session when I’ll give a snapshot of the Knitting Trends of 2025. Hope to see you there! → RSVP HERE
 Do you love a theme, too? Then you’ll feel at home in my new club for knitters and crocheters, Stitchwell Social Club.
Every month we use a trend-based theme as the launching pad for inspiration and education and use it as a touch point for our workshops, practice projects, discussions, and beyond. Learn more about Stitchwell Social Club and this month’s theme. Go HERE.
The post Knitting Trends 2025 | Free Session! appeared first on Vickie Howell.
April 22, 2025
Crochet Yo-Yo Coasters
 Crochet Yo-Yo Coasters
This month on Stitchwell Social Club we’ve been playing with knitting and crocheting lines and circles, using interesting and less-common techniques. I’ve had the most fun with the latest Stitchwell LIVE episode (livestreamed within the club) during which I taught how to crochet yo-yos. These are quick-and-easy little bits, perfect for scrap yarn all all weights. I’ve made a bunch using leftover fingering weight and sock yarns, but the two I crocheted using super-bulky yarn might be my fave. They’re so squishy! They also happen to make great (and, adorable) coasters. Bookmark this project for host gifts, paired with you’re favorite coffee or tea. Have fun!
Watch a full tutorial with a trial membership to Stitchwell Social Club. Try it here.MATERIALS
1 ball Knit Picks Tuff Puff (100% Wool; 44 yds/100 gr) — or equvilent weight super bulky weight yarn
Size US M/N (9 mm) hook
FINISHED SIZE5½”/14 cm diameter
GAUGENot important for this practice project.
ABBREVIATIONSSPECIAL STITCHESDtr = Double Triple Crochet
YO 3 times, insert hook in stitch and pull up loop, [yo and pull through 2 loops] four times.
Tr2tog = Triple crochet 2 stitches together
*YO 2 times, insert hook into stitch and pull up a loop [yo and pull through 2 loops] twice; rep from * in next st, yo and pull through remaining 3 loops.
Ch 5; join rnd with a sl st in the first ch. — ring formed
Rnd 1: Ch 5, dtr in center of ring seventeen times; join rnd with a sl st in the top of beg-ch.
–18 sts.
Rnd 2: Ch 4, tr in next st, *Tr2tog; rep from * around; join rnd with a sl st in the top of beg-ch.
–9sts
FINISHING
Stuff tails inside of yo-yo.


The post Crochet Yo-Yo Coasters appeared first on Vickie Howell.
April 11, 2025
Project Flashback: Bunny Bots
This project was originally posted in 2010 in partnership with I Love to Create.
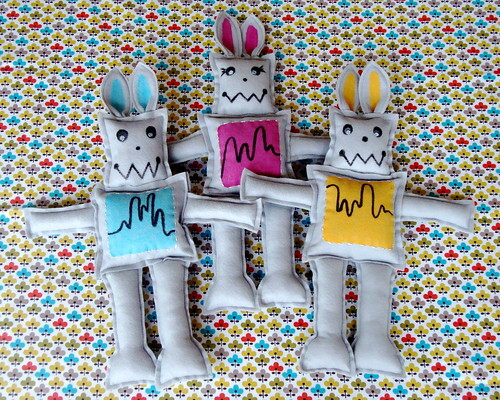
BUNNY BOTS
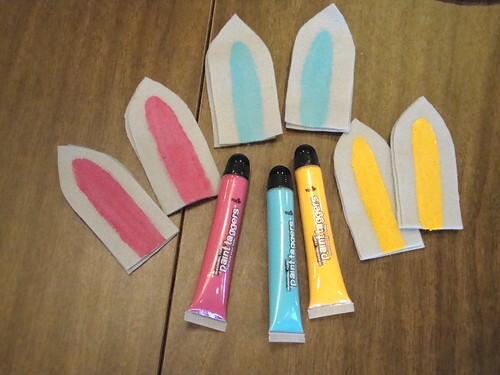
Rabbits are nice but robots are (dare I say) cooler–this year add a little techie love to a traditional bunny to make the kids a Bunny Bot plushie for their Easter basket! Here’s how.MATERIALS
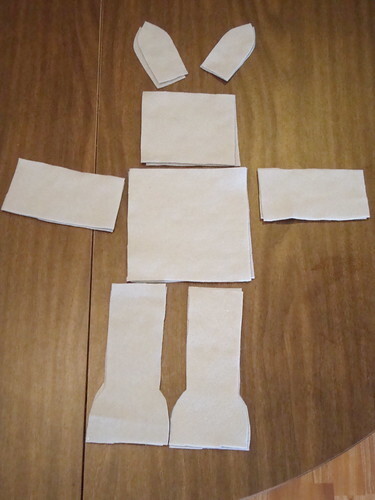
Grey Felt
Poly or Bamboo Stuffing
Sewing Machine & Grey Thread
Fashion Graffiti Fabric Paint Tagger (in either color: Soho, Merge or Taxicab)
 Use Fabric Paint Tagger to color in the center of the front ear pieces, and a square on the front body piece. Let dry.
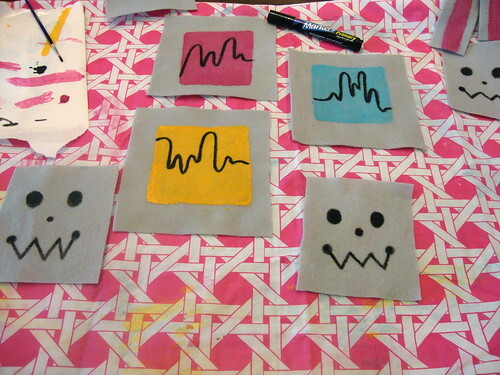
 Use Fabric Marker to draw a robot-y face on front head piece and the frequency modulator line on the body front.
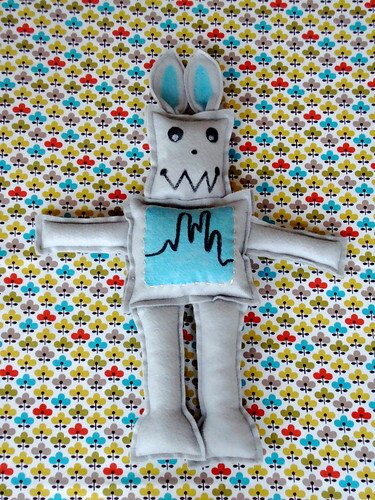
 Using needle & floss, embroider detailing on the body & eyes (optional).Sew Bunny Bot together using a top stitch & 1/4″ seam allowance; stuffing all pieces (except the ears) as you go along.Note: If you don’t want your Robbit to be all flopsy-mopsy, insert a wooden skewer through the stuffing in the body & head.
 Blue Bunny Bot
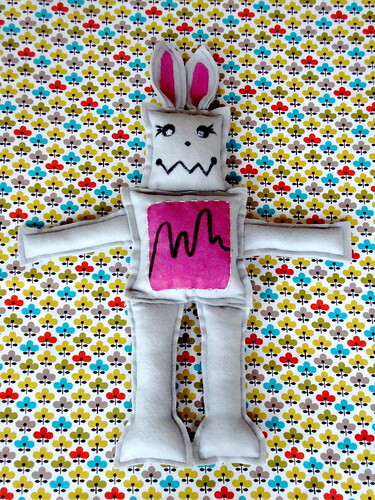
Pink Bunny Bot
Yellow Bunny Bot
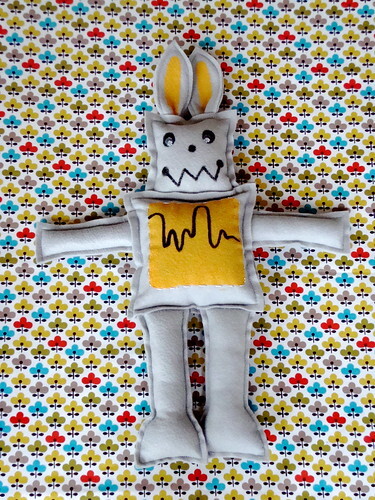 Beep-beep, hippity-hop–Happy Easter!
 The post Project Flashback: Bunny Bots appeared first on Vickie Howell.
March 31, 2025
Stitchwell Social Club | March Round-Up
 Stitchwell Social Club March Round-Up
If my latest venture isn’t yet on your radar, you’re in for a treat! There’s an epic new hangout for my community—loaded with tutorials, patterns, workshops, and more. Welcome to the Stitchwell Social Club! Here, knitters and crocheters of all levels dive into stitching magic, spicing up their skills with a sprinkle of trend-culture fun.
Curious about what’s happening? Let me unveil the charm! Check out this monthly magic we’ve cooked up.
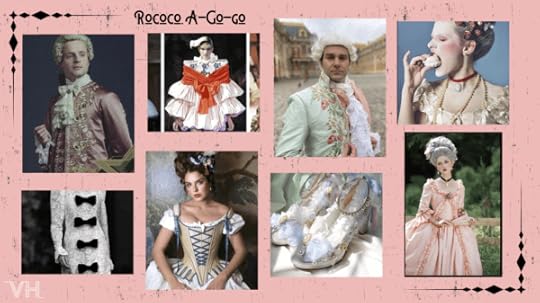
March’s Theme: Rococo A-Go-Go
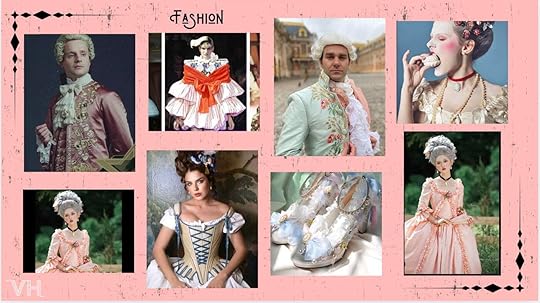
Each month, we’re inspired by an aesthetic thanks to Pinterest and trend-forecasting wizards, serving as a theme for our stitching adventures. It’s a fun, fresh way to start crafting chats, encouraging us to view our maker’s realm as part of the grand cultural tapestry. Our maiden voyage? The dazzling Rococo A-Go-Go.
Rococo is all about the conclusion of the Baroque era, known for its ultra-feminine flair, pastel hues, and extravagant charm. It’s a visual feast!

Once revealed, our trend breaks down into ante-upping skills for knitters and crocheters. Our Rococo cue? We delved into charming ruffles and pearls! Each month features three episodes of my live video series, Stitchwell LIVE (formerly Ask Me Monday), revealing the handmade how-to. March’s episodes were:
• Episode #1: How to Knit & Crochet Ruffles
• Episode #2: Stitching with Faux Pearls
• Episode #3: Knitting a Curl-Free Bind-off
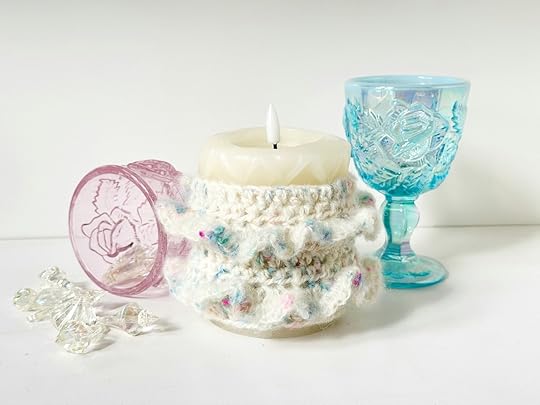
With our episodes come companion posts packed with directions for “practice projects” (easy-to-make dazzlers showcasing the skills we’ll conquer). In March, we crafted charming Ruffled Candle Covers and glitzy Pearled Wristbands.

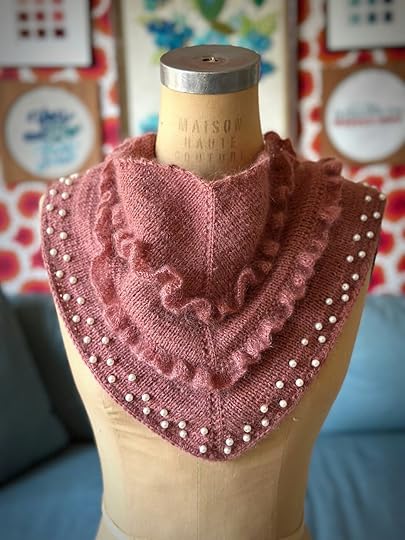
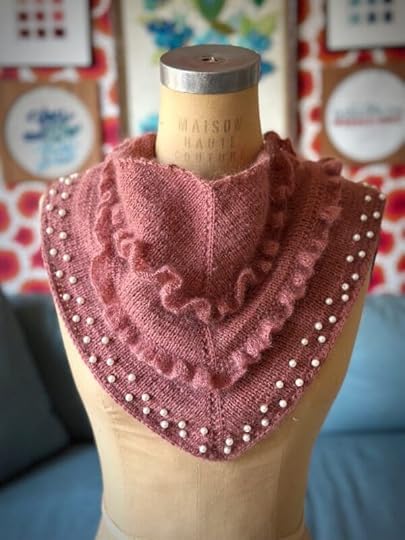
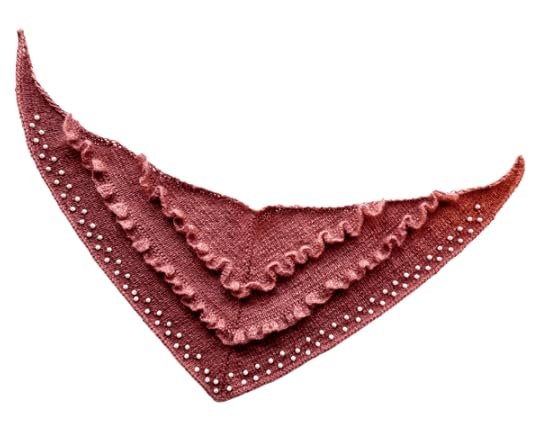
NEW: Rococo Bandit Scarf (knit)
Membership magic also unlocks a burgeoning library of patterns! Among the 55+ existing designs, we’ve spun up freshly fabulous ones. Behold Rococo Bandit—a playful triangle scarf knit in chic Stockinette stitch, with faux pearls and flirty ruffles.
Psst…not interested in a membership, but want to make this scarf? No problem! It’s for sale on Ravelry & Etsy.

Rococo Ruffles Set (crochet)
The next gem from our archives! Originally from 2010’s Pop Goes Crochet, relive the ruffly ascot and cuffs—revamped for our S.Well crocheters.

Stitchwell Social Club buzzes with creativity and connection. Our boards and chats connect us, but stitch gets real at weekly Handicraft Happy Hours.
We totally get schedule chaos. No worries—meet-ups are recorded so you can join the fun, whether live or replayed.
Phew, ok. That was a lot … but also, only the beginning. I would LOVE it if you would join me as part of Stitchwell Social Club. Give it a try, if you love it, stay and stitch for a spell. If it’s not your thing, well, at least you can check off the list that you gave it a try.
I hope to see you soon at Stitchwell Social Club. The new theme is announced tomorrow, April 1st!
Pro-Tip: the 3-Day Free Trial will get you that presentation, the first Stitchwell LIVE episode of the month, and access to the workshop and patterns library.
The post Stitchwell Social Club | March Round-Up appeared first on Vickie Howell.
March 22, 2025
Rococo Bandit | Ruffle & Beaded Scarf Pattern
Buy it on Etsy | Get it for Free on Stitchwell Social Club
NEW Pattern Release: Rococo BanditInspired by the Pinterest-forecasted trend, Rococo Revival, this triangle scarf puts a modern twist on the late Baroque-era style. Rococo fashion is known for its ultra-feminine opulence, often featuring ruffles and pearls. Rococo Bandit utilizes those same design elements but is scaled down for a wearable and versatile piece. This project is knit with a double strand of two different-weight yarns, from the top-center out, with a subtly curved top edge.
Get this pattern (and dozens more) for FREE with a membership to my community home, Stitchwell Social Social Club. Learn more HERE or by downloading the Mighty Network app and looking for Stitchwell Social Club.
Rococo Bandit is worked in Stockinette stitch, with added faux pearls or beads and stitches picked up with a single strand for the ruffles. The scarf utilizes a clever bind-off to prevent curling, giving it a professional, finished edge. See how it’s done in my video below.
Ready to Rococo? Here’s what supplies you’ll need.
MATERIALS
Knitting for Olive Merino (100% extra fine merino; 250m/270yds/50gr), 1 ball in color: Plum Rose — or equivalent, DK-weight #3 yarn
Knitting for Olive Soft Silk Mohair (70% certified mohair/30% cruelty-free silk; 225m/245yds/25gr), 2 balls in color: Plum Rose —or equivalent lace-weight #0 yarn
Size US 6/4 mm circular needle, 24”/60 cm or longer —or size needed to obtain gauge
Size US 4/3.5 mm circular needle, 24”/60 cm or longer —or size needed to obtain gauge
4 stitch markers
Tapestry needle
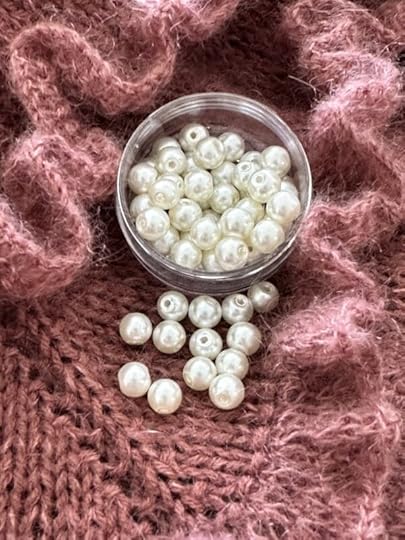
90 faux pearls or other glass beads
Embroidery or larger-eyed sewing needle
FINISHED MEASUREMENTS
36”/91 cm at widest point x 11/28 cm” at deepest point.
Get the Pattern on Etsy | Get the Pattern on Stitchwell Social Club
The post Rococo Bandit | Ruffle & Beaded Scarf Pattern appeared first on Vickie Howell.
March 12, 2025
How to Knit & Crochet with Faux Pearls
Hello, stitchers! It’s Wednesday, which means I went live with the latest of my thrice-monthly (that’s right, I said thrice) live tutorials with corresponding “practice projects,” included in a Stitchwell Social Club membership.
For the month of March, we’re using the Rococo-style trend as a launching point for our creative adventures, which I’ve distilled down to a couple of elements that could realistically work in our everyday stitching lives: ruffles (see last week’s episode and projects) and pearls.
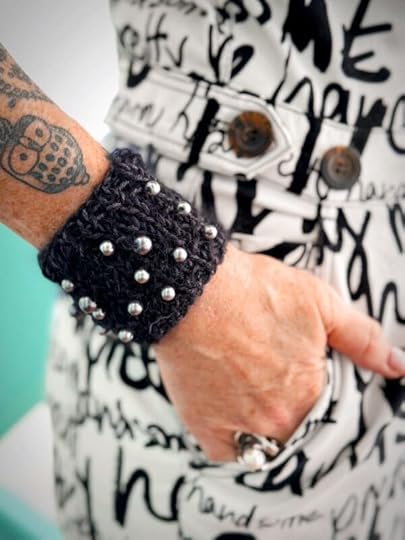
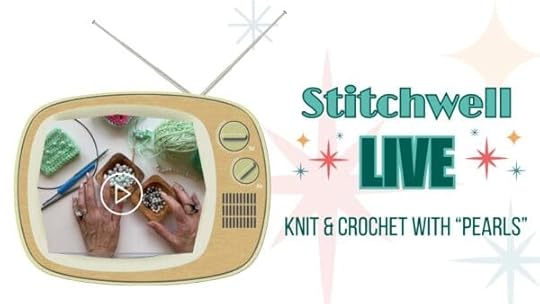
This week, we focused on the latter. Now ready for your viewing and stitching enjoyment is the recordings of this morning’s live broadcast, which focused on knitting and crocheting with pearls (or other beads), and technique practice patterns for Pearled Wristbands.
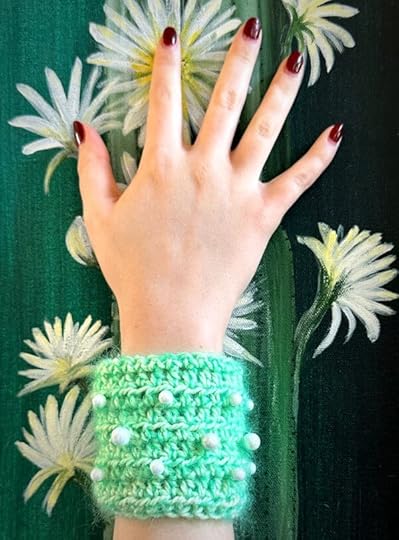
Want a non-commital way to practice knitting or crocheting with beads? My Pearled Wristbands “practice projects” are just the thing. Get both knit and crochet patterns with a free trial to Stitchwell Social Club.
Feel your stitching with beads juices flowing? Check out this post, too!
“Loved today’s wristband tutorial! So much fun and so excited to make one of each!”–Mona B.· Curious Stitcher & SWSC Member
The post How to Knit & Crochet with Faux Pearls appeared first on Vickie Howell.
March 5, 2025
How to Knit & Crochet Ruffles
 Who’s Watching?
Happy Wednesday, all! Today marks the very first episode of Stitchwell LIVE, the new iteration of my long-running Facebook Live series, Ask Me Monday. This series has all of the “live” with none of the Facebook. Interested? Click the image above to join a FREE trial of Stitchwell Social Club (my new community home) which will allow you to watch the recording.

Already S.Weller? You’re the best! Find the recording in the Stitchwell LIVE Space

Come nerd out with me.
Every month, there’ll be a fun theme to get our creative juices flowing. March’s is Rococo A-Go-Go, a glance at the opulent last gasp of the Baroque era.
We’re reveling in the extravagance of this aesthetic trend while distilling it into usable skills for us knitters and crocheters. This week, our skill-building focus: ruffles. Knit them, curl them, love em!
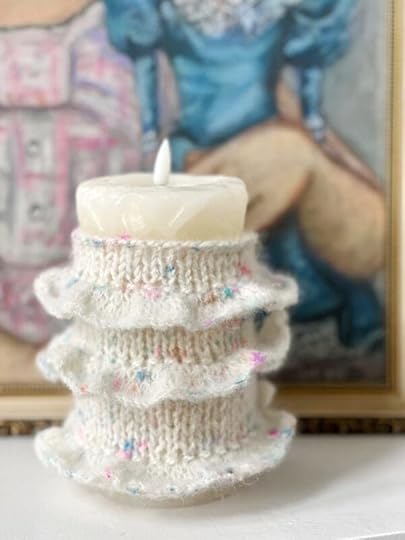
Ruffled Candle Cover (knit)
Get RuffledThis week’s focal technique is stitching ruffles and our Stitchwell LIVE accompanying “practice” projects are, knit and crochet Ruffled Candle Covers. Who’s ready to finesse their frills?
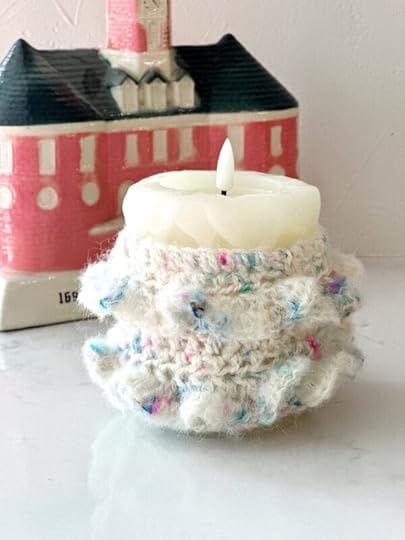
Ruffled Candle Cover (crochet)
The post How to Knit & Crochet Ruffles appeared first on Vickie Howell.
January 31, 2025
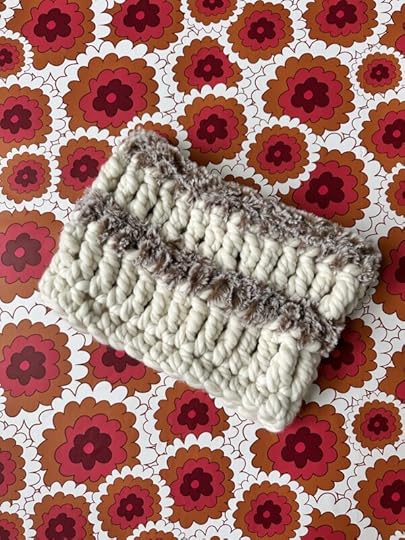
Cold Snap | Beginner-friendly Crochet Cowl
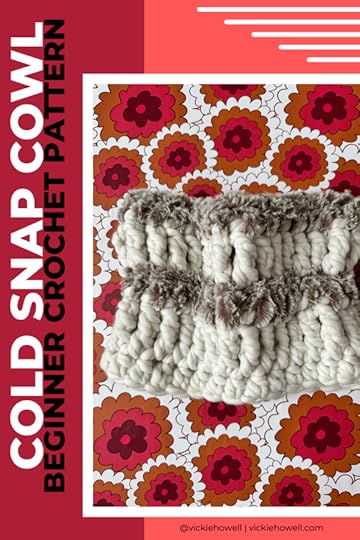
As the temperature continues to be a brrrr-level, there’s nothing quite like wrapping yourself in a warm, stylish cowl. Introducing the Cold Snap Cowl, a super chunky crochet project that’s perfect for both beginners and seasoned stitchers alike! If you’re new to crochet, this project is an excellent way to dive into the world of yarn with confidence, thanks to the step-by-step videos I’ve created for each stitch used.
For those with more experience, the Cold Snap Cowl is an ideal quick gift project that can be whipped up in about an hour. Whether you’re looking to create a cozy accessory for yourself or a heartfelt present for a loved one, you can make it and wear it on the same day! Oh, and have I mentioned that working with jumbo yarns is a delight? Each stitch comes together effortlessly, making this project not only quick but also chic. So grab your hooks, find your favorite jumbo yarns, and let’s get started on your new go-to winter accessory!
Cold Snap Cowl Pattern
MATERIALS
1 hank, Amano Yana XL (100% Fine Highland Wool; 54 yds/200 gr), in color: (A) Blanca – or equivalent jumbo-weight yarn
1 Ball Knit Picks Fairy Tale Fur (100% Polyester; 71 yds/100 gr), in color: (B) Breccia — or equivalent super-bulky, faux fur yarn DOUBLE STRANDED
Size 15 mm hook
Tapestry needle
GAUGE
3 hdc x 4 rnds = 4″ / 10 cm in jumbo yarn
FINISHED MEASUREMENTS
Height: 9″ / 23 cm
Circumference: 26″ / 66 cm
This pattern uses U.S. crochet terminology
beg = beginning
ch = chain
dc = double crochet
hdc = half double crochet
rnd(s) = round(s)
sl st = slip stitch
sp = space
st(s) = stitch(es)
tr = triple (treble) crochet
DIRECTIONS
Rnd 1: Ch 2 (counts as hdc here and throughout), hdc in next st and every st around; join rnd with a sl st. — 28 sts
Rnd 2: Ch 4 (counts as tr here and throughout), tr in next st and every st around; join rnd with a slip stitch and a DOUBLE STRAND of B.
Cut A
Row 3: With B, ch 2, hdc in the next st and every st around; join rnd with a slip stitch and A.
Cut B.
Row 4: Repeat Rnd 2.
Cut A.
Row 5: Repeat Rnd 3.
Looking for a printable pdf? I’ll DM it too you! Go HERE to see what to do.
Want more projects like this one? Check out my Under 2-Hour Cowl, Few Hours Cowl, and Cowl Gift Ideas!
The post Cold Snap | Beginner-friendly Crochet Cowl appeared first on Vickie Howell.
January 29, 2025
Year of the Snake Finger Knitting Project for Kids
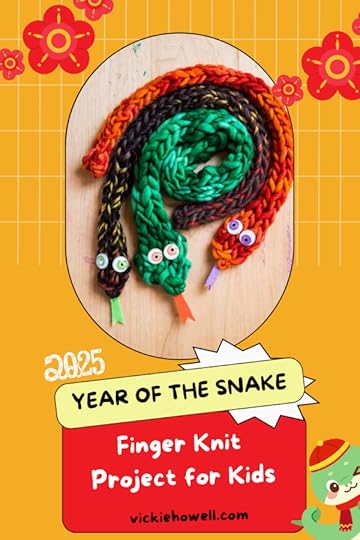 Year of the Snake Finger Knitting Project for Kids
For the first time since 2013, with the Lunar New Year, it’s time to welcome the Year of the Snake. It also happens to be the first year that kids in the AISD school system get the day off for the holiday. If you too have kids at home today, or any day this year, these finger-knit snakes (excerpted from my book, Finger Knitting Fun), are the perfect intro project to the craft and, for those of us who aren’t of Chinese heritage, a great opportunity to get the conversation started with the littles about the lunar calendar and the celebrations surrounding the new beginnings. So grab a few supplies, and let’s get sssssssstitching!
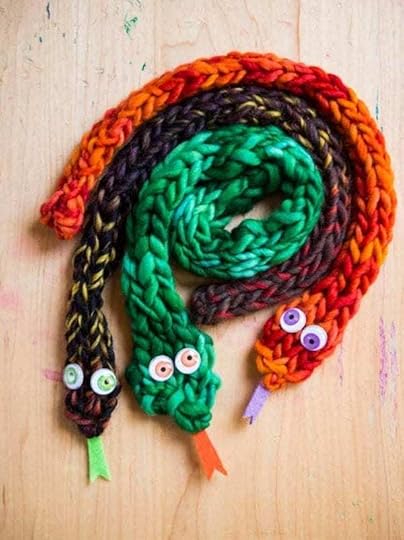
Finger Knit Year of the Snake
Supplies
• bulky yarn scraps
• set of colorful googly eyes OR black beads
• yarn needle
• hot glue gun or fabric glue
• felt scraps
Finished Size
18″ (45.5 cm) long
Make It!
Step 1. Yarn-wrap around four fingers—4 stitches.
Step 2. Finger knit until the piece measures 18″ (45.5 cm).
Step 3. Fasten off.
Step 4. Using a needle and yarn, sew a stitch on the underside of where you want your snake’s head to end to cinch it.
Finish It!
Step 1. Weave in ends.
Step 2. Cut tongue template from felt scrap.
Step 3. Glue on eyes and tongue.
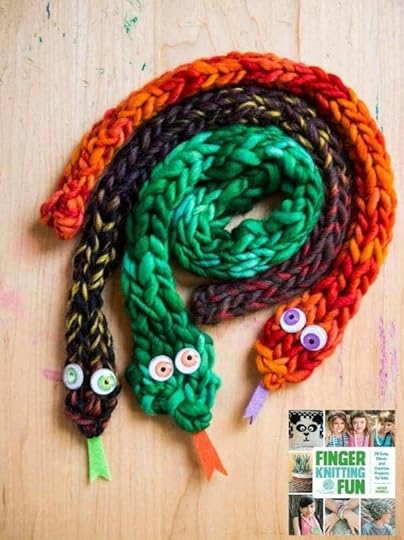
Looking for a signed copy of Finger Knitting Fun? Check out my Etsy Shop!
Still feeling snake-y? Check out how to use these snakes to create a Medusa Wig for Halloween. Are you littles, too little to finger knit? Try this snake button activity, instead!
Happy year of the snake!
The post Year of the Snake Finger Knitting Project for Kids appeared first on Vickie Howell.


![[image error]](http://farm4.static.flickr.com/3451/3248188477_e639ba8edc_o.jpg)