
Vickie Howell's Blog: Vickie Howell's Website, page 43
August 11, 2016
A Conversation with Grammy Award Winning Songwriter (and Knitter!), Siedah Garrett

This week on the CRAFT*ish Podcast, Vickie reconnected with an amazing woman she met at a Vogue Knitting Live conference where she was the keynote speaker. Siedah Garrett is most publicly well known as the co-writer of the song Man in the Mirror (sung by the iconic, Michael Jackson), the Grammy Award Winning & Oscar Nominated writer of “Love You I Do” from the movie Dream Girls, and as the back up singer for frankly, too many of the vocal greats to list here.
What the masses may not know about her, though is that she’s also an amazing knitting and crochet designer. During their conversation, we talked about how she got started as a singer, which legendary producer pushed her to song write, her childhood introduction to knitting and crochet, and about her utter enjoyment over making statement pieces for celebrities like Madonna.
Listen on iTunes, Soundcloud, or Stitcher, then go to the Show Notes page to see photos of Siedah’s stitch work, and listen to her original audition for Michael Jackson’s “Man in the Mirror” (co-written by Siedah!)
Enjoy!
–Vickie


August 9, 2016
Ask Me Monday (live stream): Provisional Cast On & Crochet Cables
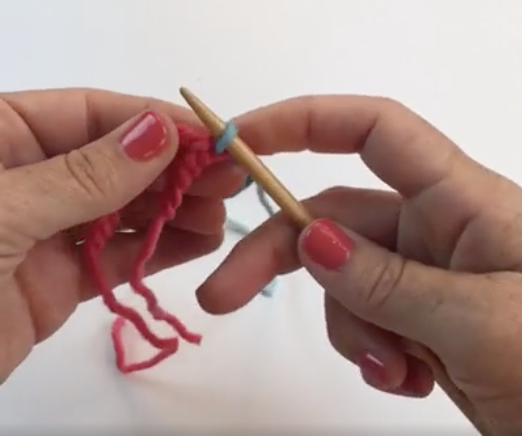
On this week’s Facebook Live stream (aka “Ask Me Monday”) my tutorials came straight from viewer requests! I showed how to crochet a cable and how to do the Provisional cast on for knitting. I also answered viewer questions about when I learned to knit & crochet, and what kinds of products one should bring for their first, craft bazaar. Click below to watch the recorded broadcast, and tune into Ask Me Monday streams live every Monday on my Facebook page at 10amPT/1pmET.
Now that you know how to crochet a cable, make a scarf and wear it like the boss you are! The Cable Gal Infinity scarf is available in my Ravelry shop.
Cable Gal


Breathe in. Craft out.
xx,
Vickie
August 4, 2016
Twinkie Chan on CRAFT*ish!

The latest episode of the CRAFT*ish podcast is up! This week I got to chat with the clever and crafty, Twinkie Chan. We talked business, empowerment, and the balance between selling out and making a living doing what you love. Learn more, here.
Like CRAFT*ish? Tell a friend! Like it a lot? Post a rating or review on iTunes. We really appreciate the support!
August 1, 2016
Ask Me Monday: Zoom Loom

This week on Ask Me Monday (Facebook Live video stream), I explained the process of felting wool, demonstrated how to use the Zoom Loom, and answered a few, real-time questions. Watch below and bookmark this tutorial for when you’re ready to give your pin loom a spin!
Thanks to this episode’s sponsor, Makers’ Mercantile! Get your Zoom Loom from them, and get 20% off! Use code: ASKMEMONDAY at checkout (offer valid through 8/5).
Enjoy, and see you next wee LIVE on Facebook at 10amPT/1pmPT
July 29, 2016
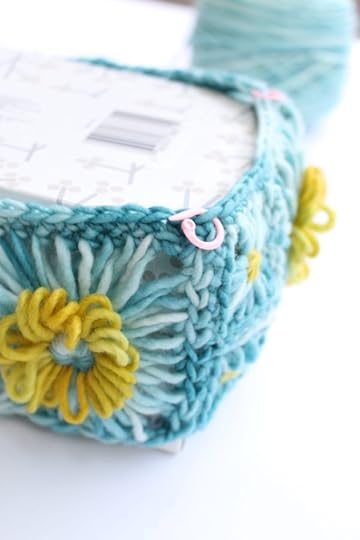
Take Me Back Tissue Cozy


This week I went full-flower. I reveled in retro. I grasped at granny-style. That’s right, I embraced the tissue cozy. There was something in making motifs –for my weekly, Ask Me Monday live stream –using the Hana-Ami Flower Loom that had me feeling nostalgic. The sweetness of the finished blooms, the ease of their creation which had me thinking of kid crafting sessions with my mom — I don’t know, I guess I’m a sap. A crafty sap, that is!
Jump on the Take Me Back train with me with a project that is more kitsch than chic, but guaranteed to remind you of the smile-power of flowers! Here’s how.
Watch the basics of working with flower looms in the video below!
Take Me Back Tissue Cozy
Materials
Clover Hana-Ami Flower Loom
1 ball each worsted-weight yarn, in Color A and Color B
Size U.S. H/8 (5mm) Amour Hook
Tapestry needle
4, Clover Split Ring Markers
Large box of tissue
Special Stitch
sc3tog = single crochet 3 stitches together
Directions
Large Flower Motif (Make 8):
Using Colors A & B, my videos as a guide, and the larger square and medium circle loom plates, make large flower motifs.

Edging: Using hook, join yarn to corner petal, 2sc, *sc in next 7 petals**, 3 sc in next (corner) petal; rep from* twice more, rep from * to ** once more, sc in last corner. Join with a sl st. Fasten off.
Small Flower Motif (Make 4):
Using the smallest square loom plate, Color A for the petals and Color B for the center, make small flower motifs.

Edging: Using hook, join yarn to corner petal, 2sc, *sc in next 3 petals**, 3 sc in next (corner) petal; rep from* twice more, rep from * to ** once more, sc in last corner. Join with a sl st. Fasten off.
ASSEMBLE COZY
Using tapestry needle and Color A, seam motifs together into long strip as follows: 3 large motifs on each side, and 1 large motif with 2 smaller motifs (stacked) on each end.
Seam ends together to form ring.
CROCHET TOP:
Join yarn one stitch in at any corner of piece top.
Rnd 1: Ch 1, *sc evenly across edge of top to 1 st before next corner, sk 2 corner sts (this will help initial cinching); rep from * 3 times more. Join rnd with a sl st.
Place marker on each of 4 corners (ie. on the stitch that bridges the gap between the skipped sts.)
Rnd 2: Ch1, *sc evenly across edge of top to 1 st before marker, sc3tog (replace marker on st just made); rep from * 3 times more. Join rnd with a sl st, remove marker.
From here you go from working rounds to rows.
Flap:
Row 1: Ch 1, sc to next marker, remove marker, sc in that st. Turn.
Rows 2 & 4: Ch 1, sc across. Turn.
Row 3: Ch 3, dc in next st and across. Turn.
Row 5: Ch 1, sc across.
Fasten off.
Join yarn at opposite side where marker is. Repeat Flap instructions.
Seam flap sides down.
EDGING:
Join yarn at bottom edge of piece.
Rnd 1: Ch2, hdc evenly around. Join with a sl st.
Rnd 2: *FPhdc, BPhdc; rep from * arounf. Join with a sl st.
Fasten off.
Finishing
Weave in ends. Steam to shape.
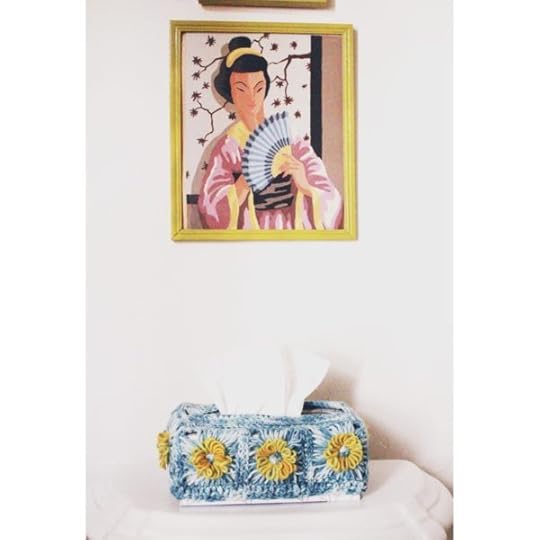
A vintage photo filter makes my current bathroom like the perfect home for this tissue cozy.
July 26, 2016
Video Tutorial: Mosaic Plaid Stitch

Yesterday’s episode of my weekly, live Facebook stream, “Ask Me Monday” focused on creating the mosaic plaid stitch perfect for on-trend, Fall accessories. Click to watch the feed below, then nab my Plaid Fad scarf pattern in the latest issue of Knit Simple Magazine!
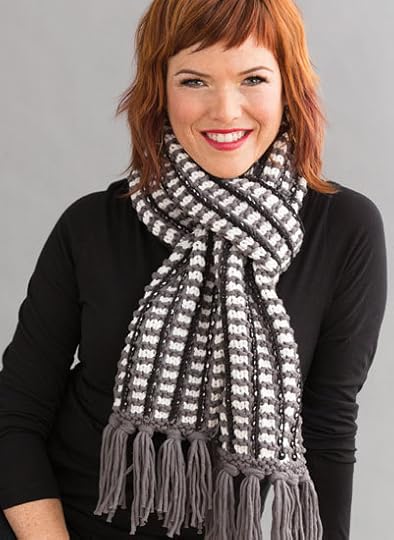
Plaid Fad Scarf, Knit Simple (Fall ’16)
Want to see more knit, crochet & craft demos, ask your creativity-related questions live, and be inspired to get makin’? Tune in weekly to “Ask Me Monday” via @FacebookMentions. Binge watch the past 39 episodes by clicking on the playlist under the videos tab on my page, then click on the “Live Notifications” button (on any video) to be alerted when I go live.
Breath in. Craft out.
–Vickie
July 18, 2016
Hippie Headband + Mini Flower Loom Tutorial
 This week I thought we could all use a little flower power, so that’s the theme of this week’s live video on Facebook. Thanks to sponsorship by Clover Needlecrafts, I’m able to offer you a tutorial and giveaways for their Flower Looms. Watch the video to get the scoop, then make a hippy headband like the one my daughter is sporting in the photo above. Enjoy! xx, Vickie
MAKE the Hippy Headband:
MATERIALS
Clover Mini Flower Loom (flower shaped version)
Small amounts of white & yellow yarn
Approx 43″/109 cm velvet ribbon
Sewing needle & thread
HOW-TO
Following the tutorial on my Ask Me Monday video as a guide, make 5 little flowers.

Hand-sew each flower to center of ribbon.
Trim ribbon & tie for headband
WATCH the flower loom tutorial + get info on how to win a set of looms!
July 5, 2016
Podcast Extra: Co-Directors of Yarn: the Movie!

This week we have a special, CRAFT*ish Extra for you! In honor of YARN: the Movie making it’s New York Debut this month, we thought we’d share the audio portion of a short-form interview I did with the film’s co-directors, Thor Jonnson and Heather Millard. Listen on iTunes, Soundcloud or Stitcher, and/or click here for a direct link and more info on the film. Enjoy!
June 22, 2016
Weaving Sticks Place Mat
 I’ve got picnics on the brain which means both portable projects (you didn’t think that I’d have an outing without crafting involved, right?), and pleasing place settings. This week’s project plays into both of my whims: a denim-look place mat made using Clover Weaving Sticks. Enjoy! –Vickie
Materials
Clover Takumi Weaving Sticks Fine
1 Ball (approx 100 yds) of Cotton or Denim, Worsted Weight Yarn. I used this.
Clover Jumbo Tapestry Needle
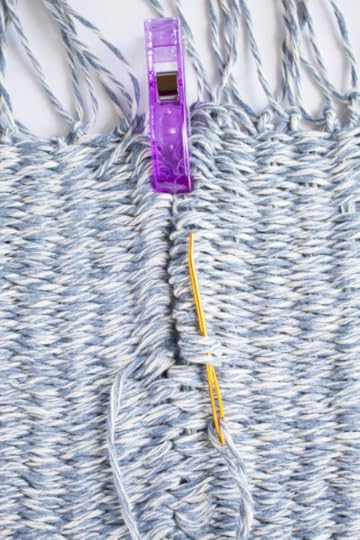
Jumbo Knitting & Crochet Wonder Clip
Optional: Pointy beads, sewing needle & thread
Finished Measurements
12″ x 9″/30.5 cm x 23 cm (excluding fringe)
Directions
PLACEMAT
Weave Strips (Make 3)
Cut 6, approx. 44″/112 cm strands of yarn.
Thread piece of yarn through hole of one weaving stick until it’s folded evenly in half. Repeat for remaining five sticks.
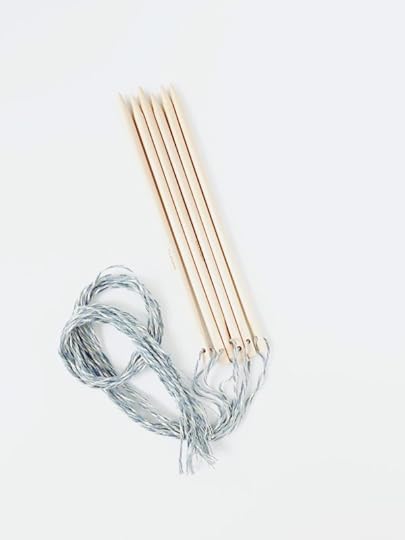
Hold all six sticks parallel in your non-dominant hand; make a slip knot with yarn from ball and place it on the first weaving stick, then *weave over and under remaining sticks. Weave back in opposite direction. Repeat from * until piece measures 12″/30.5 cm.

*Note: once your sticks are “full”, slide woven yarn down onto hanging strands.
Slide piece off of weaving sticks so that there is an even amount of “tail” yarn on both ends, and tie the tails of the two neighboring pieces together to keep woven loops in place. Repeat until all loops are secure on both ends of piece.
Finishing
Lay strips side-by-side on a flat surface. Using a tapestry needle and strand of yarn, sew pieces together by coming up through 2-4 loops on one strip, then zig-zag over to the next to do the same.
Pro Tip: Use Knitting & Crochet Jumbo Wonder Clips to hold strips together while you sew!
Trim fringe edges.
Using sewing needle & thread, sew bead embellishments to placemat edges.
Repeat process for a set (or more) of place mats!
Psst! Love your Weaving Sticks? Ready to go bigger for your next project? Check out my Wall Hanging tutorial!

June 21, 2016
Crafty Chica on CRAFT-ish!

This week on the show is Crafty Chica, Kathy Cano-Murillo. Vickie sits down with her to chat about her journey from local reporter to internationally renown artist, how following your passion trumps any nay-sayers of your work, and how they were technically O.G. mommy bloggers before that was even a thing. Click here to learn more!


