
Vickie Howell's Blog: Vickie Howell's Website, page 46
February 26, 2016
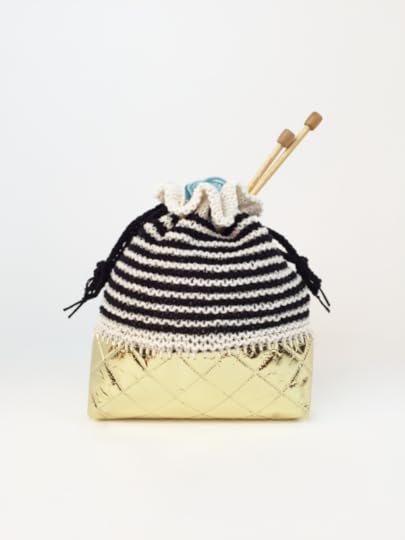
New Project: Knit Project Bag

Like most busy people, I’m always on the go — and when I go places, I rarely leave without some kind of project to work on whenever the opportunity might present itself. Waiting rooms, grocery store lines, sidelines of kids’ activities; these are all great places to sneak a few stitches in throughout an otherwise jam-packed day!
My favorite types of projects to carry along are ones that aren’t difficult to, well, carry. I already feel bogged down enough by my (albeit oversized) handbag, so I’m uninterested in lugging another large thing around. Mittens, socks, a lightweight Summer scarf, or baby items all make great portable projects, so I’m all about petite project bags to hold (and protect) them. Which brings me to this week’s project: Stripegeist a mod, metallic-and-striped pouch for your walk-about-WIPs!
Thanks to some gold, quilted fabric, lightweight yarn, and an array of Clover tools this project makes-up fast…and chic. Make it this weekend, then use it to take your (next) knits to work on Monday! Have I mentioned, lunch hour is another great time to get some stitching time in? Enjoy!

Stripegeist Project Bag
Materials
1 ball each, Bernat Cotton-ish by Vickie Howell in colors: (A) Cotton Ball, and (B) Cotton Club — or equivelant, sport-weight yarn
1, 9 1/2″ x 7 1/2″/24 cm x 19 cm piece of Fairfield Aluminor, or other quilted fabric
Size US 6 (4 mm), 16″ Clover Takumi Circular Needle
2, US size 5 (3.75 mm) Clover Takumi Needle Double-Pointed Needles
Clover Gold Eye (Sharp) Tapestry Needle
Clover Jumbo Tapestry Needle
Marking pen
Clover Wonder Clips
Sewing thread, & either needle or sewing machine
Measuring tape
Optional: Fine point hole punch
Finished Measurements
Approx 9″/23 cm tall
Directions
Sew bag bottom:
With right-sides together, fold fabric piece in half length-wise; using 1/4″/6mm allowance, sew sides.
Using picture (below) as a guide, fold piece so triangle is made by bag bottom “sides”; sew, an inch/2.5 cm or so from tip, across to create boxed corners.

Turn piece right sides out.
 Create foundation edging:
Using marking pen and measuring tape, draw dots around the perimeter of the top edge of the piece, 1/4″/6 mm apart.

Optional step: Punch holes where dots indicate.
Using color A, the sharper tapestry needle, blanket stitch, and holes (or dots — the sharp needle will be able to puncture the fabric) as guide, embroider an edging around piece. You’ll want a multiple of 3 of spaces for stitches (each “bar” created by the Blanket Stitch across the top edge of the fabric, equals 1 stitch spot) to make the eyelet row work later; I had 66. Note: For my demo on how to create the Blanket Stitch on a fabric edge, see this week’s live stream recording of, Ask Me Monday here.
Knit bag body:
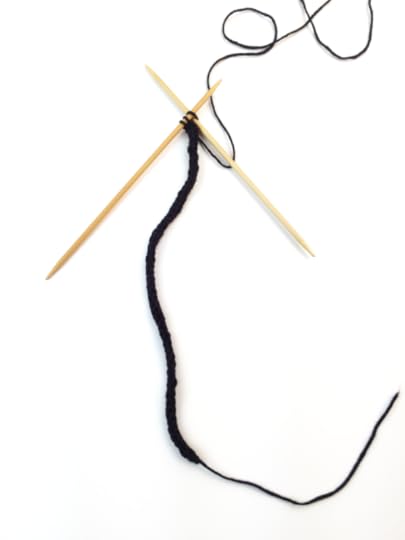
With Color A and circular needle, pick up stitches all the way around.

Rnds 1 & 3: Knit.
Rnd 2 & 4: Purl.
Join B.
Rnd 5: With B, knit.
Rnd 6: With B, Purl.
Rnd 7: With A, Knit.
Rnd 8: With A, Purl.
Continued in established (in Rnds 5-8) garter stitch in-the-round, stripe pattern until piece measures 4 1/2″/11.5 cm from embroidered edge, and ending with a Color B round.
Cut B.
With A, knit 3 rnds.
Next Rnd (eyelet): *YO, k2tog, k1; rep from * around.
Knit 3 rnds.
Next Rnd (hemline): Purl.
Knit 3 rnds.
BO.

Finishing
Fold top-edge over at hemline. Hold in place using Wonder Clips.
Using blunt tapestry needle and Color A, seam hem down.
Ties (Make 2):
With Color B and double-pointed needles, CO 3 sts.
Work i-cord over these sts until piece measures 12″/30.5 cm.
Note: for a demo on i-cord see my video on YouTube here.
BO.
Weave each tie piece through half of the eyelet holes; knot on either side.
Weave in ends.

Enjoy your new, small project bag!
xx,
Vickie


February 24, 2016
Join Me at SXSW Interactive!

Will you be heading to Austin next month for SXSW — or as us locals call it, “South By”? Yes? Awesome; then come pay me a visit during the Interactive portion of the conference! For the second year running I’ll be available for mentor sessions (free with badge) for anyone who wants to chat creative entrepreneurship, grass-roots/social media marketing, or the art of the creative hustle.
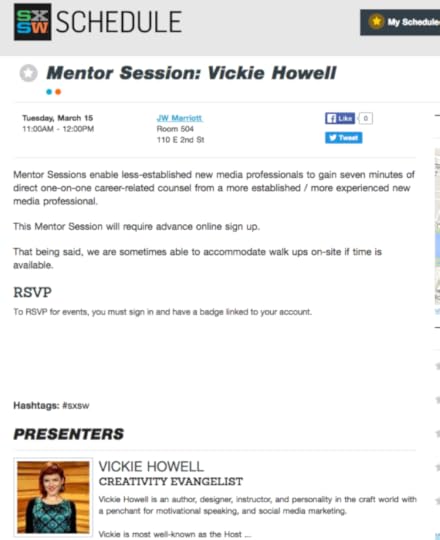
If you’re an artist, crafter, writer, blogger, aspiring influencer, or artisan looking for some brain-storming partnership on growing the monetization of your passion or even, just how to get your name out there– then sign up for a short session with me on Tuesday March 15th between 11am-12pm.
Here’s what people are saying about my recent online workshop, Monetize Your Craft:
“Wow! Vickie is succinct, clear and thorough. She knows her subject in depth and generously shares.” –CreativeLive Student
“Today, [Vickie] took crafting inspiration to a whole new level, with in depth professional insight into all the facets of making money doing what we love… crafting! She is organized, experience [sic], on point and completely invigorated the entire room to ACTION! Our lunch conversations were lively, immediately following this course, on all the exciting things we felt called to action to begin immediately to develop the crafting career of our dreams.”
–Kristin McDonnell
So come on, let’s talk. At best, you’ll leave with tactical tips tailored to your needs; at worst, you’ll feel like you have one more person on your side. What are you waiting for? Go here to sign up today!
Hope to see you there!
xx,
Vickie
February 16, 2016
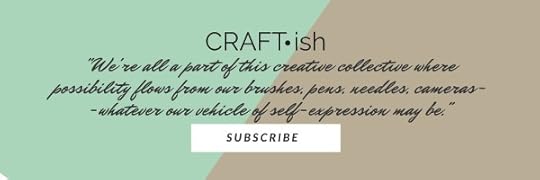
COMING SOON: CRAFT-ish Podcast!

It’s been almost 8 years since producing my limited series podcast, CRL (aka Craft.Rock.Listen). So much has happened since then technology-wise, so now people don’t bat an eye when you reference “podcasts”. Thanks to smart phones and the availability of pushing audio (via Airplay or the like) at home, and Blue Tooth in the car the ability to listen to programs on topics of tailored (to you!) interest anywhere or anytime, are literally at our fingertips. What a wonderful opportunity that presents to continue what I love most about my job; the nurturing and promoting of the creative community! With that said, I’m excited to announce that coming late March/early April we’ll be launching my new podcast, CRAFT-ish, an audio space for the gathering of great conversations with creative types spanning all genres — from knitters & crafters, to writers & musicians, to creative entrepreneurs — about the stories surrounding their craft.
In the meantime, give this little piece we (my husband, Dave Campbell is the editor) recorded from my home studio in Austin, Texas. It’s a quick promo for what to expect from CRAFT-ish in the future.
If you like what you hear, please take a moment to subscribe on iTunes. The more subscribers we have, the easier it will be for us to gain sponsors and launch quicker. Plus, you’ll be notified directly every time a new episode goes live!
Thanks for the support — I’ll speak to you soon, on CRAFT-ish!
xx,
Vickie
February 12, 2016
Cloudy Window Scarf
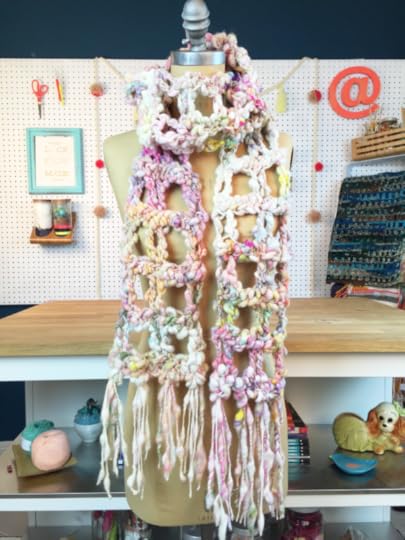
Do you ever work on projects that feel like running through a field of flowers with the wind in your hair? You know what I mean, right? With each stitch made, you feel like a kid sneaking another piece of candy — it’s that much fun? Well, folks the Cloudy Window Scarf — named for the Stratocumulus-inspiring yarn and window pane stitch pattern — is one such project. Or at least it was for me while designing and making it. This is absolutely due to the fact that I got to work with fantastic materials, including the Clover Jumbo Amour crochet hook which grabbed and eased each nubbin and strand of the Castaway yarn effortlessly. The result: a Free People worthy, bohemian neck garland that dares you not to want to spin around Maria-from-Sound-of-Music style while wearing it.
Whip up this whimsical scarf in an evening and wear it as the perfect, transitional piece from Winter to Spring. Worn wrapped you’ll feel the warmth of the wool; worn loosely hanging and the air will flow through the over-sized filet crochet squares. Here’s how to make it!
Materials
2 Hanks Knit Collage Castaway (100% wool; 68 yds.), in color: Prism
Size U.S. N/P (10 mm) Clover Amour Hook
Clover Super Jumbo Tapestry Needle
Finished Measurements
Approx. 7″ x 74″/18 cm x 188 cm (excluding fringe)
Gauge
Approx. 5 hdc x 3 rows = 4″ /1o cm
Directions
Ch 13.
Row 1: Hdc in 3rd ch from hook, and every ch to end. Turn. — 12 sts.
Row 2: Ch 4 (counts as tr), tr in next hdc, *ch 3, sk 3 hdc, 2 tr; rep from * to end. Turn.
Row 3: Ch 2 (counts as hdc), hdc in each tr and ch to end. Turn.
Repeat Rows 2-3 until piece measures 74″/188 cm, or desired length taking care to leave enough yarn for fringe.
Fasten off.

February 11, 2016
Behind the Scenes at CreativeLive
I spent last week at the San Francisco studios for CreativeLive, shooting five online courses for their platform. You can watch a sneak peak behind the scenes from a live, Facebook video I streamed from their San Francisco offices, but I also wanted to share a few snapshots from the experience.
Ready? Ok, good!
Front Desk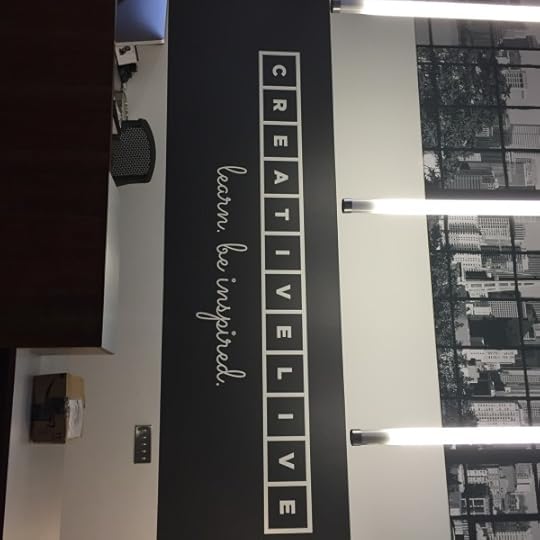 I love the signage — clean, concise and modern, but just a little bit playful.
Pre-production Meeting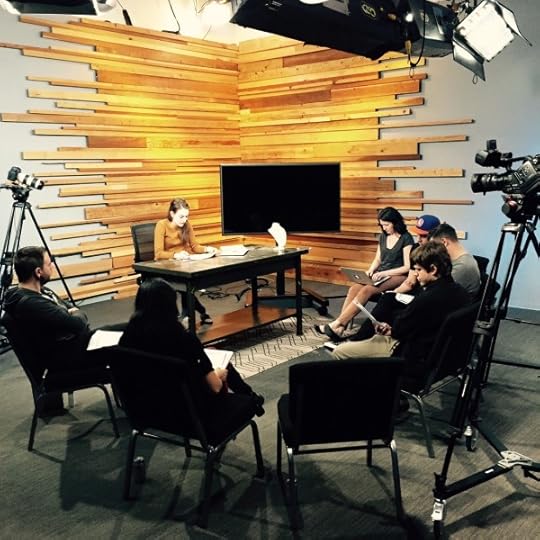 The day before the shoots the crew — producer, cameramen, audio, and technical director all led by Line Producer, Kate Giller — met with me to go over how the shows (aka courses) would flow.
Lunch Room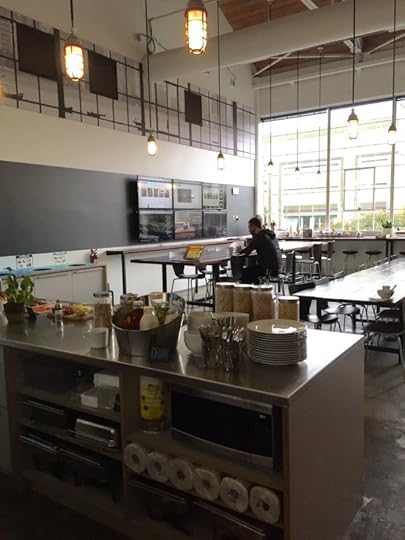 This room in particular had exactly the feel you’d expect from a cool, new tech start-up company: bright spaces filled with industrial-meets-artisanal decor. Even though CreativeLive is no longer new or a start-up, it still maintains that air of freshness and excitement.
Lunch Room Mural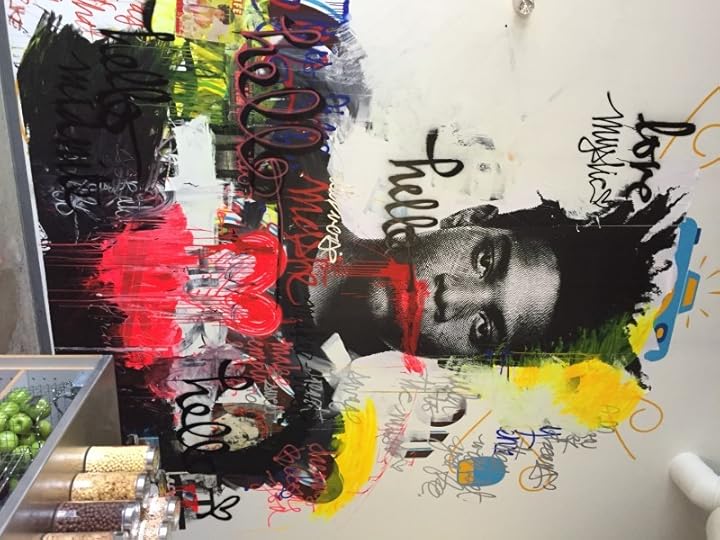 Oh, and of course there was graffiti statement art. Obviously.
Content Marketing Production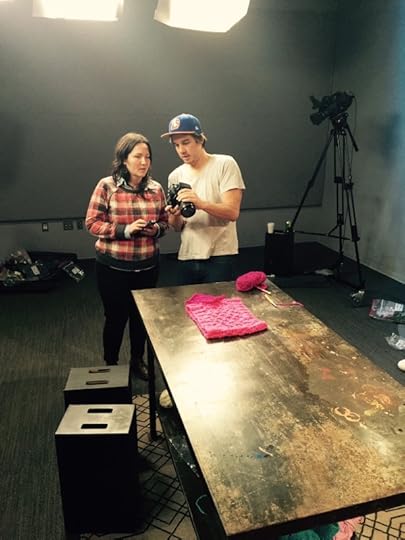 Post video shoots, Content Marketing Lead, Rachel Gregg and Photographer/Studio Manager, John Eley meet-up to shoot photos for future blog posts and web ads.
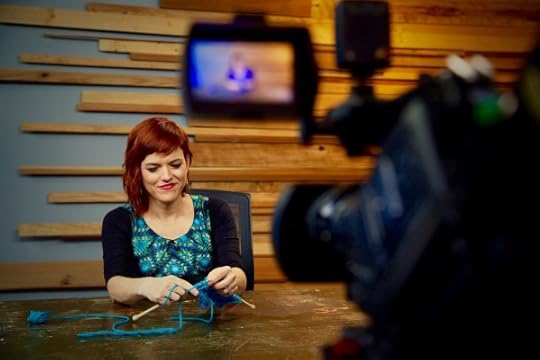
Last Minute Producing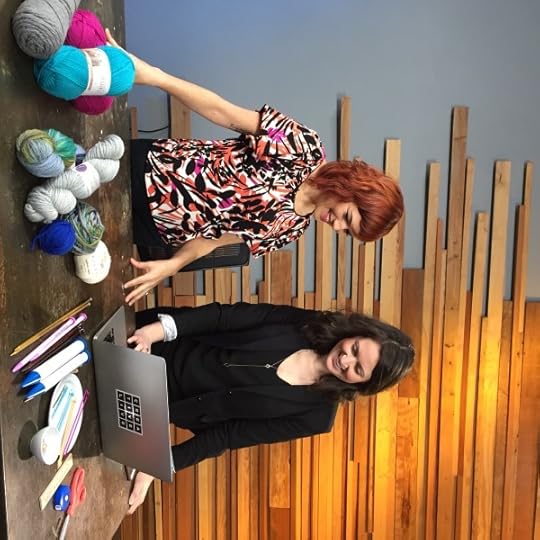 My amazing producer, Sarah Luck going over some last-minute notes before shooting the first lesson of my Knit Maker 101 class.
Live!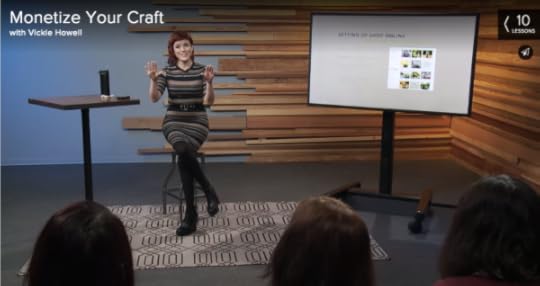 A screen shot from the live feed of my Monetize Your Class craft. I broke the cardinal rule of not wearing horizontal stripes on camera, but other than that the class went really well. I had a great live audience, and 2.8k RSVP’d virtual students! I truly enjoyed sharing what I know, and interacting with everyone. Be sure to check out this course, along with all of the bonus materials on CreativeLive!
I’ll be talking more about each individual course soon, but in the meantime we’ve set up a course page here on my website that gives info and can direct you to each of them.
Happy learning, everyone!
xx,
Vickie
January 29, 2016
Valentine’s Day Tassel Garland!
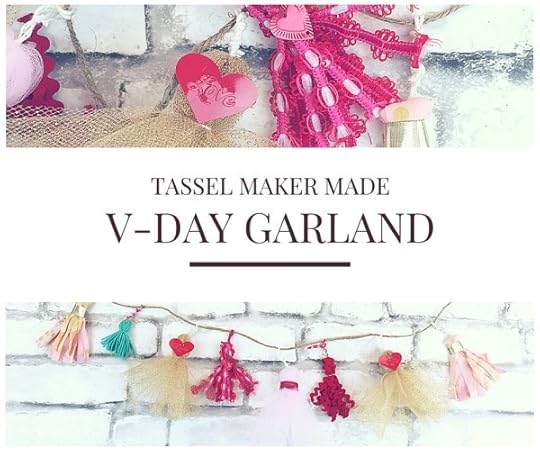 I love tools that make crafting life easier, and there’s no company we can count on more to come up with those sanity-savers than, Clover. Their latest aid to embellishing is the Tassel Maker, an adjustable frame that comes in two sizes with the ability to create tassels in several additional lengths. The fun part, though is that loads of different materials work with the tool. I experimented with yarn, fabric, tulle, ric-rac, and more! What to do with all of those finished tassels? Make a garland, of course! And, with V-Day on it’s way, a pink, red and gold theme seemed perfect.
Here’s how to use the Tassel Maker, then make your own, holiday decoration!
V-Day Tassel Garland
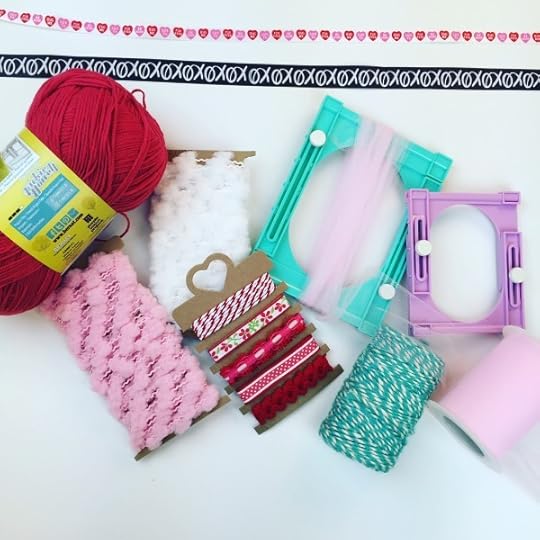
Materials
Clover Tassel Makers (Large & Small)
Various yarns, twines, ribbons & fabric strips
Scissors
Twine
Optional: Heart-shaped sequin; hot glue & gun
How-to:
Make various tassels using different heights of two Tassel Makers, along with various trimmings and string as follows:
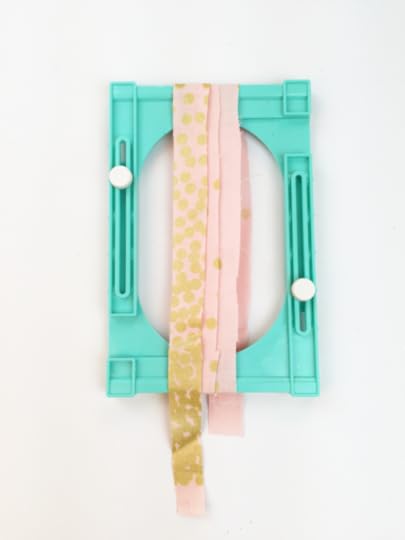
Wrap trimming (shown: fabric strip) around Tassel Maker several times.
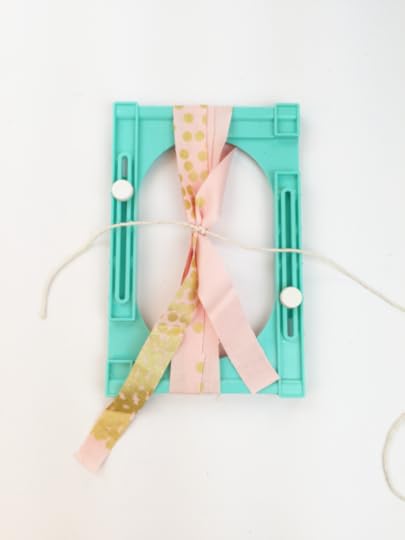
Knot a piece of string around center of wrapped trimming, taking care to make it long enough to act as the tassel hanger.
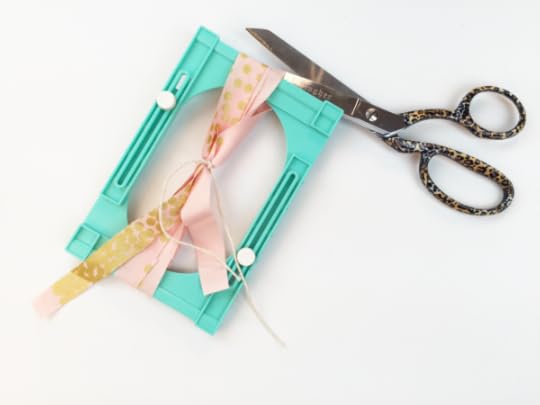
Cut trimming at either end, using ridges as a guide.
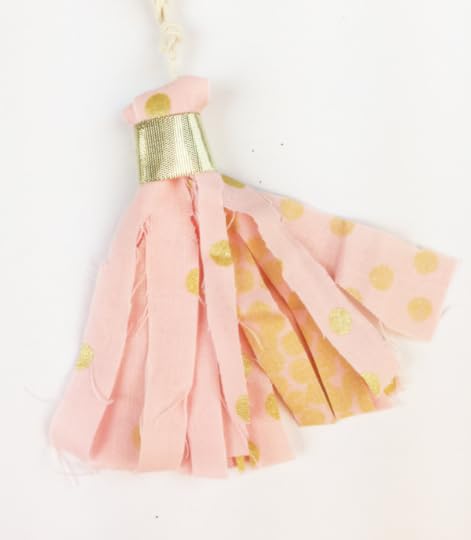
Fold piece in half; tie top with separate piece of string or trim to create neck.
Repeat process for as many tassels as makes your heart happy.
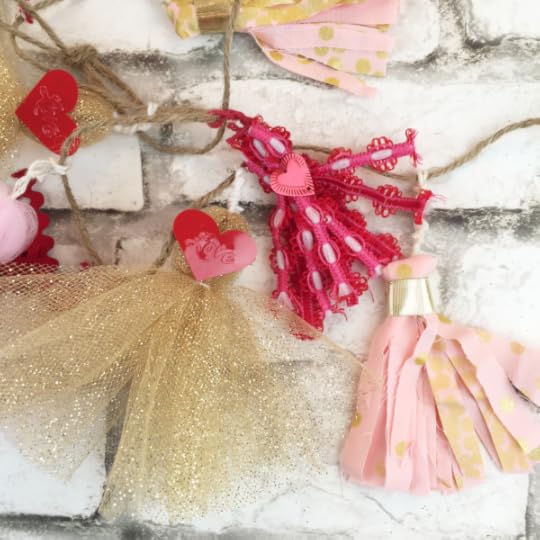
Make Garland:
Tie tassels to a long length of a piece of twine that has hanging loops knotted on either end.
Add optional, Valentine’s sequin.
Hang it!
If you’d like to see the Tassel Maker in action, watch the video of my live, Facebook stream of the demo!
Have so much fun tasseling away!
xx,
Vickie
Yarn Arts Ambassador, Clover Needlecrafts
January 20, 2016
Kids’ Knitting Workshop: Scarf Pattern + Enter to Win!
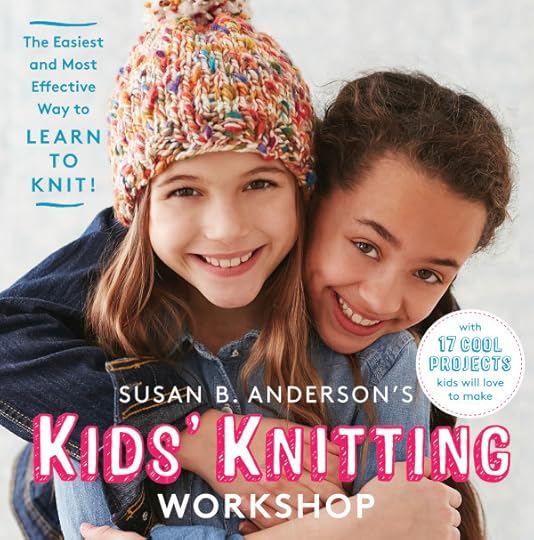
“Knitting is for everyone! It really is a craft that boys, girls, kids, teens, and adults of all ages can enjoy. Most kids naturally love making things, so knitting often resonates with them in a big way. Anyone and everyone can learn to knit—all you need are a few simple skills, knitting needles, and yarn, and away you go!” —Susan B. Anderson
Beloved knitting instructor Susan B. Anderson’s sixth book is her first one geared to a young audience. Modern in tone and vibrantly illustrated, SUSAN B. ANDERSON’S KIDS’ KNITTING WORKSHOP (Artisan Books; December 15, 2015; Spiral Bound / $17.95) is an all-in-one handbook that teaches children ages 8 to 12 how to knit. Anderson’s patient and engaging instructions and step-by-step illustrations help children move from basic knitting skills through 17 progressively challenging projects. With her friendly guidance, young knitters will have the instant gratification of making cool creations on their own, right from the start.
As a special treat to the readers of this blog, Susan has been gracious enough to give a project excerpt from her book so kids can get knitting…now!
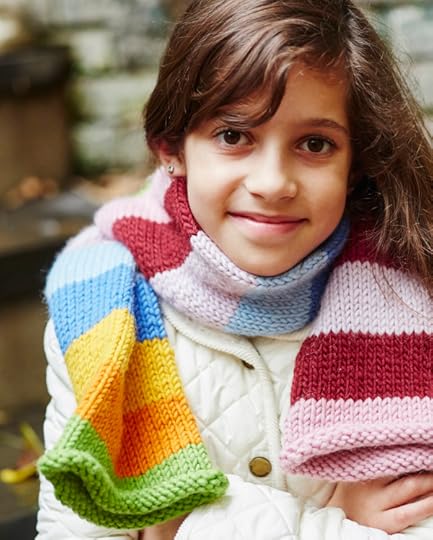
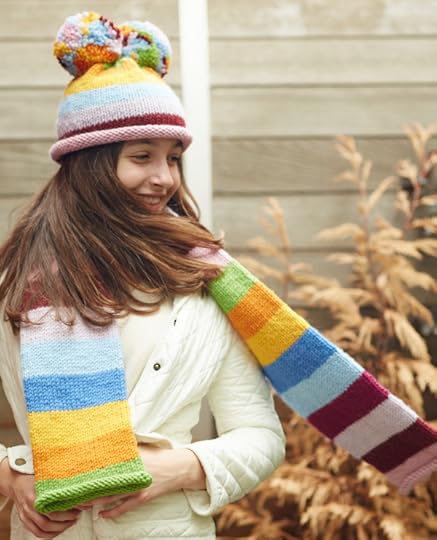
Stripy Tube Scarf
Excerpted from Susan B. Anderson’s Kids’ Knitting Workshop by Susan B. Anderson (Artisan Books). Copyright © 2015. Photographs by Lauren Volo. Illustrations by Alison Kolesar.
When you knit a scarf in the round with thick yarn and bigger needles, it will go fast even though it is long. This is why when you’re a new knitter, the only type of scarf I would recommend knitting is a tube scarf with color changes to make stripes. You could make the stripes match the Stripy Hat (page 73) to make a set, or you could make a separate scarf with different colors. Be creative!
Size
6 inches wide, 52 inches long.
Note: The scarf can be made longer or shorter in length; just bind off whenever you are ready.
Yarn
7 skeins Bulky weight in 7 colors (about 750 yards total).
Note: This is a great project to use up leftover yarns! Just make sure they are all Bulky weight.
Needles
US size 10½ / 6.5 mm, 16-inch circular needles
Gauge
3½ stitches per inch in stockinette stitch
Other things you’ll need
Stitch marker
Ruler or tape measure
Scissors
Yarn needle
Before you begin, you’ll need to know how to:
Cast on
Join stitches to work in the round
Knit stitch
Make stripes
Bind off
Weave in ends
Start Here!
With your first color, cast on 44 stitches. Make a butterfly with the end. Place a stitch marker on the first stitch.
Join to work in the round, being careful not to twist the stitches.
Knitting the Scarf
Rounds 1 to 10: Knit every stitch.
At the end of Round 10, cut the yarn, leaving a 6-inch end. Then attach the next color by tying a half-knot around the working yarn or using the more advanced method described on pages 66–67 (“Making Stripes”). Slide the knot up to the needles and start working with the new color yarn.
Repeat the last 2 steps (Rounds 1 to 10, and the color change), alternating all 7 colors, until the scarf reaches your desired length. End after completing 10 rows in the final color.
Bind off loosely.
Cut the yarn, leaving a 6-inch end. Pull the end through the remaining stitch and gently tighten.
Finishing the Scarf
Place the end on a yarn needle. Weave in the end by pulling it through 5 or 6 stitch bumps on the wrong side of the fabric.
Unwind the butterfly. Place the end on a yarn needle and weave in as described above.
Trim the ends to a ¼ inch.
Note
Since the ends from the color changes are inside the scarf, you don’t need to weave them in.
Enter to Win a copy of Kids’ Knitting Workshop! Simply post in the comments section: your name and who you’d teach to knit using Susan’s book. Deadline is Wednesday, January 27th at midnight CT. Winner will be picked at random. Good luck!
ABOUT THE AUTHOR: Susan B. Anderson is also the author of Itty-Bitty Hats, Itty-Bitty Nursery, Itty-Bitty Toys, Spud & Chloë at the Farm, andTopsy-Turvy Inside-Out Knit Toys. She writes her popular knitting blog at susanbanderson.blogspot.com and teaches award-winning courses on Craftsy.com and at workshops throughout the country. Anderson has a YouTube channel with dozens of instructional knitting videos that can be found at SusanBAnderson and connects with fans on Instagram and Twitter @susanbanderson. She lives in Madison, Wisconsin, with her husband and four children.
January 18, 2016
Get Schooled: Crochet Series
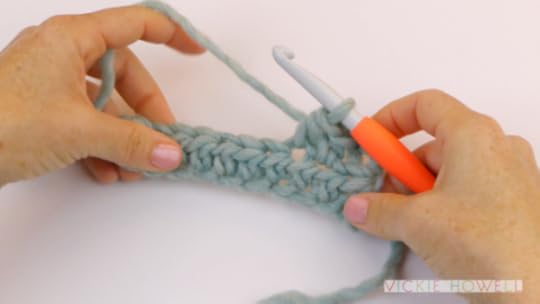
Want to learn the basics of crochet? Don’t have time for a full-on class? Just need a reference in case you forget your crocheted stitches? I’ve got you covered! This week on my new, YouTube Channel we launched the latest video series, “Get Schooled: Crochet”. Click on the playlist for tutorials on: Chain Stitch, Single Crochet, Half-double Crochet, Double Crochet, Triple Crochet, and how to Fasten Off.
Subscribe to my channel for updates on new videos as this playlist, the Get Schooled: Knitting playlist, and more get updated.
Hope to see you there!
xx,
Vickie
January 15, 2016
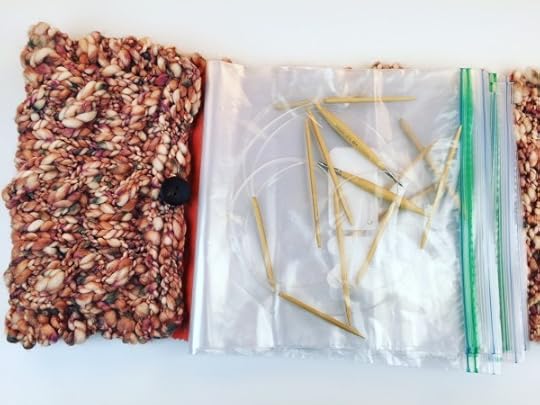
Cabled Circular Needle Organizer
Right now in the dead of Winter it may not feel like it, but soon it will be Springtime. What do we all tend to do once the weather warms up (I mean, other than sit on the patio with wine and friends)? That’s right, Spring clean which also means, get organized! Well, theoretically. We can aspire to that plan, anyway.
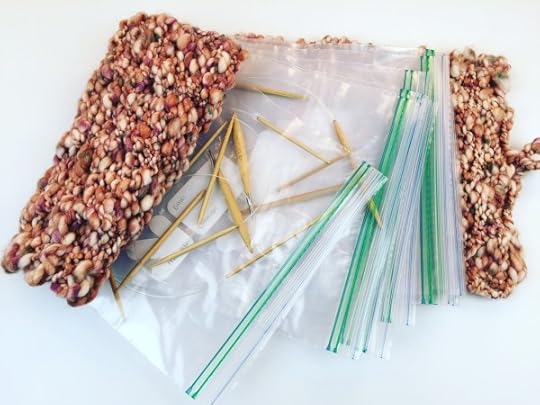
Years ago, I was looking for a way to organize my wiley pile of circular needles and was inspired by an embroidery pouch my mom (a veritable queen of organization) had held her thread in for as long as I’d been alive. It utilized zip-top sandwich bags encompassed in quilted covers to keep her supplies safe and sound. I super-sized the idea with larger, freezer bags and along with some vintage fabric made myself the keeper that still holds my circs these many years later.
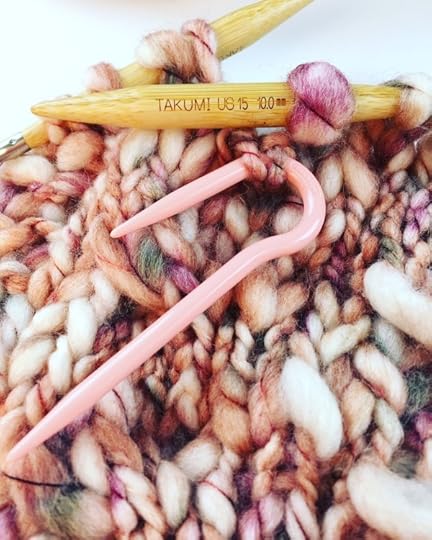
As my tool stash grows, though I’ve found that I also need to increase my container collection — even though I can’t necessarily see the floor of my office currently, come Spring this fact will change! This week’s project comes from that need. I also thought it would be fun to make a case for my Takumi Bamboo Circular Needles using a circular needle. I’m a nerd like that. And so, combined with other great, Clover tools I did just that. I knit-up a nubby, cushy, cable-y case to keep my stitchers safe. Here’s how you can make one, too!
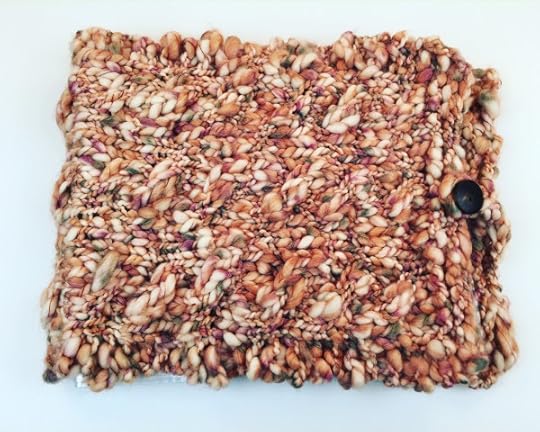
Cabled Circular Needle Organizer
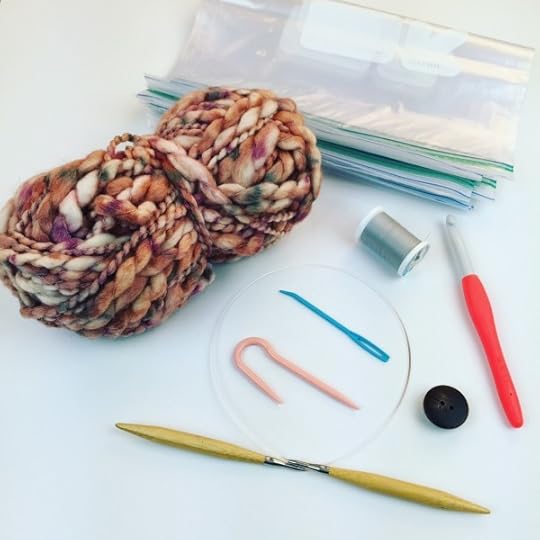
Materials
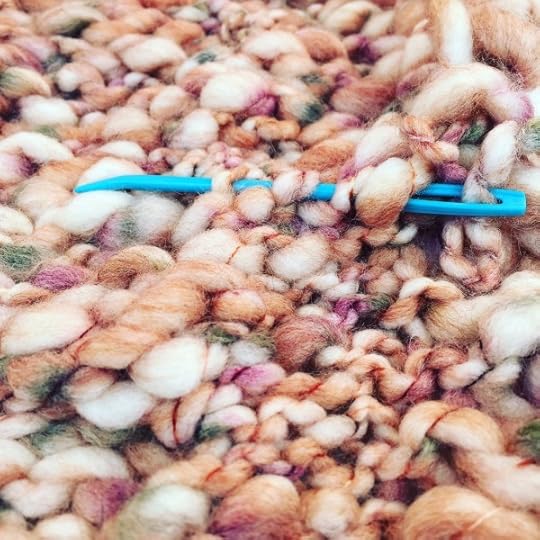
Approx 150 yds, Bulky (#6), Thick & Thin Yarn (I used this.)
Size U.S. 15 (10 mm), Clover Takumi Bamboo Needles
Clover Jumbo Cable Needle
Clover Jumbo Tapestry NeedleLarge button
Coordinating sewing thread & needle
10, Gallon/3.78 L) freezer bags
11″ x 2″/28 cm x 5 cm piece of felt
Straight pins
Sewing machine (Optional)
Wonder Clips (Optional)
Finished Measurements
Approx 12″ x 28″/30.5 x 71 cm
Gauge
8 sts x 12 rows = 4″/10 cm in Stockinette Stitch
Special Stitch: C4F: Cable 4 Front
Slip 2 sts onto cable needle and let them fall to the front of work; knit next 2 sts; knit sts from cable needle.
Directions
CO 24.
Rows 1-5: Knit.
Row 6: Purl.
Row 7 (RS): P2, K2, *C4F, k2; rep from *, twice more, p2.
Rows 8 & 10: Purl.
Rows 9 & 11: P2, k to last 2, p2.
Row 12: Purl.
Rep Rows 7-12 until piece measures 27″/68.5 cm.
Rep Rows 7-10, once more.
Knit 4 rows.
BO.
Finishing
Block piece. This is important to get measurements!
Create button loop: Using crochet hook and a slip stitch, join yarn at top-center (short) edge of what will be the back of your organizer. Crochet a chain long enough to go around desired button; slip stitch in the same space where you began to create loop. Fasten off.
Weave in ends.
Sew button on corresponding area of top-center edge of what will be the front of your organizer.
Assemble needle pouches:
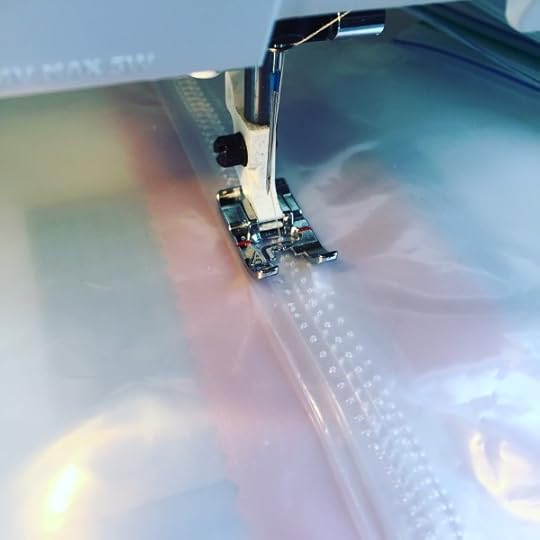
Separate freezer bags into two piles of 5.
About 1/2″/1 cm from the bottom edges, hand or machine (using zigzag stitch) sew one pile to center of felt piece; repeat process with second pile, but overlapping bag bottoms facing the opposite direction (think about the pages of a book, if it were laying open.) Tip: The Wonder Clips are really helpful for holding bags in place!
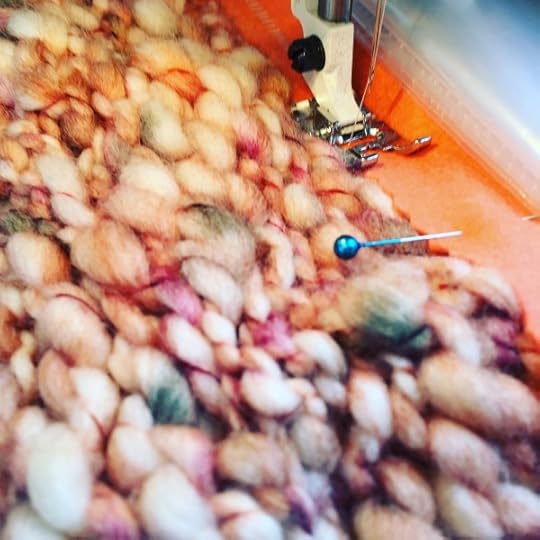
Pin felt piece with attached bags to inside-center of knitted piece (it will ultimately be folded lengthwise). Taking it very slowly, hand or machine (zigzag stitch) sew to knit piece. You’ll need two seams; one on either side of where bags are sewn to felt.
You’re done! Check you out, you multi-crafting wonder! Now gather your Takumi Bamboo Circular Needles and get to filling those pouches. Now your needles will have a cozy home, fit for a knitted king!
Enjoy!
xx,
Vickie
Psst! Can’t remember some of the knitting basics? Check out my Get Schooled: Knitting series of videos on YouTube for help!
January 14, 2016
Guest Post: Nicole Winer Tribute to David Bowie
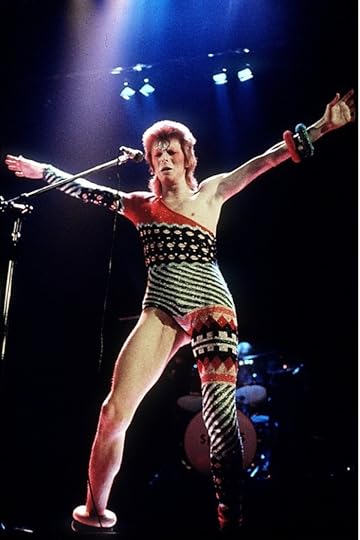
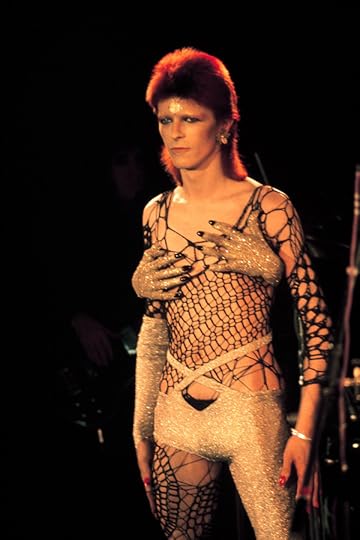
Last year I went to see the V&A ‘Bowie is…’ exhibit at the AGO when it rolled through Toronto. It was a mesmerizing 2 hour walk through his life and impossible not to leave there inspired by his influence. My favourite part of the exhibit was getting up close to his amazing stage costumes. Who could wear a one legged, off the shoulder knit jumpsuit? There is only one answer to that question.
Bowie.
When David Bowie passed away early this week I don’t know anyone who wasn’t at least a little reflective. Everyone has a Bowie story, some way in which he shaped or changed or made a moment. I went on Facebook, constantly refreshing my feed to read friends’ thoughts on this other worldly beauty that we were suddenly without. It was like a virtual vigil. I thought fondly of all the sweaty dance floors I blissfully danced on while Bowie blasted. Back when we were Rebel Rebels. Hot tramp, I loved you so. I also thought of the amazing knit jumpsuits I saw at the V&A exhibit.
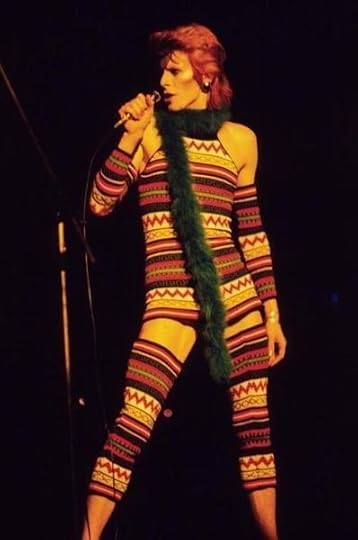
That afternoon, I decided to use my knitwear design powers for good and spent my lunch hour charting out one of the fair isle patterns in one of Kansai Yamamoto’s iconic jumpsuits he did for Bowie’s Ziggy Stardust tour. A small thing I could do to pay tribute to this beautiful space oddity.
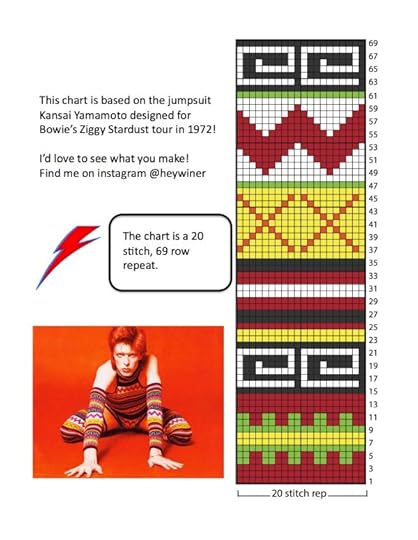
The pattern is a 20 stitch, 69 row repeat & would look great used in a hat or scarf or…. a jumpsuit (with matching arm warmers please) I’d love to see what projects you come up with!
Note: You’re project will probably turn out best if you do yourself up in some great Bowie inspired make-up and crank up your stereo while you knit.
Yours in Bowie,
Nicole
Nicole Winer In-house Designer, Yarnspirations
Website: http://instagram.com/heywiner


