
New Project: Knit Project Bag

Like most busy people, I’m always on the go — and when I go places, I rarely leave without some kind of project to work on whenever the opportunity might present itself. Waiting rooms, grocery store lines, sidelines of kids’ activities; these are all great places to sneak a few stitches in throughout an otherwise jam-packed day!
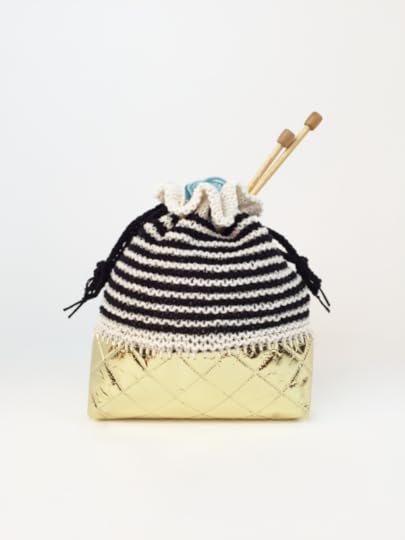
My favorite types of projects to carry along are ones that aren’t difficult to, well, carry. I already feel bogged down enough by my (albeit oversized) handbag, so I’m uninterested in lugging another large thing around. Mittens, socks, a lightweight Summer scarf, or baby items all make great portable projects, so I’m all about petite project bags to hold (and protect) them. Which brings me to this week’s project: Stripegeist a mod, metallic-and-striped pouch for your walk-about-WIPs!
Thanks to some gold, quilted fabric, lightweight yarn, and an array of Clover tools this project makes-up fast…and chic. Make it this weekend, then use it to take your (next) knits to work on Monday! Have I mentioned, lunch hour is another great time to get some stitching time in? Enjoy!

Stripegeist Project Bag
Materials
1 ball each, Bernat Cotton-ish by Vickie Howell in colors: (A) Cotton Ball, and (B) Cotton Club — or equivelant, sport-weight yarn
1, 9 1/2″ x 7 1/2″/24 cm x 19 cm piece of Fairfield Aluminor, or other quilted fabric
Size US 6 (4 mm), 16″ Clover Takumi Circular Needle
2, US size 5 (3.75 mm) Clover Takumi Needle Double-Pointed Needles
Clover Gold Eye (Sharp) Tapestry Needle
Clover Jumbo Tapestry Needle
Marking pen
Clover Wonder Clips
Sewing thread, & either needle or sewing machine
Measuring tape
Optional: Fine point hole punch
Finished Measurements
Approx 9″/23 cm tall
Directions
Sew bag bottom:
With right-sides together, fold fabric piece in half length-wise; using 1/4″/6mm allowance, sew sides.
Using picture (below) as a guide, fold piece so triangle is made by bag bottom “sides”; sew, an inch/2.5 cm or so from tip, across to create boxed corners.

Turn piece right sides out.
 Create foundation edging:
Using marking pen and measuring tape, draw dots around the perimeter of the top edge of the piece, 1/4″/6 mm apart.

Optional step: Punch holes where dots indicate.
Using color A, the sharper tapestry needle, blanket stitch, and holes (or dots — the sharp needle will be able to puncture the fabric) as guide, embroider an edging around piece. You’ll want a multiple of 3 of spaces for stitches (each “bar” created by the Blanket Stitch across the top edge of the fabric, equals 1 stitch spot) to make the eyelet row work later; I had 66. Note: For my demo on how to create the Blanket Stitch on a fabric edge, see this week’s live stream recording of, Ask Me Monday here.
Knit bag body:
With Color A and circular needle, pick up stitches all the way around.

Rnds 1 & 3: Knit.
Rnd 2 & 4: Purl.
Join B.
Rnd 5: With B, knit.
Rnd 6: With B, Purl.
Rnd 7: With A, Knit.
Rnd 8: With A, Purl.
Continued in established (in Rnds 5-8) garter stitch in-the-round, stripe pattern until piece measures 4 1/2″/11.5 cm from embroidered edge, and ending with a Color B round.
Cut B.
With A, knit 3 rnds.
Next Rnd (eyelet): *YO, k2tog, k1; rep from * around.
Knit 3 rnds.
Next Rnd (hemline): Purl.
Knit 3 rnds.
BO.

Finishing
Fold top-edge over at hemline. Hold in place using Wonder Clips.
Using blunt tapestry needle and Color A, seam hem down.
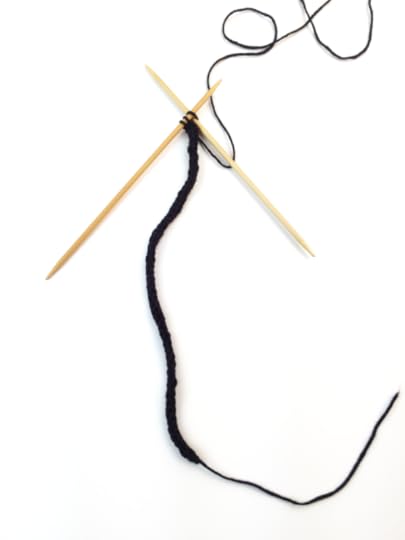
Ties (Make 2):
With Color B and double-pointed needles, CO 3 sts.
Work i-cord over these sts until piece measures 12″/30.5 cm.
Note: for a demo on i-cord see my video on YouTube here.
BO.
Weave each tie piece through half of the eyelet holes; knot on either side.
Weave in ends.

Enjoy your new, small project bag!
xx,
Vickie


