
Vickie Howell's Blog: Vickie Howell's Website, page 39
January 10, 2017
How to: Next-Level Cables in June Cashmere

Next Level Cables + June Cashmere
This week I had the pleasure of working with Ask Me Monday video sponsor, June Cashmere. I was originally introduced to them by my dear friend (and industry leader), Karin Strom. It wasn’t until researching for our partnered Live Stream however, that I really got to see what an amazing company June Cashmere is.
June (the Kyrgyz word for “animal fibers”) Cashmere is a company fully invested in nurturing the lifelines of the shepherds of Kyrgyzstan — investing in village-to-village quality control and fair trade training — and the integrity of the gorgeous fibers produced by the indigenous Kyrgyz people and animals. The cashmere fiber is purchased directly from homes and villages in the region, then sent to Europe for spinning. It makes it’s next stop in Maine, where it is lovingly died using eco-friendly and sustainable methods. In other words, June Cashmere provides jobs in 3 continents, and gorgeous yarn worldwide.
How to: Next Level Cables
When working with cashmere, one wants to make a project that is classic enough to become an heirloom and practical enough to use (and touch) often. The Journery Mitts set by Kristin Eksuzian fits the bill, and a technique used in making them was the focus of this week’s Facebook Live, Ask Me Monday episode.
What I call “next-level” cables are cables worked on double pointed needles and in which there are TWO separate cables worked to create one, more intricate design. It sounds complicate and fancy but really, it’s only the latter. (Shhh…or it at least looks fancy.)
Watch and Learn: Next Level Cables
Click below to watch the recording of my live stream demo on how to knit next-level cables. I take you through every step, breaking the technique down to make it accessible to any knitting with a little experience under their belt.
Put the Skill to Work!
Now that you’re a next-level cable bad-ass, how’s about treating yourself to a little cashmere reward and take that skill for a spin? June Cashmere is offering Ask Me Monday viewers a special deal. With the purchase of 1 hank of June Cashmere DK (all you’ll need for the project), the Journey Mitts pattern is yours for free! Just enter code: JOURNEY at checkout.

Journey Mitts, by Kristin Eksuzian. Shown in June Cashmere DK in color, Scarlet.
Be sure to tag @vickiehowell with photos of your Journey Mitts or June Cashmere projects — I love seeing your work!
xx,
Vickie
Join me every week on Facebook for my live stream. I show tutorials, answer viewer questions, and talk tips and trends. Tune in live on Mondays at 12pm CT, or watch the recorded version anytime here.
The post How to: Next-Level Cables in June Cashmere appeared first on Vickie Howell.


January 3, 2017
How to Knit Corrugated Rib
 Intro to Two-Handed Stranding: Knit Corrugated Rib
I love stripes. Horizontal, vertical, diagonal, plaid; if it’s a series of straight lines, then I’m in! In knitting, the easiest (and most common) method of creating stripes is (usually) horizontally by alternating yarn colors every X rows, depending on how wide the desired stripe will be. Vertical stripes, or columns of color, are a wee bit trickier. They’re also, graphically cool, and offer a great introduction to two-handed stranding. The method for doing so is called corrugated rib.
On the latest installment of my weekly Facebook Live series, Ask Me Monday, I showed how to knit corrugated rib in-the-round. This method is great for anywhere you’d traditionally want a little bit of ribbing, like a cuff or brim, while also adding interest to the piece. Knit corrugated rib is worked by alternating two colors of yarn, every other stitch while also alternating knits and purls (creating the rib effect.) It can absolutely be knit by holding only the strand in use, then swapping for the next color. If that’s what’s most comfortable, then you do you! If you’re feeling like you want to up the efficiency ante, though then two-handed stranding is the way to go. Stranding with both hands involves “throwing” with one hand, and “picking” with the other. This sounds intimidating, but it’s really not. It’s actually kind of fun — I promise!
Watch the video below, where I walk you step-by-step through the process.
Watch and learn how to knit Corrugated Rib!
You’ve got the skill, now get the pattern!
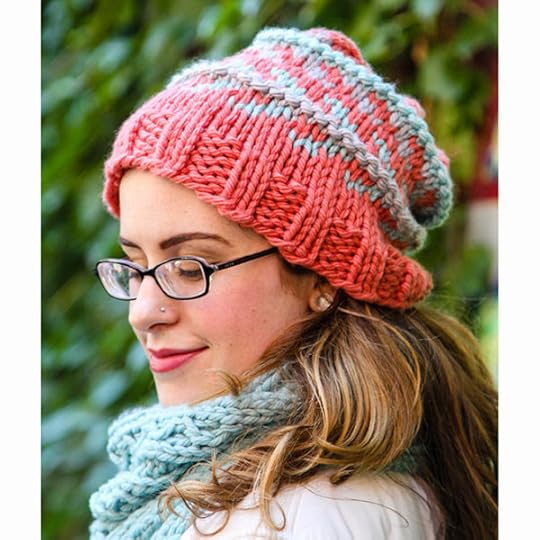
Now that you’ve watched the video and absorbed the concept, you’re ready to put the skill to use! My latest design, the Dashing beanie is a unisex hat that combines knit corrugated rib with traditional rib. It’s knit in Woolpaca Chunky which means it’s soft, has a nice, drapey slouch and works up quickly on size 10 1/2 needles.
Download the pattern here.

Dashing Beanie shown in Woolpaca Chunky colors : Blackout and Soot.
Be sure to tag @vickiehowell with photos of your knit corrugated rib projects and your Dashing beanies — I love seeing your work!
xx,
Vickie
The post How to Knit Corrugated Rib appeared first on Vickie Howell.
December 19, 2016
How to Convert (Almost) Any Hat Pattern to a Messy Bun Beanie


A trend from the early aughts is back in the knitting and crochet worlds, only this time with a slightly different name. Back in 2005, Ponytail Beanies hit the stitching community. These hats were designed with a strategically placed hole to accommodate a ponytail by the wearer. Different variations were made available for low ponies, high ponies, side ponies and even the double whammy of pig tails. Here we are a decade later, however and the high-pony version is back only this time to cater to the mom/athletic/busy person hairstyle du jour: the messy bun.
The Messy Bun Beanie is here for your hair and, as long as you’re hair is, well, long it’s a great fit for the *colder weather. On this week’s Facebook Live Stream Series, Ask Me Monday I showed how to convert (almost) any existing knit or crochet hat pattern into a Messy Bun Beanie. I began with the more involved of the duo, the crocheted beanie, then gave a quicker overview of its less involved sister, the knit beanie. Below is the breakdown, as well as basic beanie patterns for you to experiment with. Here’ goes!
(*Those in seriously cold weather would likely debate the effectiveness of any hat with a hole in it.)
Watch the Tutorial
How to Convert a Crochet Beanie Pattern into a Messy Bun Beanie: Calculate Foundation Chain Number
Stitch Gauge x Circumference of Opening = Approximate Beginning Chain
Recommended Opening Size: 3″ Diameter and 9″ circumference

Basic Crochet Beanie Pattern
MATERIALS
1 Ball each of Vickie Howell for Deramores Mod Wool (or equivalent Aran weight yarn), in colors: (A) Apollo Aran, and (B) Black Cadillac.
Size US I/5.5mm Clover Amour Crochet Hook
Clover Jumbo Bent Point Tapestry Needle
SIZE
Women’s One Size
FINISHED MEASUREMENTS
Stretches to fit up to 22″ head
GAUGE
2 1/2 stitches = 1″/2.5 cm
Conversion Calculation: 2.5 sts x 9″ = 22.5
DIRECTIONS
Crown: (As for Standard Beanie)
Rnd 1: With A, ch 4 (doesn’t count as stitch), 12 dc in center ring. — 12 sts
Rnd 2: Ch 3, 2 dc in next st and every st around. — 24 sts.
Ch 24.
That’s it. That’s the only alteration you’ll need to make. Now, resume pattern as written!

Rnd 3: Ch 3, *2dc in next st, dc in next st; rep from * around. –36 sts.
Rnd 4: Ch3, *2 dc in next st, dec in next st; rep from * around. — 48 sts.
Join B. You’ll carry whichever color is not in use, up along the inside of piece.
Body:
Rnd 5: With B, ch 3, dc in every st around. — 48 sts.
Rnd 6: With A, ch 3, dc in every st around.
Rnds 7-13: Repeat Rnds 5-6, ending with a Rnd 5.
Cut B.
Band:
Rnd 14: With A ch 2, hdc in every st around.
Rnds 15-16: Ch 2, *FPhdc, BPhdc; rep from * around.
Fasten off.
FINISHING
Weave in ends.
How to Convert a Knit Beanie Pattern: Just Stop Knitting…well, sort of.
Most knitted hats are worked from the bottom (band or brim) to top (crown.) This makes the conversation process to accommodate a hair, top-knot really easy. You can really, just knit the crown decreases until the opening is the desired size. Then, *simply bind off.
If you’d like a little more direction in your directions, you can use the same recommended opening size (3″ diameter/9″ circumference ) from the crochet hat conversation, and apply it to the crown portion of the knit hat towards the end of the knitting process. Here’s what that would look like.
Basic Knit Beanie Pattern
MATERIALS
1 Ball each of Vickie Howell for Deramores Mod Wool (or equivalent Aran weight yarn), in colors: (A) Apollo Aran, and (B) Black Cadillac.
Size US 9/5.5mm, 16″/41 cm Clover Takumi Bamboo Circular Needle
Set, Size US 9/5.5mm Clover Takumi Bamboo Double Pointed Needles
Clover Jumbo Bent Point Tapestry Needle
SIZE
Women’s One Size
FINISHED MEASUREMENTS
Stretches to fit up to 22″ head
GAUGE
4 stitches = 1″/2.5 cm
DIRECTIONS
With A, CO 80 sts.
Brim:
Rnds 1-5: *K2, p2; rep from * around. — 80 sts.
Body:
Rnds 6-7: With A, knit.
Join B.
Rnds 8-9: With B, knit.
Repeat Rnds 6-9 until piece measures 6″ from CO edge.
Cut B.
Crown:
Switch to double-pointed needles as necessary.
Before we get started, let’s do a little crown math.
Conversion Calculation: 4 sts x 9″ = 36
Rnd 1: With A, *k2tog, k6; rep from * around. –70 sts.
Rnds 2, 4, 6, 8, 10, 12, 14: Knit.
Rnd 3: *K2tog, k5; rep from * around. –60 sts.
Rnd 5: *K2tog, k4; rep from * around. –50 sts.
Rnd 7: *K2tog, k3; rep from * around. — 40 sts.
*PRO TIP: Work a round or two in K1, P1 rib, then bind-off in that rib pattern for a stretchier opening!
Rnd 9: *K2tog, k2; rep from * around. –30 sts.
Rnd 11: *K2tog, k1; rep from * around. — 20 sts.
Rnd 13: *K2tog; rep from * around. — 10 sts.
Cut yarn leaving a long tail. Using tapestry needle, feed tail through live sts, letting them fall off the needles. Cinch shut.
FINISHING
Weave in ends.
Now that you know how to convert knit and crochet hat patterns to messy bun beanies, get stitching! Don’t forget to post pictures of your beanies online and tag @vickiehowell and @cloverusa!
xx,
Vickie
Join me every week on Facebook for my live stream. I show tutorials, answer viewer questions, and talk tips and trends. Tune in live on Mondays at 12pm CT, or watch the recorded version anytime here.
The post How to Convert (Almost) Any Hat Pattern to a Messy Bun Beanie appeared first on Vickie Howell.
December 16, 2016
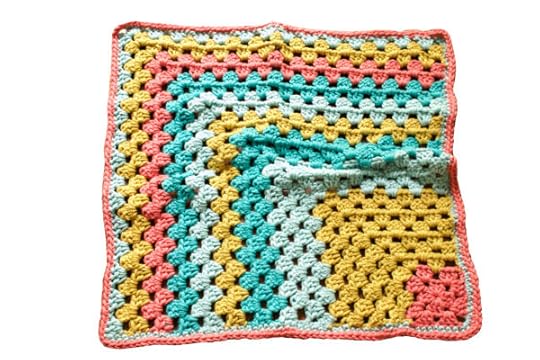
Super Bulky Baby Blanket: New Pattern!

Super Bulky Baby Blanket
The latest pattern using my color collection collaboration with the folks at Valley Yarns, is now available on Ravelry. The Super Bulky Baby Blanket is a squooshy, cheery square of crochet goodness. It’s worked in the round at first, from a small granny square in one corner out, then reverts to granny stripes building upon two side angles. The edging is then added around the entire piece. This project is crocheted using a large-sized crochet hook and (as the name suggests) super bulky yarn so with a little effort, can be whipped up in a couple of days. It’s a great gift for the new baby, born to mum’s with a retro-modern esthetic. Here’s what you’ll need to make the Super Bulky Baby Blanket:
Materials
Pattern
Valley Yarns Superwash Super Bulky (100% Superwash Extra Fine Merino Wool; 109 yds), in colors by Vickie Howell: (A) 3 Balls Castaway Coral, (B) 3 Balls Moontower Mustard, (C) 3 Balls Aqua Oasis, and (D) 2 Balls Tiki Turquoise
Size U.S. N/P (10.00 mm) crochet hook.
Tapestry needle
Finished Measurements
Approx 30”/76 cm square
Gauge
(3 dc, ch 1) = 2”/5cm

The post Super Bulky Baby Blanket: New Pattern! appeared first on Vickie Howell.
December 15, 2016
Conversation with Andrea Pippins

On CRAFT*ish: Graphic Designer, Andrea Pippins.
This week’s episode is actually the last one of the 2016 season — and over the past 29 episodes Vickie’s had the absolute honor and pleasure of talking with creative types ranging from Artists and Professional Crafters to photographers and musicians. She’s learned something from each and every conversation, but there have been a handful that’ve really stuck with her — exchanges with guests who were both generous of spirit and thoughtful in mind. Their openness underlining the very reason she wanted to produce this podcast in the first place. In part it’s to feed her own curiosity about people and what makes them, well, them. Outside of her own satiation, however she hopes this show inspires thought and creativity amongst a community she loves being a part of. For Vickie, communication is the ultimate form of creativity.
The latest episode is one of those that she won’t soon forget. Earlier this week Vickie spoke with Graphic Designer, Illustrator and Educator, Andrea Pippins. At the time of this recording we are a little over 4 weeks away from the inauguration of an almost infamous, new President. For ultimate better or worse, to say that our American society is experiencing a period of unrest is probably an understatement. Vickie and Andrea took this meeting as an opportunity to have a very candid conversation about race, education, gender, and the power of creativity during times of personal — or global — insecurity.
Listeners can find CRAFT-ish on iTunes, Soundcloud, or Stitcher. Then go to the Show Notes page to get links and see photo’s of some of Andreas work and to enter to win one of her books.
The post Conversation with Andrea Pippins appeared first on Vickie Howell.
December 12, 2016
Five Ways to Make Yarn Ribbons

Five Ways to Make Yarn Ribbons
It’s that time of year when a lot of us are thinking about gift wrapping, and if you’re a fiber crafter chances are you also have a yarn stash that’s calling to you for adornment use. This week on Ask Me Monday I showed five ways how to knit, crochet, weave and knot yarn ribbons. Here’s a recap of the skills shown:
#1 Finger Crochet
Make a slip knot. Pull working yarn through loop of slip knot to create new loop, *pull working yarn through last loop to create new loop; rep from * until desired length. Fasten off; snip yarn tail.
#2 Crochet i-Cord
With yarn and corresponding sized hook, chain 3 stitches.
Row 1: Insert hook in second chain from hook and pull up a loop and chain 1; insert hook in 3rd chain from hook and pull up a loop and chain 1. You’ll now have 3 loops on the hook.
Row 2: Slip the first 2 loops off of hook (pinch between your fingers to keep them live), chain 1; place 2nd loop back on hook, chain 1; place 3rd loop back on hook, chain 1. –3 sts.
Repeat Row 2 until desired length. Fasten off; snip yarn tail.
#3 Picot Knit
With yarn and corresponding sized needles, cast-on the appropriate amount of stitches for the length desired (see ball band for stitch gauge, aka how many stitches per inch the yarn gets on the suggested needles.)
Row 1: Knit.
Picot Bind-off: Knit 2, bind-off 1, *slip stitch on RH needle back onto LH needle, e-wrap cast-on 2 stitches, bind-off 4 stitches; repeat from * to end.
Weave in ends.
#4 Weave
Wrap yarn 6-20 times around package; using a tapestry needle and contrasting yarn weave over and under the wrapped yarn for as many rows as desired.
#5 Square Knot (Macrame)
Cut 4 strands of yarn the desired length. Knot them together at one end. A few inches down from knot, tie a square knot as follows:
Lay the strand on the far right side over the center two strands and under stand in the far left side.
Bring strand on far left side under center two strands, then up through the loop created by the strand on the far right side.
Lay the strand on far left side over center two strands, and under strand on far right side.
Bring strand on far right side under the center two strands, then up through the loop created by the strand on the far left side. Pull gently to complete know.
Repeat Square Knot every few inches along yarn strand groupings. Finish with a standard knot.
Watch and learn how to make all of the yarn ribbons listed above!
Whether you wrap, hang, drape or tie them, yarn ribbons will add a pop of color and a thread of love eyes to the holidays.
Cheers!,
Vickie
Psst! Tune in LIVE to Ask Me Mondays weekly at 12pmCT at Facebook.com/vickiehowell

The post Five Ways to Make Yarn Ribbons appeared first on Vickie Howell.
December 9, 2016
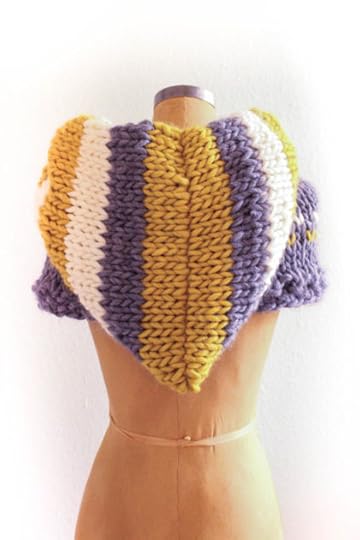
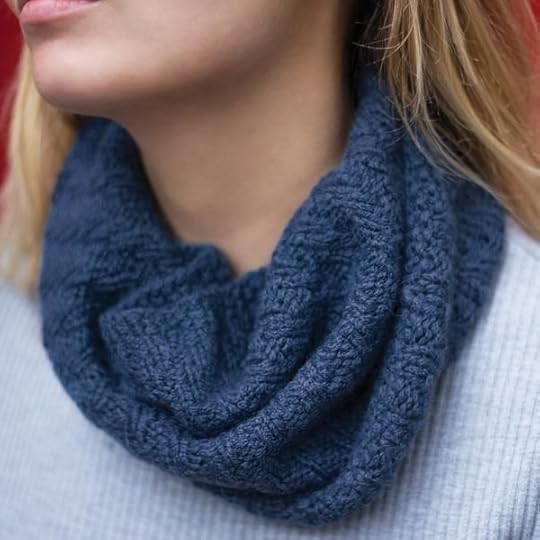
Super-Chunky Hooded Cowl
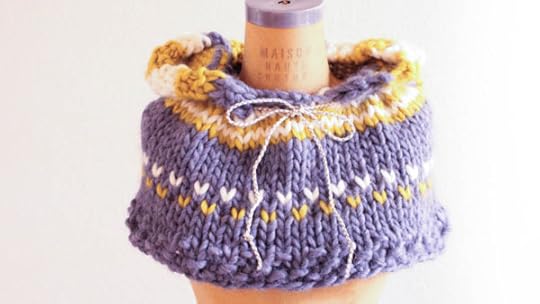
No longer am I sitting in my Austin, Texas house sweating, while working with my beloved bulky-weight fibers. Why, you ask? Because it’s FINALLY cold enough outside to sport super chunky knits. Oh, the glory! Thankfully, just in time for Winter my friends at Clover sent me their latest installment of the Takumi Bamboo collection: Size U.S. 19 circular needles. Thanks to the pointy tips and signature slick finish of the set, I was able to whip out a cool (or rather, really warm) project in no time. My Super Chunky Hooded Cowl is large in scale, but require relatively little time to knit. That means that even if you live in a climate as I do –where the chilly days are numbered — there’s plenty of time to make and wear this piece. Here’s how!
Super Chunky Hooded Cowl
Materials
Approx. 330 (360) yds total of Super Bulky Yarn in colors: 1 (2) Balls A, 1 Ball B, and 1 Ball C. I used this.
Size U.S. 19 (15 mm), 29″ (74 cm) Takumi Bamboo Circular Needle
Additional Size U.S. 19 Needle
Clover Large Eye Tapestry Needle
Leather Cording
Finished Size(s)
Women’s S/M (L/XL)
Finished Measurements
22″(25.5″)/56 cm (65 cm) Tall
40(43″)/101.5 cm (109 cm): Circumference
Gauge
6 sts x 7 rows = 4″/10 cm in Stockinette Stitch
Directions
Cowl:
With A, CO 60 (62) sts. Join rnd, taking care not to twist.
Rnds 1 & 3: *K1, p1; rep frpm * around.
Rnd 2: *P1, k1; rep from * around.
Rnds 4-6: Knit.
Join B.
Rnd 7: *With B K1, with A K1; rep from * around.
Cut B.
Rnd 8: With A, knit.
Join C when appropriate.
Rnd 9: *With A k1, with C k1; rep from * around.
Cut C.
Rnds 10-14: With A, knit.
Cut A; join B.
Rnds 15 & 17: With B, knit.
Join C; carry B.
Rnds 16 & 18: With C, knit.
Cut B & C; join A.
Rnd 19: With A, knit decreasing 4 sts evenly around. –56 (58) sts.
Rnd 20: [K1, p1] 11 times, BO 4, *p1, k1; rep from * to end of rnd, then CONTINUE around to beginning point of BOs. This will now be the end of a RS row. — 52 (56) sts.
Note: From here on you’ll work back and forth in rows.
Row 21: K1, p2tog, k2tog, *p1, k1; rep from * to last 5 sts, p2tog, k2tog, p1. — 48 (50) sts.

Hood:
Cut A, Join B.
Row 1 (RS): With B, k1, ssk, k to last 3 sts, k2tog, k1. –46 (48) sts.
Rows 2 & 4: K2, p to last 2 sts, k2.
Row 3 : Knit.
Cut B; join C.
Rows 5 & 7: With C, knit.
Rows 6 & 8: K2, p to last 2 sts, k2.
Cut C; join B.
Rows 9 & 11: With B, knit.
Rows 10 & 12: K2, p to last 2 sts, k2.
Cut B; join C.
Rows 13-16: Rep Rows 5-8.
Cut C; join A.
Rows 17 & 19: With A, knit.
Rows 18 & 20: K2, p to last 2 sts, k2.
Cut A; join B.
Rnds 21-24: Rep Rows 9-12.
Larger Size only: With B, work 2 additional rows in established pattern.
Do not bind-off.
Finishing
Flip piece inside out. Split sts evenly in half on circ cord. With RS together and holding the 2 needles parallel, introduce a 3rd needle and BO using the 3-Needle BO method. You can see the method demonstrated in this Ask Me Monday video.
Weave in ends.
Flip piece RS out; weave leather cording over and under the 1st row of ribbing before bind-offs.
Wear and stay cozy.
Enjoy!
xx,
Vickie
@vickiehowell
The post Super-Chunky Hooded Cowl appeared first on Vickie Howell.
December 6, 2016
Angeles Asymmetrical Scarf: New Kit!

Angeles Asymmetrical Scarf Kit
The last of my Vickie Howell Yarncraft Kit Series has finally arrived! The Angeles Asymmetrical Knitted Scarf is modern but wearable in gorgeous, hand-dyed teal or off-white Madeline Tosh Merino Light. This scalene triangle scarf is worked from point to flat edge, with alternating over-sized, peek-a-boo eyelets.
Here’s a look at how the eyelets are created:
Here’s the details:
Finished Size: 13″/33 cm (at widest point) x 59″/124.5 cm (tip to tip)
Needles (not included): Size 6 (4 mm)
Gauge: 24 sts x 48 rows =4″/10 cm in garter stitch
Madelinetosh Tosh Merino Light Yarn in Esoteric or Modern Fair Isle
Fiber content: 100% superwash merino wool
Ball size: 100 g balls – 420 yards
Yarn weight: 1 (fingering)

Shown in color: Esoteric
Get the kit today, and don’t forget to tag @vickiehowell with a photo of your finished, Angeles Scarf!
The post Angeles Asymmetrical Scarf: New Kit! appeared first on Vickie Howell.
November 28, 2016
Off Kilter Cable Crochet Throw

Off Kilter Cable Throw
I love a good, wool-y blanket. There’s nothing like wrapping yourself up in some super soft merino wool! Often however, crochet versions can look more kitschy (not that there’s anything wrong with that) than contemporary. So what’s a stitcher with a modern sensibility to do? I got you, kid. I got you. I give you the: Off Kilter Cable Throw.

The Off Kilter Cable Throw is crocheted in Vickie Howell for Deramores MOD Wool yarn (100% superwash merino wool), in midcentury modern-inspired colors. The cables are classic, but the asymmetrical stripes make the design feel current.
This blanket is lap-sized which makes it totally doable for the busy crocheter and also perfect for couch or office. Get the pattern and yarn, then get hooking!
Off Kilter Cable Throw: Learn how to crochet cables for this project and beyond!
Want to practice your cables with a quickie project? Check out my MOD Wool, Cuppa Cozie free pattern on the Deramores Blog!

Don’t forget to tag @vickiehowell when you make these projects. I love seeing your projects!
xx,
Vickie
The post Off Kilter Cable Crochet Throw appeared first on Vickie Howell.
November 18, 2016
Birthday Giveaway: 8th Annual Event!

Birthday Giveaway
Here we are again, another November 18th. What does that mean for me? Well, it’s the completion of another trip around the sun. The more important question though is, what does it mean for you? Well, I think you’re going to like this.
One of my favorite ways to celebrate my birthday (other than wine, family & friends and a good cheese plate) is by giving gifts to my crafty peeps. (Guess what, that’s you!) Every year I host a giveaway of prizes — usually a collection of my own products/projects mixed with others that have been kindly donated by colleagues and companies I work with. This year is no different — I’ve got a dozen gifties to give, including magazines, books, kits and tools — so let’s get this party started! Have a look at the offerings (and don’t forget to bookmark those you might want to also shop for as holiday gifts for others), then see below for entry info.
Giveaway Prizes
 2 Copies of the Abridged Version of CrochetSCENE Magazine. You can also buy the Big Bonus version here.
 2 Copies of Wee Garter Stitch: Must-Have Knits for Modern Babies & Toddlers. You can also buy the book here.
*GREAT GIFT FOR NEW MOMS OR GRANDMAS!*
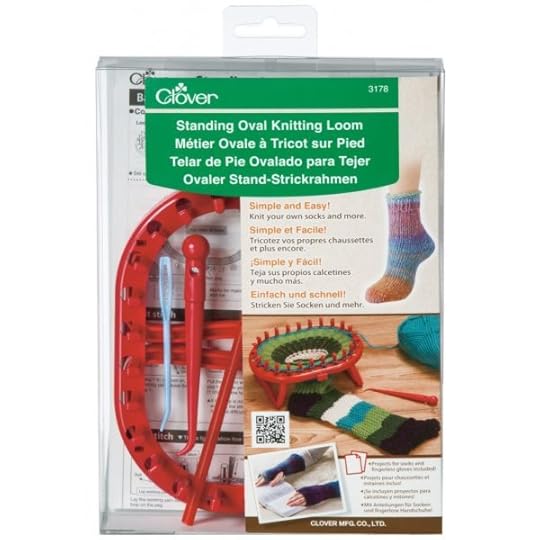 2 Clover Standing Oval Sock Looms
(Go here to see my free, ankle sock project using this loom!)
 PRIZE PACK: I Spiral Cowl Kit (Pattern + Vickie Howell for Deramores Woolpaca Chunky Yarn)
OR you can buy the kit here.
**GREAT QUICK GIFT!**
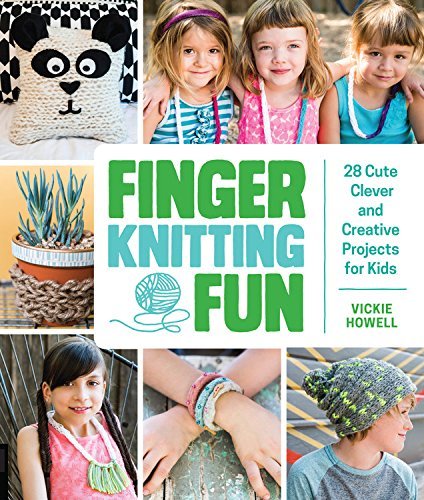 1 copy of Finger Knitting Fun. You can also buy the book here!
*GREAT KIDS GIFT*
 PRIZE PACK: 1 Ball Wrist Wonders Kit (Pattern + Vickie Howell for Deramores Mod Wool Yarn)
OR you can buy the kit here.
**GREAT QUICK GIFT!**
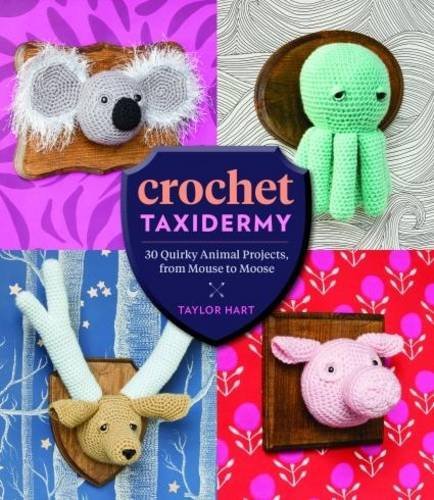 1 Copy of Crochet Taxidermy, by Taylor Hart.
**One of Vic’s Picks from Crochetscene 2017!**
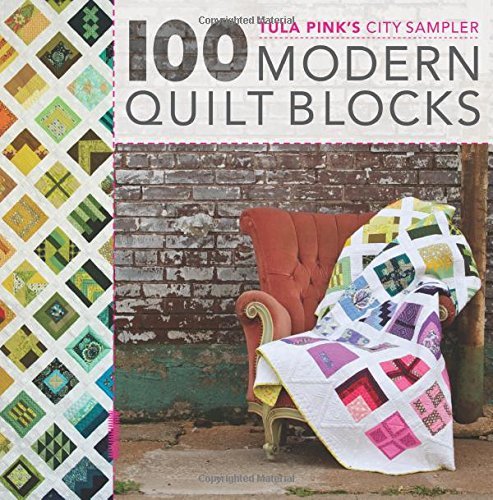 1 Copy of Tula Pink’s City Sample: 100 Modern Quilt Blocks
**Hear the episode of the CRAFT*ish podcast featuring Tula here!**
 PRIZE PACK: Arrow Head Hat Pattern + Valley Yarns Superwash Super Bulky to Make it!
Or you can buy the pattern and yarn here.
**GREAT QUICK GIFT!**
How to Enter
1.) Sign-up for my newsletter. You can do that HERE.
2.) Post a comment in the Comments Section below letting me know which prize(s) you’re hoping to win.
That’s it!
All entries must be posted by 10pmCT Friday November 25th. Winners will be contacted the following week through the e-mails attached to your profiles.
Good luck to all!
xx,
Vickie
The post Birthday Giveaway: 8th Annual Event! appeared first on Vickie Howell.


