
Vickie Howell's Blog: Vickie Howell's Website, page 51
June 15, 2015
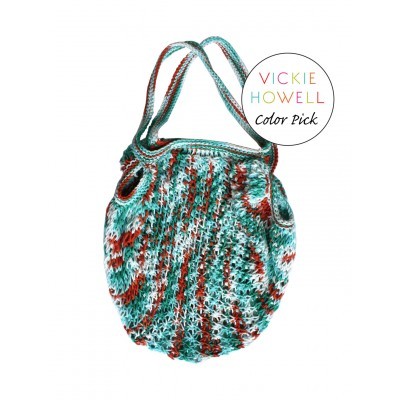
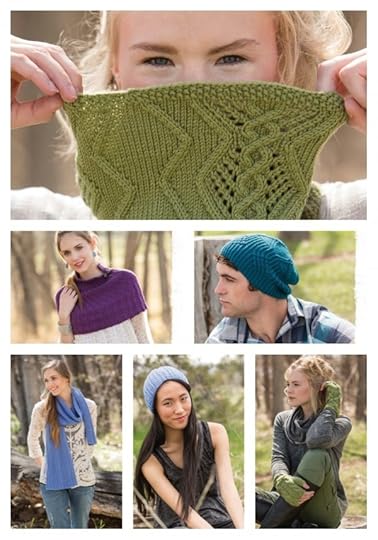
Summer Beach Bag Stitch-Along

Join me, and The Crochet Crowd as we stitch along beach bags with Yarnspirations. Beginning June 29th, we’ll spend 3 weeks making one (or all!) of 6, great bags for Summer. I’ll be hosting the knit-along, and TCC with host the crochet-along. You can get more info on joining either, as well as getting discounts on yarn, and entering our photo contest here.
Here’s a peek at the bags for the knit-along made up in my color picks. Grab the supplies to make these versions, or come up with your own color combo. You can get everything you need on Yarnspirations.com.
Week 1
Week 2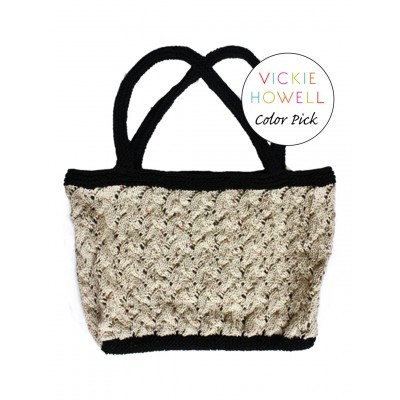
Week 3 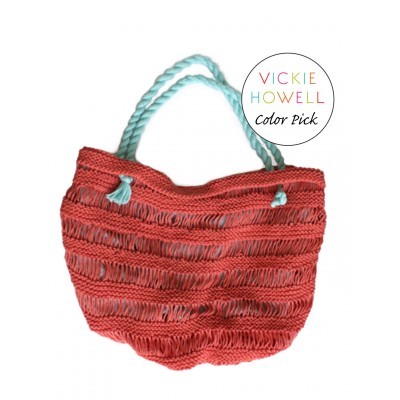
Hope to knit-along with you soon!
xx,
Vickie


June 8, 2015
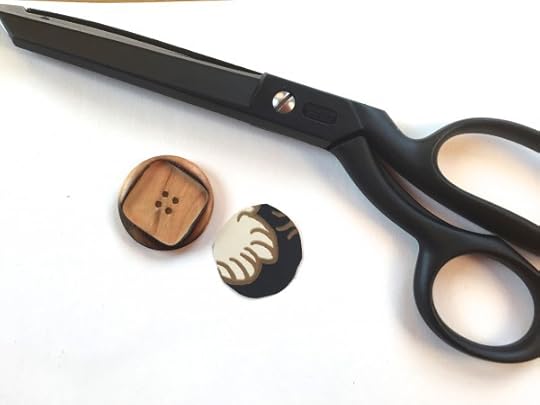
Wallpaper Covered Buttons

Last fall we had an accent wall in our bedroom with a wallpaper I found through Pinterest. I love it so much, I feel like the designer made it specifically with me and mind. He or she (why doe we not have a gender neutral pronoun in the English language?) didn’t of course, but I still couldn’t fathom getting rid of even the tiniest of scraps of it. I knew I could spread lit bits of happy, throughout other projects besides our home. Fortunately, wallpaper makes for a great, crafting medium. Stronger than most scrap booking paper, wallpaper takes glue without tearing or bubbling, which lends itself well to decoupage work.

I never seem to have the right buttons on hand when I’m ready to embellish a project. Unfortunately here in Austin, TX the waited-’til-the-last-minute-button pickin’s are slim. Thank the sweet, crafty gods, though because in just a few minutes — and with supplies you may have in your own house — you can DIY a set of fasteners that are totally unique. Here’s how I used scraps of that beloved, bedroom wallpaper to create just the pop of color that a crochet project of mine needed!

MATERIALS
Plain, wooden buttons (found at craft store — any size)
Wallpaper scraps
Pencil
Scissors
Glue/sealant
Paint Brush
Pin or needle

1. Trace around button onto wallpaper.
2. Cut out traced shape (does not need to be perfect.)

3. Place piece on button; use nail to create creases along button indendations.
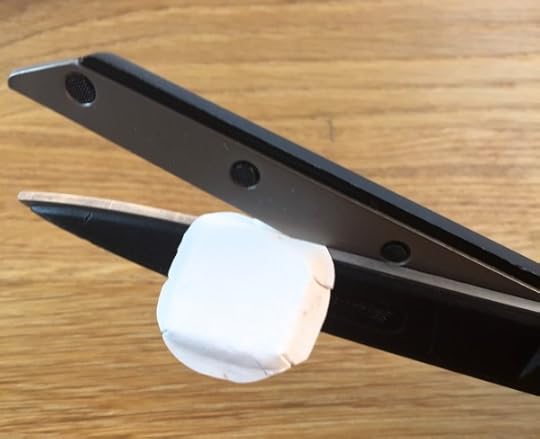
4. Trim along creased lines.
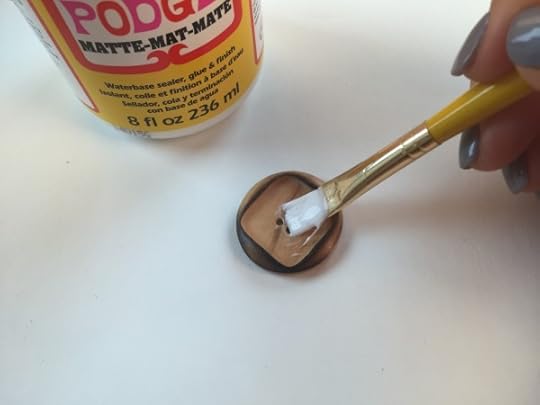
5. Apply a thin coat of glue/sealer to button surface; place wallpaper piece on top.
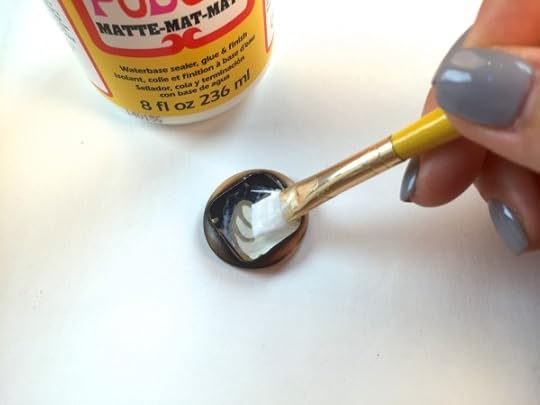
6. Seal with an additional, thin coat of glue/sealer; let dry.

7. Poke through paper to reveal button holes.

8. Attach to any project that needs a little, POW!
(Look for the reveal of the project these buttons adorn in the Fall 2015 issue of, Interweave Crochet Magazine!)
xx,
Vickie
@VickieHowell
May 29, 2015
Good Morning Texas!

That’s a wrap! (In front of News 8 HQ.)
Today I made an appearance on Dallas news show, Good Morning Texas to chat getting kids creative, and knitting & crocheting for a good cause. Not in the area or missed it? No problem! You can watch the segment below.
Have a great weekend!
xx,
Vickie
P.S. If you’re coming to the Rangers vs. Red Sox game on Sunday, please be sure to stop by the Caron United booth. I’ll be there collecting charity blankets, and giving out yarn, needles and hooks to those who want to stitch during the game. Hope to see you there!
May 28, 2015
Founder, Kelly James on Sewingly!

First, a million thanks to Vickie for inviting me to guest post and share something really exciting with all of you.
Last year I was looking for a gift and wanted to buy something special for my newborn niece. Since the days of fashion school I have always loved buying homespun items from friends and my closet shows it! Having a hard time finding what I was looking for, I realized that no marketplace existed that was dedicated solely to homespun items. I decided then to create Sewingly, a website dedicated to selling work made by needle artists from around the country.
I created Sewingly for all needle artists (knitters, sewists, weavers, crocheters, etc) and specialty supply shops. The goal is for Sewingly to be really special, not really big!
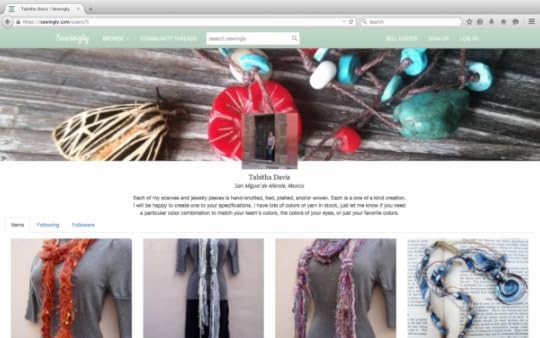
Tabitha Davis’ Sewingly Shop
Sewingly is very simple to use even for those who have never sold anything online before. When you sell on Sewingly you have a beautiful page to display your goods. You receive a full screen width cover photo for branding, a place to describe your work and link to your other websites or social media pages, and endless product listings… all for free. When you sell something, Sewingly only takes one dollar. No complicated formulas, that’s it!
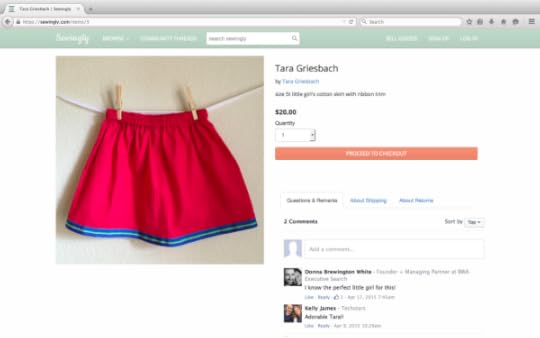
Skirt from newbie seller, Tara Griesbach.
Knitters, sewists,weavers, and all other types of needle artists have more in common than just a love for threads and yarns. It’s a love of the craft, the process, the community, and the creations. These are the sentiments I tried to weave into Sewingly, one line of code at a time.
If you’re interested in selling your work or supplies online, or just want to look around- I’m really excited to welcome you to Sewingly! You can also get in touch with me anytime at: kelly@sewingly.com.
I’d be happy to hear from you!
–Kelly

Kelly James
Founder, Sewingly
w:http://www.sewingly.com


May 26, 2015
How to Fix a Dropped Stitch


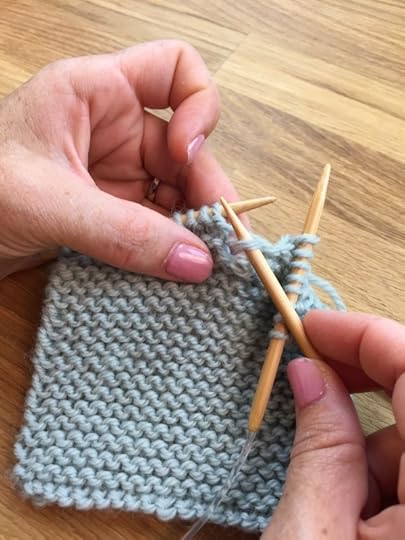
We’ve all done it: dropped a stitch while knitting. Depending on how many rows down that slippery, little sucker fell we may or may not feel the dread of the inevitable: unknitting (aka “tinking”) several rows of precious stitching. One row down is simple: just use the right-hand needle to pick up the loop of the stitch in the row below; place it on the left-hand needle; pull the “rung” or strand of yarn from the current row through the stitch on the needle, letting the other strand drop down over it. Easy-peasy. Once the stitch has ran 2 or more rows down, though things can get a little hairy. The challenge is manipulating the strands of yarn without pulling the fabric so much that it causes the stitch to drop further. Thanks to Clover’s Bamboo Knitting Repair Hook, though you can avoid the stress of stitches gone awry — and in just a few, simple steps. Here’s how to use this cool tool for a quick fix, the next time you drop a stitch!

Step 1: For Stockinette stitch come up through the loop of the stitch that’s off the needle, slip it onto the Knitting Repair Hook and under the “rung” closest to the stitch.

Step 2: Pull that strand through the loop. Repeat this step for as many times as rows have been dropped.
Tip: I don’t recommend this method for a stitch dropped any more than 5 rows down, or else you may get puckering in the fabric. Sorry, folks; for 6 or more rows, you’ve gotta frog (pull out the rows) it!
Step 3: Place fixed stitch back onto left-hand needle.

Although Garter stitch is easier to knit, it’s actually a wee bit more complicated to fix because you have to mock both the front and back facing stitches. Here’s what I mean:

Step 1: For the purl bump stitches (in garter all rows are knit, but when you knit on the wrong-side of the piece, then the backside of the stitch –which looks like a purl bump–is visible on the right-side), come down through the loop of the stitch that’s off the needle, slip it onto the Knitting Repair Hook, and over the “rung” (below) closest to the stitch.
Step 2: Pull strand through the loop.
Step 3: For knit stitches, work as for Stockinette (see above).
Alternating these two methods every other row, recreates the garter pattern.

Step 4: Place fixed stitch back onto left-hand needle.
Tip: Use the pointy end of the Knitting Repair Hook to lift a rung over the loop, so it’s in the ready position to create the purl bump effect!
Use this tool for your next, stitch snafu — I promise it’ll save time, and make you feel super fancy for knowing a quick-fix method for your favorite craft: knitting!
xx,
Vickie
@vickiehowell
May 25, 2015
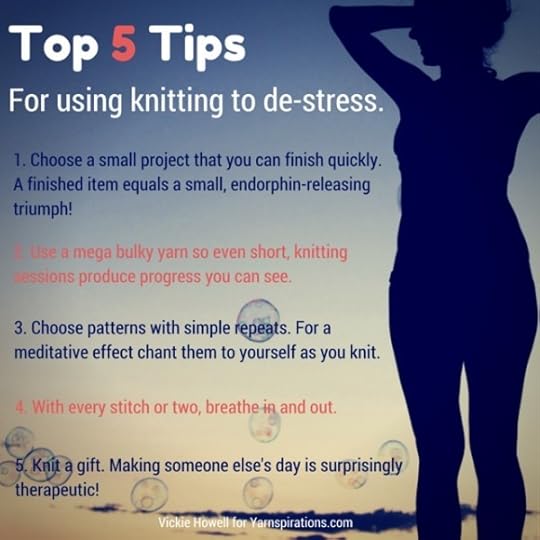
Top 5 Tips for Using Knitting to De-stress
We in the industry like to say that knitting is the new yoga. Really, though knitting is just another, wonderful weapon in our arsenal of mind and body health maintainers (I should be probably use a more passive synonym given the topic. But I digress.)
Although we may not be able to stretch our bodies as we would with yoga, we can most certainly use knitting to practice mindfulness of spirit. Here are my Top 5 Tips for using the craft that we love to help de-stress the life that we live.
1. Choose a small project that you can finish quickly. A finished item equals a small, endorphin-releasing triumph!
These self-patterning, Patons Kroy, Yoga Socks not only knit-up much quicker than traditional socks, they’ll also keep your ankles warm while you get your “Ohm” on!
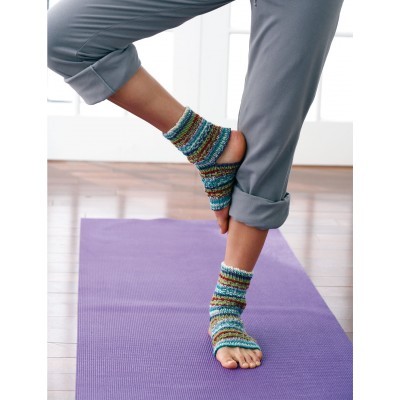
Shown in color: Summer Moss Jacquard
2. Use a mega bulky yarn so even short, knitting sessions produce progress you can see.
3. Choose patterns with simple repeats. For a meditative effect chant them to yourself as you knit.
I first gave the concept of focusing on the simplicity of the phrase of a pattern like, “knit 1, purl 1″, or “Yarn-over, knit two-together”, while listening to Stephanie Pearl-McFee’s talk, “This is your Brain on Knitting.” Since then, whenever I’m working on a a piece that doesn’t require shaping and has an easy to memorize stitch pattern I try to take at least a few minutes to zone out on the process. Projects like my, Spyro Gyro cowl or Bernat’s Big Basketweave Blanket would work perfectly for this practice!
4. With every stitch or two, breathe in and out.
According to WebMD, when you breathe deeply it sends a message to your brain to relax. All of those things that happen when you’re stressed such as, increased heart rate, fast breathing, and high blood pressure, all decrease as you take a moment to fill your lungs with air and then release.
5. Knit a gift. Making someone else’s day is surprisingly therapeutic!
Give someone the warm fuzzies by knitting her, well, something warm and fuzzy!
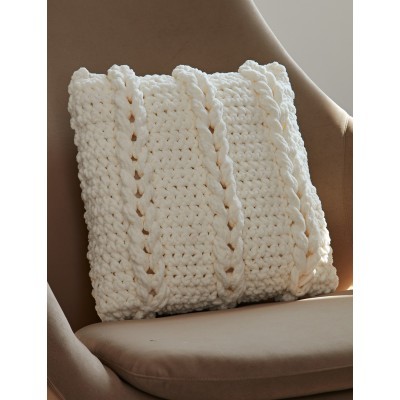
Chain Links Pillow
Until next time, breathe in; knit out.
xx,
Vickie
May 12, 2015
Sea Breeze Hack!

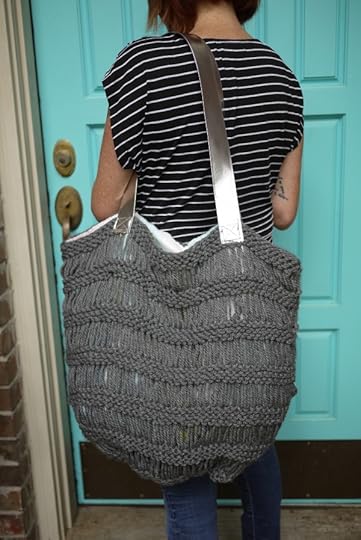
You know that old adage, “It’s a woman’s prerogative to change her mind?” Well, the same thing holds true for knitters (and crocheters!) We can find a project pattern we like, but then decide to adjust the finished size, the yarn type, or as in the case with today’s Sea Breeze Bag hack, completely change the gauge. With the help of a little math, the will to swatch, and by swapping out embellishments you’ll find that accessory patterns (which translate easier than garments, because fit isn’t as important) can often be used as a basic outline for your own interpretation of a project. This makes a few, core patterns and yarns in your personal library interchangeable resulting in a plethora of finished product possibilities! Let me explain.
Starting with a great pattern, like this bag designed by Bernat’s Svetlana Avrakh, examine the existing pattern for suggested materials. This bag required a worsted-weight cotton, and size 8 (5 mm) needles. I love the look of the original bag, but am really digging the “big knits” trend right now, and thought that the drop stitch pattern of the project would lend itself well to the rope-y look of a bulkier yarn. I also wanted my bag to be a bit larger than originally written (I have 3 kids, so on a trip to the pool our towels alone would fill-up the smaller version.) I decided on the approximate width I wanted (22″/55 cm), worked up a swatch in bulky yarn and, using my Takumi Bamboo needles, figured out how many stitches per inch/cm are achieved. I multiplied that number (which happened to be 2 sts per inch/5 cm ) by my desired measurement (22″/55 cm), and came up with an approximate, cast-on number (44 sts.) Lastly, I double-checked for repeats in the pattern, and noticed that the decreases at the end require multiples of 5. I rounded up to accommodate that, and came up with my actual cast-on amount (45 sts.)
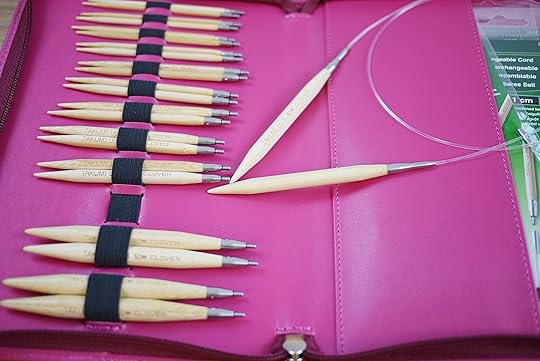
PRO TIP #1: Takumi Bamboo Interchangeable Circular Needles & Case make experimenting with different weights of yarn, quick and easy!
From there all of my adjustments were purely aesthetic. I wanted the color of the lining to be visible from both the inside and outside of the bag, so I doubled it (see below.) I also love metallics, so opted for silver vinyl straps instead of twisted yarn. That’s really it. Just have fun, and know that just because instructions are written, that doesn’t mean they are done so in stone. Play a little. You may make some mistakes along the way, but you’ll probably learn something and might even discover a design feature that’s truly and uniquely YOU. Now, let’s get knitting!
Bag Hack Instructions
MATERIALS
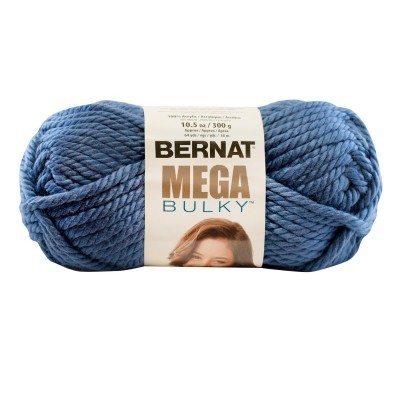
Approx 300 yds. durable, super bulky yarn (I used, Bernat Softee Chunky)
Size U.S. 11 (8mm), Takumi Bamboo Circular Needles (The cord helps hold the weight of the bulkier yarn!)
Super Jumbo Tapestry Needle
2, 32″/81.5 cm pieces, vinyl strapping
Sewing machine & coordinating thread
Optional:
1 yd fabric
Sewing needle
Straight pins
Craft paper & pen
Iron

FINISHED SIZE
Approx 22.5″/57 cm wide
DIRECTIONS
Back and Front (make alike):
With MC, cast on 45 sts .
Knit 5 rows.
Proceed in Drop St Pat as follows:
1st-6th Rows: Knit.
7th row: *K1, wrapping yarn around needle 3 times. Rep from * to end of row. 8th row: *Knit, dropping extra loops. Rep from * to end of row.
These 8 rows form Drop St Pat. Cont in pat until work from beg measures approx 19” [48 cm], ending on a 7th row.
Next row: (Dec row). *[K5tog, dropping extra loops of each st], 6 times. –15 sts rem.
Cast off.
*NOTE: I found it was easier to sl the k sts to the RH needle, drop any wrapped sts off the LH needle, then k5tog (through the back loop) on the RH needle. Whatever gets the job done for you, though is great!
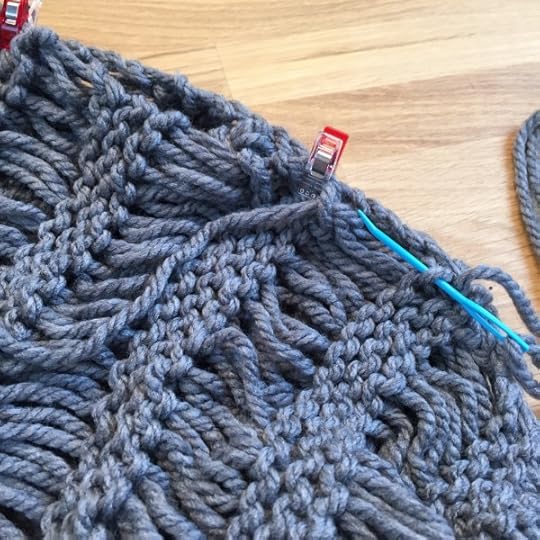
PRO TIP #2: Wonder Clips work great for holding knit pieces together while you do seam work!
FINISHING
Using a tapestry needle and yarn, sew sides and bottom of Front and Back together.
Make lining (optional):
Trace around bag onto craft paper, adding about a 1/2″/1 cm allowance; cut out.
Cut 4, bag shapes out of fabric.
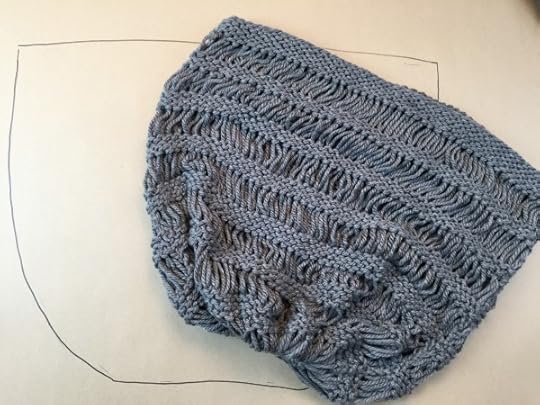
With RS facing, and using approx 1/2″/1 cm seam allowance, seam together sides and bottom. Repeat for remaining two pieces.
With RS facing, pin together and sew tops of both lining pieces together, leaving an opening for turning.
Clip curved edges with scissors; press seams.
Turn linings RS out, so one is inside the other; top seam around perimeter of lining, closing turning gap.
Hand sew lining to bag.

Handles:
Machine sew handle ends to top knit rows of Front bag, 5 1/2″/14 cm in from side seams. Repeat for Back piece.

You’re done! Now you have a bulky, go-to bag for all of your summer needs!
Can’t get enough of bag knitting? Join me in June for THREE, Yarnspirations‘ beach bag knit-alongs. Keep your eyes peeled on Facebook for details to come!
Happy, #TakumiTuesday!
xx,
Vickie
Yarn Arts Ambassador, Clover
May 8, 2015
Guest Blogger: Tanis Gray on Wanderlust!

Tanis & Vickie on the set of Knitting Daily TV
Greetings, dear readers! Tanis Gray here, guest blogging today for Vickie in honor of Mother’s Day. Vickie and I go way back to the days of knit.1 magazine, and more recently, working together on Knitting Daily TV. Vickie is an amazingly eclectic crafter, a spitfire TV personality, a curious crafter and a mother 3 times over. I’m excited to have her pass her blog reins over to me today to share with you my latest knitting book.
I’m a huge fan of superwash yarns, but something I see over and over is people living under the misconception that superwash yarns are only for knitting baby and child items. NOT TRUE! Being a mom to a young son myself, I am usually covered in dirt, paint, snot, food, play dough and juice.
Living a rather messy life doesn’t mean I have to pack up my knitted garments and stash them away until my son is older. I did some research, shopped around my LYS and found some really beautiful superwash yarns. Superwash yarns have come so far (just like all modern fibers have) and can be hand dyed, soft, bouncy and elegant. The best part? They can be chucked in the washing machine without fear. So if you’re one of those people that think superwash yarns aren’t for you, I recommend looking around your local yarn shop and see what you’ve been missing! I knit all my sweaters in superwash and many of my hats and fingerless mitts as well. Living a busy, sometimes messy life doesn’t mean I have to sacrifice quality or luxury when it comes to choosing a yarn.
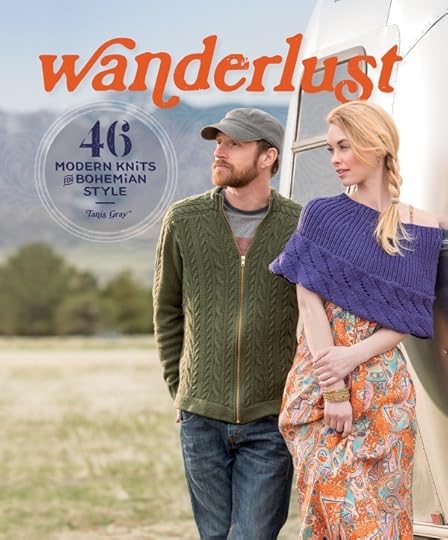
Wanderlust: 46 Modern Knits for Bohemia Style By Tanis Gray Interweave/F+W; $18.99
Inspired by my love of machine washable yarn, the idea for my new book, Wanderlust, was hatched. What if I could curate a collection of beautiful garments and accessories for women and men done in all superwash and have not one single baby or kid’s item in there? I was up for the challenge and got to work.
The result was a book I am pleased to have my name on. With over 45 knitted garments (hats, mittens, fingerless mitts, sweaters, scarves, cowls, shawls, afghans and gift sets) from designers across the globe, this book will have you reaching for superwash yarn again and again! Everything in this book used the same yarn – Cascade’s Longwood (which comes in just shy of 200 yards a ball with a very reasonable price tag) meaning you can use your leftover bits and bobs of yarn for another project. It also means you won’t break the bank knitting yourself up one of the gorgeous sweaters (one of my favorites is Elena Nodel’s Penelope Cardigan).
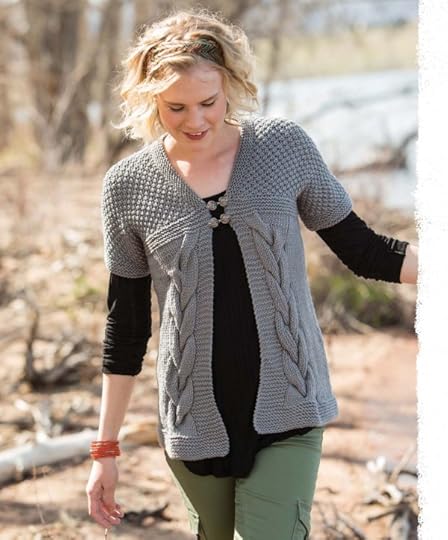
Penelope, by Elena Nodel
Since Mother’s Day is here, what about knitting Paulina Popiolek’s stunning Blizzard Hat & Scarf set for mom? Or Linda Medina’s Cabled Cowl & Wristers for your sister? I love Jennifer Wood’s Twigg Mitts, which would knit up quickly and be a great gift for anyone, or Beth Kling’s lacy Snoqualmie Wrap for someone extra special. I swooned a little when I first saw Nataliya Galifianakis’ Slip-Stitch Scarf and I’ve already knit up 3 of Svetlana Volkova’s Karite Hat for gifts (and may or may not have kept one for myself!). Robin Melanson’s Progression Cowl and Judy Marples’ Quixote Shawl went straight in my knitting queue and I currently have the Flurry Hat on my needles. There is absolutely something for everyone in this book and I’m proud of the collection and the hard work of everyone involved.
One other thing I’m really proud of are the skill levels covered in Wanderlust. I teach the advanced knitters frequently at my LYS in Alexandria, Virginia. I love watching beginner students from afar go from their first nervous cast on to taking more and more classes, educating themselves on proper materials (and appreciating different fibers and tools) to eventually taking a class with me. Knitters come with all different skill sets – some may not have cabled, others may be fearful of lace, some think Fair Isle is something they’ll never be able to master – but this book has EVERYTHING! From easy beginner projects, all the way through complex cabled sweaters, this is a book you’ll come to again and again to make you and your loved ones amazing, washable knits. It’s like having a slew of knit classes at your fingertips with techniques from short rows to saddle shoulders to setting in a zipper.

I hope you’ve enjoyed this quick peak into Wanderlust and that you find yourself knitting from it over and over again.
Happy knitting and Happy Mother’s Day to you!

Tanis Gray
Author/Designer
w:http://www.tanisknits.com


May 7, 2015
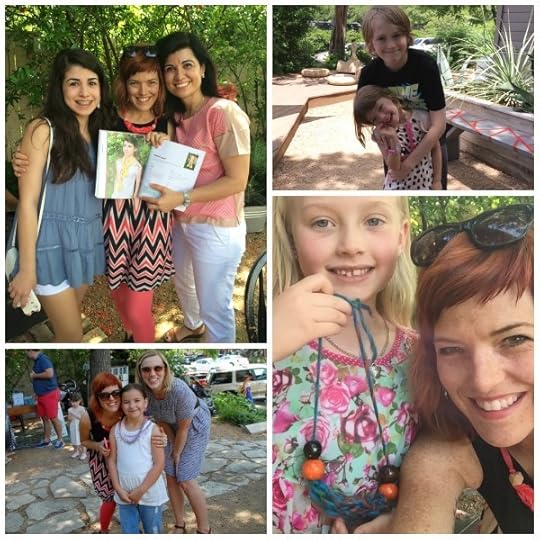
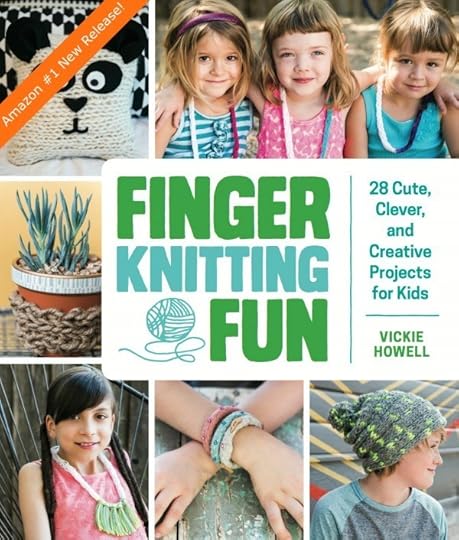
Photo Recap: Finger Knitting Fun Signing + Kids Craft Event

With my family at the event. Psst…Get instructions to make the necklace I’m wearing, here!
Sometime (read: most times) I get so caught up in deadlines and my online community of friends, “friends”, and followers that I forget about how good for the soul it is to hang out with the live, knit, crochet, and craft community. Since my latest book, Finger Knitting Fun was written by an Austin author, photographed by an Austin photographer, projects were modeled by Austin kids, and the photography was done at local business, TOMS Roasting Co., it seemed like a shame to not celebrate on my home turf, and with the people who also call this wacky, creative, paradoxical city home. So, I threw a little event, and it was lovely. Here’s a photo peak of the afternoon we spent celebrating a project, and encouraging kids to get creative with a ball of yarn!
The Treats

Cookies, ginger cocktails, fruity tea, and mini-book-cover-topped cupcakes fueled our guests’ craft session.
Author + Photographer
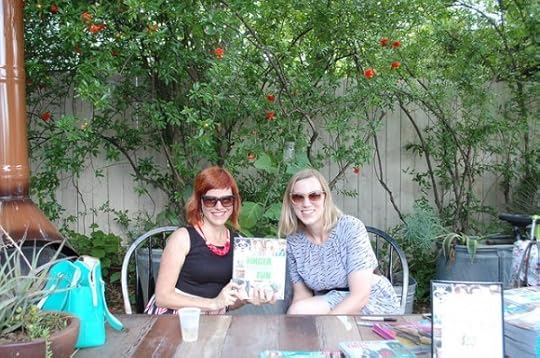
Photographer, Cory Ryan and I set up to sign some books!
Make & Take Table
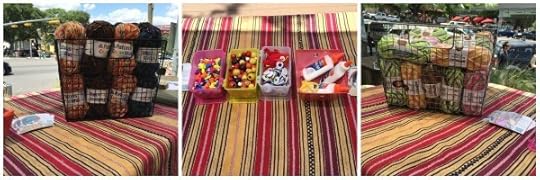
Supplies at the ready for kids to finger knit Snuggly Snakes and Simple Strand Necklaces. Huge thanks to my friends at Yarnspirations.com for donating ColorWul & Sheep(ish) Stripes yarn for the makin’!
The Models
Several of the kid models from the book showed up — all about 9 months older, and even cuter! Clockwise: Sara, Tristan & Clover, Sophia, and Manning.
Finger Knitting in Motion

Moms and kids getting in on the crafty action.
Panda-monium

Tallulah and Scarlet hold up the Panda Pillow project from the book, and matching color sheet made for the event.
Crafty Kids
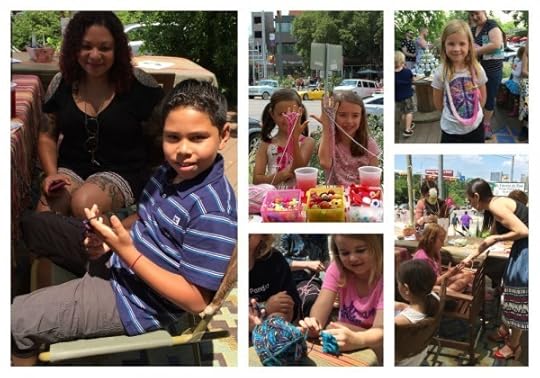
I got all gushy inside seeing so many kids getting creative, and loving it!
Success!

Nico, beaming with pride at his first, finger knitting attempt. (Or he may just REALLY love the newest color of Sheep(ish) Stripes.)
All in all it was a wonderful event. I can’t thank Kristy Matthews and her TOMS, Austin team enough for donating their space, and helping to celebrate the launch of Finger Knitting Fun. Thanks, also to all of you who joined me, and to those who continue to show support by buying the book. I really appreciate it!
xx,
Vickie
May 5, 2015
5 Minute Velvet & Geometric Bead Necklace

What’s a girl to do when her outfit is incomplete, and she only has about 5 minutes to spare? Finger knit a velvet necklace! A craft generally thought of for kids becomes cool for us adults with the help of some beautiful materials. When made with rich-colored, velvet ribbon and artisan-cut geometric beads a simple, finger knit necklace goes from crafty-cutesy to handmade-hip! Here’s how I made this version (in the car on the way to a book signing event — pictures from that to come) with just a couple supplies and in a few minutes!
Materials
2-3 yards, 3/8″ wide velvet ribbon (I got mine at a boutique, but I’ve seen it online at MJ Trim)
2, large-holed wooden beads (I found geometric shaped version on Etsy)
How-to
Leaving a long tail 12″35 cm, yarn-wrap around four fingers. (Click her for finger knitting tutorial.)
Finger knit until piece measures 7″/17.5 cm.
Fasten off, leaving tail equal in length to length on opposite end.
Finishing
Slide bead onto one end of ribbon and tie a knot. Repeat for opposite end.
Tie in a bow to form necklace; trim ends; wear!
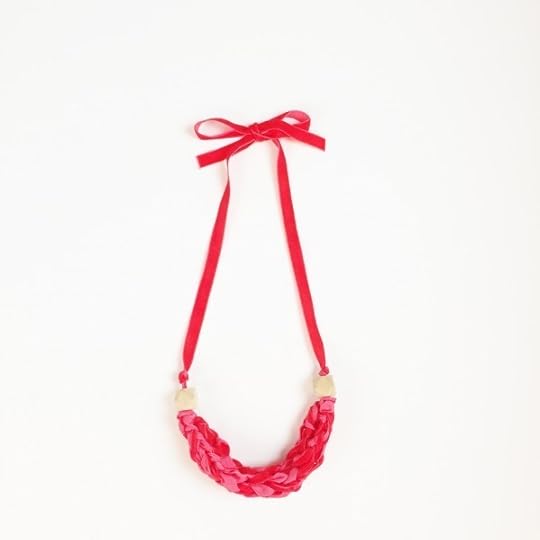
This necklace is a grown-up version of the, “Nice Girl Necklace” from my book, Finger Knitting Fun. One for big girl; one for little girl — this is a great project for mom-and-daughter day!

Get more great projects like this one in my book:
Enjoy!
xx,
Vickie


