
Vickie Howell's Blog: Vickie Howell's Website, page 54
December 9, 2014
Video Tutorial from Home & Family Show!
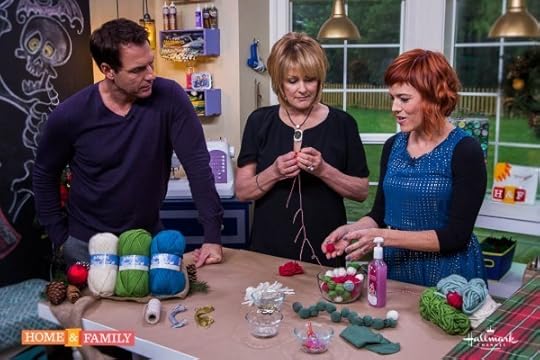
I had such a fun time as a guest last week on Hallmark’s Home & Family Show. I was lucky enough to get to hang out with the host of Survivor, taste food from a NY Times, best-selling food author, make a boy-band singer laugh while he performed (by throwing out, behind-the-scenes jazz-hands), and demonstrate how to make a holiday garland out of Patons Classic Wool Bulky yarn. It was a good day.
Missed it? No worries. You can see my segment here!
 Felted Ball Garland
Get the supply list and written instructions for this project here.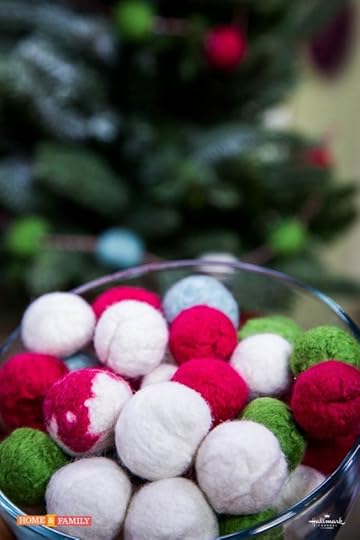 Felted yarn balls can be used to make ornaments, jewelry, and wreaths, too!
A huge thanks to producer, Jill Hess, hosts Cristina Ferrare and Mark Steines, and the entire cast and crew for being so gracious and welcoming!
Happy holidays!,
Vickie


December 2, 2014
Home & Family Show: Tune in Tomorrow!

You’ve probably seen felt beads at the yarn store, and maybe you’ve even felted your own with unspun roving. Did you know though, that you it’s easy to make these balls with regular, ol’ wool roving, yarn?
Join me tomorrow, December 3rd at 10am/9CT on the Hallmark Channel’s Home & Family show to learn how to make a festive, holiday decoration using felted balls that the whole family can create together!
Happy, handmade holidays!
xx,
Vickie
November 19, 2014
My Gift Picks

The Yarnspirations Christmas Gift Guide is out, and is filled with a plethora of ideas to inspire you to make this one a handmade holiday — no matter what you’re budget! My friends over at Yarnspirations.com asked me to choose one pick from each category (which, admittedly was hard, because I dig so many more than that!) to recommend to you, dear stitcher. So here are my choices for: Women, Men, Teens, Kids, Babies and Pets! (Side note: one choice may or may not have been swayed by the fact that my younger son is modeling. I’m admittedly biased, but the project’s great, too!)
 (Click on image above to get the patterns and/or yarn for each project.)
Bonus Pick: Ok, this one didn’t make it on my list, but I love it so I have to mention it here. The Twisted Sister Headband is made out of my Sheep(ish) yarn and would make a GREAT present for a teacher, office mate, babysitter, or any gal on your list!

Happy holiday hand-making!
xx,
Vickie
November 18, 2014
6th Annual(ish) Birthday Giveaway!

Nothing makes me happier than to spend part of my birthday giving away crafty presents, so every year (with the exception of maybe one) over the past 6 or 7 I’ve done some sort of giveaway. Well folks, it’s November 18th which means another trip around the sun for me, and another giveaway for you!
Enter to win 1 of 18 skeins of yarn provided by, Yarnspirations! Post a comment letting me know about at least one thing you’re planning on hand making for the holidays (links to patterns/images/tutorials welcome — because I’m nosey and love this time of year). Winners will be chosen at random to receive a ball of one of the following yarns: Sheep(ish) by Vickie Howell, Sheep(ish) Stripes by Vickie Howell, Bernat Blissful, Bernat Happy, Bernat Softee Chunky, Caron United, Patons Denim-y, Patons Classic Wool Bulky, Patons Lace, or Patons Misty.
THIS IS A FLASH GIVEAWAY, SO YOU ONLY HAVE 48 HOURS TO ENTER. All comments must be posted on this site (not on Facebook, Twitter, Instagram or Pinterest) by 10:30am CT on 11/20.
Good luck, and thanks for being a part of the fun!
xx,
Vickie
@VickieHowell
October 17, 2013
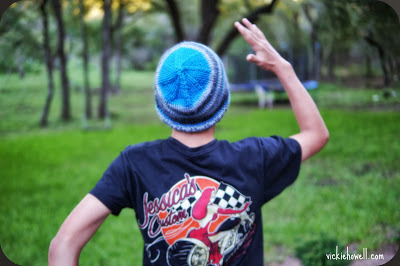
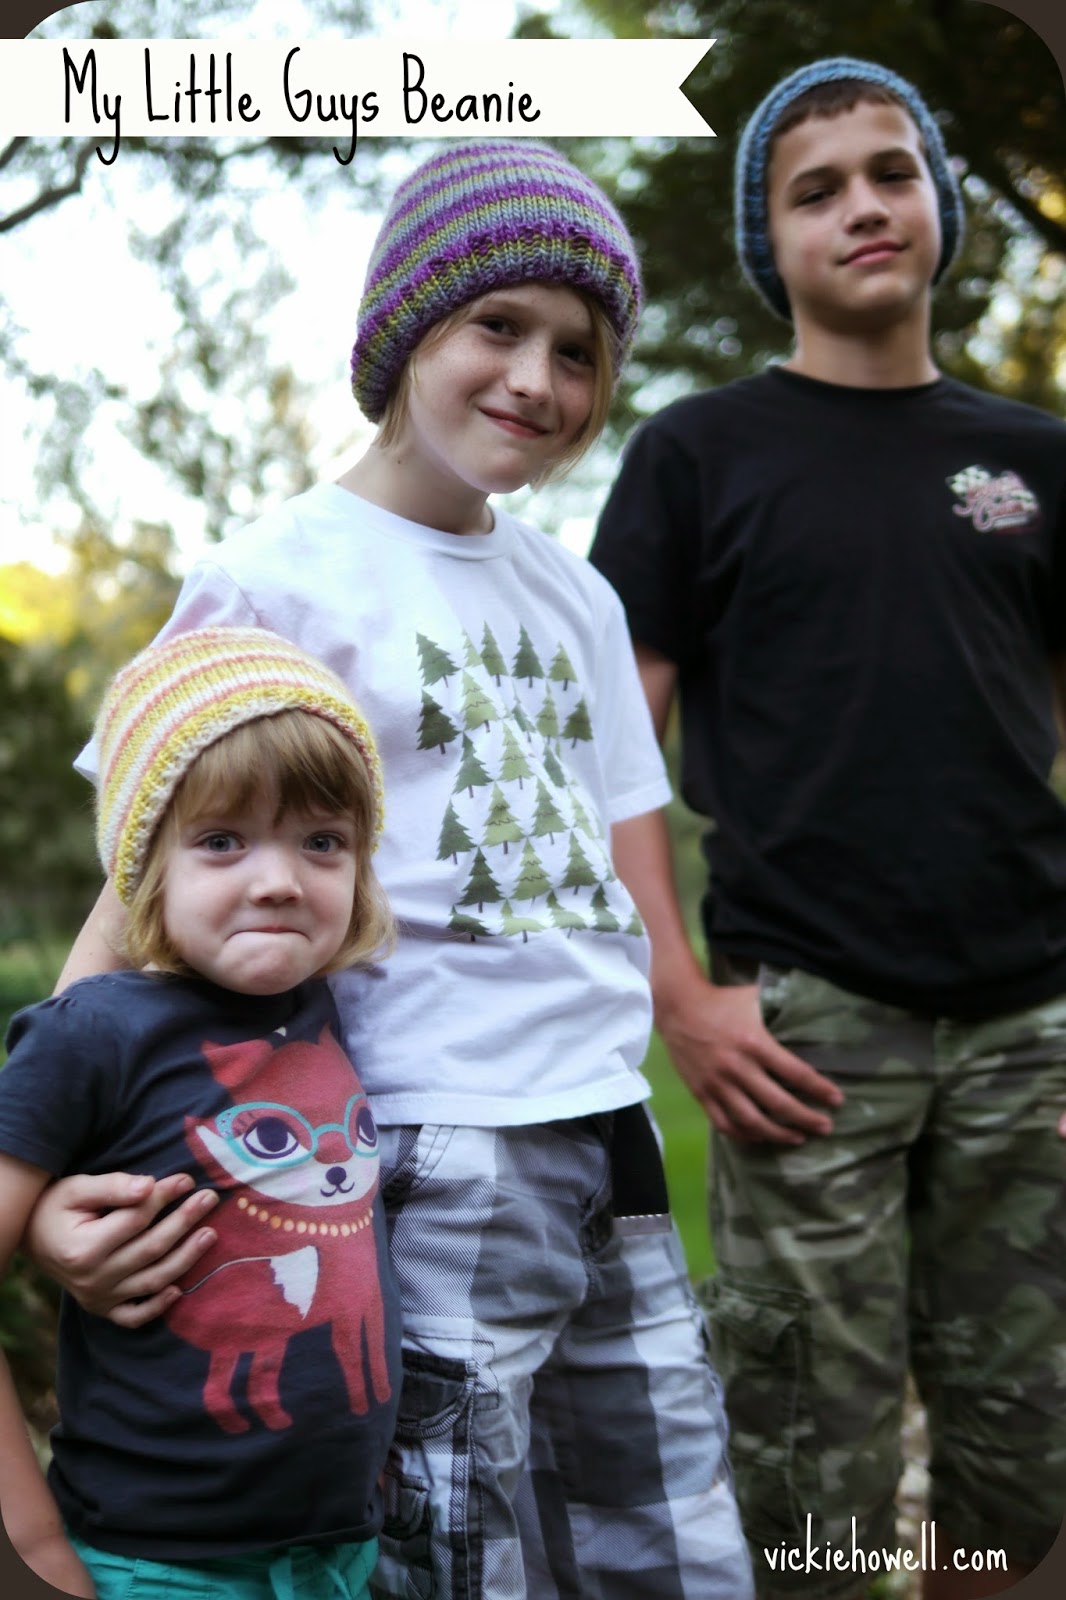
Free Pattern: My Little Guys Hat!

Main Colors (MC) L-R: Citrus(ish), Punk(ish), Night(ish)
My Little Guys Hat
A couple of years ago, I designed a slouchy beanie for my husband for Valentine's Day. Since then, the My Guy Hat has become a staple around our household (I wore a version to Vogue Knitting Live in Seattle last year, and Dave's actually wearing his beanie right this very moment!) The hat was originally designed using two-round stripes -- that however, is SO laborious! (kidding) Now that my new, self-striping line is out though, it's easy to let the yarn to the work so you don't (barely) have to!
My Little Guys Hat is the same great beanie designed for the mister, this one has just been sized-down for the sister! In addition to the added sizing option, the directions have been simplified to account for change in yarn.
Simple lines with a pop of color are always a safe bet for knitwear that'll keep you warm, but still look cool. This season, make this beanie for all of the guys (and gals) in your life -- enjoy! --Vickie

Materials
1 ball Bernat Sheep(ish) Stripes by Vickie Howell (MC)
1 ball Bernat Sheep(ish) by Vickie Howell (CC)
Size US 8 (5mm), 16”/41cm circular needles
Size US 8 (5mm) dpns
Tapestry Needle
Sizes
S(M, L) --Shown in S & M
(Note: M Fits from pre-teen to standard Women's, L fits standard Men's)
Finished Measurements
Stretches to fit up to: 22(23, 24)”/56 (58, 6) cm
Gauge
17 sts x 22 rows = 4”/10cm in Stockinette stitch
Directions
Hat Body:
With MC, CO 76(80, 84) sts. Join, taking care not to twist.
Rnds 1-8: *K2, p2; rep from * around.
Rnd 9: Knit.
Note: When working in-the-round, stockinette stitch is achieved by knitting every rnd.
Repeat Rnd 9 until piece measures 6(6 1/2, 7)”/(15.25, 16, 18)cm from edge.
Note: for less slouchy version, work body 1/2”-1”/1-2.5cm shorter.
Join CC.
S size only: Knit around while dec 6 sts (using k2tog) evenly. (70)
M size only: Knit.
L size only:
Next Rnd: With CC, knit around while dec 4 sts (using k2tog) evenly. (80)
Contrasting Color (CC): Teal(ish)
Spiral Decrease for Crown
All Sizes:
Change to dpns when necessary.
Dec. Round 1: *K8, k2tog* (rep. to end)
Rounds 2, 4, 6, 8, 10, 12, 14, & 16: K all sts.
Dec. rnd 3: *K7, k2tog; rep from * to end.
Dec. rnd 5: *K6, k2tog; rep from * to end.
Dec. rnd 7: *K5, k2tog; rep from * to end.
Dec. rnd 9: *K4, k2tog; rep from * to end.
Dec. rnd 11: *K3, k2tog; rep from * to end.
Dec. rnd 13: *K2, k2tog; rep from * to end.
Dec. rnd 15: *K1, k2tog; rep from * to end.
Dec. rnd 17: *K2tog; rep from * to end.

Finishing
Cut yarn leaving a tail. Using tapestry needle, feed yarn through remaining live sts while removing needles; pull snuggly.
Weave in ends.
Psst! Sheep(ish) Stripes is available at select Jo-ann Stores, A.C. Moore, and online at Yarnspirations.com!
October 11, 2013
I Love Yarn Day: Global Reach of Making
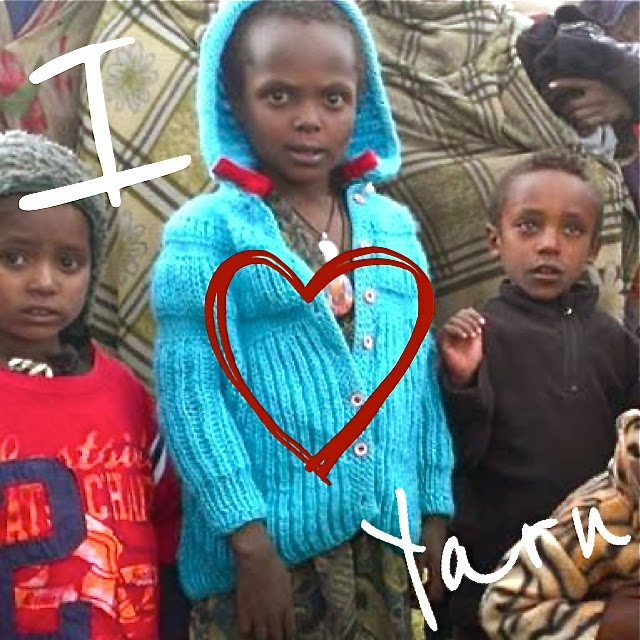
Clearly, there's no doubt that I love yarn so I'm all too happy to participate in a national day celebrating it! For the past couple of years I've shared free patterns in support of the Craft Yarn Council event. This year however, I thought I'd simply share a photo. This beautiful little girl in blue is an Ethiopian villager. She's wearing the Sheep(ish) jacket I contributed to the January 2011 issue of, Creative Knitting Magazine.
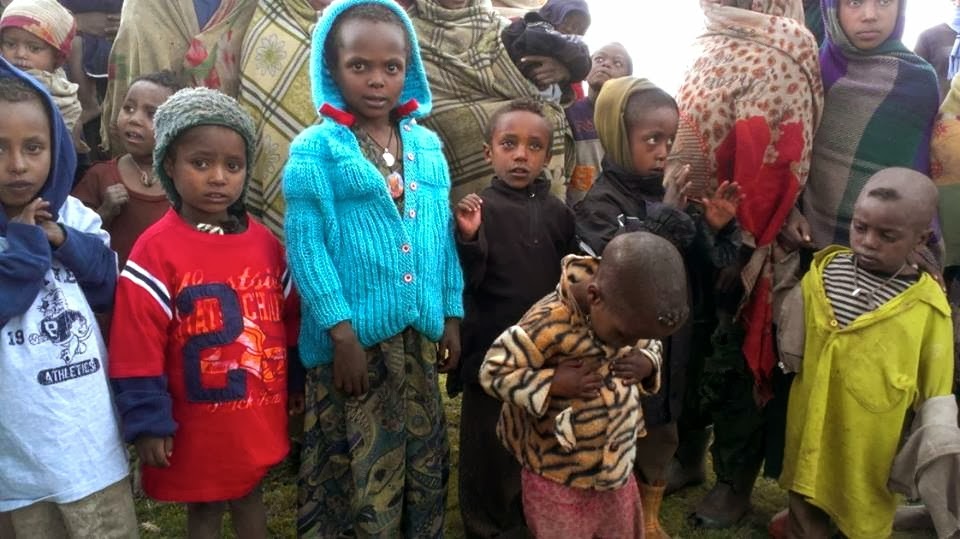
Our family's knit coat and tiger print jacket found new homes in the Ambaras village in the
Simian Mountains of Ethiopia in 2013.
As both a yarn and knitwear designer, there aren't many things as satisfying as seeing one of my pieces published in print. As a mother, having my daughter model that piece (even when she refuses to wear it again off camera) is extra special. As a global citizen though, seeing that same garment -- one that was knitted by my own hands -- make it's way across the world and finding the shoulders of a another child...well, that's extraordinary.
Moments like looking at the picture above serve as a lovely reminder: yarn isn't always just some string called for in a materials list. Sometimes, it's also the thread leading us towards unique, human experiences.

My daughter wearing the same coat in Austin, TX, 2010.
Happy I Love Yarn Day, everyone!
Stitch.Rock.Love,
Vickie
October 10, 2013
Free Crochet Pattern: Candy Corn Poncho

Project reprinted courtesy of Crafts 'n' Things Magazine
It's that time again to crochet something sweet for your favorite little trickster! In case you missed out on nabbing the pattern for my crocheted Candy Corn poncho last Fall when it was printed in Crafts n' Things Magazine , thanks to their editor I'm able to publish it again here on my blog just in time for this Halloween!
MATERIALS
1 ball each Vickie Howell Sheep(ish) for Bernat (70% acrylic/30% wool; 167 yds/153 m) in colors: (A) Yellow(ish) #0012, (B) Coral(ish) #0014, and (C) White(ish) 0004
Size US H-8 (5mm) Crochet Hook, or size needed to obtain gauge
Size US I-9 (5.5mm) Crochet Hook (optional)
2 Stitch Markers
Tapestry Needle
SIZES
12-24 mos (2-4 years)
Shown in larger size.
FINISHED MEASUREMENTS
Neck circumference: 19”/48 cm (20”/51 cm)
Length: 9 1/2”/24 cm (11”/28 cm)
GAUGE
12 sts x 6 rows = 4”/10 cm in dc
ABBREVIATIONS
ch = chain
dc = double crochet
hdc = half-double crochet
pm = place marker
rnd(s) = round(s)
sl st = slip stitch
st(s) = stitch(es)
DIRECTIONS
With Color A, ch 70(74). Join into rnd with a sl st, taking care not to twist.
Rnd 1: Ch 2, hdc in the next ch and each ch around. Join rnd with sl st. (70/74 sts)
Rnds 2-3: Ch 3, dc in next st and each st around. Join rnd with sl st in top of ch-3.
Rnd 4: Ch 3, pm, dc in next 34 (36) sts, pm, dc in each st around. Join rnd with sl st in top of ch-3.
Rnd 5: Ch 3, 2 dc in marked st, move marker to last dc made, dc in each st to 2nd marker, 2 dc in marked st, move marker to last dc made, dc in each st around. Join rnd with sl st in top of ch-3. (72/76 sts)
Large Size only:
Rnd 6: Rep Rnd 5. (78 sts)
Both Sizes: Join Color B. Cut Color A.
Next 5 Rnds: With B, rep Rnd 5.
Join Color C. Cut Color B.
Next 4 Rnds: With C, rep Rnd 5.
Edging Rnd: Ch 3, [dc, ch 1, 2 dc] in same st as ch, ch 1, sk 1 st, *[2 dc, ch 1, 2 dc] in next st, ch 1, sk 1 st; rep from * around. Join rnd with sl st in top of ch-3.
Fasten off.
FINISHING
Weave in ends.
Make Tie
With larger hook, 1 strand each of Color A & C held together, and leaving a 6”/15 cm tail, ch 170 (or amount to create desired length). Fasten off, leaving 6”/15 cm tail.
Note: If not using a larger hook, then make a chain using only 1 strand of yarn. Ch as many stitches necessary to create desired length.
Weave tie in and out of base of neckline (Rnd 2), beginning and ending at center front of poncho.
Pompoms (make 2)
Using Color A & C held together, wrap yarn around three of your fingers about 30 times. Slip wraps off of fingers and tie a piece of yarn tightly around the center of the wraps. Cut both ends of wraps and fluff pompom. Trim.
Using beginning and ending tails of tie, tie one pompom to each end. Snip tails to blend with pompom.
This pattern is for non-commercial use only. All rights reserved.
October 8, 2013
Halloween Project: Haunt Sweet Haunt

I've been digging the kitsch of the embroidered cross-stitch lately. Whether it's used in the traditional manner, sewn onto a knit or crocheted piece as embellishment, or stitched ironically onto an unintended for fabric -- it's easy for a hand-stitched "X" to mark the crafty spot!
My favorite haunt these days is at home with my family, which lends itself perfectly to a play on words worthy of the Halloween decor season. Here's a simple project that whips up wickedly quick making it an easy ode to your Haunt Sweet Haunt. Here's how:

Grey, sport-weight yarn (I used Bernat Cotton-ish by Vickie Howell in color, Grey T-Shirt)
Netted web fabric piece (at least 18"/46 cm x 22"/56 cm)
Tapestry needle
Large embroidery hoop
Scissors
Frame (16"/41 cm x 20"/51. cm -- or desired size)
Hot glue gun
Hot Glue Gun Helper (optional)
Iron (optional)

Place fabric in hoop. Using chart below as a guide, cross-stitch letters onto fabric. If you're using web fabric as shown, keep in mind that grid lines won't be perfectly symmetrical -- no worries, just fudge it as necessary! Press if fabric bunches at all from stitching.

(Click to enlarge)
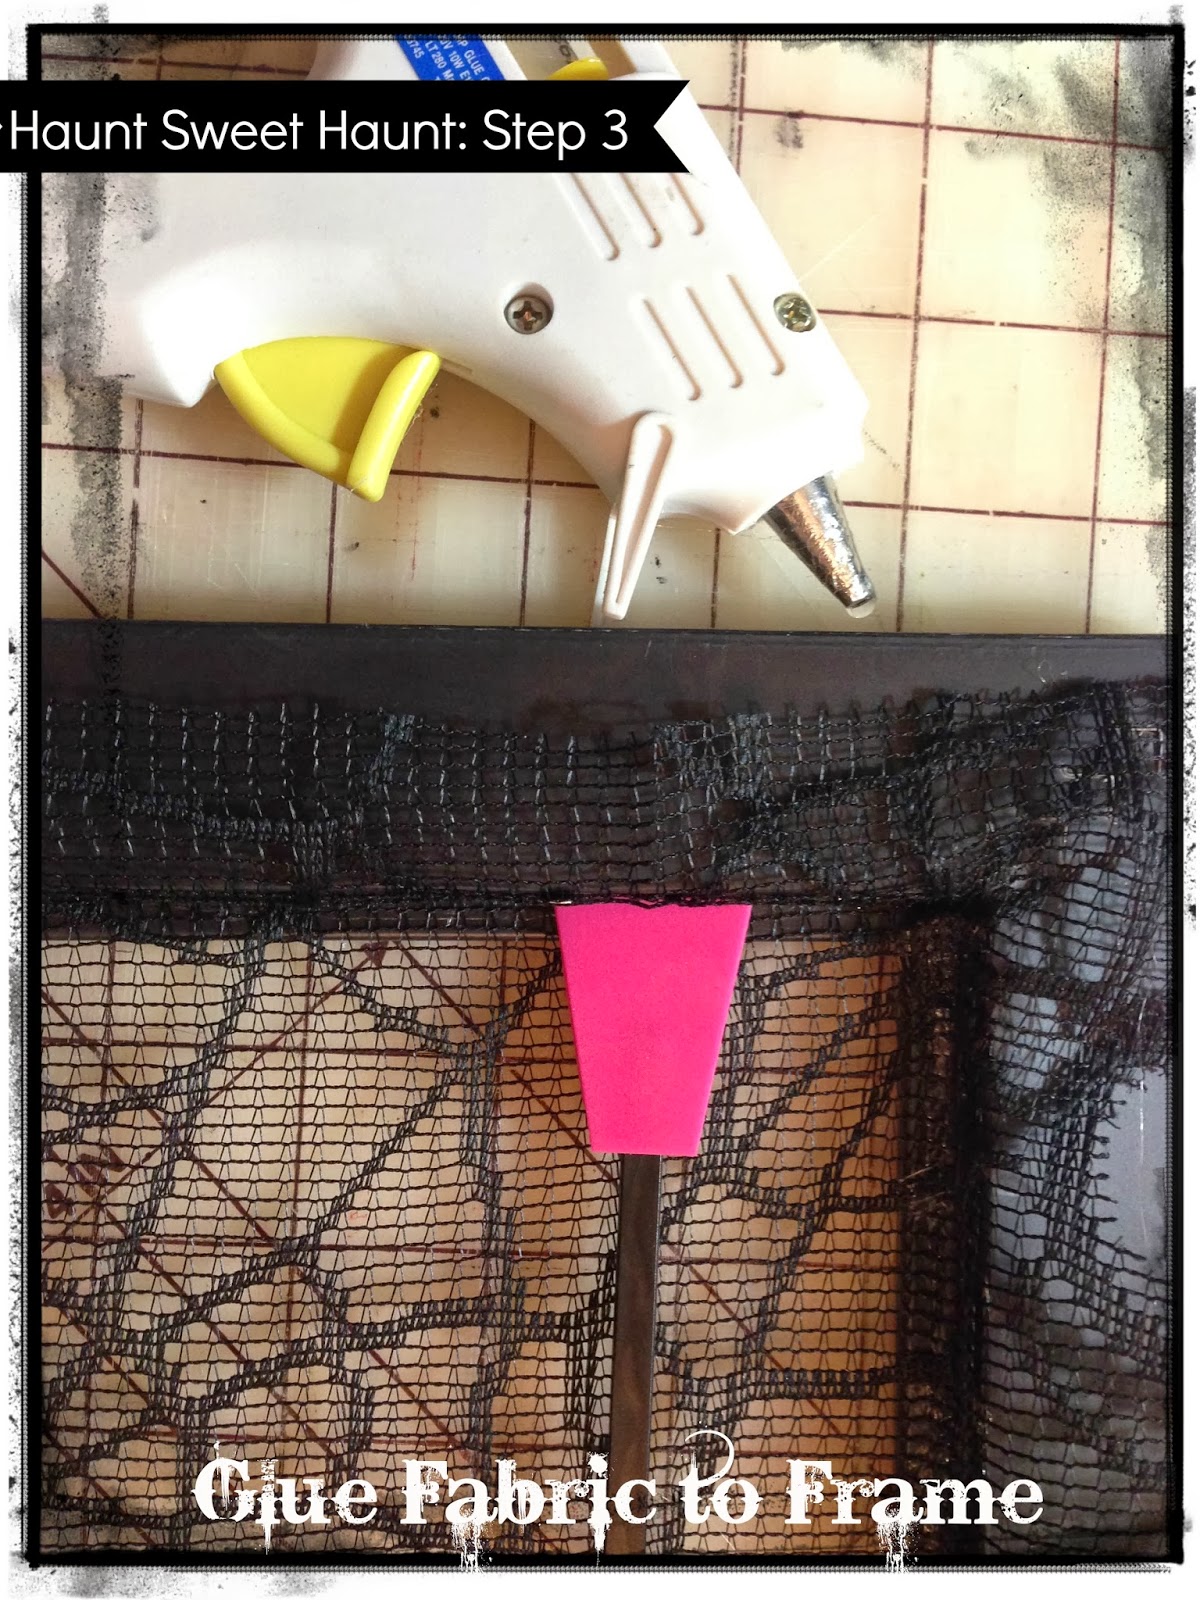
Cut fabric down so it's about a 1"/2.5 cm or so larger than the inside of your frame. Using glue gun and either a Hot Glue Gun Helper or other spatula to press down fabric securely (without burning your fingers), adhere fabric to inside lip of frame taking care to stretch piece as you go.

Hang on wall or add to a spooky vignette on your mantel!
Stitch.Rock.Haunt,
Vickie
October 7, 2013
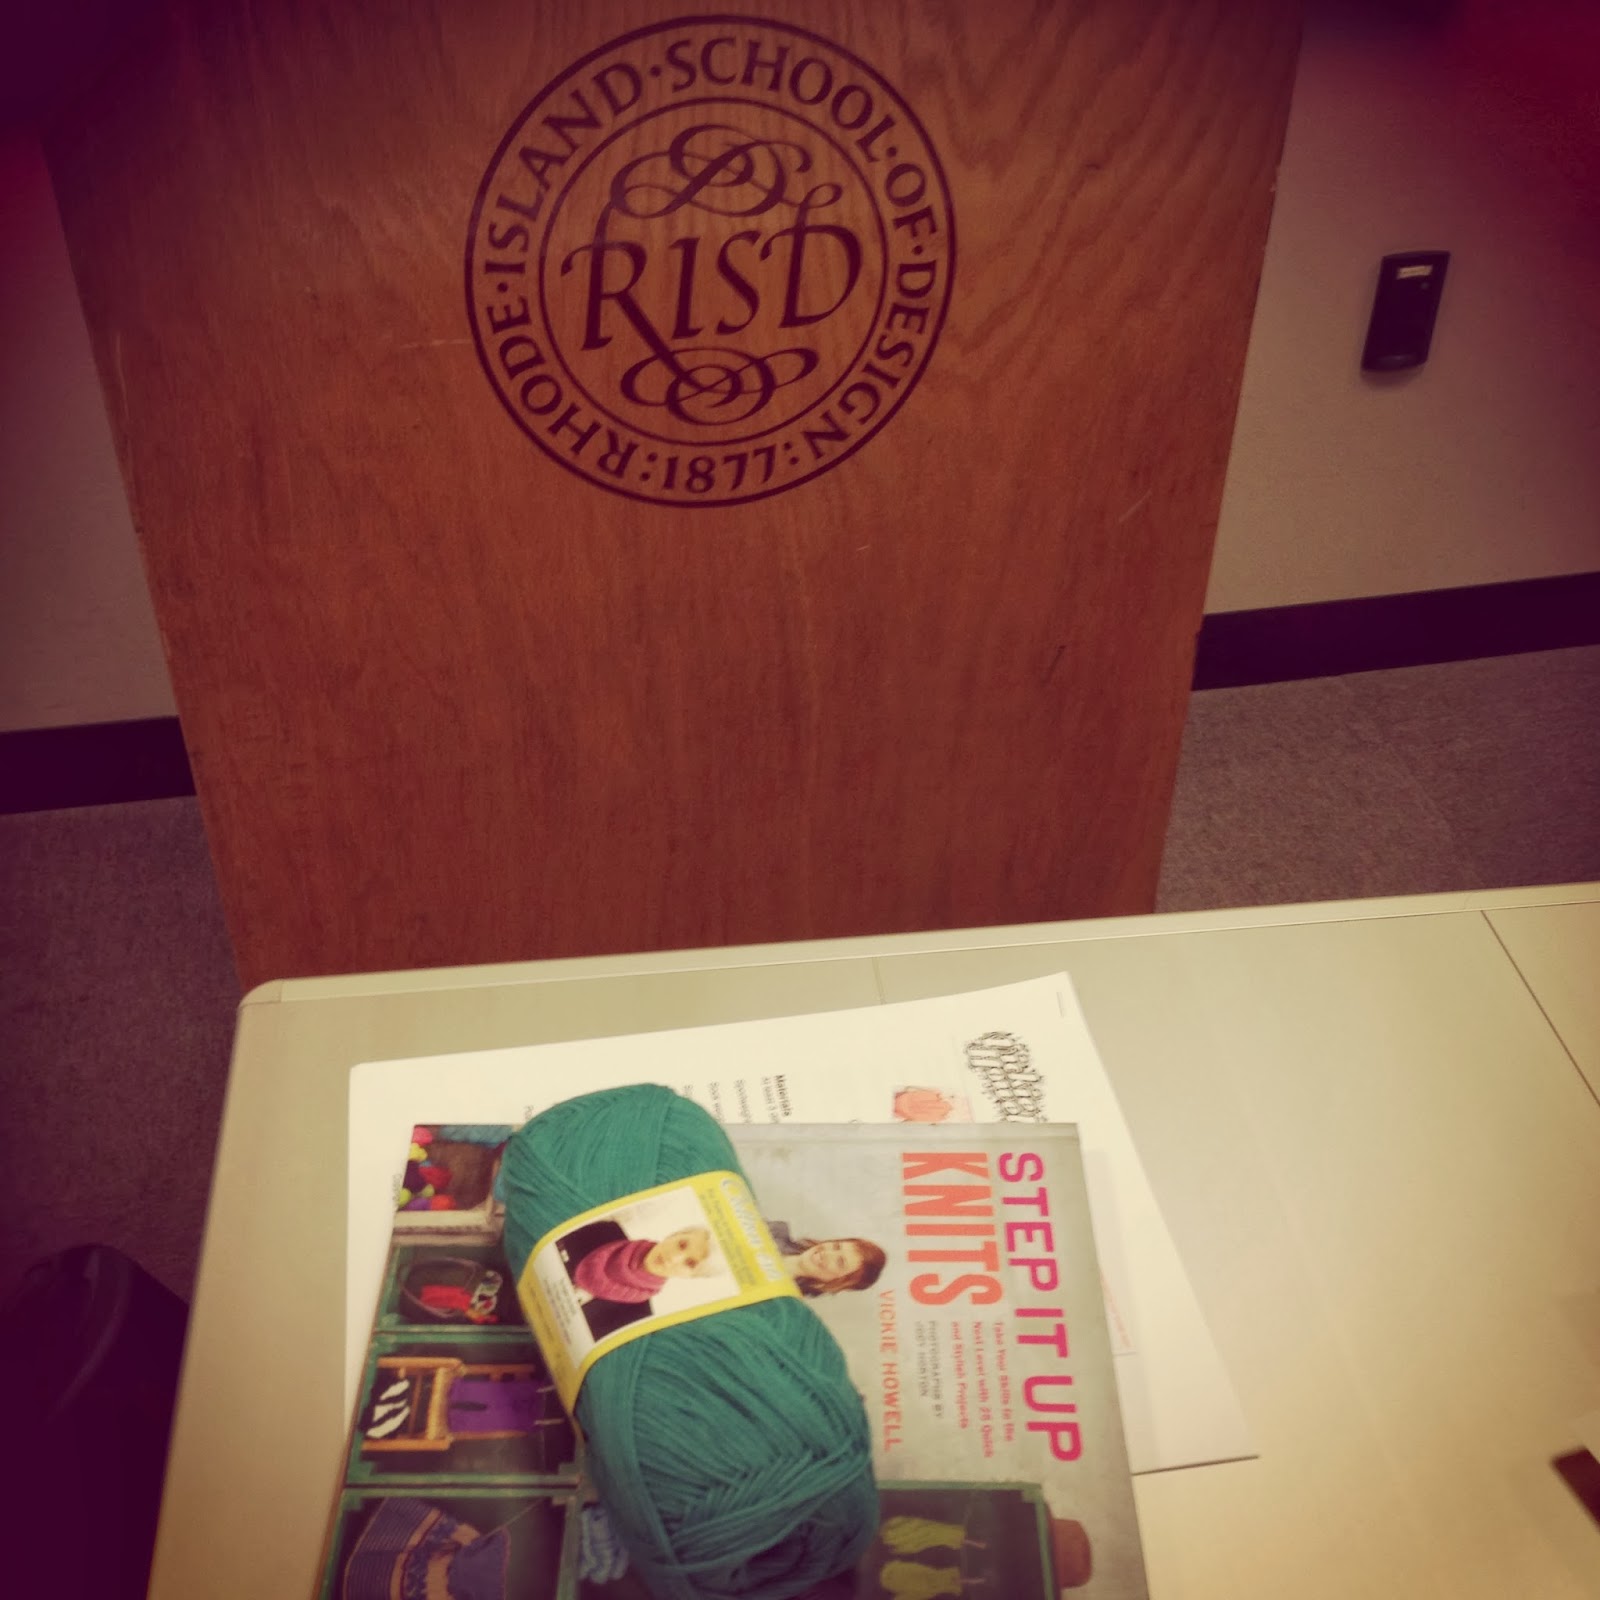
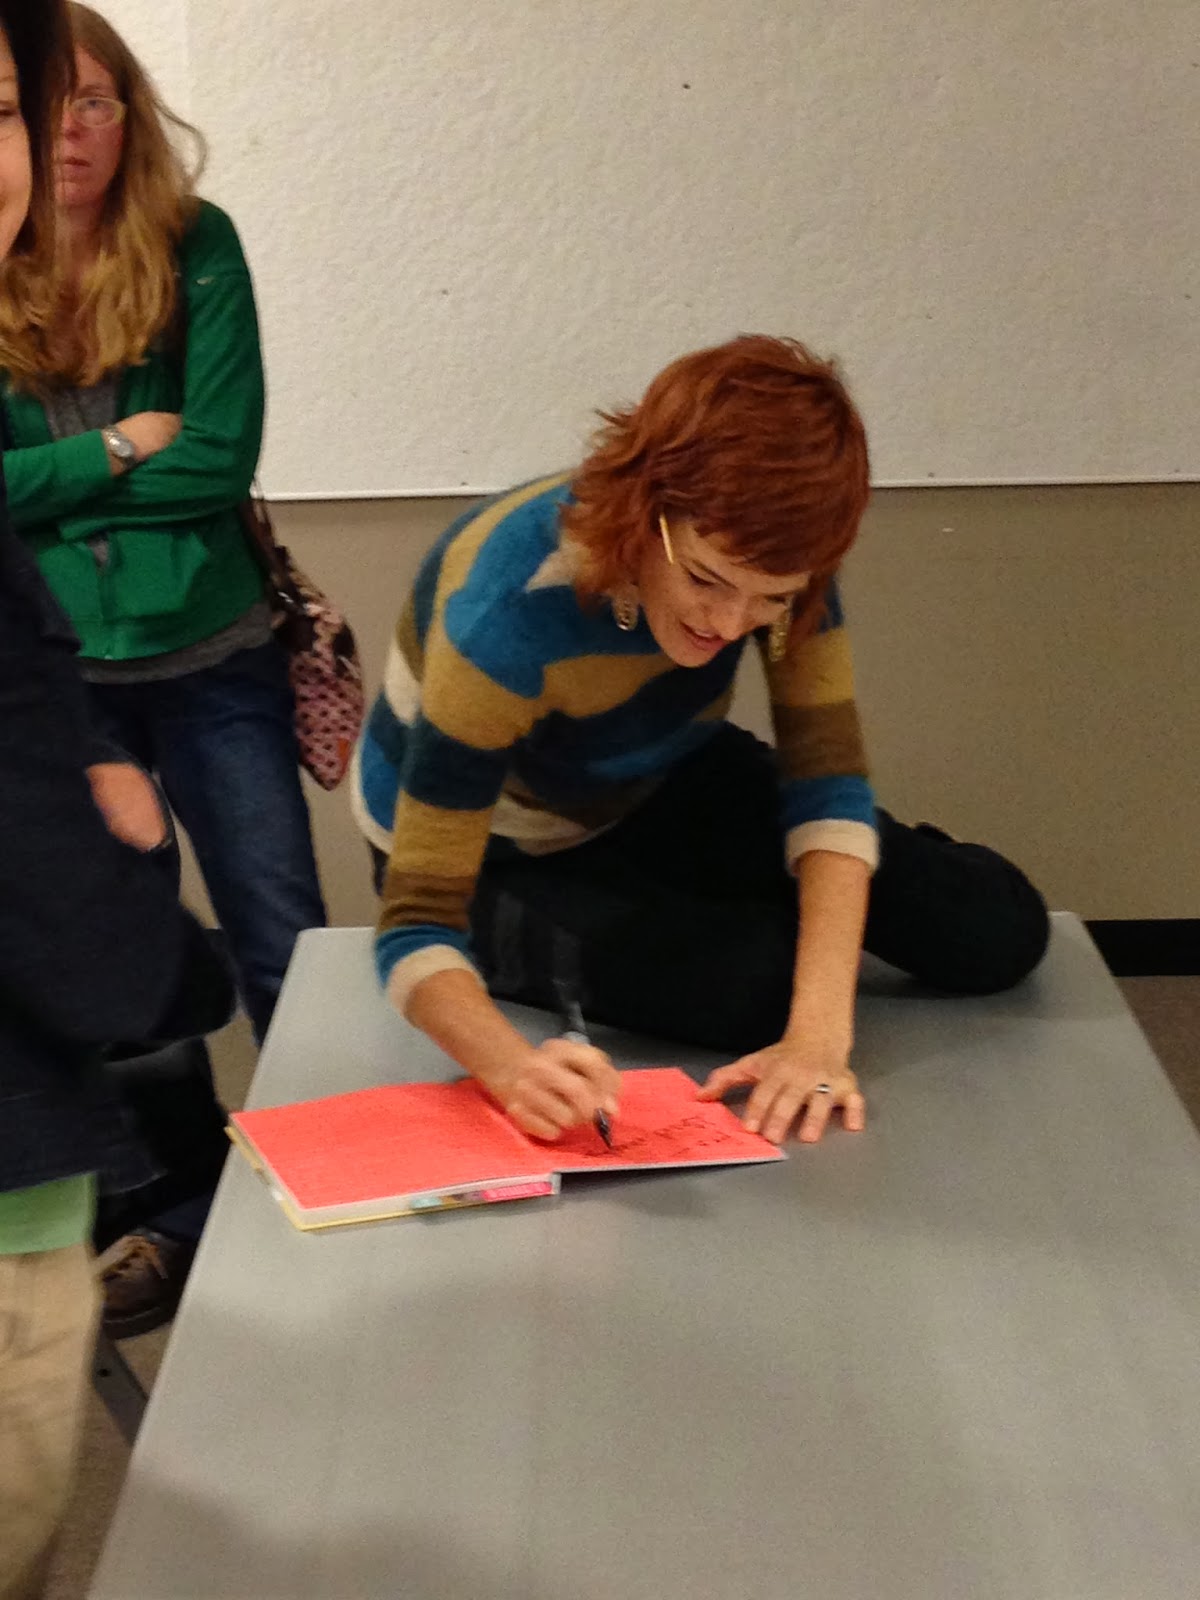
Photo Recap: Rhode Island School of Design Workshops
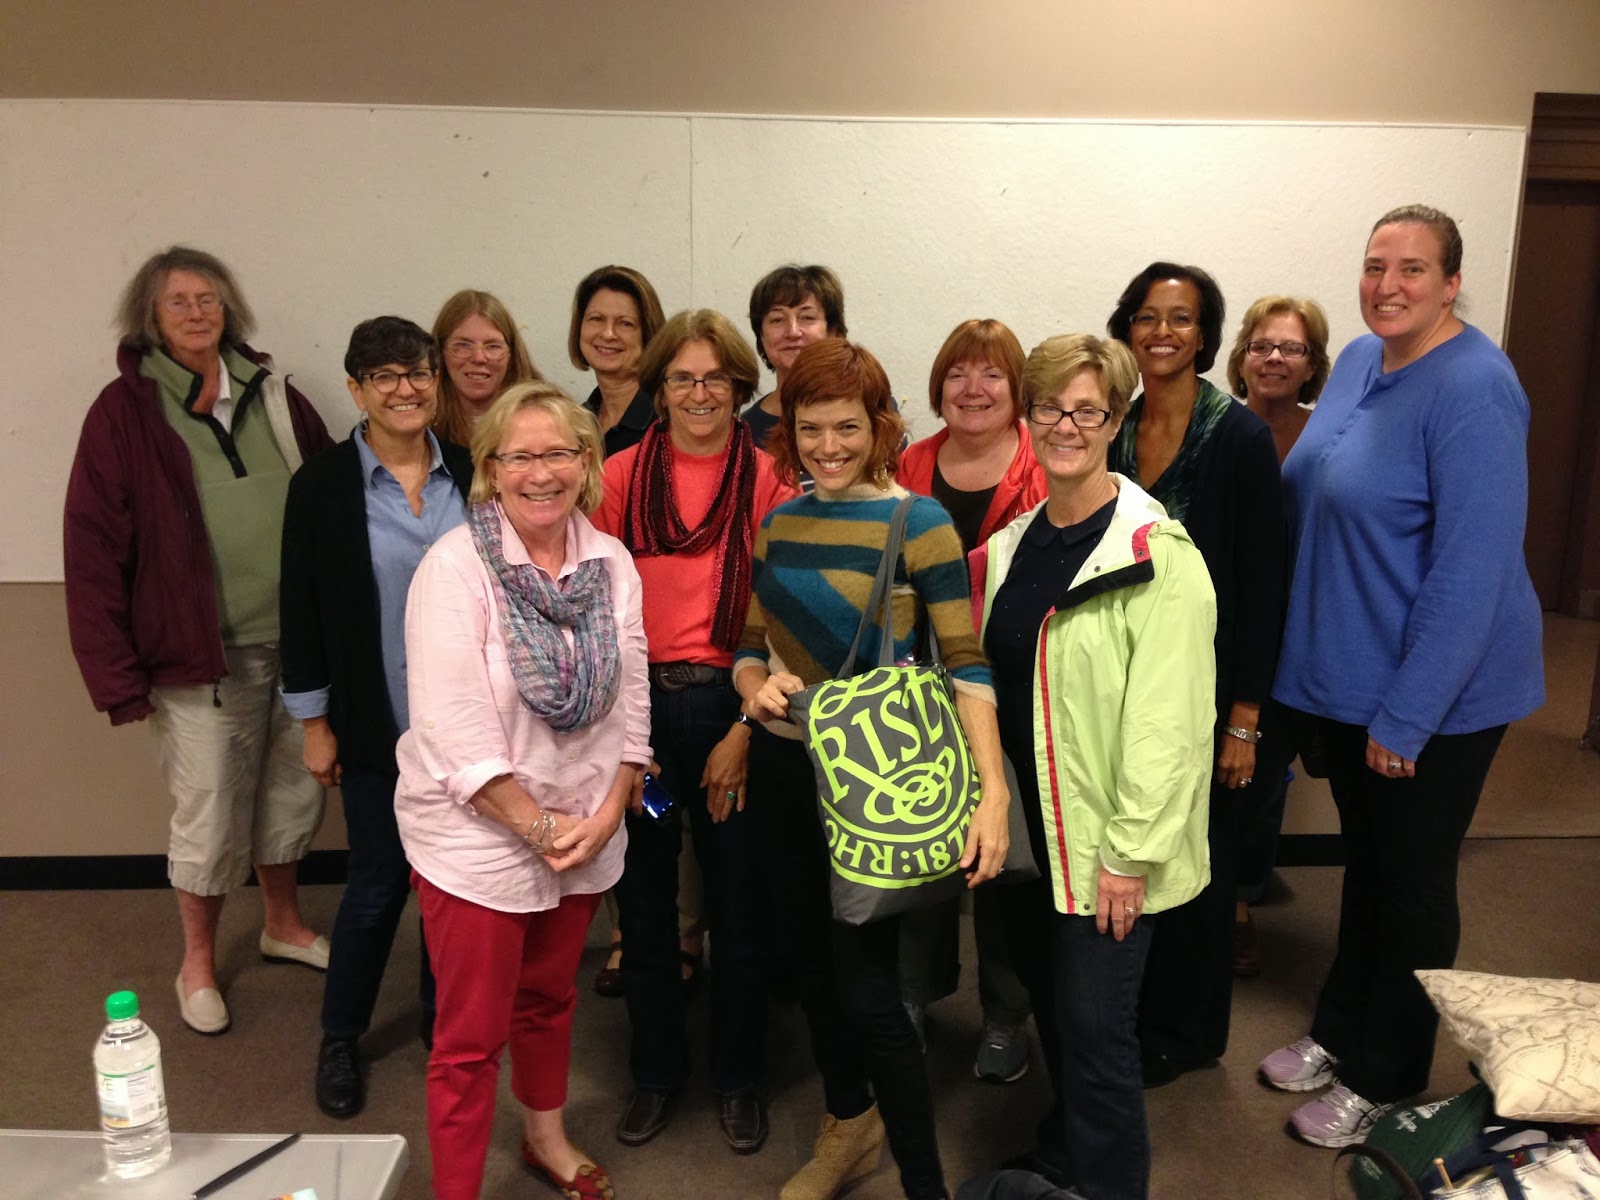
My students from the Step It Up Knits II: Finishing Techniques workshop.
Last month I had the pleasure of teaching a couple of workshops through the continued education program at the prestigious, Rhode Island School of Design. I spend most of my teaching time in a virtual classroom, so getting to interact personally with passionate knitters was an absolute treat! Thanks to all of the students, RISD CE staff, and Rhonda Fargnoli for inviting me to their beautiful campus!
Here are just a few shots from the classes, and my subsequent New England jaunt with my husband and youngest child.
Enjoy!
xx,
Vickie
Treats awaiting students.

Students in Step It Up Knits I: Intermediate Techniques.
(I have to admit, it was pretty fun using my book as a text book!)
Signage.

Hallway of the Library building/dorms at RISD.

Glue guns and duct tape? Now this is my idea of a college school supplies store!

Post class / pre shopping cuddle with Clover.

Providence thrift store score!

We made the pilgrimage to Salem, MA--a long time wish of mine.
Unfortunately, the yarn stores were closed the day we were there -- so no, "Stitch & Witch" for me. Alas.

Historic house where one of the Salem "witches" was unjustly hung.
Pit stop in Scarborough, ME to visit my childhood buddy and his beautiful family.
October 2, 2013
Project from Halloween Past: Knit Spider Web Leg Warmers

Webbed Warmers
Your kid's kicks with be a little bit creepier this Halloween while donning these Webbed warmers. Get the free pattern here and the Sheep(ish) yarn at your local Jo-Ann or A.C. Moore stores, or online at Yarnspirations.com. Make 'em today; sport them spookily tomorrow!
Stitch.Rock.Boo!,
Vickie


