
Sam Turnbull's Blog, page 44
July 1, 2018
Vegan Caesar Cocktail
It’s the Canada Day long weekend! Everyone is excited to get out of town and head to cottages or anywhere not in the city. Especially because here in Toronto, we are amid a huge heat. A classic Canadian brunch drink (aka hangover cure) is a Caesar cocktail. Similar to a bloody mary but with clamato juice, which is a tomato juice that contains clam juice. (Ew). There is a certain briny tang that the clam juice provides, but my favourite part of a Caesar drink is that it comes with hearty garnishes. A celery stick is traditional but many restaurants will up the ante with olives, pickles, pickled beans, or other fun garnishes. It’s a cocktail with a snack, what’s not to love!?

So I naturally had to veganize this drink in preparation for Canada day brunch (aka my predicted hangover). I made a recipe similar to this a long time ago but it was before I was really all about the fuss-free vegan lifestyle. The recipe involved steeping seaweed to get the brininess, a ton of ingredients, and way too much time. A lengthy process is not something I want when trying to cure a hangover, so I thought it was due time to rehash this recipe for Canada Day and make it super easy peasy, and super tasty wastey. (Tee hee)!

This time to get the brininess I came up with such a simple hack- use olive brine! (The liquid in a jar of olives). Not only is this an ingredient you will likely have hanging around, but it requires no work at all. Just stir that in with a nice store-bought vegetable juice cocktail which already comes with a ton of yummy flavours, far superior to just plain tomato juice, then a dash of hot sauce (or several if you are me), and of course, vodka, and I present you with a mighty fine vegan caesar cocktail!

To prepare a Vegan Caesar Cocktail: make the celery salt rim on the glass by running the lime wedge around the lip of a glass to wet the rim.

Sprinkle the celery salt on a small plate then flip the glass upside down and dip into the celery salt, turning to coat the rim as needed.
Fill the glass with ice, squeeze and drop in the lime wedge you used to rim the glass, then follow with the vegetable juice cocktail, vodka, olive brine, and hot sauce. Give it a stir and garnish with a grind of black pepper, a celery stick, and any bonus garnishes you like.

Vegan Caesar Cocktail

The Canadian classic drink veganized. The secret ingredient is olive brine (the liquid in a jar of olives) which adds a brininess to the cocktail which is irresistibly delicious. So quick and easy to whip up, it’s the ultimate hangover cure. Perfect for Canada day!
1 lime wedge
1 tablespoon celery salt ((or as needed))
2 handfuls ice cubes
6 oz vegetable juice cocktail (3/4 cup), ((I used V8 juice))
1 oz vodka
1 teaspoon olive brine ((the liquid in a jar of olives))
several dashes hot sauce ((I used Tabasco))
fresh ground black pepper
1 celery stick
pimento stuffed olives, spicy pickled bean, gherkin pickle, or other fun garnishes ((optional))
Make the celery salt rim on the glass by running the lime wedge around the lip of a glass to wet the rim. Sprinkle the celery salt on a small plate then flip the glass upside down and dip into the celery salt, turning to coat the rim as needed.
Fill the glass with ice, squeeze and drop in the lime wedge you used to rim the glass, then follow with the vegetable juice cocktail, vodka, olive brine, and hot sauce. Give it a stir and garnish with a bit of black pepper, a celery stick, and any bonus garnishes you like.
Bon appetegan!
Sam.


This post Vegan Caesar Cocktail appeared first on It Doesn't Taste Like Chicken


June 24, 2018
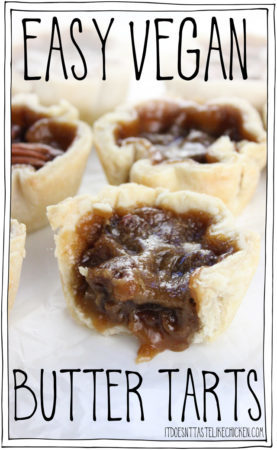
Easy Vegan Butter Tarts
Oh Canada! Our home and native land. True patriot love, in all our butter tart filled hands…
Canada day is coming soon, and to celebrate my country I wanted to make a Canadian classic, butter tarts. If you are new to butter tarts, then you are likely not Canadian as butter tarts make an appearance at pretty much every holiday, every bake sale, and in every bakery in Canada. This recipe has been requested of me for a long time, so it was due time for me to release my Easy Vegan Butter Tarts into the world. And oooeee am I glad I did!

Traditionally butter tarts are made with dairy and eggs, so it took several attempts to veganize them to perfection, but oh did I veganize them, and oh are they perfect! Rave reviews from all who sampled these beauties (non-vegans included).
In my easy vegan butter tarts, the tart shells are filled with raisins (trust me on this, this is traditional), and a mixture of vegan butter, sugar, and cornstarch (which replaces the eggs). Once baked the mixture turns into a gorgeous sweet caramel, sticky, drippy, amazing goo, and the raisins melt right into that sweet goodness.

For my vegan butter tarts, I give you the option of having a runnier or thicker filling as many have a preference one way or the other, and you can optionally top the tarts with pecans or walnuts if you desire.
Not a raisin fan? Even though raisins are traditional in butter tarts, (and in my opinion are WAY better than they sound), there are some who prefer raisin-free tarts. You can replace the raisins with 1/2 cup chopped walnuts or pecans.

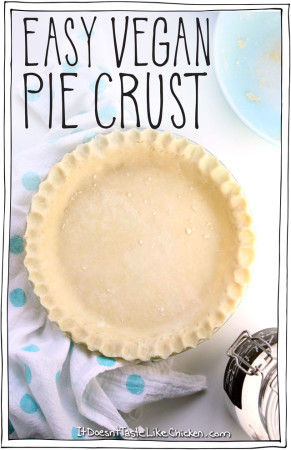
To make Easy Vegan Butter Tarts: You can either simply use store-bought vegan tart shells (some brands are accidentally vegan so check the ingredients. Or you can may my Easy Vegan Pie Crust and make your own tart shells from scratch.
If using homemade pastry, roll out the pastry nice and thin and cut 8 circles about 5 1/2″ diameter, re-rolling the pastry scraps if needed. I had a latte mug that was the perfect size so I used that to cut my pastry. Fit the pastry circles into 8 wells a muffin pan, wobbly edges are totally ok and are authentic for butter tarts.
Add 1 tablespoon of raisins to the bottom of each tart shell.

In a medium bowl, beat together the brown sugar, vegan butter, non-dairy milk, cornstarch and vanilla until smooth and creamy. For a slightly runnier filling use 2 tablespoons of cornstarch and for a thicker filling use 2 1/2 tablespoons of cornstarch.

Divide the butter-sugar mixture among each tart shell covering the raisins, about 1 1/2 tablespoons of liquid per tart. The tarts will be about 2/3rd full which is perfect. Optionally, you can top the tarts with pecans or walnuts. I did half with pecans and half without.

Bake for about 23 minutes, the filling will be bubbly and foamy. Remove from oven and let cool completely before serving. You may need to run a knife around the edges of the tarts to help release them from the pan.

Easy Vegan Butter Tarts
The Canadian classic dessert made vegan. Tastes just like the traditional recipe but its egg and dairy free! Perfect for Canada day or any holiday treat.
1 recipe Easy Vegan Pie Crust ((or 8 store-bought vegan tart shells)g)
1/2 cup raisins
3/4 cup brown sugar
1/4 cup vegan butter
3 tablespoons non-dairy milk ((such as soy or almond))
2 – 2 1/2 tablespoons cornstarch (*see instructions)
1/2 teaspoon vanilla extract
1/3 cup pecans or walnuts, (whole or chopped (optional))
Preheat oven to 325 degrees F (170 degrees C).
If using homemade pastry, roll out the pastry nice and thin and cut 8 circles about 5 1/2″ diameter, re-rolling the pastry scraps if needed. I had a latte mug that was the perfect size so I used that to cut my pastry. Fit the pastry circles into 8 wells a muffin pan, wobbly edges are totally ok and are authentic for butter tarts.
Add 1 tablespoon of raisins to the bottom of each tart shell.
In a medium bowl, beat together the brown sugar, vegan butter, non-dairy milk, cornstarch and vanilla until smooth and creamy. *For a slightly runnier filling use 2 tablespoons of cornstarch and for a thicker filling use 2 1/2 tablespoons of cornstarch. Divide the butter-sugar mixture among each tart shell covering the raisins, about 1 1/2 tablespoons of liquid per tart. The tarts will be about 2/3rd full which is perfect. Optionally, you can top the tarts with pecans or walnuts. I did half with pecans and half without.
Bake for about 23 minutes, the filling will be bubbly and foamy. Remove from oven and let cool completely before serving. You may need to run a knife around the edges of the tarts to help release them from the pan.
Not a raisin fan? Even though raisins are traditional in butter tarts, (and in my opinion are WAY better than they sound), there are some who prefer raisin-free tarts. You can replace the raisins with 1/2 cup chopped walnuts or pecans.
Bon appetegan!
Sam.
This post Easy Vegan Butter Tarts appeared first on It Doesn't Taste Like Chicken
June 17, 2018
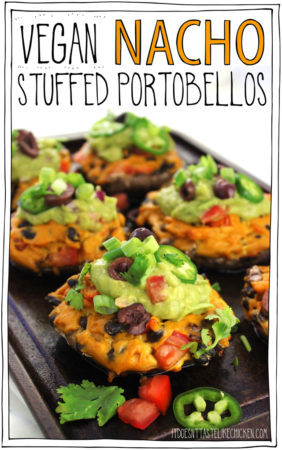
Vegan Nacho Stuffed Portobellos
Vegan Nacho Stuffed Portobellos. Boom. Annnnddd I’m done writing this post. Nuff said.

Ok, ok, I’ll write more about vegan nacho stuffed portobellos, but I think we both already know that this sounds like a very, very good idea.
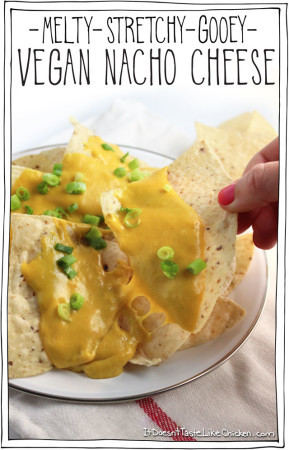
Portobello mushroom caps are stuffed full of my melty stretchy gooey vegan nacho cheese, black beans, fresh tomato, and chopped sun-dried tomatoes, which I love as they add a little salty chewy bite.
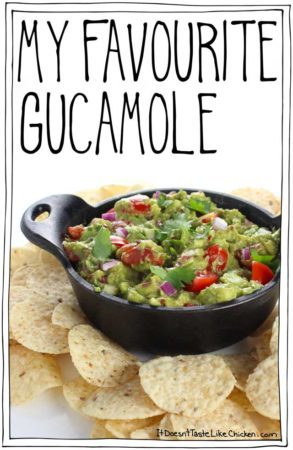
Then the mushrooms can be baked or grilled. Your choice, both ways turn out great! And because we need to take this to the next level, (we always need to take things to the next level) top each stuffed mushroom with a big ol’ dollop of guacamole, along with classic nacho toppings, black olives, cilantro, green onions, and jalapenos for a little kick.

Yes, yes, yes, this is a very good idea. It’s a fiesta in your mouth.
These portobellos make a beautiful main. Serve along with some Mexican rice, corn on the cob, maybe a green salad, and even some tortilla chips to scoop up that extra guacamole. Omnomnom!

To make Vegan Nacho Stuffed Portobellos:
Prepare the nacho cheese according to directions. You can either use my recipe for Melty Stretchy Gooey Vegan Nacho Cheese here on the blog or you can use my recipe for Nacho Cheese Love (page 291) in Fuss-Free Vegan cookbook. Both are fantastic and vary just slightly in ingredients and flavour.

Once the cheese is cooked, add the black beans, tomato, and sun-dried tomatoes into the pot with the cheese and stir to combine.

Divide the nacho bean mixture evenly among the portobello mushrooms caps, filling each mushroom.
You can either bake or grill the portobellos.
To bake the portobellos: preheat your oven to 375F (190C). Bake the portobellos cheese side up on a large baking tray until the mushrooms are tender and begin to release juices, about 15 minutes.
To grill the portobellos: heat the grill and when hot, add the portobellos with the cheese side up. Slowly grill until the portobello is cooked all the way through, about 10 minutes.
Once cooked, finish the mushrooms by topping them with a big scoopful of guacamole each, then garnishing with black olives, cilantro, green onions, and jalapeno. Serve hot with sides of choice. Some nice side dishes to pair are rice, corn on the cob, a green salad, or some tortilla chips!

Vegan Nacho Stuffed Portobellos
Portobello mushrooms are stuffed with a homemade vegan nacho cheese filled with black beans and tomato. Bake or grill the mushrooms then top with guacamole for a fiesta in your mouth! Makes a great main when paired with Mexican rice and corn on the cob.
1 recipe Melty Stretchy Gooey Vegan Nacho Cheese (or Nacho Cheese Love (page 201) in Fuss-Free Vegan)
1 cup cooked black beans, (drained and rinsed well)
1 small tomato, (chopped)
3 tablespoons sun-dried tomatoes, (chopped )
6 portobello mushrooms, (stems removed)
1 cup My Favourite Guacamole ((or other guacamole))
1/4 cup black olive slices
1 handful cilantro, (roughly chopped)
2 green onions, (chopped)
1 jalapeno, (thinly sliced (optional))
Prepare the nacho cheese according to directions. Once cooked, add the black beans, tomato, and sun-dried tomatoes into the pot with the cheese and stir to combine. Divide the nacho bean mixture evenly amoung the portobello mushrooms caps, filling each mushroom.
You can either bake or grill the portobellos.
To bake the portobellos: preheat your oven to 375F (190C). Bake the portobellos cheese side up on a large baking tray until the mushrooms are tender and begin to release juices, about 15 minutes.
To grill the portobellos: heat the grill and when hot, add the portobellos with the cheese side up. Slowly grill until the portobello is cooked all the way through, about 10 minutes.
Once cooked, finish the mushrooms by topping them with a big scoopful of guacamole each, then garnishing with black olives, cilantro, green onions, and jalapeno. Serve hot with sides of choice. Some nice side dishes to pair are rice, corn on the cob, a green salad, or some tortilla chips!
Bon appetegan!
Sam.
This post Vegan Nacho Stuffed Portobellos appeared first on It Doesn't Taste Like Chicken
June 10, 2018
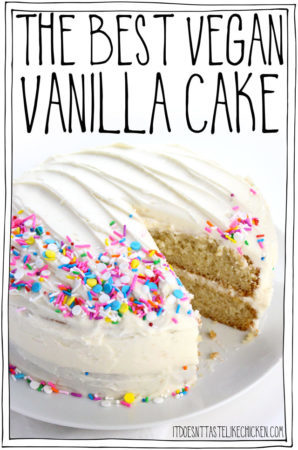
Vegan Funfetti Cake
5 years ago today, I started this blog called It Doesn’t Taste Like Chicken with my very first (embarrassingly bad) post Simply the Best Tomato Sauce. (Apparently, I was overconfident from day 1)! 
Way back then I had no idea that starting this blog would lead me to a complete career change leaving my job as art director to becoming a self-employed full-time blogger. Winning a competition and getting to film a cooking show with Food Network’s celebrity Chef Michael Smith. Writing my first cookbook Fuss-Free Vegan which now has over 150 5-star reviews on Amazon! And appearing on TV, radio, in magazines, on podcasts, and doing public speaking.
It all happened very slowly and gradually, with a lot of very hard work, but when reflecting on the years, it seems like a whirlwind of delicious vegan recipes, 1 million dishwasher loads, over 15,000 comments, almost 500 recipes (with several thousand failed recipe attempts), and a smile every morning as I open my computer to start the day. So, I’m celebrating today, my blogs birthday with a Vegan Funfetti Cake!

Not only is it my blogs birthday but it also happens to be pride month, which makes this rainbow coloured cake even more celebratory! Celebrating the love of everyone.
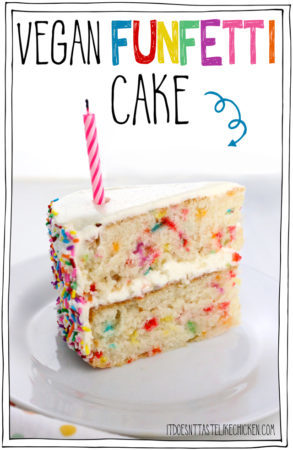
Now to cake. Vegan Funfetti Cake (also sometimes called vegan confetti cake), is a vanilla cake filled with sprinkles because… CUTE! When first writing this recipe I tried to use my Vegan Vanilla Cake recipe and just stir in sprinkles. This didn’t work too well. The cake was too fluffy and fell apart, and the sprinkles bled into a mess. So I did a lot of experimenting making this vanilla cake a little more dense to lock in those sprinkles, but still keeping it moist and fluffy by folding aquafaba into the batter.

The vegan funfetti cake comes out perfectly sweet, incredibly moist, hard to resist delicious, and the dots of colour throughout the cake are just to die for adorable fun. Vegan funfetti cake makes for a great birthday party cake or any celebratory occasion. I chose rainbow sprinkles, but you could alternatively choose all one colour of sprinkle, maybe for a gender reveal cake, or any colour combo you like… galaxy cake? The options and fun are endless!

To make Vegan Funfetti Cake: in a large bowl, whisk together the all-purpose flour, white sugar, baking powder, and salt. Now add the non-dairy milk, light oil, and vanilla extract and stir to combine. It will make for a very thick batter, almost like cookie dough.

In another large bowl, use a stand mixer or hand beater to combine the aquafaba and cream of tartar until it forms stiff peaks. This will take about 3 to 6 minutes.

Now fold the aquafaba into the batter. The batter is thick and it will take a bit of time to combine the two, so be patient. When the batter is combined you can lastly add the sprinkles. Depending on the kind of sprinkles you have they may bleed, so working quickly, scatter the sprinkles over the surface of the batter and then quickly give it 2 to 4 stirs to combine. It’s ok if the sprinkles aren’t mixed in perfectly, they will do their thing in the oven, it’s more important that they don’t bleed.
A note on sprinkles. Not all sprinkles are vegan. They can sometimes include the ingredients confectioner’s glaze or shellac, neither of which are vegan as they both come from insects. I found sprinkles at a bulk food store that were accidentally vegan, but you can also order vegan sprinkles online on Amazon, on Etsy, from Sweetapolita, or from Fancy Sprinkles, to name a few place.

Divide the batter evenly among the two pans. Bake for 35 to 42 minutes until a toothpick inserted in the center comes out clean. Let cool completely before frosting.

To make vegan vanilla frosting: In a large bowl, use a stand mixer or hand beater to mix together the vegan butter, vegetable shortening, powdered sugar, and vanilla extract until fluffy. Add 1 – 4 tablespoons of non-dairy milk as needed to reach desired frosting consistency.
Decorate cakes as desired. I covered the sides of my cake with sprinkles. I did this by placing the cake on a large baking tray (to catch any loose sprinkles), then grabbing handfuls of sprinkles, I lightly pressed them into the frosting on the sides of the cake working my way around and filling in any gaps until it was all covered.

Vegan Funfetti Cake
Also called vegan confetti cake, is a delicious vanilla cake with sprinkles stirred into the batter to make spots of bright color throughout. Perfect for a vegan birthday cake! Deliciously moist and sweet, this rainbow cake is perfect for a birthday party.
Vegan Funfetti Cake Bowl 1:
3 cups all-purpose flour
1 1/2 cups white sugar
1 tablespoon baking powder
1 teaspoon salt
1 1/4 cup non-dairy milk ((such as soy or almond))
2/3 cup light oil ((such as canola or vegetable))
1 tablespoon vanilla extract
Vegan Funfetti Cake Bowl 2:
3/4 cup aquafaba ((the liquid from a can of chickpeas))
1/2 teaspoon cream of tartar
1/3 cup vegan sprinkles ((plus more for decoration))
For the Vegan Vanilla Frosting:
1/2 cup vegan butter
1/2 cup vegetable shortening
3 cups powdered sugar
1 teaspoon vanilla extract
1 – 4 tablespoons non-dairy milk ((such as soy or almond))
To make the vegan funfetti cakes:
Preheat oven to 350F (180C). Lightly grease two 8″ baking pans and line the bottoms of the pans with a circle of parchment paper.
In a large bowl, whisk together the all-purpose flour, white sugar, baking powder, and salt. Now add the non-dairy milk, light oil, and vanilla extract and stir to combine. It will make for a very thick batter, almost like cookie dough.
In another large bowl, use a stand mixer or hand beater to combine the aquafaba and cream of tartar until it forms stiff peaks. This will take about 3 to 6 minutes.
Now fold the aquafaba into the batter. The batter is thick and it will take a bit of time to combine the two, so be patient. When the batter is combined you can lastly add the sprinkles. Depending on the kind of sprinkles you have they may bleed, so working quickly, scatter the sprinkles over the surface of the batter and then quickly give it 2 to 4 stirs to combine. It’s ok if the sprinkles aren’t mixed in perfectly, they will do their thing in the oven, it’s more important that they don’t bleed.
Divide the batter evenly among the two pans. Bake for 35 to 42 minutes until a toothpick inserted in the center comes out clean. Let cool completely before frosting.
To make the vegan vanilla frosting:
In a large bowl, use a stand mixer or hand beater to mix together the vegan butter, vegetable shortening, powdered sugar, and vanilla extract until fluffy. Add 1 – 4 tablespoons of non-dairy milk as needed to reach desired frosting consistency.
Bon appetegan!
Sam.


This post Vegan Funfetti Cake appeared first on It Doesn't Taste Like Chicken
June 3, 2018
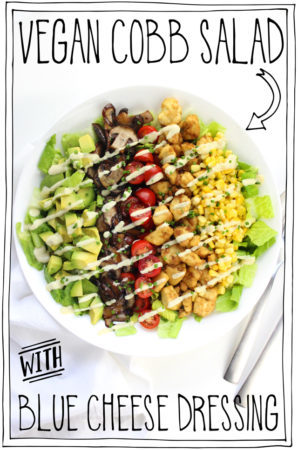
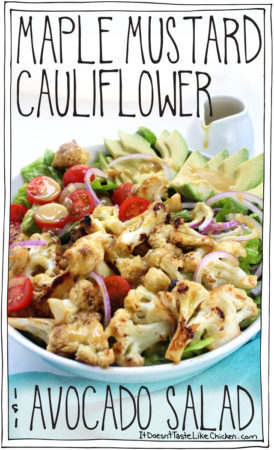
Vegan Cobb Salad with Blue Cheese Dressing
Magical things happened in my kitchen today. MAGICAL! I know you may be thinking: “Sam, it’s a salad… a good looking salad, sure, but it’s just a salad. That’s not magical”. To which I respond “but you haven’t tasted it yet, only then will you know it’s magic powers”. ~Waves wand, twinkly sounds~ a Vegan Cobb Salad with Blue Cheese Dressing appears…

There is magic in this salad. The first touch of magic is with the marinated and baked mushrooms bacon. Chewy, gorgeous mushrooms that burst with salty and smoky deliciousness.
Then more wizardy takes effect with baked tofu chunks. I made this addition on a total whim and let me tell you, these tofu chunks are the most chicken-like tofu I’ve ever made. I’m going to have to introduce these babies all on their own in another recipe, because, YUM. Tender, lightly seasoned, and 100% yum.

Put it all together to make a salad and what do you got? Flavour bursting mushroom bacon, tender baked tofu, creamy avocado, juicy cherry tomatoes, sweet pops of corn on a bed of crispy romaine topped with a vegan blue cheese dressing. ← Now THAT is magic.

To make Vegan Cobb Salad with Blue Cheese Dressing: in a medium bowl, mix together the nutritional yeast, olive oil, soy sauce and garlic powder. Break the block of tofu into small chunks and add them to the bowl. Toss well to evenly coat.

Spread the tofu evenly across one of the baking sheets and bake about 30 minutes, stirring every now and then until lightly golden.

Now for the mushrooms, in another medium bowl, mix together the olive oil, soy sauce, maple syrup, and liquid smoke. Add the sliced mushrooms to the bowl and gently toss to evenly combine.

Spread the mushrooms slices in a single layer over the remaining baking sheet, and pour over any leftover marinade. Add to the oven along with the tofu and bake for about 20 minutes until dark golden and reduced in size.
Assemble the salad: on a large platter, evenly spread the romaine lettuce. Top with the smoky mushroom bacon, tender baked tofu, cherry tomatoes, corn kernels, and avocado. I like to display each ingredient separately in a row for a rainbow effect but feel free to display your veggies however you like. Add the vegan blue cheese dressing to taste and garnish with chives.

Vegan Cobb Salad with Blue Cheese Dressing
Flavour bursting mushroom bacon, tender baked tofu, creamy avocado, juicy cherry tomatoes, sweet pops of corn on a bed of crispy romaine topped with a vegan blue cheese dressing. ← Now THAT is magic.
For the tender baked tofu:
2 tablespoons nutritional yeast
1 tablespoon olive oil
1 tablespoon soy sauce
1/2 teaspoon garlic powder
1 350g block extra-firm tofu, (torn into pieces)
For the smoky mushroom bacon:
2 tablespoons olive oil
2 tablespoons soy sauce
1 tabelspoon maple syrup or agave
1/2 teaspoon liquid smoke
8 oz button mushrooms, (sliced)
For the vegan cobb salad:
8 cups romaine or ice berg lettuce, (chopped)
1 1/2 cups grape or cherry tomatoes (225g), (halved)
1 cup corn kernels, ((thawed if frozen))
1 avocado, (chopped)
1 recipe Easy Vegan Blue Cheese Dressing
2 tablespoons fresh chives, (chopped (for garnish))
To make the tender baked tofu:
Preheat your oven to 375F (190C). Line 2 large baking sheets with parchment paper.
In a medium bowl, mix together the nutritional yeast, olive oil, soy sauce and garlic powder. Break the block of tofu into small chunks and add them to the bowl. Toss well to evenly coat.
Spread the tofu evenly across one of the baking sheets and bake about 30 minutes, stirring every now and then until lightly golden.
To make the smoky mushroom bacon:
In a medium bowl, mix together the olive oil, soy sauce, maple syrup, and liquid smoke. Add the sliced mushrooms to the bowl and gently toss to evenly combine.
Spread the mushrooms slices in a single layer over the remaining baking sheet, and pour over any leftover marinade. Add to the oven along with the tofu and bake for about 20 minutes until dark golden and reduced in size.
To assemble the vegan cobb salad:
On a large platter, evenly spread the romaine lettuce. Top with the smoky mushroom bacon, tender baked tofu, cherry tomatoes, corn kernels, and avocado. I like to display each ingredient separately in a row for a rainbow effect but feel free to display your veggies however you like. Add the vegan blue cheese dressing to taste and garnish with chives.
The mushrooms and tofu are great served both hot or cold.
Calories do not include the dressing.
Bon appetegan!
Sam.
This post Vegan Cobb Salad with Blue Cheese Dressing appeared first on It Doesn't Taste Like Chicken
May 27, 2018
Fuss-Free Vegan cookbook GIVEAWAY!!!!
I’m completely blown away! My cookbook Fuss-Free Vegan has been ordered for a THIRD printing and it’s only been 7 months since it’s release.

When writing my book, I knew there was no way my cookbook would be an instant bestseller or anything like that. I just don’t have a mega following like some other vegan influencers out there. But I also knew that there was something missing from the world of vegan cookbooks, and that was a book full of easy to make, familiar, non-scary vegan recipes that used easy-to-find ingredients.

I knew this because I think I own almost every vegan cookbook out there, and call me lazy, but the recipes I found required expensive health food store ingredients. I didn’t want to have to make an extra trip to a special store just to get a weird flour I will likely never use again, and to make a dish that I’m not even really excited about. Or to make a dish that did seem familiar but was overly complicated. Why can’t vegan cooking be easy?

So setting out to write this cookbook, I knew it wasn’t going to be an instant success, but I thought that if I wrote the best damn cookbook I could- testing recipes over and over again to make them as easy and fool-proof as possible, using only ingredients I could find at my local grocery store, and creating vegan versions of all of my favourite dishes- that I would at least end up with a book I knew I would want in my kitchen. And maybe if I wanted that cookbook, other people would want it to.

Well, it turns out, that’s just what happened. Fuss-Free Vegan wasn’t an instant bestseller as predicted, but I think it’s in it for the long run. 3rd printing and now there are well over 150, 5-star reviews on amazon.com! People are excited about Fuss-Free Vegan, and I couldn’t be happier. I’m seriously blown away, and so thankful.
May 20, 2018
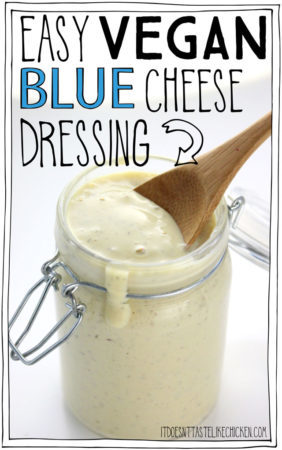
Vegan Blue Cheese Dressing
The other day I was in a HUGE dilemma. I wanted to eat a healthy salad, but I was craving my Vegan Blue Cheese Dip. Ok, ok, so this dilemma is not that huge, but this is what happens when you spend 90% of your time thinking about food. I’m all about indulging those cravings, but when it comes to salad, I do prefer it to keep it on the healthier side of meals (it is salad after all). And although it’s super delicious my vegan blue cheese dip wouldn’t be the healthiest option. So I did what any logical vegan blogger does, I made a new recipe. Easy Vegan Blue Cheese Dressing.

It’s creamy, tangy, healthy, oil-free, only 33 calories for two heaping tablespoons, and of course, super easy to make.
Instead of vegan mayonnaise, I use soft or silken tofu in this recipe. Soft tofu lacks a lot of oomf so I had to bump up the flavours of the dressing to the perfect level of vegan blue cheese dressing tanginess. A little playing around, and success. Ooooeeee is it good! Mission complete.

To make easy vegan blue cheese dressing: add all the ingredients, except the dill and crumbled tofu, to a blender and blend until smooth and creamy. Now you can add the dill and crumbled tofu (if using), and stir or pulse a few times to combine. That’s it! Done! Finito! Easy.
I opted for a smooth dressing texture, but adding in crumbled tofu to the dressing will add a crumbled cheese texture.
The dressing can be stored in an air-tight jar in the fridge for up to one week. Pour over or toss into your favourite salad.

Easy Vegan Blue Cheese Dressing
It’s creamy, tangy, healthy, oil-free, only 33 calories for two heaping tablespoons, and of course, super easy to make.
300 g soft or silken tofu (1 cup)
2 tablespoons nutritional yeast
1 1/2 tablespoon apple cider vinegar
1 tablespoon white miso paste
1/2 teaspoon onion powder
1/4 teaspoon garlic powder
1/4 teaspoon dried dill
1/4 cup medium or firm tofu (, crumbled (optional for texture))
Add the soft tofu, nutritional yeast, apple cider vinegar, white miso paste, onion powder, and garlic powder to a blender and combine until smooth. Add the dill and crumbled tofu if using, and pulse a few times, or stir to combine. Store in an air-tight jar in the fridge for up to one week. It may separate a little when stored, so just give it a stir to recombine before dressing your salad.
Bon appetegan!
Sam.

This post Vegan Blue Cheese Dressing appeared first on It Doesn't Taste Like Chicken
May 13, 2018
Vegan Seitan Steak
It finally happened. I’ve posted my first ever seitan recipe. And it isn’t just any old seitan recipe either, I decided that if I was going to post a seitan recipe, it should be THE seitan recipe. It’s go big or go home time, so I went all the way to the top of the seitan game, straight to a VEGAN SEITAN STEAK.
YES, THAT IS VEGAN!!!!! Caps lock on. So much excitement. Can’t help it. Yes, I made this vegan steak from scratch in my kitchen, and you can too! I know, it’s mind-blowing.

So first, let’s talk about seitan. Unfortunately, in the vegan world, there are a lot of unappetizing named foods. Nutritional yeast, tempeh, quinoa, and then you have seitan. If I could re-brand some vegan foods I totally would, but what can you do?
Seitan (not satan
May 6, 2018
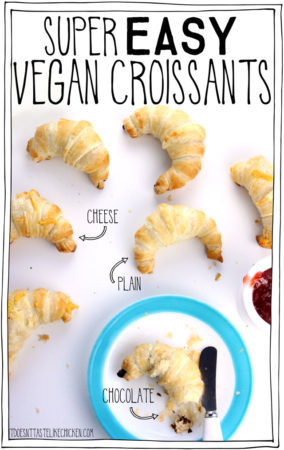
Super Easy Vegan Croissants
I have a deep love of flaky, buttery, croissants. This is a love that hasn’t been satisfied since I went vegan over 5 years ago… until now. I had considered making croissants the traditional labour intensive way but considered it is all I ever did because, seriously, who has that much time. But then it happened, I discovered the ultimate hack. Super Easy Vegan Croissants are not a myth, they are real!
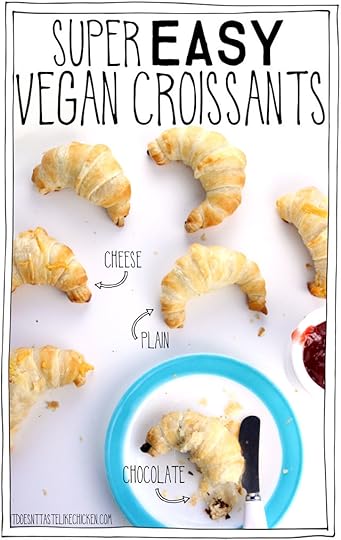
See, there’s photo evidence. ↑↓
What is the magical secret?? PUFF PASTRY! Did you know that a lot (like most) store-bought brands of puff pastry are accidentally vegan? It’s true, just take a gander at the ingredients and you will see. Puff pastry is made with tons of layers designed to become flaky and puffy. See where I’m going with this? This recipe is not even a recipe because it’s literally just like “buy some puff pastry, roll it into croissants”. Yeah, it’s almost TOO easy.

The beauty of this easy hack for vegan croissants is that you can not only easily make plain croissants, but you can also stuff them with all sorts of delicious things. I stuffed some of mine with vegan cheddar cheese, and others with chocolate. You could also try vegan nutella or any other scrumptious ideas you have. These are so easy to make you can make them on a lazy Sunday and serve warm from the oven for the ultimate weekend brunch.

To make Super Easy Vegan Croissants: lightly flour a clean work surface. My puff pastry came in two blocks. Taking one block of puff pastry at a time, roll it out to a rectangle about 10″ high x 16″ wide. Using a knife or pizza cutter, cut the puff pastry into 3 tall rectangles, then cut each rectangle diagonally from corner to corner so that you have 6 triangles.

For plain vegan croissants: roll up the triangles tightly from the wide end of the triangle to the point.
For stuffed croissants: put a bit of your filling along the wide end of a triangle. Roll up the triangle tightly around the filling.
Repeat with the remaining block of puff pastry to make 12 croissants total.

Space the croissants out on the parchment paper lined baking tray bending them into a crescent shape. Mix together the non-dairy milk and maple syrup in a small bowl. Liberally brush the tops of all of the croissants with the mixture, and also use it to glue down the points of the croissants. This will help them get golden in the oven. Bake 22 to 27 minutes until lightly golden and browned on the bottom.
Serve warm or cooled with jam if desired. SO YUMMY!

Super Easy Vegan Croissants
Inspired by Gimme Some Oven, Inspired Taste, and .
This recipe hack uses store-bought puff pastry to make the worlds easiest croissants. You can enjoy them plain, stuffed with chocolate, or dairy-free cheese. Serve them warm out of the oven for brunch or breakfast.
For the vegan croissants:
all-purpose flour for rolling
1 397g box frozen puff pastry, (thawed (check to make sure it's vegan))
1 tablespoon non-dairy milk ((such as soy or almond))
1 tablespoon maple syrup or agave
Optional fillings:
vegan chocolate chips
Melty Stretchy Gooey Vegan Nacho Cheese (or store-bought vegan cheese)
vegan nutella
Preheat your oven to 350F (180C). Line a large baking sheet with parchment paper.
Lightly flour a clean work surface. My puff pastry came in two blocks. Taking one block of puff pastry at a time, roll it out to a rectangle about 10″ high x 16″ wide. Using a knife or pizza cutter, cut the puff pastry into 3 tall rectangles, then cut each rectangle diagonally from corner to corner so that you have 6 triangles. For plain vegan croissants: roll up the triangles tightly from the wide end of the triangle to the point. For stuffed croissants: put a bit of your filling along the wide end of a triangle. Roll up the triangle tightly around the filling. Repeat with the remaining block of puff pastry to make 12 croissants total.
Space the croissants out on the parchment paper lined baking tray bending them into a crescent shape. Mix together the non-dairy milk and maple syrup in a small bowl. Liberally brush the tops of all of the croissants with the mixture, and also use it to glue down the points of the croissants. This will help them get golden in the oven. Bake 22 to 27 minutes until lightly golden and browned on the bottom.
Bon appetegan!
Sam.

This post Super Easy Vegan Croissants appeared first on It Doesn't Taste Like Chicken
April 29, 2018
Baked Vegan Corn Dogs
Is it fair season yet!? I don’t know why I get excited by the fair because I actually hate rides (I’m a wuss), and I don’t really like the games (I have terrible hand-eye coordination), but oooh pretty lights and fair food! So today I’m talking the ultimate of fair foods made a little healthier, a lot more vegan, and at home: Baked Vegan Corn Dogs.

I mean come on, how cute are those?? It took me several tries to get the perfect ketchup squiggle, for optimal cuteness.
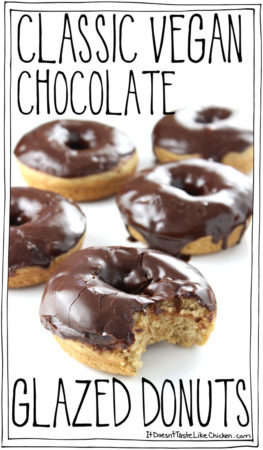
Now don’t get me wrong, if I go out on the town I will definitely order french fries, vegan donuts, fried vegan chicken wings, or other yummy fried things because we all know fried food tastes delicious. But at home for my everyday food, I try to keep it a little on the healthier side, so my recipes for French Fries, Chocolate Glazed Donuts, Crispy Buffalo Cauliflower, and today’s recipe, Baked Vegan Corn Dogs are all baked instead of fried.

Don’t fret! No flavours are sacrificed in any of those recipes and these vegan corn dogs are no exception. The crust is slightly different in texture than it would be if you were to buy this treat at a fair, but the crispy, flaky, lightly sweet, seasoned cornmeal crust is so tasty, it tastes like the best cornbread ever is wrapped around your veggie dog. Serve hot out of the oven with ketchup or mustard and oooeee are you in for a treat!

To make Baked Vegan Corn Dogs: in a large bowl whisk together the flour, cornmeal, baking powder, salt, mustard powder, and garlic powder.
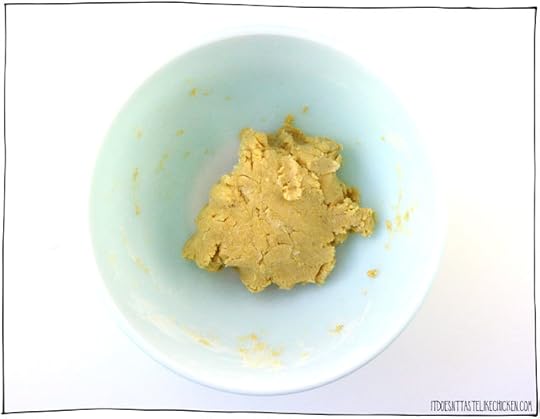
Add the softened vegan butter, non-dairy milk, and maple syrup and mix together until it forms a soft dough.
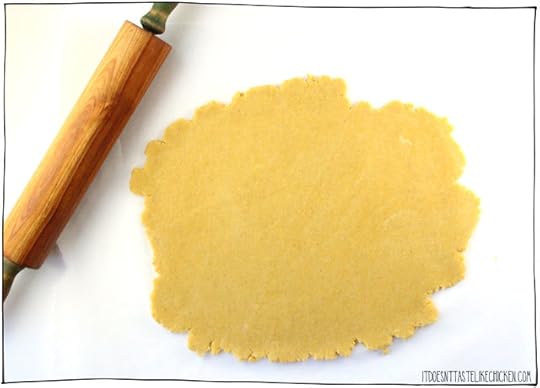
Place the corn dog dough between two large sheets of parchment paper and roll out the dough until it’s about 1/4″ thick. The dough is sticky so using parchment paper will make it easy to roll out and peel up.

Use a knife or pizza cutter to divide the dough into 6 sections that are each large enough to cover a veggie dog. Skewer the veggie dogs then wrap them in the dough. Pinch the back seam of the dough together along the veggie dog and at the top. Cut off any excess dough. Once sealed you can lightly roll the corn dog on the parchment paper to smooth it out for the best look.
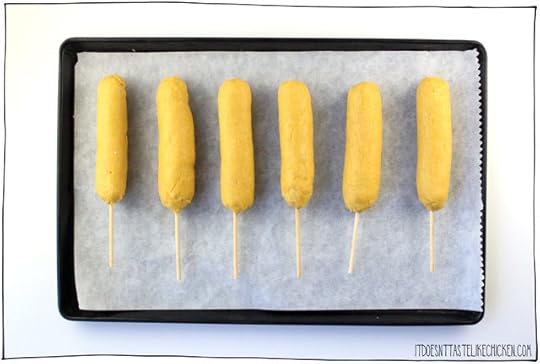
Bake 15 to 20 minutes until the bottoms are nicely browned. Serve with ketchup or mustard.

Baked Vegan Corn Dogs

Recipe lightly adapted from The Bakermama and P & G Every Day‘s recipes for baked corn dogs.
A healthier version of this awesome fair food made at home. Crispy, flaky, lightly sweet, seasoned cornmeal crust is so tasty, it tastes like the best cornbread ever is wrapped around your veggie dog. Serve hot out of the oven with ketchup or mustard and oooeee are you in for a treat!
1 cup all-purpose flour
1 cup cornmeal
1 teaspoon baking powder
1/2 teaspoon salt
1/2 teaspoon mustard powder
1/2 teaspoon garlic powder
6 tablespoons vegan butter, (softened (but not melted))
1/4 cup non-dairy milk ((such as soy or almond))
3 tablespoons maple syrup or agave
6 vegan veggie dogs ((I used Yves))
6 wooden sticks or skewers
mustard and ketchup for dipping
Preheat oven to 400F (200C). Line a baking sheet with parchment paper. If you are using wooden skewers soak them in water for 10 – 20 minutes so they don’t burn.
In a large bowl whisk together the flour, cornmeal, baking powder, salt, mustard powder, and garlic powder. Add the softened vegan butter, non-dairy milk, and maple syrup and mix together until it forms a soft dough.
Place the corn dog dough between two large sheets of parchment paper and roll out the dough until it’s about 1/4″ thick. The dough is sticky so using parchment paper will make it easy to roll out and peel up. Use a knife or pizza cutter to divide the dough into 6 sections that are each large enough to cover a veggie dog.
Skewer the veggie dogs then wrap them in the dough. Pinch the back seam of the dough together along the veggie dog and at the top. Cut off any excess dough. Once sealed you can lightly roll the corn dog on the parchment paper to smooth it out for the best look. Bake 15 to 20 minutes until the bottoms are nicely browned. Serve with ketchup or mustard.
Bon appetegan!
Sam.
This post Baked Vegan Corn Dogs appeared first on It Doesn't Taste Like Chicken
Sam Turnbull's Blog

- Sam Turnbull's profile
- 35 followers

