
Sam Turnbull's Blog, page 56
March 22, 2017
Sesame Bok Choy & Carrot Salad
Bok choy is one of my all time favourite greens. I often cook a big pile with just a little garlic, ginger, and a splash of soy sauce. So simple, so scrumptious. But when I was chopping some bok choy up the other day, I started munching on it raw, and holy smokes, it was super delicious raw too! Especially the bottom portion of the bok choy which is crisp, juicy, and sweet. Sesame Bok Choy & Carrot salad here I come!

So we’ve got the sweet and crispy bok choy, now add carrot ribbons. What is this madness you ask? They look all sorts of fancy but are just made by using a potato peeler on a carrot (clever, I know). Then dress that veggie goodness with a simple Asian-inspired dressing. So tasty!
Fun fact: This salad gets better if it sits for a bit which makes it a great salad for potlucks because it doesn’t get soggy thanks to sturdy bok choy and carrots.

So I let mine hang out in the dressing for 20 to 30 minutes, giving it a toss every now and then. I used this time to heat up some veggie dumplings, and prepare the rest of my meal. Then when ready to serve, just sprinkle on all of those toppings: green onions, toasted almond slices, and sesame seeds. Boom! Healthy, addictive, salad.

To make Sesame Bok Choy & Carrot Salad: Add all of the dressing ingredients to a small bowl and mix to combine.

Cut off the very base of the bok choy and discard it. Then just slice it up. On second thought I should have sliced my bok choy a little smaller because some of these pieces were too big, so don’t do like Sam did here. Slice it a bit smaller.

Add the bok choy to a large bowl with the carrot ribbons. Pretty.
Pour over the dressing and toss well to combine. You can serve it right away, but the flavours get even better if you let it sit for 20 to 30 minutes, tossing every now and then. When ready to serve, garnish with the toasted almond slices, green onions, and sesame seeds. I served mine alongside some veggie dumplings and vegan black bean buns. Omnomnom.

5.0 from 1 reviews Print Sesame Bok Choy & Carrot Salad Author: Sam Turnbull • It Doesn't Taste Like Chicken Prep time: 30 mins Total time: 30 mins Serves: 4 Ingredients For the dressing: 2 Tablespoons Rice Vinegar 1 Tablespoon Soy Sauce 1 Tablespoon Water 2 Teaspoons Agave 1 Clove Garlic, finely minced ½" Piece of Ginger, finely minced ½ Teaspoon Sesame Oil
For the salad: 6 Heads of Bok Choy (about 680g), sliced 2 Carrots, ribboned using a potato peeler ¼ Cup Toasted Almond Slices 6 Green Onions, chopped 1 Tablespoon Sesame Seeds Instructions To make the dressing, mix all of the dressing ingredients together in a small bowl. To assemble the salad, add the bok choy and carrots to a large bowl. Pour over the dressing and toss well to combine. You can serve it right away, but the flavours get even better if you let it sit for 20 to 30 minutes, tossing every now and then. When ready to serve, garnish with the toasted almond slices, green onions, and sesame seeds. 3.5.3226 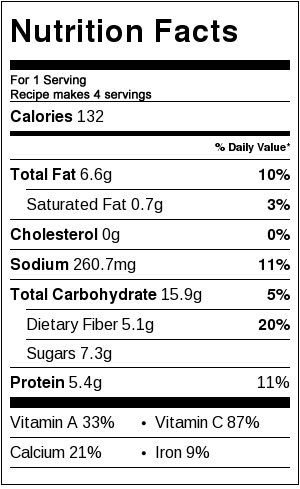
Bon Appetegan!
Sam.
If you liked this recipe you might also like:


This post Sesame Bok Choy & Carrot Salad appeared first on it doesn't taste like chicken


March 19, 2017
The Rawesome Vegan Cookbook Review & Giveaway
I met Emily von Euw from This Rawesome Vegan Life at King’s Cafe, a vegetarian Chinese restaurant in Toronto. She was having a little dinner meet-up with some of her fans. In all truth, I had no idea who she was when I arrived. Not classy, Sam. Lisa from The Viet Vegan had invited me to attend, and when I heard the words “vegan” and “food” I didn’t need to ask more, I was in.
Emily came in with her buzzed haircut and unbelievable perfect glowing skin (serious skin envy going on here). I was just a wee blogger at the time but was absolutely determined to make my blog work as a full-time career, so meeting someone like Emily, who already had a successful blog AND multiple cookbooks, I was taking in every bit of wisdom she had… and Chinese barbeque buns… I was taking in every bit of those delicious things as well.

Fast forward a year and a half (my oh my a lot has happened!), we are now internet buds and she was kind enough to send me all three of her cookbooks to review, woot!
The Rawesome Vegan Cookbook
Rawesome Vegan Baking
100 Best Juices, Smoothies and Healthy Snacks
I decided to test three recipes from The Rawesome Vegan Cookbook for this review, but I can assure you those smoothie & dessert books look insanely good as well.
WHAT I LIKED
This book is divided into two sections “raw” and “cooked”. Since I was reviewing this book in March, I was happy there were warm recipe options!
This book reminded me to eat more veggies. Yes, as a vegan I do eat a ton of veggies, but sometimes I get into routines of pasta and rice. This was a reminder that I should be eating a big bowl of fresh veggies and greens every day.
The recipes were fairly simple. Many of the dishes appeared complicated, but when I actually went to preparing them, I don’t think I was ever in the kitchen for more than 20 minutes!
WHAT YOU SHOULD KNOW
While a lot of the recipes use pretty generic ingredients, other recipes called for harder to find healthy food store or farmers market types of ingredients, such as candy cane beets, hulled hemp seeds, kelp granules, kohlrabi, radish sprouts, romanesco broccoli, morel mushrooms, and young coconut meat.
These recipes are sprouty-kale type recipes. And by that I mean they are not likely going to woo a meat eater to stop eating chicken wings. If someone is looking for a dish full of health on the other hand, this would be perfect.
Emily tells us not to worry about following the recipes exactly, and I think that’s the perfect approach for this book. A lot of her sauce recipes would go great with any kind of veggies!
On to the recipe testing!
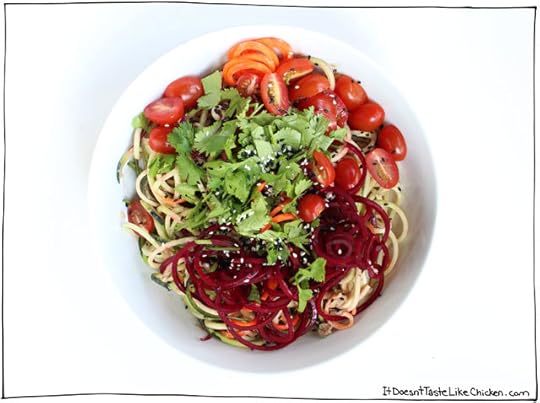
The first recipe I tried, was my favourite, The Spicy Noodle Bowl. It had me at “pad thai inspired”. The tamarind sauce was to die for delicious. I borrowed my roommate’s
I borrowed my roommate’s spiralizer to make zucchini, carrot, and beet noodles and tossed them with the sauce… YUM! So healthy and incredibly good that I had the exact same thing for dinner the very next night. The only trouble I had was that the tamarind paste I had was really really tough, so the sauce ended up a bit chunky. I think I would double or triple the sauce recipe next time, so it would fill my blender better to blend smoother, and that way I would have lots of leftover sauce to pour over
The only trouble I had was that the tamarind paste I had on hand was really really tough, so the sauce ended up a bit chunky. I think I would double or triple the sauce recipe next time, so it would fill my blender better to blend smoother, and that way I would have lots of leftover sauce to pour over everything. Omnomnom.

The second recipe I had was the Soba Noodles with Avocado Carrot Ribbons, Shredded Spinach + Maple Miso Glaze. I’m guessing that from that title, you can tell exactly what it tasted like. This was a nice and simple dish, that you could easily swap out almost any veggies and pair them with this sauce and soba noodles.
I had a disaster with the soba noodles, but that was all my own fault. I didn’t realize the noodles were tied up in bundles inside the box, so when I dumped the whole contents of the box into the boiling water, I immediately had to fish them out, untie them and put them back in the water. Not smooth, Sam. It was too late. Clump-o-soba-noodle it became. At least the miso maple glaze was delicious enough to make up for my noodle clumps!
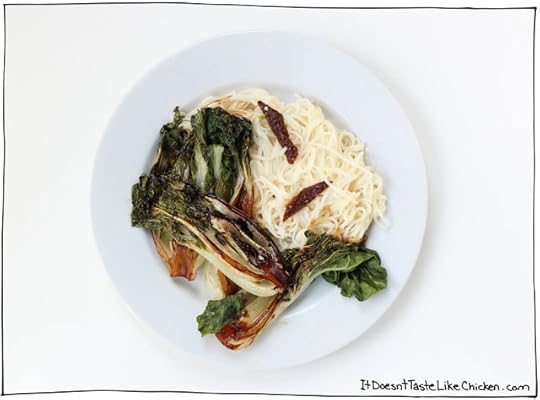
The last dish I tried was Sweet + Sour Bok Choy. First off, let me say that Emily’s picture in the book is light years better than this not appetising photo… It was late, I was starving, and I had just gotten home from the gym, so forgive my ugly photo! It does not do this dish justice in any way.
The miso noodles were good, but the bok choy, that’s where this dish shone. The bok choy gets caramelized in a simple sauce that makes them sweet, tangy, and salty all at the same time. OMGSOGOOD.
MY OPINION
While The Rawsome Vegan Cookbook isn’t generally the kind of food I prepare (I’m more of a Tofu Bolognese type girl), it was a lovely, and refreshing break to cleanse my system a little and eat more raw veggies. (Especially after my trip to Jamaica where too many cocktails, was totally a daily thing). I fell in deep love with the Spicy Noodle Bowl recipe and know that this (and loose variations) will become part of my regular rotation. If you’re looking for some ideas to cram in more fresh veggies in your system, this would be a great book for you!
THE GIVEAWAY
Enter the giveaway below! There will be three winners, and those winners can choose which one of Emily’s books they would like! US and Canadian entries only.
This post The Rawesome Vegan Cookbook Review & Giveaway appeared first on it doesn't taste like chicken
March 15, 2017
Vegan Irish Stew
All morning I have been talking to my pooch, Chickpea in an Irish accent… and I’ve learned that I’m atrociously bad at speaking in an Irish accent. Note to self: never attempt Irish accent in the company of anyone, ever. Period.
Good thing #1: this is a written post, so you don’t have to listen to any of that.
More good things: Good things are happening in my kitchen today, so many GOOD THINGS! This Vegan Irish Stew is just so many good things. So dang hearty, it’s a stick to your ribs kinda stew. I’m pretty much obsessed with the mixture of chunky vegetables in the rich stout based broth. EEeeerrrrrrrrk! (Record scratch). I’m sorry, did I say stout, as in beer? Yes, yes I did.
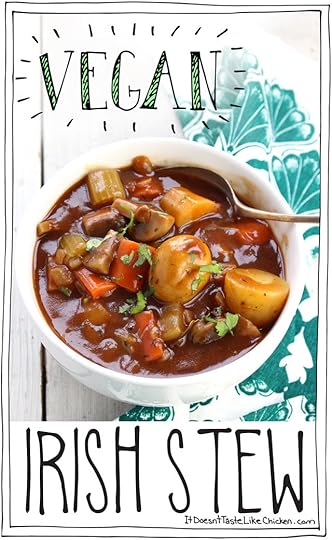
Irish stew is traditionally a lamb stew made with Guinness stout beer. Obviously, lamb isn’t vegan, and Guinness isn’t vegan… yet. Believe it or not, the people at Guinness announced they are changing their 250+ year recipe to make it vegan! Is that a sign of the times or what!? (Although, if you live in Australia, it’s already vegan down there).
Back to broth. The stout beer in this recipe gives the broth the rich, thick, and deep earthy tones. The alcohol gets cooked out, and the end result doesn’t really taste like beer anymore (this is coming from someone who isn’t a big stout fan), it just tastes of awesomeness. Seriously tho. Good things are happening in my kitchen today.

As Guinness isn’t vegan yet, I took my handy-dandy Vegaholic app to the store, (you could alternatively check out Barnivore online), and found myself Sawdust City Brewing Co.’s Skinny Dipping Stout, which is totally vegan-friendly. Woot! But any vegan stout you find will do just fine.
This vegan Irish stew is the perfect way to celebrate St. Patrick’s day, or really any day that you want a warm rich stew. Serve it with a crusty loaf of bread for cleaning up every last bite of broth, and you have yourself one mighty fine meal! It’s a good thing. 
March 12, 2017
4 Ingredient Jerk Tofu
Hi, my name is Sam, and I’m a tofu addict.
It has been one day since my last tofu-based meal. Yes, I’m vegan and this seems incredibly stereotypical…. but 4 Ingredient Jerk Tofu… Have you tasted it? No? It’s mouth-explodingly flavourful, perfectly spiced, with a fresh squeeze of lime, and it’s got this amazing chewy texture, ooooeee! Did I mention it only requires 4 ingredients!? I mean, you can’t really expect me to not make this all the time now. It’s just too good.

Thank goodness tofu is healthy or I might have a real problem on my hands because this 4 Ingredient Jerk Tofu, hot dang!
As is standard in my kitchen, I often test recipes several times, before being convinced I’ve made the best possible version. This one took 4 attempts, and for such a simple recipe that seems kinda crazy, but the recipe didn’t start out so simple.
My first error was that I bought hot jerk seasoning instead of jerk marinade. The seasoning is more of a chunky paste, and while it was delicious, it was mouth-singeingly spicy. Seriously. I’m a gal who likes a lot of spice, but it literally made my mouth ache! It was too thick and even thinned with water, it was difficult to coat the tofu nice and evenly. The marinade, on the other hand, has the perfect amount of spice and perfect saucy coating. Make sure you buy the saucier jerk marinade (not jerk seasoning)!

My second error was that I tried to fry the tofu. This resulted in smoky spice air that was stinging my eyes and making me cough. (That marinade stuff is so, so hot). The texture of the tofu was ok, but it wasn’t anything to write home about. Mom, you will not be getting a letter from me about that tofu.
So instead I tried baking it. Slow and steady I baked it, and this resulted in the most amazing chewy texture. See the skin the on the outside? Yeah, that’s a sign of pure chewy amazingness right there. Slowly baking the tofu is what takes it from soft and squidgy to sink your teeth into chewy.
Ready to cook? 3…2….1…. Let’s go!

To make 4 Ingredient Jerk Tofu: First drain and press the tofu for 15 to 30 minutes.
Once that’s all done, cut the tofu into 1-inch cubes.
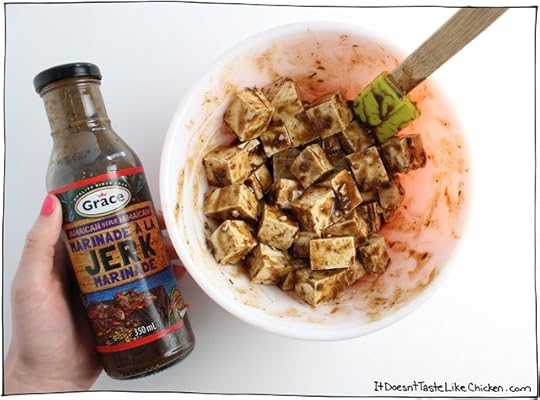
Now toss the tofu with 1/4 cup of jerk marinade. You can let it marinate for awhile, even overnight if you like, but if you are short on time, or not great at planning ahead of time (like me), you can totally skip right to baking it. The marinade will bake right in.

Spread that goodness out on a lightly greased or parchment paper lined baking sheet and bake for 45 minutes to an hour, tossing every now and then. 45 minutes will get you soft-chewy tofu, but for extra chewy (how I like it), keep it in there for the full hour. Some of the tofu pieces might puff up, this is a sign of good things happening in the oven.
Once baked, brush on or drizzle a little more of the marinade. Or alternatively, serve some jerk marinade on the side as dipping sauce. Sprinkle on chopped cilantro and a squeeze of lime juice.

Print 4 Ingredient Jerk Tofu Author: Sam Turnbull • It Doesn't Taste Like Chicken Prep time: 30 mins Cook time: 30 mins Total time: 1 hour Serves: 4 Ingredients 1 Block Extra-Firm Tofu, pressed for 15-30 minutes, and cut into 1" cubes. ¼ Cup Jerk Marinade (the saucy kind), plus more for dipping Handful of Cilantro, chopped Half a Lime, cut into wedges Instructions Preheat oven to 325F (170C). Lightly grease a baking sheet or line it with parchment paper. Toss the pressed tofu with the marinade to coat. Spread on the baking sheet. Bake for 45 minutes to an hour, tossing every now and then. 45 minutes will get you soft-chewy tofu, but for extra-chewy (how I like it), keep it in there for the full hour. Some of the tofu pieces might puff up, this is a sign of good things happening in the oven. Once baked, brush on a little more of the marinade, or alternatively, serve it on the side as dipping sauce. Sprinkle with chopped cilantro and a squeeze of lime. Perfect served with beans & rice and coleslaw. 3.5.3226 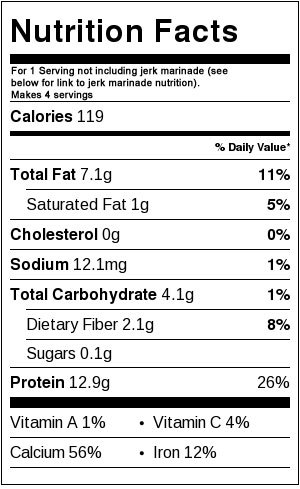 *My nutrition program did not understand what jerk marinade was, so please click here for the accurate nutrition information on the jerk marinade.
Bon Appetegan!
Sam.
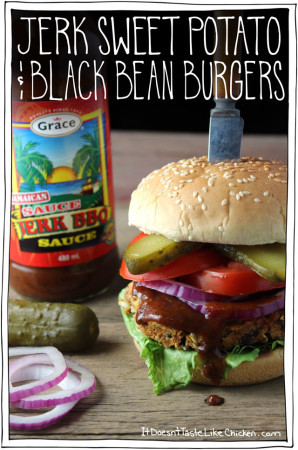
If you enjoyed this recipe you might also like:

This post 4 Ingredient Jerk Tofu appeared first on it doesn't taste like chicken
March 8, 2017
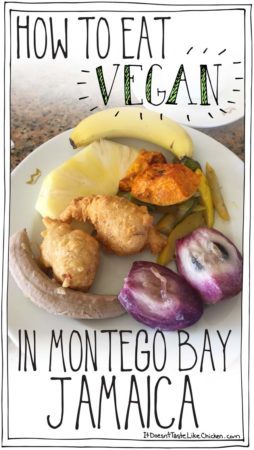
How to Eat Vegan in Montego Bay, Jamaica
This post is sponsored by RIU Hotels & Resorts who I love for their amazing all-inclusive hotel! Seriously, had the most fun ever. Almost didn’t come home.

I’m baaaaaaaaaaackkkkk!!!!
I’m now officially home, and back to work, cooking, recipe testing, blogging, social media-ing, and all things that make up my life as a food blogger. Woot!

I went on vacay with 13 other family and friends to Jamaica, and we stayed at the RIU Montego Bay. Aren’t we the cutest? Yes, yes we are. But of course this blogging obsessed chick couldn’t resist but share all my experiences with you, so I documented (mainly my food) of the trip so I could share with you How to Eat Vegan in Montego Bay, Jamaica!
Friends, I even made a video of my trip, yeah it’s true. You can check it out right here. ↓
See, so darn pretty. I just love Jamaica.
It was my first time ever staying in an all-inclusive hotel, and I gotta be honest here. Before this trip, I was totally anti all-inclusive. I always preferred Airbnb or small hotels, because I wasn’t one of those touristy people.
Well, it turns out I was ALL WRONG. It turns out that I loved the all-inclusive resort so very much, and I’m now totally one of those touristy people – and by those touristy people I learned it was people who wanted to just relax, have fun, and have no worries. Yep, I’m totally that person.

With 14 of us on the trip, and the ages ranging from 14 all the way to about 70, it made the trip so easy peasy. There was no organising, no trying to schedule everyone, now worrying about people getting hungry. There were fabulous shows every night, lots of fun activities going on, endless cocktail creations, it was just great. And not to mention, the food was fantastic!! Everything was taken care of, so there were no worries, all there was to do was to decide what day trips to do! (If you wanted to do anything at all).
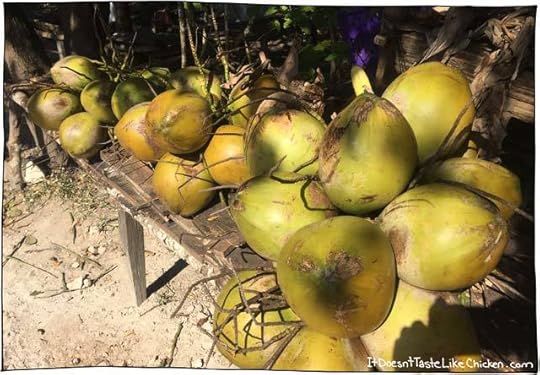
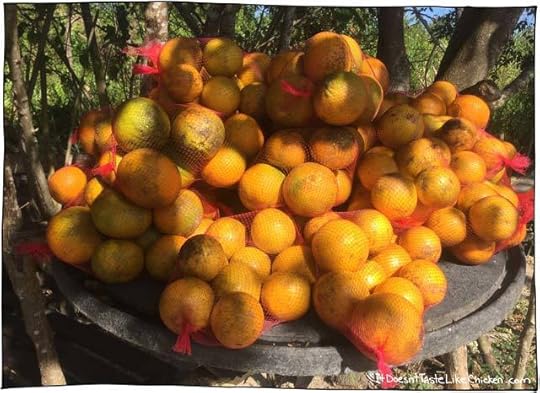
One of my favourite things about Jamaica is that there is an abundance of fruit everywhere. It’s literally just falling from the trees. Dream world, I’m telling you.
I made sure to stop at this place on the roadside that was selling jelly coconuts. And by place, I mean an area among the trees that happens to have a fridge plugged into the ground… where the power was coming from was beyond me.

Unlike the firm coconut meat we are used to in Canada, jelly coconuts are picked when they are younger. Our guy hacked away at it with a machete (the all-purpose tool in Jamaica), to make an opening so you can drink all the coconut water with a straw. When you are done with that (it’s a shocking amount of water) you hand it back to him, and he will split the coconut, make you a spoon from the coconut husk, and hand it back. Then you use the husk spoon to scoop out the flesh which is almost a jello-like texture. Omnomnom. Be sure to check out the video to see jelly coconuts in action!

While, admittedly, we did a lot of swimming and a lot less exploring, we did go out as a group to this rafting trip on the Martha Brae river. It was a 90 minute float down the river on a handmade bamboo raft that was steered by a guy using a stick.

Oh so romantic. My romantic raft riding partner was my little cousin Zuzu.
Our raft captain has been doing this for 32 years, that’s how old I am! He told us about the different plants we were passing, pointed out all of the fruit trees, and when one tree decided to rain beans on us (much to Zuzu’s horror… apparently she thought she would die via beans), he told us how the beans were the cows favourite because they were so sweet. Naturally, I tasted the bean goo he was referring to and it was indeed so sweet, it made your throat tickle and feel fuzzy… maybe I shouldn’t eat strange beans.

Here’s the family rafting crew! Aren’t we the cutest little family ever? Wait I said that already… love these guys! ❤️
(note: apparently I wore the same dress in every single picture… I swear I had other outfits)!

See! …Ok so that’s a bathing suit so it doesn’t really count… sigh.
Reviewing all of these photos makes me wonder why I even left. Can’t we be on vacation all the time!?
Ah well. Now onto the food!

The RIU Montego Bay had a massive buffet that always had new discoveries. As I was one of 3 vegans on the trip (we’re slowly taking over), muhahaha! We were all very, very pleasantly surprised by the huge abundance of vegan options at every meal! I was constantly discovering new things.
The plate above has a big helping of pokchoy greens (which are similar but different than bok choy), boiled green banana (which is kinda like eating a boiled potato), vegetable fritters, and boiled yam.

There are also 3 other restaurants on the resort. I skipped the steak house (unsurprisingly), and the Italian restaurant, as the options weren’t great at either of those, but I did try the Asian restaurant one night which again had an abundance of options, including crispy fried tofu, veggie sushi, and all sorts of yummy stir-fried veggies. I wasn’t able to take a snap there as it was night, and I wasn’t about to travel with my lighting equipment.
The plate above has fried dumplings, stewed cabbage, fried plantains (my fav), stewed pumpkin, purple yam, watermelon, and beet juice.

If I was ever unsure if anything was vegan or not, all the chefs were right there behind the buffet preparing the food, so you could just ask them. Easy peasy. Luckily butter isn’t super traditional in Jamaican cuisine as the climate is too hot for it to keep well, so most things were cooked in oil.
The plate above has grilled zucchini, peas and carrots, bammy bread (which is made from cassava root and is actually my new favourite thing), peas and rice, sun-dried tomato salad, spouts (just because), and pineapple juice.

The buffets always had a huge fruit spread, salad bar, and traditional Jamaican spread (lots of which is vegan), but there was also many other stations that changed according to meal, and I am guessing day of the week as there was always new stuff being put out. So if you wanted pasta, burritos, or other things like that, they had that too.
The plate above has stewed eggplant, boiled yams, rice, green beans, shredded beets, lentil salad, and cucumbers (just because).

Every morning there was a juice bar station set up with an array of fresh juices being made on the spot! And after several days of black coffee (not my fav), I finally discovered a big pitcher of soy milk that wasn’t with the cows milk, but with the yogurt. Bizarre placement, but I was thrilled!
The plate above has boiled dumpling, bammy bread (which I couldn’t resist biting before I even sat down), sugar cane, Jamaican apple (which is kind of like a watery pear), watermelon, cantaloupe, stewed carrots, and spinach juice.
One of the most handy dandy things about travelling to Jamaica as vegan, is that the Rastafarian diet is called Ital and is totally vegan. (Except sometimes they eat fish… although I personally have only seen vegan Ital food). So, you can ask people if there are Ital restaurants nearby, or explain your diet as such.
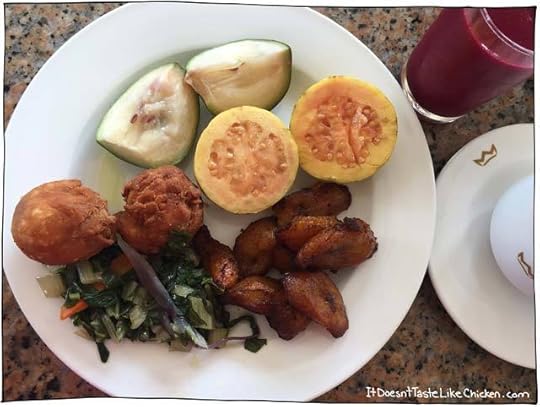
The plate above has fried dumplings, star apple (which is this weird kinda jelly like fruit I seemed to love), guava, friend plantains, pokchoy greens, and beet juice.

So I made a big mistake and left my visit to the nearest Ital restaurant to the last evening. The result? The place was already closed as it closes as 6. Poorly played Sam, poorly played. Blogging fail 101. So that was lame. Turns out I was having too much fun playing in the sun to organise such things ahead of time. But if the restaurants are anything like Ital Vital restaurant in Toronto, it would be sensational, because that place is one of my favourites.
The plate above has boiled green banana, vegetable fritters (they were vegan, I asked), pineapple, a ripe banana, pumpkin, squash, and purple star apple (which is even better than the green kind).
Overall, I was blown away with the food, the options I had to choose from, and how I totally felt belly full every single day. I wish I always had buffets of deliciousness!
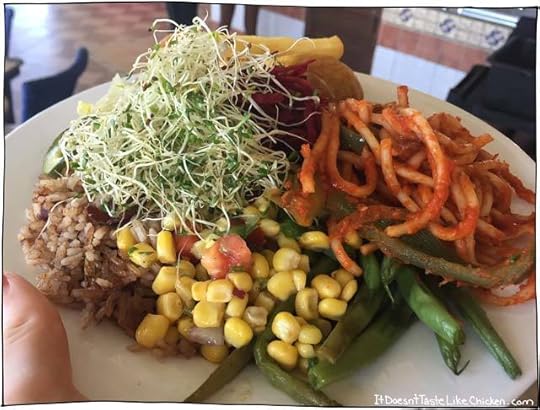
The plate above has peas and rice, sprouts, corn salad, green beans, spaghetti with tomato sauce, grated beets, and hiding behind was cucumber salad, and potato chips (because chips).

So theres a taste of what my Jamaica trip was like. And here’s a guy climbing a palm tree, which I found to be super impressive.
Jamaica, I miss you already!!
Bon Appetegan!
Sam.
This post How to Eat Vegan in Montego Bay, Jamaica appeared first on it doesn't taste like chicken
March 1, 2017
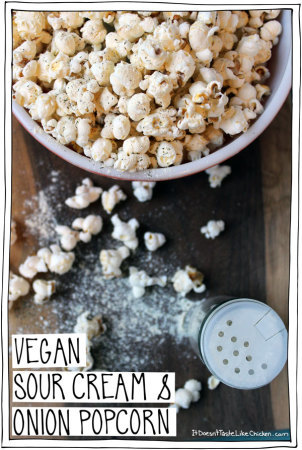
Rosemary & Lemon Zest Popcorn
Secret confession: I eat popcorn at least 4 times a week.
It’s hands down my most favourite munchy snack of them all. Crispy, crunchy, salty or sweet, and it’s actually a whole food so it ain’t even that bad for you… until you douse it in melted vegan butter… which I most definitely do, but I’m not aiming for perfection here.
I have shared with you my 10 Minute Peanut Butter Popcorn which I make when I’m in the mood for peanut butter sweetness (99% of the time). But today I have a new discovery to share with you. This one is almost elegant. (Can popcorn be elegant)? Rosemary & Lemon Zest Popcorn!

See? So elegant looking – with that branch of rosemary in there – all class, my friends.
I made this on a whim when my book club was arriving in a matter of minutes and my table was completely lacking in snacks (unacceptable when your job is to make food). You know how the saying goes: “when in doubt make popcorn!”
Ok no, that isn’t really a saying but it totally passed with my bookclubers. My friends came in the door just as I was tossing this together, and I immediately heard “why does it smell so incredibly delicious in here!?” Win for the popcorn lovers. Two ginormous bowls were devoured immediately and paired quite nicely with wine. Fresh, fragrant, zesty, bursting with flavourful personality. I loved this popcorn so much, it has been my go-to ever since.

To make rosemary & lemon zest popcorn: I just toss popcorn kernels into my hot air popper (obsessed) and melt some vegan butter in the top little compartment. If you don’t have an air popper you can totally make popcorn on the stovetop or in the microwave. Once popped, simply drizzle the melted vegan butter over the popcorn, sprinkle with the rosemary, lemon zest, and salt, give a little toss. Munch away, dear friends, munch away.

5.0 from 1 reviews Print Rosemary & Lemon Zest Popcorn Author: Sam Turnbull • It Doesn't Taste Like Chicken Prep time: 5 mins Cook time: 10 mins Total time: 15 mins Serves: 1 big bowl Ingredients ⅓ Cup Popcorn Kernels 2 Tablespoons Vegan Butter, melted 1 Tablespoon Rosemary, finely chopped Zest from 1 Lemon (about 1 teaspoon) ¼ Teaspoon Salt (or to taste) Instructions Pop the popcorn in an air popper, or pop with whatever method you normally use (stovetop or in the microwave works fine too). When the popcorn is popped, simply drizzle over the melted vegan butter, then sprinkle with the rosemary, lemon zest, and salt. Enjoy! 3.5.3226 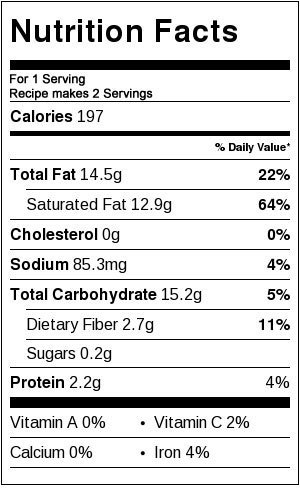
Bon Appetegan!
Sam.
If you liked this recipe you might also like:


This post Rosemary & Lemon Zest Popcorn appeared first on it doesn't taste like chicken
February 26, 2017
25 Drool-Worthy Vegan Soup Recipes
While you read this I will be basking by the ocean, sipping on some rum filled beverage, with sand between my toes, while the sunshine warms me from the outside in. Mmmhmmm, vacation.
I can’t bring all of you on vacation with me, so instead, I thought it would be good to share some warming from the inside out.
25 Drool-Worth Vegan Soup Recipes. Perfectly warming, cram-packed full of veggie deliciousness, everything from noodle-y, to hearty, to creamy, to spicy, and of course totally drool-worthy.
Soups on!

Just click on the photo or name of the soup to take you straight to the recipe.
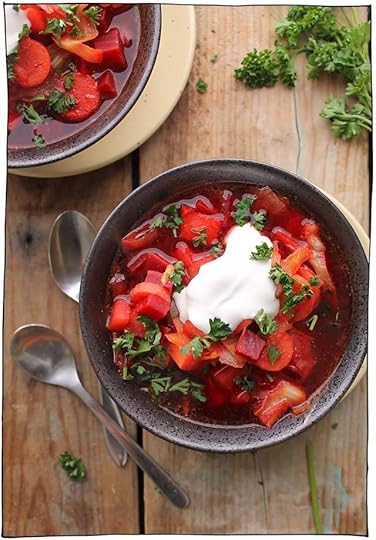
My Darling Vegan: Vegan Borscht

A Virtual Vegan: Creamy Cauliflower Horseradish Soup
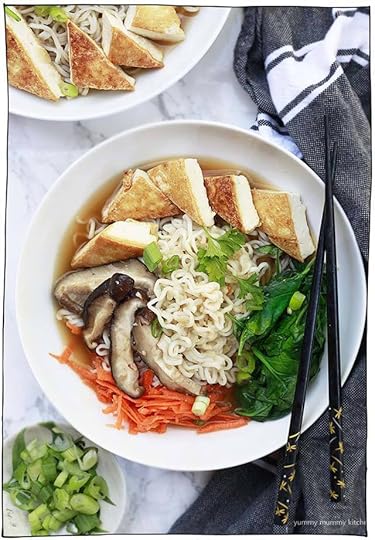
Yummy Mummy Kitchen: Vegan Ramen Recipe

Veggies Save the Day: Chickpea Noodle Soup from Homestyle Vegan

Yummy Mummy Kitchen: Mexican Lentil Soup

Brownble: “Chupe”: Vegan Corn and Potato Chowder

Vegan Huggs: New England Vegan Clam Chowder

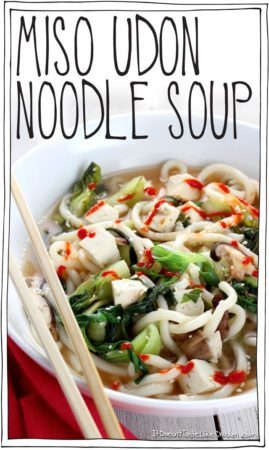
It Doesn’t Taste Like Chicken (that’s me!): Miso Udon Noodle Soup

Happy Kitchen Rocks: Silky Vegan Cauliflower Soup

Soup Addict: Sheet Pan Roasted Red Pepper Tomato Soup

My Darling Vegan: Vegan Cream of Asparagus Soup

The Lazy Broccoli: The Easiest Vegan Cream of Mushroom Soup
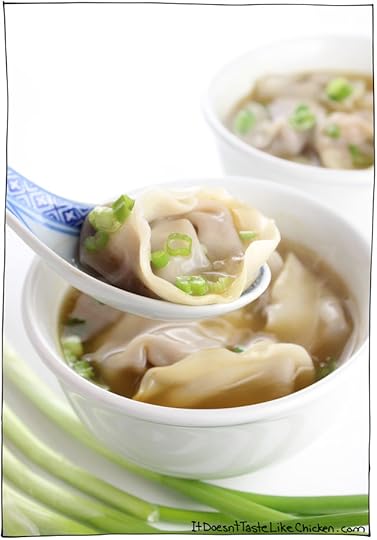
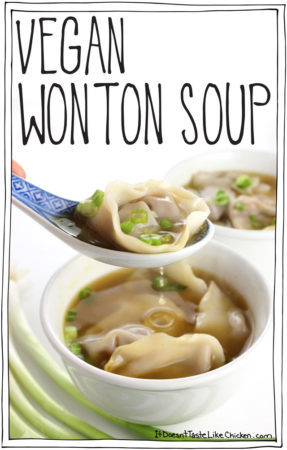
It Doesn’t Taste Like Chicken (that’s me!): Vegan Wonton Soup
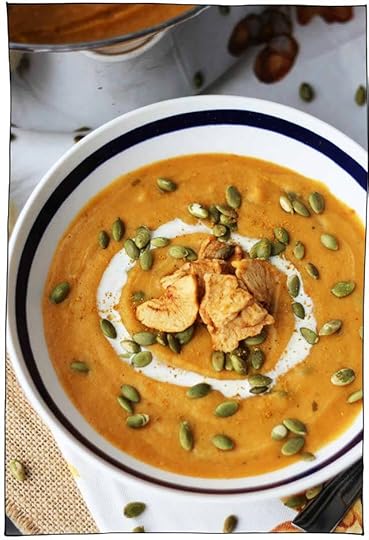
Emily Honeycutt: Spiced Butternut Squash & Coconut Milk Soup

Veggie Inspired: Coconut Curry Soup w/ Sweet Potato Noodles

Emily Honeycutt: Vegan Broccoli Cheese Soup

Vegan Heaven: Vegan Potato Kale Soup

It Doesn’t Taste Like Chicken (that’s me!): Quick Vegan Pho

Avocado Pesto: Roasted Cauliflower Soup with Garlic

The Viet Vegan: Vegan Spicy Lemongrass Noodle Soup
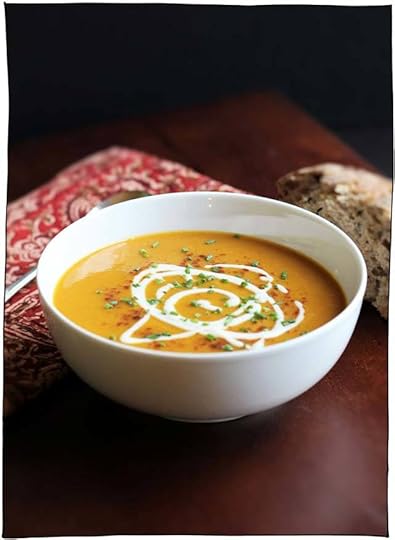
Abbey’s Kitchen: Curried Sweet Potato Soup with Apples and Cider

Apollo & Luna: Ginger Mushroom Kale Noodle Soup

Connoisseurus Veg: Slow Cooker Vegan Lasagna Soup

Cilantro and Citronella: Hot and Sour Soup
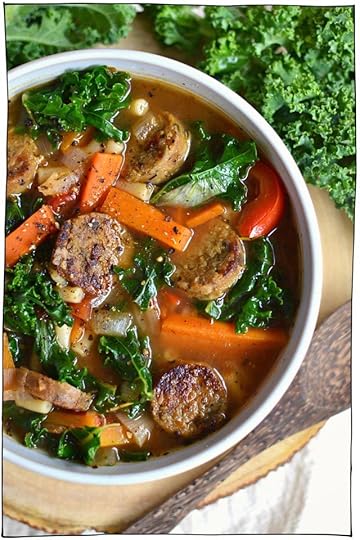
Radiant Rachels: Vegan Sausage & Kale Noodle Soup
Bon Appetegan!
Sam.
This post 25 Drool-Worthy Vegan Soup Recipes appeared first on it doesn't taste like chicken
February 22, 2017
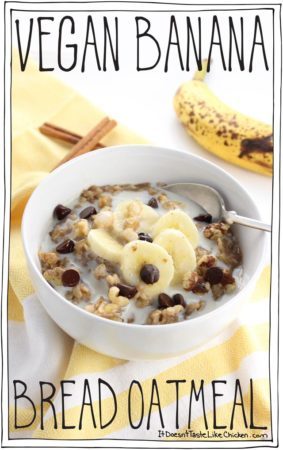
Vegan Banana Bread Oatmeal
In just two sleeps I’ll be sitting on a beach, sipping some overly boozy beverage, (probably way too early in the morning to be drinking), hopefully with a paper umbrella in it, and I CAN NOT WAIT!!! I am going on a trip with 15(!!) family and friends to Montego Bay, Jamaica. Man oh man do I need a vacay. After turning my hobby into a full-time career, writing, photographing, and editing (5 times!) my cookbook, and working basically all day, every day these past 2 years, a vacation is just what my doctor ordered.
…ok well my doctor didn’t order it, but maybe he would if I asked him too… please doc, tell me to go on vacay!

This is my last post while I’m here, at home, until I return. But fear not friends, you will still get two more posts while I am away. Yep, I didn’t want to leave you guys hanging without any vegan deliciousness for a whole week!
That said, I hope to not check social media/comments/all things blog too much while gone, so if there are questions or typos (
February 19, 2017
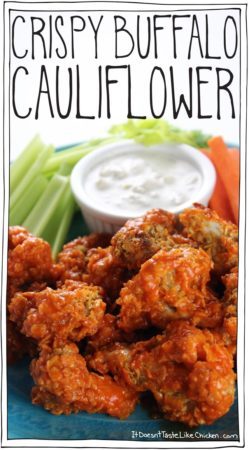
Crispy Buffalo Cauliflower
Cauliflower florets coated in a crispy spiced crust, served with hot buffalo sauce and a side of Vegan Blue Cheese Dip? Oh, hi there good lookin’. I know exactly what you got cookin’, and I like it, I like it a lot.
Hot dang theses are good little dudes. I made sure of that for you by testing them three times, just to be sure, for testing purposes only, clearly.

There is just something about eating with your hands, sauciness dripping down your arm, flavour punching bar food deliciousness that I just NEED every now and then. The need is real.
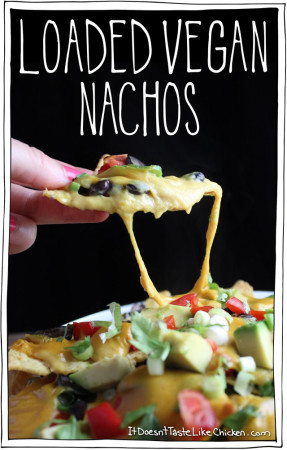
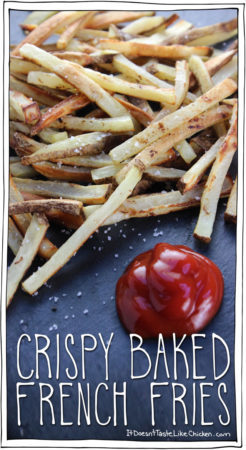
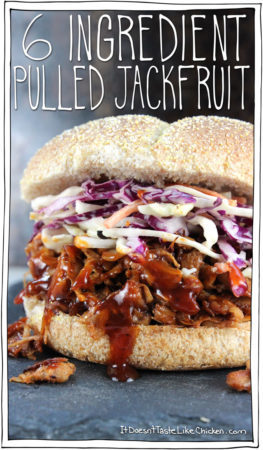
I love diving into a plate of ooey gooey nachos, snacking on crispy baked French fries, feasting on a giant BBQ pulled jackfruit sandwich, OMG getting so hungry, I just love it all.

Then this happened. And by this, I mean Crispy Buffalo Cauliflower. Now I’ve had cauliflower bites in various different ways, and they are delicious, but these crispy buffalo cauliflower bites just went from delicious all the way up to why am I not eating these every day, good. Yeah, I know, it makes me really excited too.
How did I make them so different, you ask? My super secret (internet published) technique is that instead of just a simple flour batter, I went another step and coated them in a spice corn flake crust. The result: crispy (but not fried), spiced, addictive, buffalo sauce, must…not…eat…the entire plate. Can’t resist!

To make Crispy Buffalo Cauliflower: Add the corn flakes and spices to a food processor. Pulse several times until the corn flakes are broken down, but still have texture. This is where the crunch comes in so don’t turn it to powder!

Take three large bowls, and in bowl 1, add the all-purpose flour. In bowl 2, mix together the chia (or flax) and water. In bowl 3, add the cornflake mixture.
Now rinse your cauliflower florets so they are wet. Take a handful at a time and drop them in the flour and toss to coat.
Next drop them in the chia mixture and toss to coat.
Finally, toss them in the corn flake mixture.

Lay them out on a parchment paper lined baking sheet, and bake for 20 t0 25 minutes until crispy and cooked all the way through. You can test doneness by piercing a floret with a knife to see if it’s tender all the way through.

To make the buffalo sauce, simply mix melted vegan butter with the hot sauce. You can pour the buffalo sauce directly on the cauliflower, but it will soften the crust. If you want to keep them super crispy, simply serve the buffalo sauce on the side and dip as you go.
These are perfect served with my Vegan Blue Cheese Dip.

5.0 from 3 reviews Print Crispy Buffalo Cauliflower Author: Sam Turnbull • It Doesn't Taste Like Chicken Prep time: 20 mins Cook time: 25 mins Total time: 45 mins Serves: About 4 (18 - 20 florets) Ingredients Bowl 1: ½ Cup All-Purpose Flour (or all-purpose gluten-free flour blend)
Bowl 2: 2 Tablespoons Ground Chia or Ground Flax ¾ Cup Warm Water
Bowl 3: 4 Cups Corn Flakes ½ Teaspoon Garlic Powder ½ Teaspoon Smoked Paprika ½ Teaspoon Salt ¼ Teaspoon Pepper
1 Small Head of Cauliflower, cut into florets ½ Cup Franks Red Hot (or other similar hot sauce) 3 Tablespoons Vegan Butter, melted Instructions Preheat your oven to 400F (200C). Line a baking sheet with parchment paper. Grab three big bowls. In the first bowl, add the flour. In the second bowl, mix together the chia and water. For the third bowl, add the corn flakes, garlic powder, smoked paprika, salt, and pepper to a food processor. Pulse several times until broken down, but there is still some texture. Pour the corn flake mixture into the last bowl. Rinse your cauliflower florets so they are wet. Take a handful at a time and drop them in the flour and toss to coat. Next drop them in the chia mixture and toss to coat. Finally, toss them in the corn flake mixture. Spread them out on the parchment paper lined baking sheet so that they aren't touching. Repeat with all of the florets until you have used up all of your ingredients. Bake 20 to 25 minutes, until golden brown and crusty, and the cauliflower is tender all the way through. You can test doneness by piercing a floret with a knife to see if it's tender all the way through To make the buffalo sauce, simply mix the melted vegan butter with the hot sauce. You can pour the buffalo sauce directly on the cauliflower, but it will soften the crust. If you want to keep them super crispy, simply serve the buffalo sauce on the side and dip as you go. 3.5.3226 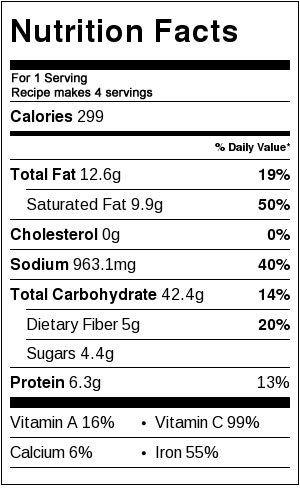
Bon Appetegan!
Sam.
If you liked this recipe you might also like:
This post Crispy Buffalo Cauliflower appeared first on it doesn't taste like chicken
February 15, 2017
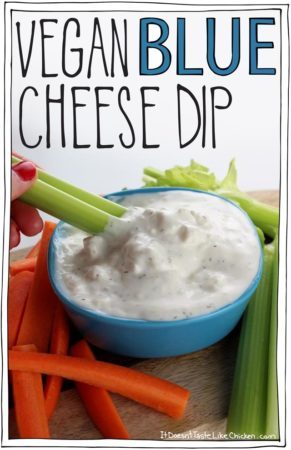
Vegan Blue Cheese Dip
If one day I rubbed my tea kettle and a magic cooking genie came out (I’m picturing the genie looking like Julia Child), and she declared “I will grant you one magic cooking wish!” (did you just read that in her warbly voice? Because I totally did). I would wish for the ability to go back in time when I ate all the non-vegan things, and take extremely detailed notes about the flavours, textures, and what could possibly taste similar in the vegan cooking world.

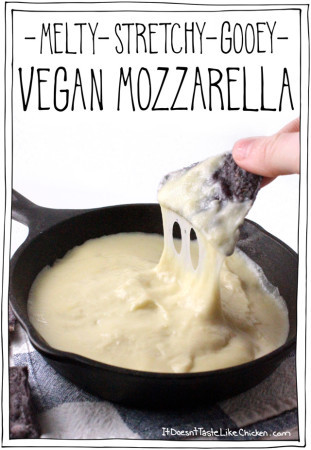
One of the more challenging things I do for my recipes is to try and recall tastes that I last had over 4 years ago if not longer! I have done this with my nacho cheese, mozzarella cheese, and cheese ball, but also in “meatier” type recipes such as my chili, and my bolognese, and even in desserts when making peanut butter cups, and pumpkin pie. Let me tell you, replicating flavours from memory is tough stuff, and it always has me digging through my fridge and pantry tasting random things, looking for the perfect missing flavour.
There are few things more exciting when people exclaim that my recipe tastes just like the non-vegan version or EVEN BETTER! Woot! Joy.
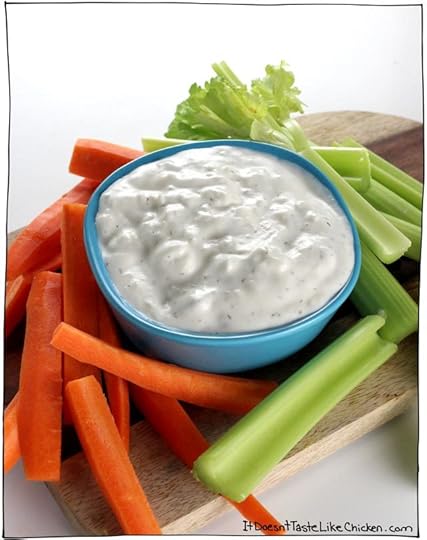
Once again, I have attempted reaching the far corners of my taste memory and I made this Vegan Blue Cheese Dip.
This vegan blue cheese dip is tangy, creamy, a little tart, full of umami, and even has chunks of cheesy(ish) goodness throughout. Best yet, it only requires 6 ingredients and can be whipped up in under 5 minutes. Just add everything to a bowl, stir, enjoy. My kinda recipe!
Whether it tastes exactly the same as traditional blue cheese dip, I’m not sure, but I will tell you one thing, it is a mighty tasty dip! And it makes the perfect accompaniment to buffalo flavoured things- I bet you have an idea of what recipe is coming up next, you clever minx you. ;

5.0 from 1 reviews Print Vegan Blue Cheese Dip Author: Sam Turnbull • It Doesn't Taste Like Chicken Prep time: 5 mins Total time: 5 mins Serves: About 1¼ Cups Ingredients 1 Cup Vegan Mayonaise 1½ Tablespoon Apple Cider Vinegar 1 TablespoonWhite Miso Paste ½ Teaspoon Onion Powder ¼ Teaspoon Dill ¼ Block Medium or Firm Tofu, crumbled Instructions Add everything but the tofu to a bowl and stir well to combine. Once mixed, add in the tofu crumbles, and give it another stir to mix in. Enjoy! 3.5.3226 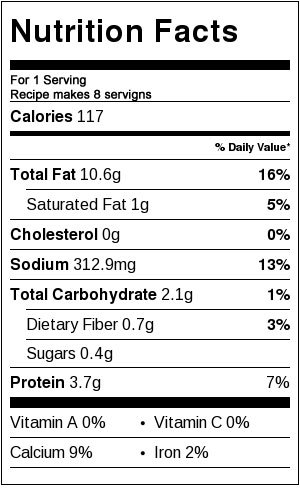
Bon Appetegan!
Sam.
If you liked this recipe you might also enjoy:
This post Vegan Blue Cheese Dip appeared first on it doesn't taste like chicken
Sam Turnbull's Blog

- Sam Turnbull's profile
- 35 followers

