
Sam Turnbull's Blog, page 54
June 4, 2017
25 Game-Changing Vegan Taco Recipes
Na na na na na na na na na na na na na na na na na TACOS!!!!! ~Sang to the theme of Batman~
Why are tacos the superhero of the food world right now? I know! Pick me!! Because they are a totally amazingly delicious game-changing meal. I mean get this: there are endless options of fillings, endless flavour combos, they can be crispy or chewy, spicy or sweet, breakfast or dinner, and there is an entire day of the week dedicated to them called #TacoTuesday! And in case you weren’t aware, let me inform you, vegan tacos make the best tacos. Fact.*
*Source: Sam.
So today I am hitting you with some serious taco deliciousness- KAPOW! 25 Game-Changing Vegan Taco Recipes. BAM!

I think vegan taco superpower is making me drool on command. DROOL!
I collected these vegan taco recipes from my blogging friends across the web. To view a recipe just click on the image or title of the recipe. I hope you enjoy this collection of 25 Vegan Game-Changing Vegan Taco Recipes. BLAM!

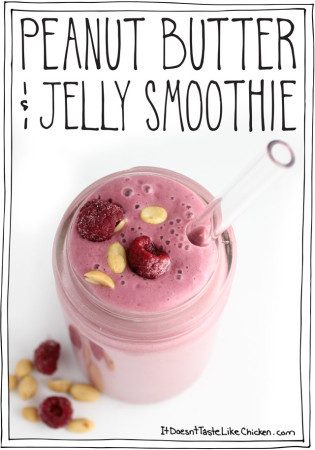
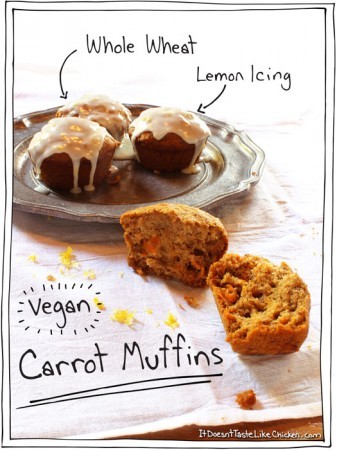
Contentedness Cooking: Al Pasto Tacos (Vegan)

The Green Life: Miso Roasted Cauliflower Tacos + Homemade Tortillas

Veganosity: Sweet Potato and Tofu Breakfast Tacos

Vegan Heaven: Vegan Tacos with Lentil Walnut Meat

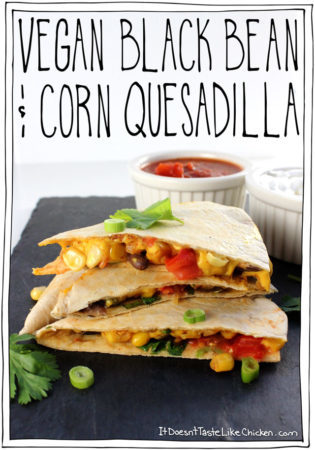
Yummy Mummy Kitchen: Veggie Tacos with Black Beans and Cabbage

It Doesn’t Taste Like Chicken (that’s me!): Easy Vegan Jackfruit Tacos

A Virtual Vegan: Enchilada Lentil Tacos with Lime Slaw

Vanilla and Bean: Mexican-Inspired Tofu Tacos with Chili-Lime Slaw and Cilantro-Pepita Crema

Veggies Don’t Bite: Crispy Cauliflower & Potato Tacos with Tangy Dill Crema

The Nut-Free Vegan: Aloo Matar Tacos

Vnutrition: Walnut Meat Tacos with Lime Cashew Cream

Pasta Based: Vegan Breakfast Tacos with Cauliflower

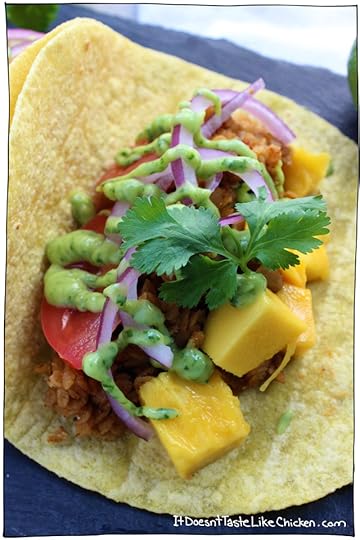
Veganosity: Beer Battered “Fish” Tacos with Mango Salsa
It Doesn’t Taste Like Chicken (that’s me!): Lentil Tacos with Avocado Cilantro Sauce

Euphoric Vegan: Orange Glazed Tempeh Tacos

Connoisseurus Veg: Smoky Tofu Banh Mi Tacos

Veggie Inspired: Healthy Breakfast Tacos w/ Tofu and Roasted Potatoes

Rabbit and Wolves: Vegan Teriyaki Tofu Tacos with Roasted Pineapple Salsa

Karissa’s Vegan Kitchen: Air Fryer Breaded Cauliflower Tacos

Vnutrition: Teriyaki Tempeh Tacos

A Virtual Vegan: Enchilada Lentil Tacos with Lime Slaw

Vegetarian Gastronomy: Crispy Tofu Tikka Masla Taco with Peppers, Onions, & Chilifire Crema

Vegetarian Gastronomy: Loaded Black Bean Tofu Tacos with Walnut Crumble

The Green Life: Coconut Crusted Avocado & Bean Tacos + Kiwi Salsa & Cashew Lime Cream

My Darling Vegan: BBQ Jackfruit Tacos with Mango Salsa
Bon appetegan!
Sam.

This post 25 Game-Changing Vegan Taco Recipes appeared first on it doesn't taste like chicken


May 31, 2017
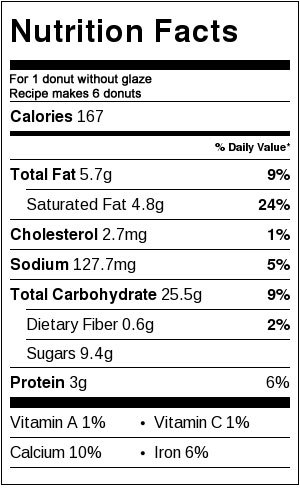
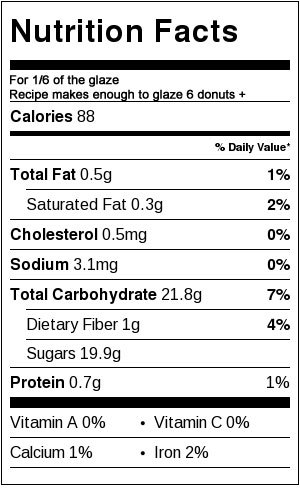
Classic Vegan Chocolate Glazed Donuts
We have a serious problem here, and that problem is that these Classic Vegan Chocolate Glazed Donuts are a little too easy to make. You just whip up the simple donut batter, fill this fancy little donut pan and bake. Then take one of these fluffy donut perfections, and dip it into the quick chocolate glaze. TOO EASY I tell ya. Because wow wow wow! These things are magic.

Look at them. LOOK AT THEM! ☝️ Sorry, getting a little bossy around here, but seriously. I can’t even.
After doing a bunch of research (yes I spend a lot of time researching donuts… #weirdjob), I found there are a few keys that take donuts from fine to fabulous. And of course in true Sam fashion, I reveal them all to you so you can make perfect vegan donuts in your home too.

THE 4 SECRETS TO VEGAN DONUT PERFECTION:
You know that classic donut taste that you can’t quite put your finger on? Well, I put my finger on it. I discovered that taste is nutmeg! Who knew right!? The donut batter is spiced with nutmeg that gives these donuts that classic bakery taste.
The donuts are baked, not fried, which makes them easy and safe to make at home and a lot healthier to boot. So now you can eat two donuts! (You’re welcome). The key I needed to figure out is how to get baked vegan donuts that were fluffy perfection. So I tried my favourite trick of adding an acid (lemon juice or apple cider vinegar) and baking soda. You know those volcanos you made in science class as a kid, same thing happens here. The combo makes for lots of quick rising bubbles making these donuts FLUFFY while still maintaining moisture.
One of these inexpensive donut pans is key. Without them the donuts won’t maintain shape. They will still taste delicious of course, but you won’t really get the donut feeling without that classic shape.
The glaze! I didn’t realize I was so picky about donut glaze until I started testing these donuts. My first attempt was delicious, but the glaze stayed gooey, and didn’t have that classic donut glaze crackle when bitten. Don’t worry friends, I sorted it out. Now you can have your chocolate glaze and have it crackle too.
And there you have it, my secrets to Classic Vegan Chocolate Glazed Donuts. You may now start your ovens!

To make Classic Vegan Chocolate Glazed Donuts: In a large bowl, whisk together all the dry ingredients.

In a medium bowl mix together all the wet ingredients.

Now add the wet ingredients into the dry ingredients and stir until just combined. Do not over mix, lumps are totally cool.

Scoop the batter into a large ziplock bag and cut the corner off of the bag. Alternatively, use a pastry bag. Pipe the batter into the donut pan, dividing it evenly among the 6 donuts wells.

Bake for 10 to 14 minutes until the donuts have fluffed up and bottoms are lightly browned. Take out of the oven and cool for 5 minutes then flip the donuts over so the bottoms can steam off a bit and don’t hold too much moisture.

Add all of the ingredients to a bowl and mix well.

Dip the donuts into the glaze half way up and carefully lift the donut back out again, the frosting will set as it rests. If you have leftover glaze, use it to drizzle over vegan ice cream, or dip fruit into it.

Classic Vegan Chocolate Glazed Donuts

Fluffy, baked, PERFECT, classic vegan chocolate glazed donuts! Just 25 minutes to make and are baked – aka you can have two!
For the dry ingredients:
1 cup all-purpose flour
1 teaspoon baking powder
1/4 teaspoon baking soda
1/4 teaspoon ground nutmeg
For the wet ingredients:
2/3 cup non-dairy milk ((such as soy or almond))
1/3 cup brown sugar
2 tablespoons vegan butter, (melted)
1 1/2 teaspoon vanilla extract
1 teaspoon lemon juice or apple cider vinegar
For the chocolate glaze:
1 cup powdered sugar
3 tablespoon cocoa powder
2 tablespoons non-dairy milk ((such as soy or almond))
1/2 teaspoon vanilla extract
To make the donuts:
Preheat your oven to 350F (180C). Lightly grease a donut baking pan.
In a large bowl, whisk together all the dry ingredients.
In a medium bowl mix together all the wet ingredients. Now add the wet ingredients into the dry ingredients and stir until just combined. Do not over mix, lumps are totally cool.
Scoop the batter into a large ziplock bag and cut the corner off of the bag. Alternatively, use a pastry bag. Pipe the batter into the donut pan, dividing it evenly among the 6 donuts wells.
Bake for 10 to 14 minutes until the donuts have fluffed up and bottoms are lightly browned. Take out of the oven and cool for 5 minutes then flip the donuts over so the bottoms can steam off a bit and don’t hold too much moisture.
To make the chocolate glaze:
Add all of the ingredients to a bowl and mix well. If the glaze is a bit too thick at 1 teaspoon non-dairy milk at a time to reach desired consistency.
Dip the donuts into the glaze half way up and carefully lift the donut back out again. The frosting will set as it rests. If you have leftover glaze, use it to drizzle over vegan ice cream, or dip fruit into it.
Bon appetegan!
Sam.
If you liked this recipe you might also enjoy:


This post Classic Vegan Chocolate Glazed Donuts appeared first on it doesn't taste like chicken
May 28, 2017
Buffalo Chickpeas Stuffed Sweet Potatoes
Buffalo sauce, meet sweet potatoes, sweet potatoes meet buffalo sauce.
I seriously have no idea why I have never combined these flavours before because this combo is pure YUM. Buffalo Chickpeas Stuffed Sweet Potatoes for the win!

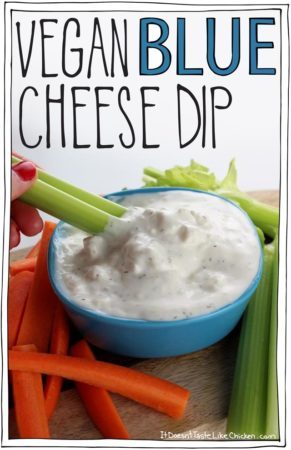
The spicy, silky, tangy, sizzle of bufflao sauce coated chickpeas, combined with the sweet, creamy, fluffy sweet potatoes. Why yes please I’ll take 3. These little ditties taste like bar food, but taken up a notch. Serve them with my Vegan Blue Cheese Dip or my Creamy Ranch Dressing to take em up another notch! So many notches.

These potatoes look all sorts of fancy, but they are so easy! This recipe requires just handful of ingredients and most of the time is spent waiting for the sweet potatoes to bake. Perfect time to crack open a beer, and put your feet up while the potatoes are doing their thang. Now that’s my kinda recipe!
These potatoes are awesome served hot, but if you have leftovers I also enjoyed them cold served with a salad for an easy weekday lunch.

To make Buffalo Chickpeas Stuffed Sweet Potatoes: Space the sweet potatoes out on a large baking tray and bake for 40 to 60 minutes until tender all the way through. Test by piercing them with a knife.

In a medium pot, add the chickpeas, hot sauce, and vegan butter and stir over medium-high heat until the vegan butter is melted. In a small cup mix together the water and cornstarch, and mix that into the hot sauce mixture. Continue cooking until the chickpeas are heated through and the sauce thickens a bit, about 2 more minutes.

Cut a slit down the middle of the potato, (careful, it’s hot!), then using a towel or oven mitts, push the ends towards each other and the potato will pop open nicely. Fluff the insides with a fork, then stuff them with the buffalo chickpeas. Finish by drizzling over a little Vegan Blue Cheese Dip or Creamy Ranch dressing if using either (optional), and garnishing with cilantro or parsley.

Buffalo Chickpeas Stuffed Sweet Potatoes

The spicy, silky, tangy, sizzle of bufflao sauce coated chickpeas, combined with the sweet, creamy, fluffy sweet potatoes. YUM. An easy vegan, vegetarian, and gluten free dish.
8 small sweet potatoes, (pierced all over with a fork to let steam escape)
1 19 oz can chickpeas (or 2 cups), (drained and rinsed)
2/3 cup Frank's Red Hot sauce ((or similar hot sauce))
3 tablespoons vegan butter
1 tablespoon water
1 tsp cornstarch
Vegan Blue Cheese Dip or Creamy Ranch, ((optional))
cilantro or parsley, (for garnish)
Preheat your oven to 400F (200C).
Space the sweet potatoes out on a large baking tray and bake for 40 to 60 minutes until tender all the way through. Test by piercing them with a knife.
In a medium pot, add the chickpeas, hot sauce, and vegan butter and stir over medium-high heat until the vegan butter is melted. In a small cup mix together the water and cornstarch, and mix that into the hot sauce mixture. Continue cooking until the chickpeas are heated through and the sauce thickens a bit, about 2 more minutes.
Cut a slit down the middle of the potato, (careful, it’s hot!), then using a towel or oven mitts, push the ends towards each other and the potato will pop open nicely. Fluff the insides with a fork, then stuff them with the buffalo chickpeas. Finish by drizzling over a little Vegan Blue Cheese Dip or Creamy Ranch dressing if using either, and garnishing with cilantro or parsley.

Bon appetegan!
Sam.
If you liked this recipe you might also enjoy:


This post Buffalo Chickpeas Stuffed Sweet Potatoes appeared first on it doesn't taste like chicken
May 24, 2017
3 Ingredient Vegan Strawberry Milk
It’s about to be strawberry season in Ontario, the best seasons ever! I’m so excited I needed to get my strawberry flavours going ahead of time with this 3 Ingredient Vegan Strawberry Milk.
Secret: I may be a city slicker now, but I actually grew up as a country bumpkin. And if you’re a country bumpkin you know the BEST way to eat strawberries is in your car.

Let me explain, when it’s strawberry season in the country, these roadside strawberry stands pop up everywhere. Some are full on strawberry businesses, and some are just families that happen to have a large strawberry patch.
So when you stop by one of these stands (which you must do on every drive) the rule is to pick up one basket for your house, and one for the car. The strawberries are still warm from the sun and they taste like the taste like little sweet sun jewels. Pure bliss. So naturally, the entire car basket is consumed on the drive home. (Hence why two baskets are required).

I’m getting so excited for strawberry season that I just couldn’t wait to get my strawberry fix! This 3 Ingredient Vegan Strawberry Milk is the perfect way to use up leftover strawberries (as if that’s a thing) or frozen strawberries to make a fun little treat.
This homemade vegan strawberry milk is so much better than store-bought versions. All natural, no dies or artificial flavours, and takes just 15 minutes to make! And it tastes like REAL strawberries and not some sort of weird artifical flavour.
If strawberry milk ain’t your thing, I would first say, are you sure? Try it. It tastes like a light version of melted strawberry ice cream. Then I would also tell you that you can use this strawberry syrup on pancakes, over vegan ice cream, on oatmeal, or anywhere syrup will go.

To make 3 Ingredient Vegan Strawberry Milk: add your strawberries (fresh or frozen) to a pot with water and agave.

Bring to a simmer and cook for 5 to 10 minutes until the strawberries have basically turned to mush.

Put a fine mesh strainer over a bowl, and pour the strawberry mixture in. Use a spatula to smush the strawberries through the strainer as best as you can.
Leftover strawberry mush can be used on top of oatmeal, in a smoothie, or just spread on toast. It tastes like a lightly sweet jam!

And now you are left with your gorgeous syrup! If you prefer a sweeter syrup, just stir in more sweetener now.
To make strawberry milk, pour a glass of your favourite non-dairy milk and add the syrup to taste. I like about 3 tablespoons per 1 cup non-dairy milk.
Store leftovers in an air-tight container in the fridge for up to a week.

3 Ingredient Vegan Strawberry Milk
2 cups strawberries (fresh or frozen)
1/2 cup water
1/4 – 1/2 cup agave or maple syrup
In a small pot, add the strawberries, 1/4 cup of the agave, and water. Bring to a simmer and cook for 5 to 10 minutes until the strawberries have basically turned to mush.
Put a fine mesh strainer over a bowl and pour the strawberry mixture in. Use a spatula to smush the strawberries through the strainer as best as you can. Leftover strawberry mush can be used on top of oatmeal, in a smoothie, or just spread on toast. It tastes like a lightly sweet jam!
And now you are left with your gorgeous syrup! If you prefer a sweeter syrup, just add up to 1/4 cup more agave to taste.
To make strawberry milk: pour a glass of your favourite non-dairy milk and add the syrup to taste. I like about 3 tablespoons per 1 cup non-dairy milk.
Store leftovers in an air-tight container in the fridge for up to a week.
Bon appetegan!
Sam.
If you liked this recipe you might also enjoy:

This post 3 Ingredient Vegan Strawberry Milk appeared first on it doesn't taste like chicken
May 21, 2017
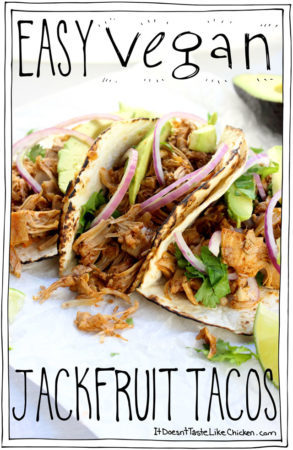
Easy Vegan Jackfruit Tacos
There are four of my most favourite words in the title of this recipe… yeah, I bet you guessed each and every one you clever minx you. Easy Vegan Jackfruit Tacos. Boom.

EASY: Every now and then I don’t mind a more complicated recipe such as my Vegan Tiramisu (so worth it), but for the most part, I like my recipes easy, and I like ’em quick. This one just takes a little sautéing, add some seasonings, then mash. Done. And it takes less than 30 minutes to prepare. I mean really, what more could you ask for?
VEGAN: pret-tay sure that you aren’t surprised that this is one of my favourite words. Not only did this life changing word make me a healthier, happier, more compassionate and environmentally friendly human being, but it also gave my career a 180-degree flip, and I now have the job of my dreams (that I didn’t even know I was dreaming about)!
JACKFRUIT: the fruit that is the jack of all trades. You can eat this fruit ripe and sweet, which to be honest is not my fave, but where it really shines is when you get it young and green. At this stage, it’s starchy and savoury and is so amazing in that it replicates pulled or shredded meat almost exactly. Except, of course it’s so much better! I swear, I was eating these tacos and wondered why in the world would anyone want to eat a chicken when they can have this!?
TACOS: this Mexican handheld food with endless topping combos is just an all time fave for me. I mean there’s an entire day of the week dedicated to tacos called #tacotuesday! I’m clearly not the only one who get’s this excited about food. Just as this shirt says, mas tacos por favor.
So there you have it, Easy Vegan Jackfruit Taocs. These tacos are a perfect quick and easy weeknight meal, packed full of spices, with a squeeze of lime on top and maybe a cerveza on the side. Happy taco-ing!

To make Easy Vegan Jackfruit Tacos: First, you are going to need jackfruit. I know, you’re probably shocked. It’s important that you find young green jackfruit in brine or in water, and not the sweet ripe kind in syrup. You can pick it up on Amazon, or check out any Asian grocery store.

For optimal texture, cut the jackfruit into thin slices from core to the outer edge as seen in the picture above. This breaks up the tougher core as much as possible and makes for the best shredded texture.

Do NOT discard the core or seeds, they are totally edible and you are just wasting precious jackfruit!

Heat the oil in a large skillet over medium-high heat. When hot, add in the onions and garlic and sauté for about 5 minutes until the onions have softened and are beginning to brown.

Add the chopped jackfruit, broth, agave, lime juice and all the spices to the pot and cover. Reduce heat and let it simmer until the jackfruit softens a bit, and about 1/2 of the liquid is absorbed. About 5 minutes.

Now take a potato masher, and smash all the jackfruit up to get that shredded texture. Pretty cool huh? If you find it a bit wet, just cook a little longer. If you find it a little dry, just add a splash more vegetable broth.

To assemble the tacos, warm the taco shells according to the package directions. When warmed, add a scoop of the jackfruit, with the toppings and a squeeze of lime juice. OR you can top with whatever your favourite taco toppings are! I also love a squeeze of hot sauce. Omnomnom.

Easy Vegan Jackfruit Tacos
For the jackfruit:
2 20oz cans green jackfruit in water or brine (, drained, rinsed, and chopped (see instructions))
1 tablespoon light oil (such as canola or vegetable)
1 yellow onion (, sliced)
4 cloves garlic (, minced)
1/2 cup vegetable broth or water
1 tablespoon agave
1/2 lime (, juiced)
2 teaspoons chili powder
1 teaspoon cumin
1 teaspoon smoked paprika
1/4 teaspoon salt
For the tacos:
8 taco shells (, hard or soft (gluten-free if preferred))
1 avocado (, sliced)
1/4 red onion (, thinly sliced)
1/4 cup cilantro (, roughly chopped)
lime wedges
To chop the jackfruit:
For optimal texture, cut the jackfruit into thin slices from core to the outer edge as seen in the pictures above. This breaks up the tougher core as much as possible and makes for the best shredded texture. Do NOT discard the core or seeds, they are totally edible, and you are just wasting precious jackfruit!
To make the shredded jackfruit:
Heat the oil in a large skillet over medium-high heat. When hot, add in the onions and garlic and sauté for about 5 minutes until the onions have softened and are beginning to brown.
Add the chopped jackfruit, broth, agave, lime juice and all the spices to the pot and cover. Reduce heat and let it simmer until the jackfruit softens a bit, and about 1/2 of the liquid is absorbed. About 5 minutes.
Now take a potato masher, and smash all the jackfruit up to get that shredded texture. Pretty cool huh? If you find it a bit wet, just cook a little longer. If you find it a little dry, just add a splash more vegetable broth.
To assemble the tacos:
Warm the taco shells according to the package directions. When warmed, add a scoop of the jackfruit, and top with an avocado slice, a couple red onion slices, some cilantro, and a squeeze of lime juice. Or you can top with whatever your favourite taco toppings are! I also love a squeeze of hot sauce. Omnomnom.

Bon appetegan!
Sam.
If you liked this recipe you might also enjoy:

This post Easy Vegan Jackfruit Tacos appeared first on it doesn't taste like chicken
May 17, 2017
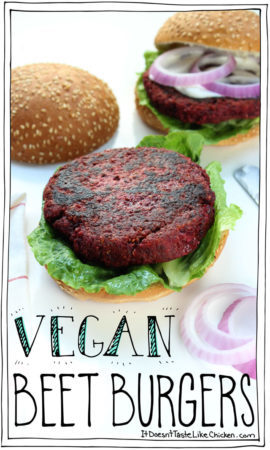
Vegan Beet Burgers
From day one of this blog, I had the idea to make “fuss-free” vegan recipes, but it took me awhile before I really nailed down what that meant. In the beginning, I thought the best approach was to use no specific measurements and vague instructions for my recipes… Unsurprisingly, recipe testers had varied results. Yep, not the smartest idea I’ve ever had.

Luckily, it wasn’t long before I re-thought “fuss-free” and made it all about simple ingredients, and quick and easy recipes. That doesn’t mean that my original fuss-free recipes (if you can call them that), were bad, it just means there was a dreadful lack of guidance and poor food photography to boot.
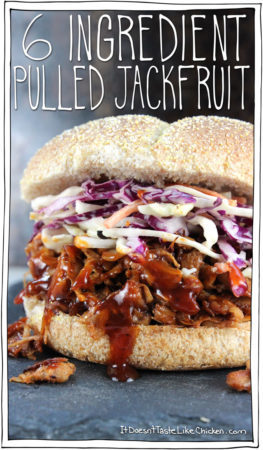
So every now and then I like to go back in time and revise one of the original fuss-free recipes. I’ve done it before with my 6 Ingredient Pulled Jackfruit, and Lentil Tacos with Avocado Cilantro Sauce, and today I am doing it with these Vegan Beet Burgers.

Because omnomnom!! My first version for vegan beet burgers required too many ingredients, a couple of flavours were competing, and of course, some measurements would be helpful. I’ve taken it from 14 ingredients to just 10, made it simpler and quicker, and got those flavour notes on point.
The intense colour of these burgers is so neat, but what’s really rocking my socks is how the beets provide this deep rich earthiness to the burgers. So much flavour depth. The oats and lentils make a great base, and the sneaky trick is adding a bit of peanut butter which adds some richness and good fat balancing everything out perfectly.
When you make these, the dough is really sticky, but once cooked, they firm up and have a nice texture bite (no mushy burger here)!

To make Vegan Beet Burgers: peel the beets. I have a grater attachment for my Breville food processor so I used it to grate the beets directly into the processor. If you don’t have that, just grate beets with the grater you have.

Then just add the beets, along with all of the remaining ingredients to the food processor.

Pulse, stopping to scrape the sides, until the mixture comes together.

Form into 4 patties. The patty mixture will be very sticky, so wet your hands in between forming each patty, to help stop the sticking.

Then you can either fry or bake the burgers, until brown on the outside and tender on the inside.
Leftover burgers get quite firm in the fridge overnight, so I prefer mine freshly made. However, if you like a nice firm bite, you might enjoy them even more!

Vegan Beet Burgers
Quick and easy recipe for a hearty veggie burger with a perfect bite (not mushy).
2 medium beets (, peeled and grated)
3/4 cup large flake rolled oats
1/2 cup cooked lentils ((I used canned))
1/2 cup all-purpose flour
1/2 yellow onion (, finely chopped)
2 cloves garlic (, finely minced)
1 tablespoons natural peanut butter
2 teaspoons dried thyme leaves
1/2 teaspoon salt
1/4 teaspoon black pepper
If you have a grater attachment for your food processor you can use it to grate the beets directly into the processor. If not grate beets with the grater you have, then add the beets, along with all of the remaining ingredients to the food processor. Pulse, stopping to scrape the sides, until the mixture comes together.
Form into 4 patties. The patty mixture will be very sticky, so wet your hands in between forming each patty, to help stop the sticking.
To fry the patties (my fave):
Heat enough oil to cover the bottom of a large skillet over medium heat. When hot, add the patties. Cooking them low and slow is the key for good texture. Cook about 3 to 5 minutes per side, until they are nicely browned on both sides and hold together well. Serve hot on a bun with your favourite burger toppings.
To bake the patties:
Preheat your oven to 350F (180C). Lightly grease a baking sheet or line it with parchment paper.
Lay the patties out in a single layer with room around them for air to circulate. Bake 30 to 35 minutes, flipping halfway through until firmed up and lightly brown on both sides. Serve hot on a bun with your favourite burger toppings.
Leftover burgers get quite firm in the fridge overnight, so I prefer mine freshly made. However, if you like a nice firm bite, you might enjoy them even more!
Bon appetegan!
Sam.
If you enjoyed this recipe you might also like:
This post Vegan Beet Burgers appeared first on it doesn't taste like chicken
May 14, 2017
Vegan Banana Nut Muffins
I know some people hate the dreaded damp “m” word… and if that’s you just skip to the next paragraph because I gotta say it, and I gotta say it loud and proud. These Vegan Banana Nut Muffins are so super MOIST. And I mean that in all the best ways possible. Bursting with banana flavour, little pops of nut crunch, tender, lightly sweet, and gorgeously moist. Mm mmmmm!
*”M” word haters may now proceed without fear.

I love these muffins because they keep gorgeously fresh for days (not that they last that long). It makes whipping out the door in a rush easy peasy. (Not that I ever whip out the door in a rush)… Ok, so it also makes rolling out of bed, slumping my way to the kitchen, and snacking while waiting for the coffee machine to heat up easy peasy.

The key to taking these Vegan Banana Nut Muffins from good to AMAZING is these 2 sneaky deaky tricks:
Double the banana! Not only do I mash banana and mix it into the batter, but then I cut up a third banana and chop that into pieces so there are extra pops of banana throughout.
Double the nuts! Chopped nuts are swirled through the batter, and once the muffins are scooped into a pan, I additionally sprinkle extra nuts on top. Not only is this pretty, but it ensures every bite gets a gorgeous nut crunch.

To make Vegan Banana Nut Muffins: mix together all of the dry ingredients together in a large bowl.

Mash up two bananas, and cut the third one up into chunks.

Add the two mashed bananas with and all of the wet ingredients to a medium bowl and mix to combine. Add the wet into dry, and mix until it’s just starting to come together. Be careful not to over mix, lumps are totally cool.

Add in the chopped banana and nuts and give it 3 to 4 more stirs.
*You don’t want to overmix the batter because then it might not rise properly.

Divide the batter evenly among the muffin pan and finish by sprinkling extra nuts on top (optional).
Bake for 22 to 26 minutes until the muffins have risen and are golden brown on the edges, and a toothpick inserted into the center of a muffin comes out clean. Let cool for at least 10 minutes before enjoying.

Vegan Banana Nut Muffins
Bursting with banana flavour, little pops of nut crunch, tender, lightly sweet, and gorgeously moist.
Dry ingredients:
1 1/2 cups all-purpose flour
3/4 cup white sugar
2 teaspoons baking powder
1 teaspoon cinnamon
1/2 teaspoon salt
Wet ingredients:
2 medium ripe bananas (, mashed)
3/4 cup non-dairy milk
1/4 cup light oil ((such as canola or vegetable))
1 tablespoon lemon juice
2 teaspoons vanilla extract
Add ins:
1 medium ripe banana (cut into chunks)
1/2 cup chopped walnuts or pecans (, plus extra for sprinkling on top)
Preheat your oven to 400F (200C). Lightly grease the cups of a muffin pan or fill with 12 non-stick liners.
In a large bowl, mix together all of the dry ingredients.
In a medium bowl, mix together mashed banana with all of the wet ingredients. Add the wet into dry, and mix until it’s just starting to come together. Be careful not to over mix, lumps are totally cool. Add in the chopped banana and nuts and give it 3 to 4 more stirs.
Divide the batter evenly among the muffin pan and finish by sprinkling extra nuts on top (optional). Bake for 22 to 26 minutes until the muffins have risen and are golden brown on the edges, and a toothpick inserted into the center of a muffin comes out clean. Let cool for at least 10 minutes before enjoying.

Bon appetegan!
Sam.
If you liked this recipe you might also enjoy:
This post Vegan Banana Nut Muffins appeared first on it doesn't taste like chicken
May 10, 2017
Vegan Creamy Pesto Pizza
Creamy, rich, basil bursting, zesty, garlic, peppery pizza, with pops of sweet grape tomatoes, yus-puhlease. Vegan Creamy Pesto Pizza you make one mighty fine meal.

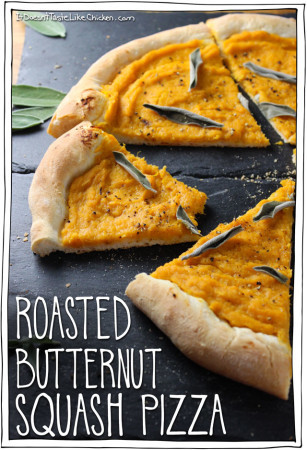
I love getting creative with pizza toppings that aren’t your standard, such as my Vegan Leek & Potato Pizza, and my Roasted Butternut Squash Pizza. These pizzas don’t have the traditional ooey gooey cheesiness, (for ooey gooey cheesy pizza be sure to pick up a copy of Fuss-Free Vegan) but instead are flavour busting handheld deliciousness. That’s what we have in this Vegan Creamy Pesto Pizza. It’s a total party in your mouth, pesto popping pizza. (Yeah, I thought that sounded pretty cute too).

Party in your mouth, check, but what about east to prepare. You know it! Just pop everything in a blender, puree, spread on pizza dough, top with tomatoes and bake. Takes less than 10 minutes to prepare, just the way I like it.

To make Vegan Creamy Pesto Pizza: Add all the pesto ingredients to a blender and blend until smooth and creamy, stopping to scrape the sides as needed.
*If you don’t have a high-speed blender, you might want to boil the cashews for 10 minutes first to soften them so they blend smoothly. Drain, rinse, then add to the blender as normal.

Ooooeee! This sauces is so deliciously creamy I had a hard time not drinking it all straight from the blender. Try to keep it classy, Sam.

Stretch your pizza dough to fit you pan, then spread all of the pesto sauce across the dough. Top with the grape tomatoes, then pop in the oven to bake for about 18 to 24 minutes until the edges are golden brown. Sprinkle over some fresh basil and red pepper flake and serve hot.

Vegan Creamy Pesto Pizza
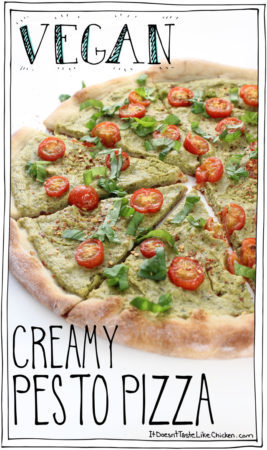
It takes just 5 minutes to whip up this creamy, rich, basil bursting, zesty, garlic, peppery sauce. Top with tomatoes and bake. Yum!
For the pesto:
1 cup raw cashews
3/4 cup water
1 bunch fresh basil ((set aside some leaves for garnish ))
3 tablespoons lemon juice
2 tablespoons nutritional yeast
2 cloves garlic (, roughly chopped)
1/2 teaspoon salt
1/2 teaspoon pepper
For the pizza:
1 pizza dough ((store-bought or homemade))
1 1/2 cups cherry or grape tomatoes (, halved)
1/2 teaspoon red pepper flakes ((optional))
Preheat your oven to 425F and lightly grease a pizza pan.
To make the pesto: if you don’t have a high-speed blender start by adding the cashews to a small pot and covering them with water. Bring to a boil and cook for about 10 minutes until they are tender. Drain and rinse. If you have a high-speed blender, you can simply skip to the next step.
Add the cashews and water to the blender and blend until smooth and creamy. Now add all of the remaining pesto ingredients and blend until smooth, stopping to scrape the sides as needed.
To make the pizza: stretch the dough on a well-floured surface to fit your pan. Spread the pesto sauce over the dough, then top with cherry tomatoes. Bake for 18 to 24 minutes until the edges of the crust are golden brown. Finish by garnishing with extra fresh basil and red pepper flakes if using.
Bon appetegan!
Sam.
If you liked this recipe you might also enjoy:


This post Vegan Creamy Pesto Pizza appeared first on it doesn't taste like chicken
May 7, 2017
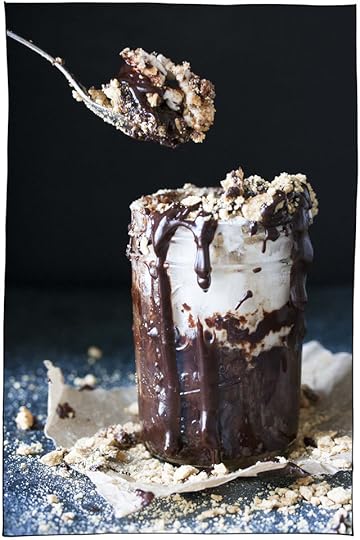
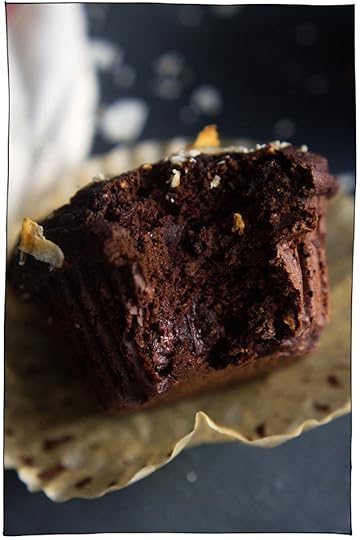
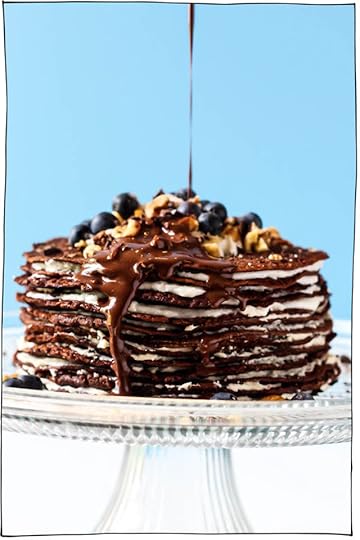
30 Super Chocolatey Vegan Chocolate Recipes
Some seriously exciting things have been going on around the blog, and I’m not just talking about 30 Super Chocolatey Vegan Chocolate Recipes (although that is clearly, very exciting). In the last week I have been working on giving It Doesn’t Taste Like Chicken a little facelift. Did you notice?
I’m in love with the new cleaner homepage, the adjustable serving size on the recipes, and I especially love the fancy new recipe index (desktop only) with its clickable filtering system so you can find the recipes you want faster. (On mobile, just use the search bar). What do you guys think? I hope you love it as much as I do!
These are all small details, but make me super happy and want to celebrate the way all good things should be celebrated: with vegan chocolate recipes of course. …and cocktails, but it’s too early in the morning for that.

If that doesn’t make you drool then I seriously don’t know what does.
I rounded up 30 totally decadent, beautiful, rich, exciting, face-dive worthy vegan chocolate recipes from my blogging friends across the web to share with you here today. Just click on the image or the title of the dish to take you right to the recipe. Chocoholics rejoice!

Joy Food Sunshine: Mini No-Bake Vegan Chocolate Cheesecake

Emilie Eats: Chocolate Chip Almond Butter Brownies

Feasting on Fruit: Salted Chocolate Truffle Bar

My Darling Vegan: Hot Fudge Espresso Cake

Yumsome: Vegan Salted Caramel Chocolate Pots

It Doesn’t Taste Like Chicken (that’s me!): The Ultimate Vegan Chocolate Cake
Radiant Rachels: Buckwheat Chocolate Orange Pancakes

Rhian’s Recipes: Gluten-Free Vegan Chocolate Truffle Cake

Veggies Don’t Bite: Sriracha Tahini Fudge

It Doesn’t Taste Like Chicken (that’s me!): Vegan Chocolate Pudding Cake

Craving Nature: Homemade Chocolate Vegan Ice Cream

Beaming Baker: Ultimate Fudgy Paleo Vegan Brownies

Goodness is Gorgeous: Raw Chocolate Hazelnut Cheesecake

Elepantastic Vegan: Vegan Chocolate Peanut Butter Pancakes
Namely Marly:

The Endless Meal: Salted Caramel Vegan Skillet Brownie

Cheftographer: Vegan Chocolate Lover’s Cake
Veggies Don’t Bite: Flourless 5 Minute S’mores Molten Lava Cake
Love Me, Feed Me: Spicy Chocolate Muffins

Baking-Ginger: Moist Gluten-Free Chocolate Cake with Avocado Frosting

My Darling Vegan: Vegan Pots de Creme

Healthy n Happy: Chocolate Heart Poptarts
Emilie Eats: Vegan & Gluten-Free Chocolate Crepe Cake

It Doesn’t Taste Like Chicken (that’s me!): Vegan Peanut Butter Hot Fudge Sundae

Vanilla and Bean: Vegan Chocoalte Hazelnut Caked with Whipped Ganache
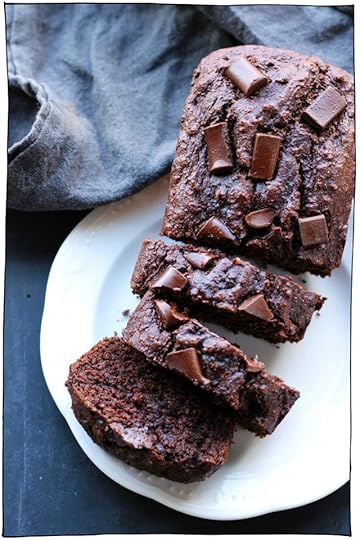
Garden in the Kitchen: Double Chocolate Banana Bread

Baking-Ginger: 5 min Chocolate Nice Cream

Baking-Ginger: Healthy Double Chocolate Cookies
Feasting on Fruit: Low-Fat Chocolate Mousse Cake

Lauren Caris Cooks: Vegan Chocolate Ganache Torte
Bon appetegan!
Sam.
This post 30 Super Chocolatey Vegan Chocolate Recipes appeared first on it doesn't taste like chicken
May 3, 2017
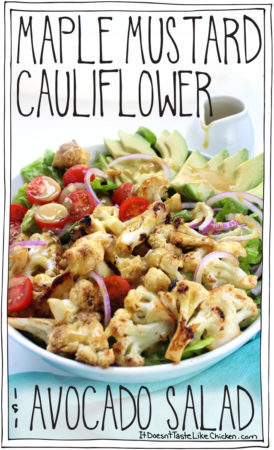
Maple Mustard Cauliflower & Avocado Salad
Sweet mustardy sticky skillet cauliflower florets, on a bed of crispy romaine, with the zing of red onion, pops of cherry tomatoes, and creamy avocado. I mean, I could just end the post right here and I’m pretty sure I’ve sold you on this salad already.

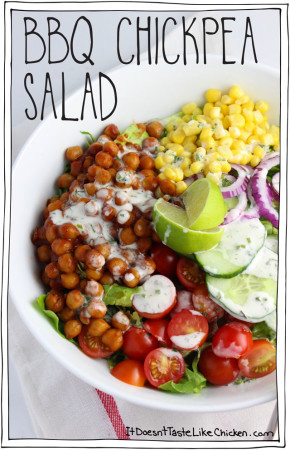
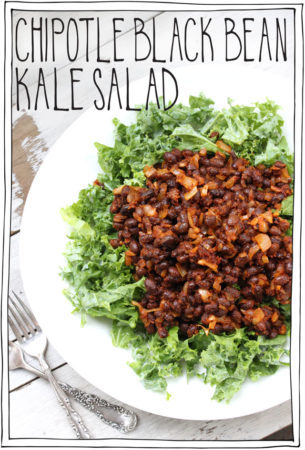
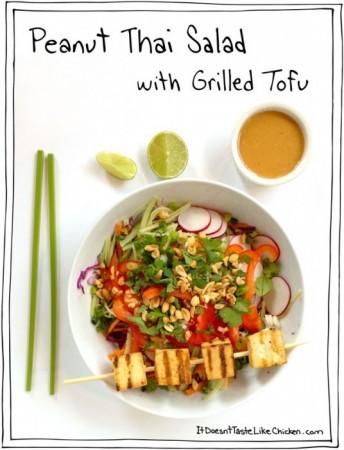
I love me a big old meal salad. My BBQ Chickpea Salad, Chipotle Black Bean Kale Salad, and Peanut Thai Salad are all faves, but I was vibing for something a little different. And that difference is my new Maple Mustard Cauliflower & Avocado Salad. Oooee! So much yum.
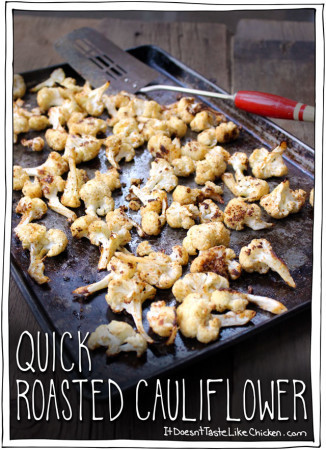
I think cauliflower is quickly becoming one of my favourite vegetables. You can give it a crispy cornflake coating for Buffalo Cauliflower, quickly roast it, or even make a creamy sauce out of it, and sautéed in this maple mustard sauce… mouth explosion.

If you have different veggies on hand, this maple mustard cauliflower combo could really be paired with any veggies and be totally and utterly scrumptious. Or, if you just want all the cauliflower and none of the lettuce, it would make for a gorgeous side dish as well. Happy salading my friends!

To make Maple Mustard Cauliflower & Avocado Salad: Mix all of the dressing ingredients together in a small bowl or cup.

Add the cauliflower to a large bowl, and pour over half of the dressing (saving the remaining half of the dressing for later). Toss to coat all of the cauliflower.

Heat a large pan or skillet over medium-high heat, and add the cauliflower. Sauté turning the cauliflower every few minutes until the cauliflower is browned and tender all the way through, about 10 minutes.

Prepare the salad by dividing the romaine amoung two large salad bowls and topping them with the tomatoes, avocado slices, red onion, and the cooked cauliflower. Drizzle the remaining dressing over the salad to taste.

Maple Mustard Cauliflower & Avocado Salad
Sweet mustardy sticky skillet cauliflower florets, on a bed of crispy romaine, with the zing of red onion, pops of cherry tomatoes, and creamy avocado.
For the dressing:
1/4 cup maple syrup
1/4 cup dijon mustard
2 tablespoons olive oil
1 clove garlic (, minced)
1/4 teaspoon salt
For the salad:
1/2 head cauliflower (, cut into florets)
2 romaine hearts (, chopped)
1 cup grape or cherry tomatoes (, halved)
1 avocado (, sliced)
¼ red onion (, thinly sliced)
Mix all of the dressing ingredients together in a small bowl.
Add the cauliflower to a large bowl, and pour over half of the dressing (saving the remaining half of the dressing for later). Toss to coat all of the cauliflower.
Heat a large pan or skillet over medium-high heat, and add the cauliflower. Sauté turning the cauliflower every few minutes until the cauliflower is browned and tender all the way through, about 10 minutes.
Prepare the salad by dividing the romaine amoung two large salad bowls and topping them with the tomatoes, avocado slices, red onion, and the cooked cauliflower. Drizzle the remaining dressing over the salad to taste.
Bon appetegan!
Sam.
If you liked this recipe you might also like:
This post Maple Mustard Cauliflower & Avocado Salad appeared first on it doesn't taste like chicken
Sam Turnbull's Blog

- Sam Turnbull's profile
- 35 followers


.%20Egg-free%2C%20dairy-free%2C%20vegetarian.%20%23itdoesnttastelikechicken)