
Sam Turnbull's Blog, page 47
January 14, 2018
Crispy Crunchy Roasted Chickpeas
Crispy Crunchy Roasted Chickpeas – one bite is delightfully crispy with a slightly tender inside, the next bite gives a loud satisfying crunch, then fingers must be licked to get all the salty goodness off. Repeat. You’re welcome.

Crispy Crunchy Roasted Chickpeas are one of my all-time favourite easy salty snacks. There are many recipes for roasted chickpeas floating around but from my recipe testing, many of those recipes resulted in squishy, mushy, or burnt chickpeas, and not crispy crunchy. I’m ALL about the crispy crunchy.
After a lot of recipe testing, I discovered the key to crispy crunchy was to dry roast the chickpeas first so they have a chance to get crispy and then season them at the last minute. Boom! Works every time.

This recipe isn’t actually new to It Doesn’t Taste Like Chicken. I originally posted it a long, long time ago in my very first year of blogging way back in 2013. See the original ugly old picture ↑↑↑.
Back in the good ol’ days when I had zero knowledge of food photography and zero knowledge of recipe writing. I used a phone to take pictures, under regular kitchen lights on my kitchen floor. I had no measurements of any kind, and only gave a vague idea of what to actually do as “instructions”. My how things have changed. …I mean, well… I still take my pictures on my kitchen floor, but floor food is “professional”, right?
Have any of you been following along since then? Let me know in the comments.
But some of those old “recipes” are still my go-to’s, like this one, so it was time these chickpeas got a little facelift. (And by little, I mean some serious surgery to make this crusty old recipe into sparkling tempting deliciousness).

Ahhh there we go. So much better.
These little dudes aren’t just for snacking either, they also make for a super yummy crunchy salad topper. Crispy Crunchy Roasted Chickpeas are best eaten fresh, as they can get a little soft when stored, but don’t worry, I promise you will have no problem polishing them off immediately.
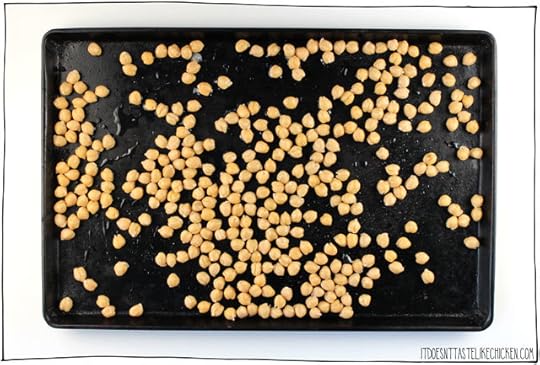
To make Crispy Crunchy Roasted Chickpeas: spread the chickpeas in a single layer on a baking sheet. It’s ok if they are still a bit wet, they will dry out in the oven. Bake 30 minutes, stopping to shake the pan every now and then.

Remove the chickpeas from the oven and carefully add the hot chickpeas to a bowl along with the olive oil, chili powder, thyme, and salt. Toss well to coat the chickpeas evenly.
Spread the seasoned chickpeas back onto the baking sheet and return to the oven for another 10 to 15 minutes until they are golden and crispy. Remove from the oven and let cool a bit before enjoying. You can snack on them still warm, or completely cooled.

Crispy Crunchy Roasted Chickpeas
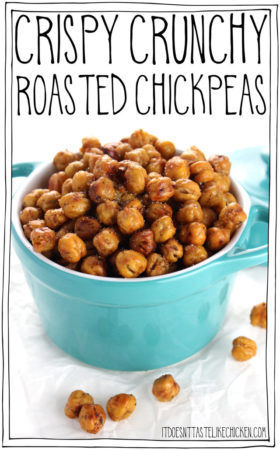
The secret to getting them extra crispy is to dry roast them first, and then season them at the last minute. This is an easy to make, healthy, vegan, 5 ingredient snack that everyone will love.
1 19oz can chickpeas, (drained and rinsed)
1 tablespoon olive oil
3/4 teaspoon chili powder
1/2 teaspoon dried thyme leaves
1/2 teaspoon salt
Preheat your oven to 375F (190C).
Spread the chickpeas in a single layer on a baking sheet. It’s ok if they are still a bit wet, they will dry out in the oven. Bake 30 minutes, stopping to shake the pan every now and then.
Remove the chickpeas from the oven and carefully add the hot chickpeas to a bowl along with the olive oil, chili powder, thyme, and salt. Toss well to coat the chickpeas evenly. Spread the seasoned chickpeas back onto the baking sheet and return to the oven for another 10 to 15 minutes until they are golden and crispy. Remove from the oven and let cool a bit before enjoying. You can snack on them still warm, or completely cooled.
Store in an air-tight container in the fridge for about a week. They may start to get a little soft and less crispy.
Bon appetegan!
Sam.

This post Crispy Crunchy Roasted Chickpeas appeared first on It Doesn't Taste Like Chicken


January 10, 2018
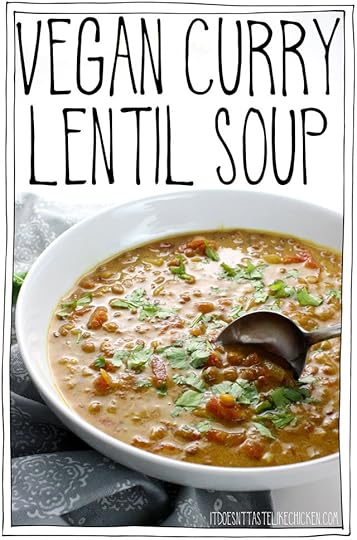
Vegan Curry Lentil Soup
Before I get to Vegan Curry Lentil Soup (which I’m currently obsessed with and can’t wait to get to), I have to tell you some pretty crazy news. My cookbook Fuss-Free Vegan is selling out! It’s already completely sold out on amazon.ca and on Barnes & Noble. There are even people trying to sell used copies on amazon.ca for $150, how crazy is that!? Do not buy my book for $150, it’s not a good deal. Luckily, there appear to be some copies of my book still on amazon.com and just a couple left at Indigo. The book is being reprinted but I am not sure when the reprint is arriving, so if you want your hands on a first edition, you better go hop like a bunny and get one now!
Now on to Vegan Curry Lentil Soup!
Just looking at these pictures I wish I had a big bowl of this soup in front of me again right now… even though it’s currently first thing in the morning and that might be an odd breakfast choice.
Vegan Curry Lentil Soup is the perfect way to celebrate my cookbook’s success. I know most people celebrate with fancy cocktails, or maybe some champagne cupcakes, but I assure you, I have already done lots of celebrating with boozy and sweet treats over the holidays. Now that it’s January (also known as #veganuary), I’m looking to celebrate instead with a warm, hearty, spicy, bowl of health. Oh boy does this fit the bill!

The lentil and tomato base make this soup hearty and satisfying with rich and aromatic spices, and coconut milk stirred in at the last minute for a little creamy bliss. And if you’re into hot spice (which I totally am) you can optionally kick it up with cayenne, (which I totally did).
In true fuss-free style, this recipe is very easy to make. Most of the time is spent just letting the soup simmer away which will make your kitchen smell amazing. This soup is gorgeous freshly made but it also holds up well and gets even better the next day, making it perfect for a make ahead meal.

To make Vegan Curry Lentil Soup: in a large soup pot, heat the oil over medium-high heat. When hot, add the onion, garlic, and ginger. Suaté for about 5 minutes until the onions turn translucent and begin to brown.
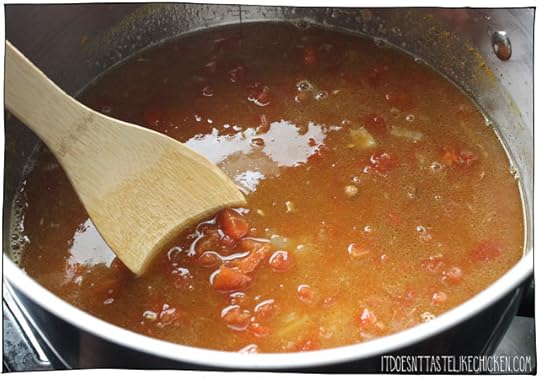
Stir in the vegetable broth, diced tomatoes, brown or green lentils, curry powder, cumin, salt, and cayenne (if using). Cover and bring to a simmer.

Cook for about 25 minutes until the tomatoes are cooked and the lentils are tender.I love brown or green lentils for this recipe as they are a bit heartier and have more chew, but if you would prefer to use red lentils, do not add them until the last 10 minutes of cooking so they don’t get mushy.
Stir in the coconut milk and heat through. Serve hot and garnish with cilantro.

Vegan Curry Lentil Soup

This is an easy hearty and satisfying soup with rich and aromatic spices, and coconut milk. Wonderful freshly made but it also holds up well and gets even better the next day, making it perfect for a make ahead meal.
1 tablespoon light oil ((such as canola or vegetable))
1 yellow onion, (chopped)
3 cloves garlic, (minced)
1 inch piece fresh ginger, (minced)
3 cups vegetable broth
1 28oz can diced tomatoes
1 cup brown or green lentils
2 tablespoons curry powder
1 teaspoon cumin
1/2 teaspoon salt
1/4- 1/2 teaspoon cayenne ((optional for spice))
1 1/2 cups full-fat coconut milk ((the kind in a can))
1 handful cilantro, (chopped)
In a large soup pot, heat the oil over medium-high heat. When hot, add the onion, garlic, and ginger. Suaté for about 5 minutes until the onions turn translucent and begin to brown.
Stir in the vegetable broth, diced tomatoes, brown or green lentils, curry powder, cumin, salt, and cayenne (if using). Cover and bring to a simmer. Cook for about 25 minutes until the tomatoes are cooked and the lentils are tender.
Stir in the coconut milk and heat through. Serve hot and garnish with cilantro.
If you would like to use red lentils, do not add them until the last 10 minutes of cooking so they don’t get mushy.
Bon appetegan!
Sam.
This post Vegan Curry Lentil Soup appeared first on It Doesn't Taste Like Chicken
January 7, 2018
Banana Milk – 2 Ingredients!
Did you hear of the new non-dairy milk trend in town? Banana milk. Yep, it’s a thing. People are buying banana milk in cartons. Why? I’m really not sure when it’s so easy and so cheap to make at home! No really, like 2 ingredients, press a button on a blender easy.
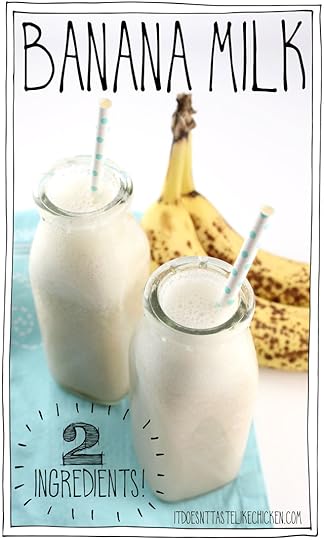
Did you guess the 2 ingredients yet? Bananas and water. I knew you would you clever minx you!
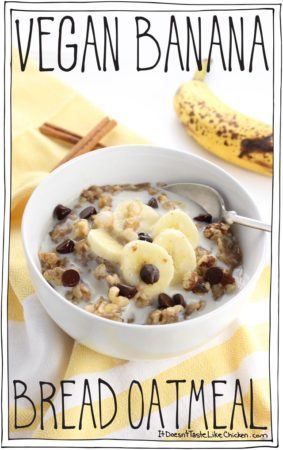
I came across this idea a while ago but thought I shouldn’t bother posting such an easy recipe that everyone could figure out. But then, one fine morning I woke up, poured myself a big bowl of cereal, only to discover that I was out of soy milk. Heartbroken momentarily, my mental lightbulb turned on and I remembered banana milk!
So I whipped up a batch, added a touch of cinnamon for some extra oh la la, and poured it over my cereal. The result: the most delicious bowl of cereal ever!!!!

So delicious and takes about 10 seconds to make, this 2 ingredient recipe is a good one to have on hand for emergencies or just for enjoying banana-y goodness. It’s not just for cereal either, this banana milk would be delish on oatmeal, for dipping cookies, in baked goods, in hot chocolate, to make fudgesicles, or basically anywhere that could use a touch of sweet creaminess.

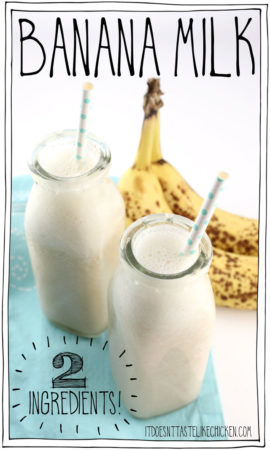
To make Banana Milk: grab a banana. I know, complicated stuff here. The riper the banana, the sweeter your milk will be so I always love when my bananas get super spotty.

Peel your banana (told you, super complicated), and add it to the blender with water. You could also add in vanilla extract, cinnamon, nutmeg, or any other flourishes you think would be yummy.

Blend until smooth and creamy. For a thicker banana milk, use less water. For a thinner milk, use more. That’s it. Enjoy!

Banana Milk – 2 Ingredients
1 banana ((the riper it is the sweeter the milk will be))
1 cup water
Optional add-ins:
1/2 teaspoon vanilla extract
1/4 teaspoon cinnamon
1/8 teaspoon nutmeg
Add the banana and water to a blender. If using, also add in any of the optional add-ins. Blend until smooth and creamy. Feel free to add more or less water for a thinner or thicker consistency.
Bon appetegan!
Sam.

This post Banana Milk – 2 Ingredients! appeared first on It Doesn't Taste Like Chicken
January 3, 2018
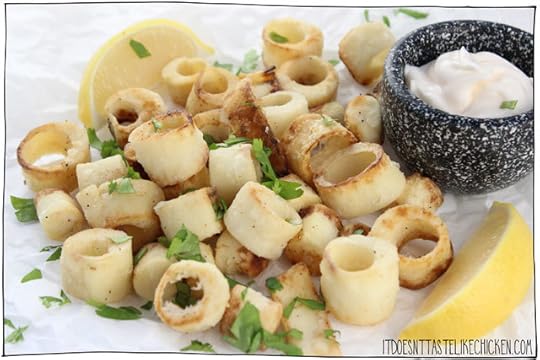
Heart of Palm Calamari
Happy New Year!!!! Can I get a “woot woot” for 2018? I’m giddily jumping in and starting off this year’s recipes with a real ohh ahh bang: hello, Heart of Palm Calamari!
Do you see that photo? Yeah, pretty dang cool if I do say so myself. A new vegan restaurant moved into town (woot woot!) and although I have yet to visit it, I have heard rumours of their vegan calamari. Always the impatient one I needed to make it for myself ASAP. The resto uses mushrooms for their version but after a bit of googling and coming across a recipe from One Green Planet, I decided heart of palms were just the thing I wanted to use.

Tender, flaky, crispy fried rings of deliciousness with a squeeze of lemon. Yes please, I’ll have 10 orders. When heart of palm is sliced you can pop out the center making these perfect little rings. How cute are they? This vegan calamari is more on the tender side than traditional calamari (it’s not chewy), but that makes this heart of palm calamari recipe even better in my opinion!
If you are new to heart of palm, believe it or not, it’s usually available canned in almost any grocery store. There are even three different brand options in my local grocery store! This tropical veg stole my heart (ba dum dum tsk!) as a perfect seafood substitute because of it’s tender, flaky texture and mild taste. I’ve already used it a few times in my cookbook, Fuss-Free Vegan, but I’m thrilled it’s making it’s first blog debut today!
Note: if you’re concerned about the sustainability of heart of palms, rest assured that, unlike some palm oils, most canned varieties of this veggie comes from farmed peach palms. Just check with the brand you are purchasing to be sure.

To make Heart of Palm Calamari: Slice the heart of palm into 1 inch slices. Then you should be able to pop out the center of each slice to make a ring. Some heart of palm is a bit on the smaller side and may be too small for the center to pop out, and that’s ok, those solid slices will work just as well.
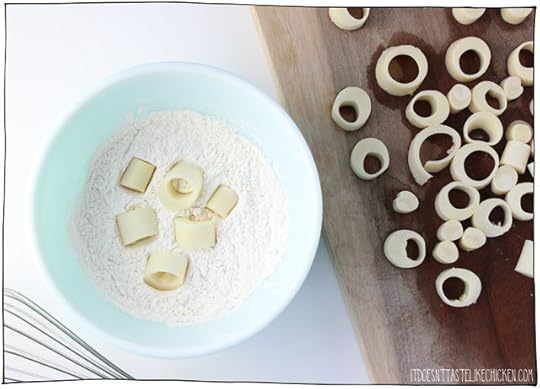
In a medium bowl, mix together the flour, cornstarch, salt, and garlic powder.
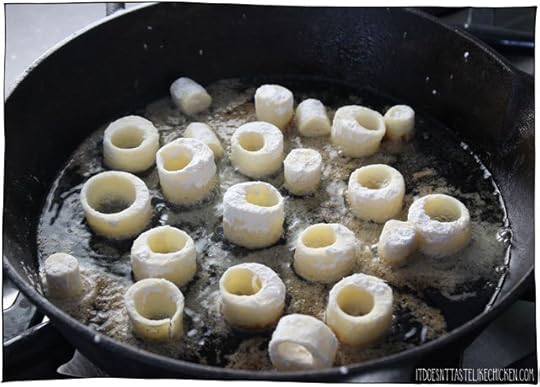
Cover the bottom of a skillet with about 1/4 inch of oil and put over medium-high heat. When the oil is hot, take a handful of heart of palm rings (which should still be wet from draining). Dredge the rings in the flour mixture shaking off the excess, and carefully drop them into the hot oil. Repeat with the remaining heart of palm. You may need to do this in batches so your pan isn’t too crowded. Fry, turning the pieces until they are lightly golden all over. Drain on paper towel. Serve hot garnishing as desired.

Heart of Palm Calamari

Heart of palm is the perfect vegan substitute for calamari. The tender, flaky texture is perfect. Toss in seasoned flour mixture and serve with wedges of lemon for an easy vegetarian seafood treat!
1/2 cup all-purpose flour
1/4 cup cornstarch
1/2 teaspoon salt ((plus more for garnish))
1/2 teaspoon garlic powder
oil for frying
1 398ml can heart of palm, (drained, cut into 1" pieces, rings separated)
Optional garnishes:
1 lemon, (cut into wedges)
1 handful parsley, (chopped)
Aioli (page 208 in Fuss-Free Vegan), marinara, or tartar sauce (page 144 in Fuss-Free Vegan), (for dipping)
In a medium bowl, mix together the flour, cornstarch, salt, and garlic powder.
Cover the bottom of a skillet with about 1/4 inch of oil and put over medium-high heat. When the oil is hot, take a handful of heart of palm rings (which should still be wet from draining). Dredge the rings in the flour mixture shaking off the excess, and carefully drop them into the hot oil. Repeat with the remaining heart of palm. You may need to do this in batches so your pan isn’t too crowded. Fry turning the pieces until they are lightly golden all over. Drain on paper towel. Serve hot garnishing as desired.
Bon appetegan!
Sam.
This post Heart of Palm Calamari appeared first on It Doesn't Taste Like Chicken
December 31, 2017
Top 10 Vegan Recipes of 2017
2017 – whew! Am I right!? What a whirlwind of a year. A fabulous whirlwind. Like a jacuzzi style whirlwind with jets and a glass of wine … if that’s a thing that exists. (That should totally be a thing that exists).
Every year at the end of the year it has been my tradition to share with you the top 10 vegan recipes of the year. You can also check out the top 10 vegan recipes for 2016, 2015, and 2014. It’s a fun little way to recap and remember 2017 for all the deliciousness it could muster. (Which was a LOT of deliciousness).

HERE’S WHAT HAPPENED OVER THE LAST YEAR:
It Doesn’t Taste Like Chicken broke a new record that I had dreamed of breaking but didn’t really think it would happen for a long, long time. My blog now receives over 1 MILLION pageviews a month!! Yeah, I know. Crazy talk. That’s more than double what my site received last year. Now that’s a LOT of vegan recipe love. ❤️
I released my first cookbook Fuss-Free Vegan which has been met with rave reviews from you! I love being tagged in all your pictures on Instagram and am continually blown away by all of the amazing 5-star reviews on Amazon. All my hard work paid off because, within a month of the release date, Fuss-Free Vegan is already getting a reprint, meaning what’s out now is the first edition print! How cool is that?
I made my TV, radio, and public speaking debuts. With the release of Fuss-Free Vegan came a lot of press, and I mean a lot! I was on TV 7 times, on the radio well over 20 times, and did 5 public speaking events. The first few times were terrifying, but once I relaxed into it, I began having a lot of fun and now I suddenly have a burning desire to have a cooking show… Hey there Food Network, you in?
Honourable Mentions:
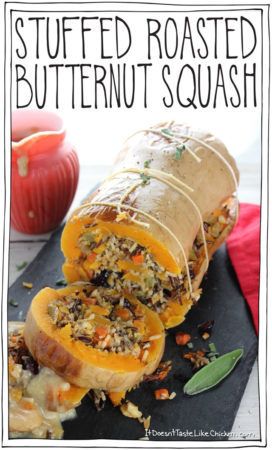
Because I do this wrap every year right at the end of the year, the recipes posted in December don’t get much of a fighting chance to make it to the list. But if I were to edit the Top Vegan Recipes of 2016 list, I would now have to add my Stuffed Roasted Butternut Squash and Perfect Vegan Sugar Cookies which have both become very popular recipes on my blog, so if you haven’t checked them out yet, take a look now.
Every now and then I also like to share non-recipe content on my blog, and you seem to love it because my How to Swap This for That to Make it Vegan was a huge hit and helped many new vegans see how easy it can be. 50 – 5 Ingredient or Less Vegan Recipes, 25 Game-Changing Vegan Taco Recipes, 25 Vegan Holiday Main Dishes That Will Be the Star of the Show were also popular posts.
And now for the drumroll please! The top 10 vegan recipes of 2017 are:
10. Quick & Easy Vegan Cottage Cheese
I LOVE when you request recipes because it’s my goal to make vegan cooking, easy, fun, and totally delicious. After a poll on Facebook (which I run fairly often), it was clear that a lot of you missed cottage cheese. Now wrapping up the year, it’s very, very clear that you wanted and fell in love my cottage cheese recipe. It quickly became a fan favourite and has wowed many.

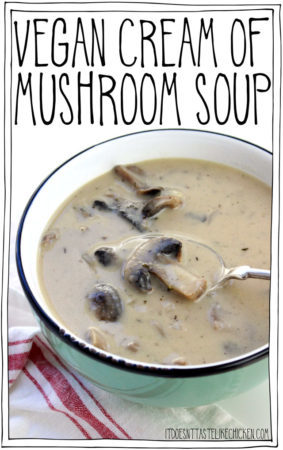
9. Vegan Cream of Mushroom Soup
KISS- Keep It Simple Stupid. Sometimes I almost feel guilty posting recipes such as this mushroom soup as it’s just such an easy recipe. I have learned that I should never feel guilty posting simple recipes because you love simple recipes just as much as I do. Woohoo!! This mushroom soup recipe has been a hit with vegans and non-vegans. Some of you were sceptical about the coconut milk used, but once you tasted it for yourself, you fell madly in love!

8. Quick Vegan Tofu Ricotta
Basics make the world go round. Well maybe not, but tofu ricotta is so easy to whip up and is perfect for layering into lasagna, pasta dishes, or anywhere that ricotta is used. Yes, it’s made from tofu, and yes, it really is delicious.

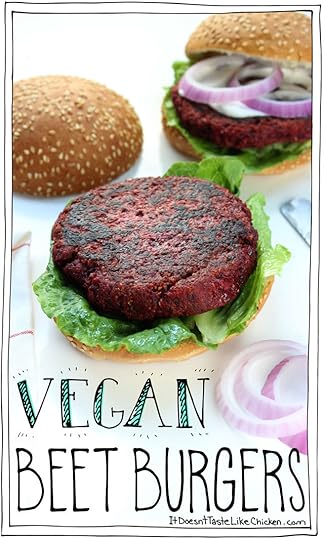
7. Vegan Beet Burgers
This recipe was a remake of a beet burger I posted on my blog way back when I didn’t know how to write a recipe and I would have incredibly vague instructions. Luckily, since then I have learned a lot about recipe writing and was able to tweak this recipe to not only be much more clear but make it easier and tastier. You approved.
6. Vegan Tiramisu
Ahhhh classics. Definitely not my easiest recipe on the blog, but sometimes a little fuss is worth it. Especially when espresso, cake, and cashew cream are involved. My favourite was when I served this to an Italian friend of mine and she couldn’t believe it was vegan… well she did, but only because I was the one serving her.

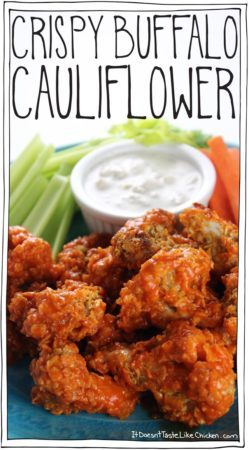
5. Crispy Buffalo Cauliflower
I’m certainly not the first person to do a version of cauliflower bites, so I put off posting this recipe for a long time… like 2 years because I thought it had been soooo done. But gosh, I really do like my recipes the most sometimes, so I thought I should share with you the version I had been secretly perfecting over the years. I’m so glad I did. This taught me that just because something has been done a million times before, it doesn’t mean that I can’t share my own version.

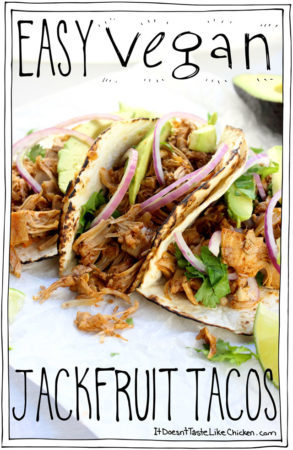
4. Easy Vegan Jackfruit Tacos
Jackfruit the wonder fruit that looks and tastes like meat! How weird and by weird I mean delicious! The only thing that I don’t love about jackfruit is that it can be difficult to find, but if you are able to lay your mitts on a couple of cans, it is oh so worth it!

3. Vegan Irish Stew
Rich, veggie-packed, hearty, beer-infused stew… need I say more? No, I don’t think I do.

2. The Best Vegan Chili Ever!!!
I’m so happy to see that my claims of this chili recipe being “the best” held up, but I can’t say I’m surprised because it really is the best I have ever had. #biased. When I have a group of people visiting and want to make something ahead of time, this is a go to. Everyone loves it, vegan or not.

1. The Easiest (and most delicious) Vegan Cornbread
It was so interesting to see that my cornbread recipe only has about 8k shares yet was the most popular recipe of the year. Now that may seem like a lot to some, but my Vegan Irish Stew had 43k shares, and it’s not unheard of for one of my recipes to reach over 100k shares. (I know, crazy talk). But what this cornbread recipe did have was super long average time spent on page. Meaning my most popular recipe this year isn’t something that people were sharing, but it was something they were cooking! Now that’s what I like to hear
December 27, 2017
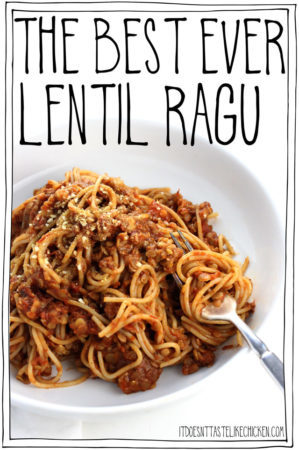
The Best Ever Lentil Ragu
Today I have for you, The Best Ever Lentil Ragu recipe. Yes, I know, I’m 100% biased because it’s my own recipe, but my friends, you have no idea. No idea until you try it anyway, then you’ll know the amazingness that is this lentil ragu recipe. This vegan ragu is so hearty, rich, slightly smoky, it makes for the best (secretly pretty healthy) comfort food heaven. But it gets even better…

…this recipe takes just 15 minutes to make. No really, 15 MINUTES. That’s it. Talk about a perfect easy weeknight meal.
My hack is using a jar of store-bought tomato sauce. Then you just cook the lentils right in the sauce so they suck up the tomato deliciousness. Stir in chopped walnuts which add to the texture and richness, and spices to take it from store-bought to OMG how in the world did you make this sauce so scrumptious?
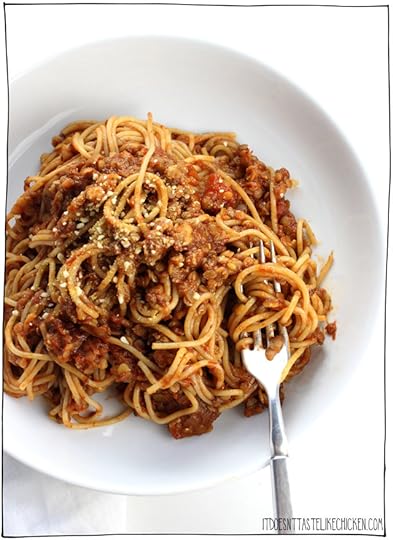
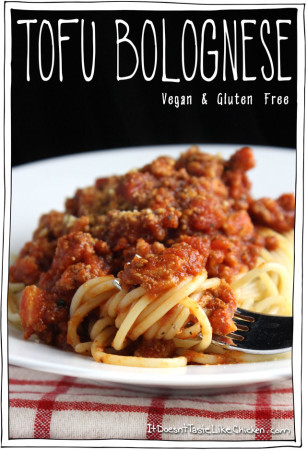
You may have tried my Tofu Bolognese recipe before, which is one of my most favourite recipes (I’m pasta obsessed). Well, this lentil version is competing now. They are both wonderful in their own unique ways so I recommend trying both dishes to see which one you like best. Or if you are like me, then you could add both pasta recipes to the regular rotation, because can you ever have too many pasta nights? The answer is no.

To make The Best Ever Lentil Ragu: bring a large pot of water to a boil and cook the pasta according to package directions.
Add the tomato sauce, vegetable broth, and lentils to a large skillet or saucepan. Now, I know I will be asked if you can use green or brown lentils instead of red lentils. The answer is yes, but both green and brown lentils take about 20 minutes to cook (instead of the 10 minutes red lentils take to cook), so this will no longer be a 15-minute recipe. That’s why I am such a huge fan of red lentils.
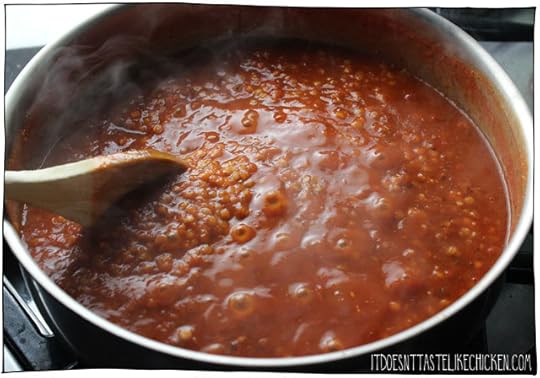
Cover and bring to a simmer stirring gently every now and then. Simmer covered for about 10 minutes until the lentils are tender.
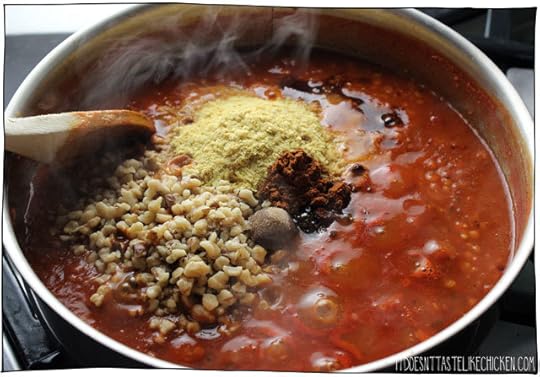
Finish the sauce by stirring in the walnuts and all of the seasonings.

You can either toss the hot pasta with the sauce or spoon the sauce over top of the pasta. Garnish with Parmegan if desired.

The Best Ever Lentil Ragu!
This easy vegan pasta takes just 15 minutes to make! Vegetarian ragu recipe is hearty, rich, slightly smoky, and makes for the perfect weeknight meal.
For the lentil ragu:
1 650ml jar tomato sauce (or 3 cups homemade tomato sauce)
1 1/2 cups vegetable broth
1 cup red lentils
1/2 cup chopped walnuts
1/4 cup nutritional yeast
2 teaspoons soy sauce ((gluten-free if preferred))
2 teaspoons brown sugar
1 teaspoon chili powder
1/4 teaspoon liquid smoke
For the pasta:
400 g spaghetti or pasta of choice ((gluten-free if preferred))
Parmegan ((optional))
Bring a large pot of water to a boil and cook the pasta according to package directions.
Add the tomato sauce, vegetable broth, and lentils to a large skillet or saucepan. Cover and bring to a simmer stirring gently every now and then. Simmer covered for about 10 minutes until the lentils are tender.
Finish the sauce by stirring in the walnuts and all of the seasonings. You can either toss the hot pasta with the sauce, or spoon the sauce over top of the pasta. Garnish with Parmegan if desired.
Bon appetegan!
Sam.
This post The Best Ever Lentil Ragu appeared first on It Doesn't Taste Like Chicken
December 24, 2017
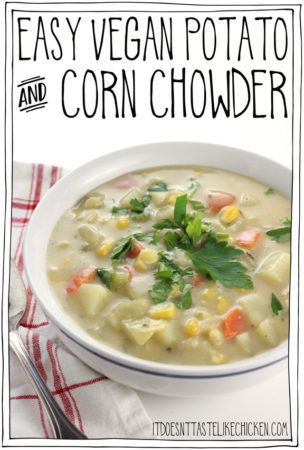
Easy Vegan Potato and Corn Chowder
My oven is being grumpy. It crossed its arms, stomped its feet, and refused to do any more work. I guess after two years of nonstop recipe testing it was demanding a break, and to make that happen, it broke its own ignitor. At least it seems more fun to blame my oven then it does to blame myself for using it so much. …I’m starting to understand why my oven is so cranky with me…
I was planning on posting a recipe for vegan scalloped potatoes (which I will eventually when my oven gets over its hissy fit), but my oven had other plans. Not sure what to do with the huge bag of potatoes I bought, I decided to whip up a simple chowder for dinner. Well, it’s time that I thanked my grumpy oven, and perhaps give it a real good polish, because wow am I glad I made this Easy Vegan Potato and Corn Chowder!

Simple, hearty, creamy, comforting chowder is just what the doctor ordered. (Not the oven doctor, he ordered a new ignitor). But the food doctor that is Sam’s stomach. The ingredients are so simple but isn’t simple often the best?

This Easy Vegan Potato and Corn Chowder would be perfect for a quick weeknight meal. It’s fantastic all on its own, but it’s also great served with a side sandwich or a crusty baguette and topped with vegan cheddar cheese or Addictive Coconut Bacon Bits (page 210 in Fuss-Free Vegan).

To make Easy Vegan Potato and Corn Chowder: heat the oil in a large soup pot over medium-high heat. When hot add the carrots, celery, onion and garlic. Sauté until the vegetables just start to soften and the onion turns translucent and begins to brown, about 5 minutes.

Sprinkle the flour and thyme over the vegetables and stir to coat. Continue to stir and cook for about a minute until the flour starts to brown.

Stir in the vegetable broth, non-dairy milk, and nutritional yeast. Bring to a simmer and cook until the potatoes are fork tender and the chowder has thickened, about 8 minutes.
Lastly, add in the corn and season with salt and pepper. If your chowder gets too thick, you can always thin it with water or a vegetable broth to the desired consistency. Serve hot. You can top with optional garnishes such as chopped parsley, Addictive Coconut Bacon Bits (page 210 in Fuss-Free Vegan), or vegan cheddar cheese.

Easy Vegan Potato and Corn Chowder
Creamy, comforting vegetable chowder, perfect for a quick weeknight meal.
1 tablespoon vegan butter or light oil
2 medium carrots, (peeled and chopped)
2 stalks celery, (chopped)
1 yellow onion, (chopped)
3 cloves garlic, (minced)
1/4 cup all-purpose flour ((use all-purpose gluten-free flour if preferred))
1 teaspoon dried thyme leaves
3 large white or yukon gold potatoes (about 1 1/2lbs) (peeled and diced (4 cups chopped))
2 cups vegetable broth
2 cups non-dairy milk ((such as soy or almond))
3 tablespoons nutritional yeast
1 cup fresh or frozen corn kernels
1 teaspoon salt ((or to taste))
1/4 teaspoon pepper ((or to taste))
Heat the oil in a large soup pot over medium-high heat. When hot add the carrots, celery, onion and garlic. Sauté until the vegetables just start to soften and the onion turns translucent and begins to brown, about 5 minutes.
Sprinkle the flour and thyme over the vegetables and stir to coat. Continue to stir and cook for about a minute until the flour starts to brown. Stir in the vegetable broth, non-dairy milk, and nutritional yeast. Bring to a simmer and cook until the potatoes are fork tender and the chowder has thickened, about 8 minutes.
Lastly, add in the corn and season with salt and pepper. If your chowder gets too thick, you can always thin it with water or a vegetable broth to the desired consistency. Serve hot.
Bon appetegan!
Sam.
This post Easy Vegan Potato and Corn Chowder appeared first on It Doesn't Taste Like Chicken
December 20, 2017
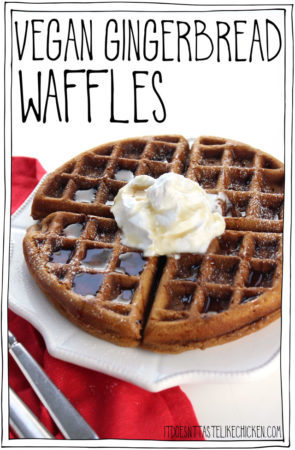
Vegan Gingerbread Waffles
How much fun were the 12 Days of Giveaways!? They were all the fun, that’s how much fun. As much as I had a total blast spreading holiday cheer via giveaways, I’m excited to get back in the kitchen and start sharing more easy vegan recipes with you again. Even better, I’m excited to have an excuse to eat Vegan Gingerbread Waffles for 3 days in a row. It was for testing purposes, clearly.

If you love gingerbread and you love waffles, well, the answer is obvious isn’t it? These Vegan Gingerbread Waffles are super easy to make but OMG are they delicious. Rich molasses, hints of spice, slightly sweet fluffy waffle goodness, topped with a dollop of Vegan Coconut Whipped Cream or Easy Vegan Marshmallow Fluff if you so desire (which you should clearly desire).

Vegan Gingerbread Waffles are perfect for a breakfast to celebrate the holiday season. These waffles are quite hearty so I enjoyed half of a waffle (or two of the sections) with a side of fruit. Cue the Christmas playlist!

To make Vegan Gingerbread Waffles: in a large bowl whisk together all the dry ingredients.

In a medium bowl whisk together all the wet ingredients. Pour the wet into dry and mix together until just combined. Lumps are totally cool.
* I included a fancy little hack for you in this recipe without even telling you… well ok I’m telling you now. I had you measure the oil first, then followed by the same amount of molasses. This is so your measuring cup will be left with a thin coat of oil on it so that when you pour in the molasses, it won’t stick to the cup and will slide right out. Pretty great right?

When the waffle iron is hot, spray oil or lightly brush oil on both the top and bottom griddles of the waffle iron. Pour about 1/4 of the batter onto the iron and lightly spread it around so that it just covers the griddle leaving room for the batter to expand.
Close the waffle iron and cook until the waffle is cooked through and golden on both sides. Use a fork or spatula to help release the waffles. Serve with a dollop of Vegan Coconut Whipped Cream or Easy Vegan Marshmallow Fluff and maple syrup if desired.

Vegan Gingerbread Waffles
The perfect easy vegan breakfast recipe for Christmas morning or the holiday season.
Dry ingredients:
2 cups all-purpose flour
1/4 cup white sugar
1 tablespoon baking powder
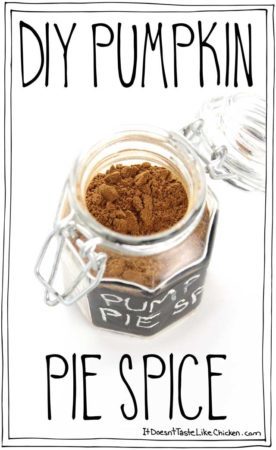
2 teaspoon Pumpkin Pie Spice
1/4 teaspoon salt
Wet ingredients:
1 cup non-dairy milk ((such as soy or almond))
1/2 cup light oil ((such as canola or vegetable))
1/2 cup fancy molasses
1 tablespoon apple cider vinegar
1 teaspoon vanilla extract
Preheat your waffle iron.
In a large bowl whisk together all the dry ingredients.
In a medium bowl whisk together all the wet ingredients. Pour the wet into dry and mix together until just combined. Lumps are totally cool.
When the waffle iron is hot, spray oil or lightly brush oil on both the top and bottom griddles of the waffle iron. Pour about 1/4 of the batter onto the iron and lightly spread it around so that it just covers the griddle leaving room for the batter to expand. Close the waffle iron and cook until the waffle is cooked through and golden on both sides. Use a fork or spatula to help release the waffles. Serve with a dollop of Vegan Coconut Whipped Cream or Easy Vegan Marshmallow Fluff and maple syrup if desired.
Guess what else is fun? In 2018 it’s my plan to deep dive into YouTube. My goal is to post a new video every single week. Oooohh aaaaahhhhh! So make sure to subscribe so you don’t miss a single one. To start off, I made a trailer for my channel. Check it out.

Bon appetegan!
Sam.


This post Vegan Gingerbread Waffles appeared first on It Doesn't Taste Like Chicken
December 17, 2017
Giveaway Winners!!!!!!!!
The 12 Days of Giveaways is over and today I’m announcing the winners, woot woot!!! There were over 30,000 entries and 29 very lucky winners were randomly selected. I’m totally blown away by all of the excitement this created for everyone. Maybe it should become an annual tradition? Vote in the comments if you think it should be!
A big huge thank you to all of the amazing brands for collaborating with me on this giveaway. If you haven’t yet, be sure to check out all the amazing products (great last minute gift ideas): Pacifica Beauty, Veganomicon, SOULier Studio, Tofuture, Vegan Cuts, Field Roast, Moo Free, Pyrex, Fuss-Free Vegan, Wully Outerwear, Daiya, and Blendtec.

The winners are listed below. For the people who only included their first name when entering, beside their first name I wrote a partial section of their email address (so I don’t get a million emails from the wrong Joe’s claiming their prize). For lots of the giveaways, there is more than one winner, and the names are listed in the order drawn- there is no additional bonus for being drawn first or anything.
If you are one of the lucky winners, check your email- the one you signed up with or the one associated with your Facebook account, as you will be getting an email from me shortly requesting your mailing address to send over your prize. Here we go ↓↓↓
Day 1: Pacifica Vegan Beauty bestsellers collection. 2 winners. US & Canada.
Leah Siapin
Jackilyn Lundy
Day 2: Veganomicon 10th Anniversary Edition. 2 winners. US & Canada.
Jennifer (jadorele…)
Sharon Marszal
Day 3: SOULier Studio vegan shoes. 1 winner. US & Canada.
Chelsea Elizabeth
Day 4: Tofuture Tofu Press. 3 winners. Open worldwide!!
Kate (sweetfern…)
Laksmi Devi
Katelyn Tuck
Day 5: Vegan Cuts Snack or Beauty Box 3-month subscription. 2 winners. US & Canada.
Sarah (sarahmm…)
Alison Kilpatrick
Ancilla Jagdeo
Day 6: Field Roast Cookbook. 2 winners. US & Canada.
Jilly s (angelic.m…)
Bethany Brown
Day 7: Moo Free Vegan Chocolate. 2 winners. US, Canada, & UK!
Jenny Ham
Elena (egandia…)
Day 8: Signed copy of Fuss-Free Vegan cookbook. 3 winners. Open worldwide!!
Mandy Pelosi
Martina Podboj
Jean Field
Day 9: Pyrex Love Collection Baking Set. 5 winners. US & Canada.
Adam Peterson
Angie Adelman
Stefani Akins
Angela Garland
John Boudakian
Day 10: Wully Outerwear Vegan Coat. 1 winner. US & Canada.
Cassandra Scullion
Day 11: Daiya Vegan Cheese gift box. 4 winners. US & Canada.
Christine (c.lewis…)
Amber Eileen
Jennifer Roberts DeFino
Chloe Seidner
Day 12: Blendtec Designer 625 blender. 1 winner. US & Canada.
Dee Torres
A big, huge congrats to everyone and happy holidays!
Bon Appetgan!
Sam
This post Giveaway Winners!!!!!!!! appeared first on It Doesn't Taste Like Chicken
December 12, 2017
Blendtec Designer 625 Blender Giveaway!
On the 12th day of giveaway my true love (Sam) gave to me, a Blendtec Designer 625 Blender!!!!!!

There is nothing quite like the high-powered Blendtec blender. Not only can it blend everything from an iPad to a baseball, seriously, it has a lot more useful options as well. Such as blending smoothies, making vegan ice cream, grinding grains such as grinding whole flax seeds into ground, or turning granulated sugar into powdered sugar. This monster of a blender does it all.

I love that Blendtec controls are touch screen, meaning no gunk gets stuck around buttons, just wipe clean! There are predesigned settings so you can just hit the smoothie button and it does it’s own thing while you can tidy up. The Wildside jar it comes with creates a vortex, so no plunger is needed and you don’t need to stop and scrape the sides. This thing makes everything so creamy dreamy it’s amazing!

The details:
1 lucky winner will receive a Blendtec Designer 625 in colour of their choice.
This contest is open to US, and Canadian residents.
Enter the contest by using the giveaway app below. ↓
To see all 12 days of giveaways click here.
This post Blendtec Designer 625 Blender Giveaway! appeared first on It Doesn't Taste Like Chicken
Sam Turnbull's Blog

- Sam Turnbull's profile
- 35 followers

