
Sam Turnbull's Blog, page 45
April 22, 2018
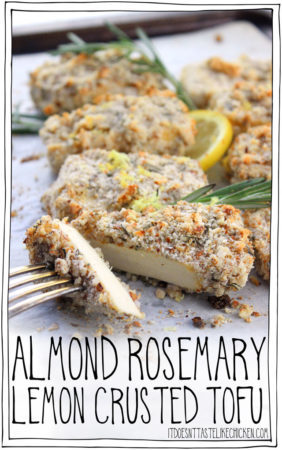
Almond Rosemary Lemon Crusted Tofu
Home from vacation and back to the grind… like literally, let’s grind up some almonds, rosemary, and lemon zest and use that delicious mixture to coat tofu slices, bake them until golden deliciousness, and I present you Almond Rosemary Lemon Crusted Tofu. See what I did there? Yeah, so clever.

I’m obsessed with these crispy, crunchy tofu slices. These are the perfect hearty, savoury main. Scrumptious served with a side of greens and a potato or totally decadent when sliced and placed on top of a salad. Add a squeeze of lemon, and oooeeee am I loving this dish.

Now, this recipe is super fun all on its own, but what’s even more fun is that this recipe was part of a challenge!
Every now and then I like to collab with another amazing vegan blogger and do a little recipe mystery box game. So for this recipe, I paired up with Jasmine and Chris from Sweet Simple Vegan.
The challenge: together we chose 4 random ingredients. I selected lemon and almond, and Jasmine and Chris selected rosemary and coconut, and from those 4 ingredients, we each had to create a recipe.
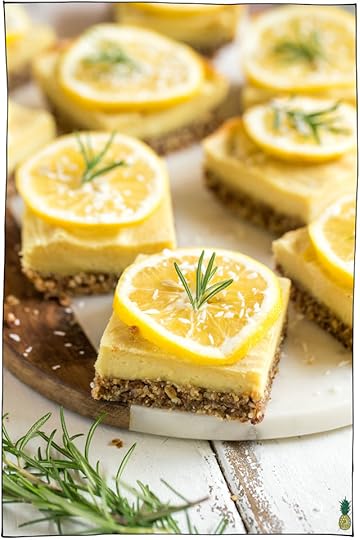
I ended up going the savoury root with my Almond Rosemary Lemon Crusted Tofu, and Jasmine and Chris went the sweet path and created a dessert, these totally gorgeous and decadent Creamy Lemon Rosemary Bars. It’s so cool to see how recipe writer brains can differ so much!
If you are new to the Sweet Simple Vegan blog, I highly recommend you check it out. Just like the name suggests, this site is packed full of simple vegan recipes. I’m drooling over this Vegan Cheddar Chipotle Cheese Sauce, Restaraunt-Style Teriyaki Tofu Bowls, and this Loaded Vegan Chickpea Omelette. They even shared my Blueberry Bliss Muffins from my cookbook Fuss-Free Vegan on their blog.

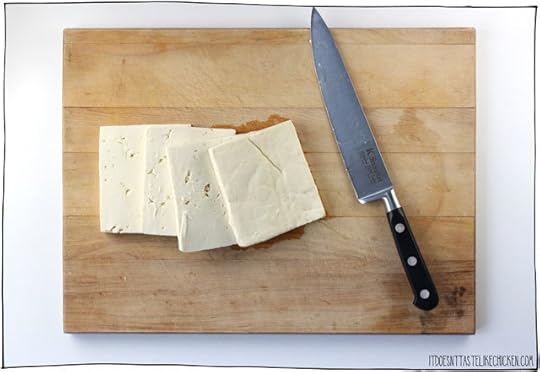
Now back to tofu. To make Almond Rosemary Lemon Crusted Tofu: you can start by pressing your tofu if desired. Pressing it, will make the tofu a little firmer and chewier. Leaving it un-pressed will result in a more tender tofu.
To make the almond rosemary crust: add the almonds and rosemary to a food processor grind until the almonds are finely chopped but some larger chunks remain.

Add the breadcrumbs, lemon zest, salt, garlic powder, and black pepper and pulse to combine. Alternatively, you can finely chop the almonds and rosemary with a knife, and then just mix everything together in a bowl.

Take 3 medium bowls. In the first bowl add the all-purpose flour. In the second bowl pour in the coconut milk. In the third bowl, add in the almond rosemary mixture.
Now take a tofu slice and dredge the tofu in the flour. Shake off excess and then dip the floured tofu into the coconut milk. Finally, dip the coconut milk covered tofu into the almond rosemary mixture to coat. Place the coated tofu on the parchment paper and repeat with remaining slices until they are all coated.
Bake 18 – 23 minutes until the crust is lightly golden and crispy. Serve hot with a wedge of lemon for squeezing.

Almond Rosemary Lemon Crusted Tofu
This crispy, crunchy, crusted tofu is the perfect vegan main. Delicious served with a side of greens and a potato, or wonderful sliced and placed on top of a salad. Easy to make and even easier to enjoy!
1 350g block extra-firm or firm tofu (drained, pressed*, and cut into 8 slices)
1/2 cup raw almonds
2 tablespoons fresh rosemary ((about 2 sprigs with stems removed))
1/2 cup bread crumbs ((gluten-free if preferred))
1 teaspoon lemon zest
1/2 teaspoon salt
1/4 teaspoon garlic powder
1/4 teaspoon black pepper
1/2 cup all-purpose flour ((gluten-free if preferred))
1 cup full-fat coconut milk ((or other non-dairy milk if preferred))
lemon wedges for serving
Preheat your oven 400F (200C). Line a baking sheet with parchment paper.
To make the almond rosemary crust, add the almonds and rosemary to a food processor grind until the almonds are finely chopped but some larger chunks remain. Add the breadcrumbs, lemon zest, salt, garlic powder, and black pepper and pulse to combine. Alternatively, you can finely chop the almonds and rosemary with a knife, and then just mix everything together in a bowl.
Take 3 medium bowls. In the first bowl add the all-purpose flour. In the second bowl pour in the coconut milk. In the third bowl, pour in the almond rosemary mixture.
Now take a tofu slice and dredge the tofu in the flour. Shake off excess and then dip the floured tofu into the coconut milk. Finally, dip the coconut milk covered tofu into the almond rosemary mixture to coat. Place the coated tofu on the parchment paper and repeat with remaining slices until they are all coated. Bake 18 – 23 minutes until the crust is lightly golden and crispy. Serve hot with a wedge of lemon for squeezing.
*You can optionally press the tofu but it isn’t required. Pressing it, will make the tofu a little firmer and chewier. Leaving it un-pressed will result in a more tender tofu.
Bon appetegan!
Sam.

This post Almond Rosemary Lemon Crusted Tofu appeared first on It Doesn't Taste Like Chicken


April 15, 2018
Grilled Tofu Skewers with Spicy Peanut Sauce
Food on a stick! Need I say more? Why is it that food on a stick is extra scrumptious. And grill marks too. Grill marks make everything look more scrumptious. And then peanut butter sauce!! The most scrumptious of all. So naturally, you can assume that these Grilled Tofu Skewers with Spicy Peanut Sauce are scrumptious times 3.

Not only are these grilled tofu skewers out of the world delicious, but they can also be mostly prepared ahead of time. The tofu can marinate in the fridge for up to 3 days, and the spicy peanut sauce can be made ahead and stored in the fridge as well. So all you have to do is grill the tofu up when you’re ready to serve. Easy peasy.

I love serving these grilled tofu skewers along with a baked potato and a salad or some grilled veggies, but if you are looking for a party appetizer, you can cut the tofu in half, and serve them on mini skewers. So cute.
Now time to fire up your BBQ! (Or grill pan in my case)…

To make Grilled Tofu Skewers with Spicy Peanut Sauce: first drain and press the tofu. Once the tofu is pressed, cut the block into 8 long sticks. Or for an appetizer, you can cut the sticks in half to make 16 small sticks.
Add the soy sauce, water, agave, smoked paprika, and garlic powder to a sealable bag or dish and mix. Add the tofu to the mixture and let marinate covered in the fridge for a minimum of 30 minutes or up to 3 days.

To make the spicy peanut sauce mix together all the ingredients in a small bowl. This can be made ahead of time and stored in the fridge.

If using wooden skewers, soak them in water for 30 minutes before using so they don’t burn. Thread the tofu onto the skewers lengthwise. Note: I didn’t do this because I only had these really long awkward metal skewers that don’t fit into my grill pan, so I ended up skewering them after they grilled, which was tricky and burnt my fingers, so don’t do what I did!!
Heat your BBQ or grill pan over medium-high heat. When hot, grill the skewers for 10 – 15 minutes, turning as needed until grill marks form on each side, brushing with the leftover marinade as they cook.
Remove from the heat and serve hot with the spicy peanut sauce on the side for dipping. Decorate with any garnishes you like.

Grilled Tofu Skewers with Spicy Peanut Sauce
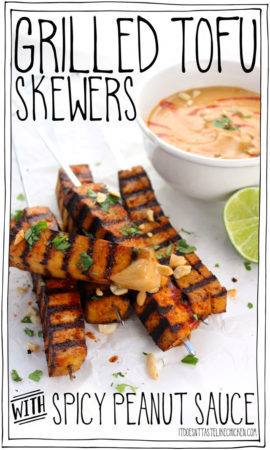
The tofu can marinate in the fridge for up to 3 days, then just grill on your BBQ when ready to enjoy. These also work great as a party appetizer.
For the grilled tofu skewers:
1 350g block extra-firm tofu, (drained and pressed for 30 minutes or longer*)
2 tablespoon soy sauce
2 tablespoon water
1 tablespoon agave or maple syrup
1/2 teaspoon smoked paprika
1/2 teaspoon garlic powder
For the spicy peanut sauce:
1/2 cup natural peanut butter
1/4 cup coconut milk
2 tablespoons soy sauce
2 tablespoons lime juice
1 tablespoon Sriracha or similar hot sauce, ((or to taste))
1/4 teaspoon garlic powder
Optional garnishes:
lime wedges
1 handful cilantro, (roughly chopped)
1 tablespoon roasted peanuts, (roughly chopped)
For the tofu: once the tofu is pressed, cut the block into 8 long sticks. Or for an appetizer, you can cut the sticks in half to make 16 small sticks. Add the soy sauce, water, agave, smoked paprika, and garlic powder to a sealable bag or dish and mix. Add the tofu to the mixture and let marinate covered in the fridge for a minimum of 30 minutes or up to 3 days.
For the spicy peanut sauce: mix together all the ingredients in a small bowl. This can be made ahead of time and stored in the fridge.
To grill the tofu: If using wooden skewers, soak them in water for 30 minutes before using so they don’t burn. Thread the tofu onto the skewers lengthwise. Heat your BBQ or grill pan over medium-high heat. When hot, grill the skewers for 10 – 15 minutes, turning as needed until grill marks form on each side, brushing with the leftover marinade as they cook. Remove from the heat and serve hot with the spicy peanut sauce on the side for dipping. Decorate with any garnishes you like.
*If you are new to pressing tofu, check out The Ultimate Guide to Pressing Tofu.
Bon appetegan!
Sam.

This post Grilled Tofu Skewers with Spicy Peanut Sauce appeared first on It Doesn't Taste Like Chicken
April 8, 2018
50 Easy Vegan Recipes for Beginners
If you are newly vegan or looking to go vegan, it can be a bit overwhelming at first. You might be used to eating whatever you want without having a second thought about it, but now you suddenly have to scrutinize ingredient lists. You probably had a handful of go-to easy recipes you could whip up and enjoy for when hunger strikes, but now some of those recipes might not be vegan.
I get a lot of emails and comments from new vegans so I wanted to help out with a collection easy vegan recipes for beginners. If you are new to my blog, then be sure to check out my recipe index, my cookbook Fuss-Free Vegan, and subscribe to my mailing list. Quick and easy recipes are the name of the game here on this blog.

I put some of my favourite and easiest recipes in this collection post along with recipes from a whole bunch of other amazing bloggers. Most of the recipes in this collection require just a handful of ingredients, not too much cooking time, and will get you started on your new vegan adventure. Everything from breakfast, snacks, mains, and desserts.
These recipes are from amazing bloggers all across the web, so not only will you be sampling some deliciousness, but you might find a few awesome blogs along the way. To get the full recipe for any dish, simply click on the picture or the title of the recipe. I hope you like this collection of easy vegan recipes for beginners!
BREAKFASTS:

It Doesn’t Taste Like Chicken (that’s me!): Vegan Pumpkin Spice Oatmeal

Sweet Simple Vegan: Healthy 3-Ingredient Vegan Pancakes

It Doesn’t Taste Like Chicken (that’s me!): Vegan Toast Dipping Sauce

Beaming Banana: Vegan No-Bake Peanut Butter Energy Bites

Evolving Table: Maple Brown Sugar and Cinnamon Overnight Oats

Serving Realness: Easy Vegan Peanut Butter Oat Bar

Gluten-Free Vegan Pantry: Avocado Toast 5 Ways

It Doesn’t Taste Like Chicken (that’s me!): Vegan Banana Bread Oatmeal
SNACKS:

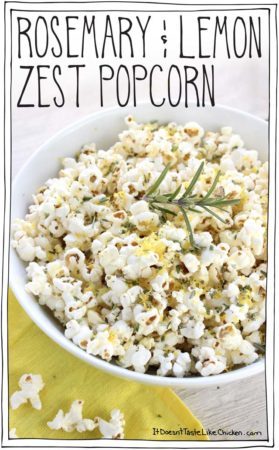
It Doesn’t Taste Like Chicken (that’s me!): Rosemary & Lemon Zest Popcorn
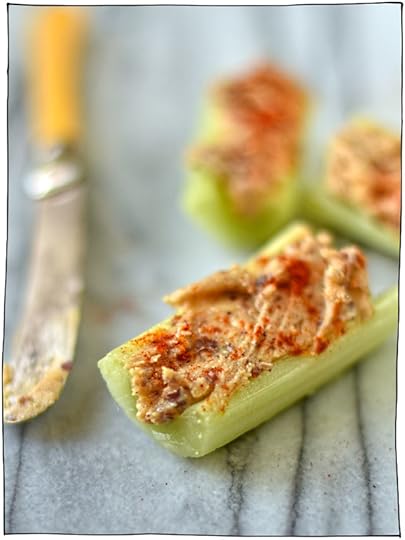
The Circus Gardener’s Kitchen: Celery with Peanut Butter and Smoked Paprika

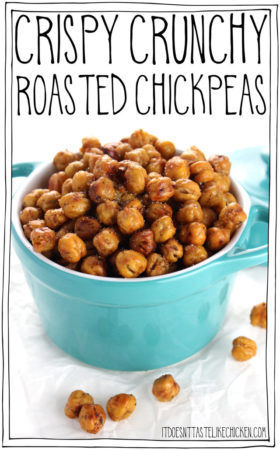
It Doesn’t Taste Like Chicken (that’s me!): Crispy Crunchy Roasted Chickpeas

Hummusapien: Easy Vegan Queso

Savory Tooth: Spicy Smoky Garlic Almonds

It Doesn’t Taste Like Chicken (that’s me!): Quick & Easy Vegan Cottage Cheese

Vegan With Curves: 5 Ingredient Spicy Roasted Nuts

The Big Man’s World: Oil-Free Baked Veggie Chips

It Doesn’t Taste Like Chicken (that’s me!): 10-Minute Peanut Butter Popcorn
MAINS:

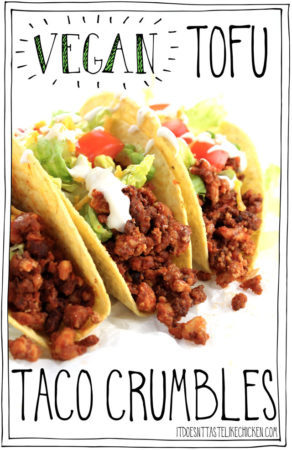
Happy Kitchen Rocks: 5-Minute Easy Vegan Tacos

Veggies Save the Day: Lemon Cream Pasta Sauce
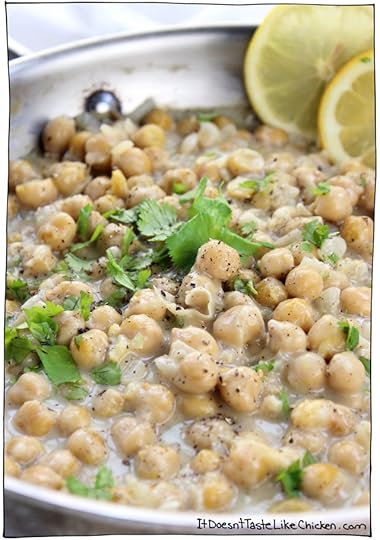
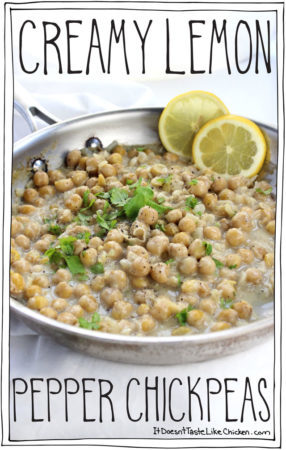
It Doesn’t Taste Like Chicken (that’s me!): Creamy Lemon Pepper Chickpeas

Where You Get Your Protein: Hummus and Avocado Toast

It Doesn’t Taste Like Chicken (that’s me!): Vegan Potato Pancakes
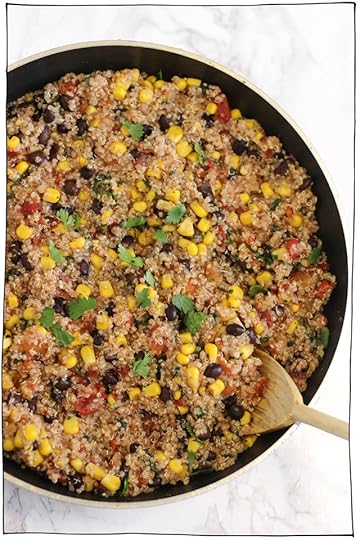
Healthy Liv: 5-Ingredient One-Pan Mexican Quinoa

Happy Healthy Mama: Simple Baked Apples

It Doesn’t Taste Like Chicken (that’s me!): Smoky Vegan Beans on Toast
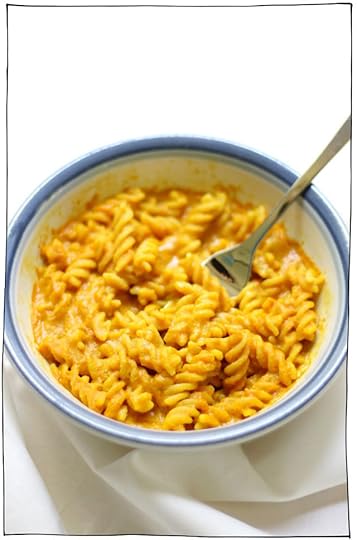
Strength & Sunshine: Microwave Gluten-Free + Vegan Mac & Cheese For One

VNutrition: Lemon One Pot Pasta

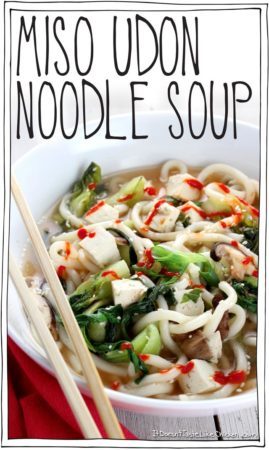
It Doesn’t Taste Like Chicken (that’s me!): 10-Minute Thai Peanut Butter & Pumpkin Soup
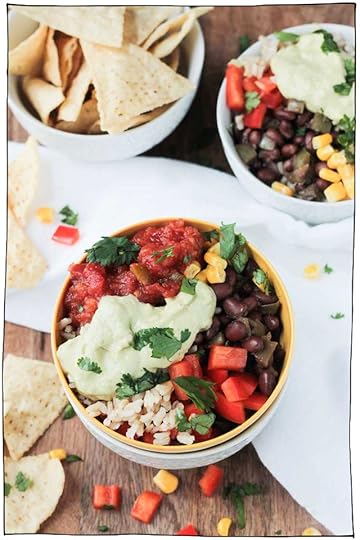
Veggie Inspired: Super Simple Vegan Burrito Bowl

Moon and Spoon and Yum: Baked Garlic Pepper Polenta Fries
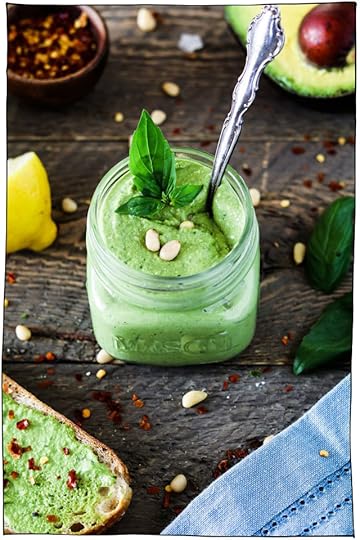
Vegan Huggs: Oil-Free Avocado Pesto

Vegan Heaven: Vegan Gnocchi with Spinach and Tomatoes
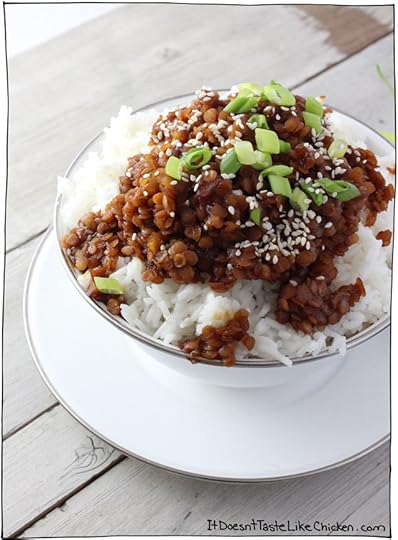
It Doesn’t Taste Like Chicken (that’s me!): Sweet Korean Lentils

Rhian’s Recipes: Lazy Falafel

Intentionally Eat: Black Bean Soup – Quick and Easy

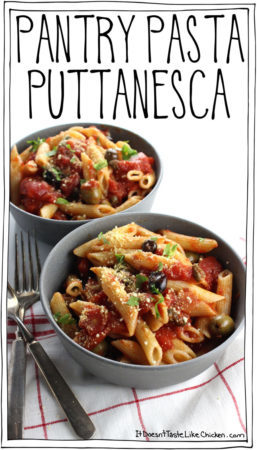
It Doesn’t Taste Like Chicken (that’s me!): Pantry Pasta Puttanesca
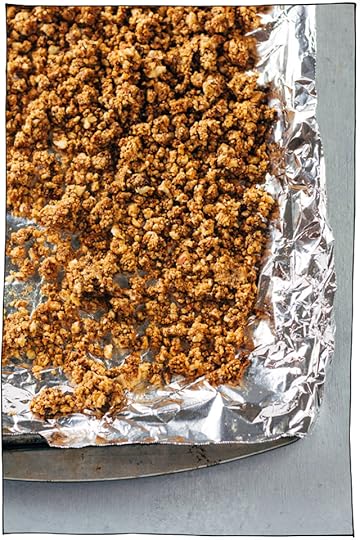
Sprouting Zen: 10-Ingredient Vegan Walnut Taco Meat
DESSERTS:

Beaming Banana: Vegan Chocolate Strawberry Shake
Namely Marly:

Joy Food Sunshine: Dark Chocolate Sea Salt Cashew Clusters
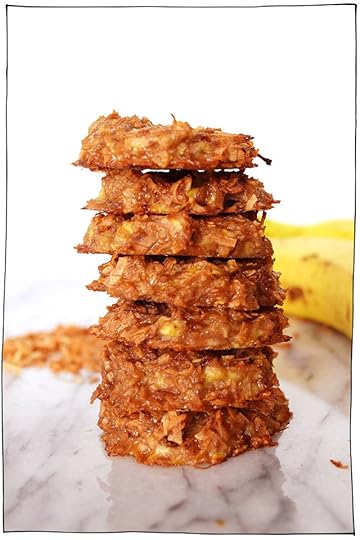
Beaming Banana: Vegan Banana Coconut Cookies – 2 Ingredients

Feasting on Fruit: 3-Ingredient Vegan Chocolate Pots

Strength & Sunshine: 3-Ingredient Maple Tahini Freezer Fudge
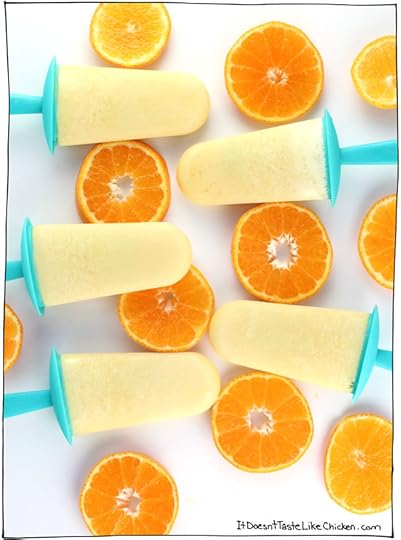
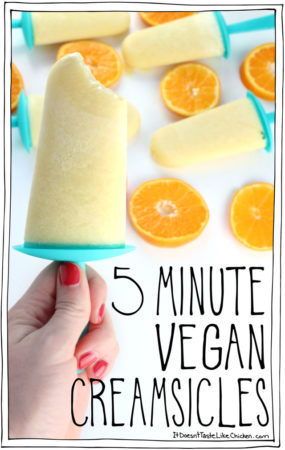
It Doesn’t Taste Like Chicken (that’s me!): 5-Minute Vegan Creamsicles

It Doesn’t Taste Like Chicken (that’s me!): Easy Fruit & Nut Vegan Chocolates

Beaming Baker: No Bake Gluten Free Peanut Butter Fruit & Nut Cookies

Blissful Basil: 5-Minute Peanut Butter Chocolate Chip Cookie Dough

Delightful Mom Food: 3-Ingredient Brownies

The Veggie Chick: Chocolate Covered Almond Dates

It Doesn’t Taste Like Chicken (that’ me!): Easy Vegan Hot Chocolate
I hope you enjoyed this collection of 50 easy vegan recipes for beginners!.
Bon appetegan!
Sam.
This post 50 Easy Vegan Recipes for Beginners appeared first on It Doesn't Taste Like Chicken
April 1, 2018
Vegan Butter Cauliflower
It’s finally here, my Vegan Butter Cauliflower recipe! This is my version of butter chicken… but without the butter and without the chicken. This recipe took a lot of testing to make it oh so perfect, and I am so excited to finally share it with you.
Not only was I looking for excellent vegan replacements for both butter and chicken, but after discovering that a lot of traditional butter chicken recipes required an entire cup (!) of butter and additional cups of whipping cream, I cringed, and knew I wanted to make this one a little healthier too.

So I present you my (mostly) guilt-free Vegan Butter Cauliflower. Tah dah!
This recipe happens to be super easy too, in true fuss-free vegan style. Just add raw cashews, tomato paste, and a bunch of spices to a blender, and you’ve just made your sauce. Then add two tablespoons of vegan butter (I still wanted a bit of that butter taste, but reduced it by a whopping 14 tablespoons), saute up some onion and garlic in a pan, pour in the sauce, add the cauliflower florets, and simmer until tender. Yep, it’s that easy peasy!

And oh man does it taste fantastic!! I’ve been eating this pretty much every day for a week because I’m madly in love. Creamy tomato-y goodness, packed full of spices, just so much deliciousness in a bowl it’s difficult to comprehend. Serve it up with some rice, naan bread, and a little cilantro, and be prepared for comfort food heaven.

To make Vegan Butter Cauliflower: add all of the ingredients to a high-powered blender and blend until smooth and creamy.
If you do not have a high-powered blender, you may want to soften the cashews first by boiling them in water for 10 minutes, draining, and then adding to the blender with all of the remaining ingredients. This will ensure a smooth sauce.

For the butter cauliflower, melt the vegan butter in a large pan or pot. When melted add the onion and garlic and sauté until the onion turns translucent and just begins to brown.

Pour in the prepared sauce and stir in the cauliflower florets. Cover and bring to a simmer. Stir the cauliflower often so the sauce doesn’t burn on the bottom of the pan.
Cook until the cauliflower is fork tender, about 10 minutes. Serve over rice with a side of naan and a garnish of cilantro.

Vegan Butter Cauliflower
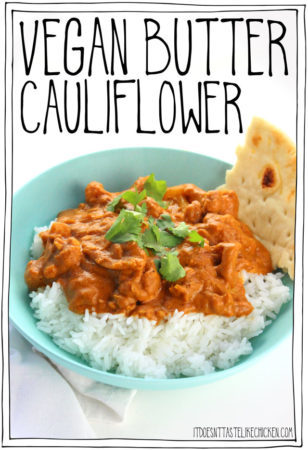
Indian butter chicken has been veganized! I present you Vegan Butter Cauliflower. A fraction of the calories and fat, but tastes even better. Super easy and quick to make, making a perfect weeknight meal.
For the sauce:
2 3/4 cups water
1/2 cup raw cashews
1 156ml can tomato paste
1 tablespoon garam masala
1 teaspoon chili powder
1 teaspoon ground cumin
1 teaspoon salt
1/2 teaspoon powdered ginger
For the butter cauliflower:
2 tablespoons vegan butter
1 yellow onion, (chopped)
4 cloves garlic, (minced)
1/2 head cauliflower, (cut into florets (about 6 cups))
For serving:
cooked rice
naan bread
1 handful cilantro, (roughly chopped)
For the sauce, add all of the ingredients to a high-powered blender and blend until smooth and creamy. If you do not have a high-powered blender, you may want to soften the cashews first by boiling them in water for 10 minutes, draining, and then adding to the blender with all of the remaining ingredients. This will ensure a smooth sauce.
For the butter cauliflower, melt the vegan butter in a large pan or pot. When melted add the onion and garlic and sauté until the onion turns translucent and just begins to brown. Pour in the prepared sauce, and stir in the cauliflower florets. Cover and bring to a simmer. Stir the cauliflower often so the sauce doesn’t burn on the bottom of the pan. Cook until the cauliflower is fork tender, about 10 minutes. Serve over rice with a side of naan and a garnish of cilantro.
Bon appetegan!
Sam.


This post Vegan Butter Cauliflower appeared first on It Doesn't Taste Like Chicken
March 25, 2018
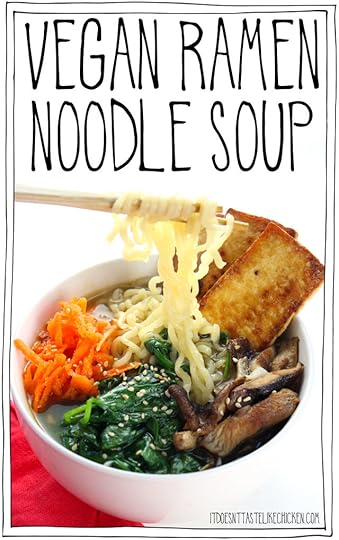
Vegan Ramen Noodle Soup
I have exciting news x 2 today!
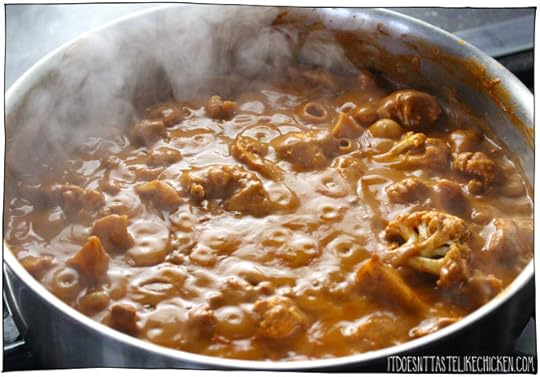
Vegan Ramen Noodle Soup. The most slurpy, drool-worthy, scrumptious vegan ramen noodle soup there ever was, with fresh veg, sautéd mushrooms, and crispy tofu slices. Uh, yes please and thank you very much.
I hired an amazing new assistant! I received over 140 applications for my virtual assistant job post, yes 140!! I was totally blown away with all of the amazing applications I received and so flattered that so many people were interested in working with me. It took me a LOT of reading and some lovely interview chats to narrow it down to Jess. Long time vegetarian, new-ish vegan, lavender-haired stay at home mom of 2 who dreams of becoming a gourmet vegan ice cream bicycle vendor. So clearly, I fell in assistant love immediately. The lovely Jess will be working behind the scenes, helping me manage some of the many details it takes to keep It Doesn’t Taste Like Chicken running smoothly, so that I will be able to spend more time dedicated to developing vegan yumminess. Welcome, Jess!
Now back to the soup. Are you a curly ramen noodle fan or a straight ramen noodle fan? I’m all for the curly noodles. I actually don’t even know why as they make it nearly impossible to eat your soup without it splashing absolutely everywhere. No, like everywhere. The last time I ate this I got soup in my eye! But somehow the splashing is worth it because this soup is my new favourite easy weeknight meal.

I used these vegan ramen noodles, but that broth powder stuff and the tiny little package of dehydrated vegetables that it came with, just ain’t going to cut it for me. This vegan ramen noodle soup is all about up-ing your ramen game.
The thin fried tofu slices had trouble even making it into the bowl because they are oh so yummy, I ate almost all of them immediately. Sautéd shiitake mushrooms, grated carrot, wilted spinach, and long, curly, splashy, ramen noodles in brothy deliciousness. Yep, it’s every bit as good as it sounds.
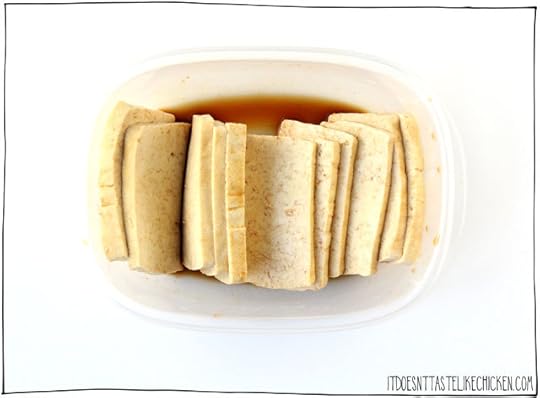
To make Vegan Ramen Noodle Soup: Cut the tofu into nice thin pieces. No need to press the tofu first as it will dry out in the pan. Put the tofu slices in a dish or plastic bag and pour over the soy sauce. Turn the tofu pieces to coat evenly in the soy sauce, but no need to let marinate.

Heat the oil in a large skillet or non-stick frying pan over medium heat. When hot add the tofu slices. Slowly fry the tofu until very golden and crispy, then flip and repeat on the other side. Remove the crispy tofu slices from the pan and set aside.
Try to resist eating all of the tofu slices immediately. I know, it’s difficult, but you will want some pieces for your soup.
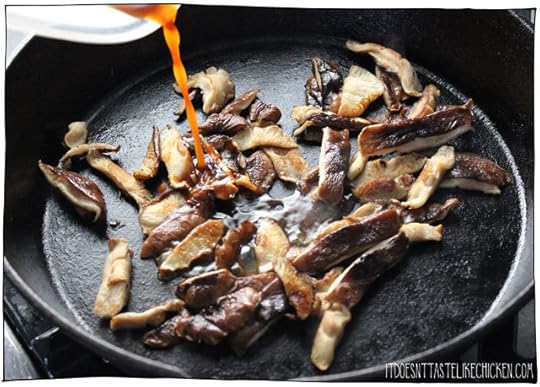
Return the pan to the heat and add the mushrooms. Slowly sauté the mushrooms, stirring as needed until reduced in size and golden brown. When finished cooking, pour over any remaining soy sauce from the tofu and stir to coat. Remove from the heat.

Heat the oil in a medium soup pot over medium-high heat. Add the garlic and ginger and sauté, stirring for about a minute until the garlic just starts to brown. Pour in the vegetable broth and bring to a boil. When boiling, add the noodles and cook until they are al dente.
I used these vegan ramen noodles for my soup and discarded the flavour packs that came with them because that’s what my grocery store carried, but you could alternatively use dried ramen noodles such as these, or another similar noodle, depending on what your store carries.

Just before serving, stir the spinach into the soup so it wilts.
To serve: Divide the soup among bowls, top with tofu, mushrooms, grated carrots, and any additional toppings you desire.

Vegan Ramen Noodle Soup

Toss out those flavour packets and instead make this easy weeknight meal. With fresh veg, sautéd mushrooms, crispy tofu slices, and ramen noodles in hot broth.
For the fried tofu and mushrooms:
1/2 block extra-firm tofu (about 175g), (drained and thinly sliced)
1 tablespoon soy sauce
1 tablespoon light oil ((such as canola or vegetable))
100g shiitake mushrooms (about 2 cups sliced with stems removed), ((or other mushrooms))
For the vegan ramen noodle soup:
1 tablespoon light oil ((such as canola or vegetable))
2 cloves garlic, (minced)
1 inch piece fresh ginger, (minced)
6 cups vegetable broth
2 112 g pacakages dried ramen noodles, (seasoning packs discarded, (or similar noodle))
3 big handfuls baby spinach leaves
1 carrot, (peeled and grated)
For garnish (optional):
sesame seeds
soy sauce, (to taste)
Sriracha
For the tofu and mushrooms: Put the tofu slices in a dish or plastic bag and pour over the soy sauce. Turn the tofu pieces to coat evenly in the soy sauce, but no need to let marinate. Heat the oil in a large skillet or non-stick frying pan over medium heat. When hot add the tofu slices. Slowly fry the tofu until very golden and crispy, then flip and repeat on the other side. Remove the crispy tofu slices from the pan and set aside.
Return the pan to the heat and add the mushrooms. Slowly sauté the mushrooms, stirring as needed until reduced in size and golden brown. When finished cooking, pour over any remaining soy sauce from the tofu and stir to coat. Remove from the heat.
To make the vegan ramen noodle soup: Heat the oil in a soup pot over medium-high heat. Add the garlic and ginger and sauté, stirring for about a minute until the garlic just starts to brown. Pour in the vegetable broth and bring to a boil. When boiling, add the noodles and cook until they are al dente. Just before serving, stir the spinach into the soup so it wilts. To serve: Divide the soup among bowls, top with tofu, mushrooms, grated carrots, and any additional toppings you desire.
Bon appetegan!
Sam.

This post Vegan Ramen Noodle Soup appeared first on It Doesn't Taste Like Chicken
March 18, 2018
Chloe Flavor Cookbook Review & Recipe • Chloe Coscarelli
So I got an email that went something like this:
Lovely people from Nasoya: “Sam, what up homie? You heard about Chloe C’s new rad cookbook, right!? Wanna review it and use our tofu?”
Sam: “Duuuudes!! That’s legit. Chloe is the bomb and tofu is my dig. That would be sick. I’m in. Fist bump!”
Ok, so that’s not actually at all how the emails went, it was a lot more professional than that on both ends, but you get the drift.
Nasoya partnered up with Chloe Coscarelli to help launch her latest cookbook Chloe Flavor, and when Nasoya asked if I would help them by reviewing Chloe’s book and sharing a tofu recipe from the book, I was 100% in. This post is not sponsored and all opinions are my own. I’m just doing Chloe and Nasoya a solid.
March 11, 2018
The Ultimate Vegan Shamrock Shake
When I asked what recipe my lovely fans on Instagram would like for St. Patrick’s Day, the top vote was a vegan shamrock shake recipe. Really!? I thought. But isn’t that just a simple minty milkshake? Well, yes it is. But then I made it, and then magic happened. And before I knew it, the entire vegan shamrock shake was gone, and there I was trying to noisily slurp up the last few drops with a straw.
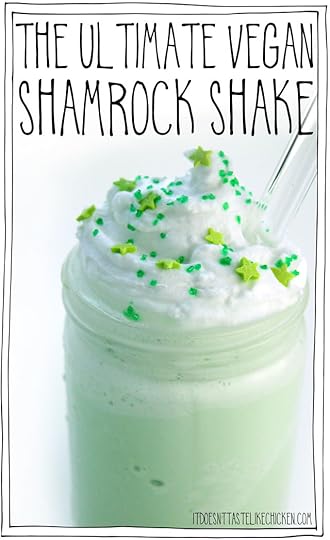
Yes, a shamrock shake is just a minty milkshake, but once I made my own vegan shamrock shake, I quickly learned why everyone was so excited. Sometimes simple is best and in the case of this vegan milkshake, it couldn’t be truer!
Creamy, rich, lightly sweet, with a minty freshness. It’s the perfect combination of flavours making it the most divine St. Patty’s day treat.
Then, for more fun, you can top the vegan shamrock shake with Coconut Whipped Cream, green sprinkles, fresh mint leaves or a maraschino cherry. So fun and festive!

Traditional Shamrock shakes are made with ice cream, and while of course, you can easily buy vegan ice cream, if you know me I am always looking for an easier hack. I took inspiration from my Instant Vanilla Ice Cream recipe in Fuss-Free Vegan (page 176), and decided to freeze full-fat coconut milk or Heavenly Heavy Cream (page 206 in Fuss-Free Vegan) for the perfect frozen creaminess. This is not only cheaper, but you can control the sweetness to your own taste preference. The result, you guessed it, The Ultimate Vegan Shamrock Shake!

To make The Ultimate Vegan Shamrock Shake: Pour the full-fat coconut milk or Heavenly Heavy Cream into an ice cube tray and freeze overnight.
I used this very handy dandy vintage ice cube tray I have, but you can get newer versions of this ice cube tray on Amazon if you desire.

Add the frozen cubes to a blender along with the agave, peppermint extract, vanilla extract, and food colouring.

Blend until smooth and creamy. Divide among two glasses.

Optionally, you can decorate your shakes with any additional toppings. I opted for Coconut Whipped Cream and green sprinkles, because CUTE!

The Ultimate Vegan Shamrock Shake
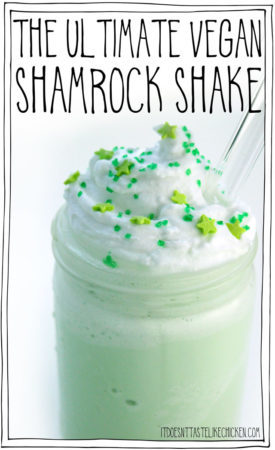
This dairy-free St. Patrick’s day dessert is easy to make! Just freeze coconut milk in an ice cube tray and blend with non-dairy milk and some flavourings for a creamy, delicious, mint milkshake.
For the shamrock shake:
1 400ml can full-fat coconut milk (1 3/4 cups) or Heavenly Heavy Cream (page 206 in Fuss-Free Vegan), ( frozen in an ice cube tray)
1 cup non-dairy milk ((such as soy or almond))
2 – 3 tablespoon agave
1/4 teaspoon peppermint extract
1/4 teaspoon vanilla extract
8 – 10 drops vegan green food colouring
Additional toppings (optional):
Coconut Whipped Cream
green sprinkles
fresh mint leaves
maraschino cherries
vegan chocolate syrup
Add the frozen cubes of full-fat coconut milk or Heavenly Heavy Cream to a blender along with the agave, peppermint extract, vanilla extract, and food colouring. Blend until smooth and creamy. Divide among two glasses. Optionally, you can decorate your shakes with any additional toppings.
Bon appetegan!
Sam.
This post The Ultimate Vegan Shamrock Shake appeared first on It Doesn't Taste Like Chicken
March 7, 2018
It Doesn’t Taste Like Chicken is hiring!
Hi friends! I’m so excited about today. In less than 5 years I have been able to grow It Doesn’t Taste Like Chicken from absolutely nothing (like literally, it didn’t exist), to my full-time business. And now has come the time that my business has gotten bigger than just lil’ old me can handle all on my lonesome. I need help!

Although it may just seem like a spend all day cooking up vegan deliciousness (and I definitely do some of that), there is actually a HUGE amount of work behind the scenes to run a blog business. I won’t bore you with the details, but I think it’s finally time that I get some help around here.
This isn’t actually the first time I have hired someone for help, but my first attempt was a mistake as I hired a random person off the internet that did not particularly have interest in my blog and they really lacked the passion and excitement that I seek. This blog is my baby, so it’s important to me to have the perfect person join my team. So after that failed attempt, it occurred to me- why am I looking elsewhere, I bet there is the worlds most perfect person has been right here all along. Hi perfect person!
March 4, 2018
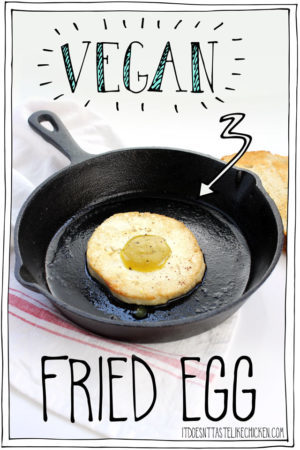
Vegan Fried Egg!?
Yes, you read that right. Vegan Fried Egg. No, Sam has not turned into a mad scientist this week, but she has turned into a craving stomper.

When I posted my recipe for Vegan Toast Dipping Sauce (which is basically a vegan egg yolk), 2 things happened.
I got flooded with messages from people raving about how dippy eggs were the only thing they missed since going vegan and now I have fulfilled their cravings. (Woot!)
I got flooded with messages from people raving about the vegan egg sauce but also asking if I could make a fried egg version.
Craving stomper Sam, here to the rescue!

For my vegan friends who crave a fried egg, for anyone who wants to try an easy, fun, and playful recipe, or for a great April fools day breakfast, I bring you my vegan fried egg. And guess what, it’s actually pretty darn eggy tasting!
To make a Vegan Fried Egg: Turn the block of tofu on its side and cut into 4 thin slices. Use the tip of your knife to cut off the corners of the tofu making it a rough circle. You could alternatively use a round cookie cutter, or just leave it as a rectangle.

Melt the vegan butter in a frying pan over medium heat. Add the tofu slices in a single layer (you may have to work in batches). Fry the tofu a couple of minutes per side until lightly browned around the edges, flip and repeat on the other side.

Once the tofu slices are cooked, remove from pan and place directly onto plates or serving dishes. Use a small round cookie cutter, a shot glass, or the tip of your knife to cut a small circle in the middle of the fried tofu slices. Serve the slices on a plate and fill the holes with the Vegan Toast Dipping Sauce. Garnish with salt and pepper as desired. You can serve any leftover dipping sauce in a small dish on the side.

Vegan Fried Egg!?
Easy to make with a runny vegan egg yolk! Great for anyone who is egg-free but misses this breakfast treat, or perfect for April fools day!
1 454g block medium-firm or firm tofu, (drained)
1 tablespoon vegan butter
1 recipe Vegan Toast Dipping Sauce
salt and pepper to taste
Turn the block of tofu on its side and cut into 4 thin slices. Use the tip of your knife to cut off the corners of the tofu making it a rough circle. You could alternatively use a round cookie cutter, or just leave it as a rectangle.
Melt the vegan butter in a frying pan over medium heat. Add in the tofu slices in a single layer (you may have to work in batches). Fry the tofu a couple of minutes per side until lightly browned around the edges, flip and repeat on the other side.
Once the tofu slices are cooked, remove from pan and place directly onto plates or serving dishes. Use a small round cookie cutter, a shot glass, or the tip of your knife to cut a small circle in the middle of the fried tofu slices. Serve the slices on a plate and fill the holes with the Vegan Toast Dipping Sauce. Garnish with salt and pepper as desired. You can serve any leftover dipping sauce in a small dish on the side.
Bon appetegan!
Sam.


This post Vegan Fried Egg!? appeared first on It Doesn't Taste Like Chicken
February 25, 2018
Fast and Easy Vegan Carbonara
A traditional carbonara is made with eggs, bacon or pancetta, and cheese (hello cholesterol bomb). So it’s basically just about the least vegan dish there could be… which is why I had so much fun playing around in the kitchen and veganizing it! Not only did I figure out a way to get the creamy blissful sauce and the chewy delicious bites, but this turned out to be a super fast and easy vegan carbonara recipe. Just the way this girl likes it!

For the bacon, I really wanted that salty, smoky, chewy bite. So I marinated some sun-dried tomatoes in soy sauce and liquid smoke.
For the sauce, I wanted that creamy, slightly sticky, rich tasting sauce. So I sautéd up some onions and garlic and then made a super easy creamy sauce using non-dairy milk which I seasoned it with black salt to get that signature eggy flavour.
Then I just boiled up some pasta (I opted for bucantini this time) and tossed it all together in a hot pan.

The result? A 20 minute, easy vegan carbonara with the most glorious, creamy coated pasta noodles, and salty, smoky bites of scrumptiousness throughout. Perfect for a busy weeknight meal, made from ingredients you probably already have in the pantry. Oh my, oh my, I have found a new favourite.
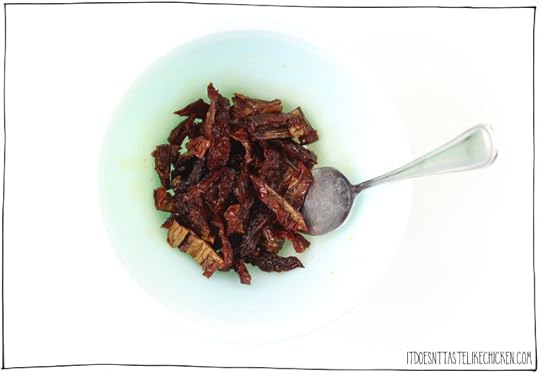
To make Fast and Easy Vegan Carbonara: mix together the sun-dried tomatoes, soy sauce, and liquid smoke in a small bowl and set aside to absorb the flavours while you prepare the rest of the dish.
You want to make sure that you pick up the dry sun-dried tomatoes and not the kind in oil so they can absorb the flavours. If you only have the kind in oil on hand, then shake off the excess oil as much as possible.
The sun-dried tomatoes will be super salty when you taste them as they are, but when you toss them with the creamy vegan carbonara, they chill out and add gorgeous salty pops of flavour throughout, just like bacon.

Heat the olive oil in a large pan over medium-high heat. When hot add the onions and garlic and sauté until the onion turns translucent and begins to brown, about 5 minutes. Sprinkle over the flour and stir to coat the onions, let cook for about 60 seconds.

Whisk in all of the remaining ingredients. Cook the sauce for about 5 minutes until thickened, whisking as needed.
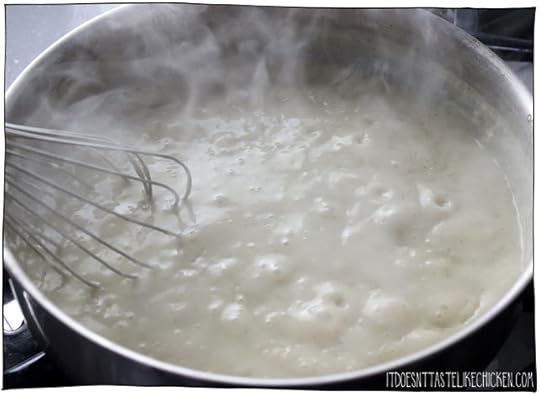
If the sauce gets too thick, add a splash more non-dairy milk, and if the sauce is too thin, simply cook it longer.

Add the cooked pasta and the marinated sun-dried tomatoes to the sauce and toss well to combine. Serve hot. Garnish with parsley and parmegan if desired.

Fast and Easy Vegan Carbonara
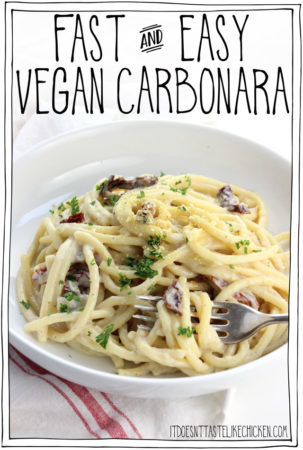
This 20-minute pasta recipe is so easy to whip together. A simple creamy sauce coats the noodles with chewy, salty, smoky, bites of sun-dried tomato. Perfect for a busy weeknight meal, made from ingredients you probably already have in the pantry.
400 g pasta of choice ((spaghetti, fettucini, bucantini, or gluten-free if preferred))
For the smoky sun-dried tomato bites:
1/2 cup sun-dried tomatoes (the dry kind, not in oil), (sliced )
2 teaspoons soy sauce
1/4 teaspoon liquid smoke
For the carbonara:
1 tablespoon olive oil
1 yellow onion, (chopped)
3 cloves garlic, (minced)
1/4 cup all-purpose flour ((gluten-free if preferred))
2 1/2 cups non-dairy milk ((such as soy or almond))
1 tablespoons nutritional yeast
3/4 teaspoon black salt ((also called kala namak), use regular salt if preferred)
1/4 teaspoon black pepper
Bring a large pot of water to a boil and cook the pasta according to the package directions.
Mix together the sun-dried tomatoes, soy sauce, and liquid smoke in a small bowl and set aside to absorb the flavours while you prepare the rest of the dish.
Heat the olive oil in a large pan over medium-high heat. When hot add the onions and garlic and sauté until the onion turns translucent and begins to brown, about 5 minutes. Sprinkle over the flour and stir to coat the onions, let cook for about 60 seconds, then whisk in all of the remaining ingredients. Cook the sauce for about 5 minutes until thickened, whisking as needed. If the sauce gets too thick, add a splash more non-dairy milk, and if the sauce is too thin, simply cook it longer.
Add the cooked pasta and the marinated sun-dried tomatoes to the sauce and toss well to combine. Serve hot. Garnish with parsley and parmegan if desired.
Bon appetegan!
Sam.

This post Fast and Easy Vegan Carbonara appeared first on It Doesn't Taste Like Chicken
Sam Turnbull's Blog

- Sam Turnbull's profile
- 35 followers

