
Sam Turnbull's Blog, page 42
October 28, 2018
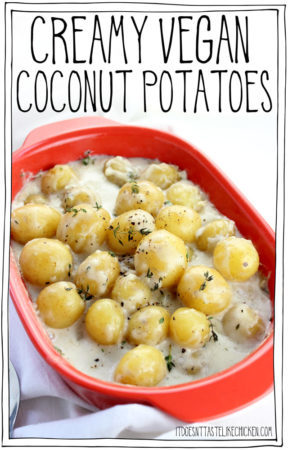
Creamy Vegan Coconut Potatoes
Peeling potatoes is one of those little kitchen chores that I should be totally cool with, but I actually hate. It’s fidgety, time-consuming, potato peels go everywhere, and little nicks and cuts are a threat. I know, settle down, Sam, it’s really not that big of a deal. You’re right, it really isn’t. BUT if you are at all like me, you are going to love my latest potato discovery, my Creamy Vegan Coconut Potatoes.

Creamy vegan coconut potatoes are like cheater scalloped potatoes. Yeah, you heard me right. The creamiest dreamiest baked potato dish, but unlike scalloped potatoes, they SO easy to make. No peeling, slicing, or cooking the sauce separately. Nope, these little dudes are a one and done type recipe. Just add coconut milk, a bit of flour, and seasoning straight into your casserole dish, mix it up, then add the potatoes, cover with foil and bake. THAT’S IT! I swear it really is that easy.

The key here is using baby potatoes. They are perfect for this dish as they often come prewashed, and you don’t need to peel or even chop them so they are good to go, no extra work involved.
The potatoes will cook to a gorgeous buttery texture, and the coconut mixture will make a glorious thick creamy sauce for a dish that’s full of great flavour. The combo of coconut and thyme paired with the potatoes is so incredibly divine, it will taste like this dish took a lot more work than it actually did. It may look like a lot of sauce in the photo, but trust me, there won’t be a drop left.

To make Creamy Vegan Coconut Potatoes: In a 1.5qt casserole dish (or larger), whisk together the coconut milk, flour, garlic, thyme, salt, pepper, and nutmeg.

Add the potatoes and give it a stir to coat. Cover with foil and bake for 50 to 65 minutes until the potatoes are fork tender.

Serve hot and prepare for creamy deliciousness. Great served along with a salad and my vegan steaks, or crusted tofu. Omnomnom!
Fun fact: I’m digging this potato dish so much that this is my entry for The Little Potato and MasterChef Canada’s recipe contest. Wish me luck!

Creamy Vegan Coconut Potatoes
These are like cheater scalloped potatoes. The creamiest dreamiest baked potato dish, but unlike scalloped potatoes, they SO easy to make. No peeling, slicing, or cooking the sauce separately.
400ml can full-fat coconut milk ( (1 3/4 cups))
1/4 cup all-purpose flour ((gluten-free all-purpose flour if preferred))
4 cloves garlic, (minced)
1 tablespoon fresh thyme leaves
3/4 teaspoon salt
1/8 teaspoon black pepper
1/8 teaspoon nutmeg
1.5 lbs yellow baby potatoes ((about 5 cups))
Preheat your oven to 400F (220C).
In a 1.5qt casserole dish (or larger), whisk together the coconut milk, flour, garlic, thyme, salt, pepper, and nutmeg. Add the potatoes and give it a stir to coat. Cover with foil and bake for 50 to 65 minutes until the potatoes are fork tender. Serve hot.
Bon appetegan!
Sam.


This post Creamy Vegan Coconut Potatoes appeared first on It Doesn't Taste Like Chicken


October 21, 2018
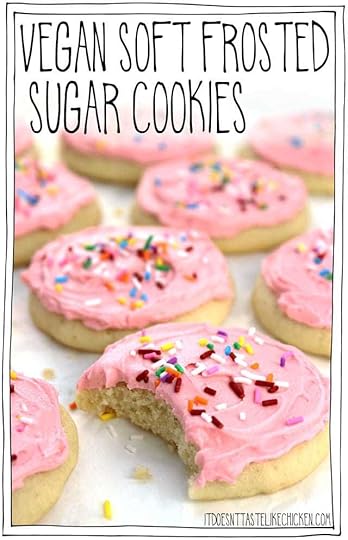
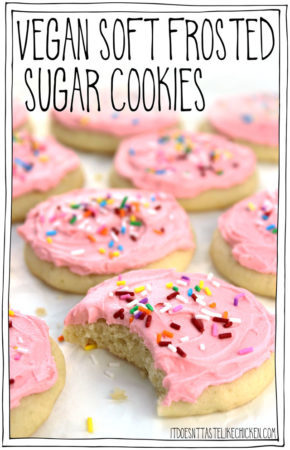
Vegan Soft Frosted Sugar Cookies
You know those pillowy soft, cakey, frosted cookies you can buy at grocery stores that are oh so good? They are almost like the top of a cupcake that got smushed into a cookie. They always come with a generous amount of frosting and sprinkles, because who doesn’t love sprinkles. I had a sudden craving for these cookies, I wanted them, I needed them, I must have them, and so I veganized them. It took a lot of recipe testing, but I finally cracked the code and satisfied my craving with my new favourite treat: Vegan Soft Frosted Sugar Cookies.
…and now I almost regret it as my diet has suddenly consisted of four cookies a day. So soft, so sweet, so fluffy amazing!!!
These are so much more than just a plain old sugar cookie. They are like funfetti turned into a cookie. The cakey texture is amazing, but I also made sure they tasted great as well. The combo of lemon juice, vanilla extract, and almond extract make for the perfect subtle, sugar cookie flavour.

I think the classic pink frosting is my favourite, but you can always change the frosting and sprinkle colours…
Orange for Halloween or autumn.
Green or red for Christmas, you could even sprinkle on crushed candy canes!
Pink, blue, or yellow for baby showers.
Classic white for a wedding.
Gold for New Years.
Pink or red for valentines day.
You get the idea. These cookies are perfect all year round and for any occasion.
Vegan Soft Frosted Sugar Cookies do require a few steps to make them, but it’s actually pretty easy- the fussiest part is spooning out the cookie dough which can be a little sticky. The cookies are of course, great fresh, but they also freeze well making them a great make-ahead treat. (I now have a freezer full of them).
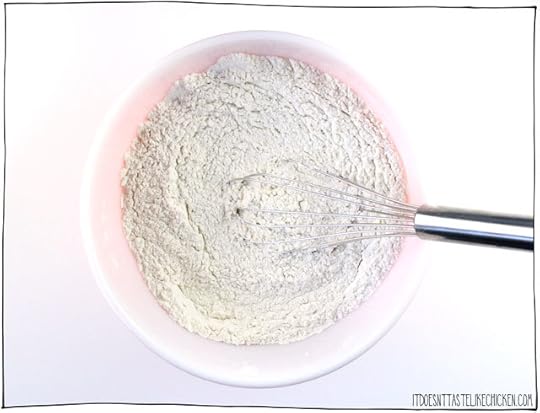
To make Vegan Soft Frosted Sugar Cookies: in a medium bowl whisk together the dry ingredients.

In a large bowl, use a stand mixer or hand mixer to beat the vegan butter and white sugar together until fluffy. Add the remaining wet ingredients and combine. The mixture won’t combine well and will look curdled and that’s totally fine. (I didn’t show a picture of that because it’s not pretty)!

Now add the dry ingredients into the bowl with the wet, and mix together. The dough will be very soft, like a thick cake batter.

You can either use the cookie batter right away or you can let it chill in the fridge for 1 hour. Chilling makes it a little easier to work with but does not affect the final cookie. Lightly spray a cookie scoop or large spoon with oil, and scoop 2 tablespoons of cookie dough and drop it onto the parchment paper lined baking sheet. Repeat to fill your tray, evenly spacing the cookies. Wet your fingers so they don’t stick to the cookies, then lightly pat the balls down into flatter shapes.

Bake 11 – 14 minutes until lightly golden on the bottom. Let cool completely before frosting.

To make the frosting: using a stand mixer or hand mixer, beat together the vegan butter, vegetable shortening, powdered sugar, and vanilla extract. If needed add 1 tablespoon of non-dairy milk at a time until desired frosting consistency is reached. Mix in food colour if desired. I divided my frosting into two to make multiple colours.
I like the combination of vegetable shortening and vegan butter for the best frosting that holds well and tastes great. If you prefer you can use all vegan butter, but note that it will make the frosting softer, so you may need less non-dairy milk, and be sure to store the cookies in a cool place.

To assemble the cookies: smear frosting on the cooled cookies then decorate with sprinkles if desired. Store cookies in an air-tight container at room temperature for up to 2 days, for about 1 week in the fridge, or they also freeze well.

Vegan Soft Frosted Sugar Cookies
Pillowy soft, cakey, frosted cookies- they are almost like the top of a cupcake that got smushed into a cookie complete with frosting and sprinkles! Decorate them for any occasion, birthdays, Christmas, Halloween, Thanksgiving, Valentine’s day, weddings, baby showers.
Dry ingredients:
3 cups all-purpose flour
1 teaspoon baking powder
1/2 teaspoon baking soda
1/2 teaspoon salt
Wet ingredients:
1 1/4 cups vegan butter
1 1/2 cups white sugar
1 cup non-dairy milk ((such as soy or almond))
1 tablespoon lemon juice
2 teaspoons pure vanilla extract
1/2 teaspoon almond extract
For the frosting:
1/2 cup vegan butter
1/2 cup vegetable shortening (*see notes)
3 cups powdered sugar
1 teaspoon vanilla extract
1 – 4 tablespoons non-dairy milk ((such as soy or almond))
vegan food colouring ((optional))
sprinkles ((optional))
To make the cookies: preheat your oven to 350F (180C). Line two large baking sheets with parchment paper.
In a medium bowl whisk together the dry ingredients.
In a large bowl, use a stand mixer or hand mixer to beat the vegan butter and white sugar together until fluffy. Add the remaining wet ingredients and combine. The mixture won’t combine well and will look curdled and that’s totally fine. Now add the dry ingredients into the bowl with the wet, and mix together. The dough will be very soft, like a thick cake batter.
You can either use the cookie batter right away or you can let it chill in the fridge for 1 hour. Chilling makes it a little easier to work with but does not affect the final cookie. Lightly spray a cookie scoop or large spoon with oil, and scoop 2 tablespoons of cookie dough and drop it onto the parchment paper lined baking sheet. Repeat to fill your tray, evenly spacing the cookies. Wet your fingers so they don’t stick to the cookies, then lightly pat the balls down into flatter shapes. Bake 11 – 14 minutes until lightly golden on the bottom. Let cool completely before frosting.
To make the frosting: using a stand mixer or hand mixer, beat together the vegan butter, vegetable shortening, powdered sugar, and vanilla extract. If needed add 1 tablespoon of non-dairy milk at a time until desired frosting consistency is reached. Mix in food colour if desired.
To assemble the cookies: smear frosting on the cooled cookies then decorate with sprinkles if desired. Store cookies in an air-tight container at room temperature for up to 2 days, for about 1 week in the fridge, or they also freeze well.
*I like the combination of vegetable shortening and vegan butter for the best frosting that holds well and tastes great. If you prefer you can use all vegan butter, but note that it will make the frosting softer, so you may need less non-dairy milk, and be sure to store the cookies in a cool place.
Bon apptegan!
Sam.


This post Vegan Soft Frosted Sugar Cookies appeared first on It Doesn't Taste Like Chicken
October 14, 2018
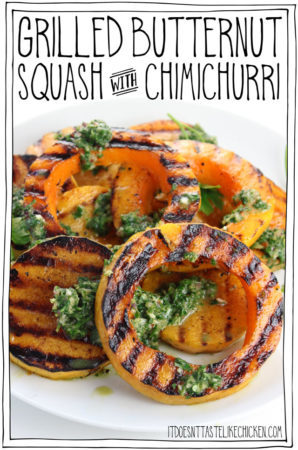
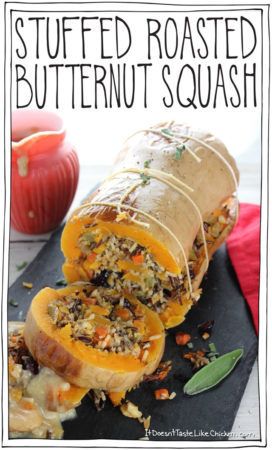
Grilled Butternut Squash with Chimichuri
Grilled butternut squash!? Yes, grilled squash. It is just as delicious as it looks too. Not that I am against roasting squash or anything, because I’m totally not, I’m just all for finding as many ways to enjoy squash deliciousness as possible, and this is my new fave.
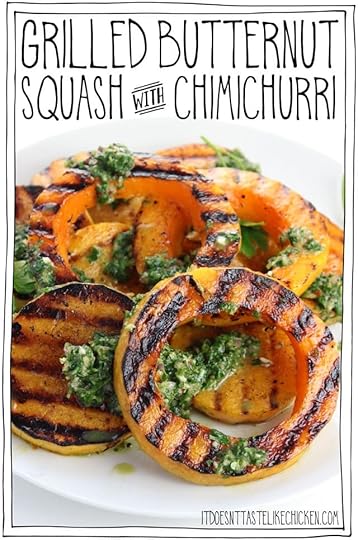
Grilling squash brings out the flavours in a whole new way. Why do grill marks make food look and taste sooo good? Not only is it beautiful to look at (and to devour), but I love grilling squash because it’s a pretty quick way to cook it. Just peel, thickly slice, and grill for about 4 minutes per side. A recipe that’s easy enough to make on a weeknight, but that happens to be gorgeous enough to look like the centerpiece for a holiday feast!

But wait there’s more! Did you notice that green saucy deliciousness called chimichurri? It is jam-packed full of fresh zesty deliciousness taking this butternut squash up a few levels or awesomeness. BUT if you’re not feeling the chimichurri vibe, you could always serve the grilled butternut squash alone seasoned with a bit of salt and pepper, or with any other sauce you think might pair well.

To make Grilled Butternut Squash with Chimichurri Sauce: prepare the squash, use a potato peeler to remove the skin.

Cut off and discard the ends, then carefully cut the squash into 1/2 inch slices. For the slices that have seeds, use a spoon to remove and discard the seeds and guts of the squash. Brush olive oil on both sides of the squash.

Heat a BBQ or grill pan over medium-high heat. You could alternatively use a frying pan if you don’t have either, you just won’t get the pretty grill marks). Grill the butternut squash slices, covered, for about 4 – 5 minutes per side until grill marks are formed and the slices are fork tender. You may need to do this in batches.
Serve the butternut squash hot, spooning over the chimichurri sauce to taste. You could also sub the chimichurri for other sauces you enjoy or even just some salt and pepper on the butternut squash for a simple side dish

Grilled Butternut Squash with Chimichurri
Quick & easy enough to make on a weeknight but looks like the centerpiece for a holiday feast!
Inspired by From the Kitchen of Yamchops cookbook, Simply Recipes, and Taste of Home.
1 butternut squash (, see step 1 for prep)
1 tablespoon olive oil
1 recipe 5- Minute Chimichurri Sauce
To prepare the squash, use a potato peeler to remove the skin. Cut off and discard the ends, then carefully cut the squash into 1/2 inch slices. For the slices that have seeds, use a spoon to remove and discard the seeds and guts of the squash. Brush olive oil on both sides of the squash.
Heat a BBQ or grill pan over medium-high heat. You could alternatively use a frying pan if you don’t have either, you just won’t get the pretty grill marks). Grill the butternut squash slices, covered, for about 4 – 5 minutes per side until grill marks are formed and the slices are fork tender. You may need to do this in batches.
Serve the butternut squash hot, spooning over the chimichurri sauce to taste. You could also sub the chimichurri for other sauces you enjoy or even just some salt and pepper on the butternut squash for a simple side dish.
Bon appetegan!
Sam
This post Grilled Butternut Squash with Chimichuri appeared first on It Doesn't Taste Like Chicken
October 7, 2018
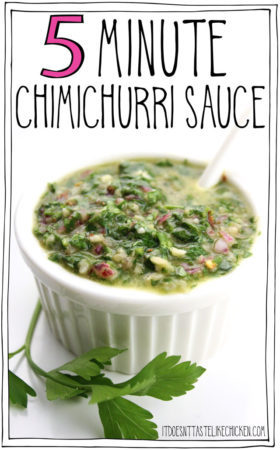
5-Minute Chimichurri Sauce
Fresh flavours alert! I have recently fallen in deep passionate love with this 5-minute chimichurri sauce recipe. Of course, it’s super easy to make, but dude, seriously, this is one amazing flavour bomb. With parsley, cilantro, red onion, garlic, and lime there is so much punch to this sauce, it can take any dish from bland to fabulous.
My version of chimichurri isn’t 100% traditional (name one recipe on my blog that is), but it’s definitely 100% delicious, and that’s all that counts in my book.

Bonus points: I even have an oil-free option for those who prefer it. Just sub aquafaba (the liquid in a can of chickpeas) for the olive oil in this recipe, and bam! Perfect easy oil-free chimichurri.
Use this sauce everywhere you want to take your dish up a notch. On a burrito or in a burrito bowl, on tacos such as my jackfruit tacos, on a vegan seitan steak, on roasted veg, on a tofu scramble, anywhere and everywhere you like! It’s such a quick and easy way to add some freshness and zing to a dish.

To make 5-Minute Chimichurri Sauce: Add all of the ingredients to a small blender, food processor, or use an immersion blender.
I used this Kitchen Aid immersion blender which has been my go-to for blending up sauces and other small dishes for years.

Blend everything together, stopping to scrape the sides as needed. I prefer a sauce with lots of visible texture, but if you prefer a smoother sauce, feel free to blend to the desired consistency.

5 Minute Chimichurri Sauce
Use this sauce everywhere you want to take your dish up a notch. On a burrito or in a burrito bowl, on tacos such as my jackfruit tacos, on a vegan seitan steak, on roasted veg, on a tofu scramble, anywhere and everywhere you like!
1 cup fresh cilantro ((1 large handful))
1 cup fresh parsley ((1 large handful))
1/4 cup red onion ((about 1/4 of an onion), chopped*)
1/4 cup olive oil ((substitute aquafaba for oil-free))
2 cloves garlic, (minced*)
2 tablespoons lime juice ((1 lime))
1/4 teaspoon salt
1/4 teaspoon red pepper flakes ((optional))
Add all of the ingredients to a small blender, food processor, or use an immersion blender. Blend everything together, stopping to scrape the sides as needed. I prefer a sauce with lots of visible texture, but if you prefer a smoother sauce, feel free to blend to the desired consistency.
*If you don’t want to chop the onion and garlic by hand, just add them to the blender first and pulse a few times until chopped. Then add all of the remaining ingredients.
**135 calories per serving for the olive oil version. 19 calories per serving for the aquafaba version. There are 4 servings in this recipe.
Bon appetegan!
Sam.

This post 5-Minute Chimichurri Sauce appeared first on It Doesn't Taste Like Chicken
October 3, 2018
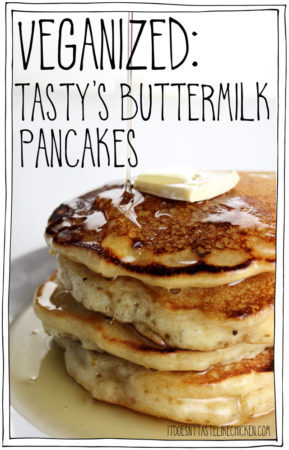
VEGANIZED: Tasty’s Buttermilk Pancakes
It’s another episode of veganized! That’s where I take a viral recipe video and challenge myself to make it vegan. Today, I was inspired by Tasty’s Ultimate Buttermilk Pancake Recipe.

In Tasty’s video, they use traditional pancake ingredients: buttermilk, eggs, and lots of butter. I wanted to stick to the recipe as closely as possible while making it vegan.
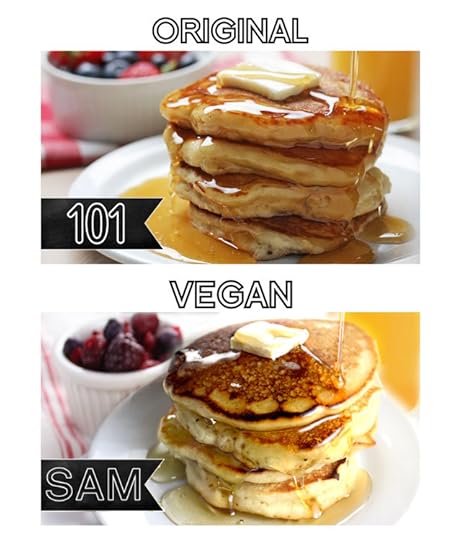
For the buttermilk, I subbed non-dairy milk mixed with lemon juice. Mixing in the lemon juice makes the non-dairy milk curdle making an instant DIY buttermilk! For the eggs, I skipped relacing the yolks, but I did replace the egg whites with aquafaba, which is the liquid in a can of chickpeas. And of course, the butter was an easy sub as I just swapped in vegan butter.
The result is a delicious, fluffy pancake you would never know was vegan.
Now while I do love the end result of this pancake, I think there are a few fussy steps here (and I hate fussy steps). So in the end, I still prefer my Pillowy Pancake recipe in my cookbook Fuss-Free Vegan, which is not only easier and quicker to prepare, but just as tasty. Either way, I have posted the final veganized Tasty pancake recipe below, so give it a try if you like.
VEGANIZED: Tasty's Buttermilk Pancakes
This recipe was adapted from Tasty’s Ultimate Buttermilk Pancake Recipe as a fun experiment. The end results are yummy, but I personally prefer my Pillowy Pancake recipe in my cookbook Fuss-Free Vegan for an easier, and just as a delicious recipe.
Dry ingredients:
2 1/2 cups all-purpose flour
3 tablespoons white sugar
1 teaspoon baking powder
1 teaspoon baking soda
1/2 teaspoon salt
Wet ingredients:
2 cups non-dairy milk ((such as soy or almond))
2 tablespoons lemon juice
1/2 cup vegan butter, (melted (plus more for frying))
1/4 cup aquafaba ((the liquid in a can of chickpeas))
In a large bowl, whisk together the flour, sugar, baking powder, baking soda, and salt.
In a medium bowl or measuring cup mix together the non-dairy milk and lemon juice so that it curdles. Whisk in the melted vegan butter. Pour the milk mixture into the dry mixture and gently fold. Now add the aquafaba and continue to fold. Don’t overmix the batter, it should be very lumpy. Let the batter rest for 15 to 30 minutes. Side note: I found this resting time didn’t make much of a difference, so skip if you prefer.
When ready to cook pancakes, use a large cast iron skillet or non-stick pan. Melt a dab of vegan butter in the pan and then pour in a heaping 1/3 cup of pancake batter. For extra thick pancakes, do not spread the batter. Cook a few minutes until the bottom is browned and bubbles appear on the top of the pancake. Flip and cook 1 to 2 minutes more on the other side. Repeat with the remaining batter.
Bon appetegan!
Sam.

This post VEGANIZED: Tasty’s Buttermilk Pancakes appeared first on It Doesn't Taste Like Chicken
September 30, 2018
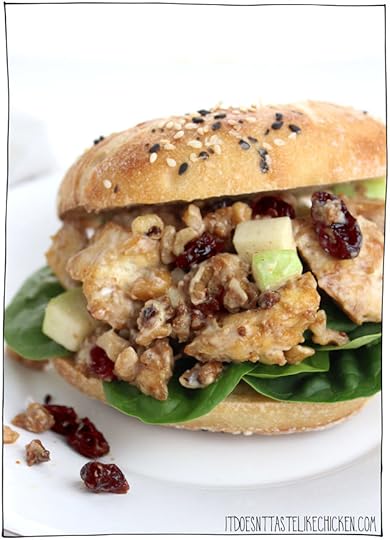
Hearty Vegan Tofu Salad Sandwich
Remember that time long ago, last week, when I made my Baked Tofu Bites? I wasn’t lying when I said I was obsessed with them and make them constantly. Now, I promise not to post only baked tofu bites recipes from now on, but I had to post at least one more to celebrate their deliciousness. My favourite way to devour tofu bites as of recent is in this awesome hearty vegan tofu salad sandwich.

The tofu bites are combined with tart granny smith apple, crunchy walnuts, and sweet dried cranberries, all mixed together with creamy vegan mayo and a little pop of Dijon mustard, oh baby. Then just toast a bagel (or any other kind of bread that you prefer) and layer on the sandwich filling nice and thick. Initiate drooling sequence. Hand out napkins. So hearty, so satisfying, chomp on.
The hearty tofu salad sandwich filling keeps well for a few days when made ahead and stored in an air-tight container in the fridge. Perfect for packing it up to take to work or to school.

To make this Hearty Vegan Tofu Salad Sandwich: first prepare the Baked Tofu Bites according to the directions. They can be made ahead of time if you like. Add the Baked Tofu Bites along with the granny smith apple, chopped walnuts, dried cranberries, vegan mayonnaise and dijon mustard to a medium bowl.

Mix well to combine.
These days store-bought vegan mayonnaise are easily available in most grocery stores or online, but if you want to make your own I have a recipe in my cookbook which is always my go-to.
Serve by loading up a bagel (or bread of choice) with the tofu salad. Store any leftover salad in an air-tight container in the fridge. It’s great prepared ahead of time making it perfect for an easy packable lunch or make-ahead meal.

Hearty Vegan Tofu Salad Sandwich
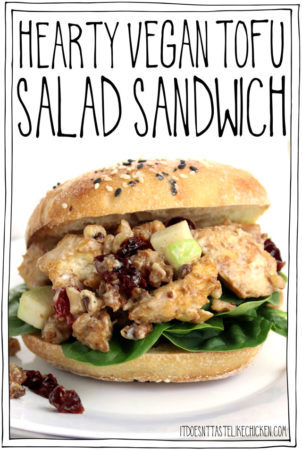
With granny smith apple, dried cranberries, walnuts, and baked tofu bites mixed with vegan mayonnaise and dijon mustard. The perfect make-ahead sandwich for work or school.
1/2 recipe Baked Tofu Bites ((1 block of tofu prepared))
1/2 of a granny smith apple, (chopped)
1/4 cup chopped walnuts or pecans
1/4 cup dried cranberries or raisins
1/4 cup vegan mayonnaise
2 teaspoons dijon mustard
4 bagels, buns, or 8 slices of bread, (toasted optionally)
Prepare the Baked Tofu Bites according to the directions. They can be made ahead of time if you like. Add the Baked Tofu Bites along with the granny smith apple, chopped walnuts, dried cranberries, vegan mayonnaise and dijon mustard to a medium bowl. Mix well to combine.
Serve by loading up a bagel (or bread of choice) with the tofu salad. Store any leftover salad in an air-tight container in the fridge. It’s great prepared ahead of time making it perfect for an easy packable lunch or make-ahead meal.
Bon appetegan!
Sam.


This post Hearty Vegan Tofu Salad Sandwich appeared first on It Doesn't Taste Like Chicken
September 23, 2018
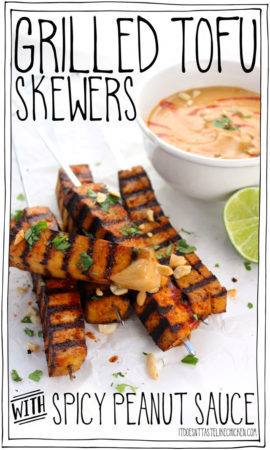
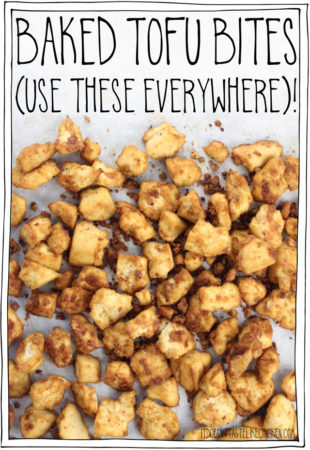
Baked Tofu Bites (Use These Everywhere)!
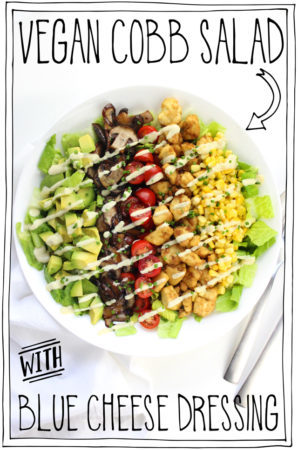
So here’s the story: I originally made these baked tofu bites for my Vegan Cobb Salad recipe. I was trying to aim for a simple tofu recipe with a chicken-ish vibe. Vibe achieved. These bites were easy to make, flavourful, and perfect for my cobb salad. But I also discovered that they were more than just perfect for a cobb salad. These baked tofu bites are delicious all on their own. I’m actually surprised any tofu even made it to the salad as I couldn’t stop eating them directly baking sheet.

I decided I needed to share this recipe as it’s own post so that you too could experience the awesomeness of this baked tofu. These tofu bites are scrumptious all on their own and they are perfect on a salad BUT they are so much more than that. This is one of those recipes that once you make it, you start discovering all of the wonderful ways these tofu bites can be used.
They are delicious served with buffalo sauce. They are delicious on top of pasta. They are delicious in a taco. They are delicious in a sandwich. They are delicious on nachos… I think you are starting to get it, these tofu bites are completely addictive and they are delicious EVERYWHERE!

I’ve been making large batches of these glorious tofu nuggets and storing them in the fridge in an air-tight container so they are ready to use whenever hunger strikes.
I like to make a big batch of these using two blocks of tofu at a time, but if you prefer you can cut the recipe in half and just use one block of tofu… But if you do decide to reduce the recipe, you might regret it. You have been warned.

To make Baked Tofu Bites: in a large bowl, mix together the nutritional yeast, olive oil, soy sauce and garlic powder.

Break the block of tofu into small chunks and add them to the bowl. (No need to press the tofu first).
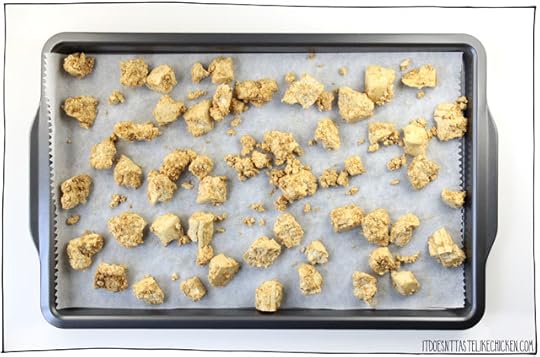
Toss the tofu well to evenly coat in the sauce mixture. Spread the tofu evenly across the baking sheets and bake about 30 minutes, stirring halfway through, until lightly golden.

Serve hot or store in an air-tight container in the fridge to use later. Great as main, as nuggets, on salads, in sandwiches, in tacos, on pasta, on nachos, the options are endless, use these everywhere!

Baked Tofu Bites
An easy baked tofu recipe that is great on its own or can be used in so many dishes: on salads, in sandwiches, in tacos, on pasta, on nachos, as nuggets, the options are endless, use these everywhere!
1/4 cup nutritional yeast
2 tablespoons olive oil
2 tablespoons soy sauce
1 teaspoon garlic powder
2 350g blocks extra-firm tofu, (drained)
Preheat your oven to 375F (190C). Line 2 baking sheets with parchment paper.
In a large bowl, mix together the nutritional yeast, olive oil, soy sauce and garlic powder. Break the block of tofu into small chunks and add them to the bowl. (No need to press the tofu first). Toss the tofu well to evenly coat in the sauce mixture.
Spread the tofu evenly across the baking sheets and bake about 30 minutes, stirring halfway through, until lightly golden. Serve hot or store in an air-tight container in the fridge to use later. Great as main, as nuggets, on salads, in sandwiches, in tacos, on pasta, on nachos, the options are endless, use these everywhere!
Bon appetegan!
Sam

This post Baked Tofu Bites (Use These Everywhere)! appeared first on It Doesn't Taste Like Chicken
September 16, 2018
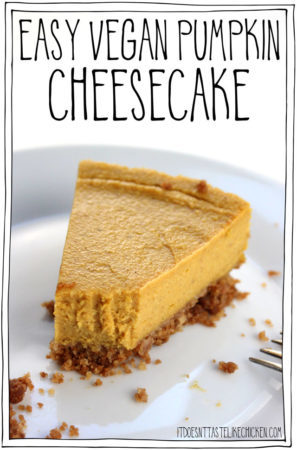
Easy Vegan Pumpkin Cheesecake
It’s always my goal here on It Doesn’t Taste Like Chicken to make recipes that YOU want. I try to make vegan food easier, more delicious, super satisfying, and to fulfil each and every craving you might have. So when I asked on my Facebook page what recipes you were hoping for from me for Thanksgiving or Christmas, an easy vegan pumpkin cheesecake recipe was one of the most requested.

My Easy Vegan Pumpkin Pie is one of the most popular recipes on my blog and I already have a classic plain vegan cheesecake that is to die for in my cookbook Fuss-Free Vegan. So my plan of attack was to combine both recipes to make the ultimate easy vegan pumpkin cheesecake. That’s what I did, and let me tell you, am I ever glad you requested this recipe because ooh la la, this is one mightly delicious pumpkin infused dessert.

The creamy bliss of a cheesecake, with autumn pumpkin flavours, not too sweet, just perfectly mouth pleasingly delicious.
I’m a fan of cheesecake with no toppings, but I know that I’m not the norm. So if you want to jazz this vegan pumpkin cheesecake up a little, feel free to serve it with Vegan Coconut Whipped Cream, Vegan Marshmallow Fluff, Pumpkin Spice Syrup, a drizzle of maple syrup, a vegan caramel sauce, some toasted pecans, or any other toppings you desire. This cheesecake can get all sorts of fancy, perfect for Thanksgiving, Christmas, or a random Tuesday celebration.

To make Easy Vegan Pumpkin Cheesecake start by cutting a circle of parchment paper to fit the bottom of an 8 inch round baking pan, and line the sides with a strip of parchment as well so that the cake won’t stick to the pan. You could alternatively try a silicon baking pan, but I just used what I had on hand.
For the cookie crust, I used store-bought gingersnap cookies that were accidentally vegan, but any hard vegan cookie will work such as graham crackers, vanilla or chocolate wafers. Just check to make sure they are vegan.
Grind up the cookies of your choice in a food processor. In a medium bowl mix the cookie crumbs with the melted vegan butter. Pour the crumb mixture into the pan then spread the crumbs evenly and press them down firmly. Bake for 6 – 8 minutes until the edges are lightly golden. Remove from oven but leave the oven on.
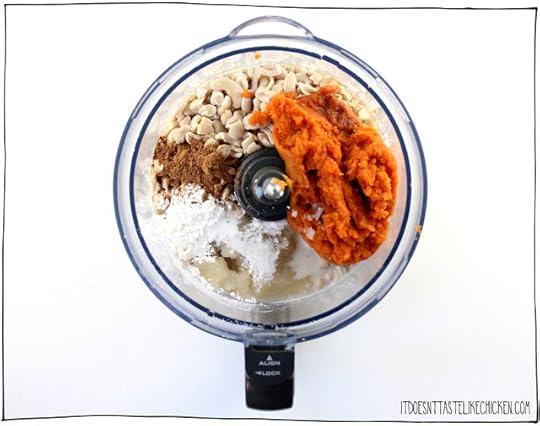
To make the vegan pumpkin cheesecake: add all of the ingredients to a food processor or blender and blend until as smooth as possible stopping to scrape the sides as needed.

The smoother you can get it, the better. I tried both the food processor and blender and didn’t have a preference for either. The key was just to keep blending for a looong time. You want this baby smooth!

Pour the mixture over top of the cookie crust and spread evenly.
Bake for 25 – 35 minutes until the edges look dry and begin to crack. Let cool at room temperature, then transfer to the fridge and allow to chill uncovered for a minimum of 4 hours or overnight until set.

Easy Vegan Pumpkin Cheesecake
Make in a blender, bake and let cool overnight for an easy make-ahead dessert. Perfect for Thanksgiving or Christmas. The creamy bliss of a cheesecake, with autumn pumpkin flavours, not too sweet, just perfectly mouth pleasingly delicious.
For the cookie crust:
1 1/2 cups cookie crumbs (graham crackers, ginger snaps, or any hard vegan cookie), (gluten-free if preferred)
1/4 cup melted vegan butter
For the vegan pumpkin cheesecake:
1 1/2 cup raw cashews, (softened (see step 3))
1 cup pumpkin puree ((not pumpkin pie filling))
1/2 cup non-dairy milk ((such as soy or almond))
1/2 cup white sugar
1 tablespoon corn starch
1 teaspoon pumpkin pie spice
1 teaspoon vanilla extract
1/4 teaspoon salt
Preheat your oven to 350F (180C). Cut a circle of parchment paper to fit the bottom of an 8 inch round baking pan, and line the sides with a strip of parchment as well so that the cake won’t stick to the pan.
To make the cookie crust: grind up the cookies of your choice in a food processor. In a medium bowl mix the cookie crumbs with the melted vegan butter. Pour the crumb mixture into the pan then spread the crumbs evenly and press them down firmly. Bake for 6 – 8 minutes until the edges are lightly golden. Remove from oven but leave the oven on.
To soften the cashews: Boil them for 10 minutes until soft. OR soak the cashews for four hours or overnight. Drain before using.
To make the vegan pumpkin cheesecake: add all of the ingredients to a food processor or blender and blend until as smooth as possible stopping to scrape the sides as needed. The smoother you can get it, the better. I tried both the food processor and blender and didn’t have a preference for either. The key was just to keep blending for a looong time. You want this baby smooth!
Pour the mixture over top of the cookie crust and spread evenly. Bake for 25 – 35 minutes until the edges look dry and begin to crack. Let cool at room temperature, then transfer to the fridge and allow to chill uncovered for a minimum of 4 hours or overnight until set.
Bon appetegan!
Sam.
This post Easy Vegan Pumpkin Cheesecake appeared first on It Doesn't Taste Like Chicken
September 9, 2018
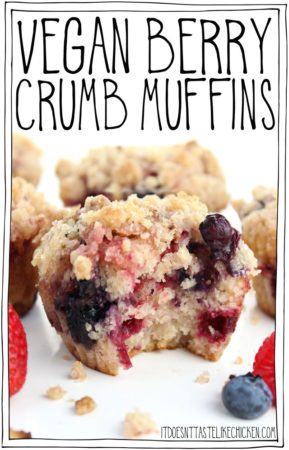
Vegan Berry Crumb Muffins
You know those types of muffins where you tell yourself it’s a healthy breakfast food, but your taste buds know the real truth: you’re secretly eating dessert. These Vegan Berry Crumb Muffins are those kind of muffins. Fluffy, sweet, berry-stuffed and cinnamon-infused, with a sweet crumbly topping- crumbs never tasted so good. These muffins are closer to a donut than they are to any type of health food, and I’m pretty much obsessed with each and every delicious crumbly morsel.

If there are any of you who are reading this and thinking, “nuh-uh my breakfast needs to be healthy for reals, yo!” Don’t worry, I’ve got you covered. Try my Healthy Vegan Breakfast Cookies, Banana Bread Oatmeal (my fave), Pumpkin Spice Oatmeal, or any one of my 10 Vegan Dessert Smoothies (that are secretly healthy). But for those of you who want a little treat, are hosting a brunch, or you want to experience perfect fluffy berry bliss, these are the muffins for you!
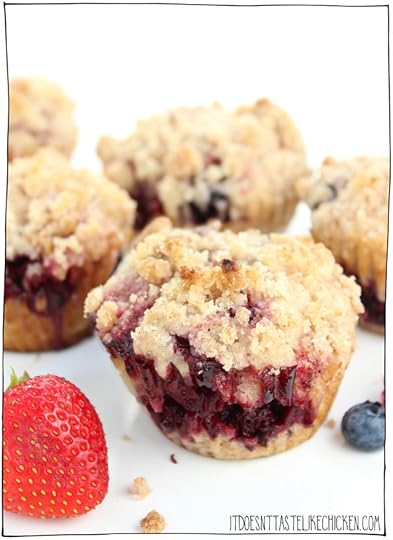
Do you see that insane berry deliciousness up there!? ↑↑↑ Yeah, I’m drooling too.
Bursting with berry flavour, sweet cinnamon crumbs, super tender and moist, this is my kinda perfect breakfast treat.
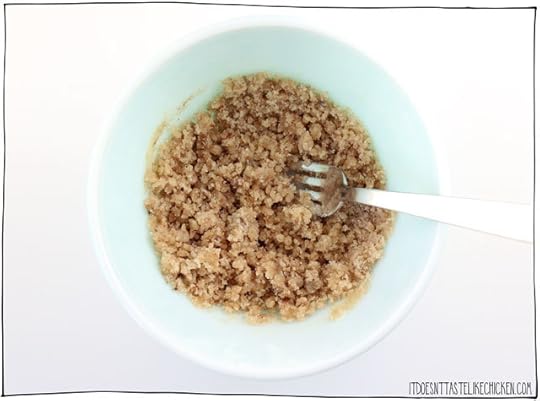
To make Vegan Berry Crumb Muffins: start by making the crumb topping. In a small bowl, mix together all the crumb topping ingredients with a fork until crumbly. Set aside.

Now make the vegan berry muffins by taking a large bowl and whisking together all the dry ingredients.
In a medium bowl mix together the non-dairy milk, light oil, lemon juice, and vanilla extract. Pour wet into dry and mix until just combined. Don’t over mix, lumps are totally cool. Add in the berries and lightly fold them in.

Divide the batter evenly among into the prepared muffin tin. Top each with a spoonful of the crumb topping mixture, dividing it evenly among all 12 muffins.

Bake 18 to 25 minutes until lightly golden on top and a toothpick inserted into the center comes out clean. Let cool in the pan. Omnomnom!

Vegan Berry Crumb Muffins
Fluffy, sweet, berry-stuffed and cinnamon-infused, super tender and moist, with a sweet crumbly topping. These quick and easy to make muffins are perfect for a special brunch or a wonderful breakfast treat.
Crumb topping:
1/4 cup all-purpose flour
1/3 cup white sugar
2 tablespoons vegan butter, (melted)
1/2 teaspoon cinnamon
Dry ingredients:
1 1/2 cups all-purpose flour
3/4 cup white sugar
2 teaspoons baking powder
1 teaspoon cinnamon
1/2 teaspoon salt
Wet ingredients:
3/4 cup non-dairy milk ((such as soy or almond))
1/2 cup light oil ((such as canola or vegetable))
1 tablespoon lemon juice
2 teaspoons vanilla extract
1 1/2 cups mixed berries ((fresh or frozen and thawed* see notes))
Preheat your oven to 400F (200C). Line 12 wells of a muffin pan with paper liners or lightly grease the pan.
To make the crumb topping: in a small bowl, mix together all the crumb topping ingredients with a fork until crumbly. Set aside.
To make the berry muffins: In a large bowl whisk together all the dry ingredients.
In a medium bowl mix together the non-dairy milk, light oil, lemon juice, and vanilla extract. Pour wet into dry and mix until just combined. Don’t over mix, lumps are totally cool. Add in the berries and lightly fold them in.
Divide the batter evenly among into the prepared muffin tin. Top each with a spoonful of the crumb topping mixture, dividing it evenly among all 12 muffins. Bake 18 to 25 minutes until lightly golden on top and a toothpick inserted into the center comes out clean. Let cool in the pan.
*If all of your berries are small such as blueberries, you can use them straight from frozen. When using larger berries such as blackberries, they should be thawed first as they will prevent the muffins from rising properly.
Bon appetegan!
Sam.
This post Vegan Berry Crumb Muffins appeared first on It Doesn't Taste Like Chicken
September 2, 2018
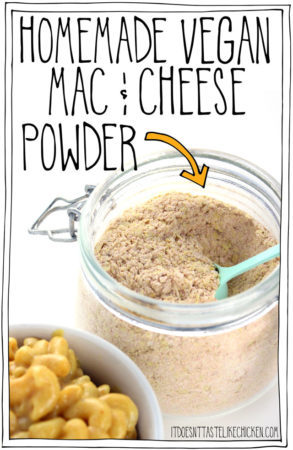
Homemade Vegan Mac & Cheese Powder
Why is boxed mac & cheese so good? Because it’s convenient, quick, it patiently waits for you in the cupboard until hunger strikes, and it tastes gooooood. I’ve miss boxed mac & cheese in my life. Now there are definitely vegan boxed mac & cheese’s available in health food store and online, and I’ve tried a few myself but I was always underwhelmed and thought I could probably do better. And so I did. I played around in my kitchen until I perfected my recipe for Homemade Vegan Mac & Cheese Powder!

How fun is that!? It’s all the fun. And it’s oh so creamy, cheesy, vegan yummy, pasta perfection. ~drool~
Homemade Vegan Mac & Cheese Powder is super duper easy to make. Just add all the ingredients to a jar and shake. That’s it! You can make as much or as little as of this mac and cheese powder as you like, and store it in the cupboard until a vegan mac and cheese craving strikes.
My recipe makes about 1 cup of powder which is enough for 4 cups of uncooked macaroni noodles (about 4 boxes). But feel free to multiply or reduce the recipe as you see fit. Then just store your jar of Homemade Vegan Mac & Cheese Powder in your pantry until ready for use.

Bonus points: my Homemade Vegan Mac & Cheese Powder recipe is completely nut free, soy free, oil-free, and with a gluten-free option. Making this recipe very allergy and whole food plant based friendly (just depending on what flour, non-dairy milk, and pasta you choose to use).
The secret ingredient in this recipe is lemon pepper which adds a nice little sharpness to the creamy sauce, which really makes for a cheesy taste. Mix that with cheesy nutritional yeast, flour for thickening and for creaminess, and spices for flavouring and colour. Oooeee is this so simple and SO tasty.
It’s convenient, quick, cupboard stable, and it tastes really, really, gooooood!!

To make the vegan mac & cheese powder: add all of the ingredients to an air-tight container.

Stir or shake well to combine. Store in your pantry until needed.

To prepare vegan mac & cheese: cook the macaroni noodles according to package directions. Drain and rinse the pasta. Return the pot to the stove (heat off) and pour in the non-dairy milk and 1/4 cup of Homemade Vegan Mac & Cheese Powder and whisk together.
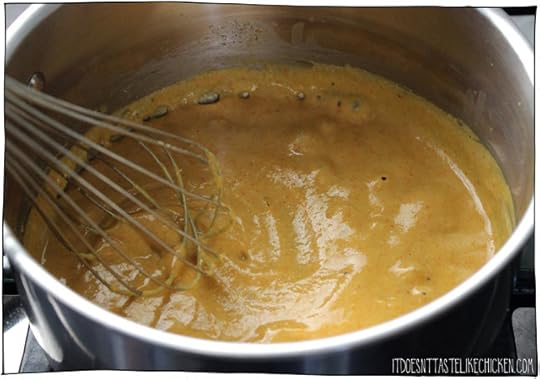
Turn the heat back on to medium-high heat and whisk while cooking until the sauce thickens, 2 – 5 minutes. Add the cooked pasta to the pot along with the cheese sauce and stir to combine.

Homemade Vegan Mac & Cheese Powder
Makes about 1 cup of powder which is enough for 4 cups of uncooked macaroni noodles (about 4 boxes). But feel free to multiply or reduce the recipe as you see fit. Then just store your jar of Homemade Vegan Mac & Cheese Powder in your pantry until ready for use.
To make homemade vegan mac & cheese powder:
3/4 cup nutritional yeast
1/2 cup all-purpose flour ((sub whole wheat or all-purpose gluten-free flour if preferred))
1 tablespoon white sugar
1 tablespoon paprika
2 teaspoons salt
2 teaspoons onion powder
1 teaspoon garlic powder
1 teaspoon lemon pepper
1/2 teaspoon turmeric
To prepare vegan mac & cheese:
1 cup uncooked macaroni noodles ((gluten-free if preferred) )
3/4 cup non-dairy milk ((such a s soy or almond))
1/4 cup prepared Homemade Vegan Mac & Cheese Powder
To make the vegan mac & cheese powder:
Add all of the ingredients to an air-tight container. Stir or shake well to combine. Store in your pantry until needed.
To prepare vegan mac & cheese
Cook the macaroni noodles according to package directions. Drain and rinse the pasta. Return the pot to the stove (heat off) and pour in the non-dairy milk and 1/4 cup of Homemade Vegan Mac & Cheese Powder and whisk together. Turn the heat back on to medium-high heat and whisk while cooking until the sauce thickens, 2 – 5 minutes. Add the cooked pasta to the pot along with the cheese sauce and stir to combine.
Bon appetegan!
Sam.

This post Homemade Vegan Mac & Cheese Powder appeared first on It Doesn't Taste Like Chicken
Sam Turnbull's Blog

- Sam Turnbull's profile
- 35 followers

